Gift Pillowcases

As you may have seen in another post, I have been on a bit of a pillowcase making binge. It is hard not to binge as they are similar to potato chips. In the process of making donation pillowcases, I also made a couple of gifts.

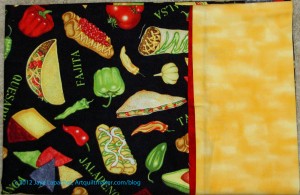
K-man's Pillowcase
K-man’s Pillowcase

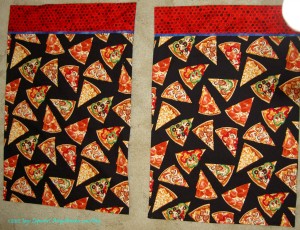
The gift pillowcase for my 14 year old nephew was languishing. It started it a long time ago and never finished it. I don’t know why it was sitting around, but it was. I had seen it a week or so ago, so in the midst of the pillowcase making frenzy, I pulled it out to assess what needed to be done.

What needed to be done was pretty easy to fix. I hadn’t caught part of the seam in the stitch line, so I trimmed the bottom even and stitched it again, then made the French seam on the inside and it was done. Too bad I didn’t finish it for Christmas.

Sweet Dreams Pillowcase #3

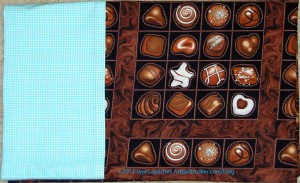
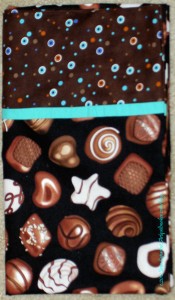
I also found more of the chocolate fabric I liked so much when I made the Chocolate/Sweet dreams pillowcase #2 earlier this year. I believe I bought the fabric in Pennsylvania or Maryland last year. I have to say, I could make pillowcases with this chocolate fabric until the cows come home and never get tired of it. This will go to my niece when she is back at college so she has sweet dreams.

You might also enjoy reading:

  1. Chocolate Pillowcase
  2. Sweet Dreams Pillowcase


Quilting the Corner Store

Border & Center Quilted

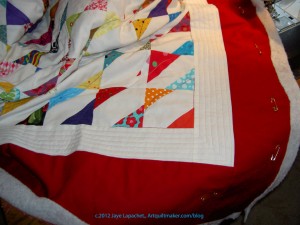
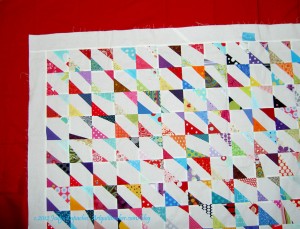
I spent several hours last week quilting the Corner Store.

Yes, she who does not normally quilt large pieces quilted a large quilt.

I went easy on myself, because my shoulder is acting up again and I didn’t want to be crippled when I had so much to do for the holiday. My pile of quilts to be quilted is getting ridiculous (7 that I can remember), though, and I wanted something to give to my BIL to provide some comfort while he goes through radiation treatment.

Quilting the 1st Border

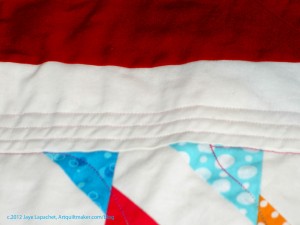
I used to be a good quilter (not like Colleen, but I could hold my own). I stopped quilting large pieces when I hurt my neck and am way out of practice. I wanted to go easy on myself and I didn’t want to try anything too ambitious, so I stuck with straight lines and gentle curves. I have to admit that my original idea for the first border (white) was to fill it with a line of large circles. I couldn’t fix the tension enough to make it look good, so I went with the straight lines. It kind of looks like a frame, if you squint.

Corner Quilting
Corner Quilting

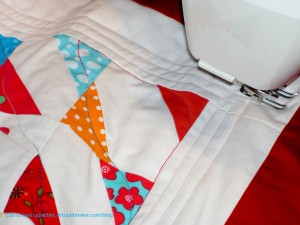
In the last photo (left), you can see some of the quilting in the center. I used a Valdani variegated thread that I bought in Chicago several years ago. I don’t really like variegated thread, but it works in certain circumstances.

You can also see how I used the walking foot to measure the space between the quilting lines. I kind of like doing that as it seems to be a consistent measurement.

The quilt won’t win any prizes, but if it provides some comfort, I will be happy.

You also might be interested in reading:

  1. Corner Store Again
  2. Corner Store Once More

Paris Back for Jelly Roll Race #2

Paris Back
Paris Back

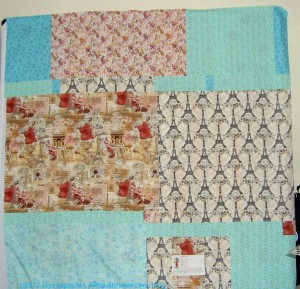
I wrote about my second Jelly Roll Race quilt a few days ago. I don’t remember if I hadn’t made the back yet, or, for some other reason, I just didn’t post about it. Probably the former, but that seems like an eternity ago, so I really can’t say.

I had a number of pieces of Paris related fabric that I bought specifically for the back of this quilt. Lil Sissy loves Paris, so it seemed appropriate.

I am actually kind of eager to quilt this. I need a basting fairy.

Twitter Power

I had the pleasure of being involved in a very sweet gesture recently.

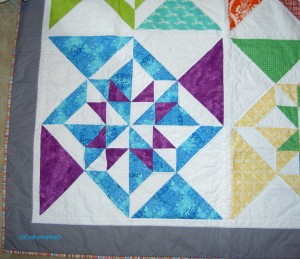
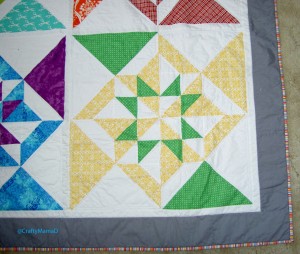
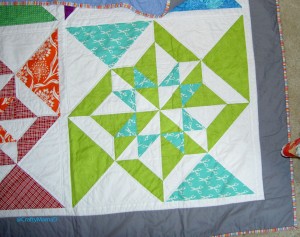
You may know that the History Quilter lost her dad earlier this year. I am fortunate enough to still have my parents, so I can’t imagine her pain. Being a public figure like History Quilter generates a lot of empathy. That empathy generated a quilt for her from Melissa of Sew Bittersweet Designs, Shanna of Fiber of All Sorts and Jenna of Sew Happy Geek. Susan met all of these wonderful women via Twitter and her podcast.

Lower Left Corner
Lower Left Corner
Upper Right
Upper Right
Navy Star Variation
Navy Star Variation
Lower Right
Lower Right

In the strange quirks of the Internet world meeting the Real World, I met Melissa at a BAMQG meeting. She had the quilt and I offered to send it to Susan for her. Susan received it and loved it. How could she not?

It is such a sweet gesture and I am pleased to be a part of it.

Pincushions

Pincushions
Pincushions

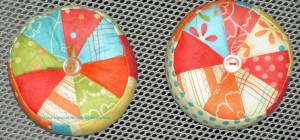
I made a couple of pincushions for the raffle baskets that will be up for raffle at BAMQG.

I have decided that I enjoy making these pincushions, so there will be more in my future. I have more of the Sandy Gervaise fabric from the charm pack, so I will make at least one more of these. I have more roving and more pellets, so I think I will make even more from other fabric.

I don’t know if tickets will be available of meetings, but if so, I will let you know.

You might also be interested in my last post on pincushions.


Infinity Quilt

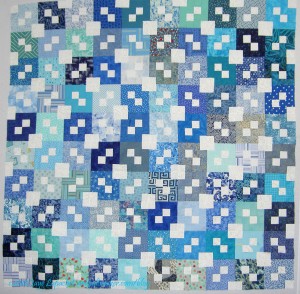
Finished Infinity Top

This photo is old news for you, but I thought it should be shown, so I could tell you that I have finished the back and you would know that the two of them go together.

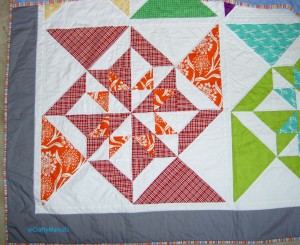
I still have not decided what to do about the border. It is possible that I will leave the grey border and just bind it with the striped fabric that every liked best. I have time to decide; it is not at the quitlter yet.

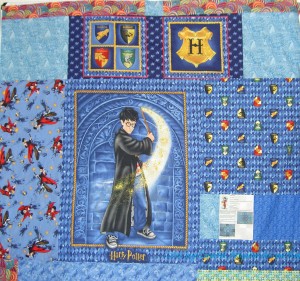
Some time ago (years, perhaps), I bought some Harry Potter fabric. I bought it make something for the Young Man when he was in the throes of his Harry Potter mania, but then never made it. Renditions of beloved characters are never as imagined, though  the Young Man didn’t seem to care. As this quilt will go to one of the nephews, I thought it would be a good opportunity to finally use it. He is just about to start reading the books, so I hope he will like the back. I spent Sunday (a week ago) making the back.

Infinity Quilt back
Infinity Quilt back

While I made the back, I tried to be calm about it. I didn’t want to make another back, but I also did not want to be angry about making the back. Angry when I am sewing? Odd, I know, but as I mentioned, performing the same parts of the quiltmaking process over and over gets tedious after awhile. I could have put this quilt away again and waited to do the back, but, instead, I decided to just making it and move forward. I really do see benefit in making up backs and bindings as soon as I am done with the top. It makes the finishing process so much easier.

Also, the pieces were large, so I didn’t have to fiddle too much. I was able to sew quite a lot of donation squares together in between sewing the back. That was gratifying.

Corner Store Once More

Corner Store Red Border

Apparently, I am still thinking about this quilt and you are, too.

Rhonda wrote in a comment “I’ve been thinking a lot about this quilt. Probably because the whole idea of a “souless quilt” is so sad! If this were my souless quilt, here’s what I would do. I would keep it as is, including the white border that is the same width as the squares. Then I would add a 6- or 8-inch wide border in a warm solid color, maybe red, or orange, or magenta. The border would need to be wide enough to balance out the white with color. I would probably do the binding in the same solid as the wide border. Maybe then it would look like the border was trying to contain/constrain all those active little triangles that are dying to get out of the box, and create some tension. Some applique on the border of escaping/leaking triangles would be fun, too. That’s it. That’s all I’ve got.”

When she wrote that I thought I would see how the quilt would look with a red border. I’m not sure, though I do see an improvement. I bought the red for something else, but it does add something to the quilt. I would have to make the back larger, if I decided to add another border.

Chocolate Pillowcase

Chocolate Pillowcase

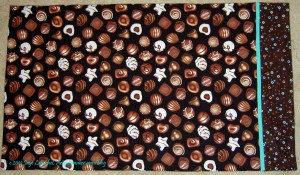
Here is another small project FINISHED!I don’t buy much conversational fabrics, so I knew this was slated for a pillowcase.

I really liked the Sweet Dreams pillowcase I made for my mom. This fabric is from the same line and made me smile every time I looked at it.

The problem for me with pillowcases is finding the cuff and trim fabric. While I was tidying up the fabric avalanche, I sorted fabric and found this chocolate dot. I seem to be buying a few chocolate fabrics (I will not say brown) now and again, but not using them. The dot fabric gave me the idea  for using a strip of one of the Pat Bravo solids for the trim and within a few minutes I was on my way to having a new pillowcase.

Chocolate Pillowcase - detail

I read about a Grandma who made a fun pillowcase for her granddaughter every month during the first year she was at college. I can’t commit to that with all of the nieces and nephews who are in college at the moment. I can come up with a pillowcase or two every now and then, though. I think this will be sent off to one of the nieces as a little treat. I have a couple more fabrics for one of the other nieces and just have to find the cuff and trim fabrics. Soon.

First Finish

Young Man Pillowcases

A la Crafty Garden Mom’s Thursday Thoughts, here is mine:

  1. I like to finish a project on New Year’s Day.
  2. I think it sets a good tone for the year.
  3. Of course, some years it is fruitless.
  4. Still, I do it.
  5. It has to be a small project.
  6. Last year it was a bag.
  7. Not the bag I thought it was, but a bag.
  8. We all know how that turned out. 🙁
  9. The photo above is probably one of the worst photos I have taken in the right conditions – well, my normal conditions.
  10. Not sure what happened.
  11. Still I post it.
  12. I would take another photo, but the recipient changed his sheets (shock, horror!) and they are no longer available for your pristine viewing pleasure.
  13. Have a great day! You don’t need to call the looney bin.

Various & Sundry #24

Well, 24 Various & Sundries (sp??) for the year. WOW! Who knew I had that much miscellaneous nonsense to share? Here is the last one.

Projects

I didn’t do a ‘Hey! Make these Projects for Christmas post’ because my theory is that if you haven’t already started by December, it isn’t going to happen. That is the way it works for me. And I actually was invited to parties this year, so I didn’t have much time to sew on the weekends, which is when I get the majority of my sewing done.

As a result, you can start on your gifts for next year. Sue Astroth has a cool chess board posted on her blog. The spray painting makes it a bit too much work for me, but I like the idea.

Quiltin’ Jenny took up the gift bag banner this year. I was a slacker and didn’t harangue about that pet project. Did you make gift bags? Let’s see them!

Quilt World News

The Pantone Color Institute has come out with their signature color for 2012: Tangerine Tango. Read the story on the Always Quilting (Australia) blog.

FunQuilts is becoming Modern Quilt Studio. They have a post about their upcoming schedule on a recent Craft Nectar post. Their new studio will again be in the basement of their home and Weeks has been keeping a diary of the renovations.

Do you know Pinterest? It is a great way to wile away the hours. There is also a great trick to find out who has pinned what pictures from your site. Adrianne over at Little Bluebell posted the tip last week. Check out who has pinned pictures from Artquiltmaker.com/blog!

My Boxing Day Sew-in post was featured on Creating the Hive. I don’t know why, but it is a thrill when they feature one of my posts. I guess I feel like my writing is validated in some way. Not that I need it to be validated, of course.

Quiltin’ Jenny has joined the SeamedUp team. Check out the announcement.

Fabric and Supplies

The week before Christmas felt like hell at work. All the vendors wanted everything done by the end of the year. Management wanted everything done by the end of the year and I wanted to bury my head in the sand. I tried very hard to buy fabric and somehow just couldn’t achieve it. Camille Roskelley kindly posted a picture of her new fabric line. I asked her to send me some…

Wouldn’t these 1920s designs make great fabric for bags and pillowcases?

Do you stock up on thread per pound when you find it? Do you use mystery fiber thread with your 100% cotton LQS quality fabric? I really liked this thread snob essay. Now, don’t get shirty about the word ‘snob.’ It is a perfectly good word in certain cases. Read the essay, tell me what you think.

There is also a review of Aurifil thread on the KikiSews blog. I liked the way she talked about what needle she used and other such details.

I heard about Quilting by Celia from the Katie’s Quilting Corner podcast. I was tempted to go and take a look because of the promise that she had investigated several methods of making half square triangles. Nice blog. She does lots of blocks, which you know I love. I am also amazed at the people doing the Orca Bay mystery challenge. The steps seem daunting – ‘make 350 HSTs’. Yikes! I would read that and run away screaming.

Design

Weeks Ringle posted about negative space on her blog recently. This post probably relates to their new Transparency book (which nobody has seen fit to send me yet. 🙁  ) While negative space isn’t, as of yet, officially part of the design series I am doing with Sandy, it is an important concept and I will at least mention this post in the Design Resources section.

Not Quilt Related

I liked this list of things to stop doing. They were all reasonable and doable to me.

Gift Books for Quiltmakers

Pam, over at Hip to Be a Square Podcast, asked me to make a list of books I would recommend for holiday gifts. I was flattered to be asked, if a little mystified. After thinking it over I thought it was a good idea.

This won’t be a review post. If you want to read book reviews, you can click on the link in the idea cloud and read to your heart’s content. Most of the books I am recommending will be quilt books, but I am including a few non-quilt books as well.

Sandy did an amazing job in her list by categorizing and giving ratings in a recent podcast. I am not doing that.

In no particular order, the books I recommend are:

1. ColorPlay by Joen Wolfrom – this book about color begins the process of teaching a quiltmaker to make informed decisions about color and guides the quiltmaker through learning to put colors together.

2. Piecing: Expanding the Basics by Ruth McDowell – this book is out of print, but can be found as an eBook at the C&T site. You need this book if you want to be able to piece any shape to any other shape. This book will nudge you along the road to piecing odd angles and out of the ordinary shapes.

3. Adventures in Design by Joen Wolfrom – This book could be considered a companion to ColorPlay. While not the most comprehensive book on the subject, a good companion to others for learning about design. The examples in this book which illustrate design points are excellent.

4. The Quilter’s Book of Design, 2d edition by Ann Johnston – Johnston writes an excellent resource on design. I like the way it is laid out by principle and element. If used with Adventures in Design, the quiltmaker can get a good picture of design in quiltmaking.

5. Falling Together by Marisa de los Santos – de los Santos’ poetic language makes this a fabulous book to which to listen while sewing.

6. Threading the Needle by Marie Bostwick – another book, from the Cobbled Court series, that stands on its own very well. Recent economic troubles factor prominently in the story. New characters are introduced.

7. Masters: Art Quilts v.2 curated by Martha Sielman – art quilt eye candy. This book is all about inspiration. The photos are wonderful and this book provides a jolt to the creative process.

8. Quilts Made Modern by Weeks Ringle and Bill Kerr – I like this book because the tone is kind and because the authors weave additional information beyond how to make the included projects their way into the text. The book is infused with advice on color. The authors took the time to show and talk about a few color variations for each project. No, they didn’t make all of the quilts in multiple colorways, but used line drawings. This is not a “my way or the highway” design team. They want the reader to be able to envision the projects in different colors.

9. The Quilter’s Album of Patchwork Patterns by Jinny Beyer – This massive block dictionary includes nearly every block known to womankind. If you want to be inspired, this is the book for you. If you want to start learning how to draft blocks, this is the book for you. If you want patterns and projects skip this book. The 4,000+ block line drawings provide endless inspiration for quilts.

10. Sew What Bags: 18 pattern free projects you can customize to fit your needs by Lexie Barnes – this book is more than a bag pattern book; it really gives information about the structure of bags and how to design your own.

Happy Reading!
Receiving Blankets

Lilac Receiving Blanket
Lilac & Wine Receiving Blankets

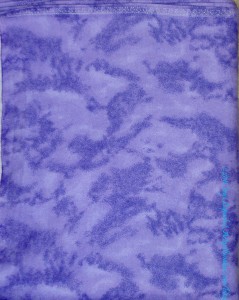
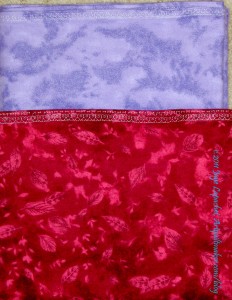
A woman at work is expecting a new baby. She is so pleasant to work with and so helpful. I have been wanting to make her some receiving blankets. As I have said many times, receiving blankets are so useful as playmats, swaddling cloths, capes, etc. She is about to go out on leave, so I finally made them last weekend and gave them to her on Monday.

Gift Wrapping
Gift Wrapping

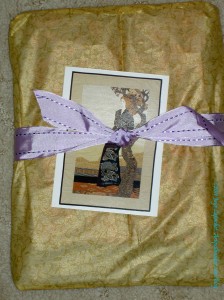
I was particularly proud of the wrapping. As many of you know, I am a very poor gift wrapper, so I was thrilled that this came out so well. I didn’t even plan it!

Little Wallets

2 Wallets
2 Wallets

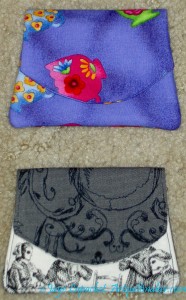
I started the purple wallet before Christmas last year to give as a gift, but never finished it. I finally got another package of snaps and finished it. I am a little short on handwork right now, so it made sense. It will be a gift, but for whom, I don’t know.

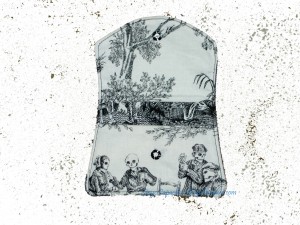
The Skull wallet goes with the Jane Market Tote bag I gave to Lil Sissy. Poor girl. I gave her her gifts over a month rather than all at once, nicely wrapped on the day. All I can say is that I hope the dribs and drabs method made the day last longer.

Skull Wallet Open
Skull Wallet Open

That is not one of my new, cool Photoshop Elements backgrounds. That is trying to get rid of the background and running out of time to figure out what I was doing wrong. It looks pretty cool, I think. I tried to center some interesting motifs on the inside, so when she opened it, she would see some skeletons. Hope she likes it.

By the way, this pattern is good for bus passes! I saw one made with a loop and clip on it, which I thought was a good modification.

Food Quilt

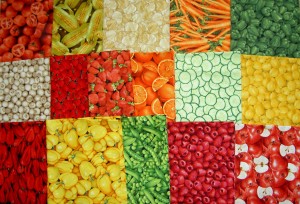
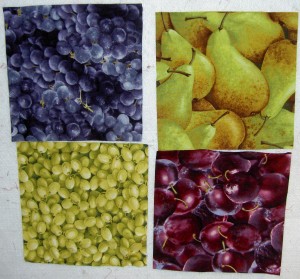
Fabric Shack Food Fabrics

This quilt is all about the fabric.

I started cutting when I found myself starting to wash and iron food fabrics AND when I started to run short of leaders and enders.

As you know I made an effort to get the Farmer’s Market fabrics put out by RJR. I was able to buy a nice selection in Pennsylvania. I also scrounged a bunch from my mom when she was done with her food quilts.

After that, it was time to do a test. I want to do a Disappearing 9 Patch. I saw Robin doing one at the CQFA 2011 Retreat and she got a lot of bang for her buck. I want something that won’t take forever, but won’t be boring. First, though I wanted to try it out.

9 Patch Basic Layout

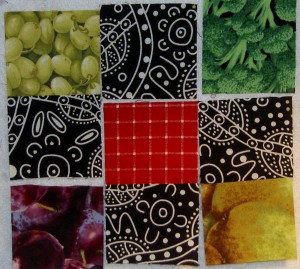
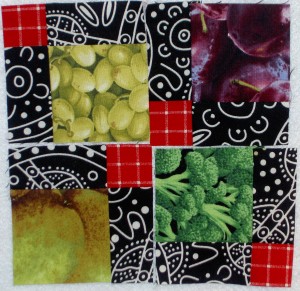
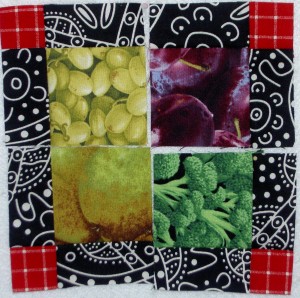
I am thinking I will make the real squares 6.5″. I didn’t want to commit that much fabric to a test, so I made the test group much smaller. The squares for each part of the test 9 Patch are 2.5″ cut. The above shows you the look I am thinking of using: food fabrics in the corners, white on black print on the middle outsides and red in the center. The Young Man gave his seal of approval, though wanted to know where the pizza fabric was, so I’ll have to rethink not including pizza fabric (it isn’t part of Farmer’s Market).

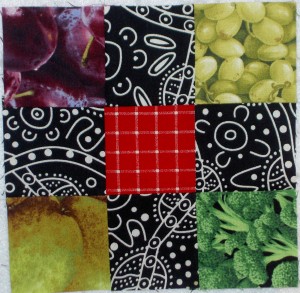
9 Patch Sewn
9 Patch Sewn
9 Patch Cut & Rearranged


The blocks look good and I think my idea will work. As I said the real blocks will be on a much larger scale. I think that the rearrangement of the blocks in that kind of infinity pattern will look good as well. Things to which I need to pay attention:

  1. not to many green food fabrics in the same block
  2. cut up lots of reds and blacks, if I really want to get moving
9 Patch Alternate
9 Patch Alternate

This is another way I could arrange the block parts. It has kind of a self sashing thing going. I don’t think I would want to do this unless I added more sashing to the center, which would be a lot more work. I don’t see any reason to cut up the 9 Patch in the Disappearing 9 Patch manner if I am just going to add more sashing to the middle. I might as well cut squares and sash them.

I really should have put a quarter or a dime next to these blocks so you can get an idea of how large they are, but I didn’t think of it before I took the photos. As a result, I don’t know if you will be able to to tell how large the final cut patches are?

First 4 Real Sized Patches

As I iron fabric, I cut these large squares out and set them aside. I was finishing up Stars for San Bruno #2 when I first cut these, so I didn’t cut any black/whites or reds. I’ll get to it.


Finished: Stars for San Bruno #1!!

Stars for San Bruno #1

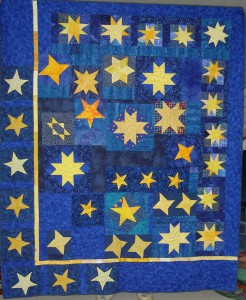
Yes, I really did it! I made the first quilt in this series and it is finished. I have brought it around to CQFA and BAMQG and shown the contributors in those groups. I want as many people as possible who contributed blocks to see it before I give it to DH’s cousin.

Now I have to call the cousins and arrange to bring the quilt. I am nervous, since I don’t know them that well. I’ll let you know how it goes.

Nota bene: the Block-a-long will return next week.