Saturday’s trunk show inspired me to look at the (photos of) the Aneela Hoey patterns I have made. I have a tag for them, but realized I hadn’t tagged all the posts correctly.
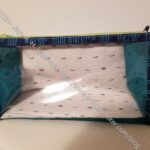
Boxy Clear Pouch
Carrie’s Boxy Clear Pouch with gift bag
Tim’s Boxy Clear Pouch
Lil Sissy’s Inside Outside Pouch – 3/4s view
Dripping Roses Inside Outside Pouch with thread
Inside Outside Pouch finished
2-in-1 Case (fixed by Carrie)
Tula 2-in-1 Case
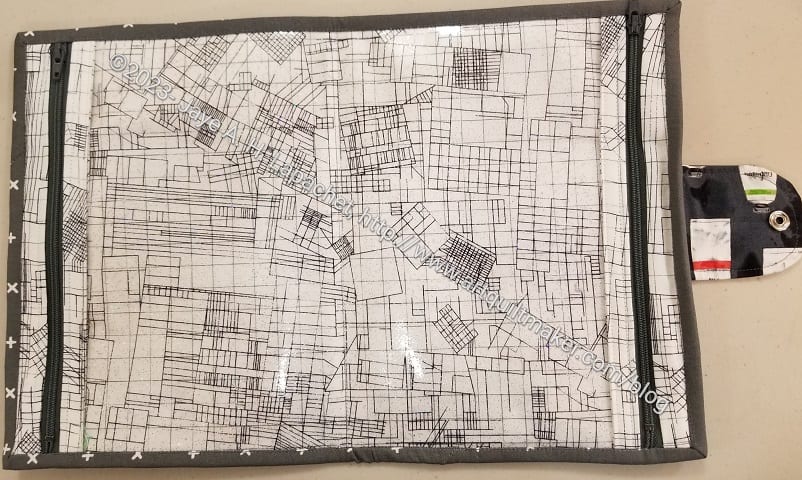
2-in-1 Case #4 exterior – open
2-in-1 Case #2- closed
Mom’s 2-in-1-Case
Sue’s Kit Supply Tote
Carrie’s Kit Supply Tote
Finished: Kit Supply Tote
Officer Gifts: Speedy Pouches
In looking at this list, I realize I have only made 1 project from Aneela’s book, Stitched Sewing Organizers. Most of the others were sewn from stand-alone patterns. I know my friend MaryM has made more. I’ll see about getting the book out again and making another project from it. There is one big organizer that I keep looking at.
Today is the day where we give the officers their gifts.
Carrie, Sue and I spent last Saturday at The Granary, a local quilt store that has a great restaurant nearby.
We bought gift cards for the officers and spent time, in between eating, looking at quilt supplies and wrapping the gifts. It was another fun time with Carrie and Sue.
I finally finished the Tula 2-in-1-Case. The binding gave me fits. I am pleased, however, that it came out so well. Choosing a Tula Tiny Stripe for the binding made coordination easy.
The inside is an old feather print I had. I like it and it is light colored so the recipient will be able to see what’s inside. I suppose, however that is not as important with a bag that opens flat?
Tula 2-in-1 Case – openTula 2-in-1 Case -back
The back is fairly normal. It is just the back of a bag. There is an interesting bit of symmetry because of the way I cut the exterior panel so that the lady would be centered on the front.
I don’t yet know who the recipient will be. Stay tuned!
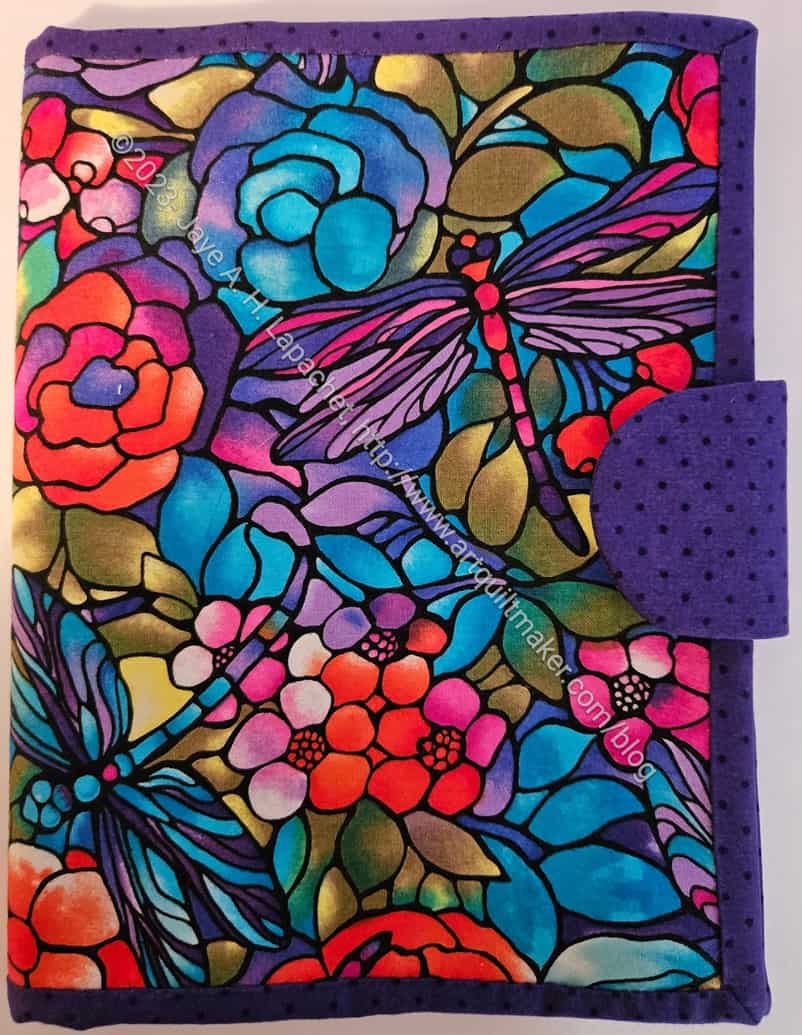
Angela is a relatively new member who volunteered to make one of the 2-in-1 cases for the officers. She did a really wonderful job!
The colors are really great. I think the binding picks up and enhances the purple in the dragonfly print really well.
I love the fussy cutting she did, though she claims it was a happy accident. The cover really looks like the dragonflies were placed intentionally.
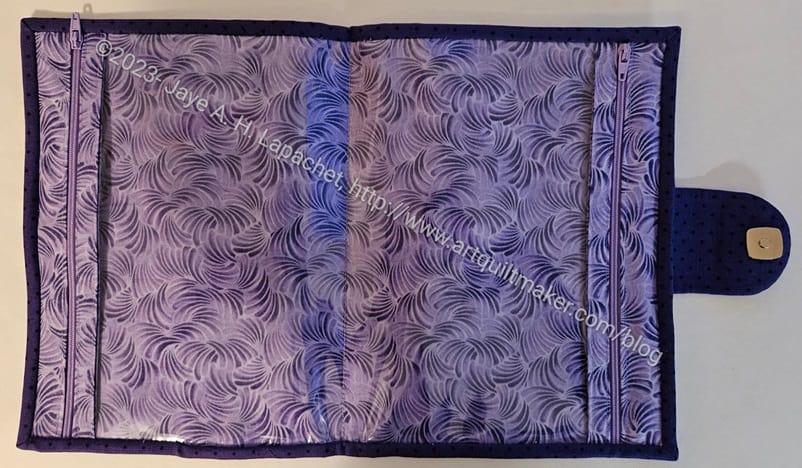
AngelaB’s 2-in-1 Case – interior
The inside mimics the outside, but uses a lighter print to still allow the owner to see what is inside.
She really matched the interior print and the zippers well.
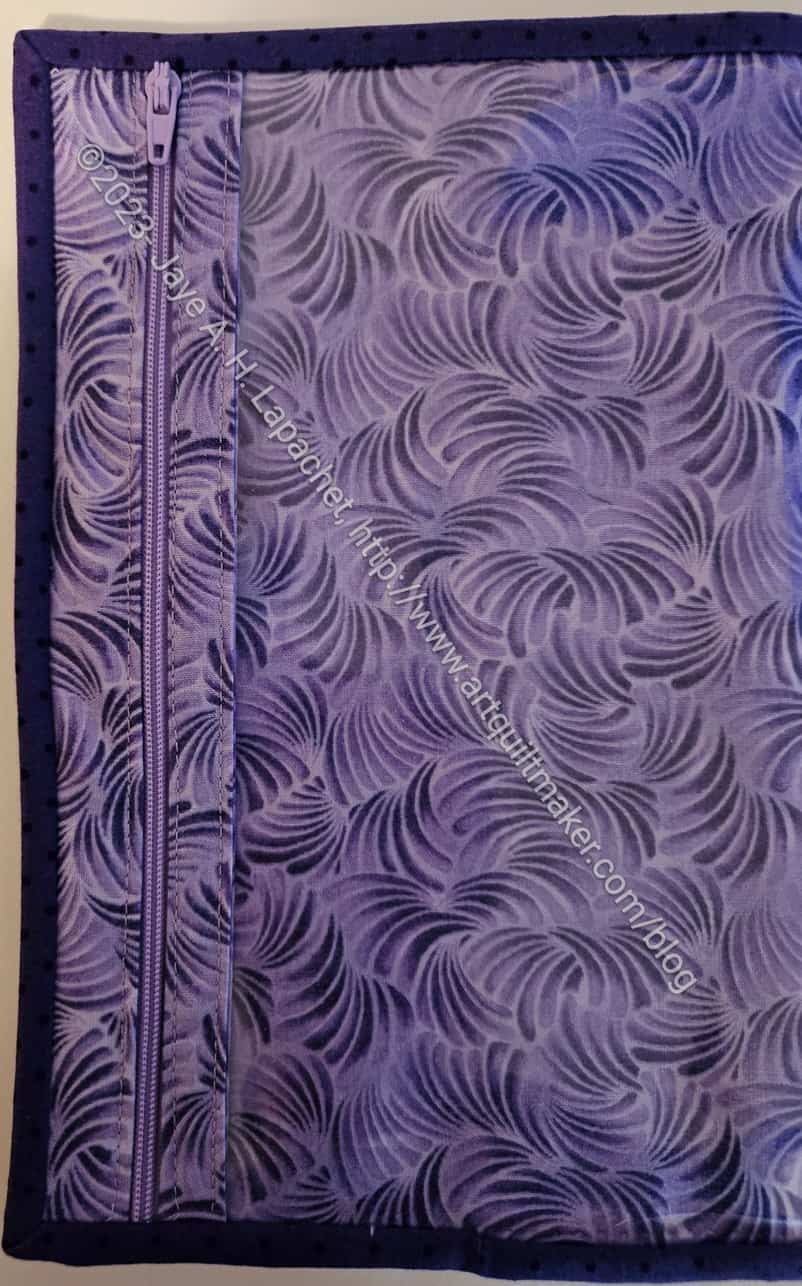
AngelaB’s 2-in-1 Case – interior detail
Angela’s zippers also went in beautifully.
I am completely impressed with this version of the case. You can see the other completed 2-in-1 Cases in a previous post and my, second, in process case in a post from earlier this week.
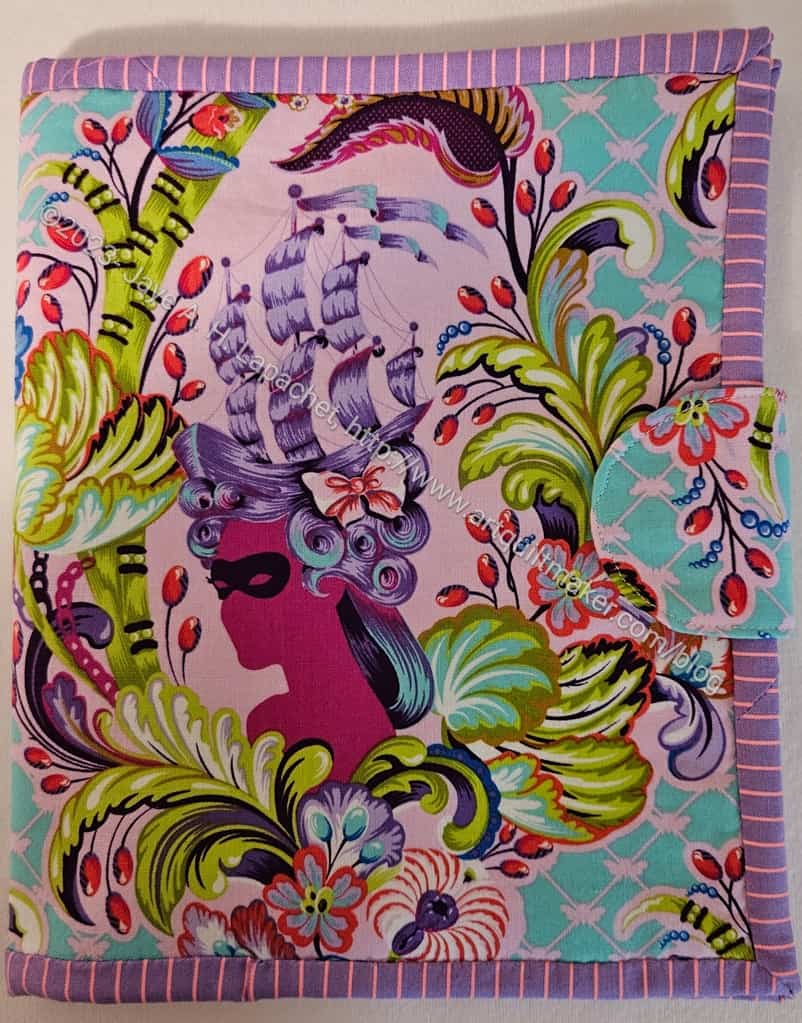
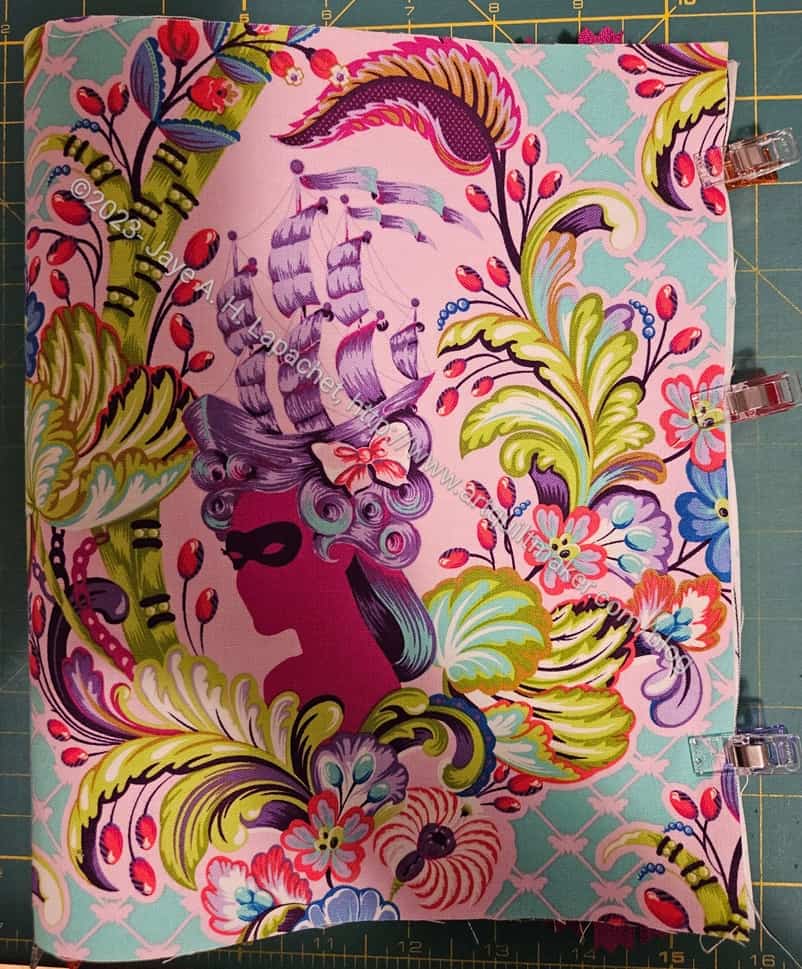
I realized I needed one more 2-in-1 Case for the officer gifts so I decided to make a Tula version.
This is a really singular print and I wouldn’t normally choose it for a gift, but it kept calling to me for this project. I really hope one of the officers is a Tula fan!
I carefully fussy cut the image of the woman so that it would show up on the front.
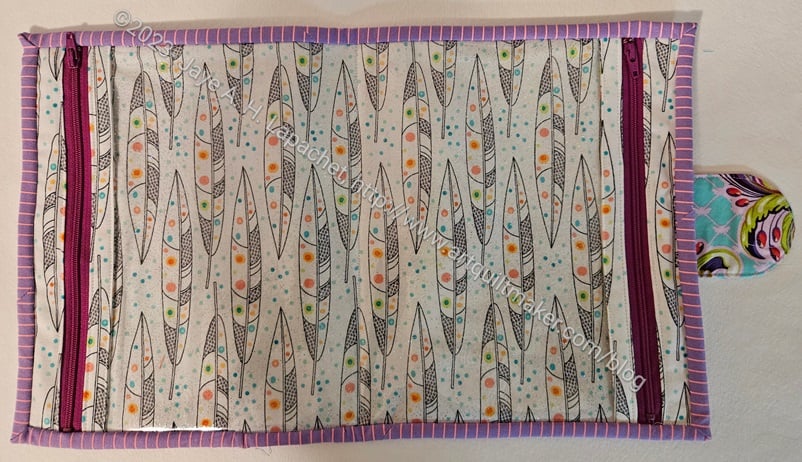
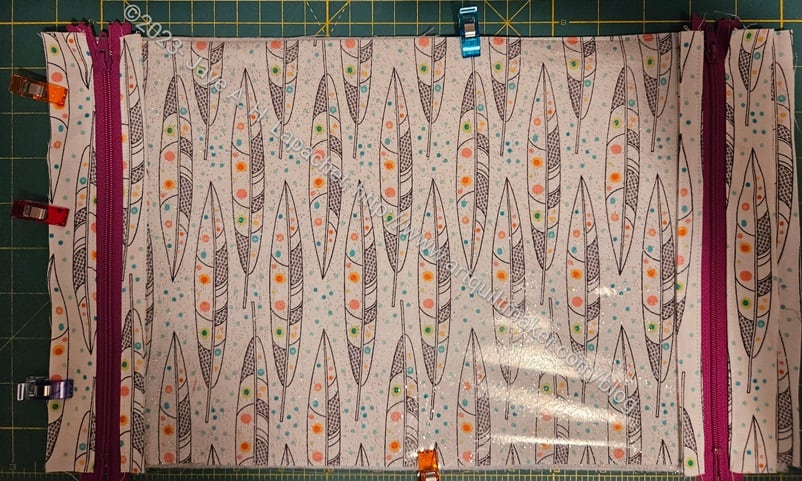
Tula 2-in-1 Case interior in process
I also made the inside first so that any seam allowance problems, as mentioned when I made the last case, could be dealt with by cutting the exterior a different size.
This version is really coming together quite quickly. I am surprised at how easy it is compared to how difficult the directions seem.
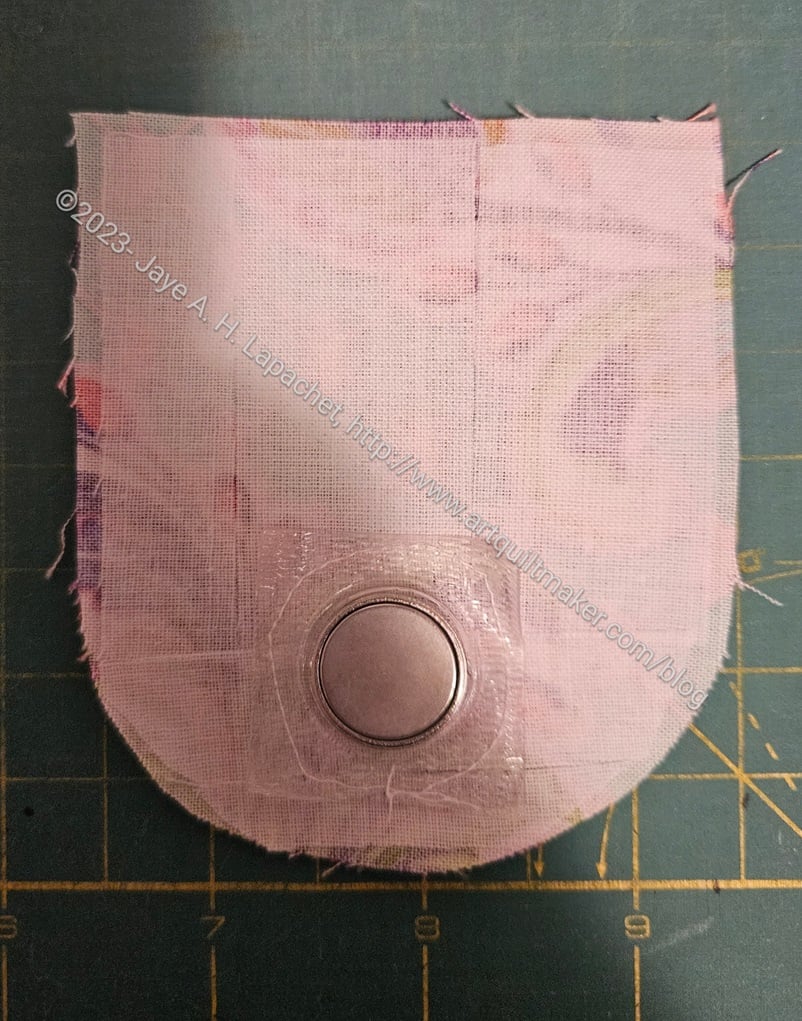
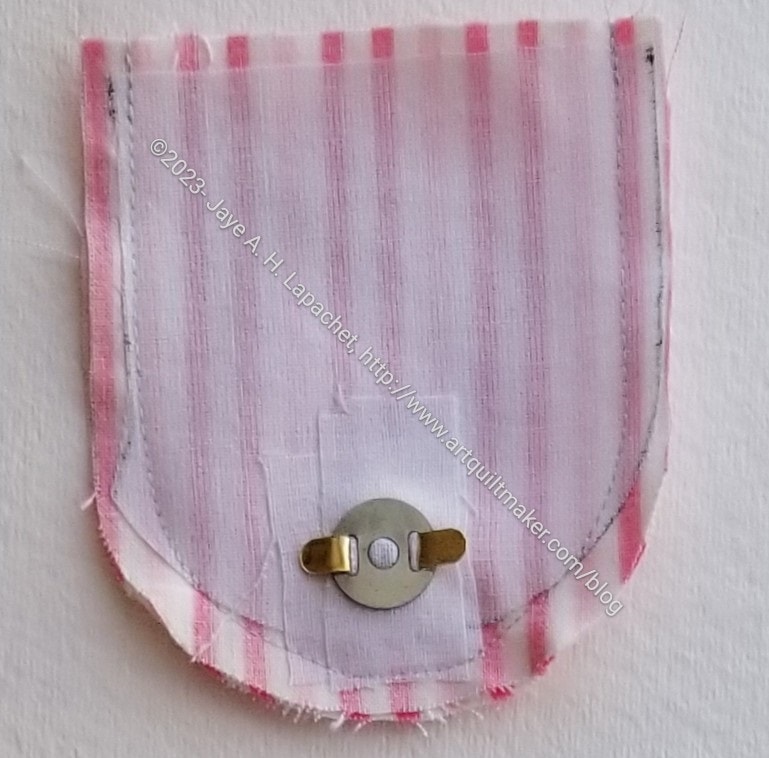
Tula 2-in-1 Case-sew in magnetic snap + tab
This time I am also using one of the sew-in magnetic snaps. I used the edge of the square-ish zipper foot to sew around the magnet part and it worked pretty well. I can sort of see the stitching on the outside, which I am not thrilled about, but am leaving and hoping for the best.
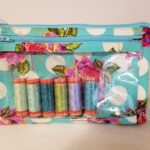
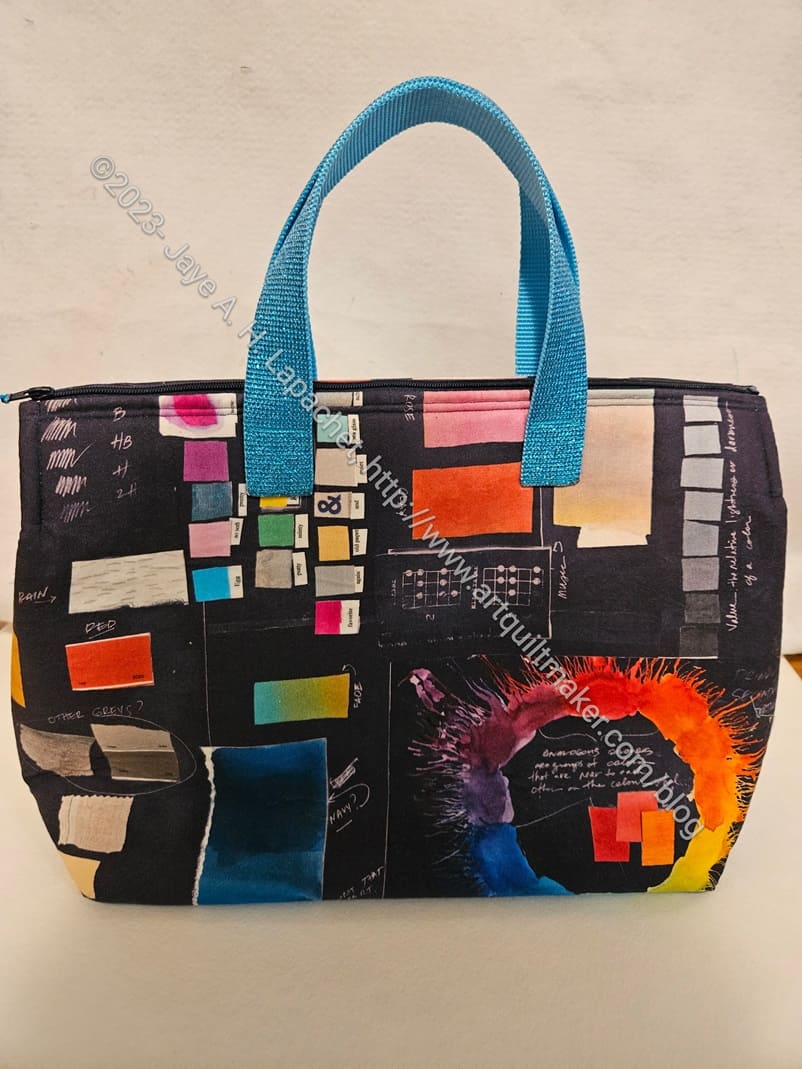
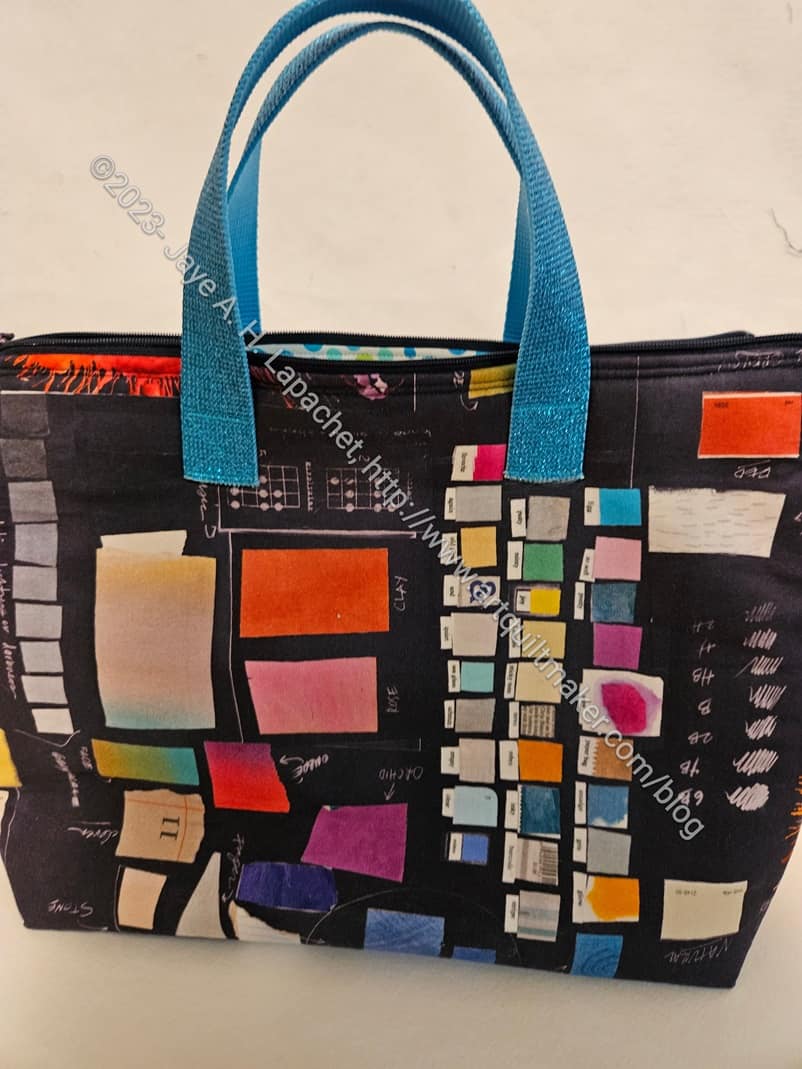
This is the Kit Supply Tote I made for Sue. As I said in the previous post about Carrie’s version, this one has a color wheel on the front.
Sue was the first one to open her gifts. Since the bags were the same and the small gifts were the same, it might have ruined the surprise for Carrie. They were both very good about it.
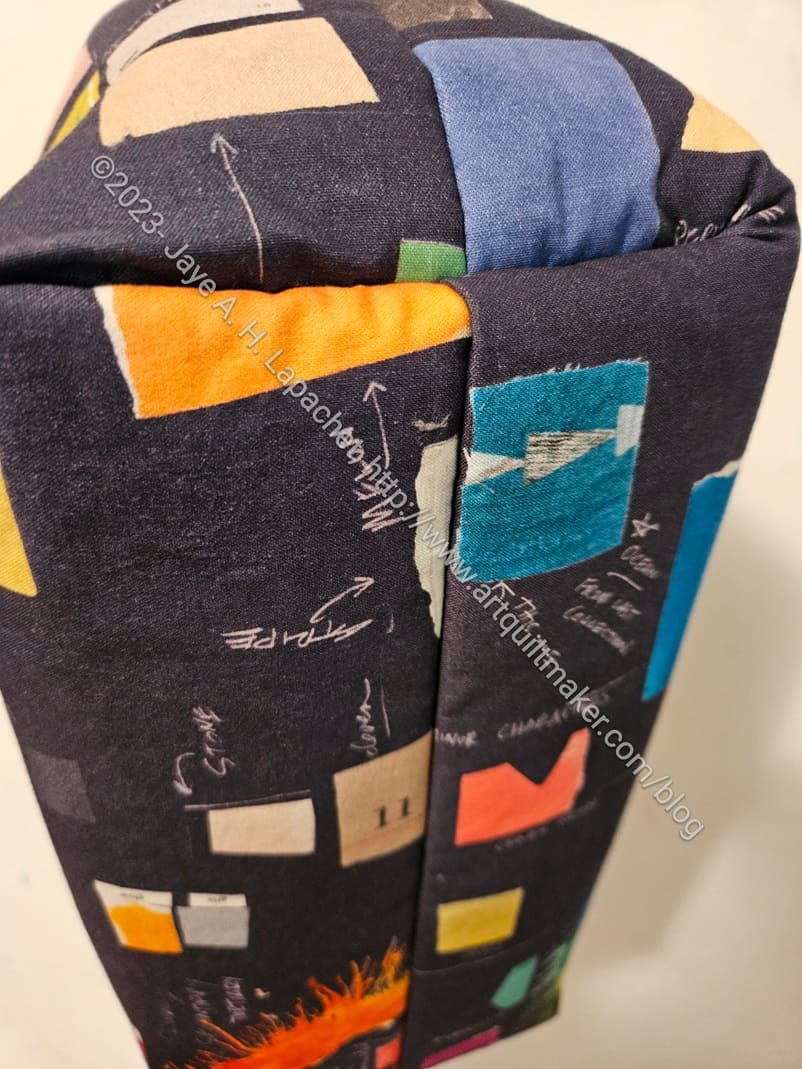
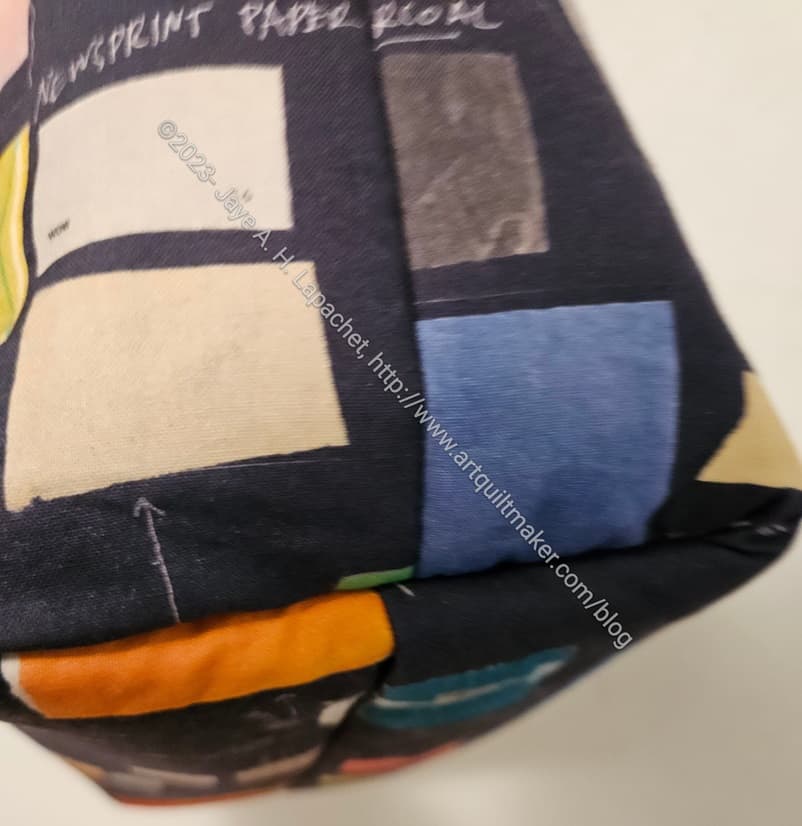
Sue’s Kit Supply Tote: bottom
One of the things I like about this bag is the way the bottom comes together. I can’t use vinyl or pleather for the bottom, because the side pieces become the bottom, but the bottom comes together so nicely.
This means the stitching looks good. I didn’t match the design of the fabric as I wanted to make sure the paint chips and color wheel were prominently displayed on the sides where people could actually see them.
Sue’s Kit Supply Tote: bottom corner
I am thrilled that the corner came out so well. I am going to try some Odicoat on the bottom of mine to protect it. I told them I would let them know how it went. I plan to paint it on theirs if it works out. If it ruin my Kit Supply Tote, I can always make another one.
Carrie and Sue both liked the turquoise handles. I was afraid they would be too glittery for them.
I made a couple of fabric gift bags to put them in so they looked a bit festive. I forgot to take a photo.
This the Kit Supply Tote I made for Carrie. It looks the same as the one for Sue, mostly because I used the same fabric for both of them. I highlighted the paint chips on this one and the color wheel on Sue’s.
We had a holiday lunch yesterday, which was super fun. I was hopping about the week before, because I could barely contain my excitement in giving these totes to them. I basically thrust the gift bags into their hands as soon as we sat down at the restaurant and made them open them. They seemed excited as well.
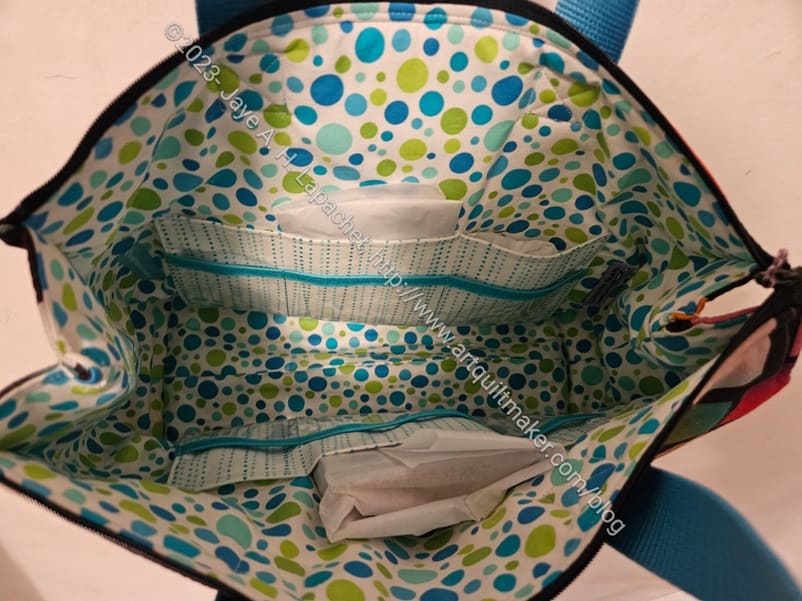
Kit Supply Tote: Carrie’s inside
I put a few small gifts in side just because I don’t like to give empty bags.
The insides are the same on both. I designed the pockets differently from the pattern as I wanted to put two layers of pockets for added storage. On Carrie’s tote, I separated the pockets more. Both have vinyl pockets on top of the fabric pocket. The vinyl pocket is edged with some turquoise doublefold elastic.
Carrie was super excited that this bag matched her Hackney bag. 😉
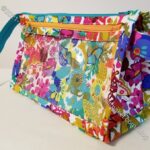
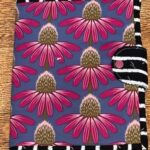
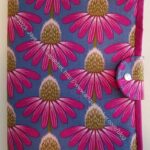
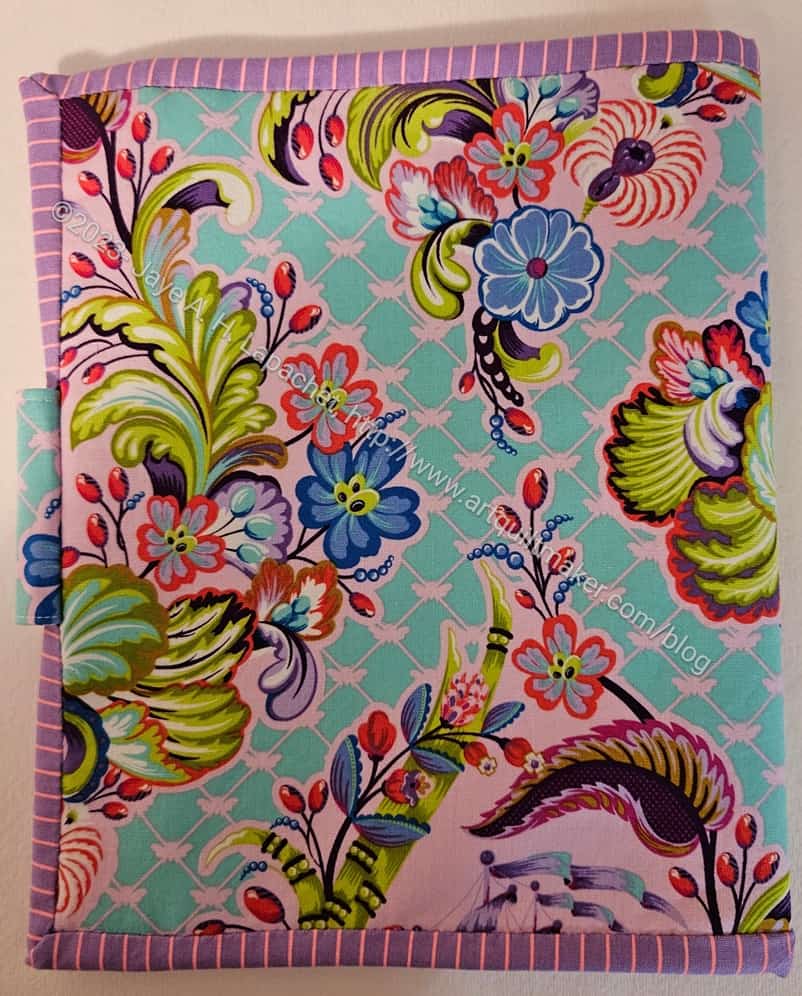
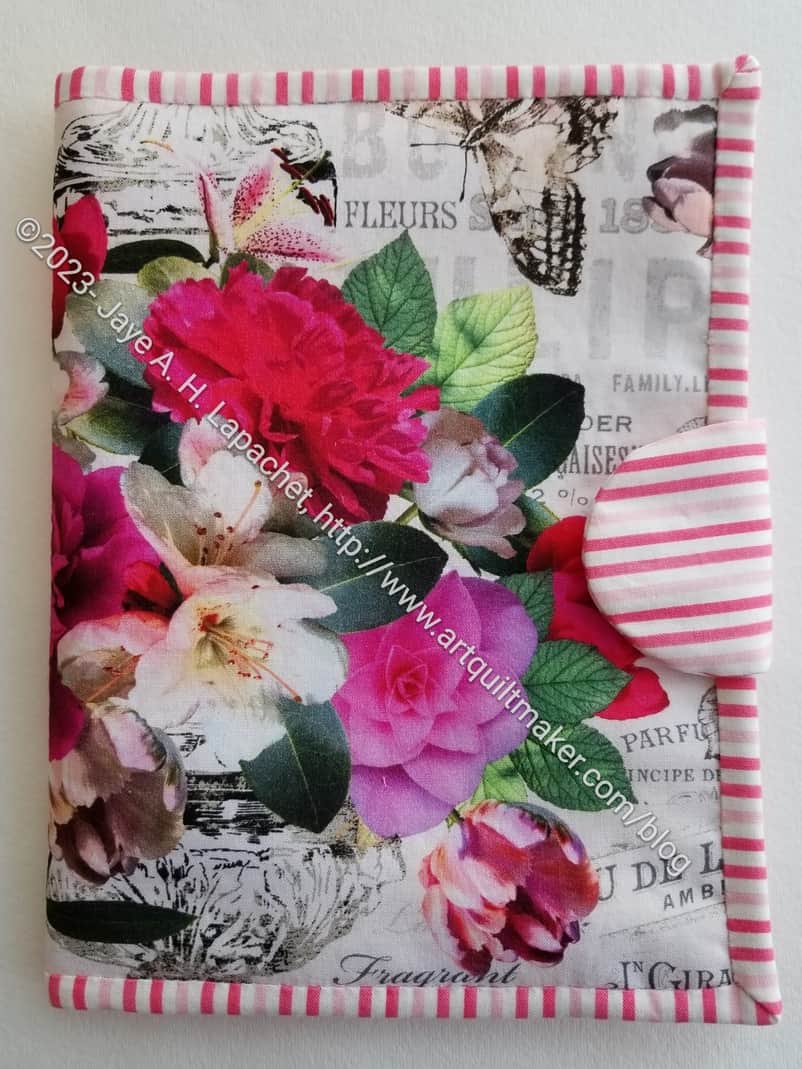
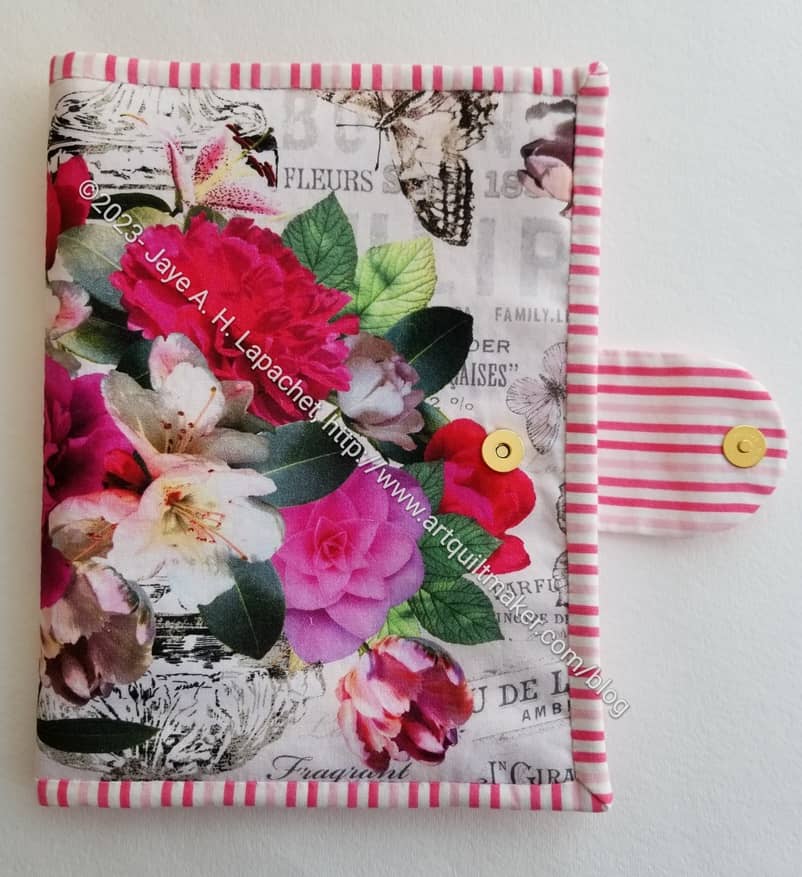
I am pleased with how it looks. I like the fussy cutting of the flower fabric (I bought that flower fabric at the Quilt Loft). It is sweet looking, though not modern at all.
I am a sucker for striped binding. I think it works. I think black and white would have been classic, but too much of a contrast with the flowers.
2-in-1 Case #4 exterior – open
The magnetic snap is gold. I am not sure why I had a gold one. I don’t usually buy gold, but the brand was one carried by Joann, so maybe I bought it there on ‘spec?
I was able to line up the stripes pretty well on the snap tab. Honestly, it was a happy accident. 😉
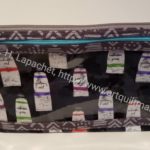
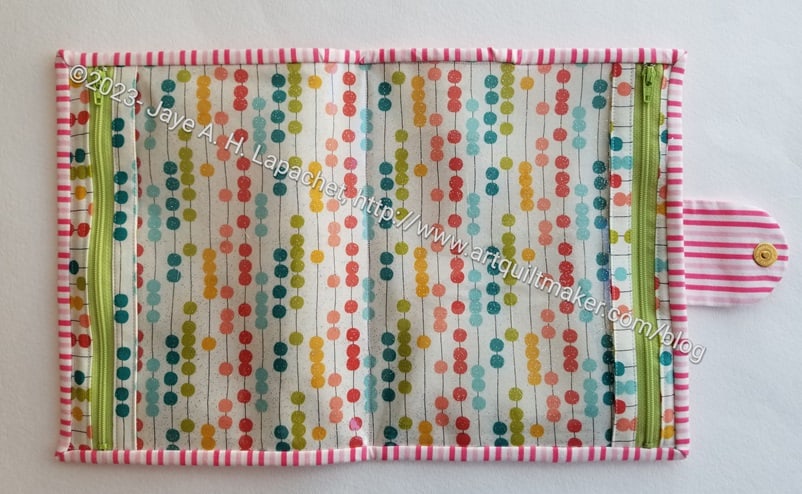
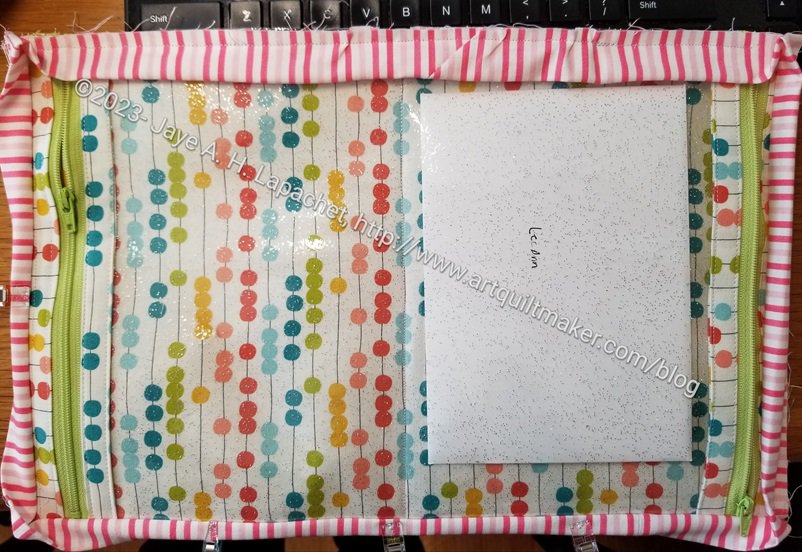
2-in-1 Case #4 interior
The inside looks pretty good as well, though the contrast between the outside (sweet and flowery) and the inside (modern) is very obvious. At least the user can’t see the flowers when the case is open.
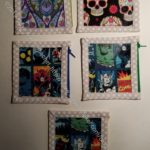
I am looking forward to seeing the last two. The photo below shows the ones I have so far.
2-in-1 Cases – closed
Joelle made the red version. Cyndi contributed the blue example in the center and mine is on the right. They look so different!
I continued to work on the 2-in-1 Case (#4) and have decided that making at least two of each bag is the best way to go. This one is so much easier than the others. Still, I am taking my time.
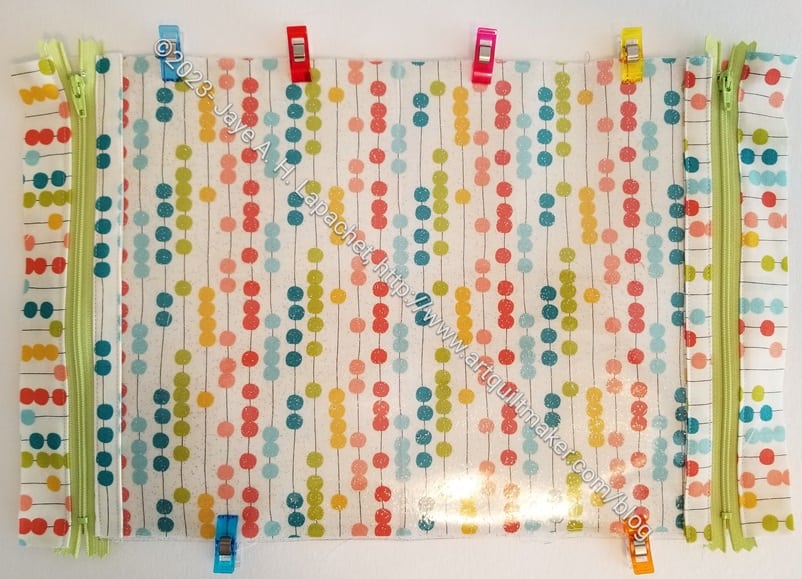
2-in-1 Case #4 – zipper stop
I forgot that I thought I should use a longer zipper than the one the pattern calls for and broke a needle.
The pattern calls for 8″ zippers. Inevitably one or other of the stops gets in the way and I break a needle. ERGH!! I wrote myself a note to use a 10″ zipper or continuous zipper tape. It doesn’t matter if the stops get cut off as the binding acts like a stop anyway.
2-in-1 Case #4 interior
Besides breaking a needle, the case is coming together.
I changed zipper colors right before I sewed them to the vinyl. The ones I chose match the light green in the fabric pretty well. I was going to use a brighter green, but like these better.
I followed the seam allowance directions, but the section with the vinyl and the zippers was still too big. I could have ripped it out and done one part over, but decided just to center the section with the vinyl and cut off the extra. Maybe lame, but it will look fine.
2-in-1 Case #4 with binding
The binding is on and I will hand sew it to the back.
I decided that 2-in-1 Cases would be great to use for the gifts going to the guild officers. I am, once again, in charge of organizing that effort. I think it is important to thank the officers, but I seem to be one of the few who wants to organize the effort. Sue and Carrie are helping, which is great. they are sensible friends who offer excellent advice.
2-in-1 Case #4 size test
In the past I have made large bags and then had people make small gifts to fill the bags. I didn’t have time for that this year, so I am gathering cash and gift cards. I needed something to hold cards and gifts and the 2-in-1 cases are the thing. They are useful for sewing supplies, but also the right size for cards and gift cards. I am gathering quite a hoard, so I hope they are large enough.
This strategy also means I do not have to cajole people into making large bags or small gift items. I was prepared to make all of these 2-in-1 cases, but a few people volunteered. I was very grateful for the others efforts. I am making one, as you see.
I had to take a break for some seam ripping on the Kit Supply Tote and do some handwork on the other bags I worked on over the weekend. That meant I was able to start sewing this bag. I cut it out at Sew Day earlier this month. It is going together much more quickly than the first ones.
2-in-1 Case #4 magnetic snap
One of the things I did was try a magnetic snap, which is recommended in the pattern. These are different than the other snaps, installed with a Snap Setter, that I used before.
Except for being quite large, I think the magnetic snap came out pretty well. The instructions in the book for installing it were a little vague, but I used some pliers to bend the arms of the snap down. That worked for me.
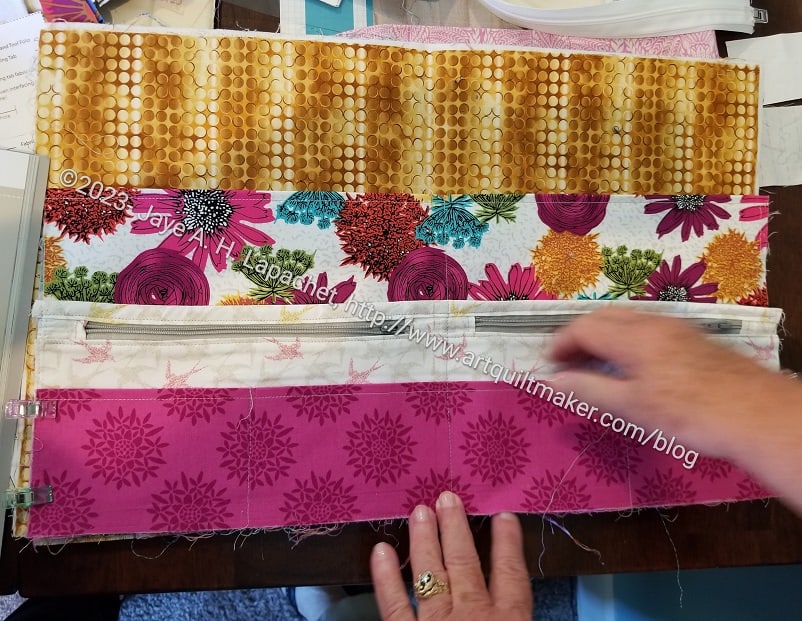
I am working on another Kit Supply Tote. As an aside, having a model to look at as I make the pattern again makes the second one much easier.
In this case, I worked on the pockets on Saturday night. I modified the pockets in the pattern, because I thought I could add more pockets. I prepared the modified pockets some time ago, but just started to sew them over the weekend.
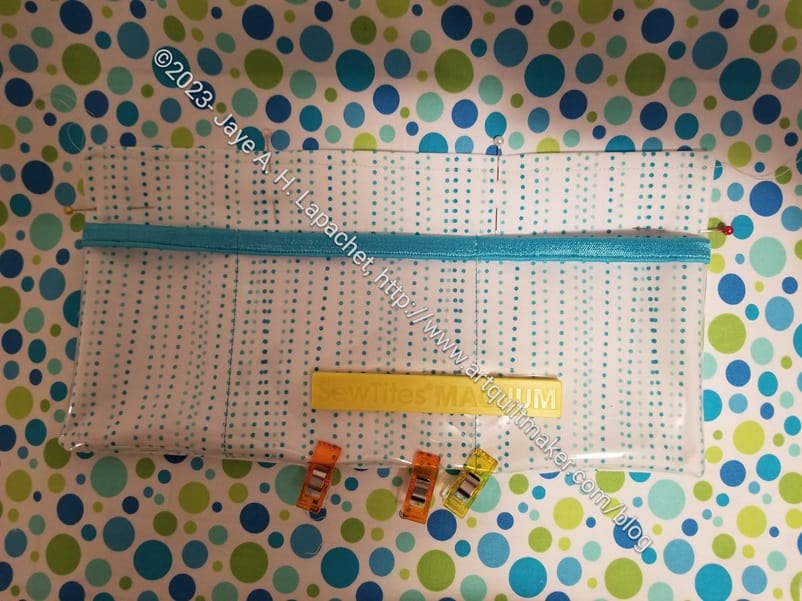
Kit Supply Tote pocket modification
My pockets have the pockets from the pattern on the bottom (white fabric with blue lines of dots) and another vinyl pocket (top of vinyl has blue double fold elastic) layered on top. I thought this was a great idea until I started to sew it. I had to fold the vinyl under to make a seam, which makes the whole piece really thick. It worked, but it wasn’t ideal. I had to rip out one section at the bottom, because I didn’t quite catch the vinyl. After that I was very careful about catching the vinyl.
I could always add an internal zipper pocket, but I think these slip pockets are more useful. I think this idea has potential; I just have to work on it a little more.
N. B. In the photo, I am using Sew Tites**, pins** and WonderClips** to hold the pocket in place. The pins cannot be used on vinyl. I know I have mentioned this before, but it is always useful to hear it again. Vinyl doesn’t self heal, so WonderClips and Sew Tites are a must when you work with vinyl. That Sew Tite Magnum** was great! I use the pins linked above because they work better for me with bags. The super thin pins that some quiltmakers love bend when used with the layers required for bagmaking.
**N. B. : Obviously, you should shop at local quilt shops and small businesses. However, if you are too busy or can’t find what you need there, I use Amazon affiliate links and may be paid for your purchase of an item when you click on an item’s link in my post. There is no additional cost to you for clicking or purchasing items I recommend. I appreciate your clicks and purchases as it helps support this blog.
Mary and I talk about bags all the time, which is super fun. I was pleased and surprised to see that she was working on various projects for the guild Door Prize team.
She wanted to change some of the fabrics after she already started the Fold-up Sewing Folio, so that project is in a bag like the I Spy pouch waiting for another day. I am not sure of the designer or the name for the I Spy-like pouch. This will be a set.
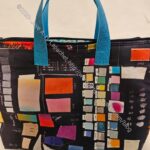
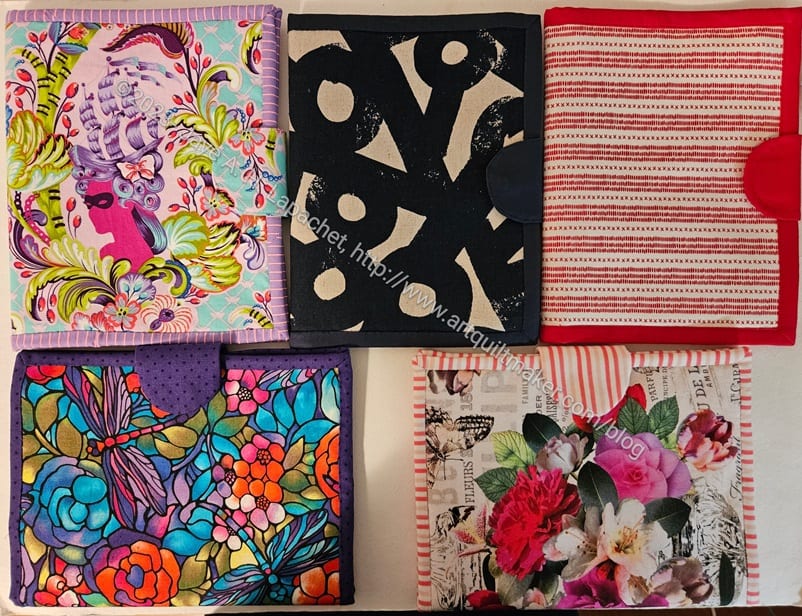
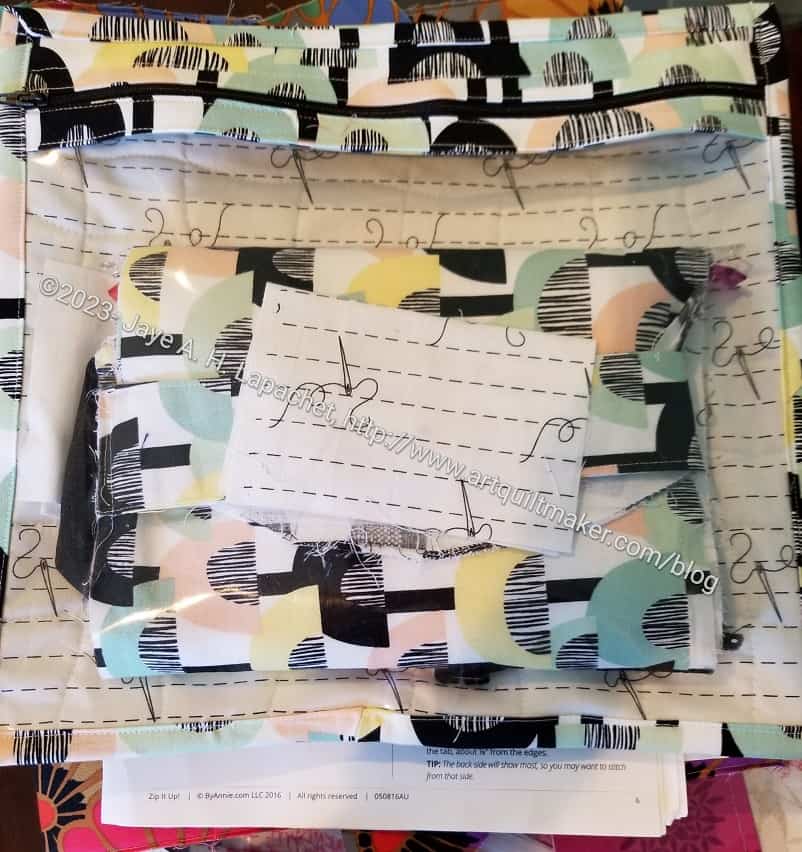
Book and Tool Folio in process
She is also working on the Book and Tool Folio. I love the fabric she chose for this pouch. I think Mary’s choice of the flower fabric paired with some tone-on-tones. It is a great combination of fabric.
I feel like I should try the Book and Tool Folio now. Mary is fearless when it comes to making bags. She just tries and works through the challenges. I am impressed and inspired.
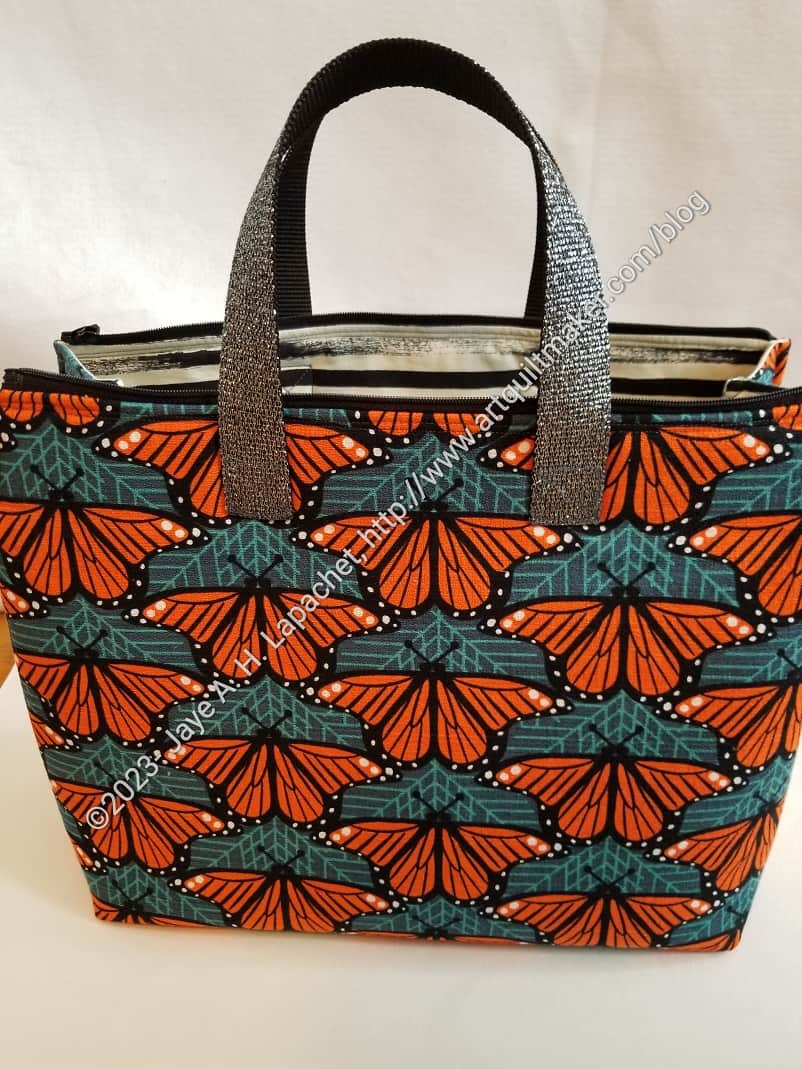
I really love this bag. It is sitting on my cutting table so I can admire it. The fabric is great, but I really love the size and shape.
I haven’t tried carrying anything in it, so stay tuned for that adventure.
There are also some details I haven’t used in other bags that I think make a nice finished look.
This is an Aneela Hoey pattern. It is a stand-alone pattern, as in not from her book, Stitched Sewing Organizers**. I have had the pattern for awhile and admired Mary C’s version at every Sew Day. I talked a little about the beginnings of this bag in the post earlier this week. I will say that I was able to finish it pretty quickly and that I immediately wanted to make another.
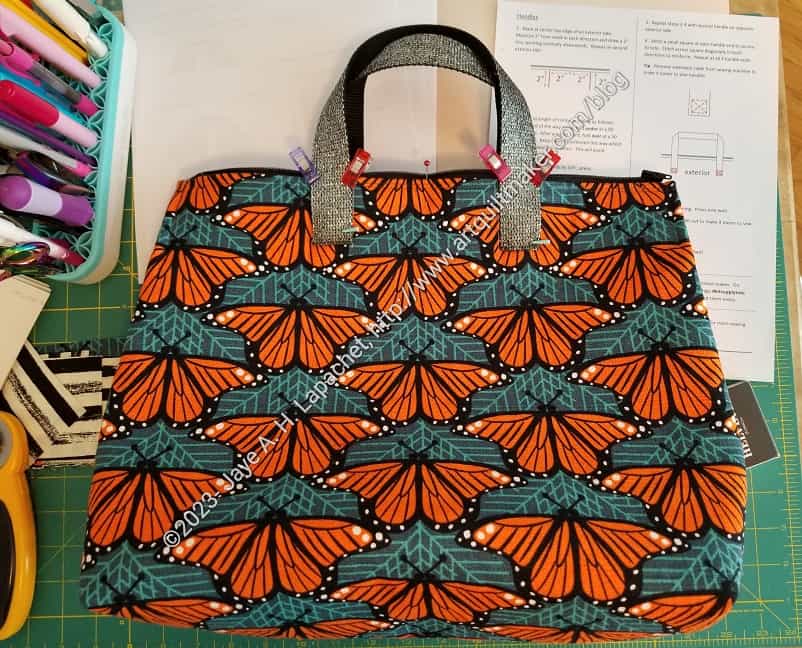
Finished: Kit Supply Tote
Of course I did! It seems to be my MO. I do have some of the pieces cut out for a smaller version, so I may make one of those. We’ll see. I do like the large size.
I had some trouble with some of the directions, but it is my poor pattern reading not the pattern. I’d love to hear what others think about the directions on pg. 8. I found them confusing, but I looked at some of the photos provided after the first page, then I tried some things and went with it. The basic idea was to sew the lining to the exterior staying within the seam allowance.
There was some ripping, but in general this bag went together pretty well.
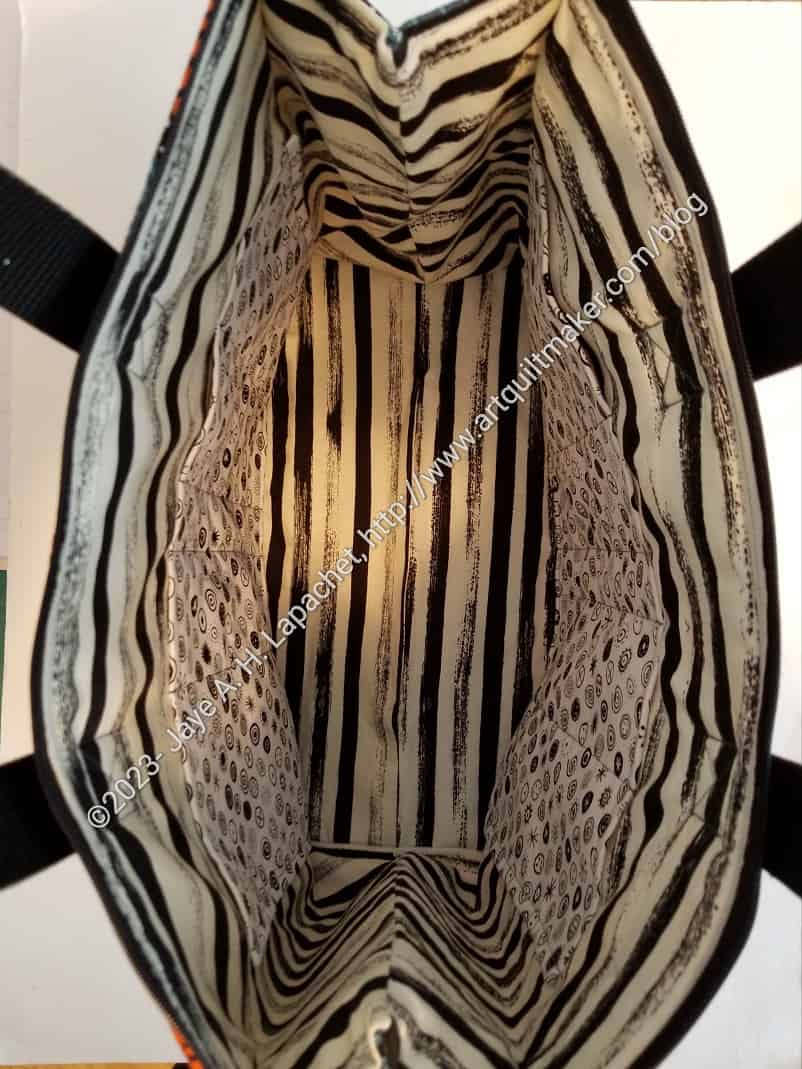
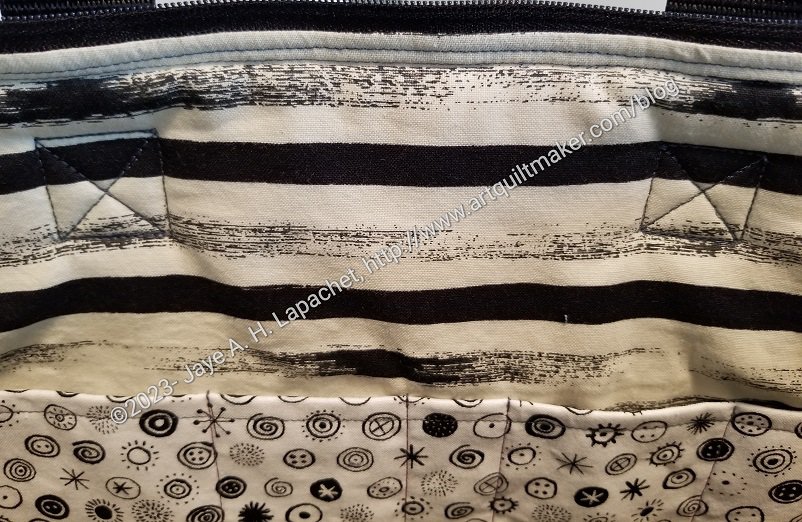
Finished: Kit Supply Tote – lining
The pockets look pretty useful. I don’t have measurements for my particular tools and supplies, so I mostly followed Ms. Hoey’s guidelines in the pattern. I don’t know yet what I will use this bag for, so I am not worried yet.
I did change the pocket fabric at the last minute for the circle motif fabric. I had cut out the pockets using the striped fabric of the lining, but changed my mind. I will use the fabric for the pockets for another version.
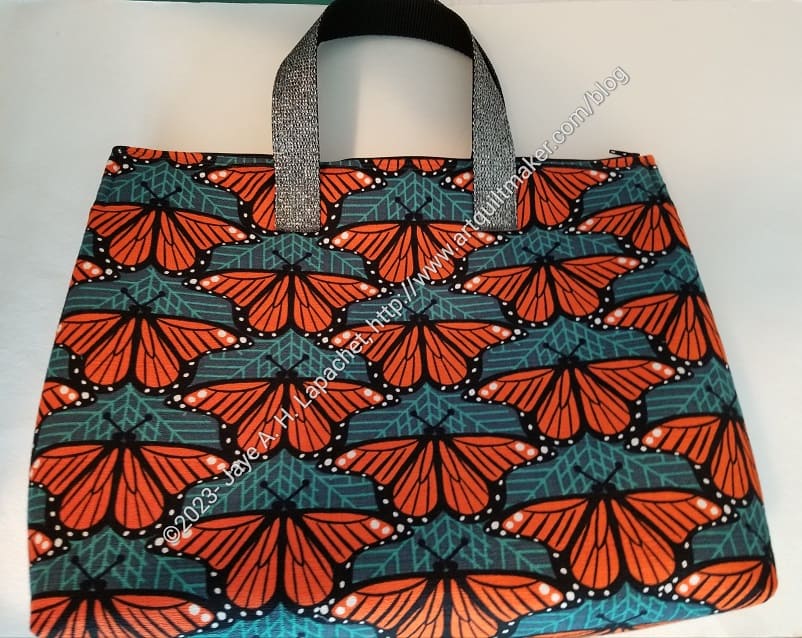
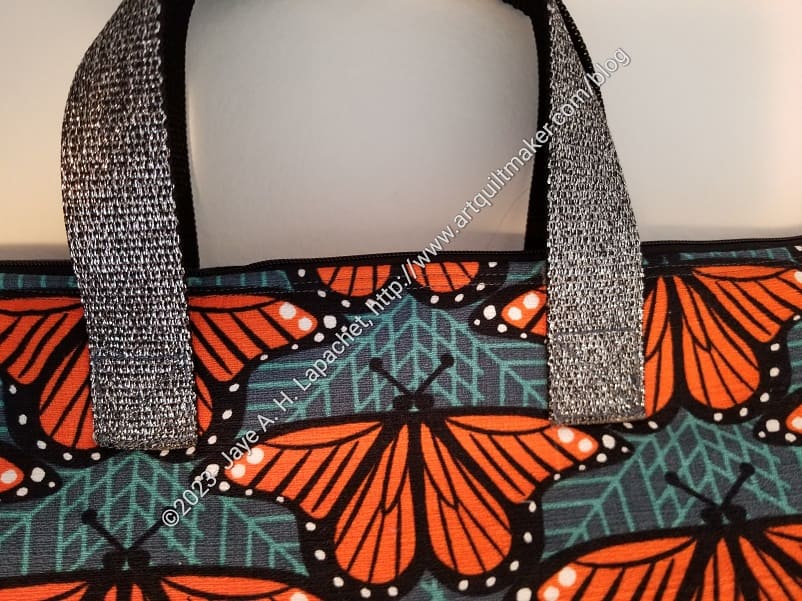
Finished: Kit Supply Tote – handles
Considering my ‘handles from the back’ technique, I am pretty pleased with how they turned out. I don’t think these handles will feel very good if I had to carry this bag filled with heavy supplied for a long distance, but I don’t anticipate that happening.
One thing I did with my fingers crossed was modify the zipper. This pattern calls for a 14″ separating zipper. I only had a longer one. I followed the directions, which were to fold the ends over at a 45 degree angle and sew the angle into place. It seemed to work just fine and the zipper looks good. Whew!
I really want to put this bag into use. I may replace the Ultimate Carry All bag with this one, though that bag is growing one me.
**Obviously, you should shop at local quilt shops and small businesses. However, if you are too busy or can’t find what you need there, I use Amazon affiliate links and may be paid for your purchase of an item when you click on an item’s link in my post. There is no additional cost to you for clicking or purchasing items I recommend. I appreciate your clicks and purchases as it helps support this blog.
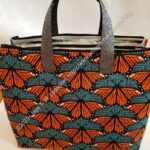
I cut out a large version of the Kit Supply Tote by Aneela Hoey at one Sew Day in the past. I checked and can’t find a date when I did it. Still, I decided, over the weekend, that it was time to put the bag together.
Overall, this is a pretty straightforward tote. Directions are provided for two sizes and both are put together the same way.
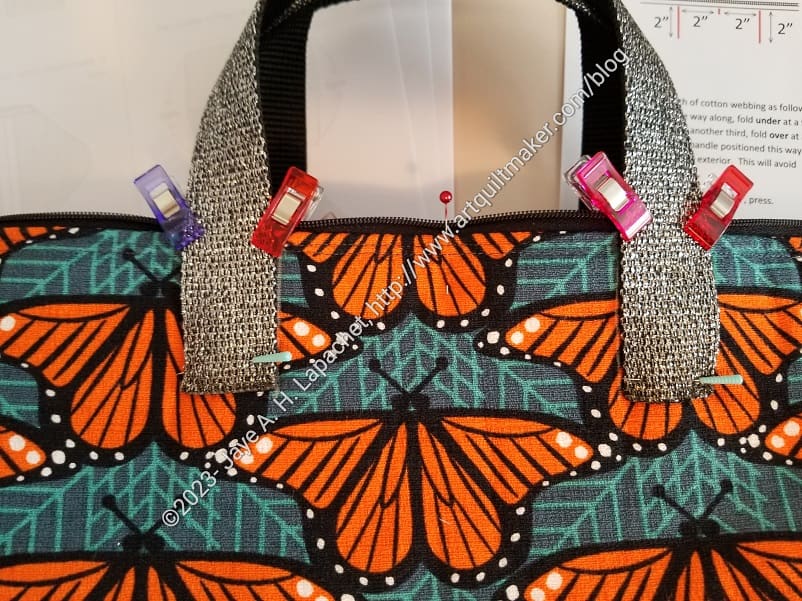
Kit Supply Tote handles
Towards the end, I chose one of the webbing handle materials from Sew Hungry Hippie.They are a glittery black or silver overlaid on black. Very glittery
It was hard to sew on the previous lines from the front. I was using a charcoal thread color that matched pretty well. I sewed the handles on a little bit from the top/exterior, counting stitches carefully until I had one line of stitching sewn in a square.
Handle stitching
Thereafter, I took the bag out of the machine and sewed from the lining side. I could easily follow the stitching by sewing on the previous lines. I am pretty pleased with how the stitching came out.
This 2-in-1 Case is for my Mom for Mother’s Day. I cut this out at Sew Day, I think, and made it at the Retreat.
I forgot to put the foam inside. I did adhere fusible batting, so it has some structure, but it floopier than the others I have made.
I really had trouble with the snaps. I used the Snapsetter and found out that it has to be on a hard surface. The folding table that made my Retreat workstation was not stable enough so I had to redo the top cap twice. I think the bottom part may come off if she isn’t careful, so I’ll have to warn her.
Mom’s 2-in-1-Case – inside
I think she could probably use this for non-sewing stuff in a tote bag or in her purse. I am sure she will think of some way to use it.
I got her a bigger and better gift also, which makes me not so worried about the snap.