Receiving Blankets

Lilac Receiving Blanket
Lilac & Wine Receiving Blankets

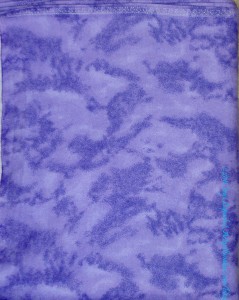
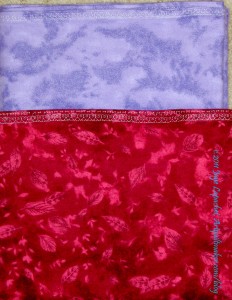
A woman at work is expecting a new baby. She is so pleasant to work with and so helpful. I have been wanting to make her some receiving blankets. As I have said many times, receiving blankets are so useful as playmats, swaddling cloths, capes, etc. She is about to go out on leave, so I finally made them last weekend and gave them to her on Monday.

Gift Wrapping
Gift Wrapping

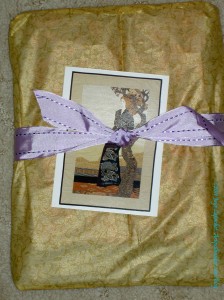
I was particularly proud of the wrapping. As many of you know, I am a very poor gift wrapper, so I was thrilled that this came out so well. I didn’t even plan it!

Fall Journal Cover

I am on the last section of my current journal and know I will be needing a new journal soon. I have gotten used to using journal covers and thought it was time to make a new one. I have been using the Innocent Crush cover since I made it. Even though I have made others, none of them have felt the way the Innocent Crush journal cover feels.

Finished Fall Journal

Still, I enjoy using journal covers and I want to perfect the process, so I made a new one.

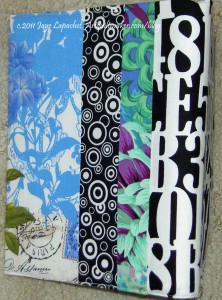
I am pleased with the fabrics I used – all scraps and bits from other projects, though the letters and numbers were a perk from Bear Patch Quilting in Minnesota.

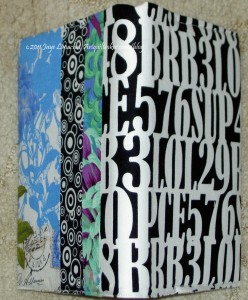
I am glad I was able to use the Belle Fleur fabric, but I am a little annoyed that the piecing all ended up the back. I might switch the cover around so that the piecing is on the front even though that will mean that the letters are upside down. I might not care, but we will see.

Yes, I knew while I was working on this that I should be working on the Stars for San Bruno #3 quilt. I haven’t been in a really great mood, so I haven’t wanted to work on it, since I don’t want to infuse it with bad energy. I may have to eat more chocolate.

Finished Journal
Finished Journal

I decided to photograph this end up from above so you could all see the front and back.

I have heard mention of ‘lifestyle’ photographs that seem to be popular on blogs right now. I don’t have a photograph studio, so this was the best option I could think of at the time.

Bear Patch Quilting gave out small pieces of fabric (about 10″x10″), which is where I got the letters and numbers and fabrics. Apparently, they give them out to everyone who purchases something in the store. I think they were called Bear Paws. I was allowed to choose the fabric I wanted from a box they kept under the counter. I asked what kind of fabrics they used and the owner said that they cut from current fabrics.

Using Wonder Clips
Using Wonder Clips

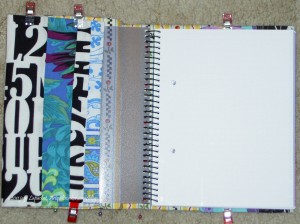
One thing that worked out really well was the Wonder Clips. Again, I bought these in Minnesota. I had been wanting to try them for binding. I was tempted to buy the large size package, but decided to try the small one first. Good thing, because they worked fine for binding but not for my process. I already poke myself plenty with the needle and the clips stuck out too much for comfortable stitching.

I had a brain wave, however to use them to sew the journal cover together and that worked great! Using straight pins works ok, but it hard to insert them into the fabric when the cover is on the journal, but not sewn. I need to have the cover around the journal so that I get the fit right. The clips worked really well, because they didn’t interfere with the journal. I loved them for this purpose!

There is a link to the journal cover directions from the tutorials page on the toolbar (just under the AQ banner) above. You will see the submenus if you put your mouse over AQ Info. I welcome your suggestions on making this tutorial better.


Last Jane Market Totes

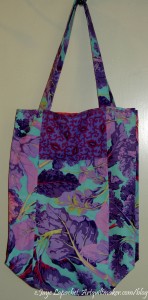
Jane Market Totes
Jane Market Totes

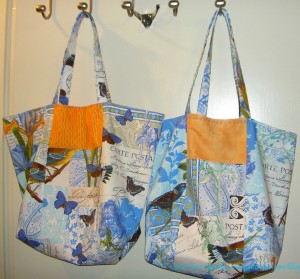
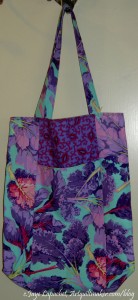
Yes, I should have been working on the Stars for San Bruno #3 quilt, but I didn’t. these bags were cut out and I just wanted to get them out of my hair. I believe that these are the last two Jane Market Totes I need for Christmas. I counted three times as I was rearranging bags to take this photo and came up with the right number. I have to check with DH to make sure I know about everyone who needs one.

If these are the last ones, I would just like to point out that it isn’t even December much less the 24th of December and this part of the gift giving process is done!

I feel like these came out the best of all of the bags. I put some fusible interfacing on the bottom of the bag (after I cut out the corners) and that gave them a little more shape.

Book Review: Push Stitchery

PUSH Stitchery: 30 Artists Explore the Boundaries of Stitched ArtPUSH Stitchery: 30 Artists Explore the Boundaries of Stitched Art by Lark Books

I have to admit that I like pretty, cheerful art. I also like pushing the boundaries, which isn’t always pretty. This book make stitchery (do they call it that anymore??) cool, but not always pretty.

This book arrived on my doorstep from Lark (Hey! Thanks, Lark!) at an interesting time, because I was stitching madly on my Kissy Fish project. Compared to the work in this book, my work is extremely simple.

This book has a lot of intimate imagery. There are images of people in bed together, faces stare out at you imploringly from the pages,nakedness, roadkill and the jostling crowds of people that make up the daily life of those of who take public transportation. there are flaming eye sockets (pg.124), plenty of skulls, and sex. One of the artists says “The things that interest me are shock, sex, violence, love, laughter, absurdity, beauty, and contrasts” (pg.116). This quote describes the book pretty well. These pieces are more like paintings than the kind of embroidery to which I am accustomed.

Vintage linens are used in various pieces. Pieces are also mixed with non-textile elements including china and metal. All different types of stitching are used as well: machine, hand, variety of threads and stitches, etc.
I think of embroidery and stitchery as crafts where women dominate. There are a large number of men represented in this book.

Some of my favorite pieces are the stamps (pg.46-47, the image of the carafe and cup (pg.27), London Calling Paris (pg.104) and Driving (pg.158). The pieces and the imagery are the stars of this book. The text was minimal, both in amount and layout. It was not the star of the show and that allowed me to immerse myself in the images. The photography is really good in this book. I was able to see the detail of the stitching in most of the pieces.

Lark is really putting themselves out there by producing catalogs of different types of crafts. I really appreciate the risk they are taking and suggest that you support their efforts.

View all my reviews

Juicy Soul Retreat

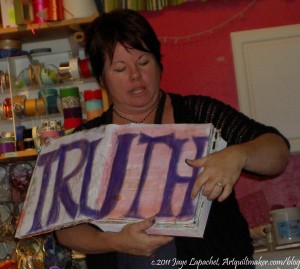
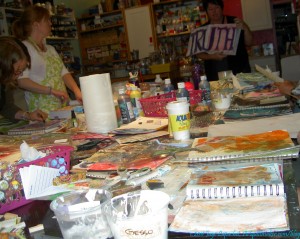
A couple of weeks ago I went back to A Work of Heart for a Juicy Soul Retreat. I really had no idea what a juicy soul was or how it could be retreated. I went because I needed a bit of a creative change and Andrea and her good energy were just what I needed.

Andrea
Andrea

It was the right thing to do. I really enjoyed the day, got a lot done and got my head a bit straighter than it was.

Finished Cover + Marker

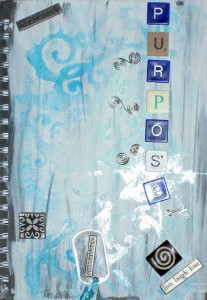
I thought about the journal I wanted to make and wasn’t sure so I bought a new journal and brought my Purpose journal as well. I was thinking I might be able to add to that one.

One of the things that was different about this class than the other journaling classes I have attended at AWOH was that we all introduced ourselves and shared a little bit about ourselves. Some people shared why they were there-what they hoped to achieve- and others shared something about their art. My friend, though quite young, is staring retirement in the face and she was there to work on figuring out what’s next.

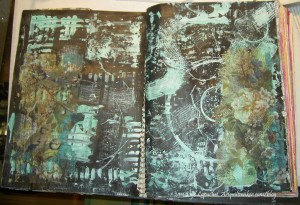
That struck a chord with me and I started working on the new journal. Some of the techniques for making backgrounds were similar to those I had used in other AWOH classes, but there was plenty of new stuff as well. Also, I don’t take notes in Andrea’s classes; I try to absorb the techniques, so I don’t remember some of the nuances from previous classes.

Darcy's Background
Darcy’s Background

I tried to get the backgrounds for the new journal done, but there just wasn’t enough time. It was probably a good thing. I have to remember that it isn’t about the finished product, but about the process.

The Process
The Process
AWOH Hearts
AWOH Hearts

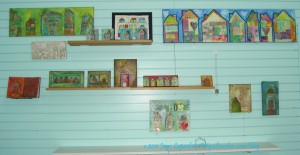
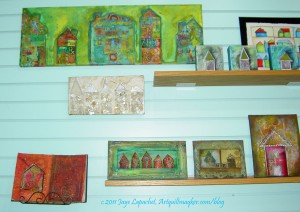
Andrea is revamping half of her studio space and she has some of her work displayed on the new shelves there. I love the hearts. The pink background is such a wonderful pink. It isn’t too sickly sweet or light.

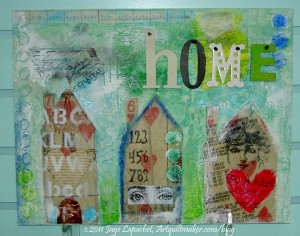
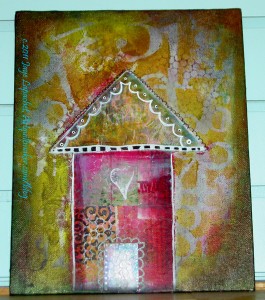
She has a project of her own in which she is creating 1000 houses-images of houses. I love the idea of choosing a shape and creating a series using that shape. The house shape is simple, but has a lot of possibilities. Hearts would also work. A 1000 is an amazing number of pieces of art. It is large enough to be a challenge, but also obtainable. She eventually wants to raffle the collection off to raise money for a charity.

AWOH Houses
AWOH Houses
AWOH Houses
AWOH Houses
AWOH Houses
AWOH Houses
AWOH Houses
AWOH Houses
AWOH Houses
AWOH Houses
AWOH Houses
AWOH Houses

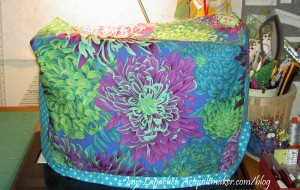
Finished: Sewing Machine Cozy

Front View
Front View

I have been thinking (and, perhaps, also talking about) making a cover for my sewing machine for a long time. Last Friday was the day! I took one extra day off work and made the long weekend really long. I got a ton done and was able to rest a bit. I didn’t feel so exhausted when I went back to work.

I buy some large pieces of fabric if I think I will make a bag from the fabric. I don’t like piecing together bits and pieces to make a bag. The Philip Jacobs Japanese Chrysanthemum print I used was one such piece. I was going to make a bag, but I really like it and thought I wouldn’t mind looking at it all the time as a sewing machine cover.

I used a pattern from Strawberry Patches. I had a hard time understanding the pattern, so I also printed the post where she talked about making the cozy and showed pictures. The pattern is fine; my brain just didn’t understand how to make the thing without pictures. I do appreciate people posting tutorials like this, which is part of the reason I post tutorials, too. Have you see the AQ Tutorials? Someday I’ll optimize them for printing.

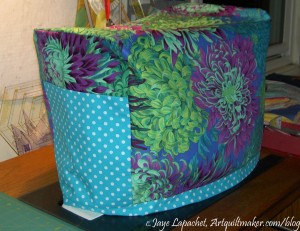
Side View
Side View

The pattern provides measurements for some Bernina machines, but also tells the maker how to measure your own machine, which is what I did. The one thing I should have done is compared the measurements for the lining and the outside. The author suggests that you do those measurements separately, but I think they need to be similar in size. Mine were similar, but not exactly the same and I found the outside was larger once I was ready to sew the lining to the outside. I put some tucks in it, which I wouldn’t do for a gift, but I consider it a lesson for the future.

I am not sure why the author had pockets on the pattern, but I put them in. The Michael Miller turquoise dot makes me happy. Now I can keep the dust off my machine.

Two More JMTs

August 1 marks the beginning of the long slow slide to Christmas for me. I know you are running away and screaming ACK! when you hear that (except for those of you who don’t celebrate and are just sitting back and laughing right now), but it is true. I am working away on gifts for Christmas after learning that it is much better to get them done early rather than staying up until the crack of dawn on the 23rd. I am not as organized as Quiltin’ Jenny, but I am getting better!

I finished two more of the Jane Market Totes over the long weekend. I made some progress while my main machine was in the shop since it doesn’t matter much about consistent seam allowances (between machines) on these bags.

JMT #6
JMT #6
JMT #7
JMT #7

I know they look the same. I used all the same fabrics for the outsides, but they really are two different bags. I have 4 more to make. I inadvertently counted Grama’s Birthday gift as one of the Christmas gifts. Oops!

I also remembered to box the corners on these, which I am really happy about. Not sure why I had the mental block on that, but, perhaps it is over?

Book Review: Ring a Day

Ring a Day: 700 Photos from a 365 Day Jewelry ChallengeRing a Day: 700 Photos from a 365 Day Jewelry Challenge by Marthe Le Van

This is a book by Marthe Le Van that I received for free to review from Lark Crafts. The first paragraph sums this book up very well. Le Van writes “When I hard that a group of jewelers was creating one new ring per day for an entire calendar year, three thoughts immediately came to mind — This is brilliant! This is completely mad! Where do I sign up?”

Some of the most creative works come out of projects that are brilliant or mad and the Internet helps by making such projects global. The project ended up with 1600 images of rings and the book contains 700 of them.

The book is small in format, easy to carry around; a nice workbook type size. The photos are on the small side, but not tiny. The book is arranged like a daily calendar and some of the rings fit in with the day. For example, for New Year’s Day (January 1) there is a ring made from a champagne cork. I like the fact that there is just enough text in this book. There are not long essays on jewelry making, but salient quotes from the artists. I think these quotes can be used by quiltmakers to gain inspiration. A simple quote that struck home was from Victoria Lynn Takahashi who said “Sometimes a girl just has to play. (pg.15)”

I noticed that entries recounted family projects where people had gathered, someone suggested they all make rings and the entire family sat around making them (pg.69).

I think the great part of this book is the message of inspiration: you can make a work every day; you can make a work from things on hand, you don’t need to shop; making a lot of small work enhances your chances for creating a masterwork; practice makes perfect.

I love this quote from Shannon Conrad ‘The hardest part of making a ring a day was just that — you have to make a ring EVERY day. There was no break. It was relentless. (pg.11)”

Even if you are not a jewelry maker, take a look at this book. Take a look at the shapes and materials and be inspired by them.

Thanks to Leah Eagel from Sterling Publishing for sending me this book

View all my reviews

Little Wallets

2 Wallets
2 Wallets

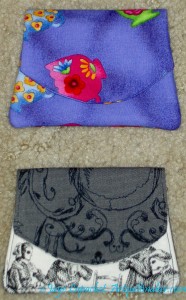
I started the purple wallet before Christmas last year to give as a gift, but never finished it. I finally got another package of snaps and finished it. I am a little short on handwork right now, so it made sense. It will be a gift, but for whom, I don’t know.

The Skull wallet goes with the Jane Market Tote bag I gave to Lil Sissy. Poor girl. I gave her her gifts over a month rather than all at once, nicely wrapped on the day. All I can say is that I hope the dribs and drabs method made the day last longer.

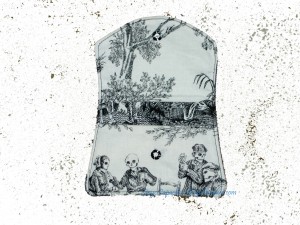
Skull Wallet Open
Skull Wallet Open

That is not one of my new, cool Photoshop Elements backgrounds. That is trying to get rid of the background and running out of time to figure out what I was doing wrong. It looks pretty cool, I think. I tried to center some interesting motifs on the inside, so when she opened it, she would see some skeletons. Hope she likes it.

By the way, this pattern is good for bus passes! I saw one made with a loop and clip on it, which I thought was a good modification.

Cat Beds

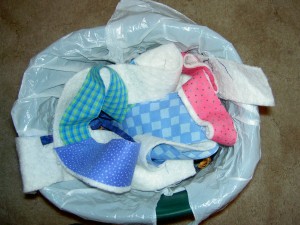
For a long time I have been wondering why tiny bits of fabric couldn’t be recycled. As I tossed out stockings and holey socks, I wondered if there wasn’t something that could be done with them. Reading Victorian mystery novels didn’t help, because they describe ‘rag pickers’, but who wants that job?

How Much Work?
How Much Work?

I have often judged the amount of work I have done over the course of a week by how full my garbage can was. Still, I wished that I could put those bits of fabric somewhere to use without having to store them myself.

A few months ago, Amanda came to the BAMQG meeting and solved my problem! She told us that she and some friends were making cat beds for a local homeless cat shelter. She asked us to save our tiny bits of fabric including worn out clothing (no underwear!) such as t-shirts and sweatshirts. She would use them to fill the cat beds she was making so the beds would be soft and comfy for the cats.

Despite the fact that I had long thought about saving tiny scraps and doing something with them, I thought saving the tiny bits would be too much trouble. Then I remembered 1) all the times I had been reluctant to toss tiny bits; 2) Pam and what what good care she takes of her cats; and 3) how lame I was acting.

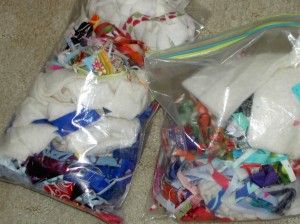
Cat Bed Filling
Cat Bed Filling

I got myself a zipper bag and started tossing scraps in. Thread, schnibbles, bits of batting, and selvedges all go into the cat bed filling bag. I was shocked at how many tiny bits I had and how quickly I filled up a bag. I brought two bags of bits to Amanda the first time she collected them!

Trimmings from quilting, e.g. the edges of the quilt sandwich fill those bags up faster. It is another kind of sorting I have to do daily and I haven’t quite found the right place for the bags. I am really happy to do one small thing to make a cat’s life better and to help Amanda, who is doing the heavy lifting on this project. The other good thing is that my garbage can is a lot emptier, which means less stuff going to the landfill.

I am really good at doing one small thing for various projects that all need time, attention and money. In other projects where this has been my M.O. I have found that I can see the difference – how my contribution changes things-when I do one small thing.


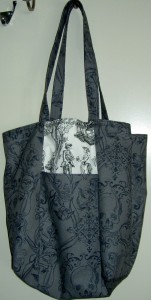
Finished: Skull Bag

Skull Jane Market Tote

Last year on my trip down to Long Beach, one of the many fabric stops we made was at Hart’s Fabrics in Santa Cruz. In case, I didn’t mention it back then, it is a great store. Great service, lots and LOTS of great fabric, indie patterns, notions, laminated cottons, embellishments, everything a girl could want.

While there, I saw some skull fabric that was sort of a canvas or home dec fabric, but smooth and not really heavy. I thought I might have trouble sewing it, but the print was so great I knew my sister would love a bag made from it. I intended to make it for Christmas, as her birthday had passed by the time I got home from the trip. Didn’t do it. The fabric sat and stared at me.

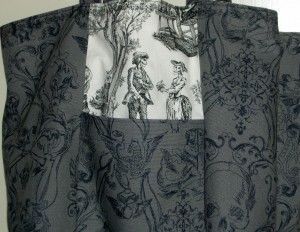
Skull Jane Market Tote - detail

Sharona, owner of New Pieces and solver of all problems  point out the skull toile to me when I was in the shop a few weeks ago. Suddenly this project came together. I made the bag in a few hours. Now I just have to grab Lil Sissy so I can give it to her.

Grama Gift

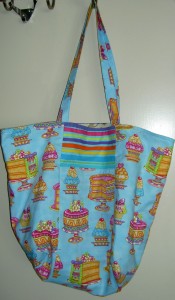
Grama Jane Market Tote

Mom came over the other day and told me that she had bought Grama her birthday gift. I got into a little panic, not realizing that her birthday was a still a month away. When I got my knickers out of the twist, Mom told me that she had a seen a perfect gift and bought it. Grama liked the Grab Bag I made her, so I decided to make her a Jane Market Tote.

I am embroiled in Jane Market totes for Christmas gifts and I need all the practice I can get. These are fairly straightforward bags to make, yet I seem to always screw something up.

Mom helped me pick the fabric. I wouldn’t have picked this, but Mom said she would like it. I found the stripe for the front panels that goes well with the cake fabric. This one went together very well and spurred me on to work on the other bags I had already cut, but not sewn.

Book Reviews: 3 Jewelry Books

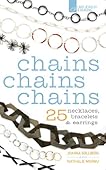
Chains Chains Chains: 25 Necklaces, Bracelets & EarringsChains Chains Chains: 25 Necklaces, Bracelets & Earrings by Joanna Gollberg

This book was sent to me for free by Sterling Publishing. Thanks to Ray at Lark and his whole team for thinking of me. I am not a jewelry maker, so this will be a basic review.

The first thing I noticed about this book is the binding. I don’t know what it is called, but the books lays flat even though it does not have a spiral. Interesting. There is a comprehensive table of contents and an index (YAY!). The authors, Joanna Gollberg and Nathalie Mornu exploit the chain part of necklaces throughout the book, starting with “A Chain Letter”, which is the introduction or foreword.

After a page of tools, the book starts into projects. The photos are large and appealing. The page layouts are light and airy and I like the circle motif the publisher used throughout the book. The projects come from different designers, but the projects have a modern feel with a lot of space between the elements. The projects do become denser as the maker works his/her way through the book. The projects look cohesive.

There is a basics section at the end, which talks about metals and their properties, including precious metals, and tools and equipment. The techniques section, which follows includes cleaning metal, transferring designs, chasing, bending sheet metal and much more. There are also sections on soldering and finishing, which I am guessing are the quilting and binding of the jewelry world. A very useful Mandrel and Ring Size conversion chart is also included.

I enjoyed looking at the inspiration section, which includes a gallery of additional pieces (not projects). I really like the Double Circle Bracelet on page 134.
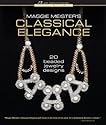
Maggie Meister's Classical Elegance: 20 Beaded Jewelry Designs (Beadweaving Master Class)Maggie Meister’s Classical Elegance: 20 Beaded Jewelry Designs by Maggie Meister

Maggie Meister’s Classical Elegance: 20 Beaded Jewelry was also sent to me from Lark Crafts/Sterling Publishing for free. Again, there is a comprehensive table of contents and an index as well as a very small bibliography. The gallery at the end shows several pages of amazing necklaces, which look more like museum pieces than jewelry. When I looked at some of them, I thought they might be historical reproductions, but I don’t see anything that says one way or another.

The first part of the book goes over basic tools and stitches. The author talks a bit about the pros and cons of different clasps, the Great Thread Wars, and different types of ear wires and posts. I like it that she injects a bit of humor into what can be a boring, rote section. Stitches, both in the beginning and in the projects include a lot of diagrams so the maker can clearly see the author’s method of creating. The stitches section would be good for quiltmakers who are embellishing their quilts.

I like it that Ms. Meister talks about her inspiration, which, in part, comes from ancient pieces. Each project has a brief description of something historical that influenced the piece. The inspiration could be common practices at the time, marriage jewelry, and torques worn in ancient Ireland. I would have liked to have seen some footnotes for these comments.

I think most of the projects in the book walk the fine line between lush and over-the-top very well.

Chapter 5, starting on page 96, is called Architectural elements as Inspiration. The facing page (pg.97) has photos of chimneys, title, a Russian (or maybe Greek?) Orthodox church and other architectural elements that can serve as inspiration for any kind of creativity.

Check this book out and see how different things in the world around you can inspire your creative work.

21st Century Jewelry: The Best of the 500 Series21st Century Jewelry: The Best of the 500 Series by Marthe Le Van

For my purposes, this book is definitely the best of the three. This book is pure eye candy. Thanks to Ray at Lark for sending me this book for free!

The foreword and juror statements are a little bit strangely formatted. The designer of the book used different sizes within the same sentences, which makes parts of the text jump out at’ me when I read. I wonder if I just read the larger text if there would be some kind of subliminal message? I didn’t take the time to try that.

Starting on page 12, there is very little text – just artists’ names and the names of pieces as well as size and materials used. The major part of the book is all about inspiration. Most of these pieces are art and could not really be worn anywhere where you had to get in a car or pick up a drink much less to work or to pick up the kids at daycare. The Puddle Series Bracelet is one such piece. It doesn’t matter, though, because these one of a kind (presumably) pieces are gorgeous to look at

These pieces are also not the thrown together pieces that can be made in a few hours. The shapes and forms are, in many cases, organic and curvilinear. The colors are also, mostly, neutrals and golds. There are a few pieces with other colors and they really shine. Most of the pieces are metal, but I saw a few fiber pieces. One of my favorite pieces is I Long for Your Touch (pg. 99) by Roberta and David Williamson. I like the face and leaf shapes.

It is not clear to me what type of jewelry many of the pieces are intended to be. I am not bothered by this, because I won’t be buying or wearing these pieces and can be inspired from bracelets and broaches. If you need to rev up your creativity, take a look at this book, regardless of your medium.

Check the A Work of Heart blog for a giveaway of one of these books. A Work of Heart is San Jose is an awesome art studio where experienced artists teach a variety of jewelry classes as well as other classes. It takes me an hour to get there and it is well worth the drive. In a way it is good that the studio is not around the corner. If it was, i would not see my child grow up or remember my family and I would be broke, because I would be there all. the. time. If you haven’t been there, make the time. Not only will you have fun, you will be inspired.
New Handmade Bag

After finishing the Stars for San Bruno #2 top, I needed to get away from quilt tops for awhile. I really liked the Bird Watcher Messenger bag that Angela made and showed at the BAMQG meeting a few months ago. This pattern is from a book I reviewed called The New Handmade by Cassie Barden.

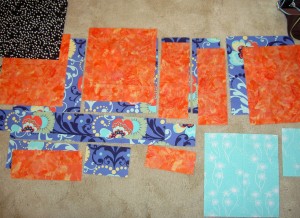
Organizing Bag Pieces

I am still not as comfortable making bags, as I am making quilts. I am getting better. I do get comfortable making one one bag pattern, but in terms of bags in general, I still feel like I am learning.

When I am making a bag, I lay out the pieces so I know what I have and can keep track of what parts I have. One thing I would have done differently with this pattern is I would have pinned notes to them to identify the different parts. I often use post-it notes to identify the pieces. Post-it notes are sticky, but I still pin them to the fabric.

Pinning notes to the pieces would have helped a lot, because the author refers to the various pieces by the color of the fabric she uses. This was a problem for me because I had different fabric. I had to keep referring to the pattern and translating the fabric names to the fabric I had. I have since annotated my book.

Bag in progress
Bag in progress

The directions and accompanying drawings were pretty good. Aside from translating the fabric, the bag went together pretty well. I was able to put the outside of the bag together within a few hours over a few days.

I added a lot more interfacing than the pattern requires, because I don’t like floopy bags. I like my bags to be stiff so they can stand up.  This allows me to throw things in the bag from across the room.

When I went to see Colleen she mentioned fusible Pellon. It is, apparently, stiff, but not as fluffy/fat as fusible fleece. Perhaps I will try it? We’ll see. I am loathe to diverge from the Chubby Charmer pattern after making the Sugar Pop Chubby Charmer, but it might work for the messenger bag of my own design that I am planning.

Messenger Bag in Progress

If I made this bag again, I wouldn’t use so many fabrics.  It is good to see that the maker can use a number of different fabrics, if desired, but I don’t need to use that many.

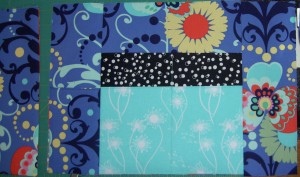
What I would do differently is use the outside fabric (Amy Butler Love) for the pocket that is currently aqua (Michael Miller Dandelion). I don’t think the lower pocket needs to be a separate fabric. I would use the aqua for the middle pocket and skip the black. Putting the aqua up where the black is would give the whole bag a more cohesive look. Aside from the pattern requiring too many fabrics, I found that I paid close attention to the fabrics I chose so they wouldn’t look weird together. I didn’t just grab the fabrics randomly so I get to the sewing part. I like it that all the fabrics are from different groups. It is easy to choose fabrics when they come from the same group and takes more time when they don’t.

I was worried about the flap, too. I don’t remember making a bag with a flap before. I was worried about inserting it  and I was also worried about the tab.

The other thing I need to remember when I make bags is that I like to have all the fiddly bits out of the way when I start. I like to make the tabs and straps and pockets detailed at the beginning of the pattern and finished right away, not at the end. A lot of bag designers seem to like to have the maker put the straps together at the end. I wonder why that is?

Inside Messenger Bag

I really tried to pick fabric for the bag so the bag would be usable. The blue Amy Butler Love fabric is cheerful and there is a possibility that I will use it. The bag itself isn’t really the right size, though. It is more handbag sized than taking-stuff-to-work size. Also, I am really in love with the Innocent Crush Flea Market Bag for carrying extra stuff right at the moment.

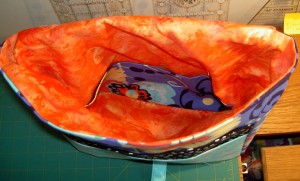
For the inside, I chose orange. One of my two awesome 7YO nephews told me his favorite color is orange, but orange is not a color that I use often. As you know, from my Lovey Blocks post, I pulled out my orange bin and, suddenly, I was in an orange mood. The oranges really counteract the grey fog swirling around my house right now. The inside won’t show that often and orange is light so I will be able to see the stuff at the bottom of the bag. I think the inside is a bit bigger than I would like, because it bunches up. I wonder if I didn’t get the seam allowance quite right or if I should, generally, make bag insides a bit smaller.

I added the pocket using sizes from one of the outside pockets. The more pockets the merrier in my world.

Finished -Shut
Finished -Shut

Left is an image of the finished bag. It is a nice shape and an okay size. I worked hard on the fussy cutting the flower for the front and think I did a good job.

I didn’t like the way the pattern said to make the straps. Turning straps right side out makes me want to scream AND they look bunched up and wrinkled when I finally get them turned. I am not using that method again, except for Anna Maria Horner’s Multi-tasker tote. I should have learned my lesson. It is just as easy to cut the straps bigger and fold them and that method adds padding.
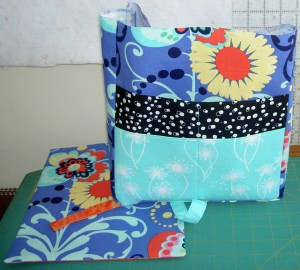
The other weird thing about this bag is the closure. The pattern calls for a closure like a camping bag or Timbuk2 bag – those black plastic things that pinch your fingers. Not my style. I found a Nancy Zieman closure that looks nicer, but weighs about 13 lbs. There wasn’t a lot of selection at my local fabric store and I hadn’t planned ahead. It is ok, but, again, not my style. I like the bag hardware that Sherpani uses for their bags. The Buckle Guy doesn’t have the Sherpani hardware, but he has some really nice looking hardware with a variety of finishes that I hope to use in the future. I just need to plan ahead.
I didn’t like the way the pattern told me to sew through the nicely fussy cut front of my bag to install the closure. I tried to pick thread that wouldn’t show much, so it looks ok. I think that the tab could be applied to the inside of the flap before sewing the flap together, perhaps with a little extra interfacing, but will have to test it out, if I use the pattern again.

Finished -Open
Finished -Open

I’ll have to see about giving this bag a test run.


New Journal Cover

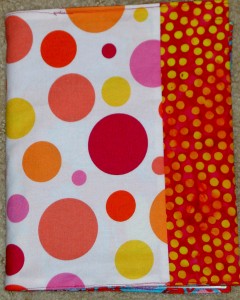
Summer Journal Cover

I needed a new journal cover, but I also made this with some scraps to comply with Sandy’s Stash Mystery challenge. I tried to do her gorilla challenge last summer, but never got to the stitching. I still would like to finish that, but it isn’t high on the priority list.

Anyway, I heard her talk about the challenge and then I went to look at the requirements. Knowing I had to make a new journal cover and it would fit the rules, I used the requisite number of fabrics and made the journal cover.

I have already been using it for a few days and I don’t know what I was thinking.  Have I made one of these before? It certainly doesn’t seem like it. I had problems with the stitching and I forgot to put interfacing or batting on the inside, so it feels really weird.

Journal Cover Inside
Journal Cover Back
Journal Cover Back

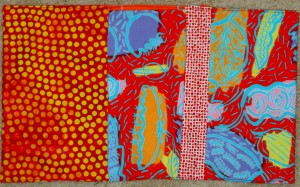
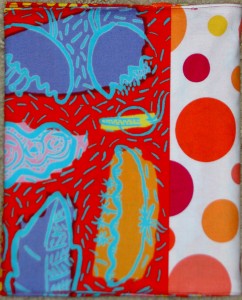
I started out with the wild dark orange with blue, yellow and orange print. It is an older fabric that I have had for awhile. I pulled that out when I was making the Lovey blocks, but ended up not using it. The piece of the crazy print I had was nearly exactly the right size for a journal cover, so instead of putting back in the orange bin, I used that for the basis of the journal cover. I used some other small pieces, as I mentioned. The colors are good together except the white in the dot print really screams.

I may switch it out for one of the other journal covers I have already made or I may make a new one and put this on an old journal. I just don’t like the way it feels. I use these journals for 2-3 months and I don’t want to be thinking “I don’t like this journal cover” every day. We’ll see.