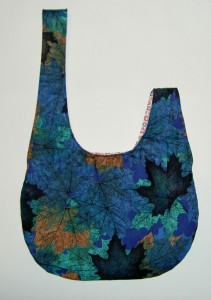
Really Finished Bag

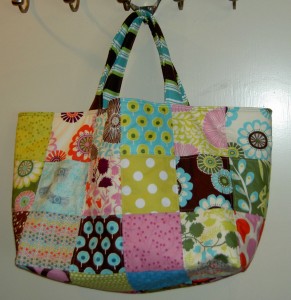
Flea Market Bag
Flea Market Bag

You might remember this bag from the end of 2010. I finished it, but wasn’t really happy with the way it came out. For some reason, I couldn’t move on from it, so a few months ago, I ripped out the straps and then left it to languish. Yesterday evening, I redid the button loop and redid some of the top stitching. Then today, I finished the top stitching and sewed on a different button. It isn’t perfect, but I am much happier with the result. Before I was a little embarrassed that I had made the bag and now I don’t mind saying that I made it.

After finishing Stars for San Bruno #2, I feel like I have a little bit of brainspace. I feel like I can do a few small finishing projects. I need to piece some batting. I need to make a binding. I need to make sure the back for SfSB#2 is large enough (mom made it before she went on vacation and before I had finished the top), etc. There are those things that I would assign to an assistant, if I were a fancy enough quiltmaker to have an assistant. Since I don’t, I’ll just do it since I am in the right frame of mind.

Have a great weekend!

Maker Faire Inspiration


FabMo.org booth
FabMo.org booth

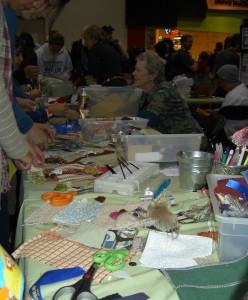
A very kind person gave us tickets to the Maker Faire. It is something that I have heard lots of good things about, but never visited. Friend Julie loves it. Maureen and Amy from the Creative Mom podcast also rave about it. We finally got a chance to go and I have to say that the best thing about it was being inspired. I saw lots of this and that which had a nice line or good texture or something else that struck my imagination. It made it worth it to give up a day of sewing for that inspiration.

One of the things I really liked and did not photograph was the Steampunk costumes and fantastical vehicles. The ingenuity and creativity was amazing and oozing all over the place.

Back of Coat
Back of Coat

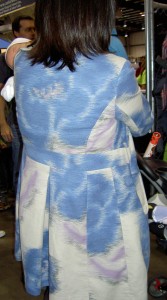
I don’t know this woman. I have no idea if she knew I was photographing the back of her coat. I really liked the back of her coat. It looked very tailored, yet easy to wear.

Embroidered Buttons
Embroidered Buttons

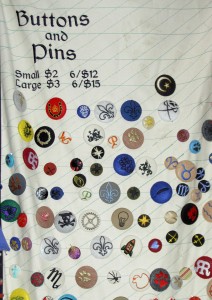
I have an embroidery module on my sewing machine. Lately I keep hearing about or needing to deal with buttons. This display gave me the idea of making my own buttons from embroidered designs I can do using my embroidery module. Cool, eh?

Bathroom Quilt Idea
Bathroom Quilt Idea

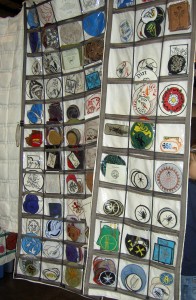
Every year for the past few years, I have talked about the quilt I want to make and put in one or both of my bathrooms. I saw this display and it is the same idea. I probably would make mine 4×5 rather than 3 x 12 or whatever it was. I like the idea of slipping things in and taking them out.

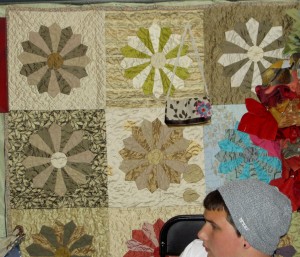
FabMo.org Dresden Plate

I don’t know anything about the above Dresden Plate,but the fact that it is in the FabMo booth makes me think the maker used FabMo fabrics. Isn’t it GREAT?

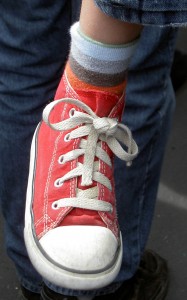
Inspiration Foot
Inspiration Foot

In a sea of black, denim and asphalt was this kid wearing red Chuck Taylors. I couldn’t stop looking at this foot dangling off of the dad who held him for the entire 20 minutes of the Mentos/Coke Zero show. He didn’t wiggle or talk really, his dad didn’t complain about holding him and the whole time his foot dangled down waiting for me to photograph it. The socks are an added bonus. This is definitely a photo I want to draw.


Finished: More Pillows

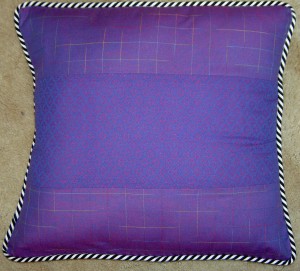
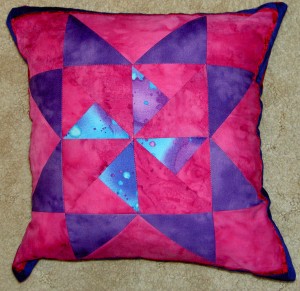
Simply Pillows class project from 1999

These pillows have been languishing in my fabric closet for so long they weren’t even on my WIP list. They were yelling at me very loudly on Saturday after I finished the Teacher Pillows. I was inclined to work on them since they were taking up valuable floor space in my fabric closet.

The class I took at the Sewing Workshop was called Simply Pillows and Linda Lee taught the class. I took the class in 1999. Most people didn’t piece their pillows, but since I was enamored with quiltmaking I decided to piece my pillows. We learned to do piping and the striped piping on the pillow above was already done when I took the pieces out of the bag on the weekend. I had to sew one seam and I was done. It is pathetic that I let this project languish for so long.

Actually, I was kind of surprised that I took the class in 1999, because I thought for sure I had taken it when I lived closer, but the dates are in my handwriting on the folder. Very strange.

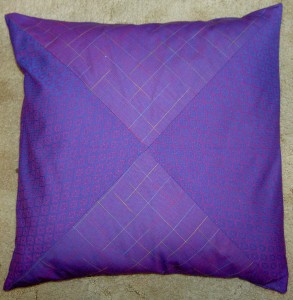
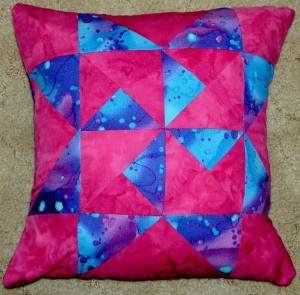
Simply Pillows Class Project #2

The hourglass pillow did not finish as intended. I put on some piping, which was in the bag of supplies. I found out that the back wouldn’t fit, because, apparently, I needed to trim the front of the pillow before adding the piping. I took off the piping and just sewed the back to the front and called it done.

Enough pillows already!

Finished: Teacher Pillows 2011

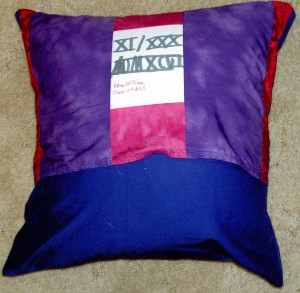
Whenever I finish the Teacher Pillow Project, I always feel a little sad. This is even after ripping half my hair out and spending way more time than I wanted in the process. Crazy, I know.Somehow the end result of a little pile of pillows is wonderful. And this is the last year I am doing this. The Young Man goes to high school next year and, except for special occasions or for special recognition, I am resolved to not make this many pillows again. (I know you are thinking “Famous Last Words.” Stop thinking that!)

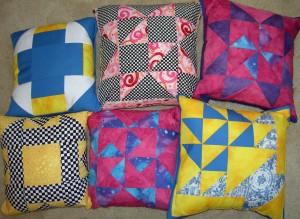
2011 Teacher Pillow Group

This year I had 5 pillows to make, but decided, as I talked about yesterday, to also make a pillow for the Art Teacher, leaving me with a total of 6 pillows to make.

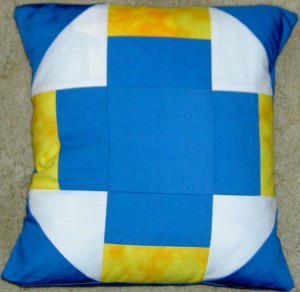
2011 Religion Teacher Pillow
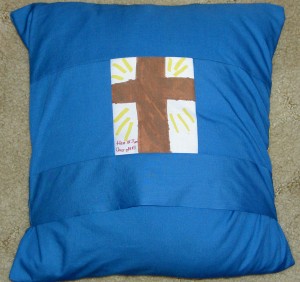
Religion Teacher Back

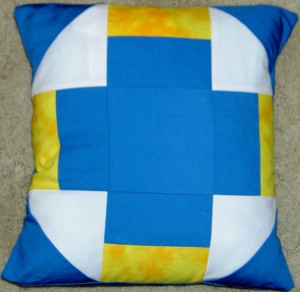
I made a Greek Cross (pg.72) block for the 8th grade Religion Teacher.

2011 Science Teacher Pillow
2011 Science Teacher Pillow back

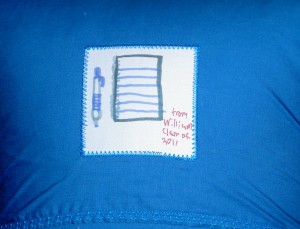
The Science Teacher got a Big T (pg.37) block. Do you like the label? It is an exploding test tube. The Young Man’s goal of blowing something up in science class has not yet been achieved.

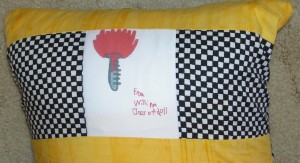
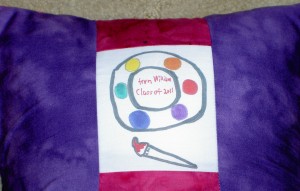
2011 Art Teacher Pillow
2011 Art Teacher Pillow back

Art will receive a Martha Washington Star (pg.85). I really like the back that the Young Man did for her. Very appropriate, I think.

2011 SS & Reading Teacher Pillow
2011 SS & Reading Teacher Pillow back

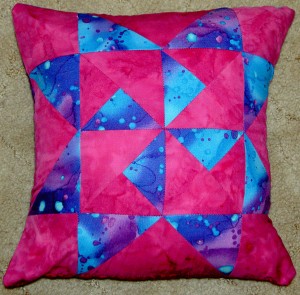
The Social Studies and Reading Teacher will also receive a Martha Washington Star. Look familiar? I was feeling uninspired. Now I think I should have  made the block red, white and black, but I am not remaking it. I don’t know what the back means. Perhaps an inside joke?

2011 English/Literature Teacher Pillow
2011 English/Literature Teacher Pillow back

English and Literature received a basket block pillow last year and she will receive the above Grape Basket (pg.71) this year. The fabrics and colors goes with the block I made last year. This basket block was a bit of pain. I have made a number of basket blocks and this one went together very strangely. When I had finished putting it together, I looked at it and thought that I would have done it differently, had I known.

2011 Math Teacher Pillow
2011 Math Teacher Pillow back

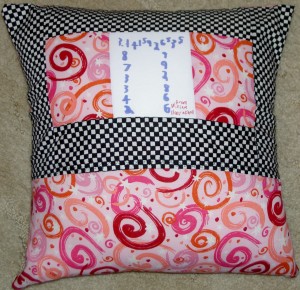
The Math teacher will receive a Free Trade block (pg.67). see a theme here with the Sawtooth Star variations? Again, I was uninspired. The fabrics go with some I used last year. Hope she likes pink. The back depicts Pi out to a lot of digits.

In years past, I have also given the Resource teacher a pillow, but this year she is getting a quilt.

Nota bene: All the blocks are from a book called Around the Block. It is out of print, but has been been reprinted with v.2 and v.3 in a book called 501 Rotary-Cut Quilt Blocks. Very worthwhile purchase. I would have a hard time living without this book.

Teacher Pillows 2011 Progress

Art Teacher Pillow
Art Teacher Pillow
Religion Teacher Pillow

I will be glad when this project is done. I wanted to finish last week, but there was too much going on. I thought I could make some progress this past week in the evenings. No joy there either. Today, I am supposed to be resting, because of this cold that I am trying to have not turn into the flu.

And this is the last year for bulk pillow making. I still have to make the raffle pillows for the Native Sons and I may make a pillow every once in a while for a special teacher, but that is it. If I go back on my word feel free to remind me.

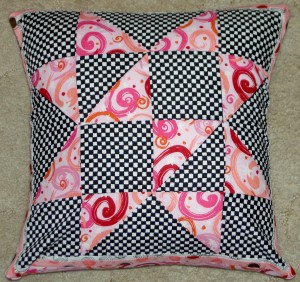
Anyway, the above pillow is for the art teacher. She has been a rock for the Young Man and has really encouraged his creativity and has encouraged his style. The pattern is Martha Washington Star from Around the Block.

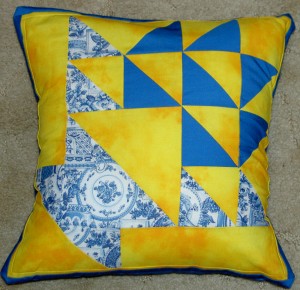
The blue and yellow pillow is Greek Cross for the religion teacher. It actually came out really well. I used my last IKEA pillow form and kind of like those forms. I wanted more robust forms, but the ones I bought are REALLY really firm and forced me to make the pillow covers a bit bigger.

Raffle Pillows

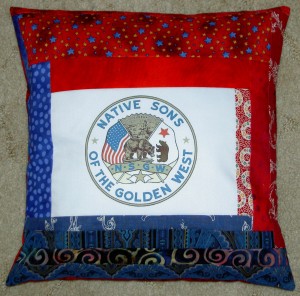
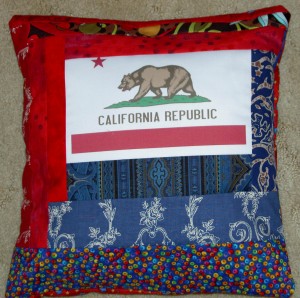
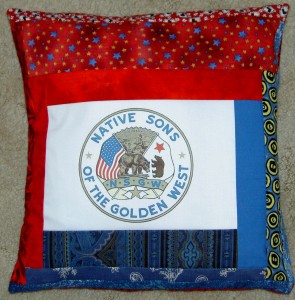
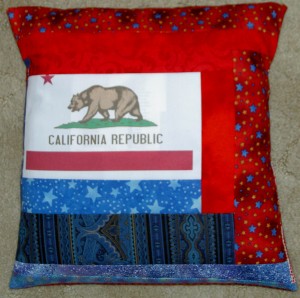
2011 NSGW Raffle Pillows

I explained the whole deal about these pillows a few days ago.

Last Friday I needed to clear off my sewing table (do you see a theme of Spring Cleaning here again?) before I did anything else.

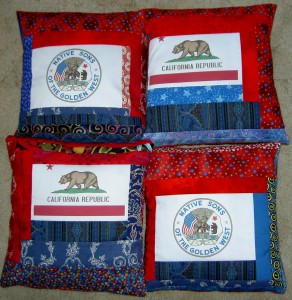
The pillow tops were already pinned to the backs, so I really just had to sew around the edges and do a little trimming. Since it was easy, I did it and now they are done and I can cross this task off my to do list. I can’t tell you how good this makes me feel. I am not sewing like a demon at the last minute! Hooray!

2011 NSGW Seal Pillow #2
2011 NSGW Bear Flag Pillow #1
2011 NSGW Seal Pillow #1
2011 NSGW Bear Flag Pillow #2

Pillow Time Again

NSGW Pillow #1 - 2011
NSGW Pillow #1 – 2011

This is the first first of a series of pillows I will be making over the next month.

My DH is an executive board member for a California organization called the Native Sons of the Golden West. In addition to supporting the preservation of California history, they raise money to help people suffering from facial deformities such as Cleft Palette. During their elections, each of the candidates opens a hospitality room. They do their best to raise the most money for Cleft Palette. To do this they display items, such as gift baskets, for sale. People purchase raffle tickets or bid on items. The competition to put out the best items is fierce, because each candidate wants to draw the most people to hospitality room. They get kudos for the amount of money they raise.

Last year, the pillows were a big hit. People bought many tickets and when I made a brief appearance for the Grand Ball, people wanted to place orders for pillows. I told them they had to buy raffle tickets. The pillows and the gift baskets put together for DH raised over $600 to donate to the NSGW Foundation. Get a donation form on their website.

The Young Man was visiting his Grama so I spent time (when I was not doing Easter stuff) working on the pillows. I did a kind of log cabin design around the printed flag and emblem with leftover strips from various projects that are piling up on my desk for the Spiderweb.

I have all of the pillow tops done, but haven’t made the backs for all of them.

Book Review: Sensational Bead Embroidery

Sherry Serafini's Sensational Bead Embroidery: 25 Inspiring Jewelry ProjectsSherry Serafini’s Sensational Bead Embroidery: 25 Inspiring Jewelry Projects by Sherry Serafini

This is another book that I received from Lark Books for free. Thanks, Lark! I will be giving this book away to a lucky reader, so read on for instructions on how to enter.

Lark is really stretching my creative boundaries with the last two books they have sent me. This one isn’t quite as completely out of my realm as the last one. I have done some beading. Still, it is kind of interesting to review a book on a topic I don’t know much about.

Sensational Bead Embroidery feels and looks really nice. It is hard cover and about 8.5″x11″. The layout is appealing. The font is a soft grey color, but not so soft that older eyes can’t read it. I found the color of the font to be different from other books I have seen. I found it easy to read.

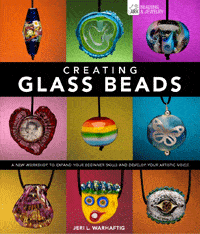
There are, like the book Creating Glass Beads, lots of good photos in this book. Each page is decorated with different images. On the first page of chapter one are spills of seed beads and examples of cabochons. The images illustrate points on the page.

The first photo in the book is a pendant on a stiff gold metal hoop (like hoop earrings, but for the neck). It is complicated looking and my first thought was that this was a piece to show off the epitome of the author’s work. Wrong! Some of the pieces are smaller, but they all look elaborate and quite complex.

In the introduction, the author acknowledges that she and the reader may have different focal point beads, because the reader may not be able to locate the exact same materials. This sets the reader up for not remaking the exact pieces, but bringing their own creativity into the process.

Chapter 1 is an explanation of basic materials and tools. I am so glad she defined cabochon, because I had read that word in the introduction and was already at a loss. The book doesn’t have a glossary, but chapter one is a pretty good replacement for a glossary. Serafini talks about everything from synthetic suede for backing to marking tools and thread burners. She has a tip box which lists basic supplies. She also has describes optional tools. I like those types of explanations, because people may have questions about certain tools from what they have heard ‘around’ and it is nice to have the answers handy. She also mentions that a task lamp is a must-have. Good lighting is something we don’t always think about and this tip is a good reminder.

Chapter 2 is all about stitches and general techniques. The illustrations are very clear and coded to the text. Any quiltmaker who wants to add beads to a quilt could benefit from this section. Ms. Serafini also talks about patternmaking, which I think is something lacking in many quilt project books. There are outline drawings of patterns in various projects. She gives a basic overview of cuffs and collars. There is also a page on color and design.

The projects start after the first two chapters. There is a large ‘head shot’ of each finished project, a brief description of her inspiration or process, and a supply list, which does refer back to the basic supplies list. In the first project, Spike Angel Brooch, the first few instructions have to do with designing the piece.

The projects range from collars and cuffs to earrings. The Simply Sweet Necklace is one of the least elaborate designs and looks like something non-beaders could wear, which is to say that many of the designs are quite elaborate and might take a special wardrobe to pull off. Finished pieces for which there appear to be no instructions, AKA inspirational pieces, are scattered in between projects throughout the book.

Probably my favorite piece in the book is the Donut and Pearl Cuff. I like it because of the use of sequins. I really like the way they border and highlight the center of this bracelet. I also like the asymmetry of the Triple Play Brooch. This piece also uses some sequins as accents. The Rivoli Brooch is one that I would wear. I noticed in many of the projects that the coloration was subtle. Each piece has color, but it doesn’t scream, which is better for jewelry.

The Gallery at the end shows some really amazing work by other artists. Sherry Serafini doesn’t say whether the pieces are by her students or just people that she knows. She does say that these are possible variations (the equivalent of alternate colorways?) on the projects. The Polar Bear bracelet by Heidi Kummli is pretty amazing. It looks like a cuff sort of bracelet with a polar bear head on it. The description says that the animal [beads?] are cast animals. The author points out that a focal bead can really change the feel of the piece and Kummli’s piece demonstrates that.

I also like Diane Hyde’s Opulent Spring. It is a round ball that I would love to hang in a window so that light could show off the beads.

I would like to see an index and a bibliography so interested readers could investigate this craft further.

Good inspiration and instructions if you want to take up this creative endeavor.

If you would like to enter the giveaway, please leave a substantive comment in the comment section of this post on any topic you want. I will draw the winner’s name on or around April 20, so your comments should be added before midnight on April 19.

View all my reviews
4/20/2011 Update: No more comments! Sharon is the winner!
Book Review: Creating Glass Beads

Creating Glass  Beads
Creating Glass Beads

Creating Glass Beads: A New Workshop to Expand Your Beginner Skills and Develop Your Artistic Voice by Jeri L. Warhaftig

This is a book that I received for free from Lark Books. Thanks, Lark! The main subject matter is completely out of my realm, though I did start my creative life making leaded glass panels, so I settled in to expand my horizons.

The author describes the books as a “workshop in intermediate glass bead making.” I applaud Lark for not publishing another beginner book. I like the various appendices in the back, especially Appendix D, which gives a little bit about the project testers.

There are many photographs in the book. Each of the pages has two photos at a minimum. Most of them have many more. My favorites were the pages showing many beads. There were a couple of pages of beads with what looked like eyes on the beads, which were interesting. I was less enamored with the beads that depicted faces, though there were elements of those beads that I really liked. The technical skill is obvious in the photos.

The second section of the book talks about the basics. Unlike quiltmaking, I needed to read this section since, as I said, I know nothing about this art. The tools are all metal and a lot of them have names that meant nothing to me until I read the description. This section also includes detailed information about safety, not just the “be careful, this work is dangerous” type of warnings several columns of information about clothing and eye protection, ventilation and how to set up your studio for optimum safety.

Jeri Warhaftig has a friendly writing style that includes tips and tricks in the writing as well as little stories. The large amount of text is not only broken up on the page by the many images, but also by tips boxes called workshop wisdom. The author provides vocabulary, additional information and practice pointers.

Each session starts with an overview of what the session will teach, they types of glass and materials the artist will need as well as list of tools. Ms. Warhaftig includes some notes on tools and materials, then jumps into a detailed description, which is fully illustrated, of how to master the techniques of the session. The last part of each session begins with a description of the experience of the project testers as well as photos of their work and a gallery of other projects.

As with all project books, this one sets out to teach specific skills. Cane work, ruffles, eyes, and glass portal, are, among others, covered. For those who are moderately interested, the book is full of lots of eye candy. I particularly liked a bead called Modern Artifact by Bernadette Fuentes (pg.71) which is described as soft glass, blown, layered, cane work.

View all my reviews

Sugar Pop CC

Sugar Pop CC
Sugar Pop CC

I still have a bit of handsewing to do, but I want to bring this to the meeting this weekend, so I am considering it done. 😉 As Margi says: My quilt, my rules.

This is a great pattern. Once I sat down, focused and stopped with my own creative drama, it really came together.

I know now why one should use the fusible fleece. It is much stiffer and makes the bag stand up very well. This one is a little floopier than my first Chubby Charmer. My closet is a bit emptier because I used batting I already had.

Bright Spring Journal Cover

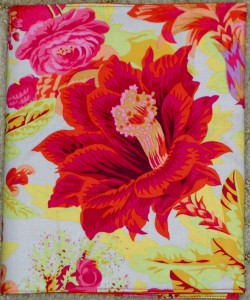
Journal Cover - closed

Perhaps this is more summery than springy?

Perhaps I should have used more blues and greens and held on to this for summer? Nah! I was ready for some cheerfulness after the unbelievably grey skies of the past few weeks.

My plan worked. My plan was to alleviate the depressing grey that was shrouding my town. It worked! Today was beautiful out! Blue skies… no clouds. It was gorgeous, even from the window of my office. And, peeking out of my bag was this cheerful (bordering on loud and obnoxious??) journal cover. It made me smile every time I caught sight of it.

I used the Philip Jacobs fabric I bought at Always Quilting after PIQF 2010. I still want to make a bag or something larger, but I haven’t gotten to it yet.

I didn’t plan on centering the flower, but it was a pleasant surprise.

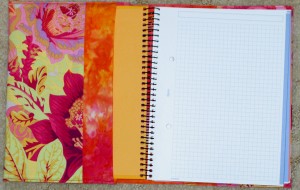
Journal Cover - open

I used a bit of hand dyed fabric for the inside and added a little to the edges of Philip Jacobs fabric to add interest.

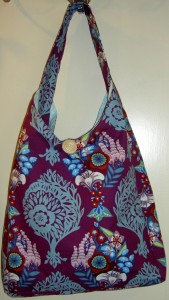
I have finished all of the pages my current journal, which has the Innocent Crush cover. I am sorry to be finished with that journal, because I wanted to carry it around in the Innocent Crush Flea Market bag. Adrianne brings her Flea Market bag to the BAMQG meetings and I admired it again at the last meeting. I wasn’t happy with the way my bagn turned out so I took it apart – not the whole bag yet, but the straps. You can kind of see the unevenness in the photo (the one I linked to above). I like the fabric and the design and didn’t want to just abandon it. When I made the bag, I was not able to sew the straps smoothly  which meant that I tried to ease the handles together, which, further, left tucks in them. I didn’t like the way the tucks looked. I have unsewed the handles and am working on lining them up better. I haven’t done any further sewing on them. We’ll see.

Yes, I can reuse the Innocent Crush journal cover and I might do that. For now, though, I am loving the cheerful and fun Philip Jacobs cover.

This is a quick project. I made the journal cover in about a half an hour on Saturday morning.

Grama’s 2d Grab Bag

Grama's 2d Grab Bag
Grama's 2d Grab Bag

I finally finished Grama’s 2d Grab Bag. She lost the first one, perhaps I mentioned it? I am really sad she lost the first one, because I really liked that one. Oh well.

I wrote (sewed??) her name with my stitch letters in the handle, so perhaps the next finder will return it to her. Perhaps I should start the next one? 😉

I used Aurifil thread and two different light fabrics for the inside so she could see what was in there. The leaf fabric is one I have had, but since I hadn’t used it, I thought it would be fine to use for this project.

Hope she likes it.

Various and Sundry 2011 #3

Crafts
Since it is never too early to start making gift bags, especially since you can use them for birthdays, Mother’s Day, Father’s Day, Groundhog Day, etc. Here is a video gift bag tutorial for another way of making gift bags.

Time
TedTalks is back with a great audio essay on work life balance. That term “work-life balance” always makes me laugh. People take time for their lives in the midst of work here in the US. IMO, of course.

Media
I went to the C&T Publishing Digital Lounge, which is hosted by Lisa of LisaLizaLou, on a recent Wednesday. There were two video demos and a chat portion. Lisa did one demo of TAP and Liquitex products, while SuziBlu did a demo of working iwth the canvas book. She isn’t an artist with whom I was familiar, but it was interesting.  Links to the products used:

  • Transfer Artists Paper:  Lisa basically showed how to use this. I still don’t know, because the chat was so distracting, but it looks very cool and I know my sister would love it for her cardmaking and scrapbooking. I may have go back and watch the archive demo again.
  • Ready-to-Go!® Blank Canvas Book 8 1/2” x 11:  SuziBlu, the featured artist, used this book to show fabric printing, fabric painting and various other techniques. I haven’t never heard of her, but the audience was very enthusiastic. Her faces looked similar to Kelly Rae Roberts and I wonder if they work together?
  • Silicone Release Paper:  – Lisa said that this does not get hot. The sheets are only 8/5×11″, but I think they would be useful. I’ll put a package on my list.
  • Liquitex paints (inks?) from C&T:  I have used something similar at A Work of Heart. Inks are wonderful.
  • Fabric Art Collage—40+ Mixed Media Techniques eBook by Rebekah Meier:

You can watched the archived replay as well. Lisa received an award at CHA and you can pretend you were there by watching the video.

I ran across Judy Nolan’s blog post on sewing notions. There were some listed that I thought would be very helpful to quiltmakers, including the Cotton Mills Treasure Markers. In the course of the post, she also gives a brief history of Nancy Zieman, of Nancy’s Notions fame, and her career.

Adrianne keeps pointing me (and her other blog fans) to the Fat Quarterly Magazine/Newsletter. I love the idea and think the articles and information would be right up my alley. I don’t love the online aspect and I can’t see myself printing 70+ pages on my little inkjet. I don’t enjoy reading in bed with my laptop. Perhaps with the iPad, but still, I really like the old print versions to read at night. Not sure what I will do, except not buy it at the moment. New business model: printing and binding online mags for people for a reasonable price on a subscription basis.

In some part of Fat Quarterly that I, as a non-subscriber, could access, I was introduced to Modern Day Quilts, a Tumblr blog that showcases one quilt a day. When I went to look I saw one that looked like the mosaic piecing from a recent issue of the AQS magazine and the art glass type quilts by Julie Hirota. It was made by the writer of PinkPlease! blog. Apparently, though, the artist is calling it a ticker tape quilt from a tutorial.

Be*mused has a set on Flickr of quilts from the Tokyo Quilt Festival this past January.

I haven’t always loved video, but I am liking it more. I didn’t used to watch much TV and the video was jerky and weird. Now, there are so many videos on subjects in which I am interested (such as quiltmaking! Embellishing! Piecing! etc) that it is great to watch little bits of videos and learn something. I just found that Laura Wasilowski has a video on making French knots. It is a little over a minute long and well done (except for the wooshing sound in the background). Viewers also get to see one of her fabulous whimsical pieces.

Shows
I’m part of Contemporary Quilt and Fiber Artists (CQFA) and we’ll be exhibiting “Primal Green: Environmental Art Quilts” @ the Main Branch of the San Francisco Public Library (5th fl) from March 1 – July 30. Artist reception will be held on April 17th @ 1pm. Hope some of you can come! Check out our link for more info: www.cqfa.org/shows.html

Projects
The Young Man keeps asking for his annual quilt. Huh? He recently told me he wants a food quilt. Mom has a lot of food fabric that I bought for her. Robin, at the recent retreat, was making a disappearing 9 patch, which is stuck in my head. I was thinking of working on one of those using food fabric for him. Recently, I talked to my mom and she said that she was thinking about making a disappearing 4patch. I looked up the directions to which she pointed me and it looks interesting, too.

Machinery
I know BryeLynn of Sew*Stitch*Create has had a lot of problems with her Janome 11K, but I would still like to upgrade to one. It isn’t going to happen until we get the Young Man off to college, but that doesn’t mean I am not tempted by ads that Janome currently has running.