The other day I posted the Origami Starburst tutorial with a second wreath picture at the bottom.
The top picture was made out of paper and very straight forward. After I made several starbursts out of paper, I couldn’t help wondering what would happen if I made one out of fabric.
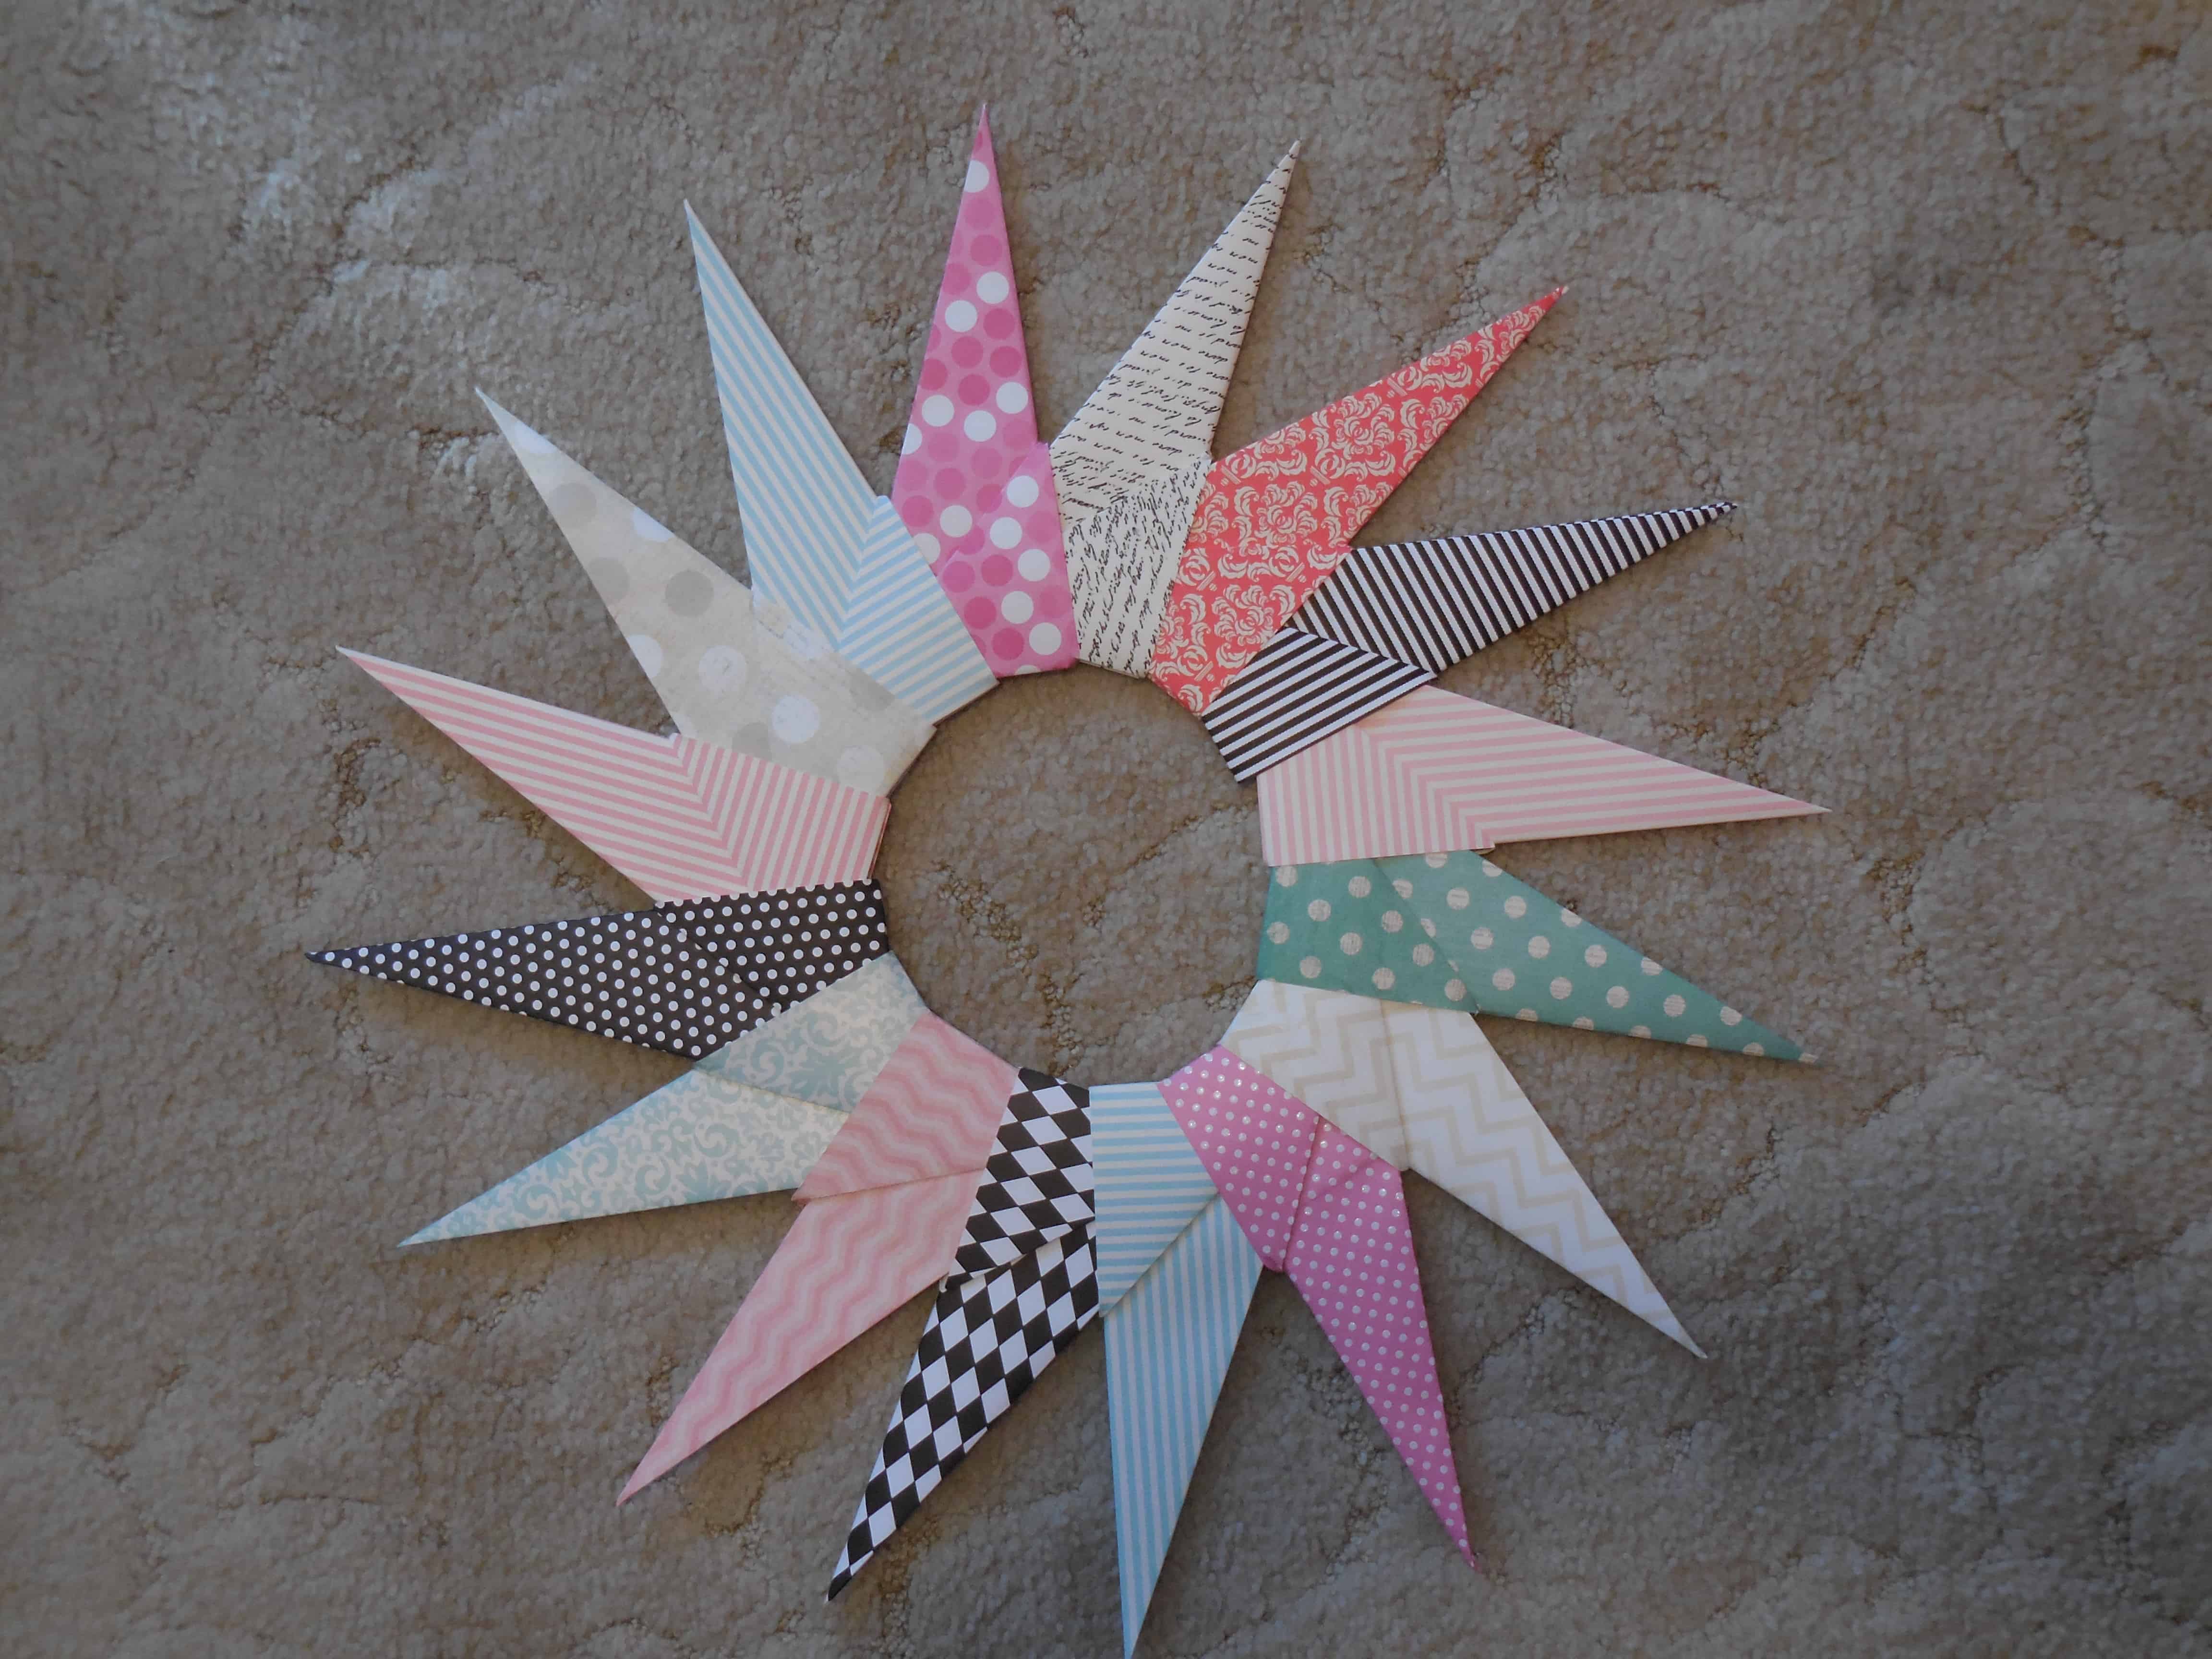
The Starburst in the photo is made from charm squares from the Fresh Cuts line of fabric. You can use any size square of any 16 fabrics as long as the squares are allthe same size. It took some special maneuvering to get it to work.
You make the legs the same way you do the paper legs except you need to back them with some kind of interfacing like ShapeFlex. The interfacing makes the squares less floopy. Once your 16 Charm Squares have interfacing only to within a 1/4 or 1/8 inch from the edge, spray each square with Mary Ellen’s Best Press, so the squares are quite stiff. Once the squares are stiff, you are ready to start folding each square of fabric per the tutorial. After each fold you will need to press each fold. Press each fold really well and, then, spray each fold with Mary Ellen’s Best Press or something similar to keep them stiff and in place.
Once you start to put the legs together, you need to glue with Aleene’s or Elmer’s glue as you do it, being very careful to only put the glue on the tips of the legs. Let the piece dry thoroughly before trying to pick it up.
The paper starbursts stay together even if not glued, but the fabric starbursts are too heavy and too floopy, so glue them right away.
The fabric starbursts are much more three dimensional, much more fragile and much heavier than their paper counterparts, so decorate with and use them with care. They make great gifts.
I was so thrilled to find a tutorial on the origami starburst (paper wreath). It is a great tutorial, but I like to do my own, as you know. I made several of these and have enough paper to make a few more. We might use these to give out as gifts at the Ladies Lunch at DH’s Grand Parlor. These make great hostess gifts.
Supplies
16 pieces SQUARE paper (any size) – almost all paper is suitable except very thin paper. Super thick paper will be hard to fold
bone folder
glue (Elmer’s or Aleene’s are both fine)
Nota bene: you can use fabric. If you do, you will also need the following items:
Mary Ellen’s Best Press
ShapeFlex or other lightweight interfacing
16 square patches (any size)
Directions:
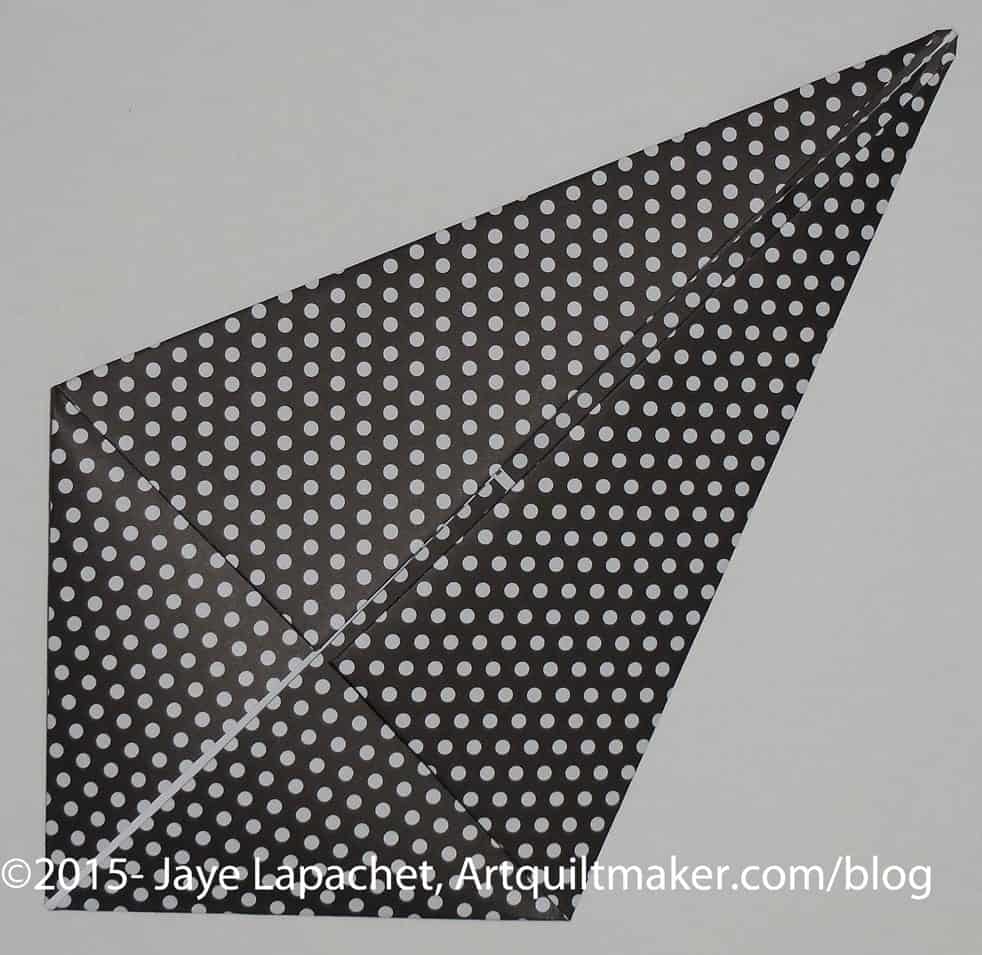
Make legs:
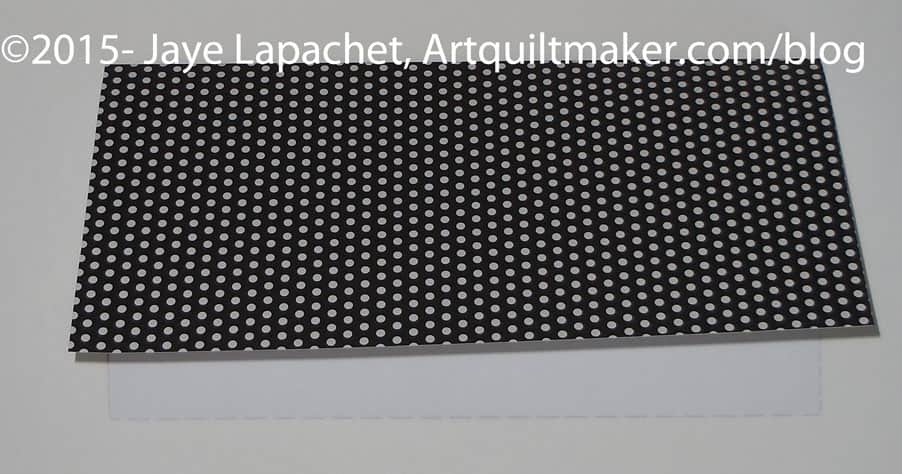
Fold square paper in half
1. Take square piece of paper and fold paper in half.
Fold square paper in half
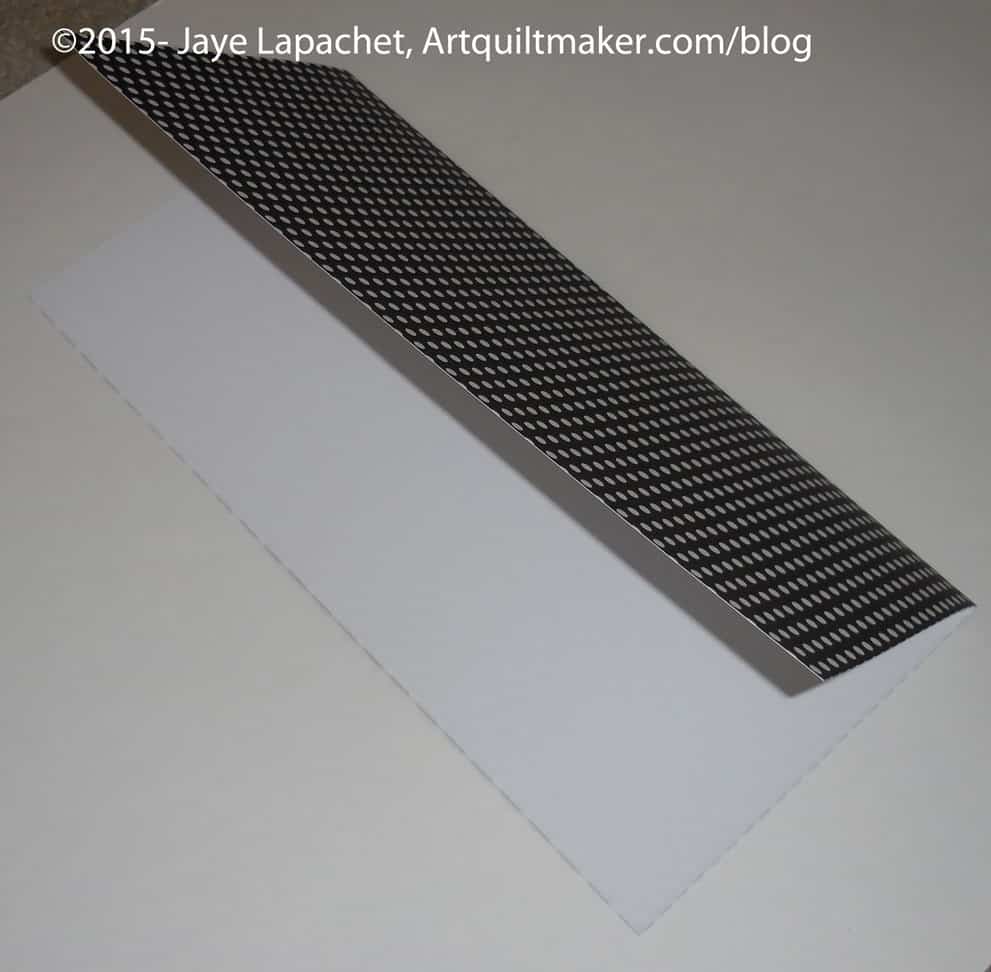
2. Open and fold in half the other way
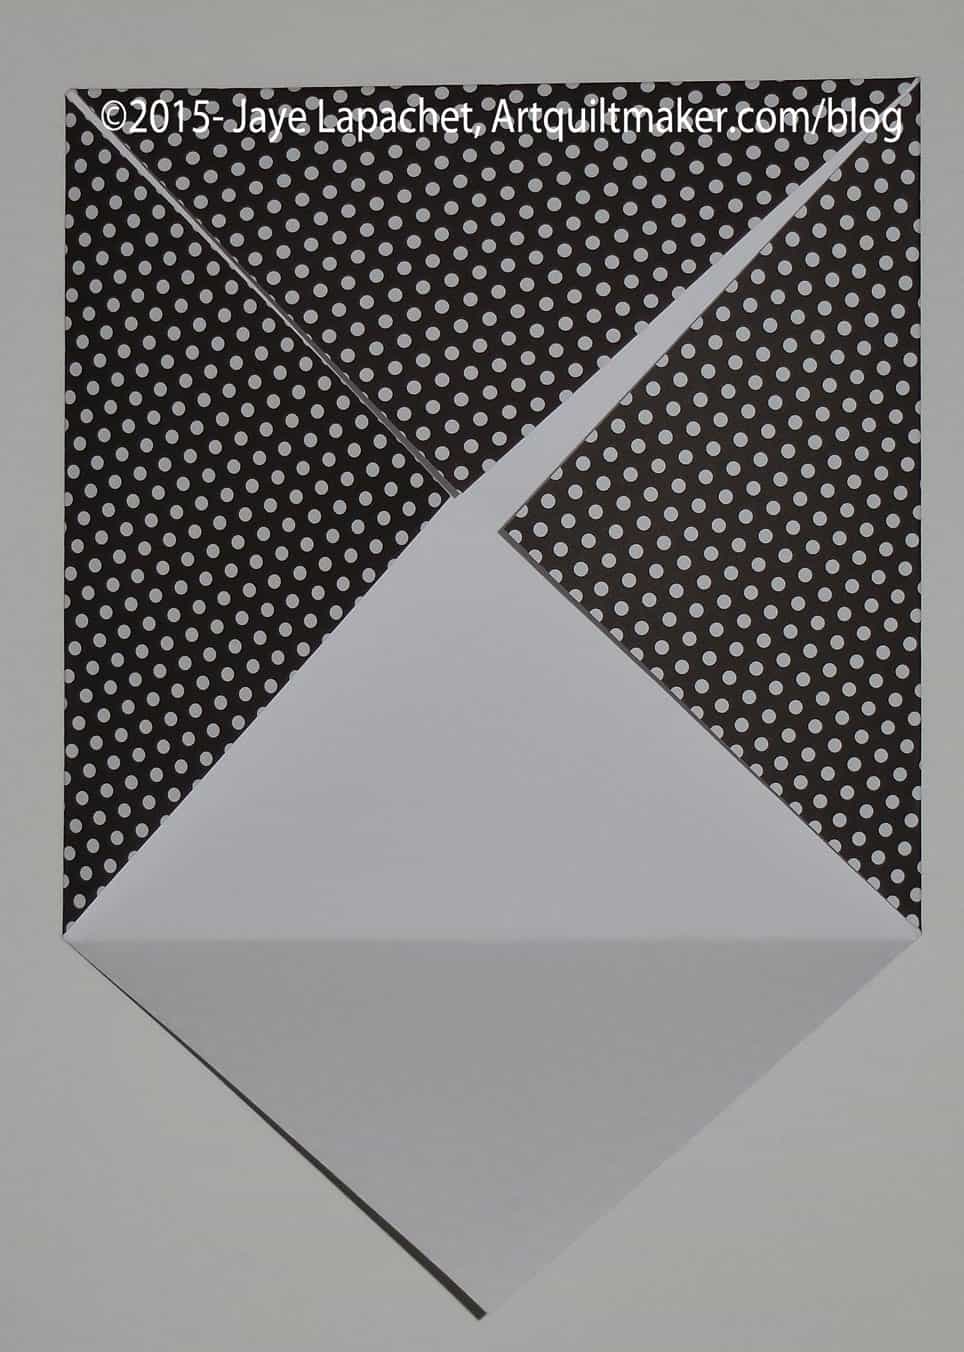
Fold corners into centerFold corners into center
3. Fold corners in to center point
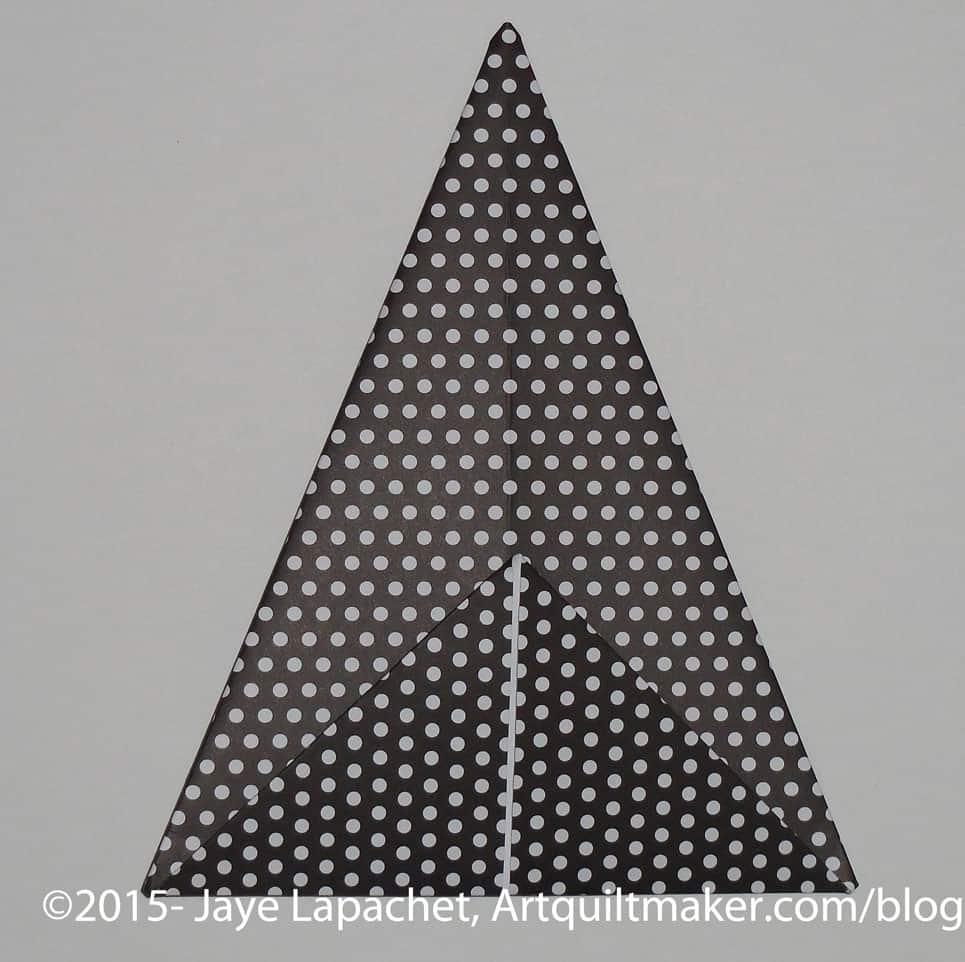
Use bone folder
4. Use your bone folder to make the folds nice and sharp
With a point facing you, fold the bottom half up to meet the center crease.
5. With a point facing you, fold the bottom half up to meet the center crease.
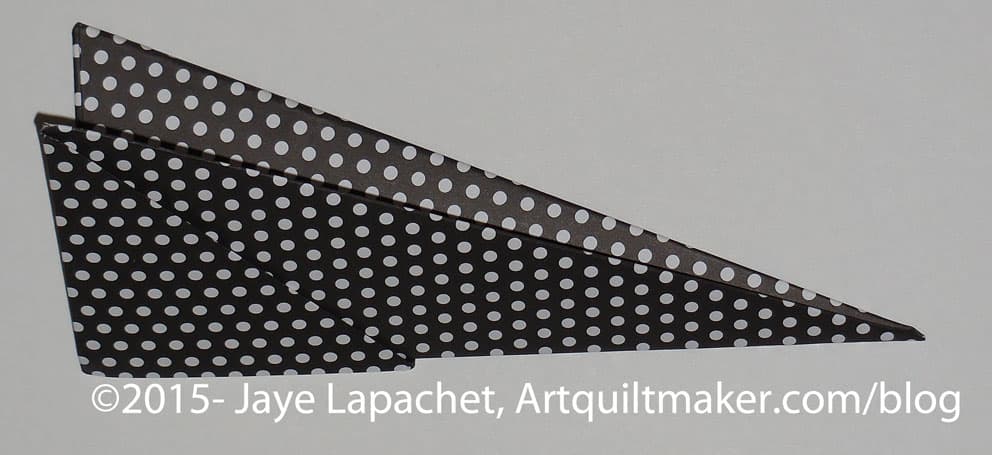
Fold to a kite shape
6. Do the same to the other point. Now you will have a piece that looks like a kite.
Fold bottom of kite up
7. Flip the piece so the open bits are face down. Fold the short piece so you can see the open spot between the folded piece again.
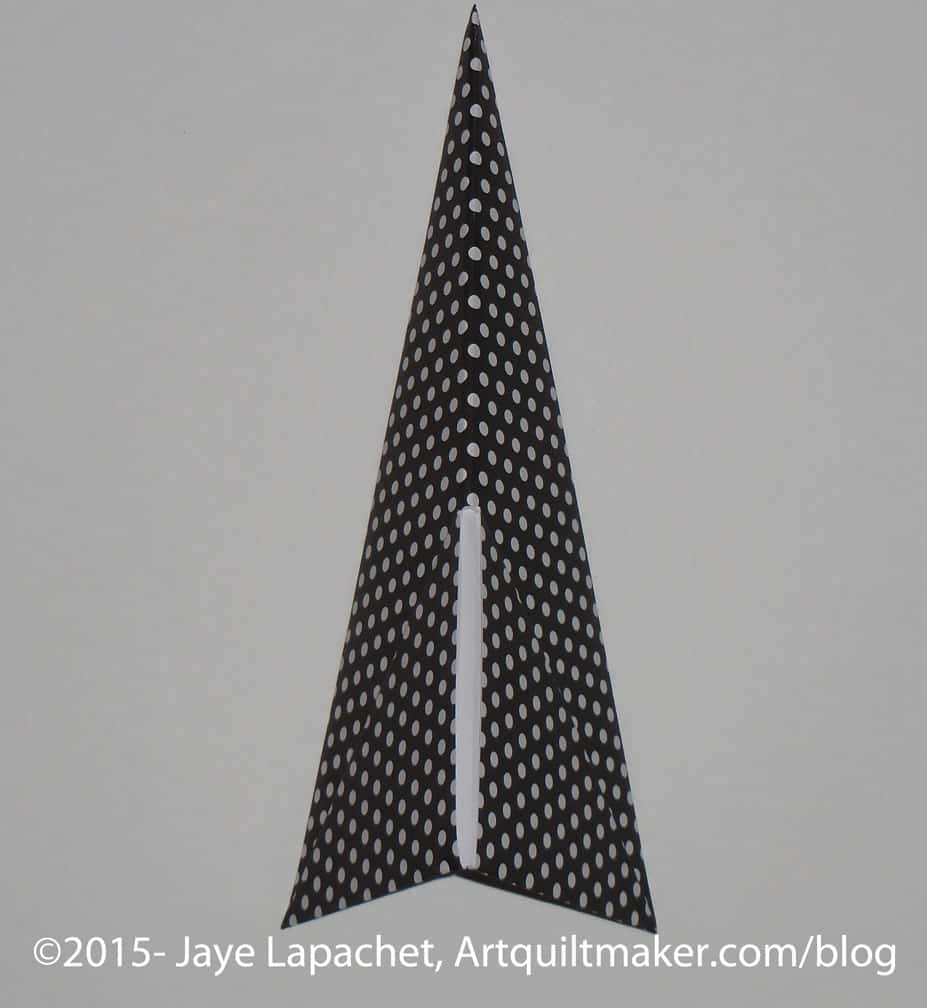
Fold in halfFold in half
8. Fold leg in half with short side out. That opening will be where you put the other legs.
Make Wreath
1. Make 16 legs (directions above)
2. Put a little glue on to the tip of one leg
3. Insert each leg into 2 holes in another leg to make four quarters
4. Glue tip of each leg until you have a circle or wreath.
5. Before the glue dries, arrange the wreath so the inner circle is smooth.
Now you can carefully hang your wreath on the wall
I wanted to make some progress on something. I felt like I wasn’t making progress on anything, so I got out my To Do list and looked up what I felt like doing. The first thing I did was make progress on the Pinkalicious Journal Cover.
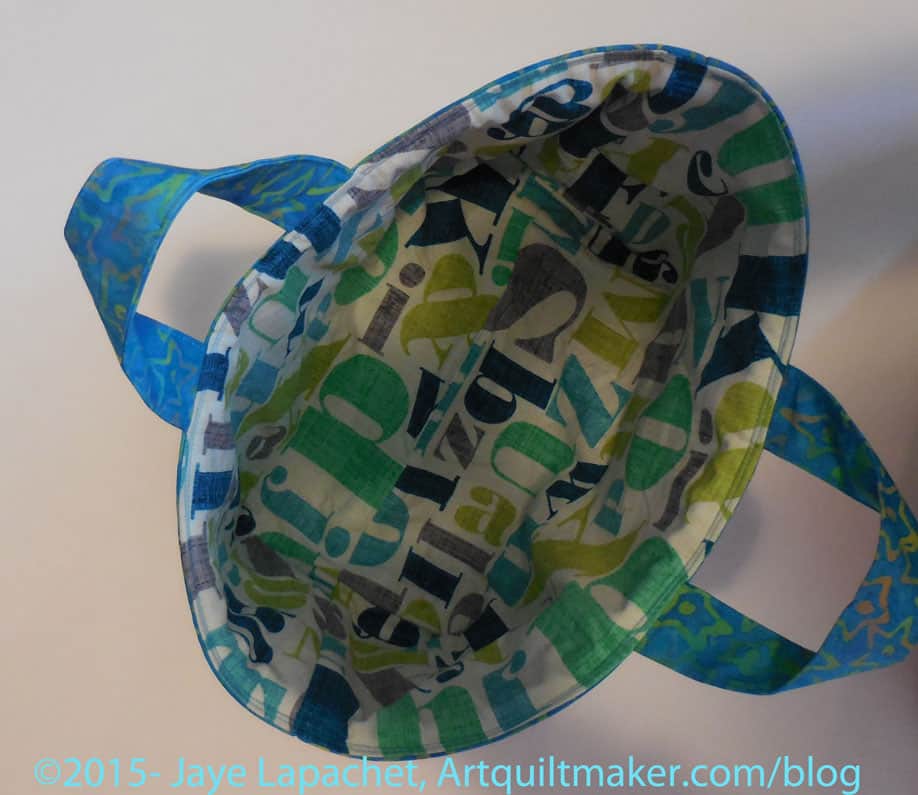
Once that project was well on its way, I made a second One Hour Basket. I don’t think it took me an hour, even if I subtract the time it took to sew pieces of Soft & Stable together. It didn’t take much longer, though. I was pleased to get something finished.
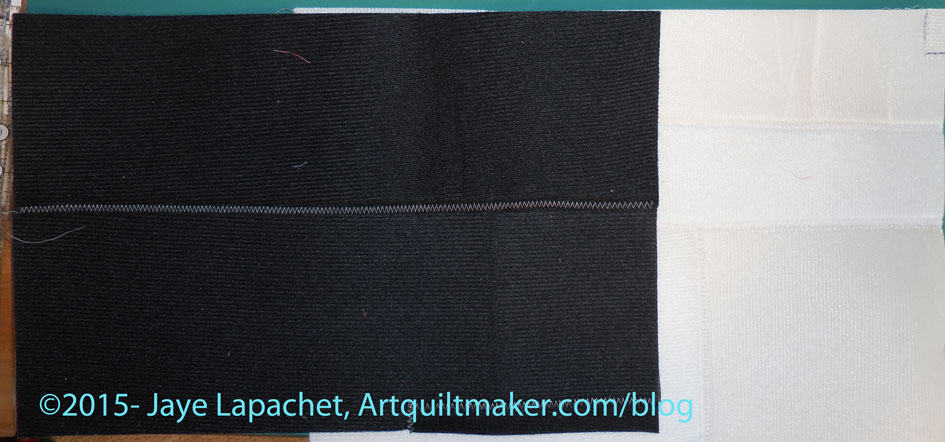
Sewn together Soft & Stable
I had some weird pieces of Soft & table leftover that were on the small and thin side. I decided I had enough to use as stabilizer for this pattern. I sewed them together much like I would sew a piece of Frankenbatting together. I was able to use most of the leftover S&S, which pleased me.
The pattern is free on Craftsy, I think and the directions are fairly good. The weird part is that the pattern uses 3 different seam allowances for this one pattern. I think there is something off as the lining seems a bit baggy when the whole piece is finished. It is fine for my purposes, but if I were going to give it as a gift, I might use a slightly larger seam allowance for the lining. If I make more I’ll have to play around.
One Hour Basket #2
I am pleased that I got something done and have something I can cross of my list.
I was so nervous about the fabric selection, but I am so pleased about how it turned out. I hope it will fit well with my living and dining room. My dining room is a rich red and my living room is a butter yellow, so this piece isn’t a perfect match, but it is an interesting combination of motifs.
My issue from the other day was seam allowance. You know that I have hard time actually reading directions and understanding them and the Tuffet directions were no different (all me, not Robin). I always assume a 1/4″ seam allowance, which, as a quiltmaker, is normal. As a real sewist it is absolutely not normal. In this case, the pattern had the seam line on it or I could use a 3/4″ seam allowance.
I had to unpick all the stitching that held the tuffet top together, but when I resewed, it looked like Robin’s description of how it should look.
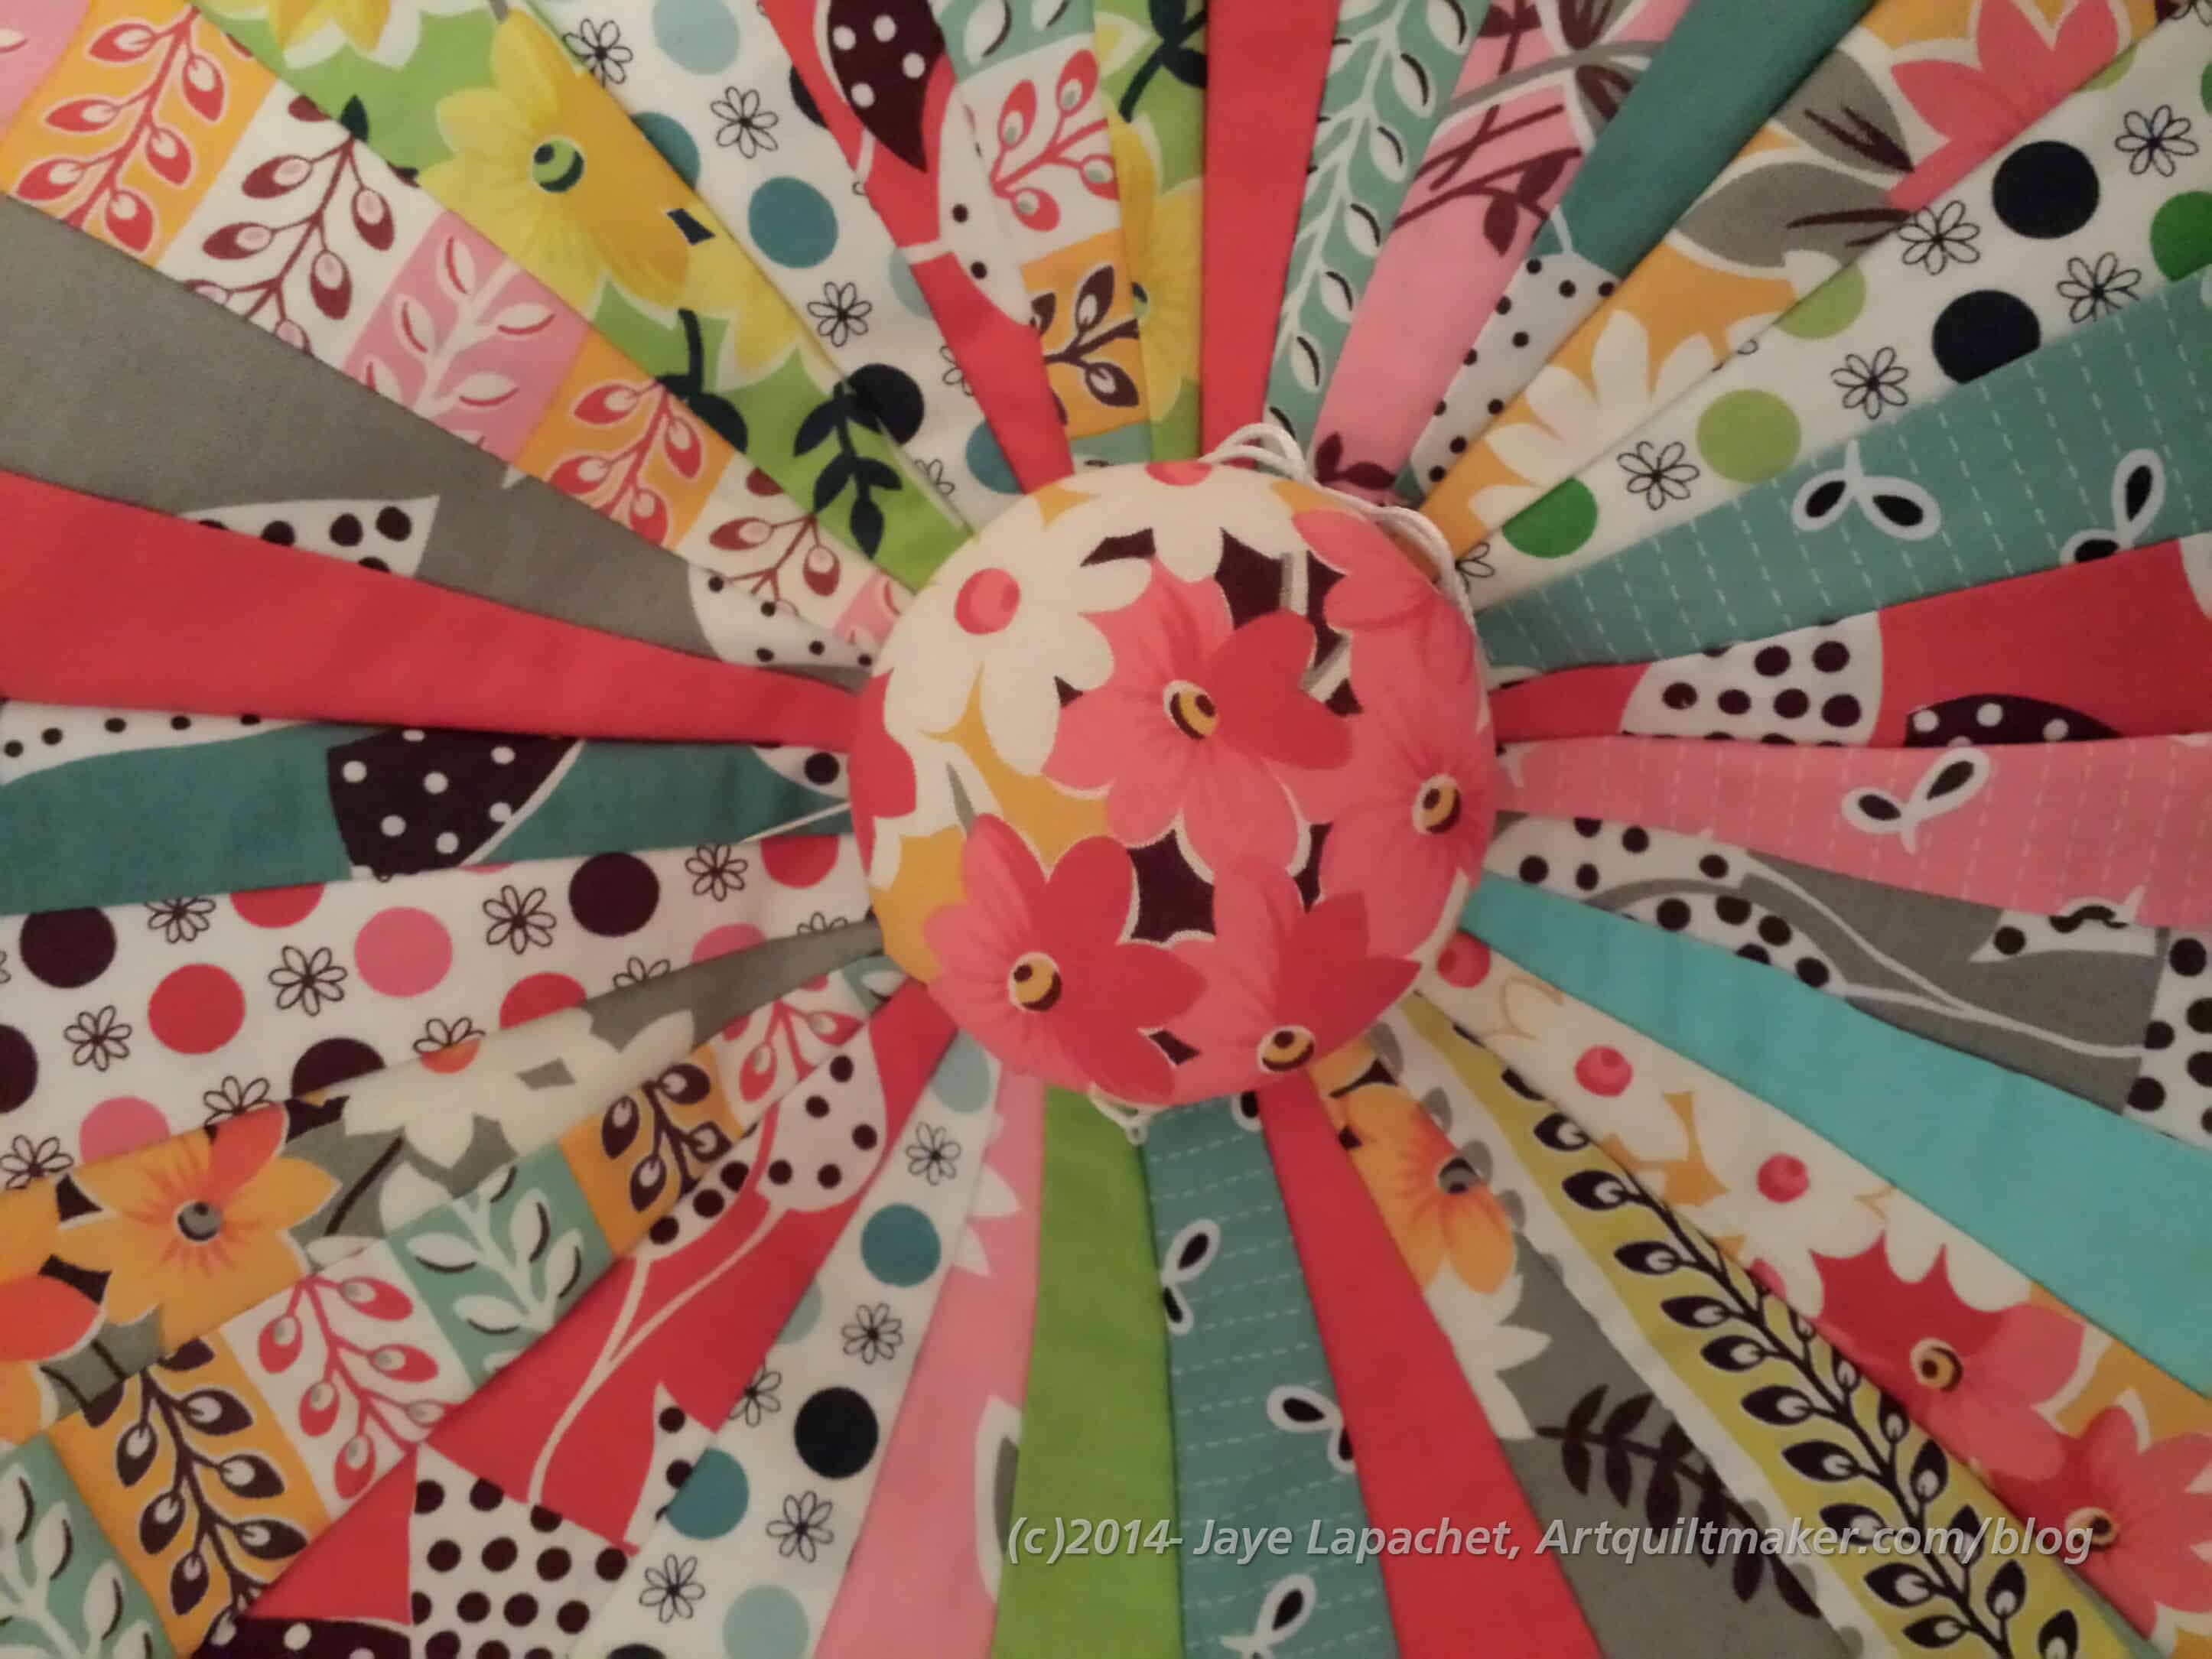
Tuffet Button Cover
I was running up and down the stairs, doing as much as I could while chatting with my Mom as she cooked (she was cooking the Y.M.’s last meal with her and the Big Guy and preparing a meal for us for later in the week. She is awesome!). One of the things I was able to do was make the button cover.
I fussy cut some flowers out of one of the Flea Market Fancy prints. The button blends in, which I might not do again, but I kind of like it.
I was thinking that Robin should print the patterns at Spoonflower and then people could just buy them without having to make the foundations as part of the class. I do think that there is an element of “becoming one with the pattern” that you get from drawing out the pattern, but printing them off of Spoonflower would be much easier and it might be less expensive than some of the other pattern choices Robin described.
I am thinking that I will make another so both DH and I have one to put our feet on. We will see since the class is tomorrow and I have to see how it goes.
I was naughty and didn’t work on my Tuffet at all last weekend. The class is Thursday, so I got to it a little during the week and then seriously on Sunday.
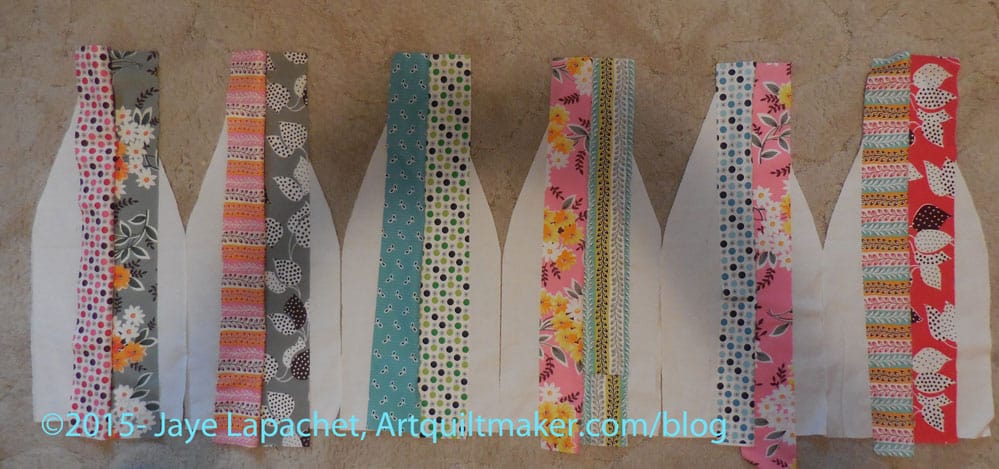
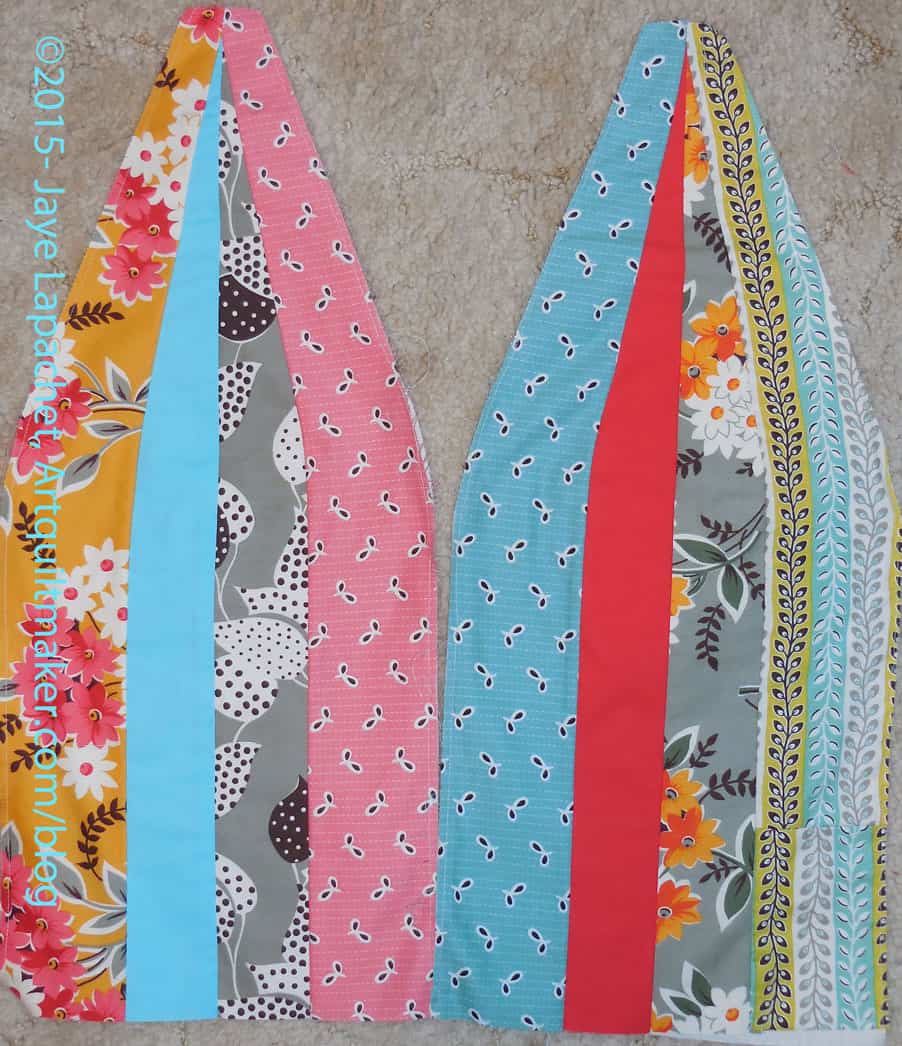
Tuffet Class Work2 finished panels
I came home from class with some work done, but not enough. I finished 2 panels and sewed 2 strips (one seam) on the 6 other panels. Respectable work, but not a finished top. I still had work to do.
Making the Tuffet uses foundation piecing, so all I needed to do was place more strips on the foundations and sew. For some stupid reason I was reluctant.
This is new to me. I didn’t want want to ruin it. I wasn’t 100% sure of my fabric choices. Blah Blah Blah. Fear.
I decided to just take one step at a time. So, last Thursday or so, I laid out the foundations in the photo above and looked at them for a few minutes. I got my stash of project strips and laid them out. I moved them around and then I sewed one strip on. Nobody died.
Yesterday I did the same with the last strip on each foundation. Because I am using 3″ strips, I didn’t need as many as those using 2.5″ strips. That made the process go a little faster for me.
Panels ready to sew
I also trimmed all the excess fabric and stay stitched the edges. This means that the panels were ready to sew into a 3D bubble.
So, I am making progress. I will, for sure, be ready by Wednesday night. There is no choice about it.
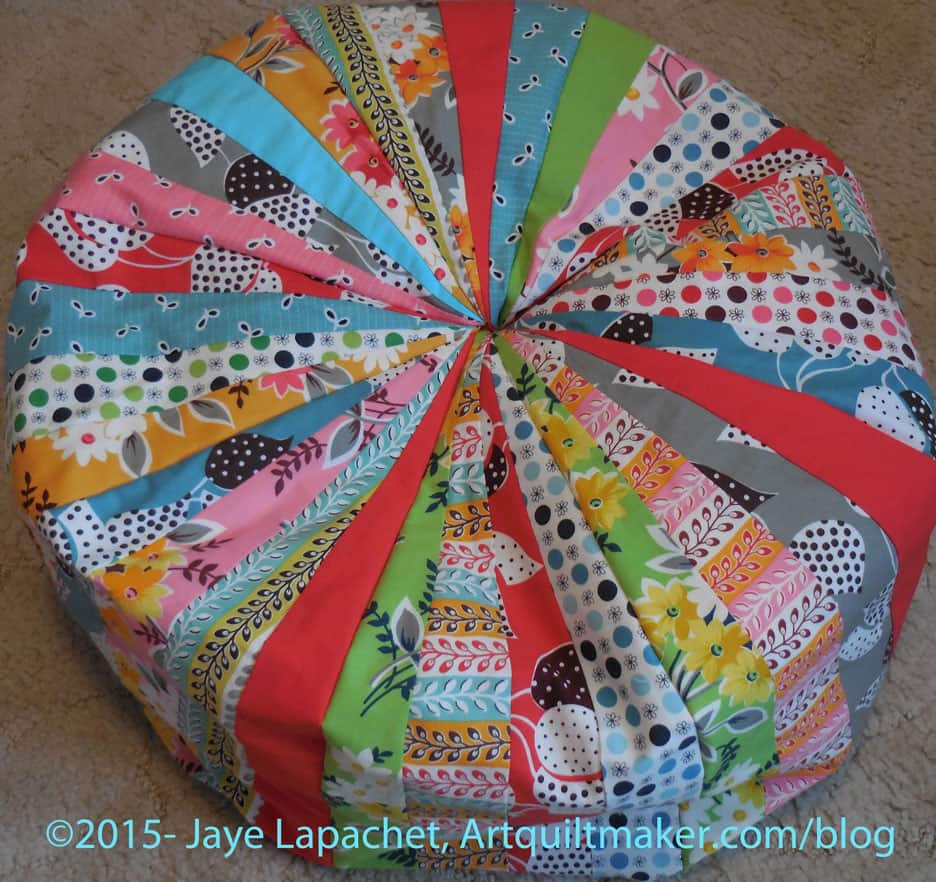
I am not Miss Muffet, but I am making a tuffet. As I mentioned, I have wanted to make one for a long time. I took the class at Scruffy Quilts and had a great time. The teacher, Robin Koenig, of West Coast Tuffets, was excellent. She was funny and helpful and engaging. She didn’t patronize us and she wasn’t a ditz.
The class is four hours, 2 sessions. The first session was last Thursday. We had to cut strips in advance (or buy a jelly roll), so we were ready to make the pattern and sew when we got to class. The patterns were a bit of a pain to make, but Robin had the templates ready, so we had to trace and cut. I was able to sew two sections out of eight, an accomplishment of which I was very pleased.
Tuffet, 2 sections
I got so much done, because I used 3″ strips, which meant that each section only required 4 strips. My fellow students used jelly roll strips and their sections required at least 6 strips per section so they had a lot more work to do.
The next class is in two weeks. I need to have all eight sections finished. I also want to make the button that covers the center.
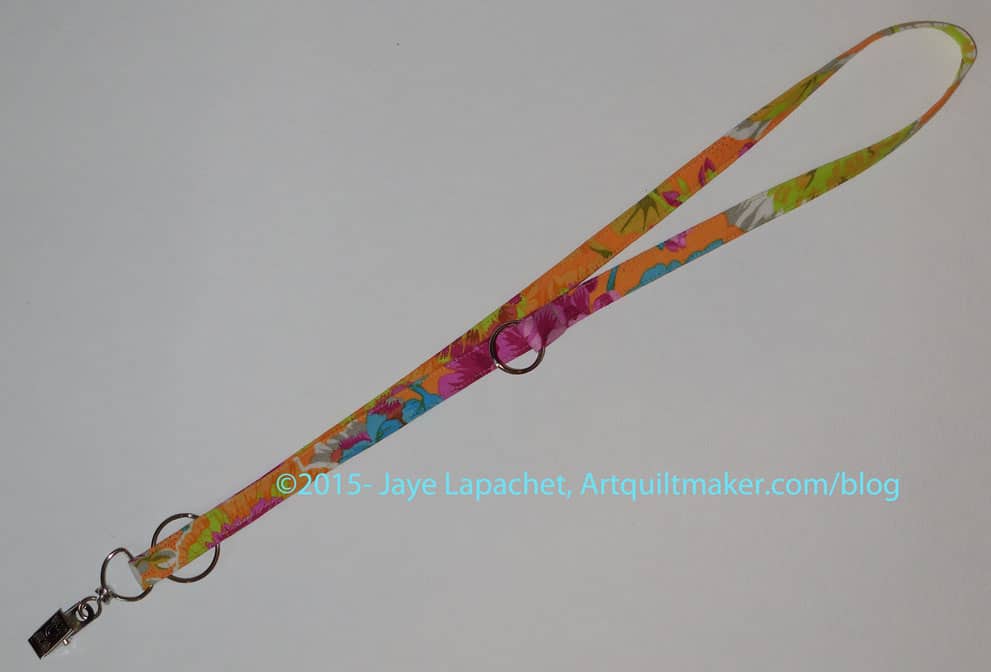
I wanted a certain kind of lanyard for my quilt guild nametag. I wanted my nametag to be near my shoulder so people could really see it. I also wanted some options to hang things from it, like a pouch for id, money, etc.
Make this lanyard fit your personality.
Supplies
sewing machine in good working order
ironing kit
thread
fabric
basic sewing kit (BSK)
pins
WonderClips
Shape Flex fusible interfacing (scraps are perfectly fine)
2 circle metal rings (D ring or similar will work also)
1 metal hanging clip
Directions
Wash and press your fabric
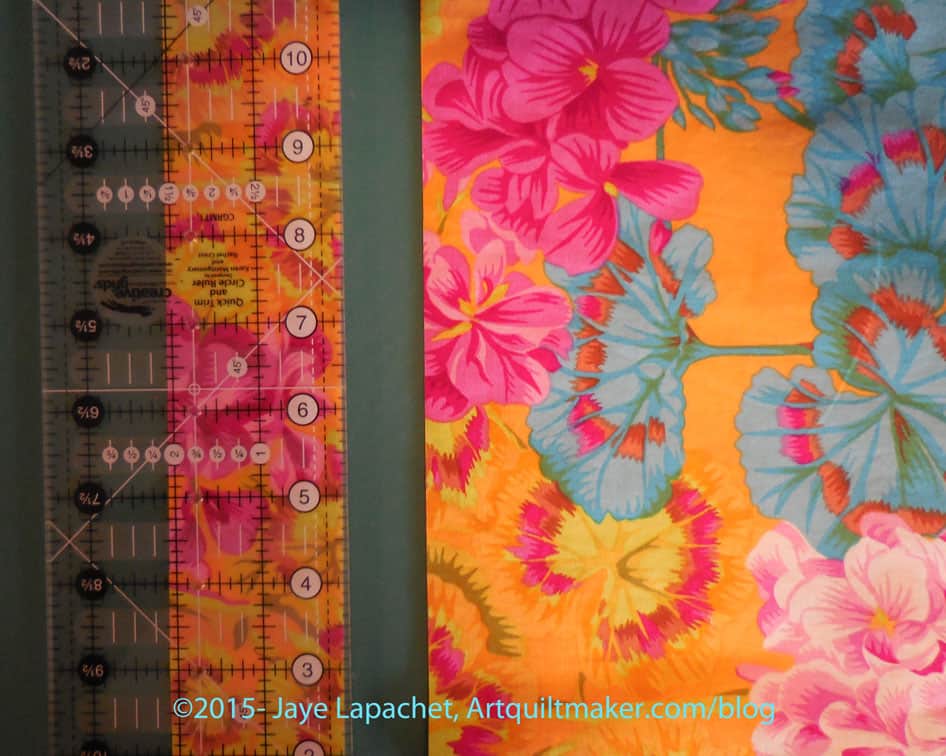
Cut 2″ strip
1. Cut a piece of fabric 40″ x 2″. You can adjust the length to fit your height, neck size, etc.
Cover with interfacing
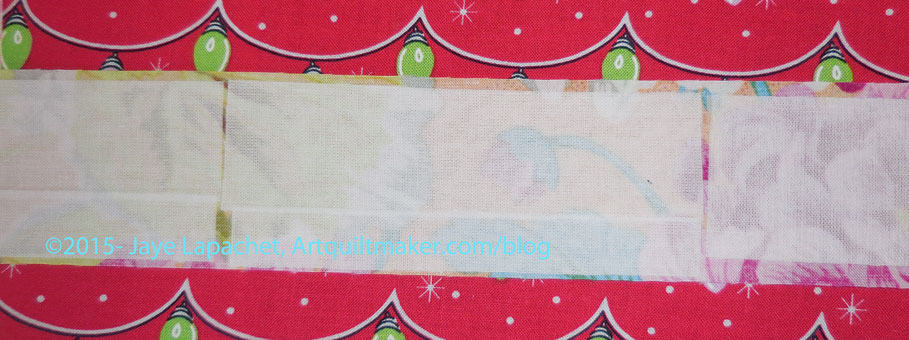
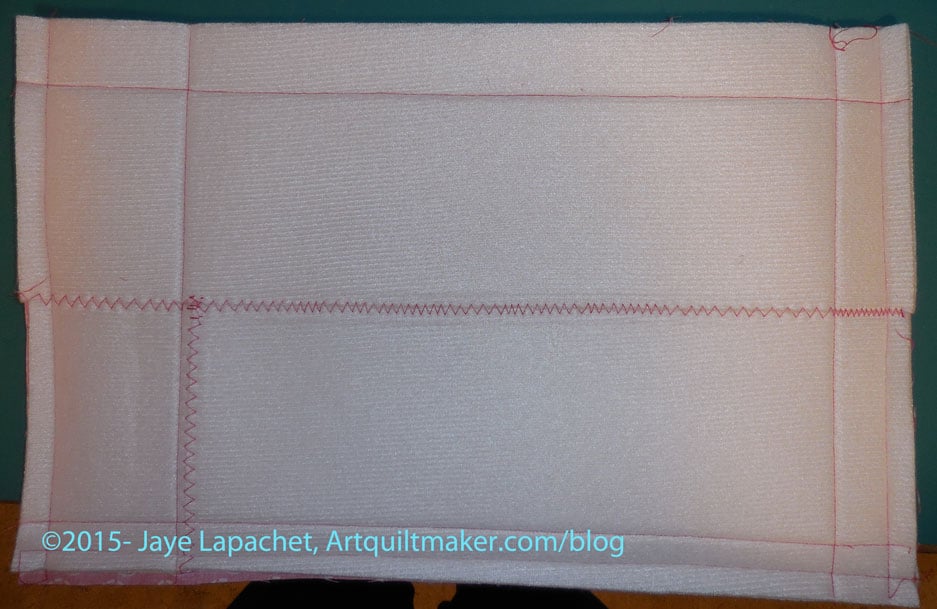
2. Layout your strip on the ironing board wrong side up. Cover the wrong side of the fabric with Shape Flex (or similar) interfacing. I usually cut the interfacing so it only goes with about 1/8″ from the edge. This reduces bulk.
**Note the Christmas light fabric was what was laying on my ironing board at the time I took the photo.
Fold in half
3. Fold your ShapeFlex covered strip in half, wrong sides together, and press so the edges match up.
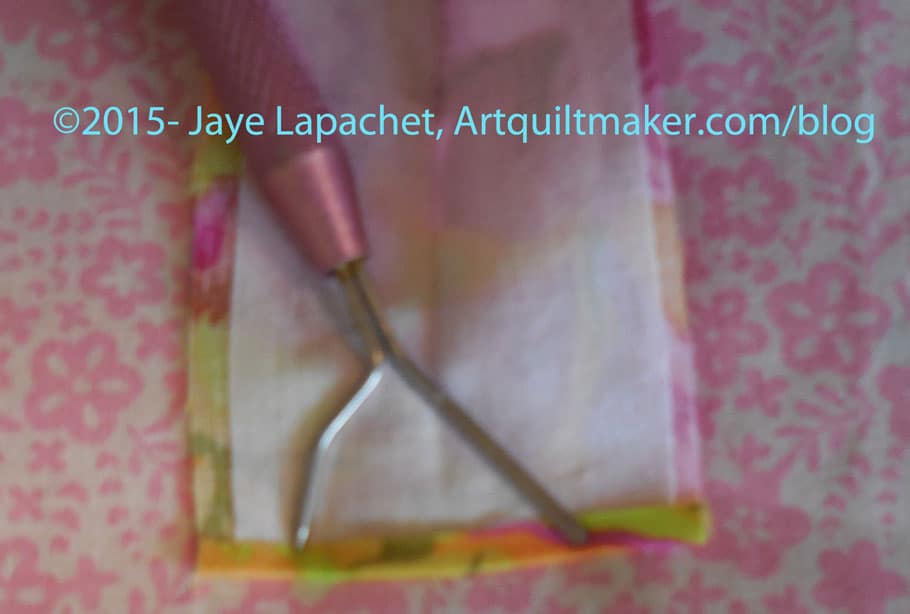
Fold ends
4. Fold both ends up about 1/8″ (WST). This will finish the ends.
**Note: I don’t know what that tool is or where I got it, but I use it to keep from burning my fingers when I iron.
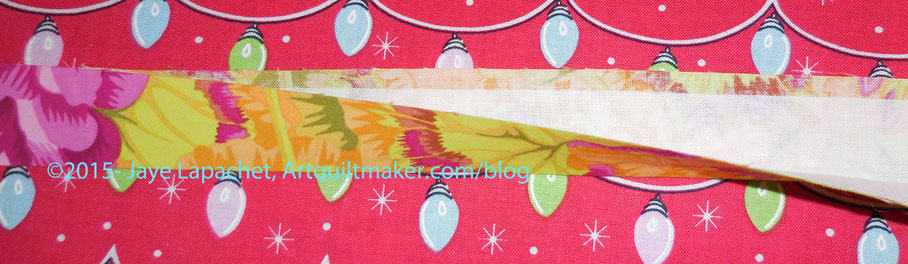
5. Open the strip you have just pressed down the middle.
Fold towards to center
6. Fold both raw edges towards the center. Don’t fold past the center pressed line.
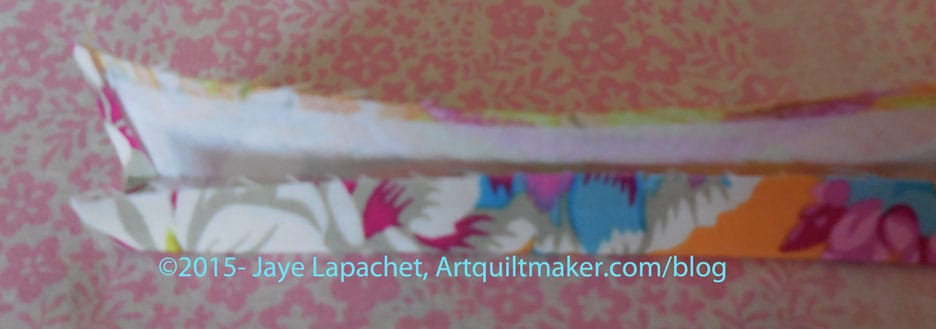
Folded lanyard piece
6A. Once you have pressed both raw edges towards the center, repress the whole strip together on the center line.
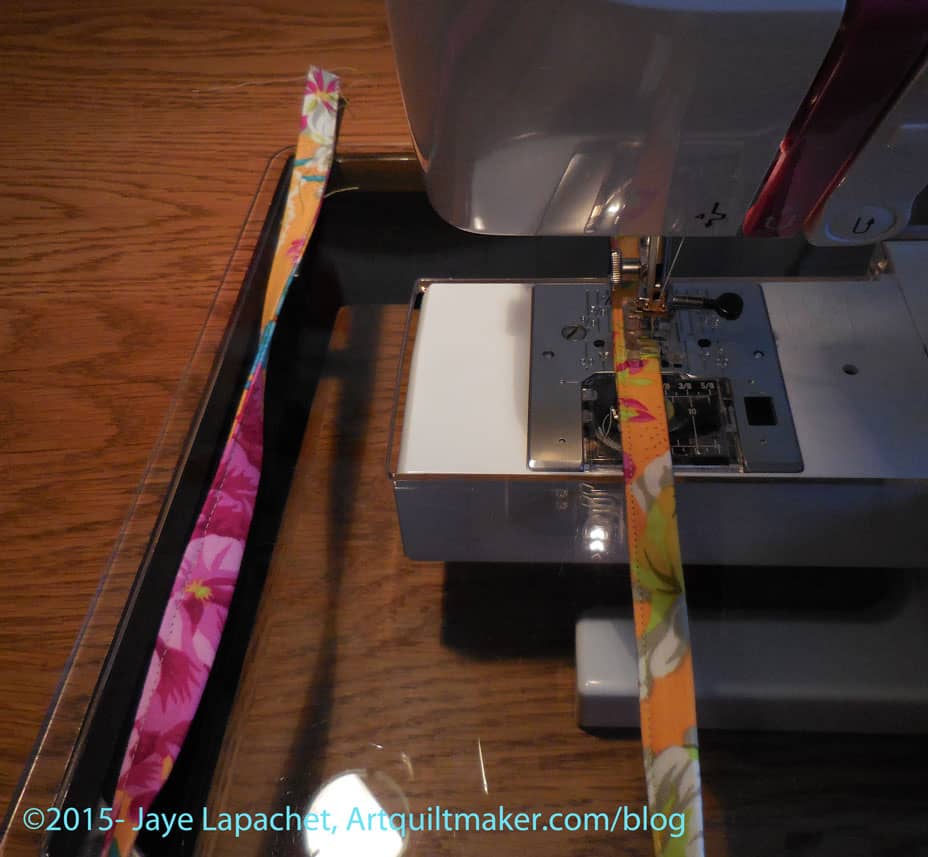
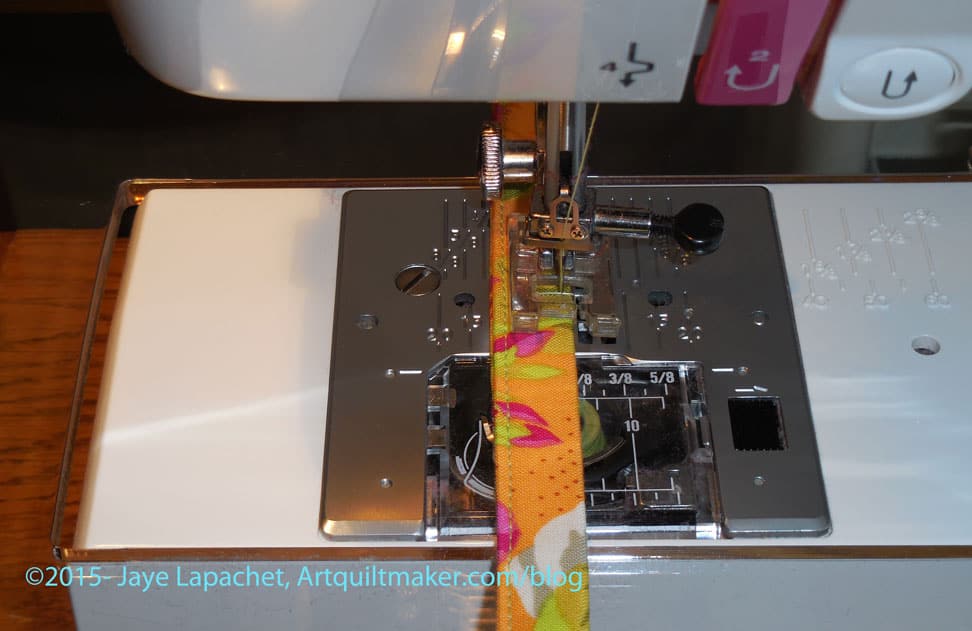
Topstitch around entire stripTopstitch around fabric – detail
7. Topstitch around the whole strip using a matching thread. Of course, you can use whatever color you want, so do that. Make the piece interesting.
Topstitching encloses the whole strip so there are no raw edges visible.
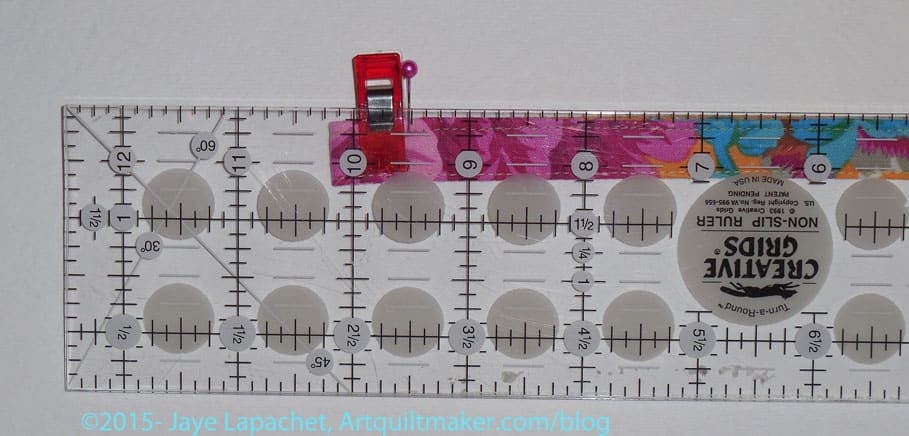
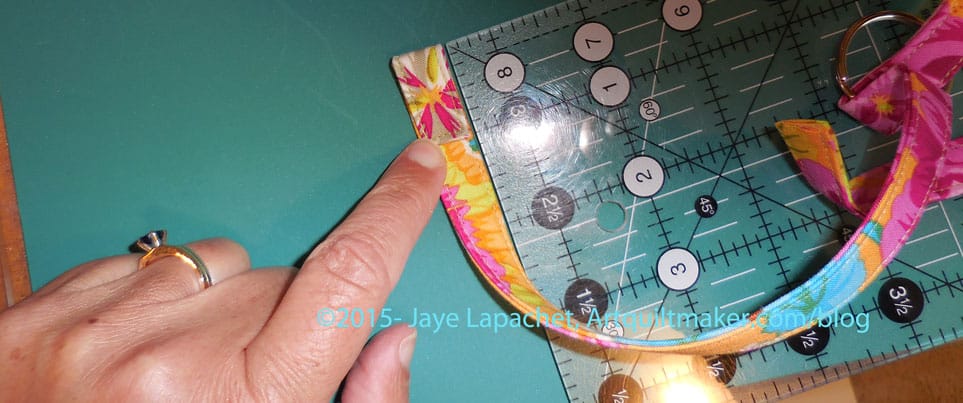
Mark with a pin
8. Mark 9.5″ up from the end with a pin. This will be your sewing line, which will create the lace to clip your name tag.
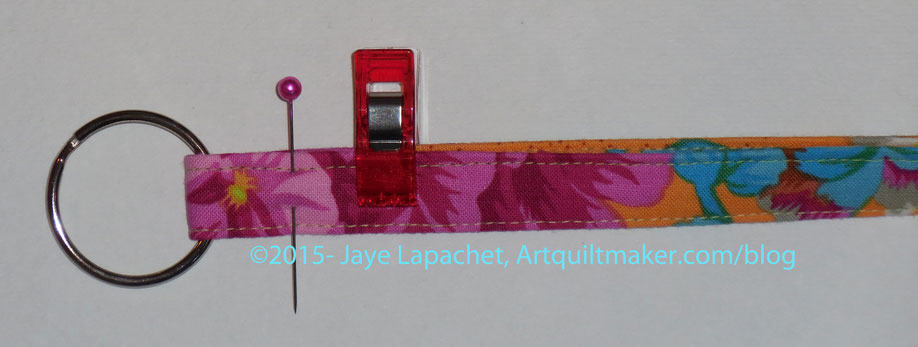
Fold at 10.25″
9. Fold that same end at 10.25″ and insert a ring or D Ring.
Clip to hold ends together
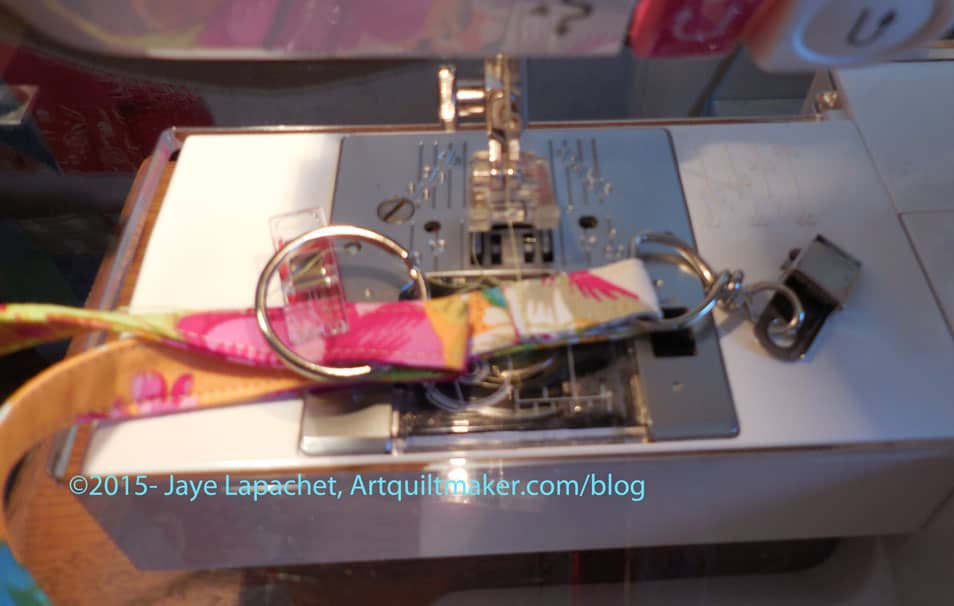
10. Clip piece with a WonderClip to keep everything together while you sew.
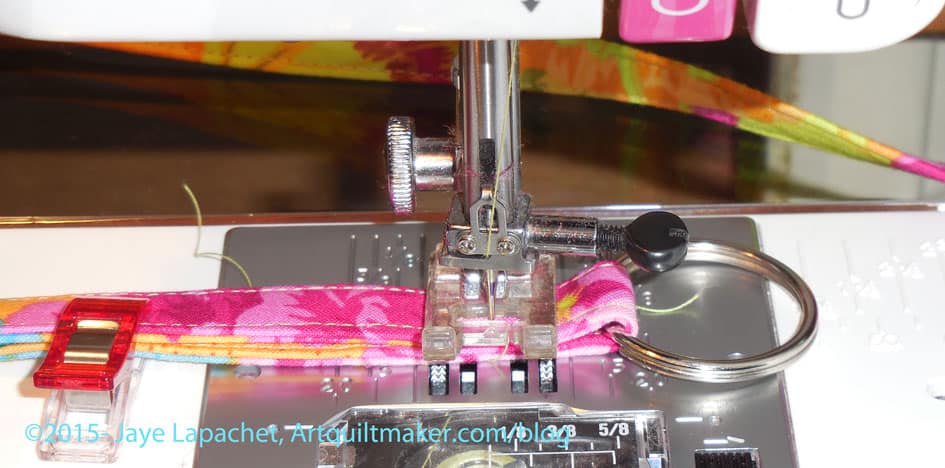
Sew on marked line
11. Sew on your marked line. I sew between the top stitched lines. The ring will need to face out so you can clip your name tag on to it and it will not be covered by the lanyard.
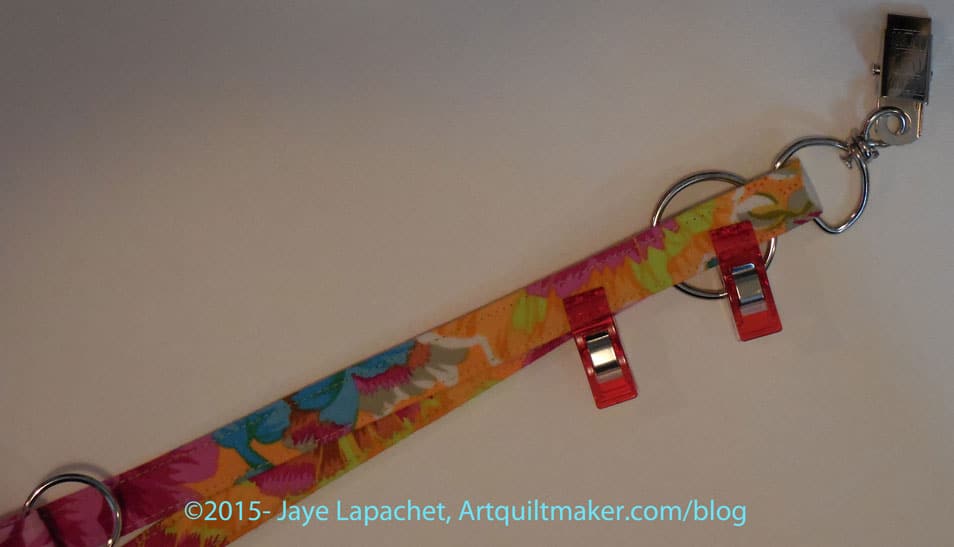
Fold ends up 1″Make sure hardware is on the same side as upper ring
12. Fold each end up 1″. Make sure that the fold on the same side as the upper ring is to the back.
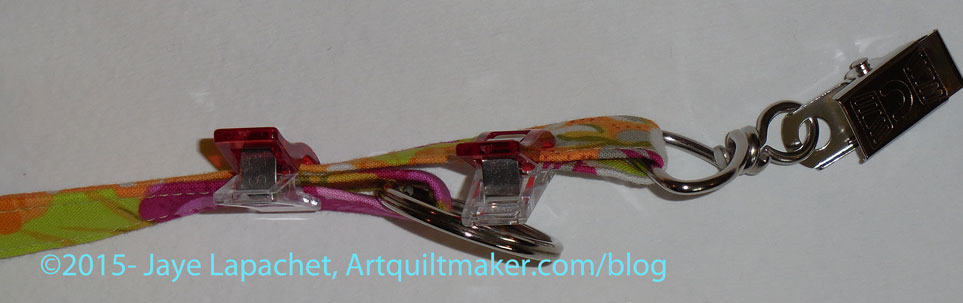
Add hardwareAdd hardware and clip ends
13. Add a circle ring to one end and clip with a WonderClip.
Clip end to prep for sewing
14. Add the metal hanging clip to the other end and clip with a WonderClip.
15. Adjust the ends so the circle ring does not clank against the hanging metal clip when you wear it. If it does it will drive you crazy. If it doesn’t bother you, it will drive someone with auditory sensitivity crazy. I always adjust the hanging metal clip to be the longer end.
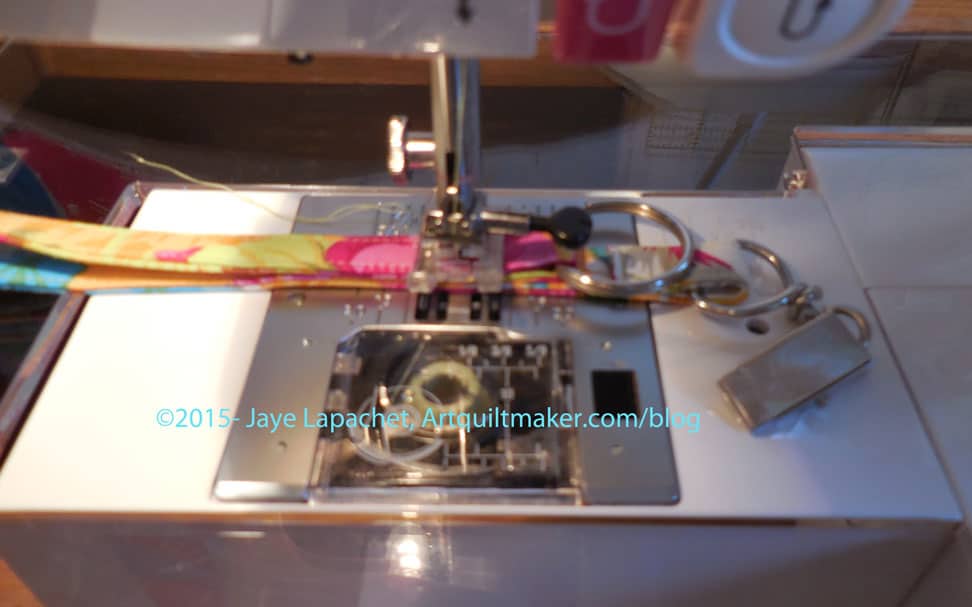
Sew First End Together
16. Sew the end of the hanging metal clip closed. Bury or clip threads.
Sew Layers TogetherSew Layers Together
17. Now, carefully sew all the rest of the layers together. I sew the end with the ring using a square stitch pattern to reinforce all the layers of the lanyard.
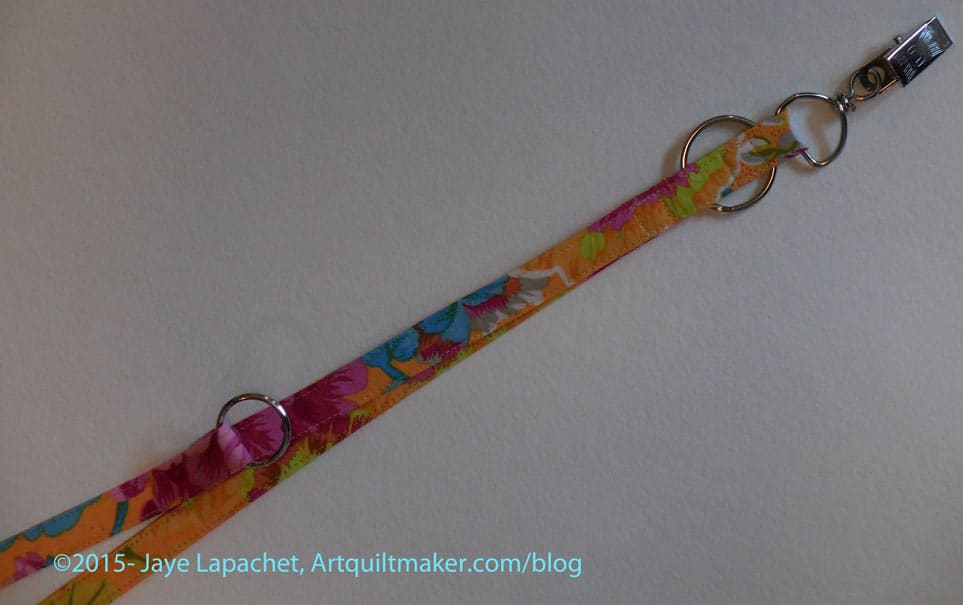
Finished Lanyard detail
Clip your nametag on, hang your pouch and you are ready to rock.
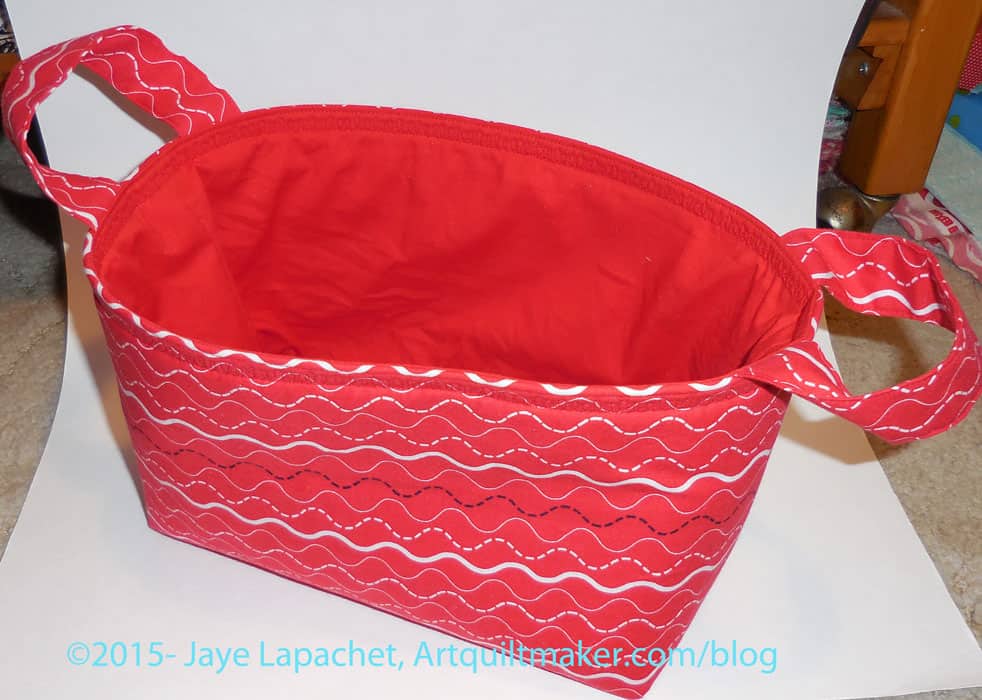
I finally made something in which to store the TP! Hooray! Only one, though, so I have another for the other bath off my to do list.
This is not a difficult project and I am glad I made it when I did, which was at the end of a long day of sewing. It was a very satisfying day where I was basically getting stuff done that had been hanging around on my to do list for way too long.
One Hour Basket
I needed less than a yard of fabric. The partial half yard worked fine for the exterior.
The following are simply some things to know about or to consider:
The pattern used three different seam allowances
I did not have fusible fleece on hand, so I used leftover Soft and Stable
One Hour Basket Side with Soft & Stable
Since I used Soft and Stable I sewed a couple of lines of quilting to attach the fabric to the Soft and Stable. Also, I had to do a Franken-batting job to the Soft and Stable, because I only had small pieces and didn’t want to open my new package. I used a very large zigzag stitch to hold the parts together. Where you see the zigzag in the picture (left) is where I had to sew bits and pieces of the Soft & Stable together.
I did a few lines of quilting since the pattern calls for fusible fleece and Soft & Stable isn’t fusible, just to keep the fabric attached. I don’t think it was really necessary, but it made me feel better.
The one thing I couldn’t do was add some Vinyl Fuse to the bottom. I like to do this for bags to keep them clean. I only add the VinylFuse if I can also sew all the sides of the Vinyl Fuse into a seam since there is a possibility of the fusible coming away from the fabric. Since this is for use in the bathroom and there is always a possibility of water on the floor, it would have been nice. On the other hand, I can always make a new one if this one gets nasty, especially now that I know how easy it is.
I put this in the tote bag hashtag basket. I am not sure it is really a tote bag, but I don’t have a basket tag and I am not about to make one at this moment. I may make a few more of these, but not tons, so into the ‘tote bag’ hashtag bucket it goes.
One Hour Basket in Use
I can’t tell you how thrilled I am with this project. Getting the TPoff the floor has been on my list for an eternity. Finally! Yay!
Tanesha over at CraftyGardenMom website and podcast made one of these. I love the fabrics she chose! Pam at Hip to be a Square podcast made one as well.
After returning from Philadelphia, I got back into the groove by cutting some pieces for pillowcases. I made three. The first is a college pillowcase. I used Minkee, which I told you I was going to try.
The Young Man is quite kinesthetic and I think having something soft will be good for stress.
I have never used Minkee before and this was a challenge. First of all, I only had a small piece of flannel so I had to cram the Minkee pillowcase body into it before sewing. I use the burrito method I have discussed a number of times. The quilt shop had a guide for using Minkee, which said I should use a 1/2″ seam allowance and a walking foot. I pinned the flannel really well to the Minkee and that worked to keep the Minkee stable while I sewed. It was difficult to cut straight initially so after sewing, I trimmed the body straight again. I hope I didn’t trim to much, but we will see.
Again, I pinned the body of the pillowcase really well and sewed. Then I used a knit stitch to do the French Seam to finish the case.
This isn’t an instant success guarantee. We’ll have to see if the case is too small and if the bumps on the Minkee bug his face when he sleeps. Still, I am pleased. I have a September pillowcase and something for the care package. I also got some experience with Minkee.
Since I did the Christmas Pillowcase Tally the other day, I thought I had better keep myself honest by putting some notes down about the pillowcases I want to make the Young Man for college. I may need help, but we will see.
I want them to be punny, if possible September
Theme: soft
Fabric: Minkee and flannel
I was tempted by a “School Daze” theme, but I don’t want to send him something that will embarrass him. I also want him to use the pillowcases. I decided to make him a really soft pillowcase so I bought some Minkee to try. I am about half done with it.
October – Done
Theme: Halloween
Fabric: skeleton fabric by Timeless Treasures
November
Theme: Thanksgiving
Fabric: timeless Treasures Golden Harvest
I was disappointed I couldn’t find a cornucopia fabric, but I did find another fabric that looks very Thanksgiving-y.
December
Theme: Christmas
Fabric: not purchased
January
Theme: snow, winter?
Fabric: ?
February
Theme: ?
Fabric: ?
March
Theme: ?
Fabric: ?
April
Theme: Easter?
Fabric: ?
May
Theme: Cinco de Mayo?
Fabric: ?
I’d be tempted to make a pillowcase from Philip Jacobs fabric, but I don’t think that would be popular.
Food is always a good fill in theme for months where there is no apparent theme. I think I have some Pokemon and Star Trek fabric that can become pillowcases as well.
After one of my recent posts on pillowcases, I thought I had better do a tally regarding the Christmas pillowcases I am planning on making. The last tally I did was May 4 and I have made some progress, so I thought I had better crow a little bit.
Here is the grand total of what I still need:
SIL#1: 4 kids, 2 spouses/SOs
3rd oldest nephew + SO
Oldest niece + Fiance (yes, this has changed since the last update) (DONE for fiance)
I am off the fence about my 3 youngest nephews. Even though I made them pillowcases last year for Christmas, they are each getting a pillowcase. My YM is also not on the list, but I will probably just send him one before the school year ends.
I needed some leaders and enders s I worked on the backs for the Food Quilt #2 and the Box Full of Letters quilt. I still have several Christmas pillowcases to make AND college care package pillowcases to make for the Young Man so I decided that pillowcases would be my leaders and enders.It is much easier to use mindless squares, but I didn’t have any prepared (make a to do list note) so it had to be pillowcase. I did a bit of putting together the Field Day quilt, but not much.
I finished three pillowcases, which doesn’t seem like a lot, but it is progress.
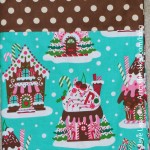
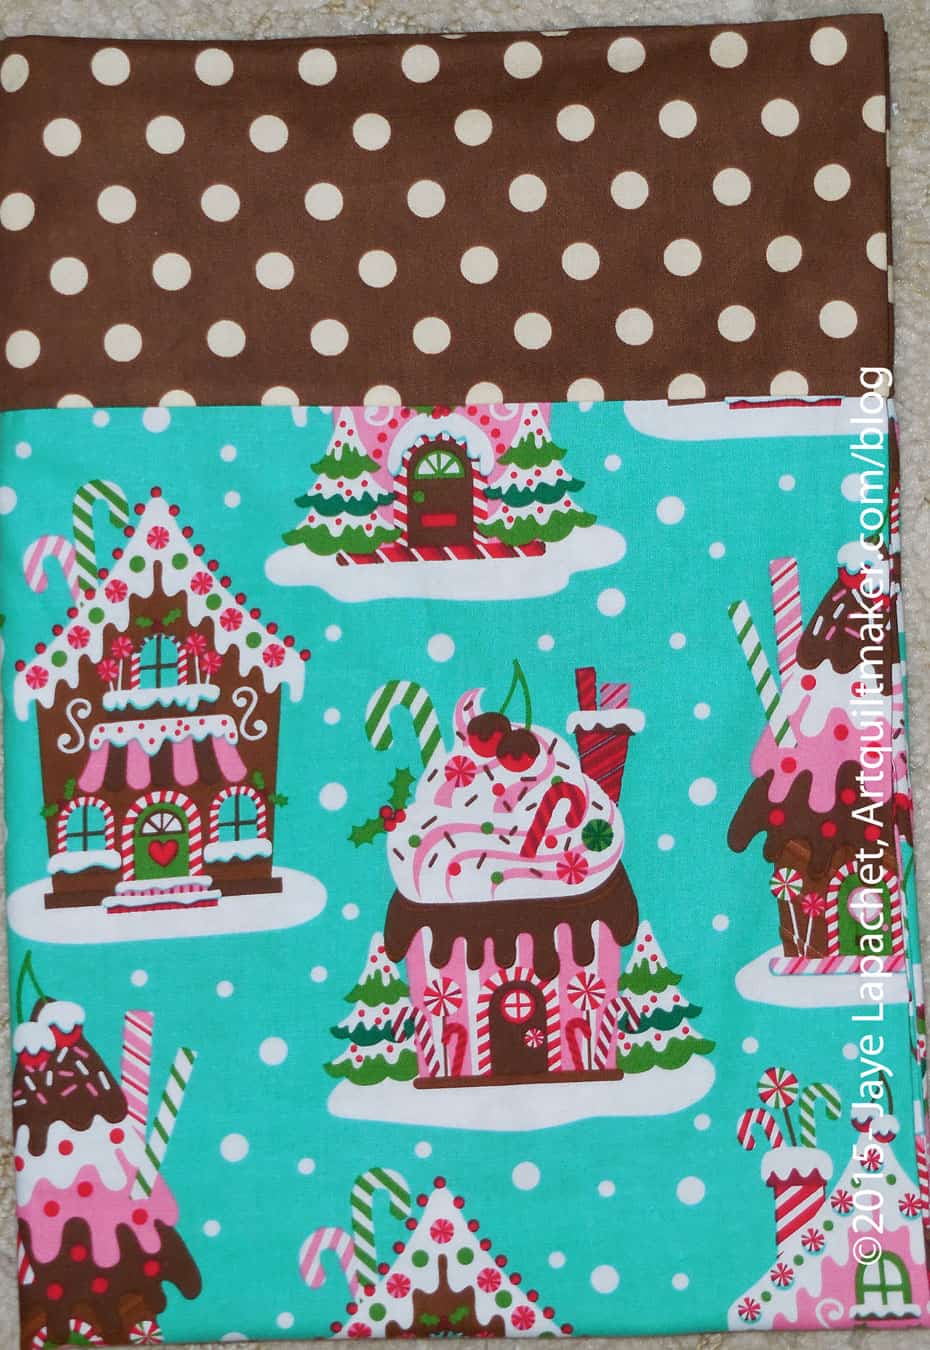
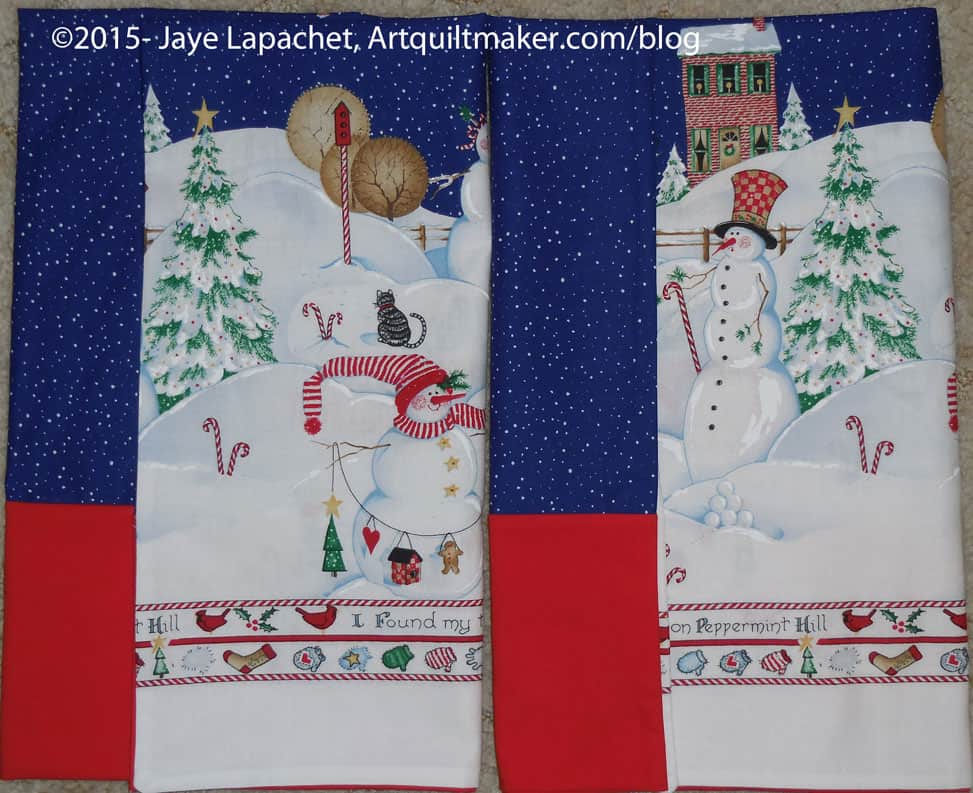
Gingerbread House Pillowcase
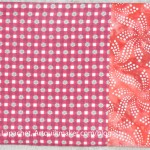
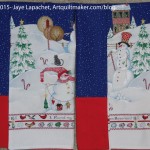
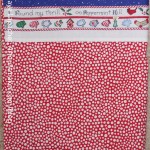
First, I have finished one of the Christmas pillowcases with fabric that I bought at a shop in the South Bay (forgot the name, sorry!) which I really like. The colors are cheerful and one take on the modern Christmas palette. I really like the way designers are using pink and aqua and turquoise for Christmas now. Yes, it will look dated in 10 years (remember mauve?), but I still like it. Choosing fabrics for the cuffs is always a problem for me. Not sure why. I thought this dot worked with the brown in the gingerbread houses and added a little fun fun.
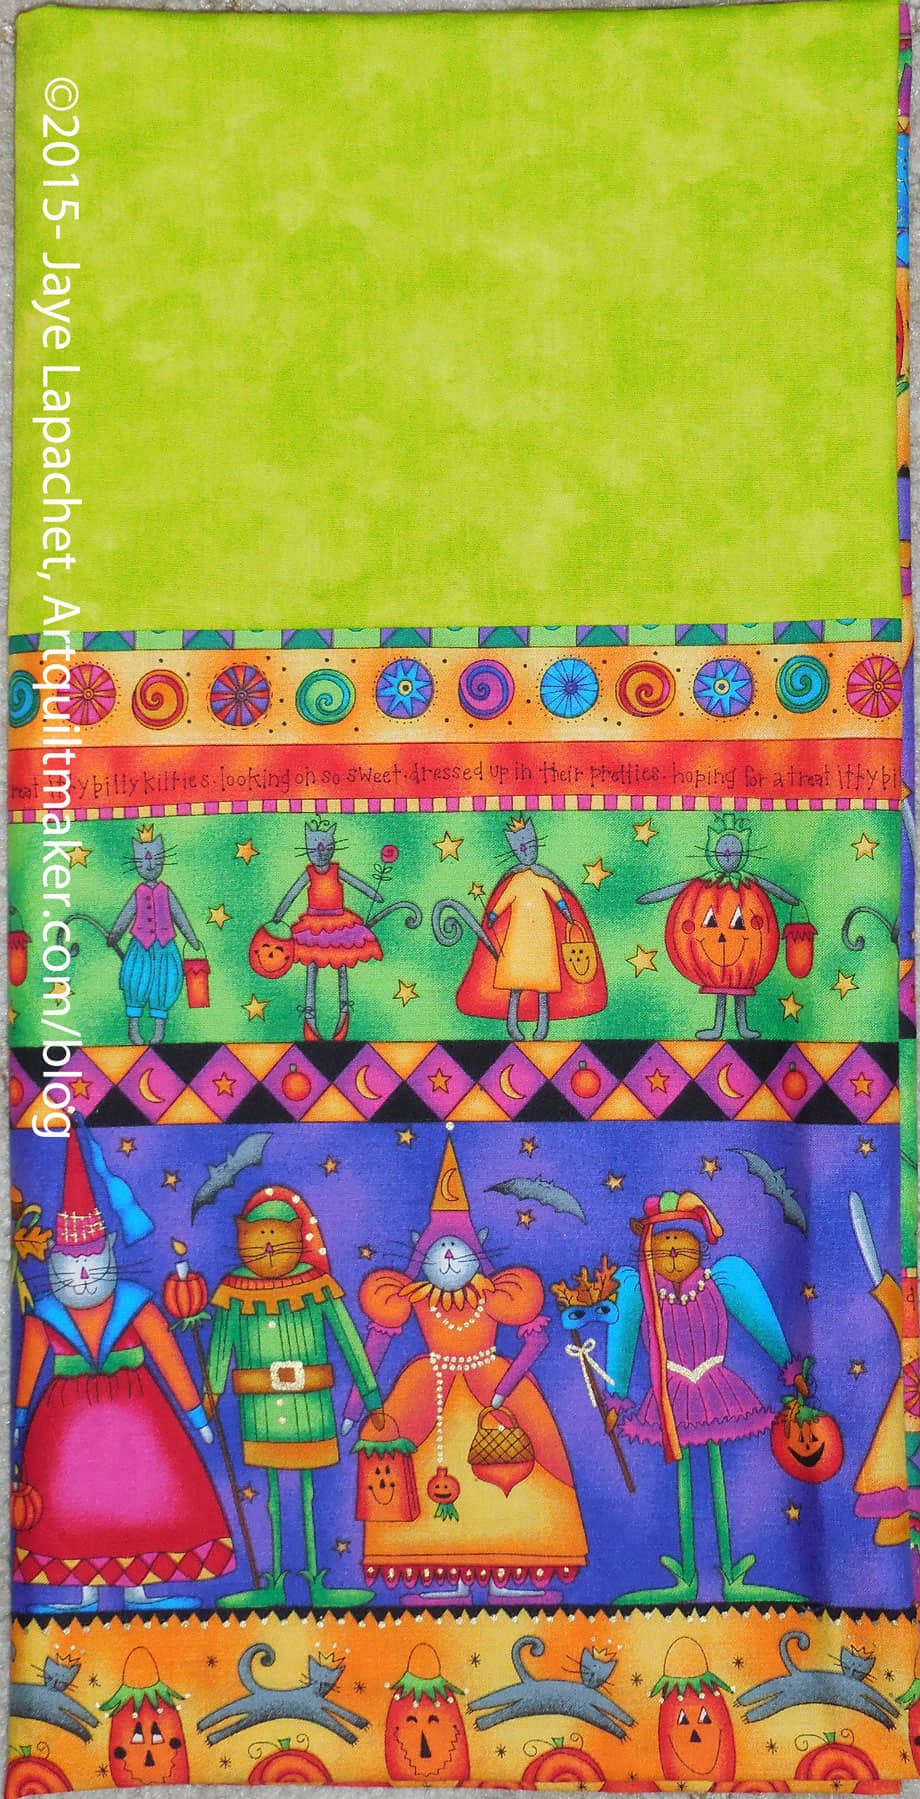
Next, I made one of the college care package pillowcases. This one will be for Halloween. I don’t plan on sending giant care packages every month, but a little something every month or so will be fun. Hallowe’en is good time to fill a box with rubber spiders, mini-Snickers, spider webs and plastic ants.
Halloween Pillowcase for YM
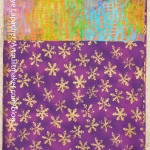
I found this skeleton fabric at the Fabricworm and knew the YM would appreciate the Halloween fun. The cuff is made from an old Jennifer Sampou print from her Art Nouveau line. It has been laying around much too long and I think it works fine with the skeletons. It isn’t perfect, but it is ok and the YM won’t care.
I am feeling a lot better about my pillowcases now. They are a uniform size and I can make them quickly.
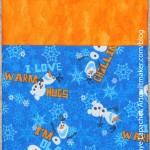
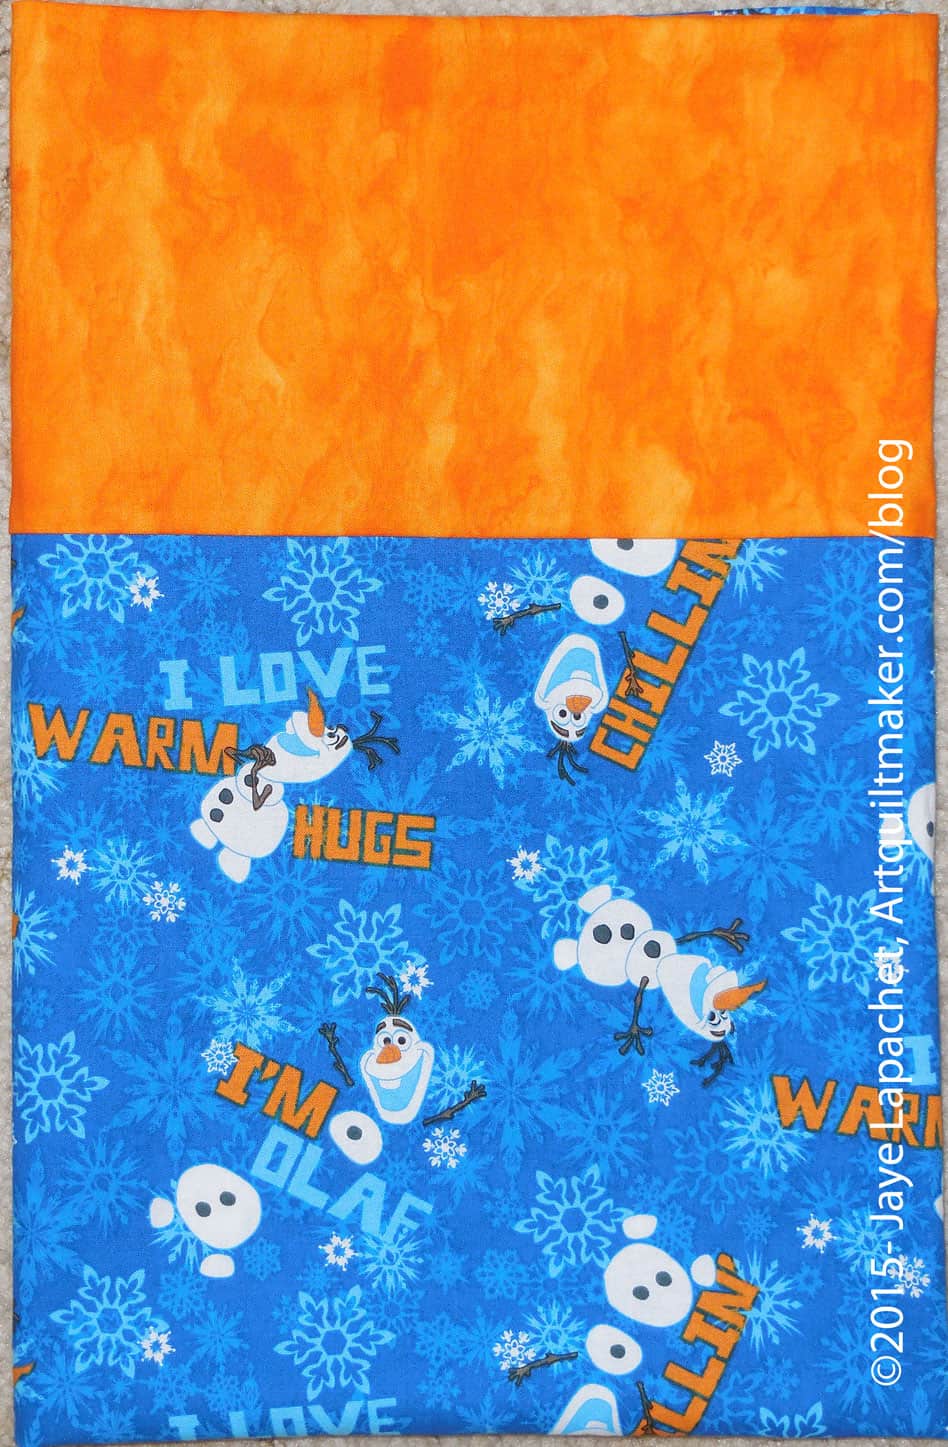
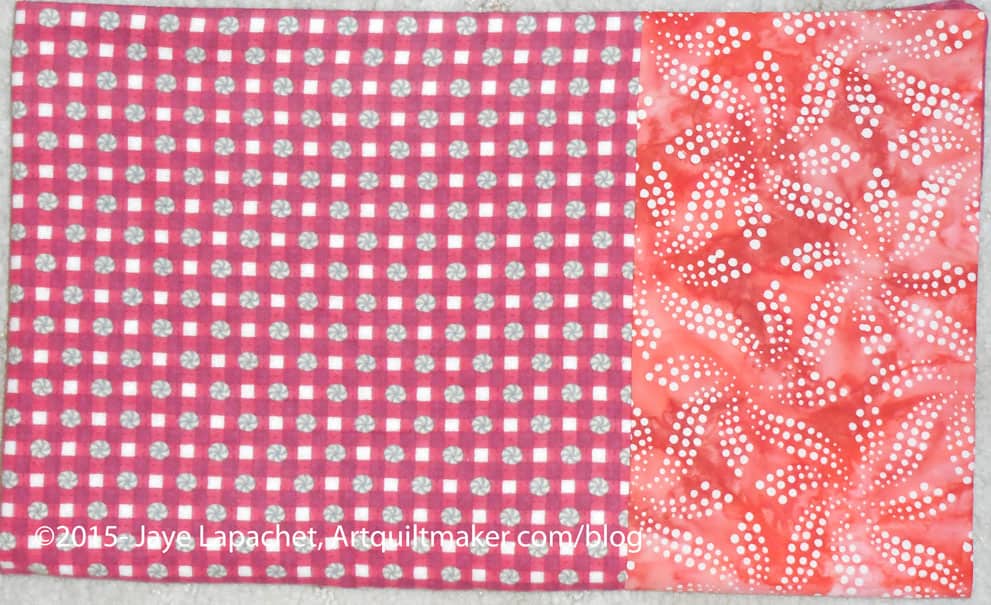
Olaf Pillowcase
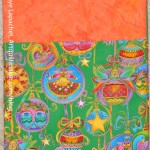
The last pillowcase is another for the Christmas series. I found some Frozen fabric and decided to use it to make a fun case for one of the littlest nephews. I think the orange I picked for the cuff makes for one of the best cuffs ever. Hopefully, this will delight a little boy.
I still have to make a pillowcase for his sister and she will get one from the Frozen fabric line, too. Once hers is done I can get the family’s ready to send off.
A long time ago, I met up with a friend and she taught me to make folded paper stars. Later, I found out that they are actually called starbursts.
Back in the day, I only had copy paper and I made a practice star from that. You need 16 squares of paper to make one starburst, so it is not an insignificant amount of paper and I didn’t have that much pretty paper on hand. I was pretty proud of that simple white star. At some point, I glued it together.
It was a good technique and the results are impressive, so one Christmas, not long after, DH and I folded up bunches of legs to make ornaments for gifts. We also made some larger ones as gifts and Christmas passed. Then the process kind of fell off my radar and I forgot how to make these starbursts. Sadly, I couldn’t figure out how to make them by reengineering, because I glued the one I had left together.
So, time passed, but I kept looking at that star at the top of my design wall. I started to become obsessed by making one again. I searched the web and couldn’t find instructions. I was infuriated. I am a librarian, for goodness sake, I should have been able to find one measley set of instrustions.
I firmly put the problem into the back of my mind to torture me there – uh, rumble around – and let my subconscious work on it.
One day I was on a boring call and clicked over to Pinterest to peruse while I listened. Suddenly, I saw a folded paper star!!! It finally dawned on me to search Pinterest and after trying ‘starburst’, within moments, I found instructions on a blog!!! I know I reported on this in the last V& S post.
For awhile I basked in the knowledge that I had the instructions and could make a starburst anytime I wanted.
Last week, I decided to make one to see if works. Now I can’t really stop. I haven’t been doing much scrapbooking lately, so I took some paper and made a first star. I cut the paper to 8.5″ squares and made a pretty big starburst.
Origami Starburst
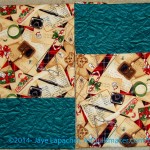
Next I went, coupon in hand, and bought some special pieces of 12″x12″ scrapbook paper and make them into another even more giant starburst. The paper I picked wasn’t matchy-matchy, but it reminded me of a line of fabric that kind of had a Paris theme with lots of pink and black. I just felt like these were the right patterns and motifs.
Paper is fun and everything, but I have a lot of fabric and I began wondering if I could make a starburst from fabric. I let the idea rattle around in my head and decided that one big problem was cutting 32 pieces of square fabric – well 16 pieces of fabric and 16 pieces of interfacing. Regardless of how much I cut in other projects, it seemed daunting for this starburst. I think it was a problem in my mind, because of the uncertainty of whether it would work.
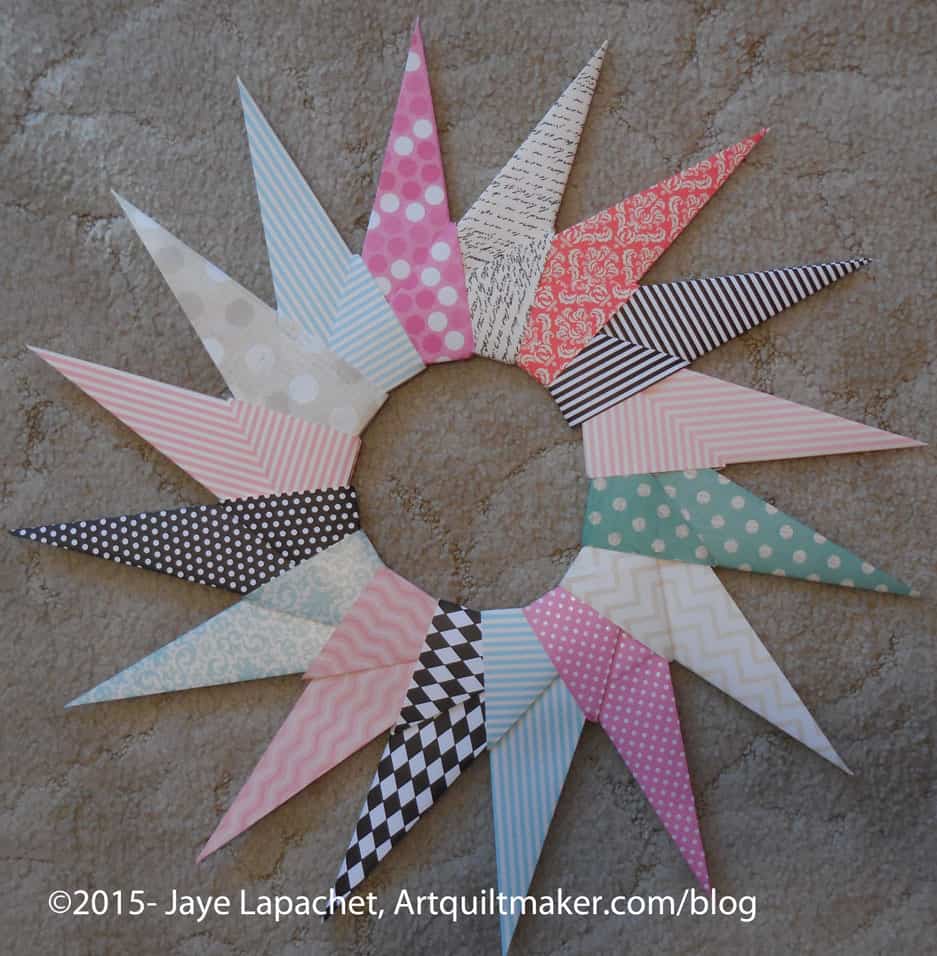
Finally, I came up with charm squares. I got a Fresh Cuts charm pack out of my drawer and picked out 16 squares that I thought would work together. I worked on it at Sew Day and then finished it at home. You need Flatter or Best Press to make the pieces really flat.
Fresh Cuts Origami Starburst
The idea worked. I think the starburst came out really well. It is a little bright and cheerful. The only thing I need to think about is how to keep it together. Normally, the tension keeps them together, but the starburst wreath is kind of fragile if it gets handled too much. Sewing or gluing are my options.
I counted up the pillowcases I need as well as the ones I have made and have a good idea of what I need to make before Thanksgiving.
Thanksgiving, you ask?
I was thinking I would mail these out around Thanksgiving so the niece-phews could use them throughout the Christmas holiday. We’ll see.
Here is the grand total of what I need:
SIL#1: 4 kids, 2 spouses/SOs
3rd oldest nephew + SO
Oldest niece + SO
Nephew (not sure where he falls in the order)
Youngest niece
SIL#2: 3 kids, 1 spouse, 2 great niece-phews
Oldest nephew + spouse + 2 kids
2d oldest nephew
middle of the pack nephew
BIL #1: 1 kid
3rd youngest nephew
SIL#3: 2 kids
Middle niece
middle of the pack nephew – 4th youngest (??)
BIL #2: 2 kids
2d youngest nephew
Youngest nephew
____________________
Grand Total: 17 pillowcases needed
This does not count The Young Man. Not sure whether to include him or not. I am thinking of sending him a pillowcase per month when he goes to college. It might be the only time he changes his pillowcase. (EEWWW!).
Now, the thing is that I made 3 pillowcases for the littlest nephews a few years ago. They should still have theirs, but it somehow seems unfair to leave them out. I was also thinking of giving them the designs above. They are close in age and often play together. I would give the 2 that are the closest in age (different families) the top two and then the littlest nephew the bottom one. I want them to know which are theirs, so I don’t want to duplicate the designs.
Still if I give those three away when they have already gotten them, I have to make three more.
Halloween Pillowcase
I think the Halloween pillowcase needs to go to the youngest niece. It just seems like her and I wonder if she will notice that it is not Christmas. Since I would be giving them out together, she will probably notice and think I am odd. Perhaps she will get two.
Flannel Pillowcase
Finally, this one is flannel and nice and cuddly, except for the cuff. It is also fairly staid. Not sure who will get this. Perhaps a spouse?
Last year, I thought about making pillowcases for all of the nieces and nephews. It didn’t get done. I didn’t do it. I made an effort, though. I pressed a bunch of Christmas fabric at some point and it has been hanging over a piece of furniture for months. For some reason, I decided to get those pieces of fabric out of my life. Well, not out of my life quite yet, but into a form where I can get them out of my life in December.
I made 7 pillowcases on Sunday. I don’t really like making pillowcases, but making them in batches is much better than one at a time. I get a feel for the cutting and once I deal with the cutting issues, the sewing is much, much easier. The sewing is actually really easy – 5 seams and the pillowcase is finished.