I bought this pattern a couple of years ago at a shop in Mt. Airy, Maryland called Patches. I finally dragged it out, as I said, to keep my clothes clean.
I took out the apron pieces I cut out last week, thinking I could whip at least one apron out on Saturday afternoon. Sigh. the first step has to do with making pockets and is virtually unintelligible**. I had no idea what I was supposed to do, so I did what I thought was best. I am sure the pockets won’t look as cute, but at least the apron will have pockets.
What I have accomplished
Sunday, I managed to understand step 2 and make the ties.
I also read through all the directions and just sighed again. How am I ever supposed to understand this pattern?
My mom came over yesterday and I asked her to read through the step for the pocket and she had to explain it to me about 5 times. I think what is wrong with the step is that it is stupid. The top of the pocket is turned down and then you are supposed to zigzag over the raw edge. That means the trim of the pocket isn’t finished. I like my stuff finished and I don’t have a serger. Mom said that the way I did the pockets will look better and stuff won’t get caught on the raw edges. I might turn over the top so that the text fabric shows on the top of the Phillip Jacobs print and visa-versa.
**Nota bene: I do much better when someone shows me how to do something, but I did turn off the podcast, slow down and read each sentence carefully, after which I let it sink in. I still had no idea what the heck to do with these pockets. ERGH!!!
I splashed grease on yet another shirt and decided that Super G and my Great Grama had a good thing going with the whole apron idea. I also remembered the aprons hanging in the shop in San Luis Obispo. I pulled out a box, which I remembered had some patterns in it. In the process found a huge cache of other bag, etc patterns –OOPS, I wondered where those were.
Apron Layout
When I can make more, why would I just make one? I might be in the mood for sedate one day and crazy another day.
Yes, I have cut out two aprons.
Apron Layout
Cutting is a good activity to do while at Sew Days as it does not require a machine, as I have said numerous times. I cut out one apron at the Sew Day and the other at the recent CQFA meeting.
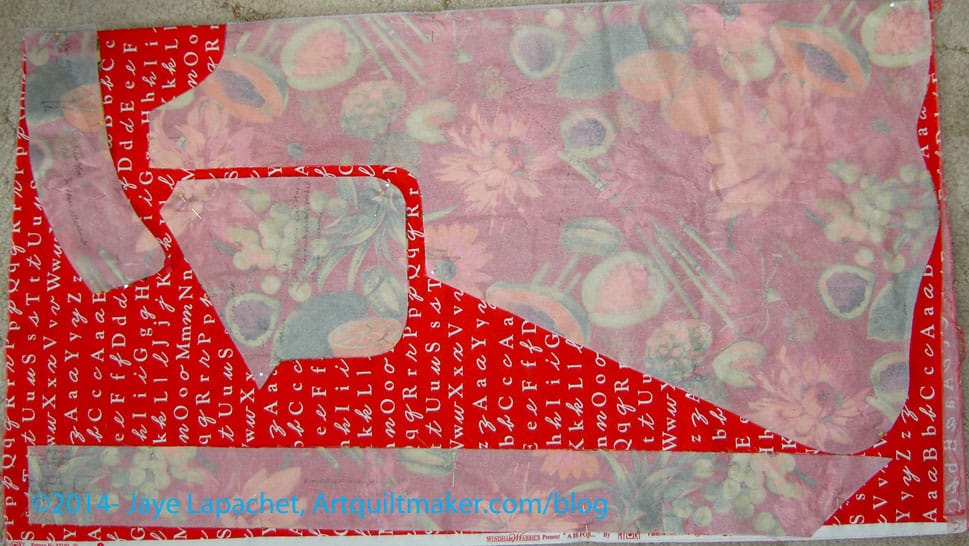
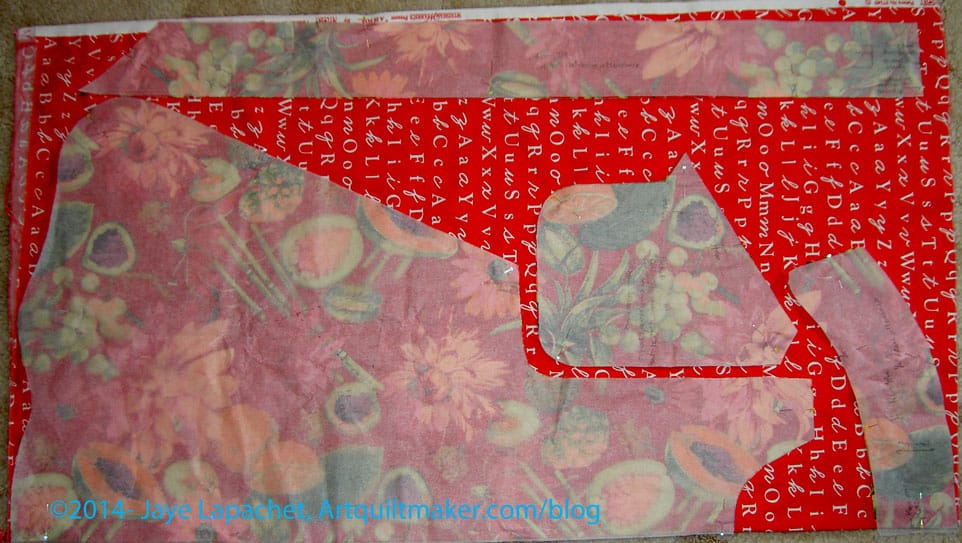
I needed help with the layouts and even though the second pattern, the Church Ladies Apron Pattern by Mary Mulari, says it only needs a yard, you can see the layout problems I had when I used one yard of fabric.
I decided to use a nice Philip Jacobs prints for one side In searching for the perfect other side, I came across a text print and decided that would be fun. I am sure I will get some modern points for the text fabric. 😉
Apron Fabric & Pattern
The other pattern is from McCall’s and is called Fashion Accessories “The Retro Collection” (#2811). I don’t remember when I bought it, but it has been around for awhile.
I have not started to sew yet, but stay tuned for that step.
This is a long overdue project. I started it in May 2007 in a workshop with Pamela Allen through the East Bay Heritage Quilters. It would have been easy to toss it into a Goodwill bin and move on, but because it was started in a Pamela class, I just couldn’t. I am not 100% happy with the stitching and the fish looks a little freaky, but I am really glad it is done.
I sent it off to a friend who is spearheading a Lovey for a mutual acquaintance who is going through a tough time.
You might remember that I mentioned that I made my BIL give up his winning pillow at Grand Parlor with the promise that I would make him one. The pillow forms were clogging up my fabric closet (and creating or encouraging Fabri-lanches), so I finally got busy with them last week.
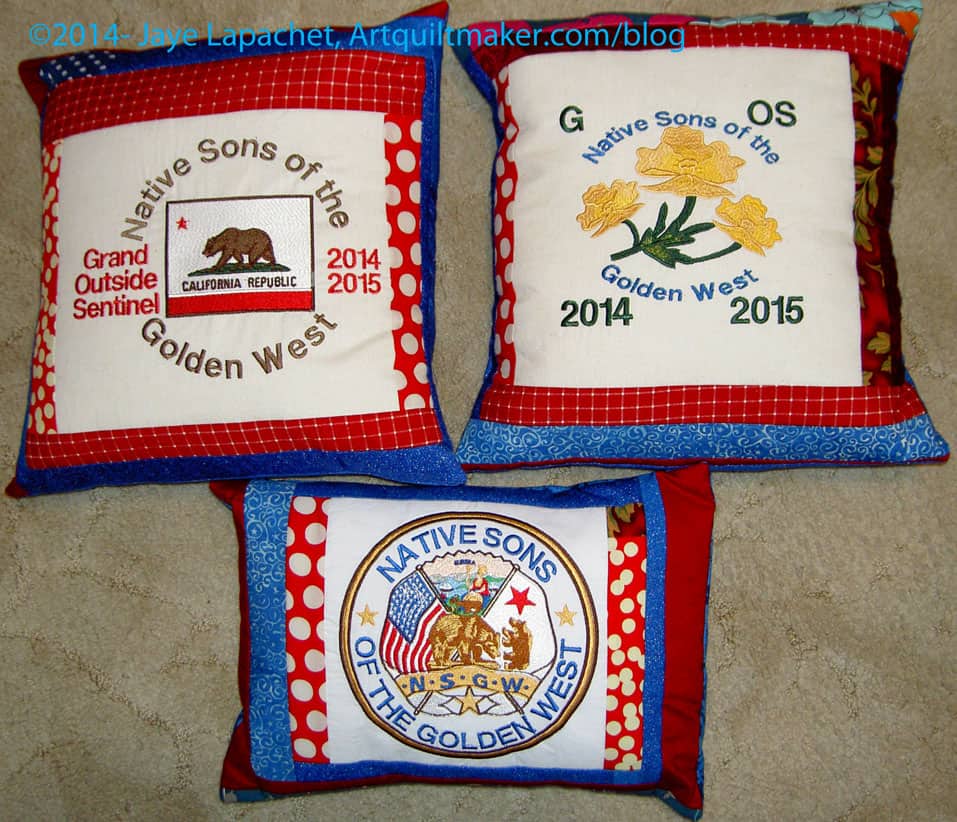
Right after Grand Parlor, my SIL sent me the embroideries. She made about five (I still have some generic versions). She did an exceptional job personalizing the two larger embroideries to reflect BIL’s office. I am really pleased with how the logo pillow came out.
First, I had to get the forms. I went to Joann with a coupon and bought 16″ pillow forms, which BIL favors. I also mentioned the project to my mom and she came over with a travel size pillow form. Suddenly the project went from 1 to 3 pillows!
Next, when I had a few minutes, I cut the batting and pinned the embroideries to the batting. Some of the batting scraps I was using were too small, which required some Frankenbatting. I bought some of the batting tape from the Fat Quarter Shop recently and tried it out. It worked like a charm. Yes, it is another notion and I could have zigzagged the two pieces of batting together, but I this method worked out very well and there is no lump, which I can’t seem to avoid when I zigzag.
Later in the week I started sewing. Pretty much I used scraps from my scrap bin for the strips, which was great. Some of the strips were pieced together to make them long enough, but I had some longish strips from the previous pillows, so there is some continuity.
Again, I used the Pointillist Palette fabric for the back (Mrs. K to the rescue again!).
I hope BIL likes them. I guess I have to go work on quilts now.
A few weeks ago I posted a pillowcase tutorial that used some sort of Christmas fabric. I think that I really want to make pillowcases for my nieces and nephews. For those that are married, I will make one for the spouse and children as well. I thought I mentioned it, but don’t see the words on my blog. It may have been that I was thinking about it since I made the three pillowcases for the littlest nephews last year.
I have a bunch of Christmas fabric that I bought on sale for gift bags. I never made those gift bags as I really have enough and am happy with the ones I have. The fabric was languishing (read taking up precious space and getting on my nerves) in one of my drawers. I finally decided that I would actually make pillowcases for pre-Christmas gifts for the nieces and nephews so they could enjoy the holiday season while they sleep.
This means the following: <Quilt Math ALERT: Breathe deeply and don’t panic>
13 nieces and nephews
+1 great niece
+1 great nephew
+1 niece spouse
_________________
16 total pillowcases
-3 pillowcases already made for nephews last year
______________________________________
13 total to make by Thanksgiving*
-2 already made this year (see this post (-; )
______________________________________
11 pillowcases to make by Thanksgiving
I will make as many as I can and I will start from the top down so kids in the same family or household all get the pillowcases at the same time if I can’t finish them by Thanksgiving. I feel a little bad that the littlest nephews won’t get them with their cousins, but since I plan on sending them early (so the cases can be enjoyed during the season) rather than giving them out at christmas, they really won’t know. I am pretty sure the 3rd and 5th graders don’t read this blog.
I washed all of the Christmas fabric for the pillowcases and decided to press it as I made the cases. If you have read the gift bag tutorial, you know that I don’t wash fabric I use for gift bags as I like the sizing to give the bags a bit of body and they will probably never be washed, so I don’t take the time. There is minimal pressing so I don’t break out from pressing the unwashed fabric.
Although I haven’t used up all the fabric I have, I had to buy some fun, modern Christmas fabric on sale after Grand Parlor because I loved the color. I think I bought enough for 4 pillowcases, but can’t remember.
Christmas Pillowcases
Last week, I finished up the two pillowcases I started the week before I went to Vancouver.
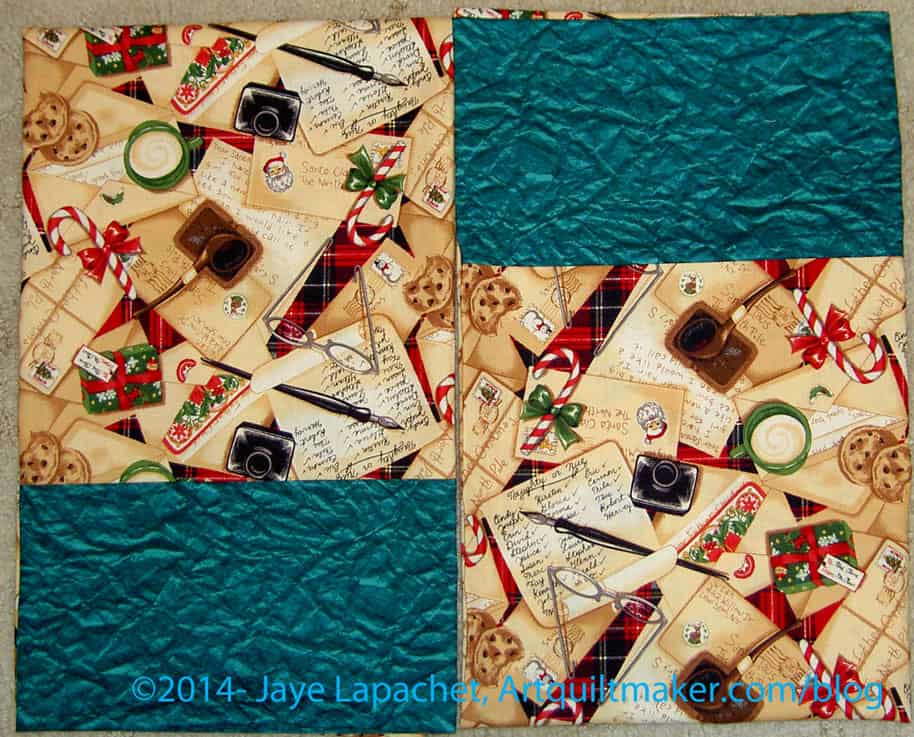
The main body of the pillowcases is the Christmas fabric and the cuff is some fabric that looks like crumpled paper that I got in the mid 1990s. I remember getting that fabric from Lisa Call, who bought a bunch of it in several different colorways and distributed it to those who ordered and paid. I was really excited about the fabric, then never did much with this particular colorway. I used the turquoise and rose colors in various projects. Green has never been a favorite of mine, but the fabric worked very well with the Christmas fabric. (Aside: use your beloved fabric before it ends up as the cuffs of pillowcases!)
I decided I didn’t want to bother with the trim. I don’t really like the way it has come out on the ones I have made. I also think it is an extra bit of annoyance when I am trying to plow through a project. I might feel differently on future pillowcases, but for now that is the word.
I do want to try piping again and if I can perfect my piping technique, then that might look lovely. On the other hand, piping might just make ugly lines on the nieces and nephews faces when they sleep. For now, I will leave it.
I might even get the packs ready to send to people, so there isn’t a lot of packing up required. That might be a little creepy organized even for me. We will have to see.
It is kind of fun to have a project like this. I don’t think I have had one since I made the card holders. I feel like I am spreading the quilt/fabric love when I make useful stuff that non-quilt people won’t wonder too much about. Who knows? They all might think I am insane regardless.
*Thanksgiving is kind of my unofficial cutoff time for sewing projects like this. I go later sometimes, but really try to have big projects done by Thanksgiving so that I am not sewing at the last minute. A lot of my spare time after Thanksgiving is taken up by writing cards.
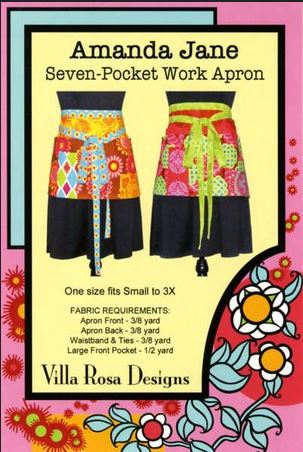
These had been on my list for a long time. I bought this pattern and two kits when we were on the North Coast in February. Making the aprons, which I think of as Cafe’ Aprons, has been on my list since then. I had washed and ironed the fabric and then moved the fabric carefully around my workroom for a couple of months. I finally got myself together to make them last week. I think my list, which has seen little movement in recent months, has been nudging me.
Apron Pattern
The pattern is on a little card, about the size of a postcard. I like the marketing idea, especially when I see a variety of these Villa Rosa Designs cards in stores on a rack. They are like candy and I want to buy 12. The idea is genius – one card, one project. Clever. Cheap possibilities. The size of the card, however, in terms of following the directions makes it very hard to read. I guess I am getting old, but I was squinting at the directions quite a bit.
The size also does not allow for very much explanation and several times I had to sit down, read the directions over and over, a little at a time, imagining the steps in my mind before I could take the next step. I can’t blame it completely on the size of the card. I am bad at following directions. This was especially true for the tie. Once I understood the directions, it was simple, but a photo would have been very helpful.
I see, now, also in small print, that Boutique Patterns has posted a page of tips and tricks regarding this pattern. The straps are covered on this page, so I should have looked; it would have been helpful. Once I figured out the straps, I liked the way they were attached to the apron.
As an aside, I liked how they show the apron, as made from the directions, looks on two different sized models. If I were making it for a more statuesque friend, I would definitely make the Apron front and backs taller than 13″ called for in the directions.
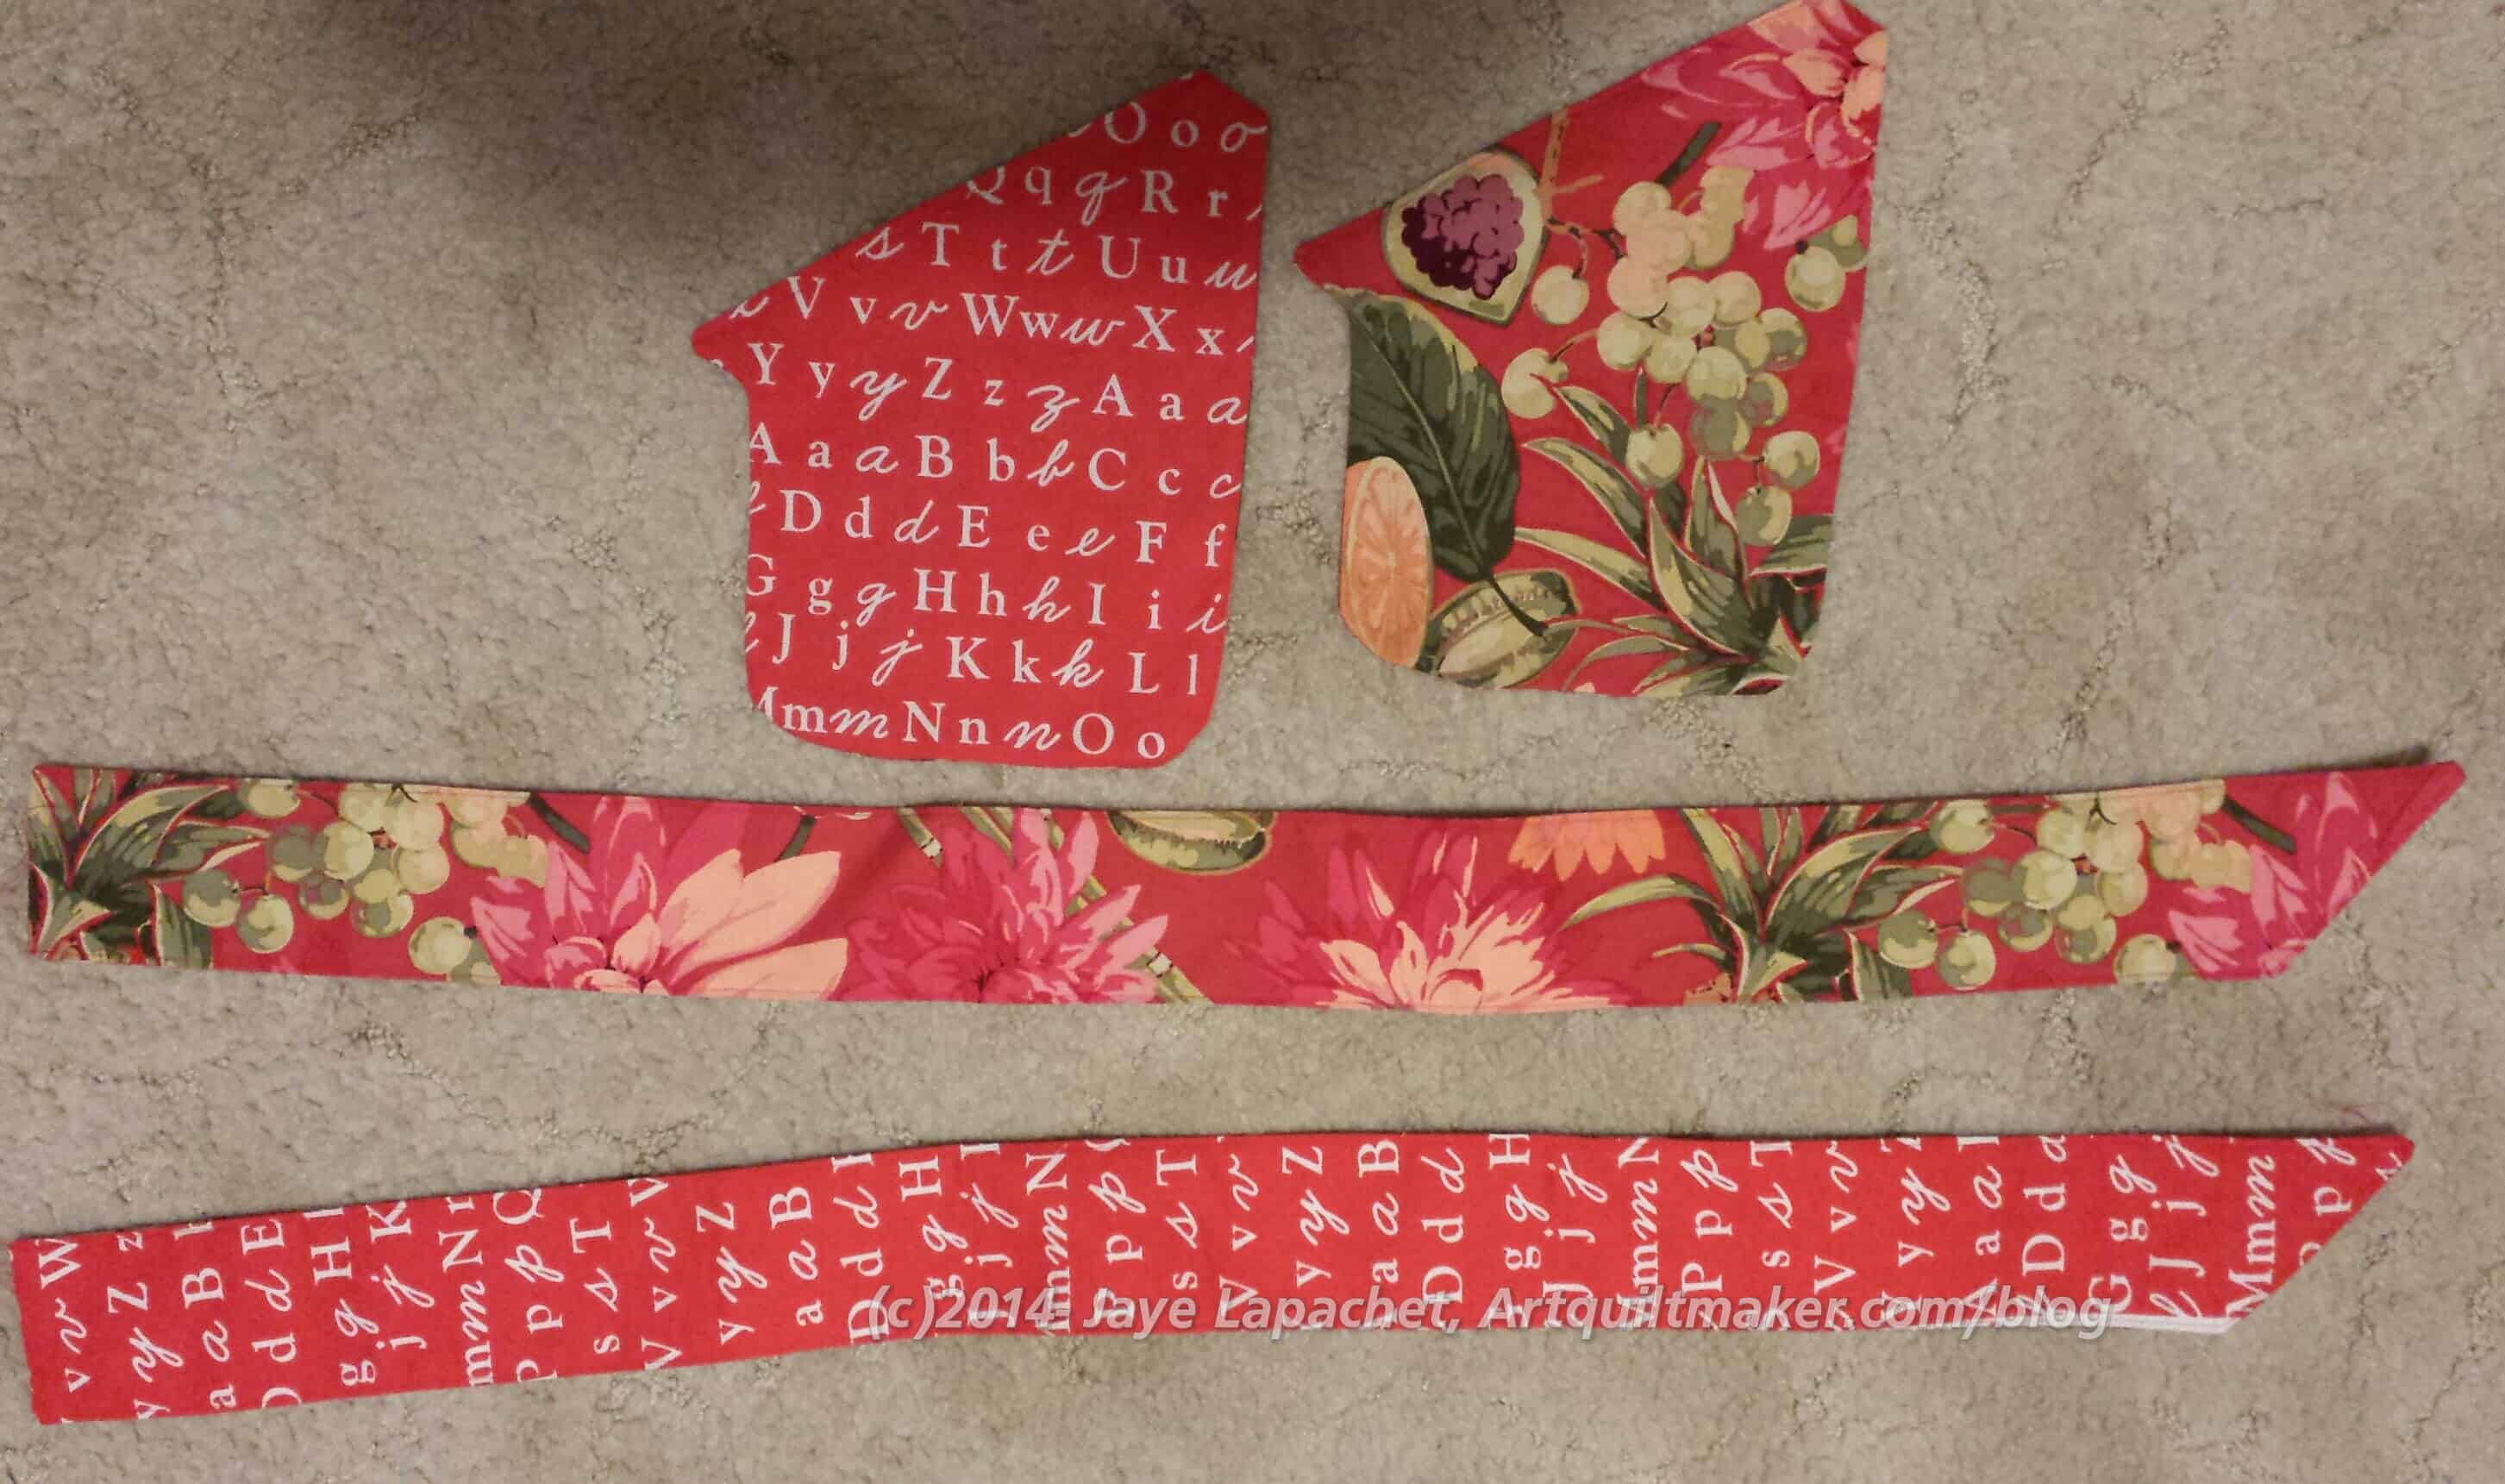
Bright Cafe’ Apron
When I finally made them I made three, one right after the other. I like to get accessories like this right and the only way I can do it is to go over the steps in fabric until I have the process down in my mind. I bought the kits to make a couple of gifts and the first one didn’t come out well, because I missed a crucial part of the pattern. I don’t think I want to give it as a gift, but we will see.
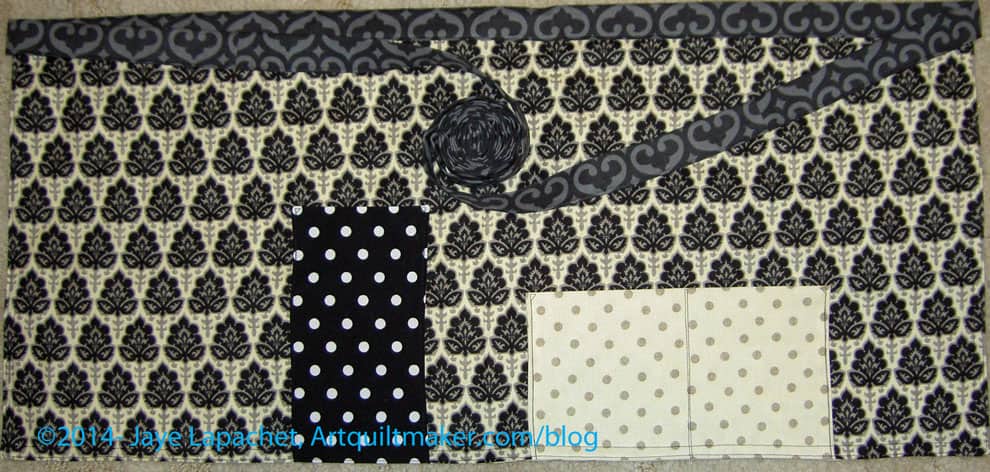
Little Black Dress 2 Cafe’ Apron
I think that this is a fairly easy pattern to modify slightly, as described above or in terms of pockets. I thought the small horizontal pocket was kind of a dumb size so I made it larger. I also didn’t hem the pockets, but doubled them in size, folded the fabric in half and sewed them closed. This made each pocket fully lined. That kind of pocket is easier to make than doing the hems. Less chance of burning my fingers on the iron, too. I thought that not having the wrong side of the fabric showing and having everything fully lined made the apron nicer.
Little Black Dress Cafe’ Apron
I wasn’t that happy with the kits I bought. I loved the fabric, of course, but there wasn’t enough for the Apron back and the fabric for the large pocket was not wide enough. Fortunately, I have plenty of fabric around and was able to fill in the gaps. It could be that this was explained to me when I bought the kits and I forgot.
I think this apron would be a nice quick gift for quilt or cooking friends. It is more of a work apron than a hostess apron, but would work for a variety of crafts as well as not-too-messy-cooking.
I needed to get back in the swing of sewing last week after being out of town. I don’t know why I have so much trouble getting back into the swing after being out of town, because all I really want to do is sew. I am sure there is some guilt about having fun mixed up in there. Oh well, I think about that later. 😉
Paris Pillowcases
Anyway, pillowcases are easy and I wanted to cement the process in my mind. I had just ironed some Paris prints and decided to make them as a birthday gift for a friend who has everything.
I was inspired by my sister’s love of Paris and France to buy these prints, but I decided that they were too brown and muted for me. I bought the Black Dress print at Scottie Dog fabrics in January and thought that fabric, used as a cuff, would tie the set together.
I know that three is an odd number for a gift, but that was all the cuff fabric I had. I am not even sure I will be able to cut a piece of it for FOTY 2014. I might have another piece somewhere. We will see.
I am pleased with how they came out and think the recipient will like them. I hope so, at least.
As you read this, I have hopefully just returned from another Grand Parlor. With any luck, I did not say something stupid and embarrass DH. With a little more luck and some preparation, I looked nice and people spent a lot of money for Cleft Palate buying raffle tickets to win the pillows. I am writing it in advance so I don’t have to worry about posting wearing high heels and lipstick. 😉
These were on my radar. Really they were. My BIL asked me to make them in plenty of time and I agreed. I really had no mental problem making them. Not much of a problem anyway. I don’t like making pillows and I always seem to have some problem making them. I just didn’t start them.
Eventually, the pillows really and truly entered my consciousness. I asked DH when we were leaving for Grand Parlor. I have been having a problem lately fitting where I am in space and time with the actual days of the week. I am not sure what that is about. I blame the months and a change in schedule. They seem really long lately. Anyway, I asked DH when we were leaving and he said May 18. I realized that I had a week (Yes, 1 week!!!) since we were talking on the Saturday before Mother’s Day.
So, I got started. I spent most of the day on Sunday (Mother’s Day) making pillows.
Fabrics for Pillows
First things first, I got DH to approve the fabrics. These aren’t what I would have chosen, but he knows the constituency, so I trusted his judgement.
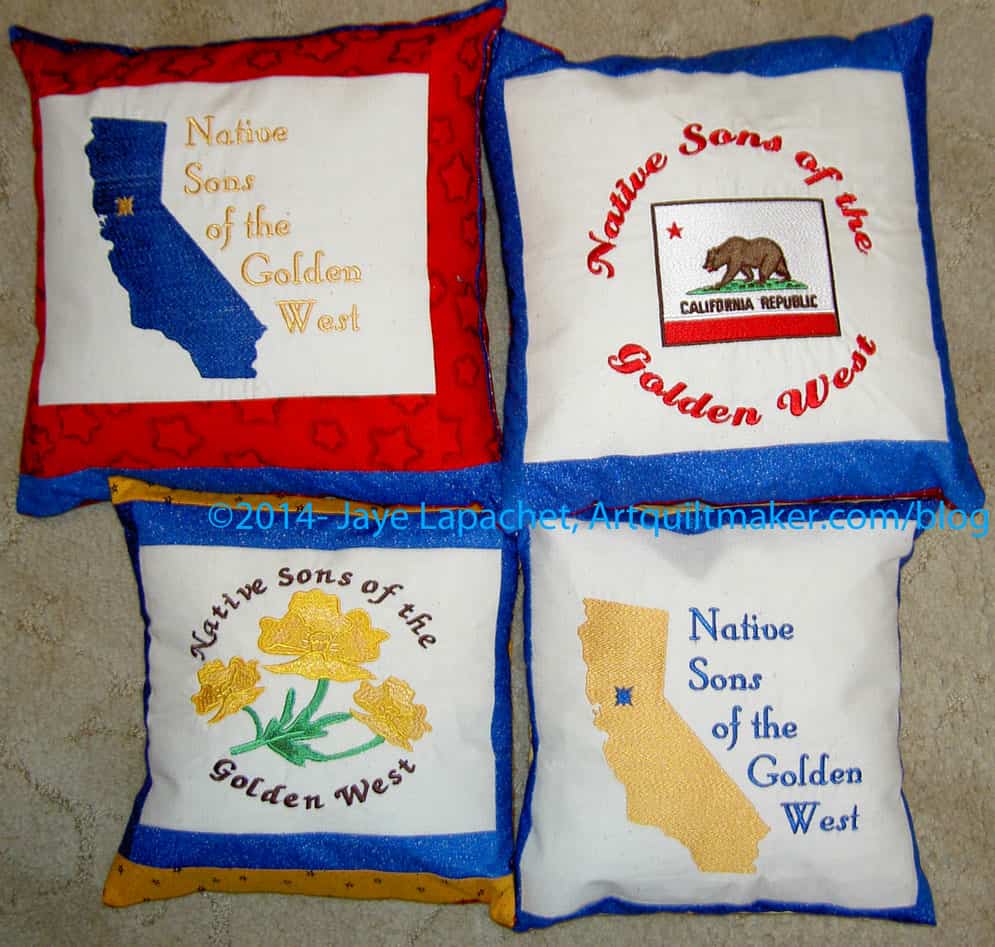
He wanted a color scheme of blue and red and another of blue and yellow. I thought about making sets of two, though I don’t know if that is the way the pillows will be raffled.
Mrs. K. saved my bacon by sending me more of the Pointillist Palette blue. I know she didn’t even intend to send it for the pillows. It is an old fabric and one that got me hooked on quilt fabric and building a stash. She sent me some reserves recently, I think, as a subtle way of encouraging me to finish the series of Pointillist Palette quilts. 😉 [As an aside, I found some of the blocks for the next in the PP series of quilts which means I can get started on them again.]
She saved me, however, because I am mostly out of dark blue prints. I don’t buy or use them much and whatever I did have I used for the Stars for San Bruno quilts. I didn’t think I had any dark blue and then I saw the one on the top in the above photo. It is perfect and DH approved.
Tension Problem
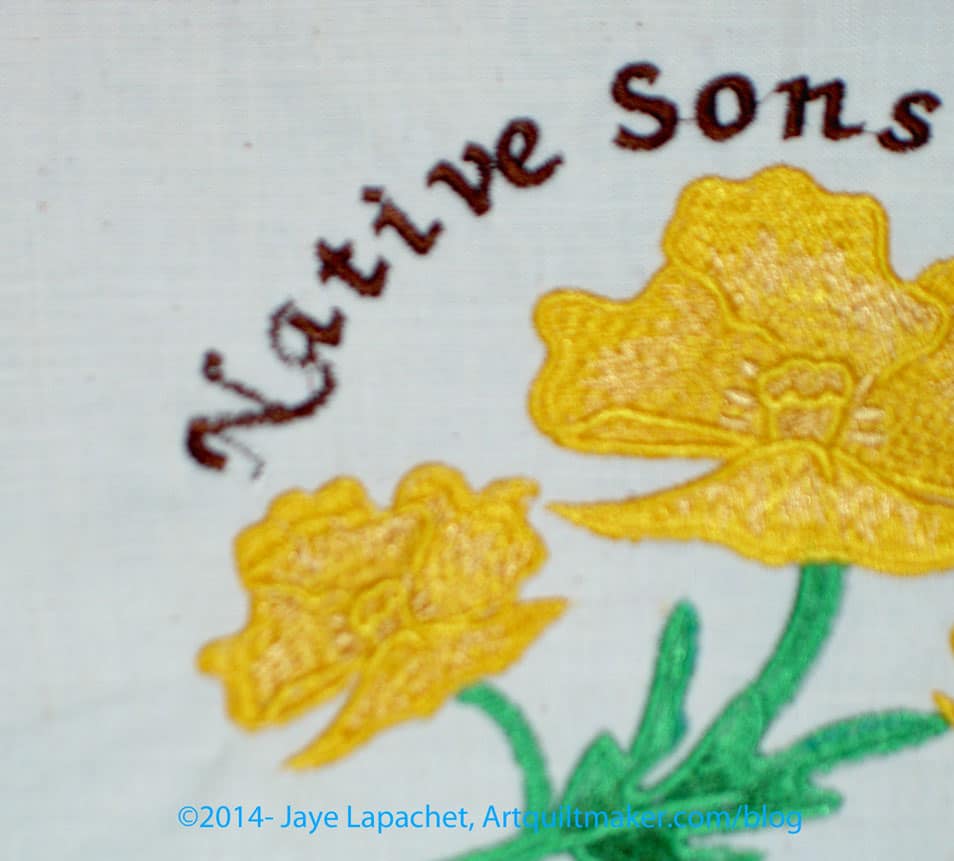
I noticed that SIL had a tension problem on one of the embroidered panels. Tension issues happen, even in the best of circumstances. We all know that. I didn’t think that people would notice immediately, but I also didn’t want any awkward questions later.
I had recently used my fabric markers, so I pulled them out. No brown. A number of them had dried up and had to be thrown out. The brown must have been among them. I have another set, but I couldn’t find it, then I remembered the Staedler set I received for my birthday a few years ago.
I carefully colored over the parts of the N (see above in the poppy panel) and the A with the brown. If you look closely you will see that the brown of the thread and the brown of the marker do not match. It is a very slight difference and I don’t think the Muggles will notice.
Then I just started sewing. I forgot to use batting, so the blocks are a bit thin, but I think they will be ok. I’ll try to remember for next time.
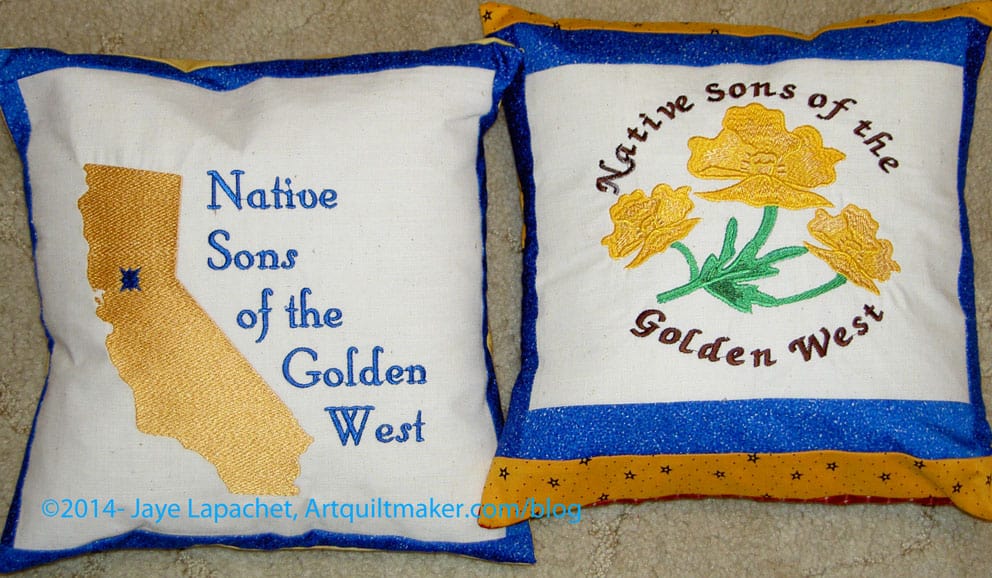
Yellow & Blue NSGW Pillows
One issue turned out to be that I didn’t have the forms. My SIL bought the forms and originally I thought I would just give her the cases, she would stuff them and all would be well. I got nervous, though and worried that they wouldn’t fit. I needed to check the sizing to be sure they weren’t saggy or too small.
To alleviate my fear, she brought them over and, fortunately, the forms she bought worked with the pillow covers I made. I didn’t have to make any adjustments.
Red & Blue NSGW Pillows
I really had to sew a lot less than I thought. I did a good job cutting the embroideries apart so they were fairly close to the finished size of the pillow forms. I had way more fabric than I needed.
I finished the last bits, stuffed them and took them to Grand Parlor where I told the boys to charge a lot for the tickets. The proceeds of the raffle went to the Charitable Foundation. We had a separate sale of pins and bracelets for Prostate Cancer Awareness (BIL has it).
2014 NSGW Pillows Complete
You can see photos from the event on Flickr or read more about the event on another blog.
DH is firmly ensconced in his position on the Executive Board of the Native Sons of the Golden West, so I was off the hook last year in terms of making pillows. The last time I made them was in 2012. They are extremely popular and I got a lot of questions last year about whether I had made any. It is kind empowering having control of an item that people really want. It is also shocking that others don’t make pillows for this event. People really like them.
DH’s Grand Presidential year is approaching and he needs a Marshall. The Marshall is an Executive Board position in which the guy makes sure he has the names of all the “dignitaries” correct, knows whether the dignitaries have a wife, girlfriend or daughter along as companion and that the AV equipment works at any given function. He passes all the relevant information to the Grand President. This position votes in Board votes and has a say in discussions as well. As I understand it, of course. DH asked his brother, which means there will be a Hospitality Suite this year with all the trappings of a political campaign: portable bar, raffles and lots of hand shaking.
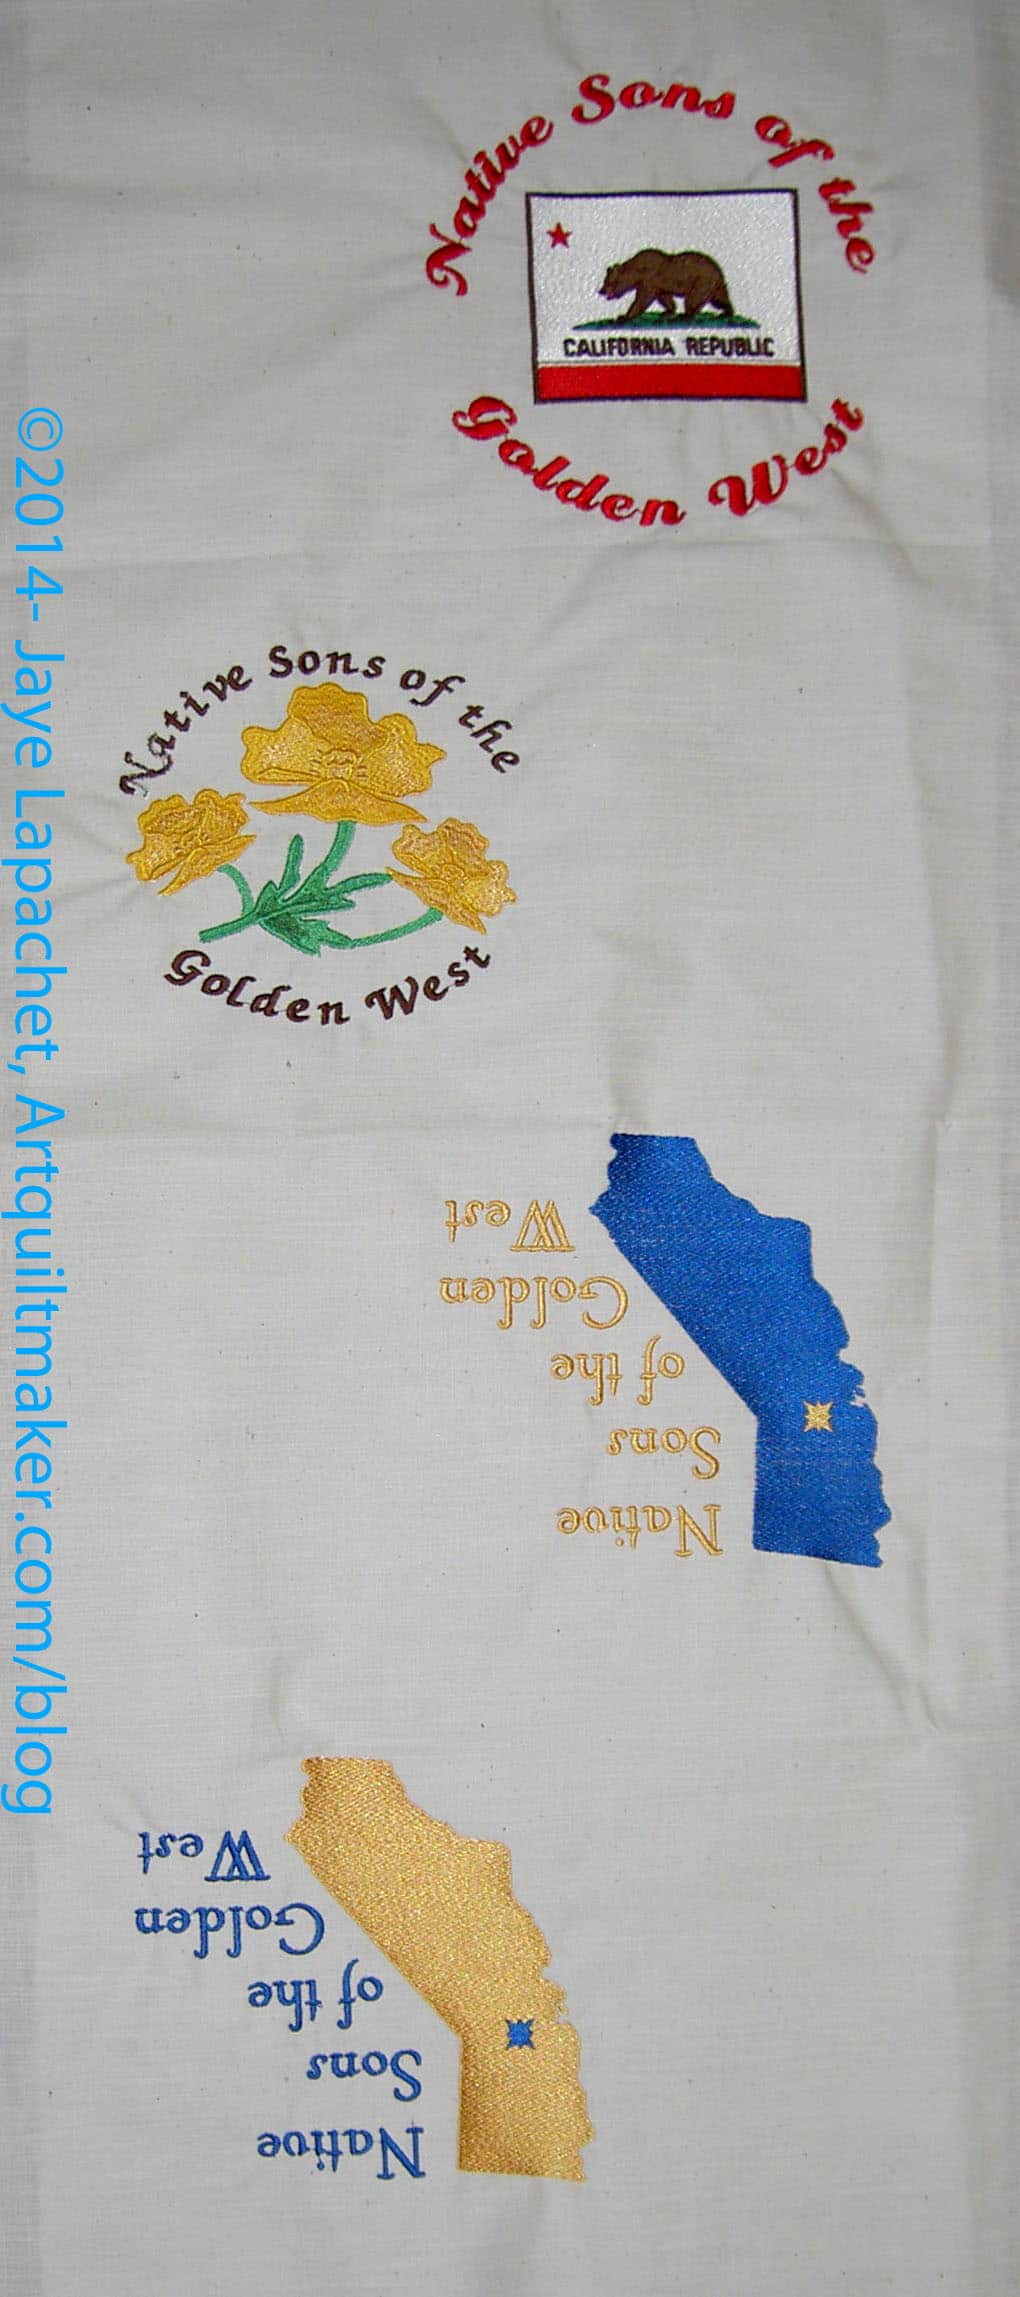
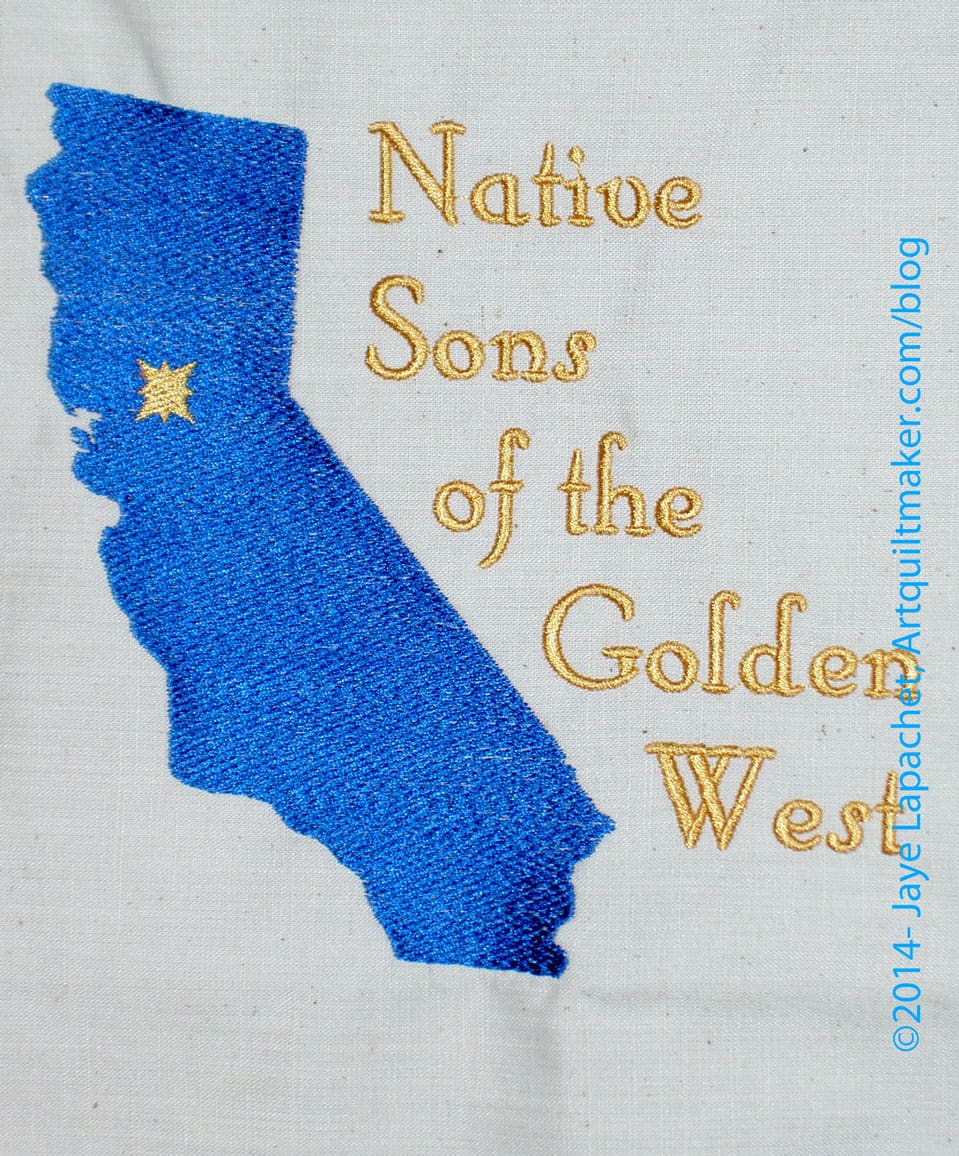
NSGW Pillow Embroidery
I was, apparently, first on his list for the raffle requests. His mom and a neighbor always make gift baskets. He asked me at least a month and a half ago to make pillows and he wanted four. No problem, right? Pillows don’t take that long to make, but I always seem to have problems making them. They are also very popular and bring in a lot of money for Cleft Palate. I also like having my work ‘out there’ for the Muggles (as Frances says) to see. The more people we have admiring handmade work, the better.
I immediately emailed my SIL with examples from previous years and she agreed to do the embroideries. She couldn’t do them until May 6 as she was heading off to graduation for our niece in Michigan. No problem.
NSGW Pillow Embroidery
We don’t, yet, have a .blf file (I think???) of the logo of the Native Sons, so SIL uses various embroidery motifs to come up with suitable designs for the embroidered panels. The software that works for her machine is so much more sophisticated than the embroidery module on my 9000. I never did get the software for it, but I am glad I didn’t spend the money as embroidery software has gotten so much easier to use, more workable with a computer and, generally, so much more sophisticated.
The bear, the California flag and the outline of the state work well and are popular. Even though we don’t have the official logo, once we add the name, people seem to like these designs.
NSGW Pillow Embroidery
While I can take very little credit for the designs, SIL and I worked together on some designs when I was in DC in 2011. The pictures I emailed her were from that trip, I believe, though they could have been from the 2012 pillows. The designs are similar.
I got SIL’s work on the 7th or 8th of May. The first thing was to cut the embroidered panels apart into squares.
Then piece the panels to the right size, then put the back on.
Done.
NSGW Pillow Embroidery
Go to the conference and have people fling money at the raffle box.
My last effort with a pillowcase was frustrating. Amy left a comment that really helped me make this one. Except for messing up the French Seam and having to rip it out, this pillowcase went together really well.
Amy said that the selvedges go on the side of the pillowcase. What I did was leave the selvedges on until I had sewn the first seam and used the numbers and other directions from the Twiddletails tutorial. Sometimes a comment as simple as that can really help (which is why your comments really matter!!!).
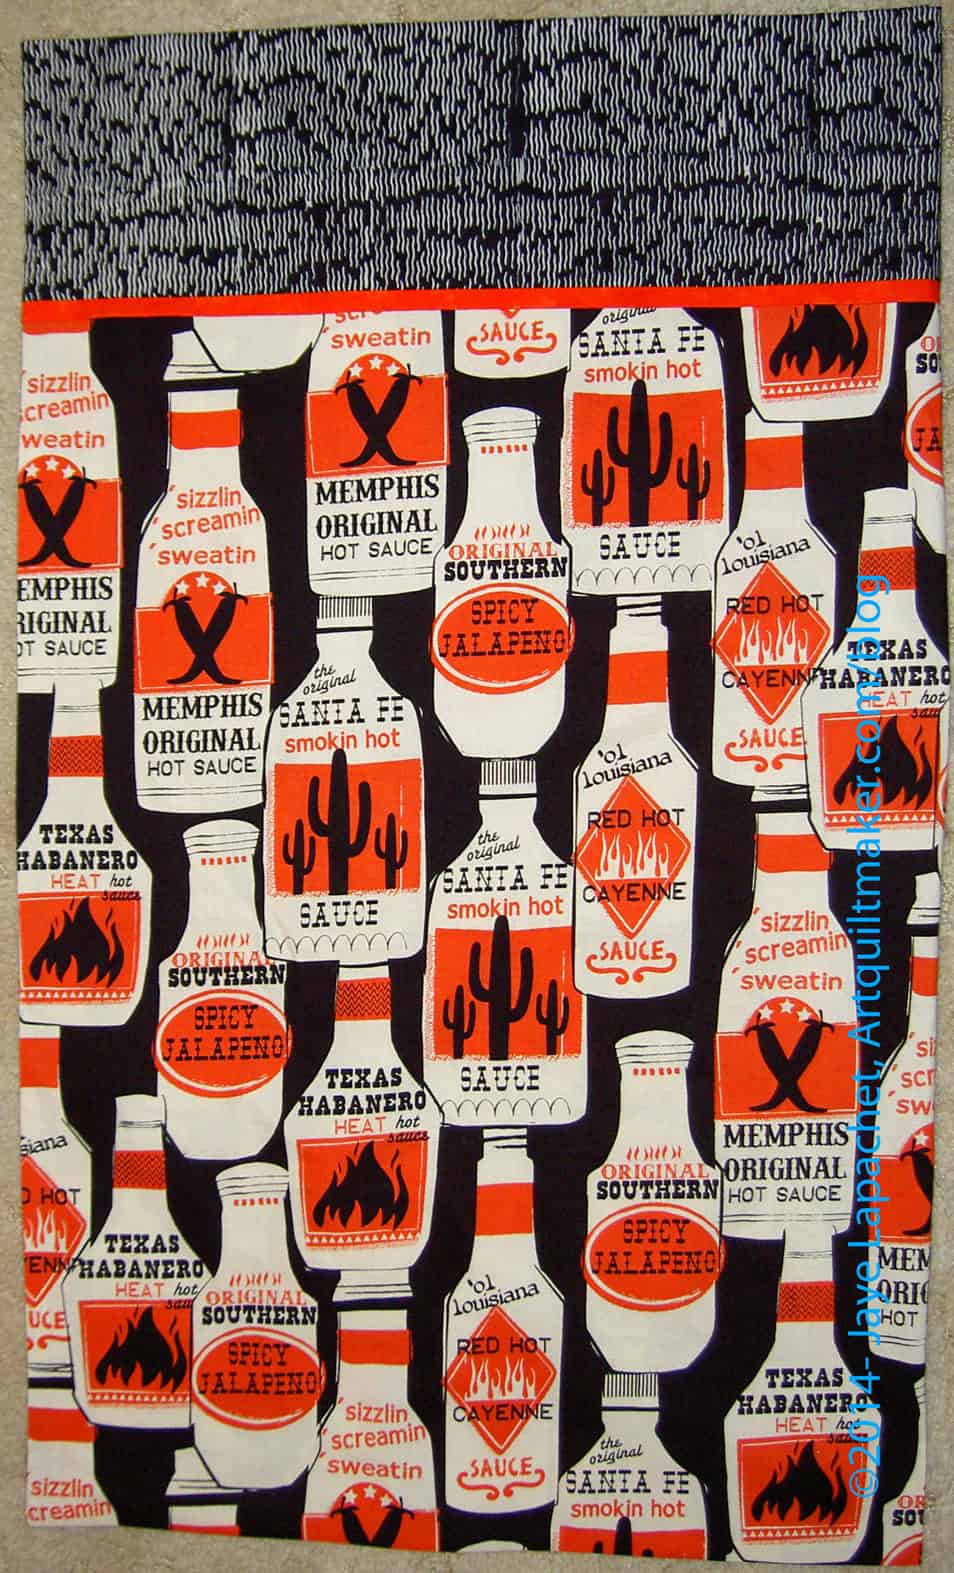
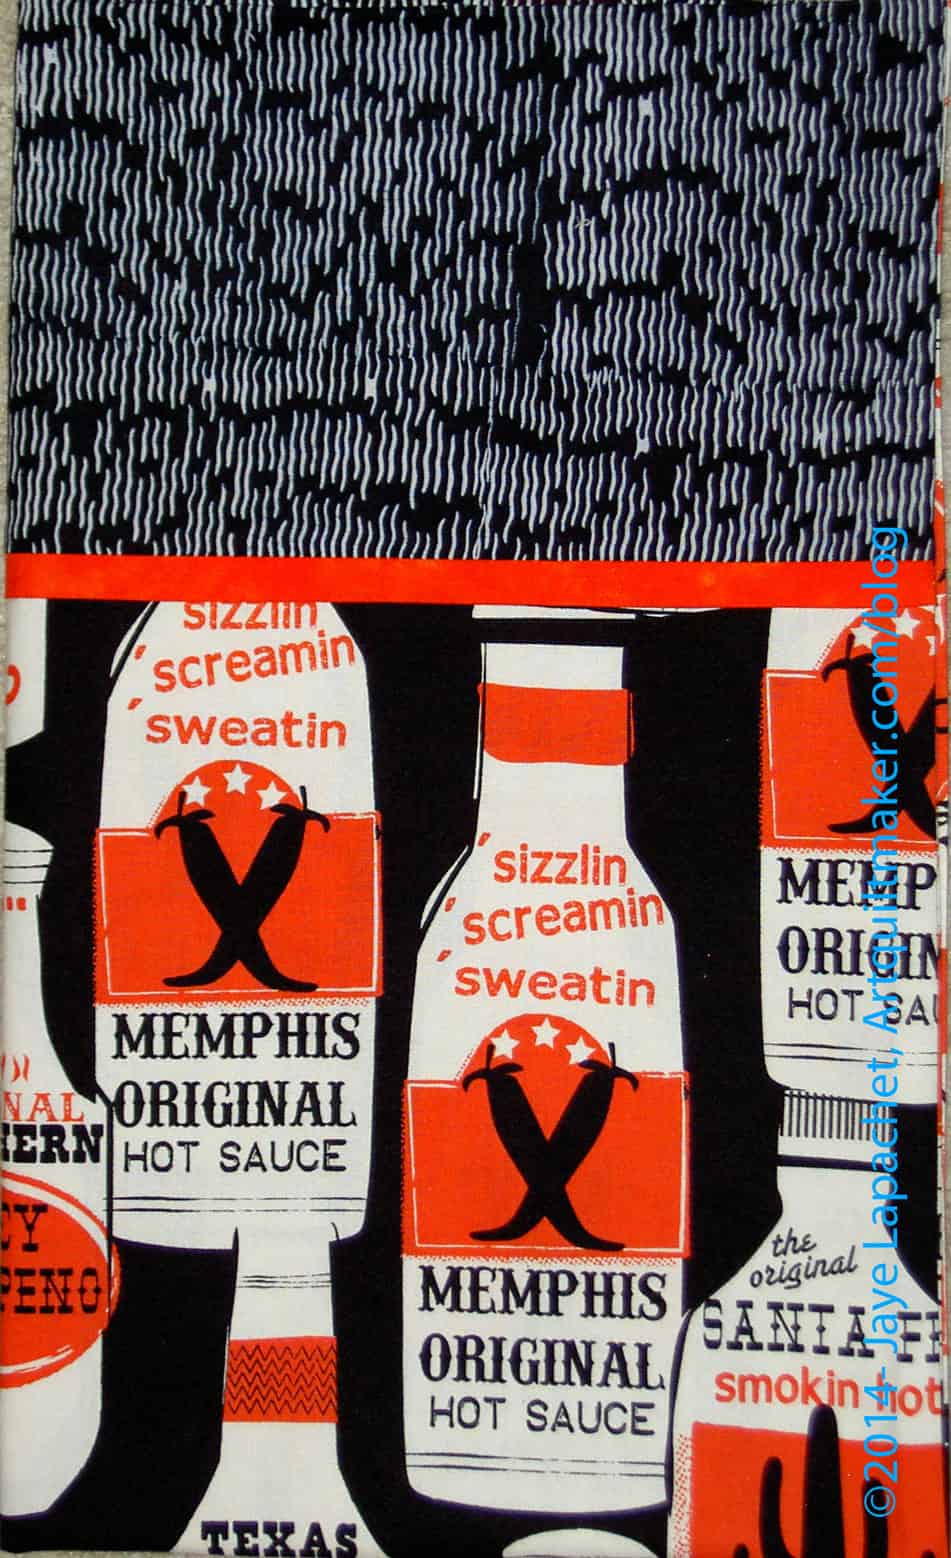
I am not sure I bought this fabric for a pillowcase or for a pillowcase for my nephew who is off at college, but I washed this fabric and decided that I was neglecting the poor soul.I like to make things and send them to my nieces and nephews who are off at college. You have seen a quilt or two that have gone off to colleges around the country. I have also made pillowcases and have a few other items on my list to make as gifts. Yes, pillowcases, I am sure get strange looks from their recipients, but I don’t care. They are good vehicles for fun fabrics. Where else could you use hot sauce fabric?
Smokin’ Hot Pillowcase – folded
After I finished the top and back for Super Secret Project #4, I decided to tackle the pillowcase. I am really glad it went together easily, because I don’t think I could have taken another frustrating pillowcase experience.
It would have been a shame, too, because I probably would have given up on pillowcases and I really can’t think of another way to use fun fabrics like this.
I really am completely thrilled at how this one came out. It came together really easily and even the trim is matched up pretty well. No, I didn’t match the pattern of the fabric. That is a fight for another day.
I hope this pillowcase doesn’t look too Halloween-y
I don’t know if his new mom will name him Henry, but he looks like a Henry to me.
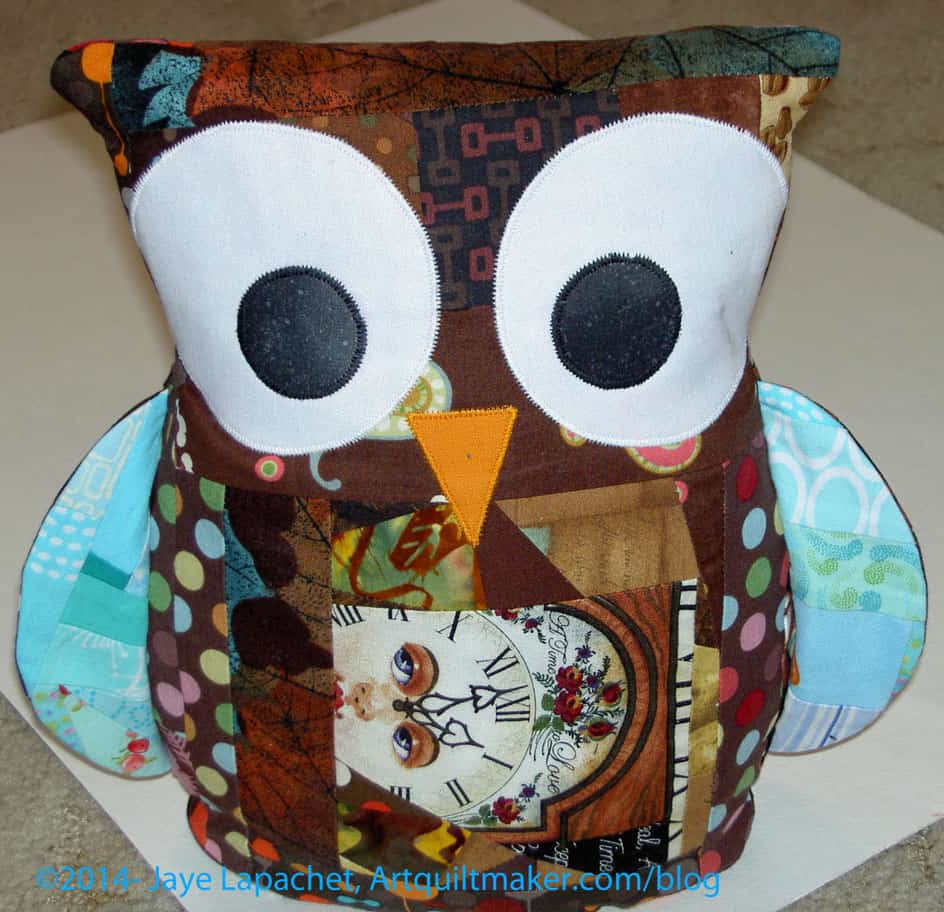
Remember the mosaic quilting I showed you at the beginning of the month? Here is what I was working on. I just sent him off and hope his new mom likes him.
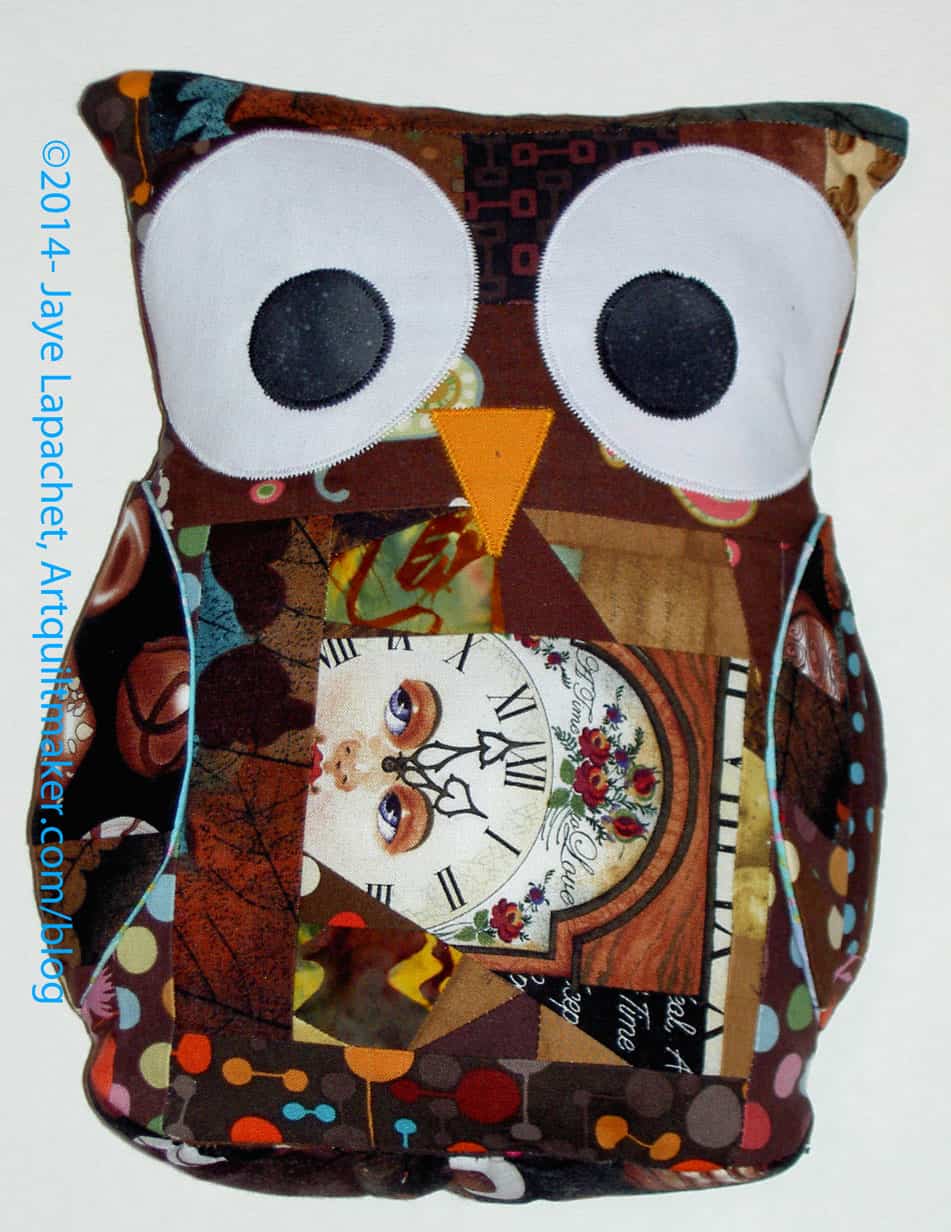
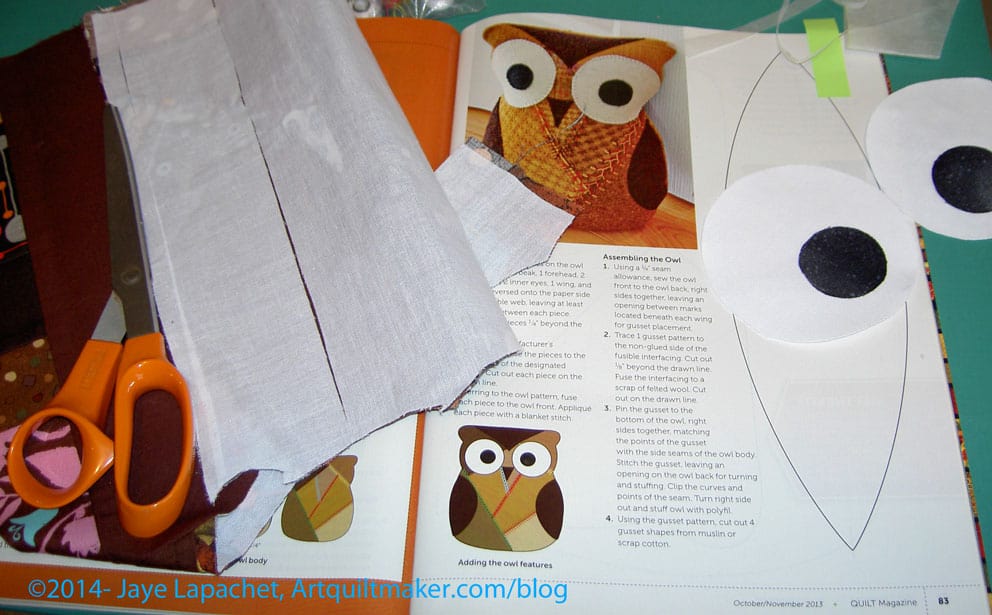
His whole body is made from small scraps of brown fabric. The inside of the wings are also mosaic pieced. The beak is made from a scrap of a mango colored solid. The eyes are rather large scraps that also came out of the scrap bin. He is Scrapilicious!
Henry -Wings Closed
I saw the pattern (Quilt magazine, October/November 2013) and immediatelyt hought of a friend who was going through a tough time. I wanted to make him, but I don’t want to keep him and I thought he would be perfect for her. It took me awhile to make him and since I have been working on him, things have gotten better for Henry’s new mom.
I did the wings a little differently than the pattern suggested. The pattern said to applique them on, similar to the way the eyes and beak were applied. I thought it would be more fun if the wings had some dimension and it wasn’t that big of a deal to make them move.
The original pattern had the maker using wool scraps and crazy quilting over the seams. I wasn’t about to use wool with all of this cotton laying around. Crazy quilting would be a great idea, but I didn’t want to take the time. As I have mentioned, there is a lot of chaos around my work table right now and I needed to make some headway through it. I am considering making another one soon-ish and may go with the crazy quilting on that one. We will see.
Henry in Process
I put my cutting table to good use for this project. It is a good thing I cleared off part of it as I would not have had enough space for it.
I stuffed him with schnibbles so he is heavy. I still need to sew a label on to him.
The toys in this book are really imaginative. Making some or all of them would really add some fun to the creative toy box of a child in your life. This is one of the books that I gave away in November’s Black Friday Sew-in, but didn’t really get a chance to look at. Shannon at Lark was able to send me a copy. Thanks to Lark Crafts for sending this book to me to review.
I can imagine an aunt or uncle making the characters in this book and sending them, one at a time, to a niece or nephew. The other wonderful thing about the creatures in this book is the opportunity for adding texture, as in fabric texture, to a child’s life.
If you have no children in your life that should not deter you from this book. Toys on your desk at work draw people in to talk, collaborate, shoot the breeze. Flip dolls, which seem to not really be readily available, are a twofer. Two toys in one and an additional spur to the imagination in children and adults.
Like many of Lark’s books, this one starts with a “Getting Started” (pg.10) section that includes tools, materials, basic techniques, special skills, and customizing. There are sidebars, two of which caught my attention, “The History of Flip Dolls (you know I love history!) and age appropriateness. I noticed, throughout the book, that the author discusses modifications to accommodate the ‘mouthiness’ of smaller children. All of the sections have a description for each entry. For example, there are three kinds of scissors listed in the tools section. Wilson writes a few lines about why you need each, e.g. no cutting paper with your fabric scissors! The section is illustrated by photographs and whimsical drawings. It also includes the basic shape and some examples of how to modify it to create different creatures.
Following the introductory section are three additional sections, which provide the projects in ever increasing difficulty. The sections are Zip & Stack, Hide, Seek & Go, and Flip & Turn.
All of the projects have a difficulty rating and it took me a minute to understand how they were coded. The arrows were a little confusing, but I got with the program quickly.
Some of the cleverness of the projects shows up in the section. The Cheshire Cat has a pocket in the back with additional mouth pieces (lips, mustache, etc) that add to the fun of this toy. My favorite project in the Zip & Stack section has to be the Smiling Crocodile. I LOVE the zipper for the mouth. There are brief instructions for shortening a zipper and also a good description of installing a zipper.
On many of the projects there is opportunity for your own creativity. The wings of the flying horse could have sparkly embroidery floss, the plates on the shell of the turtle could have embroidered outlines.
In the Hide, Seek & Go section, the Winged Horse could do double duty as a regular horse as the wings are removable. I also like the front panel of the Nuts & Bolts Robot, which provides additional opportunity for creativity.
Finally, the Flip & Turn section has the flip dolls. There is a caterpillar and butterfly combination, George & the Dragon (you might need two so some actual swordplay could happen!), and the Owl and the Pussycat. With the directions, I can see a lot of other flip dolls: Red Riding Hood, Cinderella and Snow White with the Wicked Queen under her skirt as a few examples.
The one small thing I didn’t like about the book was the materials used. This is a small thing and easily remedied. I wasn’t fond of the fabrics from which the projects were made. I thought they were too subtle and old fashioned looking. As I said, that is easily remedied by using your own fabrics. Also, I would have liked to have seen some tiny red beads standing in for blood drops on the vampire (pg.25). Looking at finished objects made from fabric in a book is much different than feeling the item in person.
Templates are at the back and have to be enlarged, so plan ahead. No late night runs to the copy store!
I like this book because it is different. The projects are not your usual run of hte mill projects. The toys are clever and inspire the imagination. I also see the spark that can lead to readers jumping off and taking the ideas to different levels. Take a look at the book and enjoy!
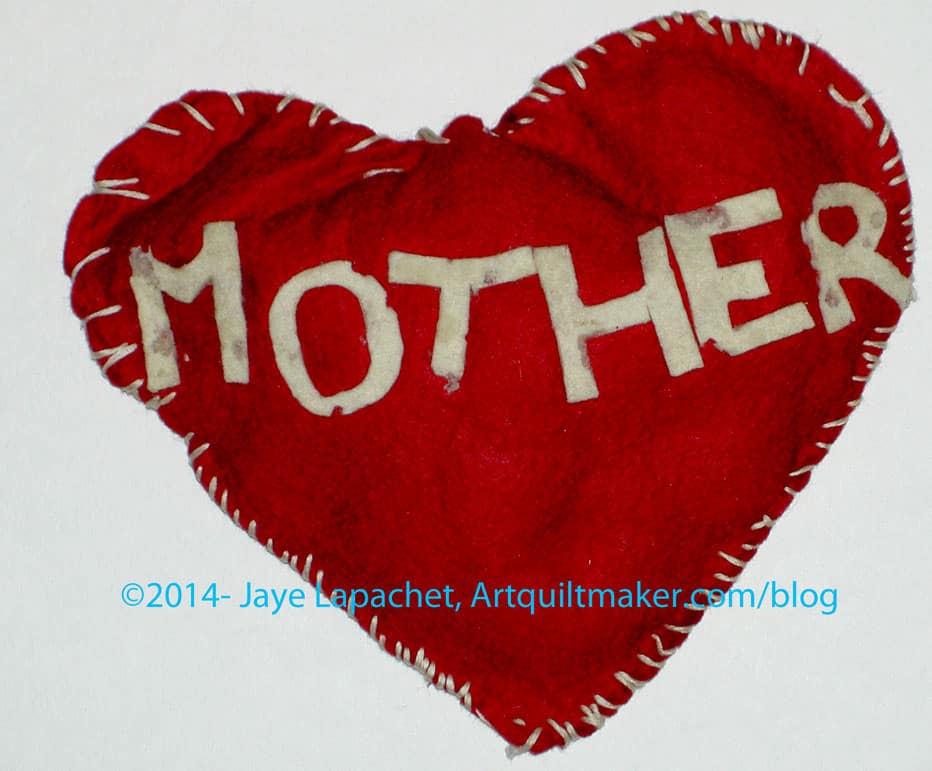
Recently Mom cleared out her storage unit. She found a lot of great stuff, like her jewelry box and some not so great stuff, e.g. my childhood in a plastic sweater box. I had mixed feelings as I went through the box. Clearly, these things meant something to me, or my mom, at some point, but, frankly, most of them I didn’t remember. I put them away. When I am dead someone else can decide to toss them.
Childhood Heart Pillow
I did find this pillow, though, which I thought was very sweet. It doesn’t have my name on it, but if Mom says I made, I have to believe her. It looks like something I would do. I love the wonkiness of it. I also love the visible stitches. It seems heartfelt to me.
It also seems odd, in a way, because I never called my mom ‘Mother’. That must have been the pattern.
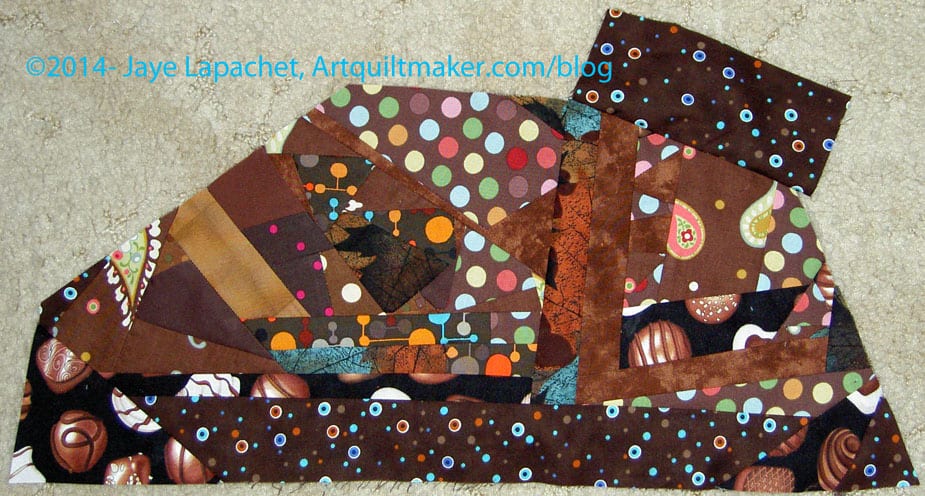
Some people call this crumb piecing. I have always called it mosaic quilting since I saw Shannon Williams on Simply Quilts about a thousand years ago. I like the term mosaic quilting. It sounds fancy and important. 😉 Crumb piecing sounds like something I have to wipe off my counter with a sponge (with apologies to Bonnie Hunter!)
I consider this to be making new fabric from scraps – some very tiny scraps in some cases. I am putting scraps together into a larger piece so that I can cut it up later using pattern pieces to make something new.
When I am working on a piece like this, I often use it as leaders and enders. I usually have several small pieces to which I add, then at some point I sew them together to make a larger piece. The piece above is getting to large to work on comfortably and I have not yet sewn it to the larger piece.
There are a lot of seams and these pieces get to be pretty heavy. I like them, though as I think they add interest and create a topic for conversation in a piece. Also, it is a technique you can use to draw people in closer to look at your quilt.
Once you have made your ‘fabric’, you can cut it up again into squares or other shapes and use them as patches for your quilt. You have to be aware of the seam allowances, because they can get quite thick. This technique is a good time to press your seams open.
I have several pieces of this new brown ‘fabric’ that I am making to use for a project that will be a gift for a friend. I will show you the project eventually, but for now you will have to be satisfied with the sneak peek above.
Some weeks ago, I saw a backpack in the Scrap Lab article in an issue of Quilts & More. The pattern is also on the web on Allpeoplequilt.com. It captured my attention in a “hhmmmm interesting” kind of way. After meeting a young friend at one of DH’s events, I decided to sew it for her. I wanted to make it, but I didn’t want to keep it, so this was a great solution. The Fat Quarter Shop, at that time, had a fabric kit (no hardware), which I bought.
Scrap Lab Backpack Bag Body
Last weekend I started on the project. It has a lot of steps and the directions were not always completely clear *to me*. I know magazines have limited space.
The pattern calls for fat quarters to create the bag body. That is what came in the kit. The pattern also said that I should cut 2″x21″ strips from the FQs. The problem turned out to be that the FQs were not 21″ wide even before I squared them up. It made no sense to me since that is what I understood the whole point of the Scrap Lab is – to use a small amount of fabric. I worked at adjusting all the measurements to accommodate this problem.
Sewing Strips
The backpack requires two panels, like the one made from strips (shown above). In order to keep the strips in order, I laid them out on my design wall and sewed them in order. I found that, in order to keep them in the same order, I had to sew them in the same order, but upside down. For example, I always placed the strip I wanted to end up lower on the panel on top to sew it.
I was further disappointed when I also found that the half yard of background was not enough for all the pieces that needed to be cut. I am not sure if I cut wrong. I didn’t see a cutting layout (like they have in garment sewing), so I cut the largest pieces first, but still did not have enough. Shifting gears deftly, as I did not what a ‘lack’ of fabric to derail the project completely, I chose a different fabric for the pocket, which will look nice and will solve that problem. All in all these fabric problems were unexpected and, as I said, disappointing.
I worked on it on Sunday this past weekend. It has a 1/2″ seam allowance, so I couldn’t really make progress on my various leaders and enders projects without the 1/4″ foot on the machine. That was a little frustrating.
I did make good progress on the backpack, though. I have the straps and drawstring done. I have the bag outside and the lining done. I wasn’t able to finish it, because I didn’t have a slider buckle/triglides. I also didn’t really understand what they were even after searching out a photo on the web.
The slider buckle/triglides turned out to be pretty hard to find. I found some nice ones in the UK and Australia. Amazon has packs of 50. My local Joann and Beverly’s had none. ERGH! Monday, after work, I went to Britex and they had them there. They usually have weird stuff like this. With bags being so popular, I was surprised that these were so hard to find.
It was good that I went to Britex, though, as the people there actually know something about what they sell. We looked at our own bags and the pieces I was thinking of buying and kind of talked through where the parts went on the bag. It was a good experience.
I think I have said before that I prefer to make all the fiddly pieces first – straps, pockets, etc. This pattern is not written that way, so it was a little hard to backtrack and make the straps and drawstring when I was on a roll with getting the larger pieces of the bag done.
There were some directions on the pattern that were confusing or poorly explained. I was able to figure out making the pocket, even though I wasn’t familiar with the type of pocket. Once I figured out that it was a 3D pocket, I thought the method was clever. The pattern leaves the inside edges raw. The method could have been improved somewhat by finishing the inside edges, which I did even though the directions didn’t say to do it. The location of a 3D pocket is a little odd, I thought, as whatever you put in it will pull the whole bag down from the shoulders.
I had some trouble applying the pocket to the bag. The directions just say to topstitch the pocket on to the body of the bag. They do not take into account the corners which are multiple layers thick. Since the pocket is 3D, I could have used some more detailed directions and additional photos on going around the corner.
I also thought the pattern on the web did not use the web to maximum effect. I would have had the PDF, as they do, since it is easy to print. I would have also linked out to videos showing how to apply the pocket, how to add the grommets and other handy hints. These videos could be used over and over for many different patterns and would drive traffic to their site.
It could be that this pattern was perfectly written and the problems were all user error. I am a visual person and learn better with lots of pictures and when people show me how to do something.