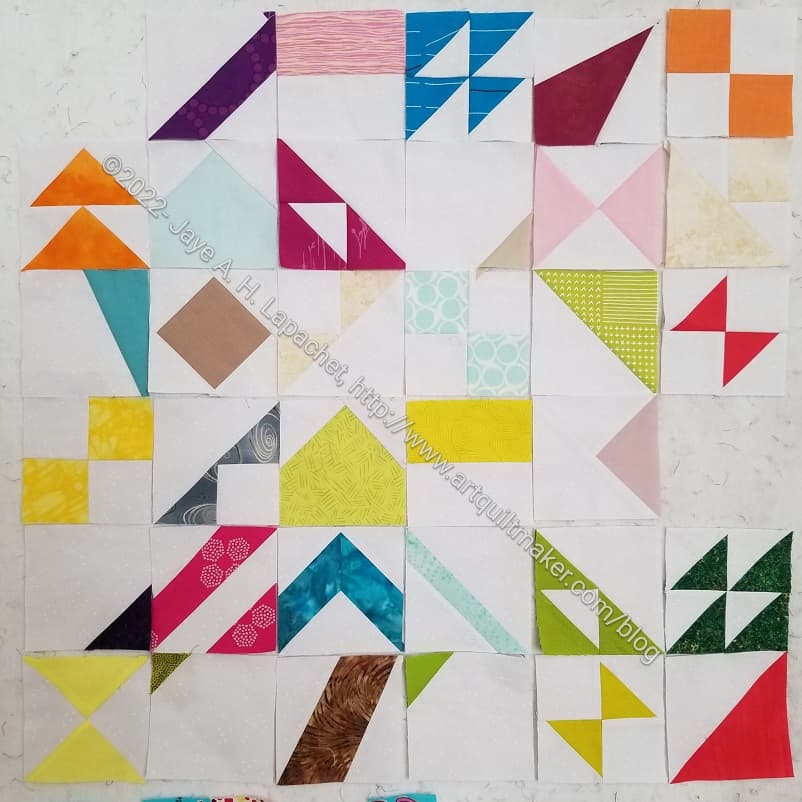
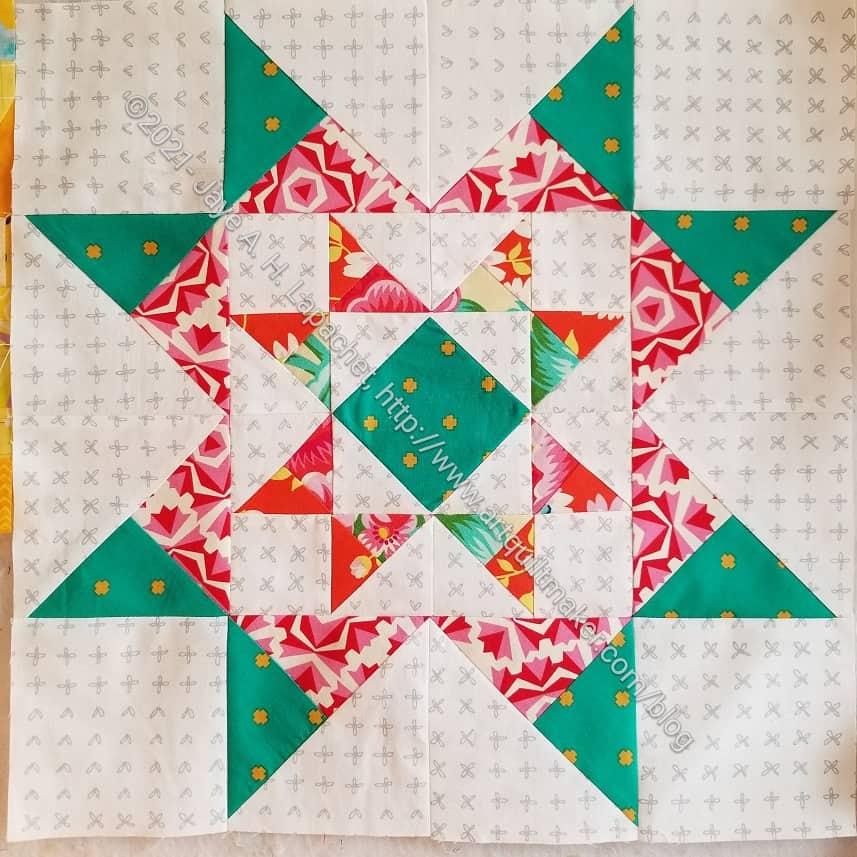
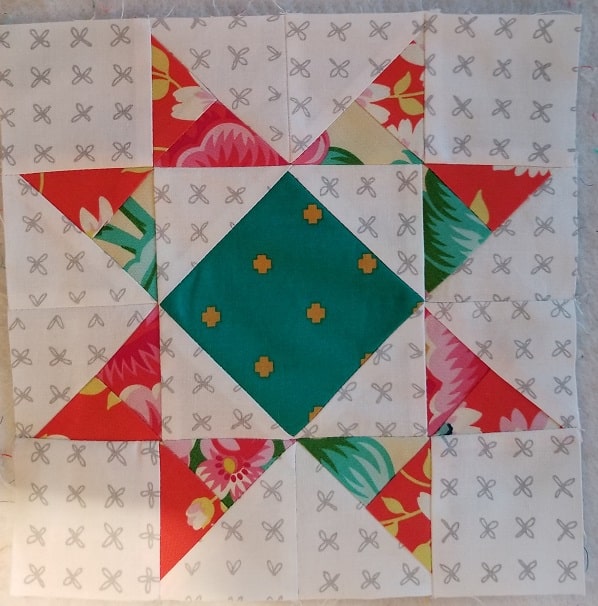
I received a nice package of blocks from Friend Julie the other day. It is so interesting to see these blocks. Julie mentioned that it looked like a real project now when she posted about the blocks I sent to her last week.
I can’t really see what they will end up looking like, but I can see that they will end up as something. I can see the possibilities now.
I have received more postcards and need to match them to fabric. I might be over the hump of fabric selection being a big barrier. We’ll see how it goes with the next group.
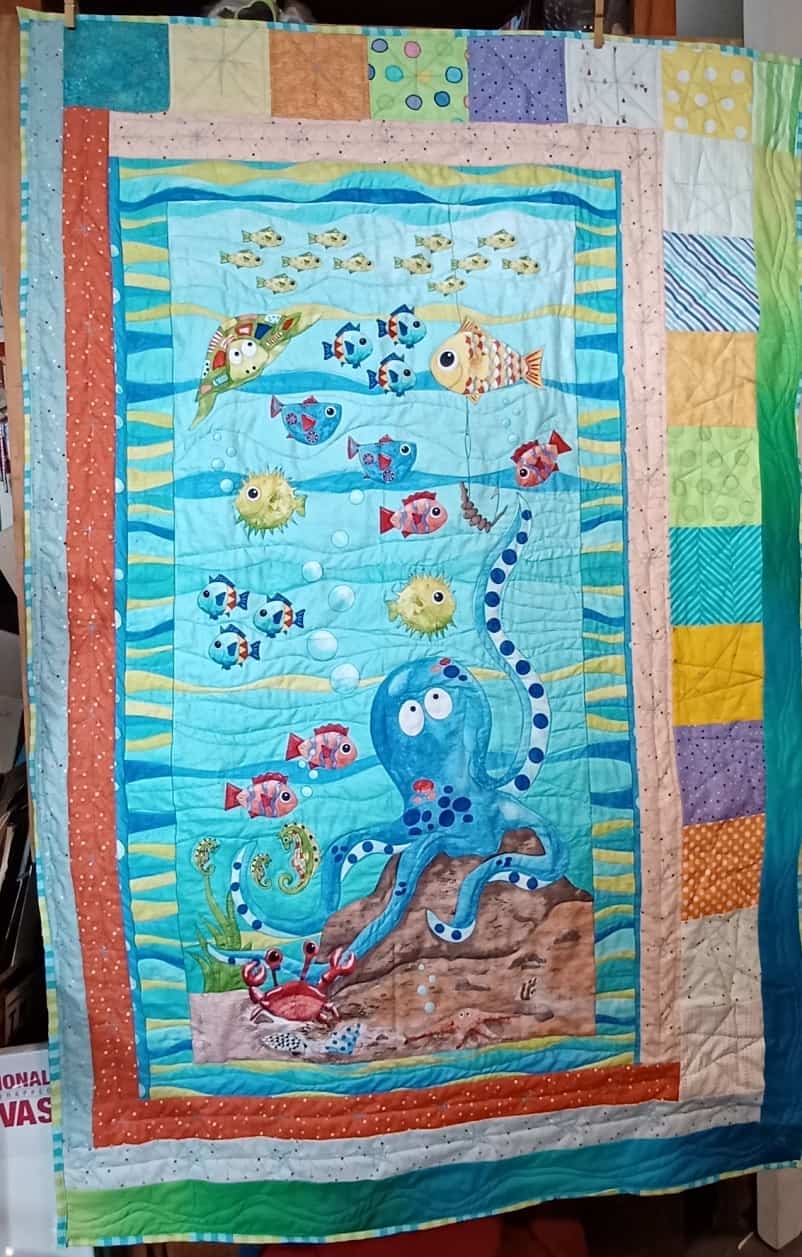
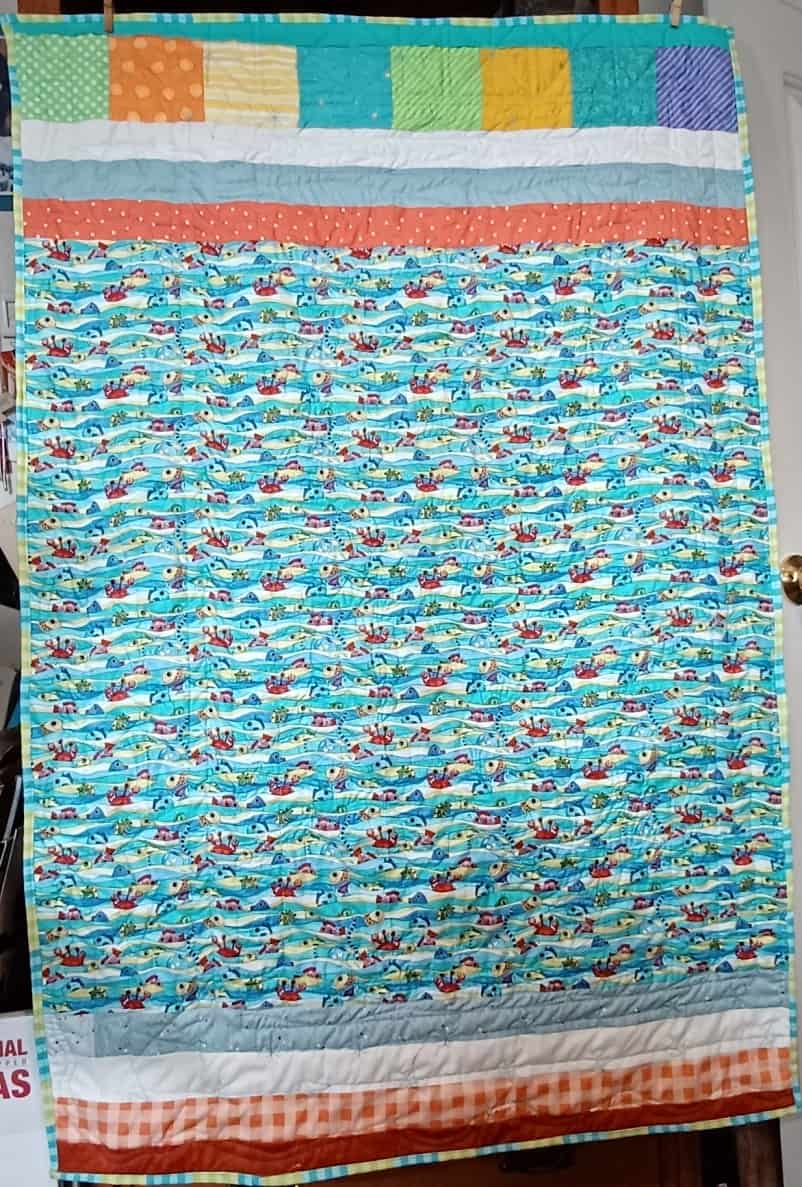
My mom made a baby quilt for our new family baby.This is the same baby for whom I made the Diagonal 9 Patch. The baby, born in October, received at least 4 quilts. That’s what you get when you have aunts who sew.
It is an adorable panel she bought while we were visiting Portland last time. She actually bought it at Just for Fun in Vancouver, WA. For those of you who haven’t been to that area, Vancouver is just over the river from Portland. It’s an easy drive. Just for Fun had a lot of panels.
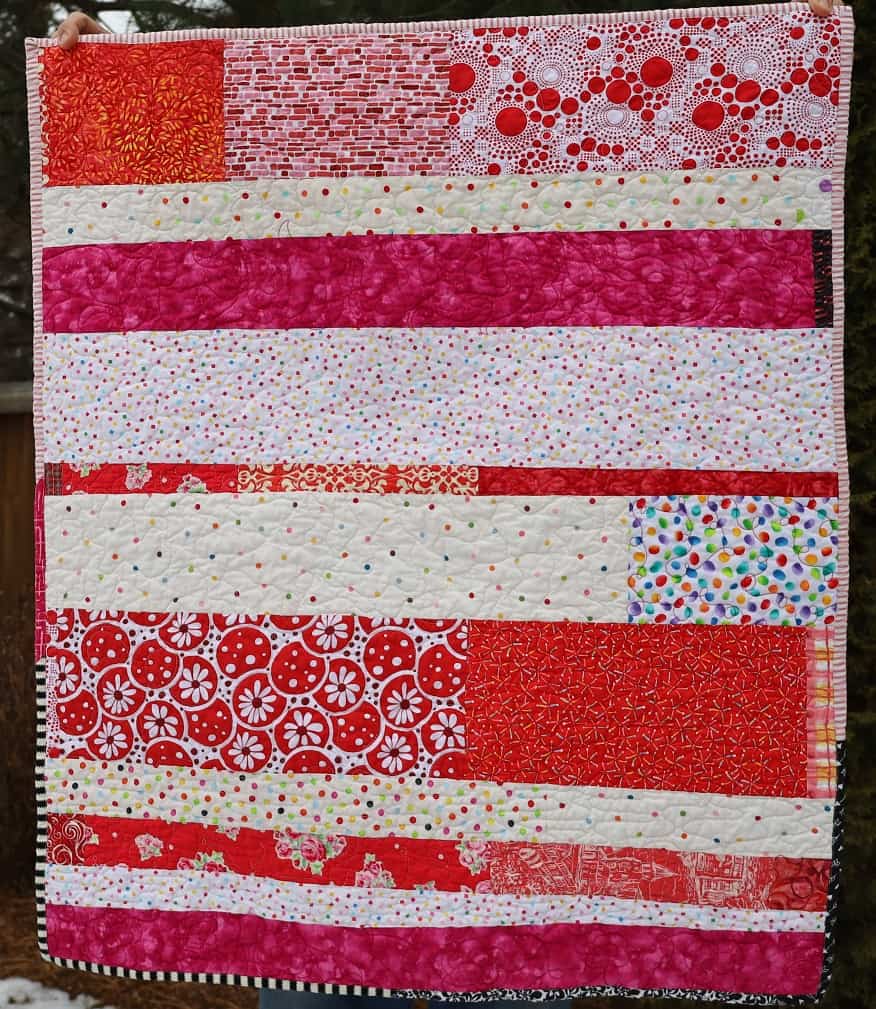
Mom’s Octopus Quilt (back)
Mom quilt this quilt herself on her Featherweight during Craft Night. She bought the binding when we were together, too, and I really like it.
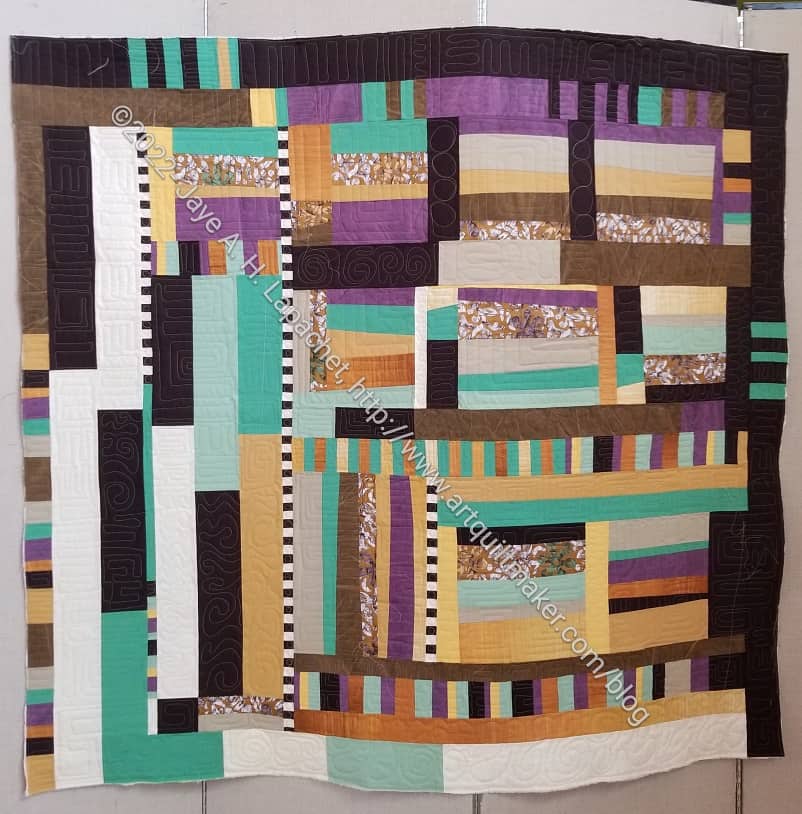
Tim brought his newest quilt to Sew Day. I really like his work. Even though I wouldn’t use these colors, I think the whole piece is really appealing and attractive. I especially like the checkerboards.
I thought he was making this quilt for himself, but he is giving it to one of his nieces.
Gerre and I finally arranged a sewing day, which consists a lot of talking and eating with a little sewing thrown in. I worked on cutting out pouches for upcoming holidays and birthdays. I decided to make some small Moto Pouches, from Sew Sweetness Minikins Season 1, for the nieces as well as a large Hackney pouch Minikins Season 3.
Gerre worked on her Harmony & Light Quilt-a-long quilt. She bought the fabric bundle and her quilt is coming a long very nicely.
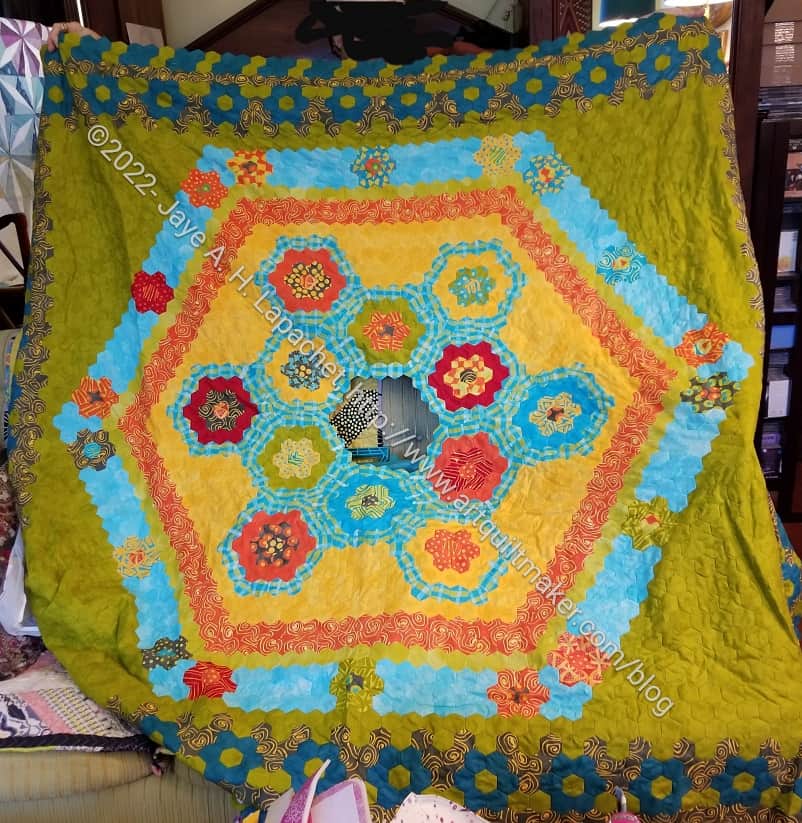
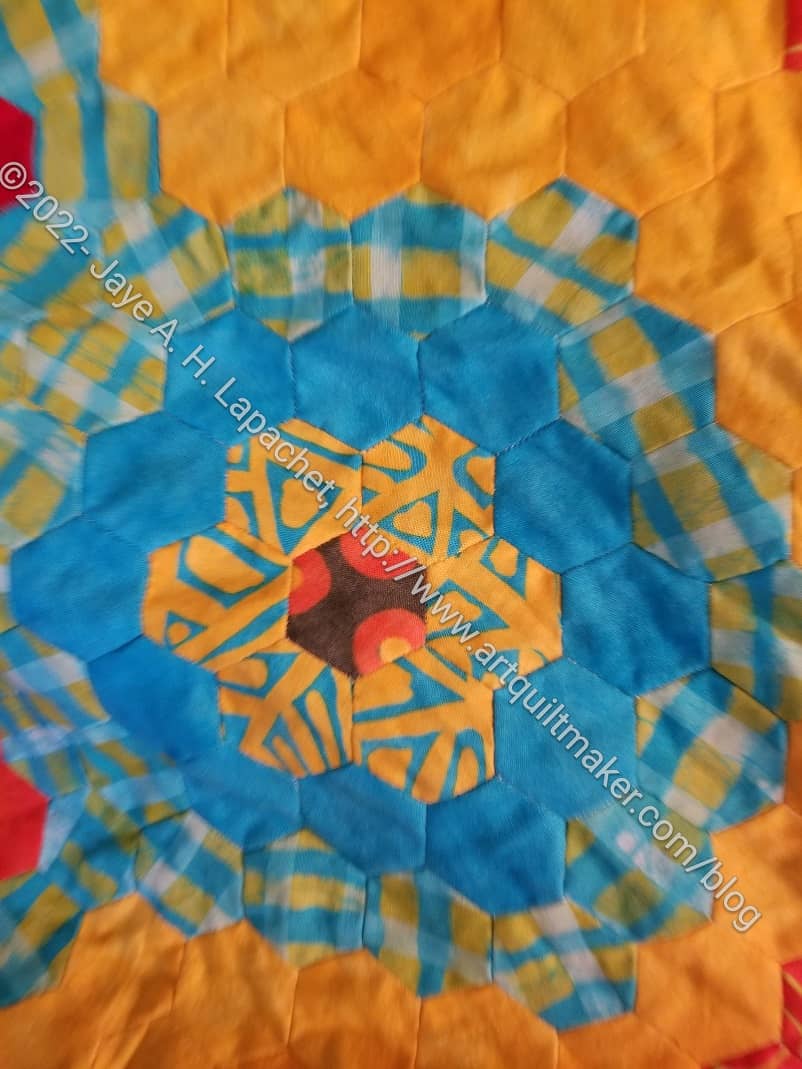
Gerre’s EPP project
One of the things we talked about was her needing some handwork for some upcoming recovery time on the couch. I asked her if she had any UFOs. She does some hand quilting and I was thinking of big stitch. Instead she talked about an EPP project on which she was stalled. It was made with Malka Dubrowsky fabric. She brought it out and I was gobsmacked by the amazing design, the beautiful colors, her amazing stitching and how far along she was. Those hexies are 3/4 inch!
Gerre’s EPP project- detail
She said she got stalled at some point and put it away. I gushed about it, because I really like it and we talked about design. After I was done gushing, we talked about what she needed to do to finish it. She needs to make a center and finish the edges.
She said I gave her the All Points Patchwork book. She brought it out and we looked through to see if we could get some ideas for finishing the edges. In looking through it we found a hexie design that would be perfect for the center. We discussed different ways of finishing the quilt, like adding pieces to make the edges straight, cutting off the edges and appliqueing the edges to another piece of fabric.
I got really excited about this project and she did, too. It will give her something to work on and she will get a UFO completed. I can’t wait to see it finished.
Friend Julie and I started a project together. This isn’t the first project we have worked on together. We have worked on Bullseye quilt projects together, the Windmill quilts and Julie’s Tumbler quilts. I enjoy working on projects with her.
Pantone Postcards
This project started with me asking for the Pantone Postcard Box for a gift. Friend Julie got it for me, then we started talking about doing something quilty with it.
We threw ideas back and forth, but recently we got together for lunch and laid out our guidelines. It was a lot easier to make the list when we were together, though I suppose we could have done it on the phone as well.
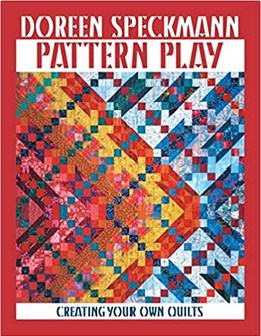
Pattern Play by Doreen Speckmann
We decided we would use the units Doreen Speckmann recommends in her Pattern Play book. I LOVED Doreen Speckmann’s classes. I have had the book for a long time, but Friend Julie bought it recently. It is a technique book, though there are a few patterns. Doreen shows readers how to make and use different units to make quilts look more personalized. These were the types of books that were written in the past whereas now people just write books that tell you how to make a certain quilt with certain fabric. I don’t see that I have written a book review on this book, but it might be time.
That being said, this is a block based book and, thus The Pantone Project will be a block based quilt.
Fabric, Sewing machine and regular Sewing supplies (BSK)
Decisions to Make:
Size of units (blocks)
Type of units to make
Timeframe for making the project
Timeframe for sending postcards
Every week or so we send each other a postcard. The interval is pretty random, but we aren’t letting months go by. I was on a trip recently and didn’t send any that week, but sent one as soon as I got back.
The postcards have a certain Pantone color. From the color we will choose a solid, tone-on-tone or ‘reads as solid’ fabric to use for the block.
Blossom by Christopher Thompson for Riley Blake
We decided to use the same background and bought some together the other day. We bought a cool grey called Blossom by Riley Blake. Christopher Thompson is the designer. I don’t know why it is called Blossom since there is not one blossom-y color on it. Some of the other fabrics in the line are more blossom-like. Anyway, this is a really good grey, which is now washed and waiting to be incorporated into blocks. You can see more of the design of the fabric on Julie’s blog.
Our units will be 4 inches finished (4.5 inches unfinished).
We will make two blocks, plus cut two squares and send one block and one square to the other person. At the moment, I am behind and won’t be able to get started until later this week or next week. Julie has a nice picture of the postcards I have sent on her blog. She also made one block already. I need to get busy, and will soon.
**Obviously, you should shop at a local quilt shop. However, I use affiliate links and may be paid for your purchase of an item when you click on an item’s link in my post. There is no additional cost to you for clicking or purchasing items I recommend. I appreciate your clicks and purchases as it helps support this blog.
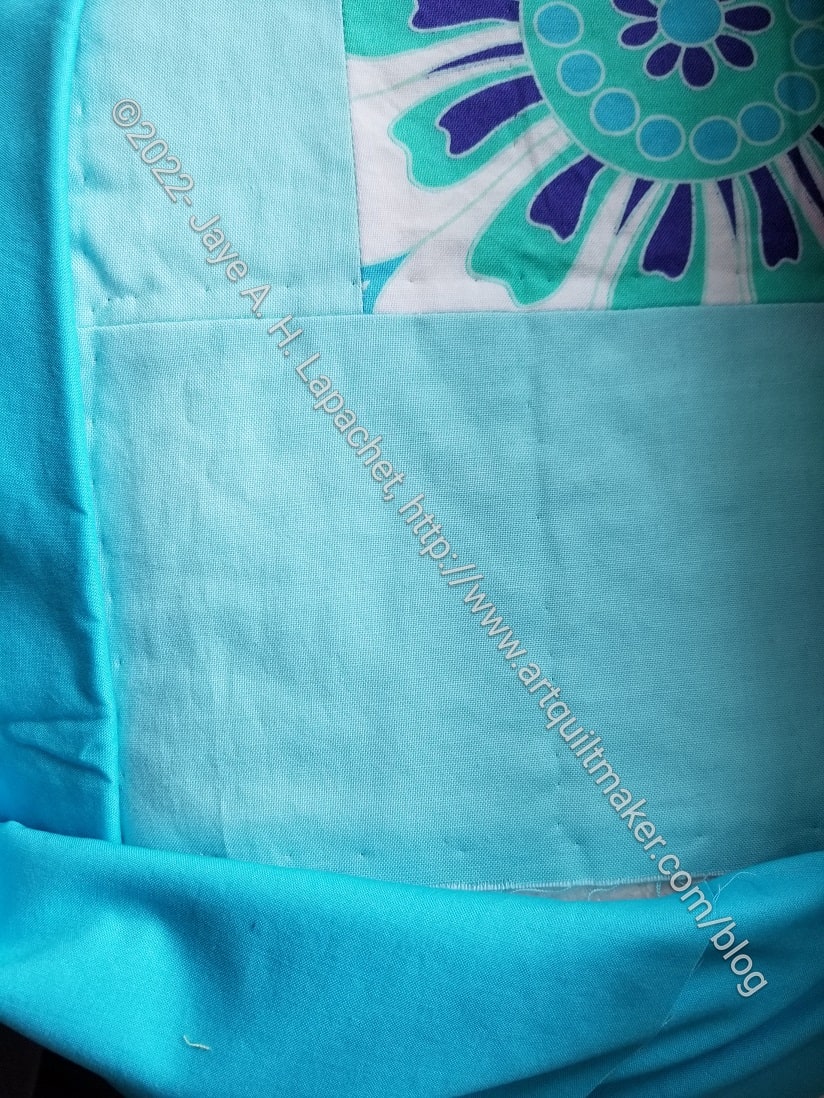
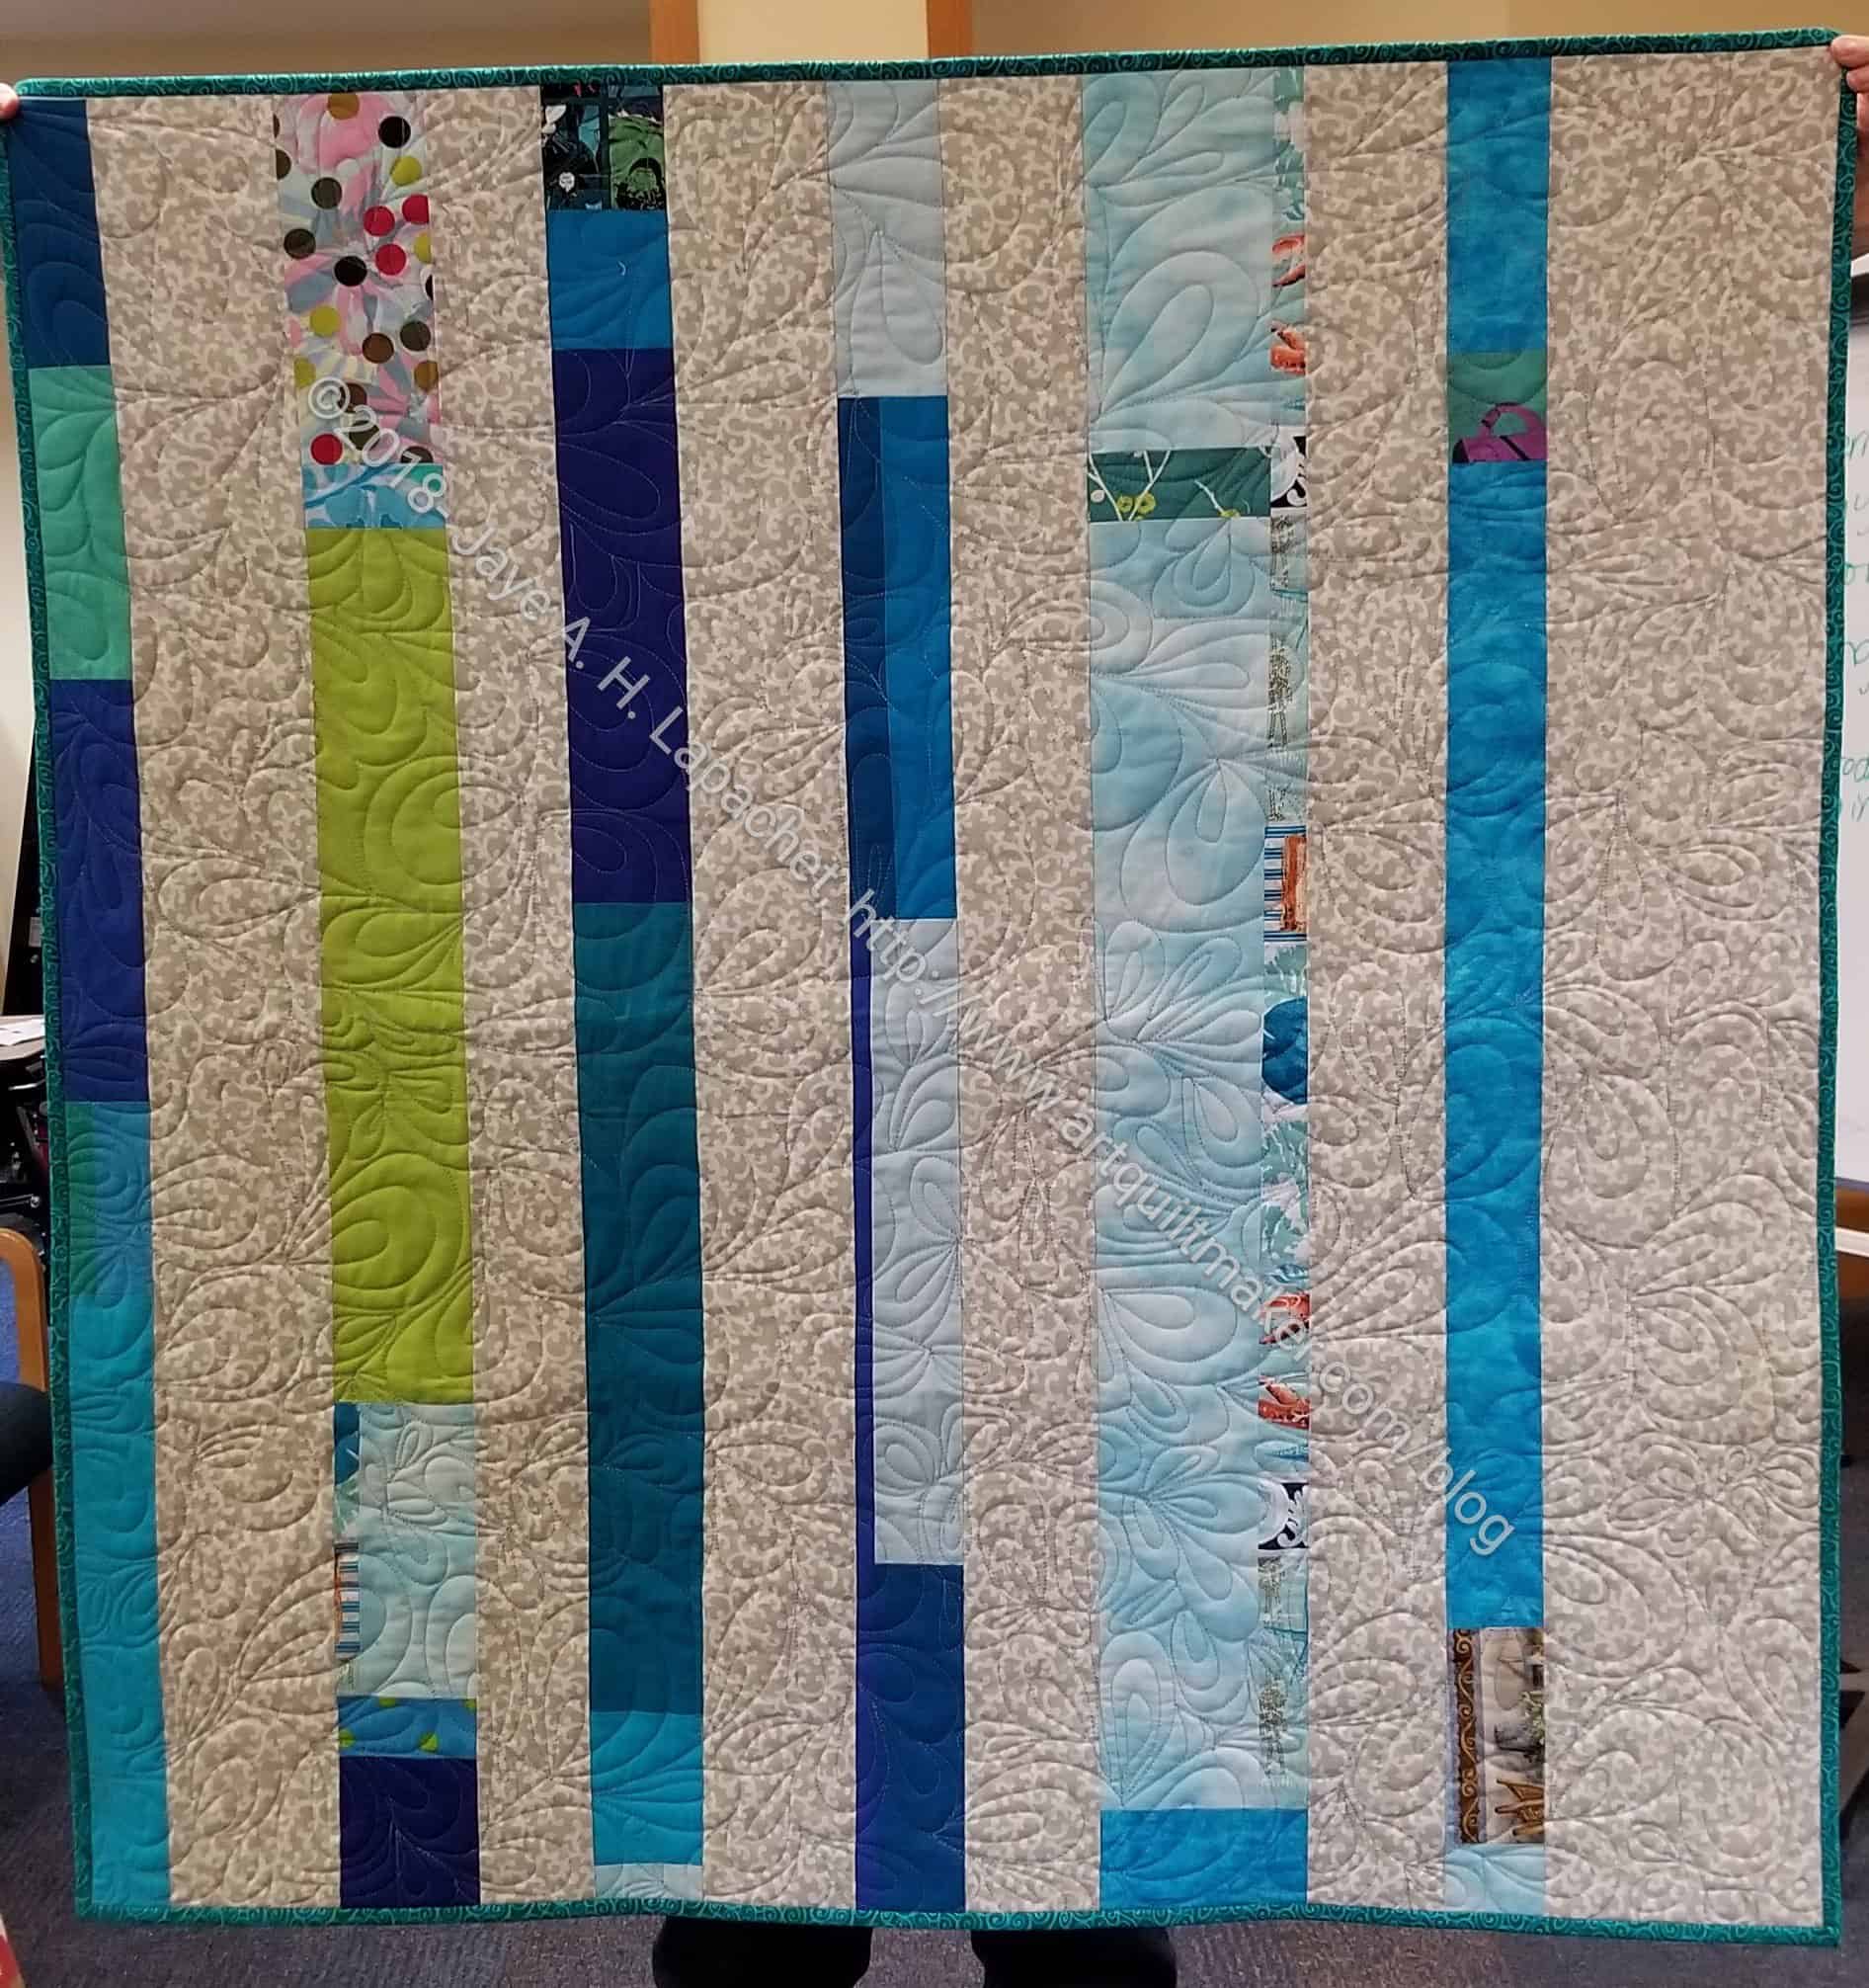
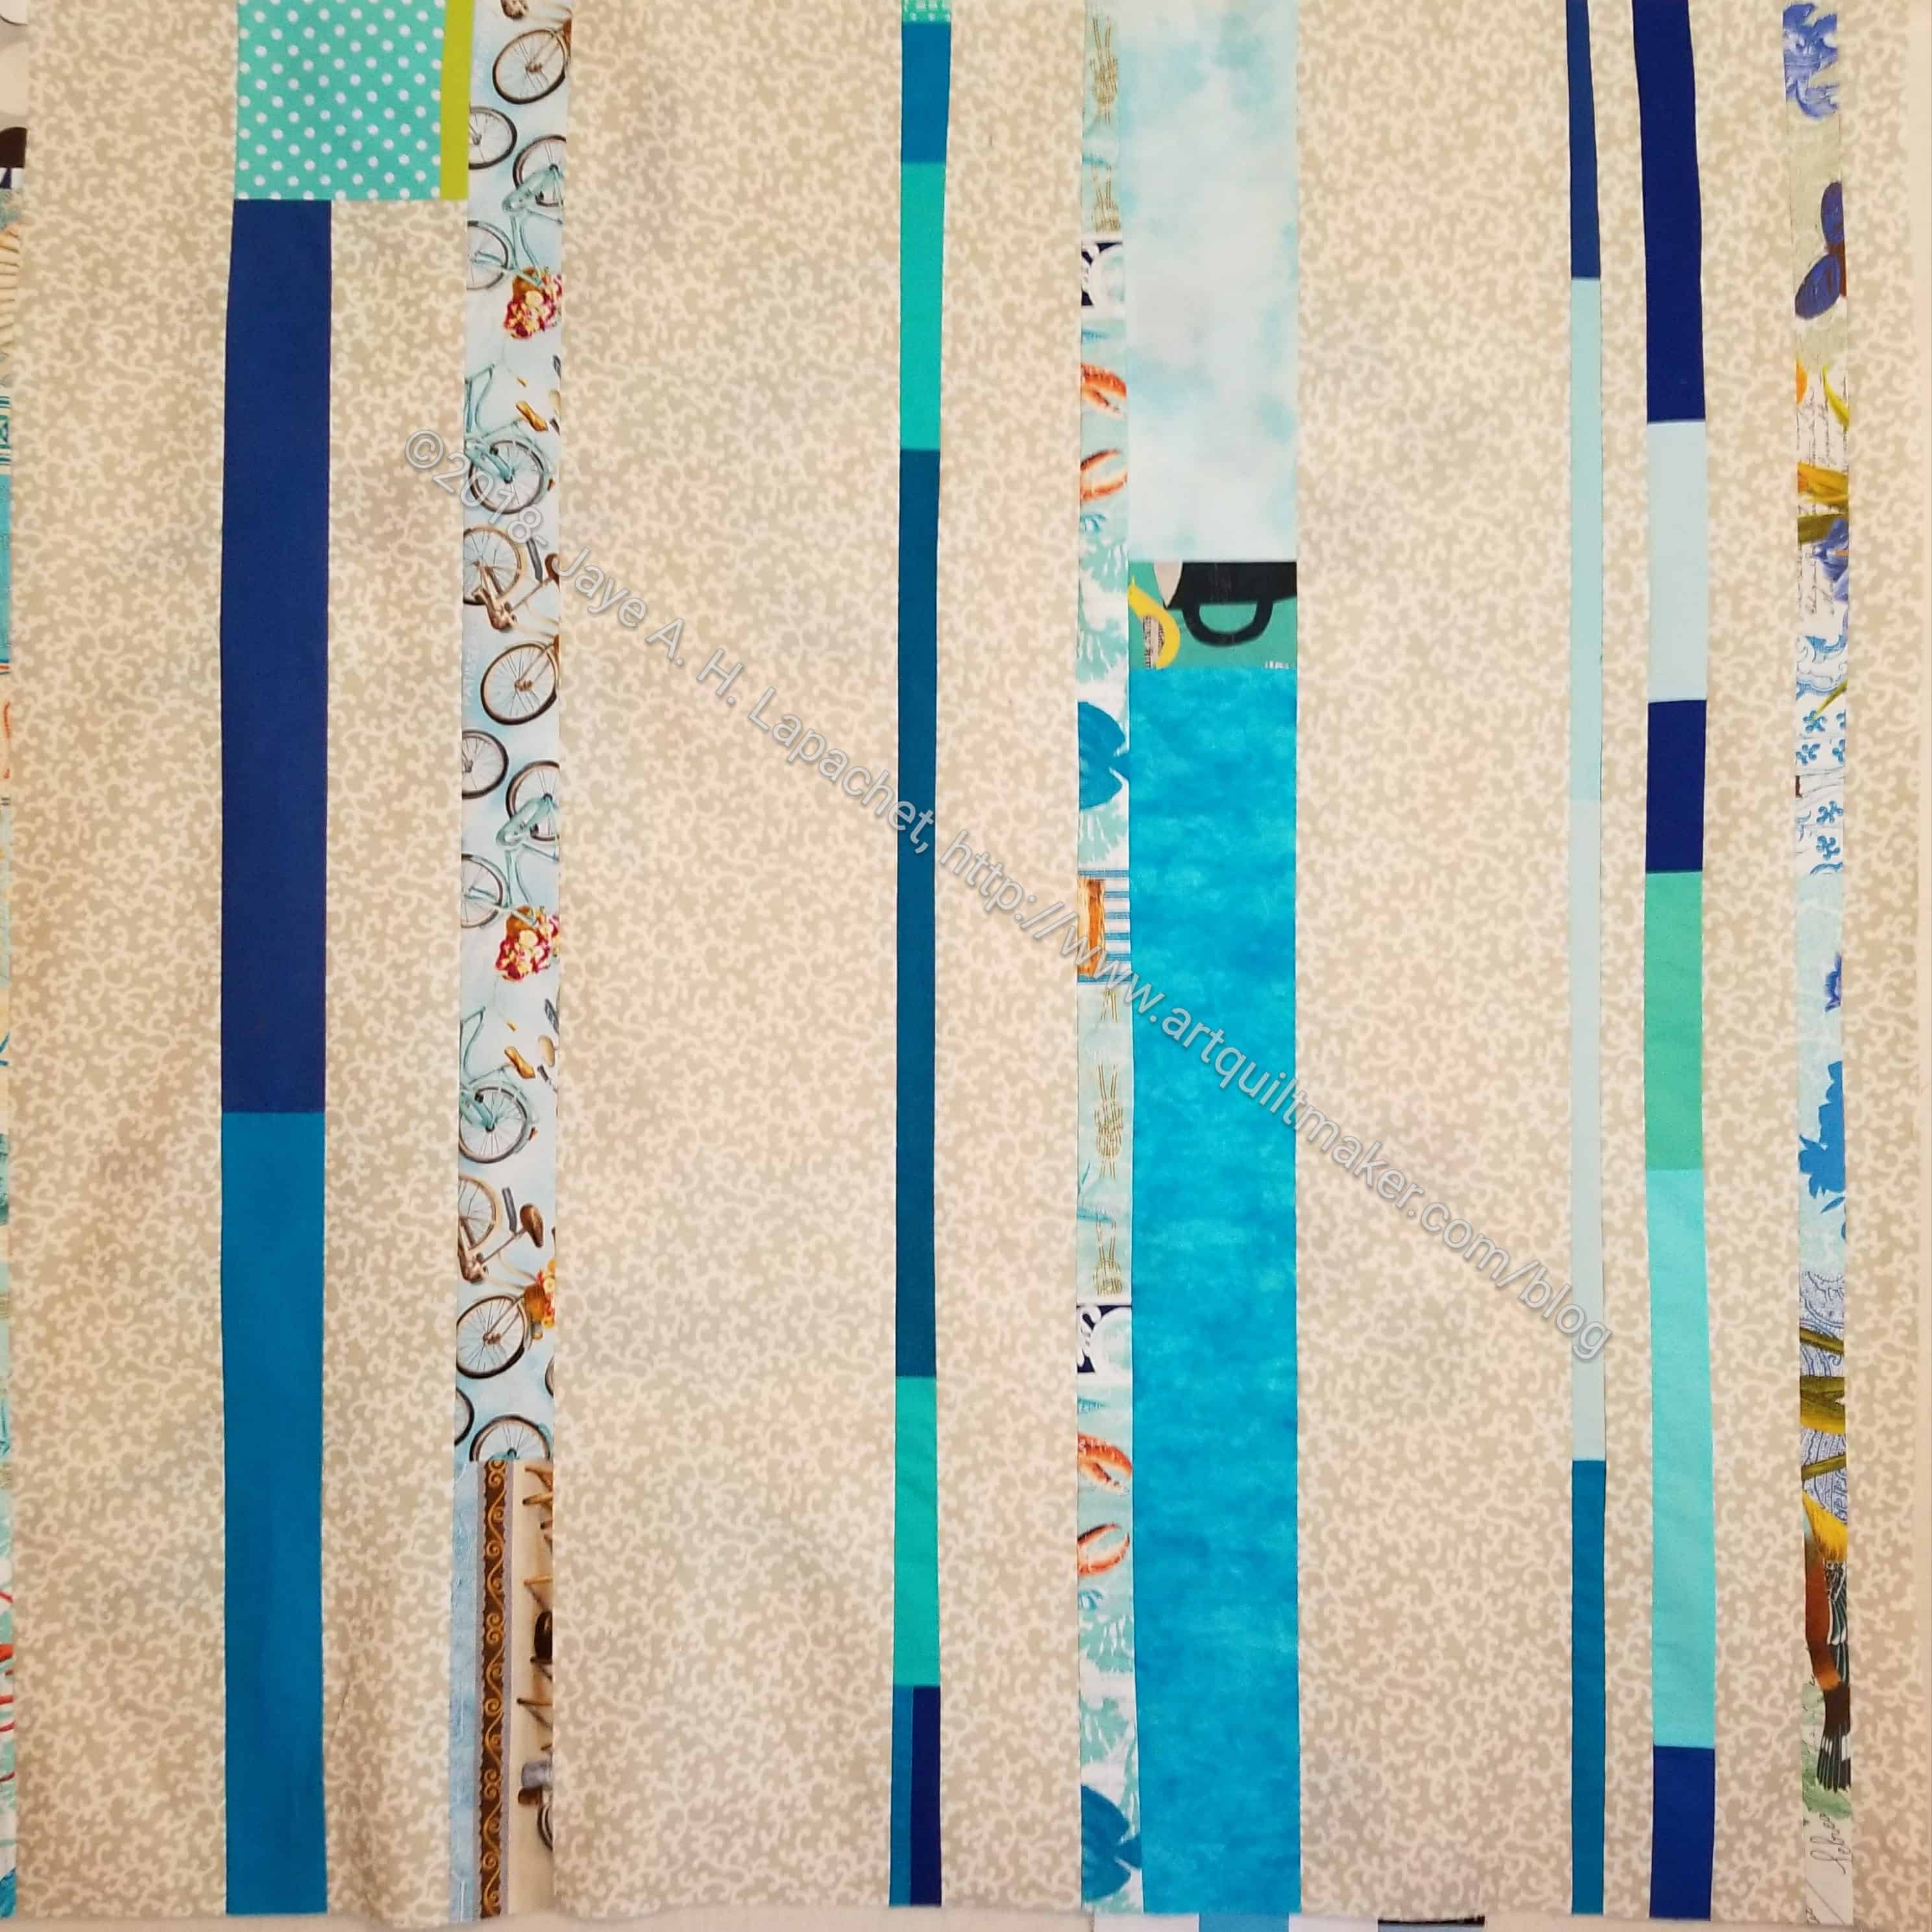
I may not have mentioned that I ripped out all of the Big Stitch quilting on this project. I am preparing it to go to Colleen.
To do so, I had to find some fabric for the binding. I wanted the main turquoise used for the background. I couldn’t find it anywhere.
BAMQG IRR Corner with possible binding
I did find a slightly darker solid turquoise that I think will frame the piece better than the same color. I know the differentiation is hard to see, but I think you can see that the slight difference looks good for the binding.
I still haven’t done anything with the bits and bobs included by the others who worked on it.
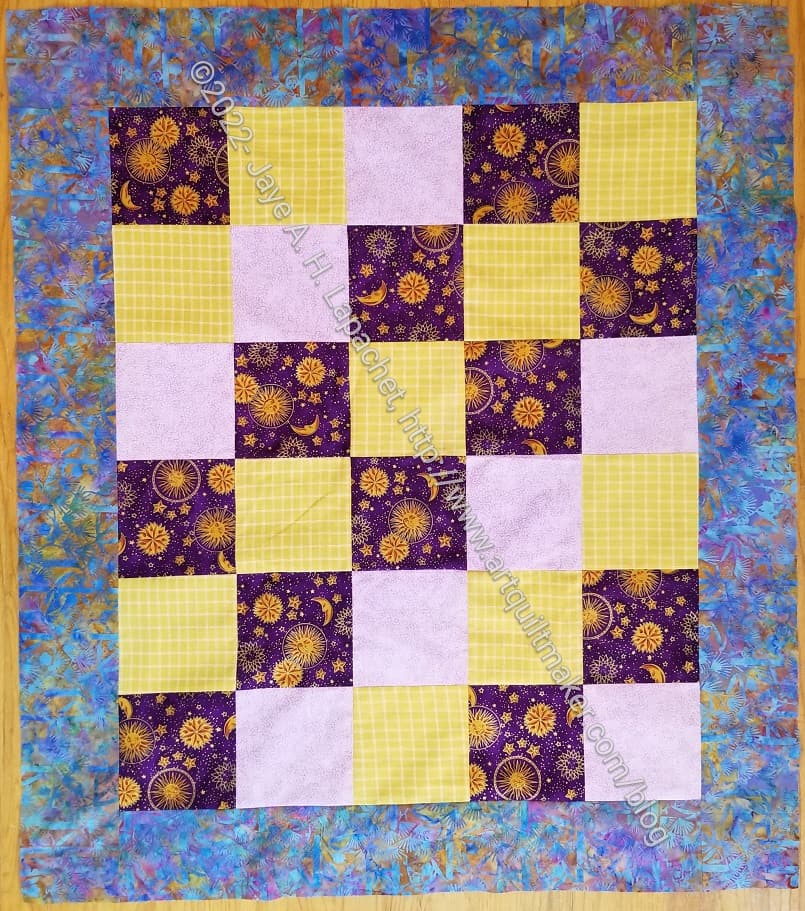
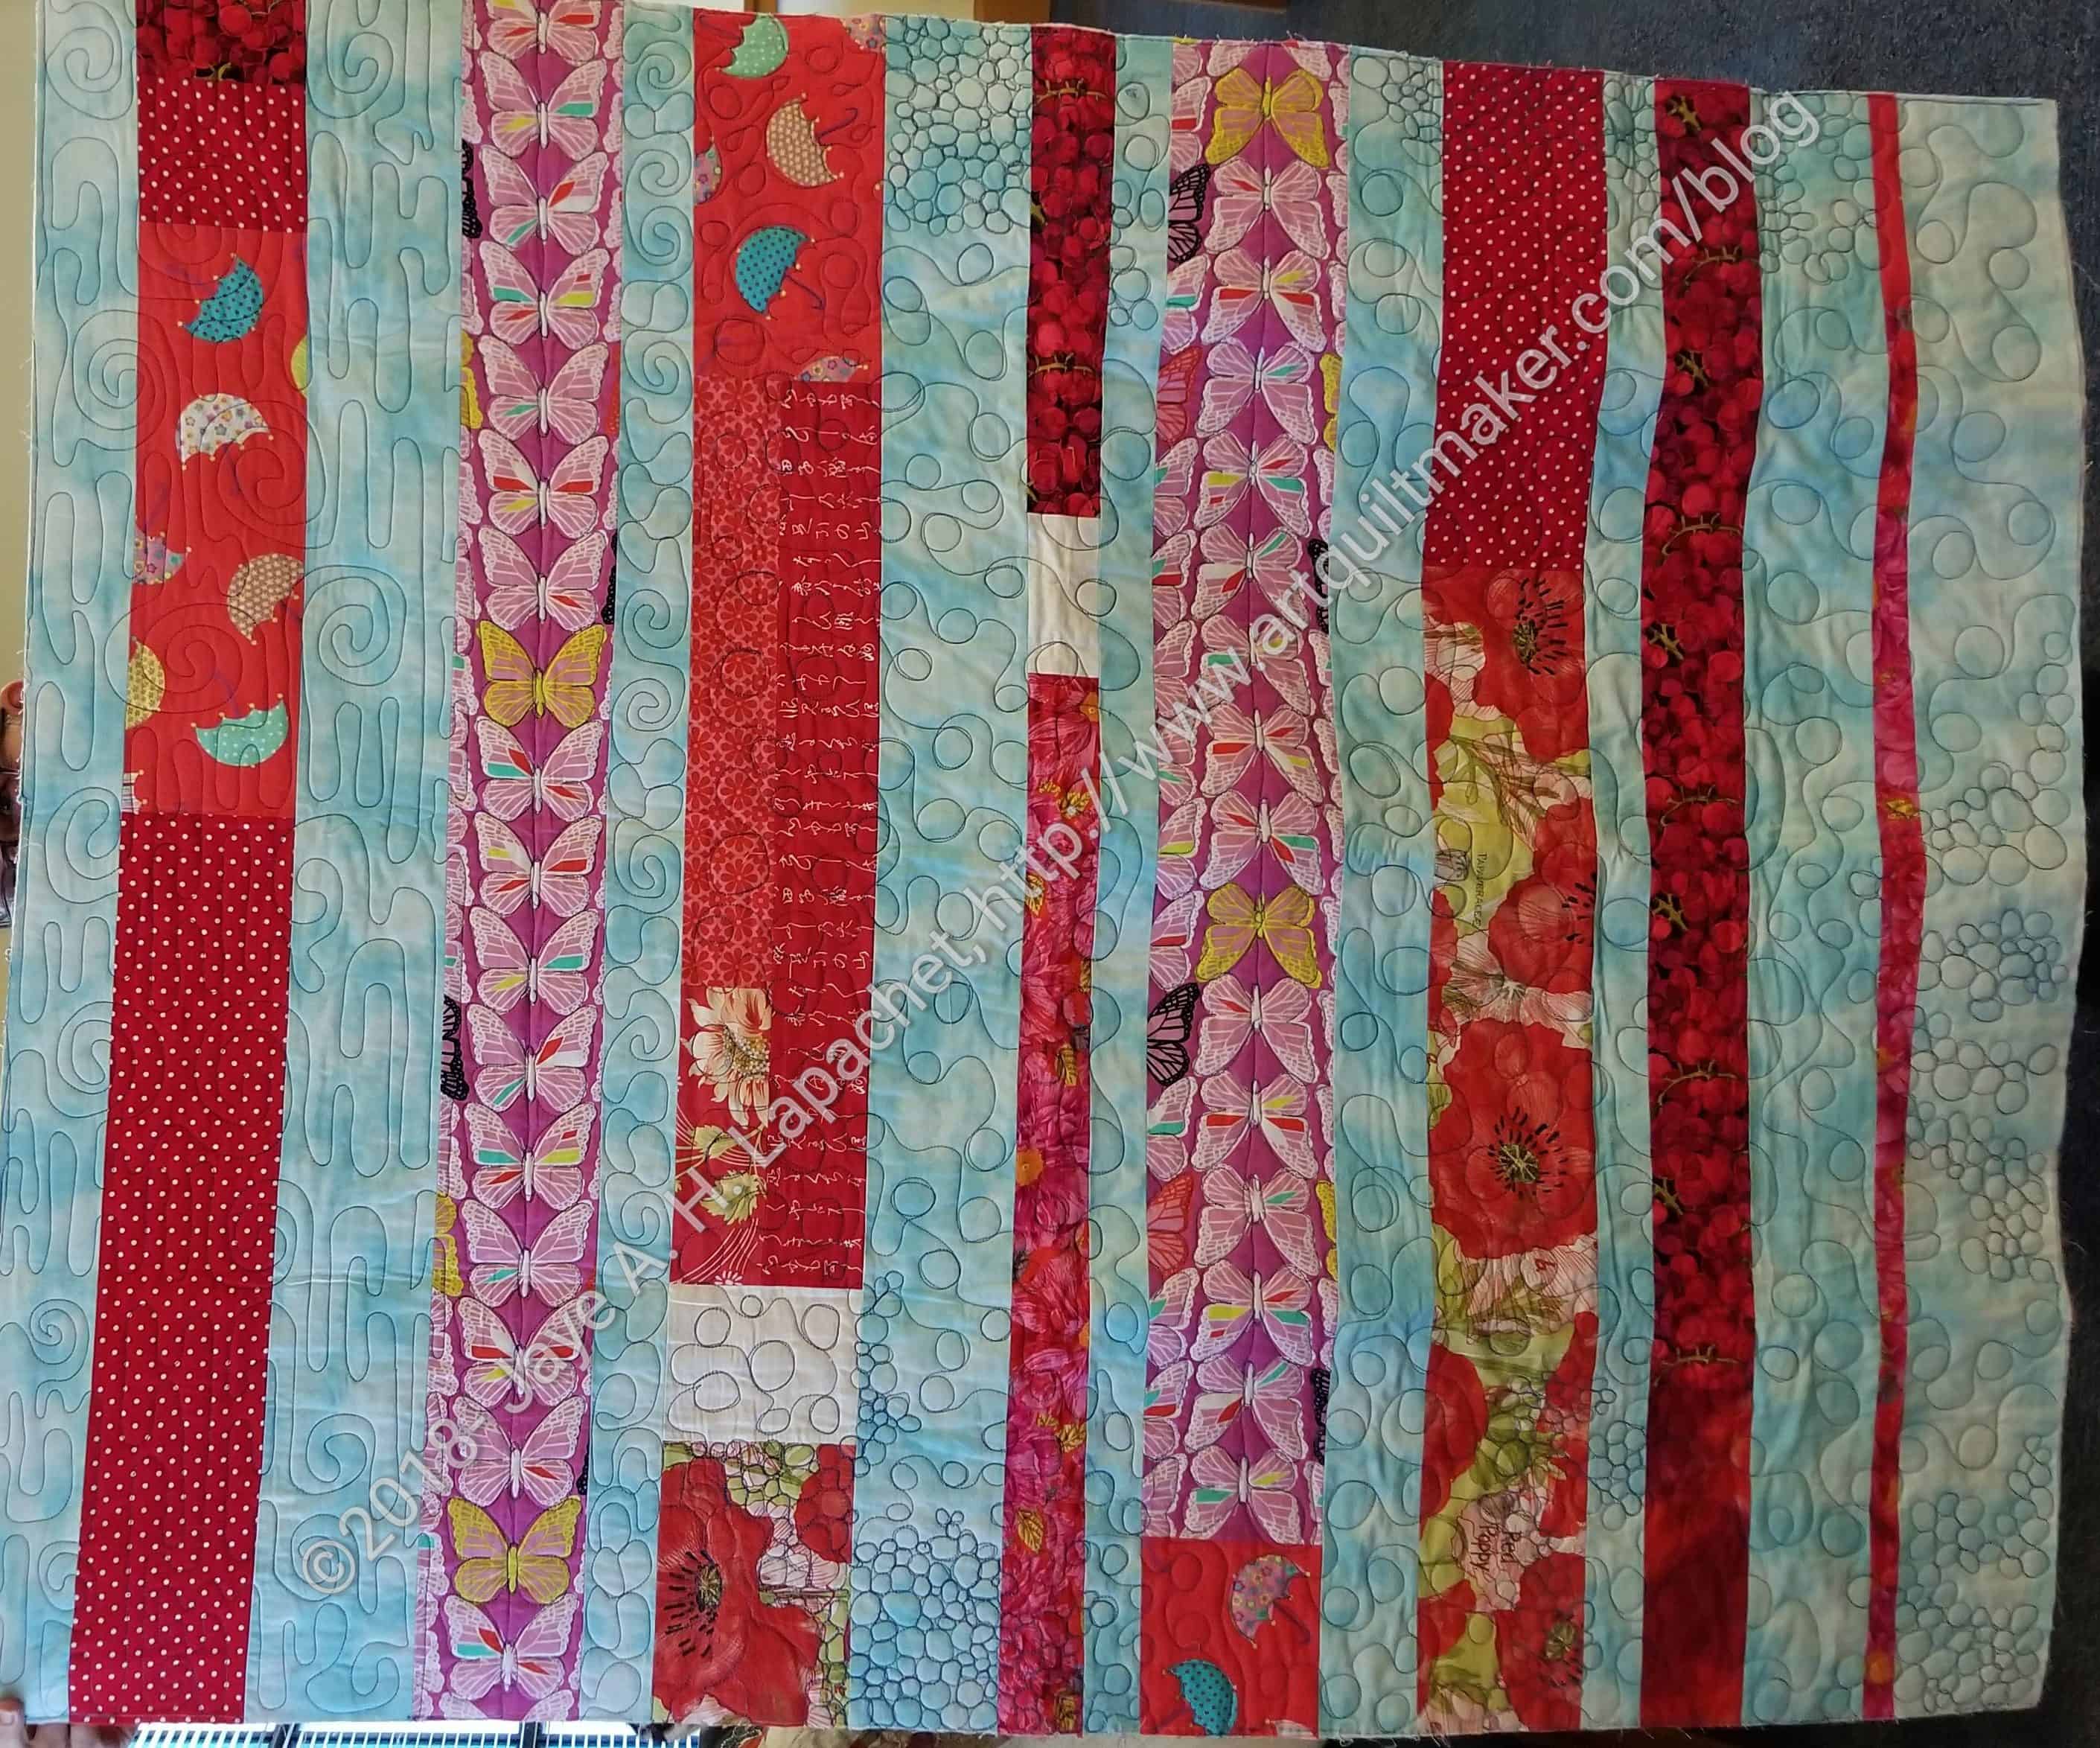
I took some time to choose fabric for my Mom’s piece and was able to finish on Saturday. It is ready to hand in for quilting.
The batik is not an obvious choice, but I think it works. I chose it because of the bits of gold included in the surface. I also didn’t want an exact match to any of the other fabrics because they would blend into the border.
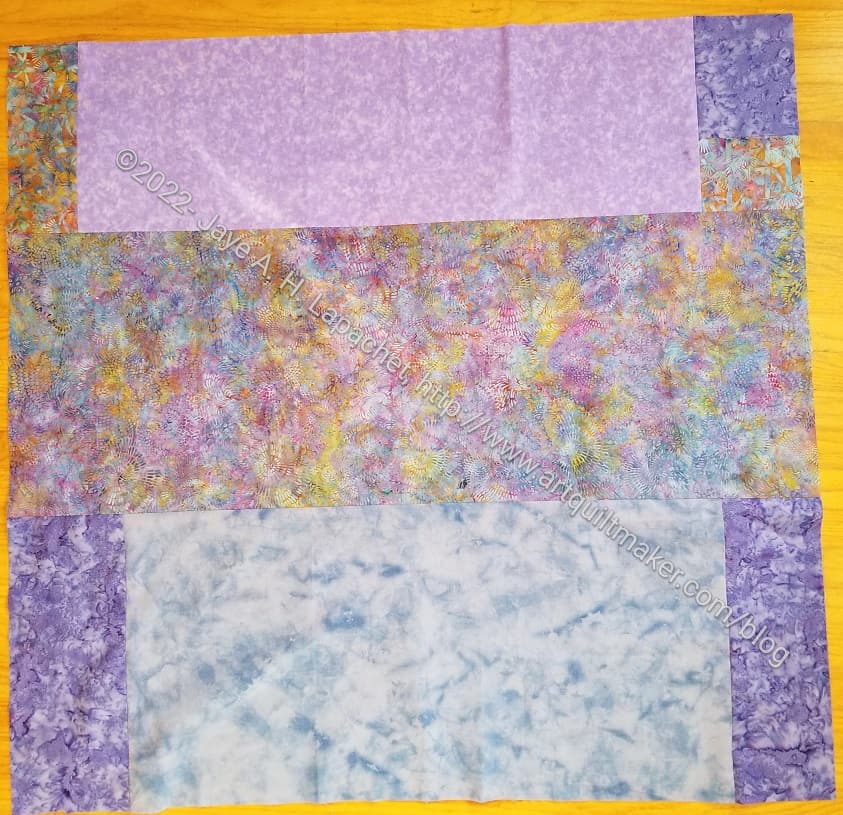
Purple & Gold Donation Back
That particular batik, and its sister on the back, have been hanging around my fabric closet for a long time. It was time to use them up.
I don’t get a lot of fabric usage bang for my work, because the main part of the quilt was Mom’s fabric and work. Still, every little bit helps and the point is to make something beautiful so someone knows I (or someone) cares.
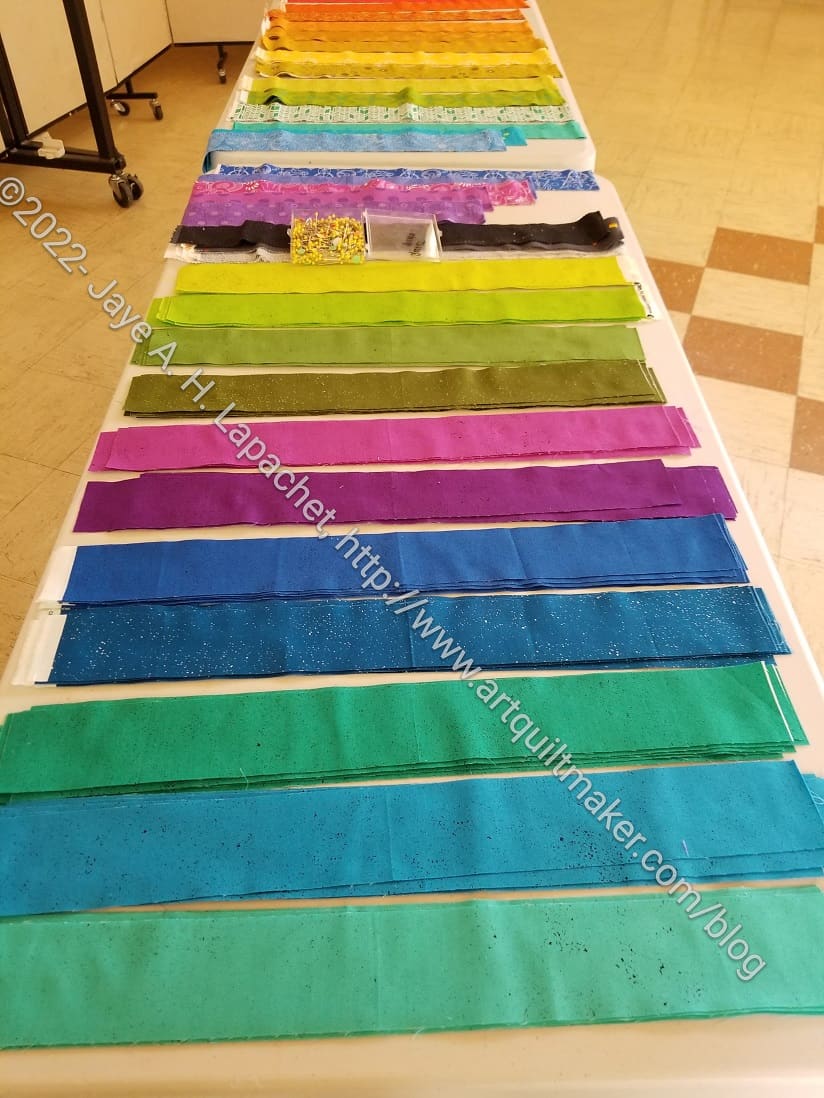
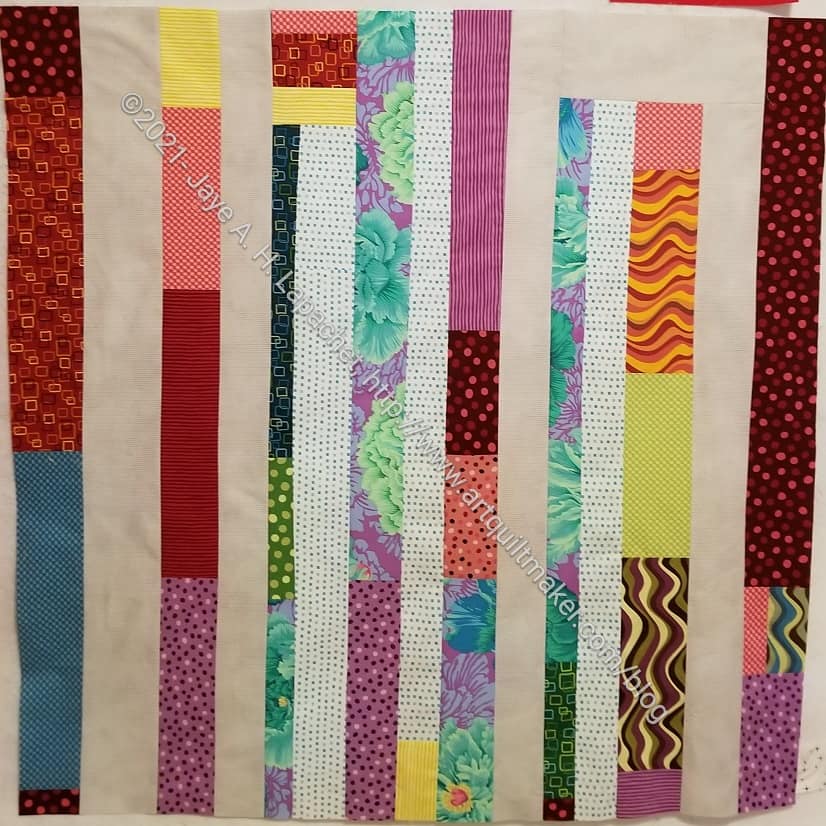
Remember when I talked about Sew Day? I mentioned a future donation quilt (no progress yet). I talked about some Sew Day Improv I worked on with Tim and Mary to create a quilt that would keep someone warm and comfy. I also talked about basting La Pass Month 10. What I didn’t talk about -yet- was Amy’s amazing rainbow quilt.
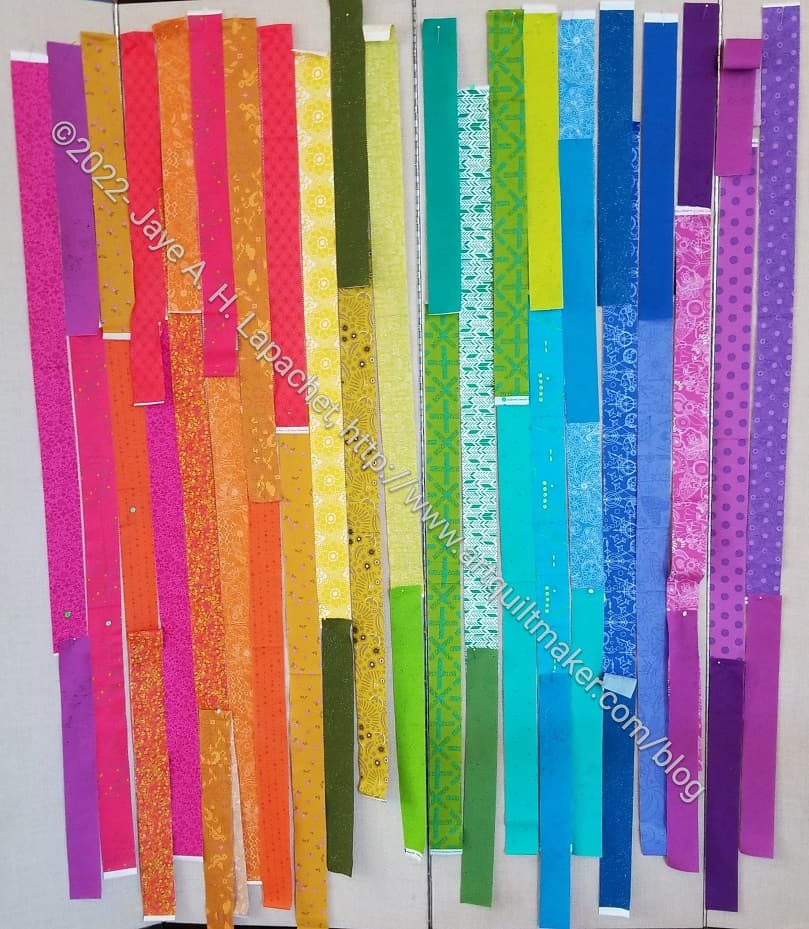
The first thing I saw was the line of strip stacks laid out on two long tables.
Rainbow – first draft
As the day progressed, I began to see the piece take shape. Amy struggled with not having a complete set of colors/shades/tones to make a smooth transition between colors. She was determined to make it work. I could sympathize after working with the various Fabric of the Year quilts. Unlike painting, generally we work with certain fabric prints and can’t alter them (yes, I know there is fabric painting and dyeing, but you know what I mean) like painters can on the fly.
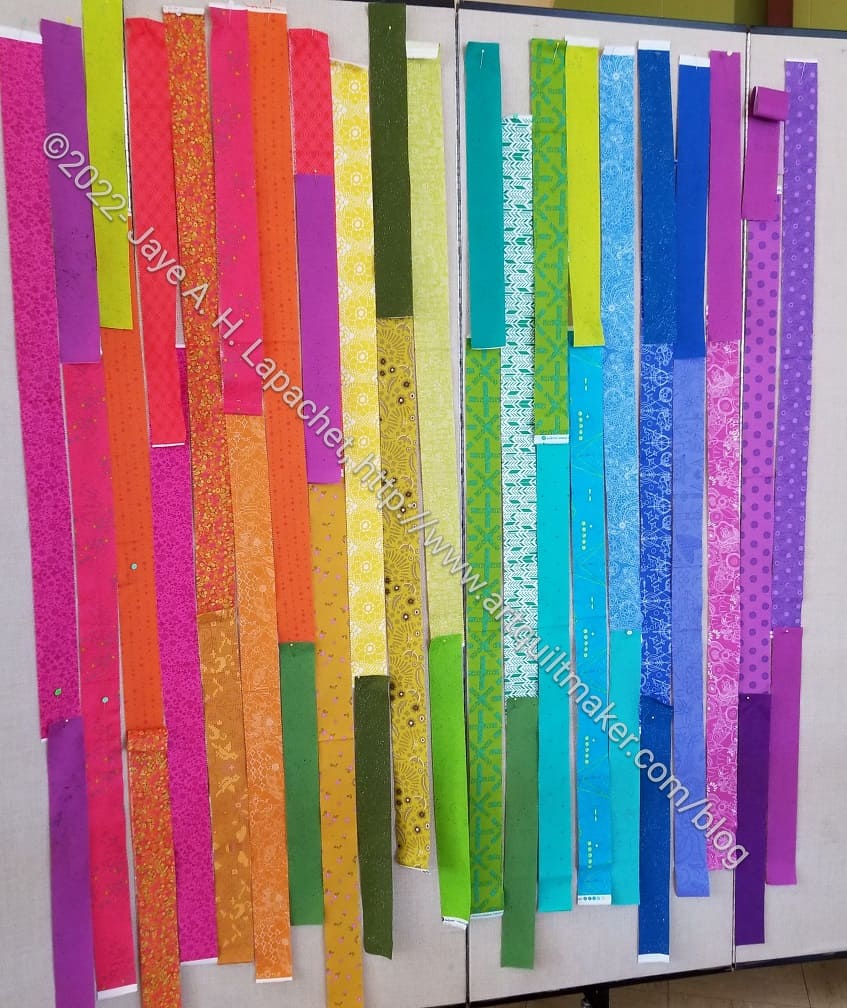
Amy’s Rainbow – 2d draft
The piece progressed well, I think. There was a lot of moving around of strips and a lot of people got involved.
Amy wasn’t super picky that everything flowed into one another. I think the rest of us were more invested in the outcome than she was.
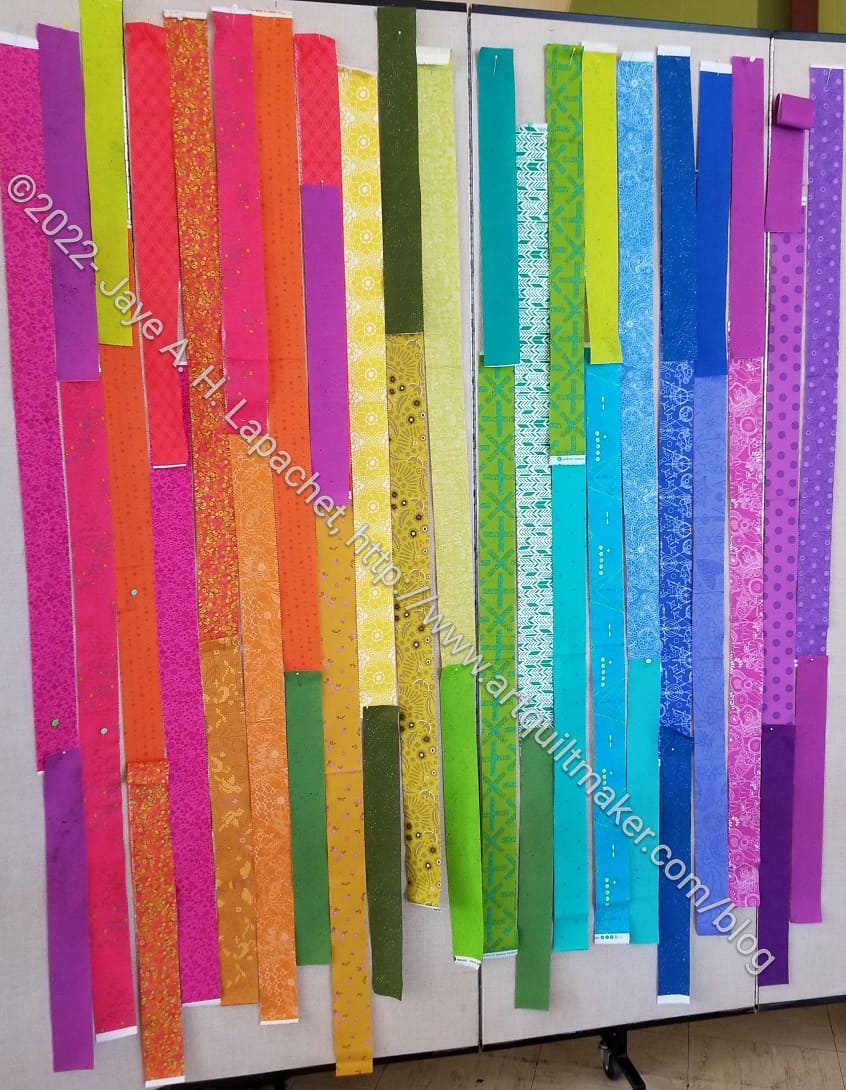
Amy is cleaning out her workroom and I think this was a set of Allison Glass strips she wanted to use. I didn’t hear what her plans were for the final piece.
Amy’s Rainbow – near final
I did not get a picture of the final piece. This is close, though, to the final layout.
Maria helped Amy sew, so the piece could get finished by the end of Sew Day.
I thought the last bullseye I sewed with Julie and Adrienne was Passionate Purple. I looked back on my blog and found that the Original Bullseye was actually the last one that I finished. I am not sure when I started that one, but from my various blog posts, it sounds like I had stuck it somewhere and then found it again. The Original Bullseye was part of the project with Adrienne and Julie, but it was the kernel that started the whole Bullseye project.
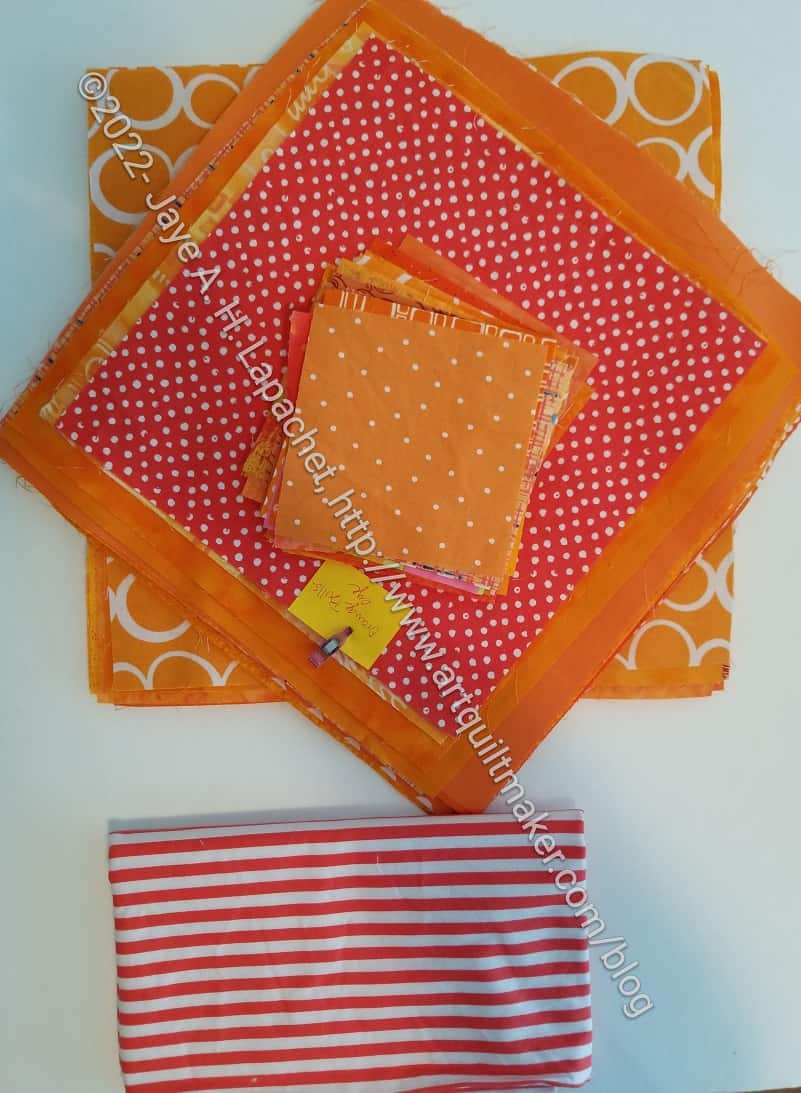
We are now working on an orange bullseye. We will cut 48 squares of fabric at 10″ and then send them on to the next person, who will add a circle and send it on to the third person who will add another circle. Then the squares will come back to each of us. We will add another orange circle, cut the blocks into 4 and keep two. The other two quarters will be sent to each other.
Orange You Glad squares
Friend Julie has also started cutting and I think she landed on a good name, Orange You Glad. I have finished cutting my squares, but will press them so the centers are clear and to make it easier for my team members to line up their second circles. I cut my squares bigger so I can square them up, if necessary, later.
I also started cutting the small squares for the last round. I am getting ahead of myself, but I couldn’t help myself.
In order to find enough squares, I rummaged through my entire fabric closet. I found a lot of orange in random places and will take this opportunity to rearrange it.
I am considering the strip for the binding, though it isn’t quite the right color. I’ll have to see once the top is done.
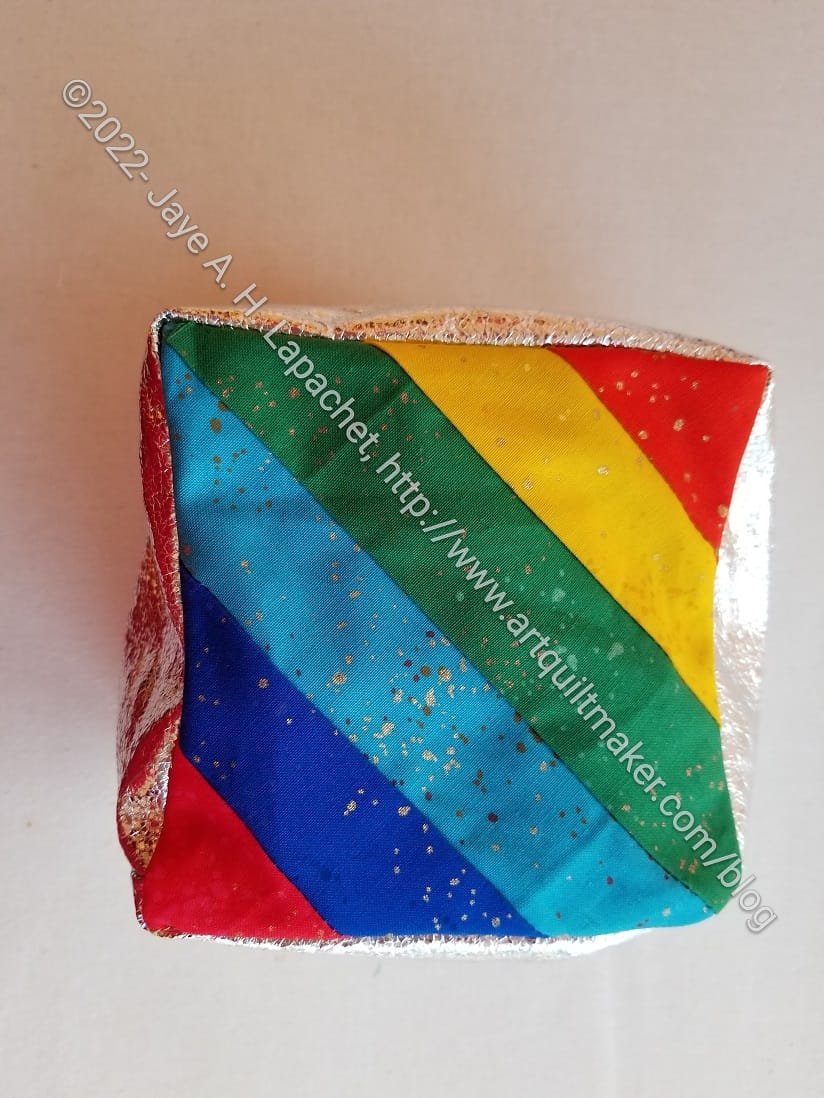
I started this Rainbow pincushion after receiving the pieces and parts as part of the Happy Box from Sew Hungry Hippie.
The Happy Box is a subscription box, but not a fabric and projects subscription box exclusively. I received my first one towards the beginning of the month and really enjoyed the contents.
One of the things it included was a kit for this rainbow pincushion. The top was foundation paper pieced, which gave me the opportunity to try the Quilter’s Select FPP paper in a small way.
All of the pieces were cut and ready to sew, so I just started making it. I don’t really need another pincushion, but WTH? It is cheerful looking.
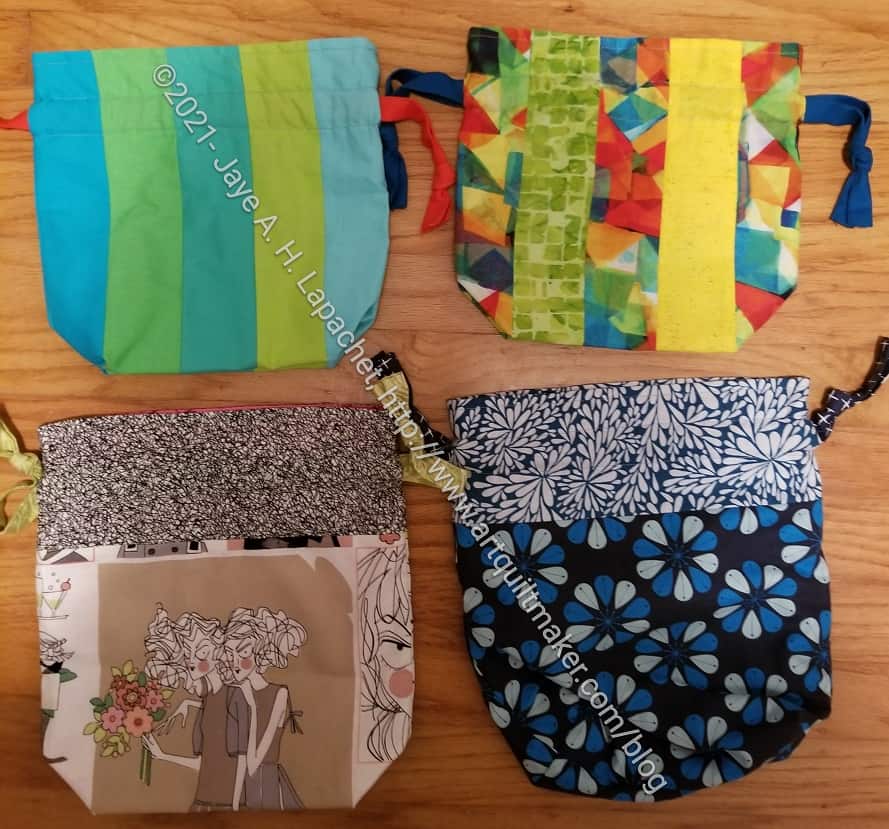
I received a small shipment of various items for the BAM 2022 door prize bags. Sue chose the In Color Order Drawstring bag pattern I have mentioned a few times and made some bags. We can use them for the door prize main bag or for holding smaller items.
I love the way Sue pieced some of the bags and also her fussy cutting. She said she will work on other projects for the door prizes in January.
I have to get myself together to organize the bags for the year. At the moment I have very few items to give away, but I can scrape together a bag for January. Then I’ll have plenty of time to worry about the rest of 2022.
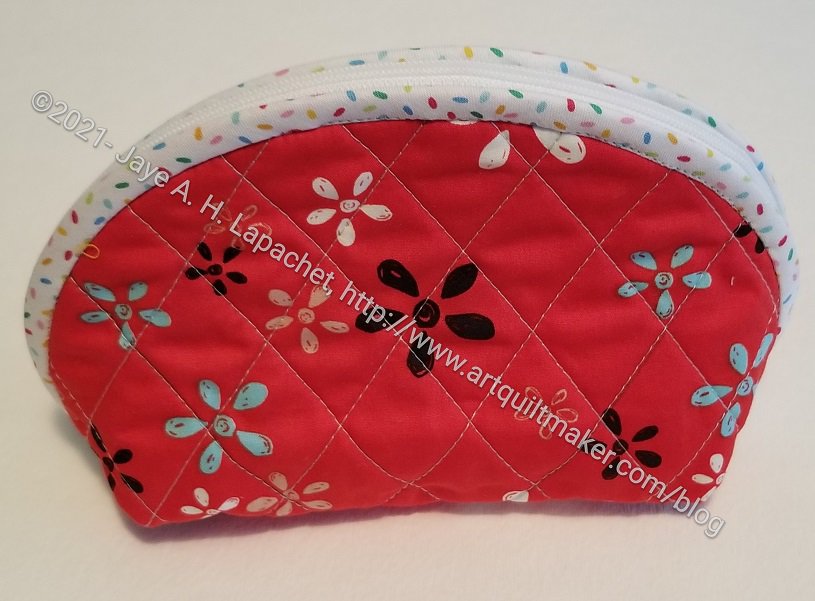
Joelle described the construction and it seems a little different from the Persimmon Dumpling Pouches I made. This pouch has little shield in the bottom to keep things from falling out, I guess, which is clever.
Joelle said she didn’t like the way the zipper was put in. The technique leaves part of the zipper exposed. I can see what she means, but Joelle did a great job being precise about inserting the zipper so it looks nice and even.
Swap pouch from Joelle – zipper
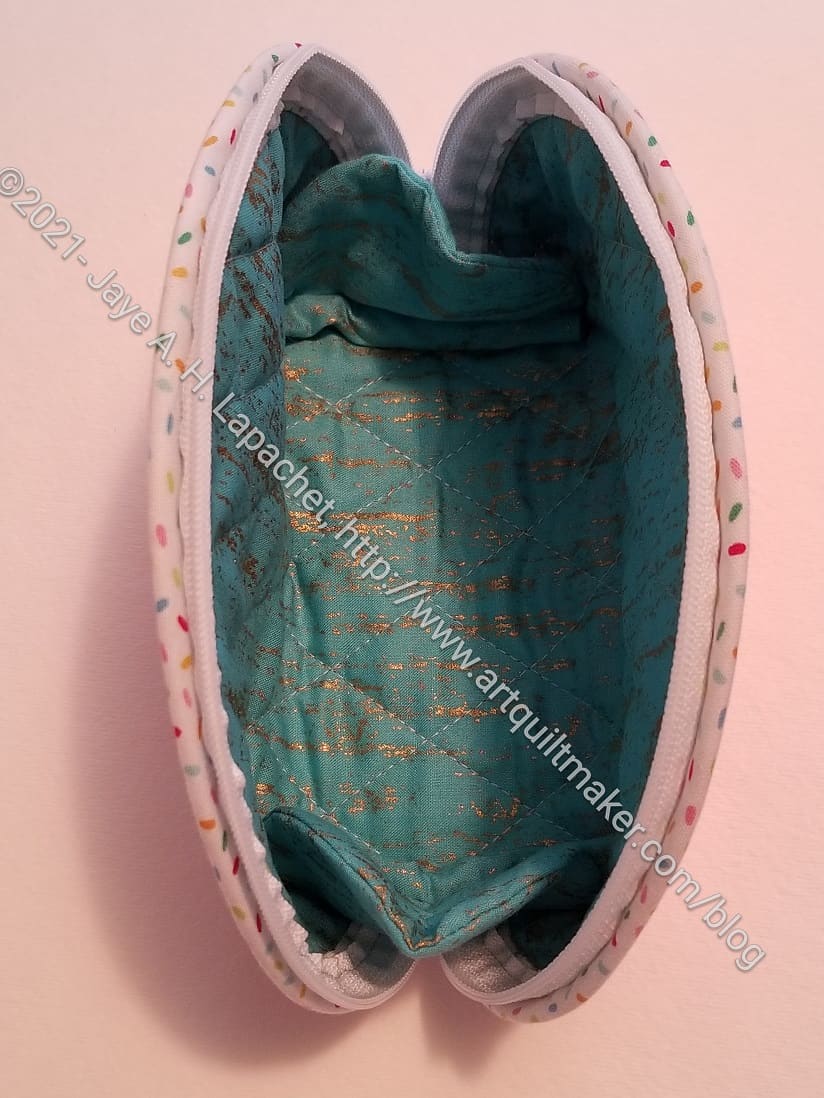
Also, you can see in the interior view that the exposed zipper is not that noticeable.
I haven’t decided how I will use this pouch, but I have some hardware that might need a home.
These quilts are all made from the edges that are cut off of other quilts as they are being squared up. Sometimes I make the backs larger than needed so I get some large-ish pieces back. Those pieces are hard to store, so making some donation quilts out of them is a good idea.
Ends (n.1) – see more information – this is the top that started it all!
You could also put scraps together into strips, add some background and make one of these. These are very improv-y and there isn’t a pattern. It is a good way to do something good with fabrics I wouldn’t otherwise use.
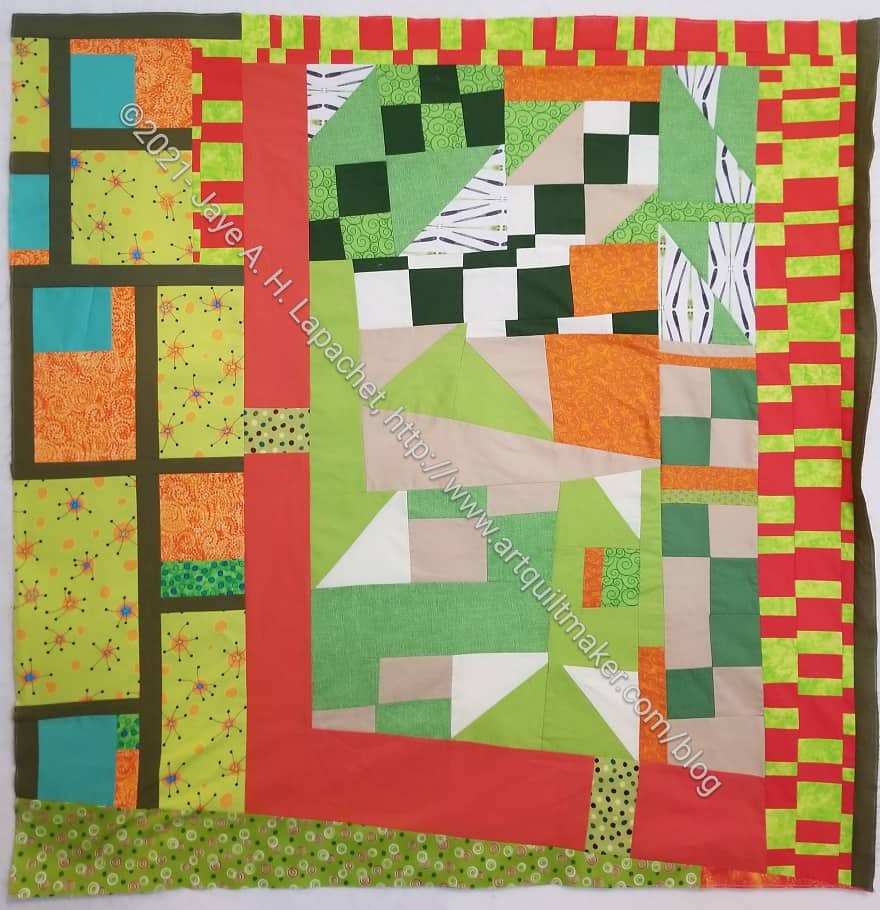
I don’t think this is my best work. there are a lot of disparate elements. Somehow it works. It kind of looks like buildings surrounding a park to me.
I struggled with this piece, because of the green and orange. I don’t sincerely dislike green, but I don’t make it a main color in any of my quilts except the Improv Color quilts. I also like orange, but somehow this was a struggle on which to work.
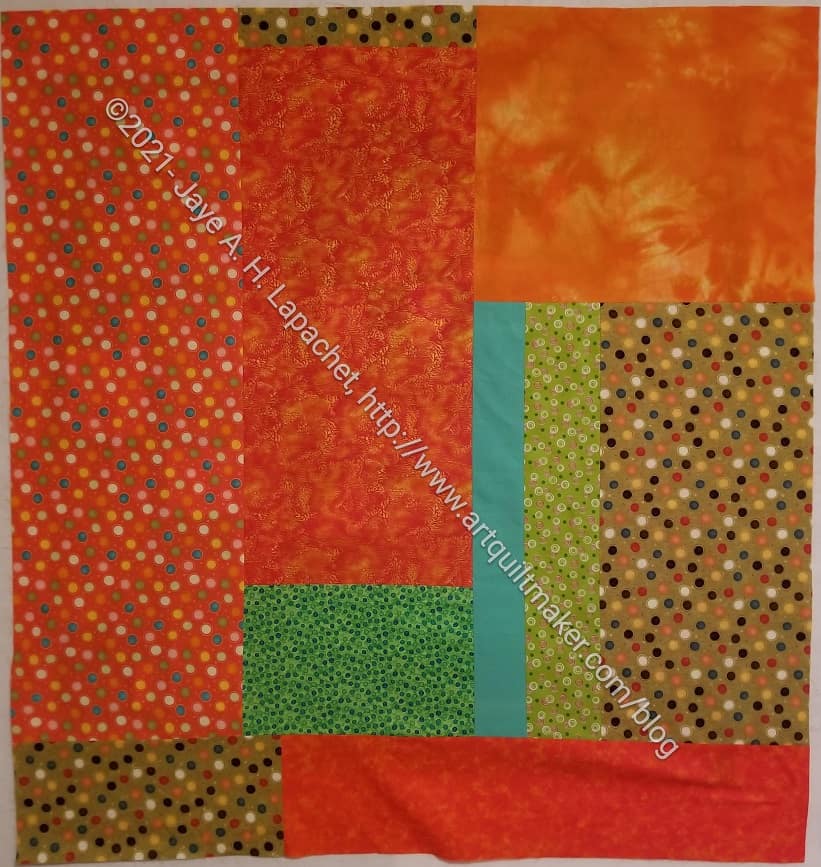
Tim’s Improv Donation Back
The back went relatively fast. I took both pieces to Sew Day and gave them to Peggy and the team for quilting.
I talked about one of the Triple Play Missouri Star videos in a recent Various & Sundry post. In this video, Jenny, Natalie and Misty take the same block pattern and make different quilts. I really liked what Natalie did with her version and I decided to try it out myself.
I thought it would be a quick test. Then I thought that I know how those quick “tests” go and started surfing around the Internet for fabric, thinking I would make an entire quilt. Fortunately, I got myself under control and decided to make one block with the True Kisses fabric I have and go from there. Cotton Cure still has packs of yardage.
I stopped and started the video as I followed along with the Missouri Star directions. Unlike other shows, Jenny and the gang tell viewers what sizes to cut, show you how to sew and press so you can follow along and make the block or quilt just from watching a free video. I like this about them.
Double Missouri Star center
The Missouri Star is a block they use for their logo. In this video they redid it. Jenny shrank the block and made a quilt from smaller versions. This version provided the directions for the center of Natalie’s block (above).
I didn’t choose good fabrics from the True Kisses line. There wasn’t enough contrast in the legs. Unfortunately I succumbed to the lure of those fabrics and the desire to just make something.
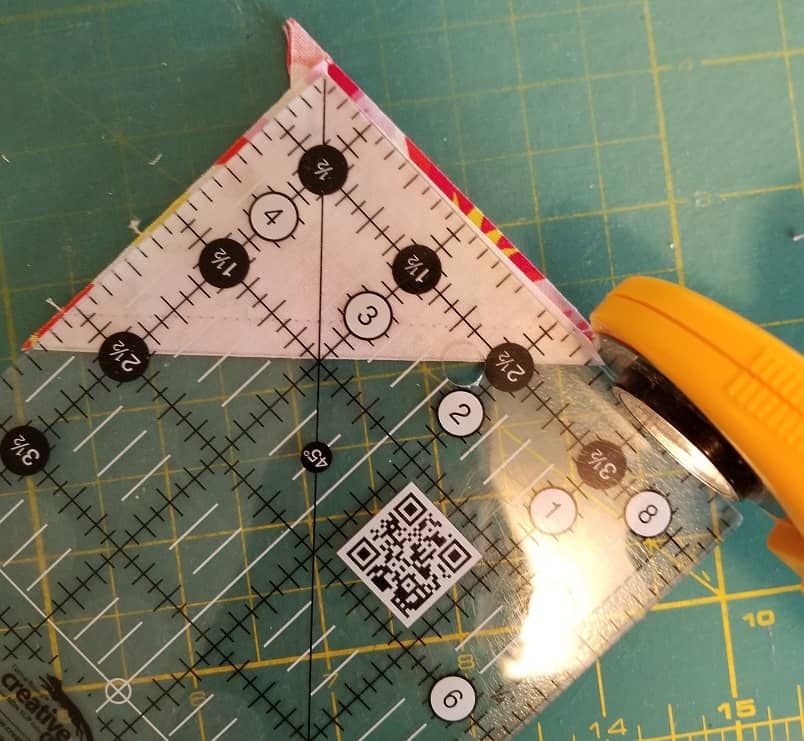
Trimming alternative
In the video, they show how to use the Clearly Perfect Trimmer**. I didn’t have that ruler so I tried their alternative method of using a regular ruler and it absolutely didn’t work. I should have saved myself the trouble and just squared up the various pieces the normal way.
My pieces were all the wrong size. Since I followed the Missouri Star method for making HSTs, all of my edges were on the bias. The small center block looked awful. I took the whole block apart, trimmed and put it back together again. I was reminded of how bias can work against me. I also think I didn’t completely understand the alternative method of trimming.
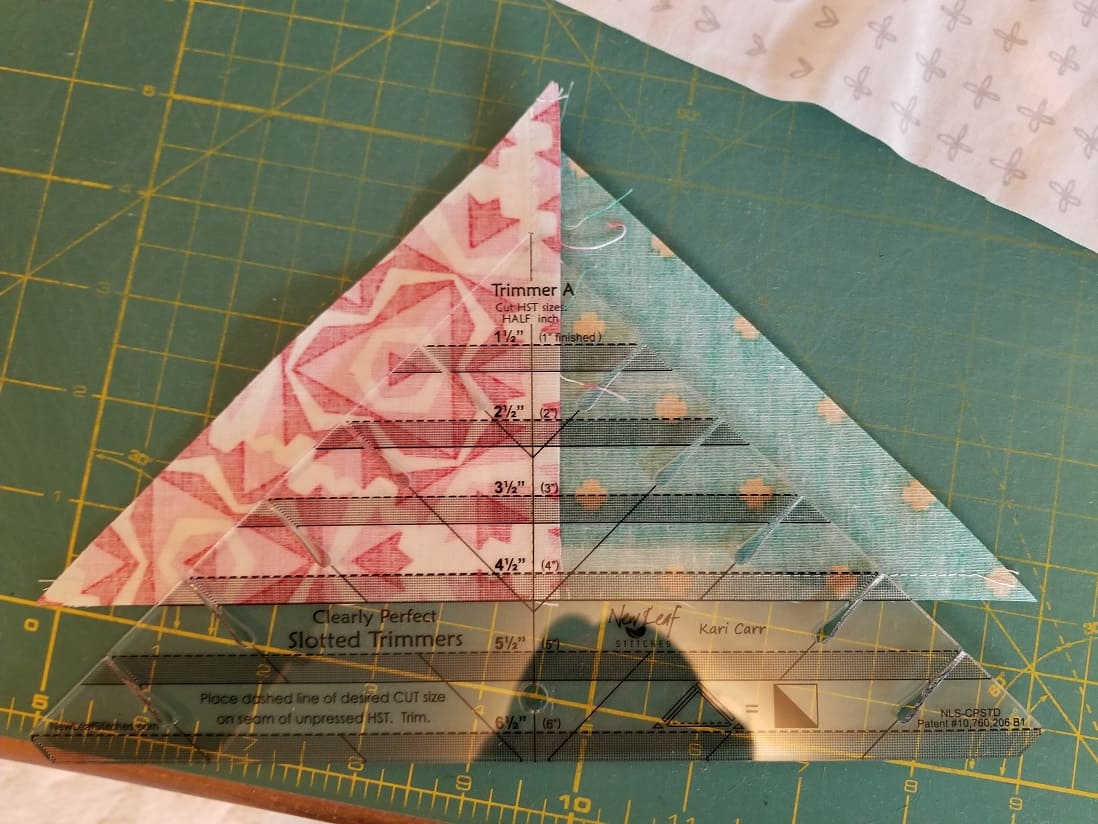
Using the Clearly Perfect Trimmer
I did end buying the Clearly Perfect Trimmer**. I had never heard of this ruler and I was curious to try it out. I can’t really tell if it was any better than trimming the regular way. The one difference was that you only make two cuts vs making two cuts, turning your piece and making two more cuts.
I haven’t read all of the directions for this set of rulers, but I am interested in learning how to use more of its capabilities.
Despite all of the ripping, I am pretty pleased with the way the block came out. I won’t be making a whole quilt, however.
**I use affiliate links and may be paid for your purchase of an item when you click on an item link in my post. There is no additional cost to you for clicking or purchasing items I recommend. I appreciate your clicks and purchases as it helps support this blog.