The Fabric of the Year 2011 top, back and binding are finished and ready to be sent to the quilter.
As you may know from my previous post, I ripped out the first inner border (which meant ripping out all of the outer borders as well) and replaced it with a different fabric. The ‘different’ fabric, is a 2002 star fabric from kp kids. I used it a few years ago on Women’s Work #1. The stars suggest the same form as the triangles and the color is the right amount of black to frame the piece.
I also trimmed a bit of the grey Ta Dot from the top and bottom borders. The top and bottom borders didn’t need that much space.
FOTY 2011 before removing diamond border
You might think I am crazy for doing all that ripping. I really think I need to make visual decisions visually, but sometimes I can’t see the piece as a whole until I get pretty far along the sewing path. I really want to do my best work and in order to do my best work I needed to get rid of that diamond border. I couldn’t get the joins in the strips I was using for the border to match up to my satisfaction. TFQ pointed out that the diamond fabric was printed off grain so the parts of the pattern printed on the fabric was not the same each section of the strip I used. She is right and I didn’t notice it until she articulated it. All I could tell is that I didn’t like the border and I needed to rip it out. So, I ripped it out.
FOTY 2011 back
I used large pieces to make the back, for once. The two fabrics on the left are Basic Grey and I thought using the large pieces would show off the labels and the portions of letters, which are part of the pattern of the fabric. I was also pleased that I was able to use the last bit of the Belle Fleur fabric. I like that fabric and I am glad I have a piece that I can keep for awhile.
Backs are arduous and I am really glad I was able to focus on using large pieces and getting the back finished.
I was going to say “HOORAY!!! I finished the FOTY 2011 top!”, jump up and down and encourage us all to dance together.
But.
No dice. I starting ripping out the border on Monday, because it screamed at me. The diamond black and white didn’t work. Two people that I asked didn’t even notice, but I can’t even look at the top without my eyes going straight to that black and white border. And that means I have to rip.
Still, I spent all day Sunday sewing and that is a bonus. It was such a pleasure to spend time with my sewing machine listening to audiobooks (yes, I finished one book and started another). Still, the pleasure did not create a great border.
If fabric were wider than 42"
If fabric were wider than 42″the quilt top would have looked like the photo right. In this photo, you can’t see the way the fabric was printed off grain or the way my joins did not line up properly when I tried to make the borders longer. The border didn’t work for *me* and the sooner I faced that reality the sooner I could really get to finishing the top.
I got to this place, because I couldn’t find the fabric I originally wanted to use and I was too lazy to shift stacks of fabric around to find it.
New Border OptionNew Border #2New Border Option #3
Laziness is my downfall and I deserve what I get. In fairness, I did move some fabric AND I may have used all of the fabric I was considering, but I did not look all of the blacks to make sure.
I retrieved some other fabrics and found the stars. Right now it is my favorite. I’ll see how I feel and how the joins look later in the week. I am so glad to have some time this week to work on this project in little bits.
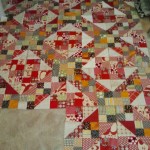
I made really good headway on FOTY 2011 over the weekend. If I had not gone to BAMQG, I would have finished the top, but socialization is a good thing. 😉
The photo on the left shows where I left it on Sunday night when my family finally managed to drag me away from the sewing machine. I start the piece by laying out the patches in the bottom left hand corner. I, first, concentrate on arranging the pieces in that area and move towards the upper right hand corner. The patches, before sewing, take up enough space to cover the entire design wall. As I sew, I move the sections (chunks) away from that beginning corner towards the upper right. It helps me know how much I have left to sew.
It turns out that I had a fair amount of unsewing to do. When I started, I just sewed one triangle to another without really thinking of how I was going to put the chunks together. As you can see in the light blue section, I now have all of the chunks angling to the left. To get them to line up, I had to rip some pairs out and sew those patches to other pieces.
I also needed to rip out and recut the smaller triangles. I am not sure what happened, but when I sewed the three prints and one background triangles together, they were at least a 1/2″ too big. I tried to work with them that way, but, in the end, I ripped them out and recut them, then sewed them back together. I have a few more to do in the last couple of rows, but am almost done. I am much happier with them now.
I may finish the top this weekend, but we will see. DH and I have to try and fix our printer and I have an event on Saturday to attend. I hope to have a bit of time to sew.
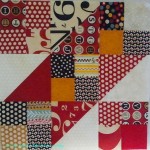
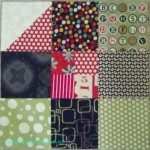
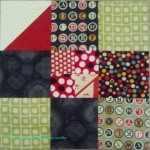
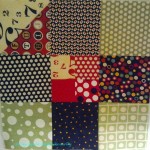
I am really enjoying making these 16 patch/postage stamp blocks for the BAMQG Charity Quilt project.The beneficiary of our quilts is the Lucille Packard NICU. Apparently, they use the quilts (and other kinds of blankets) to cover the incubators and keep out the light. Each baby who leaves receives a quilt or afghan or other kind of blanket to take home.
I take as many kits, which consist of 16 2.5″ squares, as I want and sew them together into 16 patch blocks. Last time I only took one, but this time I took 4, which was all the red kits available.
They made great leaders and enders and I really was able to put the blocks together very quickly.
The Stepping Stones top is done. It is quite large and my quilt hanger was not able to hold it to its full width. I am pleased with how it came out, though I think I will add a quilting border to preserve the pattern.
I used the leftovers to make the back, which is even larger.
Stepping Stones Back
I don’t know when it will be quilted as I have not heard from my quilter and have not found anyone suitable to step in.
Stepping Stones Corner
In the corner photo you can see the modifications I made to the pattern.I am pleased with how it came out and how the green in the center works with the green border blocks.
Monday was the Boxing Day Sew-in, which was organized by Sandy and contributed to by various other podcasters and quiltmakers. I have to say that I jollied myself along to get involved and am glad I did, because I had a great time watching the tweets scroll past AND making major progress on the Stepping Stones.
Somehow the Stepping Stones project was well on it’s way to becoming a chronic UFO. I don’t know why. Somehow it just became a chore. I think that starting it around Thanksgiving and then not having my usual sewing time to devote to it contributed to the feeling.
Spending time on it on Monday and getting cheers from others participating in BDSI was the shove I needed. The support felt great and the project is well on its way to completion.
Starting Point
This is where I started. Looking at it now I find that I had made good progress. My whole problem was my attitude. Perhaps I am a fickle creature and if I cannot work on a project intensely, I become angry at it and want to move on?
During the day, we were all tweeting our progress and I was using my cell phone to take pictures. I hope the pictures are acceptable quality.
Center Done
By 10:30 or 11am, I had finished the center part of the quilt. I was able to start in on the border. As you may have seen in the previous post, I decided to modify the border so it looked more finished. As such, I needed 4 corner blocks that were slightly different from the side blocks and then 20 side blocks.
Corner labeled
Again, I was able to finish the corner (4) blocks and 2 of the side blocks. This allowed me to take a look at the way the corner would look and if my design had the desired effect. The quilt top always looks different once sewn together, but I think it will suit me.
Yesterday, I sewed several big chunks together. this is another monster quilt, so it is taking me some time to get it sewn together. I would like to have the top and back done by the time I go back to work on the 2nd. I had really big sewing plans and the holidays got in the way.
Now back to listening to my audio book and getting this baby finished!
As you may have inferred, I got two quilts back from the stand-in longarm quilter last week, so I had two quilts to trim and bind. I don’t enjoy these steps in the process, probably because I don’t have a good set up for dealing with them. Colleen usually machine applies the binding and trims the quilts for me, but I didn’t feel like asking the new person since I don’t know her that well.
Friday, before the weekend, when I was at work, I made a list of tasks I wanted to accomplish during the weekend and trimming and binding these two quilts were among them. All of the tasks I wanted to accomplish were what I call ‘finishing tasks’ – making backs and bindings, trimming, applying bindings. Unsatisfying tasks, IMO. Of course, I like the finished products and I don’t mind hand stitching the binding, but getting to that stage is an uphill battle for me.
Hexagons, early October 2011
I buckled down and did the tasks and in between I added hexagons to the Sugar Flour Hexagon quilt top. I am not sure I will make a thousand hexagon quilts, but I making this one is really fun. The pieces are large enough so that it is not misery to machine sew the hexagons together.
I also enjoy the fabrics and, thus, the color placement. I thought of adding the hexagons in rows, but adding rows wouldn’t allow me to control the placement of the color in the same way.
I had fun with the blob, but want to make it more square, in anticipation of it actually being used for a quilt like purpose. I don’t know how large I will make it – I have plenty of fabric so that isn’t an issue – but I think, perhaps making the width in the neighborhood of how large I want the quilt to be would be a good idea.
Adding the hexagons was a really nice treat in between making the back, and binding and trimming Pavers and Stars for San Bruno #2.
If you have made blocks or a quilt from these patterns, please post a link in the comments section of the relevant block or on the AQ Block-a-Long Flickr group. I would love to see what you have made.
This is a tutorial on making a LeMoyne Star. This block is also called an Eight Pointed Star. This is one of the ways that I make it. There are many methods and I encourage you to try different techniques.
Alex Anderson has a great tutorial on one of the Quilt Show episodes on making a Split LeMoyne Star.
Before you do anything else, print the rotary cutting instructions below (first item under supplies). All the sizes, etc are there.
These directions use a quarter inch seam allowance.
You will be creating Y seams.
Chain piecing is not part of this tutorial.
Respect the bias.
Do not sew into the seam allowance.
Cutting
Line Up Ruler to Cut 1 Side of Diamond
Cut a 3″x23″ strips. That should be long enough for 4 diamonds (parallelograms). Cutting a 3″ strip across the width of a half yard of fabric will generate a strip that is long enough. You will need two and using 2 different fabrics looks good.
As shown (left), line your ruler up so the 45 degree angle on your ruler is along the bottom of the strip.The side of the ruler should be lined up right in the corner of your strip.
The idea is to cut off the end of the strip, so you have the correct angle of one pointy end of the diamond. I did try my diamond ruler, but none of the lines were quite the right size, so I couldn’t use it for this particular block.
Line Up Rulers to Cut the Second End
I used the two rulers to make sure that the diamond were accurate. The first ruler, on the left, should be even with the far left [soon to be] diamond point so that it would measure 4.25″ along the bottom edge. I used that measurement to line up the 45 degree angle of the second ruler so I could cut the angle in the right place. I butted the second ruler up against the first ruler (carefully) so everything was in alignment. The second ruler (on the right) must have a 45 degree angle that intersects with a corner or this trick won’t work.
I removed the left ruler before I started cutting, as it was easier to cut with just one ruler on the mat. I was careful not to jostle the ruler in the 45 degree angle position. Line your ruler up exactly as shown in the photo. You don’t have to have exactly the rulers I have. You can use any rulers with the correct lines.
Cut 2d End of Diamond
I found that the method really does work. You will need to repeat the step above 8 times to get 8 diamonds. After the first diamond, it will be easier, since you can use the 2d cut for each diamond as the first cut for the next diamond.
Aside from having to watch out for ruler jostling, I was really pleased with how easy this was and well these diamonds came out. Don’t get me wrong, I wouldn’t have wanted to cut the 300+ diamonds for FOTY 2010 using this method, but for a LeMoyne Star, it works very well.
I cut all the diamonds at once from two strips of two different fabrics. My fabrics are:
background: Lil Plain Jane
red diamonds: Moda Bliss #55021
aqua dot diamonds: Moda Bliss #55023
Side Triangles
Cut the squares and triangles according to the cutting directions on the PDF in the supply list. The triangles are quarter square triangles, which means that you cut the triangles so the straight of the grain will be along the hypotenuse (the long side of the traingle).
If you have some reason for not being able to cut the side triangles as shown, be careful sewing the block together and then stay stitch the outside of the block once you are finished.
Pieces cut
Once your pieces are cut, lay them out or adhere them to your design wall, so you know what you have.
Cut Diamond, Face down
I like to keep them where I can see them because it helps me know where I am. As I sew, I put the sewn elements of the block back up on the design wall.
Once you have cut all the diamonds, you will need to mark them. You need to mark 1/4″ away from the seam line, because if you want this block to come out right, you cannot sew into the seam allowance. The biggest rule I have for making the LeMoyne/8 pointed star block is NOT to sew into the seam allowance. There are exceptions, but I am not going into those now.
Put your diamonds face down on a writing surface and prepare to mark. As you can see from the photo, I used my cutting mat as the hard surface. You can use a table or whatever else works for your work area. I used the Sewline pencil to make the marks. Pilot SCUF pens, a mechanical pencil, etc also work.
Get ready to mark the seam allowance on all of your pieces (squares, triangles, diamonds).
Mark with Perfect Piecer
I like using the Perfect Piecer ruler by Jinny Beyer for marking weird angles, because I only have to move the ruler once to mark the ‘corner.’
With the Perfect Piecer (they aren’t giving me free stuff, BTW!), you put the ruler in the ‘corner’ as shown in the photo. Where I have placed the circle is a hole. Note it is a small hole, so a regular No.2 pencil usually won’t work. Stick your Sewline (or other fabric marking implement with a very thin point) in there and make a dot. Voilà!
You will need to use two different parts of
Ruler Angle Does Not Fit Side
the Perfect Piecer ruler to make the marks on all four ‘corners’. There is no angle for the sides of the diamonds, so just use the straight edge (as I describe below). You don’t need to know the angles, if angles make you crazy. Just match up the shape of the ruler with your cut piece.
Use Straight Edge for Marking
You can certainly use any kind of ruler. Take your regular ruler and line up the 1/4″ line with the cut edge. Make a line around where you think the quarter inch would be. Make it longer, so you don’t have to go back and do it over. Move the ruler to the opposite cut edge of the diamond and cross your first line with a new line. It makes an X. I have done this numerous time and there is no problem using an X instead of the Perfect Piecer dot.
Beautiful marks!
In case you were wondering what the marks look like, the photo (red diamond with blue circles, left) shows examples.
The upper left hand mark inside the blue circle is the mark made with a Perfect Piecer and the Sewline pencil.
The lower right hand mark is made using a regular rotary cutting ruler and the Sewline pencil. Either mark works, as I said. You will use these marks to stop and start your seam lines. NO sewing into the seam allowance!
You will need to mark the squares and the triangles, too. You can use the Perfect Piecer to mark those pieces as well.
At this point, you might want to use some Mary Ellen’s Best Press to stiffen your pieces since you will be sewing along a lot of bias edges. You can either spray it on all of your pieces all at once, or as you are getting ready to sew. If you don’t want to use Mary Ellen’s Best Press or spray starch, no problem. Just keep in mind that you are working with bias edges, so work with them carefully. You don’t need to be afraid of bias edges. Just work slowly and carefully. Respect the Bias! 😉
Position Triangle over Diamond
Sew Segments Together
Now you are ready to sew!
First, position one of your side triangles over the diamond as shown, right sides together. You are lining up the diamond with the left non-hypotenuse side of the side triangle.
Line up the marks you have made on the diamond with the marks you made on the triangles.
I used pins, but only stuck them through vertically one time to keep them in place until I got to the sewing machine.
You can give the pieces a little press to stick them together, too, if you want.
Sew from Mark to Mark
Next you sew from mark to mark. Stay out of the seam allowance! You can back stitch, if you want, but stay out of the seam allowance. Start sewing at one mark and stop at the second mark. Easy!
An Aside: You are probably wondering about the lemon fabric. I press fabric on my ironing board and if I am pressing a lot of pieces, then I will put a larger piece of fabric so that I can get more bang for my buck. As I press the smaller pieces the larger piece gets pressed as well.
Press Carefully
You can press now. If you do, press carefully (remember the bias, respect the bias) towards the diamond. If you don’t want to press until later, that is ok, too. I usually create the entire segment (2 diamonds, one triangle) before I press.
Now you have your first piece. YAY!
Not hard or scary, right?
Repeat this step for all of the diamonds that will be in the same position as my aqua with white dot diamonds.
2d Diamond with Pieced
The next step is to sew the second diamond on to the segment (above: aqua with white dot & Lil Plain Jane fabrics) you have just made. You will be doing an inset seam. An inset seam is also called a Y seam. A lot of people hear this and panic. It isn’t difficult, but you can’t chain piece them and you have to pay attention. This method is similar to sewing hexagons together. Y seams really expand your quilt block piecing repertoire.
As you can see I have lined the red diamond up with the segment I sewed and am ready to line up the pieces, pin and sew.
Line Up 2d Diamond & Pin
First, line up the marks on the triangle and the diamond.
I just used vertical pins to make sure that everything was lined up before I sewed. I put a pin in the middle of seam line right before I sewed just to hold everything together.
You will be sewing in two stages. I like to sew the triangle to the second diamond before I sew the two diamonds together.
Sew 2d Diamond
Next, place the group of 3 patches (2 diamonds and a triangle) under the needle, lining up the marks so that the needle misses the seam allowance and goes straight into the first mark.
Sew from mark to mark. The triangle and the second diamond will now be sewed together.
Sew from Top to Middle
Second, line up the new diamond with the diamond you have already sewed to the triangle.
Line Up 2d Diamond & Pin
Match up the marks on the top and sides of the diamond. Right sides should be together.
Put the top of the 2 diamonds into the machine. You will start sewing at the mark, which is 1/4″ in from the top of the diamond. Sew between the two marks, avoiding the seam allowance.
Top View of Sewing Mark to Mark
Sew down to the mark at the bottom of the diamond. If the pressed seam allowance looks like it will go under the needle, move it out of the way with your finger, the tip of some sharp scissors or a stiletto.
Stop at the second mark.
Remove the piece from the machine.
Segment 1 Complete
Once you have sewed the the three patches together, you will have one full segment completed.
Next, press the 3 seam allowances into a swirl. This is similar to what you do with hexagons. As a guide, use the first seam that you pressed after sewing the first diamond to your triangle.
The reason I suggest the ‘Swirl’ is that it reduces bulk later. This particular pressing point isn’t as important in terms of bulk as the center, which has a crazy number of layers, once finished. Consistency is good, though.
Repeat to make four of the above segments.
Sew Quarters into Halves
Segment and SquareSew Square to Segment
Line up the square to the [red] diamond, matching the marks.
Arrange your pieces like I have done.
Line up the marks in the square with the marks on the outside side of the bottom (in the picture it is red) diamond.
Press, if you like. Pin, if you like. Go back to the sewing machine and sew from mark to mark.
Repeat this step for all four segments.
Sew Square to Segment 1
If you just look at the next photo, you might have a heart attack. Please don’t. Add the square is not hard. The key is to NOT sew into the seam allowance.
Two Quarters of the Block
Once you have two segments sewn to two squares, prepare to sew the two quarters together.
An Aside: You can actually sew into the seam allowance on any seam that will end up on the outside of the block. If this thought is going to make your head explode, then just remember my mantra: don’t sew into the seam allowance and you will be fine.
Line up 2 Halves along the Center Diamond
Sew Diamond Only
Sew the [red] diamond to the aqua diamond on the bottom. Stay out of the seam allowance and sew mark to mark.
Seam Line After Sewing Diamonds
After Diamonds are Sewn
It looks weird once you have sewn the diamonds together, but it will work out.
Line up Square
Line up the square with the [aqua] diamond and sew from mark to mark.
You Finished Half of Your LeMoyne Star
Two Halves of Block
Center detail
Finally, we are ready to sew the two halves together. You should have pressed in such a way that you can nestle the diamonds together using your pressed opposing seams.
Match up the marks with pins. I used really thin ones this time. I normally use the kind shown in the center detail photo, but switched to thinner ones as I worked on this step, because my normal pins weren’t giving me the results I needed for this tricky piecing. Note that I don’t pin right in the center. I pin well where I am not going to sew and may put another vertical pin in the center temporarily. There are so many layers in the center that it doesn’t always make sense to pin there. Do what works for you.
Sew Halves Together
Line up your piece carefully.
Hold on to your pinned halves tightly.
Sew over the center only. Start about an inch from one side of the center and stop about an inch after the center.
Sewing only a couple of inches makes it much easier to rip out, which I had to do. You might think that this will be a piece of cake, which it might be for you. It can be tricky also, because of the many layers of fabric that you are sewing through. My sewing machine did not want to go straight over that center section, which is why I had to rip out the first time.
Take the piece out of your machine, open it and see if you were able to match the center.
Once you have the center matched to your satisfaction, sew from the edge of one diamond across the entire center to the edge of the opposite diamond. Remember the mantra? Refrain from sewing into the seam allowance.
Finished and Pressed (full)
Once you have sewn the squares to the last sides of the last diamonds, pressing becomes very important. I have indicated with the circles how your pressing should look. If you need to re-press, spray the piece with water and that will make it easier.
By creating a swirl during the pressing of the center, you will reduce bulk for your quilting step. You will thank yourself if you quilt your own quilts. Your quilter will thank you, if you have someone quilt your quilts.
Finished and Pressed (detail)
Once you have sewn the squares to the last sides of the last diamonds and pressed the piece, you should have a gorgeous block and feel very proud of yourself.
This looks similar to the block from last week, Off Center 4 Patch Rectangle. There are some differences in the cutting, but you could make a second version of last week’s block and use that instead.
If you have made blocks or a quilt from these patterns, please post a link in the comments section of the relevant block or on the AQ Block-a-Long Flickr group. I would love to see what you have made.
This blocks is similar to the four patch and the other rectangle block I have posted, which I called Rectangle Four Patch.
This blocks is slightly off center, so the squares and rectangle are slightly different sizes than what you have been cutting.
This block is also suitable for 3 fabrics.
If you have made blocks or a quilt from these patterns, please post a link in the comments section of the relevant block or on the AQ Block-a-Long Flickr group. I would love to see what you have made.
The other night I caught a new episode of Love of Quilting and Jo Morton was a guest again. She was showing another technique for making half square triangles. I first became aware of Jo last year when I watched a previous episode of Love of Quilting.
Jo Morton is a fabric designer, writer and quilt designer. She has a website, where she sells, apparently, self-published, books, and a blog. She is also a designer for Andover Fabrics and has a large number of collections and projects on their site.
Based on what I saw Marianne and Jo do on the show, I tried the technique and was pleased with the results.
I got in touch with Jo, who was very quick about getting back to me, and asked whether she had technique sheets or sections in her books discussing the scalability of her techniques. She said that the market is geared towards projects and she didn’t have technique sheets. Too bad. I had trouble with her Flying Geese technique, but found the half square triangle (HST ) technique to be one of the best I have seen. It is straightforward, there is a minimum of dealing with bias and the squares magically appear all at once.
Since she didn’t have technique sheets, searched the web. I found a similar one posted on Wet Canvas. The Wet Canvas tutorial does a good job of showing the different ways of using the half square triangles. Most of the techniques were the square method (like what I describe below, but with one square making 2 HSTs, rather than a larger square making 8 HSTs) like the p.s. i quilt tutorial. I am also interested in the Quilt in a Day method and this tutorial talks about that. B’s Modern Quilting has the fish tutorial method.
I started with 5″ squares, which is the size they used on the show. The 5″ squares make 8 HSTs. I thought this would be a great way to use charm packs.
2 5Draw an XPut 2 squares together
First, I drew an X, corner to corner, on the lighter square. Then I put the 2 squares right sides together and pressed them. If I had wanted to pin I would have pinned far away from any of the lines. I walked on the wild side and didn’t use pins.
Next, I sewed on each side of the lines, 1/4″ away from each line
Measure 2.5
After sewing, I measured 2.5″ from the side of the square.
Cut in a + Configuration
Cut the square in a plus configuration 2.5″ (middle of the X). I think you could cut on the pencil lines, but you have to cut in a plus configuration at some point and it seems to make sense to cut in the plus configuration first.
Cut in +, then X
After you cut the plus, you will have four squares, each with a line drawn diagonally across the middle. Cut the squares in half diagonally. You can use the line as a guide. It is more important to line your ruler up corner to corner.
HSTs from 5
The result is 8 2″ half square triangles. The above are actually a thread or two larger than 2″, which leaves the perfect opportunity for trimming to make them an absolutely perfect 2″.
Trim
Trim the squares to 2″. Trim on all four sides. Don’t be tempted to trim just on two sides. Line the 45 degree angle line on your ruler up with the diagonal seam line on your HST and trim on all four sides.
Beautiful HSTs
Now you have 8 beautiful HSTs. The bias edges shouldn’t be scary for you on the regular method, but this method makes HSTs much easier. I think this would be a fabulous method to make a lot of HSTs in a short amount of time. It is similar to a tutorial that p.s. i quilt posted, but times 4. I am planning to try out different sized beginning squares to see what sized HSTs I come up with.
I talked over the math with my DH and came up with a chart showing the different sizes you can make with this technique.
I worked on the LeMoyne Star today. I had some work, which languished while I was out of town,so I had to do that as well, but it was great to get back to sewing a bit.
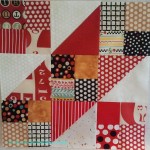
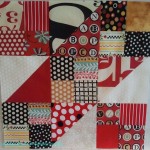
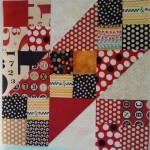
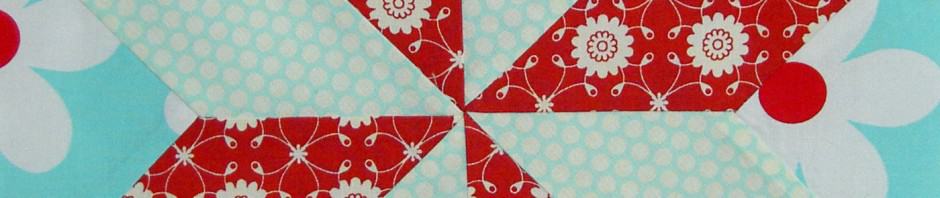
The LeMoyne Star has some tricks, but is not very difficult to piece. I took pictures as I pieced it and will work on a tutorial for a future post. The key trick is to NEVER sew into the seam allowances. I did sew into the seam allowances along the outside edge towards the end of the process, but otherwise, I stopped shy of the seam allowance, or moved it out of the way as I was sewing. My stilletto came in handy. Choosing fabrics was a key piece of the process and took longer than I expected. The ‘make visual decisions visually’ adage worked well, though, because what I thought would look good didn’t look good at all. Below are some of the choices I considered:
Alternate colorway from the Moda Bliss lineDots from Quilted FishBright FlowersAnother Bliss FabricAqua-Red Sampler Quilt Blocks -September 2011
Above are all of the blocks I have made for the class so far. Don’t they look nice? They are hogging up space on my design wall, so I will need to take them down, but I am pleased with how they are coming out.
Some of the blogs do a feature every week called WIP Wednesday where they show a work in progress. I don’t want to do that every week, but somehow this week it seems appropriate.
Original Bullseye
This is the project that started the whole Bullseye project. This has been on my mind lately, for some reason that I don’t know. I always planned to do a border with curves in it, so it would look like a curve was going all the way around the quilt. I found directions. I have a test piece and I just decided that was not the way to go.
This quilt doesn’t lend itself to the self bordering technique. I have a lot of leftover circles that I could use in some way, but I don’t know what way. Aside from slapping on some borders and calling it good, I don’t have any ideas. Do YOU have any ideas? Even a little spark would be helpful. Let me know.
As I mentioned in a previous post, back in July, this quilt is all about the fabric. I got down to it over Labor Day weekend and made the top. I still need to add borders, but the top is basically done.
You can see that the Disappearing 9 patch block means that there is an automatic border on two sides of the quilt. I don’t want a border on two sides of the quilt. I want the border (a border in this case) to be symmetrical, so I added a row of rectangles and squares.
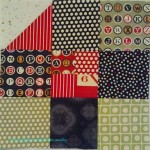
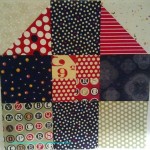
Giant Food 9 PatchGiant Food 9 Patch #2
These blocks actually are quite large. Each square in the block is 6.5″. Once you cut them into quarters they become a manageable size.
I was consistent about placement of red and black, so that the red would end up as cornerstones and the black would be the sashing. I fiddled around with the arrangement quite a bit, as I am wont to do. I wanted to vary the food prints that were next to each other as well as the location of the blacks.
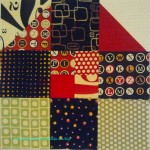
Arranging
This is what you get once you cut a 9 patch block into quarters and rearrange them. In fairness and honesty, the above are quarters from 4 different 9 patches. You would see the same red, if they were from the same 9 patch, but you get the point. Even if this was from the same 9 patch, there would be variety, because of the different blacks and the different focus fabrics.
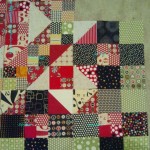
Chunkin' It
Per TFQ’s instructions, I did chunk this quilt together. That method of putting together quilts works so much better for me than sewing blocks together in rows. I also find it easier to keep my blocks placed where I want them placed.


")
")


