I have had some interest in the Zig Zaggy Quilt. I have had a lot of nice comments. While, it is not a completely original design, being related to the Oh Fransson! New Wave pattern and the Happy Zombie variation, I thought you might be interested in my version of how to make this quilt.
First, the differences: Oh Fransson’s pattern using templates. Happy Zombie uses the EZ Quilt wedge ruler. My variation uses the longer Philips Wedge Ruler.
Supplies
Basic Sewing Kit
Sewing machine
thread
2 Jelly Rolls (one Jelly Roll will get you 4 rows and a bit of fabric for the border)
sashing fabric (not sure how much you need for this project. I bought a 5 yard piece of Kona Snow and have been hacking bits off for various projects)
Mary Ellen Best Press
10 degree wedge ruler (www.phillipsfiberart.com)
stilleto
quarter inch foot to fit your sewing machine.
iron & iron board
Directions
First, I cut strips of the Kona Snow, selvedge to selvedge, 1.5″ wide. I probably would cut them 1.75″ or 2″ wide if I were to make this quilt again.
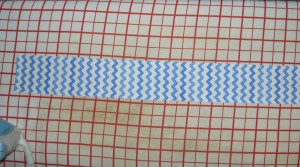
One by one, lay out your strips on your ironing board. Spray with Mary Ellen’s Best press and press with a hot iron. Follow the directions on the MEBP.
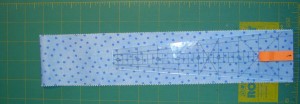
After pressing the Jelly Roll strips with Mary Ellen’s Best Press, take your strip over to the cutting station and trim off the selvedges. Double the strip. Place the ruler on strip lining up your preferred ruler line with the bottom of the strip. My orange post it was used to remind me where I was cutting each time.
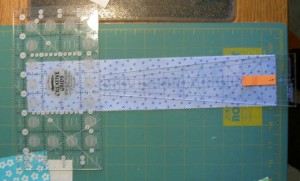
Use a small ruler and line it up against the short end of the wedge ruler. Remove the wedge ruler and trim the strips (remember your strip is doubled) to the desired length.
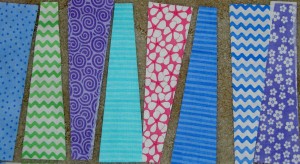
It is important to lay out the pieces, before sewing, so you know which way the wedges are sewn to the sashing strips. I also found this layout helpful in order to keep the colors in the correct order.
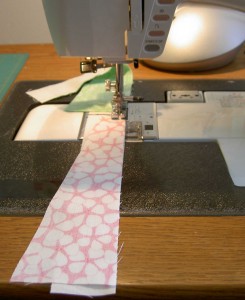
Carefully line up the wedge skinny end or fat end towards you depending on the orientation of the wedge and sew without pushing or pulling the fabric. Remember you are working with bias.
I sew each of the wedges to one sashing piece in assembly line/ chain piecing fashion. After I sew, I press and then lay the wedges in order by color on the floor. You could also use a design wall. Once that is done, all wedges need to be sewn together.
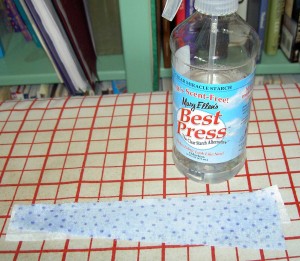
After stitching, I lay the two pieces on the ironing board. The piece towards which the seam will be press should be on top. In the photo above, I am pressing towards the color/wedge and NOT towards the sashing. I spray lightly with Mary Ellen’s Best Press and PRESS (not iron) the seam in the correct direction.
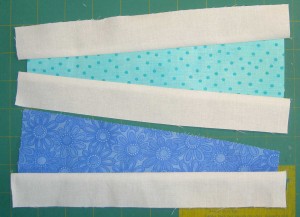
Before trimming, lay the two pieces and eyeball how they would be sewn together.
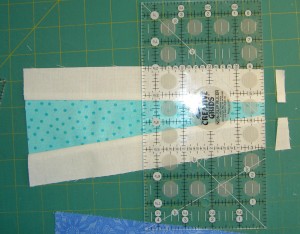
After eyeballing the sashing, move the pieces aside and trim the sashing so it aligns with the top and bottom of the wedge. This may seem wasteful, but it is a lot easier than trying line up perfectly cut sashing with a diagonal line.
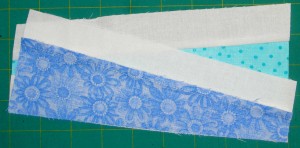
After trimming, line up the corner (bottom right in the picture above) on the sashing so that when you put the pieces in the machine there is a little v that is approximately 1/4″ from the edge (bottom in the picture above). You may not be able to see the v as it may be on the bottom.
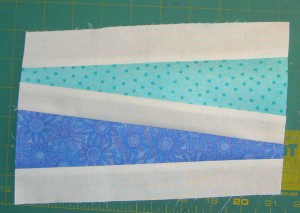
Above is what the trimmed wedge group will look like.

After trimming the ends off the wedge group, put it back in it’s place in line, so you don’t get confused about where these colors go. You want to ensure that the colors are consistent lengthwise down the quilt.
Keep sewing the groups together until you have a whole row.
Once you have two rows of wedges completed you need to sew the rows together.
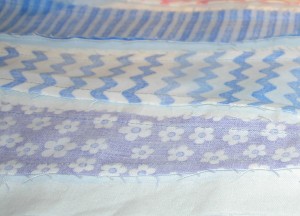
In the above photo, you can see that I carefully pressed the seams in the same direction on all the pieces in this row (towards the sashing). The row on the bottom has the seams carefully pressed in the opposite direction (towards the wedges). In that way, I was able to nest them together before sewing the row. This helped the pieces to line up when I put the rows together.
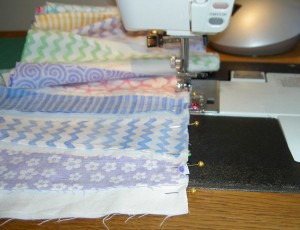
Notice: LOTS of pins!
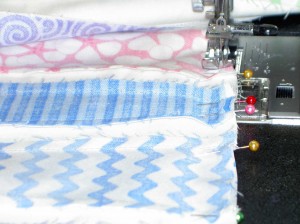
When putting the rows together, pinning is very important. Also, using a stilleto and sewing slowly really helped.
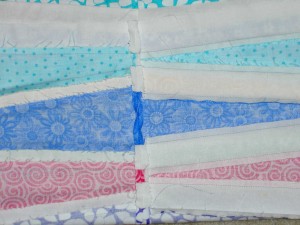
Look! The world didn’t end because I pressed the seam joining the two rows together open. It makes the join of the two rows lay flatter. If you have gotten anything from this post it should be that pressing is really an important aspect of putting this quilt together.
You want success? Press. Carefully.
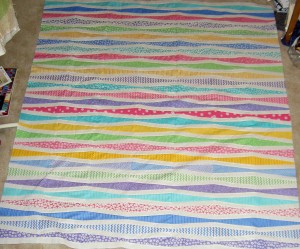
I left two edges wiggly. I didn’t feel like squaring them up.
This is great, Jaye.
Thanks, I am glad you like it, Kathy!
I actually love it and put it on the bucket list. Thanks for posting it.
Let me know if you need advice. It really isn’t that difficult. Pressing, in case I didn’t mention it, is the secret weapon. 😉