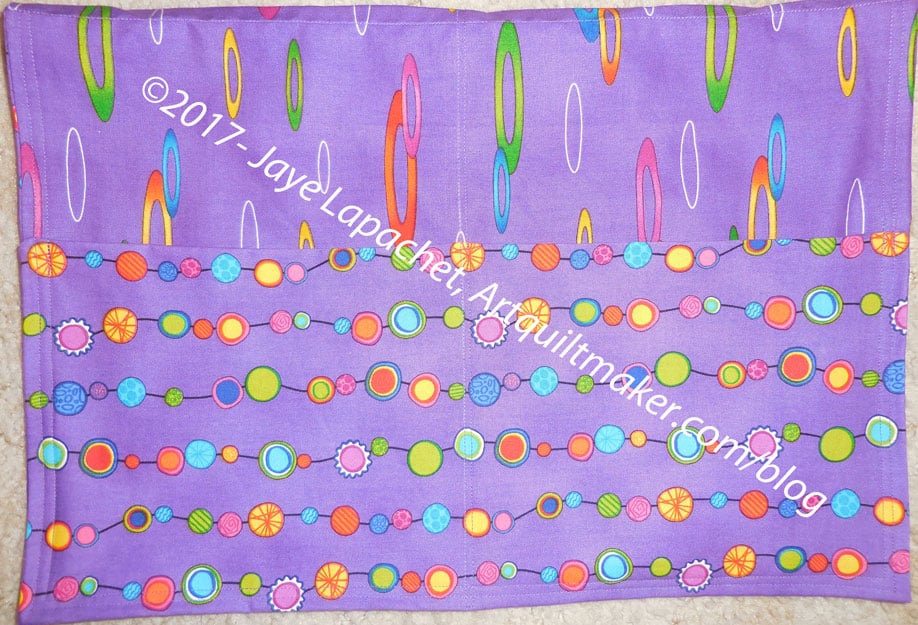
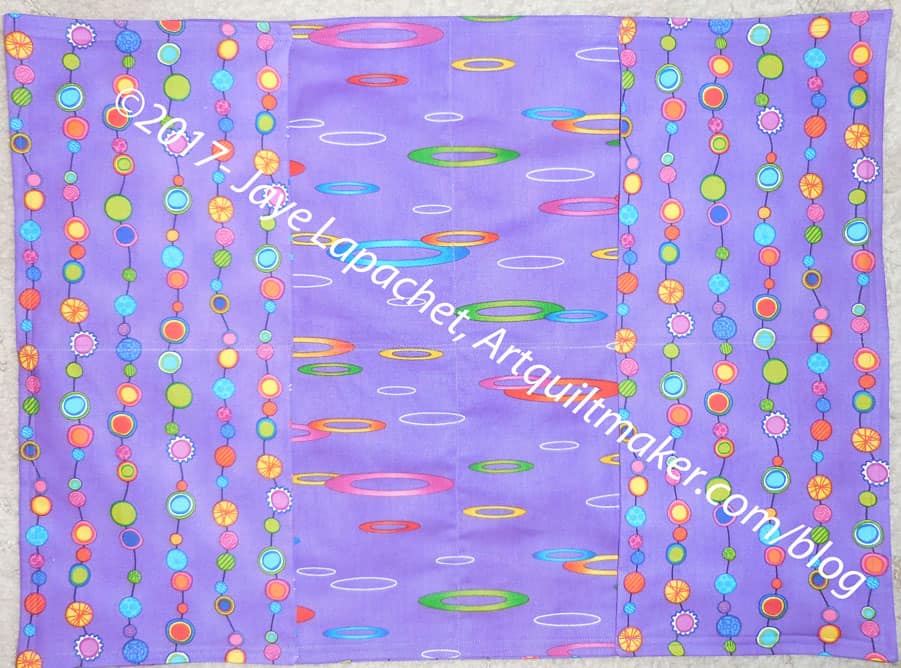
You never know when skills/patterns from Sew Days will come in handy. Remember a few months ago when we made walker bags for the folks at a local nursing home? Peggy worked out the pattern for that day. I remembered it and when I found out my friend was getting her hip replaced, I contacted Peggy about a few measurements and made one.
Walker Bag-open
The fabric line is called Alien Invasion. I pulled the purple bins out of my closet and found it. My friend will have to try it out and see if it is practical. I told her I would make another, if it didn’t work.
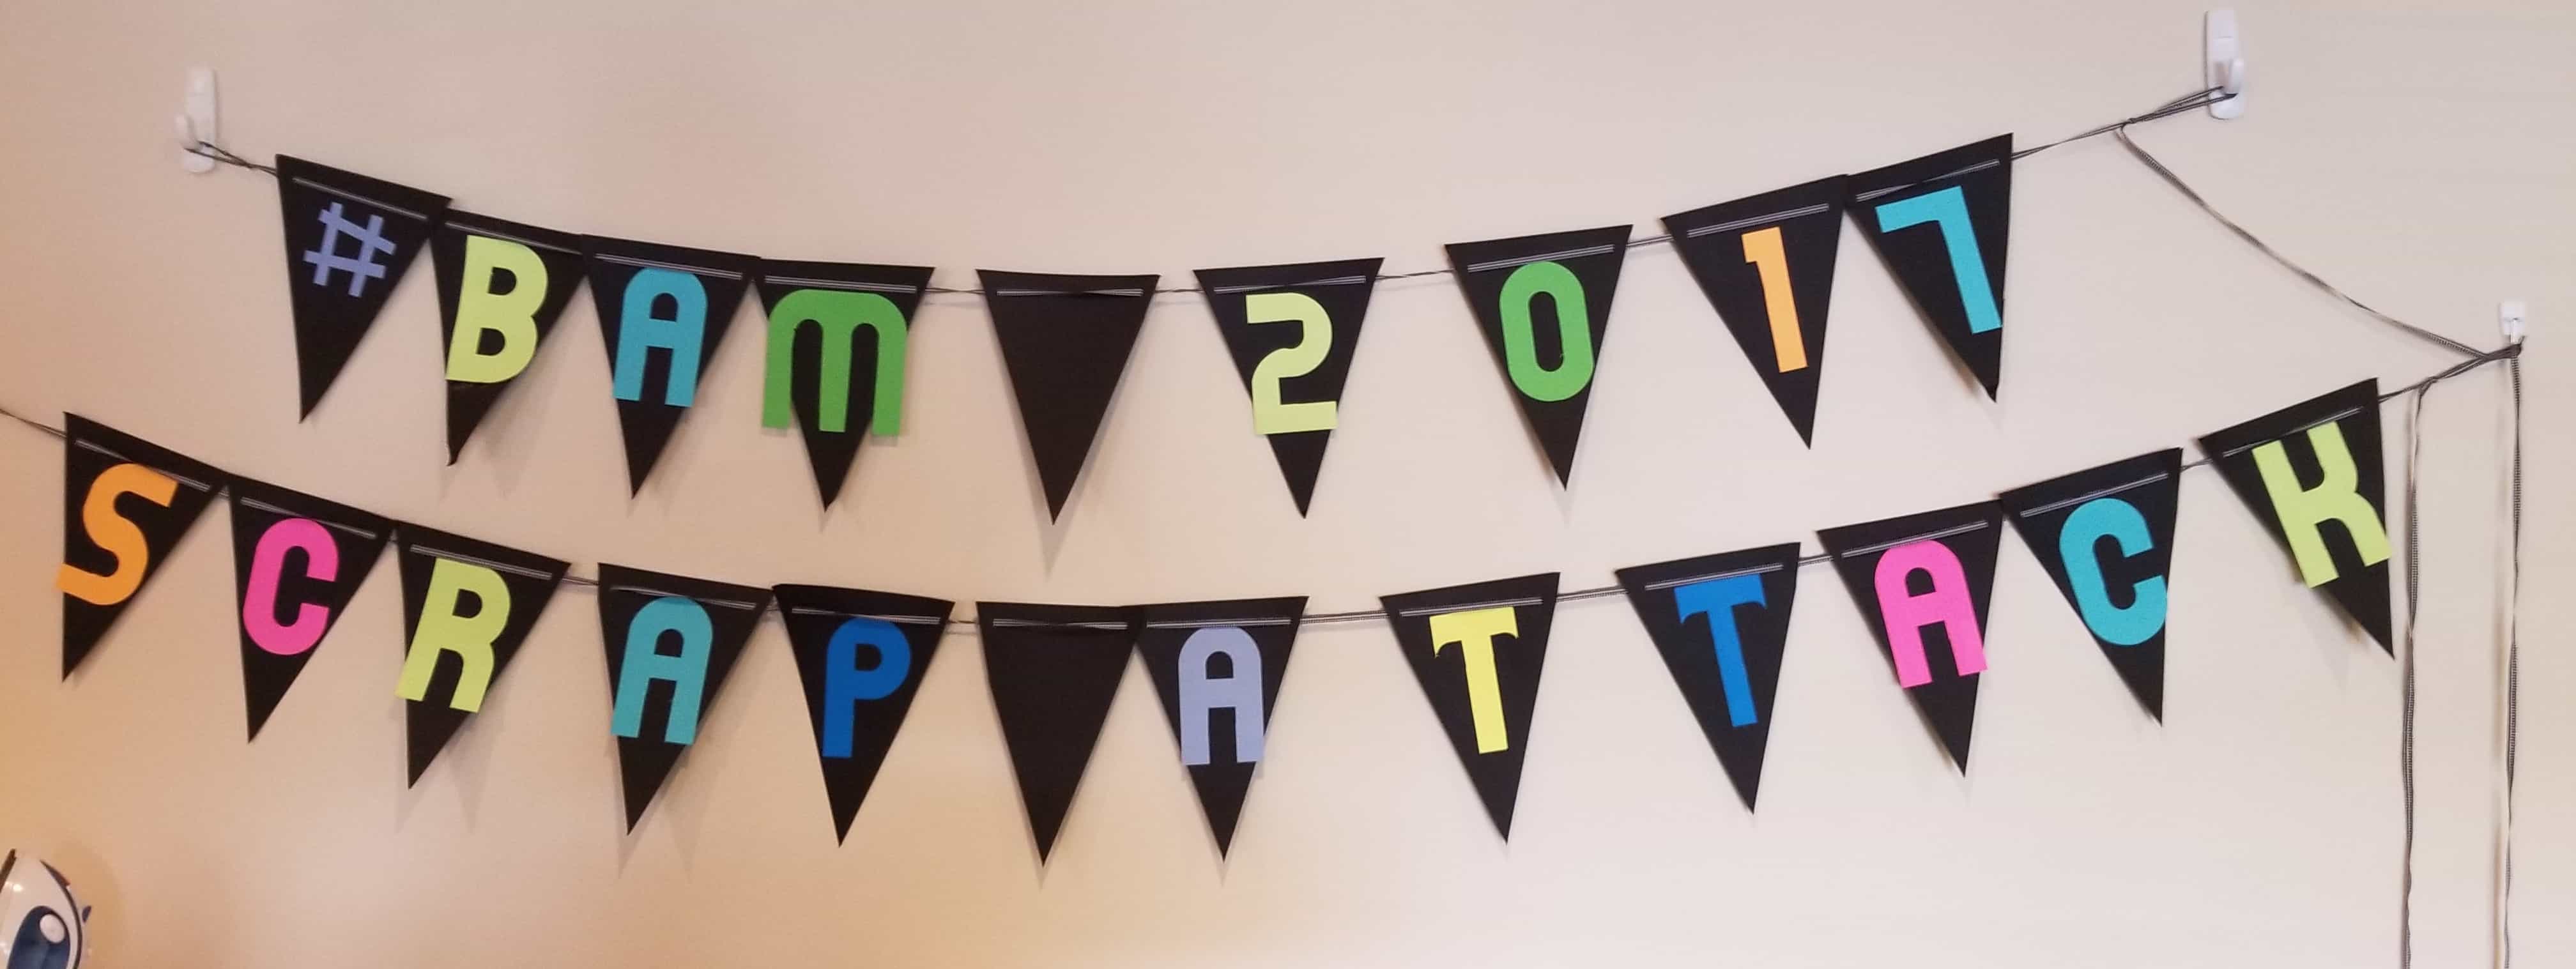
I have discussed the Retreat in passing over and over, so finally decided that I should get around to writing about the retreat itself.
BAM 2017 Scrap Attack
The Retreat started on Friday at 10am. Following along with our year long theme, Scrap Attack, the Retreat followed that them as well.
Before arriving at the Retreat, I went to the gym, ate breakfast and packed the car. I had two days at home alone (YM gone at school, DH on a NSGW trip) in the evenings during which I prepared and packed and organized. After leaving to go to the Retreat, we stopped at Always Quilting and The Granary. I wanted to find an open toe Acufeed foot for my Janome 6600. I planned to quilt the Thanksgiving tablemat and needed to see where I was going. The Acufeed foot that came with the machine is good, but not for seeing exactly where the foot is going or following a line. I didn’t get my hopes up for the foot to be available at Always Quilting and I wasn’t disappointed. I resolved to try to quilt the tablemat anyway.
We went to the Granary, because I like that store and SIL had never been there. I bought a couple of pieces of fabric, thinking I might make an extra Cell Phone Wallet with one of the pinks.
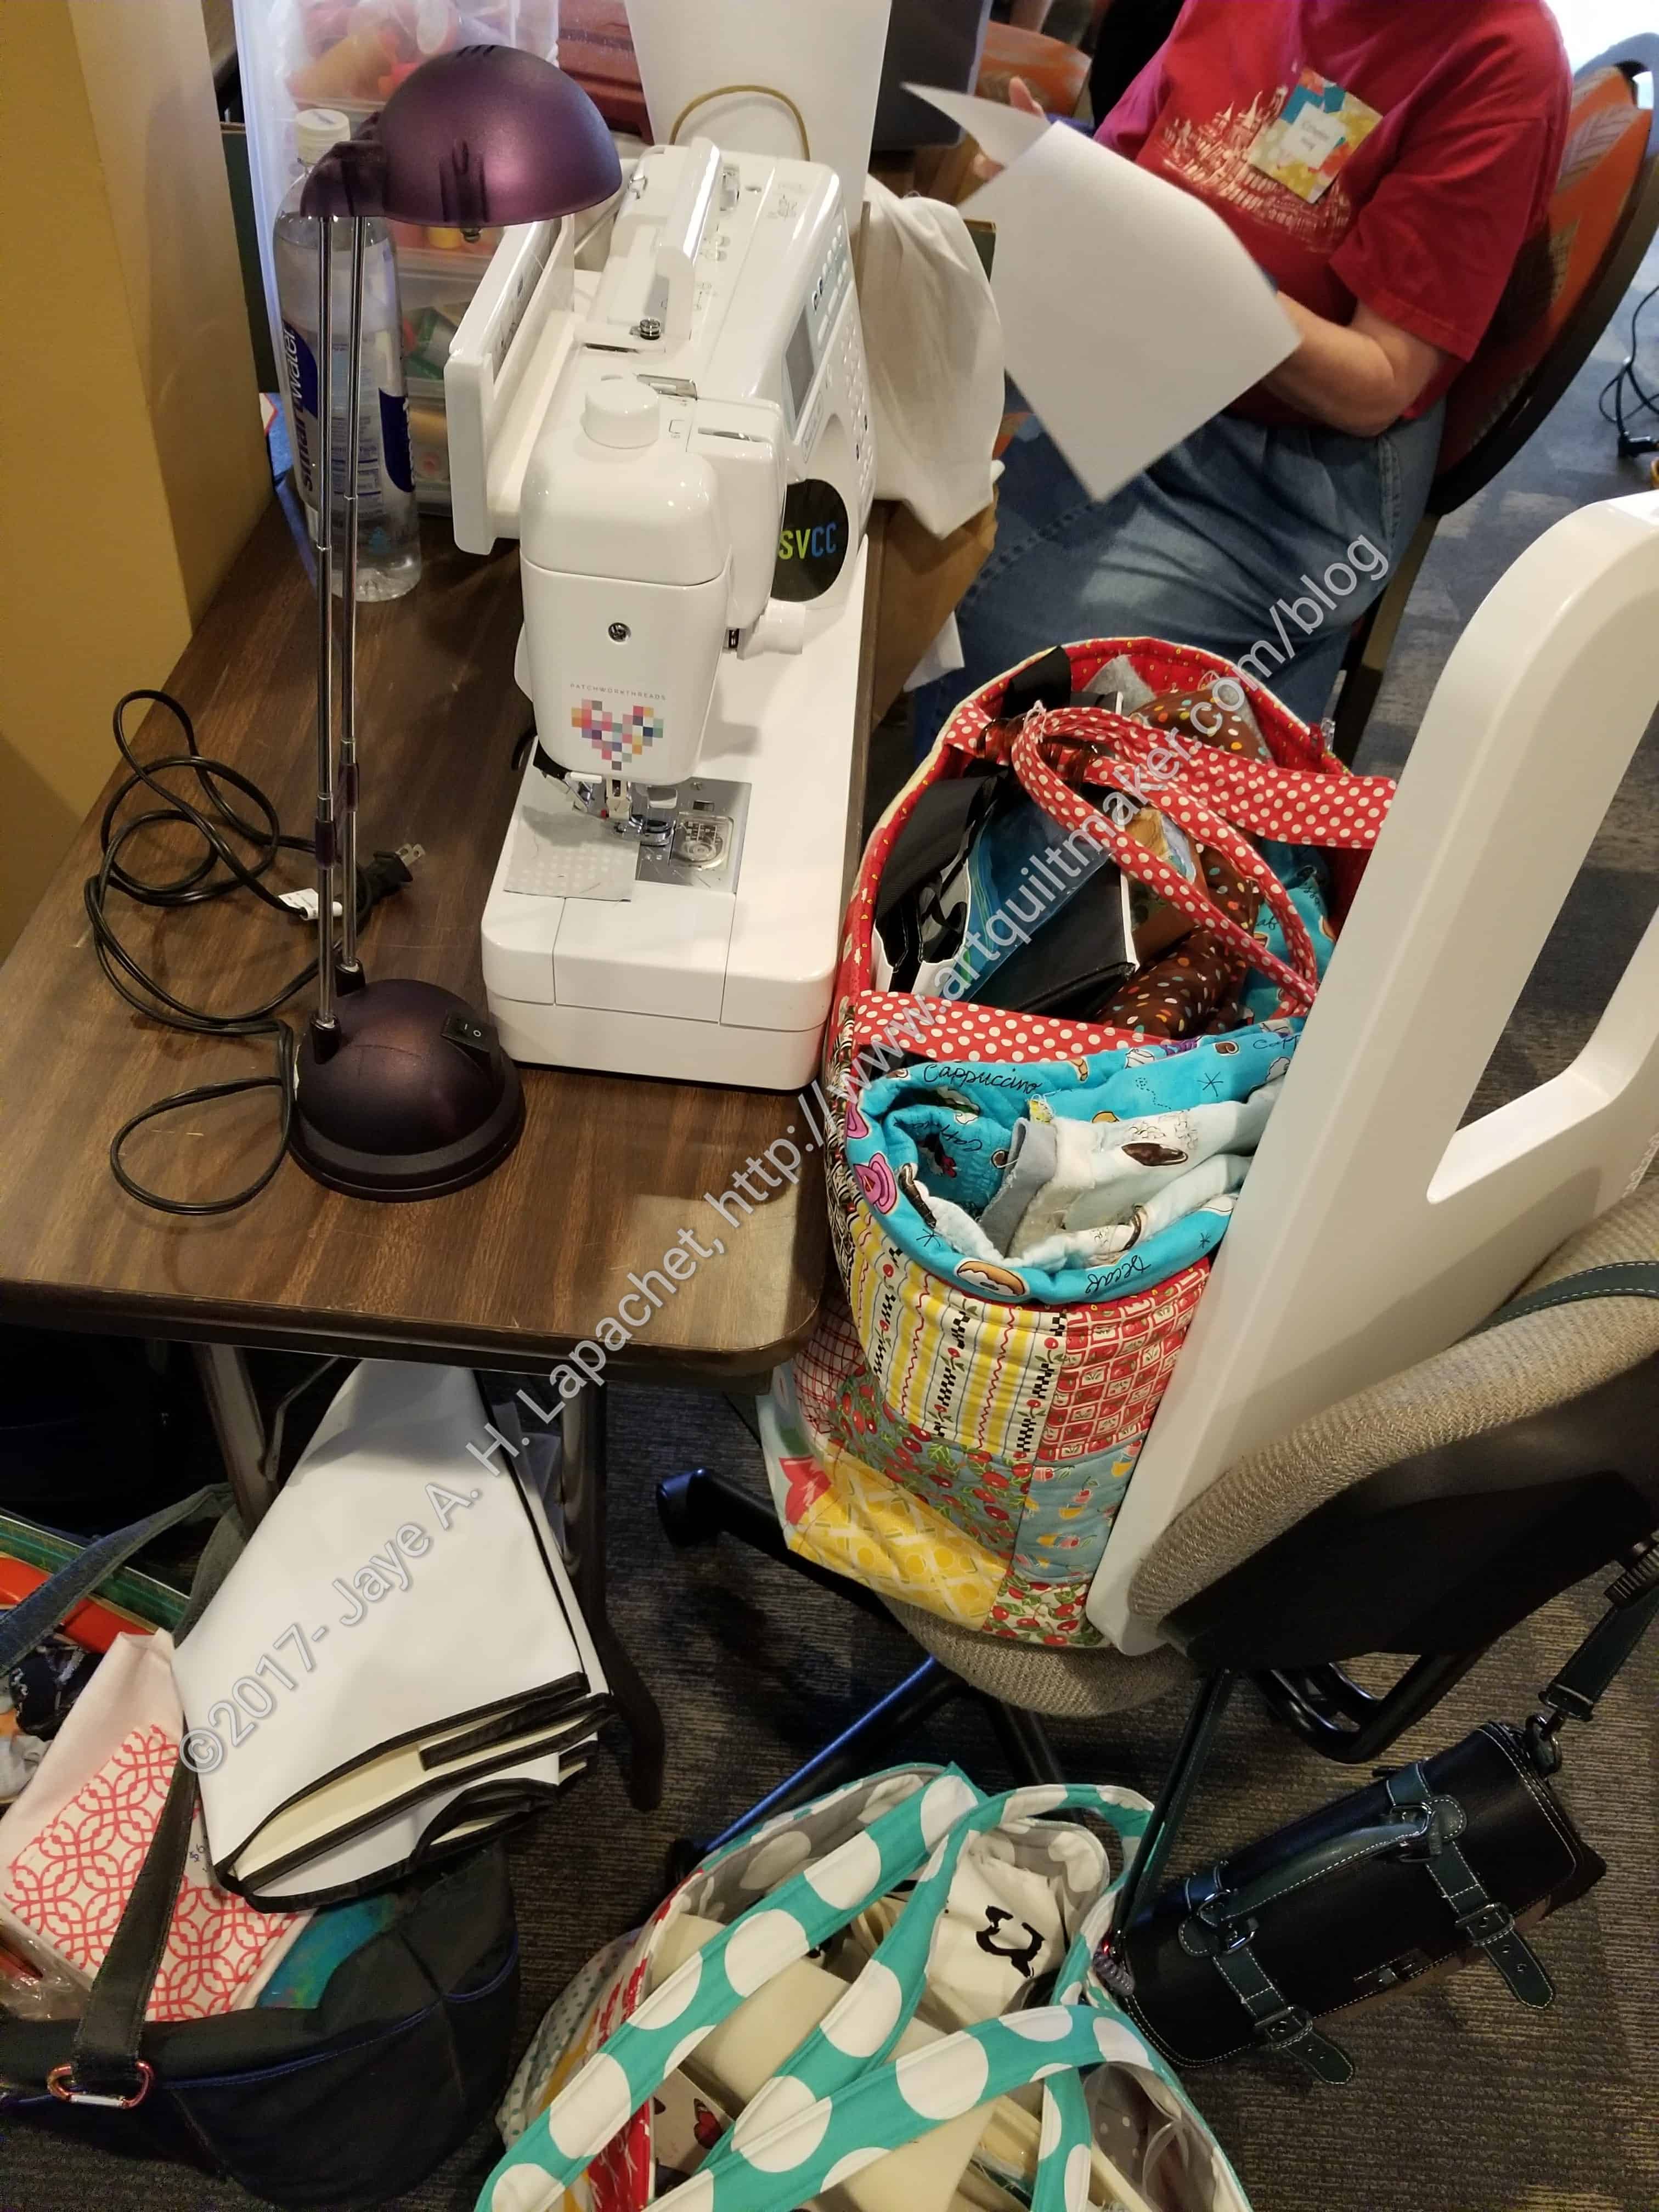
Sewing Nirvana?
Then we headed the 8 or so blocks to the Wild Palms hotel and to sewing nirvana. We didn’t arrive until about noon, but we set up and got to work right away. Nirvana isn’t easy and setting up took some time.
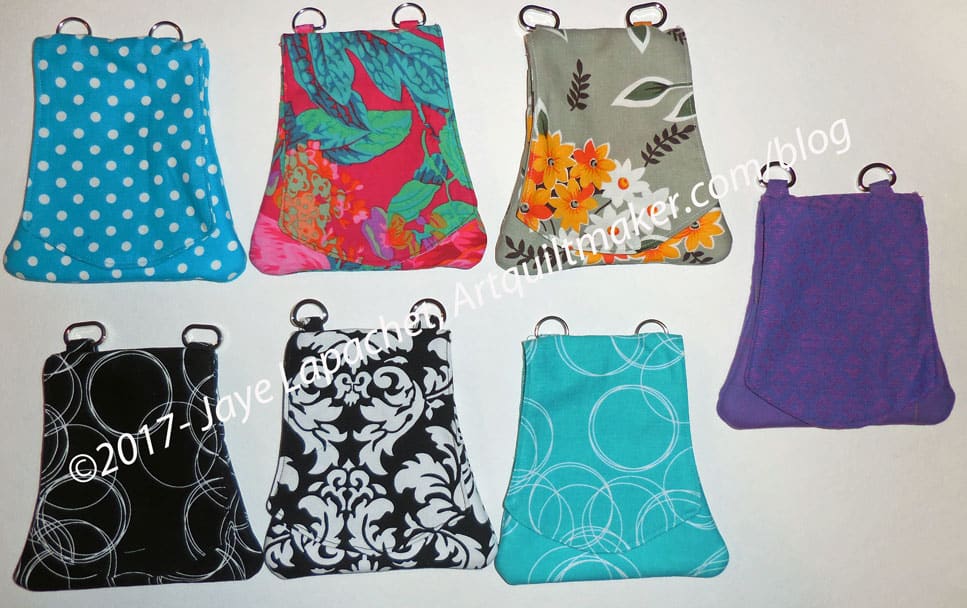
Once I got set up, my first order of business was sewing together all seven Cell Phone Wallets I had cut out.
Lesson one for quilting retreat is prep your projects. Having several projects already cut out made my output much better than expected.
7 Cell Phone Wallets
I had cut out seven Cell Phone Wallets from fabric leftover from dresses and tunics. I spent Friday making them. I didn’t think I would get as far as I did, but I was able to finish all except for weaving in the last two ends from top stitching. I was shocked that I even had time to turn the pieces. Turning these and poking out the ‘corners’ is not for the faint of heart. I rose to the challenge and got the job done. Now I am going to feel a lot more confident when wearing my dresses, skirts and tunics. I made all of these with D rings and will use the same chain for all of them. I also think I can use the black one with other black outfits.
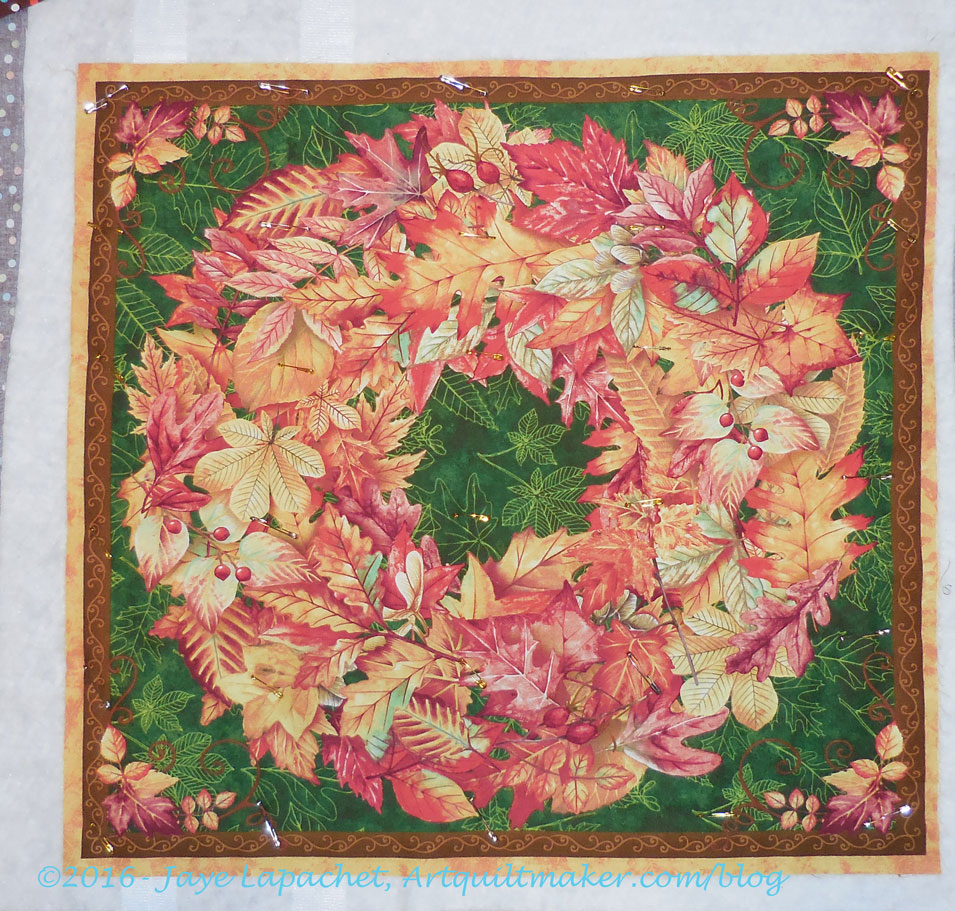
Thanksgiving Table Mat
Next, I started quilting the tablemat. 🙁 It didn’t work. I want to follow the lines of the leaves and other Thanksgiving motifs and I just couldn’t see where I was going. I ripped stitching out three times before I gave up. I would really like to get it done before Thanksgiving. Not only to I want to count the yardage as fabric used, I also want to have one less item on my to do list. I have ordered new feet from Sew Vac Direct, a suggestion from Gerre, so we will see.
Poolside Tote
No rest for the sad or wicked. I was determined to get as much done as possible. So, next up was the Poolside Tote. Not only had it been taking up horizontal surface space for a long time – ever since I cut it out at Scruffy Quilts back in May, but Tim and I had decided to work on ours together. Julie said she would make one as well, but she wasn’t at the retreat and I have only seen quilts coming out of her studio. You can read about the sewing, etc of this tote in the post from earlier in the week. I am not sure if I will make this tote again. I may need to as it is large and popular.
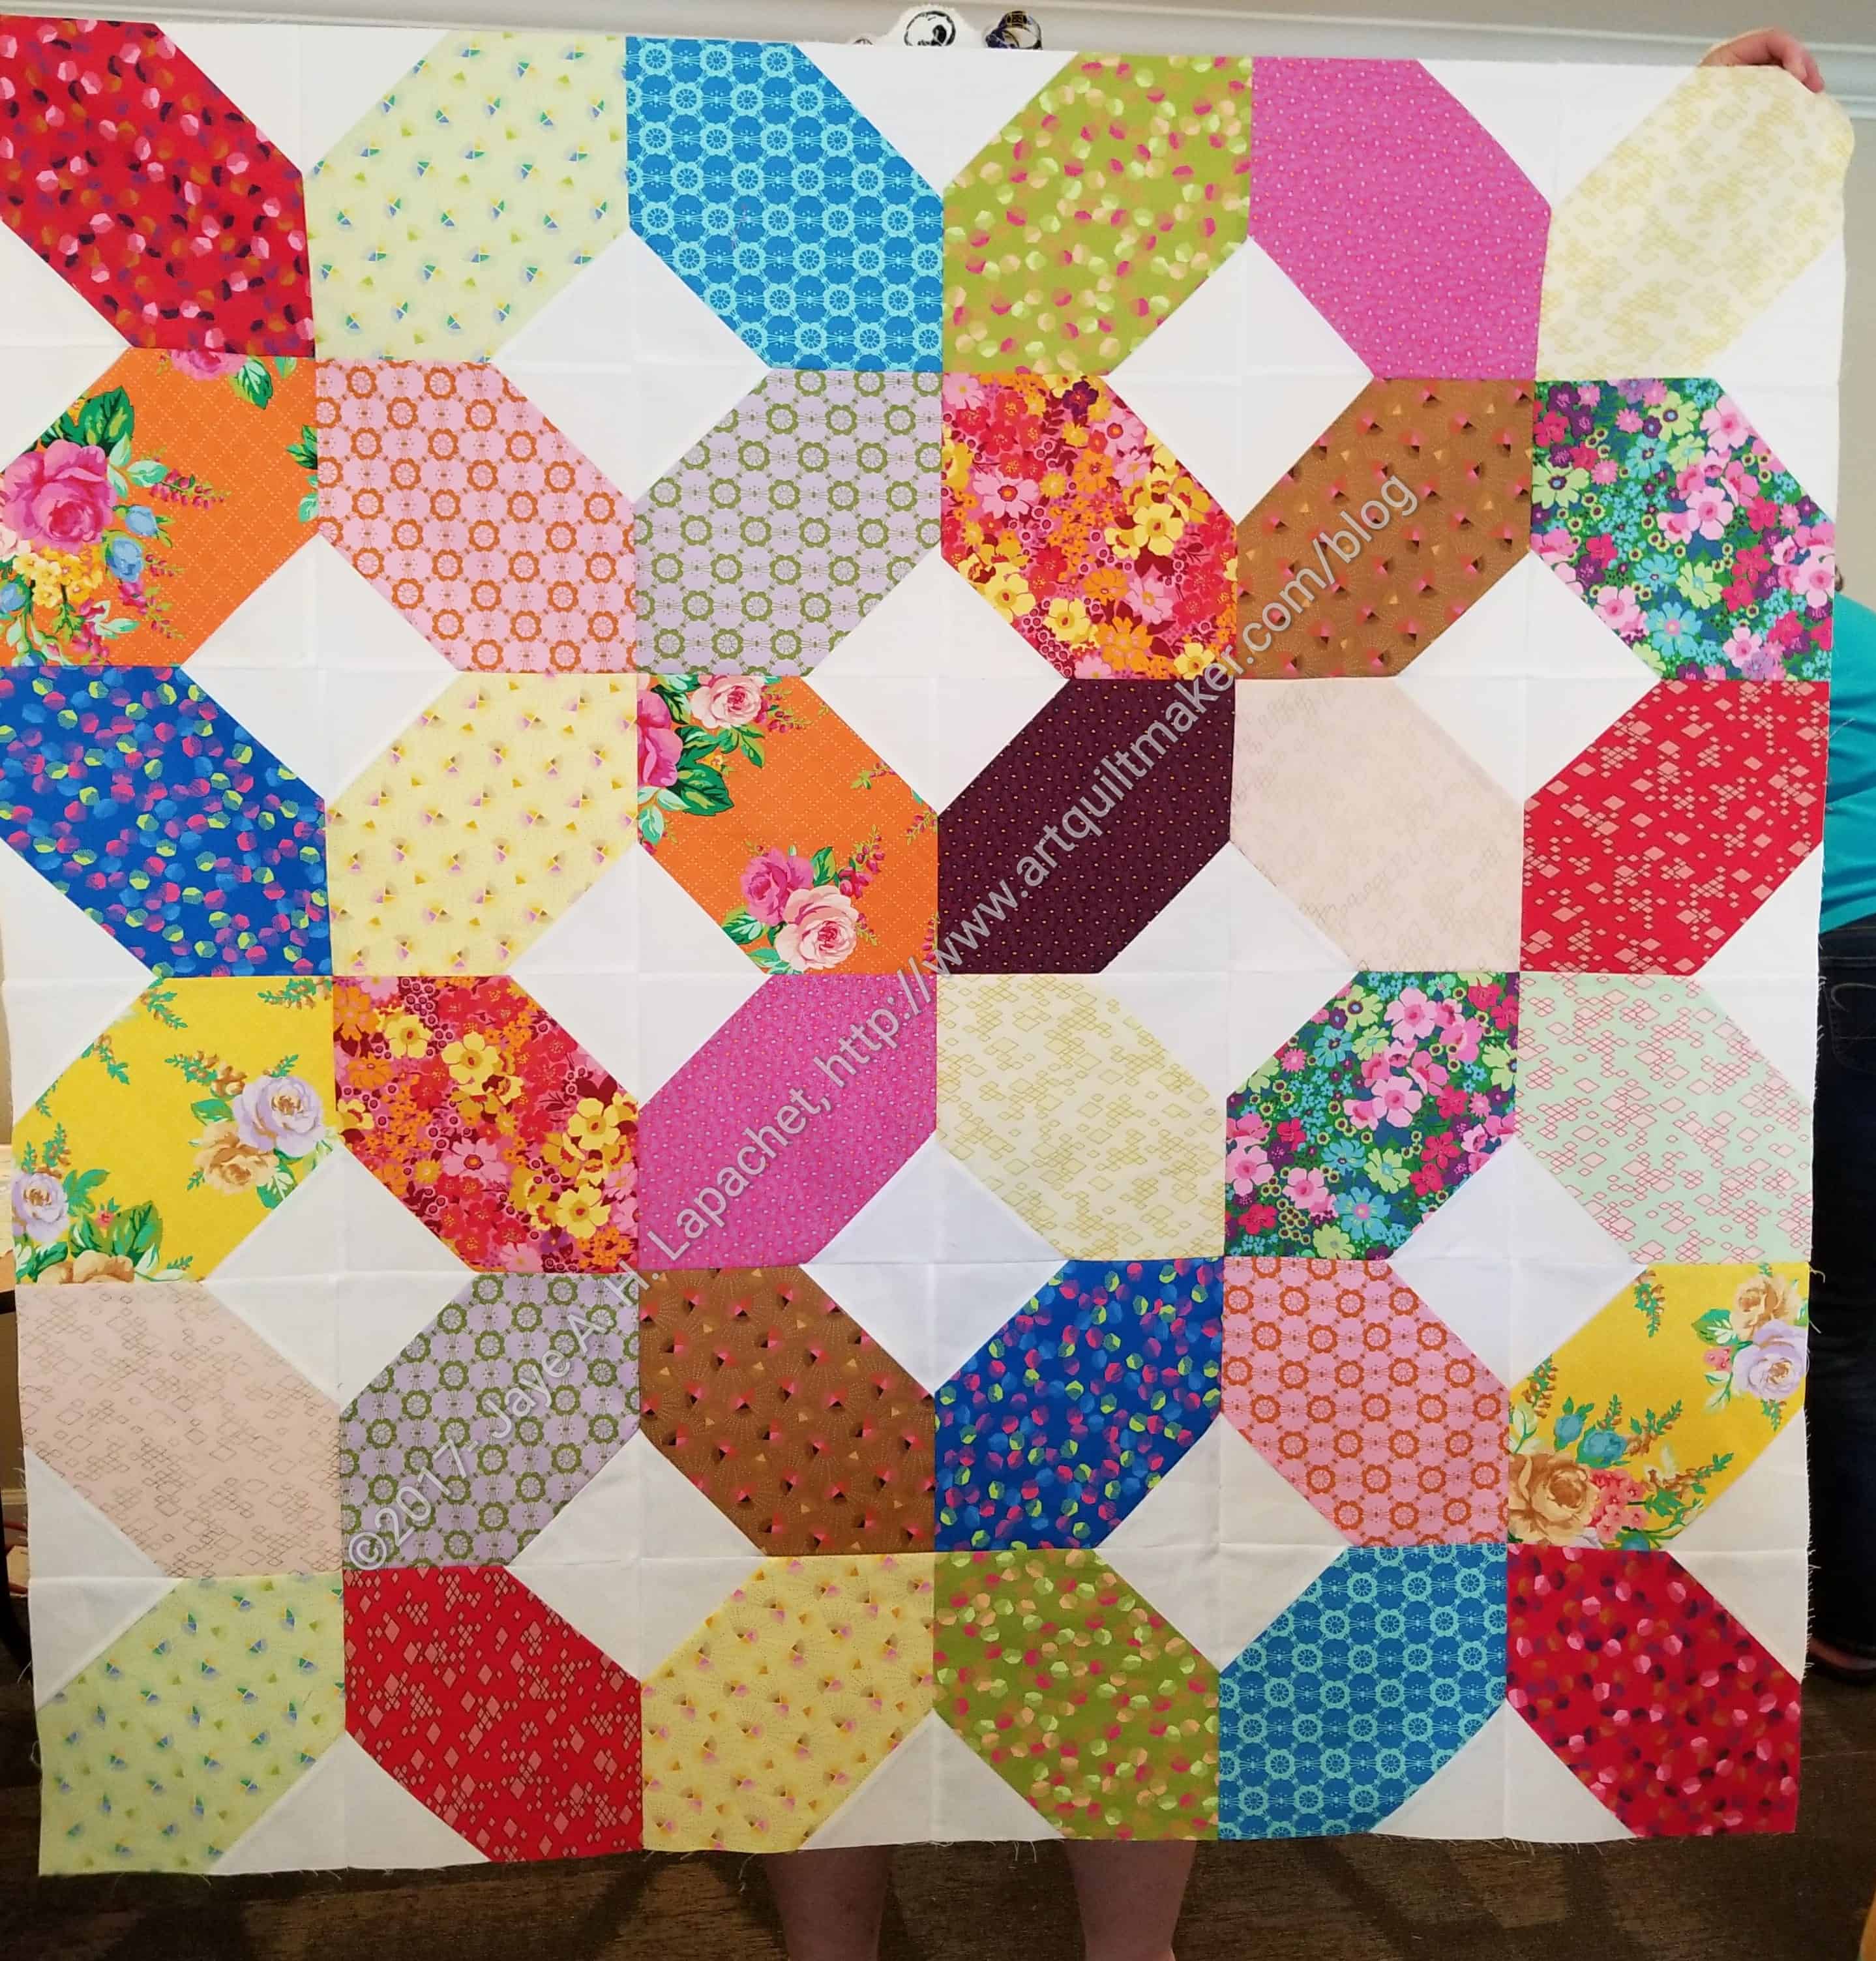
Mostly Manor Lozenge Quilt
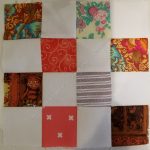
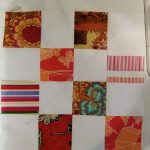
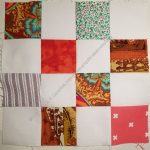
I worked on this all day Saturday and a little bit on Sunday morning. Next on the list was the Mostly Manor Lozenge quilt. I had the blocks made so all I had to do was sew them together. Lucky for me, the raffle prizes had all been given away (I won a charm pack of grey Northcott solids-YAY), so I had a table right behind me to use as design surface space.
I sewed fast and got this top done in a couple of hours. I used the Terrain donation blocks as leaders and enders.
Retreat Donation Block n.1
Retreat Donation Block n.2
Retreat Donation Block n.3
In between everything I made three donation blocks. We received kits for 3 donation blocks in our goody bags. I didn’t have a lot of leaders and enders opportunities, so I rushed at the end to get these done. The Committee gave extra raffle tickets for handing in donation blocks and charity quilts and tops.
I really didn’t want to leave and stayed until the bitter end. The Retreat Committee did a great job organizing everything and I was thrilled to get so much done.
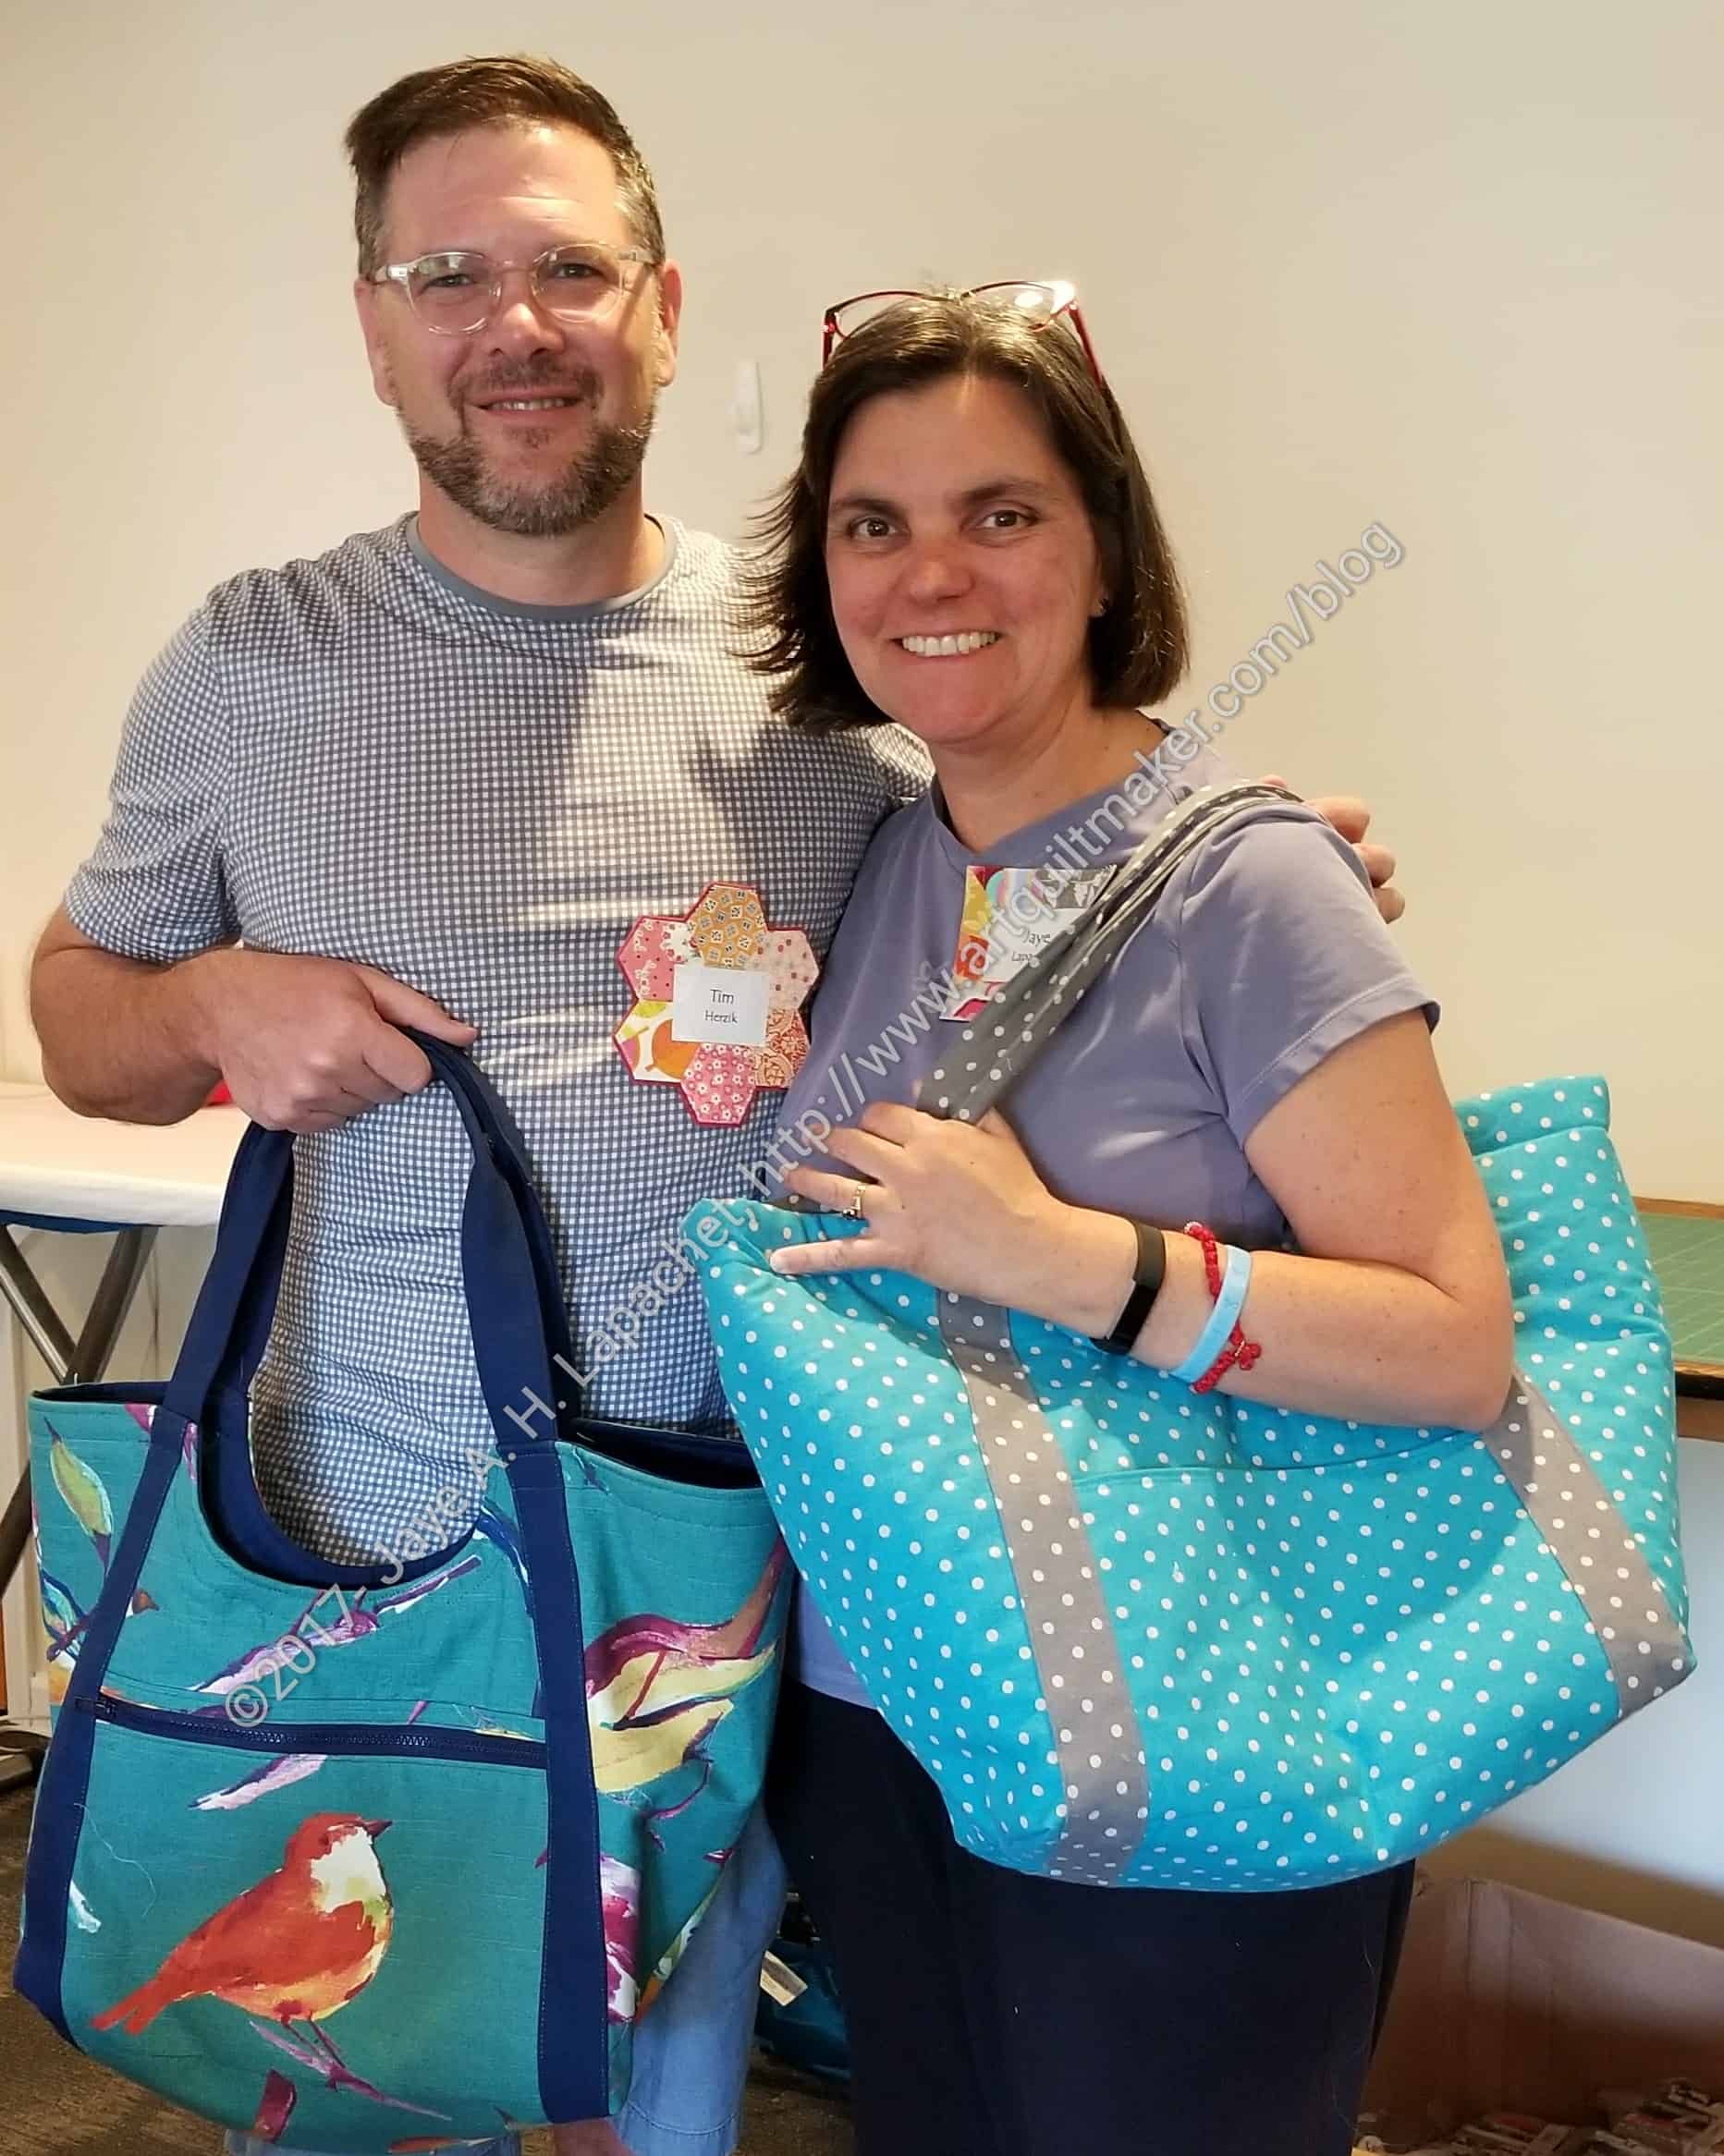
This past weekend was the weekend when I sewed the whole thing together. Tim and I sewed ours at the Retreat. He got busy first and I followed his lead. I had to rip a bunch, so I got behind. It was a great to have a buddy and Diana L acted as mentor to us with some tricky parts.
I love the fabric that Tim used. He fussy cut birds for certain parts of the tote.
Having all the pieces cut and fused was awesome! It made the tote so much easier to put together. Yes, I did have to cut them out at some point, but not having to cut them out and them sew them at the Retreat made everything go much more smoothly.
Poolside Tote facing
I am not sure about making this bag again, though I have the fabric to make a pink version. It wasn’t difficult, but it was fiddly.
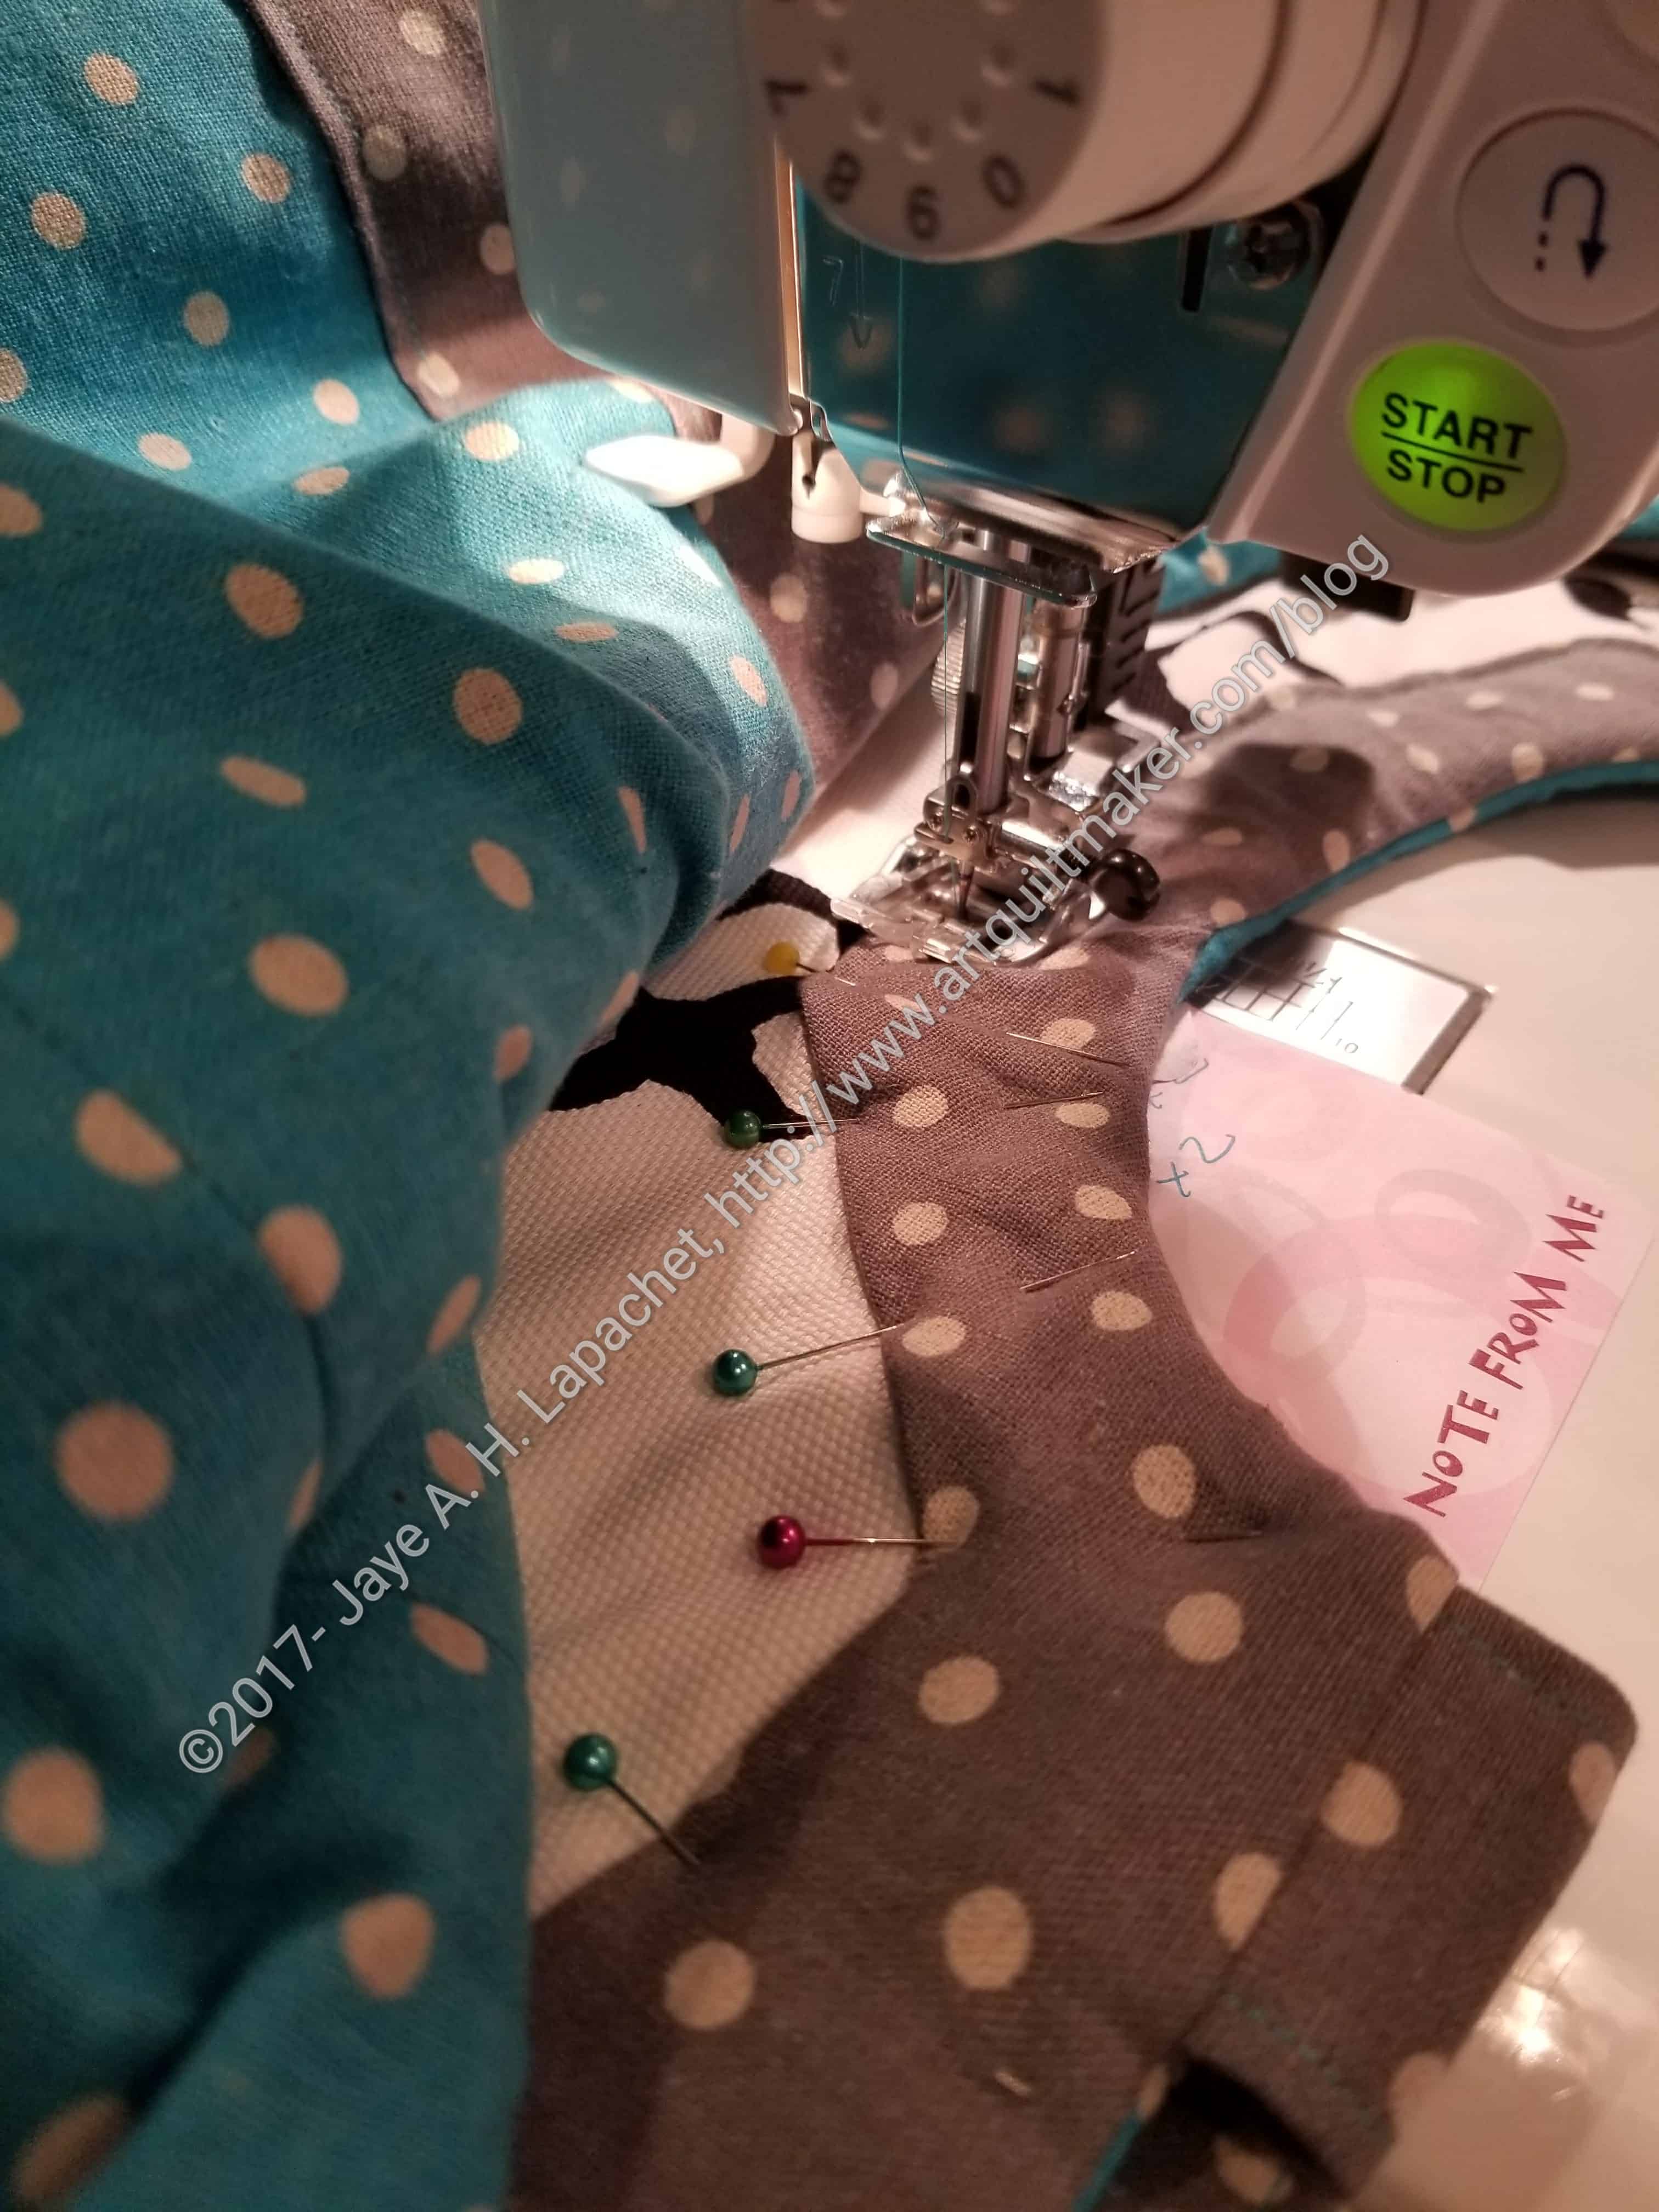
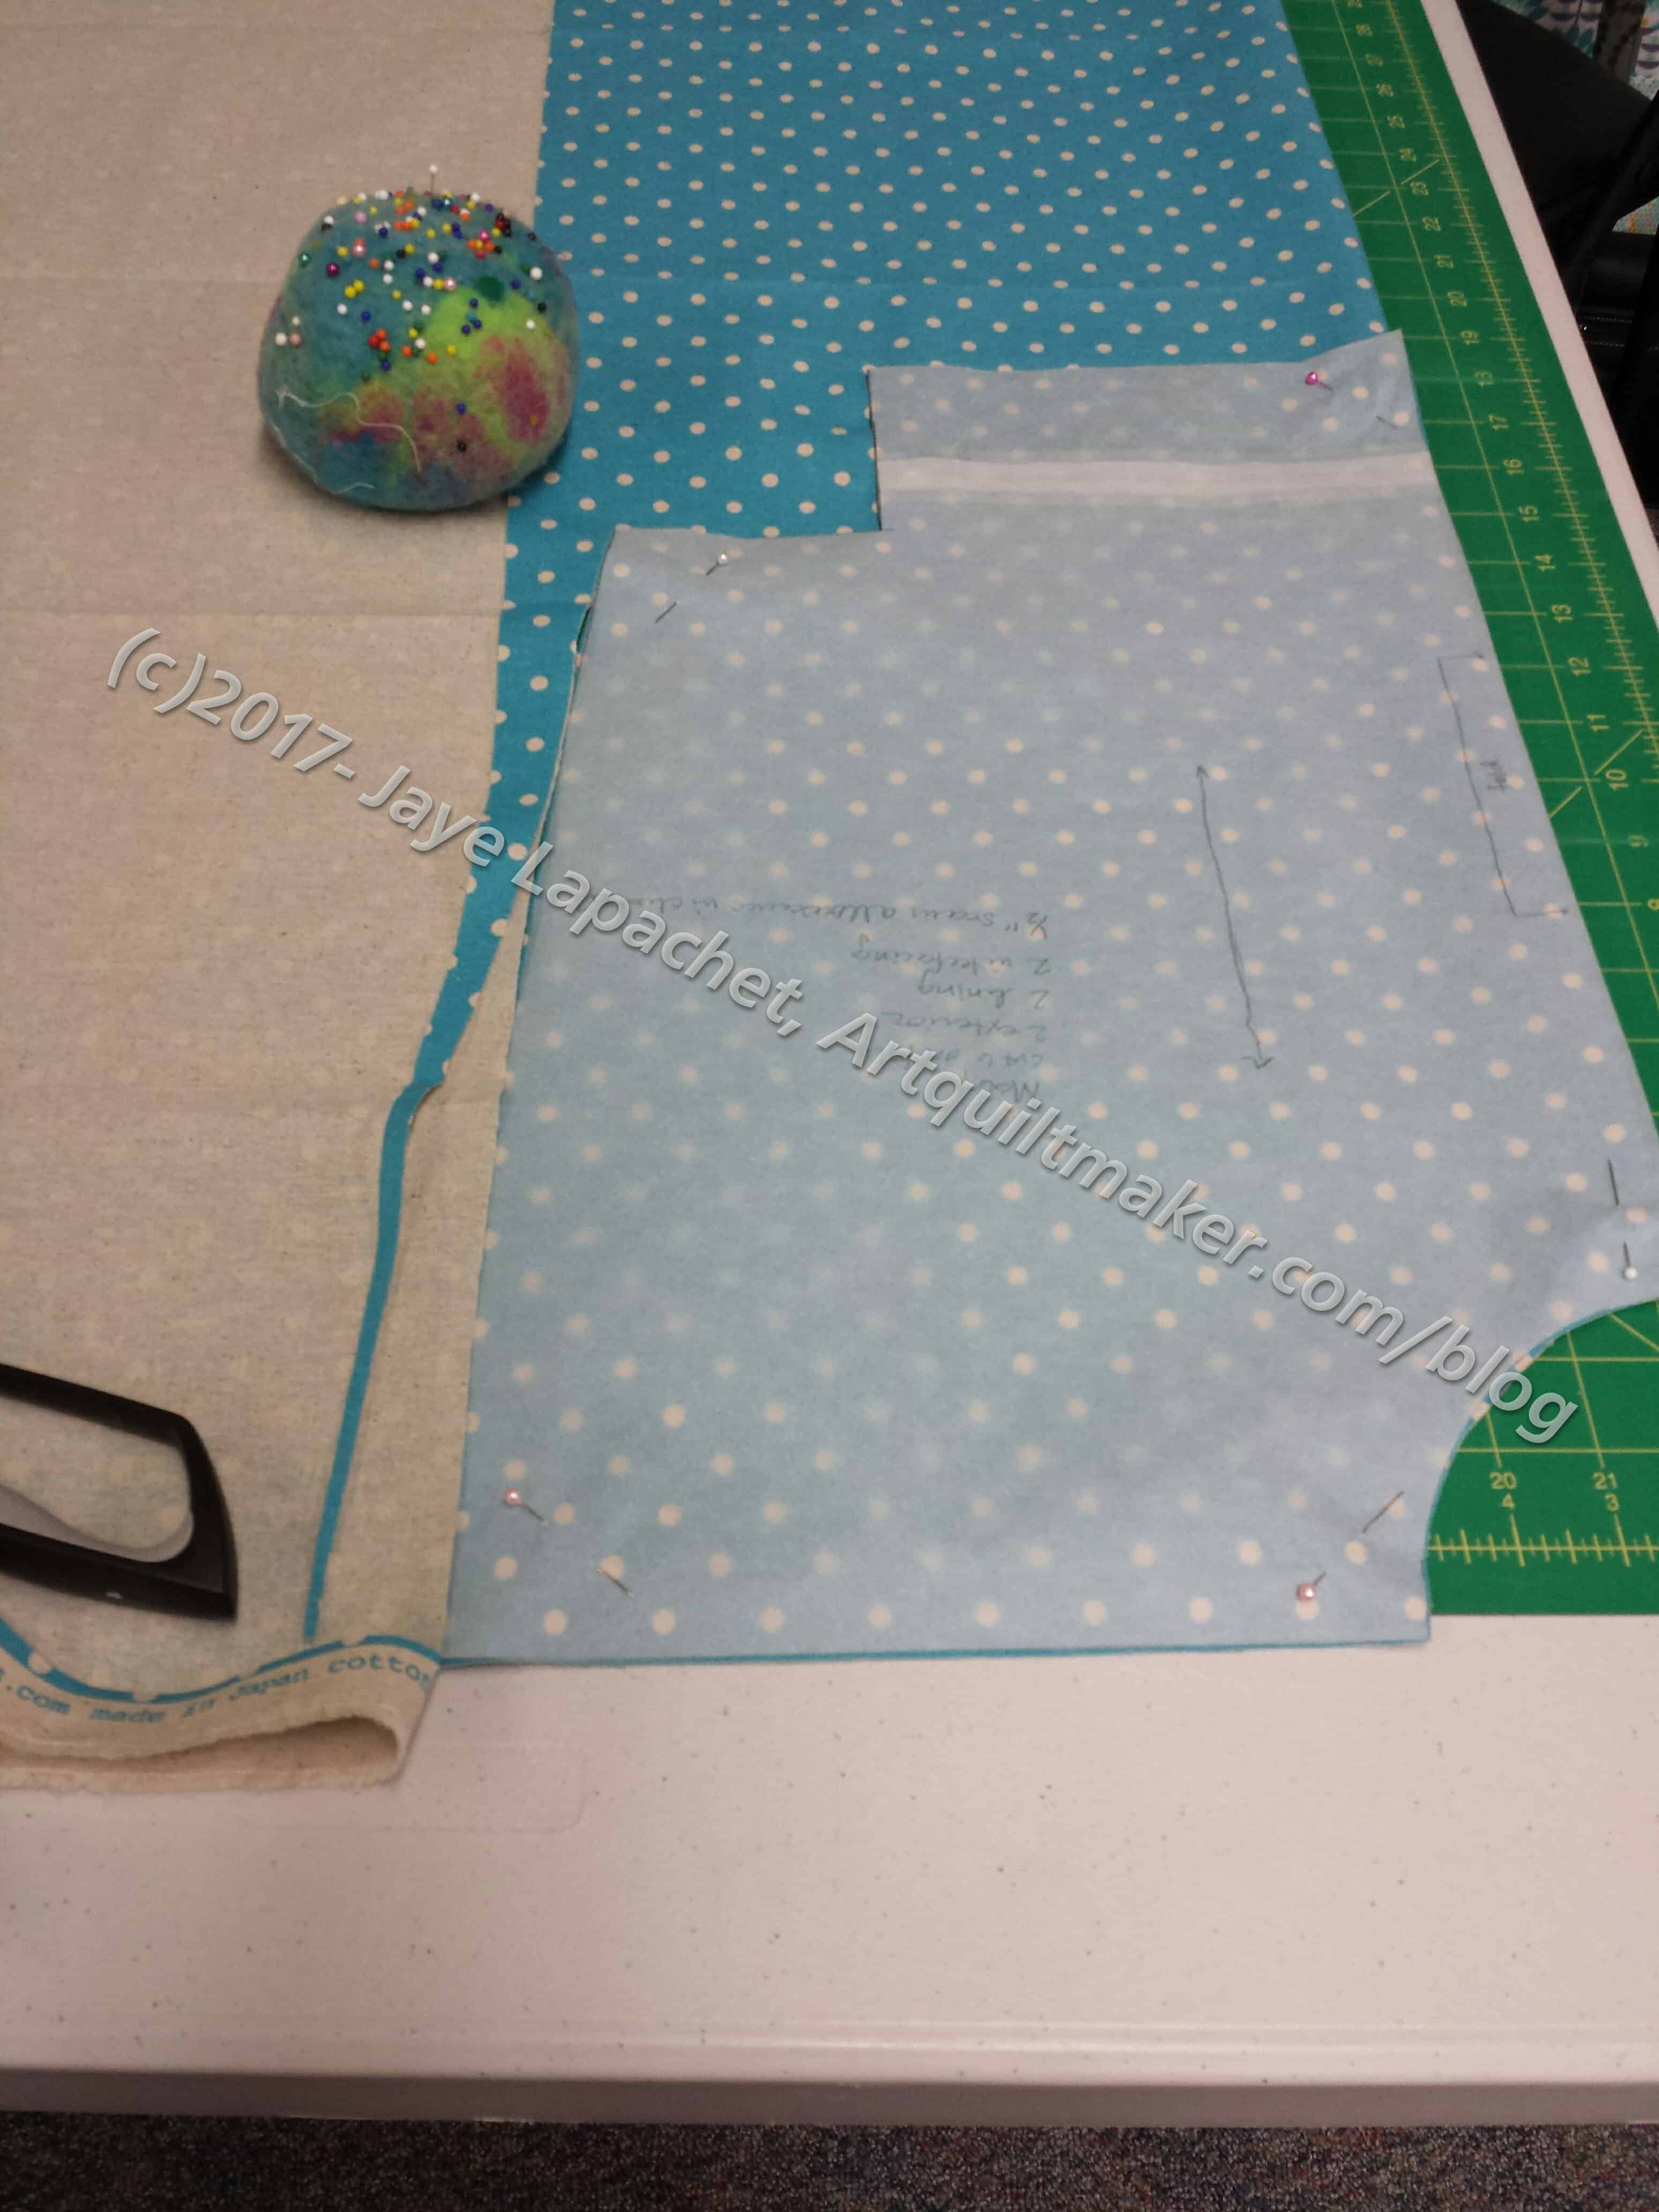
The sides have rounded centers, which are kind of a pain. There is a piece of facing that is sewed around the top edge to cover all of the raw edges. In general, I thought it was a good way to cover the raw edges, but it was difficult to sew on. I pinned a lot and still got puckers. It might be useful to fuse down parts of it.
The facing was large enough so I wasn’t sewing right on the edge where the bag was thickest, which was helpful. I sewed slowly and used a walking foot for most of this project.
It would not have been possible, or perhaps convenient is a better term, to use the add on style of walking foot. The 6600 has the integrated walking foot and, while not perfect, that thing is awesome. It was great for bag making, especially after I adjusted the foot pressure to the correct number.
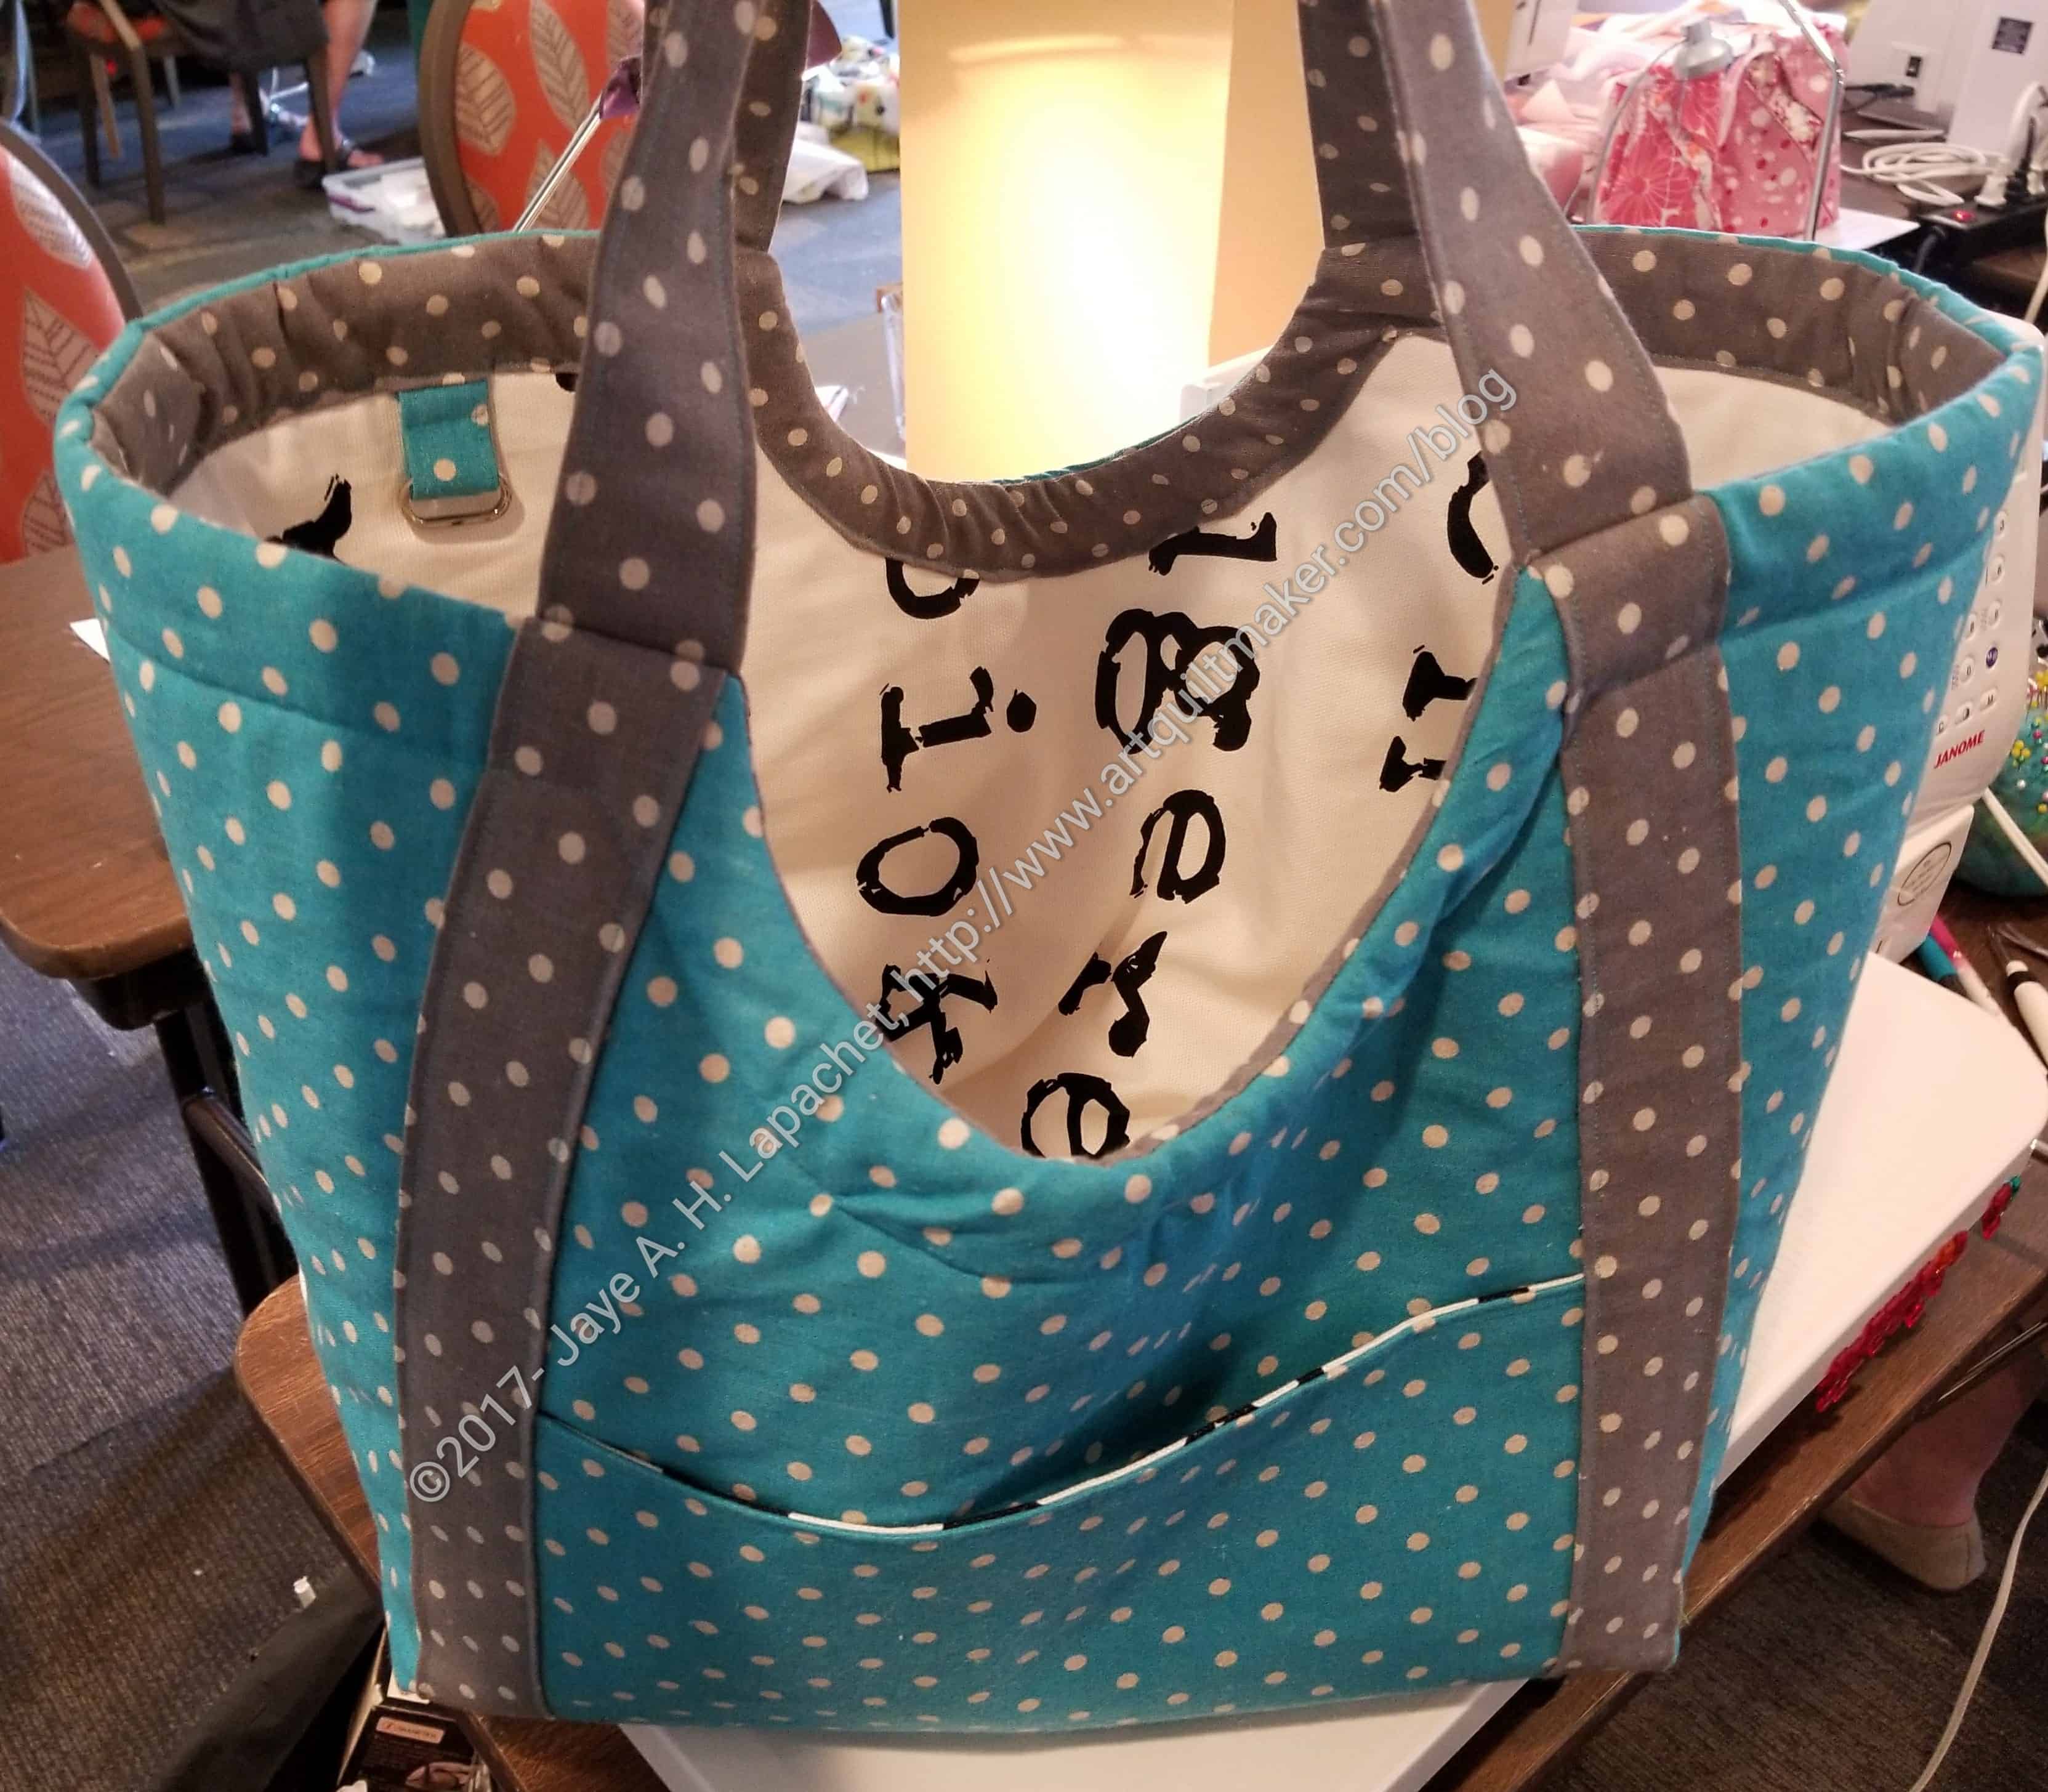
Poolside Tote – inside
I sewed the inside smaller than the directions said (using a larger seam allowance) and it was still really large. You can see the extra fabric really well. I am not sure how much more to adjust it.
I forgot my zippers and swivel hook, so I made slip pockets for the outside and put a metal loop on the inside. The inside has no pockets, which is kind of a design fail, so I think I will make a zipper tote in the same fabric with a swivel hook and clip it on. Either I, or my giftee will be able to put items in there securely without worrying about someone reaching their hand in and easily grabbing them.
Tim & Jaye
I am not sure how I feel about this tote. The lack of inside pockets or a pen pen makes it more for carrying large items rather than everyday use. I guess Poolside Tote is a good descriptions because it would be great for towels and swimsuits.
Yes, I have started another project, a small one, but another project for which I have to find time.
EPP Travel Kit – Bright and Cheerful
I am making another EPP Pouch like the one I made for Mary. I intend for this one to be much brighter and more cheerful. I also intended for it to be at the point where I could do the hand sewing while I was away, but that didn’t happen.
Yes, I cut out another tote. Are you screaming at me? 😉
Cutting out and prepping the Poolside Tote at the Scruffy Quilts Sewcial went so well that I decided to repeat the happiness with the Boxcar Tote. There were several factors:
I knew I would have very little time over the weekend to sew; AND
I actually knew when the Sewcial was
not to mention I would miss Sew Day
Also, I need to get this tote done in the next week or so as it is a gift I am giving in the next two weeks.
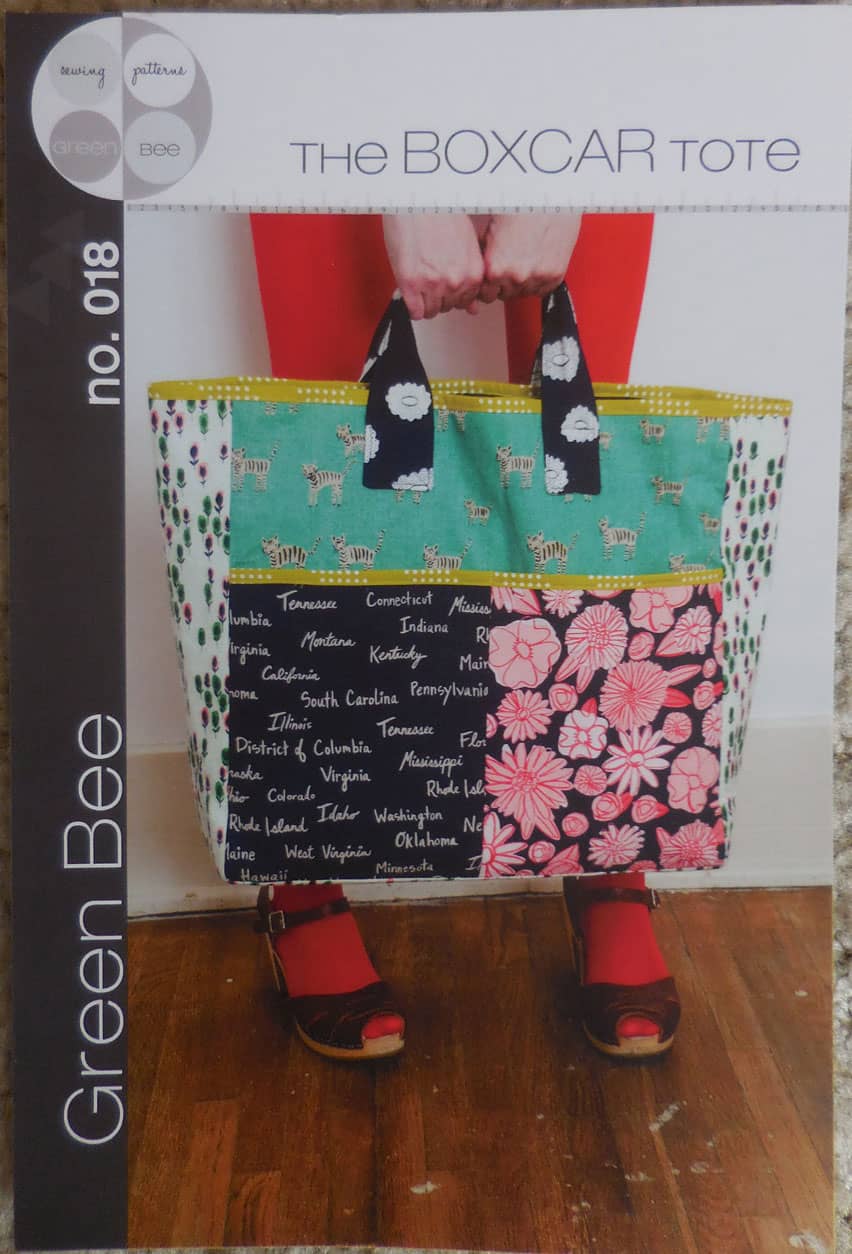
I bought this pattern on a whim from Hawthorne Threads in April. I liked the shape and thought this would be a great bag for a friend. I have a number of bag patterns waiting to be cut out, so I kind of surprised myself by gathering the materials for this one then finding an opportunity to cut it out relatively quickly considering when I bought it.
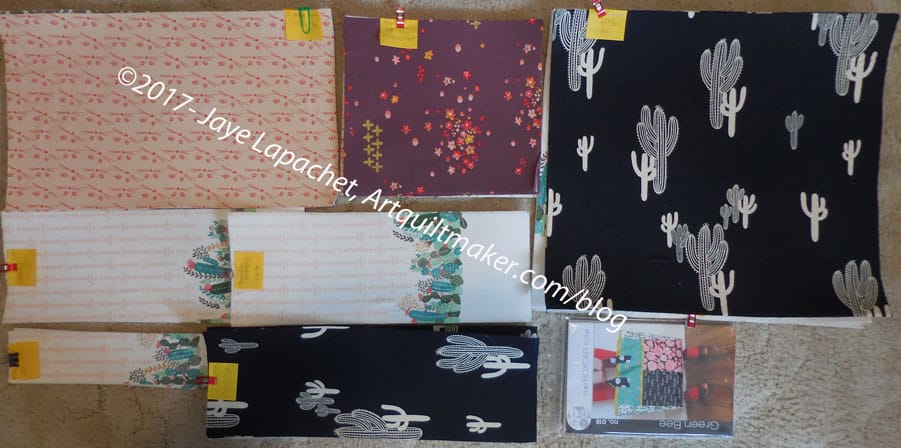
Boxcar Tote in pieces
Again, the Sewcial provided the right kind of space and also a bit of sociability which enabled me to cut out this pattern and prep the pieces for construction.
I am using some cactus fabric I bought plus some of the winnings from the recent BAMaQG meeting.
It wasn’t all peaches and roses as I ran out of the stiffener. Fortunately, oh so fortunately, Scruffy had something similar and I was able to move on. Still, it took me less than 3 hours to cut out and apply the stiffener to the fabric (one side was fusible).
I was annoyed at the pattern, because the designer expected me to cut out square pattern pieces, pin them to fabric and cut the whole mess out. For non-square pattern pieces, I always make a tracing paper pattern, so the original stays pristine. Since these were squares and rectangles, I measured them and cut them out with a rotary cutter, not using a paper pattern. Not sure why the designer didn’t tell me the size of the rectangles. It wasn’t rocket science and seems like a crucial piece of information. I’d like to make another one so I wrote the sizes on the pattern and cut them out with a ruler.
This is a pattern with all squares and rectangles, which means I will have to insert the bottom (a rectangle) into place by matching up corner dots. Not my favorite method of constructing a bottom, but I am reserving judgment. I am thinking that I may make it a little differently the second time around. We’ll see.
I can’t wait to see how this bag comes out. I really want to work on some bags. I am also curious to see the final size.
I thought I would be able to sew the Poolside Tote together over the weekend, but no such luck. The project is still waiting for me to have time.
I was engrossed in En Provence and the Carpenter’s Wheel, as you know.
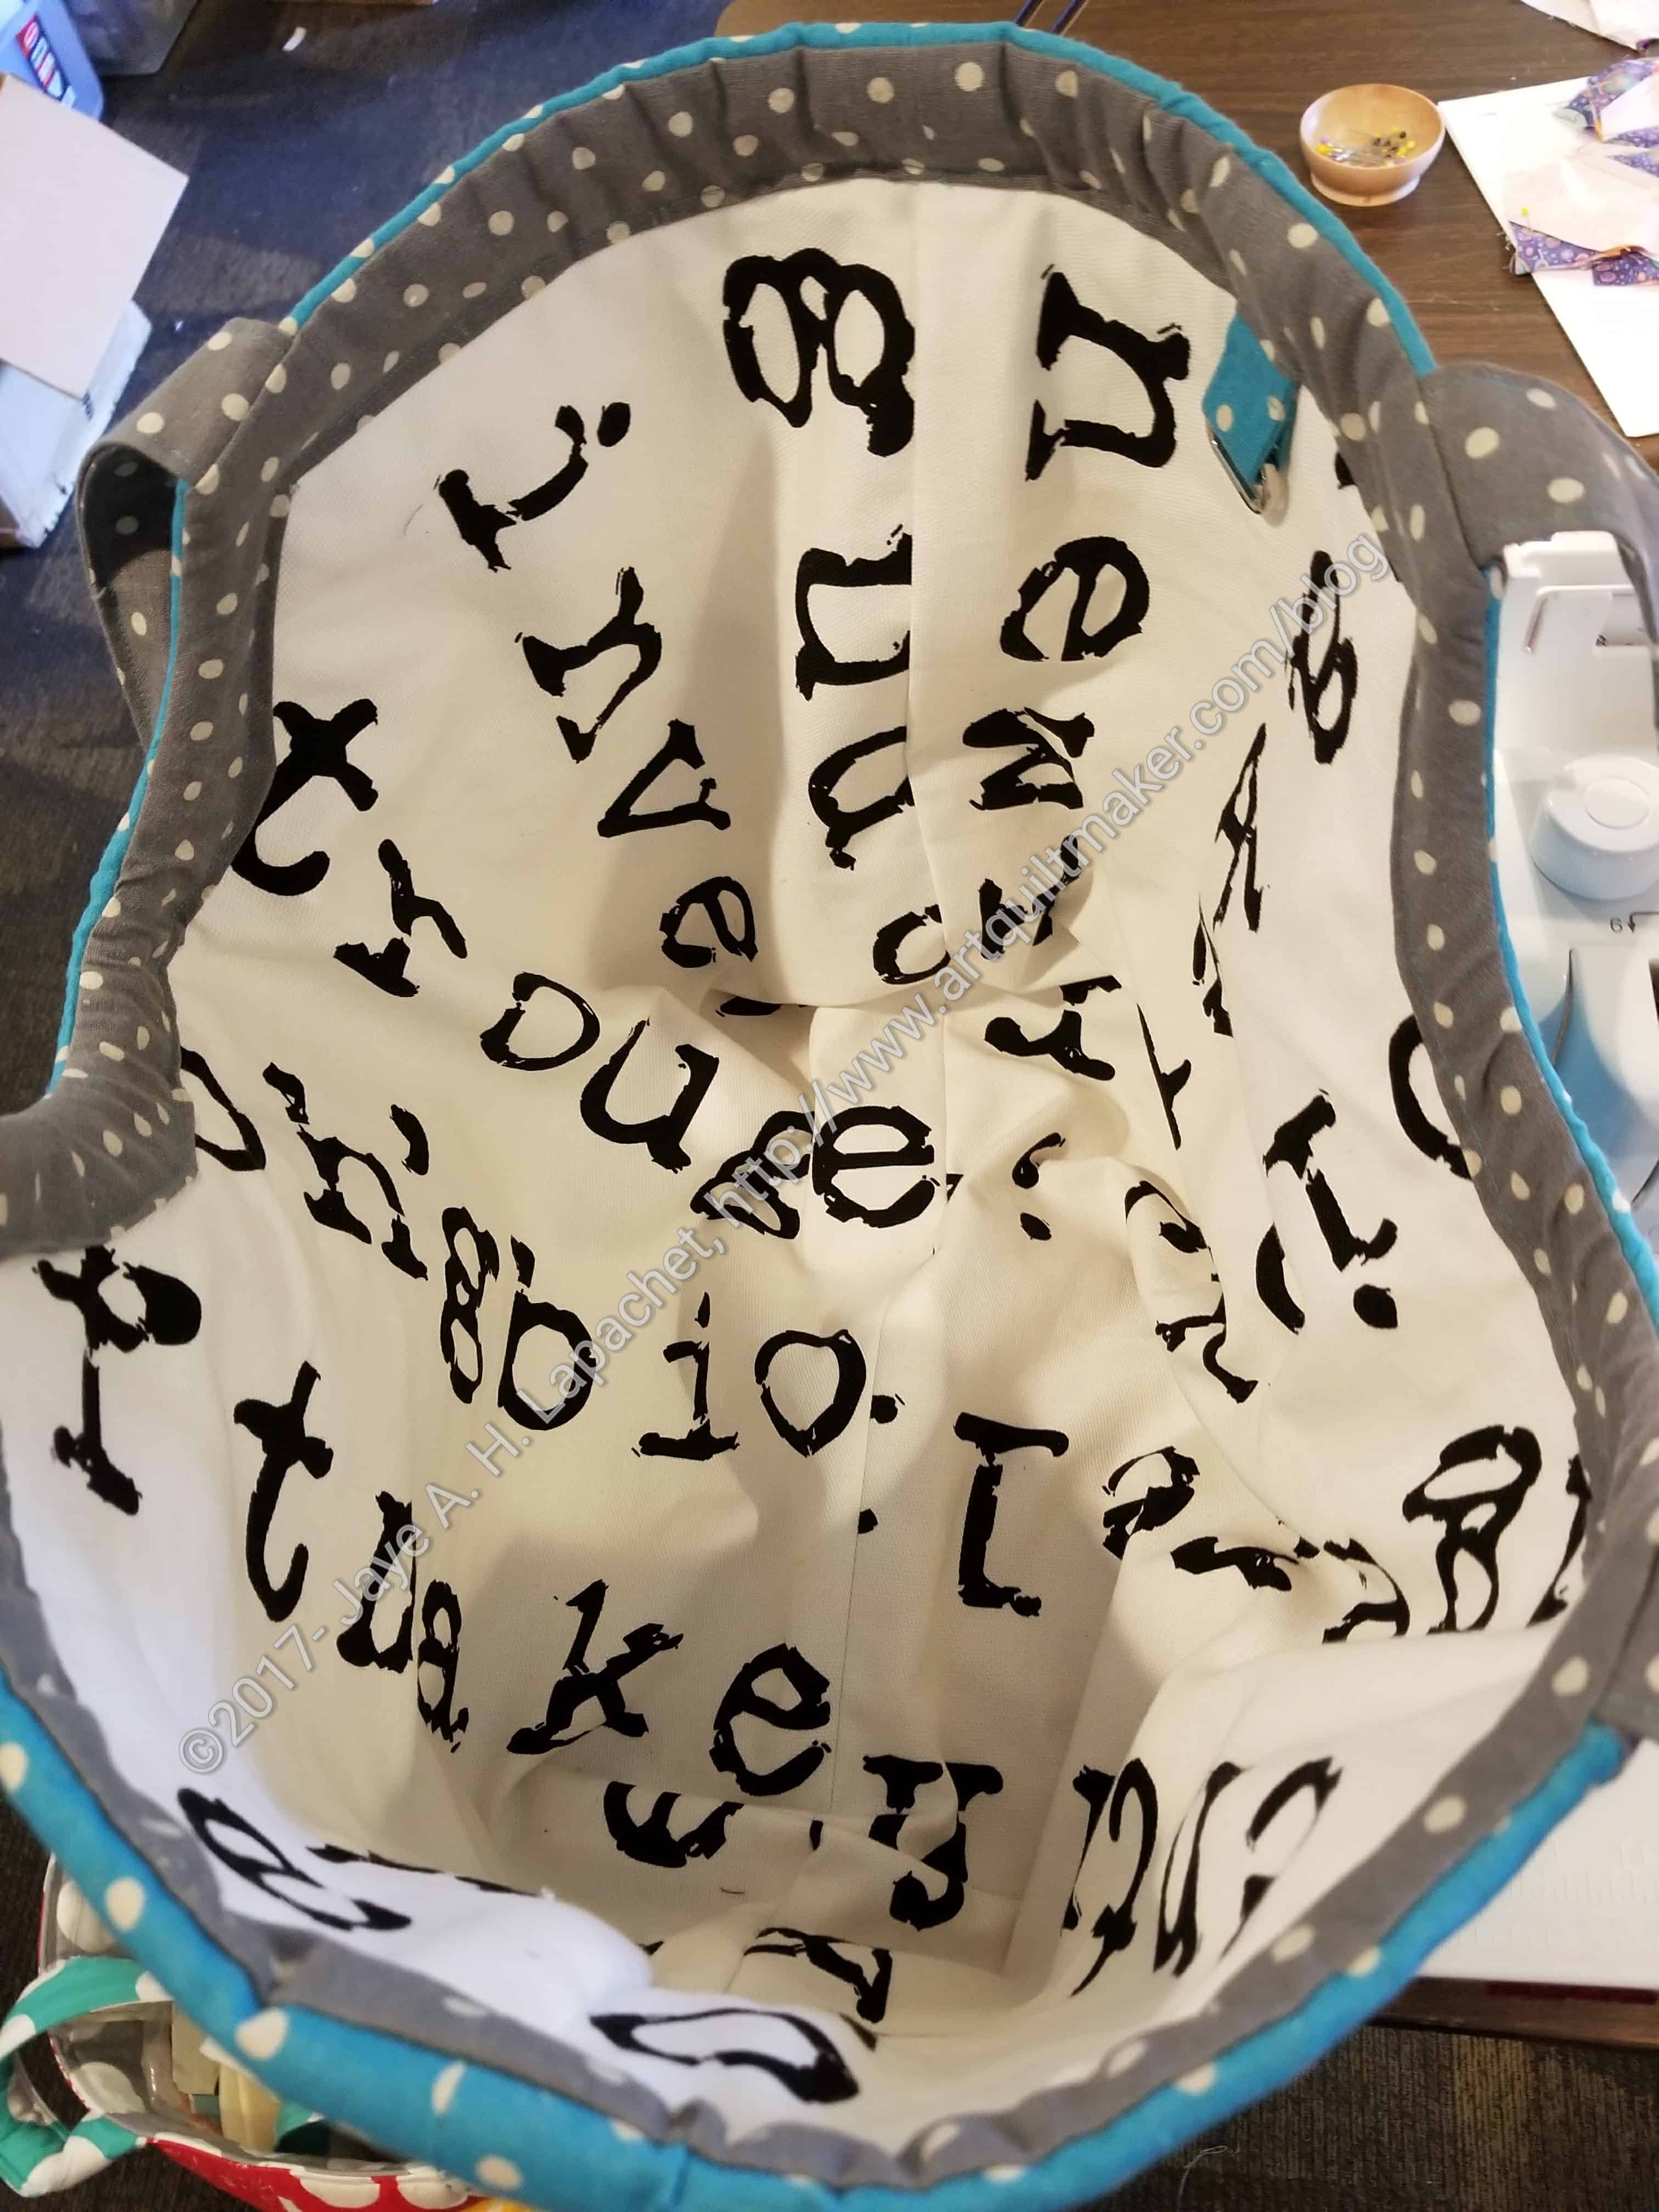
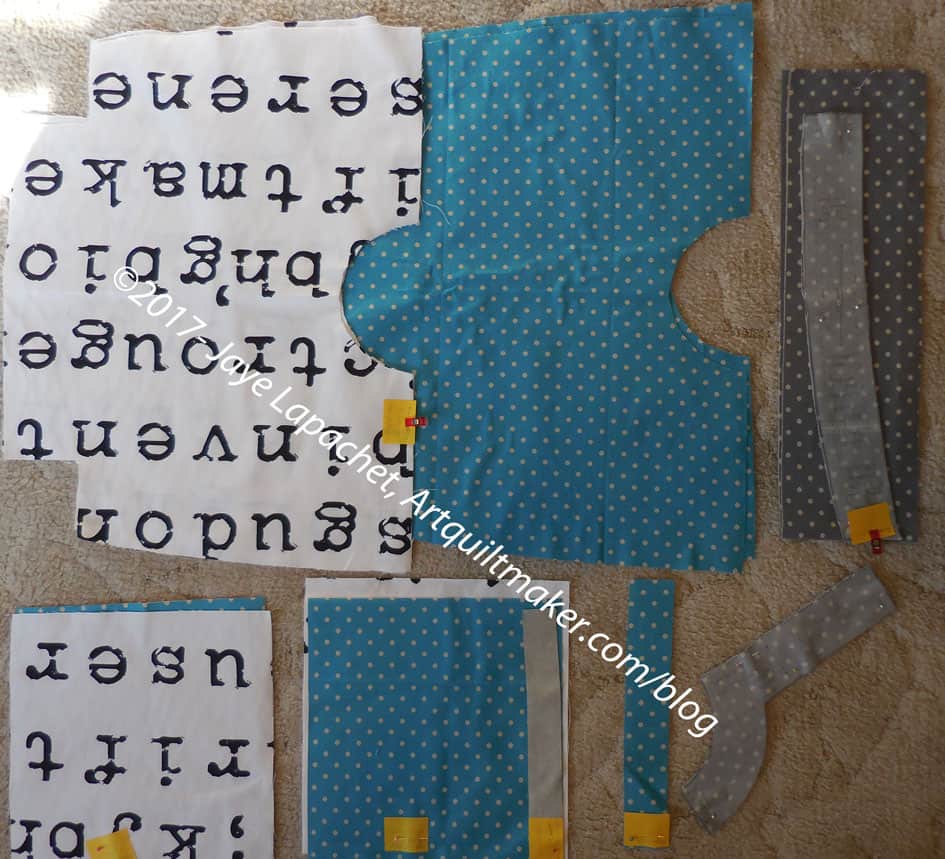
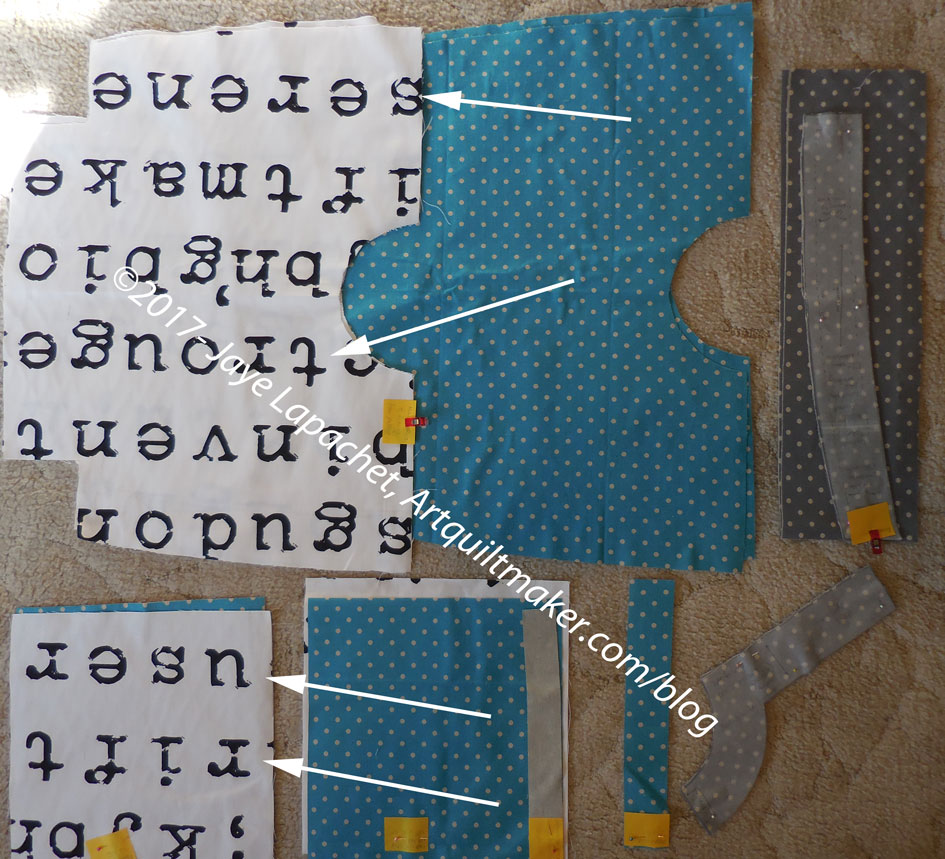
While the pieces laid on my floor (all horizontal surfaces are fair game for storage), I noticed that the random letters, in certain cases actually made words.
Hhmm.
Poolside Tote in pieces, annotated
I am not sure how I feel about that. I have pointed out some of the words I see.
The text fabric will be on the inside of the tote, so they won’t be very prominent. Making up stories using the words is a challenge.
On another note, the text fabric is VERY loosely woven and frays quite a bit. I might stitch the edge like I would a quilt with no border. I am just worried that another layer of stitching will make it hard to sew a bunch of layers together.
Not long ago, I talked about assembling the fabrics, etc to make the Poolside Tote. I know you thought it would be forever until I made it. Angelainspired me to get off my duff and said she would offer advice. Then Tim (both BAMers) said he wanted to make one as well. Julie also said she is going to make one. I might be leaving my two pals in the dust, however, or inspiring them to get off their duffs.
Poolside Tote: outside bag (tote 1)
I went to a Sewcial on Thursday and cut out one version of the Poolside Tote. I used all the linen I bought and the AGF text print. It was a three hour Sewcial at Scruffy Quilts and I was able to cut out an entire bag except for the Soft and Stable.
I was kind of shocked at how much fabric this bag took. I don’t remember using up so much fabric. Well, I don’t remember using almost the same amount of fabric that the pattern demanded.
Poolside Tote: lining bag fabric (tote 1)
The other thing that was a surprise was how loosely woven the AGF text fabric was. It was actually kind of a pain to cut because it kept shifting because of how loosely the fabric turned out to be.
Still, I got the whole thing cut out. I just focused and did it. I started to think I could do a second one, then I realized I probably didn’t have enough handle fabric and I had forgotten to cut the handles out anyway!
This was another almost finish that I finally did finish. I need these cell phone wallets to wear with dresses that have not pockets. This means that I had to finish a few of them before Grand Parlor. I knew I would be wearing the dresses and tunics, so I had to get sewing. You know I finished the Red Dot Cell Phone Wallet and the Habitat Cell Phone Wallet. Just before we left I finished the Emerald P. J. Cell Phone Wallet as well.
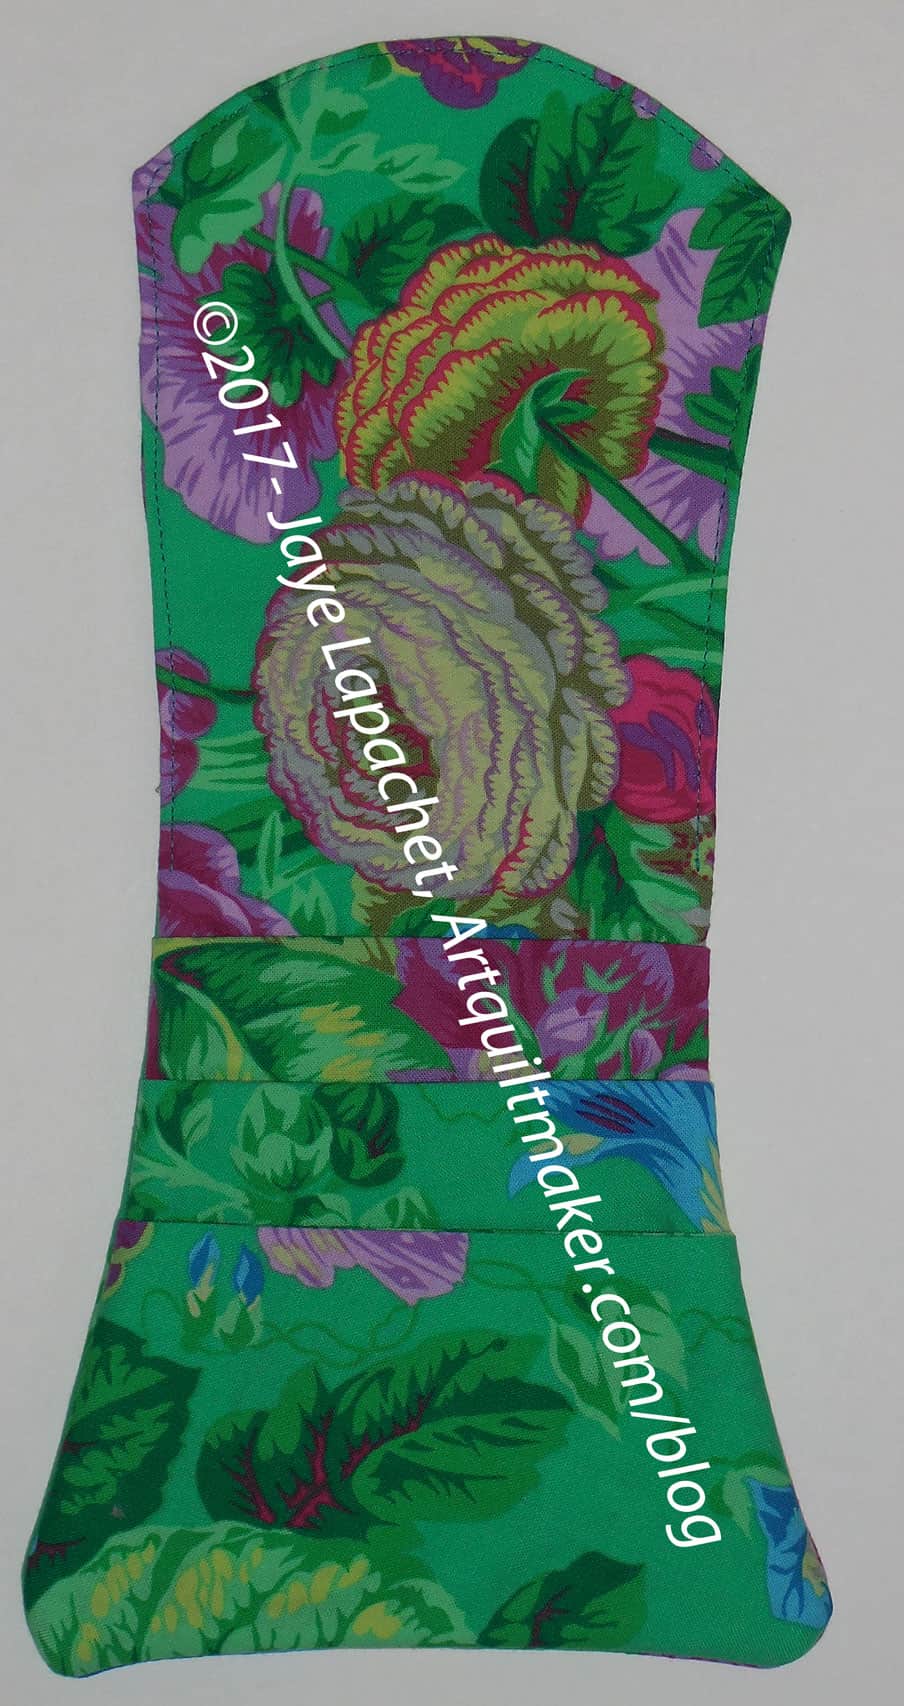
Emerald P.J. Cell Phone Wallet – closed
I find it hard to determine where the fabric will end up when I use the pattern. On this one, I really wanted to the flowers you see to end up on the outside, but they ended up on the inside.
The leaf that did end up on the outside is nice looking, but it isn’t the flower that I wanted.
The pattern calls for a snap on the flap (photo above right), but I haven’t put one on any of the pieces yet. I don’t feel like I need one.
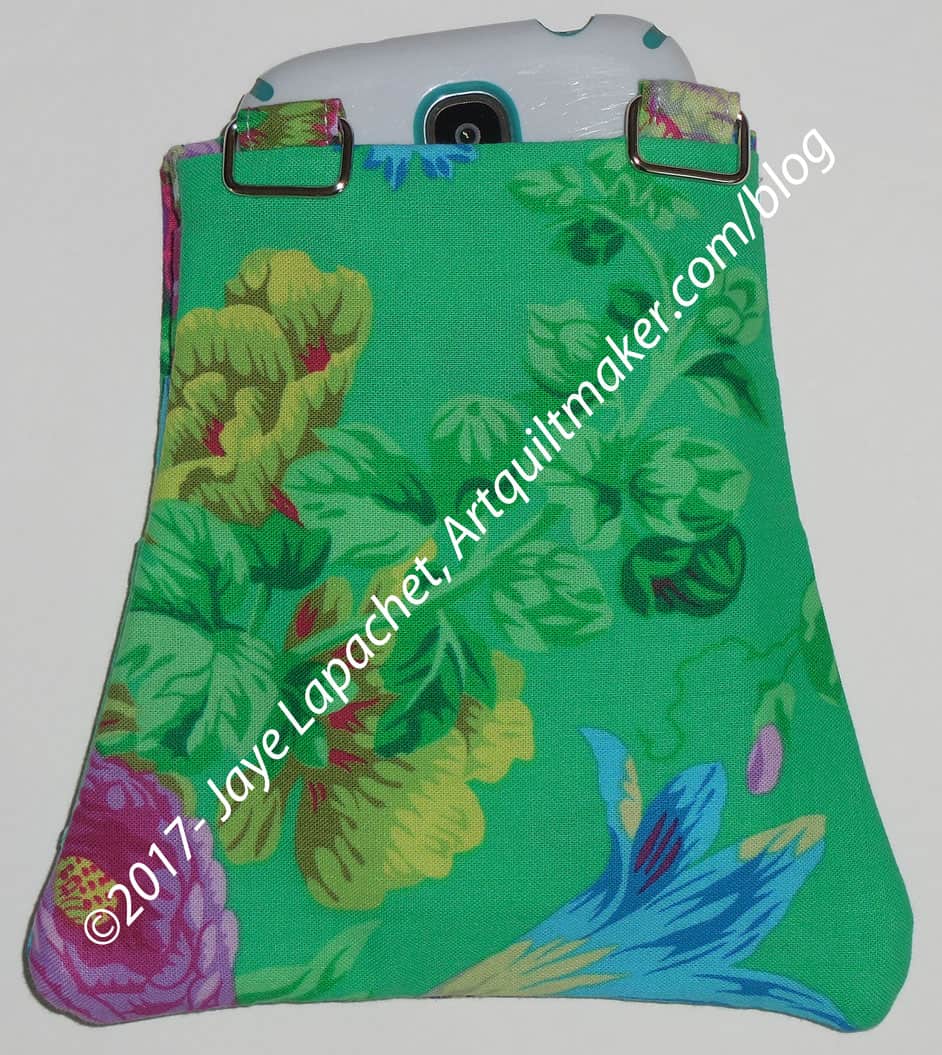
Emerald P.J. Cell Phone Wallet – closed with phone
These bags are so helpful when I am at an event and don’t want or need a full purse. I keep my phone and hotel key in it. I can also put a few other small things in each one. I try not to stuff them too full so they stay flat-ish.
The last photo shows my phone in it. The design is such that I don’t have to open the flap to get my phone out.
I really like this pattern even though it gave me a few fits before I finished it.
I found this pattern somehow. It is free (for personal use only) from Zen of Making*. I wish I had thought of the name, because there is something zenlike about making and the name is cool.
Anyway.
The travel kit is part of a three part series, which includes a lesson on making the hexie flowers. The final piece is making a pincushion out of smaller hexies to use with the EPP Kit. I had plans to make that as well, but ran out of time.
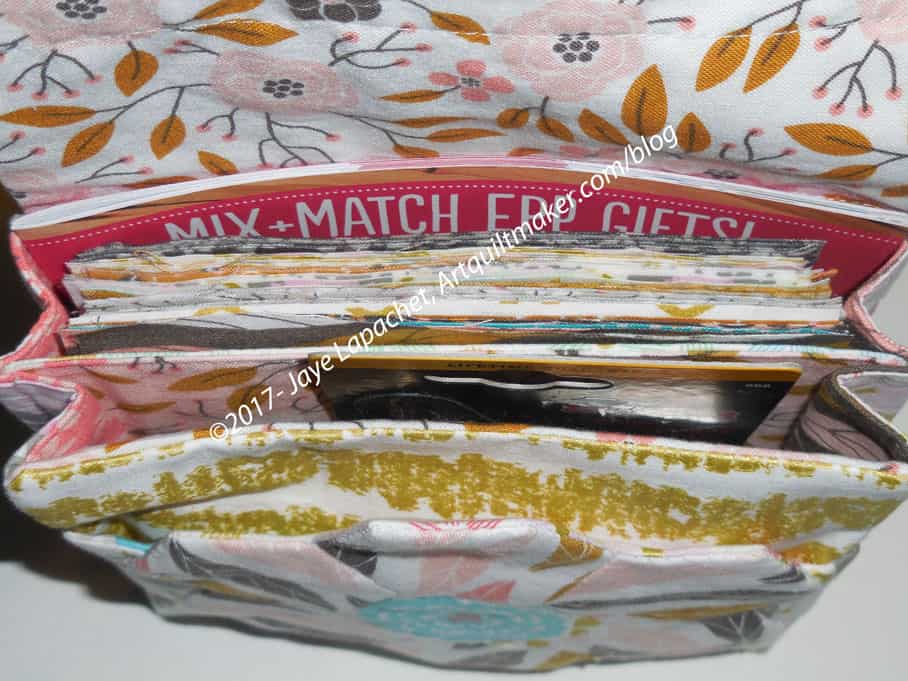
EPP Travel Kit – open (front)
This travel kit is awesome and the problem I had really had nothing to do with the pattern, but with the supplies I had on hand. I hand on hand, and wanted to use, some sew-in invisible magnet closures. Sara of Sew Sweetness uses these in a lot of her patterns and I find I have better success with them than the models with the ‘legs’ used in this pattern.
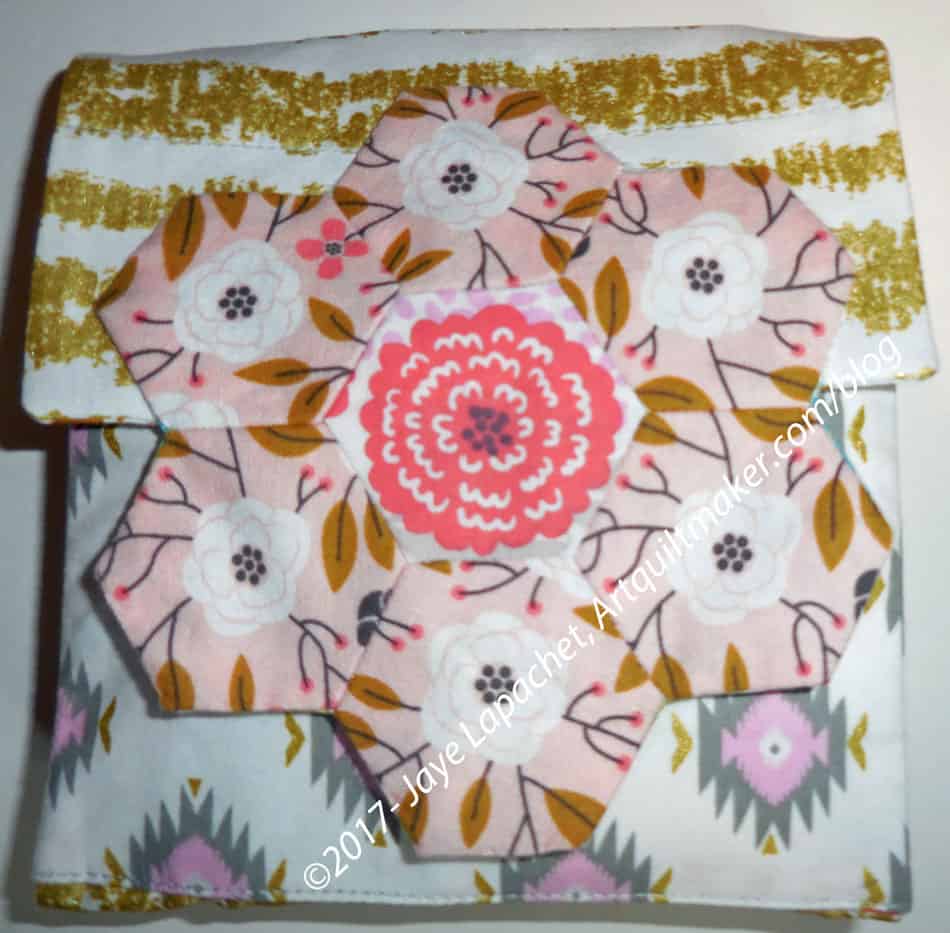
The closure is pretty awesome. I love the way the hexie flowers stick together. Very clever.
Once I figured out how to get the sew-in magnetic closures oriented in the right direction, the assembly went pretty smoothly. There is a lot of handwork in this pattern, which I wasn’t expecting.
The open look (right, slightly above) is a little odd. I think it might be because of the scrappiness of the whole piece. I think I should have used a backing for the flap hexie flower that matched the hexie flower (the one with leaves and a turquoise center). I do kind of like the scrappy look. I think I will make one that looks like a Dia de los Muertos celebration for a different friend. I definitely want to try different colors.
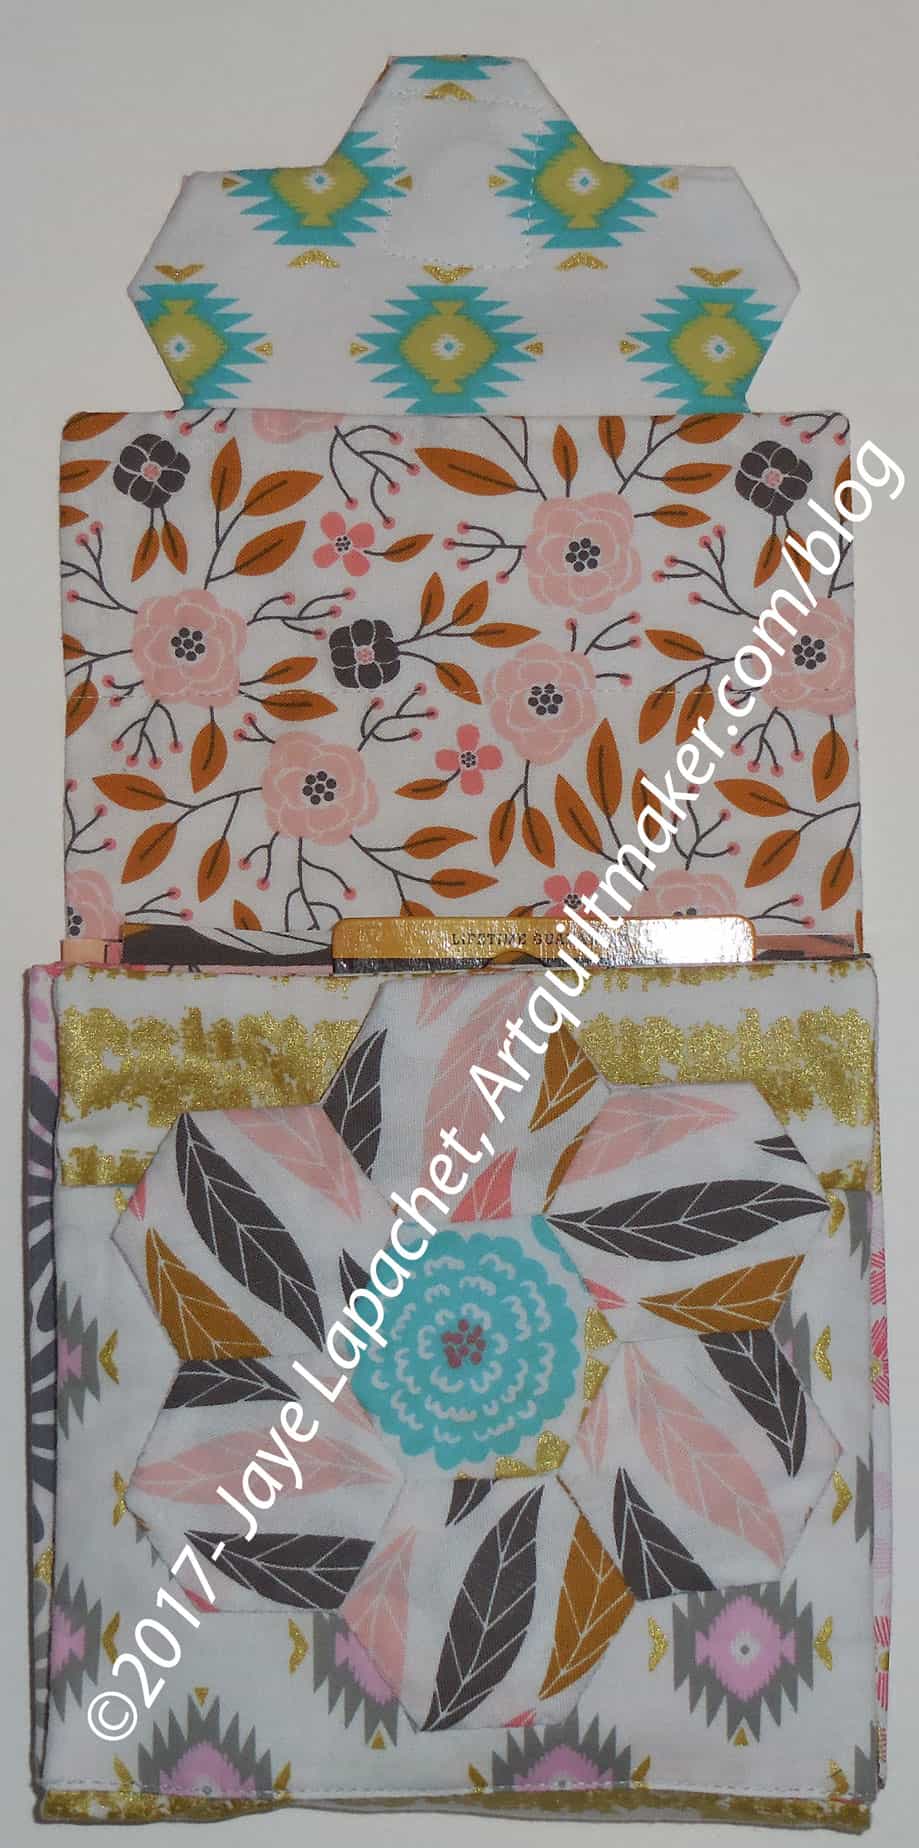
EPP Travel Kit – inside view
Altoids tins fit nicely inside and Haley (blog owner/designer) calls for two of them for this project. I had to scrounge them up. I put a piece of felt in the bottom of each tin to make them less rattly and a little nicer.
I cut and added some 5″ squares, and an EPP book to make the kit look full and fun.
*It appears that the name of the blog has changed to Red Handled Scissors. Not sure why, but the pattern is still there.
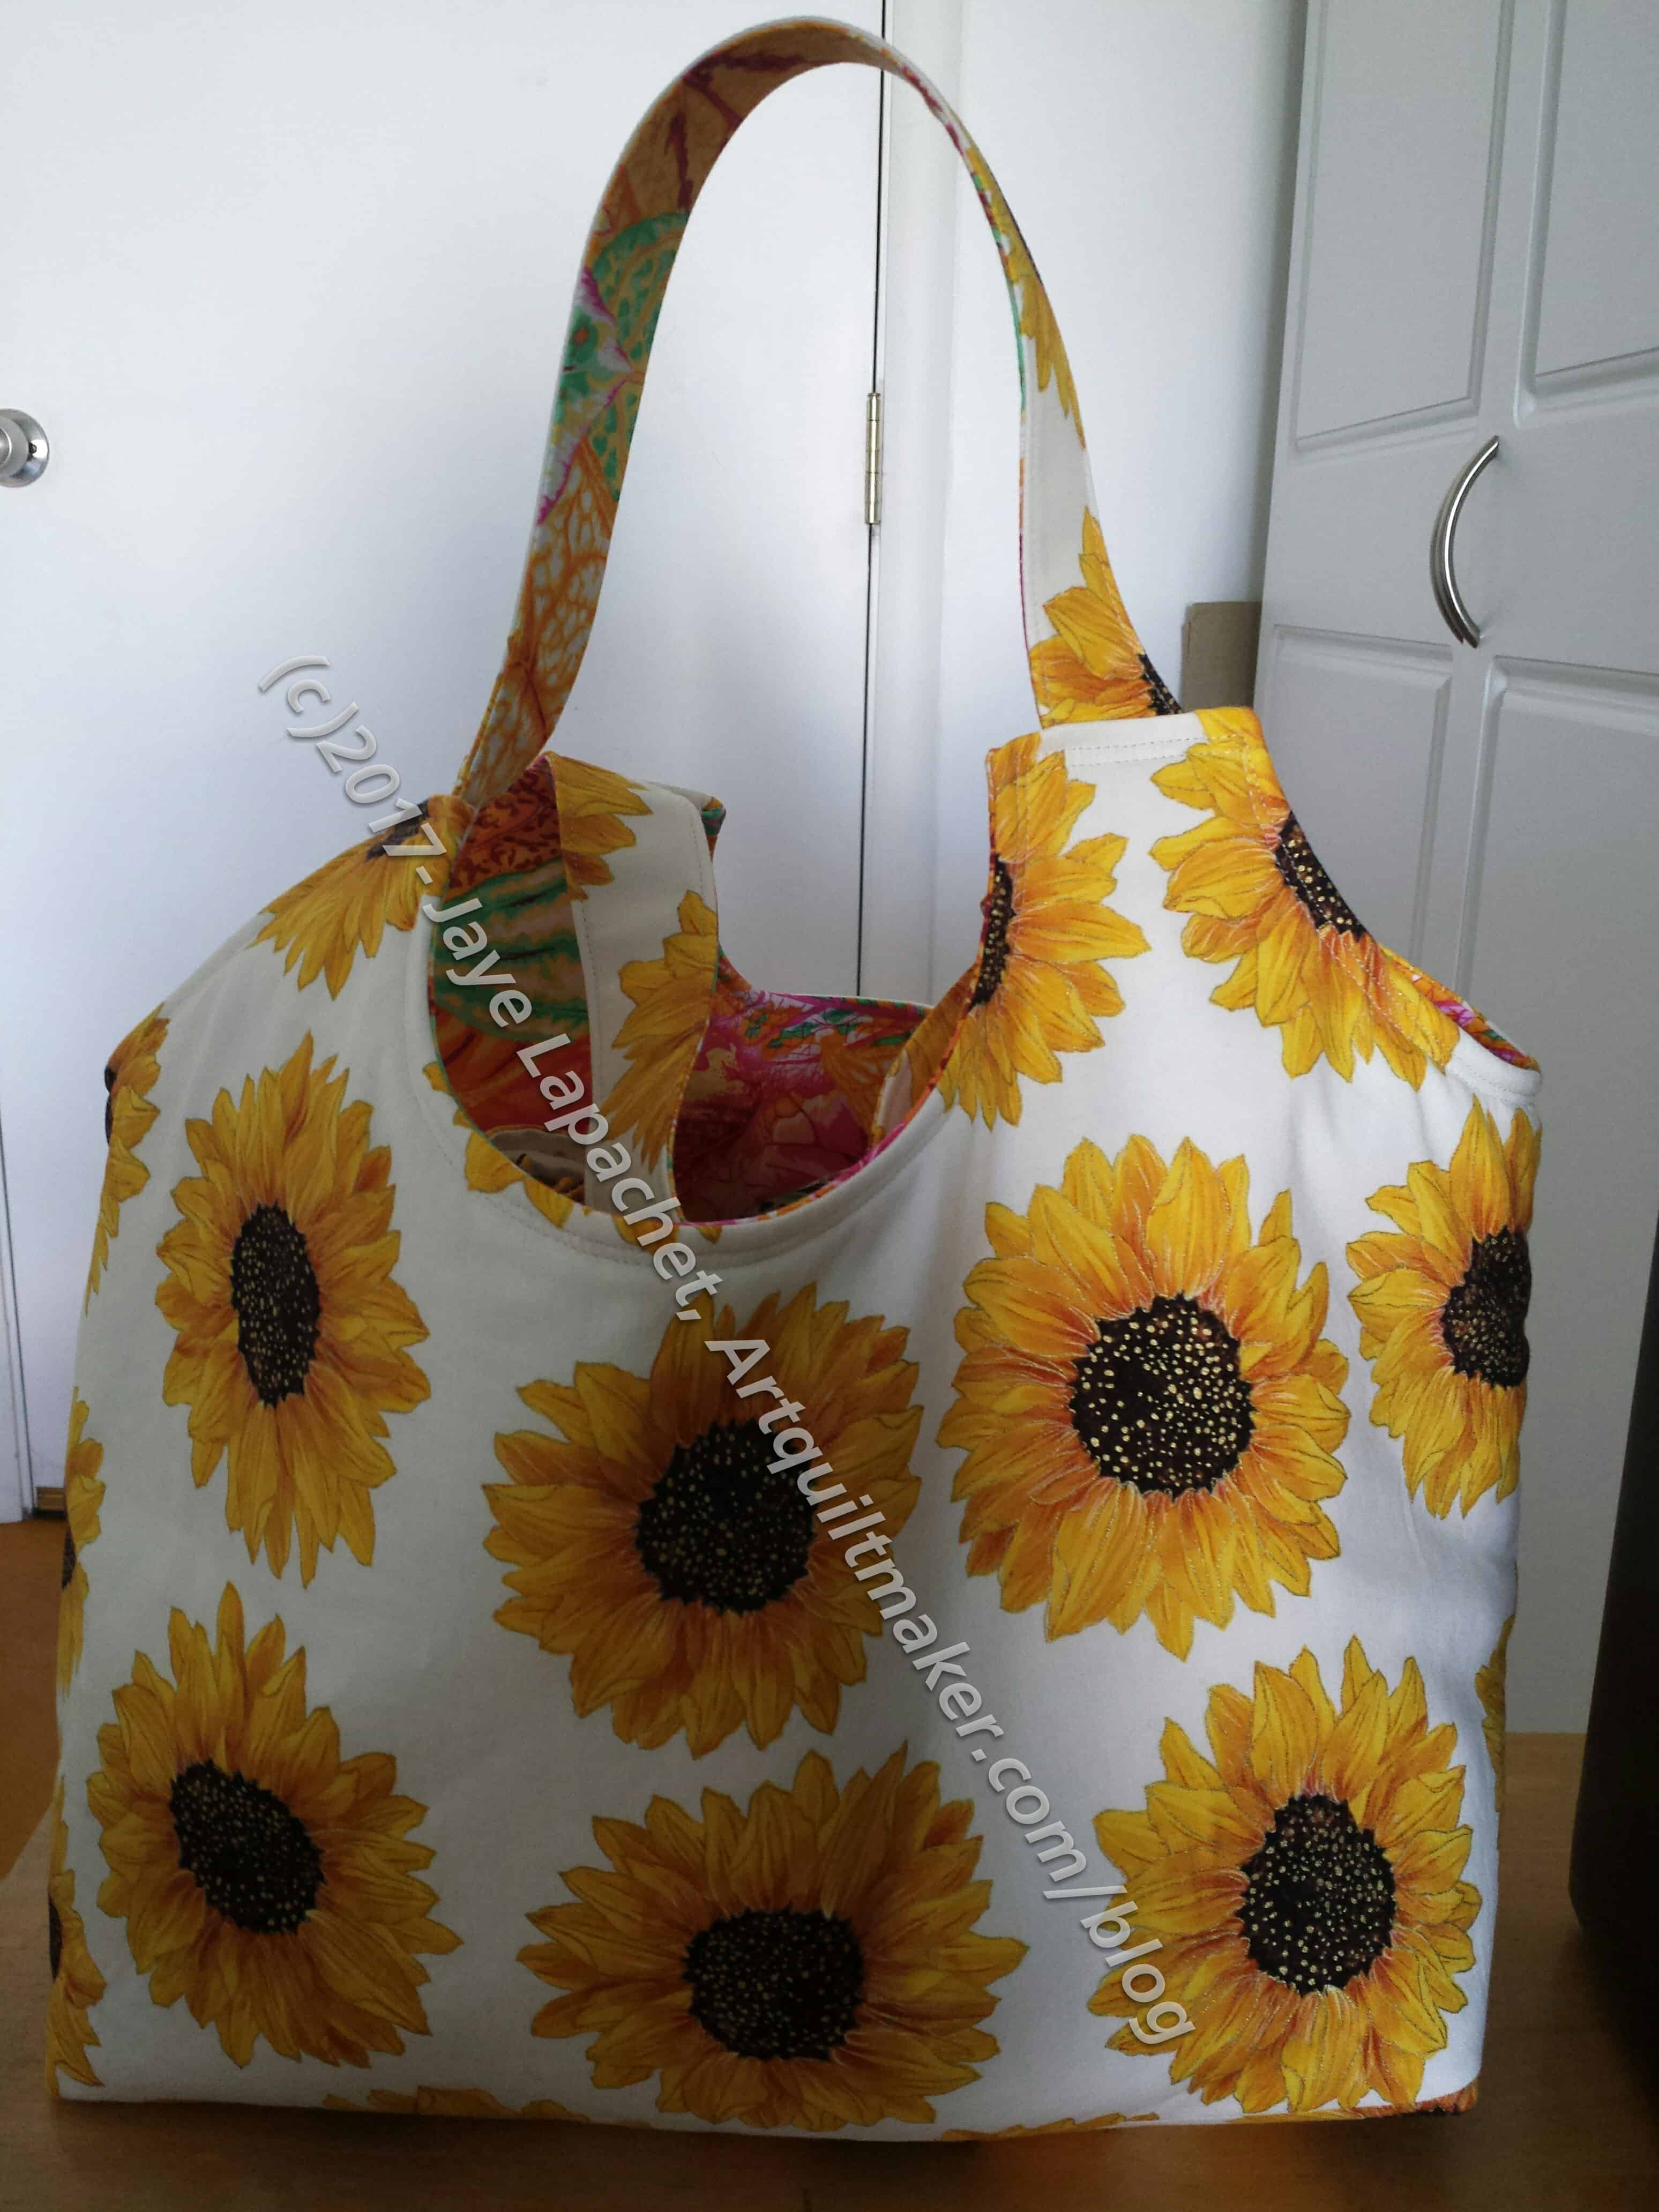
I have decided that I like that Big Tote pattern from the Make It Take It book.
This will be the carrier for the other gifts, such as the cloth napkins I talked about earlier this week, DH will present to the NDGW Grand President. This is the first one I made with just two fabrics. No mosaic piecing. The bold print works very well, but I think smaller prints would look better using the mosaic piecing method I used for the second one I made.
There are some things I would like to try, e.g. pockets. In my mind pockets are essential. This isn’t a huge tote, so I envision it being used as a handy bag to put a few things in when you weren’t planning on buying anything.
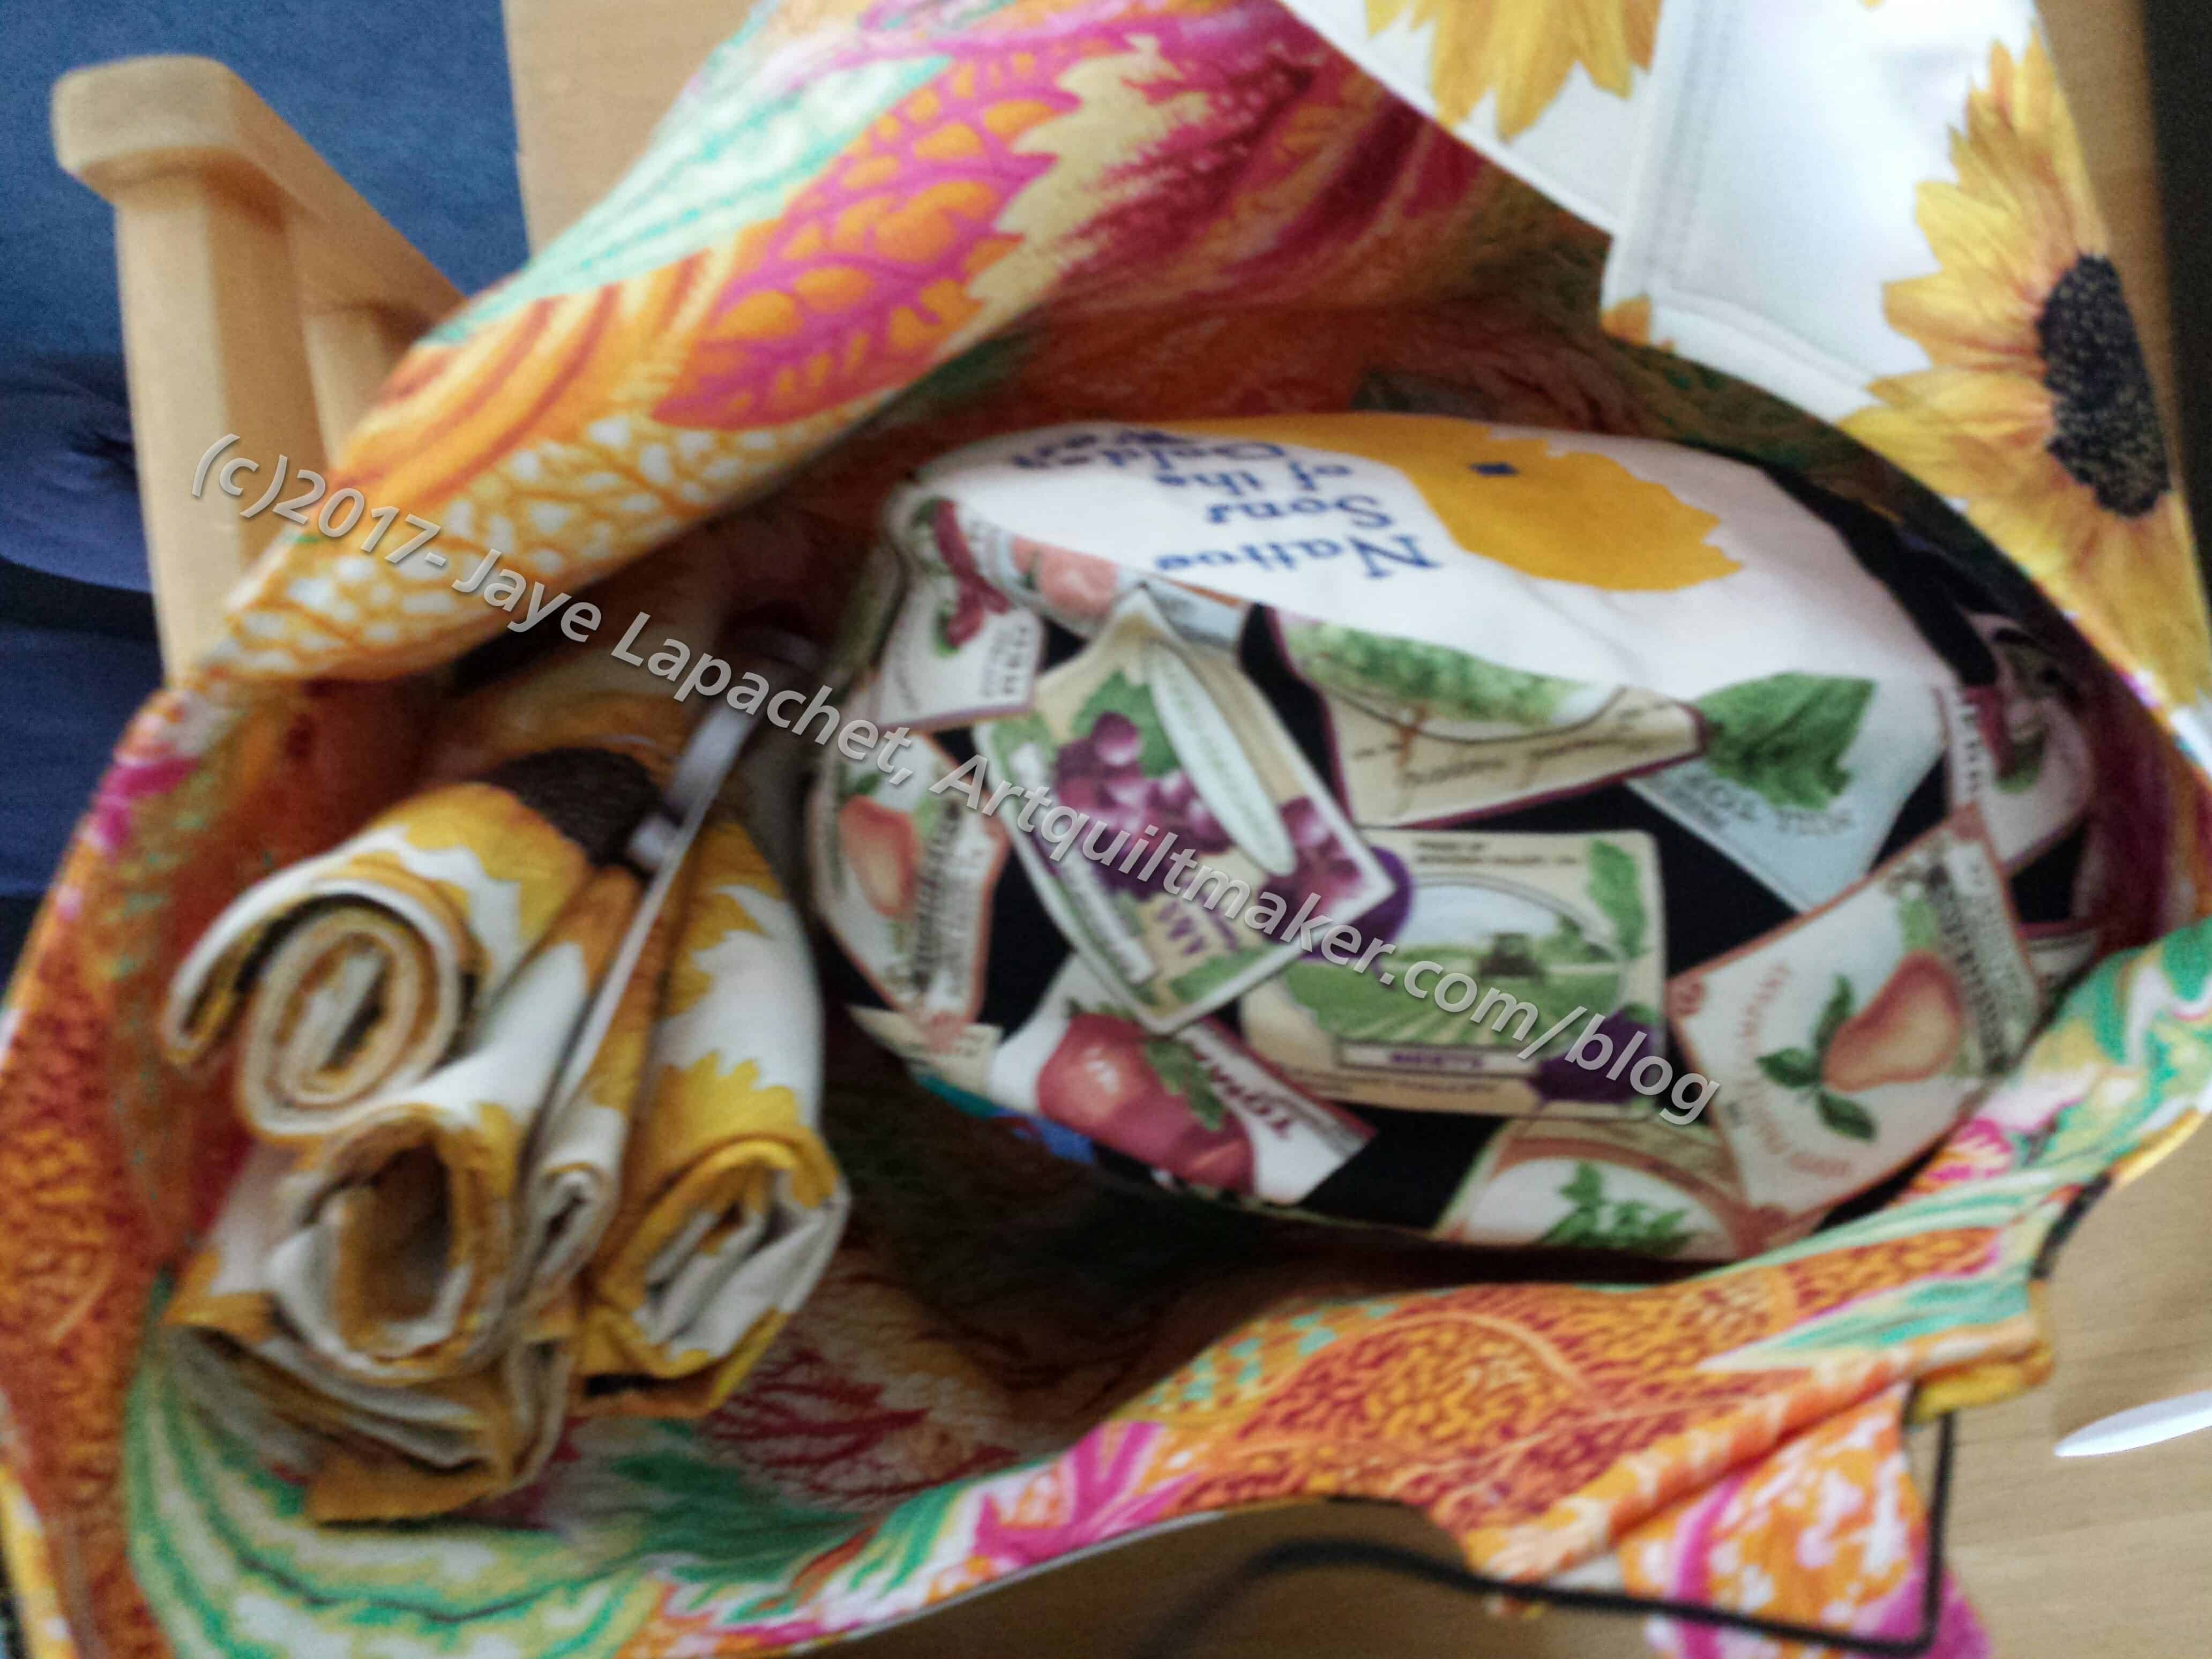
Kaffe print inside
I couldn’t resist adding a little of my own personality to the inside.
You can see some of the other gifts inside the bag.
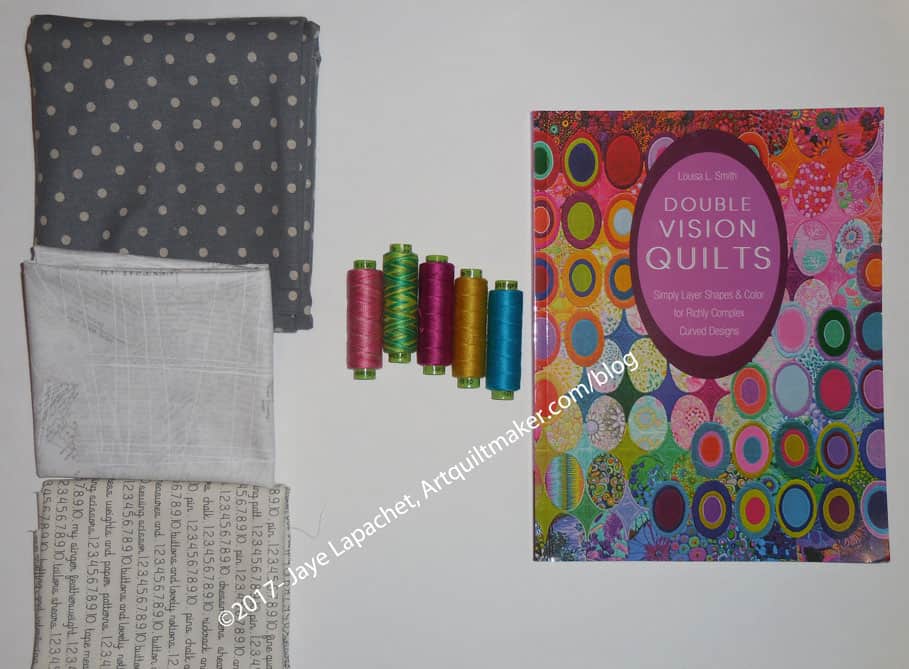
In Portland, I bought some fabric for the Poolside Tote. And the pattern. I thought I had the pattern, but I didn’t, so I bought that as well.
I really found the perfect fabrics for two totes. The text print is home dec weight and will be the inside.I hope my machine can handle it. I’d love this fabric for some chairs in my living room.
Stitch Purchases
The dots are scheduled to be used for the outside of the totes. I have some grey already that will make great straps. It might be too many dots or it might be super cheerful.
I was on a roll after yesterday’s finishing of the Red Dot Cell Phone Wallet. As a result, I decided to add to my fabric usage report by finishing the Habitat Cell Phone Wallet.
I forgot to mention that this goes with the other pattern by Valorie Wells called Little Wallet. I have made a few of these as they are really useful when giving gift cards and don’t take very along.
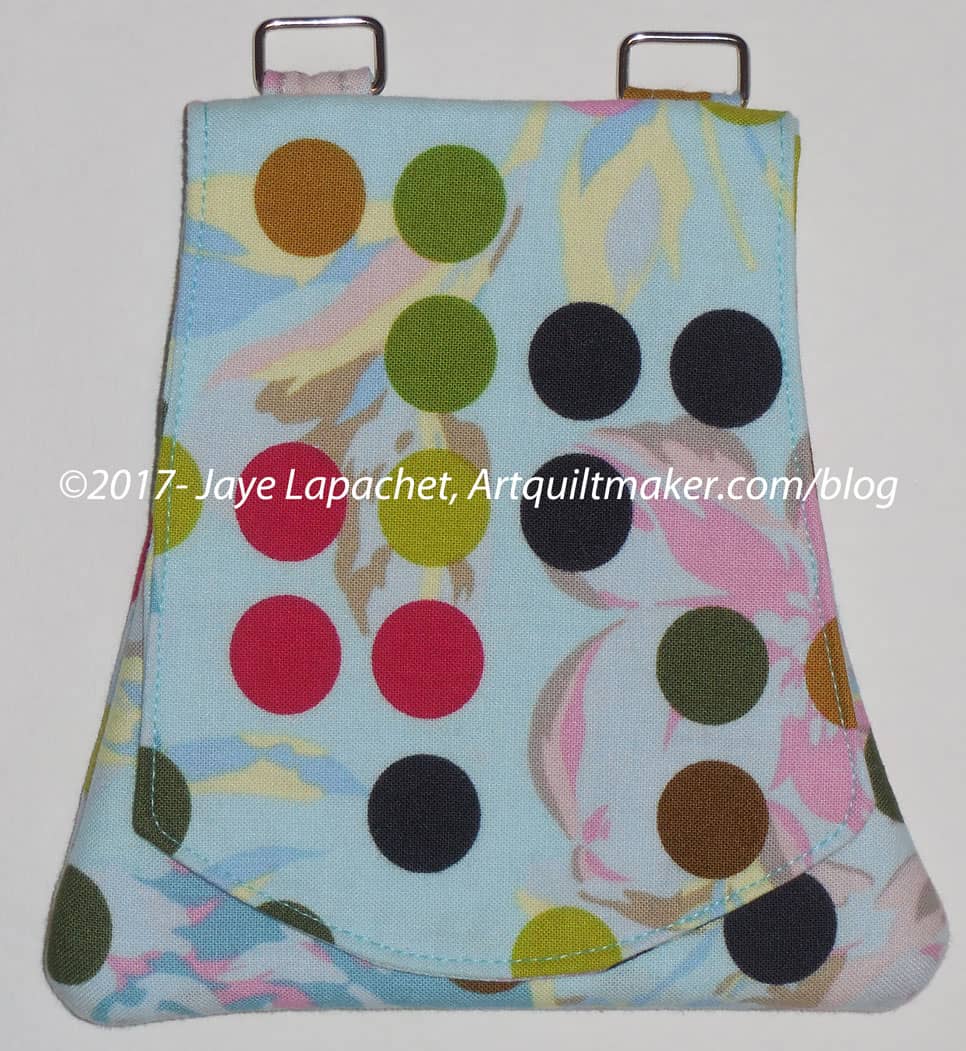
Habitat Cell Phone Wallet – open
This goes with the same dress pattern as the Red Dot version. No pockets in a dress or tunic is something I will avoid at all costs in the future.
This fabric is an older one by Jay Carroll and I had enough scraps from the dress to make this. You can see the details of this version much better because of the asymmetricality of the fabric motifs. The piece has four pockets (one of which is in the back and you can see in the last photo), all with graduated sizes.
I did not put a closure on the flap, though the pattern calls for one, because I wanted easy access and wasn’t expecting to keep anything of great value in it.
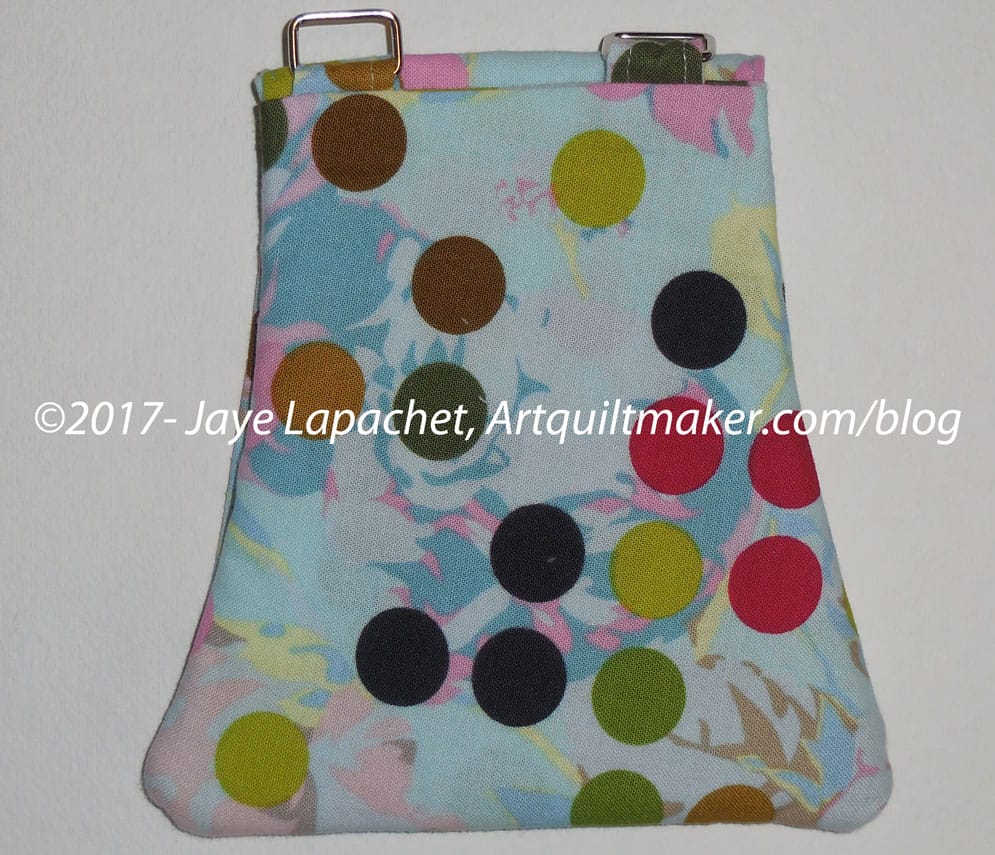
Habitat Cell Phone Wallet – back
I find that I do not need to interface all but the covers. The rounded corners are quite bulky and difficult to turn. I did not topstitch the bottom part of the piece. I stuck to the flaps as my needle would not go through those corners no matter what.
I have a black one I want to make and may try the fabric strap. I also have a green one in pieces. I need to find the pieces and sew that one together.
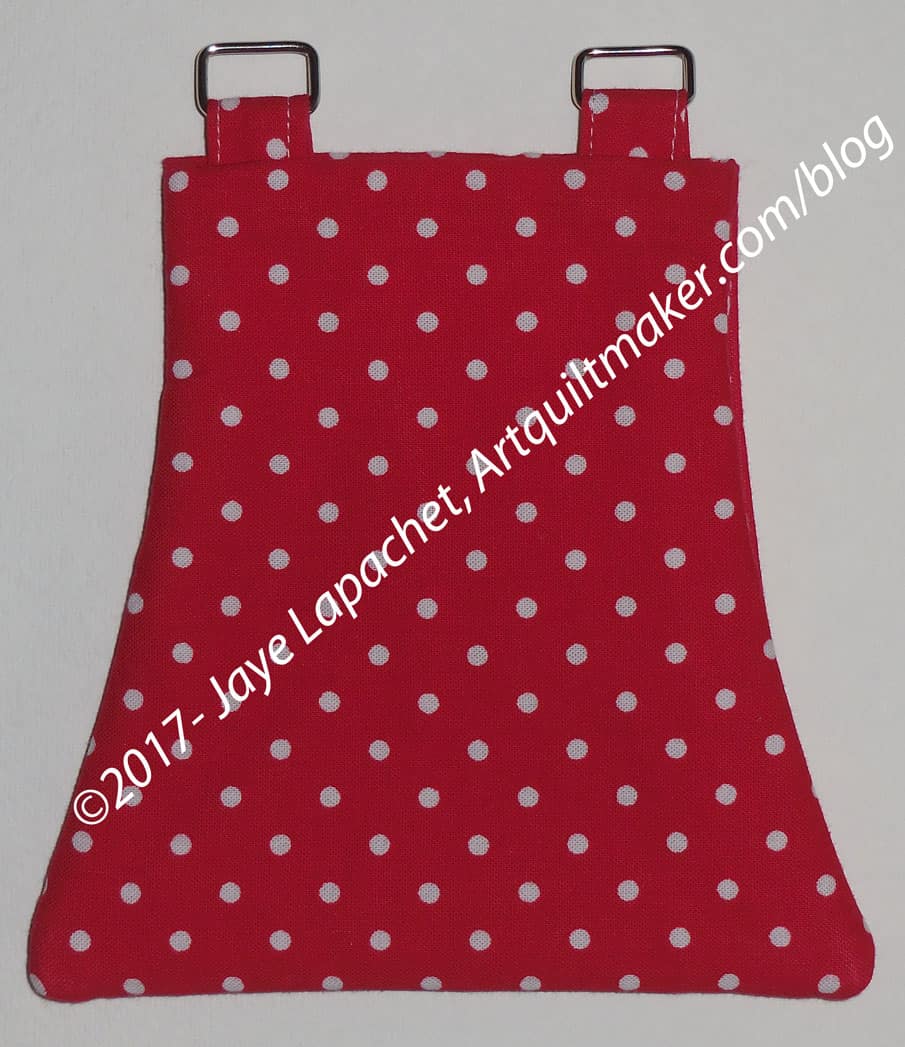
I decided to wear my red dot dress to Easter, despite the rain. That meant no pockets so I needed to finish the Red Dot Cell Phone Wallet. It had been languishing for months and only needed some topstitching. I sewed the topstitching and sank the threads really quick Easter morning before we left for the party.
My SIL noticed right away and I was pleased to have finished the bag. It was very useful for its intended purpose.
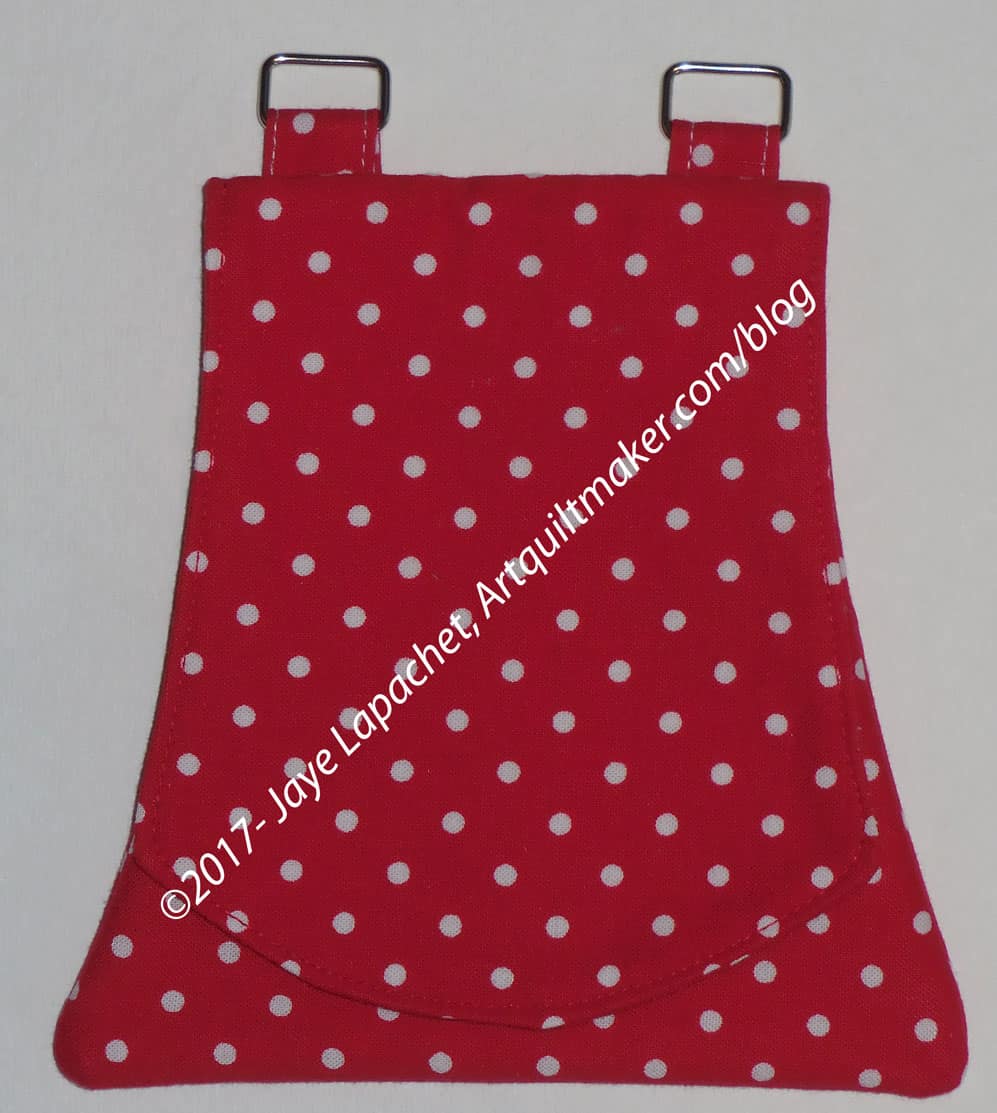
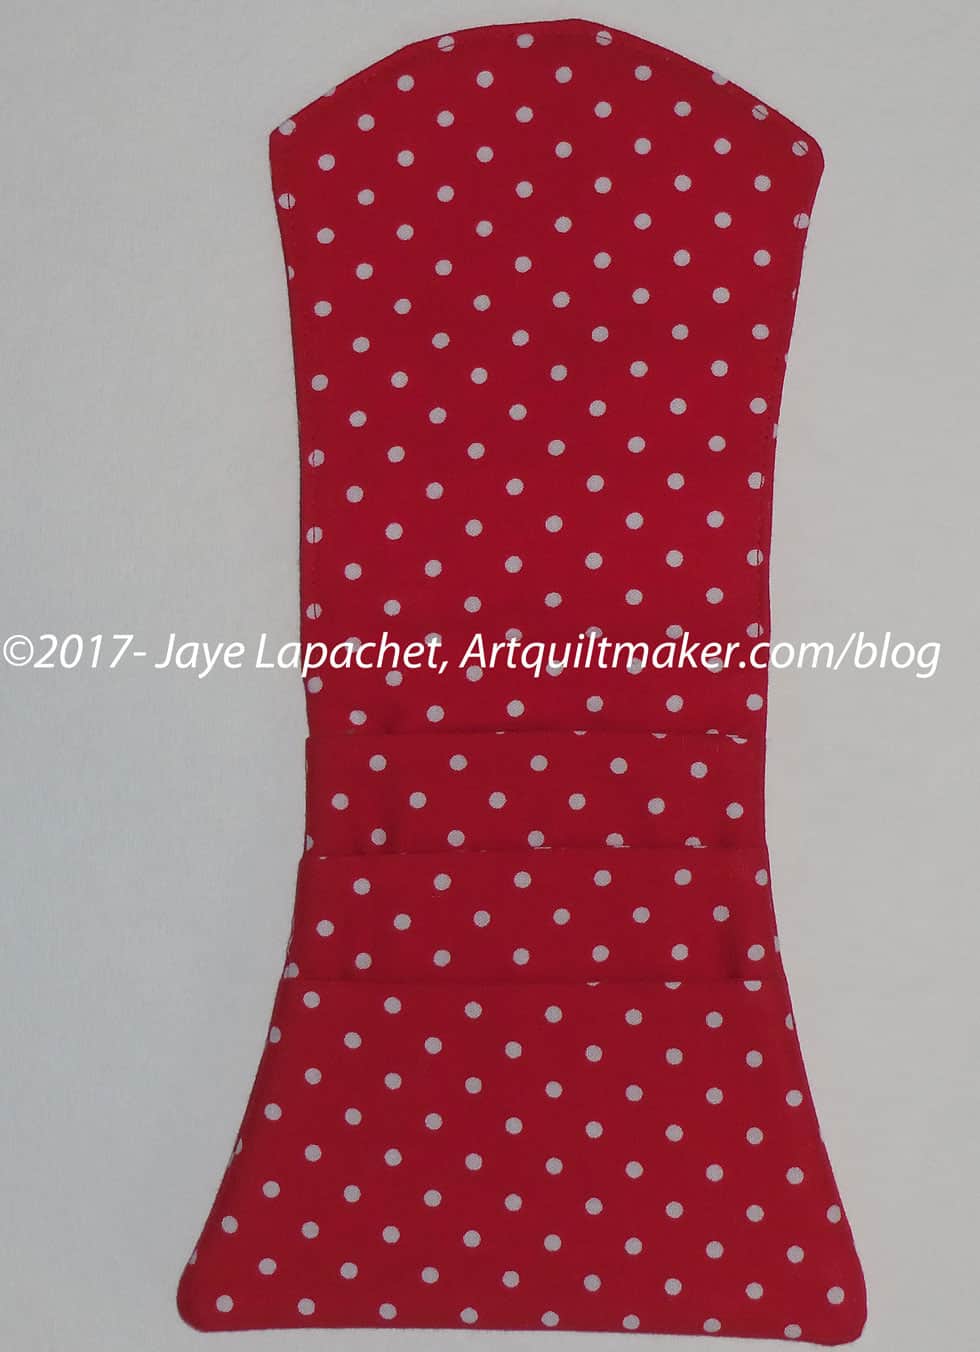
Red Dot Cell Phone Wallet – open
The pattern calls for a strap made from fabric, but SIL gave me the idea of an interchangeable strap. I bought those small rectangular ‘rings’ and a long chain, which I use for this one and two others I have. There are two things I don’t like about the chain. First, it stands out from the dress when I wear it. Second, it is of a sufficiently intricate nature as to get caught in my hair when I am not careful or needing a haircut. If I make more, I may make straps. We will see.
Red Dot Cell Phone Wallet – back
It is a pretty easy pattern and useful for the purpose of providing a pocket in a dress whose pattern does not lend itself to pockets. There are several pockets for cards, though I only use it for a hotel key and cell phone. I have put my keys in there, but my car keys are too bulky because of the clicker for DH’s car. I toss them in and they ruin the slim line of the bag.
After wearing the dress, I think I will bring it with me to Grand Parlor to wear at one of the less official events.
I thought I would write a little more about this pattern as it is a pretty good pattern and has interesting construction techniques.
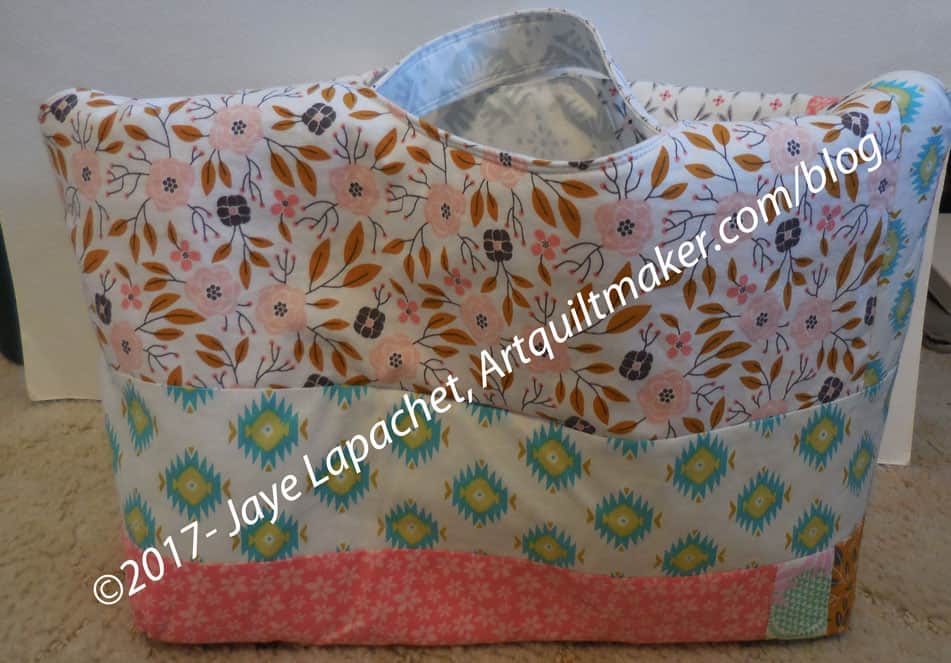
The bag pattern is included in a book called Make it Take It by Krista Hennebury. The bag is a cover girl and is what attracted me to the book.
I had a gift to make and thought this would be a perfect opportunity to try the pattern. I made the Little Patchwork the first and was a little disappointed at how little it was. I hadn’t planned to make both, but I needed a larger tote for my gift. From the photos in the book, I thought the little tote was more of the large tote size and the Big Patchwork Tote was larger – almost the size of a Chubby Charmer.
Big Patchwork Tote – 2
The pattern calls for patchwork sides and gives instructions for making a strip set. Fortunately, the pattern also gives the desired final size of the strip set, so the maker can cut the piece from one piece of fabric, if desired. This dimension also allows one to use something like mosaic piecing techniques if strips are undesired. Since I am using a fat quarter stack for this project, I didn’t have pieces large enough for the strips. I pieced strips together and used those. You can see that in the photo above if you look for vertical strips. I recommend piecing the desired fabrics together well in advance of the deadline for this bag as that takes a lot of time.
I used fusible fleece on the small bag and Soft and Stable on the larger bag. Both work, but I found the fusible fleece to be easier to deal with. Of course, if I had remembered to attach the Soft and Stable before I put the bag together, that would have made a difference. 😉 In the future, if I plan to use Soft and Stable, I will attach it (in the ditch stitching, perhaps) to the exterior before I put the bag together.
The interesting part is how the bag goes together. Instead of putting the exterior inside the interior, right sides together and sewing around the top, as the maker does in most bags, this one asks the maker to fold and press the interior and exterior in half and layer them. It is an interesting method that seems to work, though is hard to understand until you do it.
The problems with this bag are: no pockets, no closure. Considering the method of construction, I am trying to figure out if I can add a pocket or sew-in magnets as closures.
All in all this bag has an interesting shape and lot of room for creativity in making the exterior. I encourage you to buy the book and try it.
The Winter Extravaganza Palooza swap was yesterday at the BAM meeting. Being the blog editor, I had compiled a giant list of tutorials and patterns a few months ago for inspiration. It is an impressive list, so take a look. 😉
My swap partner wanted a bag, so I pulled out one of the bag patterns I have had sitting around and tried it out. I know I could have used one of the tutorials I just crowed about, but I didn’t. I wanted to plow through some of the bag patterns I have purchased and this was the perfect opportunity.
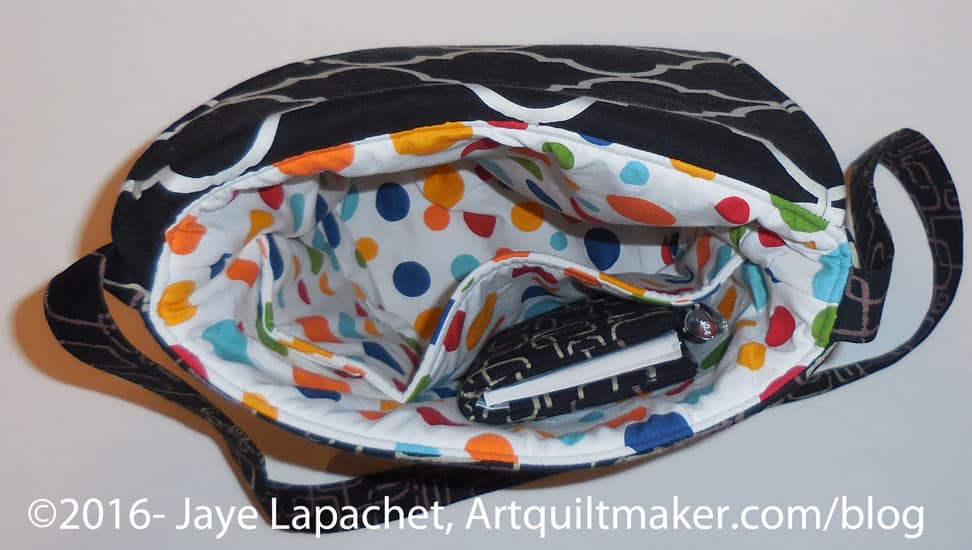
I wasn’t hopeful that this bag would be successful (unlike me, I know!), so I was pleasantly surprised to find that this bag came out pretty well. The flap is a great opportunity to do some machine embroidery or applique’ or other type of embellishment. I chose some interesting, if black, modern fabrics for the outside, so it wouldn’t show the dirt.
The pattern is Flip Flap bag from Totes by Sandy. The pattern is not 100% clearly written, though the interpretation could have been my problem. I had some trouble with some of the steps, but it all came out in the end. I would have made the lining section much smaller. I did make it a little smaller, knowing from past experience that it didn’t need to be the same size as the outside. I didn’t make it small enough and the inside sags a little. 🙁 I don’t know what the normal reduction is for linings – half inch? a whole inch? I could experiment, but probably won’t.
Flip Flap Bag inside view
I made the inside light so my partner could see her stuff.
I am thinking about making this again, as I think it is a good size. I wonder about adding more pockets. The handbag I use now has a section at the front for cards, lipstick, etc and I wonder if that could be incorporated into this design. Perhaps not with the asymmetrical flap.