As I said the other day, it is the practice of the group to make bags as thank yous for the BAMQG officers. I made all, but one of the bags for the main officers.
I really enjoyed last year at BAMQG. I thought Kelly started off strong and had some good challenges. Remember the Kelly Bag? I want to do that practice again and her technique of making a bag out of the practice really makes me want to do it. There is nothing like having a bunch of ugly muslin 12″ squares laying around to put the best of us off FMQ practice.
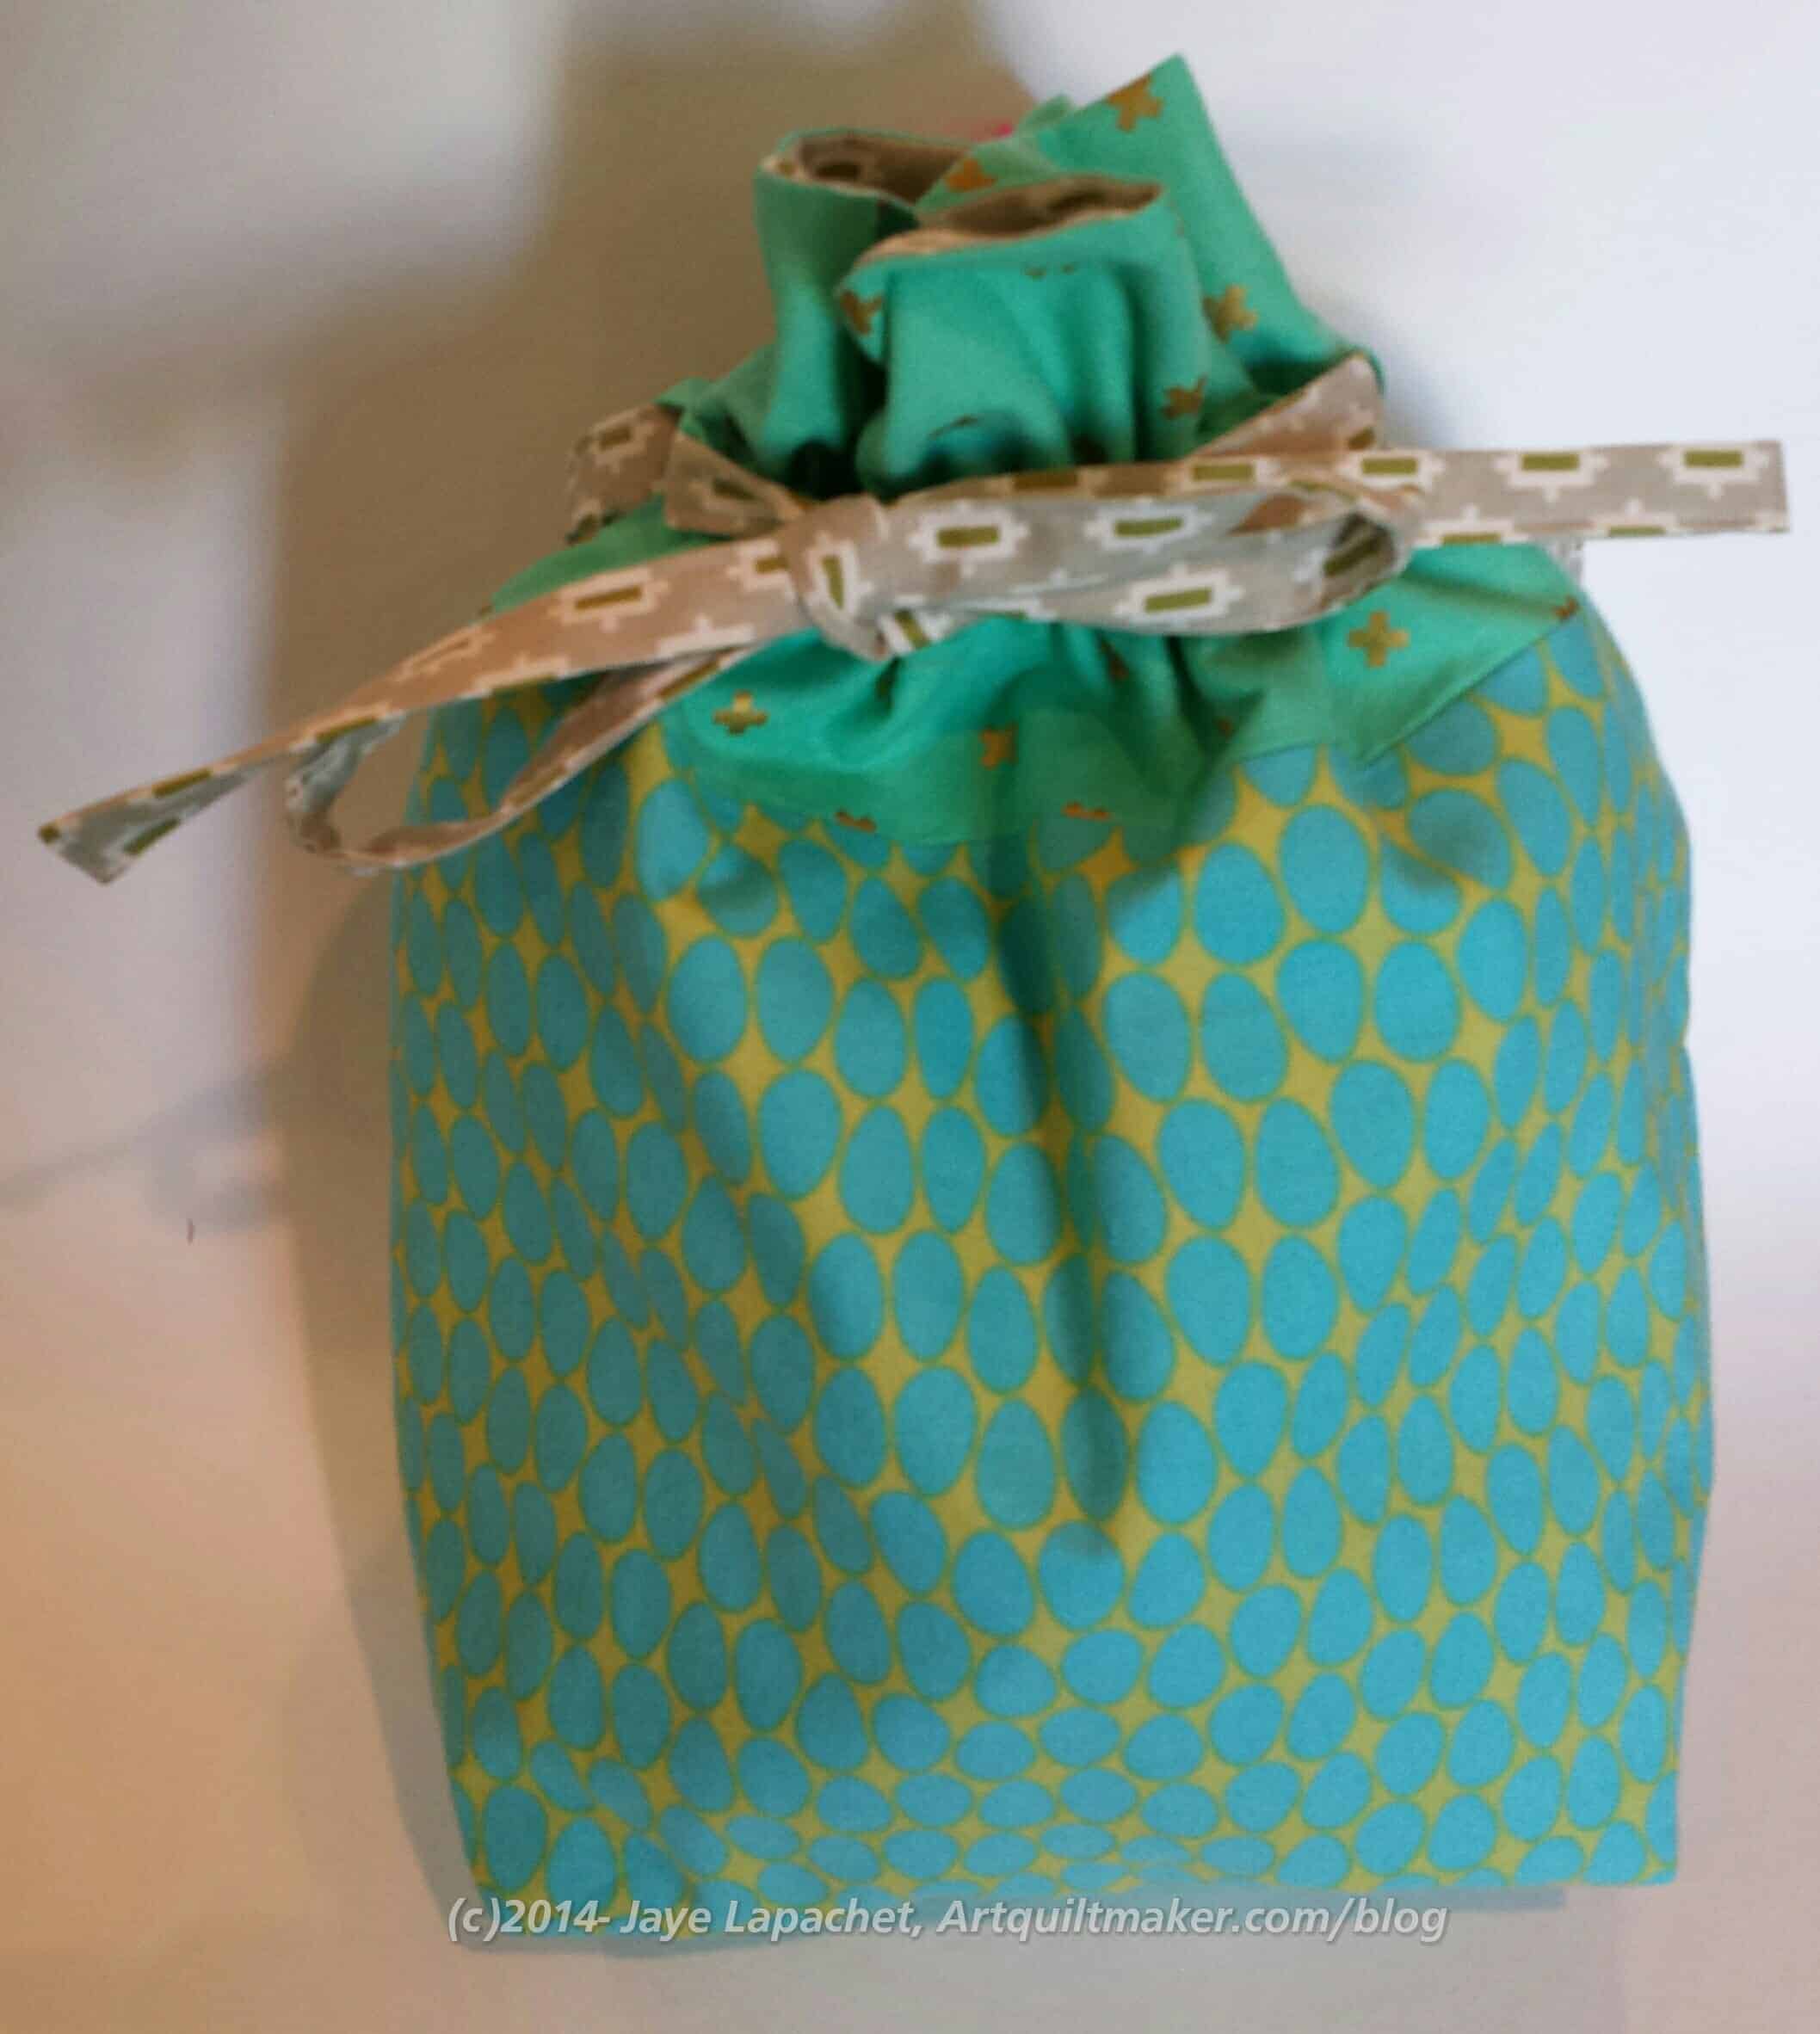
I got some Cotton + Steel and thought I would use some of it for her back along with the egg fabric I don’t remember the name of and some Bonnie and Camille on the inside and for the tie.
Claire’s Bag
Claire’s bag is much more lively. She is such a little dynamo that I wanted some cheerful fabric. Making her bag coincided with me rummaging through my multicolor fabric bin.
I really should do a review of the pattern. I made these from the Jeni Baker Drawstring Bag pattern, which is so popular now. They are relatively fast to make. We’ll see if I do a review.
This is a good project for other guilds as thank yous, because if you can get people to make the bags everyone else only had to bring a few small gifts. I never liked the idea of getting blocks as a thank you. Yes, you get a little of each person, but you have to deal with another UFO and their foibles in sewing. JMO YMMV, of course.
I have an idea to make the perfect work bag. I haven’t yet found a pattern out there, but with the right knowledge of techniques and an ok pattern, I can probably make something that will work.
After reviewing Big City Bags by Sara Lawson, I put the book in my database (I am a librarian after all!). In the course of testing the records and the search results, I came across Lisa Lam’s The Bag Making Bible and had to look through it for more ideas.
If you have this book and Big City Bags, you have everything you need to make almost any bag out there. Big City Bags by Sara Lawson has good techniques, but is mostly a project book. Lisa Lam‘s book focuses more on techniques, but has projects to go with each technique. The projects are not the focus of the book. In fact they are even hard to find, hidden as they are in the midst of detailed instructions for techniques.
One of the different aspects of this book is that the techniques build on each other. This is a more down and dirty, ‘here’s everything you need to know’ kind of book than Big City Bags. It goes from very basic (explaining parts of the sewing machine-pg.14) through intermediate (explaining a pattern with a glossary of terms) to advanced (modifying patterns). You will have to think, because skills or techniques you learn in one section are referred to again in another section.
On careful examination of the table of contents, I saw that the projects were, indeed, named and given a page number as a subheading under the main point/heading of the chapter. I like this idea, because by scanning the list of techniques, I can find projects that will illustrate the technique I want to learn.
The book is laid out in a pretty standard way: Table of Contents, Foreword and Introduction. The introduction has one line that explains the premise of the book “I have purposefully moved away from quick and easy bag projects because I believe that when you spend a little more time in creating something special you will cherish the results all the more.” This is a great description of the premise of the book.
The first sections after the above are all about the basics. They start with Basic Equipment. The author has good photos of the basic equipment, some of which I have never seen in a bag book. I like it that these unusual tools are included. I did wonder why no rotary ruler was included in the list, though a rotary cutter is included.
The sewing machine section includes some information on machine stitches and photos of the machine feet.
The next section is called Anatomy of a Bag, which covers all the aspects of a bag from parts you have heard of like flaps to parts like the gussets, which are less common.
The basics continue with ‘Getting Started’, which discusses using patterns, ‘Understanding Patterns’,’Fabric Preparation and Cutting,’ Modifying Patterns and then the book continues on to the techniques and projects. The ‘Understanding Patterns’ section is good also for garment sewing.
‘Choosing Fabrics’ is very complete. It includes a description of different types of fabrics and the pros and cons of each. The section talks about how best to use the fabrics for bags. This section has a subsection on choosing interfacing and interlining. Again, there are descriptions and definitions of different types and weights of interfacing.
I like the section called ‘Working with Colour and Pattern.’ The author has some beginner level suggestions. While there is no color wheel, the section gives the reader some suggestions about choosing colors as well as using pattern/motifs.
This is where the projects come in. The techniques are all associated with projects and the project teaches the reader those associated techniques. For example, in the Structure and Reinforcement section, there is a chart of ‘Volume Adding Features’. These are darts, pleats, etc and the chart tells the reader the benefits and suggested uses of each. The project photos have good detail shots and lots of instructions which, together, help understand how to use the featured technique while putting the project together.
The book has sidebar boxes throughout the book. The color and pattern section has boxes about using texture and sourcing fabrics. Some of the sections have a ‘Need to Know’, which covers important concepts that don’t fit into the other text.
I like the section on ‘Linings.’ It includes a chart of different types of pockets (charts are a good way to get a lot of information across quickly) as well as photos of the linings.
As with Big City Bags, zippers are covered really well. This book helps me understand what Sara Lawson was doing when I followed the directions for her Flush Zipper Pocket on the Petrillo Bag pattern. I was able to make the pocket from Sara’s excellent directions, but didn’t understand the underlying concept until I read this book. This is a great example of why these two books work really well together.
Information about zippers leaks over into the section called ‘Closures.’ Again, Lam includes a chart of different types of closures with benefits and suggested uses. There are photos different types of closures and how to insert them. I really liked the instructions on adding a pull tab to a zipper. This would have really helped me in some projects I have made recently.
Different types of trim, such as tassels, and edgings, such as piping, are also covered. Ready made handles and the different types of pockets that can be used are defined and instructions are provided.
I do think this book, and most bag books, could have benefited more from photos of the inside of the bags. I thought this, especially, when I saw The Organized Office Bag project. There are plenty of gorgeous pictures of the outside, but, frankly, the inside is heart of the matter for me. How many pockets are there?
This is a comprehensive book and would be a great addition to any bag maker’s library. It is a necessity for anyone who wants to understand bags and their components to an extent of designing or modifying patterns.
A little while ago I participated in Kelly’s monthly BAMQG Challenge, which was to quilt a half yard fabric sandwich. The goal ended up being to make a bag from this piece. I wasn’t entirely happy with the quilting, but I didn’t sincerely dislike it either. The quilted piece laid around for awhile, but it was on my mind. It is only recently that I made time to start the bagmaking part. Part of the delay was because I couldn’t understand and extrapolate out from Kelly’s excellent directions. You know me. Sometimes I can read and read and the words look like gibberish. She was very patient with me and agreed to give me one step at a time. Broken down I could do it.
Supplies:
1 yard of fabric (2 different half yard pieces will add interest)
1/2 yard of fabric for straps and other fiddley bits
12″ x 42″ (or WOF) ShapeFlex
12″ square of coordinating fabric for binding
batting slightly larger than 18″ wide to accommodate the half yards above
Sewing machine and supplies to machine quilt/free motion quilt
Layer and sandwich 2 half yards of fabric with batting
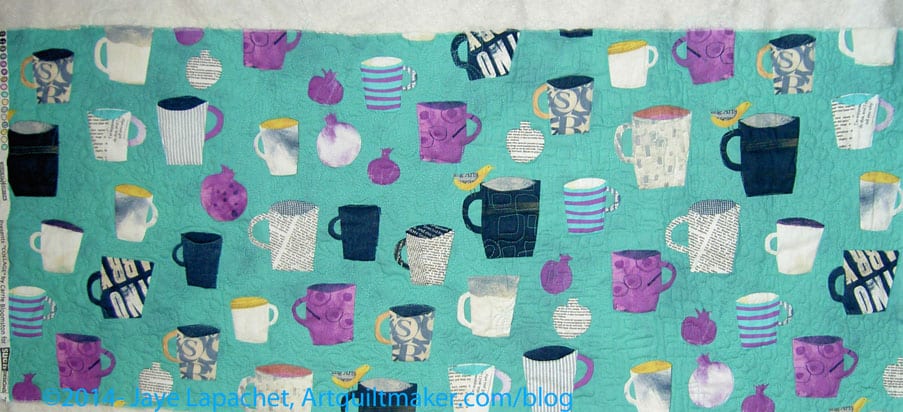
Full Piece Quilted
Free motion quilt piece as desired. Shown is the piece that I did back in April. I know pieces of fabric don’t magically quilt themselves and I am not saying they do. It took me some time, but it is good practice and this is a good use for those practice pieces. Go back to the previous post and look at the different quilting designs I used.
Kelly didn’t have me make the straps until after the bag was put together. I like to make all the fiddley bits first, so they are ready to go when I am on a roll making the bag and ready for them. That means: make the straps whenever you want. You should make them your favorite way. Here are the directions for making the straps that I used for this bag:
Cut 2 strips 6″ wide by WOF. You could make them 5.5″ and they would be a touch skinnier.
Cut 2 strips 5 3/4″ x WOF from ShapeFlex (If you make the straps skinnier, you need to adjust the size of the ShapeFlex. I cut it smaller to reduce bulk in the seams, which can get quite hefty without trying.
Press ShapeFlex to wrong side of fabric, following the manufacturer’s directions.
Fold each 6″ fabric backed piece in half and press well.
Open the pieces you just pressed and fold raw edges to the center.
Press folded edges.
Fold entire strap on original center fold again. Raw edges should be inside and strap should measure about 1.5″.
Optional: Depending on what you want to use the bag for, you can further line the straps with something like Timtex or Soft & Stable.
Topstitch along both edges very close to the edge. You can use a decorative stitch or two lines of straight stitching to add interest
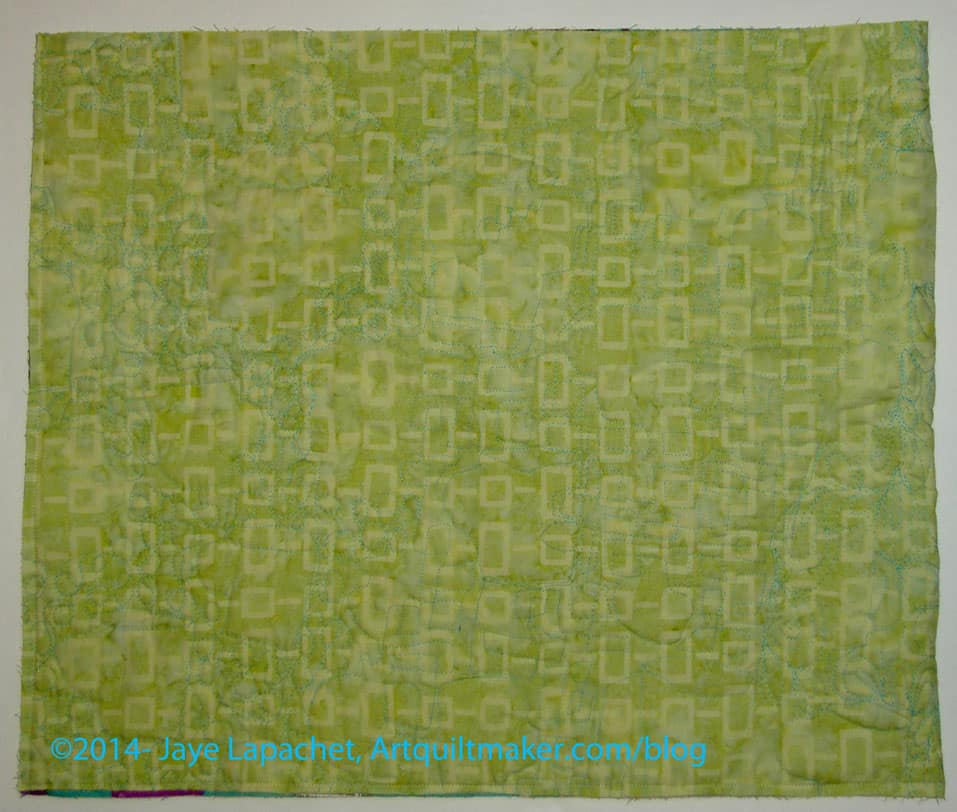
Squared up Quilted Piece
Square up your quilted piece by trimming the excess batting and raw edges.
Fold trimmed piece in half RST* and sew along side and bottom edges ONLY. Only the top will be open. You will have a flat piece that looks like an oversized iPad cover.
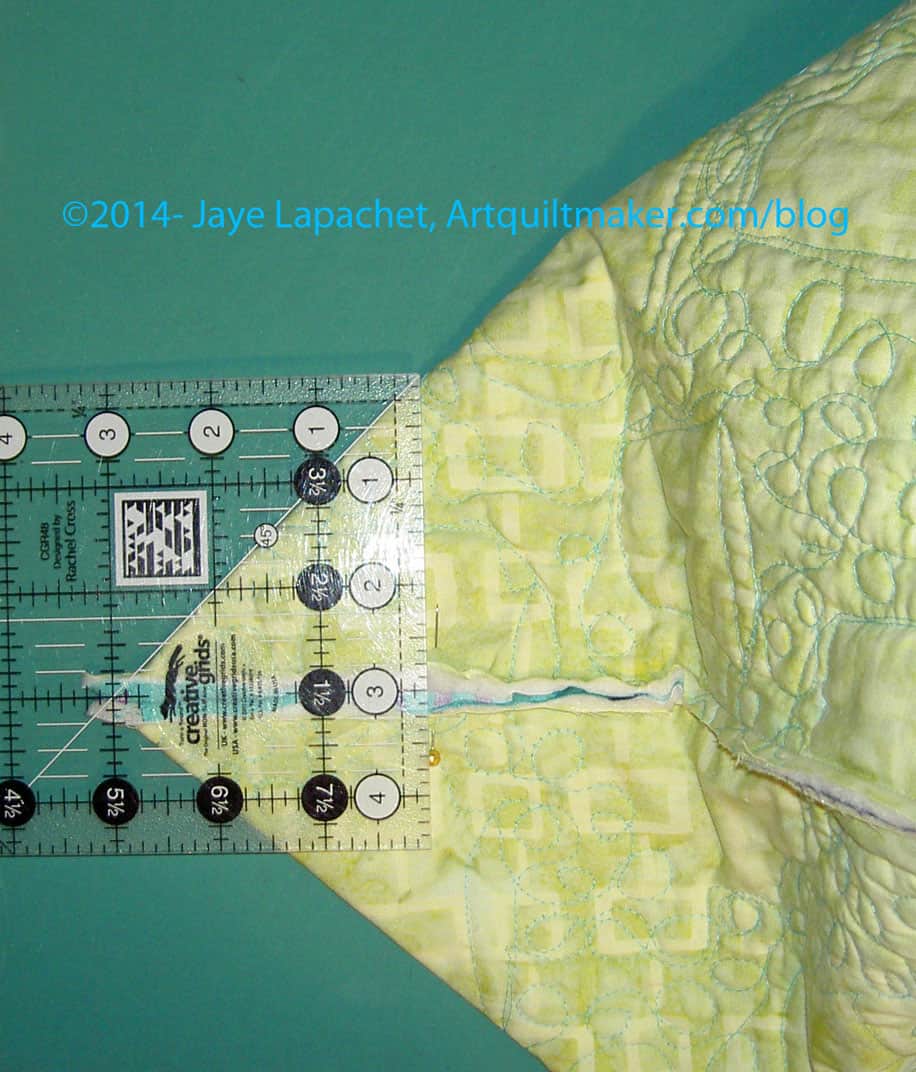
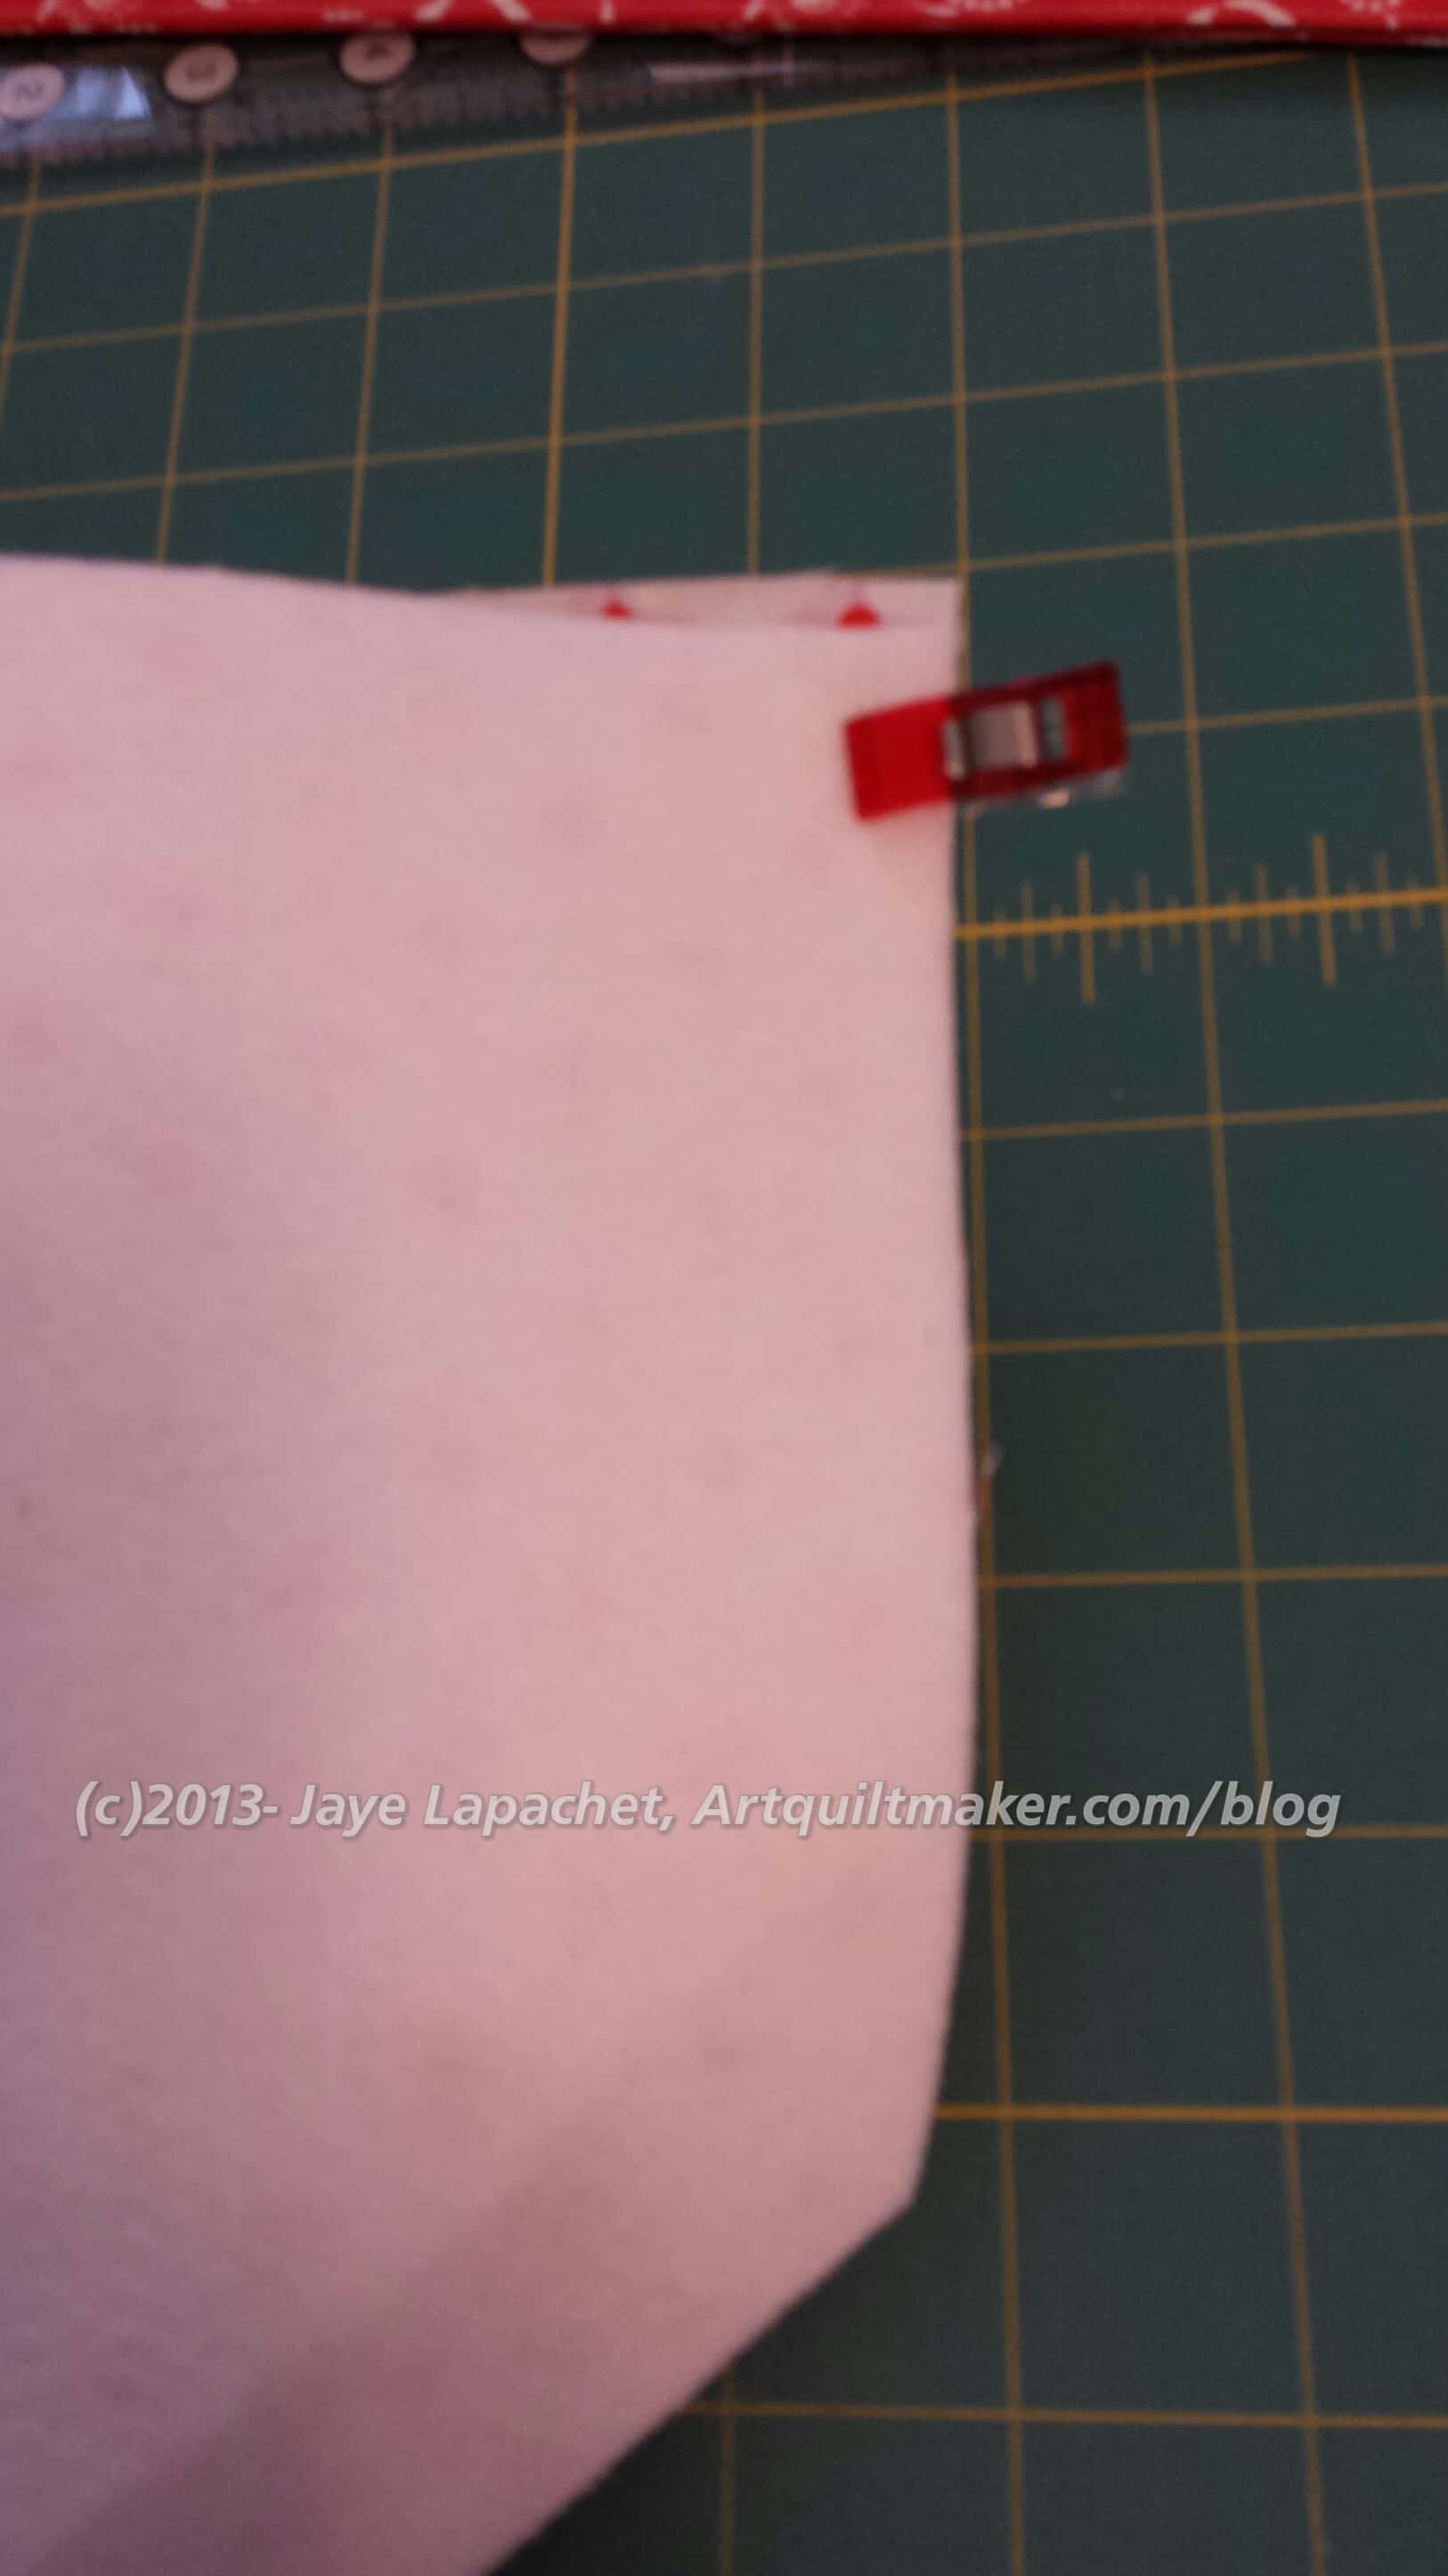
Measure to Box the Corners
Box the corners. Kelly does a minimum of 2″ from the side seam. FYI: there is no seam on one side, so I pressed the fold and treated the folded part as a seam. I used my Creative Grids 4.5″x8.5″ ruler to try out different corner sizes. I ended up doing a 3″ box, using pins to try out the size and see what I liked. You can see in the photo that I was able to use the side and bottom measurements to help decide. I had to see how big the bag would be and how it work as a bag I actually used. Once I decided on the size of the boxed corner, I drew a pencil line across the corner to know where to sew. I placed a couple of pins across the drawn line to hold the bottom in place. Then I sewed on that line to make the box. in the picture, I sewed along the short end of the ruler from diagonal line to diagonal line using the center seam as the straight line.
Corners Boxed
Optional: Trim off the excess corners to reduce bulk. I like to do this because I don’t like the excess to interfere with my stuff once I start using the bag. Also, small stuff that migrates to the bottom of the bag gets tangled up with them. Since this bag doesn’t have pockets, small stuff will migrate.
Press raw seams open. You’ll have to stick the iron inside the bag.
This is the point where, when I make the next version, I will sew binding over the raw seams. If I knew someone with a serger, I would serge them, but I don’t, so binding it is. I could just leave the raw edges, but that just seems wrong. On this version of the bag, I did this step later, but it makes sense to do it after the corners, so there is not a lot of other stuff to worry about and you won’t have to fold the ends of the inside binding over, because you can cover the raw edges of the inside binding when the top binding is sewn.
Make a bias binding like you would for a quilt. You will need about 50″. I cut my square (see list of supplies) into 2.25″ wide strips on the diagonal. The Judy Martin Point Trimmer ruler makes it really easy to sew the strips together. I suppose you could use straight of the grain binding, but I think a bias binding works well.
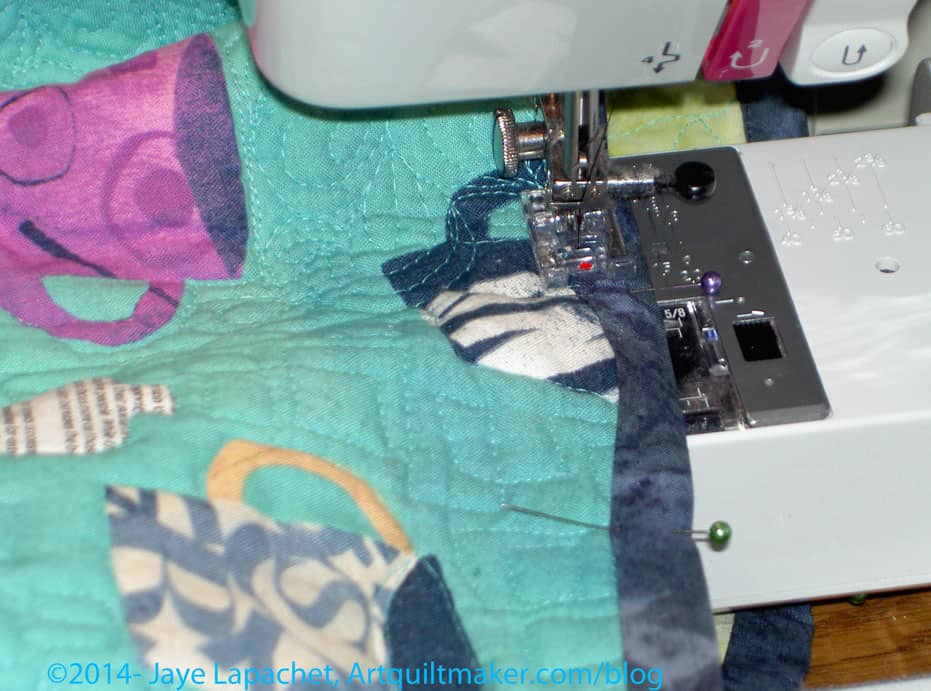
Add binding
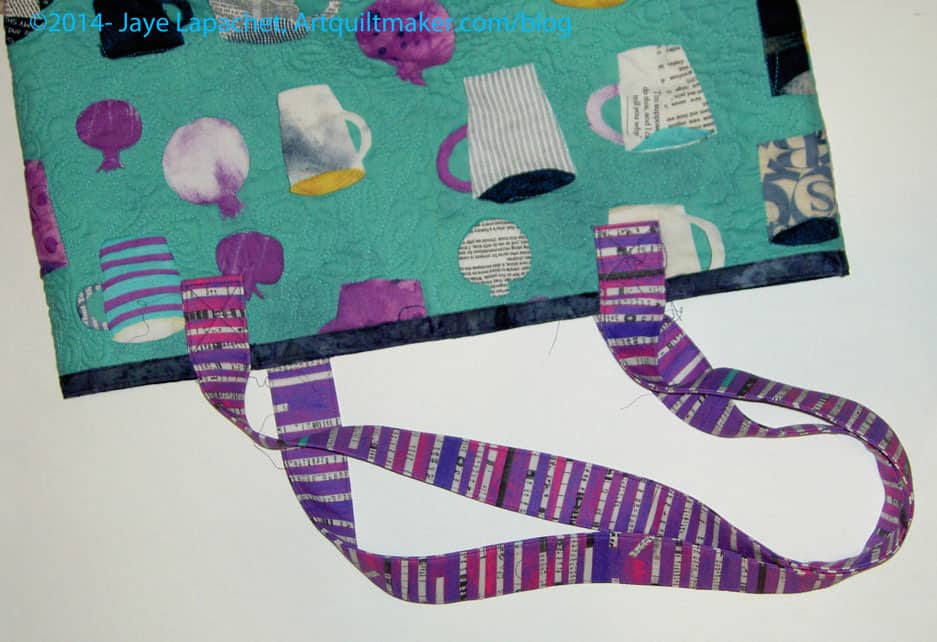
Bind the top, covering the edges of the binding that covers the inside raw edges (step above). I sewed along the bottom first, making sure I caught the underside as well as the top. When I finished I sewed along the top of the binding as well. I thought it made the bag look more finished and added some interest (must be my favorite term today). I used an extra piece of binding leftover from the Spiderweb quilt and I am glad I used something that mostly matched. On another version, I would plan ahead better and use a coordinating fabric or the strap fabric.
If you haven’t made your straps, make them now.
Test the length of the straps until they are right for your height. I used WonderClips at different lengths to find the right length, then I trimmed the original length to my custom length, which was about 36″.
Flatten the bag carefully so the edge of the side is folded. This means that the edge of the side measures an equal amount from the side seam to the edge of the side as is the top. Measure two inches from this fold.
Place a pin at 2″ that you just measured.
Measure 2″ down from the top and place a pin parallel to the top of the bag. This makes a half square where you will place your strap.
Fold the end of the strap 2″ up and place the folded edge right beneath the bottom of the binding.
Sew the straps to the bag, making a box with an X in the middle. Go around the edges and the X a few times.
Optional: After you sew on the straps, sew along the fake edge of the side (see step 14) from the top to about 4″ from the bottom. Do this on all sides to make the bag into a box.
You are finished! You have made the bag. Hooray!!!
A Variety of Notes:
Crazy as it sounds, I am now thinking of fabrics I can quilt that would look awesome in bag form. I know. I think I have lost mind.
I like my bags to have pockets, but I also don’t like the stitching to show through, so I didn’t put any in this bag. You could make a lining and add it before you sew on the binding, then you wouldn’t have to cover the raw edges with a binding. You could sew the pockets to the lining. You’ll have to figure the measurements out yourself. Of course, your beautiful quilting would be covered.
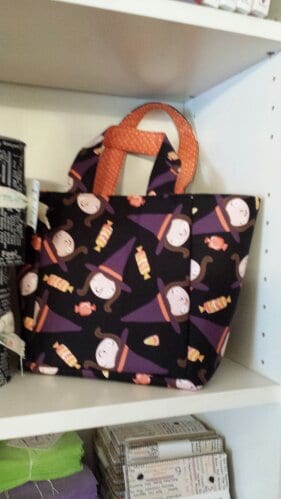
Recently, Mom asked for something for her church auction. they raise money to pay off the student loans of the priests, presumably so the priests can adhere to their vow of poverty.**
Donation Jane Market Tote
I thought of this bag. It was, after all, almost done and meant I didn’t have to start a new project. Perfect. I started this bag before I started having machine problems. It was actually the straw that broke the camel’s back. I try not to hold that against it. Regardless, I had some decorative stitches to rip out. At Sew Day, Kelly did the job for me while I did a job for her. Then I just did another decorative stitch with the backup machine and finished it.
The difficulty with decorative stitches is that I am not familiar with the options available on my backup machine. I used almost all, if not all of the decorative stitches on my 9K to make gift bags. I don’t really need more gift bags and I am not that interested in making gift bags right now (Don’t get me wrong! I love them and think everyone should use them, but I have plenty and am over making them for the moment). That gift bag project was also an opportunity for me to try out all the decorative stitches. I learned:
how much thread each one requires
placement information
size
Making this tote bag was great and adding the decorative stitch was kind of a shot in the dark. The other variable was that my backup machine allows me to resize the stitches as well. I haven’t played much with that option, but it introduces a whole additional level of options to my choices.
I dove in and sewed the last bit, then gave it to Mom who was thrilled. I might make something else, if I have a chance, since the auction isn’t until December. What I would love is to make something that would blow their socks off and have people fighting over. I would be a hero. A quiltmaking hero and that would be awesome.
**My mom is Greek Orthodox and I have no idea if their priests have to take a vow of poverty. I do know that their salary has to come from the congregation and that is daunting. I don’t see the priest getting $90k per year.
You have probably noticed that I make a lot of bags. Mostly I give them away. There are only a few (Springy bag, Jane Market totes) that I actually carry around. Part of that is that I am one person and one person only needs so many bags. Still, I do like to make them.
As I have said in the past, I carry a bunch of stuff with me to work in a bag on public transport. The bags have to be sturdy, have lots of pockets, be on the large side and relatively stain resistant. The bags I carry to work have been Timbuktu bags for the past several years. They work but they aren’t perfect. They are large enough, have enough pockets, but they look like everyone else’s bag. Also, I am kind of over the backpack thing with my work clothes.
When I made the Petrillo Bag, I did so because I liked the shape, mostly.
In the case of making the bag, I don’t have control over the finish, but I can choose the colors and pattern. I probably have an equal, if different, amount of control over color the as I do if I bought a bag in the store.
Using the ShapeFlex plus layers of fabric plus interfacing. That is a lot of layers to go through and my backup machine wasn’t happy. I could make a better, sturdier bag if I had a tougher machine, perhaps an industrial machine or pseudo industrial machine. There is no way I am even going to consider buying an industrial machine, but I still want to make bags. I may never do it, but there is a place where you can go and rent table saws and welding things…Tech something. They have industrial machines there. Perhaps I will go and see if I can use theirs.
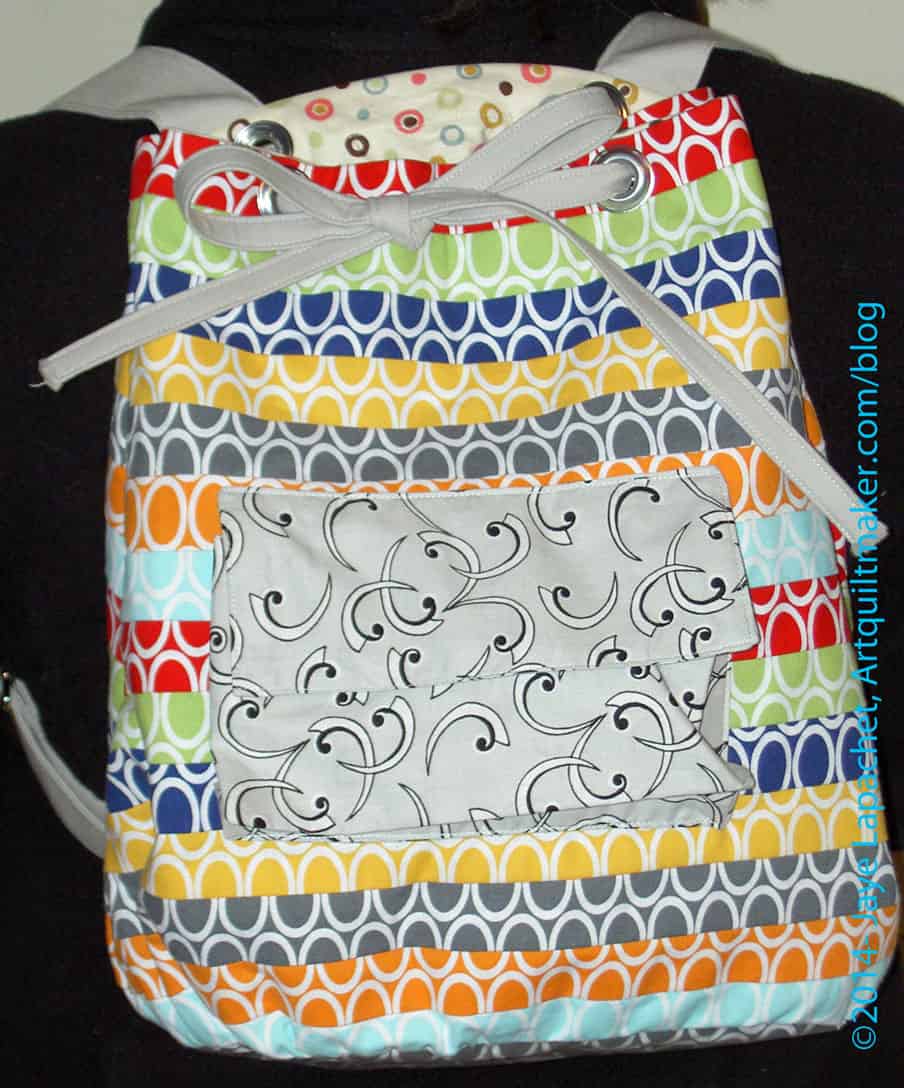
I worry most about setting the bag in something and not being able to get the stain out or having the stain leak through the bag. I like my bags nice and when you take public transport, it is hard to keep things nice. This is why Sheldon has ‘bus pants.’ I tried using the fusible laminating stuff on the Scrap Lab Backpack and that worked OK. It isn’t like using regular oilcloth. I suppose I could just make a new bag if the old one got stained or boring…
Detail of Gusset I added to make the bag bigger, if necessary
The BAMQG retreat was over Memorial Day Weekend. I wasn’t able to attend on Friday, but I had been cajoled for a couple of years and decided to join as a commuter this year. I really had a good time and will post some more of the fun in a different post. Short bit of advice: if you have the opportunity to go on retreat, GO! You get a lot done and really get an opportunity to get to know your guild-mates much better.
After working on the mystery quilt, I switched to working on the Petrillo Bag. This a Sew Sweetness (Sara Lawson) pattern. Pam and I worked on a Petrillo Bag-along last year. Since then, I had wanted to make another with some changes.
Since I commute to work by train and do not have a car at work to store stuff, I have to carry my stuff or leave it at work. Thus, I have developed very specific ideas about what I like in my bags.
Part of what I like in a bag is security. I don’t want people reaching into my bag and grabbing stuff out. Thus, the bag has to have some kind of flap and closure. I also like lots of pockets and a light colored interior so I can see all the stuff inside. Easy, quick access is also a must.
One of the things I didn’t like about the Petrillo Bag, as written in the pattern, was the skinny top. I liked the look a lot, but the functionality needed to be improved for my use. The side panels are shaped like ice cream cones. After you insert them the top access is very thin. This does help with security, but it makes it hard to stick stuff in and pull it out.
I had been thinking about changes to the pattern in my mind for awhile and had started cutting out pieces several months ago. As you know this bag has been on my to do list for awhile.
Petrillo Bag back
After being frustrated with another project, I started working on this bag and was able to get most of the outside done on Sunday, late, and Monday at the retreat. It is a good thing I was commuting, because I switched lining fabric midstream and was able to get some Michael Miller red with white Dumb Dots from home and start recutting lining pieces. I’ll use the previous lining choice for another bag.
I got to the point Sunday night that I was ready to construct the gussets and on the drive home, I turned over the process in my head, so I really felt ready to tackle it on Monday when I returned to my sewing machine at the Retreat.
A number of people at the Retreat had never heard of Soft & Stable, so we had a little talk about that. Many are not bag makers and since I never heard of it before the Petrillo Bag pattern, I wasn’t surprised.
When I got home I worked on the lining and, as of this writing, I am ready to start putting the lining together. I am not sure what I will do about the side panels of the lining. I don’t want to put another set of clips on the inside. Elastic, maybe?
I don’t know if this will be the perfect bag as I have just realized that I forgot to put on side pockets for a water bottle or my cell phone, but I will try it out and see if I like it enough to use it or if I will give it as a gift.
I am glad this thing is completed. It was a pain from start to finish, but it will be cute for my young friend.
I think it will be perfect for a beach bag or some such for a teenager. I do think a teen would like it better.
I think I am not liking it that much because of all the problems I had with hardware. The last part was the*&^%$ grommets. Dritz grommets, I think, are not that good in terms of quality. DH helped me and we had problems putting them in. He had to pound like a crazy man and we ruined 2 of them in the process.
Still, the adjustments I made to the sizes worked out and I did a nice job finishing, so I think it looks ok. One friend told me my standards are too high. I’ll keep that under advisement. 😉
Some weeks ago, I saw a backpack in the Scrap Lab article in an issue of Quilts & More. The pattern is also on the web on Allpeoplequilt.com. It captured my attention in a “hhmmmm interesting” kind of way. After meeting a young friend at one of DH’s events, I decided to sew it for her. I wanted to make it, but I didn’t want to keep it, so this was a great solution. The Fat Quarter Shop, at that time, had a fabric kit (no hardware), which I bought.
Scrap Lab Backpack Bag Body
Last weekend I started on the project. It has a lot of steps and the directions were not always completely clear *to me*. I know magazines have limited space.
The pattern calls for fat quarters to create the bag body. That is what came in the kit. The pattern also said that I should cut 2″x21″ strips from the FQs. The problem turned out to be that the FQs were not 21″ wide even before I squared them up. It made no sense to me since that is what I understood the whole point of the Scrap Lab is – to use a small amount of fabric. I worked at adjusting all the measurements to accommodate this problem.
Sewing Strips
The backpack requires two panels, like the one made from strips (shown above). In order to keep the strips in order, I laid them out on my design wall and sewed them in order. I found that, in order to keep them in the same order, I had to sew them in the same order, but upside down. For example, I always placed the strip I wanted to end up lower on the panel on top to sew it.
I was further disappointed when I also found that the half yard of background was not enough for all the pieces that needed to be cut. I am not sure if I cut wrong. I didn’t see a cutting layout (like they have in garment sewing), so I cut the largest pieces first, but still did not have enough. Shifting gears deftly, as I did not what a ‘lack’ of fabric to derail the project completely, I chose a different fabric for the pocket, which will look nice and will solve that problem. All in all these fabric problems were unexpected and, as I said, disappointing.
I worked on it on Sunday this past weekend. It has a 1/2″ seam allowance, so I couldn’t really make progress on my various leaders and enders projects without the 1/4″ foot on the machine. That was a little frustrating.
I did make good progress on the backpack, though. I have the straps and drawstring done. I have the bag outside and the lining done. I wasn’t able to finish it, because I didn’t have a slider buckle/triglides. I also didn’t really understand what they were even after searching out a photo on the web.
The slider buckle/triglides turned out to be pretty hard to find. I found some nice ones in the UK and Australia. Amazon has packs of 50. My local Joann and Beverly’s had none. ERGH! Monday, after work, I went to Britex and they had them there. They usually have weird stuff like this. With bags being so popular, I was surprised that these were so hard to find.
It was good that I went to Britex, though, as the people there actually know something about what they sell. We looked at our own bags and the pieces I was thinking of buying and kind of talked through where the parts went on the bag. It was a good experience.
I think I have said before that I prefer to make all the fiddly pieces first – straps, pockets, etc. This pattern is not written that way, so it was a little hard to backtrack and make the straps and drawstring when I was on a roll with getting the larger pieces of the bag done.
There were some directions on the pattern that were confusing or poorly explained. I was able to figure out making the pocket, even though I wasn’t familiar with the type of pocket. Once I figured out that it was a 3D pocket, I thought the method was clever. The pattern leaves the inside edges raw. The method could have been improved somewhat by finishing the inside edges, which I did even though the directions didn’t say to do it. The location of a 3D pocket is a little odd, I thought, as whatever you put in it will pull the whole bag down from the shoulders.
I had some trouble applying the pocket to the bag. The directions just say to topstitch the pocket on to the body of the bag. They do not take into account the corners which are multiple layers thick. Since the pocket is 3D, I could have used some more detailed directions and additional photos on going around the corner.
I also thought the pattern on the web did not use the web to maximum effect. I would have had the PDF, as they do, since it is easy to print. I would have also linked out to videos showing how to apply the pocket, how to add the grommets and other handy hints. These videos could be used over and over for many different patterns and would drive traffic to their site.
It could be that this pattern was perfectly written and the problems were all user error. I am a visual person and learn better with lots of pictures and when people show me how to do something.
As you know, I will be First Lady of the NSGW in 2017. Sounds pretty fancy, I know, but I won’t have a paid staff or a clothing allowance and it will be a ton of work. DH and I have to plan the annual conference. There will be several ladies (about 12, I think) who will be helping me plan the events for the ladies. It is common practice in this group, as well as good manners, to give thank you gifts. Since there is no shortage of fabric at my house, I thought I would see about making gifts. I may not end up going this route, but it is a good, and fun, first step. Much better than shopping, I think.
I first thought of the Anna Maria Horner Multi-tasker tote, but wasn’t really happy with that choice (too much fabric, hard straps to turn). One AMH MTT once in a while is no problem, but 12 one after another? I might rip my hair out. I put it on the back burner and thought it would be my go to option. Truthfully, though I was still casting around for an idea that really floated my boat.
WSFC Handbag
At the West Seattle Fabric Company, I saw a little tote bag, or fabric handbag, that made me take notice. I thought it would be a better option: smaller, more useful, no difficult straps to turn, good size, nice body (e.g. stands up). They didn’t have a pattern, so we we searched the web and TFQ found a tutorial that we thought would work.
My job, while TFQ went to work one day during my visit, was to figure out whether the tutorial, with the addition of handles, would work or if we would have to modify the tutorial further.
I figured that we would have to modify the size, definitely. Also, in my experience web tutorials aren’t tested as well as some other patterns (though I have used some patterns that were pretty terrible in the directions department), but the shape was right and the size was pretty good. Just to keep those of you off the edge of your chairs: this tutorial turned out to be pretty good in terms of directions.
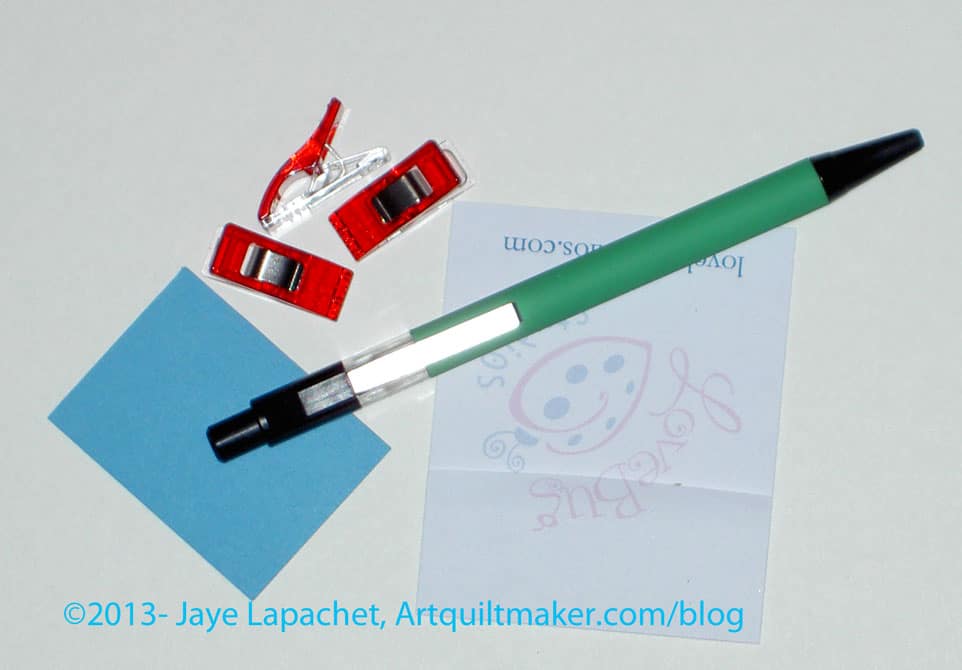
Supplies and tools
Fabric for outside and lining
Wonderclips
Peltex
Sewing machine
thread
Iron
Ironing Board
graph paper
mechanical pencil
drafting ruler
rotary cutter
rotary ruler
Pins
Optional: fusible interfacing for handles
The tutorial from the Sometimes Crafter is also very helpful. Note that her basket is square and if you do not make your basket (handbag) square, you cannot use her folding trick for sewing.
When I make a bag, I like to get all the fiddly bits out of the way. When I am on a roll, I don’t want to stop to make handles or pockets or whatever. I want to grab them and add them, thus I changed around the order of how I made the bag from the way the tutorial arranges the steps.
I did, actually, make the pattern first, so you could do that before the fiddly bits.
Make the Handles
Cut two strips 4″x19″ or whatever length you want your handles. I wanted someone to be able to slip her hand under a handle, thus the length. Feel free to adjust the length to suit your needs. You may need to make one or two of these to figure out what works. They are fast so don’t roll your eyes. 😉
Optional: if you want added body for the handles, use some fusible interfacing. Cut the interfacing about 1/4″ smaller than the handles and center the interfacing before you press it to the wrong side of the handles. Choose whatever weight you think is appropriate for your use.
Fold the newly cut strips in half and press.
Open both handles.
Fold the raw edges towards the center line. Press the new folds only. Press carefully so you don’t press out the center pressed line.
Fold along the center line and press the entire strap.
Fold to center line
You should have a piece that is 1″ x 4 layers.
Top stitch the open end of the handles with matching thread.
Top stitch the closed end of the handles with matching thread.
Set aside until after you sew the body
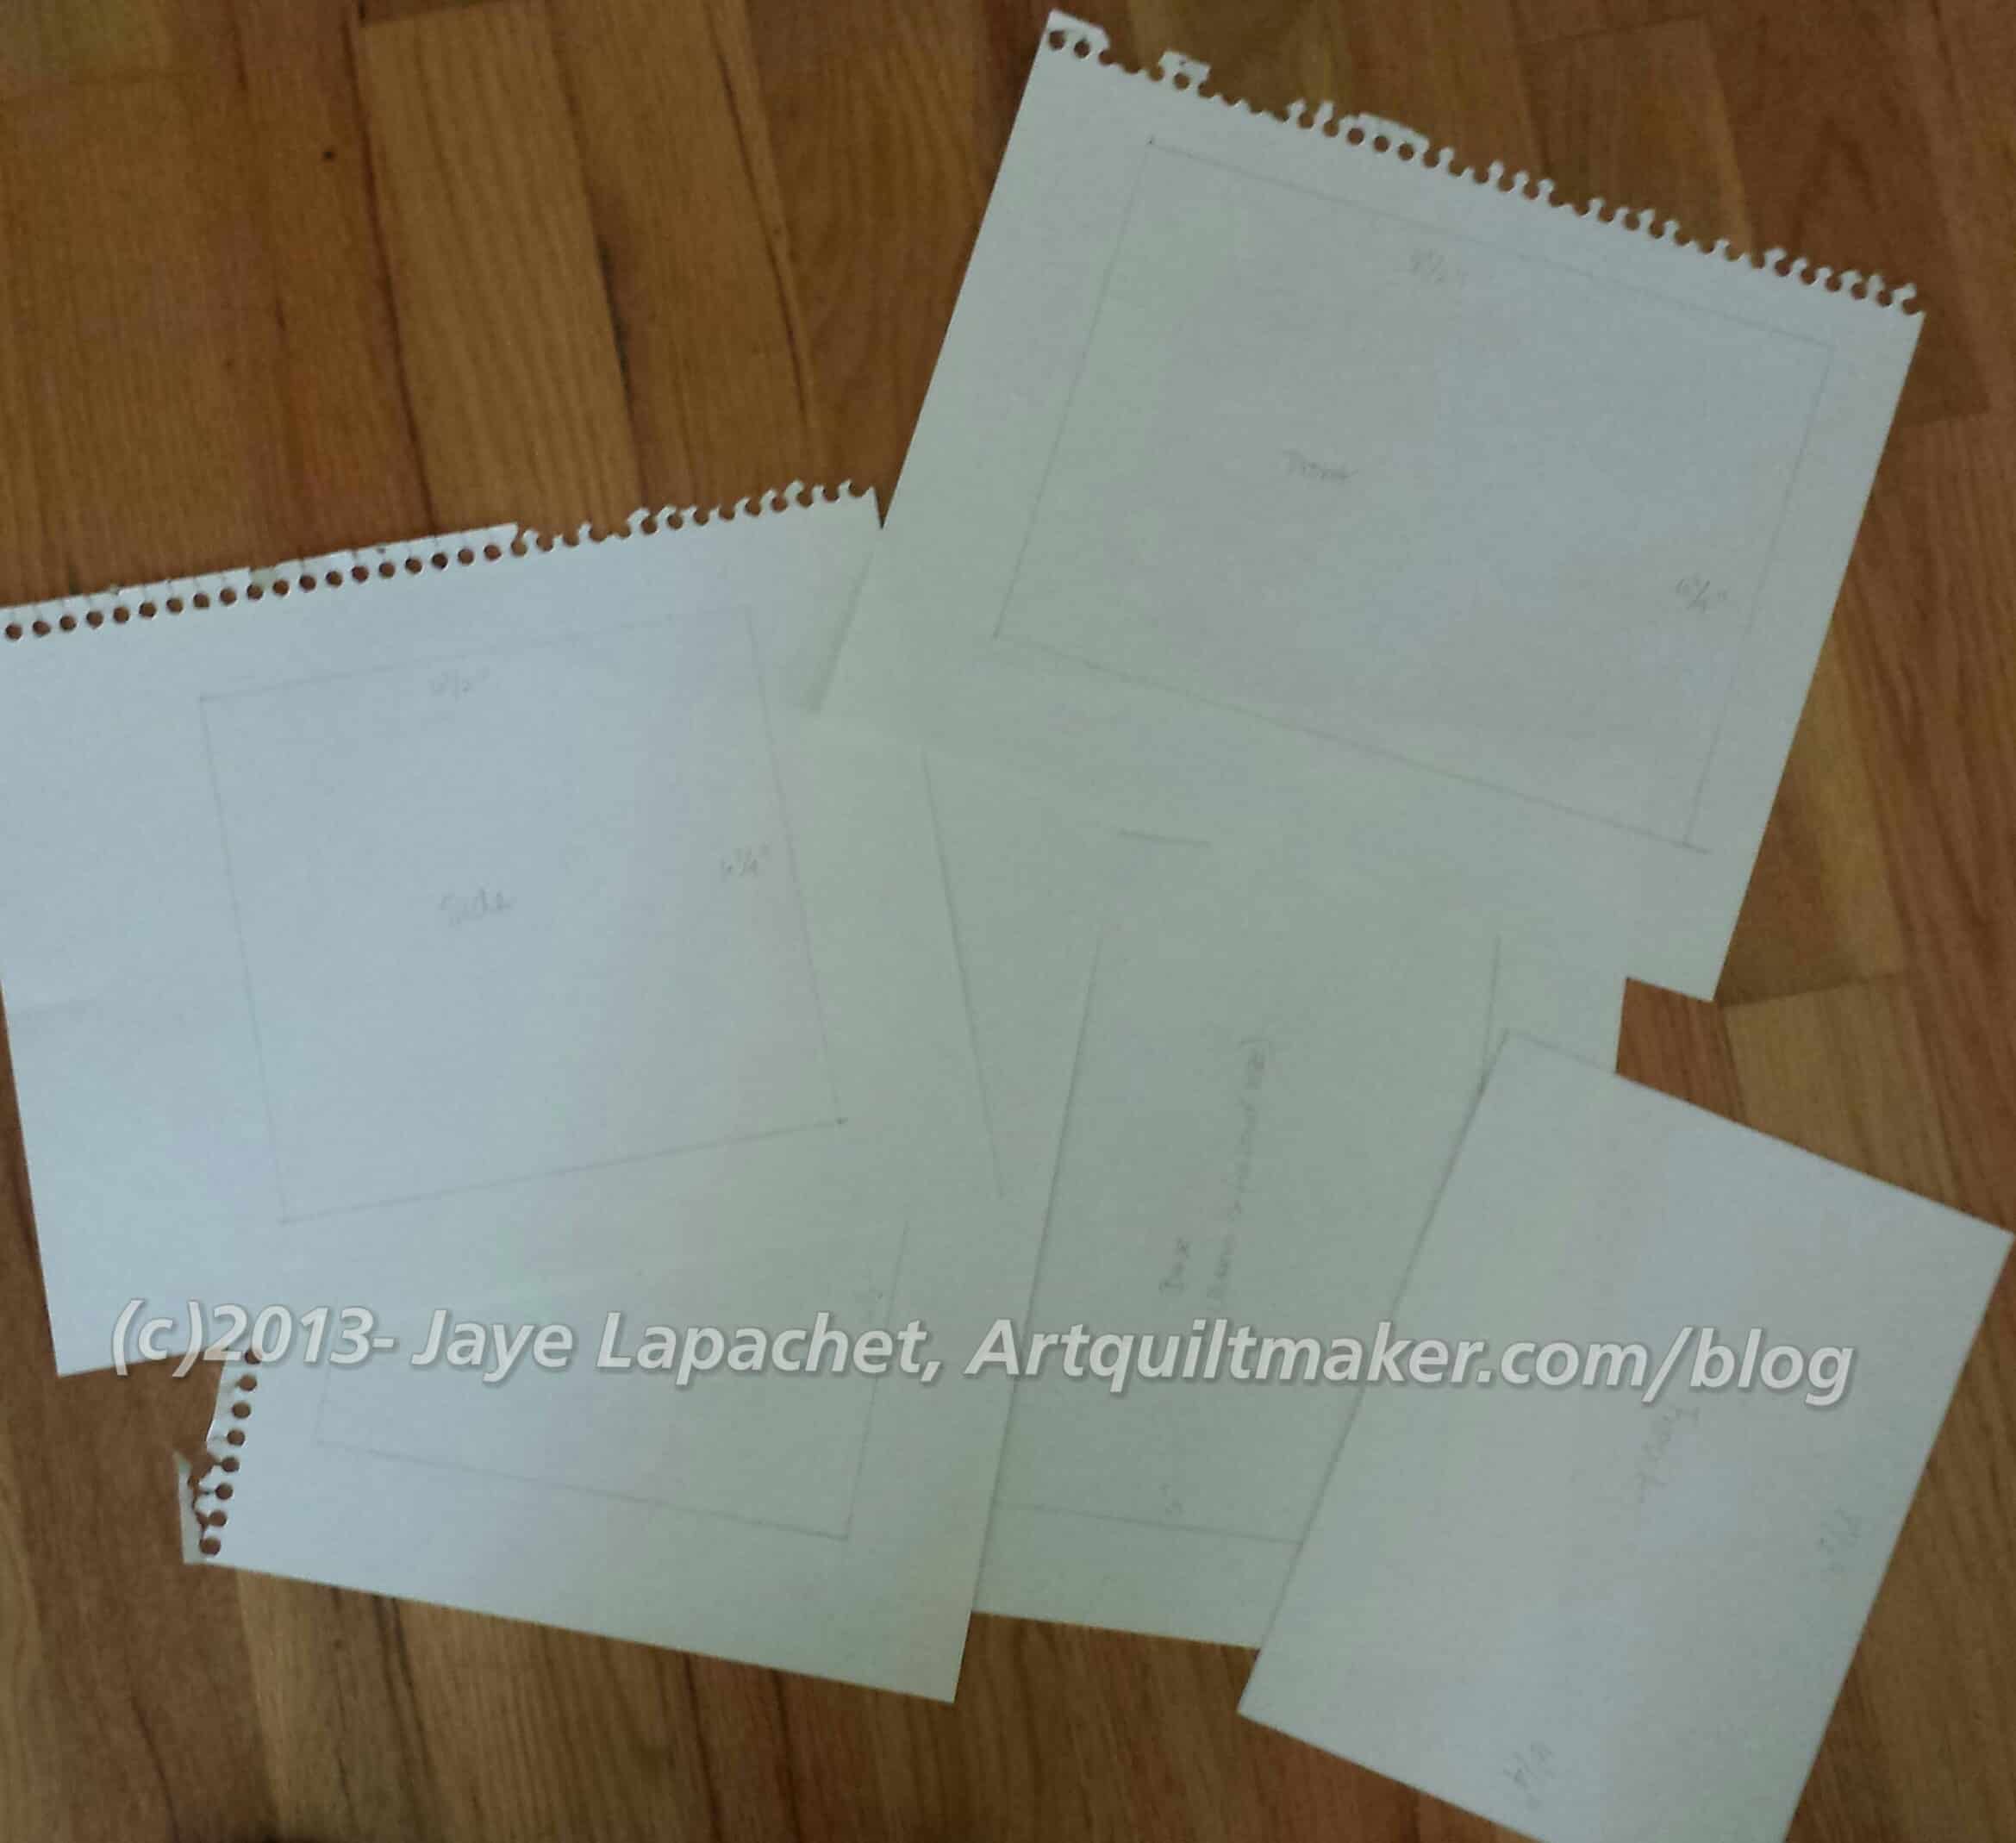
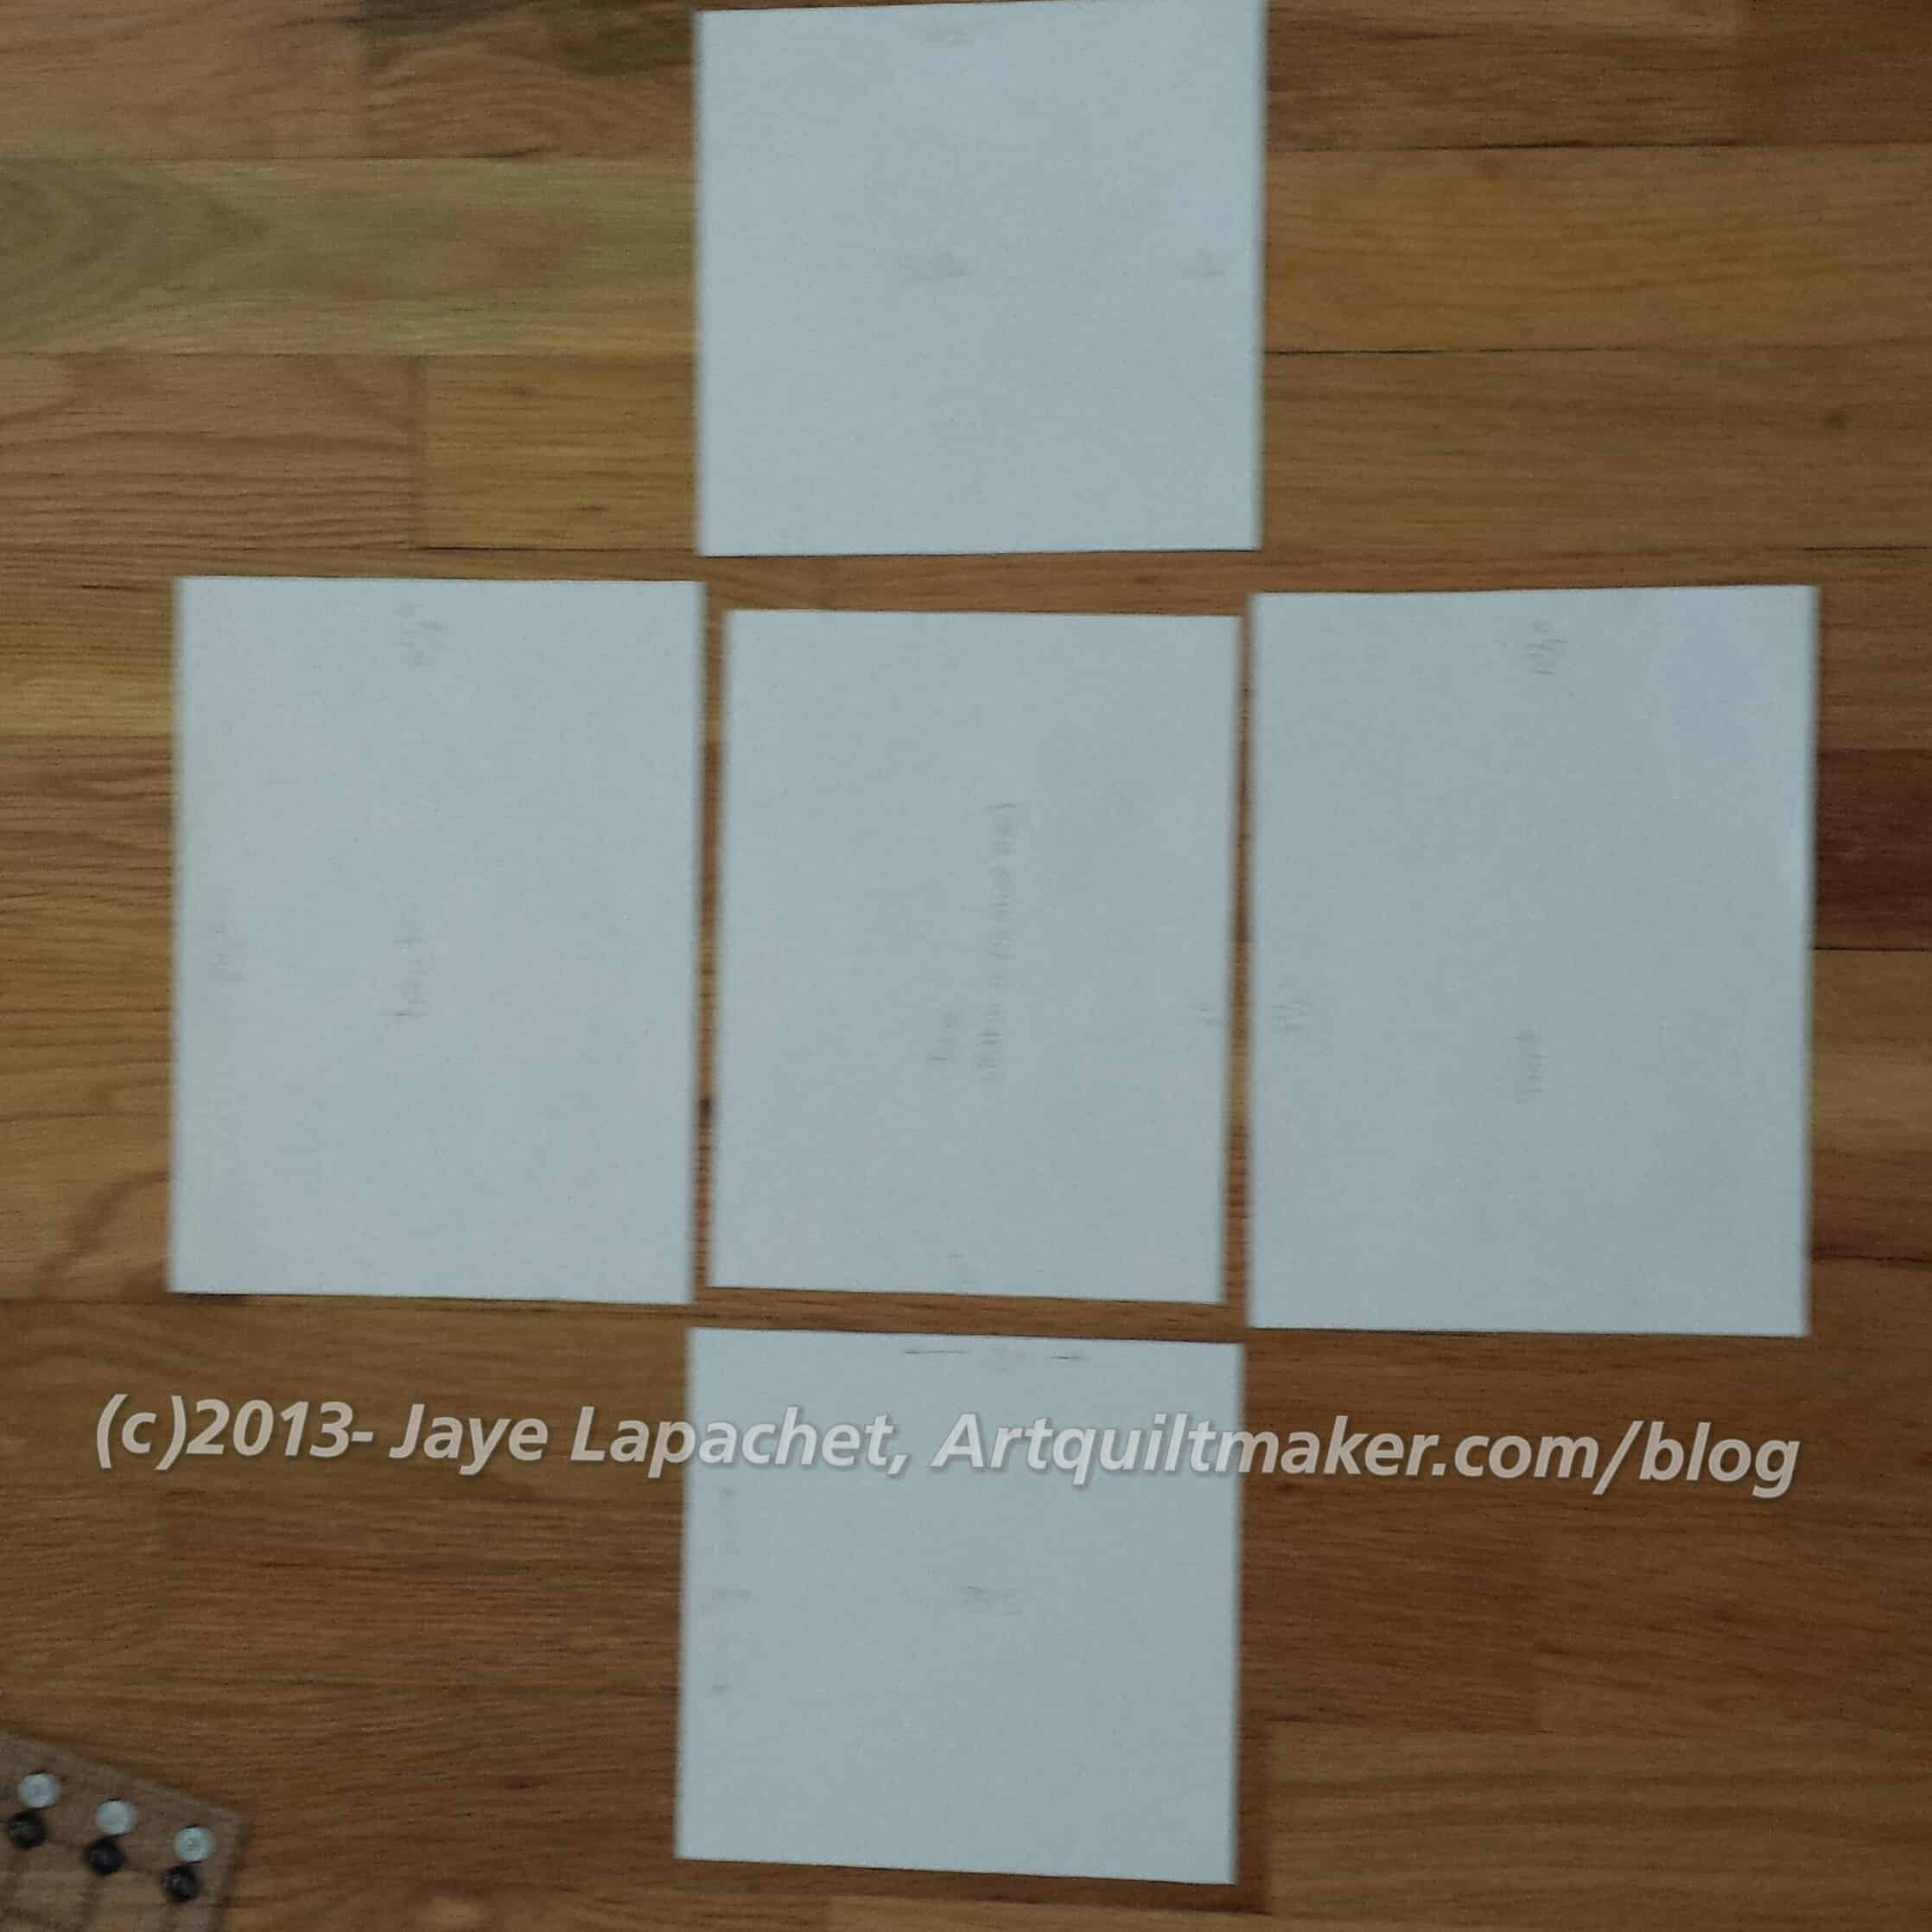
Make the Pattern
Get your graph paper.
In the above photo, I just used plain paper and a rotary ruler, because I didn’t have graph paper handy. I would DEFINITELY use graph paper. I used it in the second version and it made the process of pattern making faster and easier.
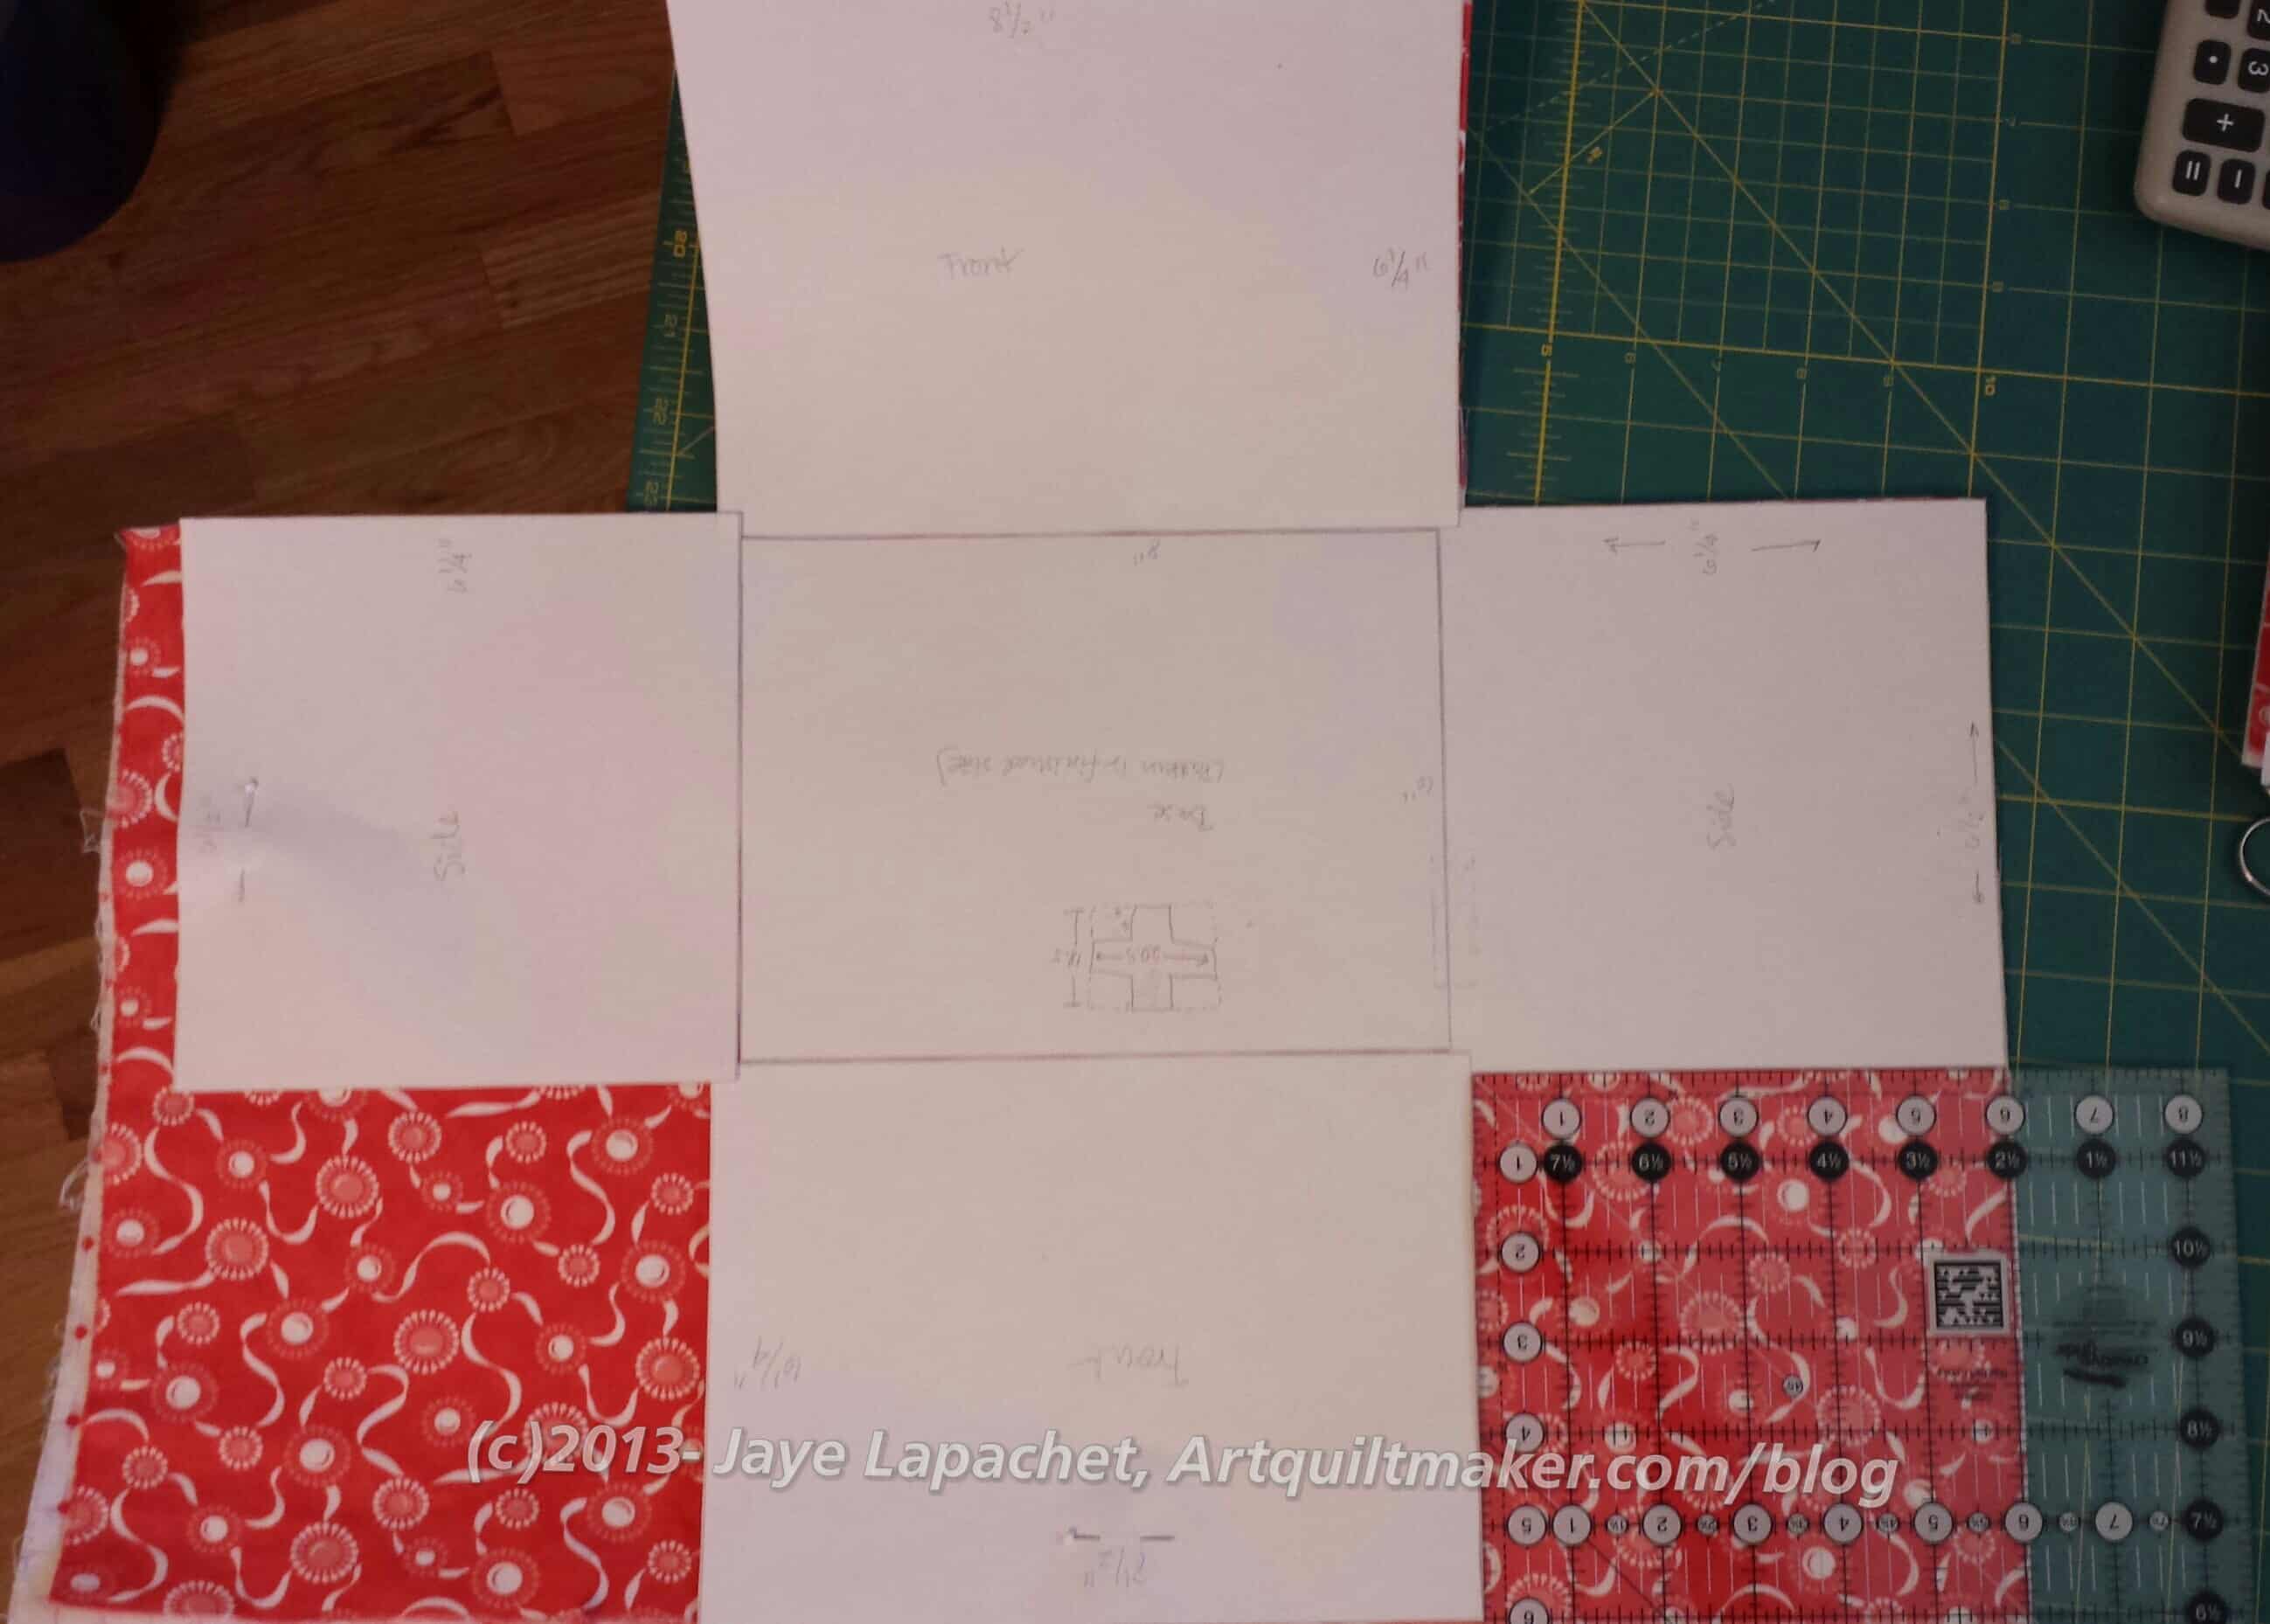
Your pattern will end up as the shape of a cross. You may have to tape your pattern together, like I did. Here are the sizes to draw out or use the sizes listed in the tutorial :
Basic size of bag is 8″x4″
Sides: 4.5″x6.25″
Bottom: 4.5″x 8.5″
Front: 4.25″ x 8.5″
Back: 4.25″ x 8.5″
Seam allowances are 1/4″
The above sizes are from the second version, because I liked the proportions better. Before I commit to 12, I will tweak the dimensions further. Don’t worry! I’ll keep you in the loop. 😉
Get your ruler, paper and pencil and draw the rectangles described above.
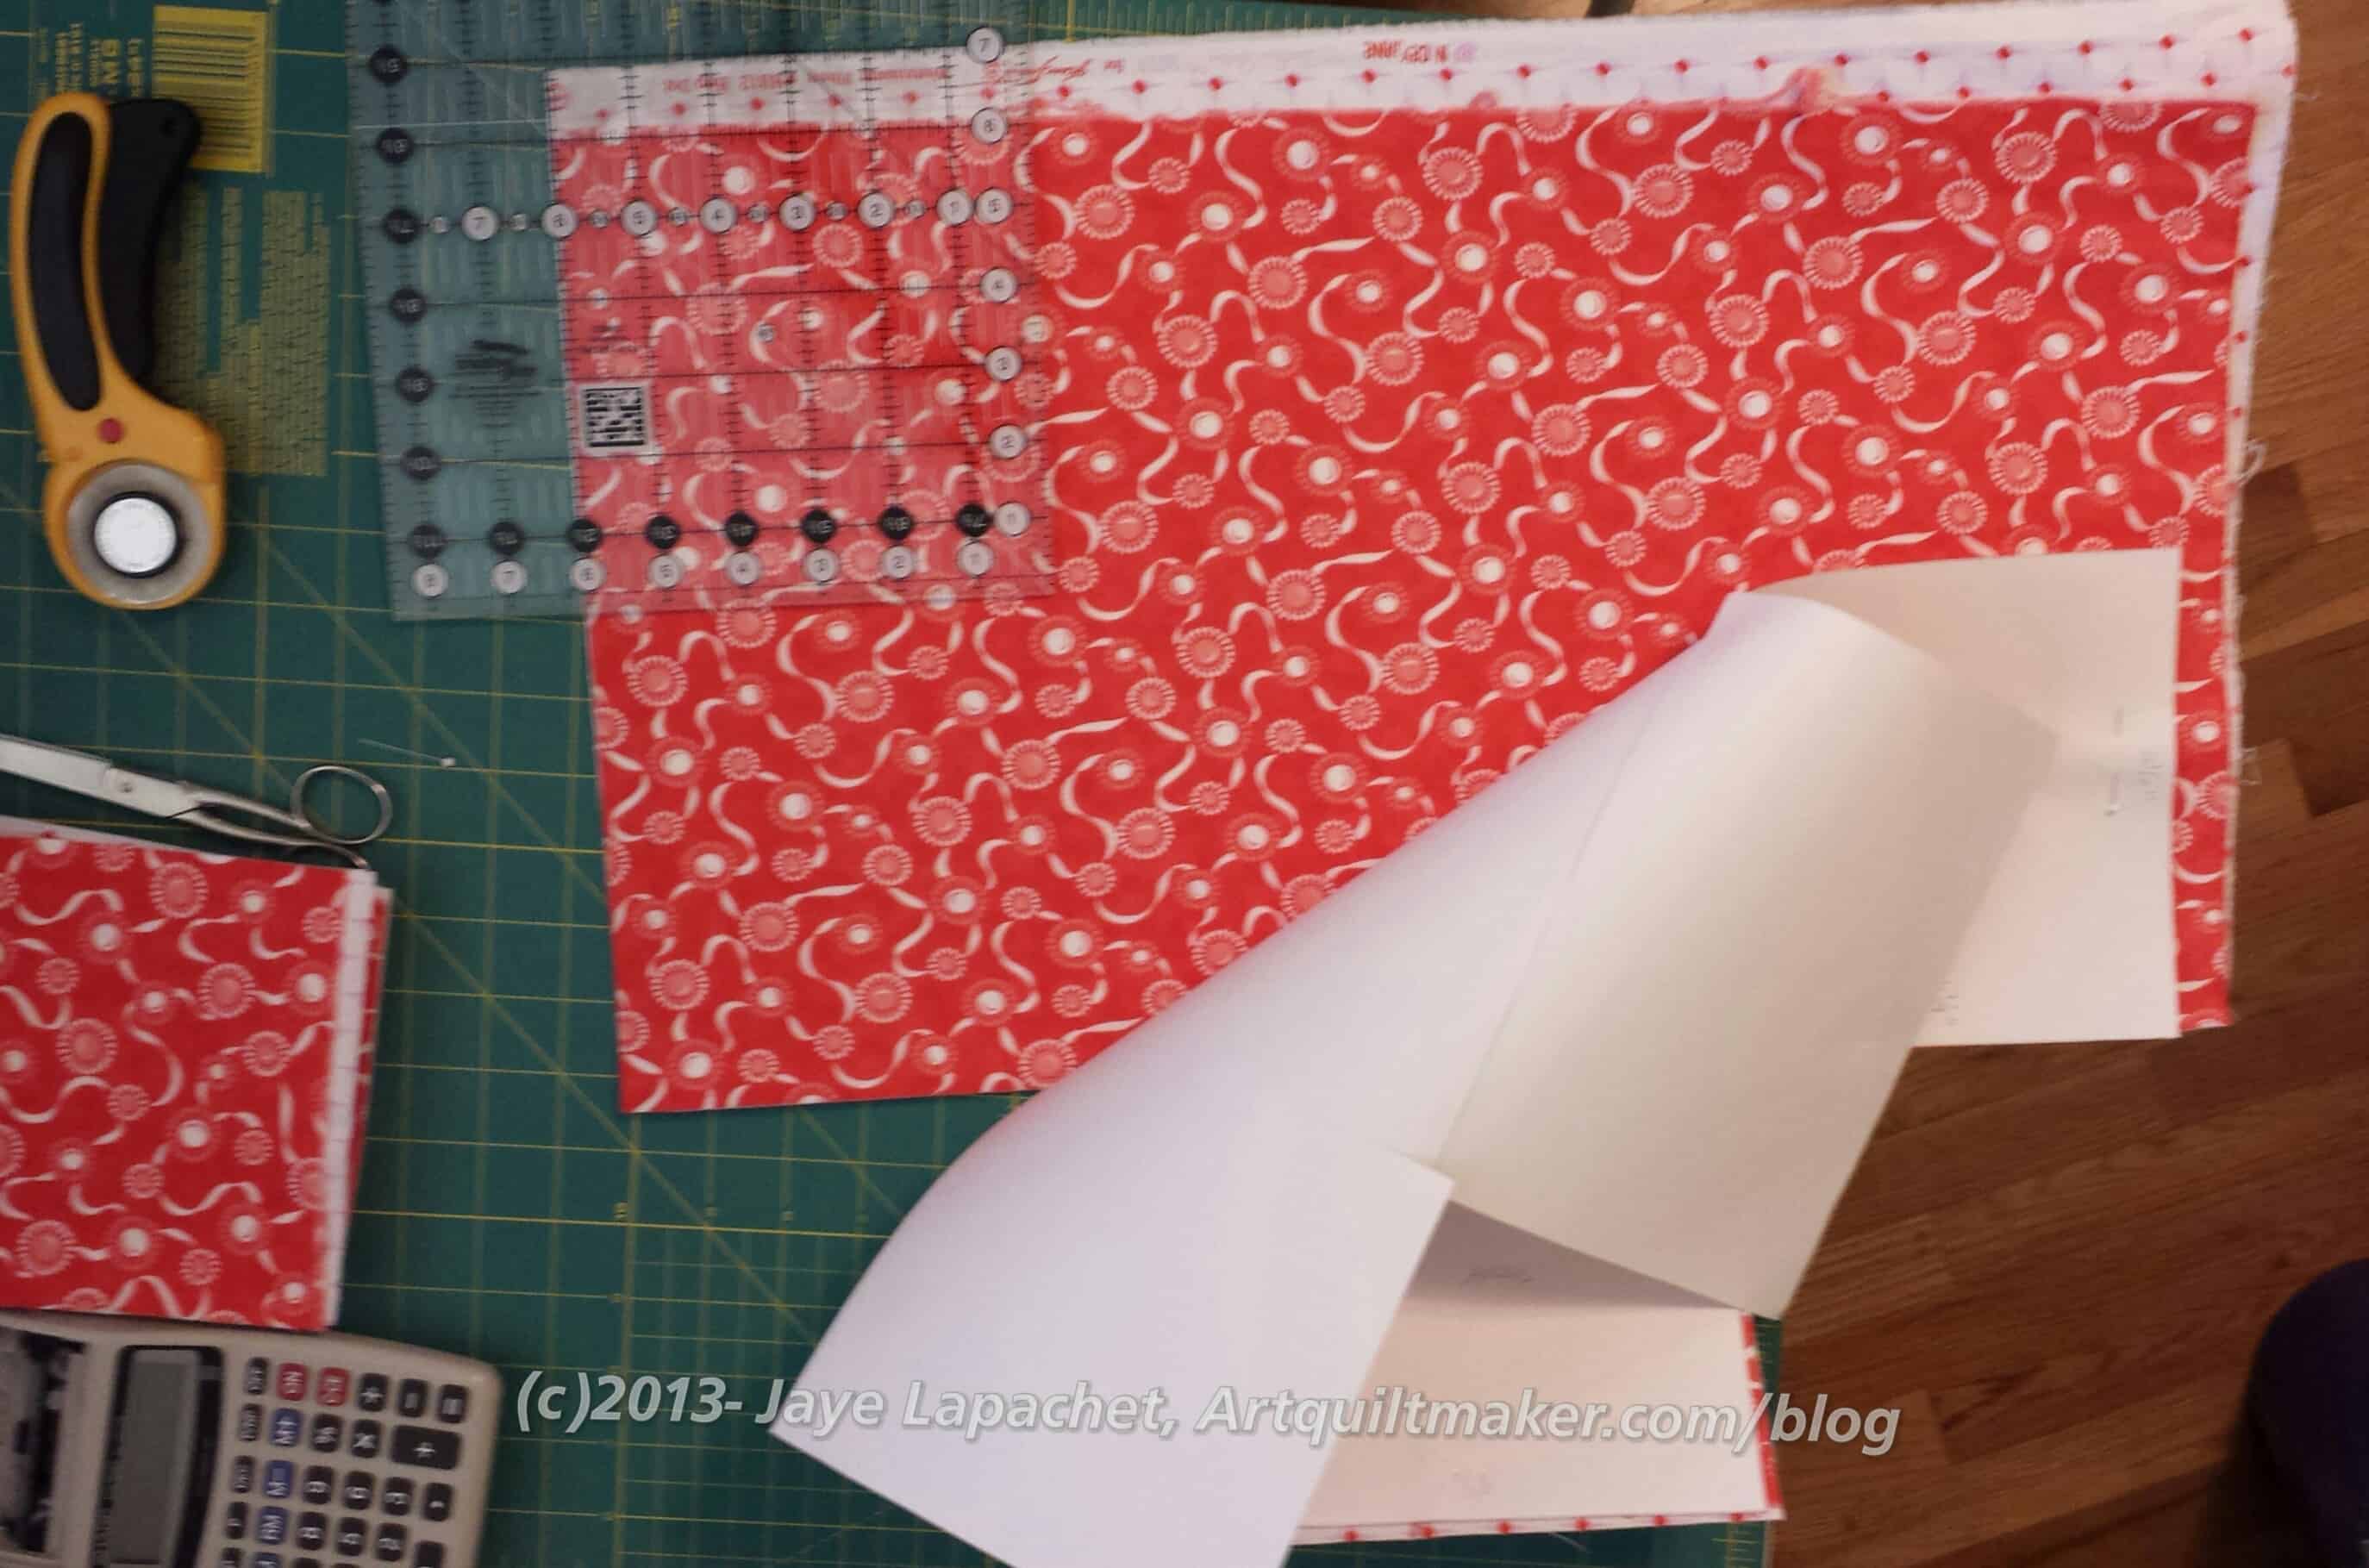
Cut out your pieces and lay them out.
Layout your pattern so you can get an idea of the size. Carefully tape the pieces together and find fabric that works both in size and design. Nota bene: you may want to hold back the front and back pieces. Read the section below on cutting fabric and decide.
Cut the Fabric I tried to keep the pattern to a size where I could use 1/2 yard of fabric. It was difficult with the size I was trying to make. I have a lot of half yards, so I really wanted that size to work. Some of my seam allowances are a little scant, but it will work if you can work with pieces that are slightly small. This takes practice and careful sewing.
If you don’t want to worry about this, then hold the front and back pieces aside (e.g. don’t tape them to make a cross shaped pattern). Cut out the the long strip that comprises the two sides and bottom.
Now cut out the front and back separately, then sew them to the side/bottom strip to make the cross.
Pin the pattern to the fabric to keep it in place while you cut.
Instead of cutting around the pattern, I used a rotary cutter and ruler to cut the same size. I took out some of the pins to move the pattern aside. I kept some pins in the pattern and fabric so that I could reposition the pattern easily to make the other cuts.
Move around the whole cross, trims the corners away per the pattern until you have a cross made out of the fabric. Do the same thing using the lining fabric and the Peltex.
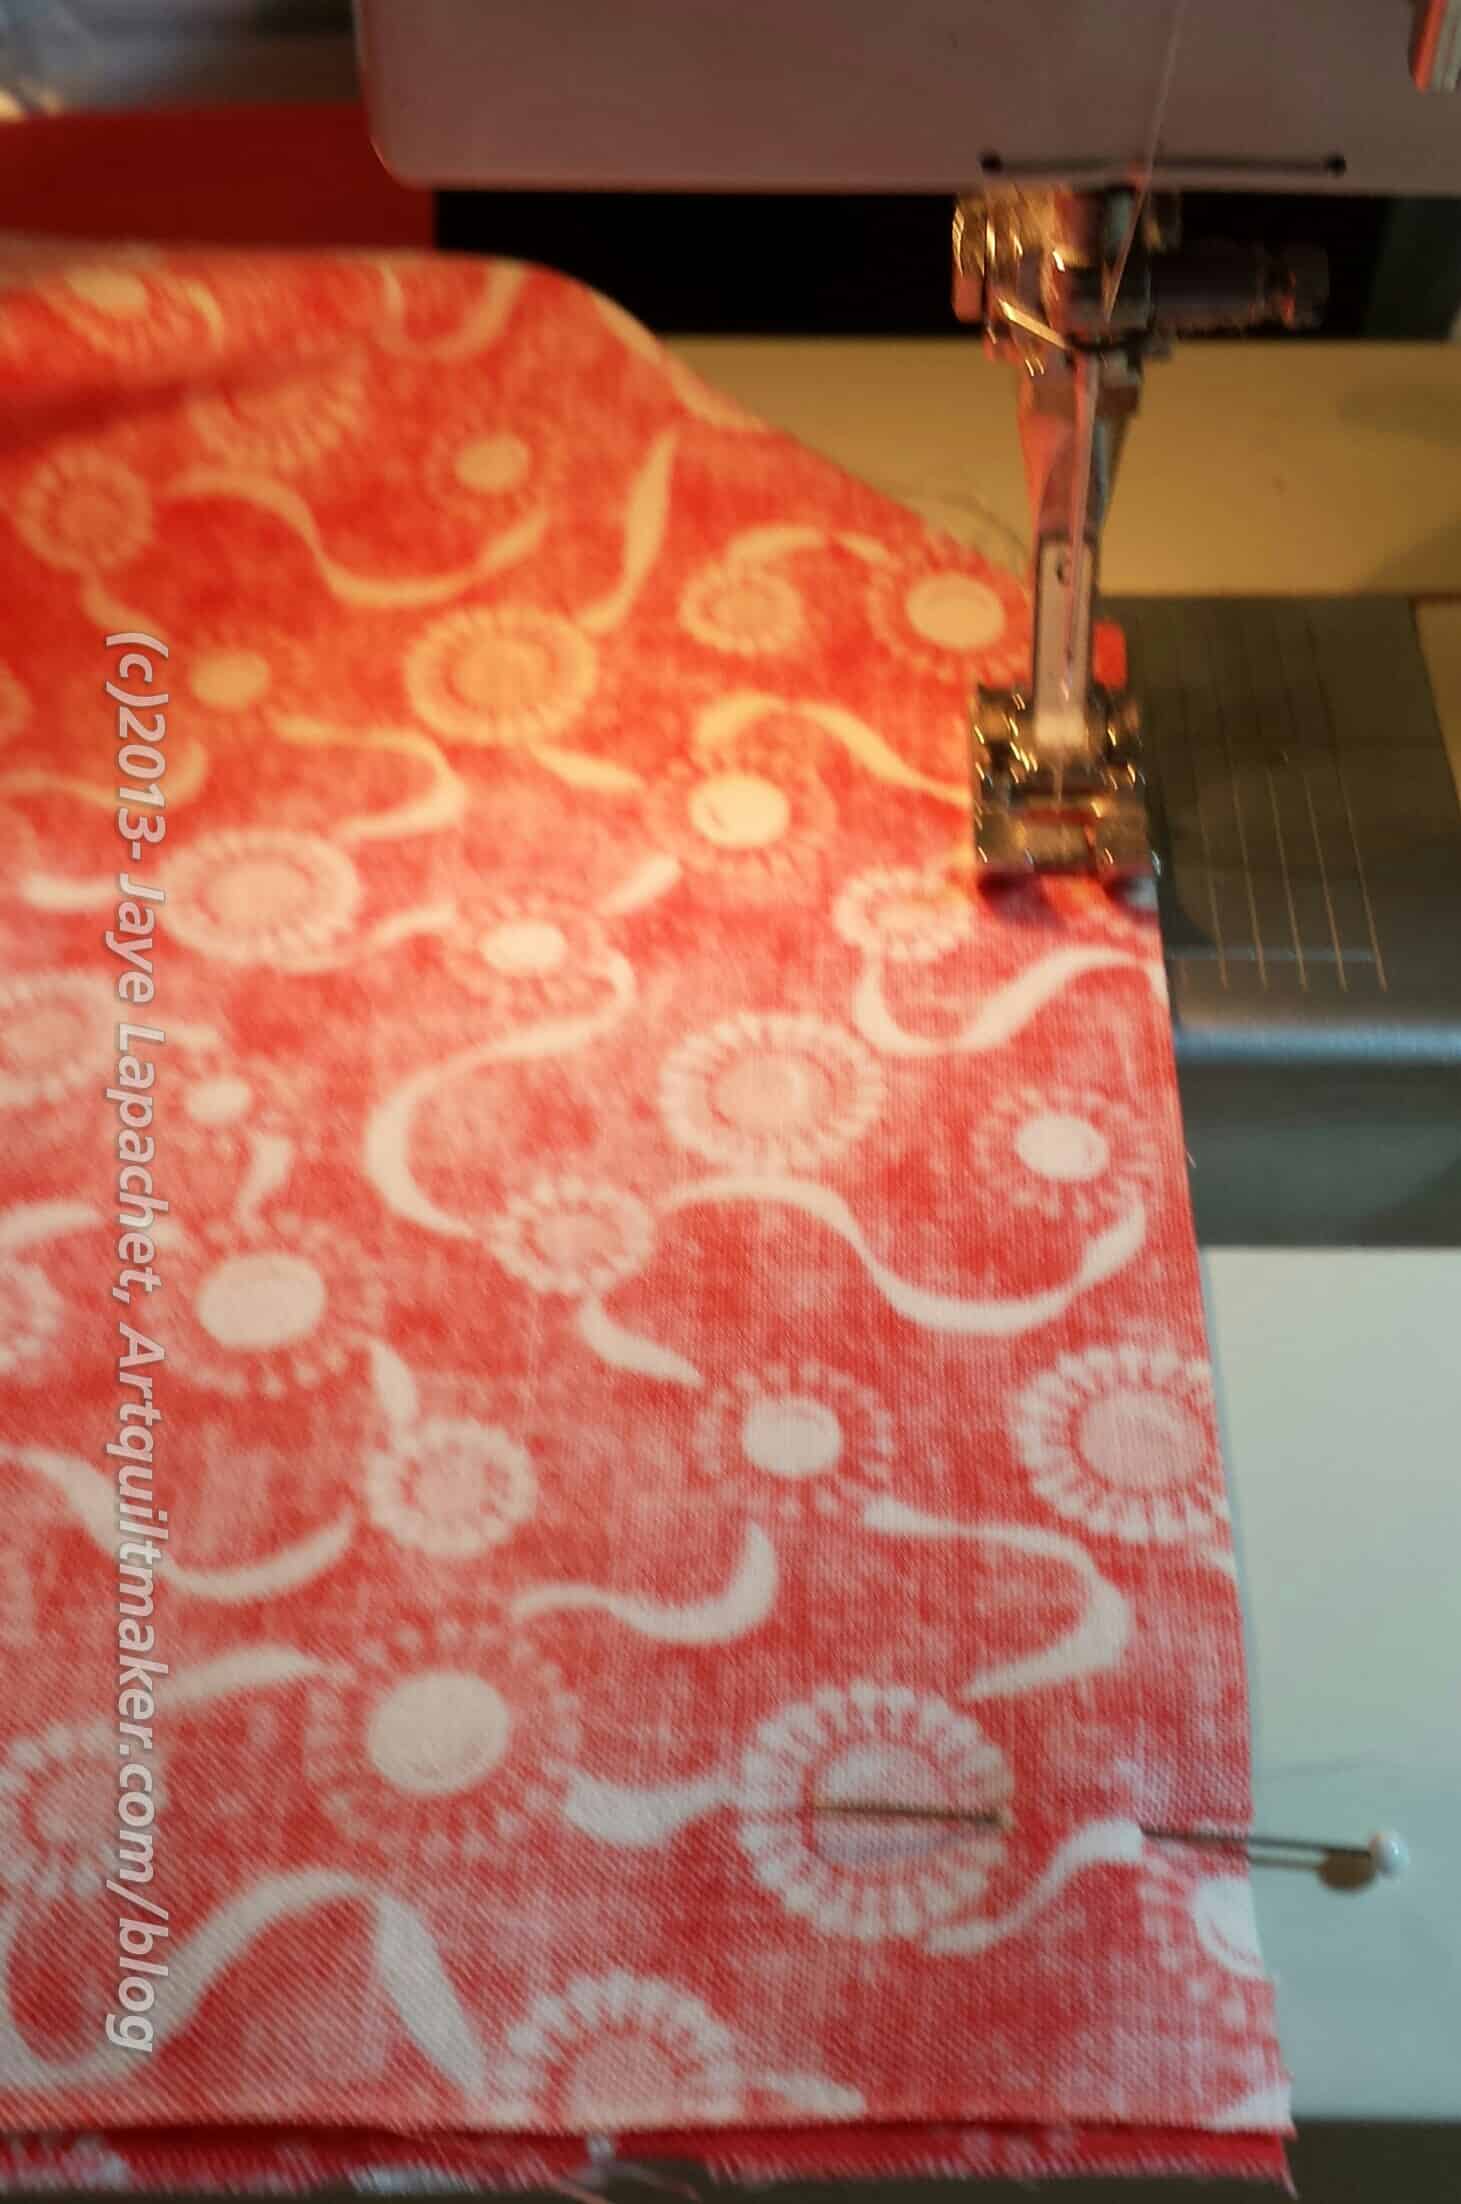
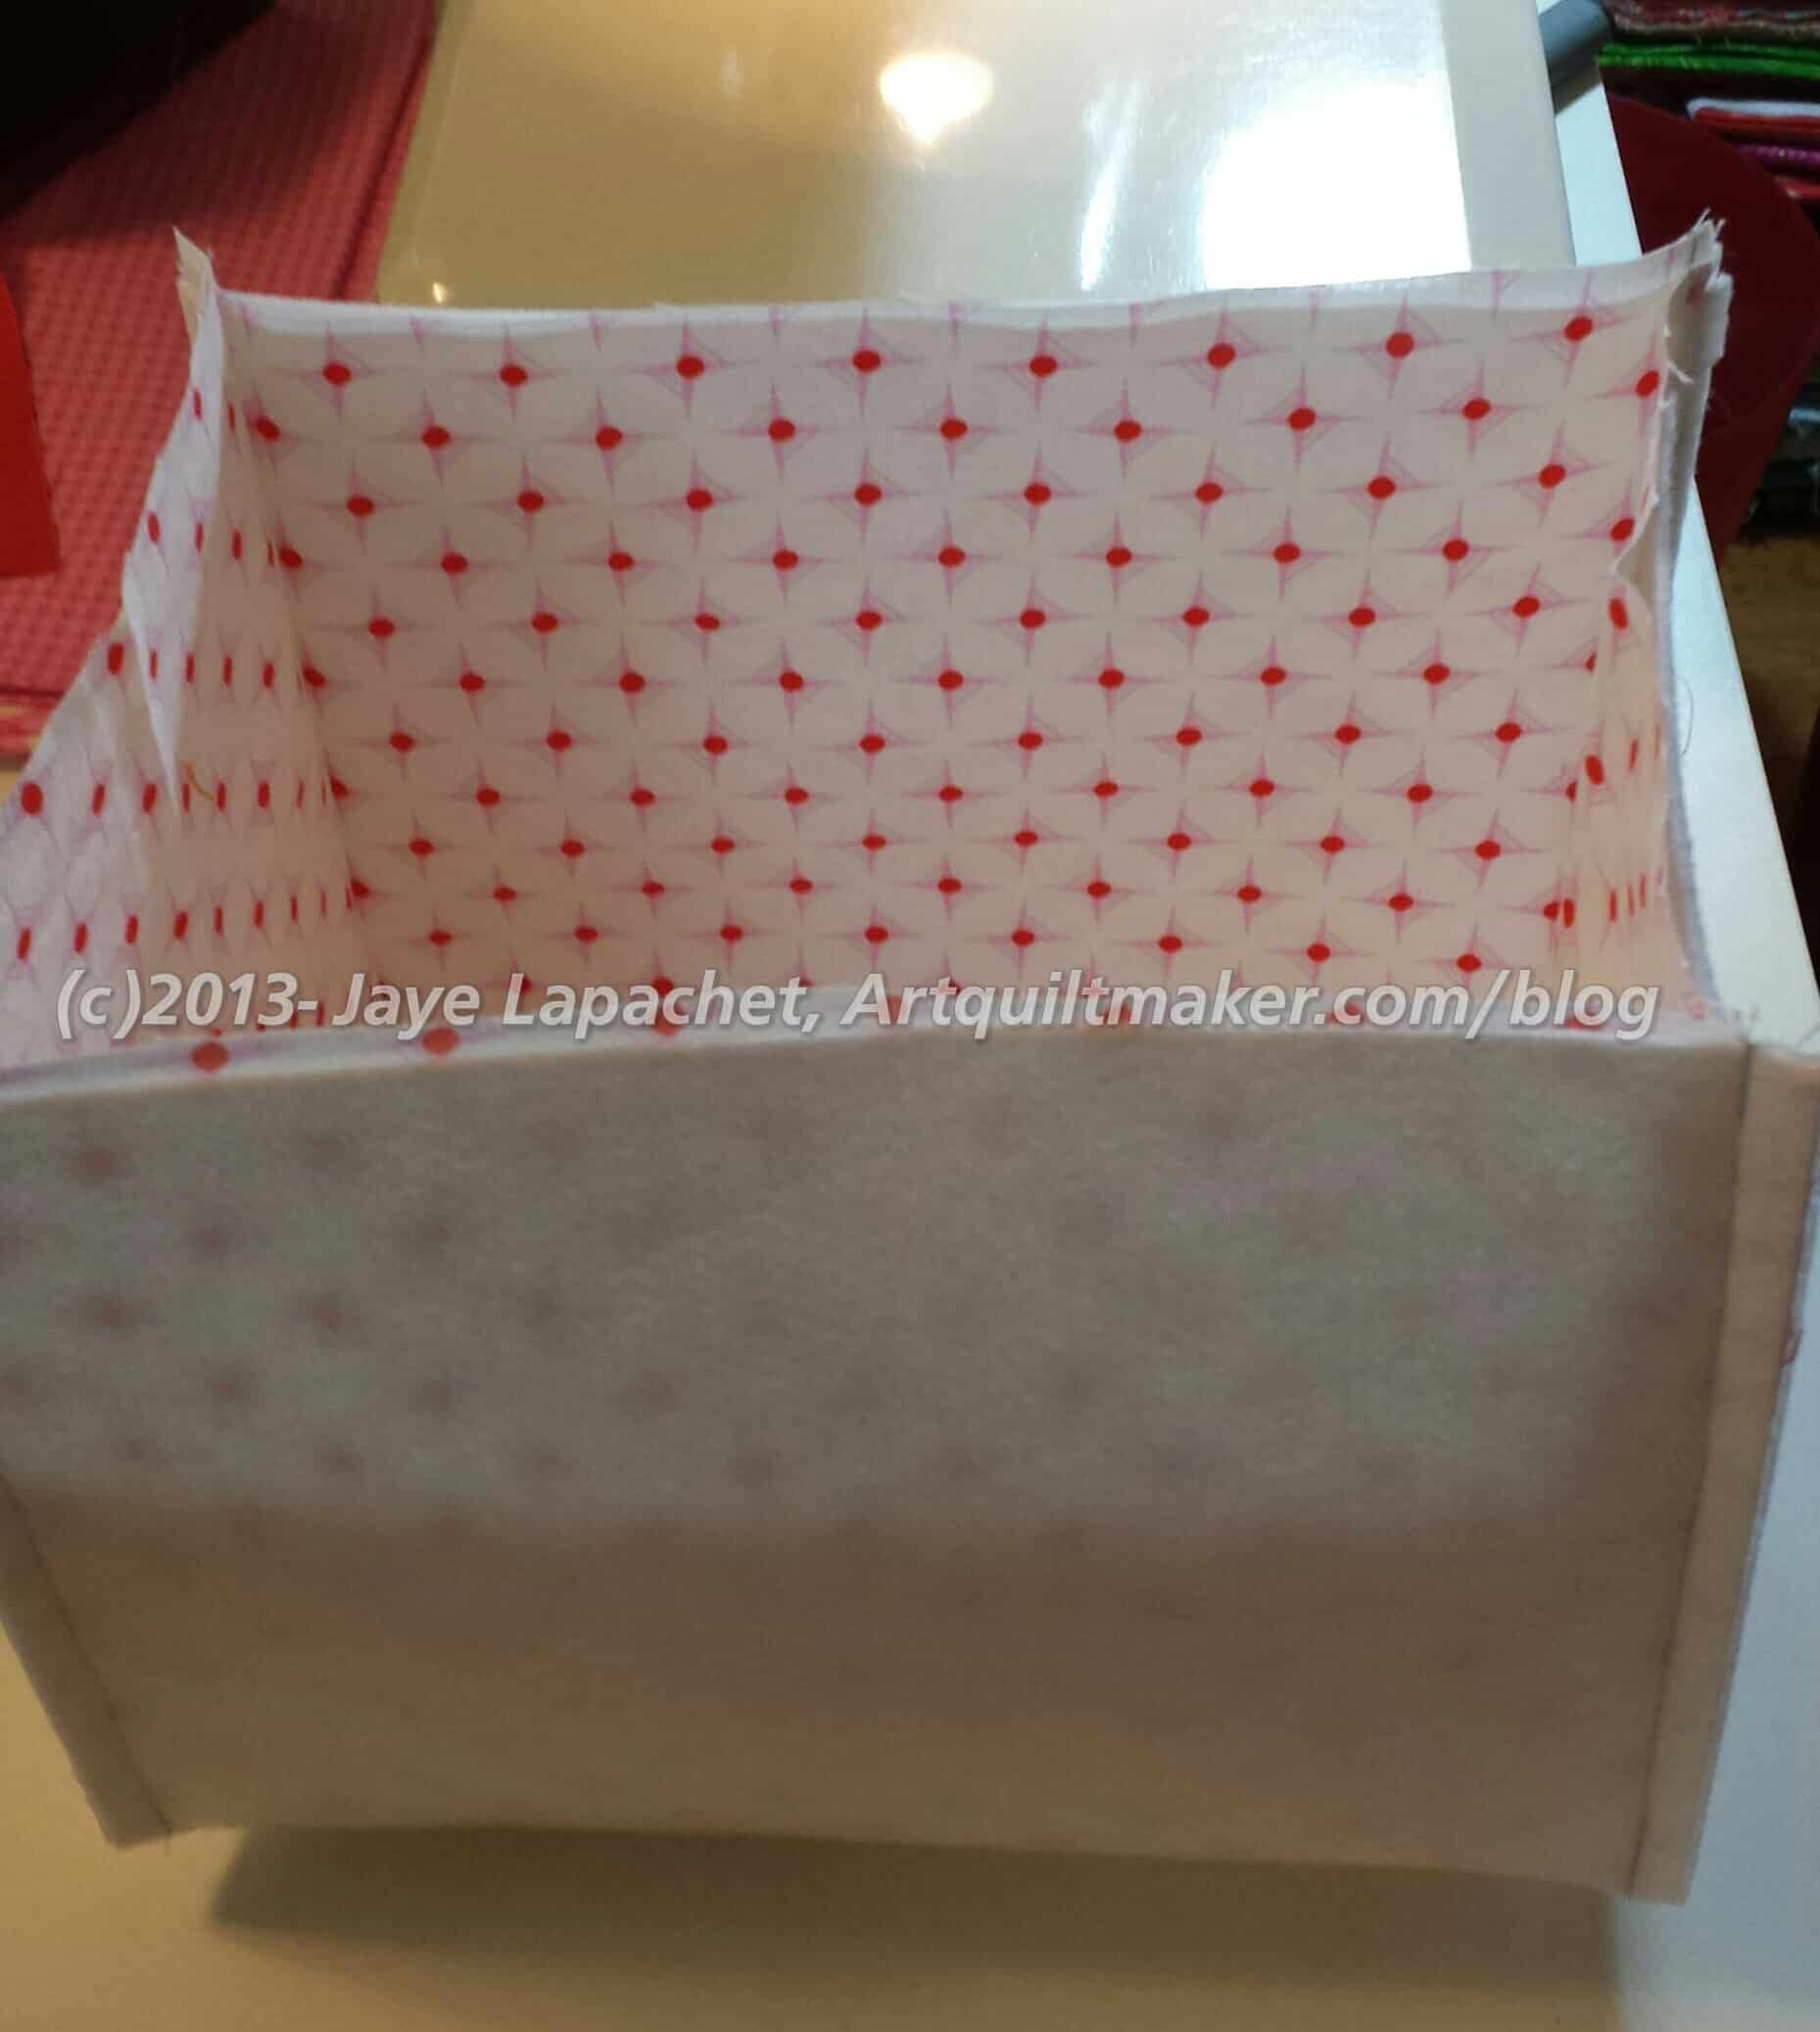
Sew the Body
Lay the cross of fabric in front of you right side up. Fold the top of the cross towards the right leg of the cross, lining up the right side of the top leg with the top of the right leg. The angle along the fold will be on the diagonal. Sew 1/4″ seam from the diagonal fold to the raw edge.
Do the same for all four corners (eight edges) until you have a fabric box with the top open.
Pin the lining to the Peltex.
I used Wonderclips and they worked like a charm.
Closest to you, near the Wonderclip is the edge of the fabric. Note that the Peltex wasn’t wide enough to cut it out the width of the pattern, but I added a little sliver later and that worked fine.
Once the lining and Peltex are sewn you will start to see the shape of the handbag.
After sewing the body together fold the front and back of the bag in halves and then quarters and finger press. Pin the end of each handle, making sure there are no twists, to the quarter finger pressed mark. One handle goes on the front and one on the back.
Put the outside of the bag into the lining with the right sides together. Tuck the handles out of the way and pin in such a way that you leave an opening at least 3″ wide to turn the bag right side out.
The thing will be hard to turn. Don’t yank too much, just poke and pull gently.
After you have turned the bag, pull out the straps and press carefully. Press especially carefully the section that isn’t sewn.
After pressing, sew a double line of stitching to secure the lining to the outside and close up the open edge or use a decorative stitch.
Cute little finished bag. TFQ kept this one and will use it for knitting projects. The Bonnie and Camille bag is more of a square bag.
The pink diamond bag is the second one I made. It is a little skinnier and longer, e.g. the side is bigger.
This week we are finishing. You may already be done. If so YAY!!! If not, keep at it! You can do it!
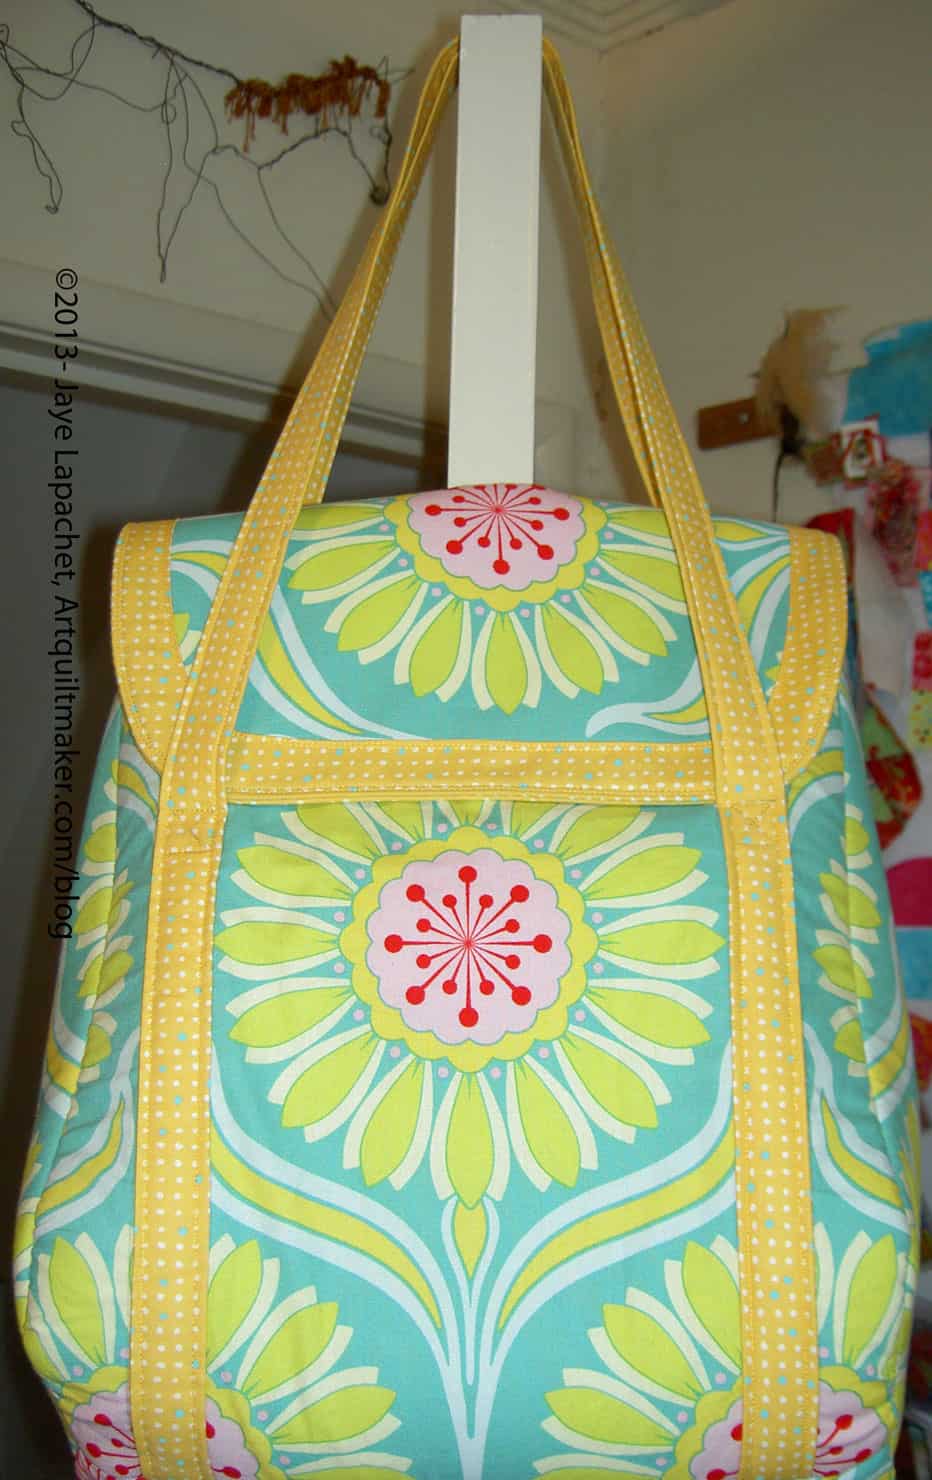
Petrillo Bag Complete
Me? Yes, I am mostly finished. I have a bit of hand stitching of the inside to do then I can say I really am finished. I will put up a completed project post when I am done.
As I have mentioned, I was out of town for part of last week including the time I usually spend sewing. That meant that I had to get back in the groove of where I was with this bag. I found that I rely on regular sewing time to keep me on track. Not having that time completely put me off my game.
It turned out that more ripping was in store for me. I had forgotten to, not only, cut the inside flap piece for the main flap used on the top of the bag, but also to sew it when I put the main flap together. Sara clearly says in Step 17 what to do and I just missed it. Sigh.
I ripped out the Main Flap top stitching, put in the inside Flap piece to line the Main Flap and resewed.
Then I thought I could make some progress, but when I tried to sew the flap to the back of the bag (Step 29) I found that I had sewed the straps too close to the top of the bag (Steps 24 & 25). Sigh. More ripping ensued. I would recommend stopping an 1″-1.5″ away from the top of the back of the bag.
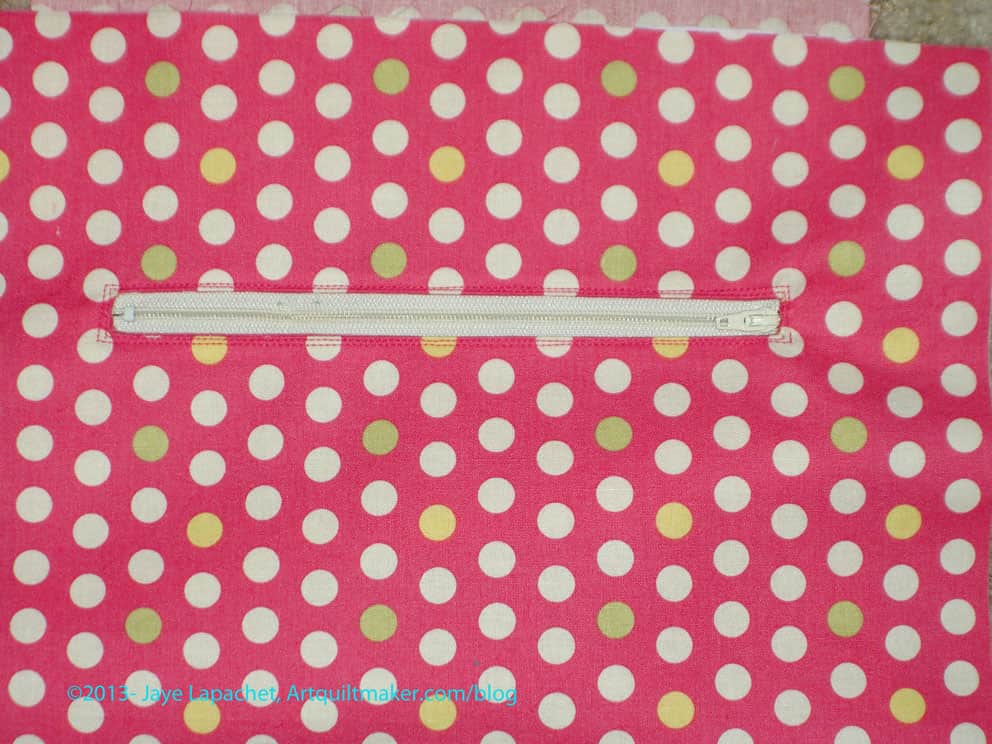
Zipper Pocket
I also started the inside of the bag. The inside of the bag starts with the zipper pocket (Step 33). I did Steps 33-36, which include cutting the opening for the zipper. As soon as I cut the zipper opening, I was sure I had the placement of the pieces wrong. I stared at the picture in Step 33 and the picture in Step 36 and they didn’t compute in my mind. I emailed Sara and she was kind enough to email me back fairly quickly to reassure me. I still was not convinced, but I soldiered on. As she promised, the zipper pocket worked out fine.
Do I seem like I am struggling with this bag? I am a bit. It is really hard for me to read directions and do what they say. I am much better when someone shows me what to. I got through it which gives me an image in my mind. I’ll be able to breeze through the next iteration of this bag. Yes, there will be a second bag. 😉
I have to say that I do like the shape of this bag. Good thing since there is so much ripping. 😉
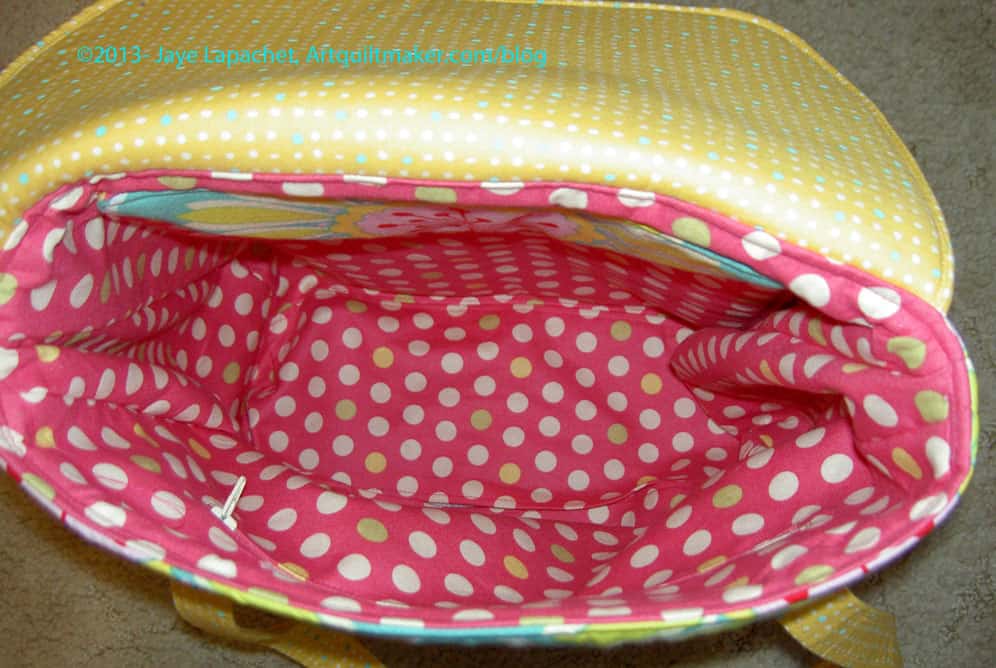
Inside Petrillo Bag
The inside of the bag, which went together very well, after I made the zipper pocket and the padded pocket, seems a little big to me.
More Hilarity
Tutinella made a second Petrillo bag and wrote about it recently. The thing she did differently was add side pockets, which is a great idea. I might add side pockets to my second bag. I may also add inside side pockets.
Another thing I like about this bag is the opportunity to use new products. I have talked a bit about the Soft & Stable, but the Shape Flex is on my mind today. I still have the skirts I planned, to make. One thing that was holding me up was lining. The pattern I have does not call for a lining, but quilt weight fabric is not very thick, most of the time, so I will need something under. I am not sure my clothing skills are up to the task of a lined skirt out of the gate. I got to thinking about the Shape Flex and may try it to give a bit of weight to the fabric and to provide a kind of lining. I will have to give up some drape, so I will need to think about it. Let me know if you have experience with using Shape Flex on clothing.
I have to say that I am amazed at how Sara could have conceived of this bag and the way it goes together. I thought the same thing about the Anna Maria Horner Multi-tasker tote, which is a great bag, if you haven’t made one.
This week we are working on the sewing. Before we can get to sewing the bag together, there is still some prep to do. Please note that this is not a tutorial on how to make this bag. I am just recording my experience and noting things I had trouble with. If you want to make the bag (and I think you should), buy the pattern and read the opening post. Keep in mind that I don’t learn well by reading directions, so I have more trouble than most when reading patterns. My trouble is no reflection on Sara’s pattern directions.
Prep
I was so relieved to finish the cutting. What a lot of work that was! Anyway, I was so relieved that I got right down to the business of putting the bag together. Since adding the magnetic snaps is one of the first steps, I immediately realized that that I had bought the wrong ones. I didn’t buy the sew-in snaps. I bought the ones with the arms you have to bend. This is absolutely NOT Sara’s fault. Yes, I did read the instructions for purchasing supplies, but I didn’t know there was such a thing as sew-in magnetic snaps and simply didn’t see those two words on supply list. UGH! A delay!
I ordered them immediately from Tantalizing Stitches’ Etsy Shop, which is the vendor Sara recommneds. I received the sew-in snaps in about 2 days. I put them in relatively quickly using a small zigzag. The sew-in snap was covered with a clear plastic square and I had to sew over the plastic, which was odd. My machine did it, but I had to yank on the piece a bit to get it started since I was sewing the plastic covered snap to the Soft & Stable (=very thick!). I went around twice just to make sure it would stay in place. The hard part was keeping the snap straight. It didn’t end up completely straight, but since the important part is the circle, I figured it didn’t matter as long as it was in the middle. These are sewed to the Soft and Stable so there is no distortion of the fabric.
I know I could have used the magnetic snaps that you bend, which I think Pam did, but I did like the sew in snaps: no cutting of the fabric.
A lot of the prep was preparing to sew the whole bag together and some of the prep involved some top stitching and sewing parts together.
Straps
I was pleased to see the way Sara creates the straps. None of that turning tiny strips inside out nonsense. She creates them using the folding method that I like. Hooray!
Sewing
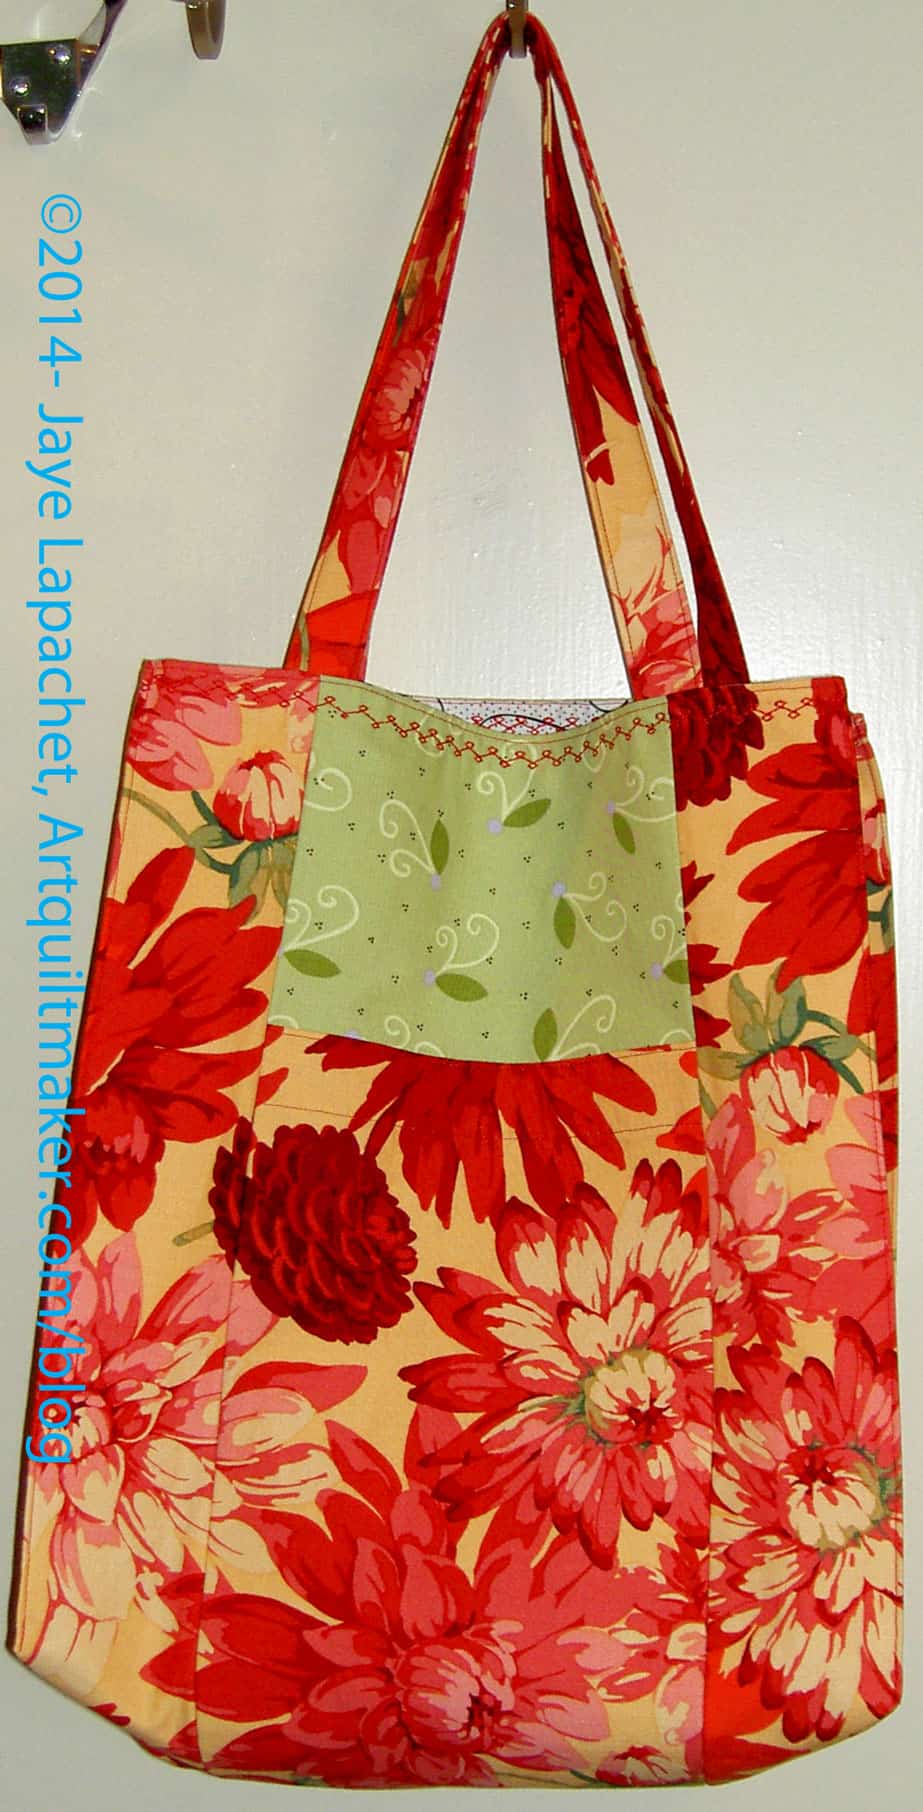
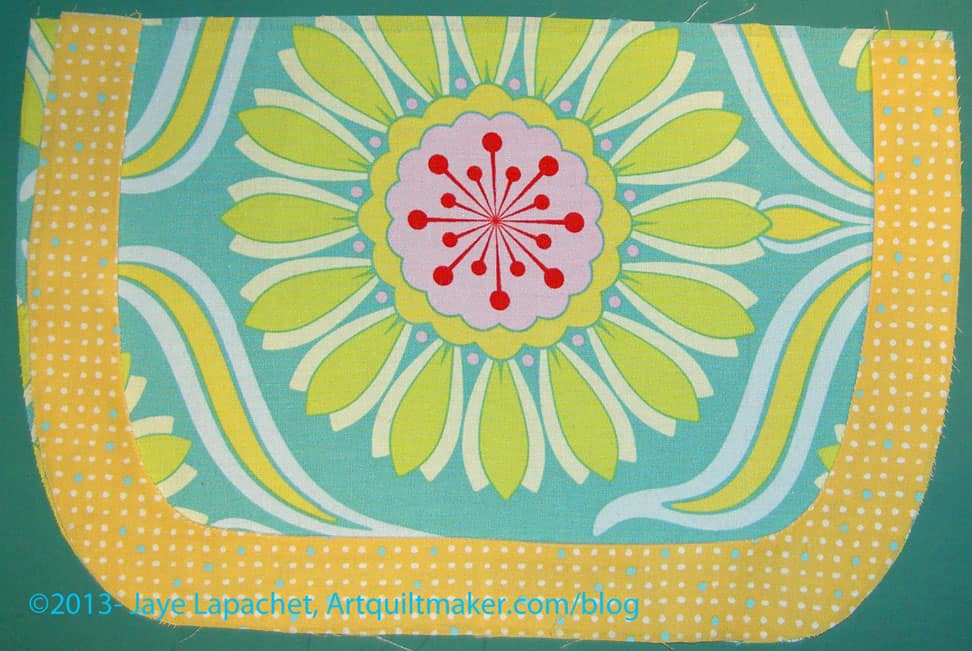
Flap with Accent
I decided not to do the gathered flap after having some trouble with the gathers. I can’t remember whether I have done gathers before. This was not unexpected as I was a little unsure of the gathers from the beginning. They do add some interest to the bag, but I kept wondering if they would catch on something as I navigate my way through the public transportation systems I frequent. Sara suggested just cutting out a flat piece of fabric using the Flap pattern piece, which is what I did. I also liked that I was able to highlight one of the motifs of the fabric
I was a little confused by the directions in Step #14, covering the flap, but I decided Sara meant topstitching and went with that. I was able to apply the accent with no problems, though, as usual, turning under a small seam allowance, like you would do for applique’ was a pain. I think you could do a regular quilt binding around this piece, if you didn’t mind a little bit of dimension.
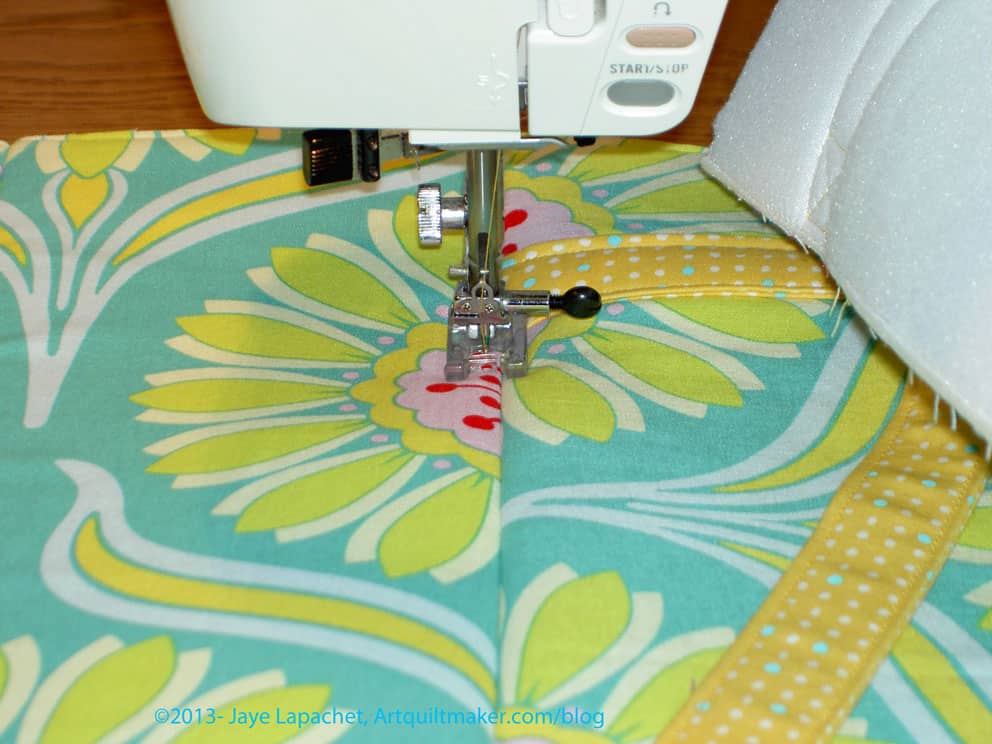
Tutinella suggests topstitching the bottom, which I thought was a great idea.
I used my clear applique’ foot and just measured using the inside of the right hand side of the foot, which gives me a line of stitching about 1/8″ away from the bottom of the bag.
One thing about all the prep is that you don’t have to stop to do prep. Once the prep is done, the bag starts to go together very quickly.
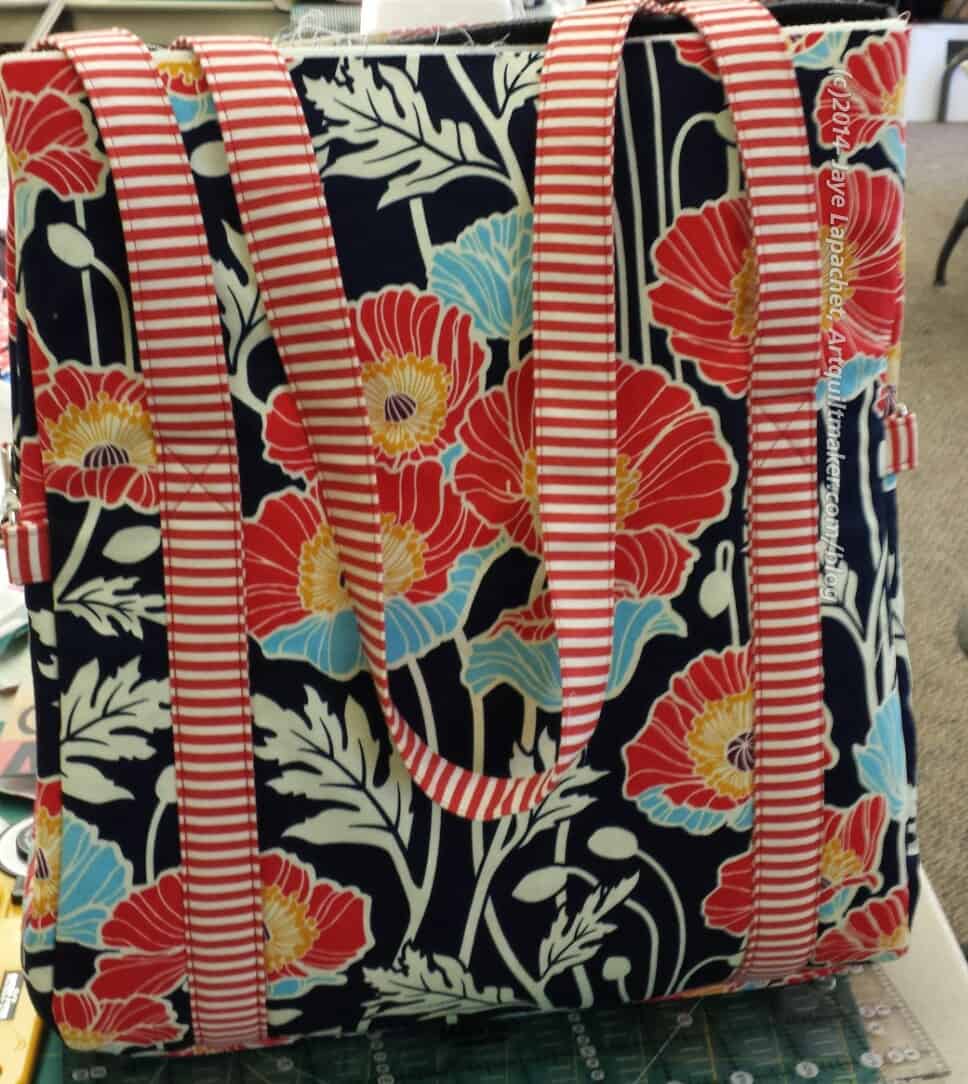
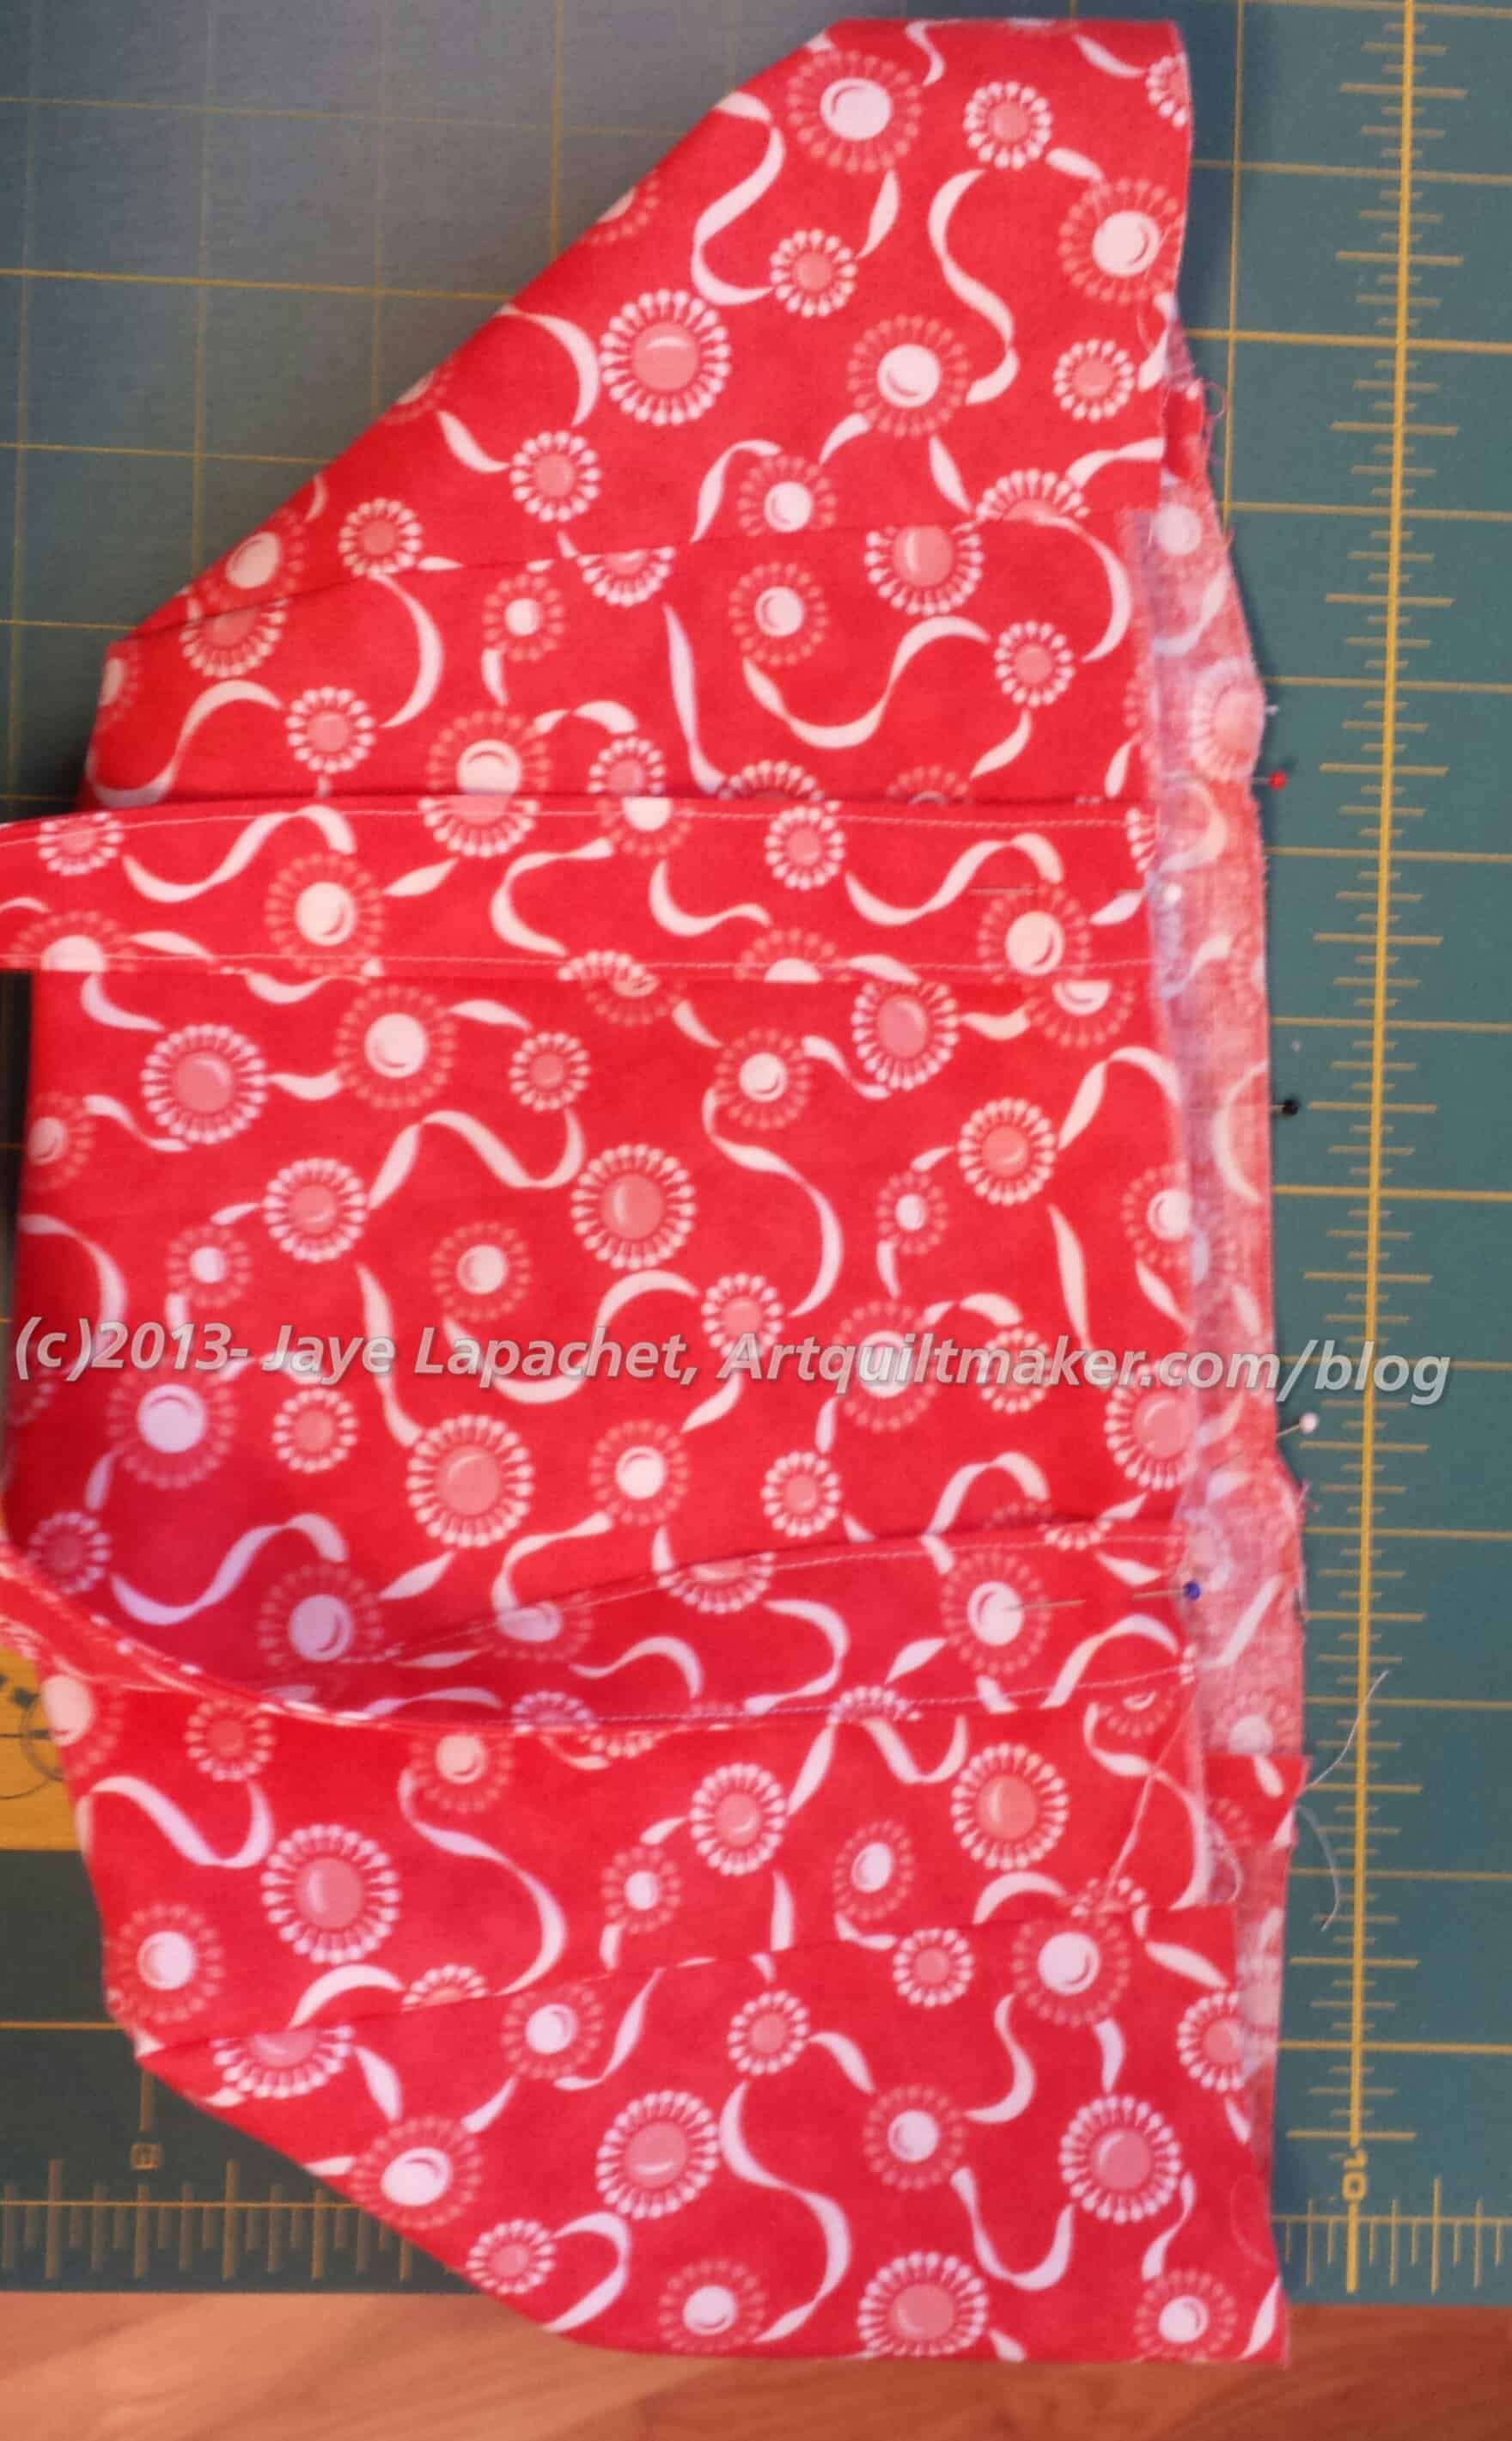
Petrillo Bag
I was really surprised at how well the Soft & Stable acted with my machine. I thought I would have to fight with the machine, because of the layers (fabric + Soft & Stable, occasionally 4 additional layers with the straps).
The first round of stitching was really satisfying because of the quick way the bag started to look like something. Yes, the above photo shows it being flat, but it still starts to look like a bag.
Finished Outside of bag
The directions say to draw a line 4 3/4″ from the top of the front of the bag. The purpose is to show you where to stop sewing the straps. You need to stop sewing, because the flap flap slides underneath the straps to keep it closed.
I missed that part of the directions and sewed the straps to the bag all the way around. when I realized what I had done, I knew I had to rip. Bleah. It is very hard to rip through all of those layers. I also had made the little squares with Xes through them at the top of the bag which made the ripping even more arduous.
I did it, though, and after an hour and a half I had the bag back to where I should have been.
If you read between the lines of my last post, I was a little ahead of those of you, because I had already gathered my supplies back in March and had started to cut. I did want to be a little ahead of you, so I could give you some tips and tricks if I found any.
Nota bene: Kay at Tantalizing Stitches sent the sew-in magnetic snaps out the day after I ordered them.
Fabric
The fun part was choosing fabric. You can see the colorways below, but the particulars about what I chose are:
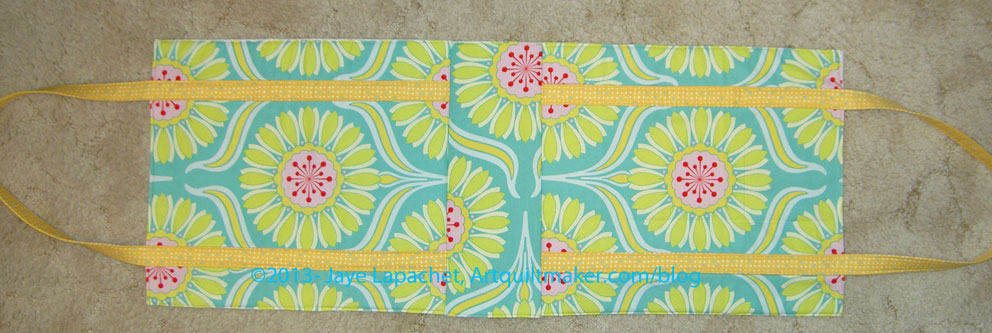
For the exterior: Heather Bailey’s Pop Daisy from the Pop Garden line (Westminster Fibers #HB02). It is a few years old and had been slated for a back, but called to me when I looked in the Fabric Closet – green, yellow, red print
For the lining: Savon Bouquet by Verna Mosquera for FreeSpirit – pink polka dots
Straps and accents: City Weekend by Oliver & S for Moda (Pattern #11165, I think. It might be L1165)- yellow
I am not sure what possessed me to choose these colors and this combination of the three. It was grey and foggy at my house the day I chose the fabrics, so, perhaps, I was seeking cheerfulness. I also wanted to use some dots for something. I do like a light interior for bags. It is hard to see what is inside if the chosen fabric is too dark.
Organization
Petrillo cut pieces
Week 2 is all about cutting, so I did the cutting. It took me awhile to get the cutting done. I would say it took me about 3-4 hours. I was doing laundry, ate lunch and went to pick up the Young Man in between, so it is hard to say. It did take me a long time as I was trying to be really careful and not miscut. Don’t plan on doing it in a few minutes.
Additional supplies
There are a lot of pieces to cut for this bag, so take the time to be organized. I would add the following to the supply list:
sticky notes, though paper will do as well
Wonderclips
pen
I like to pin a piece of paper or sticky note to each cut pattern piece with the corresponding name from the pattern, e.g. Lining Flap, and the size. Even if it doesn’t help me truly be more organized, I feel more organized.
I also felt like I needed a spreadsheet to track everything that I needed to cut. I think it would look like a main column of what parts needed to be cut and a main row of the materials out of which the parts needed to be cut. I might also put dual columns for each put a tick mark in one noting I needed to cut a part from that materials and the second column for when I had done it. I could have just ticked off the lines on the pattern. I didn’t because I didn’t want to confuse myself for the future use of this pattern.
Cutting
Sara wants you to cut the fabrics in the order listed on the pattern. In some places, she has you cut a smaller piece before a larger piece. I like to cut all the larger pieces first, so I rearranged a few, but really tried to stick to her pattern directions. I would like to see a layout sketch for the pattern pieces on fabric in the directions.
There is enough fabric to cut all the pattern pieces. Sara did a great job estimating yardage.
I did cut one piece wrong early on and had to piece together enough of the lining fabric later for one of the bottom pieces. As I haven’t made this pattern before, I am hoping it will be ok. I am going to rummage through the fabric closet and see if I have another piece of the pink fabric (shown above) and cut a whole piece out of it. You could add an additional quarter of a yard, if you are worried about screwing up the cutting.
I just used my rotary cutter to cut the Soft & Stable where possible. I did notice, during cutting of the Soft & Stable, the sounds of paper being cut. I couldn’t feel any paper on it, especially something like paper covering a fusible. I am not sure what it is made of or if it was a good idea to use a rotary cutter, but I did want to speed the process along as much as I could.
This Petrillo bag by Tutinella is one of my favorites. I love the use of the map fabric, especially how she carefully placed the legend. I think Tutinella (great name, don’t you think? It is fun to say!) is a girl after my own heart. She writes “I’m a typical girl – no matter how many bags I have, I want more!” in her post about this bag. I also love how she calls her husband/significant other Mr. Right. I wish I had thought of that first! This is one of the great bags you can see in the Sew Sweetness Flickr Group, so go and take a look.
You might remember that I saw this bag a few weeks ago and extolled its virtues, most of which had to do with it being a vertical bag that was good sized, but not a Rotator Cuff Injury inducing size. I posted a ‘warning’ in a post on March 18 that we would be starting soon and Pam, of Hip to Be a Square fame, talked about the bag along in her episode 121 podcast. We have finally gotten our acts together, other projects in order and are ready to go. Pam already posted the notice of the ‘Along’ yesterday and I am following along in her footsteps to catch my readers as well.
Here is the schedule that Pam laid out:
Week 1 (week of 4/7/2013) – assemble pattern pieces, supplies, and get fabric cut out.
Week 2 (next week, starting on 4/14) – sew the bag.
I may have to modify it to:
Week 1 (week of 4/7/2013) – assemble pattern pieces, and supplies
Week 2 (week of 4/14/2013) – Cut out the fabric
Week 3 (starting on 4/21) – sew the bag
Week 4 (starting 4/28) – finish up
I know that we all have a different working pace and obligations. Pam works quickly, so don’t be intimidated by her pace. I have to be out of town a couple of times this month and I like to work slowly on bags. Pick (or make up) the schedule that works for you. Pam is in the middle of her Labyrinth quilt, so the only hope I have of finishing the Petrillo bag anywhere close to when Pam does is to get started immediately and sew like a demon. 😉 I would advise you to focus on having fun.
If you need to buy the pattern you can get it instantly (or nearly instantly) as it is a downloadable pattern. It is only $8.
There are some specialty supplies you need to probably get online. Sara suggests different places to get the supplies. I had seen Soft & Stable at the Road to California quilt show I attended last year. I was interested in trying it, but didn’t buy any as I didn’t have a suitable project at the time. Thus, for this project, I ended up buying the Soft and Stable from ByAnnie.com. I am not affilated with that site and don’t think it was the absolute cheapest site, but I was in a rush and wanted to make sure I got the right stuff. Amazon was out at the time. The package was sent out really quickly. I received the Soft & Stable in a few days.
I bought the snaps from AGraffSupplies on Etsy. I am not affiliated with that site. They had the snaps cheaper than Sara’s preferred vendor. I compared and I am pretty sure the snaps were the same. The confusing part about both Etsy shops was that it was hard to tell how many I was buying. I ended up with a big bag of magnetic snaps – many more than I needed. I’ll have to go on a bag making binge to use them all up. Nota bene: These turned out to the wrong ones. You need to buy SEW-IN magnetic snaps. I didn’t even realize such a thing existed.
I bought the Shape Flex, which seems to be muslin with fusible on the back from Beverly’s online.
Pam made the Aeroplane bag pattern and says “Sara’s patterns are awesomely written with clear instructions and lots of pictures”. Pam is making one change to the bag construction; rather than using the Soft & Stable, she will be using “a combination of Pellon Decor Bond (a home dec weight interfacing) along with Pellon Fusible Fleece.” If you want to make changes like that, then Pam is your girl. I wasn’t happy with the floopy results of changing out fusible fleece for two layers of regular batting and some interfacing when I made my last Chubby Charmer, so I am going to stick with the directions on supplies for the most part. It is also a good opportunity for me to try the Soft & Stable as well.
As Pam said, in addition to posting my progress here, I’ll be posting pictures to Sara’s usual Flickr group so she can see our work as well.
Go forth and make a Petrillo bag!
**Thanks to Sara at Sew Sweetness for allowing me to use her image.
Yes, I should have been working on the Stars for San Bruno #3 quilt, but I didn’t. these bags were cut out and I just wanted to get them out of my hair. I believe that these are the last two Jane Market Totes I need for Christmas. I counted three times as I was rearranging bags to take this photo and came up with the right number. I have to check with DH to make sure I know about everyone who needs one.
If these are the last ones, I would just like to point out that it isn’t even December much less the 24th of December and this part of the gift giving process is done!
I feel like these came out the best of all of the bags. I put some fusible interfacing on the bottom of the bag (after I cut out the corners) and that gave them a little more shape.
I am still not as comfortable making bags, as I am making quilts. I am getting better. I do get comfortable making one one bag pattern, but in terms of bags in general, I still feel like I am learning.
When I am making a bag, I lay out the pieces so I know what I have and can keep track of what parts I have. One thing I would have done differently with this pattern is I would have pinned notes to them to identify the different parts. I often use post-it notes to identify the pieces. Post-it notes are sticky, but I still pin them to the fabric.
Pinning notes to the pieces would have helped a lot, because the author refers to the various pieces by the color of the fabric she uses. This was a problem for me because I had different fabric. I had to keep referring to the pattern and translating the fabric names to the fabric I had. I have since annotated my book.
Bag in progress
The directions and accompanying drawings were pretty good. Aside from translating the fabric, the bag went together pretty well. I was able to put the outside of the bag together within a few hours over a few days.
I added a lot more interfacing than the pattern requires, because I don’t like floopy bags. I like my bags to be stiff so they can stand up. This allows me to throw things in the bag from across the room.
When I went to see Colleen she mentioned fusible Pellon. It is, apparently, stiff, but not as fluffy/fat as fusible fleece. Perhaps I will try it? We’ll see. I am loathe to diverge from the Chubby Charmer pattern after making the Sugar Pop Chubby Charmer, but it might work for the messenger bag of my own design that I am planning.
Messenger Bag in Progress
If I made this bag again, I wouldn’t use so many fabrics. It is good to see that the maker can use a number of different fabrics, if desired, but I don’t need to use that many.
What I would do differently is use the outside fabric (Amy Butler Love) for the pocket that is currently aqua (Michael Miller Dandelion). I don’t think the lower pocket needs to be a separate fabric. I would use the aqua for the middle pocket and skip the black. Putting the aqua up where the black is would give the whole bag a more cohesive look. Aside from the pattern requiring too many fabrics, I found that I paid close attention to the fabrics I chose so they wouldn’t look weird together. I didn’t just grab the fabrics randomly so I get to the sewing part. I like it that all the fabrics are from different groups. It is easy to choose fabrics when they come from the same group and takes more time when they don’t.
I was worried about the flap, too. I don’t remember making a bag with a flap before. I was worried about inserting it and I was also worried about the tab.
The other thing I need to remember when I make bags is that I like to have all the fiddly bits out of the way when I start. I like to make the tabs and straps and pockets detailed at the beginning of the pattern and finished right away, not at the end. A lot of bag designers seem to like to have the maker put the straps together at the end. I wonder why that is?
Inside Messenger Bag
I really tried to pick fabric for the bag so the bag would be usable. The blue Amy Butler Love fabric is cheerful and there is a possibility that I will use it. The bag itself isn’t really the right size, though. It is more handbag sized than taking-stuff-to-work size. Also, I am really in love with the Innocent Crush Flea Market Bag for carrying extra stuff right at the moment.
For the inside, I chose orange. One of my two awesome 7YO nephews told me his favorite color is orange, but orange is not a color that I use often. As you know, from my Lovey Blocks post, I pulled out my orange bin and, suddenly, I was in an orange mood. The oranges really counteract the grey fog swirling around my house right now. The inside won’t show that often and orange is light so I will be able to see the stuff at the bottom of the bag. I think the inside is a bit bigger than I would like, because it bunches up. I wonder if I didn’t get the seam allowance quite right or if I should, generally, make bag insides a bit smaller.
I added the pocket using sizes from one of the outside pockets. The more pockets the merrier in my world.
Finished -Shut
Left is an image of the finished bag. It is a nice shape and an okay size. I worked hard on the fussy cutting the flower for the front and think I did a good job.
I didn’t like the way the pattern said to make the straps. Turning straps right side out makes me want to scream AND they look bunched up and wrinkled when I finally get them turned. I am not using that method again, except for Anna Maria Horner’s Multi-tasker tote. I should have learned my lesson. It is just as easy to cut the straps bigger and fold them and that method adds padding.
The other weird thing about this bag is the closure. The pattern calls for a closure like a camping bag or Timbuk2 bag – those black plastic things that pinch your fingers. Not my style. I found a Nancy Zieman closure that looks nicer, but weighs about 13 lbs. There wasn’t a lot of selection at my local fabric store and I hadn’t planned ahead. It is ok, but, again, not my style. I like the bag hardware that Sherpani uses for their bags. The Buckle Guy doesn’t have the Sherpani hardware, but he has some really nice looking hardware with a variety of finishes that I hope to use in the future. I just need to plan ahead.
I didn’t like the way the pattern told me to sew through the nicely fussy cut front of my bag to install the closure. I tried to pick thread that wouldn’t show much, so it looks ok. I think that the tab could be applied to the inside of the flap before sewing the flap together, perhaps with a little extra interfacing, but will have to test it out, if I use the pattern again.
Finished -Open
I’ll have to see about giving this bag a test run.