Quilt Class: Making Half Square Triangles

Some time ago, I saw an episode of Love of Quilting where Jo Morton was the guest. She was showing a technique for making half square triangles that blew my mind. Based on what I saw Marianne and Jo do on the show, I tried the technique and was pleased with the results.

I found this half square triangle (HST) technique to be one of the best I have seen. It is straightforward, there is a minimum of dealing with bias and the squares magically appear all at once.

There are a number of different tutorials for making HSTs (half square triangles/triangle squares) and I link to some of them below. My technique below makes 8 HSTs at a time and can be used for the Double Pinwheel that is part of the Quilt Class tutorials.

This is more of an informational tutorial than a tutorial related to certain blocks. HSTs are a component in many, many blocks designs, so learning to make HSTs using this method will come in handy

I started with 5″ squares, which is the size they used on the show. The 5″ squares make 8 HSTs. I thought it would be a great way to use charm packs. For other sizes, I have created the AQ HST Size Chart. You need this chart to find the sizes of the various pieces to make other block patterns.

Supply list:

  • AQ HST Size Chart
  • fabric
  • rotary cutter
  • rotary cutting ruler large enough to cut 4.5″ squares
  • rotary cutting mat
  • fabric (2 different)
  • Optional: Mary Ellen’s Best Press (or similar)
  • pins
  • sharp trimmers or scissors
  • thread for piecing
  • sewing machine
  • Iron
  • ironing surface
  • Sewline pencil** or mechanical pencil
2 5
2 5
Draw an X
Draw an X
Put 2 squares together

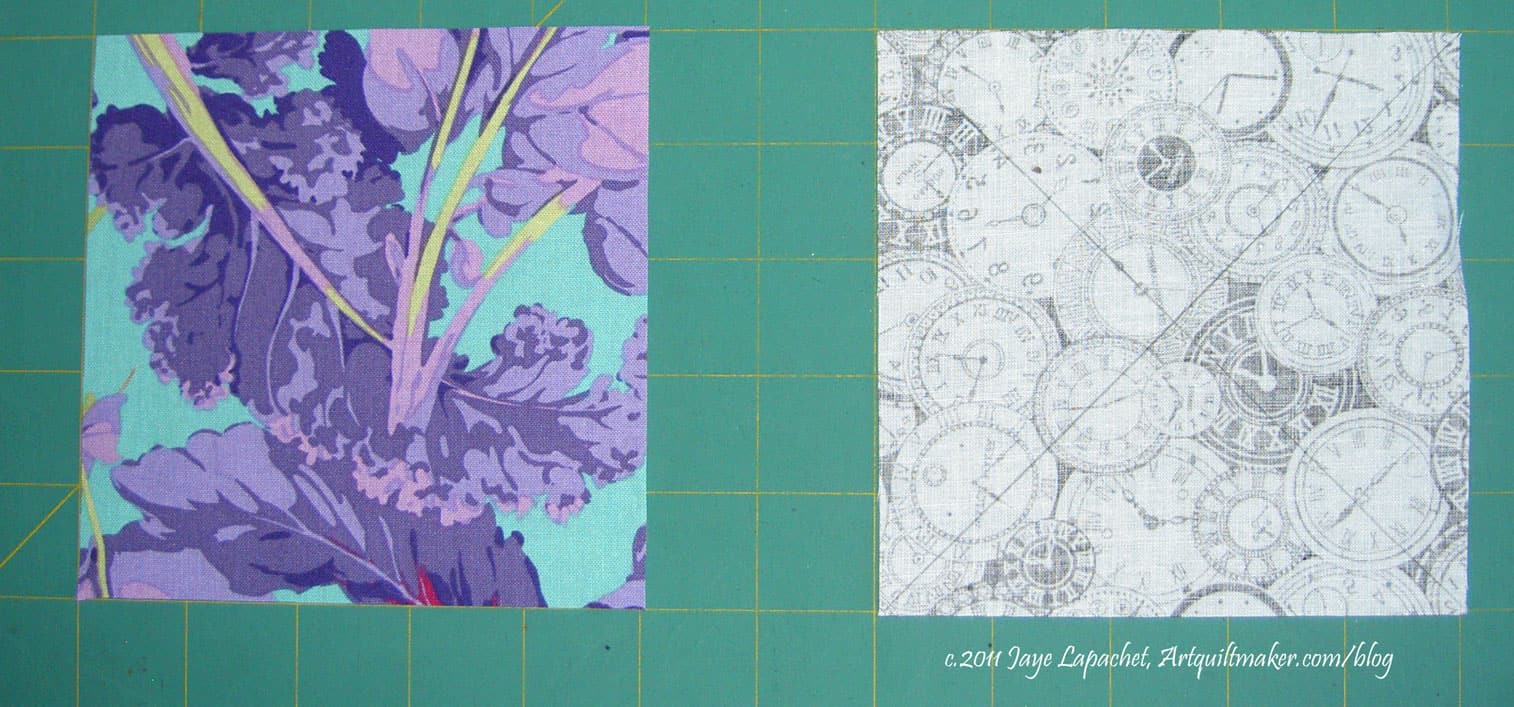
First, I cut two squares according to the AQ HST Size Chart.

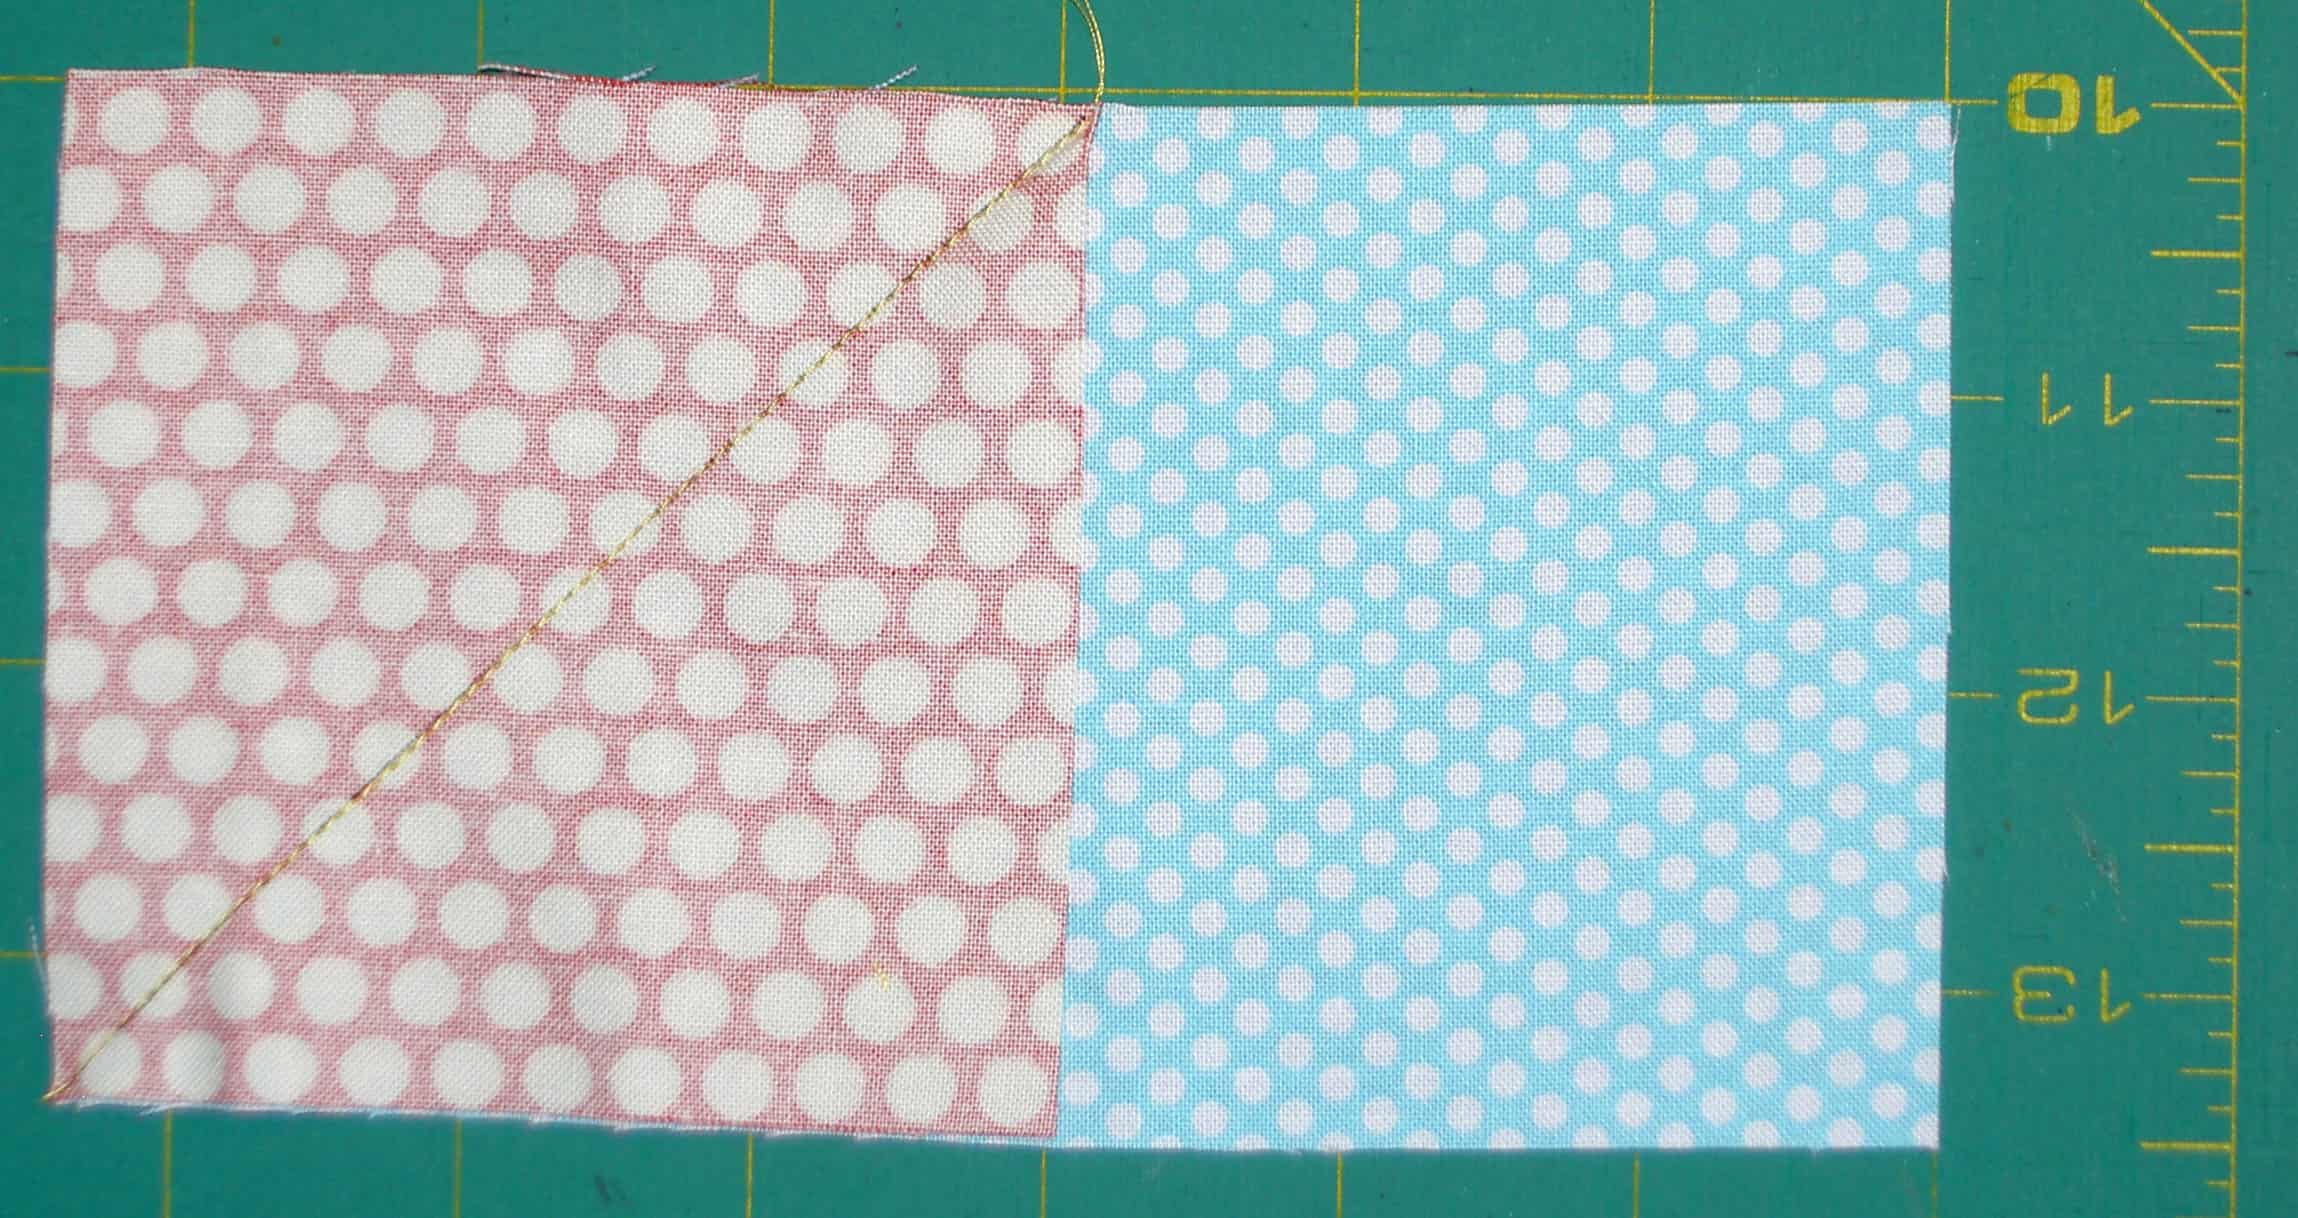
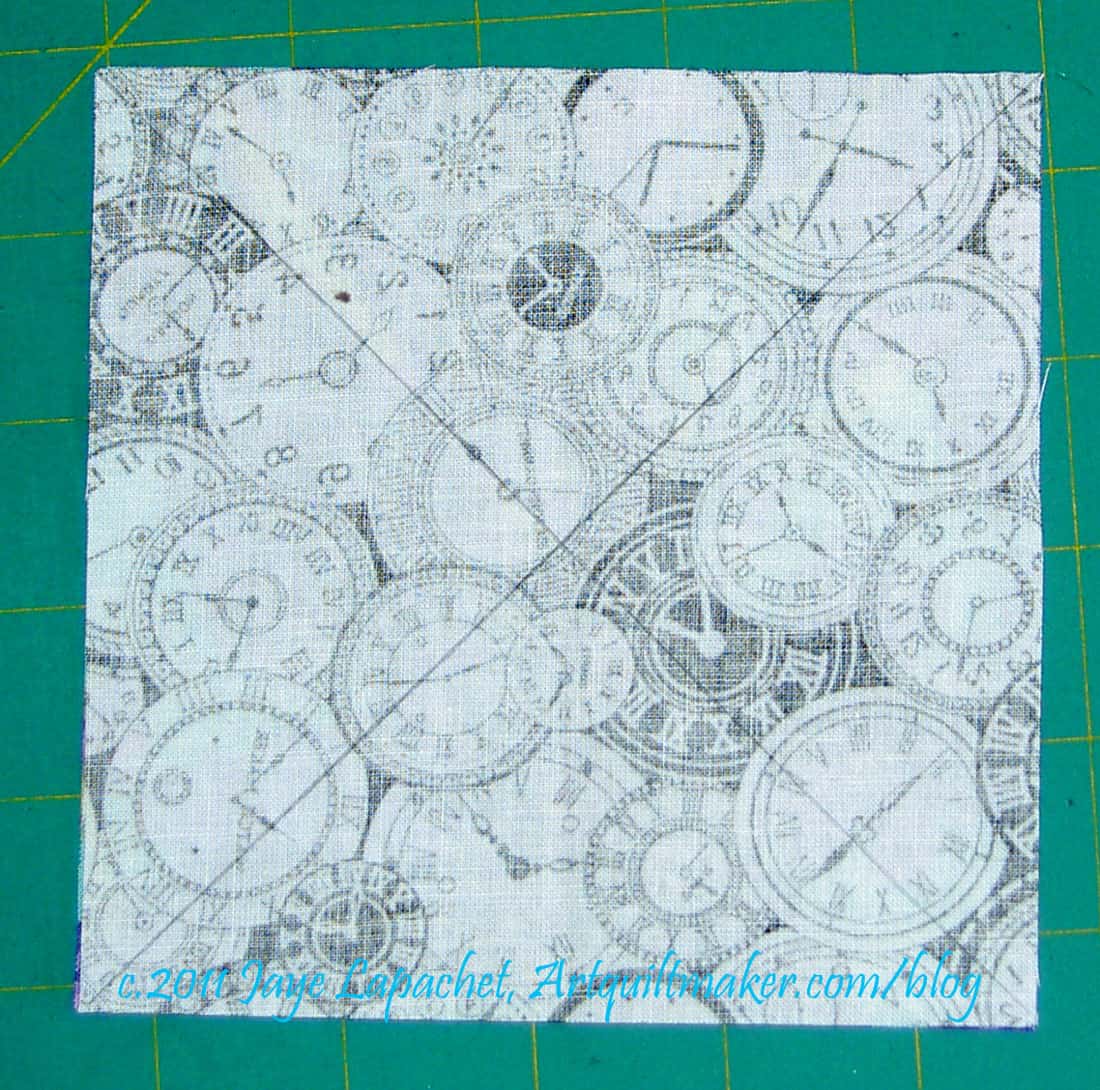
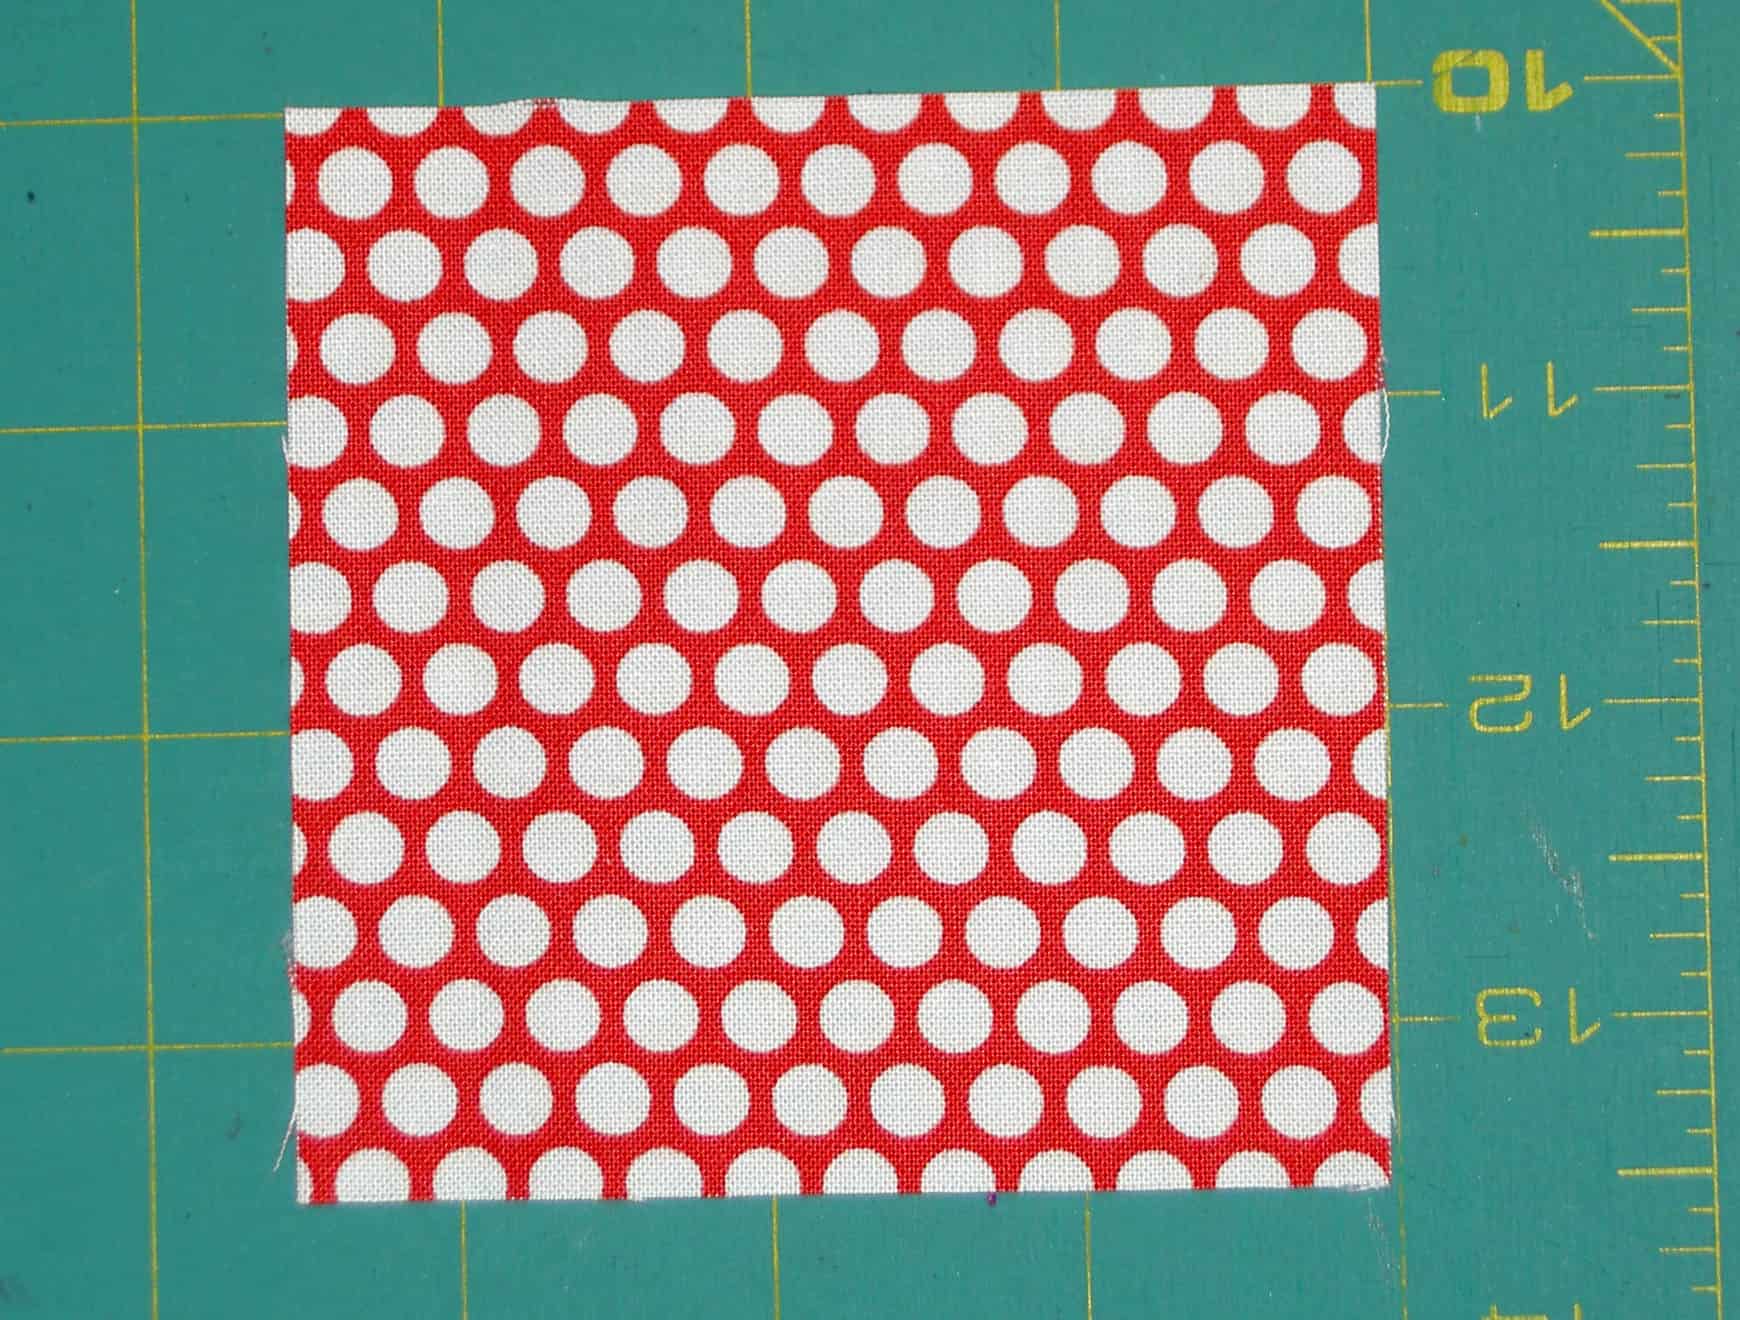
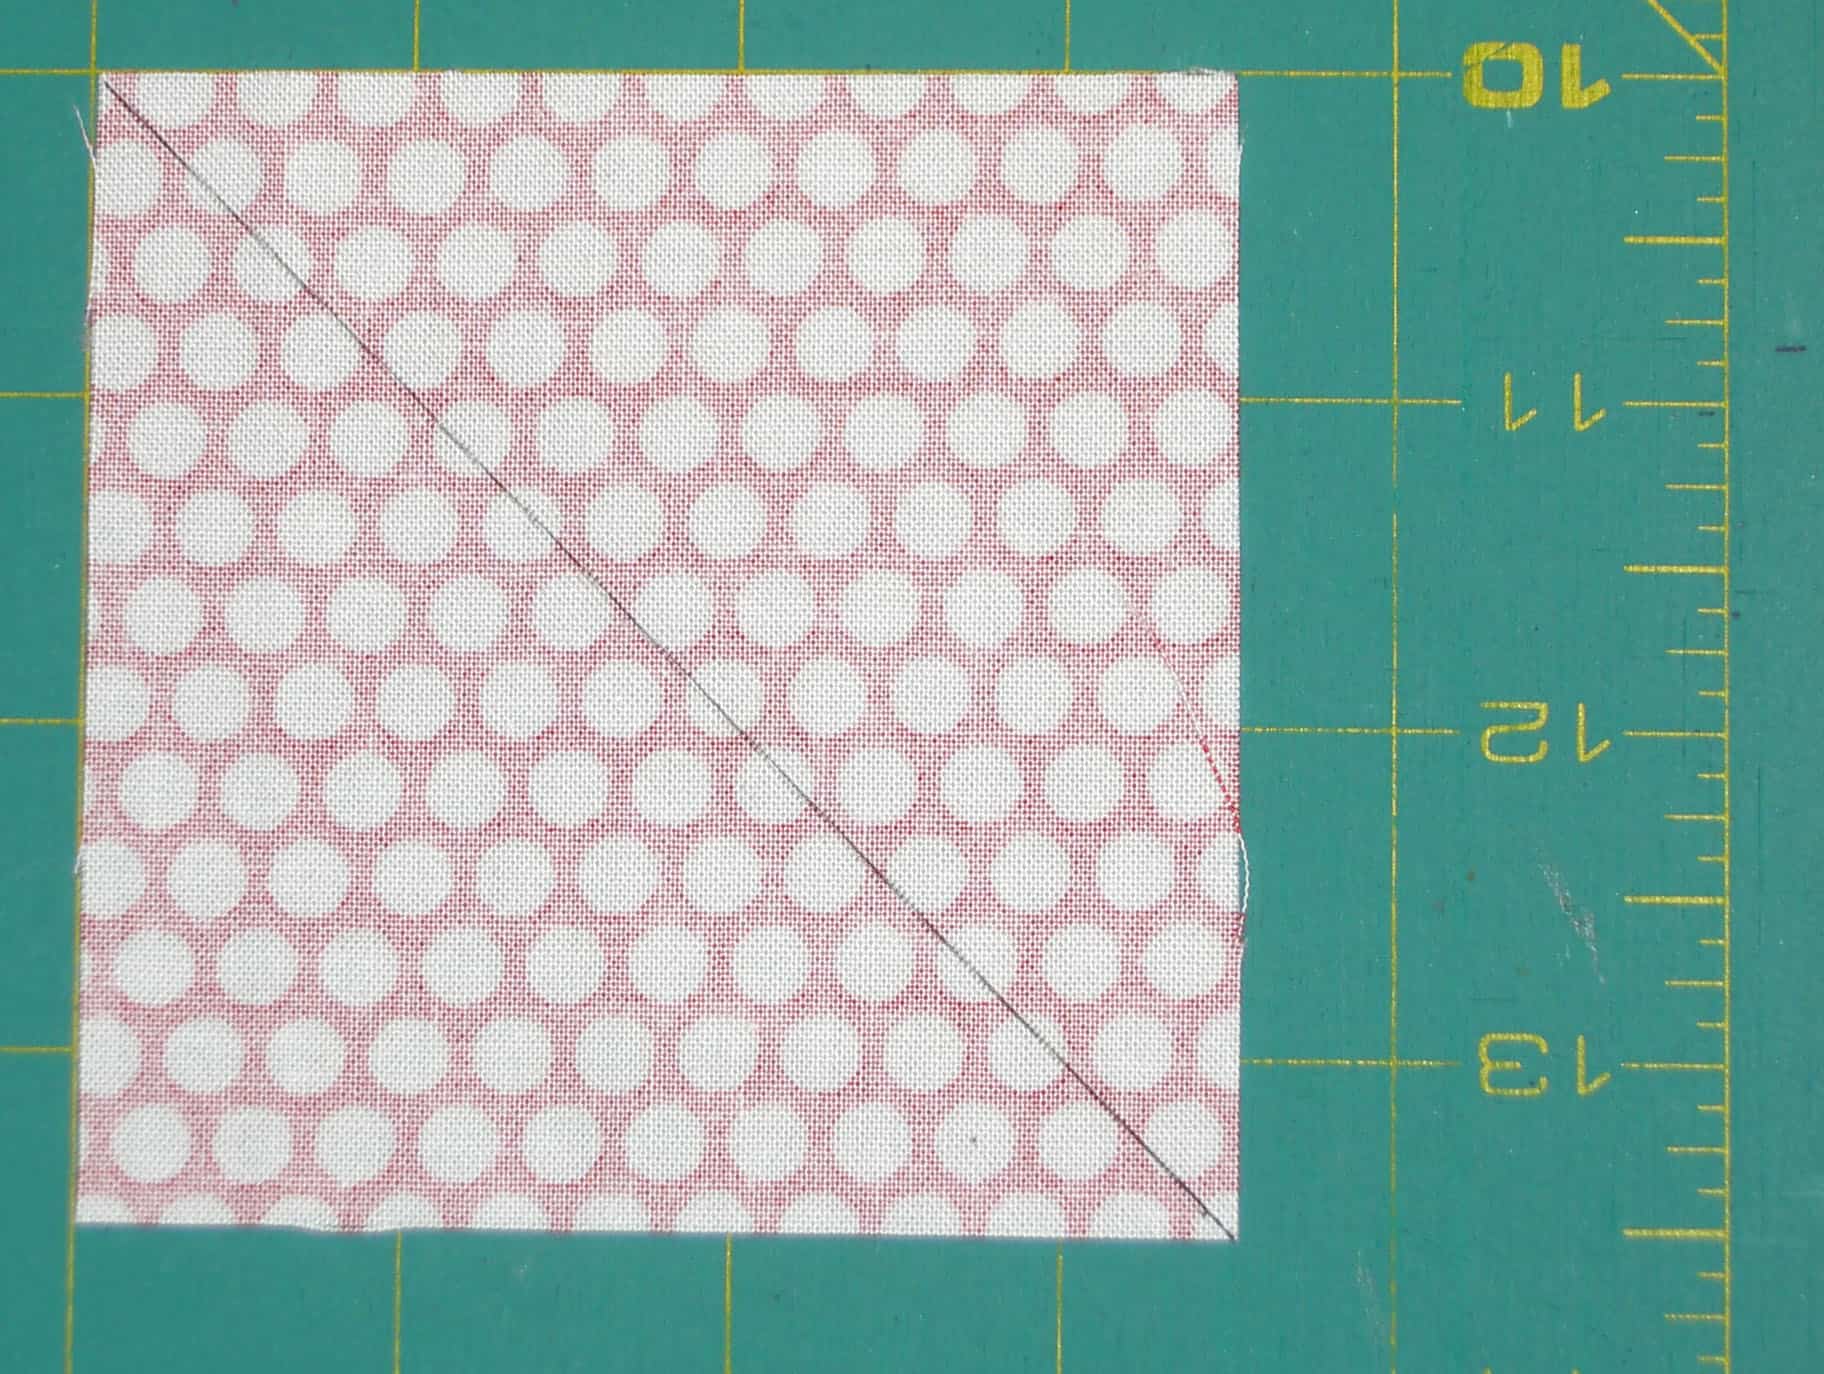
Next, using a ruler and my Sewline pencil, I drew an X, corner to corner, on the lighter square.

Place the 2 squares right sides together and press them.  Pin far away from any of the lines.

Next, sew 1/4″ away from each line. I place the guide of my 1/4″ foot on the pencil line, which ensures my needle is 1/4″ away. Sew on both sides of all of the lines.
Measure 2.5" from the edge
Measure 2.5″ from the edge

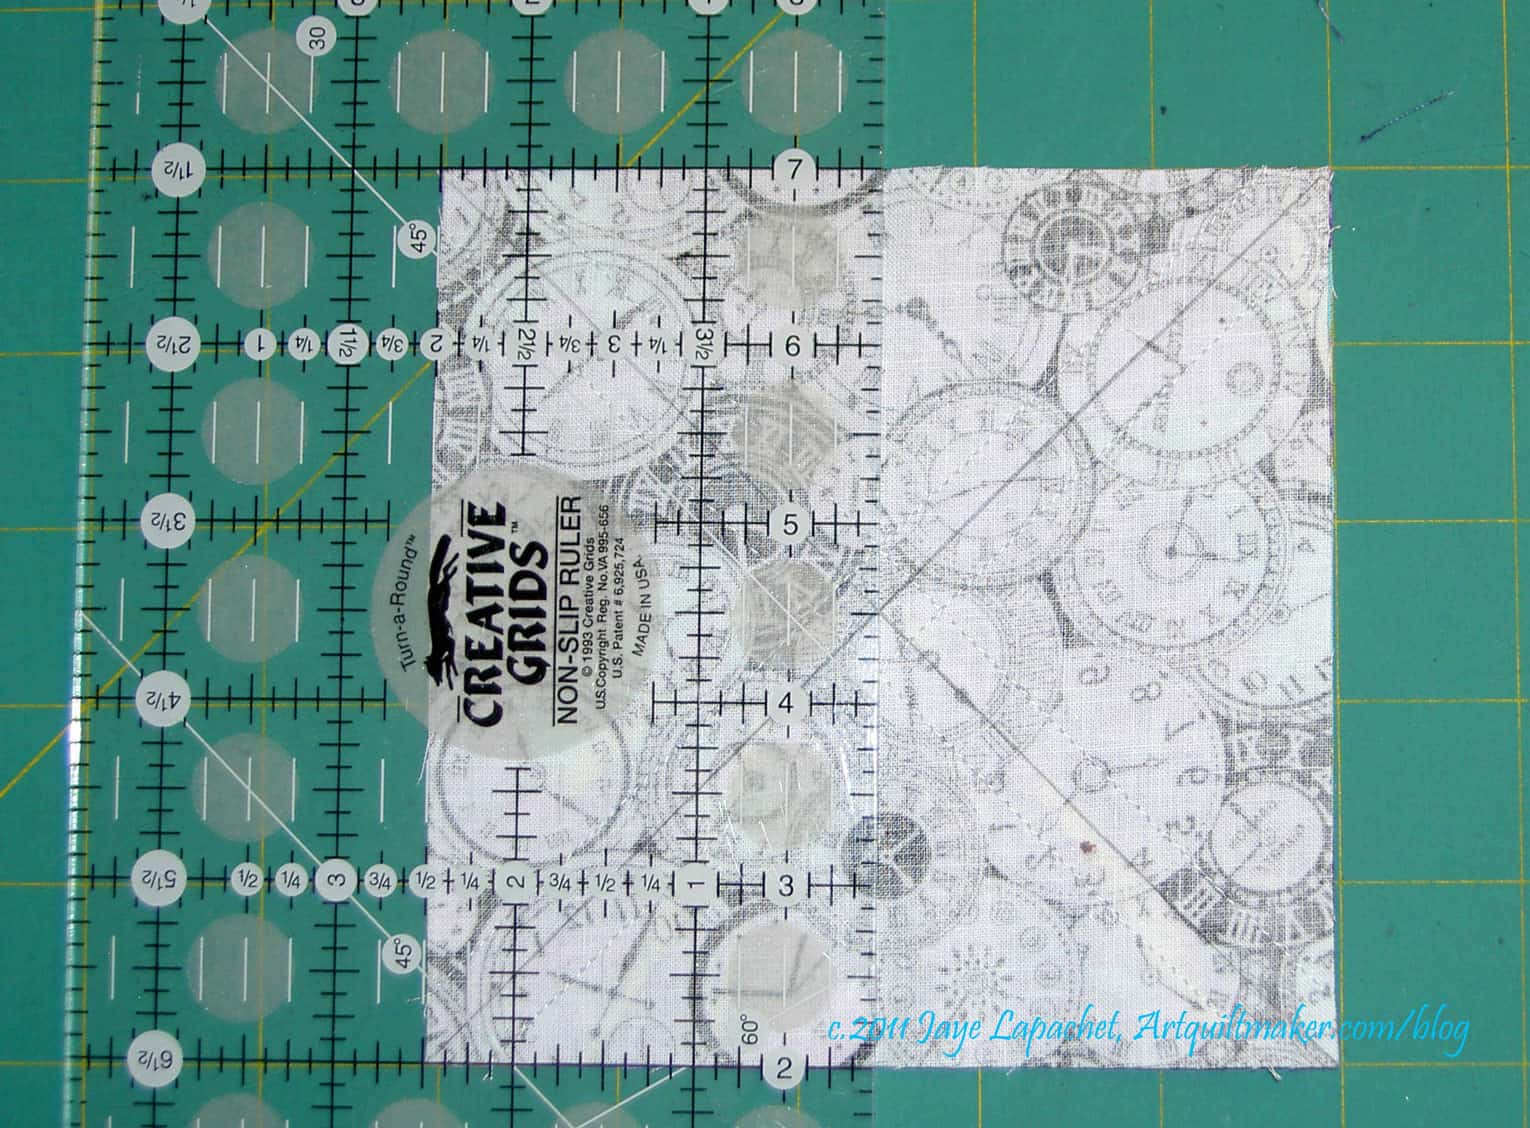
After sewing, I measured 2.5″ from the side of the square and cut. Don’t move the two pieces. Position your ruler 2.5″ from bottom and make another cut.
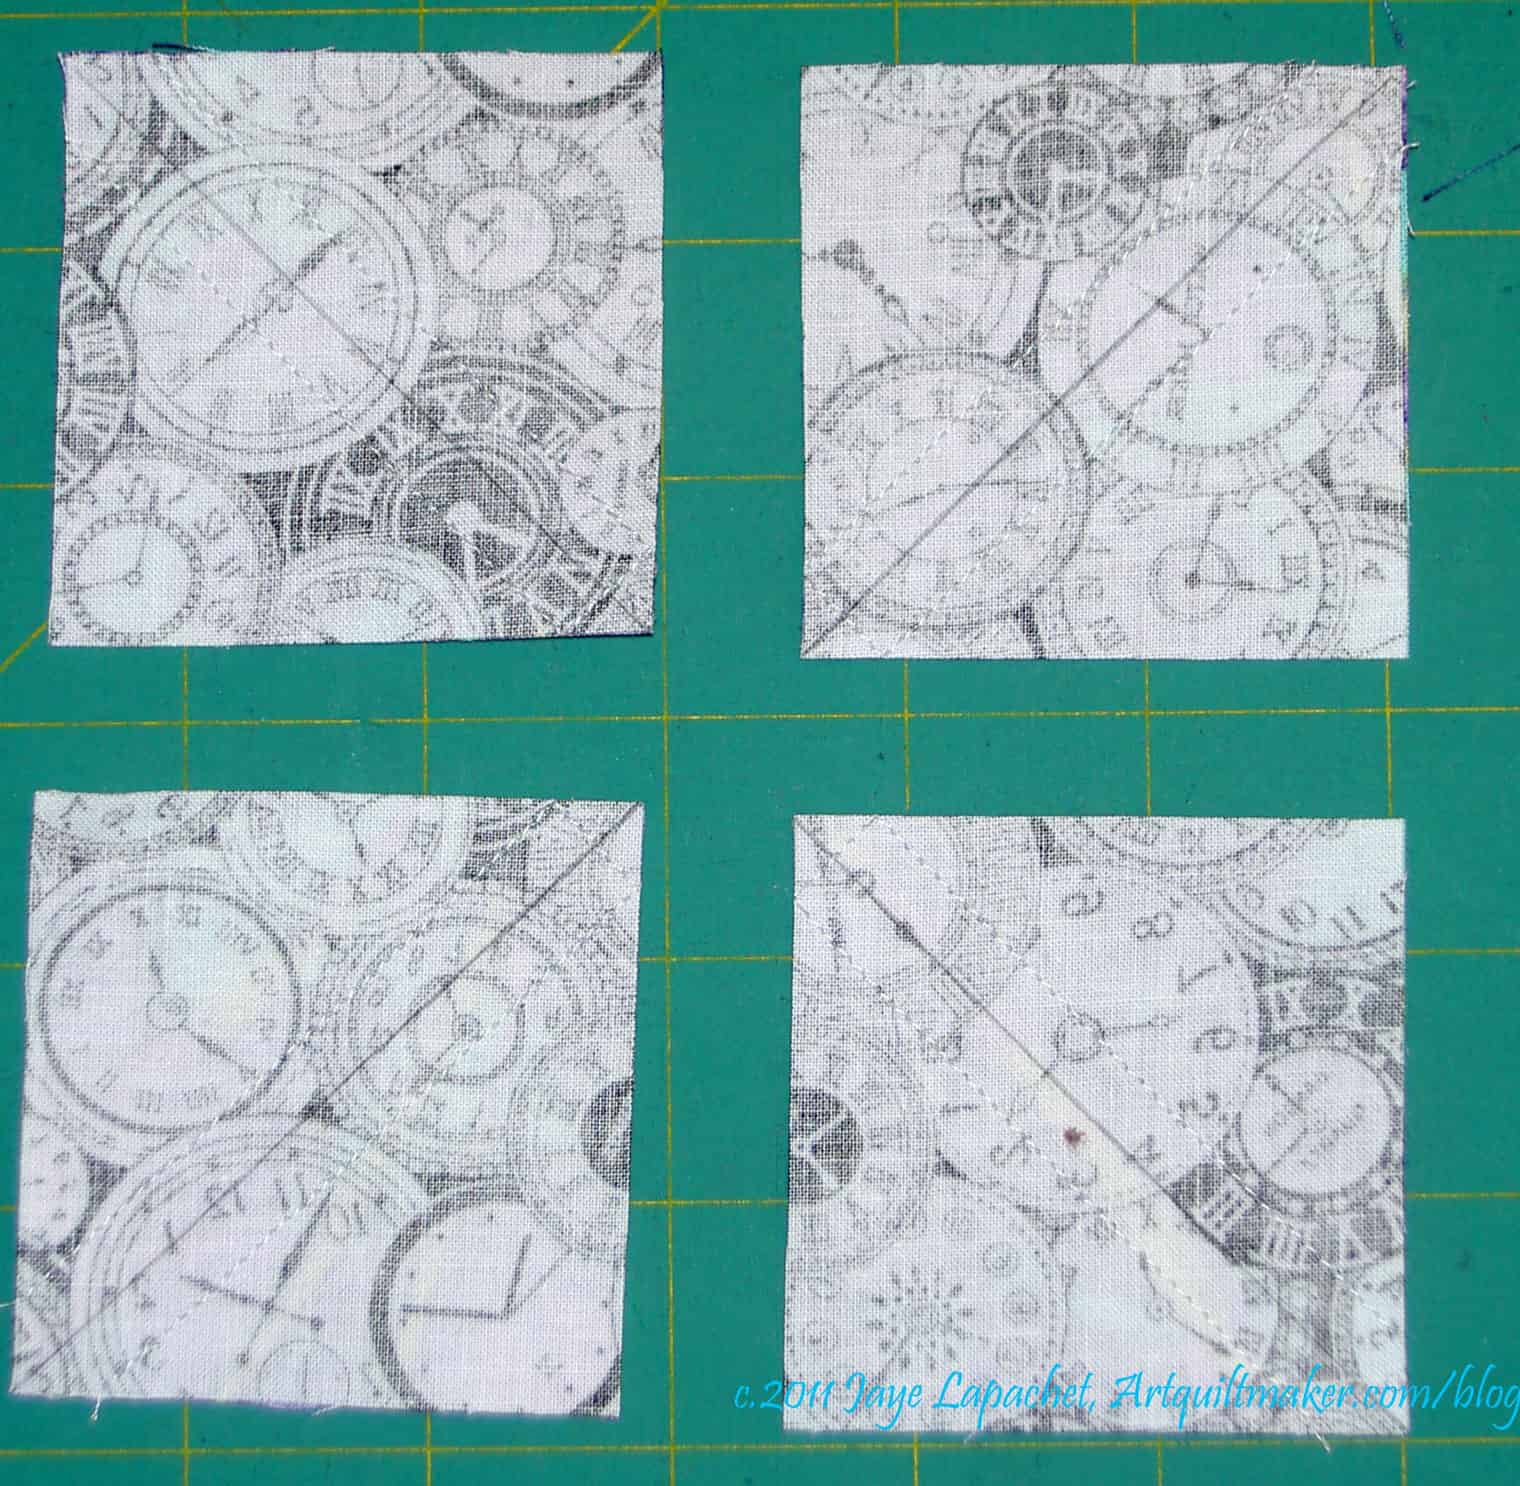
Cut in a PLUS Configuration

Cut the square in a plus configuration 2.5″ – use the middle of the X as a guide. This is called the PLUS cut on the chart. You can draw pencil lines in a plus configuration and cut on those, if you want.
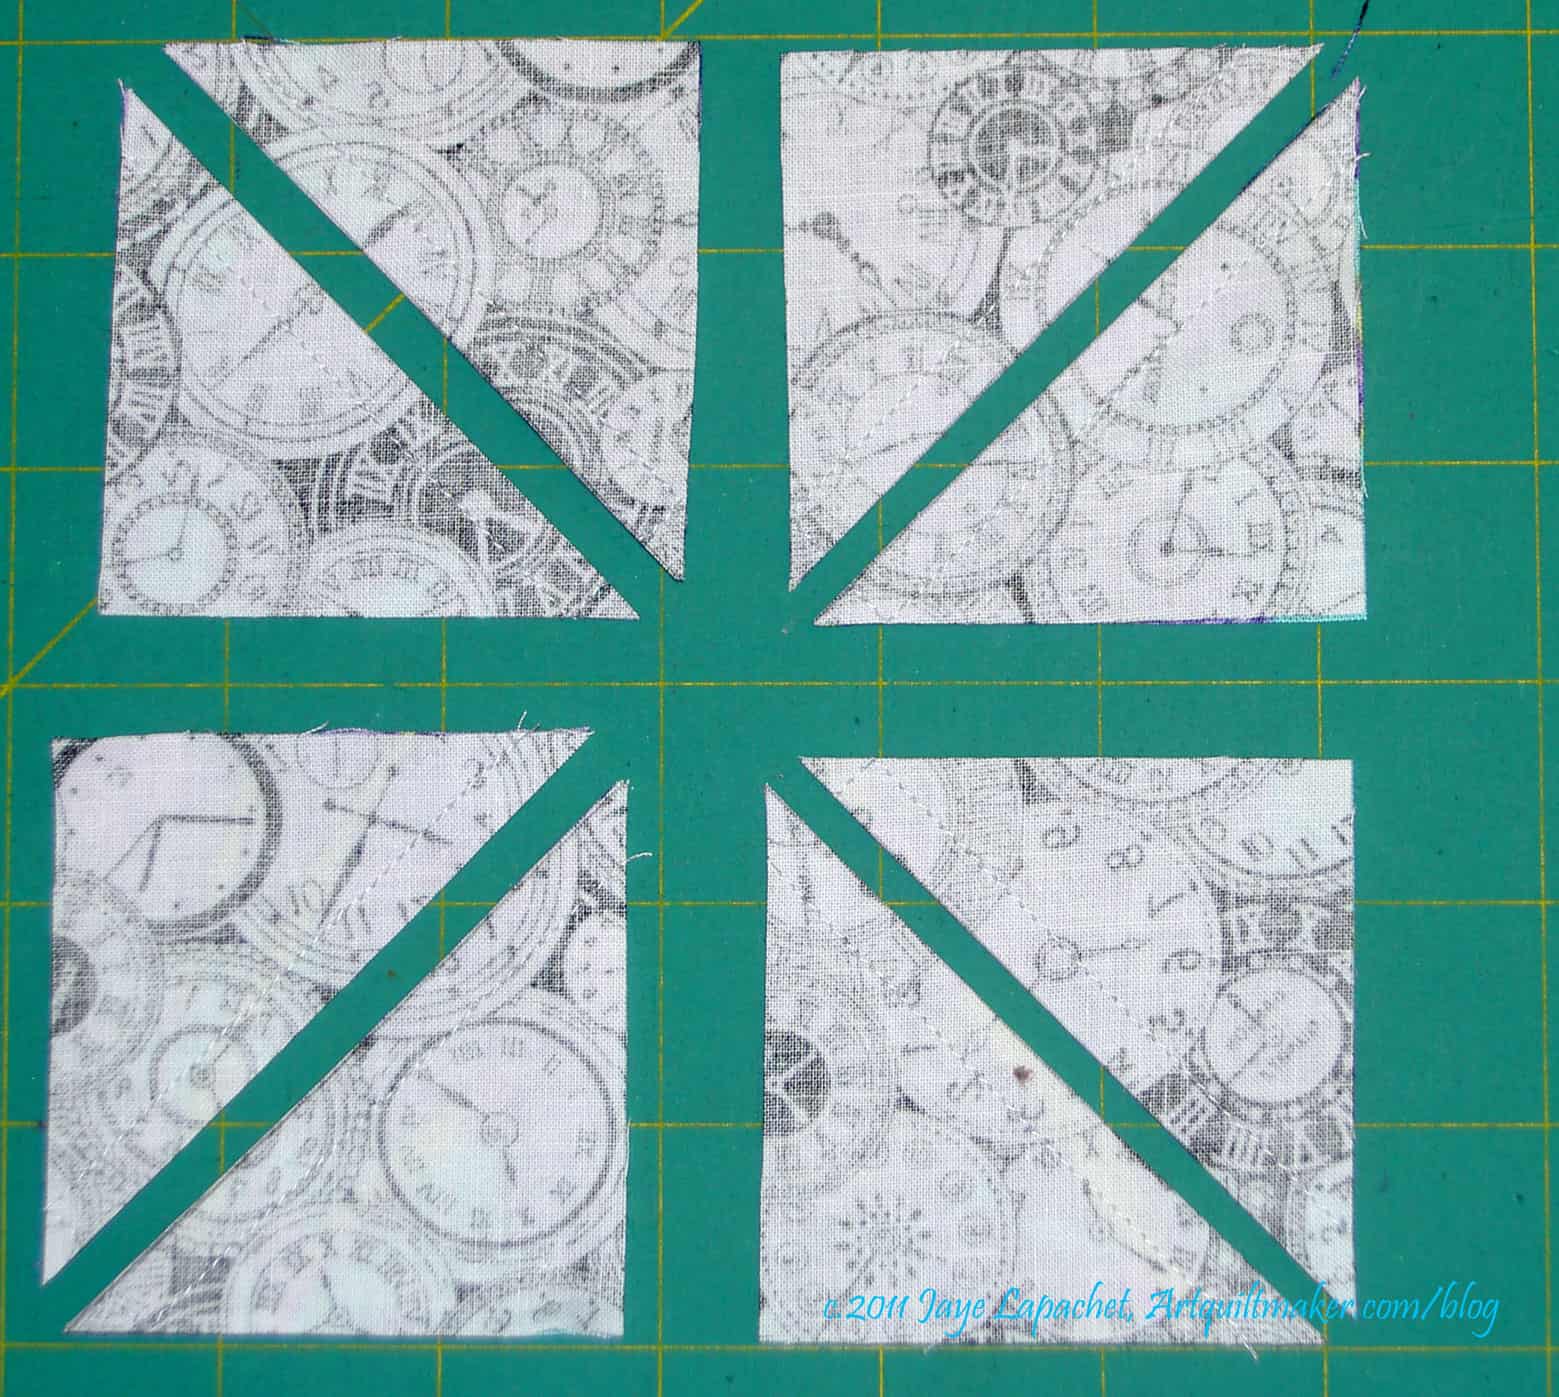
Cut in PLUS, then X
Cut in PLUS, then X

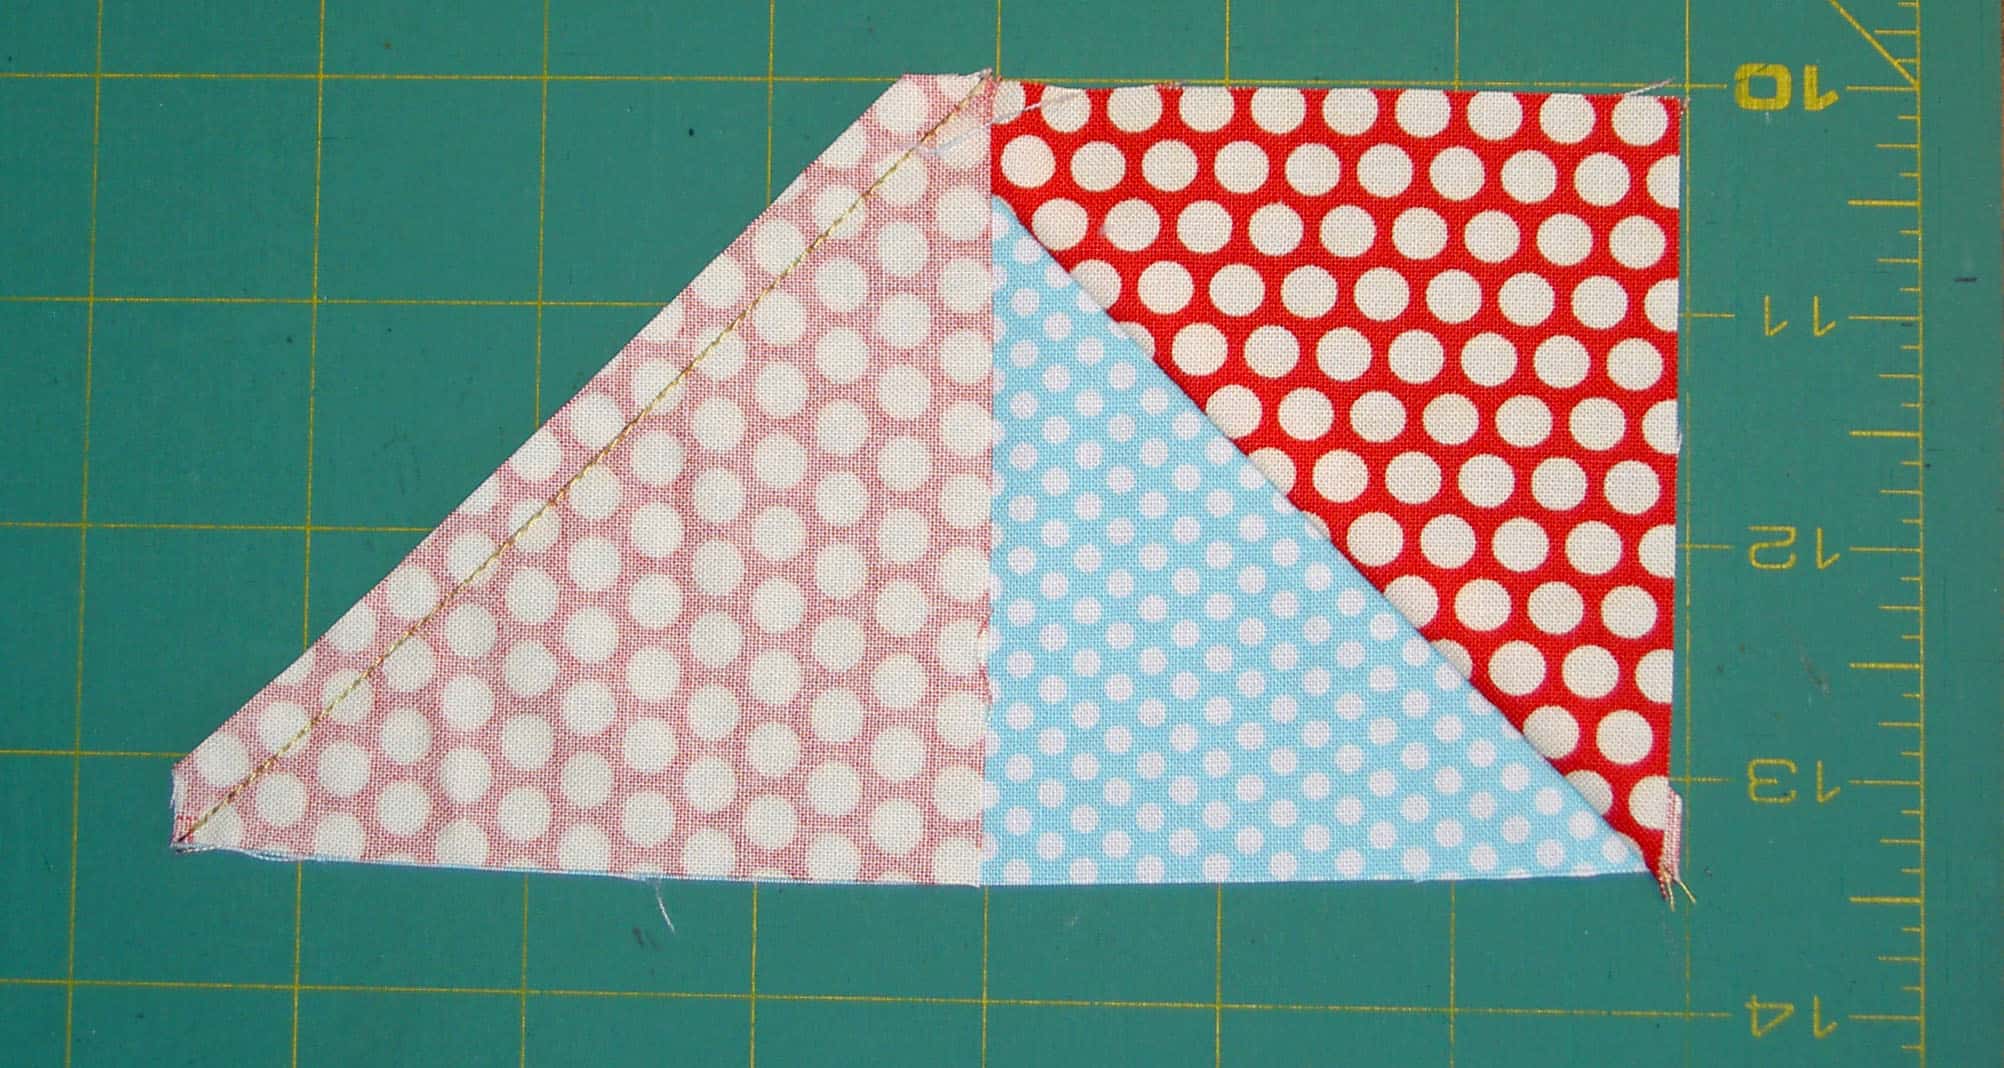
After you cut the PLUS you will have four squares, each with a line drawn diagonally across the middle. Cut the squares in half diagonally on the line. Use the line as a guide. It is more important to line your ruler up corner to corner.

HSTs from 5" squares
HSTs from 5″ squares

The result is 8 2″ half square triangles. The above are actually a thread or two larger than 2″, which leaves the perfect opportunity for trimming to make them an absolutely perfect 2″. If you trim, you get rid of the bunny ears as well.
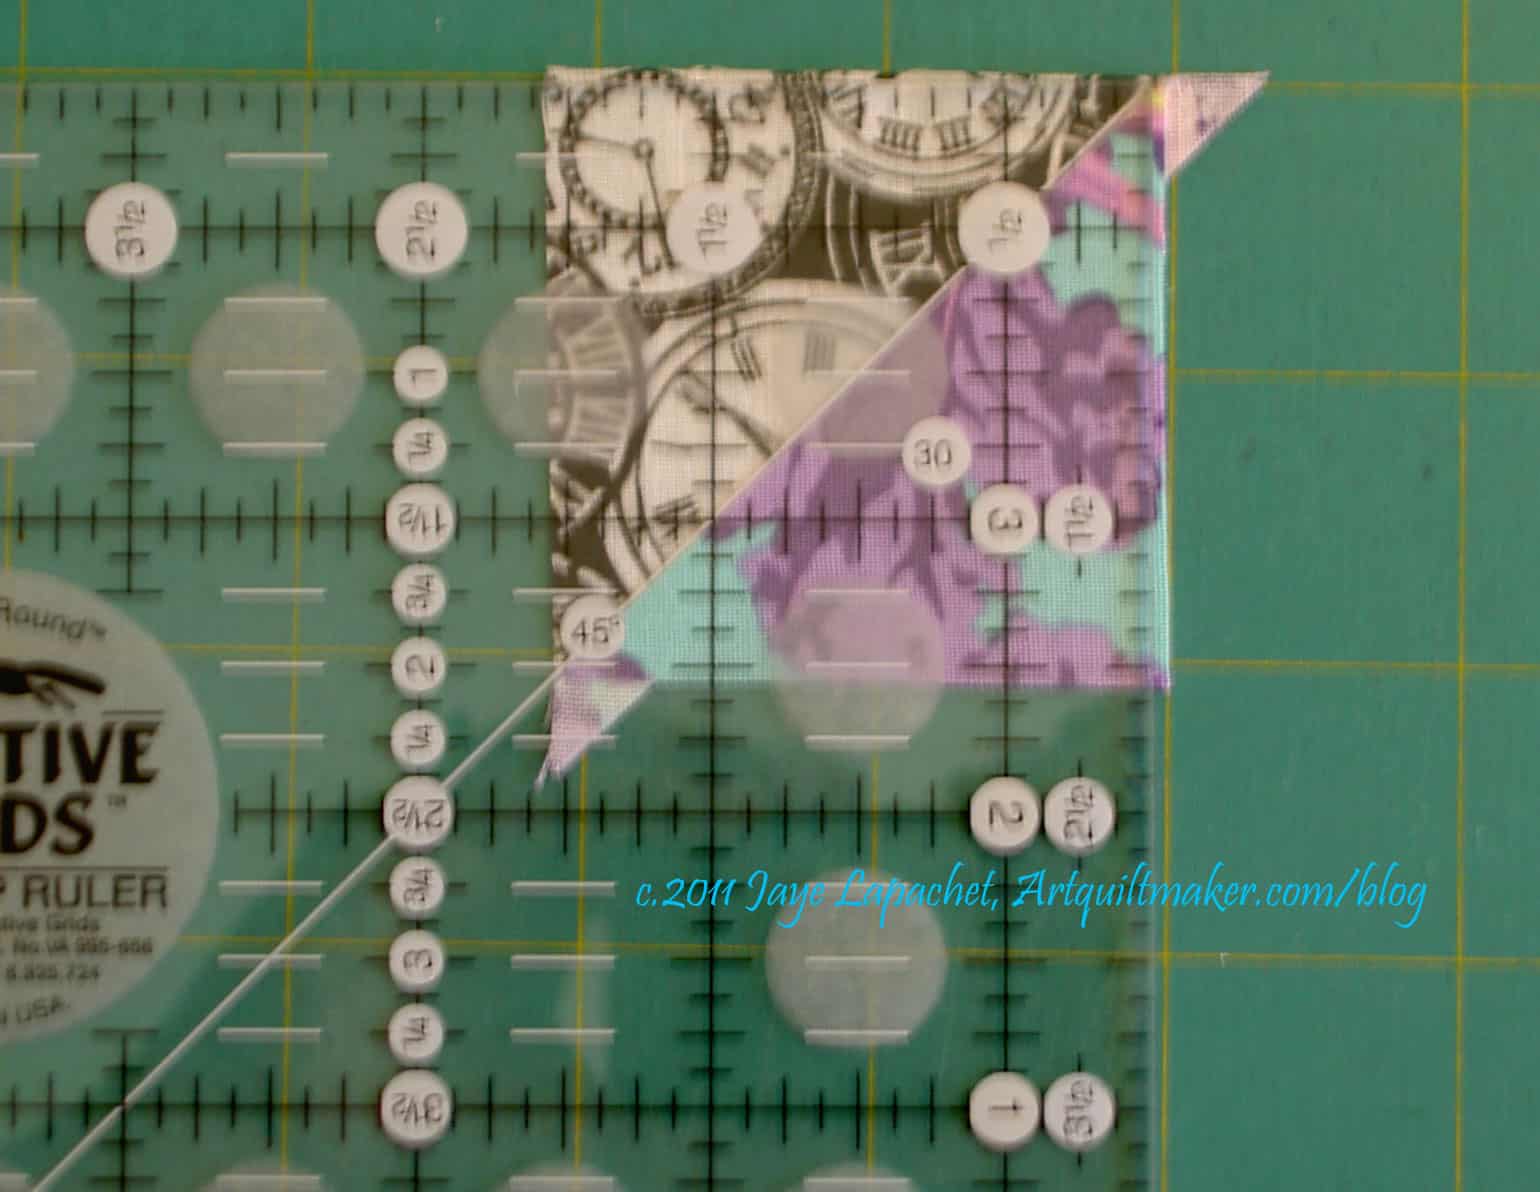
Trim on all four sides

Trim the squares to 2″. Line the 45 degree angle line on your ruler up with the diagonal seam line on your HST and trim on all four sides. Trim on all four sides. Don’t be tempted to trim just on two sides.
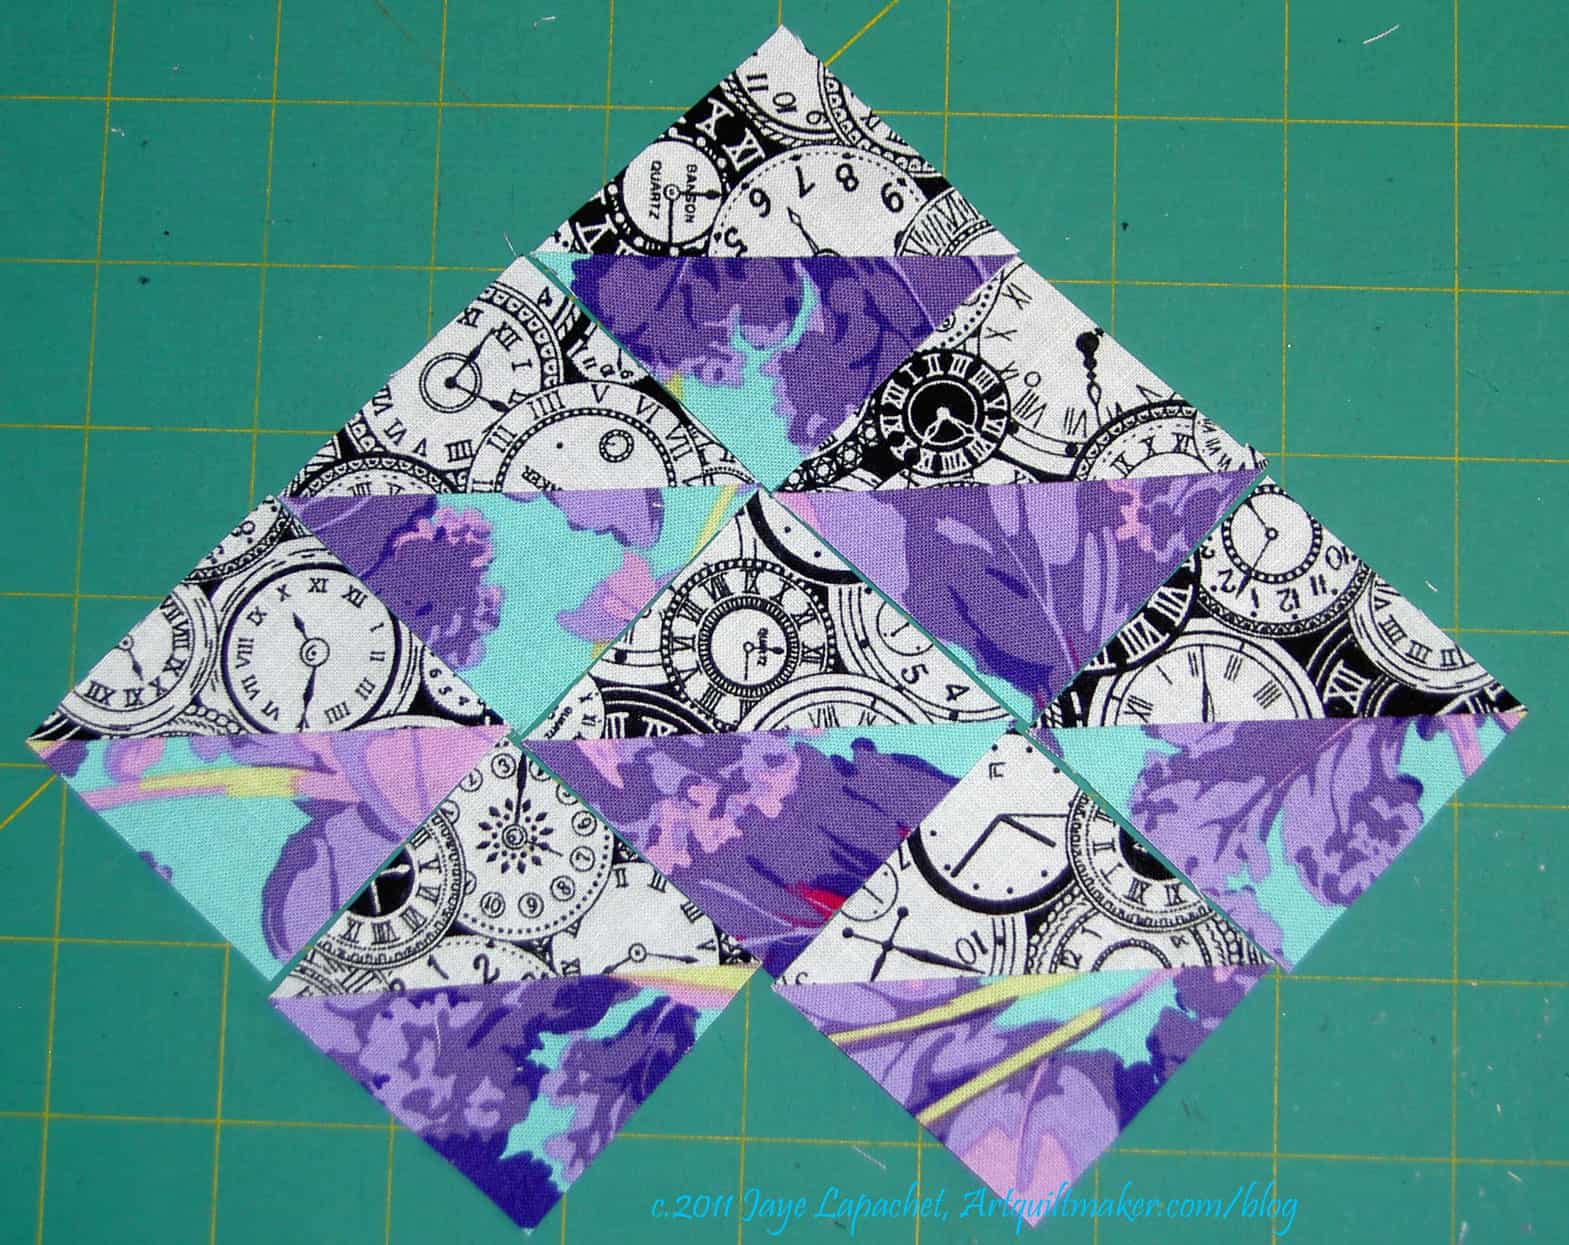
Beautiful HSTs
Beautiful HSTs

Now you have 8 beautiful HSTs. The bias edges shouldn’t be scary for you when you use the regular HST method, but this method makes HSTs much easier. This is a fabulous method when you need to make a lot of HSTs in a short amount of time. It is similar to a tutorial that p.s. i quilt posted, but times 4.

My DH came up with a chart showing the different sizes you can make with this technique. Look at this chart to find the correct size for your project.

AQ HST Size Chart

Links:

  1. Jo Morton website
  2. Jo Morton blog
  3. Jo Morton on Andover
  4. Wet Canvas tutorial
  5. Carole’s Quilting Adventures tutorial
  6. B’s Modern Quilting Fish Tutorial
  7. p.s. i quilt HST tutorial


**I use affiliate links and may be paid for your purchase of an item when you click on an item link in my post. There is no additional cost to you for clicking or purchasing items I recommend. I appreciate your clicks and purchases as it helps support this blog.
Quilt Class: Flying Geese

Quilt Class: Sawtooth Star

Today we will be making the Sawtooth Star block. You will use your newly formed bias skills as well as cutting. You will also learn to make Flying Geese.

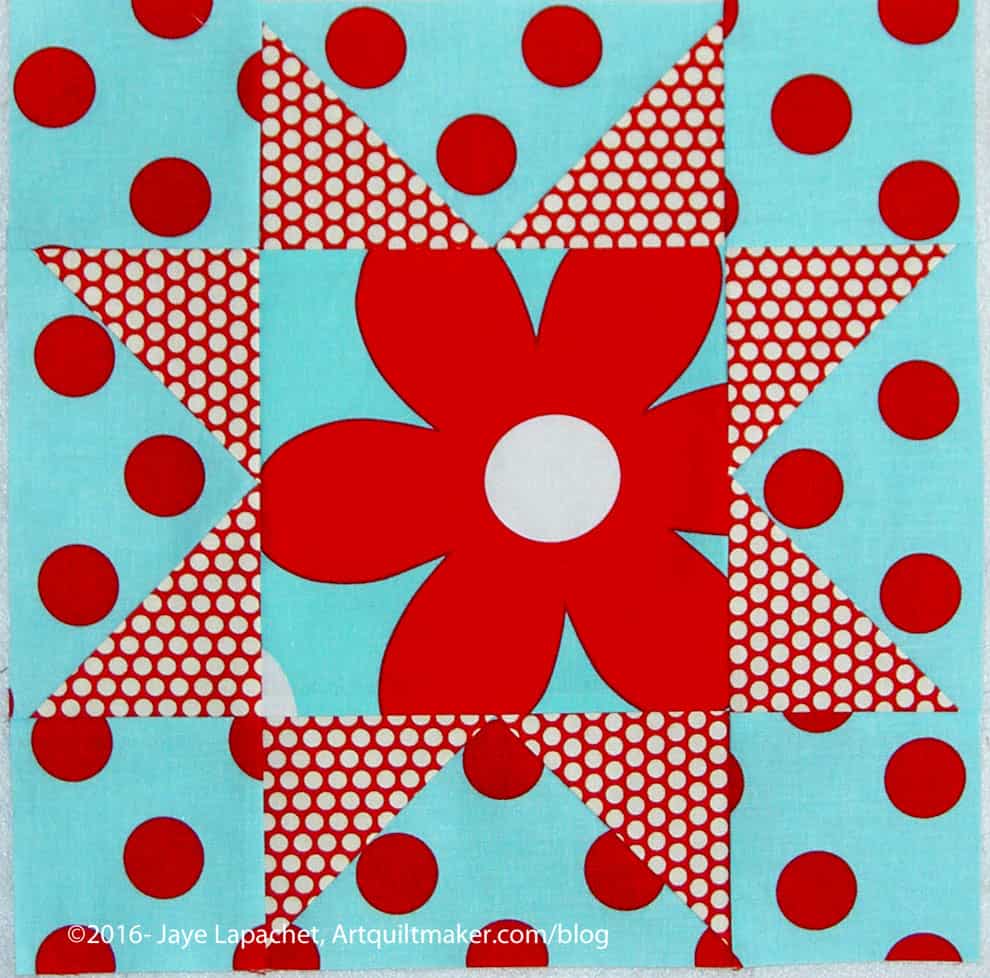
I love this block. I could make tons of them and never get bored. Like the Nine Patch, there are a lot of variations of this block to keep it interesting. I made about 1,000 of them for the Star Sampler quilt. Yes, I got tired of making them, but the end result is spectacular and I would make that quilt again.

In the large size (12 inches or larger), it is good to use large prints, like I did, especially with the center. Alternatively, make one of the variations (see Star Sampler for examples of the variations) with more pieces. For now, if you have large prints, use those for this block.

Flying Geese are a unit comprised of two different kinds of triangles. One of them is the same and the other is different from the triangles we used yesterday. The Flying Geese are also used as a component in many types of blocks as well as as a design component by themselves and in borders.

This is a thinking girl’s tutorial to making flying geese. Knowing how to make Flying Geese allows you to make, not only, Sawtooth Star blocks, but also Dutchman’s Puzzle blocks, borders and many other other parts needed for your quilts.

We will be learning the very basic way to make Flying Geese – no special rulers or tricks. There are many other ways to make flying geese and I use a specialty ruler now that I know the basic method. I’ll see about a tutorial using specialty rulers another time.

Supply list:

  • Cutting instructions for Sawtooth Star
  • fabric
  • rotary cutter
  • rotary cutting ruler large enough to cut 4.5″ squares
  • rotary cutting mat
  • fabric (2-3 different)
  • Optional: Mary Ellen’s Best Press (or similar)
  • pins
  • sharp trimmers or scissors
  • thread for piecing
  • sewing machine
  • Iron
  • ironing surface
  • Sewline pencil or mechanical pencil

First print the cutting instructions (pattern) for the Sawtooth Star block.

Cut your pieces according to the instructions.

Cut 2 Squares for each Flying Geese Element

The above is the fabric I will use for the ‘wings’.

Draw diagonal line from corner to corner

Turn the squares wrong side up and draw a diagonal line from corner to corner. You will need to do this on all of the squares for your Flying Geese.

Cut background
Cut background

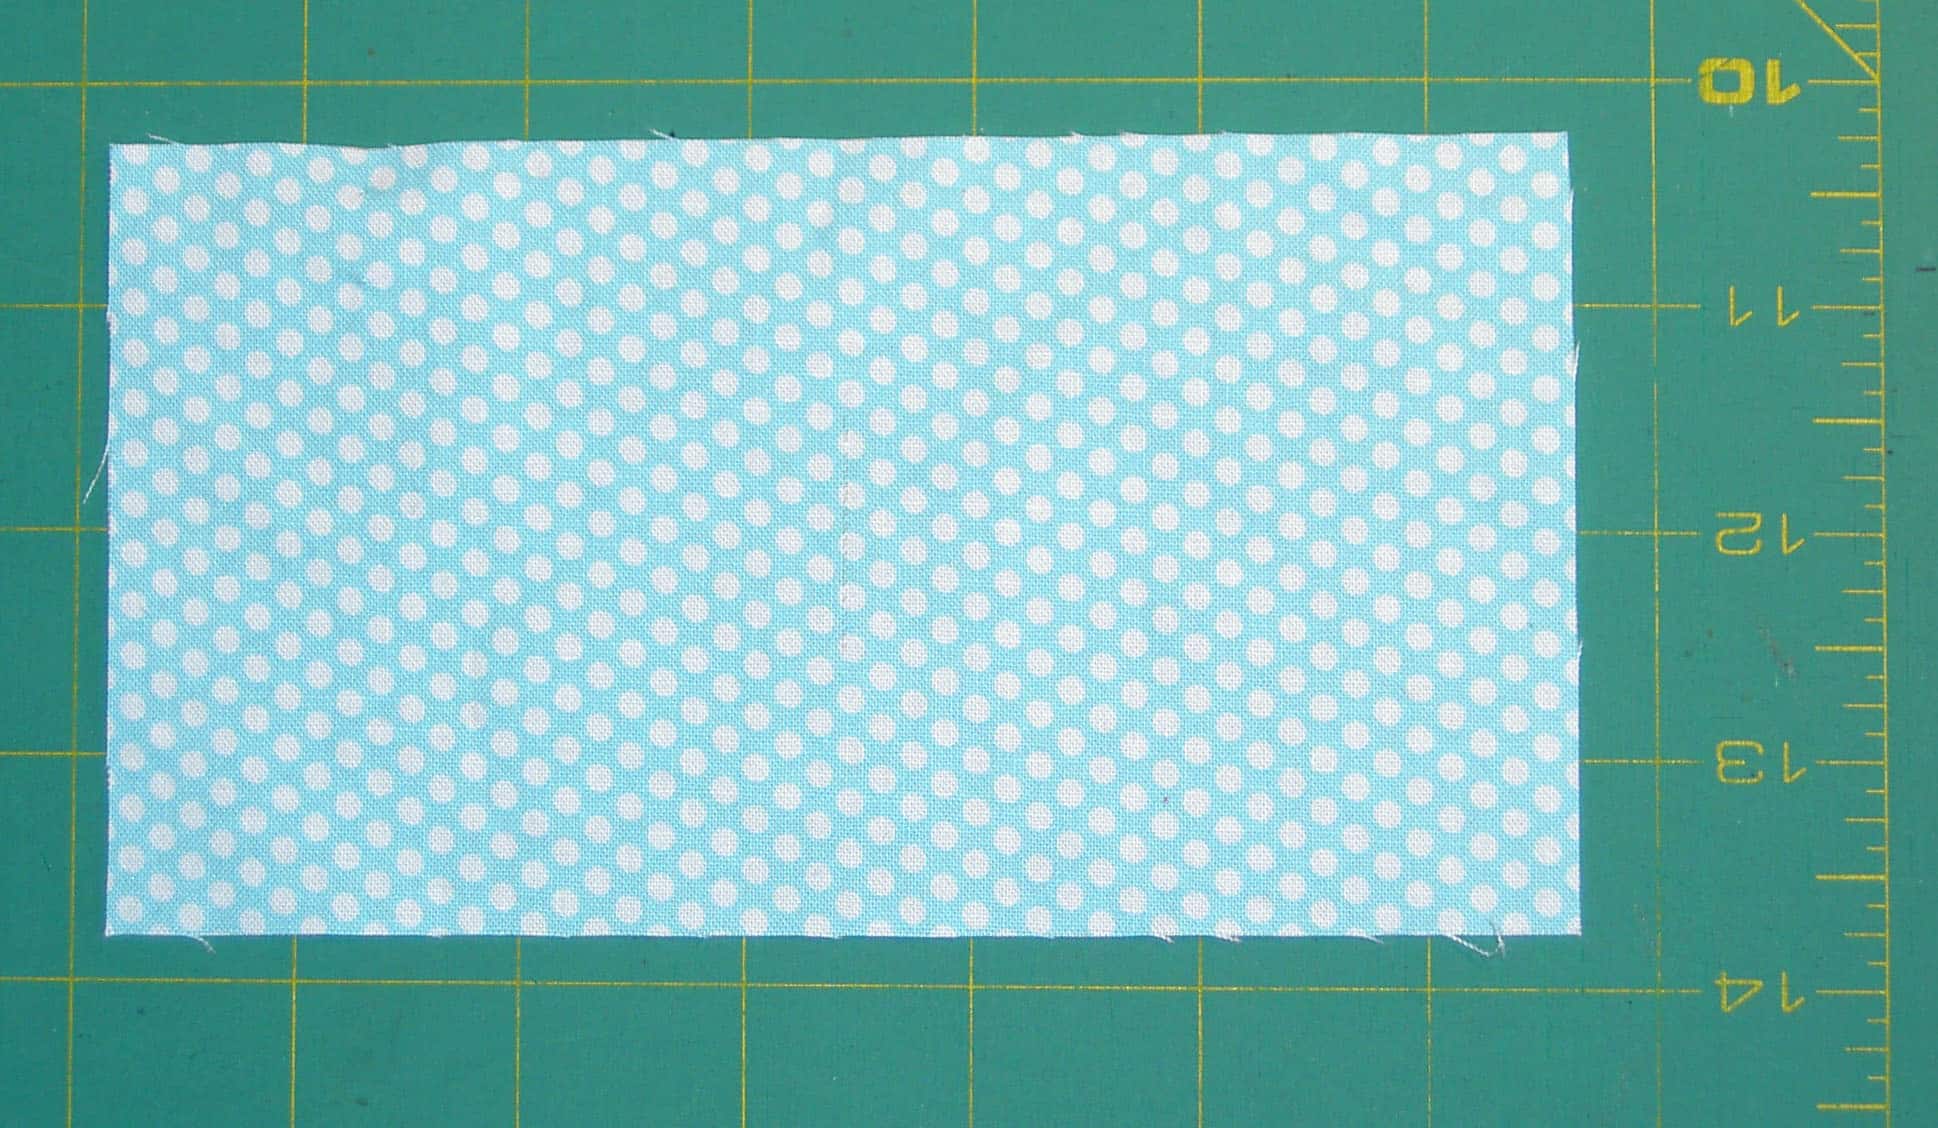
Cut the goose, fabric. Nota bene: above is a different fabric than I used in the final block. In the finished block I used an aqua with red dots.

Lay wing 1 on goose
Lay wing 1 on goose

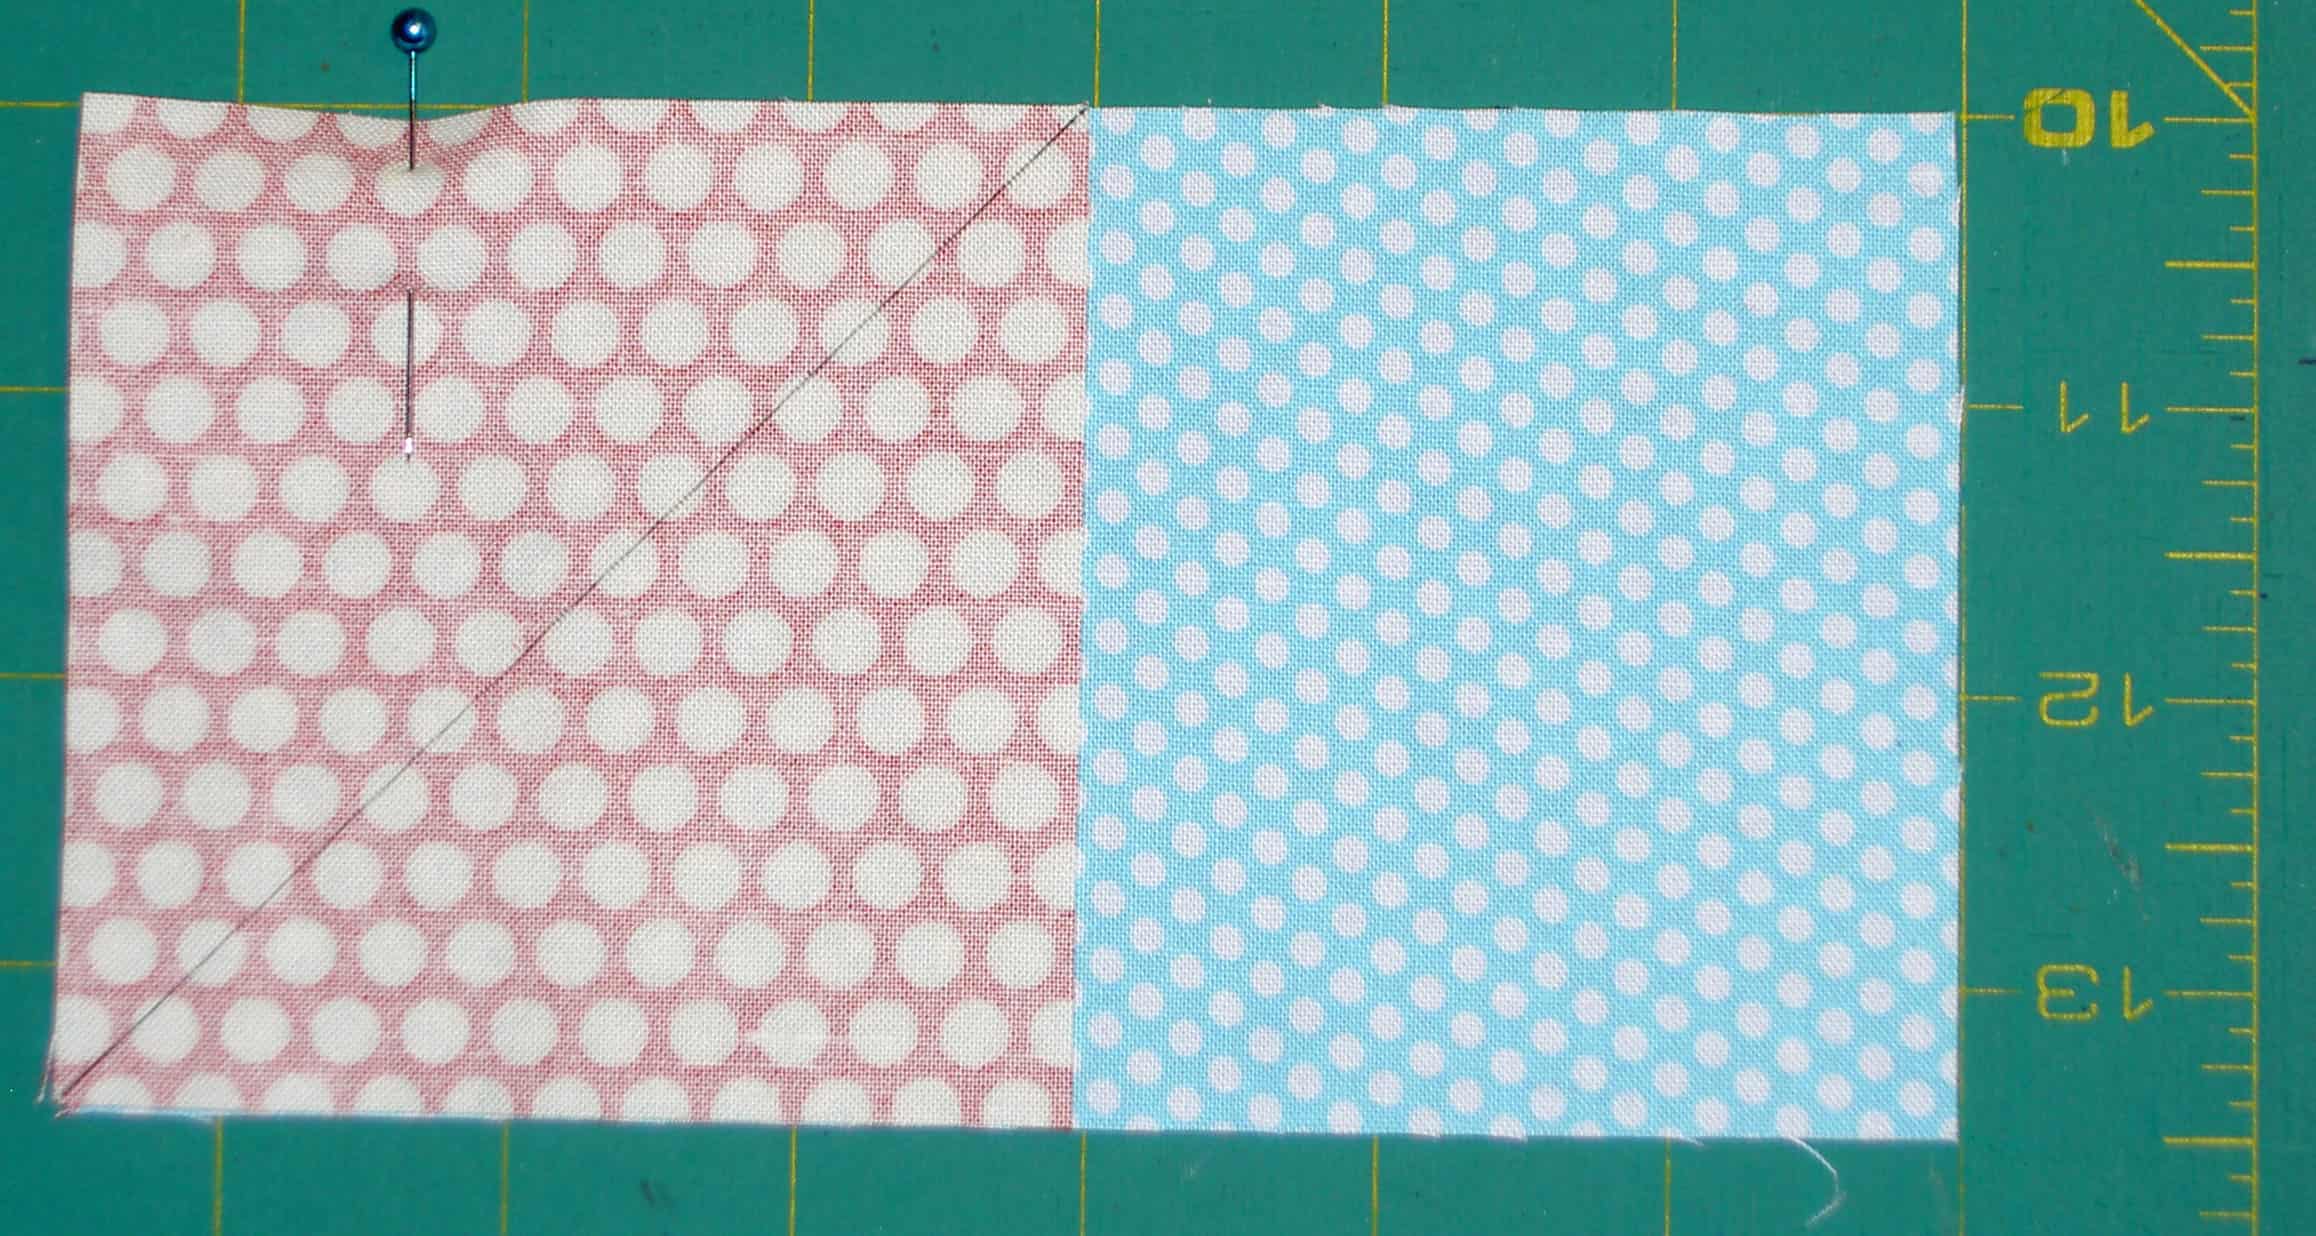
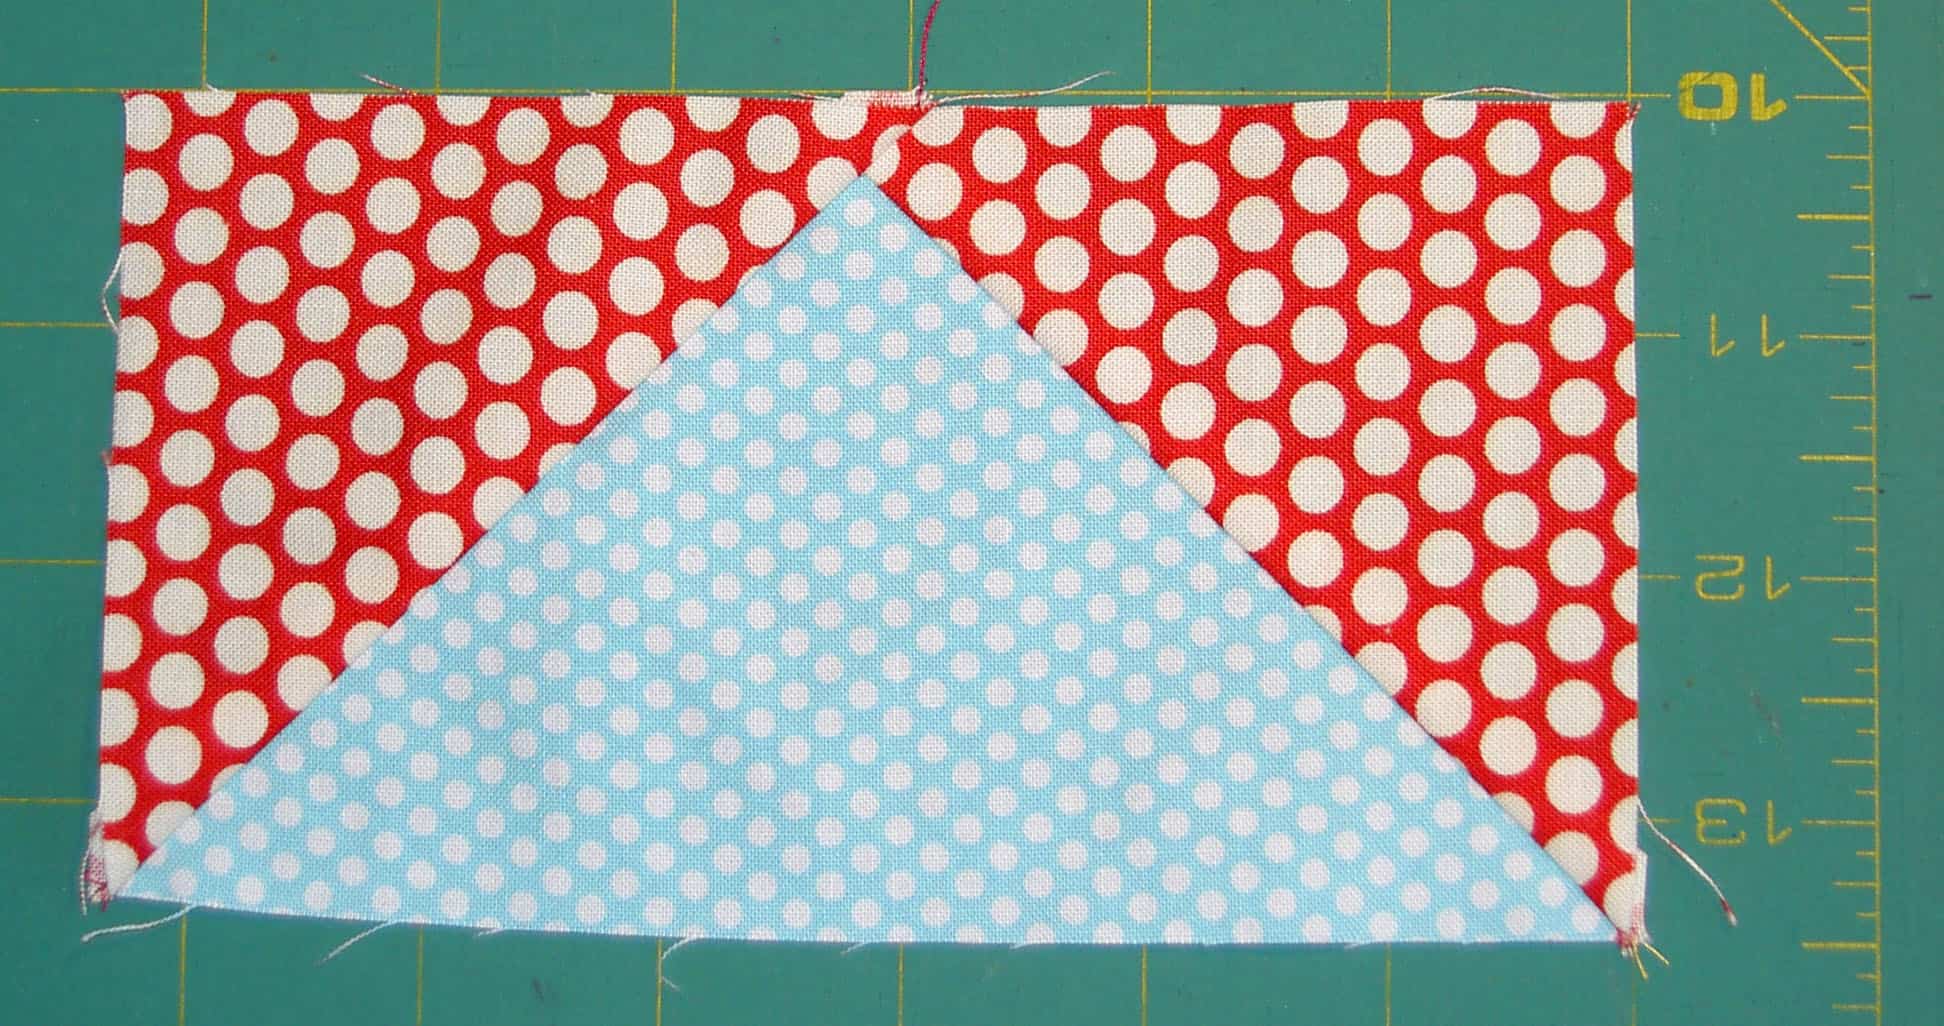
Lay first square that will be a wing on the goose (blue) fabric. The diagonal line should be pointing to the center of the blue piece.

Pin the square to the larger patch. Make sure the pin is out of the way. You will be sewing on that drawn line, so you will need to pin far enough away so the pin doesn’t interfere with the operation of the machine.

Sew along line
Sew along line

Sew along line and trim threads. I use a foot that has an arrow on it. I can line that arrow up with the drawn line and sew away.

Trim
Trim

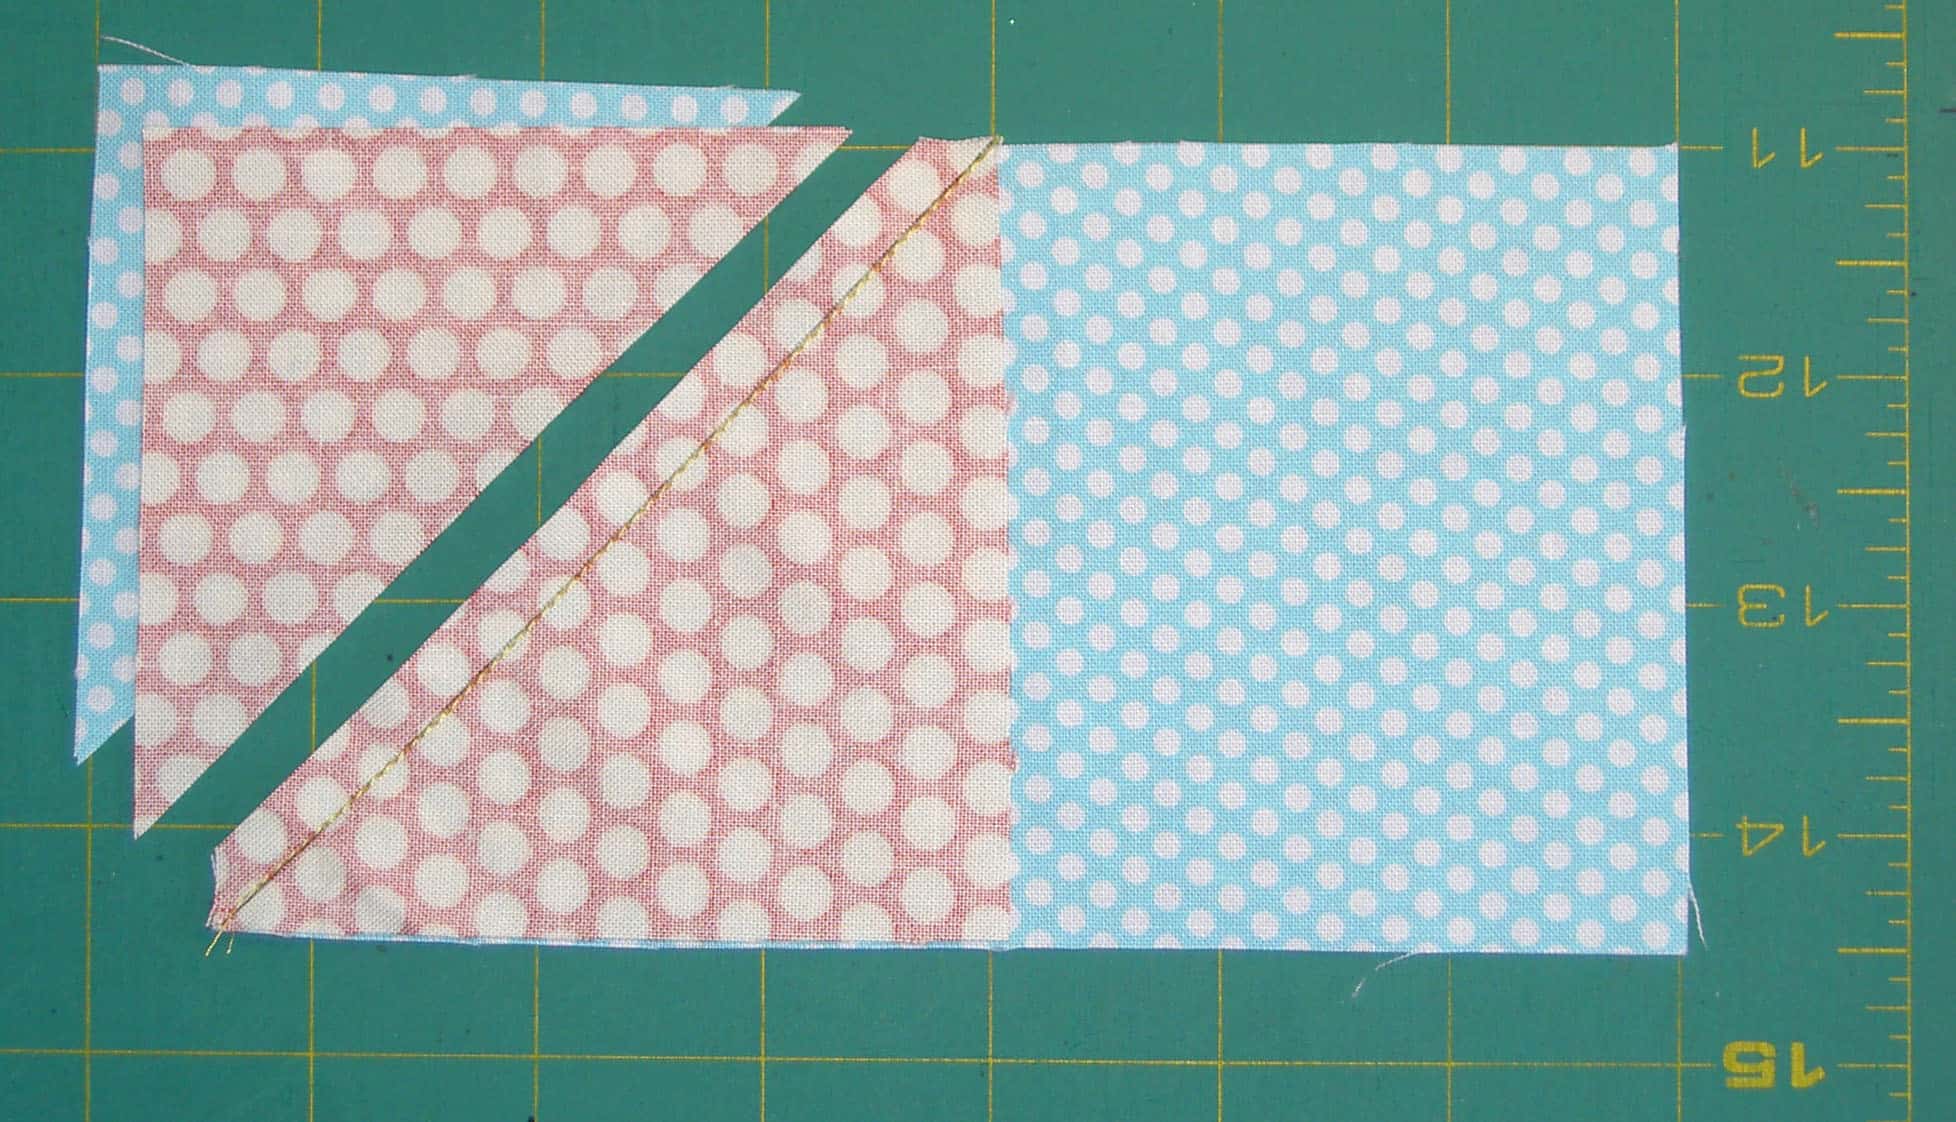
Trim 1/4″ away from the sewn line as shown above. You will cut through the wing and the goose.

Press the wing so the front of the wing fabric is showing. You must press the wing into its final position before you sew the other background on to your block.

Lay 2d square on goose.

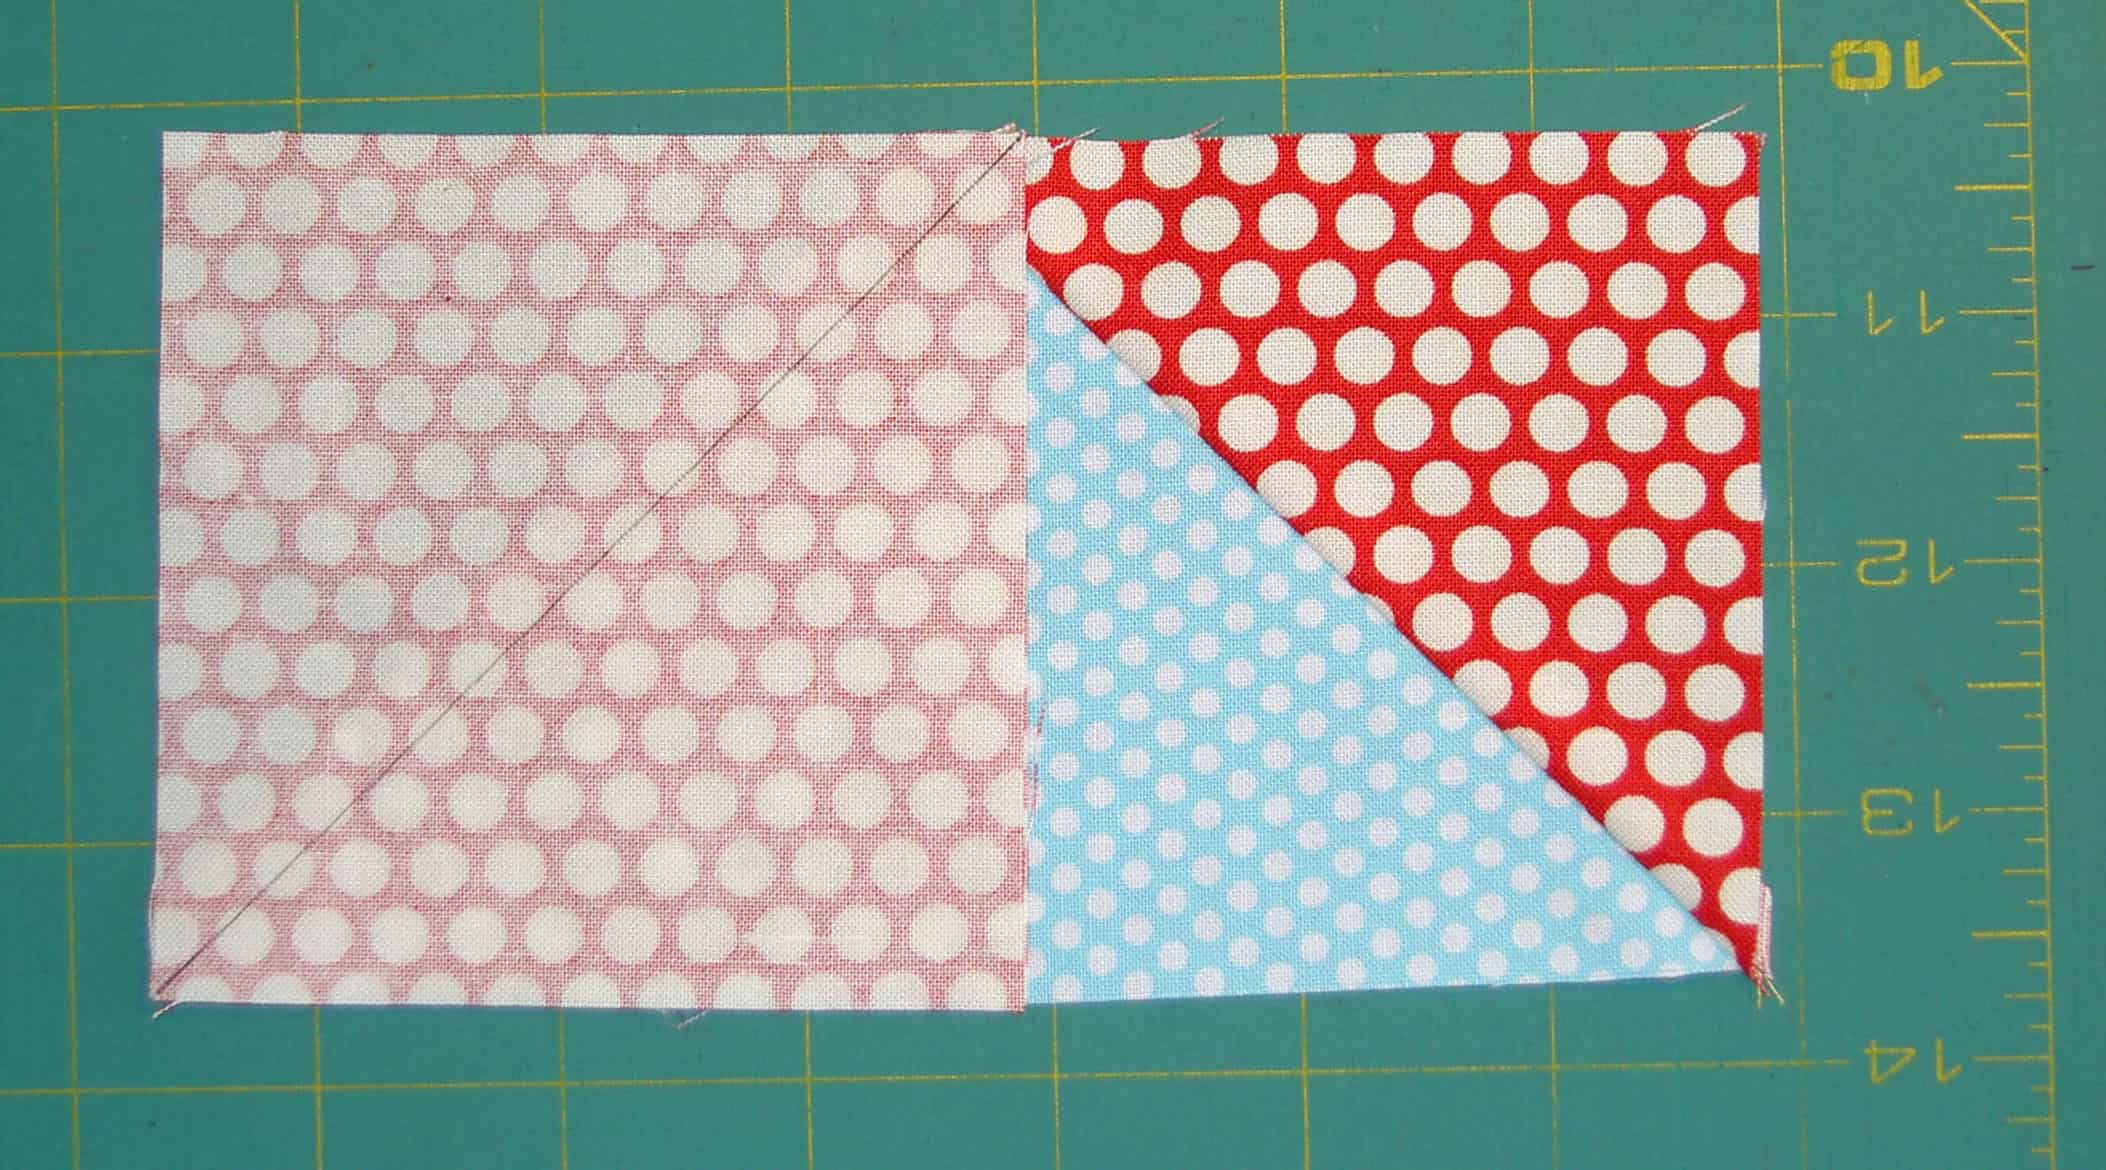
Place the second wing on the other side of the background fabric. Again, the diagonal line will be pointed towards the center of the larger patch.

Trim 2d sewn wing
Trim 2d sewn wing
Sew and trim second wing

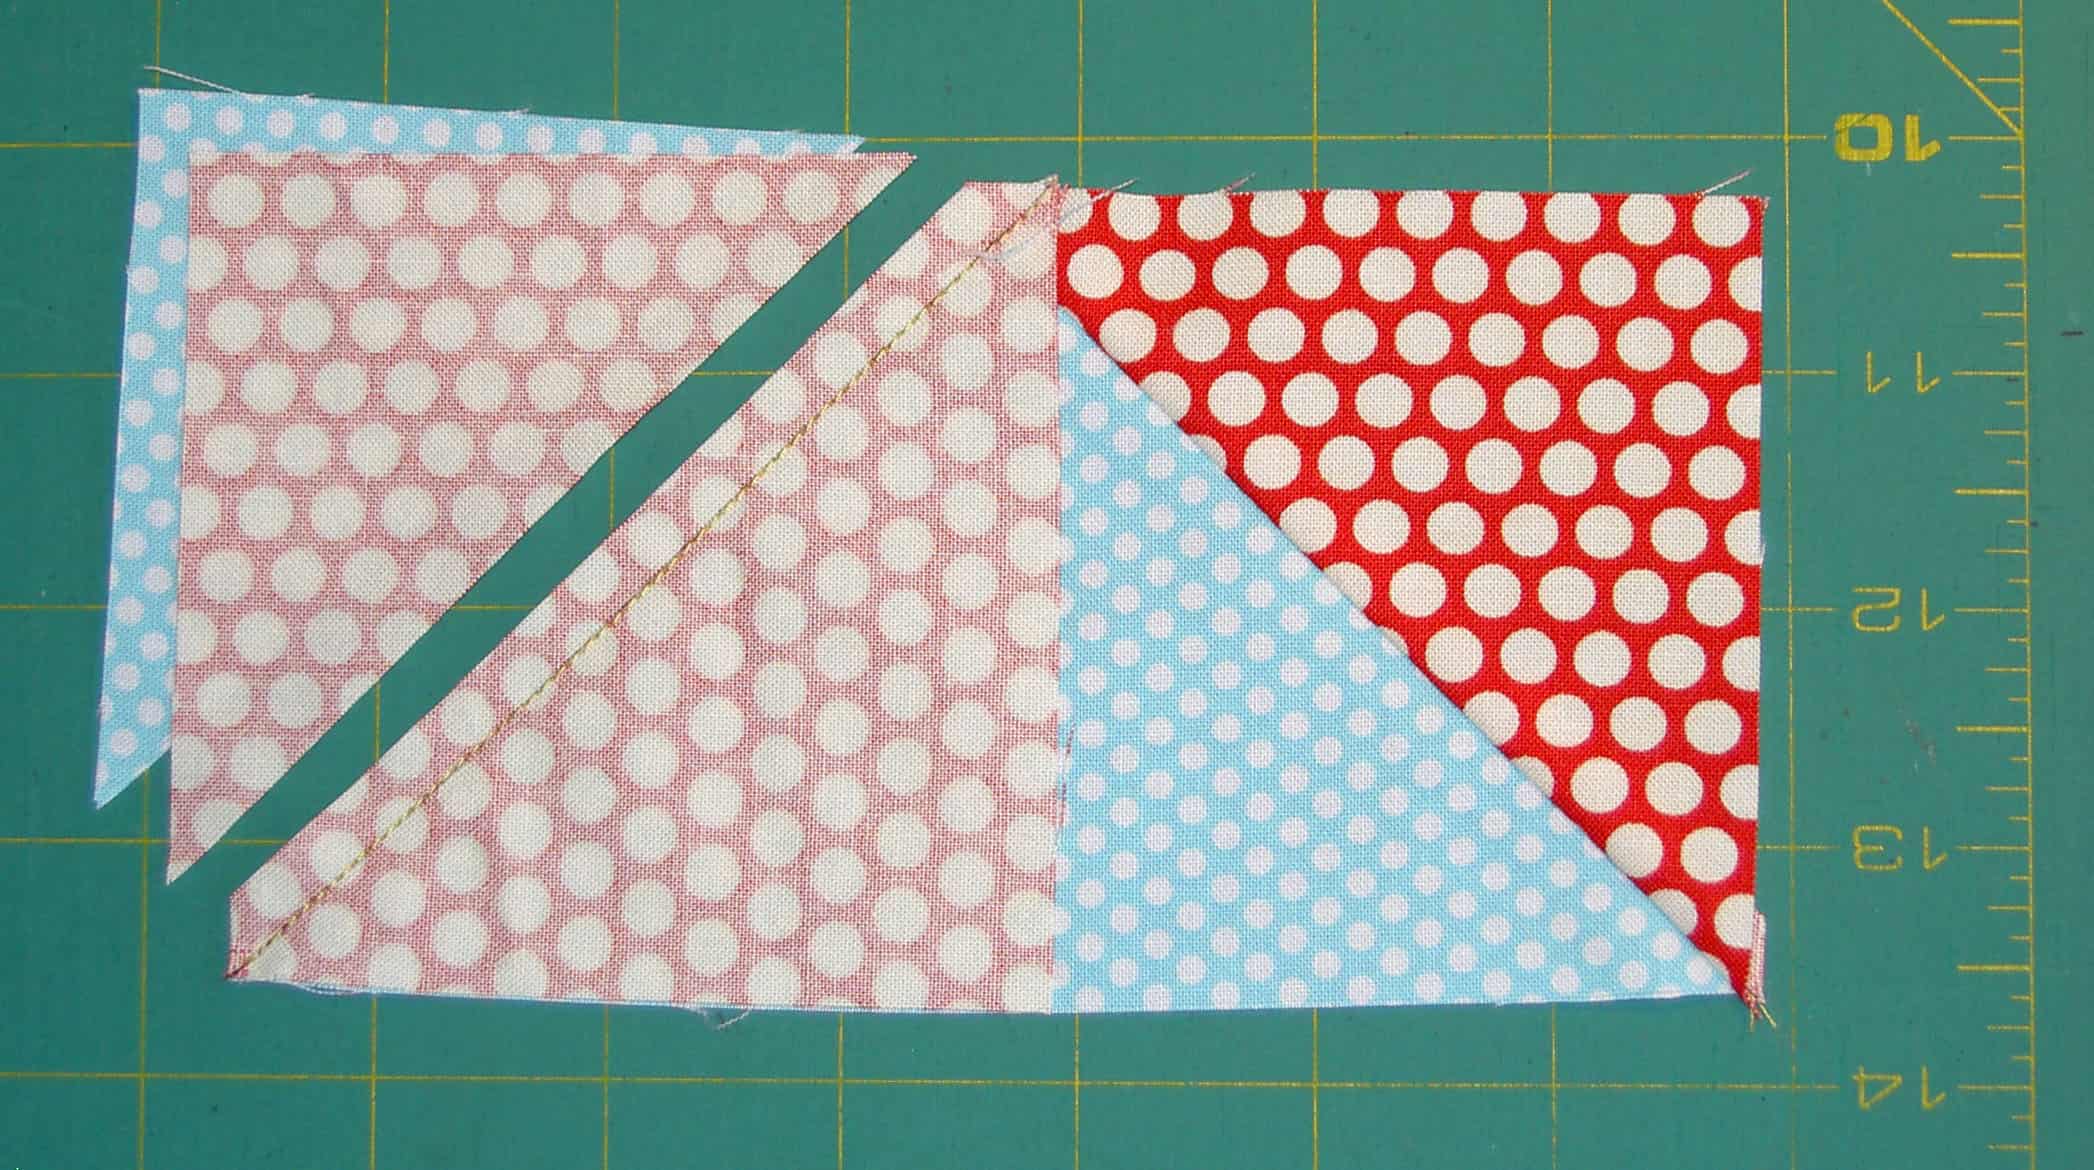
Sew and trim as above. Sew so that you cross the previous sewing line.

Press back 2d wing
Press back 2d wing

Press back the 2d wing and, voila’, you have a Flying Geese element.

Now make 3 more and cut your squares for the rest of the block.

You can also make these with various rulers. I often use the Deb Tucker Wing Clipper ruler and also have the various sizes of the Quilt in a Day Flying Geese ruler. I teach this basic method so you know how to do it and don’t have to purchase a specialty ruler. If you plan to make many Flying Geese, I suggest you buy either of the rulers listed above.

You need four of these to make a Sawtooth Star or eight of them to make a Dutchman’s Puzzle.

Bonus pattern: Dutchman’s Puzzle

I found an interesting border on Instagram using Flying Geese.

Quilt Class: Triangles

Now it is time for triangles. Triangles are not hard but you do have to pay attention to the bias. There are different types of triangles and in this block you will make Half Square Triangles. Understanding how to sew triangles expands your repertoire of designs by leaps and bounds.

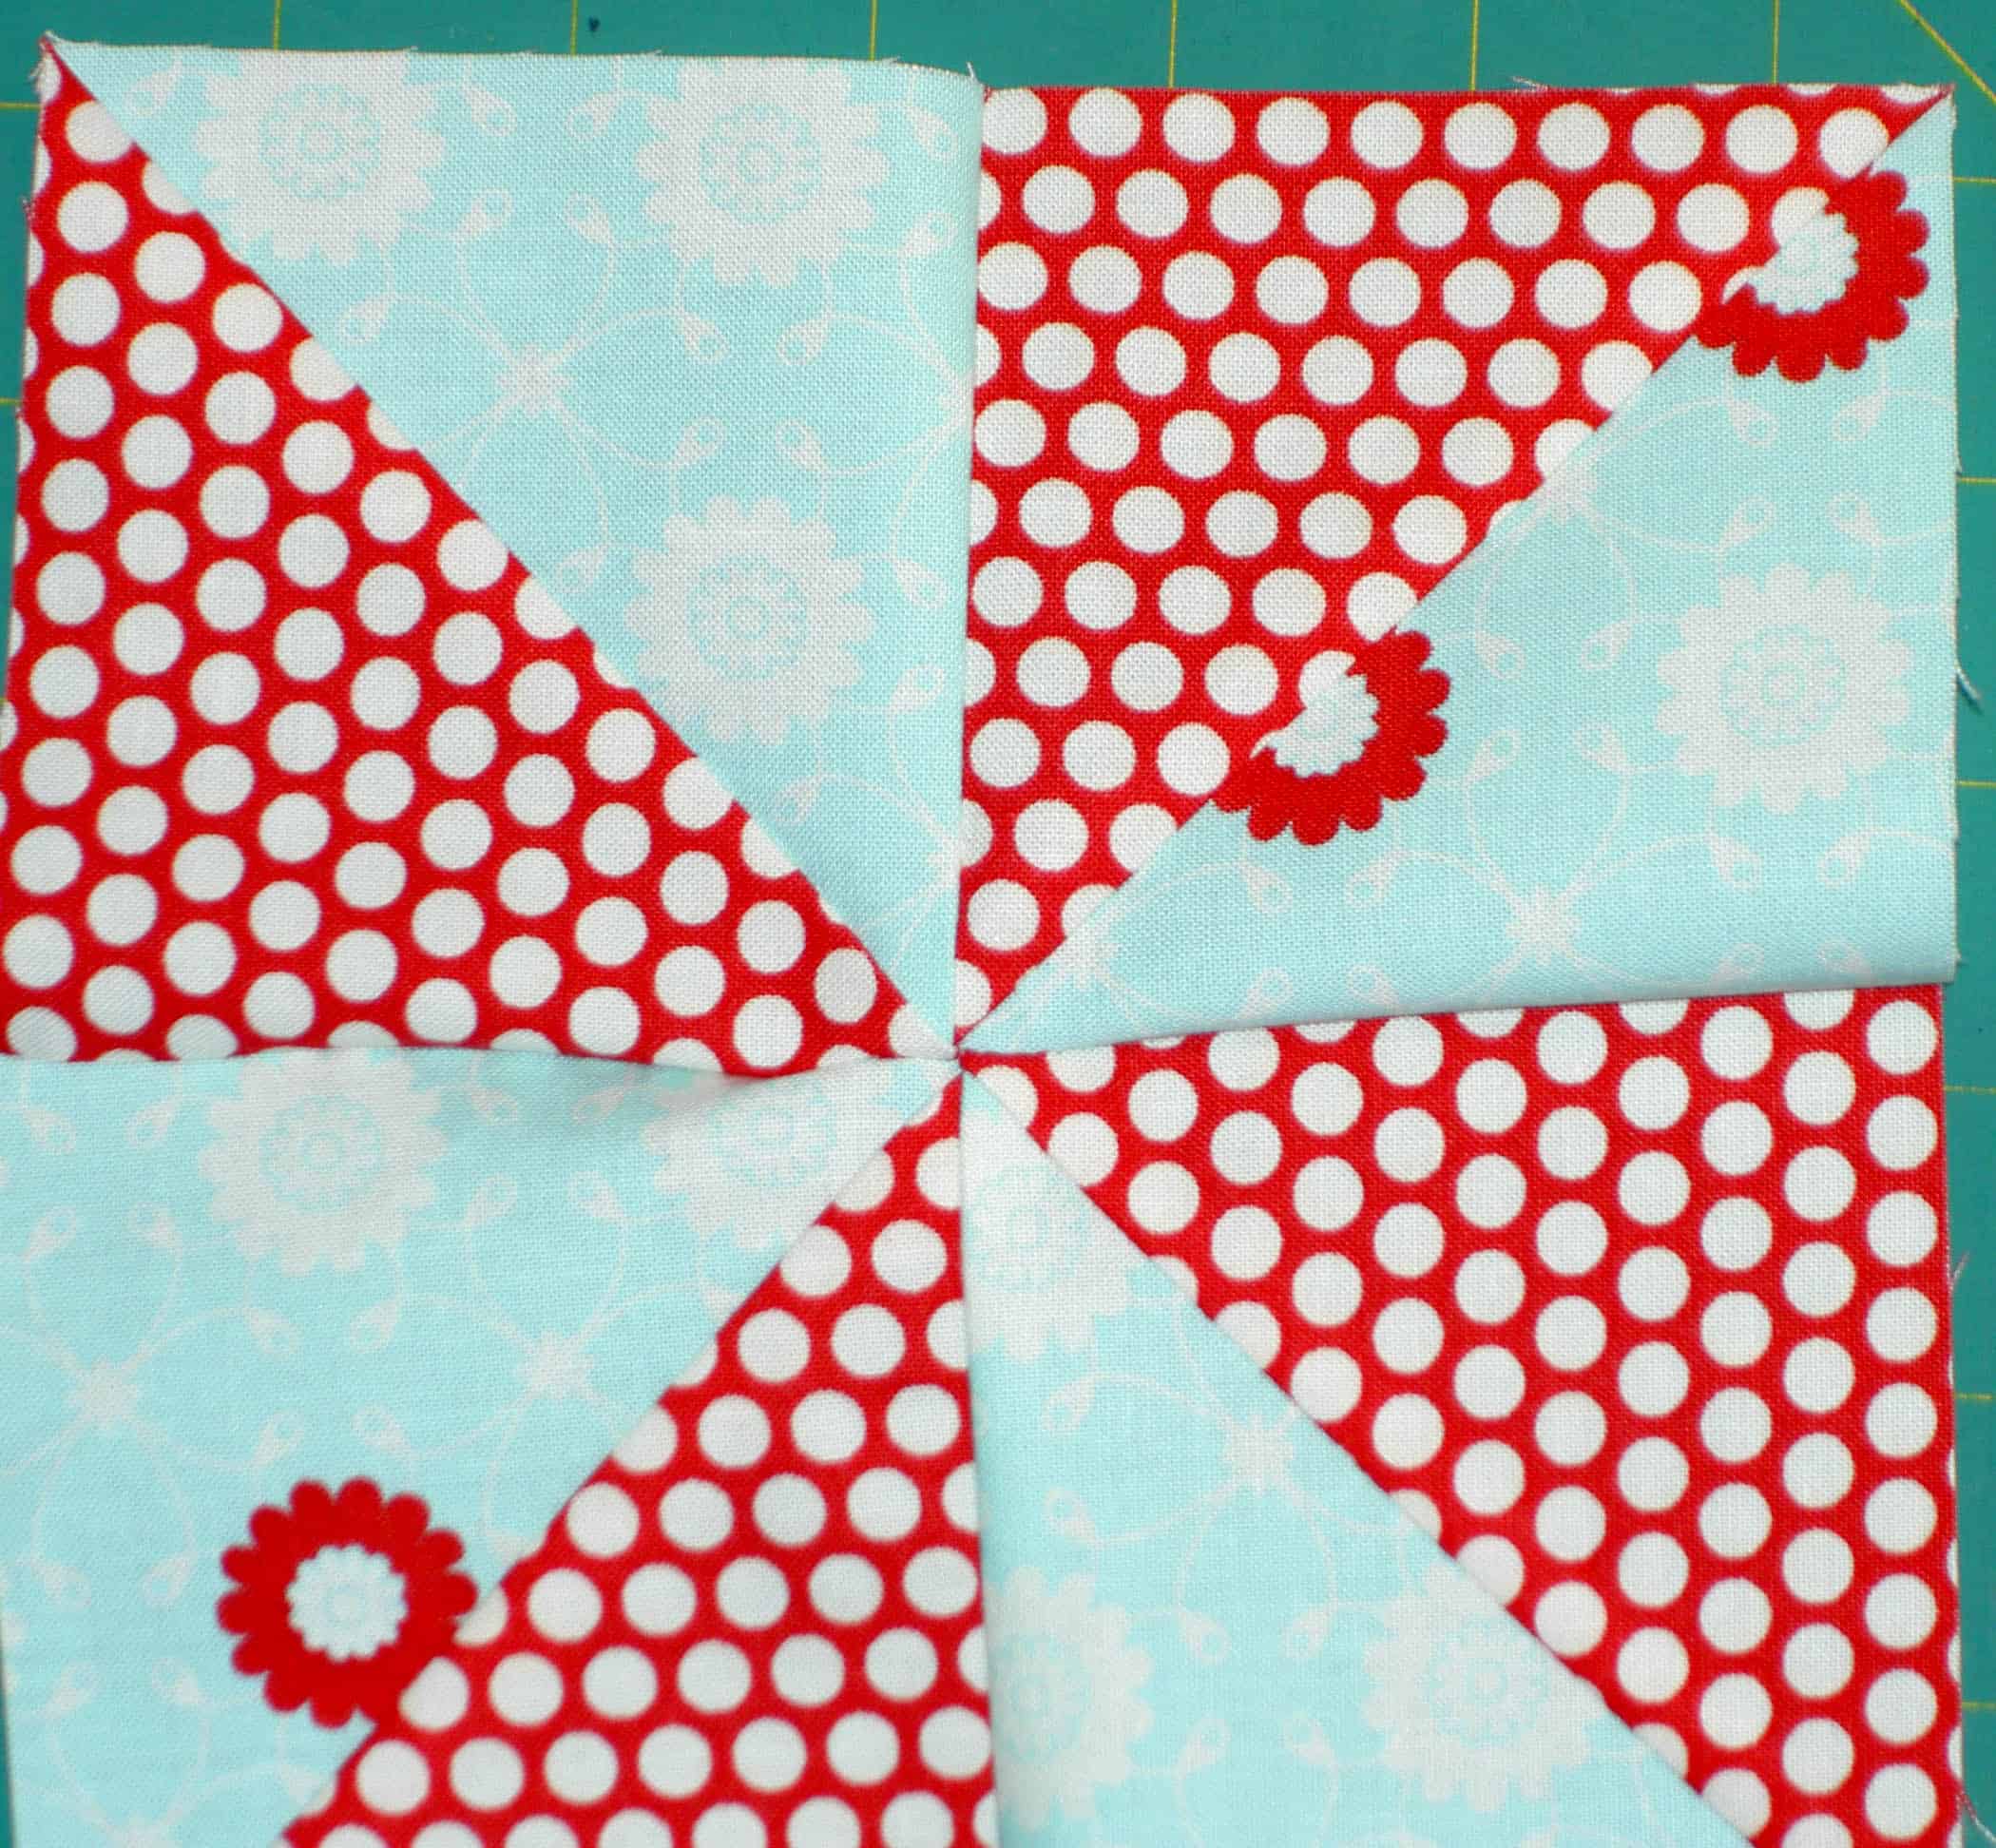
Double Pinwheel
Double Pinwheel

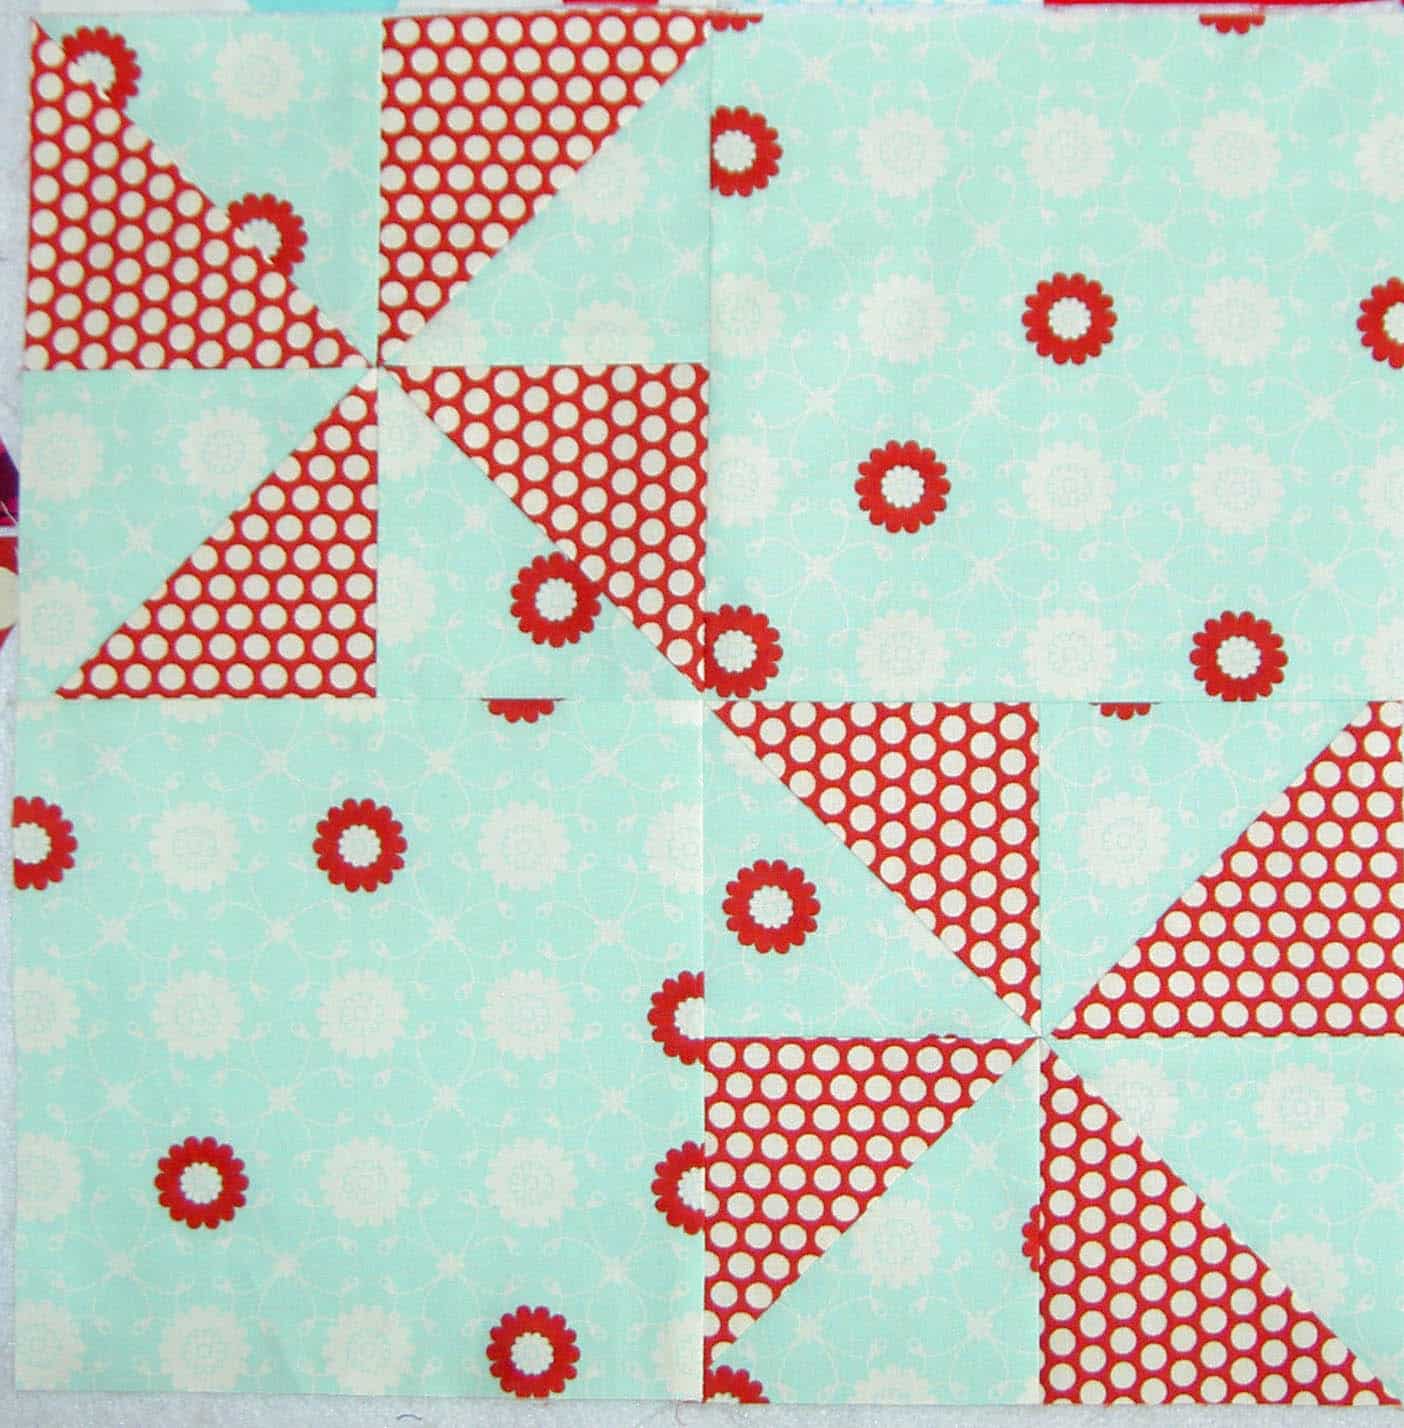
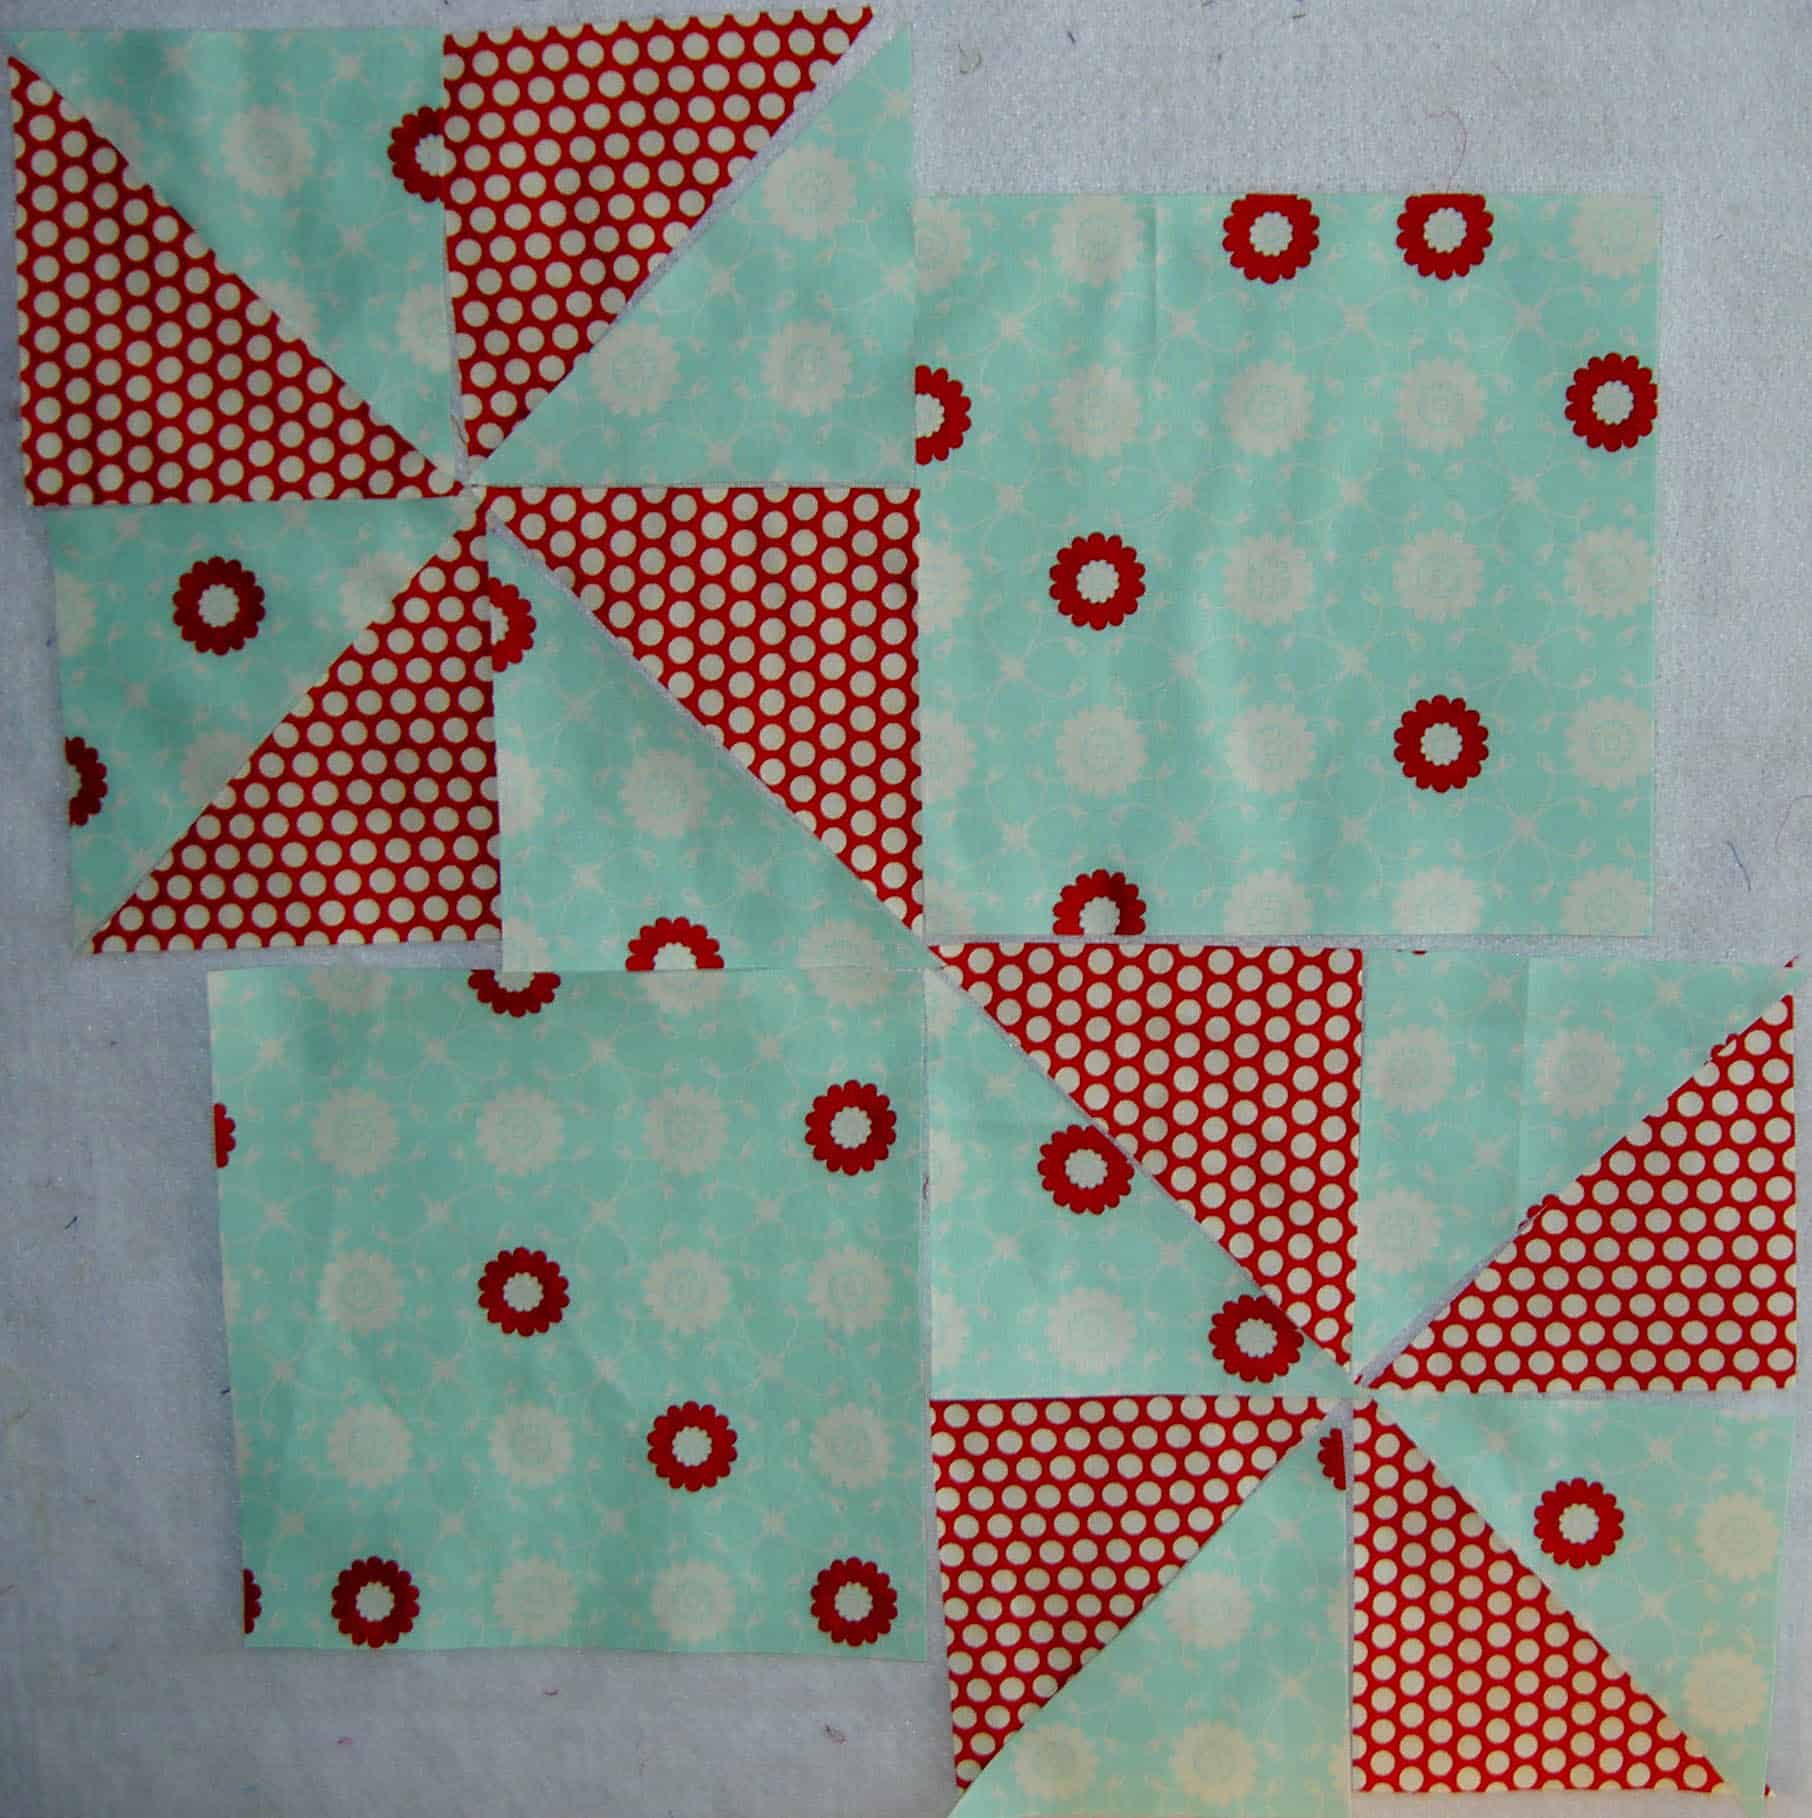
You will make a 12 inch finished Double Pinwheel block. This block is also a 2×2 grid, just like the Double Four Patch. The pinwheels make up one square in each row of the two by two grid. Plain blocks make up the other squares.

Supply list:

  • fabric
  • rotary cutter
  • rotary cutting ruler
  • rotary cutting mat
  • fabric (2-3 different)
  • Mary Ellen’s Best Press (or similar) is very helpful with the bias
  • pins
  • sharp scissors
  • thread for piecing
  • sewing machine
  • Iron
  • ironing surface
  • Optional: numbered pins

Steps:

Double Pinwheel - Another View
Double Pinwheel – Another View

1. Cut:

  • 4 squares 4in. x 4in. for the blades of the pinwheel AKA the triangles. Mine are red in the above photos
  • 4 squares 4in. x 4in. from the background fabric. My background fabric is aqua in the above photo. This size will allow you to have enough extra fabric to trim the half square triangles before you sew them into the pinwheel. I like trimming
  • 2 -6.5in. squares from the background fabric for the plain background squares.

2. Cut all of the 4in. squares in half on the diagonal.

Layout your patches
Layout your patches
Layout your patches

3. Lay out all of your patches on your design surface so you can see how the block will look.

The cut patches look like they won’t fit.  That is because of the seam allowances. It will all work out in the end. I promise.

4. Put one background triangle and one pinwheel triangle right sides together matching the hypotenuse (longest side) of the triangle.

4A. Spray the two fabric patches with Mary Ellen’s Best Press. Handle the triangles carefully by not yanking on them.

Gently put triangles under presser foot

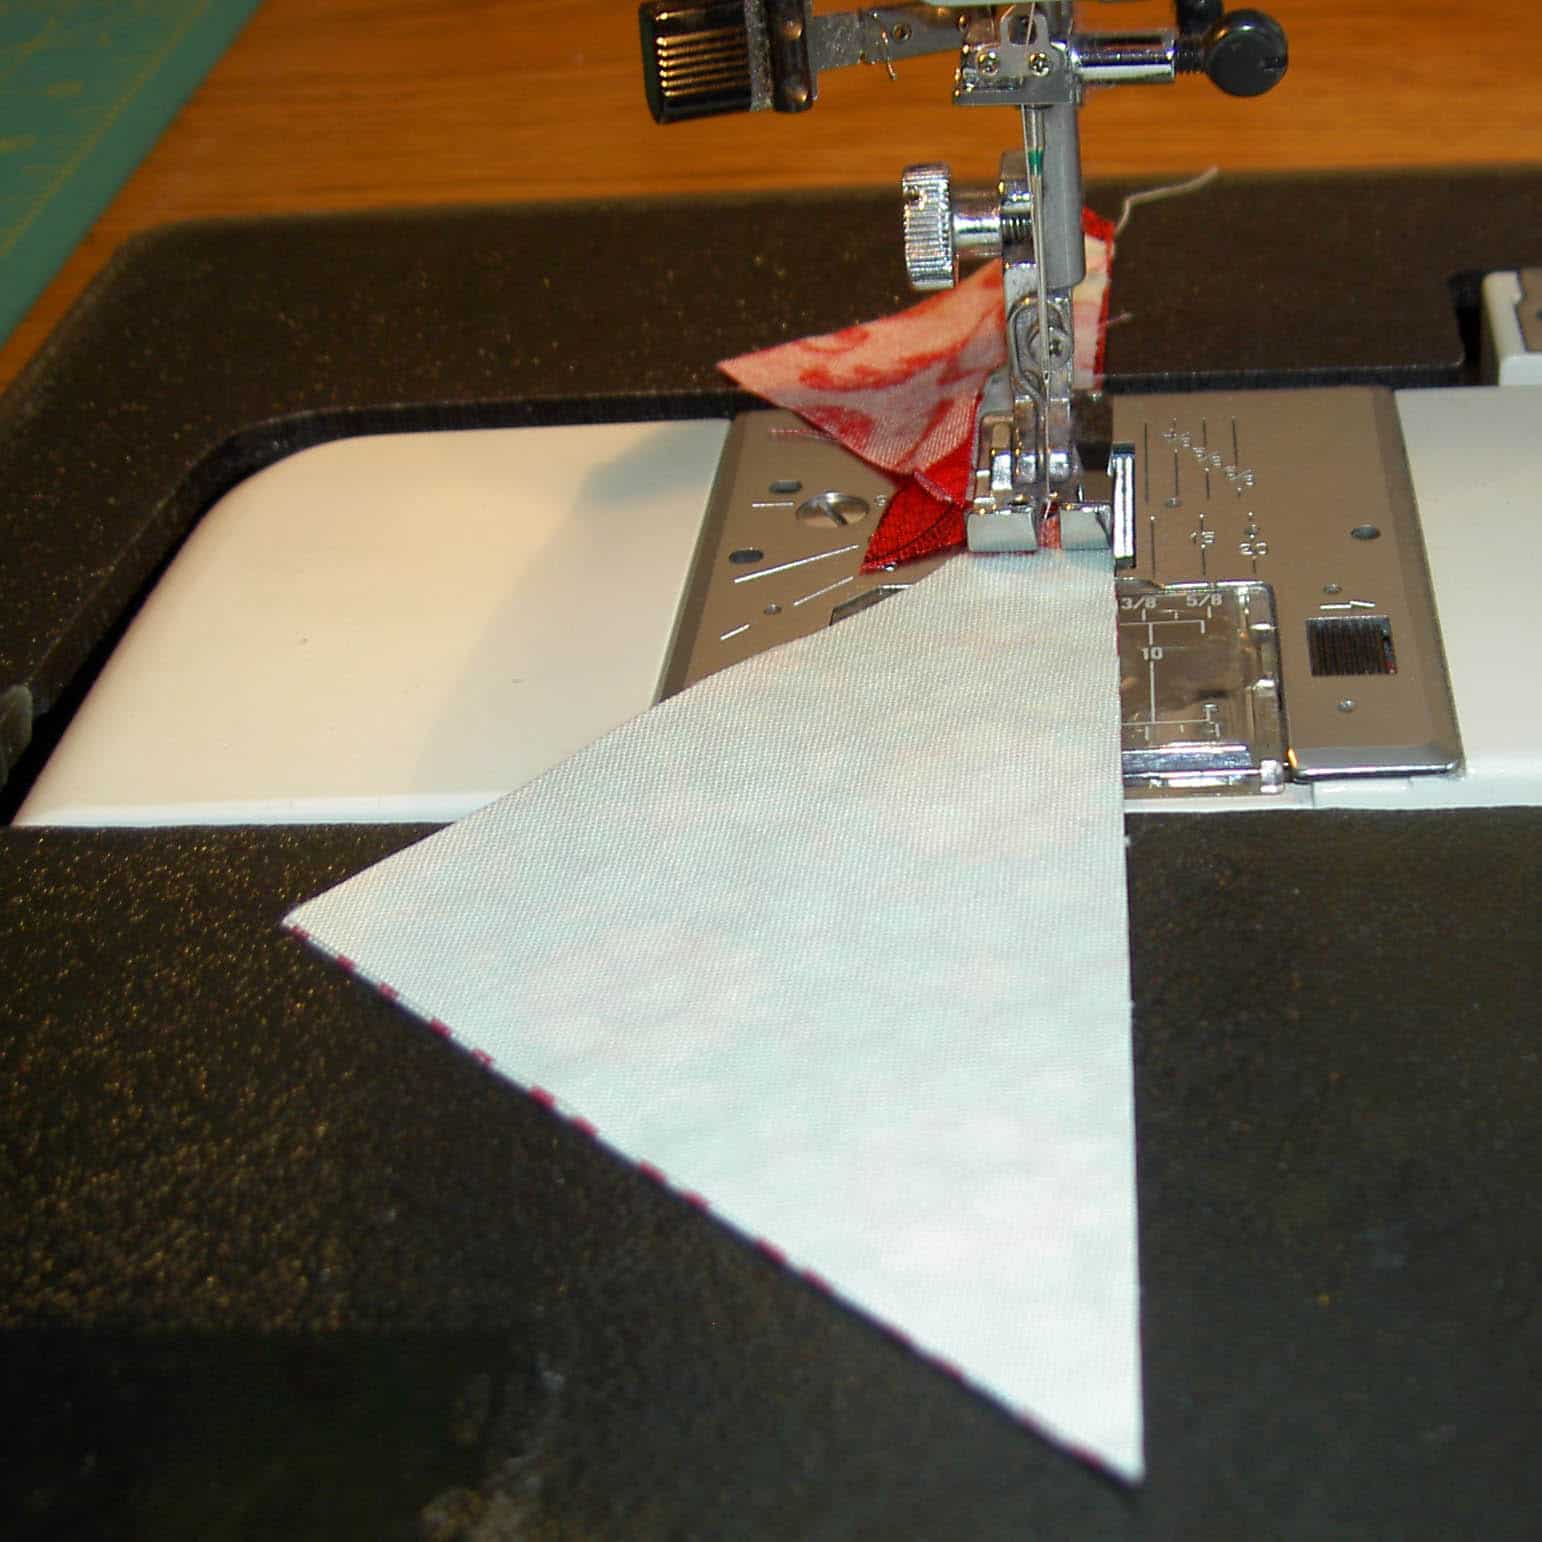
5. Sew one background triangle and one pinwheel triangle together along the hypotenuse of the triangle. I sew them with the background patch on top.

Use your hands to guide not yank

Sew all patches with the same color fabric on top. It will help you keep them organized.

My fingers are just keeping the hypotenuse up against my seam guide. The feed dogs are moving the fabric.

Chain piecing, baby!

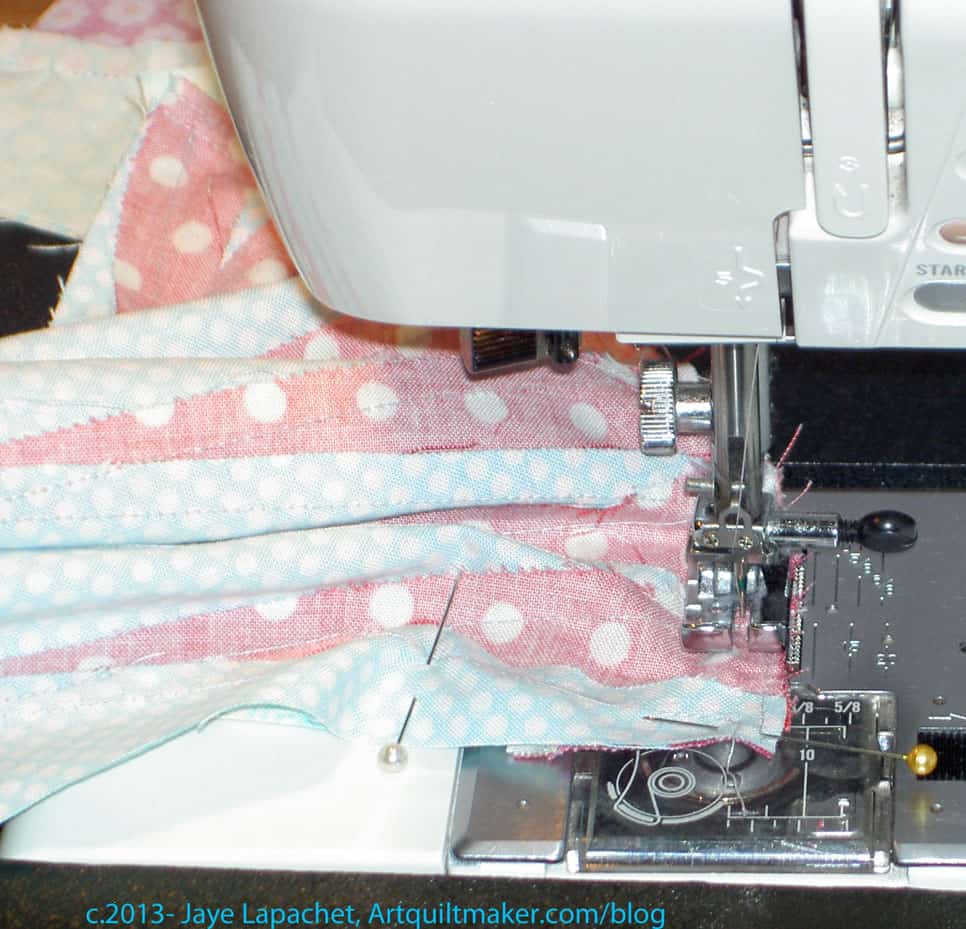
Sew one triangle after the other without clipping the thread between them. This is chain piecing. I use chain piecing to piece all of the triangles. I try and prevent them from falling off the back of my table so the falling triangles don’t yank on the ones still under the presser foot.

6. Sew all triangles needed to make pinwheels. Take them out of the machine and clip the threads between.

7. Take all of your sewn triangles to your pressing surface. First, I set the seam like Fons & Porter suggest and then open the seam and carefully press the seam towards the pinwheel fabric (red dot in my case).

8. Take the pieces to your cutting mat. Line up the diagonal line on your ruler (hopefully you are using a square ruler with a diagonal line) with the diagonal line you have sewed and trim your new half square triangle (HST) block to 3.5in.

  • You will need to make this cut twice for each patch as you cut two sides. Trim the top and the right side first. Then, turn the block 180 degrees and then trim the other two sides, which are, once again, the top and the right side.

9. Arrange your sewn HSTs on your design wall to you can be sure that they are arranged in a pinwheel block.

10. Make a note to yourself (use a pin, eyeball it, pinch it) which sides you are going to sew together. Nota bene: This is where numbered pins come in handy, if you decided to buy them.

Sew 2 HSTs together
Sew 2 HSTs together

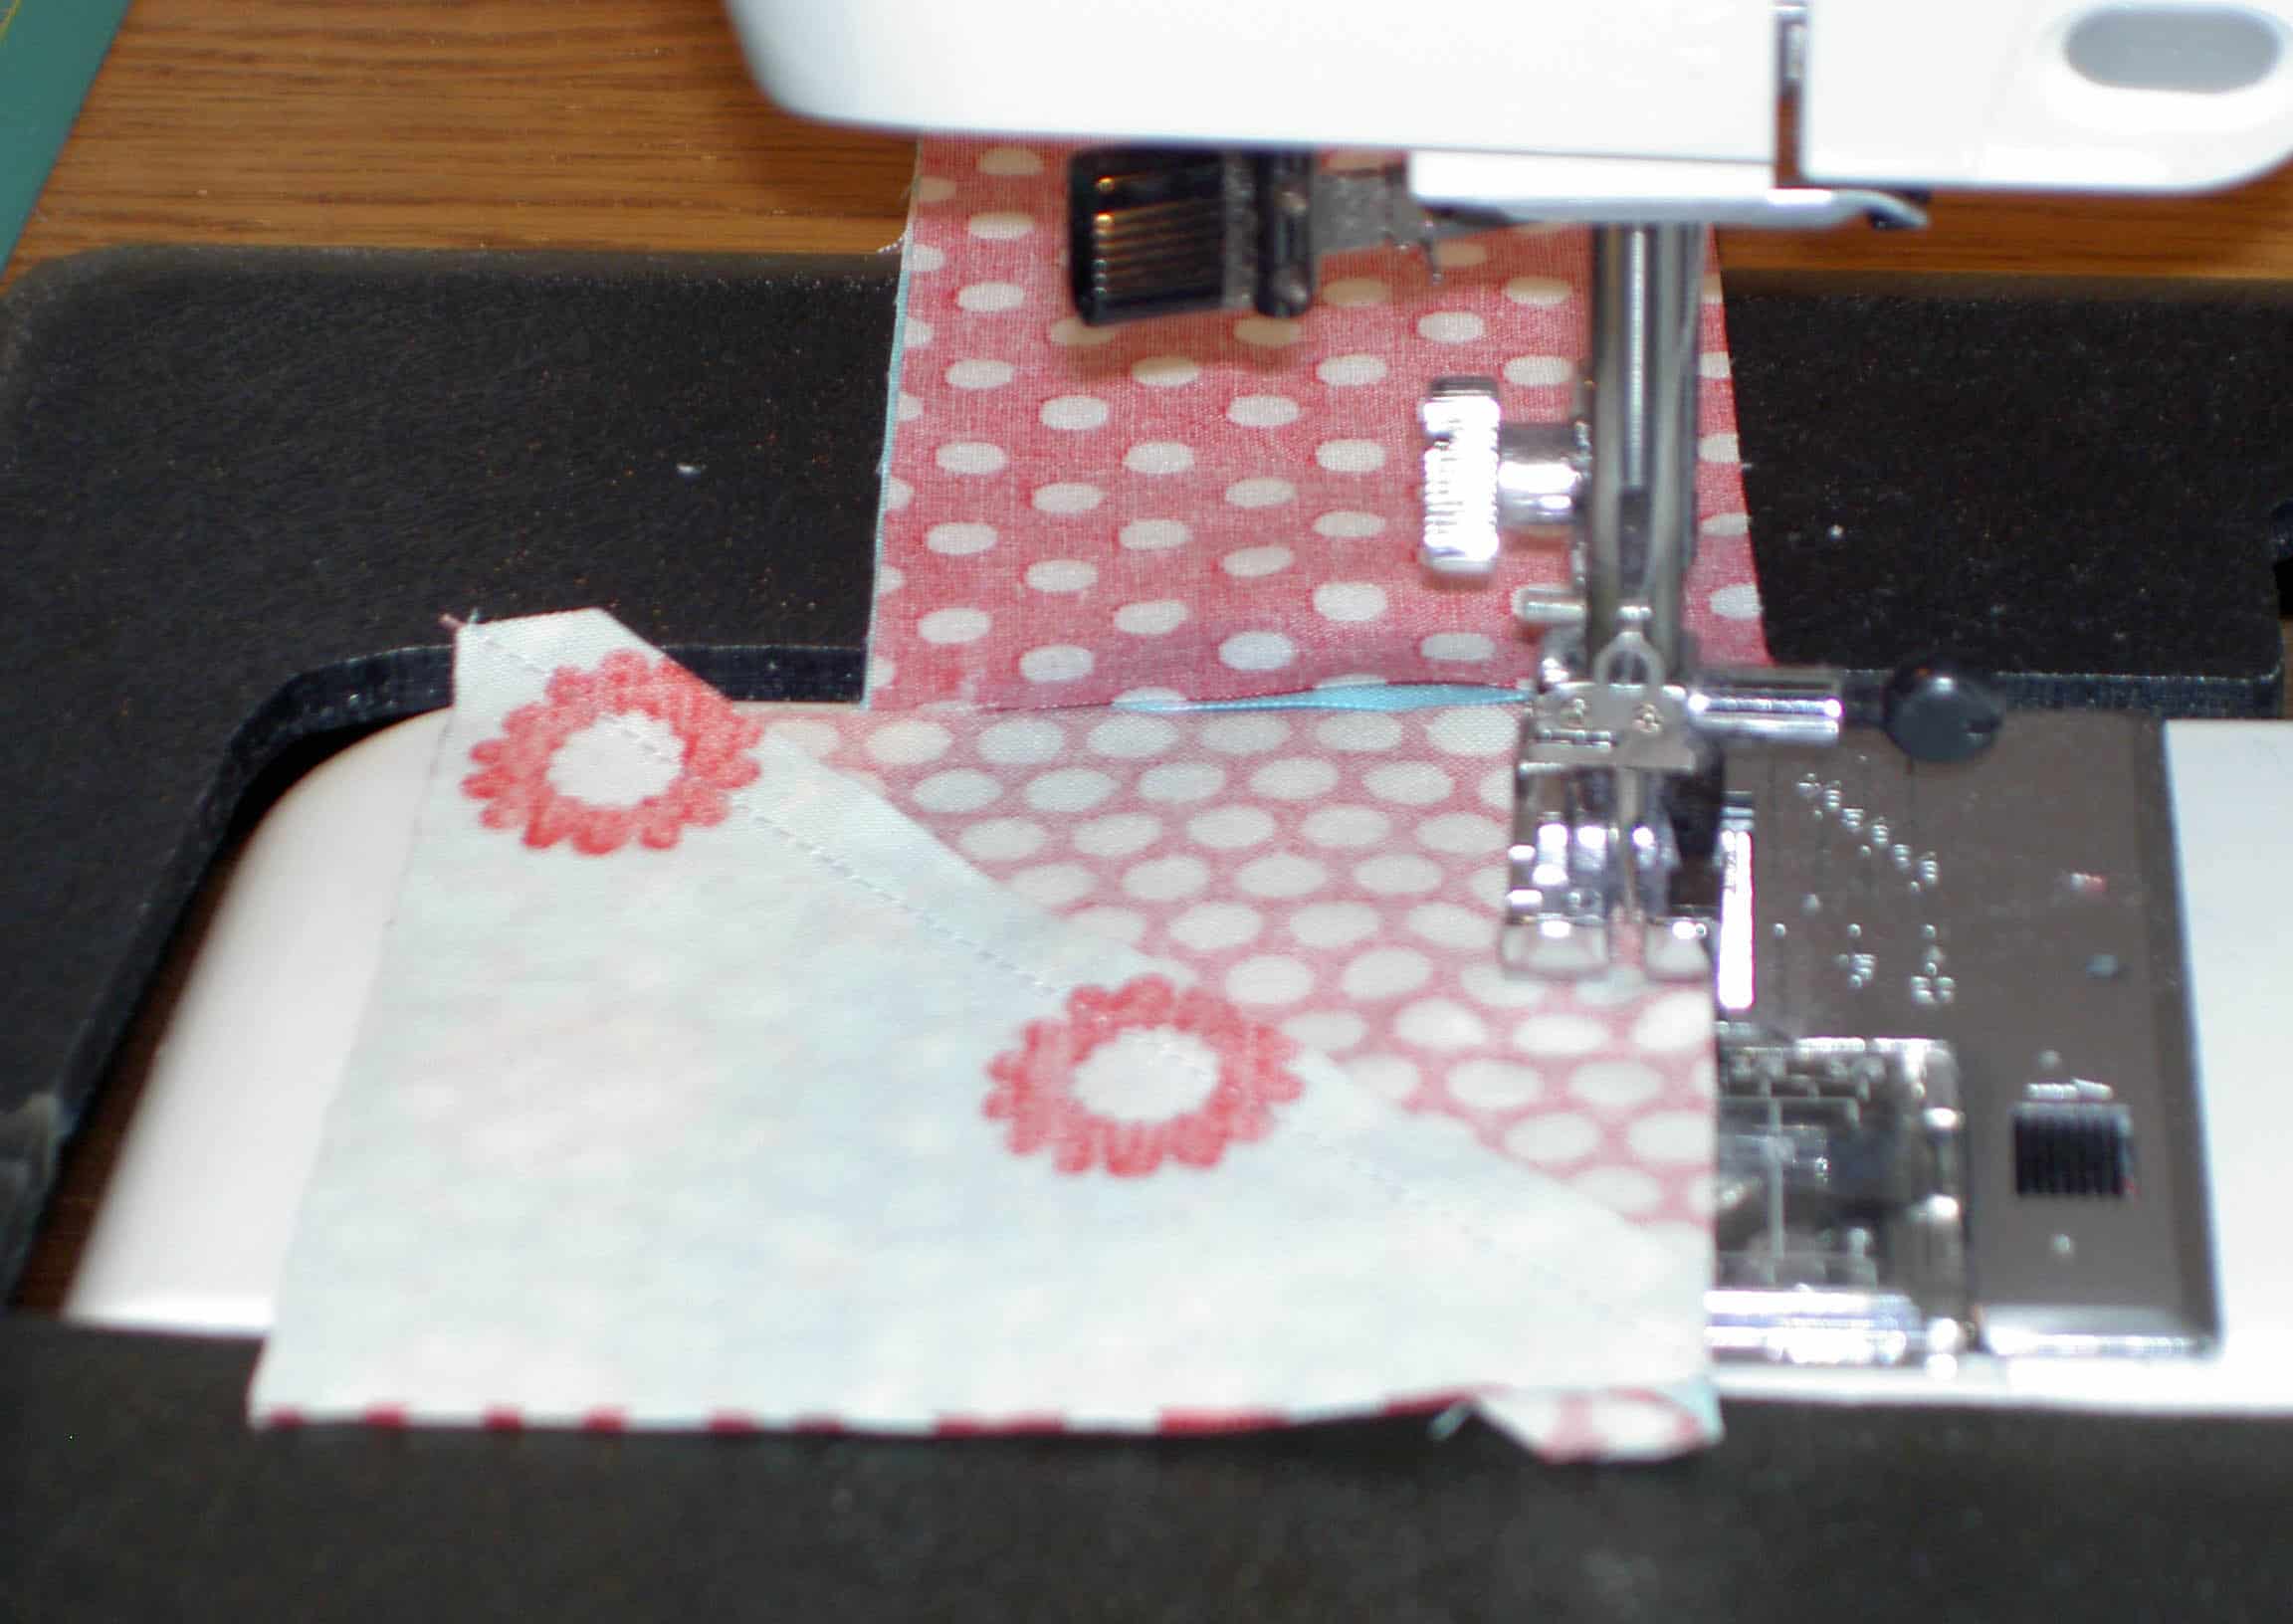
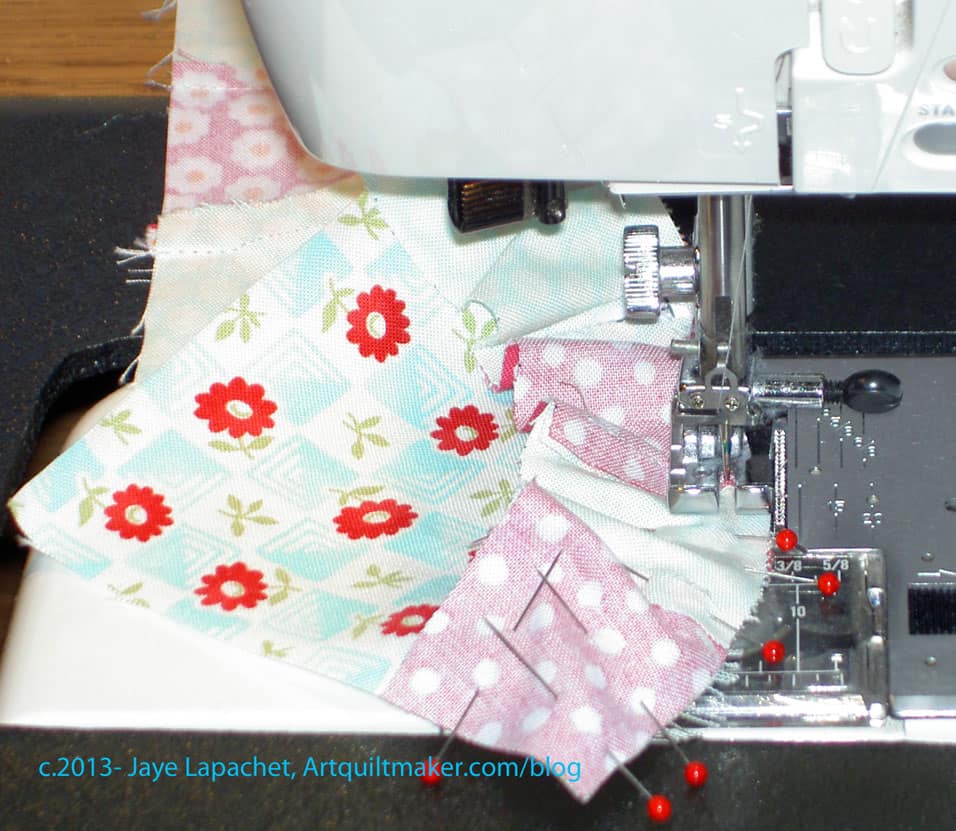
11. Take 2 half square triangles and place them right sides together underneath your machine’s presser foot.

Nested HSTs
Nested HSTs
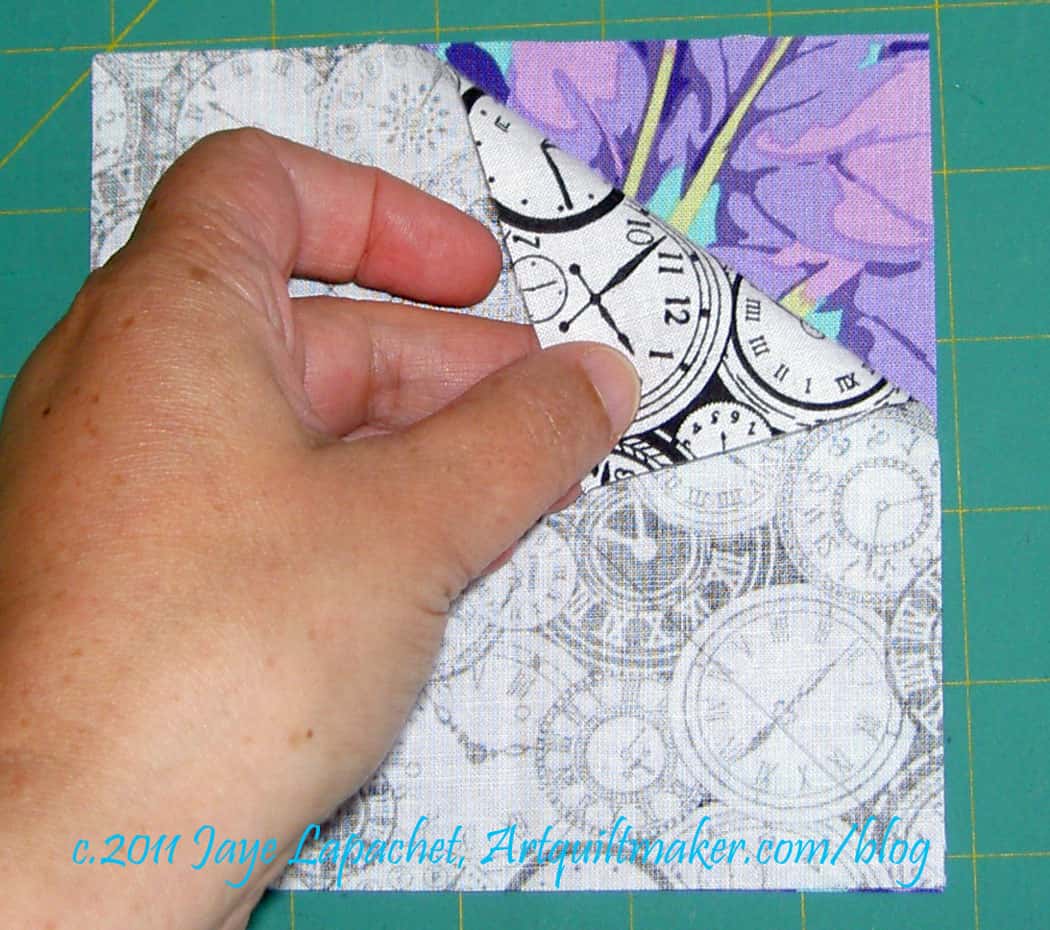
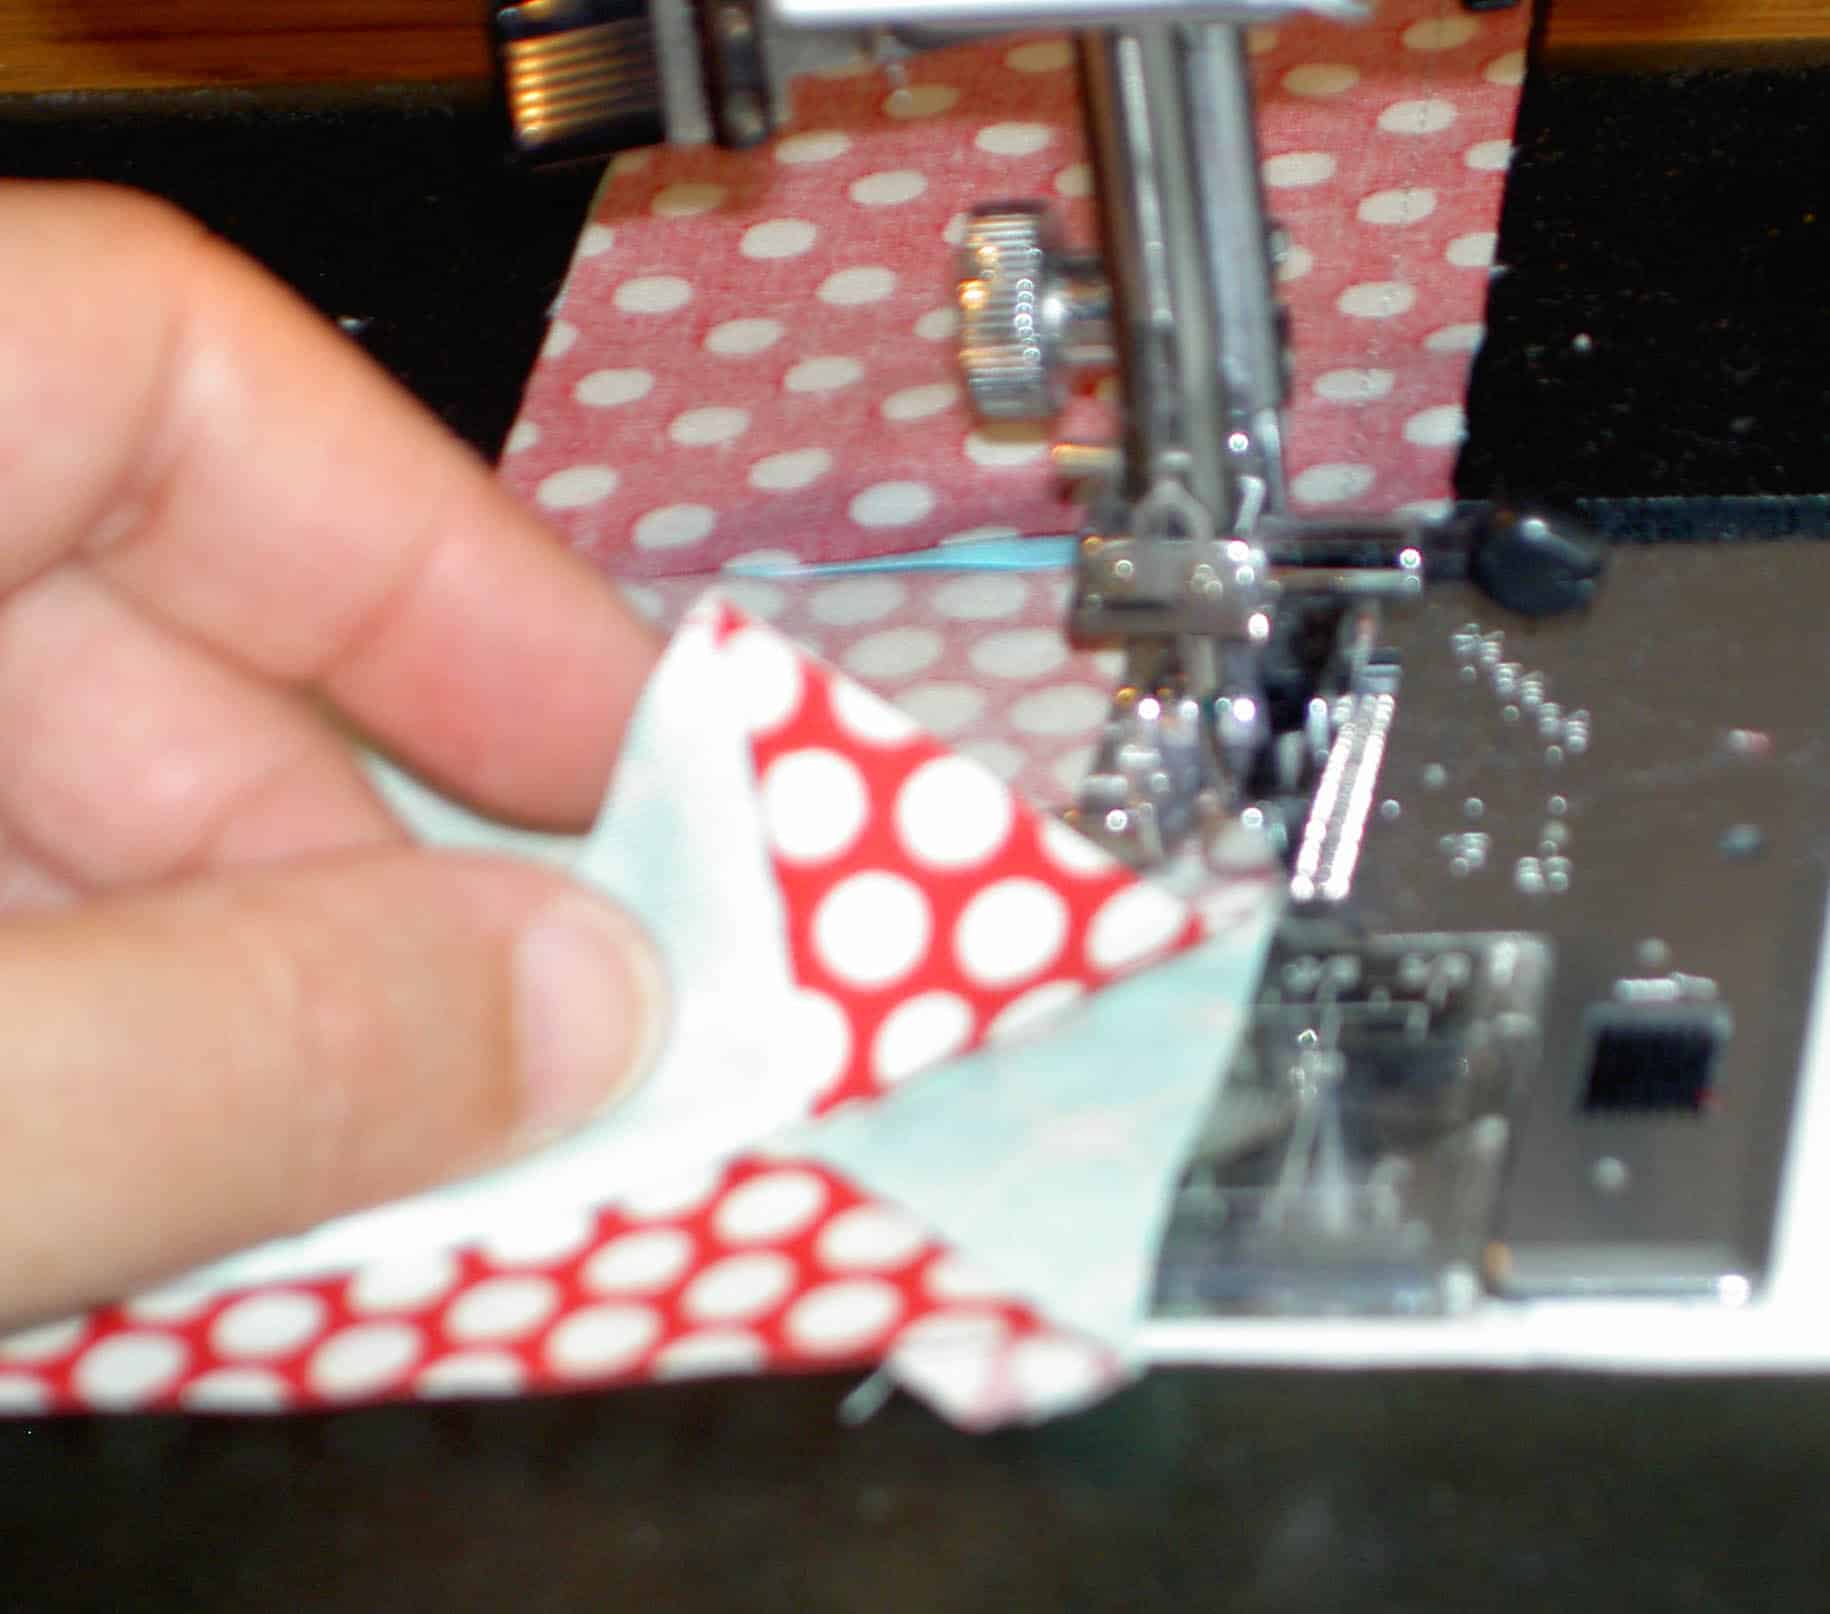
  • The seam allowances on the diagonal should be nested together. This will work if you have pressed all of your HSTs towards the pinwheel fabric. In the above photo you can see how the diagonal seams are lined up when I lift the corner of the fabric to show you. (Professional stunt quiltmaker! Please do not try this at home with your machine running!!!)

12. Making sure you are sewing them in the right orientation, sew two half square triangles together.

13. Press these half pinwheels towards the background.

  • You should have 2 pieces of 2 half square triangles ready to sew into a pinwheel.
Important Matching Spot

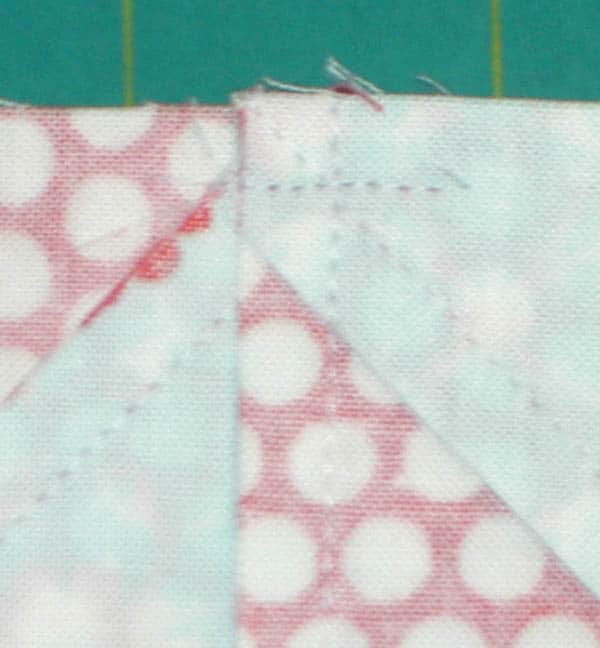
14. Nest the 2 half pieces together. In the above photo I have put the pin in just to show you about where you should sew. Sew along the middle of the pinwheel

  • When you sew try not to cut off the point of the pinwheel center. You will see a V made by the seams you have sewn previously. Make sure you err towards the seam allowance (on your right looking at the needle of the sewing machine) and don’t cut off that V. Ideally, you want to sew one thread towards the seam allowance on top of that V.
V
V
  • You can just sew over the middle (.5in. on either side of the middle point) to make sure your points match, then you can go over the whole seam once you decide if you like the way the center looks. The ripping out is easier if you only have an inch to do.
Middle Sewn to Check Points

When you open the block (with just the middle sewn) you can tell whether or not the center point will match.

A NOTE ABOUT POINT MATCHING: It is really important that you know your tolerance level for points not matching. My points don’t always match and either I leave them or rip them out. If my points are 1/4inch apart, I usually rip them out. If they are 1/16th of inch from one another, I will probably leave them. It is important to know:

  • what you are trying to achieve (practice block or show quilt)
  • if you are going to think about that seam not matching late into the night and it is going to prevent you from sleeping.
  • deadlines
  • whether the quilt is a gift to a prize winning quiltmaker or a baby who will drool all over it.
  • How busy the fabrics are (can you actually see the seams matching?)

Be kind to yourself when you think about whether to agonize over a seam not matching. Have fun, there is always more fabric and don’t make yourself crazy.

15. Sew the halves together, along the whole side, for both pinwheels. If you have sewn along the middle for an inch, make sure you stay on that line when you sew the whole side together.

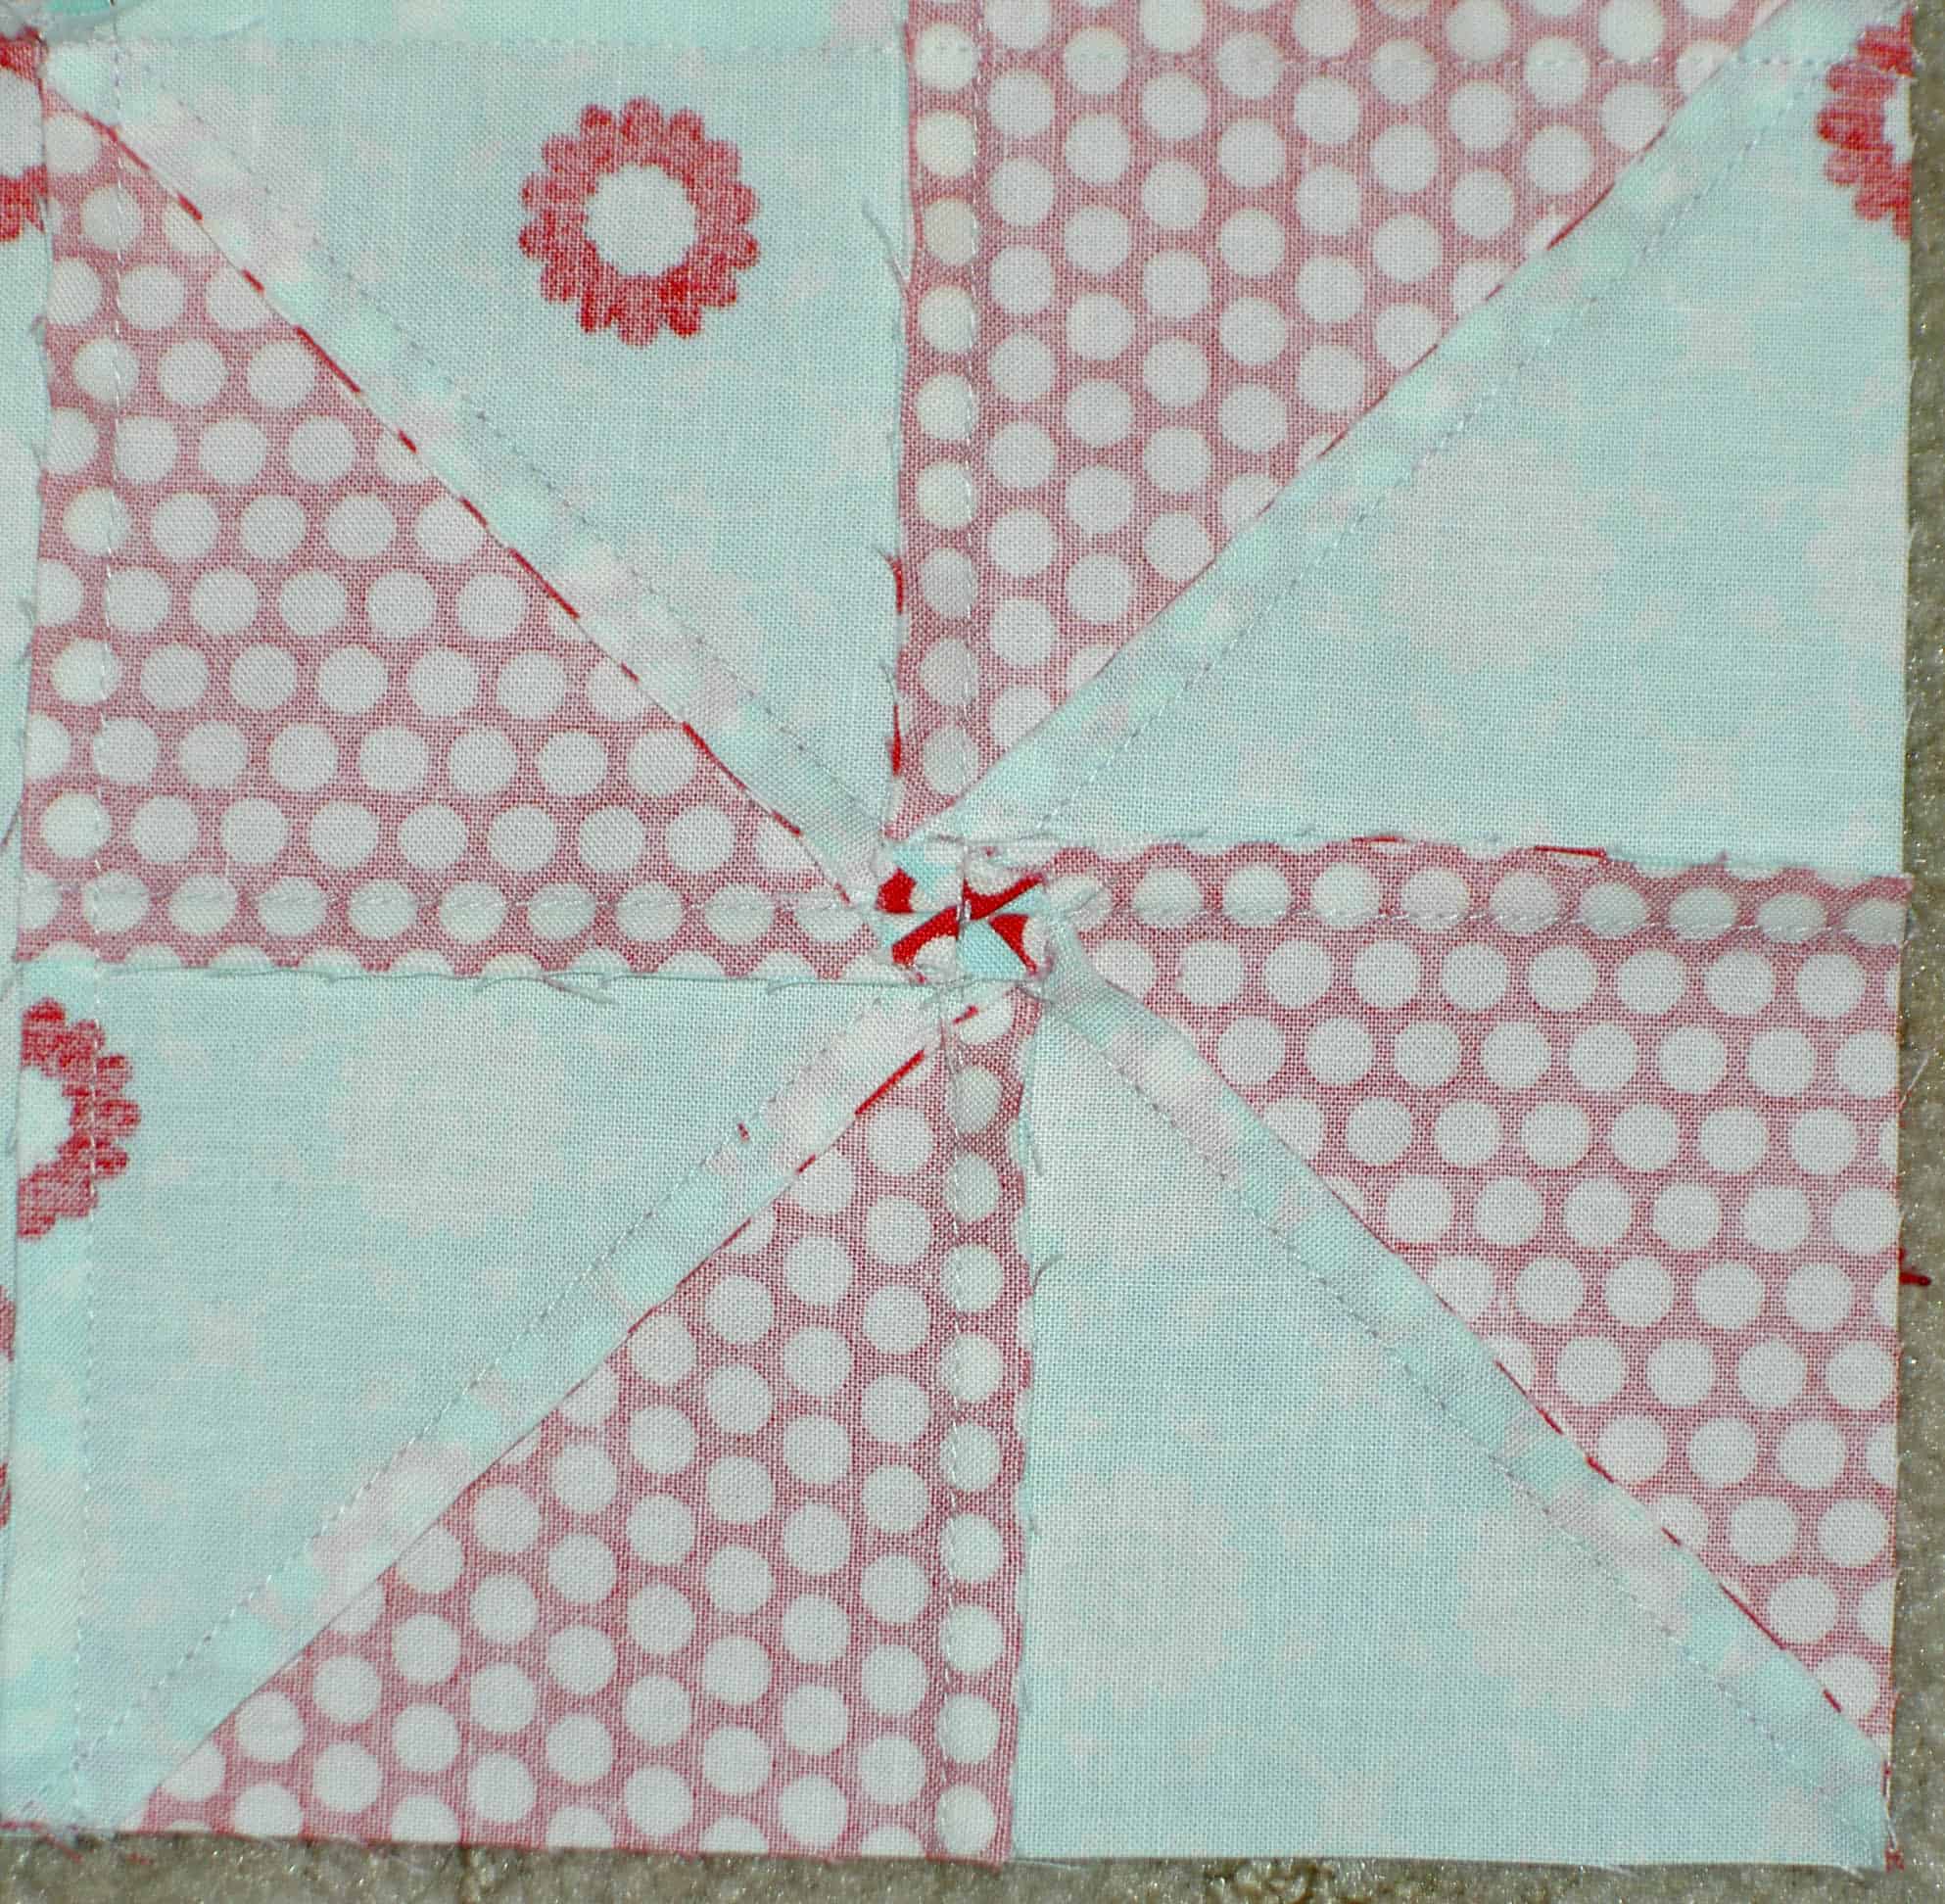
Pressing Perfection
Pressing Perfection
  • See that nice little square that the pinwheel makes in the center? That means you did it right!

16. Press the pinwheels patches in the same direction as the other triangles. It will look like the seam allowances are spinning. It will also make less bulk in the center of the block.

17. Sew the large 6.5inch background square to each of your pinwheels. Pay attention to which side of the pinwheels they are sewn.

18. Press towards the 6.5inch square/background.

19. Nest the two pieces (which are made up of a pinwheel and a background patch).

20. Sew over the middle  starting from about .5inch on either side of the middle to make sure your seams match and you have not cut off points.

21. Sew the 2 pieces together starting on one side, sewing over the middle where you have already sewn and continuing to the end of the block.

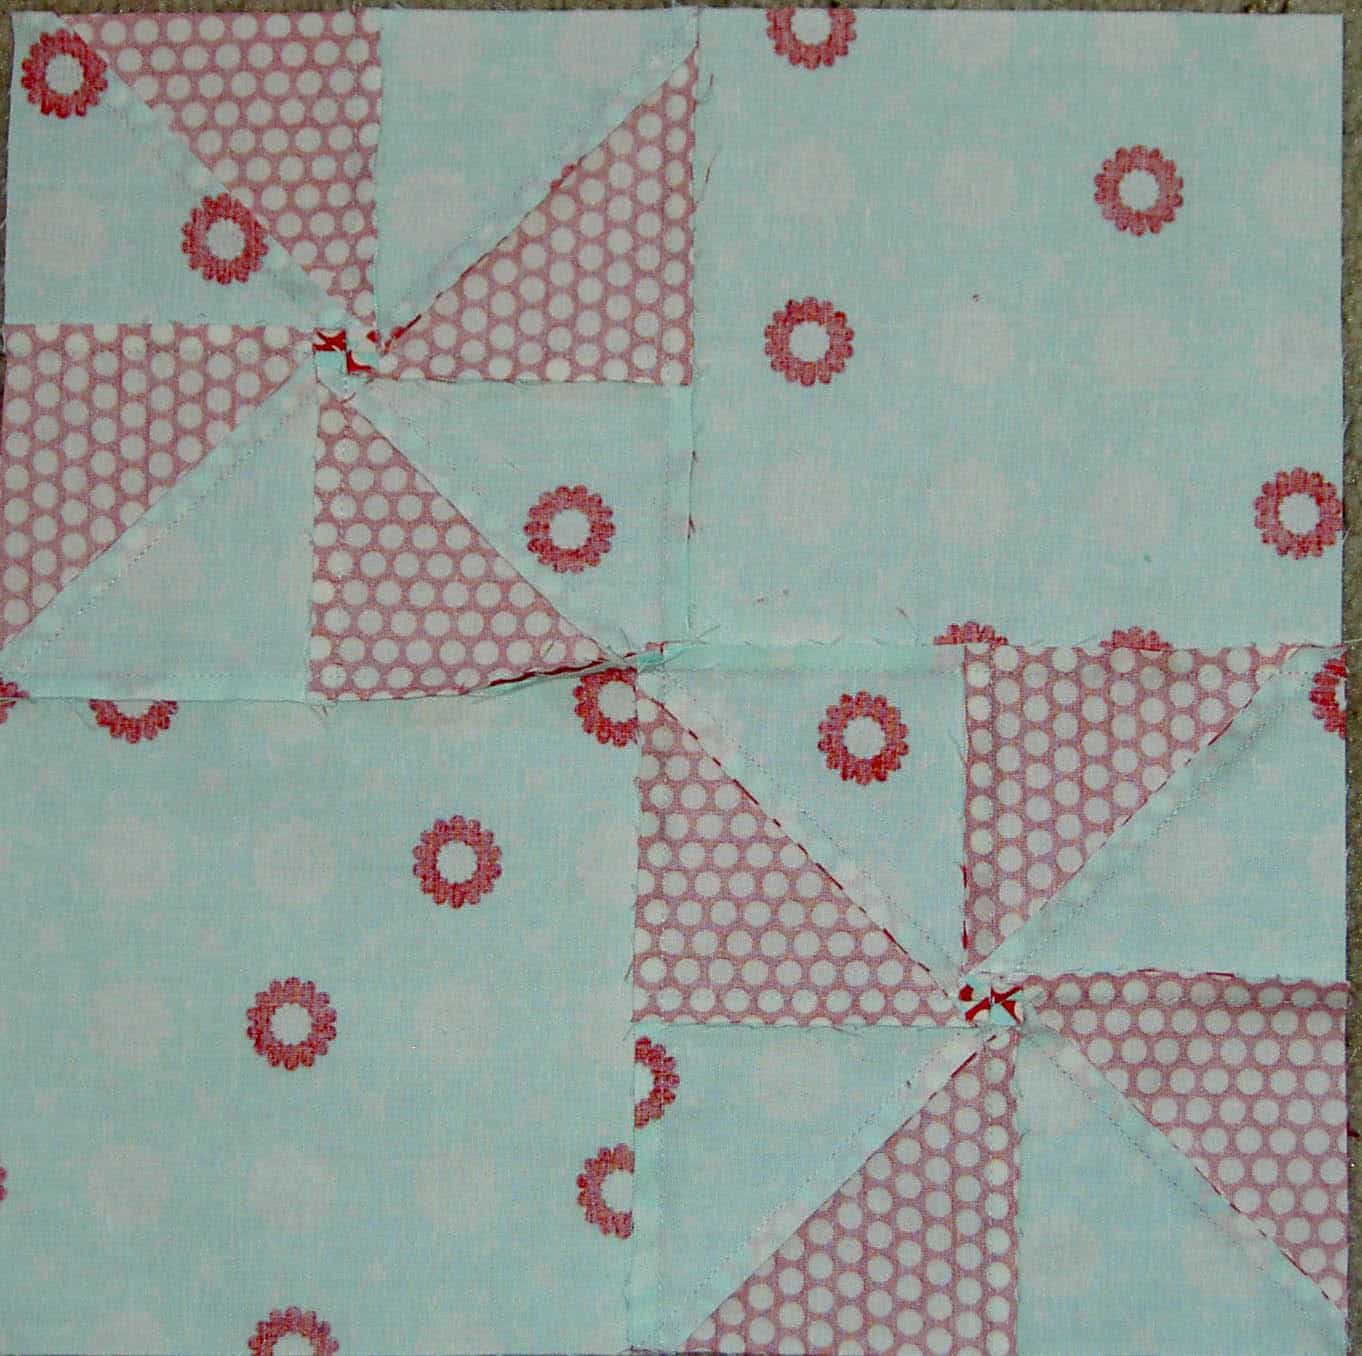
View of Pressing
View of Pressing

22. Press whichever way the seam seems to want to go. I like to press each half of the seam towards the background. It makes for kind of an ugly pressing job, but I am not going to quilt over that center anyway, so, for me, it doesn’t matter. Pressing this seam open also works.

  • You could trim the seam in the middle, but I don’t do that. Jo Morton talks about doing that and you might want to check out her website and YouTube videos.

    3 Sampler Blocks
    3 Sampler Blocks

Look how nice the 3 blocks look together!

Quilt Class: More Squares

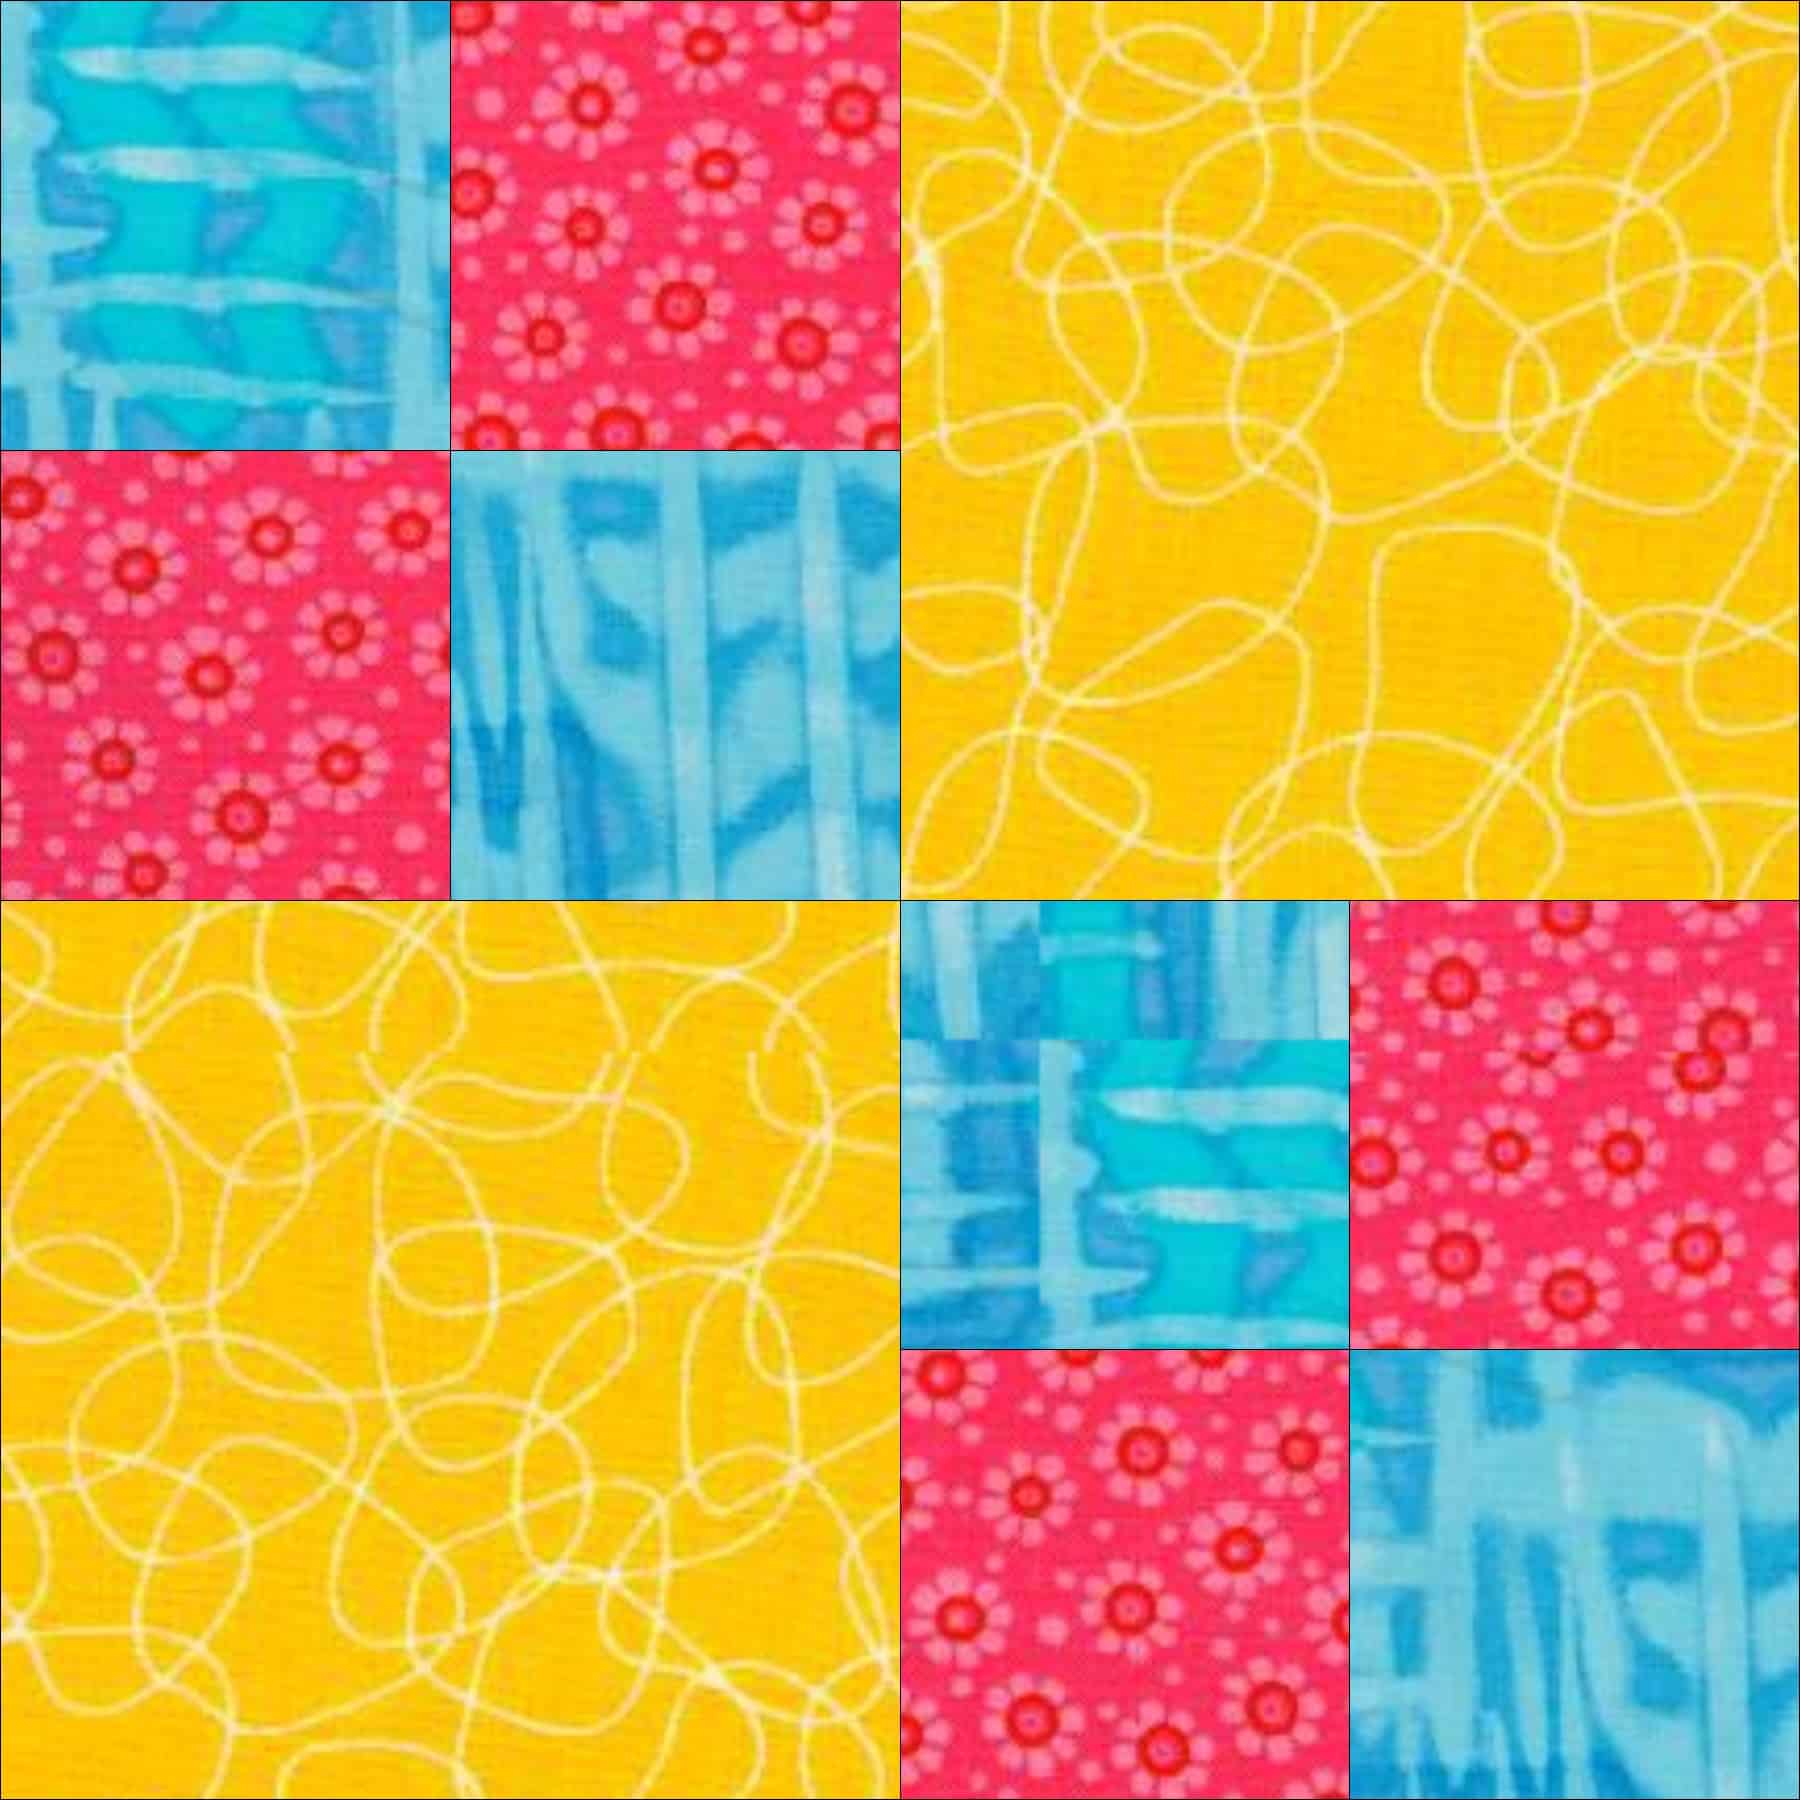
Double Four Patch
Double Four Patch

This is a bonus block. I would like you to make it and use your fabrics to practice the techniques you learned in making your Nine Patch block. While this block is firmly rooted in square patches, there are a lot more seams to match, but not so many that you can’t do it. You can make this block or not. Remember Practice Makes Perfect.

Use a quarter inch seam allowance

All the supplies you need were listed in the Nine Patch Tutorial

You will also need these Double 4 patch Cutting Instructions

Use the same group of fabrics you used for the Nine Patch so you can use this block in the same quilt, if you choose.

Some tips:

This block has a different grid than the 9 patch. It has a 2×2 grid. That means that there are, essentially two patch across and two patches down. In this case you make one of the patches up from a Four Patch, so you sew each 4 patch, to a two plain square and then sew the halves together.

You can do it.

Sampler Class: Partial Seams

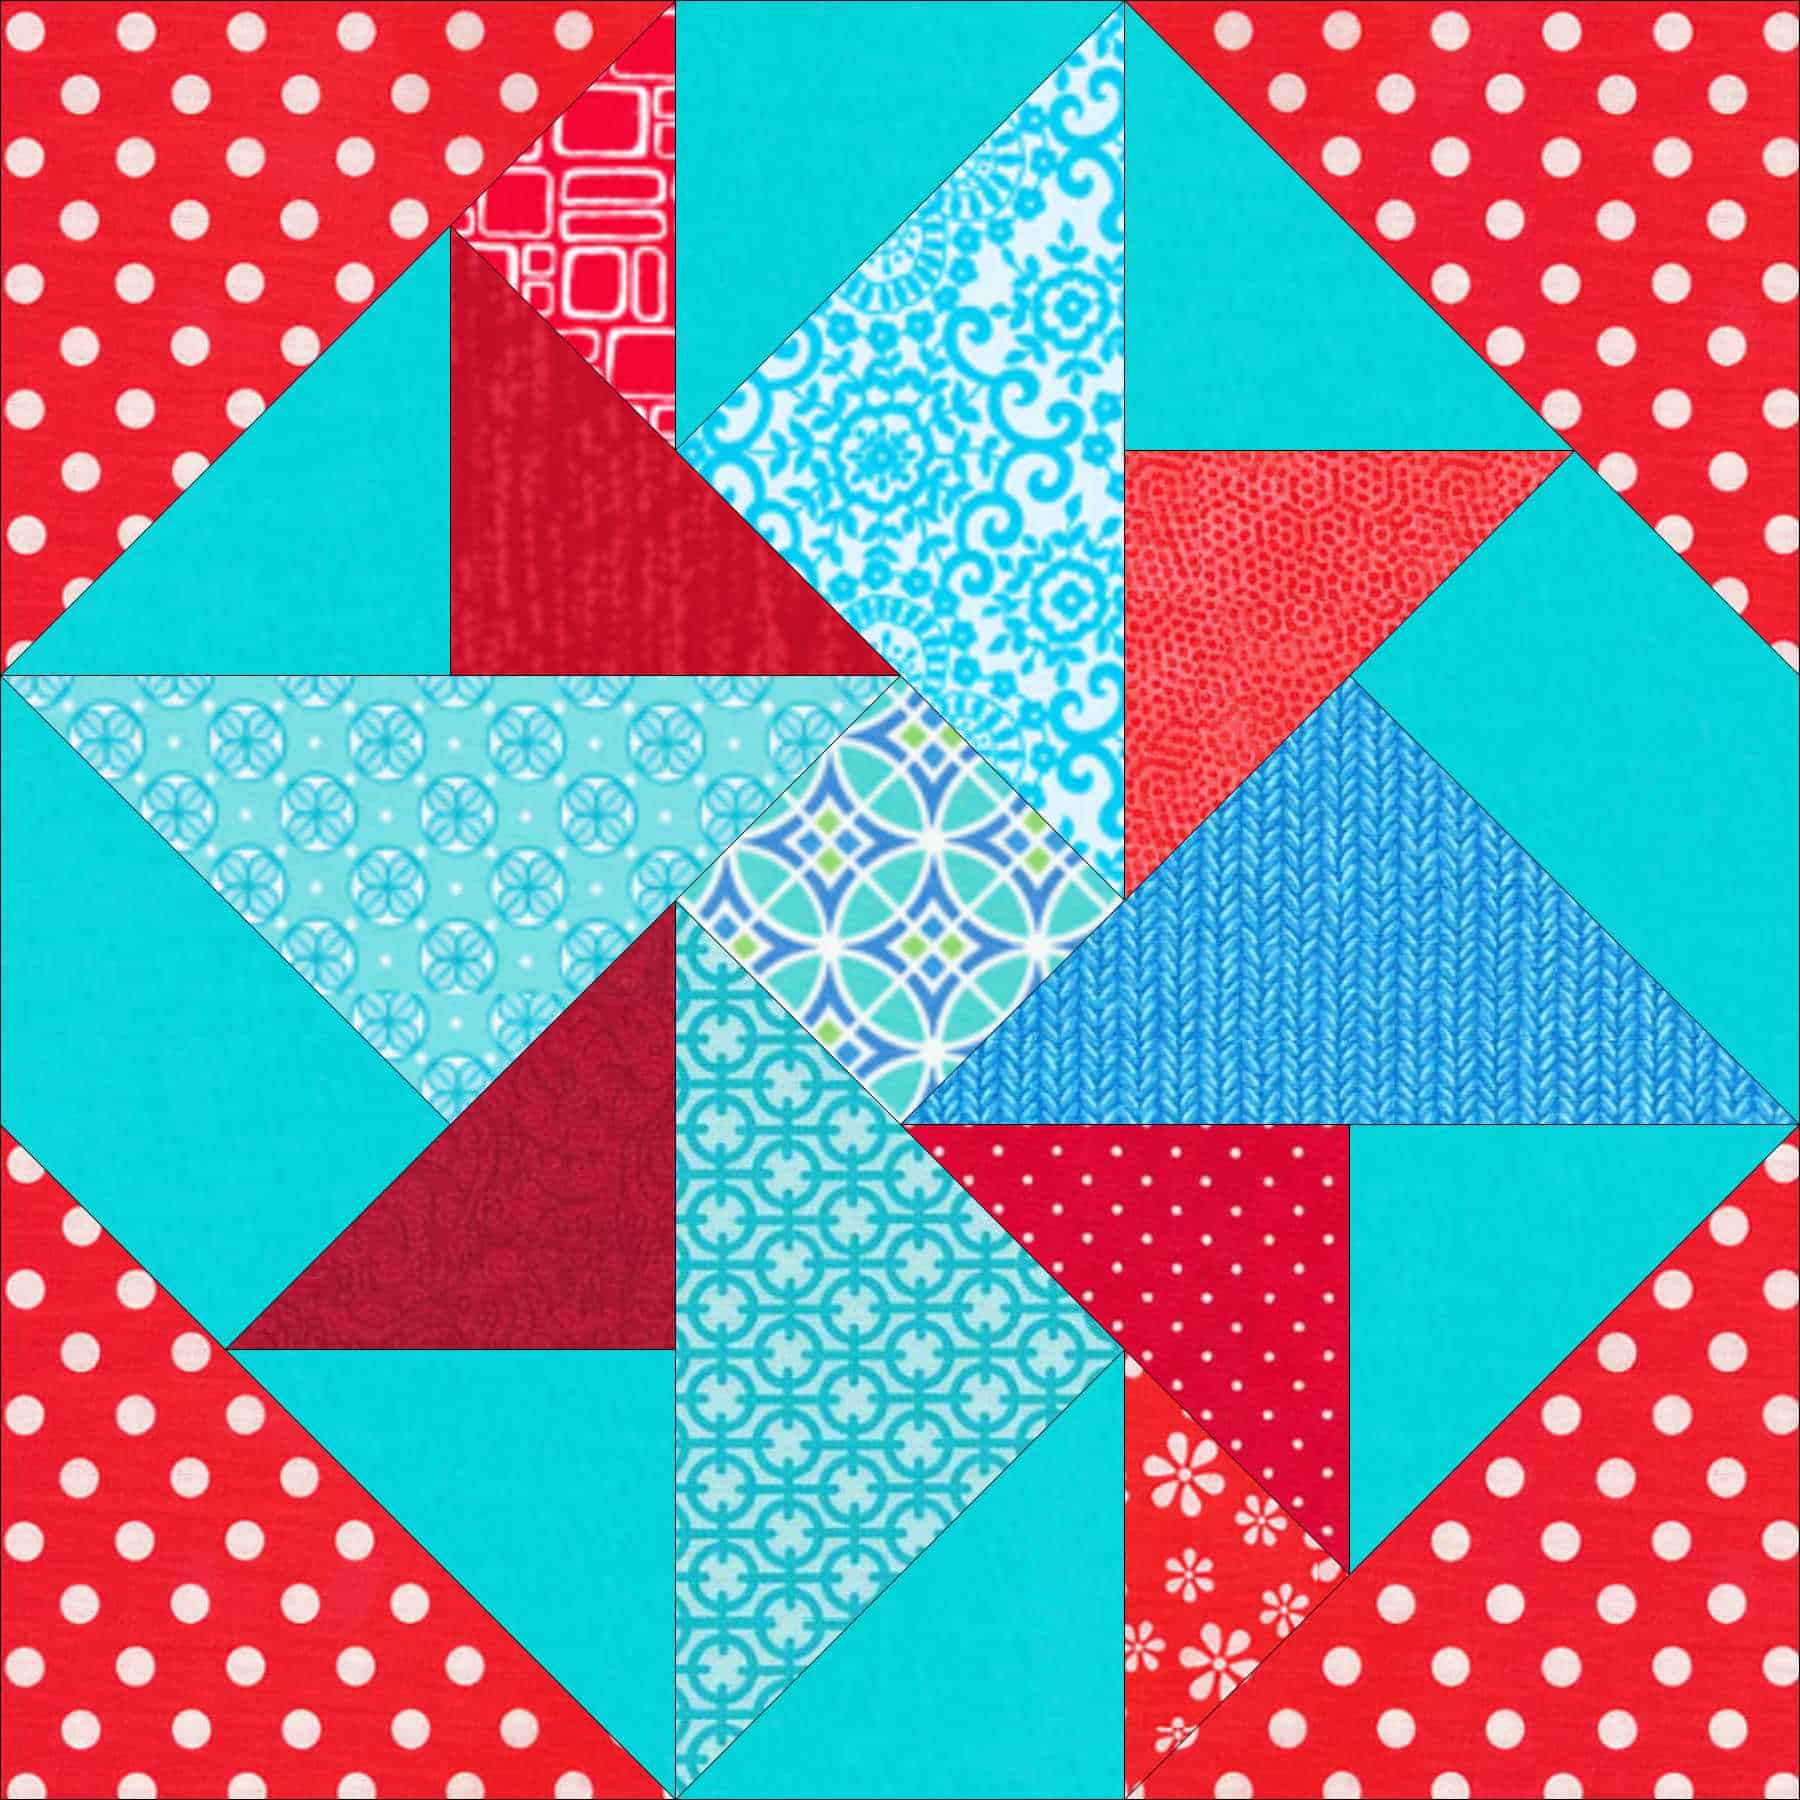
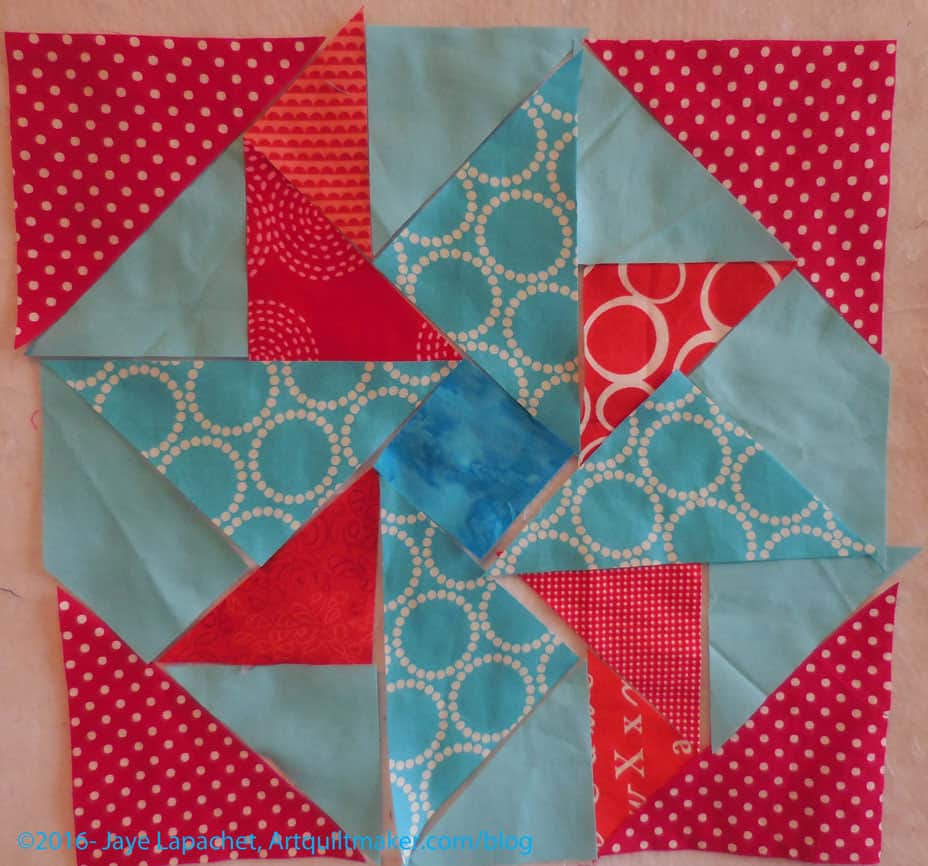
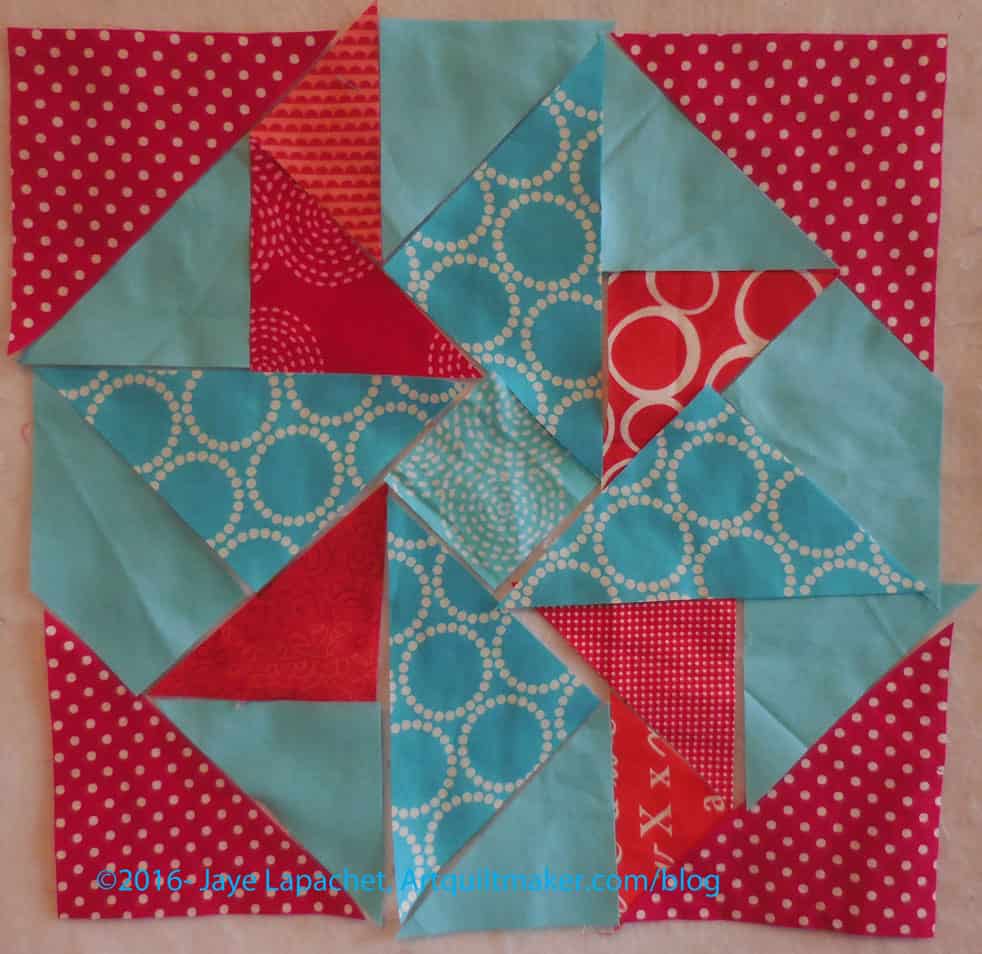
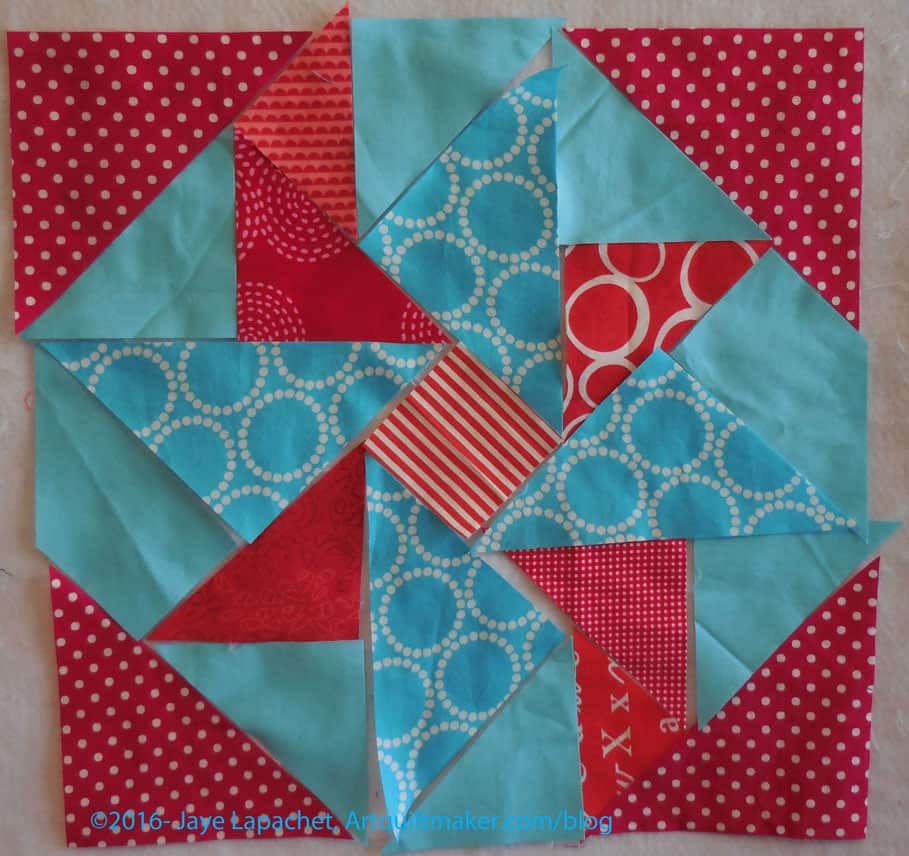
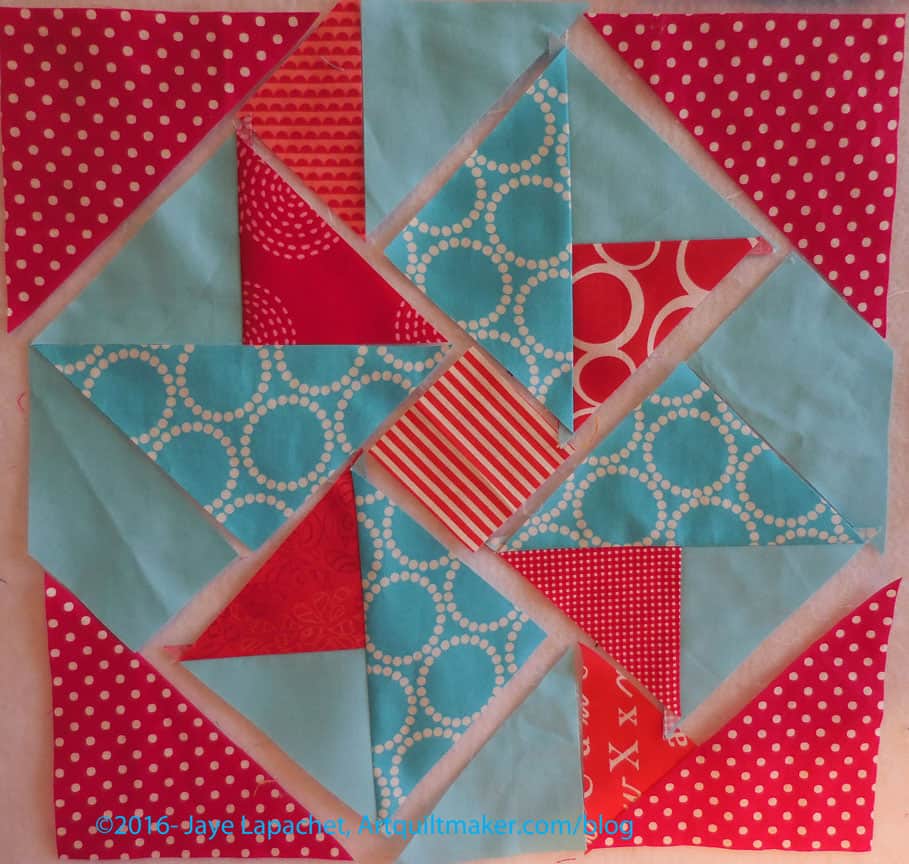
Double Windmill #3
Double Windmill #3

We are going to talk about partial seams. Partial seams are a way to create a more complex looking block without using truly difficult piecing techniques. Even a relative beginner can navigate partial seams successfully.

Supply list:

Directions:

1. Prewash and press fabric

2. Select fabrics to fit the color scheme of your other blocks. You need contrast between the various pieces.

Partial Seam Final Colors

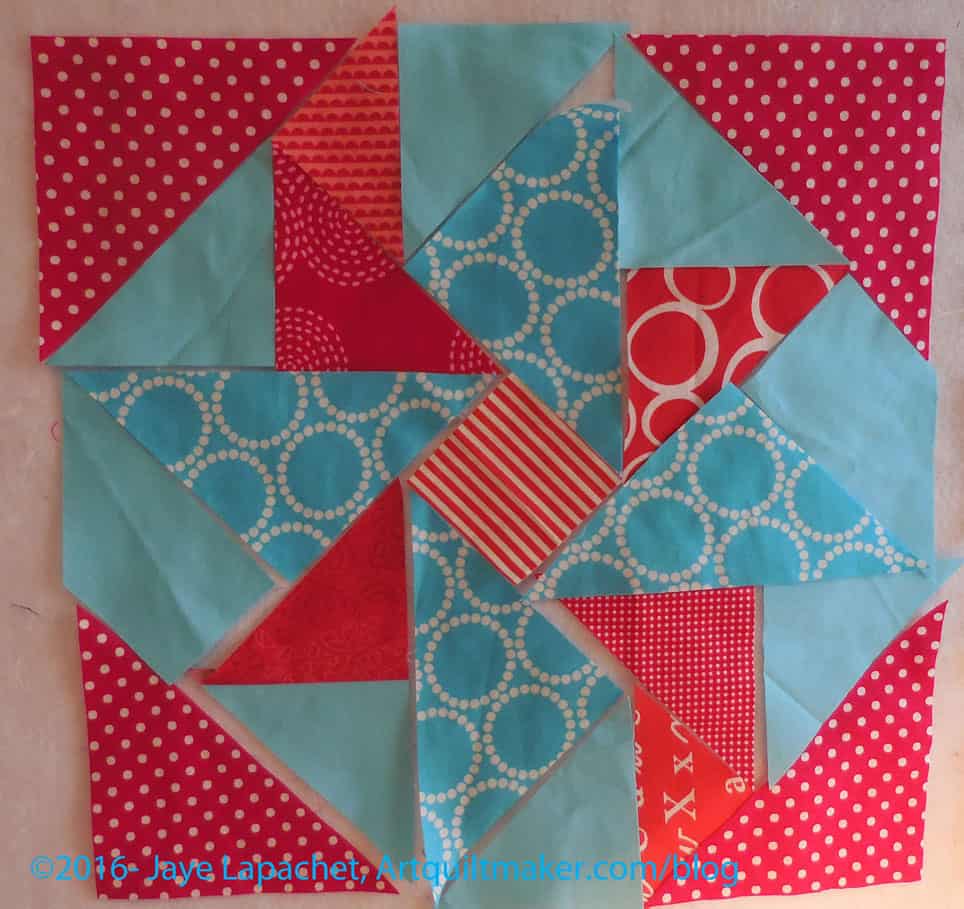
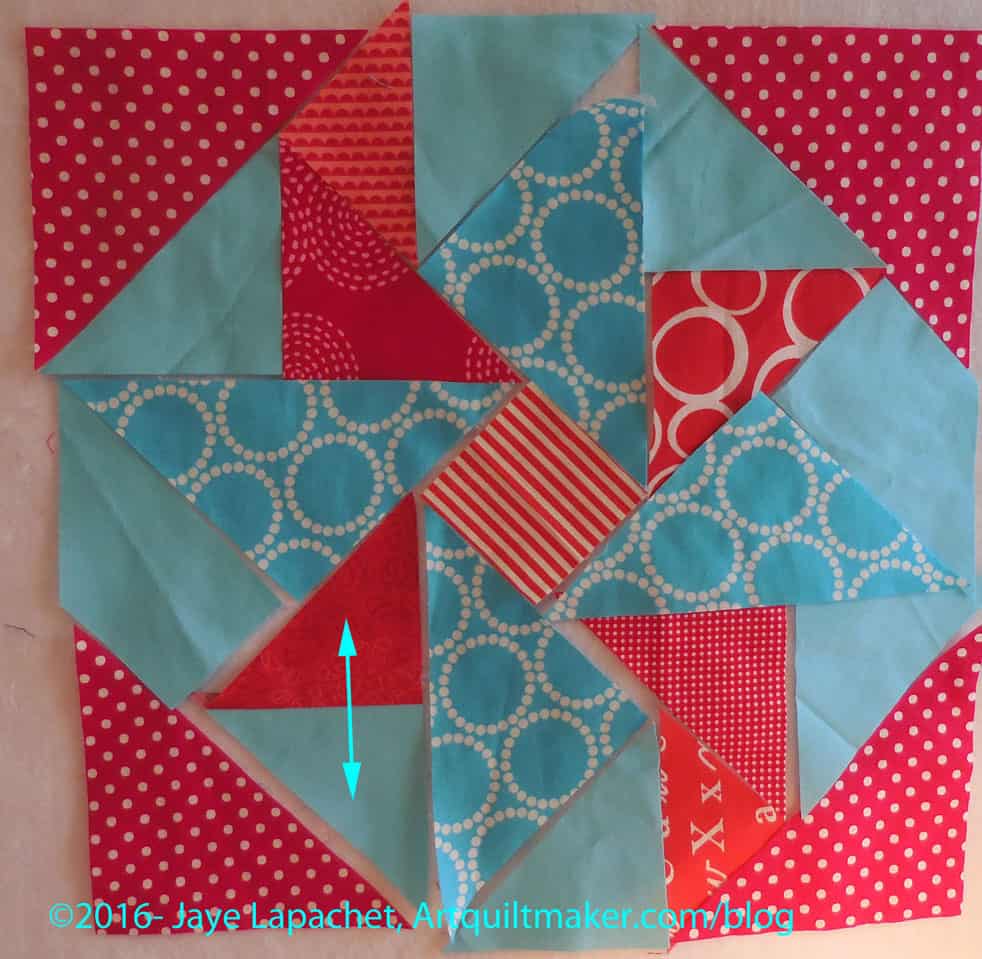
The one red triangle with the white curves might not be exactly right, but it will look fine in the overall quilt.

3. Cut out pieces using the chart. Press as you cut if necessary.

Partial Seams: Sew Triangles Together

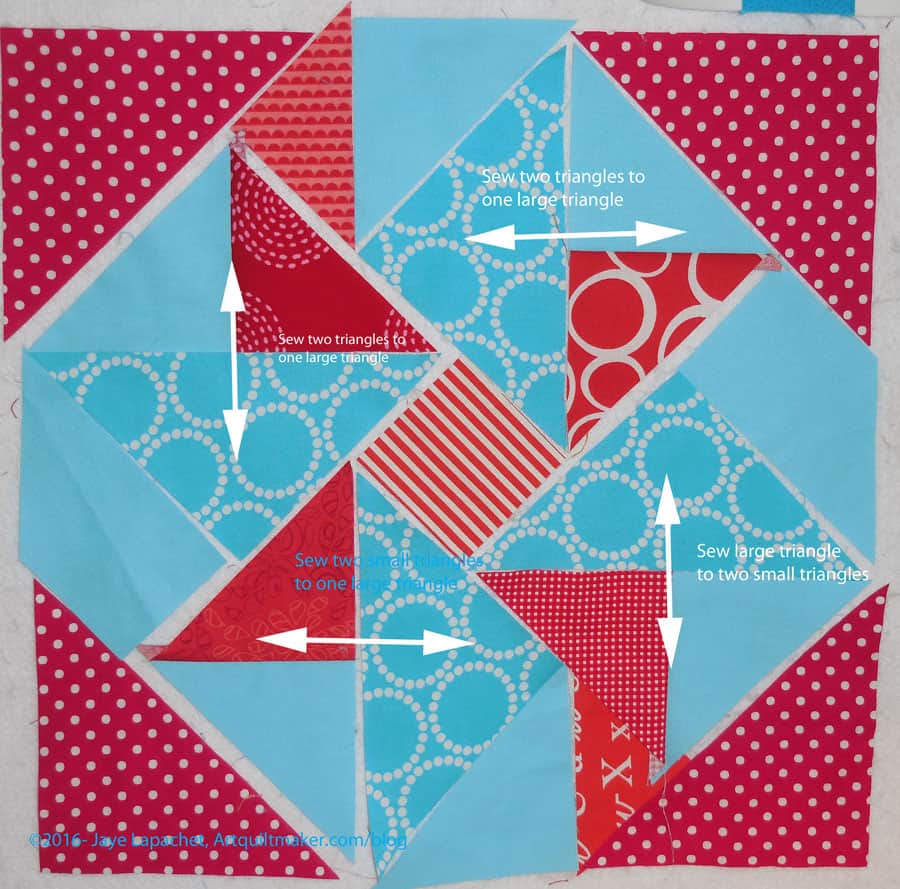
4. As we discussed before, sew smallest to largest. I started with the matching small triangles. Sew carefully without yanking the bias.

Press flat, then press to the red

5. Press flat and then press to the red. Press carefully without distorting the bias.

Partial Seam Triangles Sewn

6. Place the newly sewn triangles back in position on your design wall.

Partial Seam: Sew other like triangles

7. Sew the similar triangles, press and place back in place.

Remember, you are sewing from smallest to largest. This means that you are creating larger and larger sections until the whole block is done.

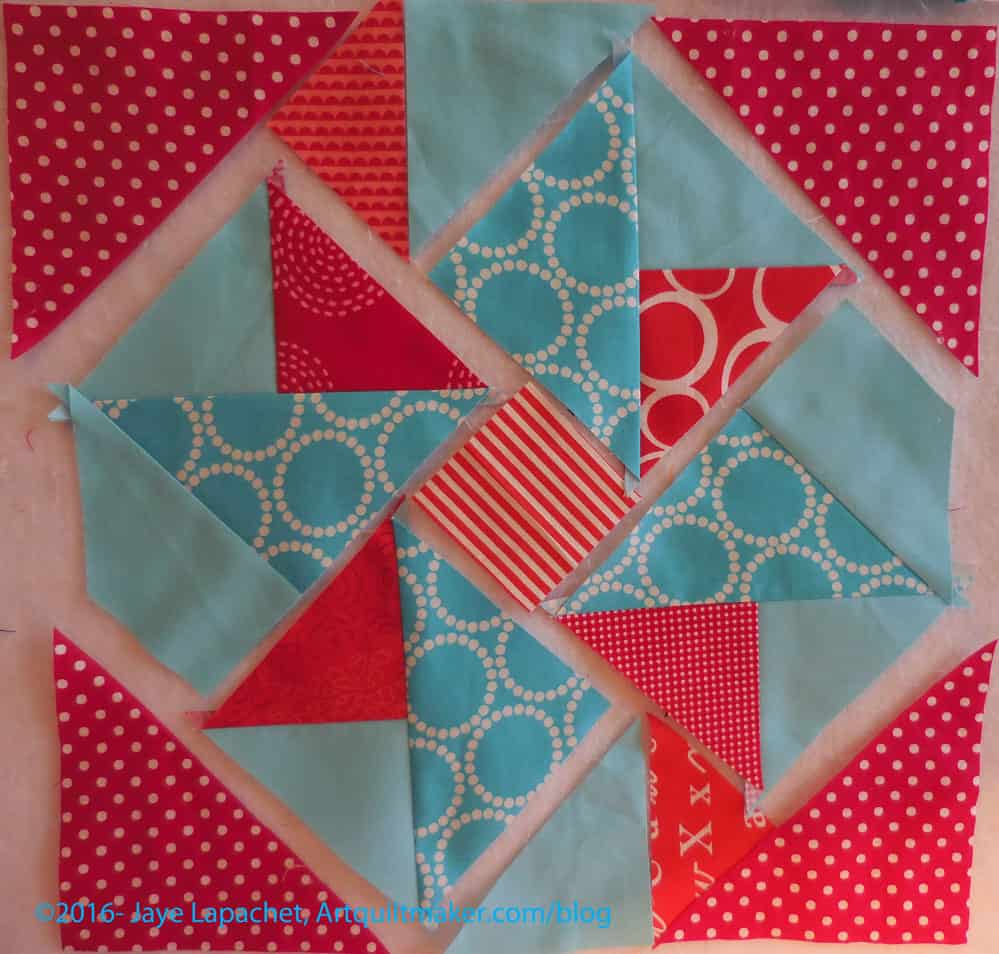
Patches Sewn in 4 sections

8. Once the newly sewn patches are back in place, it is fairly easy to see the next logical step. The large turquoise triangles (mini-Pearl Bracelets fabric in the example) should be sewn to your two triangles. This will make a square.

Sew small triangles to larger triangle

9. Sew the two small triangles, which are now sewn together (step 4-7), to the large turquoise triangle. This step makes the triangles into a square.

Place sewn squares on to the design wall

10. Press flat and then press to the larger triangle. Press carefully without distorting the bias. Place the squares back on the design wall.

Sew squares to solid fabric

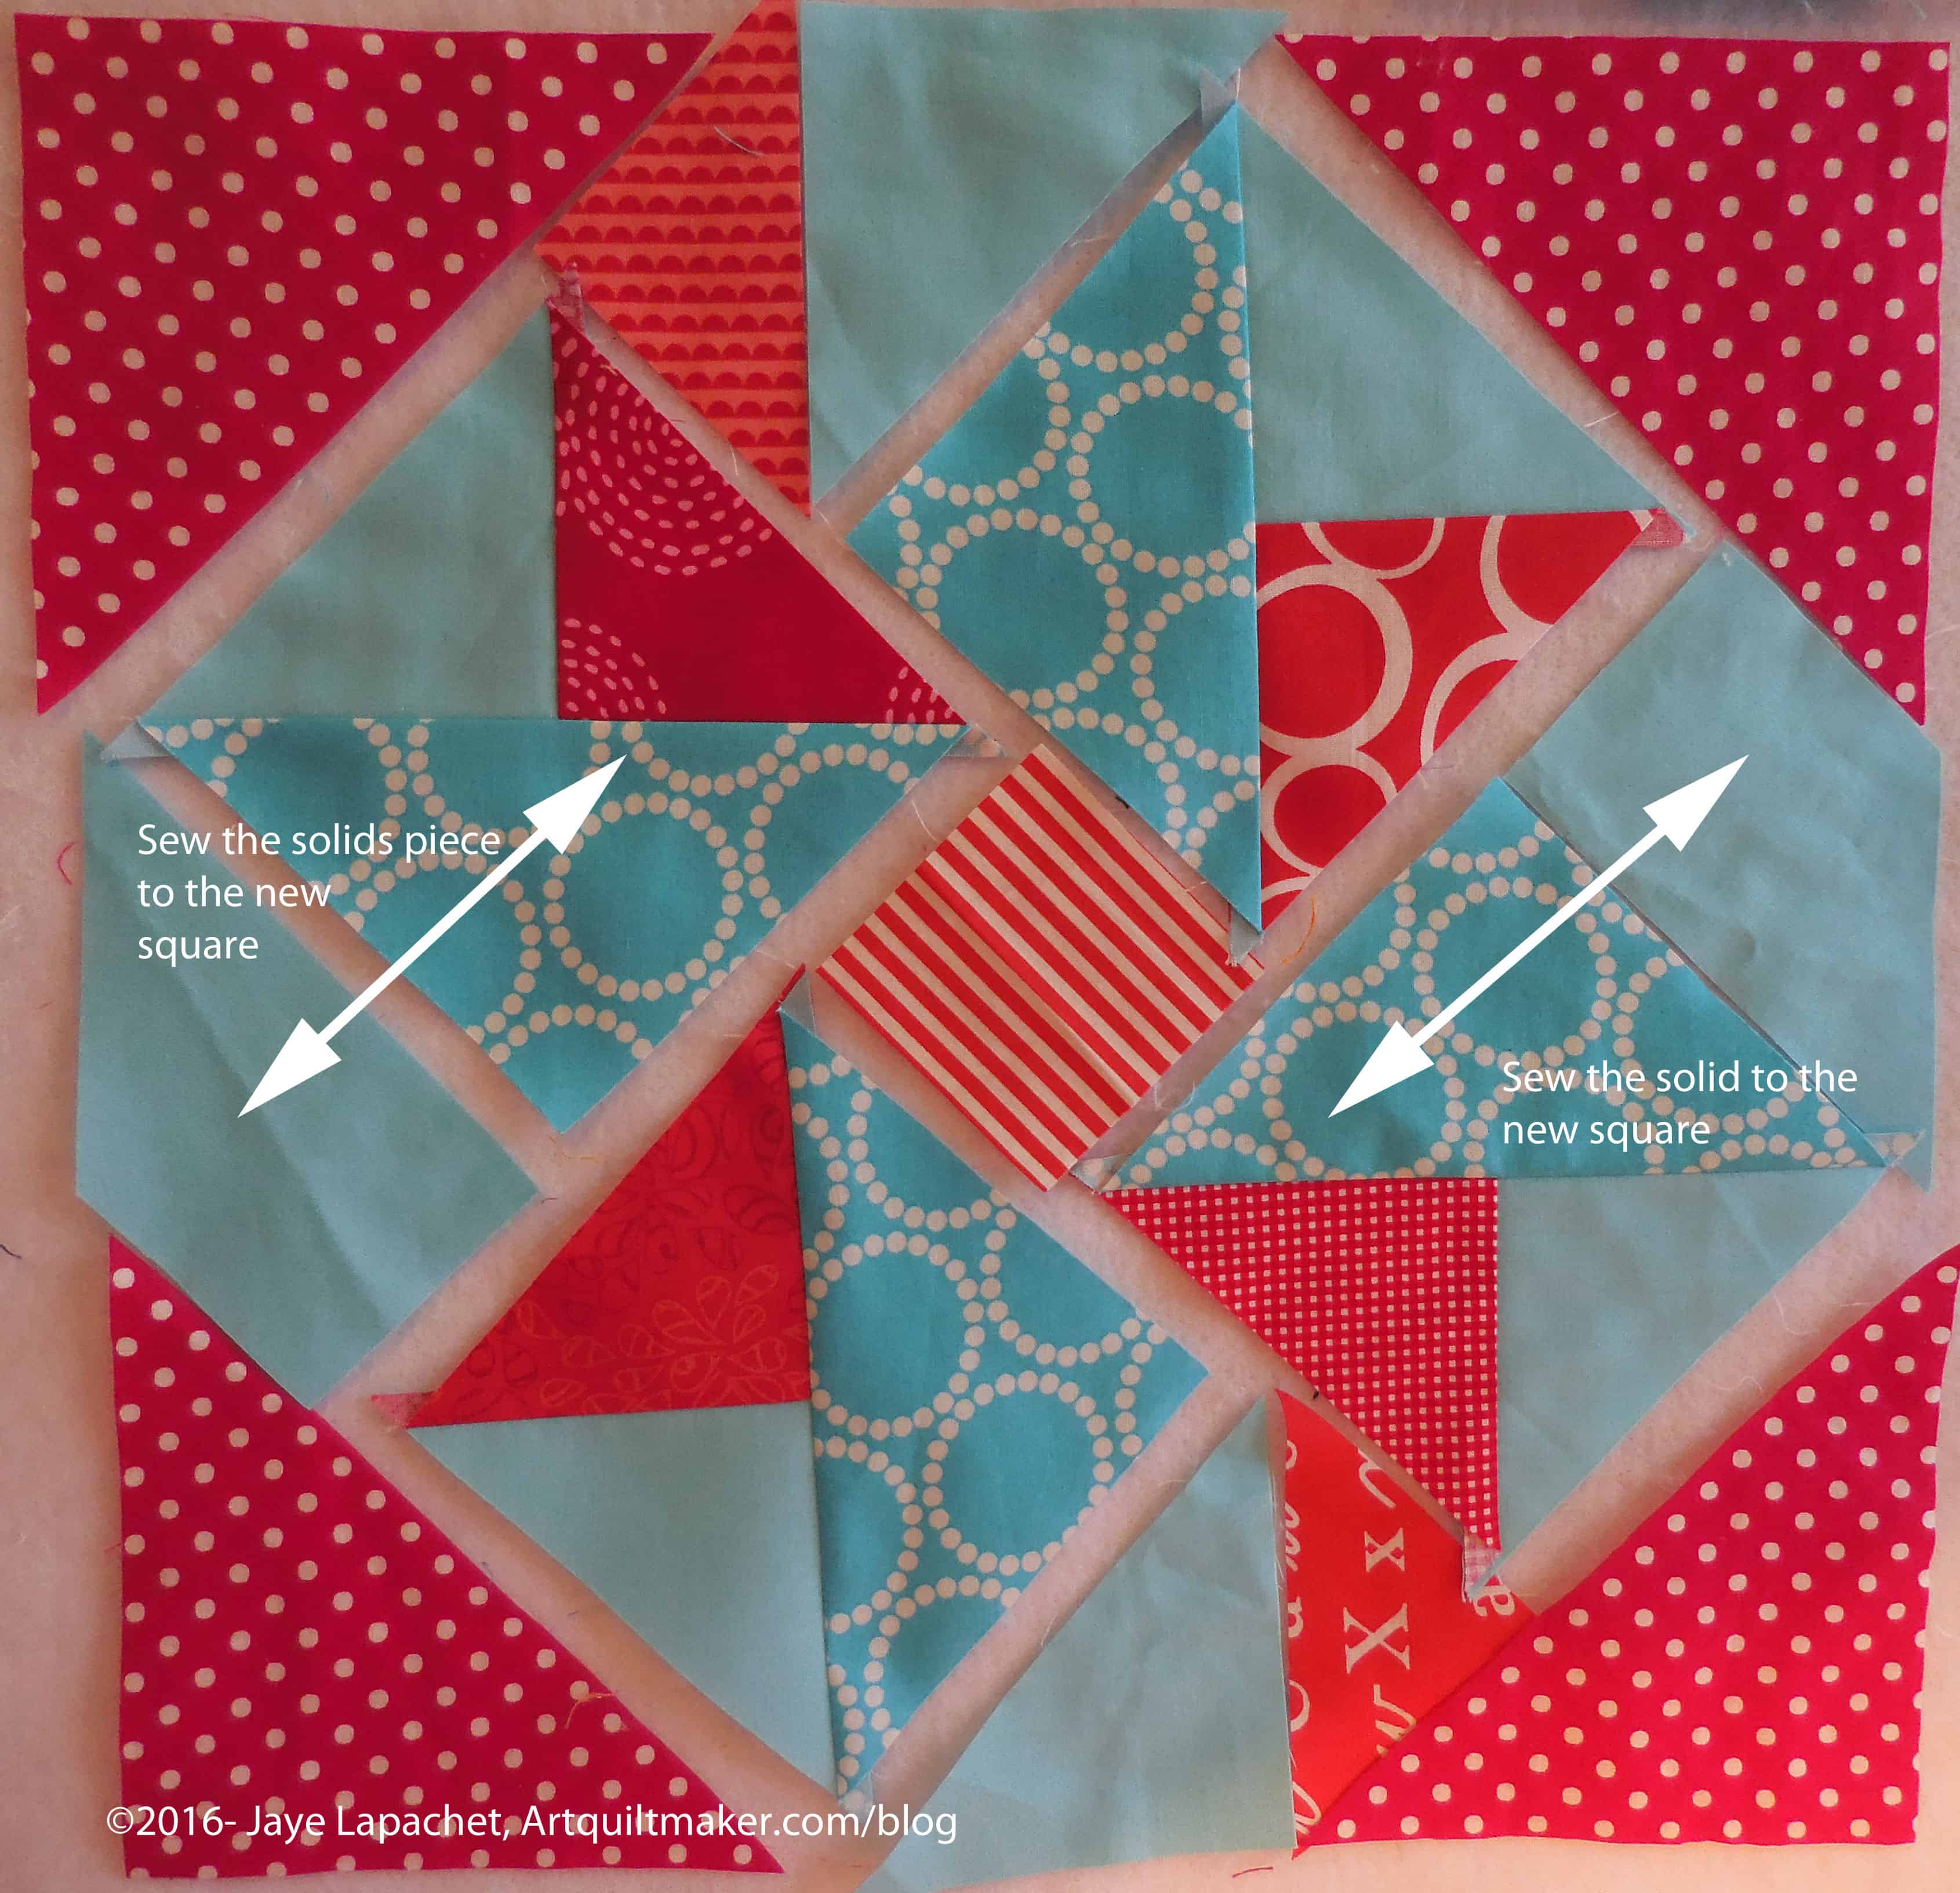
11. Sew the solid, rectangle-ish pieces to the squares you just sewed.

Place sewn sections back on the design wall

12. Place the sewn sections back on the design wall.

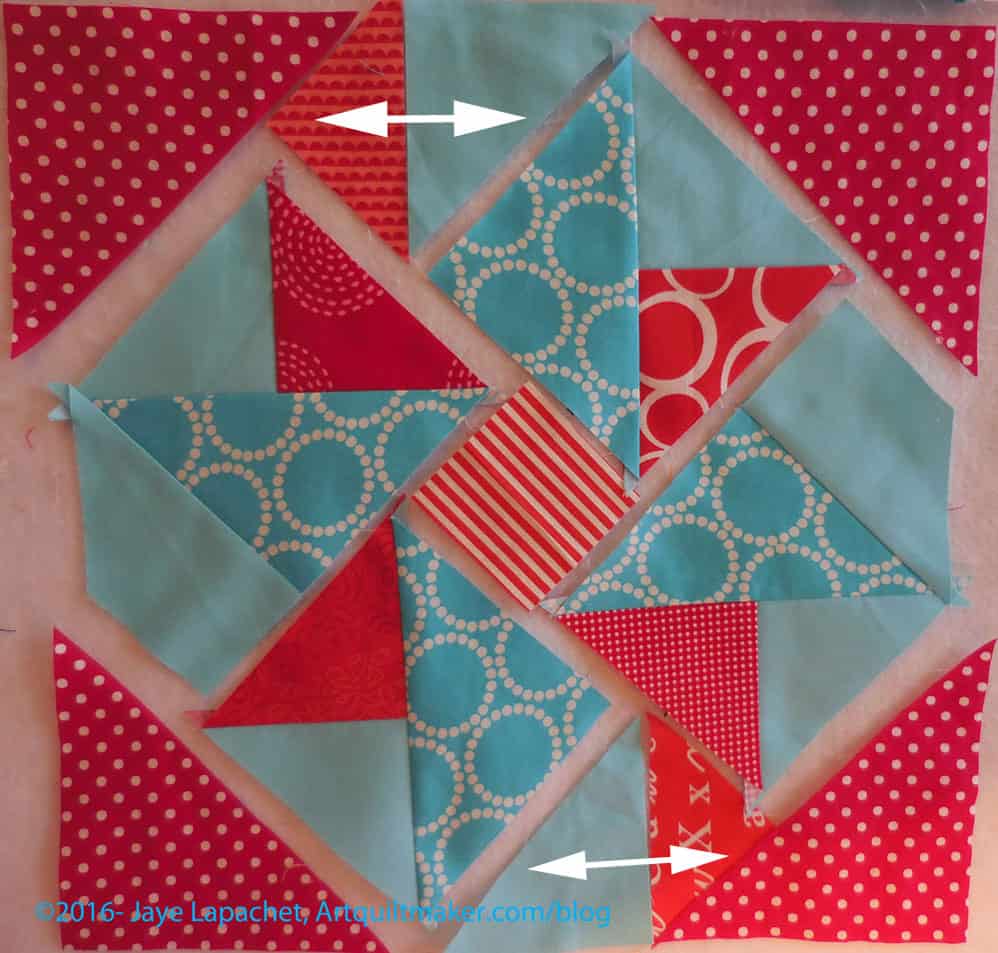
Sew small red triangles to solid triangles

13. Sew small red triangles to solid triangles

Sew new section to square

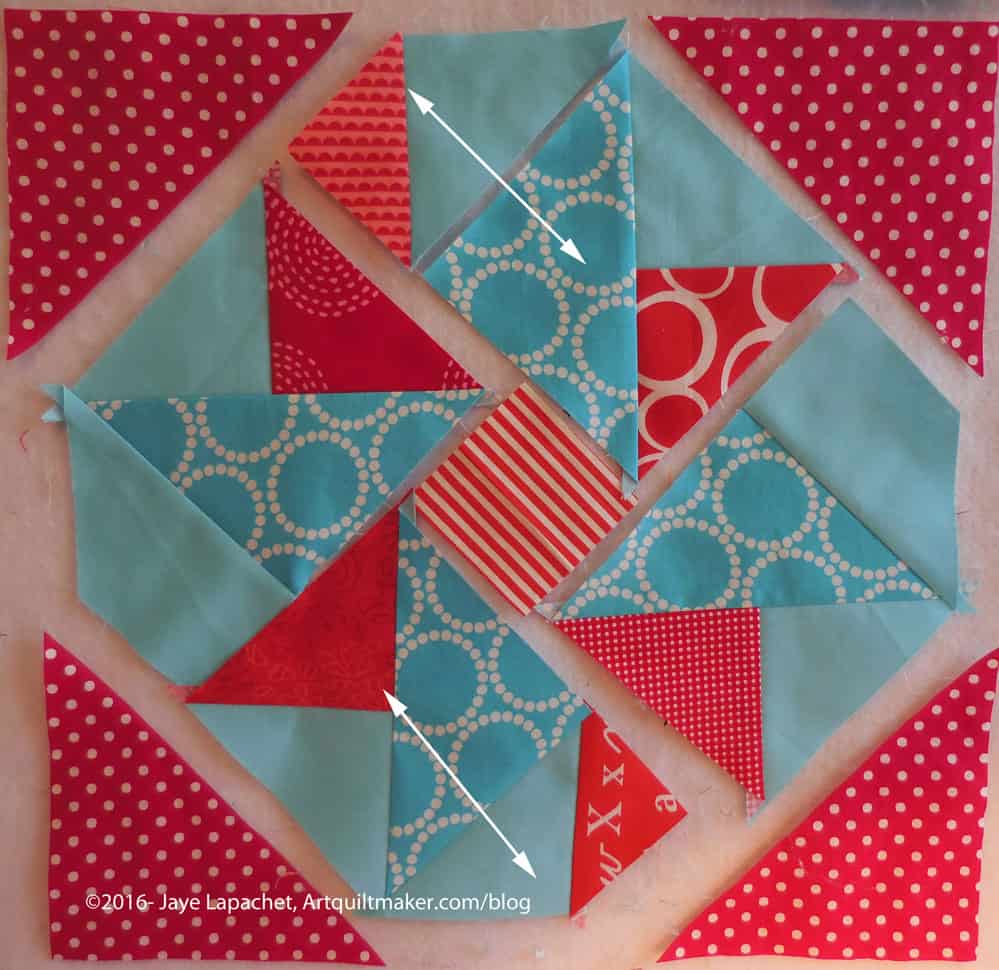
14. Sew new section to your squares.

Place sewn sections back on the design wall

15. Place the sewn sections back on the design wall.

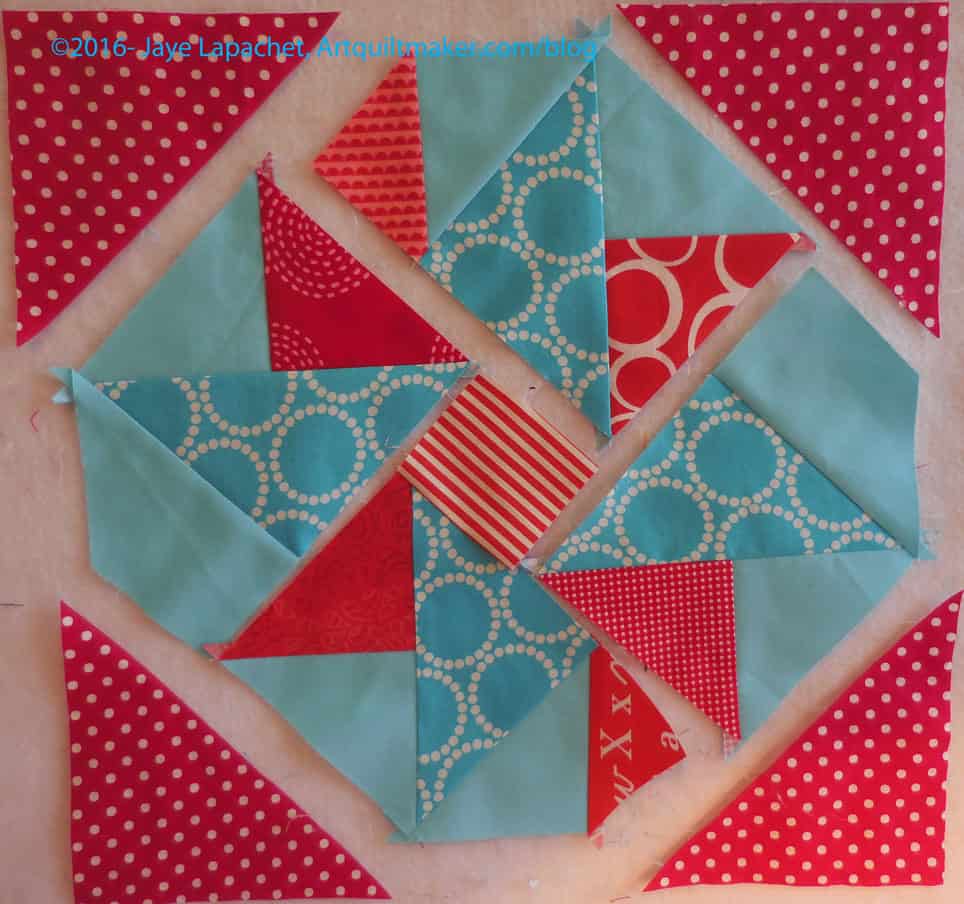
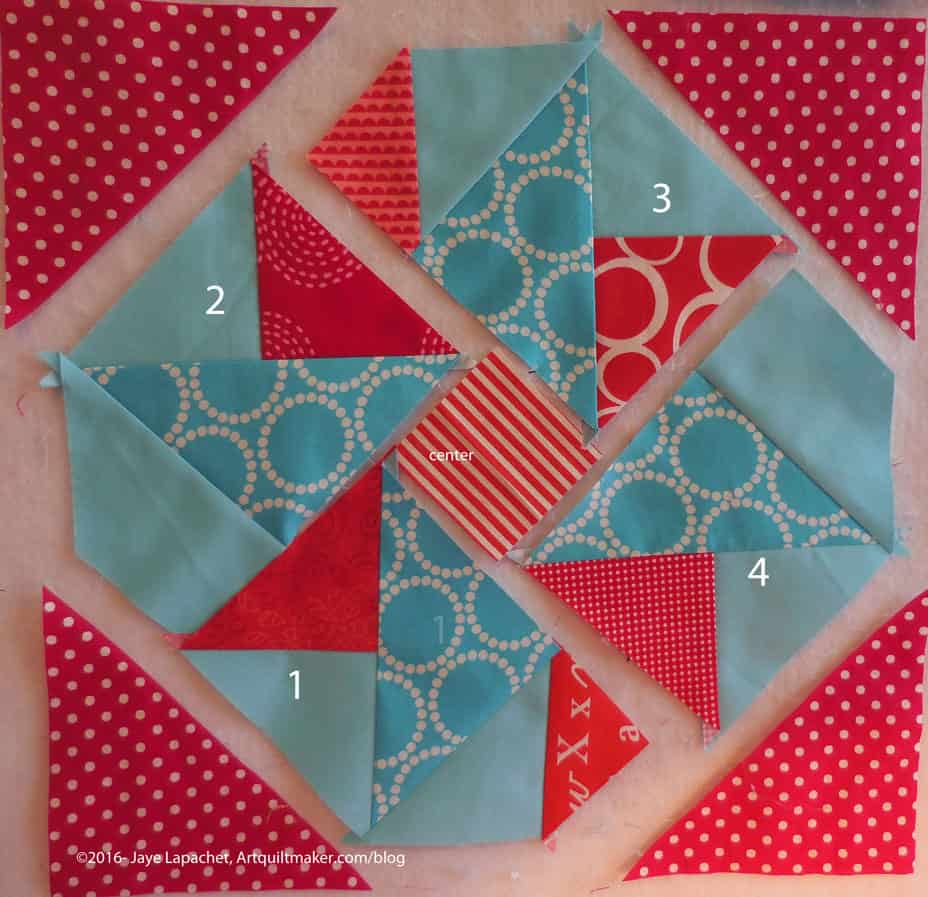
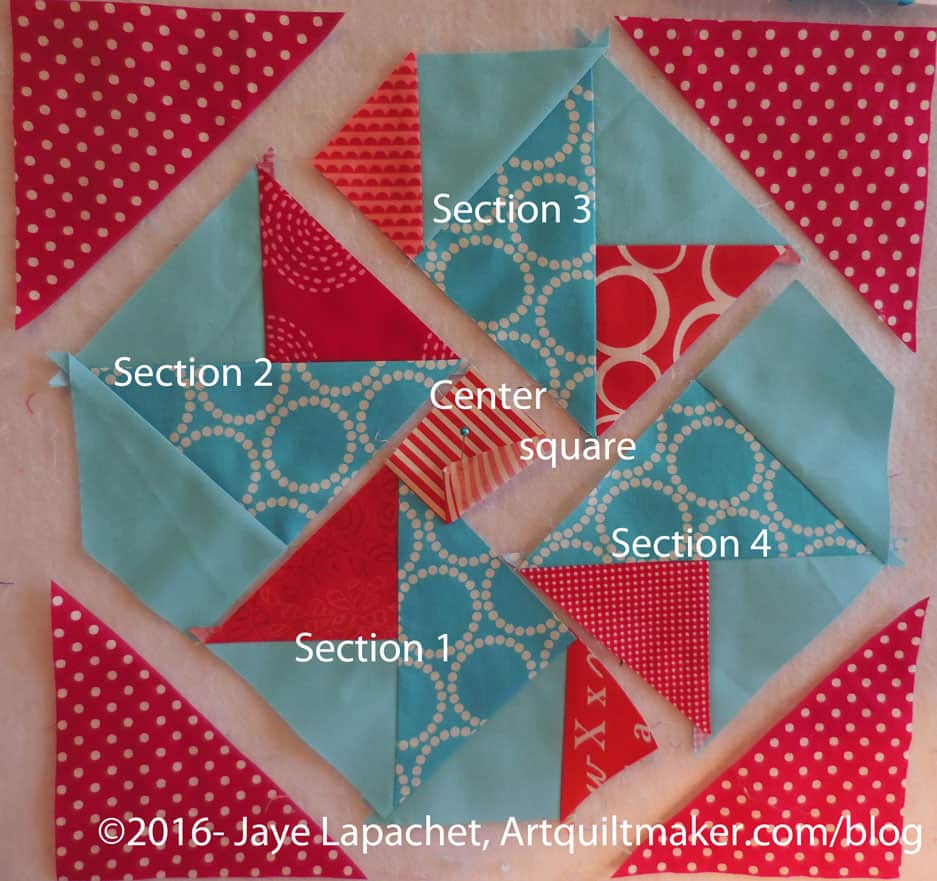
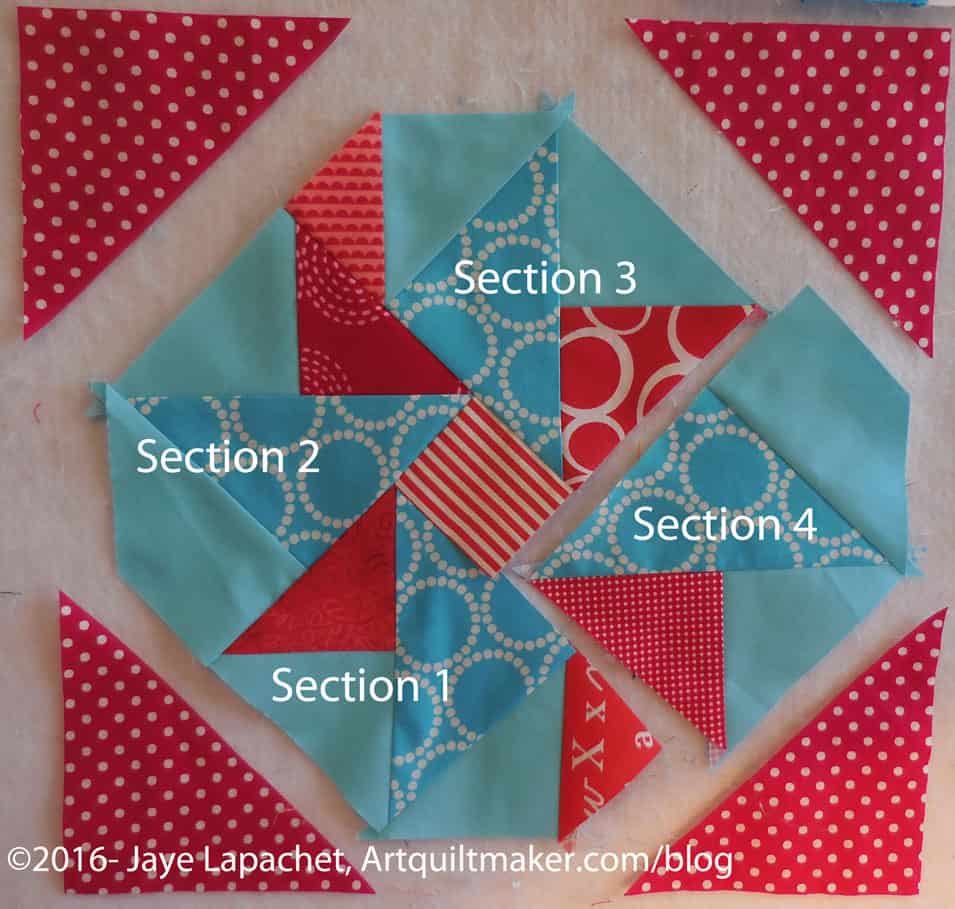
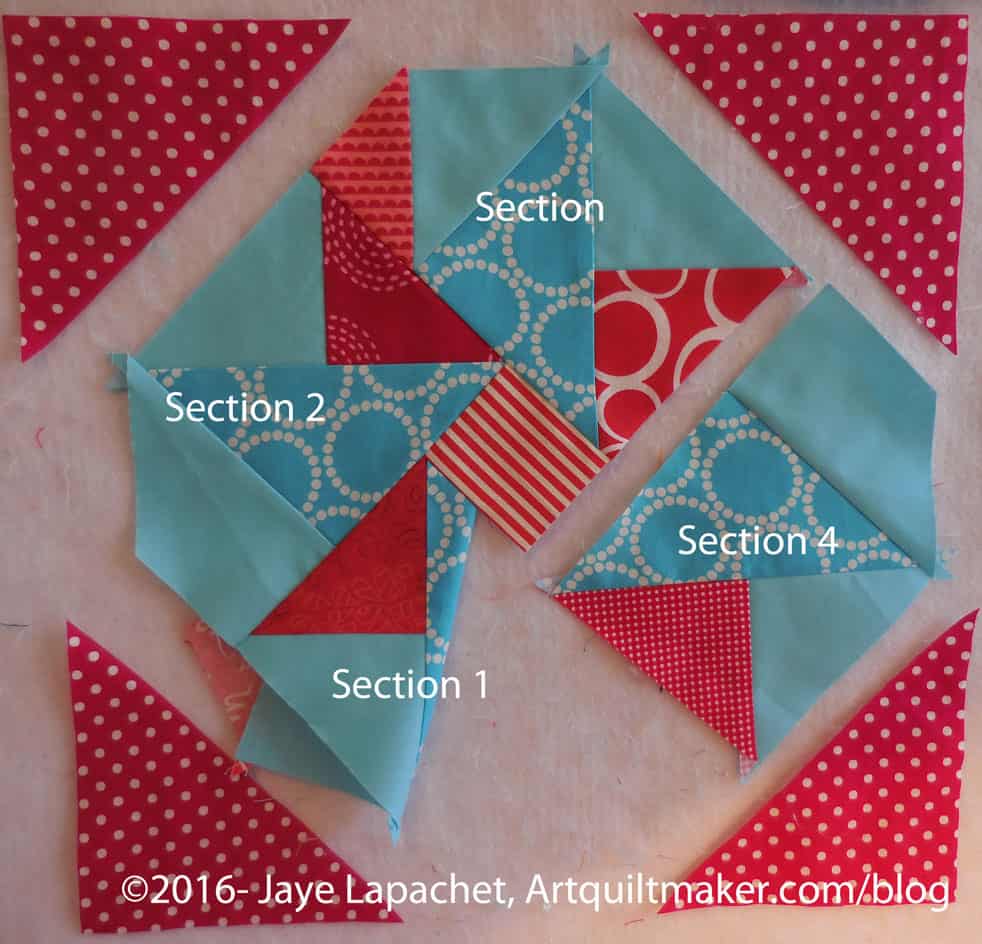
Now you have 4 major sections plus the center and 4 corner patches. Now we are going to get serious with partial seaming.

Take the center and section 1

16. Take the center and section 1.

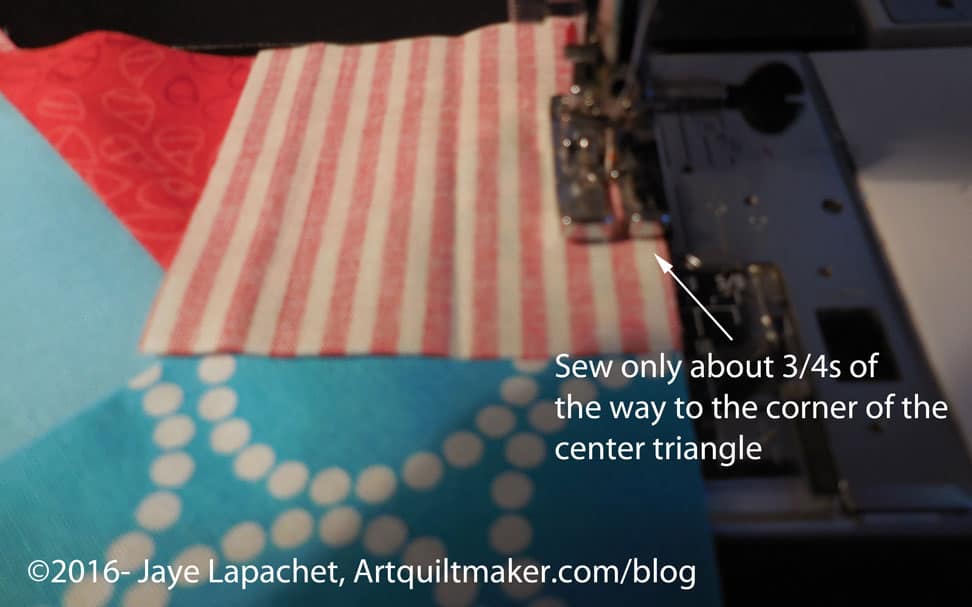
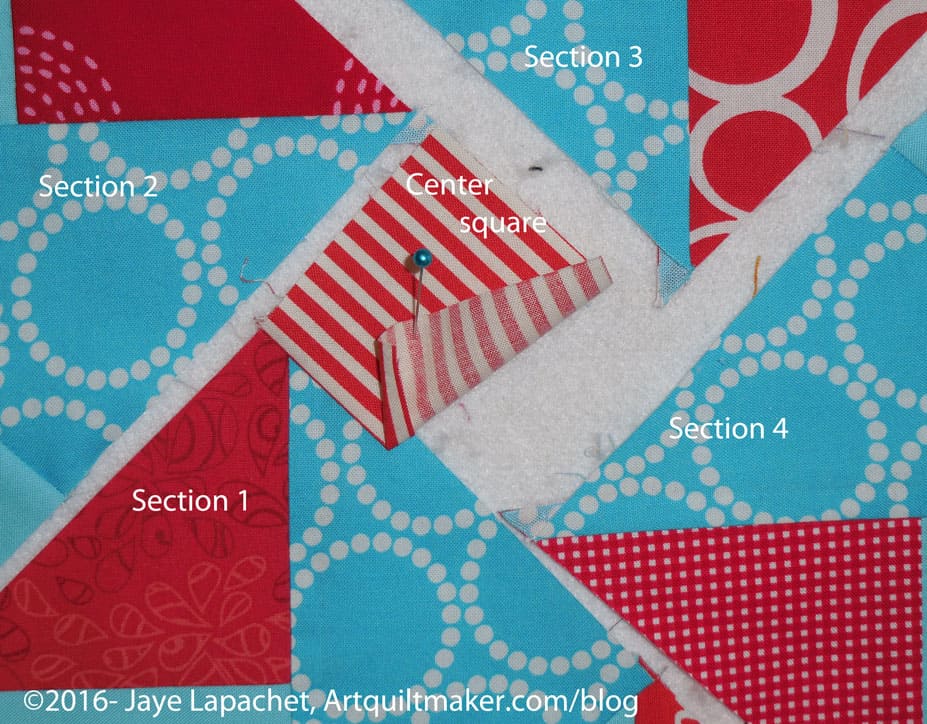
Sew about 3/4s of the way down the center square seam

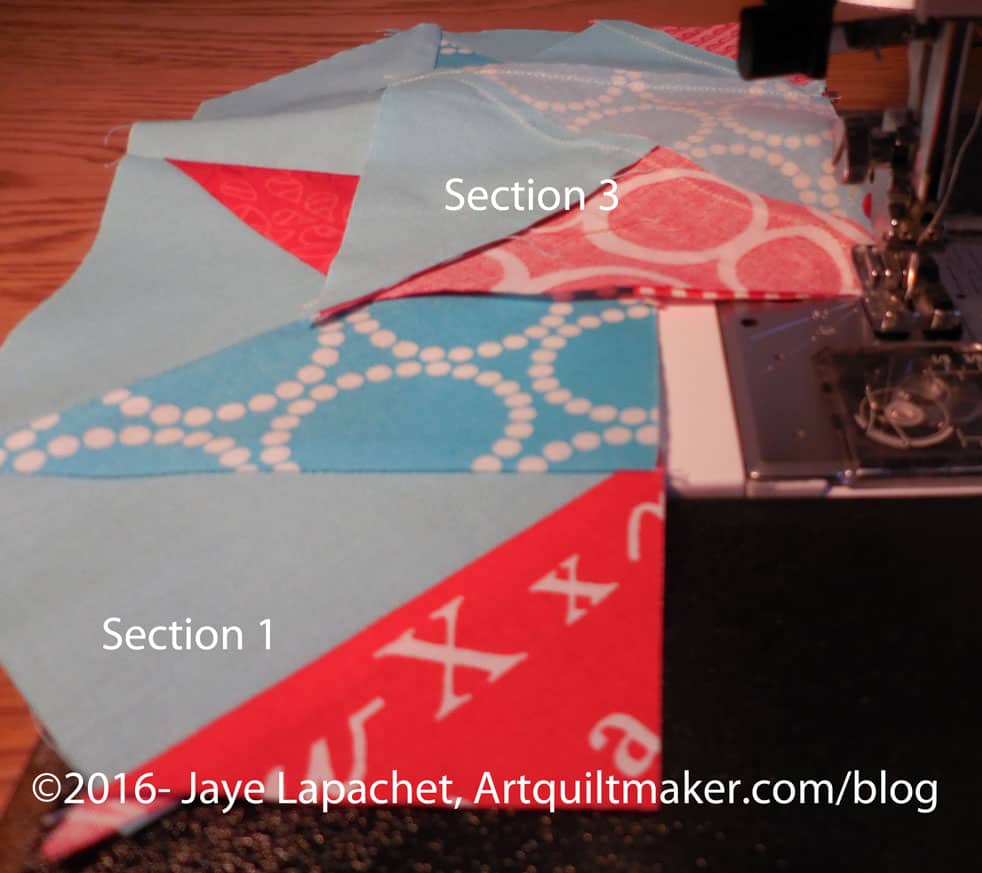
17. Put section 1 under the needle with the center square on top. Line the center square up with the intersection of the red triangle and the Pearl Bracelets triangle (my fabrics used as a guide).

Backstitch at the end of the seam to secure the seam since you will be playing with it.

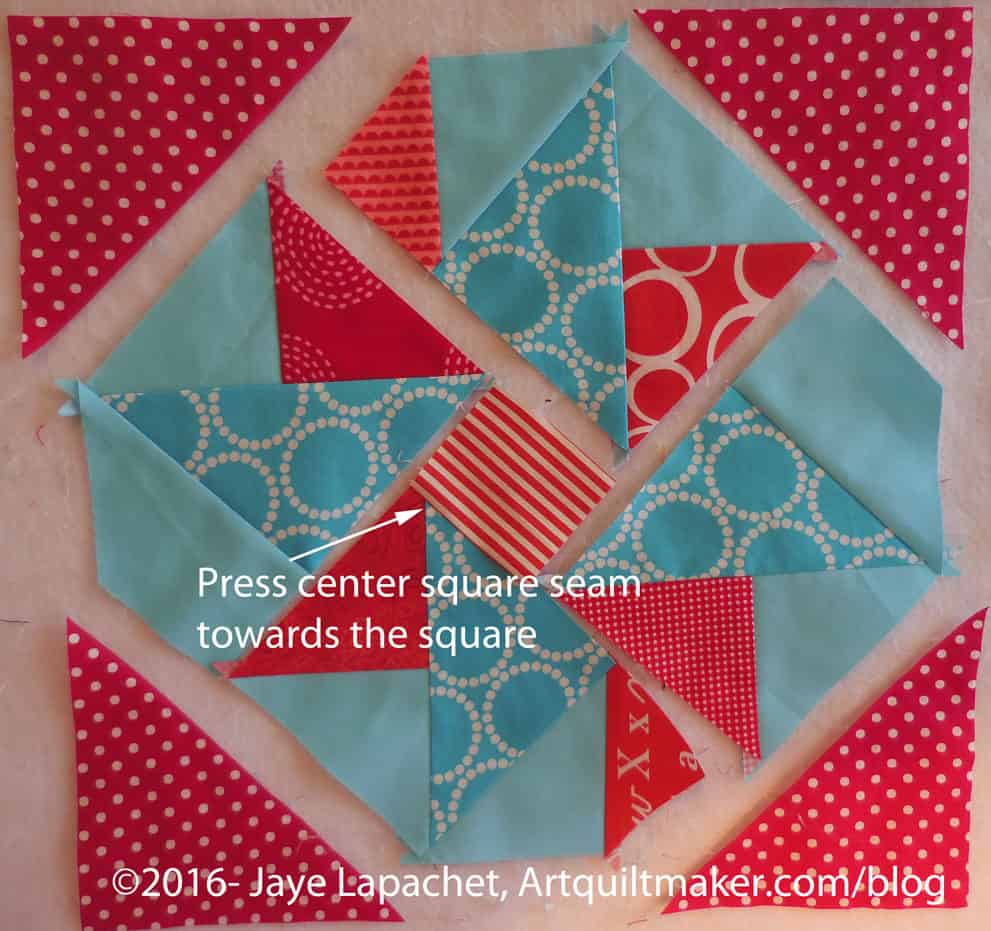
Press seam towards center

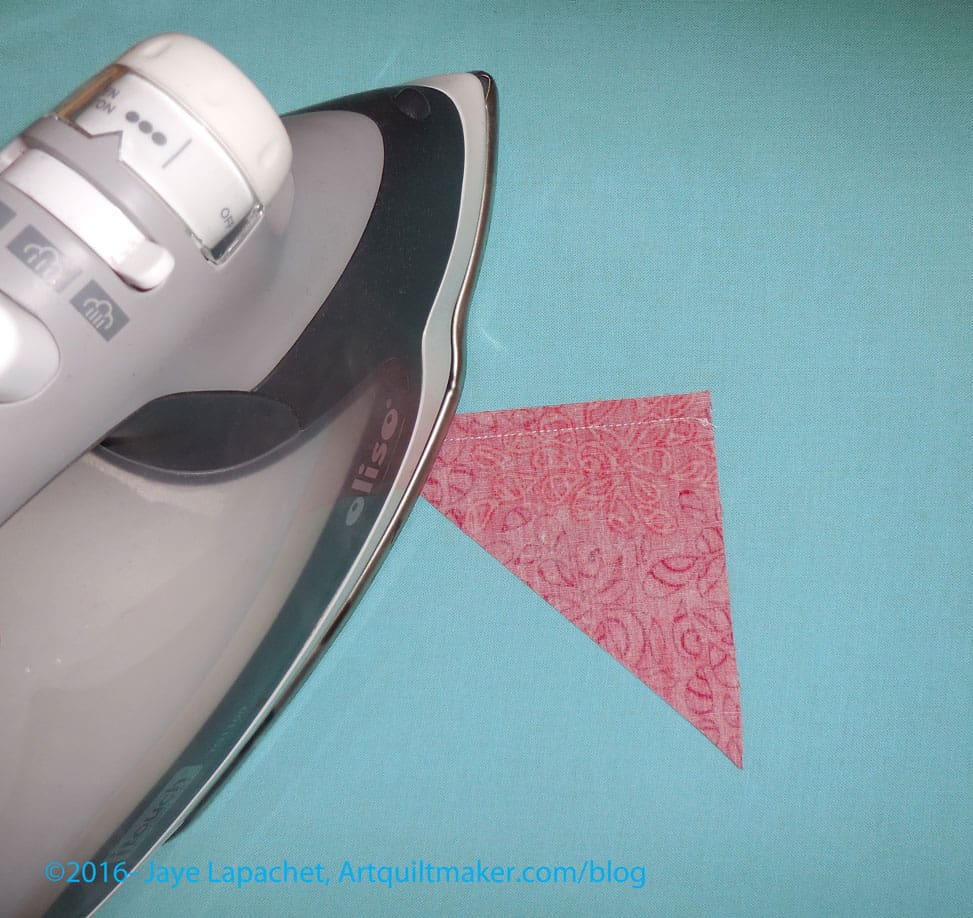
18. Press seam towards center square. Press carefully since the whole seam isn’t sewn.

Partially sewn seam
Partially sewn seam
Partially sewn seam - detail
Partially sewn seam – detail

The sewn piece will flip up. You can see about how much to sew in the picture above.

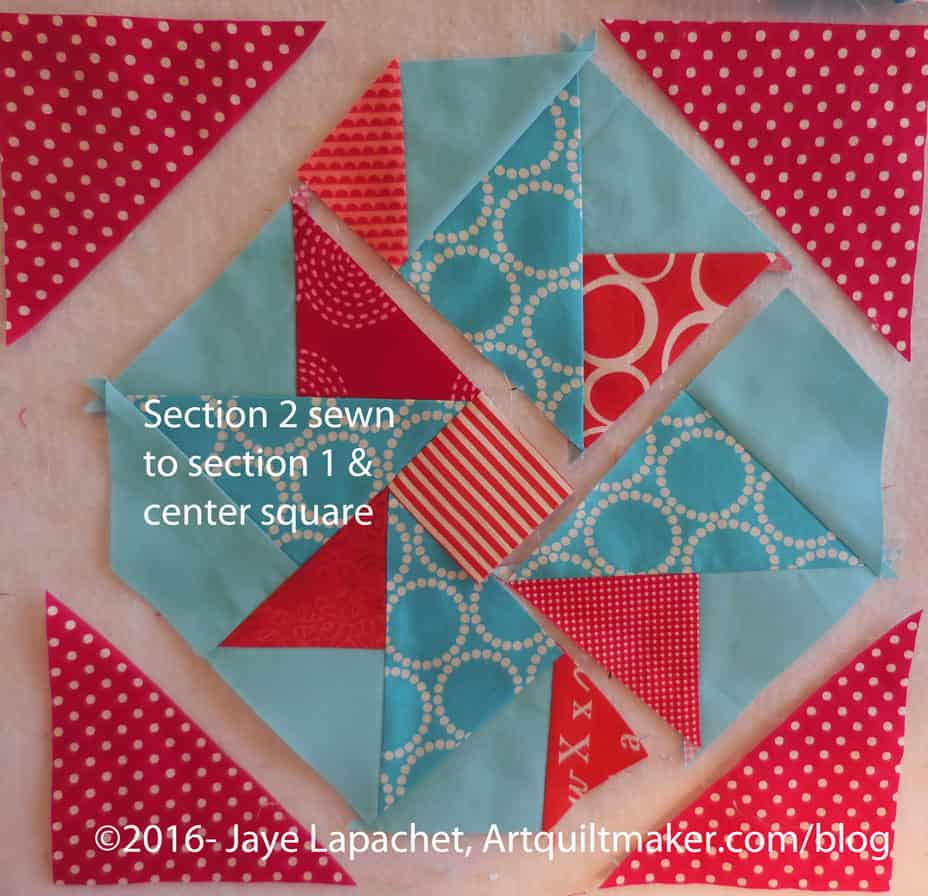
19. Take section 2 and lay it over section one and the center square with right sides together. The lengths should be about the same.

Section 2 sewn to section 1
Section 2 sewn to section 1 + center square

Completing the sewing of section 2 makes the section look like it is possible to sew on section 3.

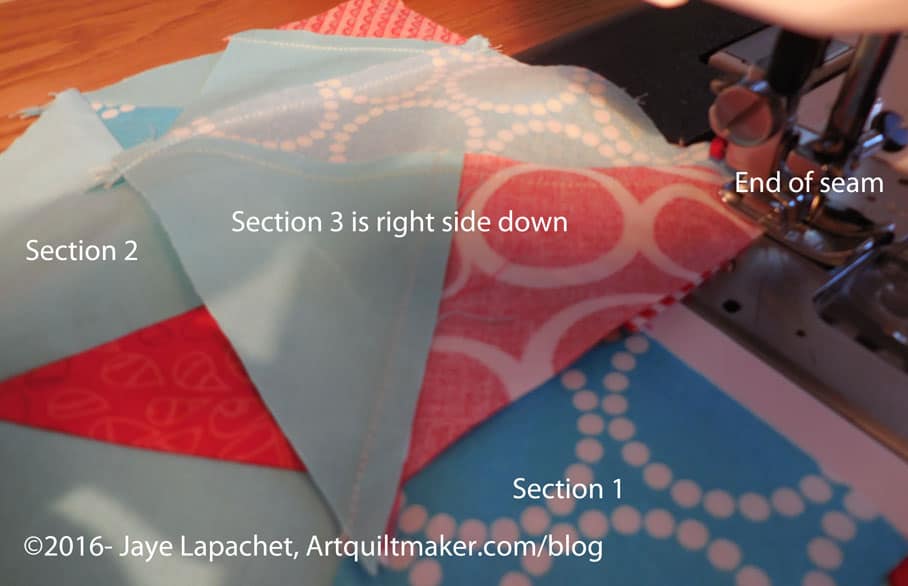
Section 3 right side down
End of section 3 seam

20. Lay section 3 over section 2 and the center square. Line up the edges so they are event.

Center section almost done

Now your center section is almost done.

Tuck section 1 under section 2

21. Prepare to sew section 4 to the larger piece you have made by tucking section 1 under section 2. You might want to use a pin to keep it out of the way.

22. Lay section 4 over section 3, right sides together.

Section 4 sewn
Section 4 sewn

Section 4 is sewn. Keep section 1 tucked under and out of the way for the next step. Get ready to complete your partial seam.

Fold center section up
Fold section up - detail
Fold section up – detail

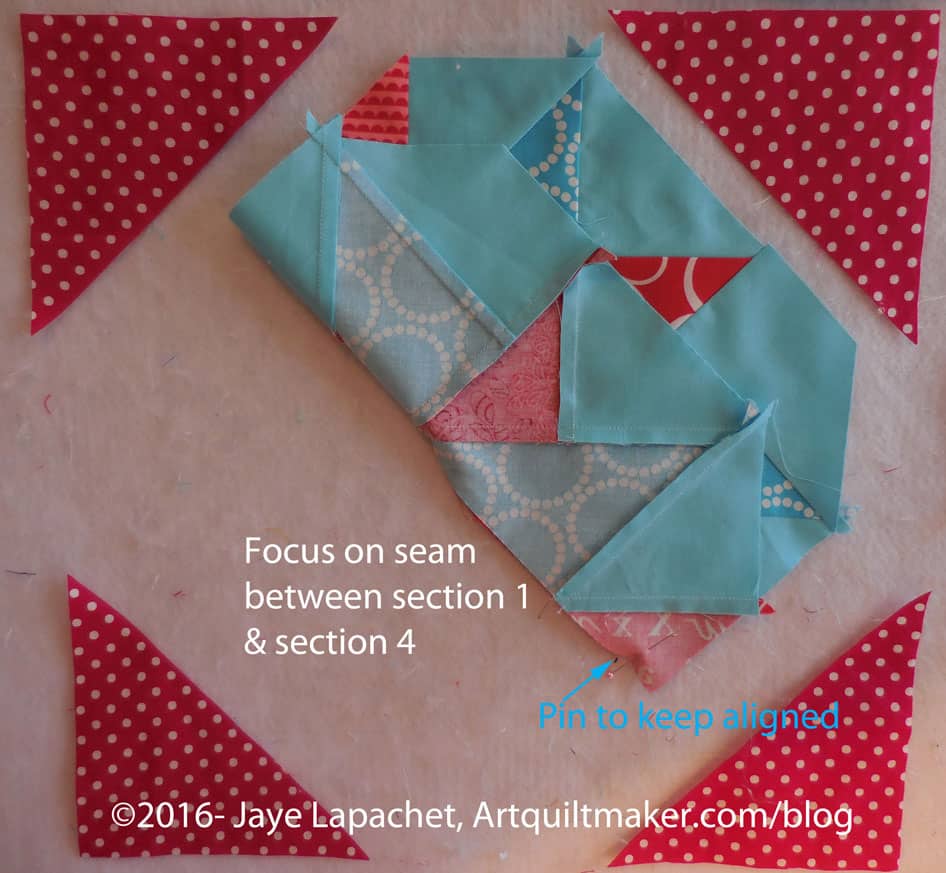
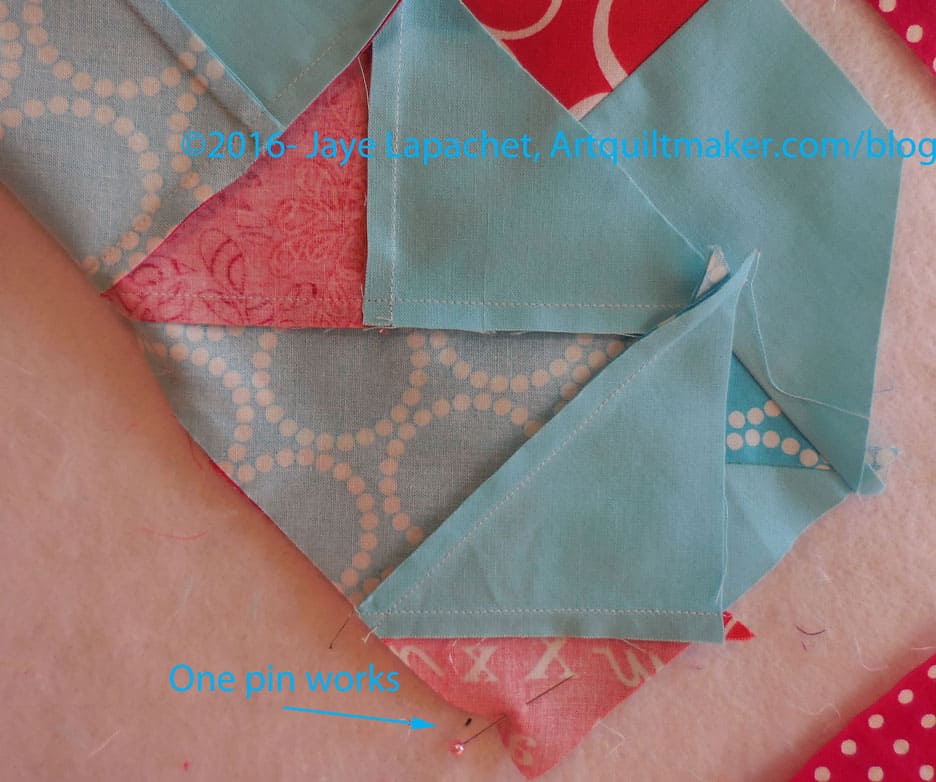
23. Fold the raw edges between section 1 and section 4 up like half of it wasn’t sewn. Use a pin near the end of the seam (edge of the section) to keep it in place.

Position piece near pin
Start sewing near pin - detail
Start sewing near pin – detail

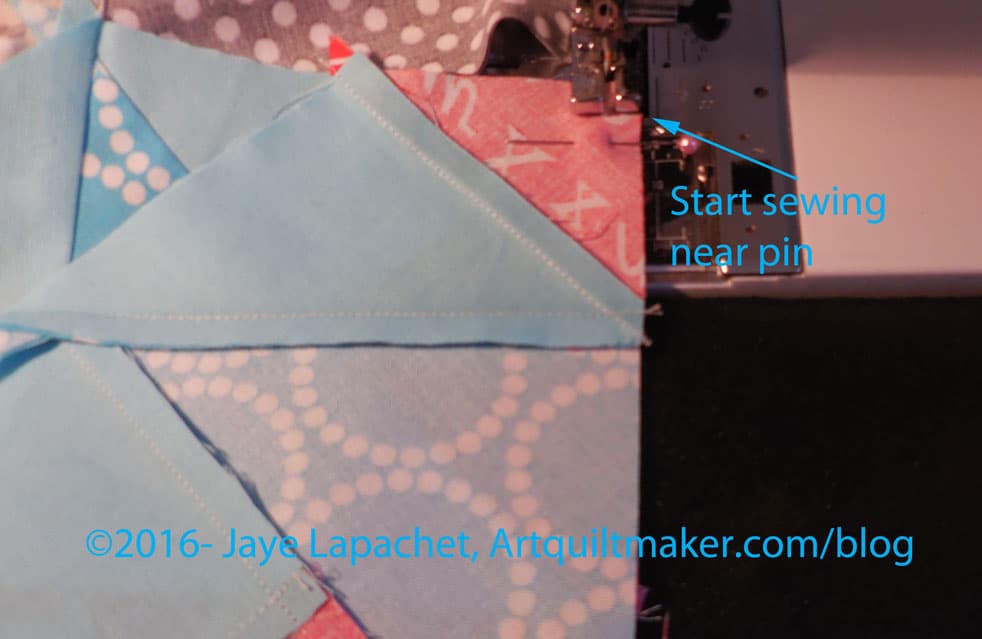
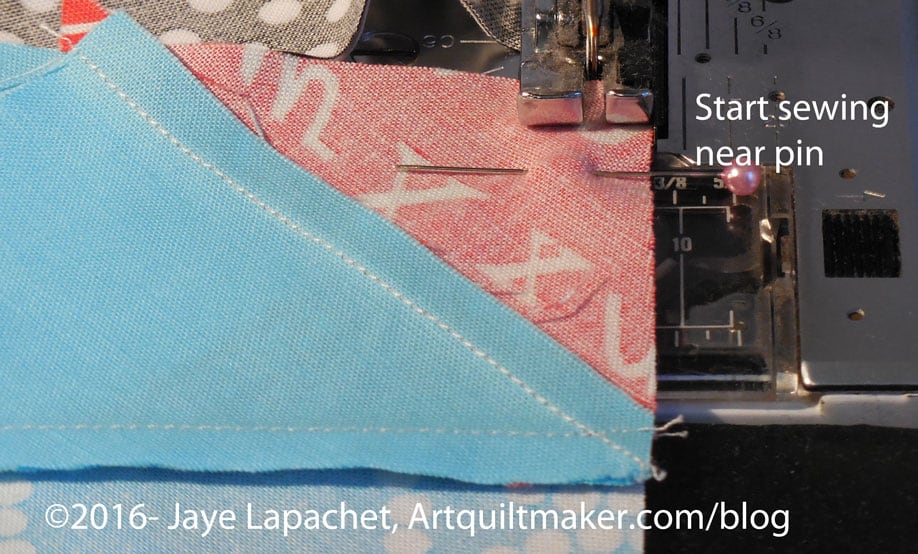
24. Position piece so you start sewing near the pin.

Now you will sew the partial seam.

Sew partial seam
Sew partial seam
Sew partial seam
Sew partial seam

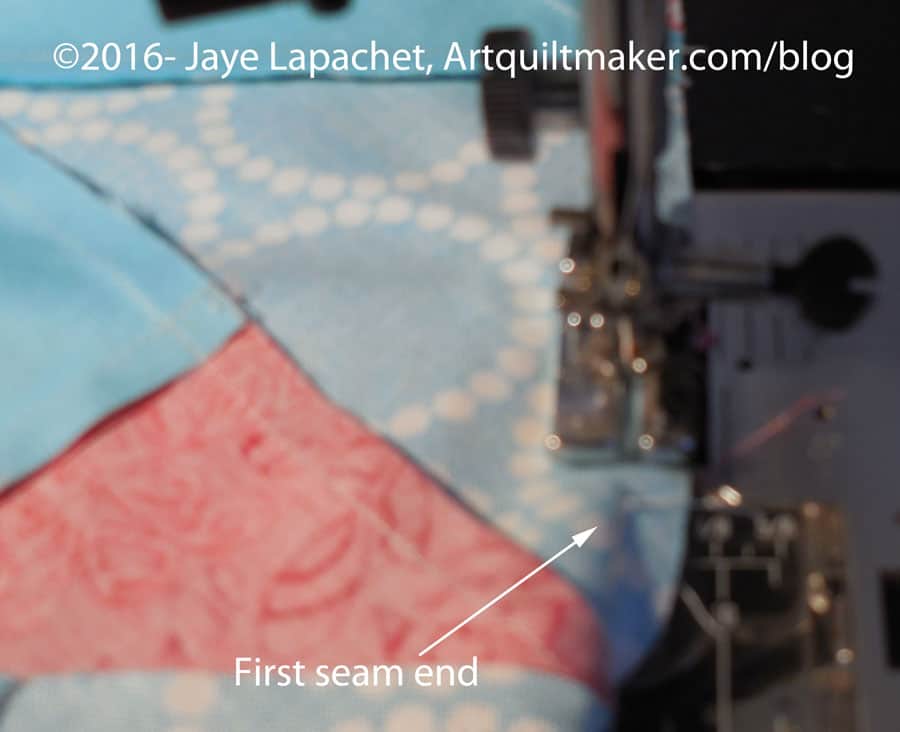
25. Once you start sewing from the pin (noted above), you will see the end of the first seam you partially sewed. Sew slowly to the end of previous seam line. To avoid a lump in the middle where the two seams meet, you can tug VERY gently towards your body as you sew. Do this only if necessary.

Center section sewn
Center section sewn

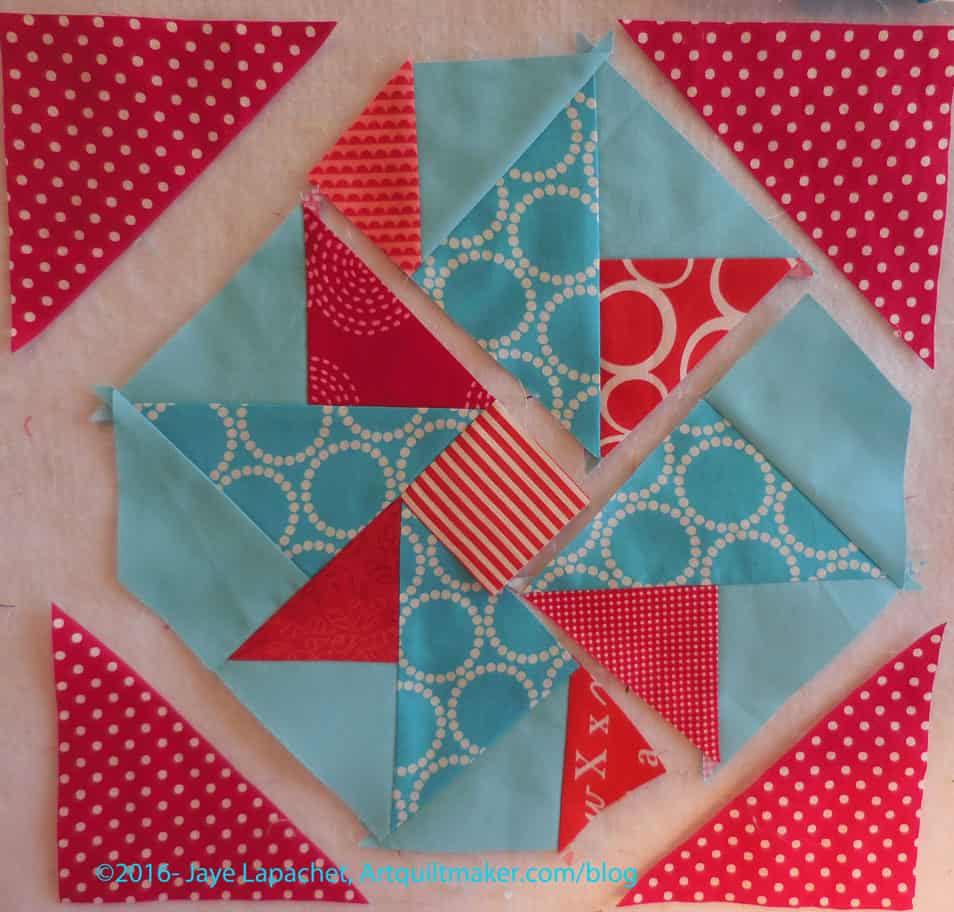
Hooray!!! You have finished the center section

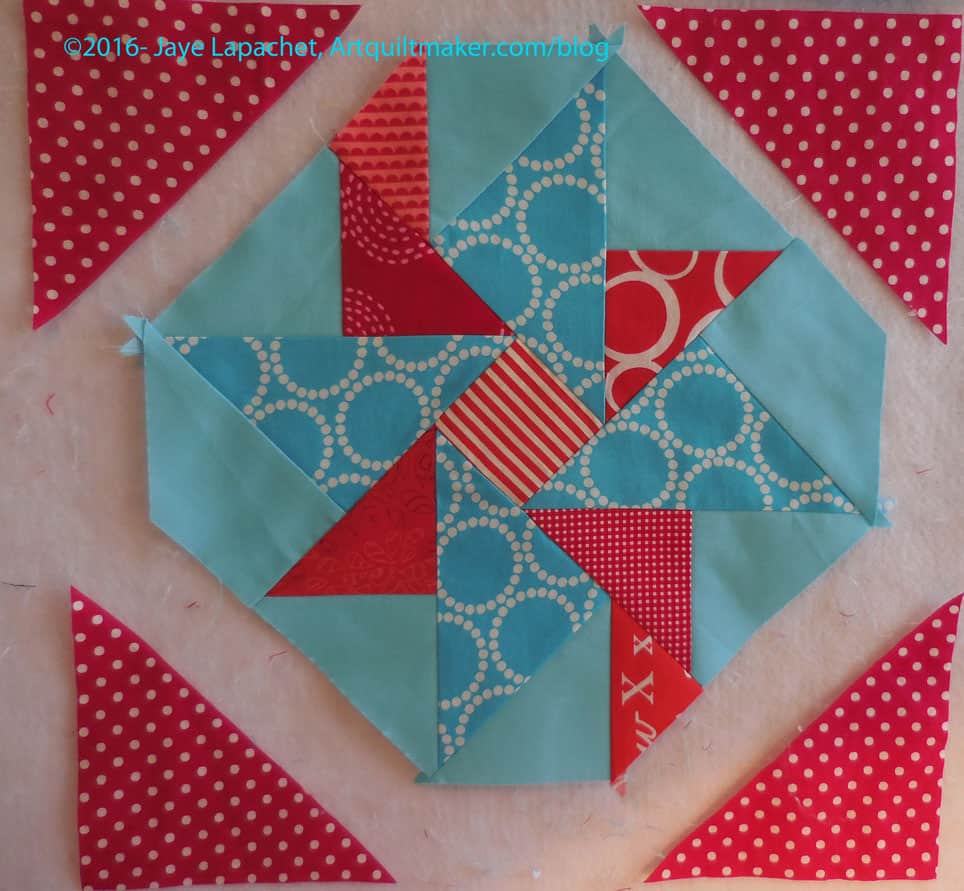
Now you have to sew the corner triangles to the center section to finish the block.

Trim off corners
Trim off corners

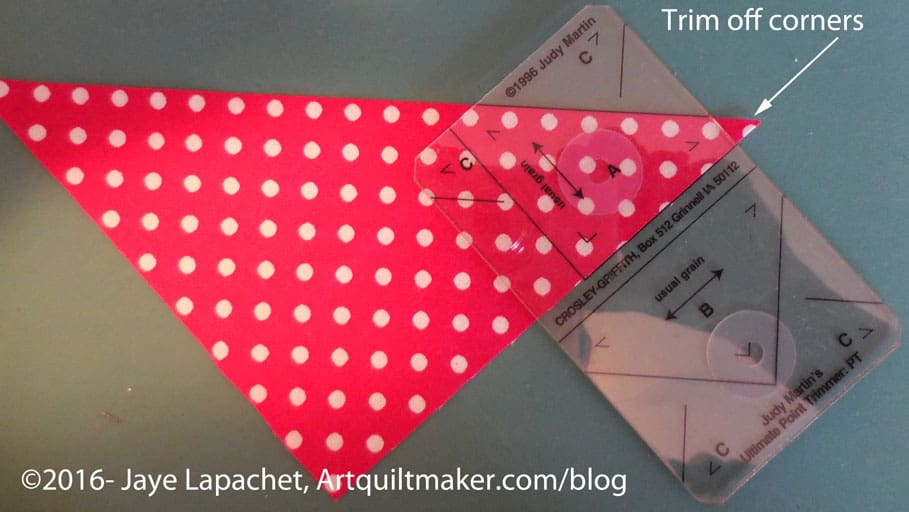
26. Trim off corners of large corner triangles before you sew them on. You can trim them all at once or one at a time, which is what I do.

Lay out triangle on sewn section

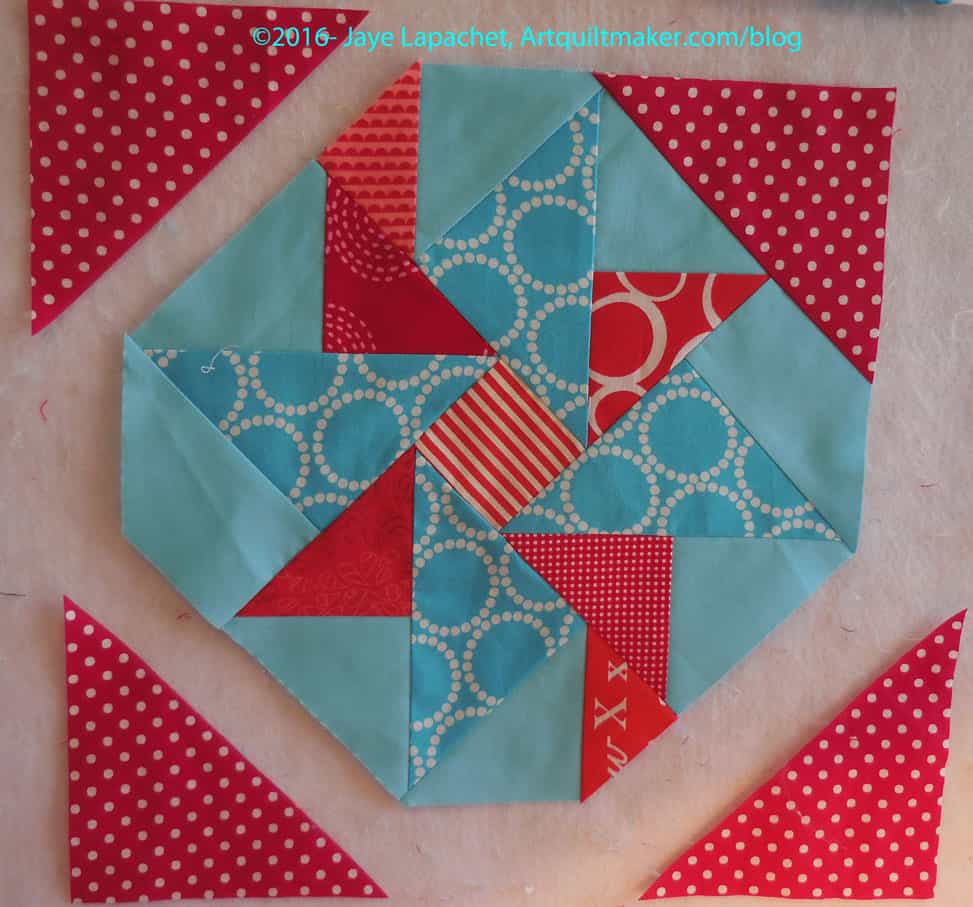
27. Lay triangle on the sewn section, lining up trimmed corners even with edge of sewn section.

First corner triangle sewn

Your piece will look like the above image. Follow steps 26-27 for all corner triangles.

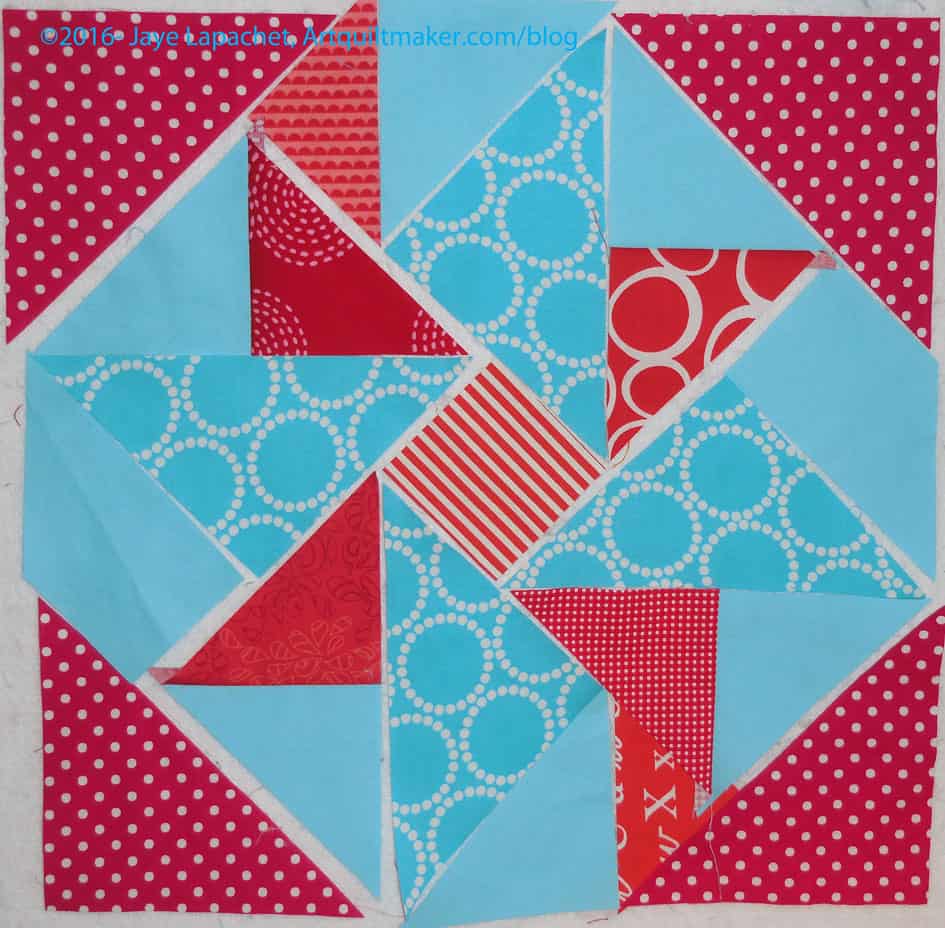
Finished Block
Finished Block

You are now finished! Great job!

___________________________________

Other resources and patterns regarding partial seams:

  • Chain Link from Link to the 30’s: Making the Quilts We Didn’t Inherit (That Patchwork Place) by Kay Connors and Karen Earlywine. I saw it on the Patchwork Play blog made with a great red background. The maker calls it Shelburne Tartan on that blog.
  • Double Windmill block. I saw an example on the Swim Bike Quilt blog.
  • Kate Colleran partial seams tutorial
  • Laura Nownes tutorial on partial seams. Good tip about avoiding puckering on the last seam. I don’t agree with not pressing the seams until the end. Avoid pressing the first half seam, but press all the rest.
  • Jinny Beyer tutorial. Not sure I can compete. 😉
  • Judy Martin’s Ultimate Book of Quilt Block Patterns, pg.16.
  • Quilting Daily Partial Seam Tutorial


**Obviously, you should shop at local quilt shops and small businesses. However, if you are too busy or can’t find what you need there, I use Amazon affiliate links and may be paid for your purchase of an item when you click on an item’s link in my post. There is no additional cost to you for clicking or purchasing items I recommend. I appreciate your clicks and purchases as it helps support this blog.
Miss Muffet’s Tuffet

I am not Miss Muffet, but I am making a tuffet. As I mentioned, I have wanted to make one for a long time. I took the class at Scruffy Quilts and had a great time. The teacher, Robin Koenig, of West Coast Tuffets, was excellent. She was funny and helpful and engaging. She didn’t patronize us and she wasn’t a ditz.
The class is four hours, 2 sessions. The first session was last Thursday. We had to cut strips in advance (or buy a jelly roll), so we were ready to make the pattern and sew when we got to class. The patterns were a bit of a pain to make, but Robin had the templates ready, so we had to trace and cut. I was able to sew two sections out of eight, an accomplishment of which I was very pleased.

Tuffet, 2 sections
Tuffet, 2 sections

I got so much done, because I used 3″ strips, which meant that each section only required 4 strips. My fellow students used jelly roll strips and their sections required at least 6 strips per section so they had a lot more work to do.

The next class is in two weeks. I need to have all eight sections finished. I also want to make the button that covers the center.

I can’t wait to go back!


Sampler Quilt: Basket pt.1A

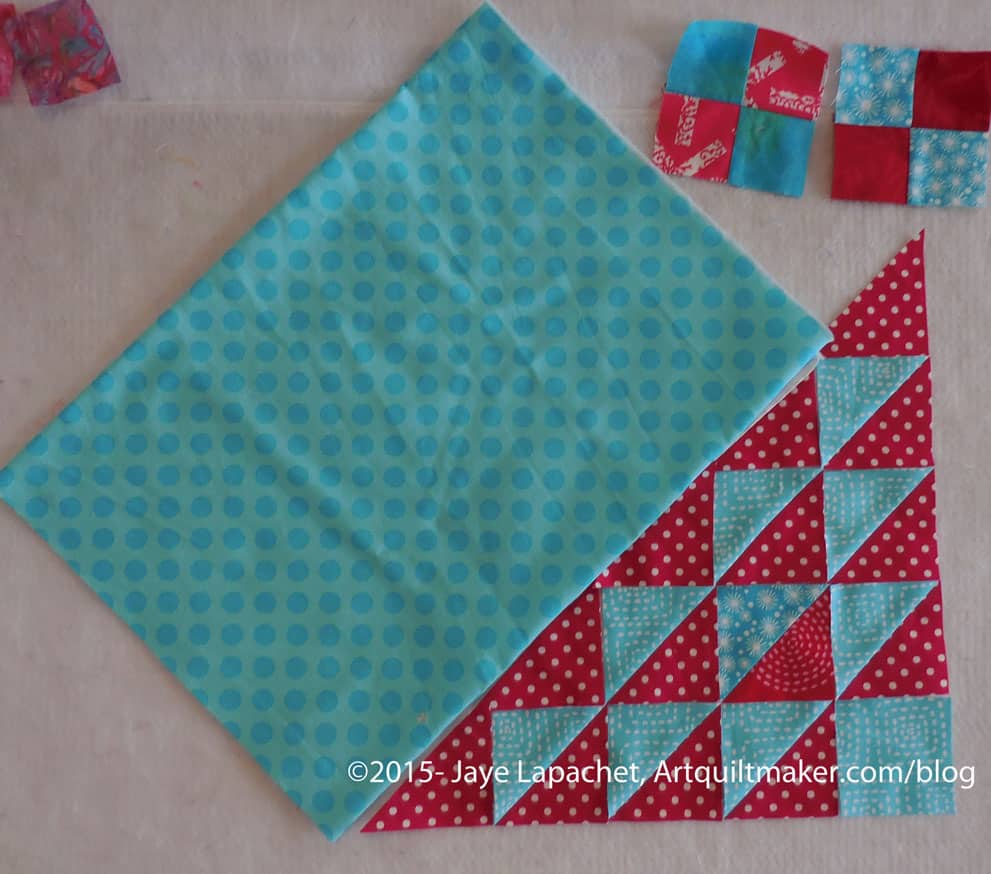
This post is about selecting colors and should have been posted after part 1 of the Basket tutorial. I didn’t think of it until I was almost done with Basket tutorial part 2. C’est la vie.

DSCN0121sm

I ended up wanting the fabric choices to be similar to the EQ rendering. May seem lame or small minded, but it is what it is.
Stitch Blue
Stitch Blue

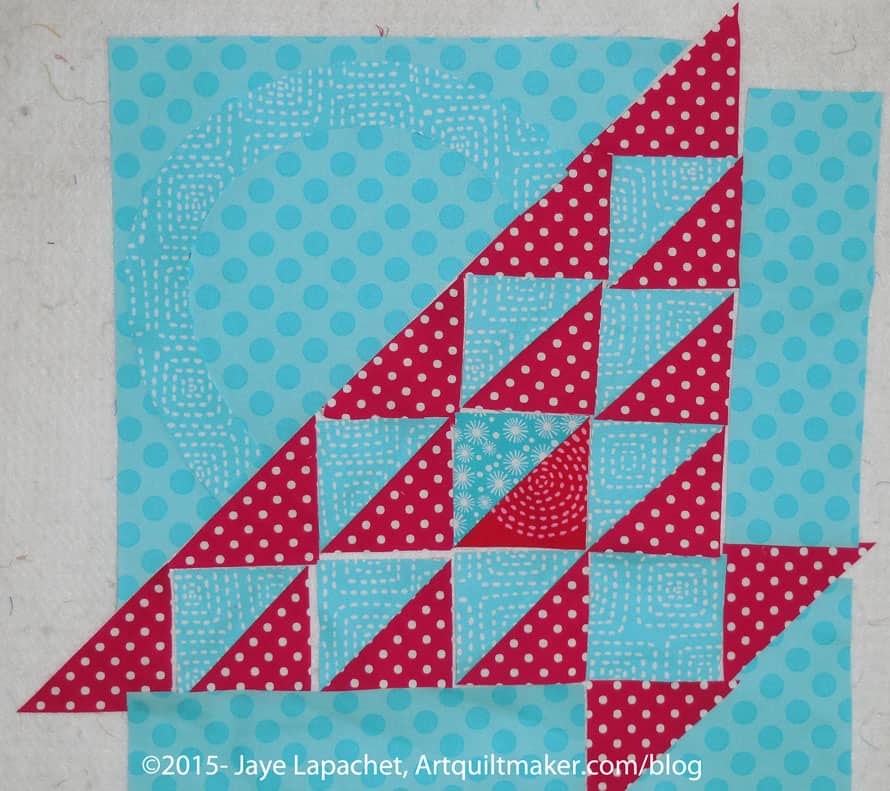
The above is fabric I used for the other half of the HSTs. I wanted to match that fabric, but it didn’t work. The stitch fabric blends into the background too much, so I had to figure something else out.

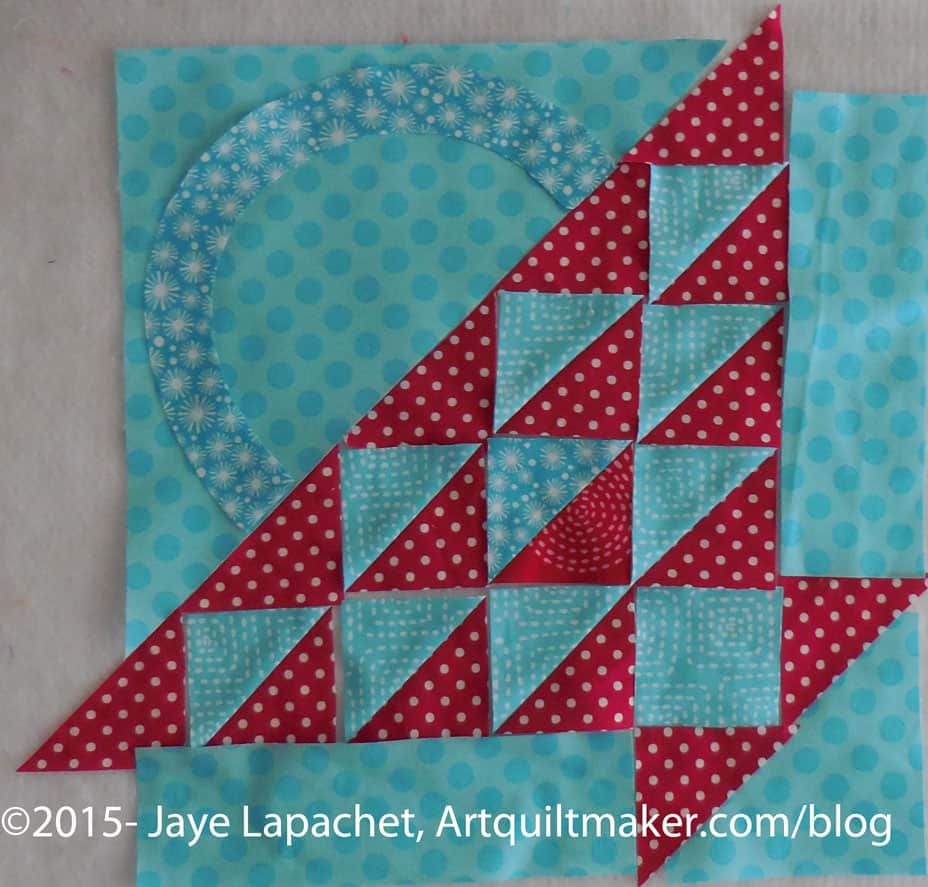
Snowflake Handle
Snowflake Handle

The above snowflake fabric is good, but I was concerned that the snowflake fabric might look too Christmasy.

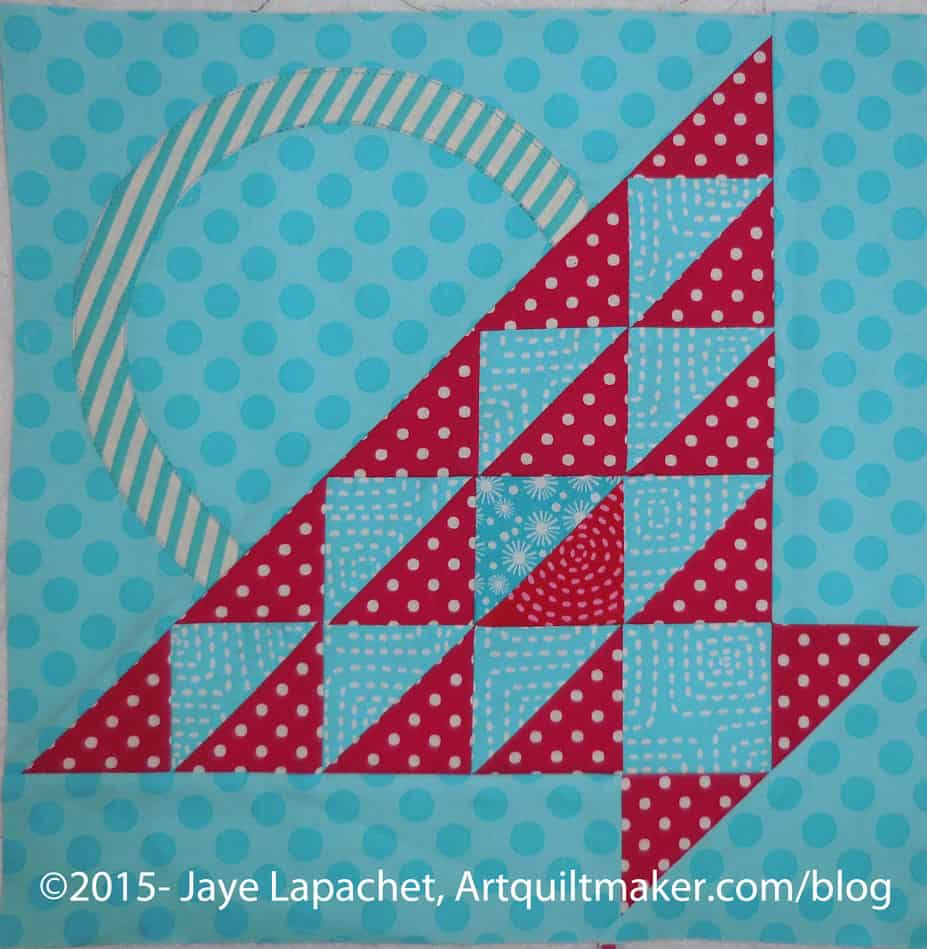
Completed Basket Block

The above fabric selection is what I finally decided upon. The stripe is good, because it is a different motif than any of the others already in the block. The white also stands out a bit from the blues. If I had used a blue with a white dot like the EQ rendering then one of the others might have been ok, but this stripe works well.

Sampler Quilt Blocks To Date

Last week, I got a bug in my ear to look at all of my Sampler blocks. I hadn’t done it in awhile and, frankly, I had forgotten where we were with the class.

As soon as I finished the top and back of the Super Secret #4 project, I got it off the design wall and put up the blocks.

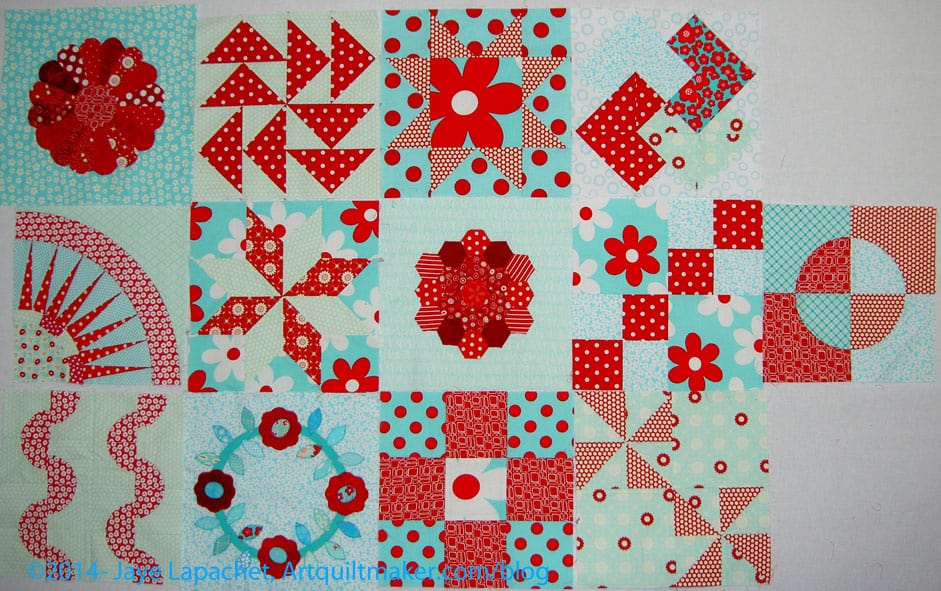
Aqua/Red Sampler Blocks

I had totally forgotten the Double 4 Patch, the Card Trick and the Dutchman’s Puzzle. I had also forgotten what a good job I did using the large Patty Young flowers in these blocks.

I also noticed how some of the backgrounds are very bold and others are more subtle. I think the piece hangs together well despite the differences. I am not sure what block to do next, but I need at least 2 more and could work with more.

The basket block is clearly missing. That block teaches combining piecing and applique’. If I did a different one, such as the Tea Basket block that would be an interesting addition that I haven’t done AND be challenging.

Other than a basket block I can’t think of what skills I haven’t worked on with Frances. I don’t think an art quilt block would work with this piece and I am not sure what something like the Spiderweb would buy. I could do a block with some weird shapes like trapezoids.

What do you think?

Hexagon Tutorial

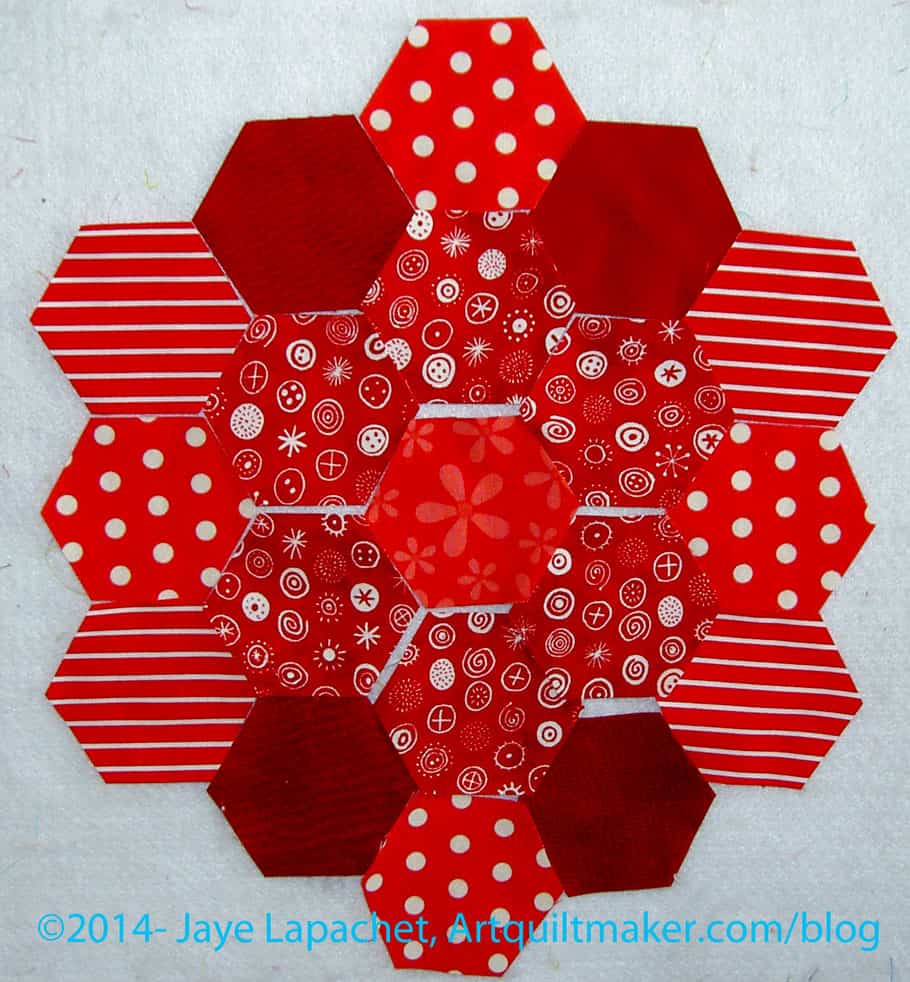
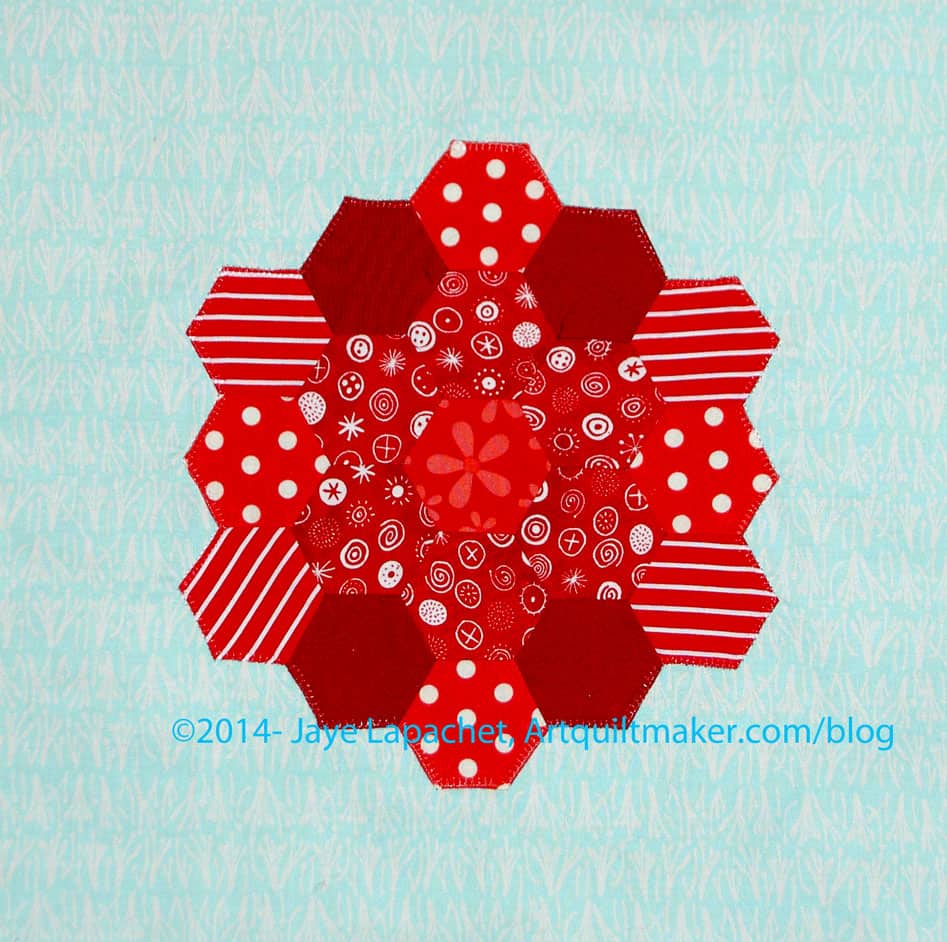
Hexagon Block
Hexagon Block

Here is the next block in our Sampler Quilt Class. These directions are for machine sewing your hexagons.

Supply List

  • Hexagon Template
  • mechanical pencil
  • thin Pigma pen (or similar)
  • template plastic
  • glue stick
  • foreground fabric
  • 12.5″ x12.5″ piece of background fabric
  • Perfect Piecer ruler by Jinny Beyer
  • Small rotary ruler such as the Creative Grids 4.5″x8.5
  • Fabric scissors (see note on using a rotary cutter**)
  • thread
  • pins
  • Design wall or sandpaper board
  • Wooden kebab stick or similar item you can use with your iron
  • sewing machine

Optional

  • Mary Ellen’s Best Press
  • hand sewing needle
  • hand sewing thread

Important information:

  • Block is 12.5? unfinished, 12? finished
  • These directions use a quarter inch seam allowance.
  • You will be creating Y seams.
  • Chain piecing is not part of this tutorial.
  • Respect the bias.
  • Do not sew into the seam allowance.

Templates

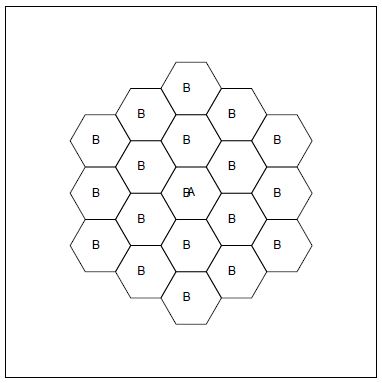
1. Prepare pattern for your hexagon template by printing two copies of pattern.

Place one copy of the pattern in your binder, but you can use it as reference first.  Rough cut the hexagon pattern out of the other pattern.

Add Seam Allowance if it doesn't Print
Add Seam Allowance if it doesn’t Print

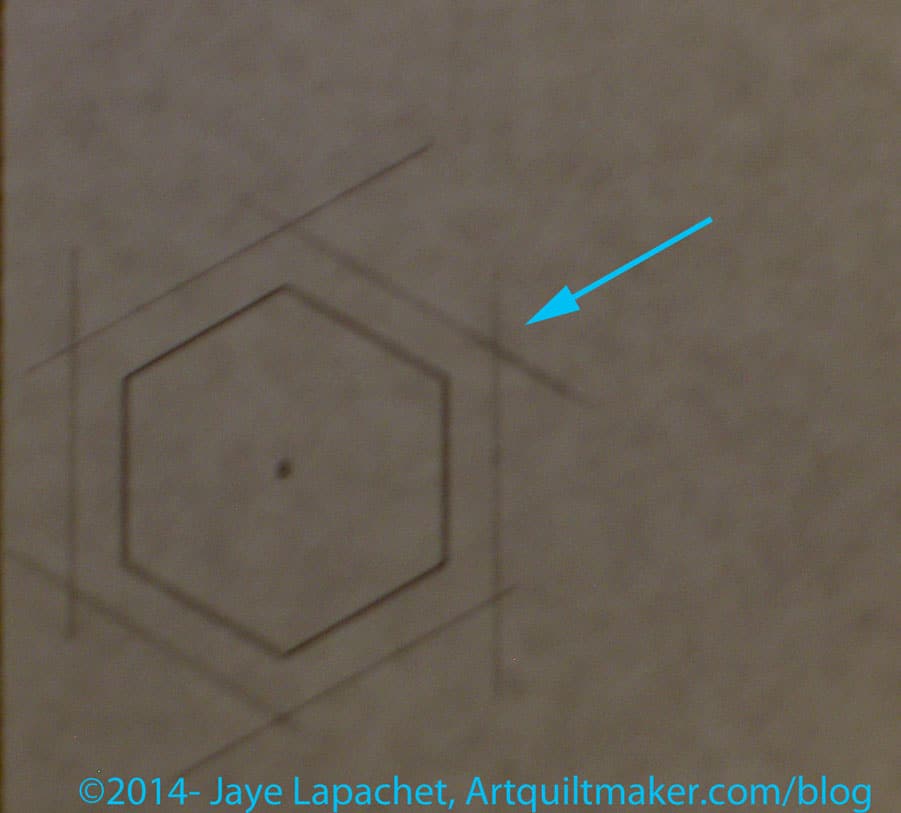
Nota bene: Sometimes the seam allowance don’t print out, so you may need to add 1/4″ seam allowance to the pattern before rough cutting.

Glue the paper pattern (with seam allowances) using the glue stick (or other suitable adhesive) to the template plastic.

Fine cut the paper pattern you have adhered to the template plastic so you have an accurate template.

Gather your fabric and press it all. You can rough cut some pieces and press it with Mary Ellen’s Best Press to help deal with the bias.

Cutting

Place Templates Face Down

Place your template face down on the wrong side of the fabric and trace carefully around your template directly on to the fabric.

Cut using scissors.**

**Do not cut around your template plastic template with a rotary cutter. There is not enough protection for your fingers. I want you to be able to finish the block with no blood.  A rotary ruler gives your finger some protection from the blade of your cutter cutter. If you use a rotary cutter, you may want to use a hexagon ruler, such as the Fons & Porter Hexagon ruler. The smallest hexagon on that ruler is larger than my template, but 19 of those will still fit in the 12.5″ block. You can also cut using a rotary ruler and rotary cutter by lining up the ruler on the line you drew around your template.

Cut 19 Hexagons
Cut 19 Hexagons

Cut 19 hexagons from your fabric.

Mark your hexagons
Mark your hexagons

Marking

Now, mark your hexagons so that the Y seams will be easy to sew. As mentioned in the supply list, I use the Jinny Beyer Perfect Piecer.


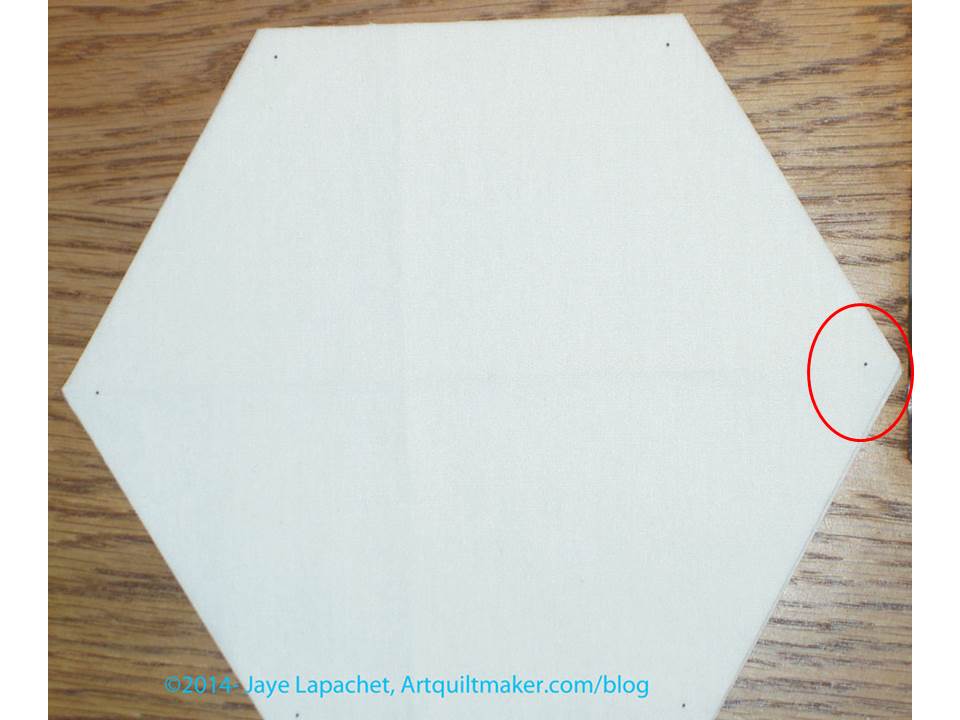
Hexagon Markings
Hexagon Markings

Line up your ruler in every angle and  in every hexagon and make a dot.

You can also make a cross at the seam allowance by lining up a regular ruler along your cut edge and drawing a line near the angle. See the tutorial called Hexagons -Preparing to Sew, which gives more information.

Sewing

Remember: you will sew between the dots only NOT into the seam allowance. This is how you sew Y seams and we have done that in other tutorials.

Arrange Hexagons
Arrange Hexagons

Arrange your hexagons in a pleasing manner on your design wall or on a sandpaper board.

Hexagons right sides together

Take two hexagons, that will be next to each other in the final block, place them right sides together.

Put them under the presser foot, lining up your Perfect Piecer mark under the needle

Sew a few stitches, then backstitch.

Sew the entire seam to the second Perfect Piecer mark. Backstitch to secure.

Nota bene: You want to backstitch even though it is a bit tedious, because no other seams will cross the seams stitching the hexagons together. If you do not backstitch, there is a chance your stitches will come out before you get to the quilting part. You can also leave long tails and make a knot at every intersection.

I like to to sew my hexagon patches together in groups of three, thus we will need to add the third hexagon to the two you just sewed together.

Add 3d Hexagon -seam 1

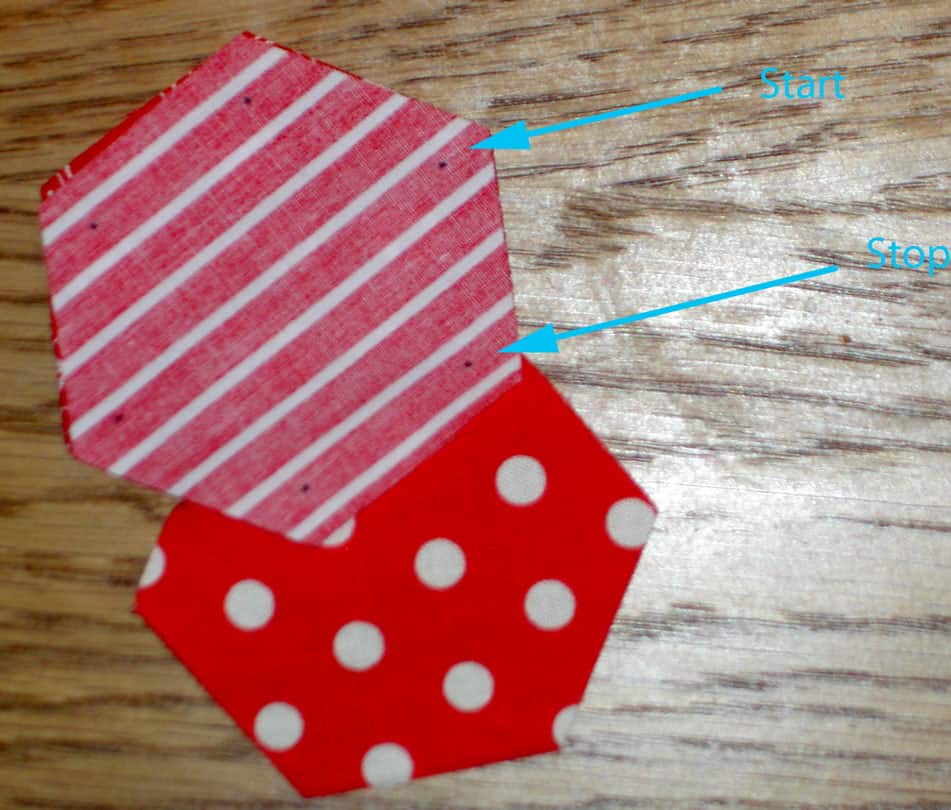
Lay the piece of two hexagons you just sewed on the table and place the third hexagon patch on top of top one, right sides together. Sew the third hexagon to the piece of two hexagons starting at the dot marked Start and stopping at the Perfect Piecer mark indicated as Stop. Backstitch as described above.

Remove from the machine and clip your threads.

Add 3d Hexagon -seam 2

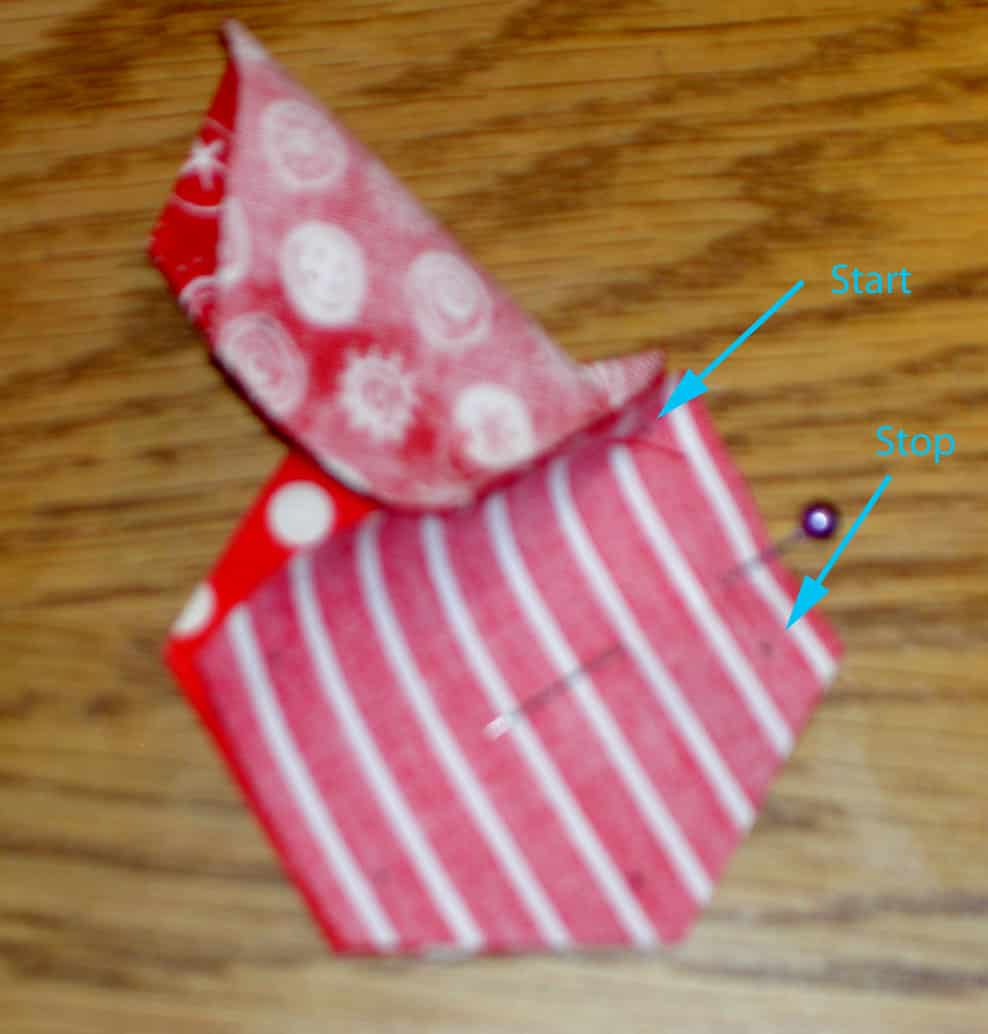
Now you are ready to sew the last seam to make a piece of three hexagons. Line up your third hexagon with the hexagon you didn’t sew a minute ago.

Pin. I put the pin in a place closer to the stop mark, so I can fit the sewing machine foot on the Perfect Piecer Start mark.

Nota bene: I don’t normally pin small hexagons, but when I am sewing the last seam it is useful.

The second hexagon will be kind of rolled up. Just keep it out of the way of the needle. You don’t want to sew it to the underside of the other hexagons.

Sewn hexagons on the design wall

I keep my pieces on the design wall (you can also use a sandpaper board) as I sew them in order to keep them in order.

Sewing patches together

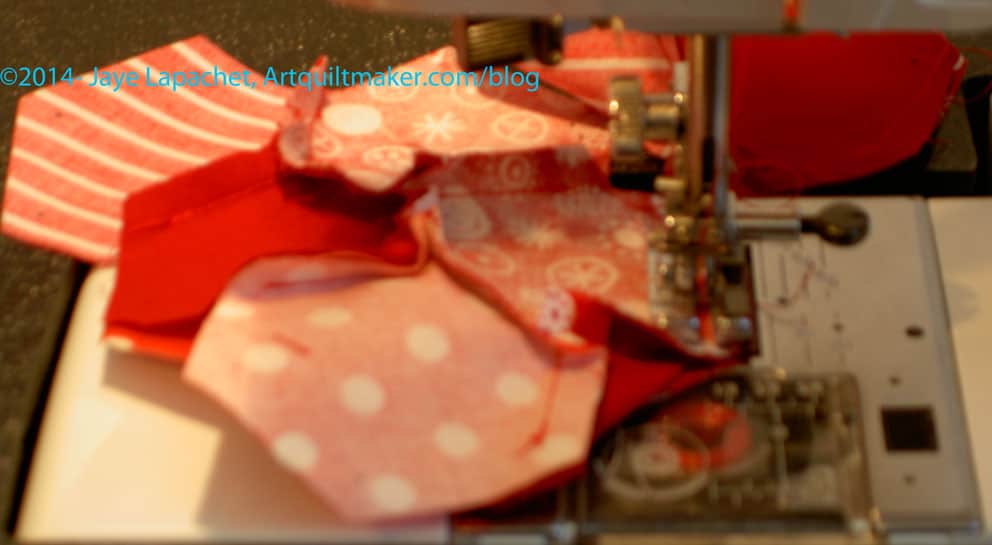
Keep sewing your patches together in chunks, then into larger chunks until you get all of them sewn together. Sewing groups of hexagons together is like sewing 2 or three together. Sew between Perfect Piecer dots. You just have to be carefully to keep the other, already sewn, hexagons out of the way.

Nota bene: It is useful to have a digital camera handy and take a photo of your layout in case of confusion while sewing. You can also number your patches.

More on sewing hexagons can be found in a previous post.

Press

For small hexagon blocks, I usually don’t press until I am done sewing all of them, because I want all the swirls to be orderly.

Press in a circular motion
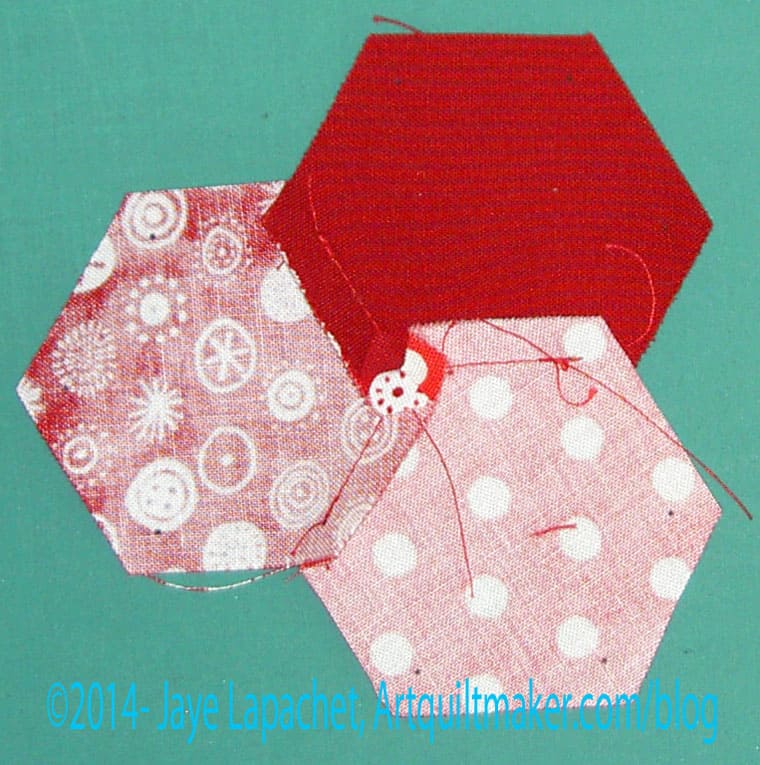
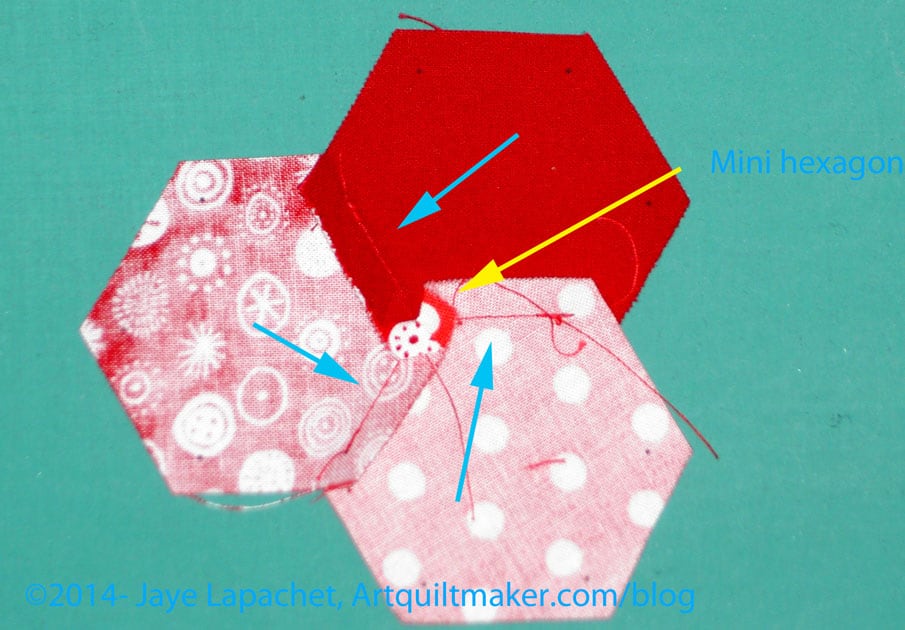
Press in a swirl to create mini hexagons

Press from the back, one seam at a time so all of the seams look like they are pressed in a circular motion. The center where the patches meet will look like a mini hexagon.

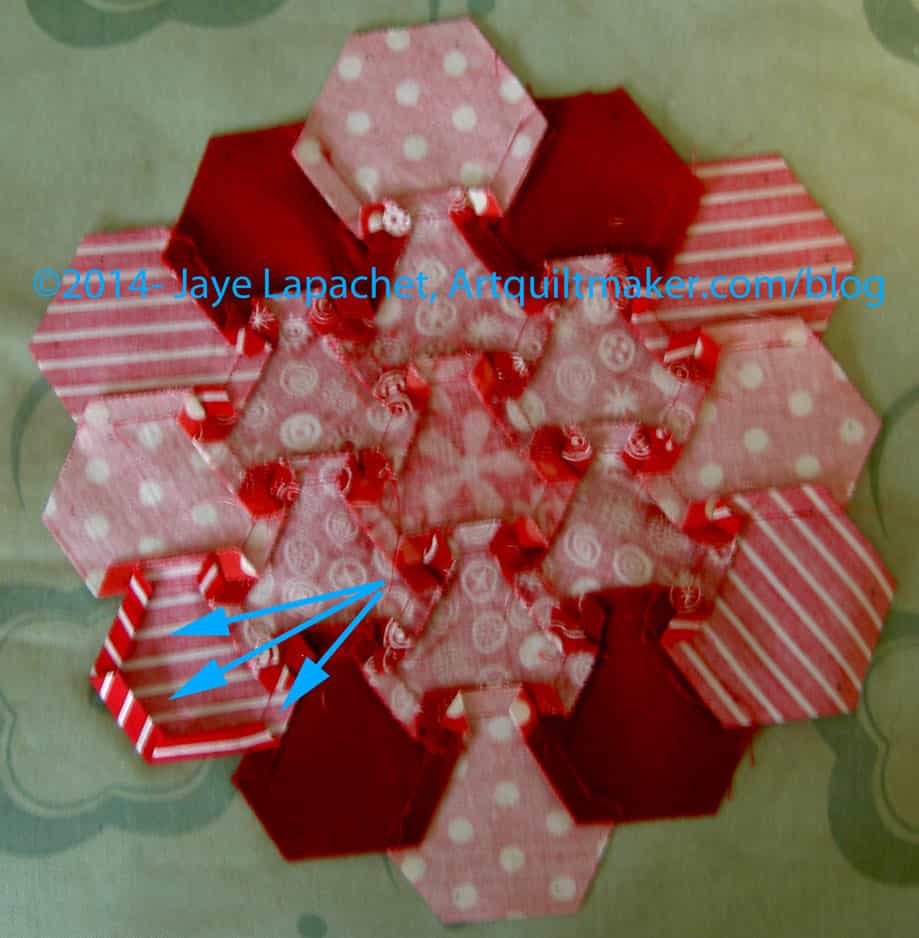
Pressed back of hexagon piece

When finished the block will have a lot of mini hexagons on the back.

Applique’

In order to prepare for applique’,  you have to do something with the edges. If you want to do raw edge applique, you will need to trim the seam allowance off the outer edges, using the Perfect Piecer marks as a guide.

I suggest pressing the seam allowance on the outer edges in to make a clean edge.

Lay your hexagon piece right sides down on ironing surface

Lay your hexagon piece right sides down on your ironing board.

Use the Perfect Piecer marks as a guide. Fold and finger press the outer edges in.

Press edges in
Press edges in

Get your fingers out of the way and press using a hot iron so the edges is pressed permanently in. You a chop stick or kebab stick to hold the edge under the iron.

Once all of the edges are pressed under you are ready to place your piece on the background.

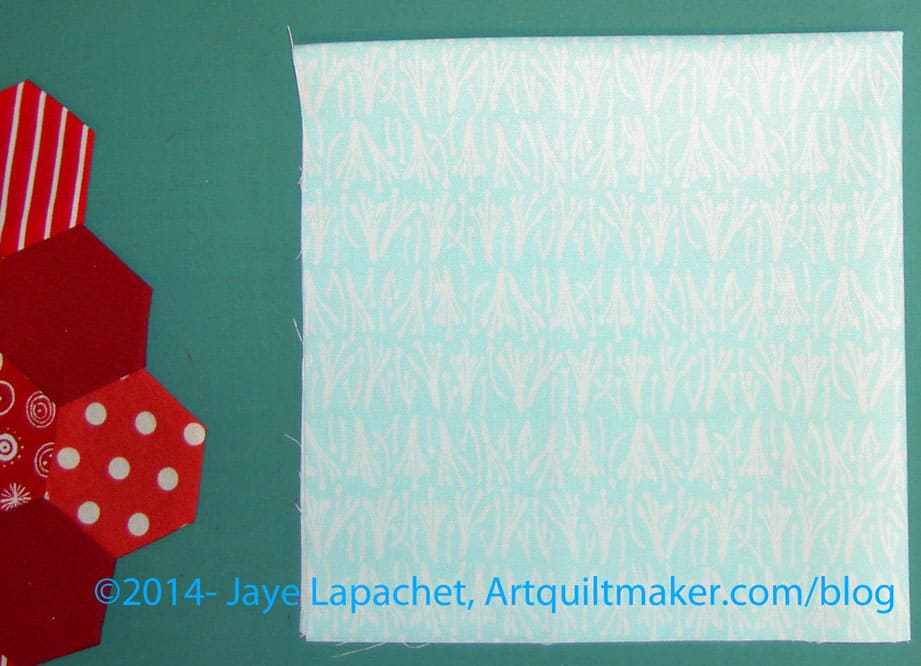
If you have not already done so, cut a background piece 12.5″ x 12.5″.

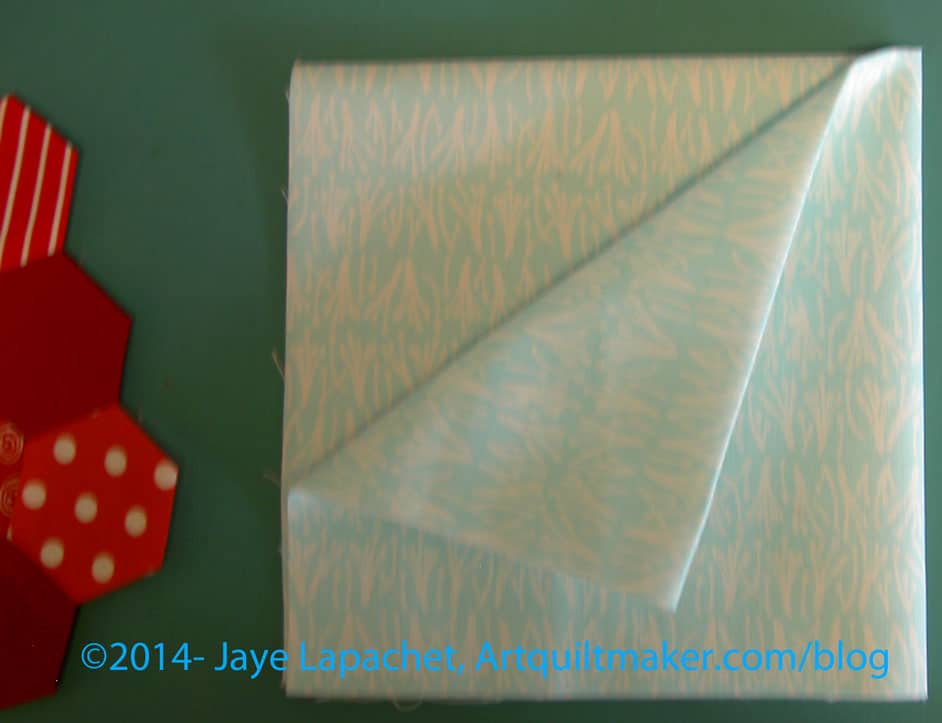
Fold background into quarters

Fold in quarters and finger press just so you can see the lines. DO NOT press with an iron.

Using your finger pressed lines, center the hexagon piece, right side up, on the background.

Finish Line

YAY! You have completed your block! Good job!

Finished Hexagon Block

You can find more information in the Hexagon Clarification post.

Remember: no sewing into the seam allowances!


Hexagon Block

Finished Hexagon Block

Tomorrow I will talk about how to make a hexagon block. I realized that I haven’t been talking about the actual blocks that *I* make for the sampler more than what is in the tutorial. I decided I wanted to talk about it a little bit.

As with the other blocks, the reasons I have my students make this block are:

  1. More practice on Y seams
  2. Hexagon quilts are popular and my students may want to make one one day
  3. More practice with color is always good
  4. More practice with pattern is always good.

You may think that Y seams are tedious PITA that aren’t worth it, but becoming comfortable with Y seams has truly expanded my repertoire of techniques. I can make so many more blocks knowing how to complete Y seams.

I never thought I would make a whole hexagon quilt, but I did. I was even shocked. I don’t think I will make another, but you never know. I also watch TFQ make one with a similar sized hexagons to the hexagons in the block above.

Since my sampler quilt is basically a two color quilt, I need to create contrast within that palette for each block. With all of those Y seams, you can bet that I do NOT want you, as the viewer, to see a big blob. I want you to see every single Y seam. 😉 While I am comfortable with Y seams, they are still a technique worthy of celebration and the choices of fabric that I made reflect that.

The result of using only two colors is that my color choices have already been selected. For the foreground, I am working hard to stay in the bright red arena – like scarlet. No blood red or rust red. As a result, I had mostly pattern with which to work . Using the different patterns of the fabric draws the viewer’s attention around the block.

For the background, I am trying to stay in the aqua arena. Some of my blocks have red in the background, but for continuity’s sake, none of the blocks have a completely red background and most have more aqua than red.

In the past I have hand appliqued the piece of hexagons to the background, but I was impatient this time. I machine appliqued it using Aurifil invisible thread. I didn’t scream through it, I sewed slowly and the blocks is pretty flat. I am pleased.

Sampler Class: Foundation Piecing Part 5

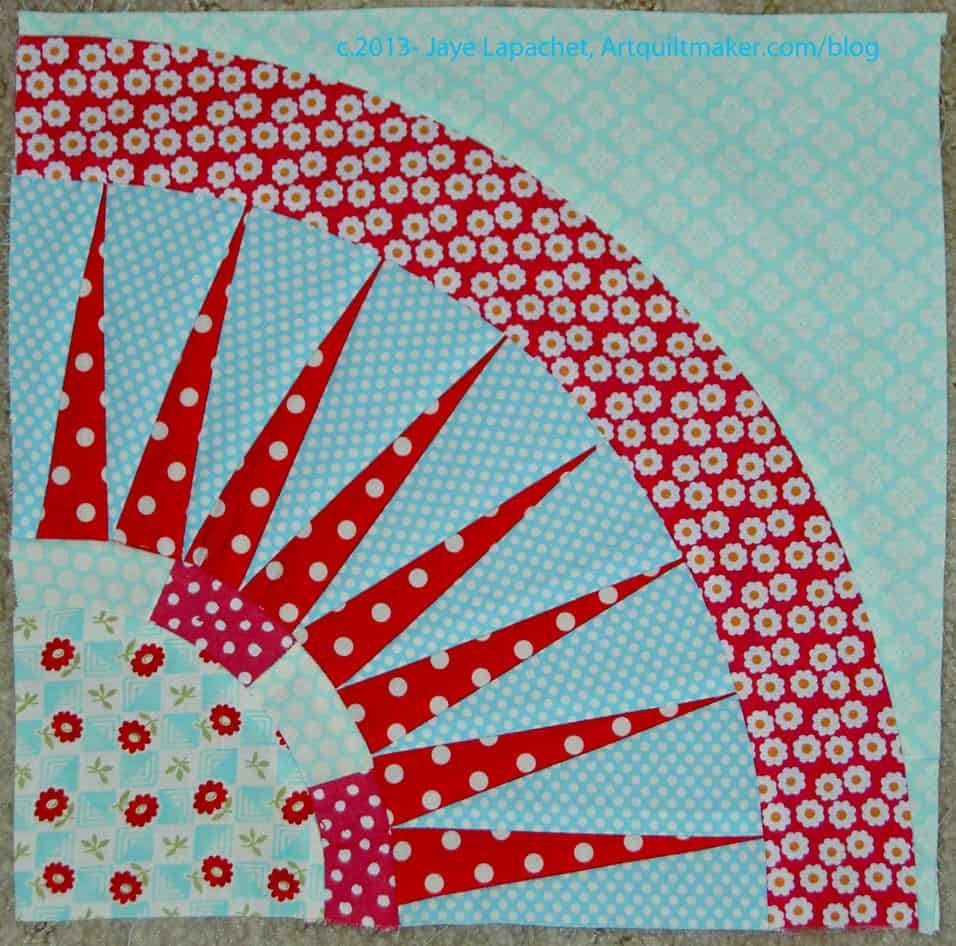
New York Compass
New York Compass

This segment discusses sewing the block together. In order to get to this point, you should have completed parts 1 and two and three as well as part four.

Like piecing all other blocks, you want to sew smaller pieces together to make larger pieces, then sew the larger pieces together to complete the block. In part three, you should have cut any fabric for templates that did not have matching fabric patches. so, inventory your templates and make sure you have a fabric patch for each template. If you don’t, go back to part three.

In part 4 you also pinned:

Pin sections together

Remember that the edges are not quite as smooth on the other  (blue) side, but that is ok. Just remember to sew slowly and carefully.

Outer patches sewn
Outer patches sewn
Outer patches sewn - blue side up
Outer patches sewn – blue side up

Once those two patches are sewn, they might look a little rumpled, but once you turn them both right side up and press the section, they will look great.

Outer sections pressed

Press which ever way you think will work best for your block.

Section D
Section D

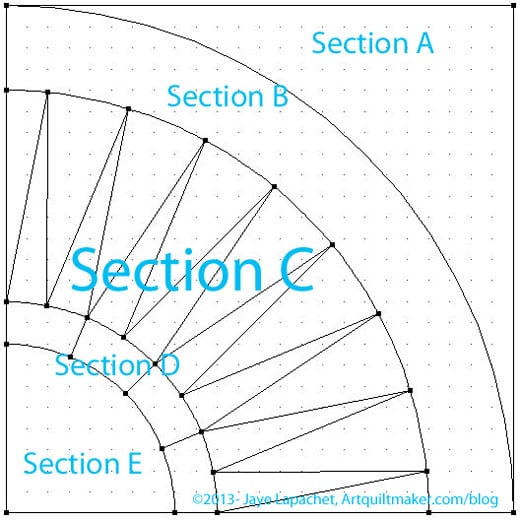
Next, we will sew the corner section to the small pieced strip (Section D).

Nota bene: if you did not foundation piece the small strip, follow the directions in part 4 or part three to do so. If you haven’t done any foundation piecing you might want to start with this piece as it is smaller and less complex than the pointy triangles section.

Again you will need to pin. This time you are pinning your quarter circle corner piece and your small foundation pieced strip.

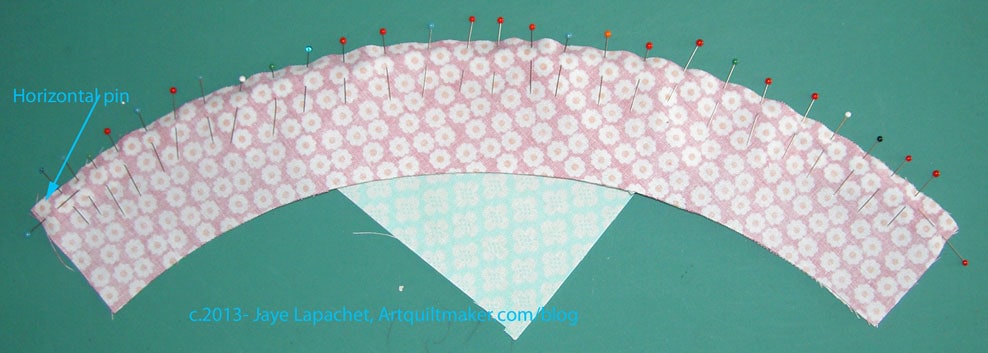
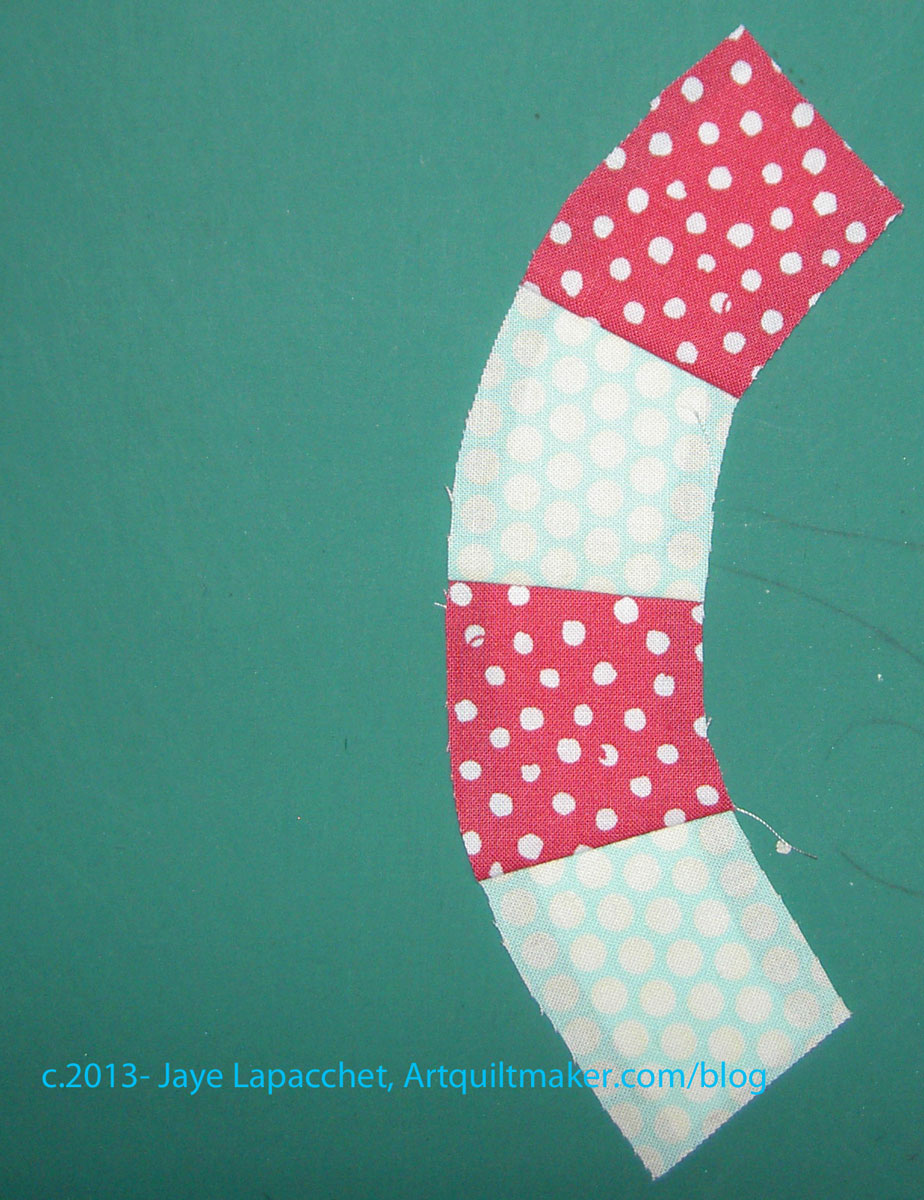
Pin ends horizontally

Take your quarter circle corner piece and your small foundation pieced strip and pin them together. I, first, line up the straight edges on the ends and pin them together (horizontally). I make sure the horizontal pins are out of the way of other pins and the sewing machine foot. they are used just to make sure my piece is in place while I put the other pins in.

I use a lot of pins. It works for me. I know there are other tutorials that are pinless or use minimal pins, but I want precision and pins give me precision. Put these two pieces together the way it works for you. Remember: you only have two hands.

Sew 2 patches together

Once you are happy with your pinning, get ready to sew. I put the non-pieced corner quarter circle on the bottom and the pieced part on the top. I try to make this a habit, though it doesn’t matter with this particular foundation pieced section. In some sections, like our spiky triangle section, it matters.

You can rip off the paper before you piece or not. I was having some other problems, so I ripped it off, but normally, I would leave it on until the very last second I could, e.g. before I took the pieced top to the quilter!

Attach your quarter inch foot and sew your small foundation pieced strip to your corner quarter circle. If you don’t know how to sew curves, take a look at the curves tutorial.

Corner with 2 sections

Once you are finished, press carefully. I press to the side with the least number of seams, or to the side that the fabric seems to be naturally inclined to lay. Your corner will look gorgeous like the one above.

Once you have the small foundation pieced strip attached to your quarter circle, you will sew it to your spiky triangles piece. You will, again, pin a lot, using the horizontal pin trick to stabilize the piece.

Sew Sections Together

Again, as shown in the photo above, I put the foundation pieced part on top. In this case, you are sewing two foundation pieced sections together, so you can choose which you want on top. I chose the spiky triangles section to go on top, but it doesn’t really matter, since there are no points to worry about cutting off.

Next sew the two remaining sections together, press, again, towards the piece with the least number of seams and you should have a piece like the one below.

Finished: Foundation Pieced Block

After all that work, you have a beautiful foundation pieced block. Pat yourself on the back!

Sampler Class: Foundation Piecing Part 4

New York Compass
New York Compass

We are nearing the last part of the foundation piecing class. I know this is a long tutorial, but there are a lot of steps and it is difficult to explain when I am not in the same room with you. I also don’t have a crew, so photographing every single step with only two hands can be a challenge.

Mostly this segment discusses getting ready to sew the major parts of your block together. Yes, there is more prep before you can sew your blocks together. I will give some template tips as well. In order to get to this point, you should have completed parts 1, 2 and part 3. All of the supplies are listed in part 1.

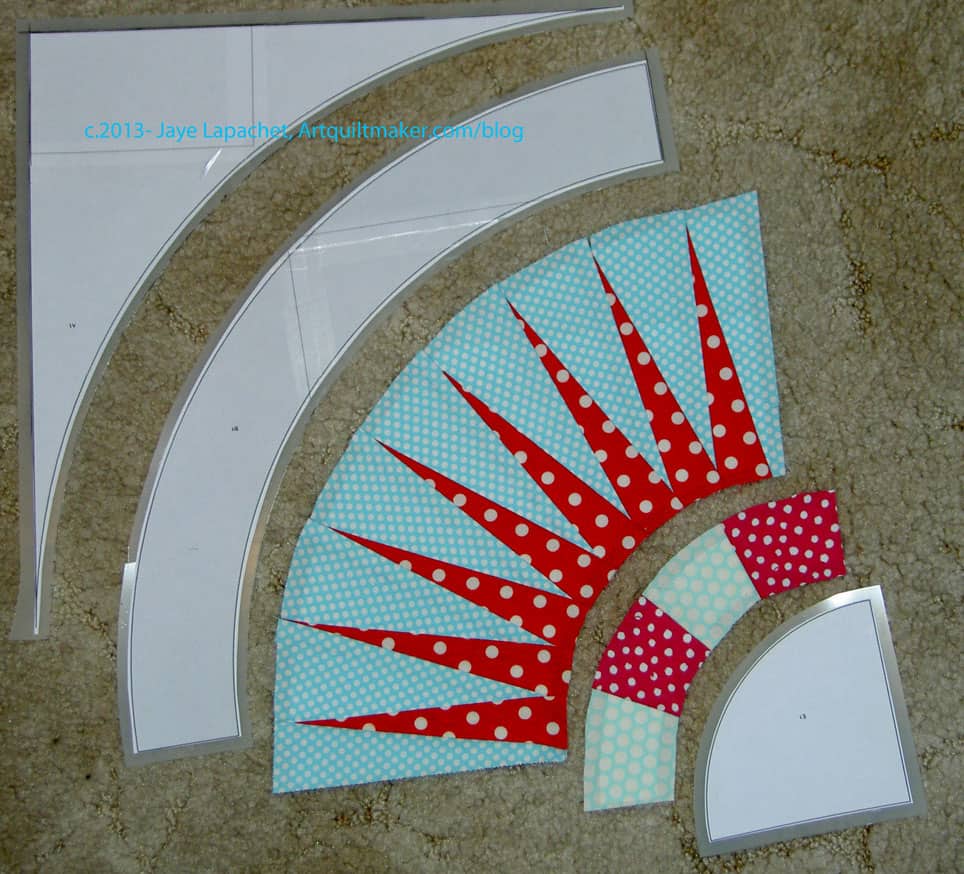
Like all other parts of piecing, your goal is to sew smaller pieces together to make larger pieces. First, inventory your templates and make sure you have a fabric patch for each template.

NY Compass Outline
NY Compass Outline

For any templates that do not have matching fabric patches, cut your fabric.

parts and templates

Based on the photo above, I need to cut 3 pieces. In some New York Beauty related patterns, these are pieced, but in ours we are using one fabric. You can certainly modify any of these pieces to do more foundation piecing.

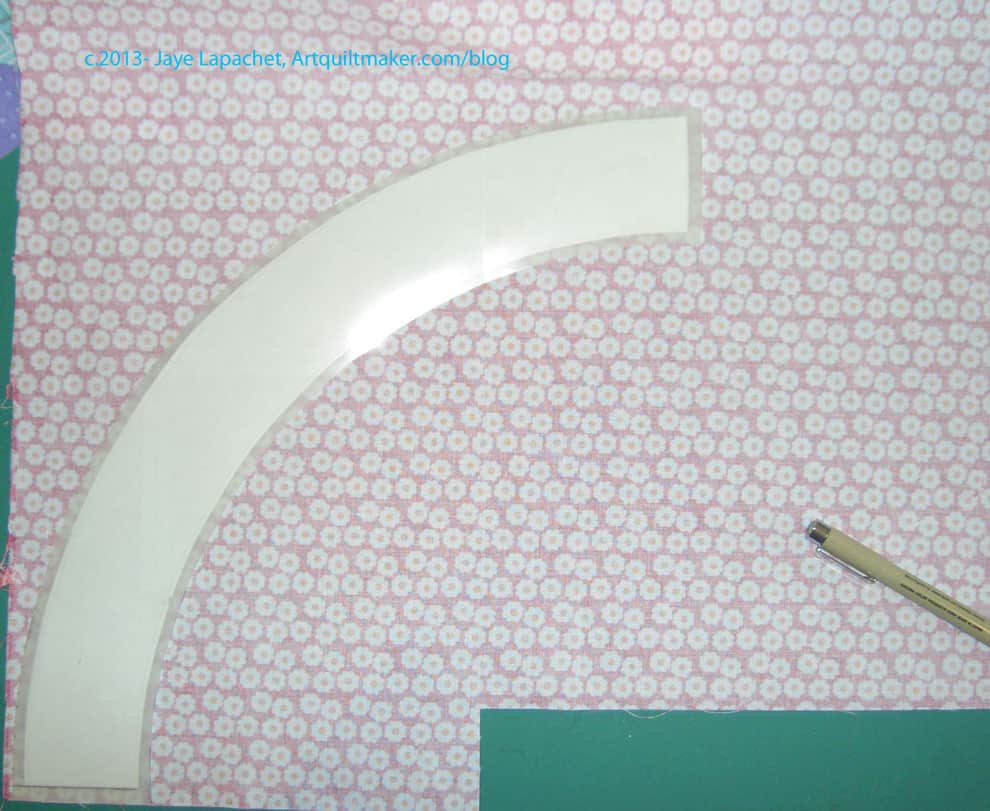
Cutting fabric patches

To cut out these templates, I place my fabric right side down and the template right side down and draw on the back of the fabric. This is the same for all three of the templates.

Patches should look similar to template

Your patches should look similar to your template once cut out. All of these templates have an element of bias, so handle them carefully.

Outer Edge Patch half cut out

Once you have drawn your template shape on the fabric, you can cut it out. Where possible, I use a rotary cutter and ruler. If I cannot use those tools, e.g. for the curves in the pieces of this block, I use very sharp scissors and cut slowly and carefully. Above you can see that I have cut as many parts of the patch as possible with my rotary kit and am ready to cut the curve with scissors.

Corner template on fabric

Lay your fabric right side down and place the corner template on top, also face down. Draw around it with a Pigma Micron, or similar, pen.

Line drawn on fabric

Once you have drawn carefully around the template, remove it and make sure your line is continuous. If it is not continuous, carefully replace the template and fix the missing segments.

Line up ruler along 90 degree angle

Line up your ruler with the corner of the fabric patch. You may need to rough cut your fabric first, if there is too much yardage skewing the fabric as you try and cut.

Cut using rotary kit

The corner quarter circle template has a quarter inch seam allowance, so you don’t have to do anything, but cut the line you drew (and all the fabric on the other side) off. You will want to cut so that the line is cut off, but you need to cut ONLY the line off.

Also, these pieces are large, so make sure you can hold your ruler down tight as you are cutting. You want to avoid ruining a whole large piece of fabric because your ruler shifted.

Fabric patches cut

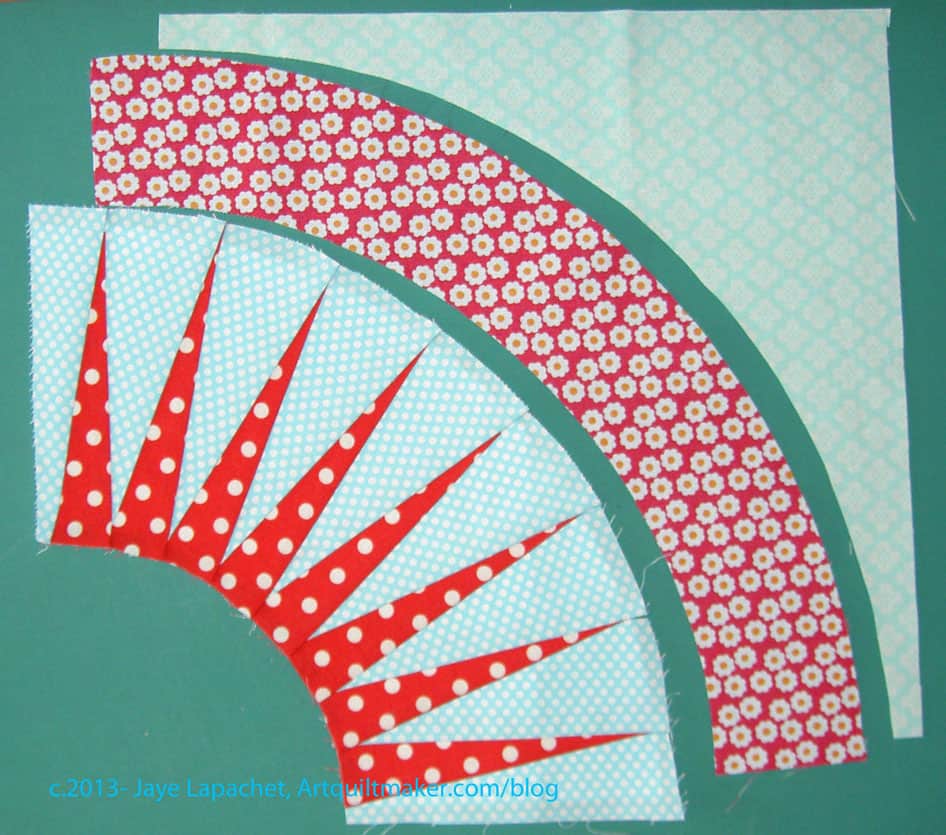
Once you have cut out your fabric patches, you will have pieces that look like those in the above photo.

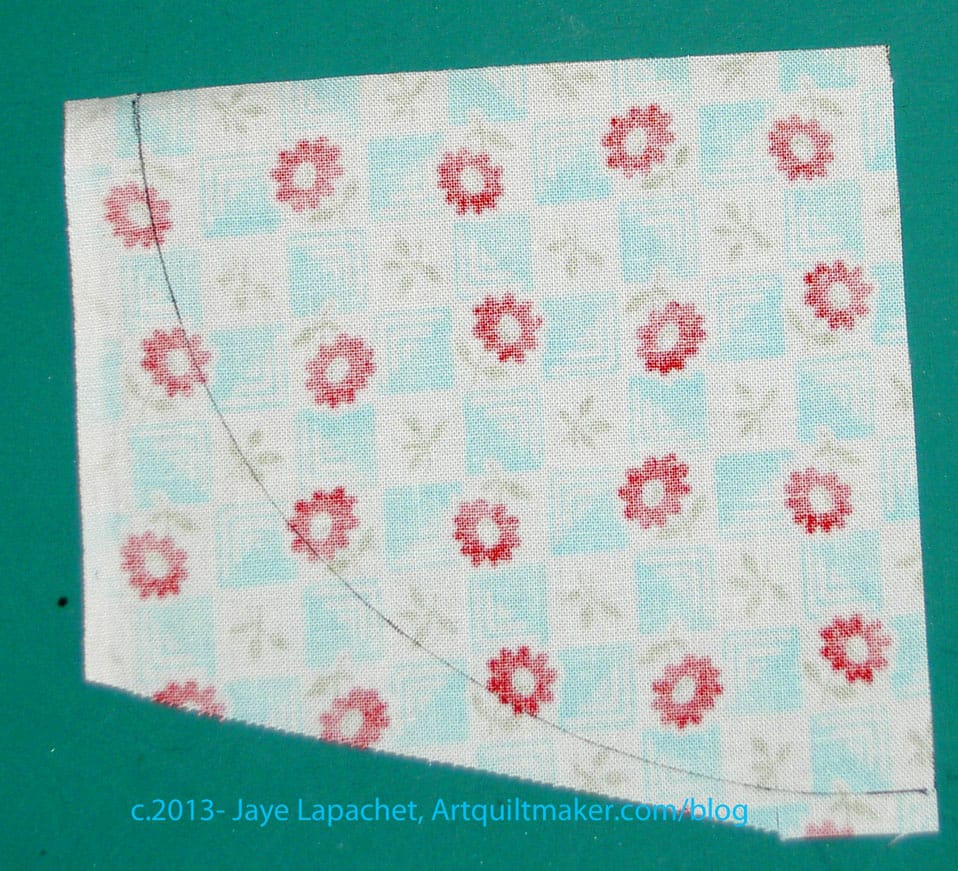
After seeing the above patches laid out, I decided to sew the two outer pieces together first. Again I want to join smaller pieces into larger sections. Also, the very outer piece has very skinny ends. I want to stabilize them a bit by sewing them to another piece before sewing them to the foundation pieced Section C.

Pin sections together

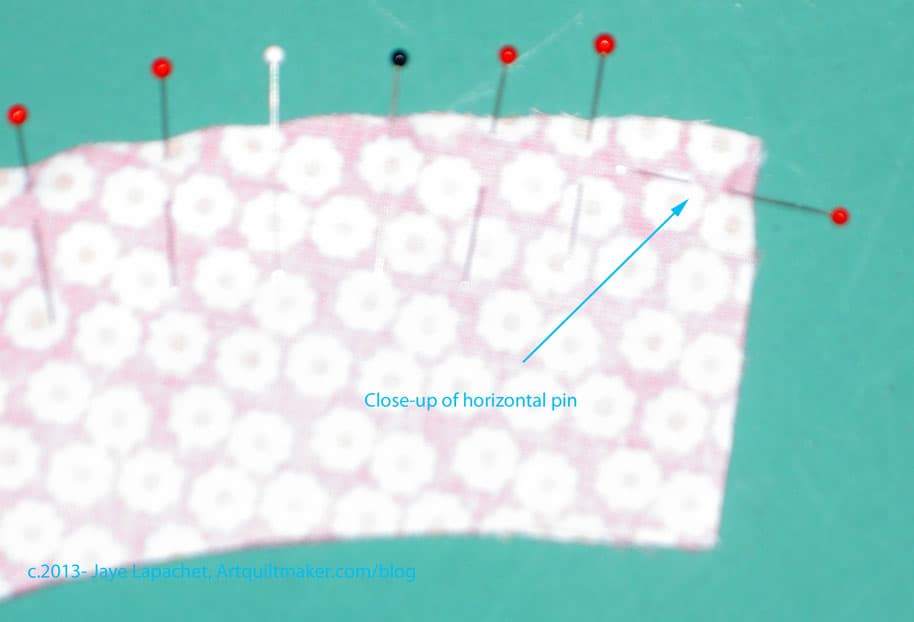
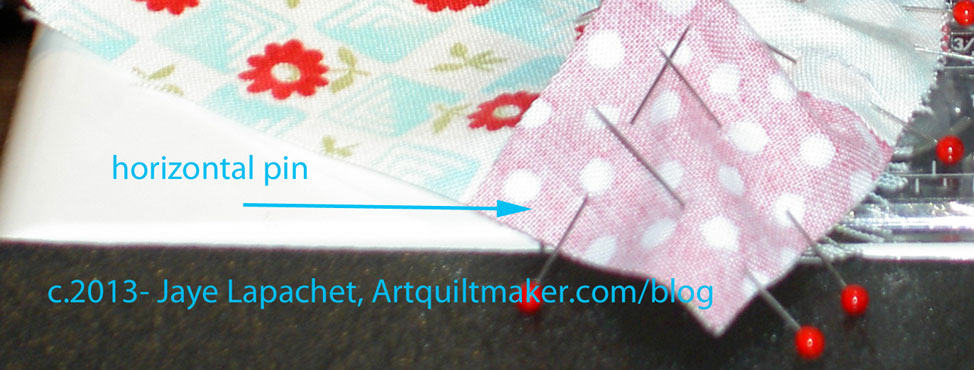
The first order of business is to pin them together. I apply horizontal pins on the ends and a lot of pins in the middle. My goal is to make the seam smooth. You are working on the bias, so don’t yank too much.

Horizontal pin - close-up

For my advanced students: if you put the horizontal pin in the two fabrics as shown above, the horizontal pins on each side should be out of the way of your 1/4″ foot.

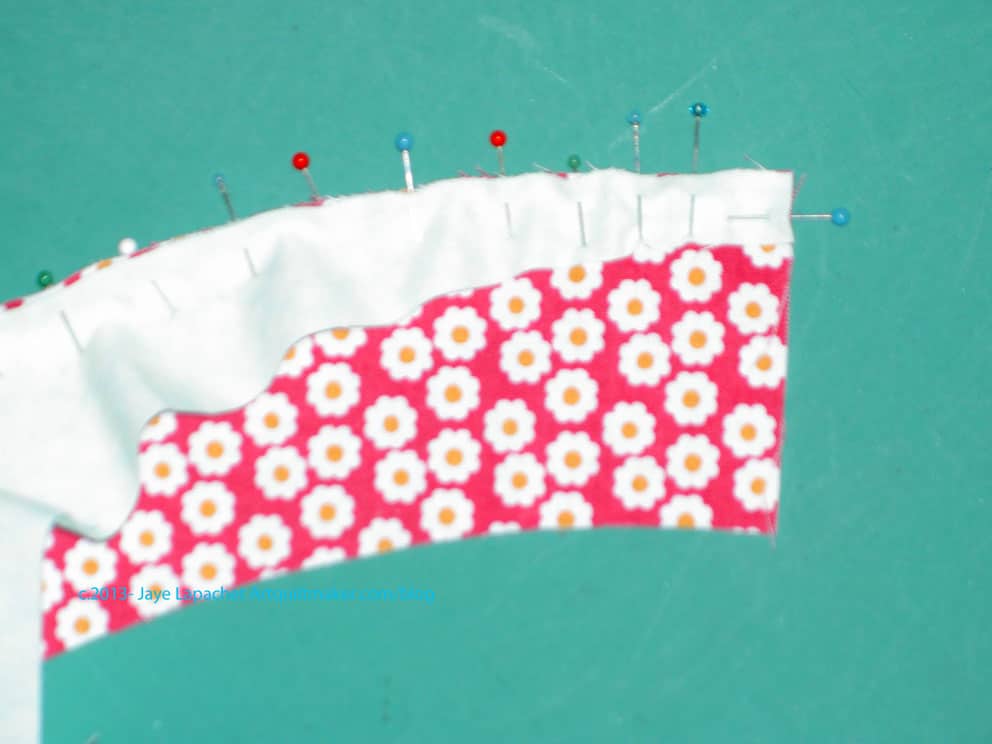
Pinned End
Pinned End
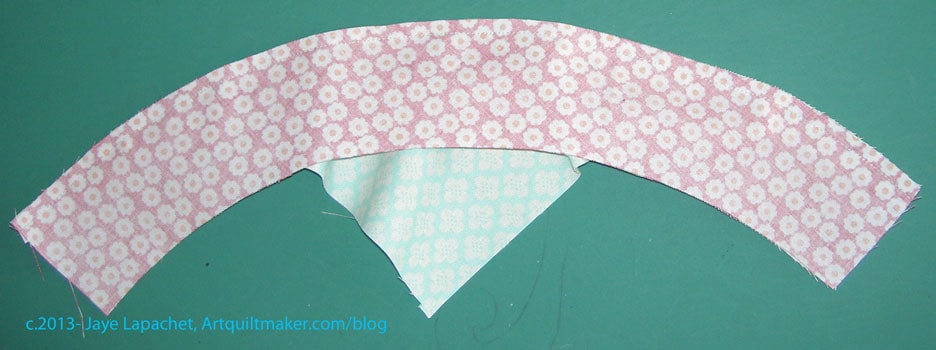
blue side up
blue side up

It is not quite as smooth on the other side, but that is ok. Set this piece aside for now, but remember that when you are ready to sew, sew slowly and carefully. Next, we will sew the corner section (quarter circle, Section D) to the small pieced strip.

If you don’t know how to sew curves together, check out the curves tutorial.

Nota bene: if you did not foundation piece the small strip, follow the directions in part 3 or above to do so. If you haven’t done any foundation piecing before you might want to start with this piece as it is smaller and less complex than the pointy triangles section (Section C).

I use a lot of pins and I know there are other tutorials that are pinless or use minimal pins. Put these two pieces together the way it works for you.

Now you are ready for part 5, which is the last part, I promise. 😉

Tips:

  • If you have to rip out stitches, rip them out from the fabric side, not the paper side.
  • Pay attention to putting the next fabric piece on the foundation.
  • Avoid the bump by pressing!

Resources:

Fabric & Color Choices

While this certainly won’t be a comprehensive post on everything there is to know about color and fabric choices, I thought I could pass along a little information while it was fresh in my mind.

Finished: Foundation Pieced Block

Above is my completed foundation pieced New York Compass. If I were doing this block over again, I would not choose that specific aqua or that red for the small second foundation pieced strip (next to the corner quarter circle). In the grand scheme of the quilt, it will be fine, but this close up it really takes away from the fine piecing of those spiky triangles. The reds, especially run into each other.

That second foundation pieced part is tricky for my particular version, because my quilt is a two color quilt. I can’t introduce additional colors into the blocks at this late stage and maintain the integrity of my plan. I could have paid more attention to the particular reds and aquas I was choosing and chose fabrics for that small foundation pieced strip that stood out more against the red dot of the spiky triangles.

My mistake?

I grabbed fabrics and started cutting. I did not look at all the fabrics together before cutting. I didn’t try different fabrics to see what the change in look would be. I didn’t make my visual decisions visually. This lesson is a good reminder.

Sampler Class: Foundation Piecing Part 3

New York Compass
New York Compass

We are midway through the foundation piecing class. This is a long tutorial, but there are a lot of steps and I want all of the parts to be clear. This would be a great tutorial for a video, but A) I don’t have a crew and B) I don’t do video.

This segment discusses more foundation piecing. In order to get to this point, you should have completed parts 1 and 2. All of the supplies are listed in Part 1

Remember our goal:

NY Compass Outline
NY Compass Outline

Next, we need to foundation piece the small strip called Section D.

Cut fabric
Cut fabric
4 Pieces of fabric
4 Pieces of fabric

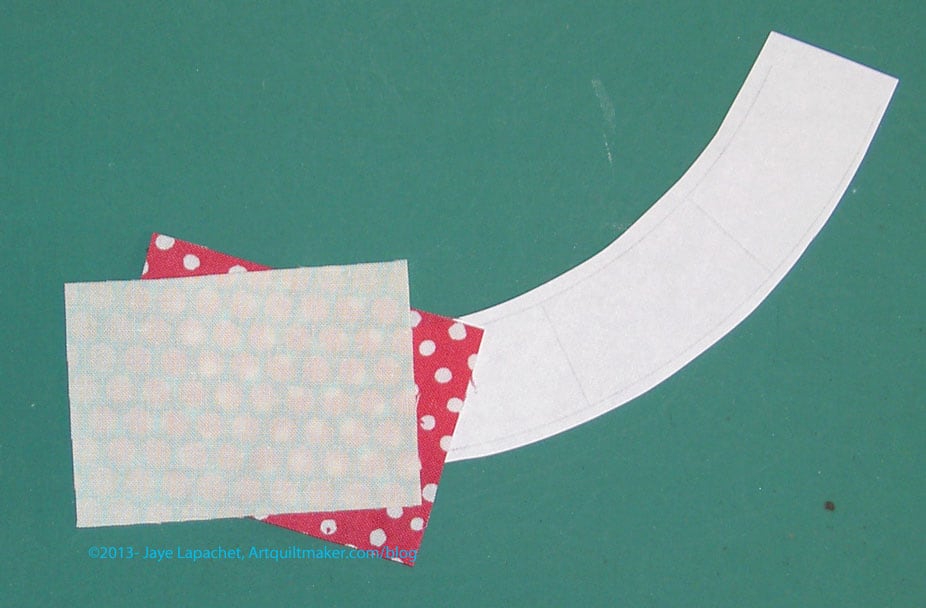
Cut 4 pieces of fabric that coordinate with the fabrics of your block. The pieces should be about 2.5″x 1.75″, which is generous. You may be able to use scraps for these pieces. (Please ignore the messy cutting table)

Place fabric on pattern

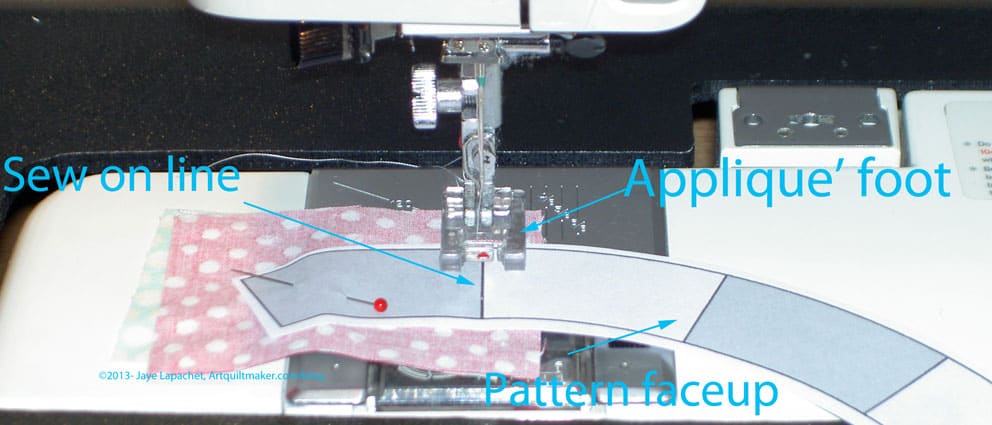
As you did in Part 2, you will work on placing 2 fabrics on the line between D1 & D2 with about a quarter inch hanging over into D2 as a seam allowance. Note the printed part of the pattern (the lines on which you sew) are face down for this step.

Pin fabric
Pin fabric

I like to pin the first piece of fabric to my pattern. It helps keep the fabric from shifting as I work on the second piece of fabric. Note the printed part of the pattern (the lines on which you sew) are face up for this step.

Position 2d piece of fabric

Flip Section D back over and position the second piece of fabric over the first.

Ready to Sew
Ready to Sew

When you have both of your pieces placed like you like them, pin in place. I like to use thin pins. Your piece should now look like the above photo.

Sew on line
Sew on line
Sew on the line (#2)

With the applique’ foot on your machine. Sew on the line between D1 & D2. Do not cross the perpendicular line at the top or bottom. Back stitch one stitch at the beginning and the end.

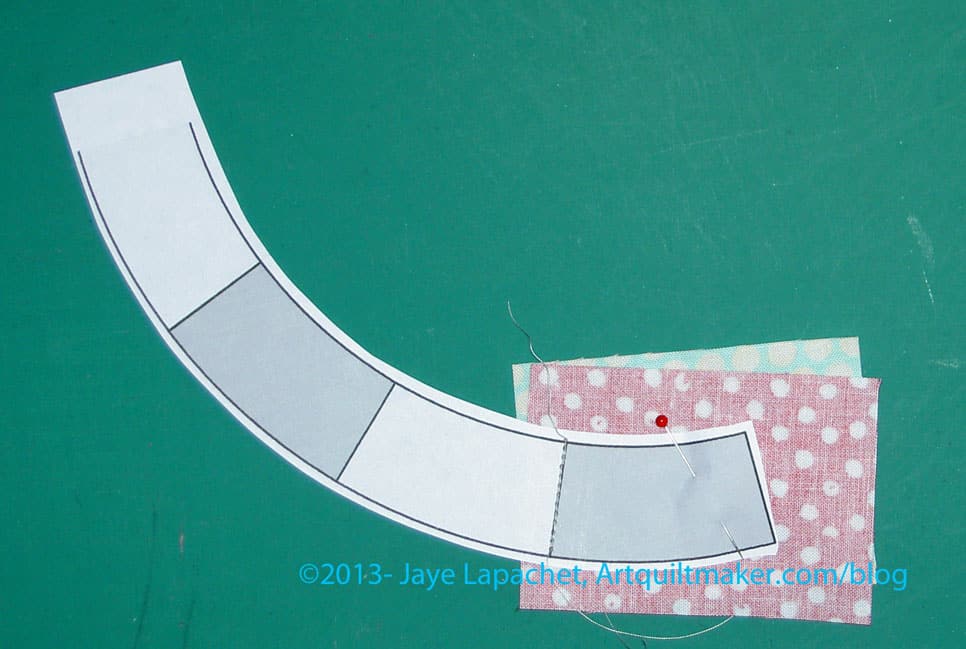
Section D sewn
Section D sewn

Once you have sewn on the line, your piece should look like the above photo.

Press first sewn pieces

Open up both pieces and make sure they cover D1 & D2. Once you are convinced that you have covered both D1 & D2 with your fabric and there is a 1/4″ seam allowance, press your piece. Press with the pattern on top. Note the pattern is face up and you can see the sewing lines. (Nota bene: if you have taped your pattern, use a press cloth so that you do not get melted tape on your iron)

Sewn, pressed Section D back

Flip your Section D over again, so you are ready to trim.

Ready to trim
Ready to trim

Lay your pattern, with sewn fabric, pattern side up (fabric down) on your cutting mat. The inside part of the curve will be facing your body. You may want to flip Section D around if you are left handed.

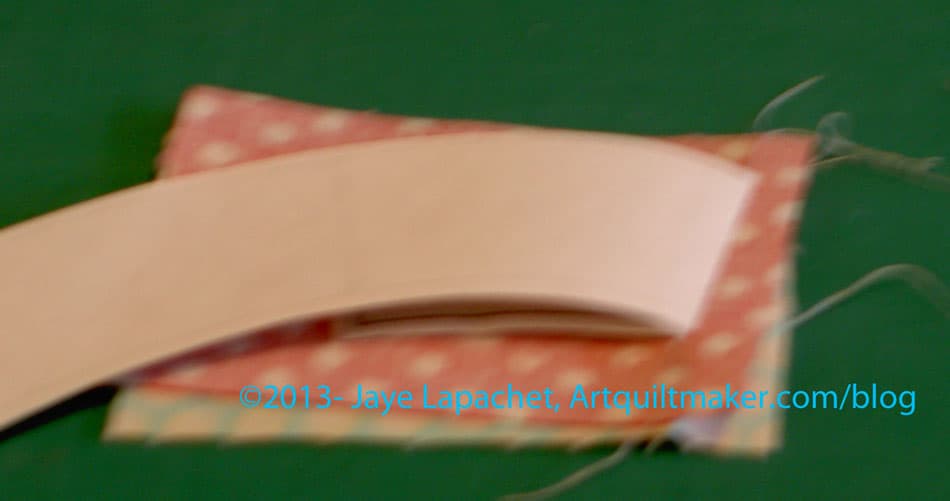
Fold the longer piece of the pattern over to the left using the seam line as the fold line. This will expose the fabric that will be your seam allowance.

Place ruler on sewn line

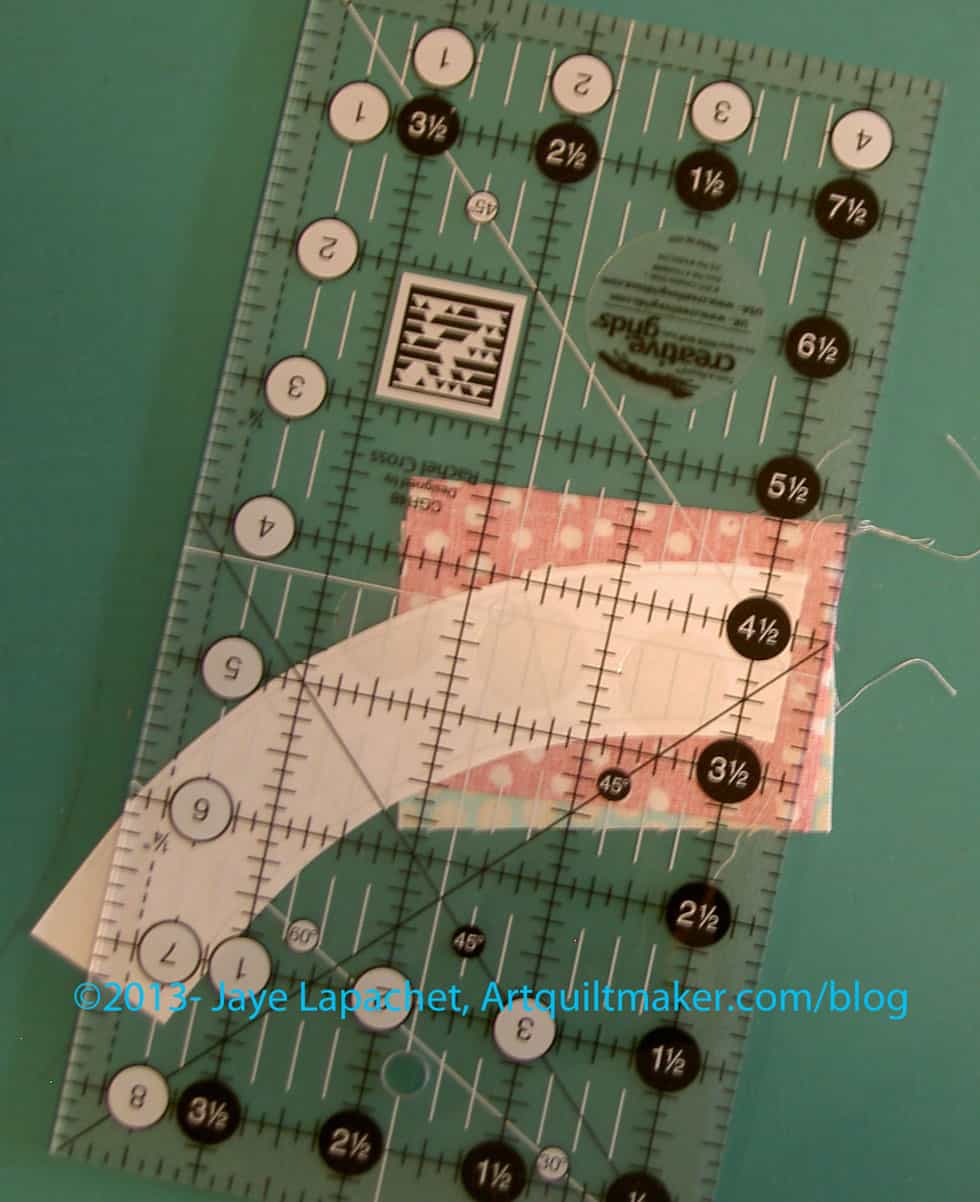
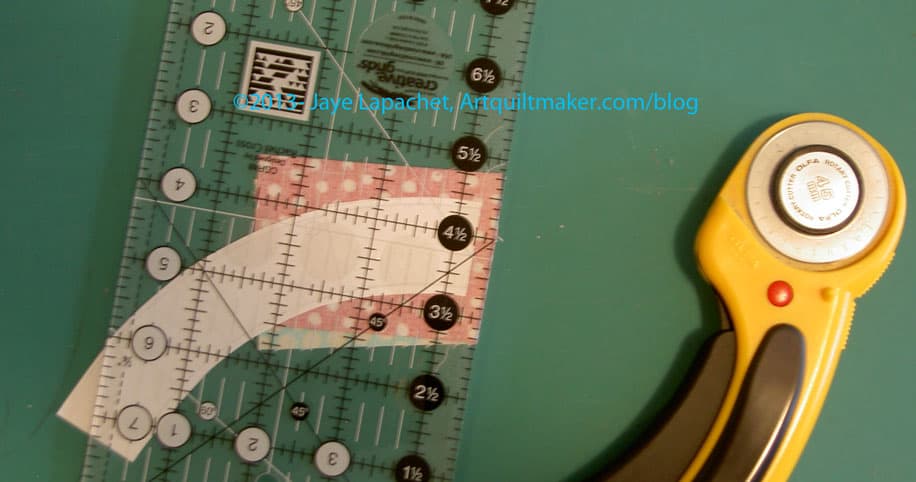
Line up your ruler’s 1/4″ mark on the seam/fold line and trim your seam allowance to 1/4″.

Trim
Trim
Trimmed
Trimmed

Trim seam allowance to 1/4″.

Ready to press pieces into place

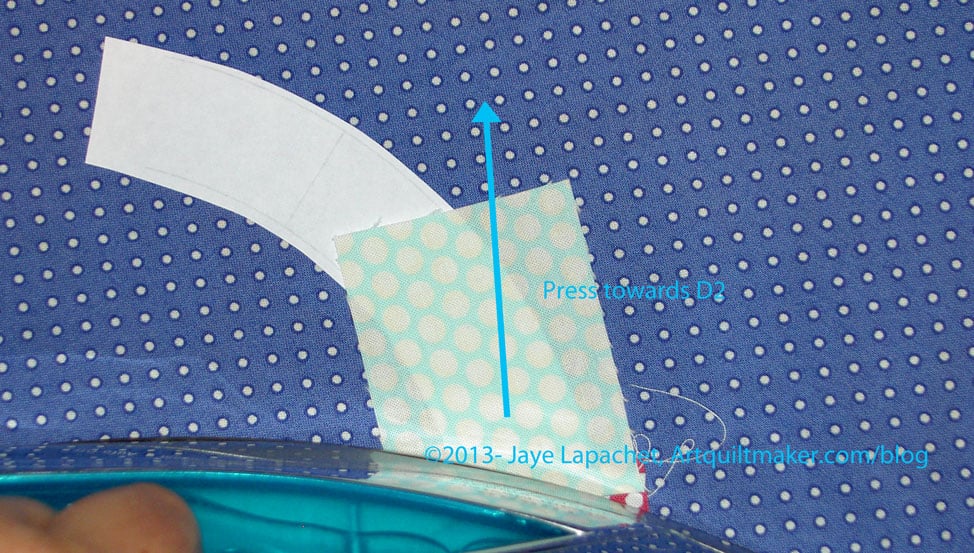
Go back to the ironing board and position your piece so the fabric is up, pattern side down  and smooth the fabric towards D2, lightly finger pressing.

Press towards D2
Press towards D2
Press towards D2
Press towards D2

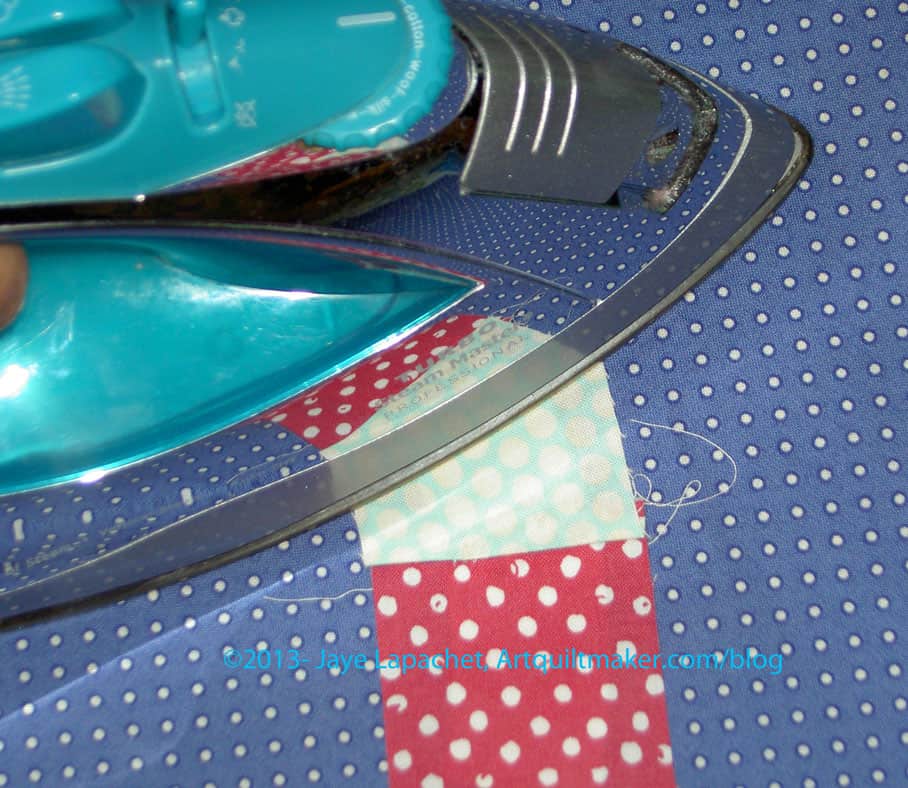
Take the piece to the iron and press carefully towards D2.

Place D3 fabric
Place D3 fabric

Place your next fabric with the longer part towards D2 and the future seam allowance closer to D3. Hold the whole piece up to the light to make sure your placement is correct.

Place D3 fabric in place

Pin in place.

Get ready to sew on the line between D2 & D3.

Sewn D3
Sewn D3

Once sewn, your piece should look like the photo above.

Check to make sure fabric covers D3

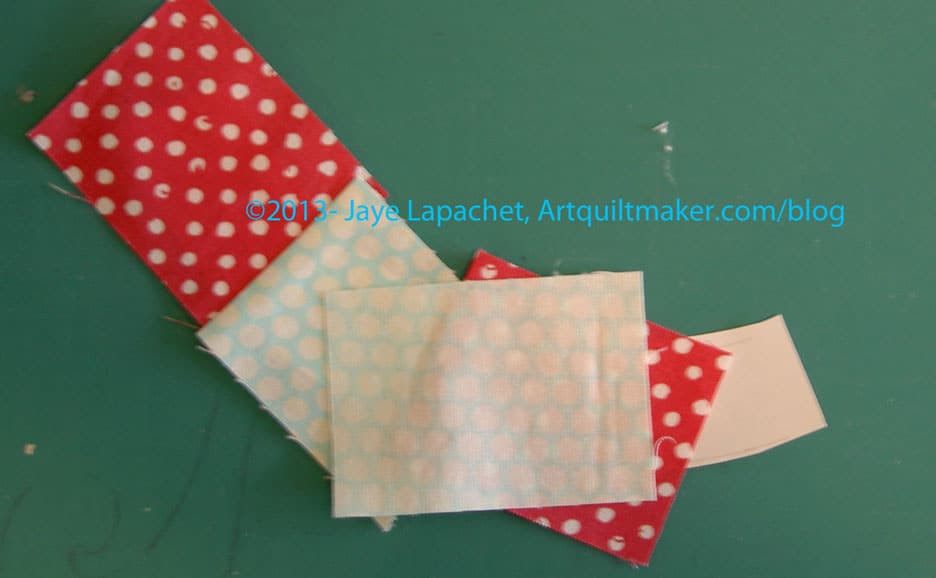
Check to make sure your fabric covers pattern section D3. You do this by folding the fabric over and looking to see that you have about 1/4″ on all sides.

Pattern side up
Pattern side up

Now, get ready to trim. Put your piece on the cutting mat pattern side up.

Folder pattern back
Folder pattern back

Fold your pattern to the left again, like you did before.

Ready to trim
Ready to trim
Trimmed
Trimmed

Line up your ruler’s 1/4″ mark on the seam/fold line and trim your seam allowance to 1/4″.

Avoid the bump
Avoid the bump

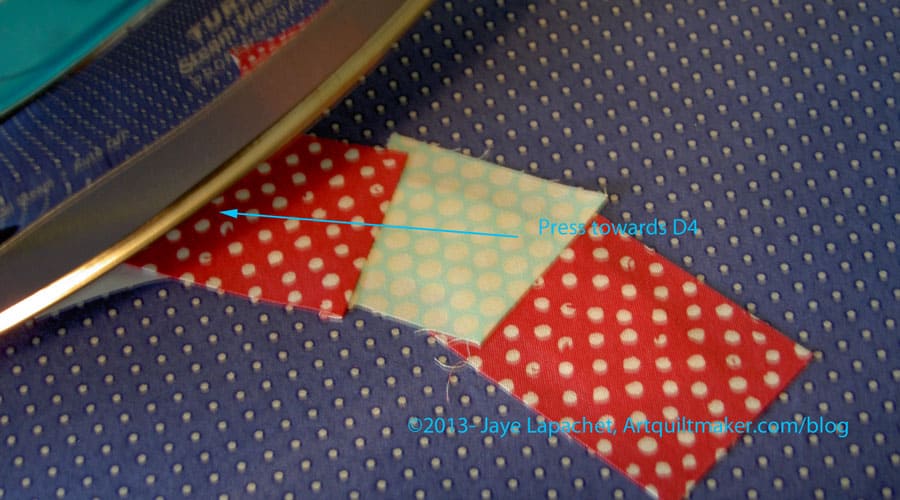
See that bump in the photo above? You do not want that bump to show once you have pieced D4 on to the parts of Section D you have already pieced. Press again, this time towards D4. Avoid the bump by pressing!

Press towards D4
Press towards D4

Press towards D4. No ironing!

We are heading to the home stretch!

Position D5
Position D5

Position your last piece as you have done before. It is going to look at little weird and out of alignment, because you are working with a curve. Remember to position the fabric so it covers D5 plus 1/4″ seam allowance. Pay no attention to the edges of the other pieces, such as D4, that you have already sewn.

Check placement
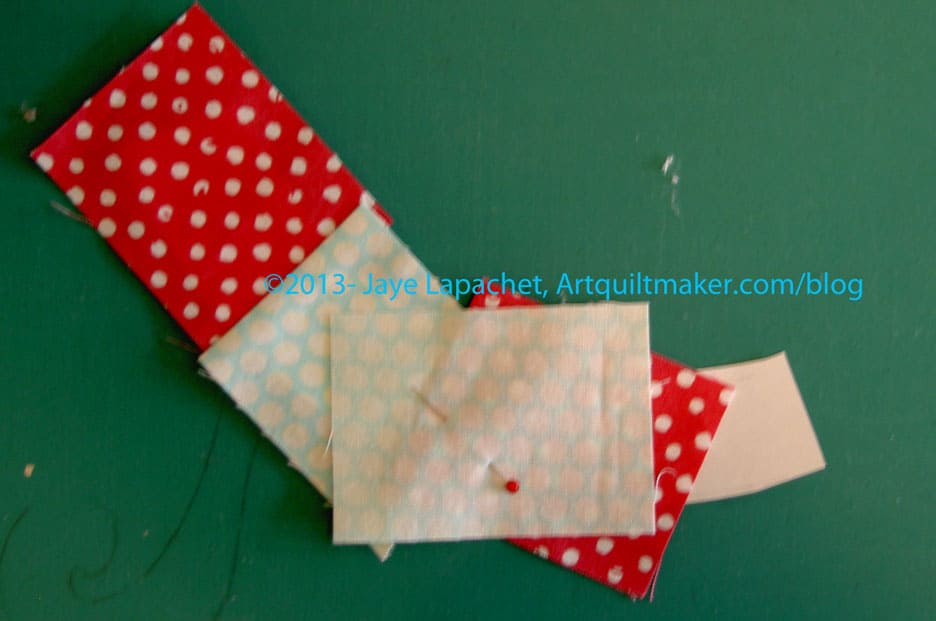
Check placement

It is easier for me to see whether or not piece D5 was in the right position by pinning it. Note, I would pin it on the pattern side to sew, because then I can see where the pin is in relation to where my sewing machine foot and needle are. the pin in the photo is temporary.

Sewn D5
Sewn D5

Once you have the placement finalized, go ahead and sew.

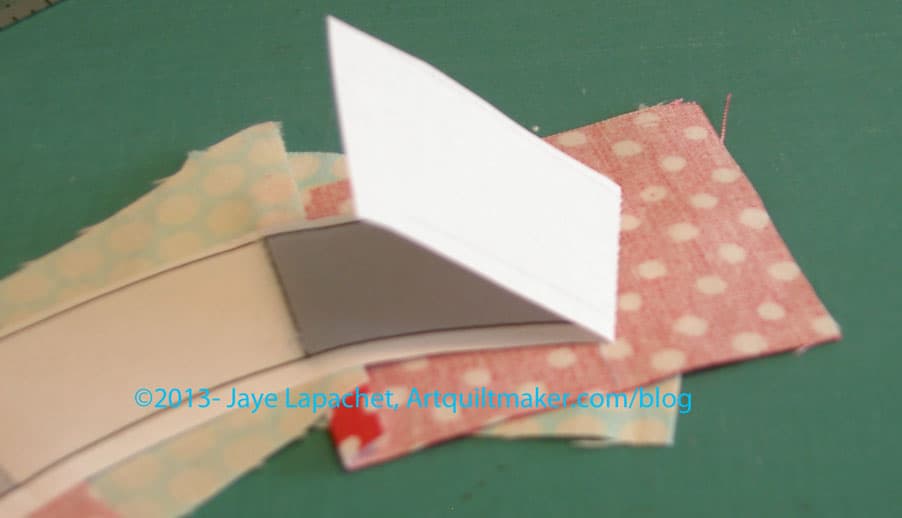
Fold back pattern and prepare to trim seam allowance
Align ruler for 1/4" seam allowance
Align ruler for 1/4″ seam allowance

Now you have to fold back the pattern one last time and prepare to trim the seam allowance.

D5 trimmed!
D5 trimmed!

Trim!

Section D Complete!
Section D Complete!

Now your piece is done. Fold back the D5 fabric and press. Place your ruler on the lines at the end of the pattern and trim a 1/4″ seam allowance. I know you can do this without photos.

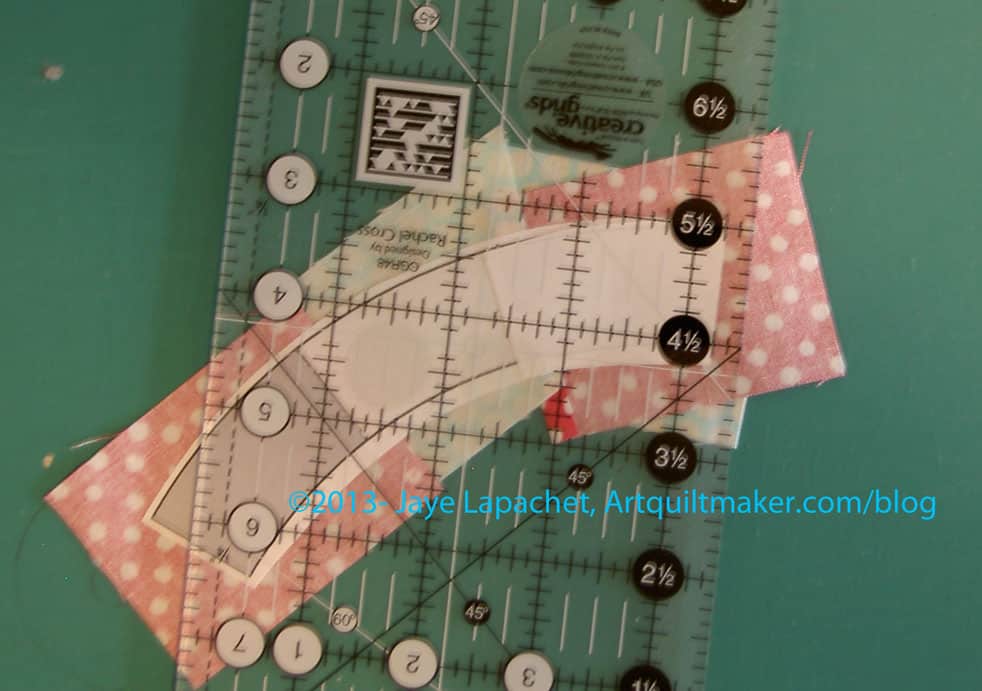
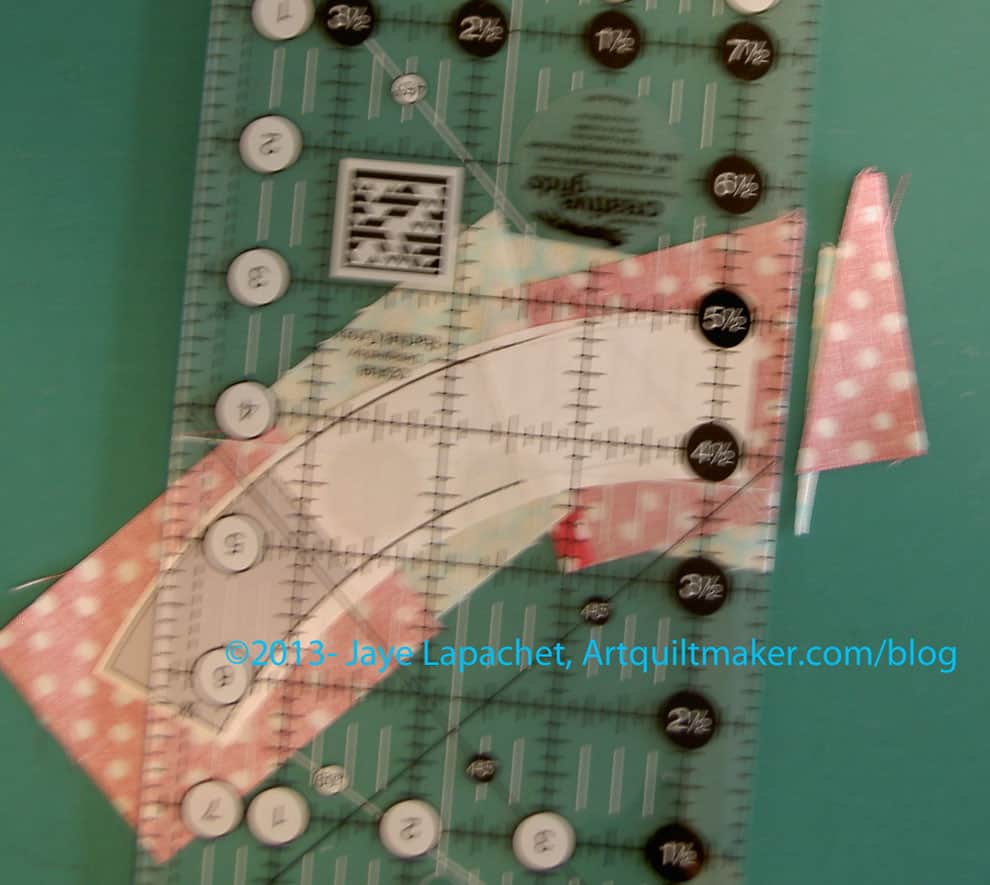
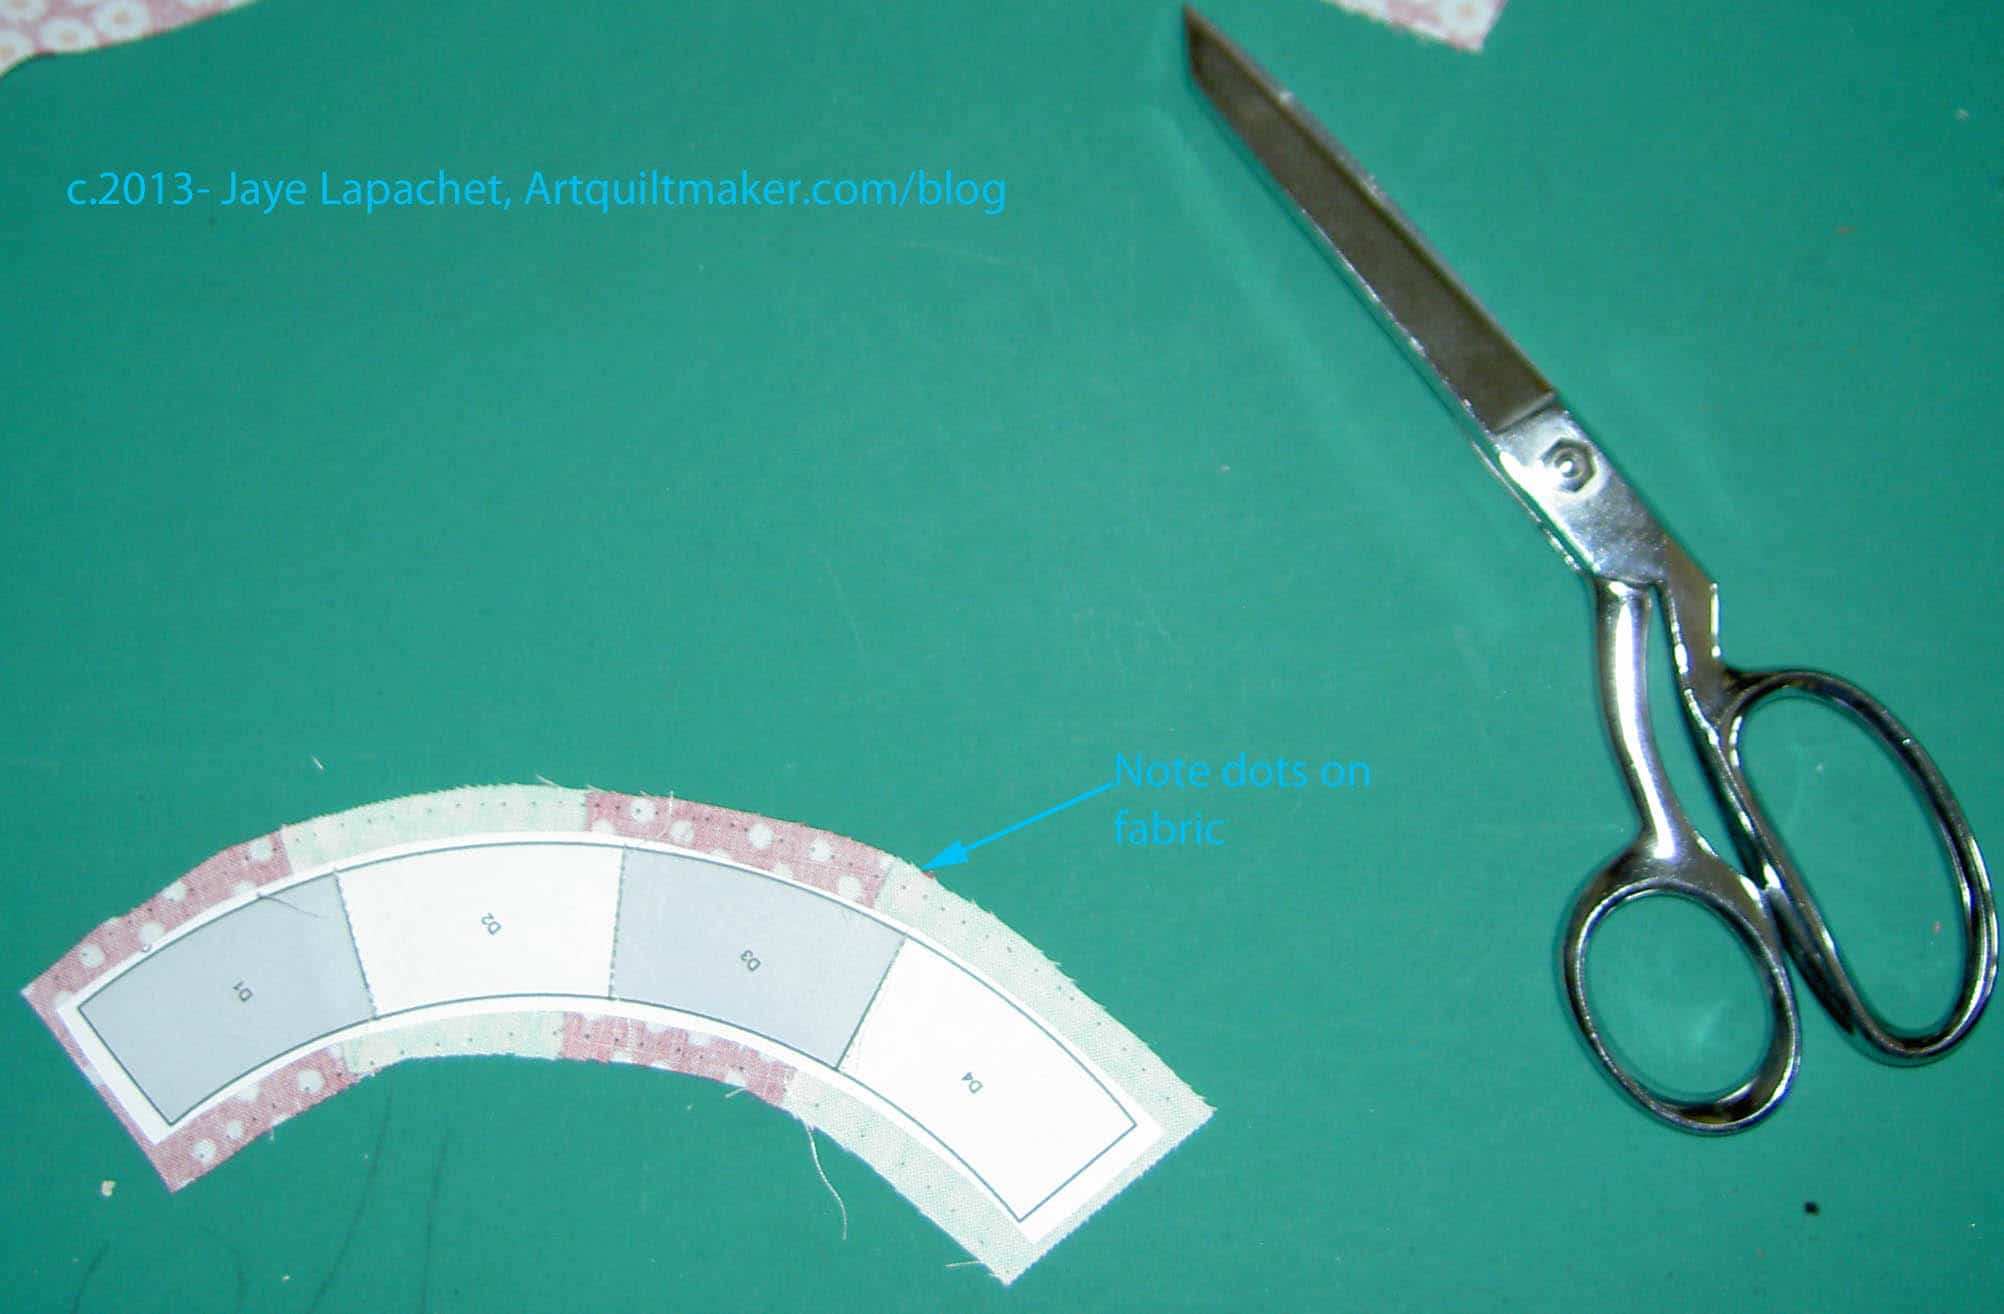
Now you have to trim the curved parts of Section D

Untrimmed Section D
Untrimmed Section D

It is too difficult to sew the untrimmed Section D, so you will have to trim.

Dots mark 1/4"
Dots mark 1/4″

To trim, mark 1/4″ away from the dark line. The dots in the photo above mark 1/4″. I have trimmed the straight ends with a rotary cutter and I am ready to play “dot to dot” with my scissors. I am going to cut from dot to dot to create a 1/4″ seam allowance.

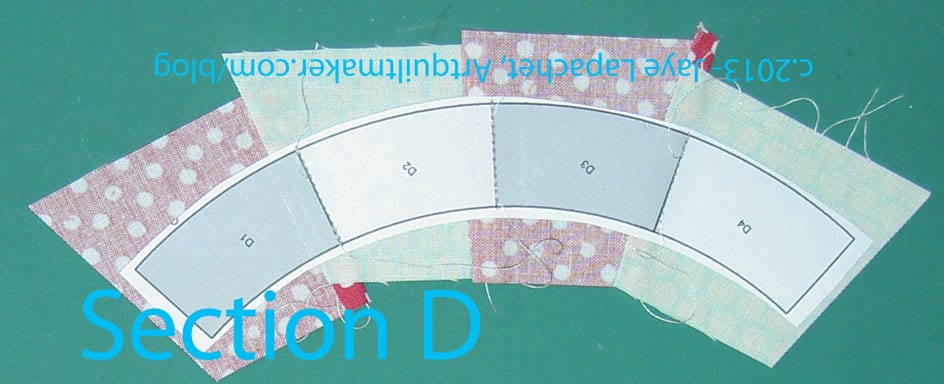
Section D
Section D

On to part 4!

Tips:

  • If you have to rip out stitches, rip them out from the fabric side, not the paper side.
  • Pay attention to putting the next piece on the foundation.
  • Avoid the bump by pressing!

Resources:

Quilt Class: Curves Part 2

Tutorial on sewing curves

I started a series of tutorials on sewing curves during my last Sampler Class, but I never finished the last two parts. The first part is about fabric and arrangement of pieces.

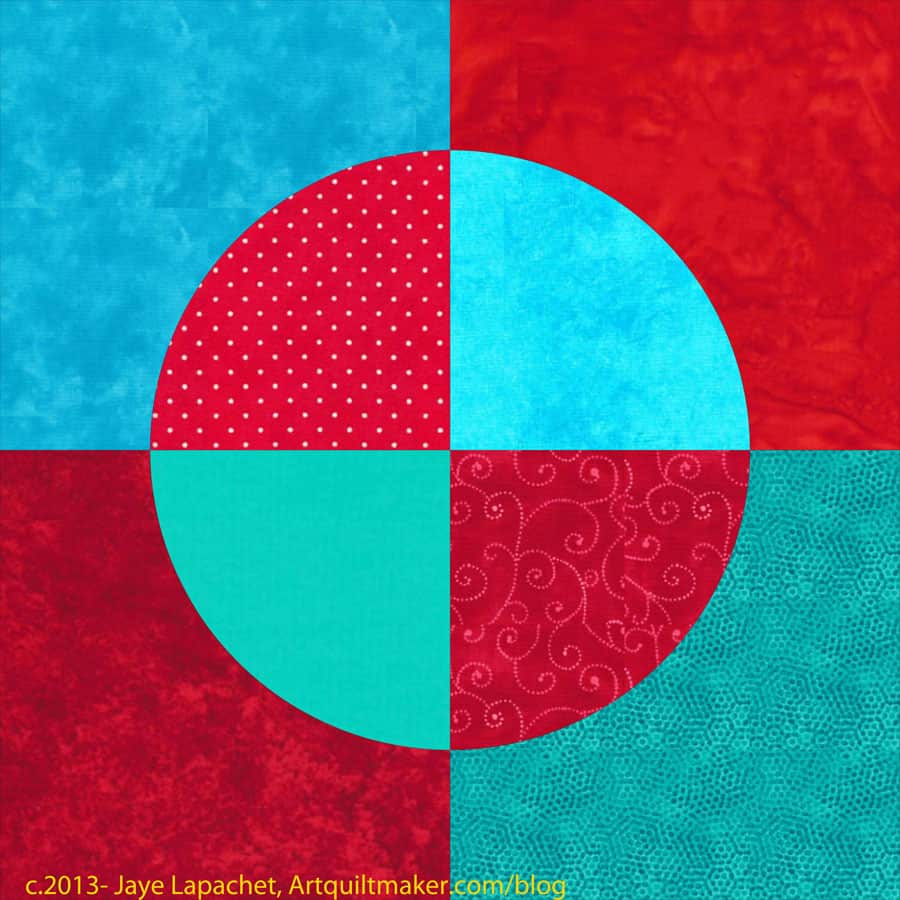
Curves-The Dove
Curves-The Dove

Supplies:

  • The Dove pattern
  • paper scissors
  • template plastic
  • glue stick
  • fabric (at least 2 different)
  • pen ( I like the Pigma Micron & the Pilot Ultra Fine Point)
  • Fabric scissors
  • pins
  • Sewing machine
  • quarter inch foot or other marking system
  • thread
  • Iron and ironing board

We will be using a quarter inch seam allowance. You will need to adjust the pattern if you are using a different seam allowance.

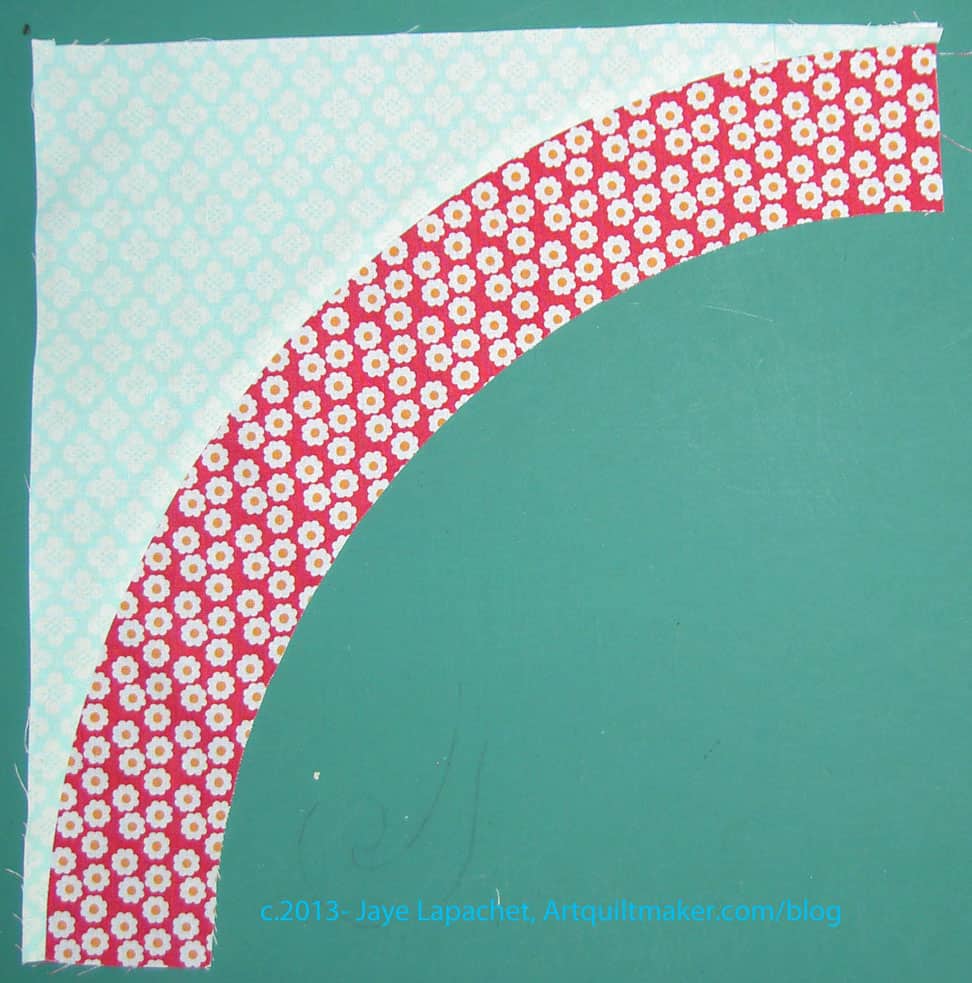
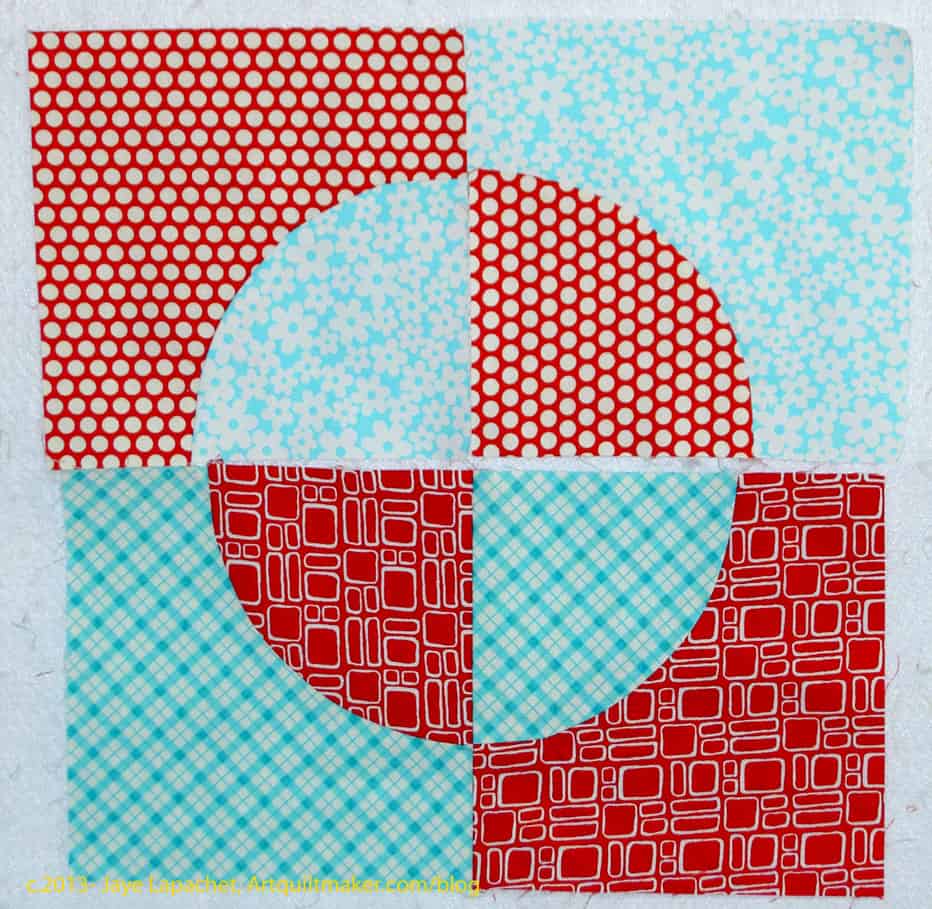
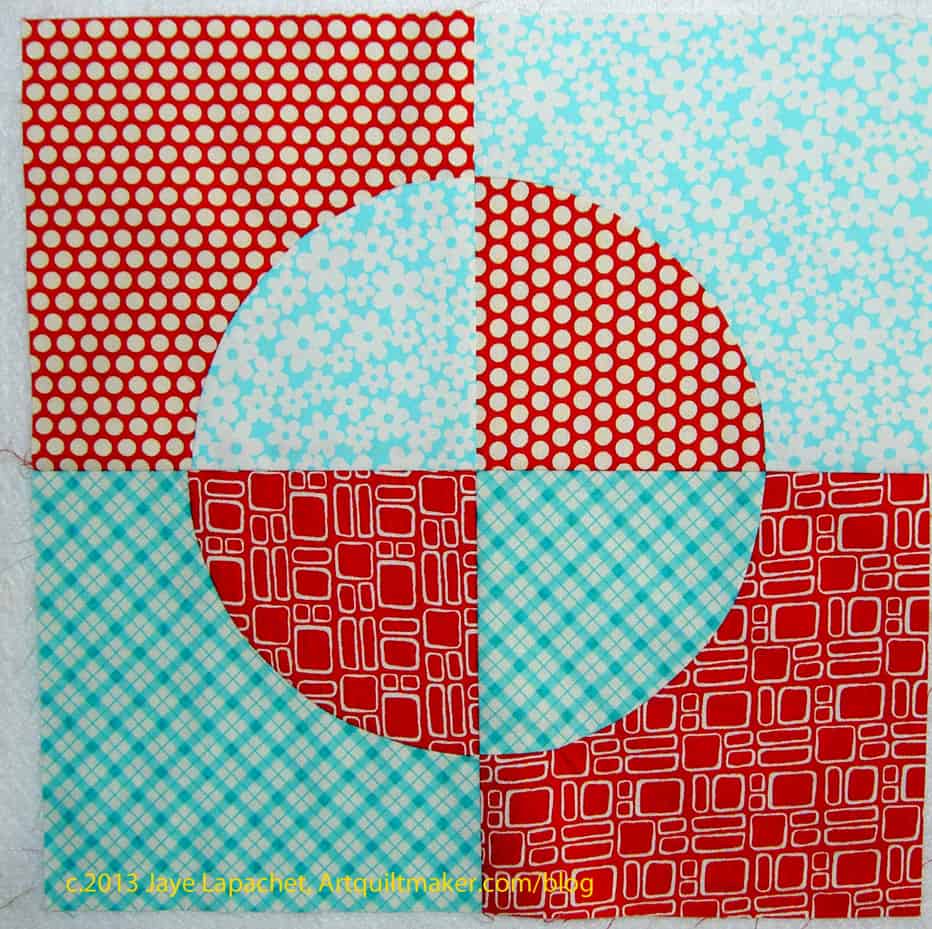
The Dove pattern is a baby version of the Drunkard’s Path. If you make this piece, the next logical curved piece would be a Drunkard’s path block.

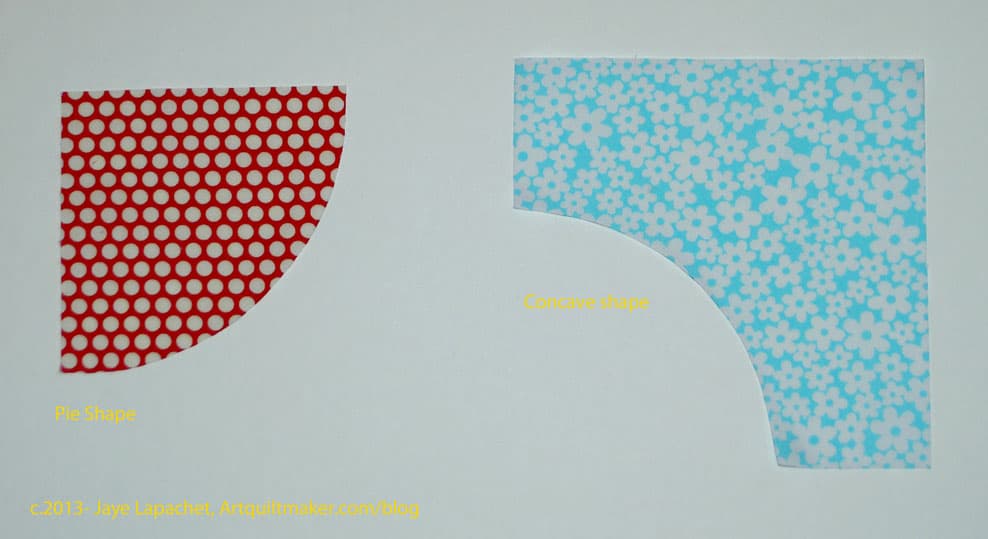
Key to Pieces
Key to Pieces

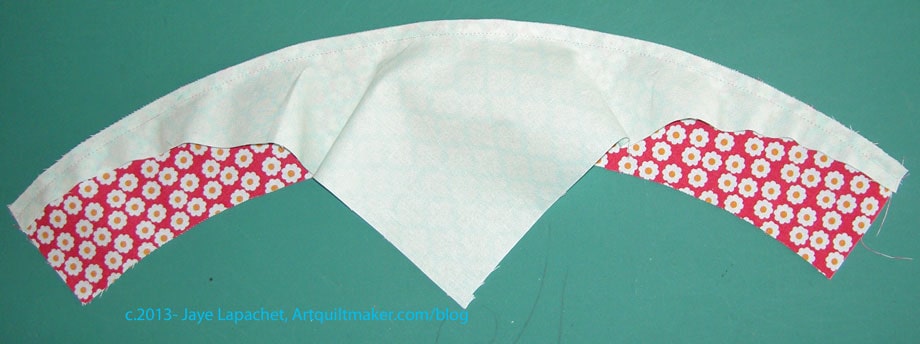
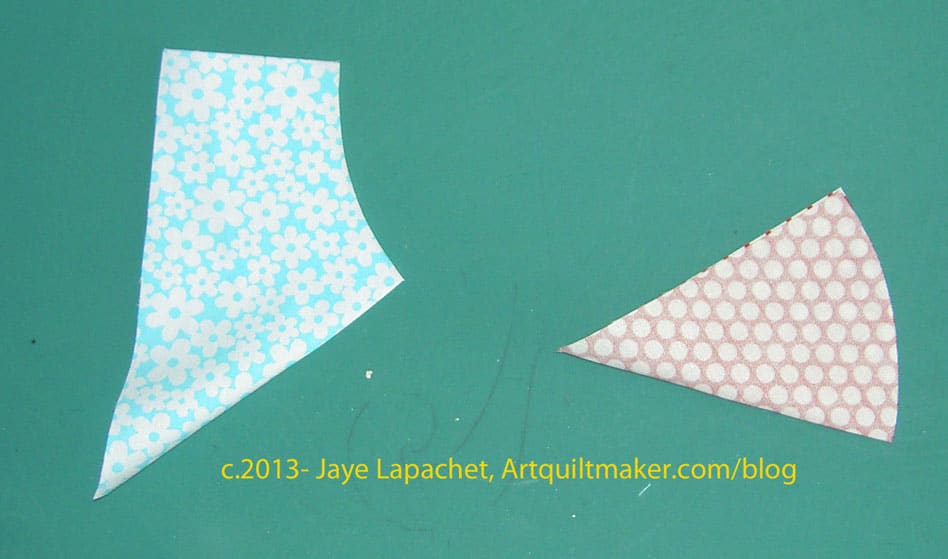
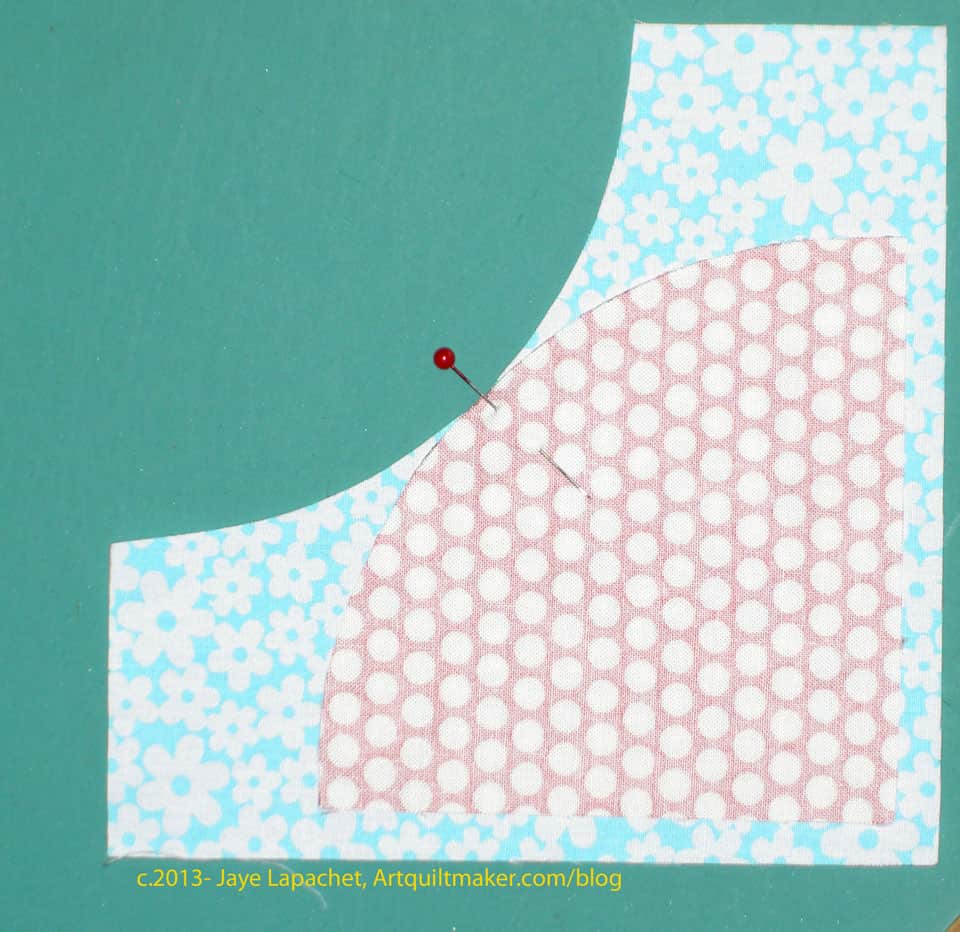
This block, as well as the Drunkard’s Path block is made from two types of pieces: a concave ‘L’ and a pie shape. The pie shape forms the circle in the center and the concave ‘L’ can be considered the background. In this block, the pieces are somewhat larger than in the 12″ Drunkard’s Path I used in my previous class. This design also has a very strong focal point.

  1. Take the The Dove pattern and rough cut the templates.
  2. Use the glue stick to stick the paper templates to the template plastic. You won’t need heat resistant template plastic as we won’t be ironing over the templates. It is fine to use, though, if that is the only kind you have.
  3. Rough cut out the templates you have glued to the plastic.
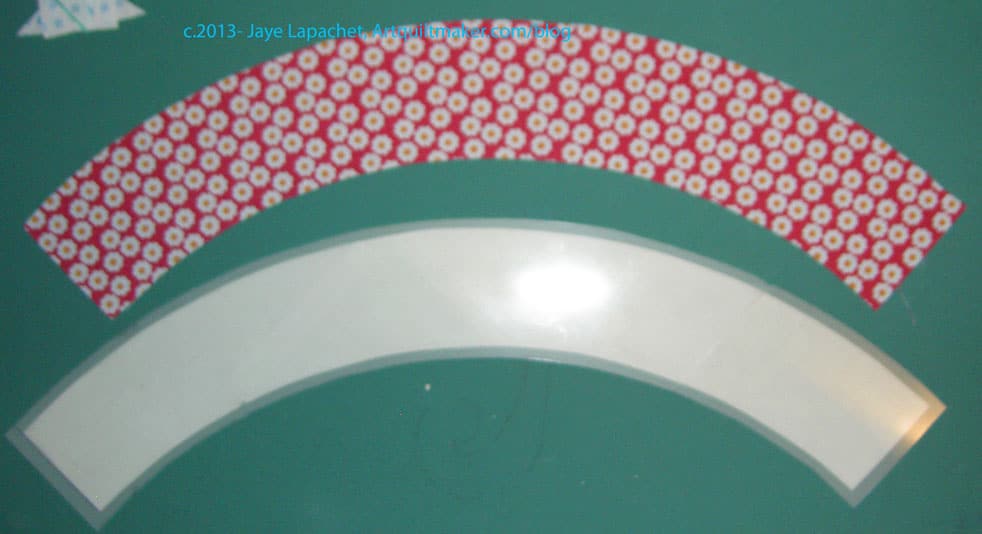
  4. Carefully cut out the template on the seam allowance line, cutting off the rough cut paper and plastic.
  5. Place your fabric wrong side up on a hard surface.
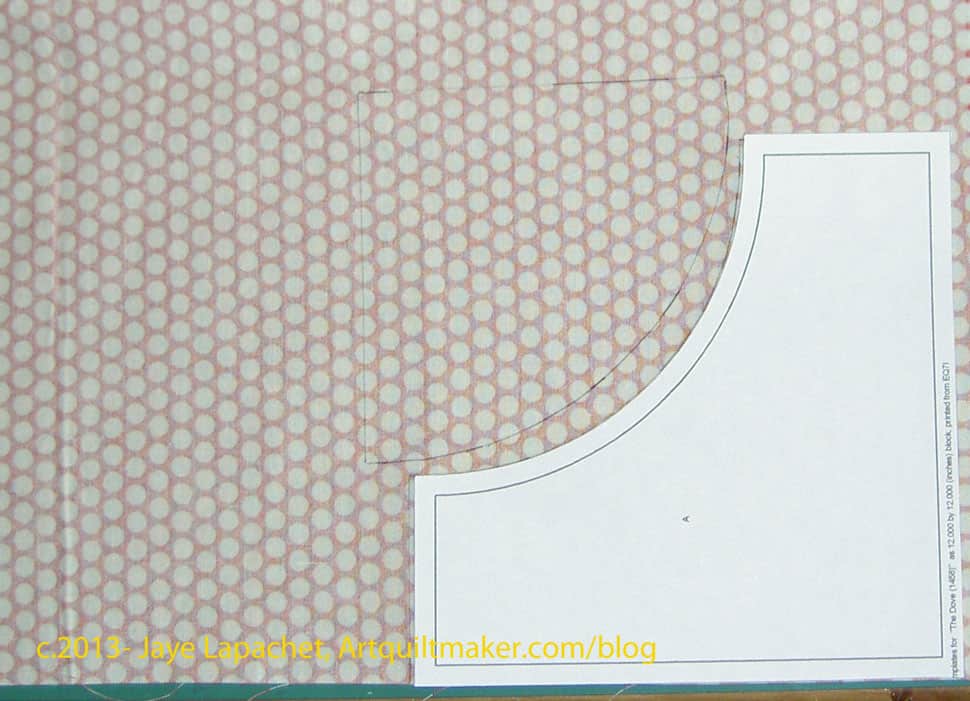
  6. Draw Around Templates
    Draw Around Templates

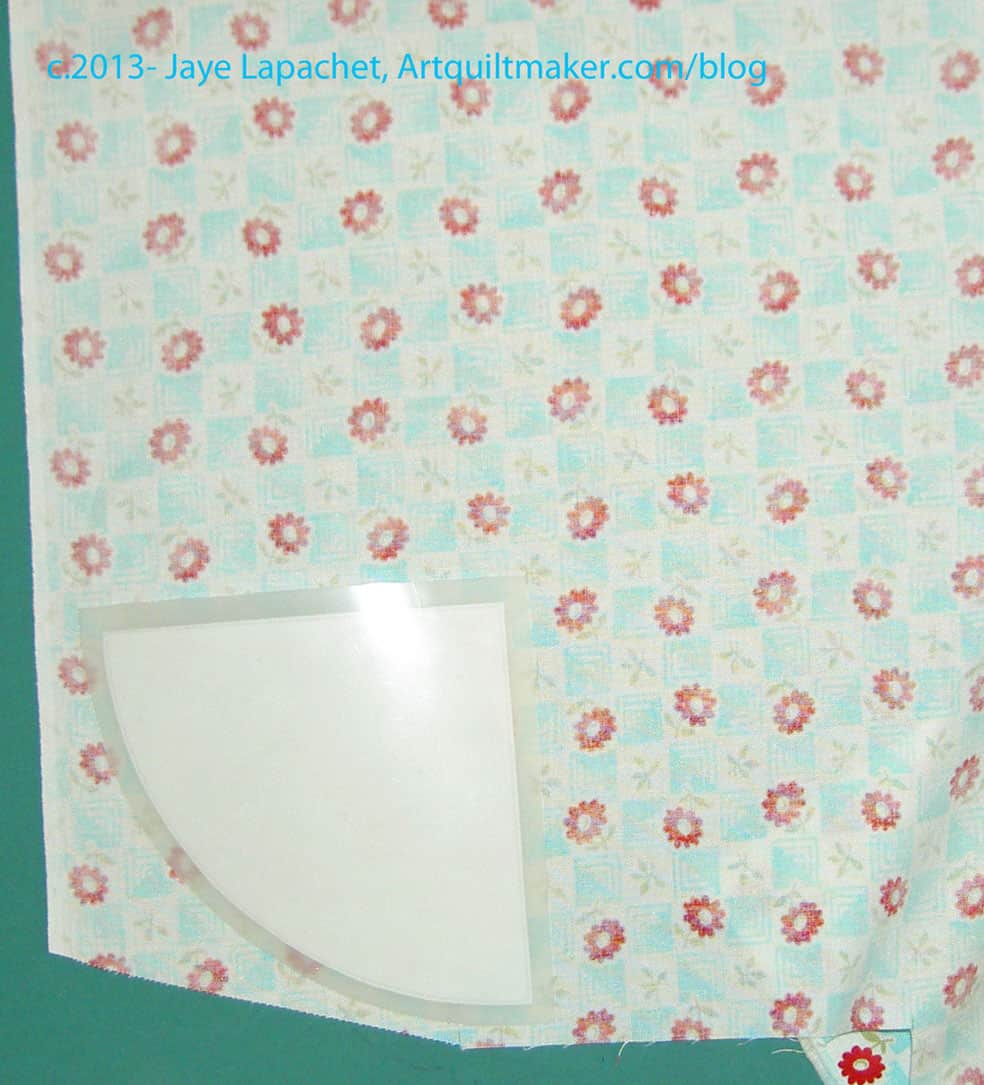
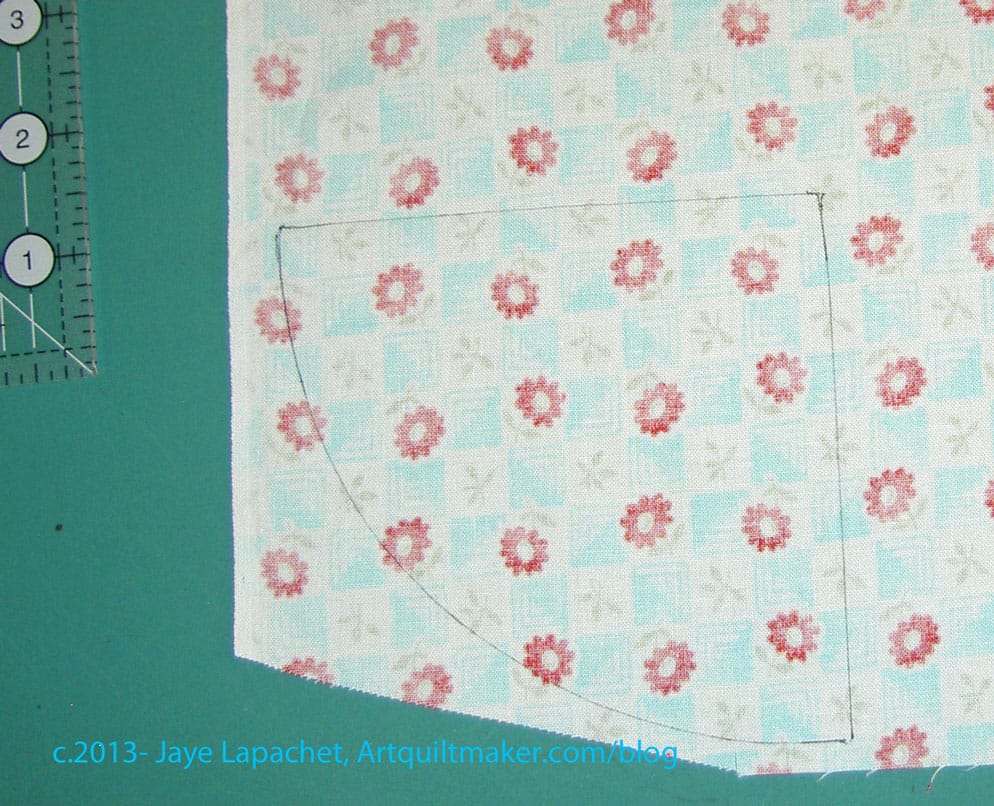
    Place the templates wrong side up on your chosen fabric. Nota bene: If you are using symmetrical templates, then it doesn’t matter whether they are right side or wrong side up, but it is good to get in the habit of doing it the right way in case you use non-symmetrical templates in a future project.

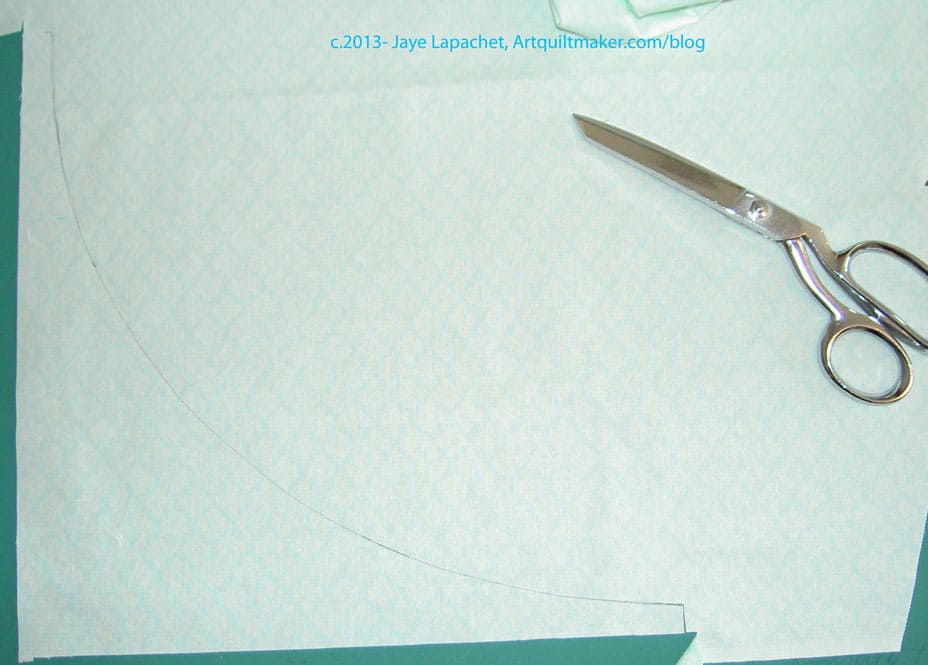
  7. Draw around the template with your marking implement of choice. You will need to hold your template firmly so it doesn’t shift. You can also rough cut out the fabric pieces if trying to cut precisely or carefully with a long length of fabric draped over the cutting table is too difficult.
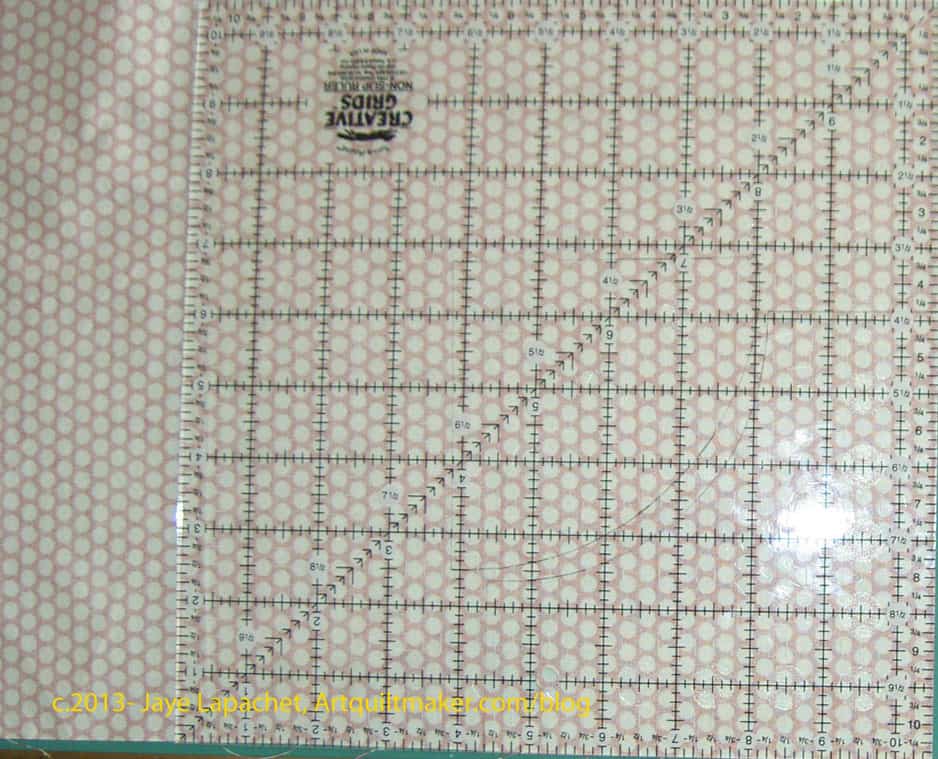
  8. Rotary Cut 90 degree angles
    Rotary Cut 90 degree angles

    Cut the fabric out carefully using your fabric scissors, especially the curves. Cut the drawn line off the fabric. I used a rotary cutter for the 90 degree angles.

  9. Check to make sure that the fabric you just cut out is the same size and shape as your templates. You can lay the template over your fabric to check.
  10. Fold Pieces in Half
    Fold Pieces in Half

    Take a pie shape and a concave shape and fold them in half. Line up the edges carefully. The halfway point that you create will be used to make sure the pieces are sewn together evenly. You will want to make the marks so the patches nest. That means you fold the concave piece in half with right sides together and the pie shaped piece in half with the wrong sides together. Mark the halfway point with a pin or through finger pressing.

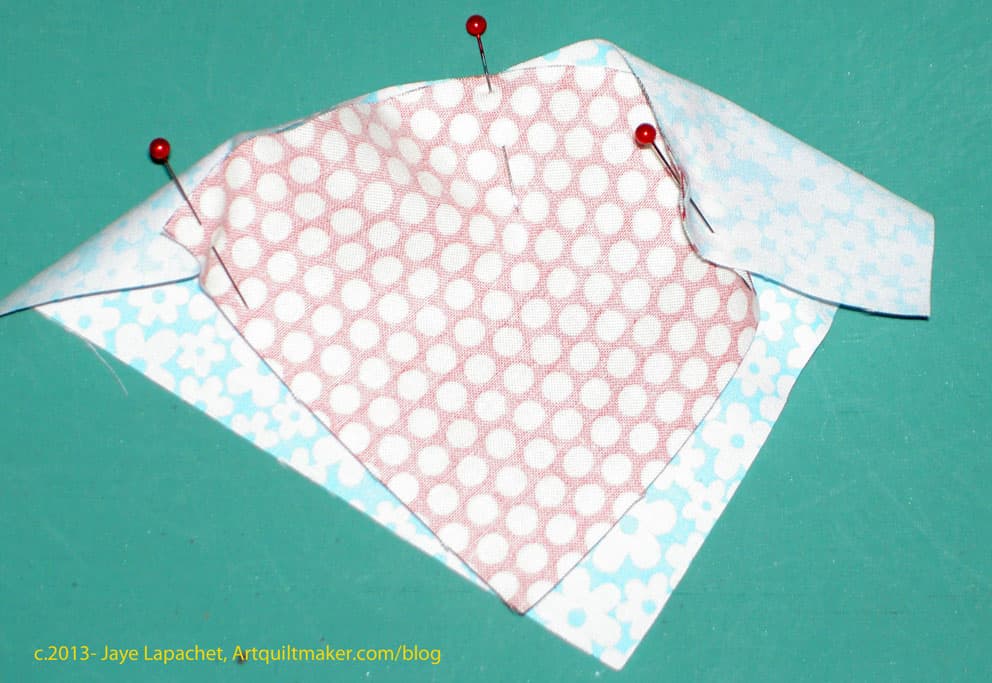
  11. Nestle the pieces right sides together.
  12. Pin in Middle
    Pin in Middle

    To do this, line up the middle mark where you have finger pressed to align the blocks accurately.

  13. Pinned 3 times
    Pinned 3 times

    Line up the outside edges and place a pin close to the two outside edges.

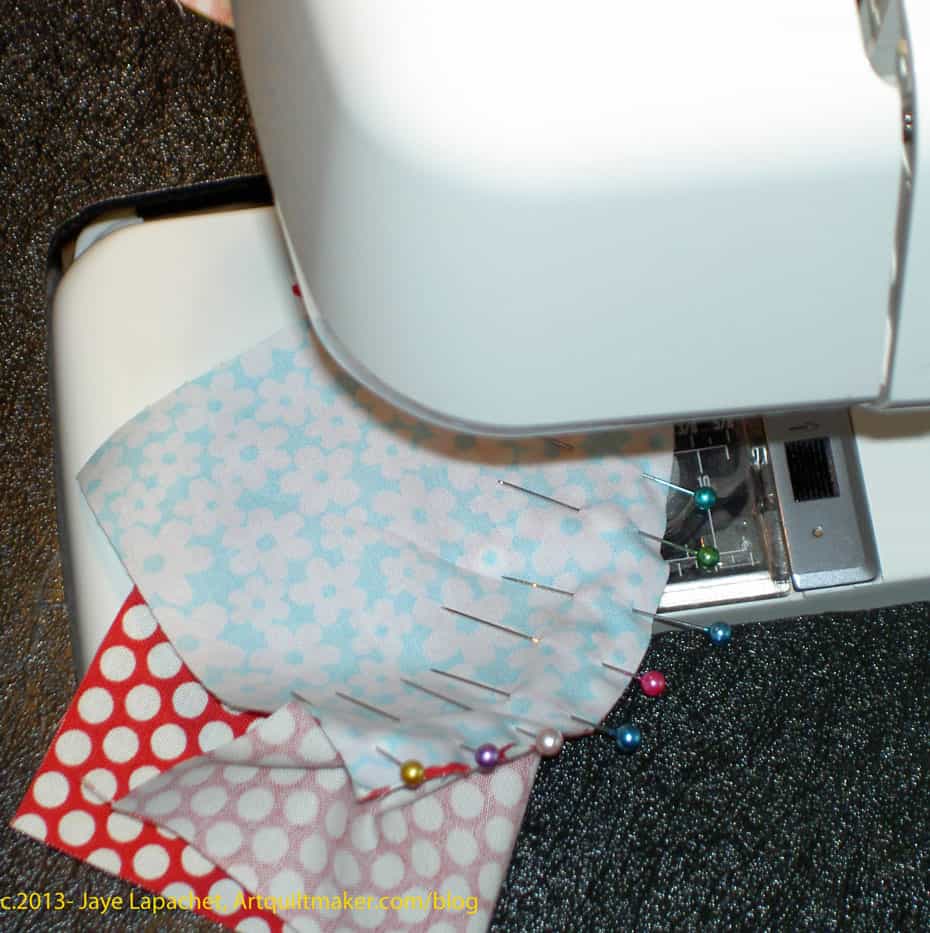
  14. Fill in the area between the middle pin and each outside pin with pins. Ease the area between the outside and middle pins into smoothness with your fingers, lining up the edges of the fabric as you do so. Place as many pins as you need between the middle pin and the outside pin. Make sure the fabric is flat and there are no pooches. You may have to ease a bit, but do it very gently so as not to stretch the pieces. If you have to stretch and tug and pull, there is something wrong and you should check to see if your templates match your fabric pieces.
  15. Completed Pinning
    Completed Pinning

    Do the same with the second section between the middle and the other outside edge until you have used a lot of pins.

  16. Sew Pie to Concave Piece
    Sew Pie to Concave Piece

    Sew Pie to Concave piece, removing pins before you sew over them. You may want to use the point of a pin to keep the edges of the fabric lined up until you sew over the area where the pin was. I also use a seam ripper as a stiletto to keep the two pieces in place after I remove the pins.

  17. Dove Block in Process
    Dove Block in Process

    Press carefully.

  18. Repeat for all of the quarter blocks.
  19. Dove Block in Process
    Dove Block in Process

    Sew 2 quarter blocks together to make a half, then sew the other 2 quarter blocks together so you have two halves.

  20. Press so that the center seams nest
  21. Pin the two halves together, paying careful attention to the center.
  22. Sew the two halves together.
  23. Press carefully.


Finished Dove Block
Finished Dove Block