Frances talked about foundation piecing in one of her recent podcasts. I am nothing if not an accommodating 😉 teacher, so I thought we would tackle a foundation piecing pattern next. This is called New York Compass, a variation of the New York Beauty pattern. It is a little more complex than the patterns we have been working on, but I decided to throw caution to the wind and nudge Frances to step up. She has done curves, so I am confident she can do this one.

In part 1, we will prep everything.
Supplies:
- Notebook for notes
- Pen to take notes 😉
- Sewing Machine
- applique’ foot (preferably one with a mark showing where the needle will stitch)
- 1/4″ foot
- thread
- fabric
- fabric scissors
- paper scissors
- foundation piecing paper like Toni’s Disappearing Paper or Carol Doak’s Foundation Paper
- pins
- Rotary cutter
- rulers
- template plastic
- template plastic friendly pen (Bic works)
- glue stick
- iron and ironing surface
- thin pressing cloth
- New York Compass pattern
- Optional: Wonderclips
- Optional: Lightbox
-
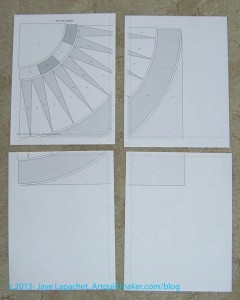
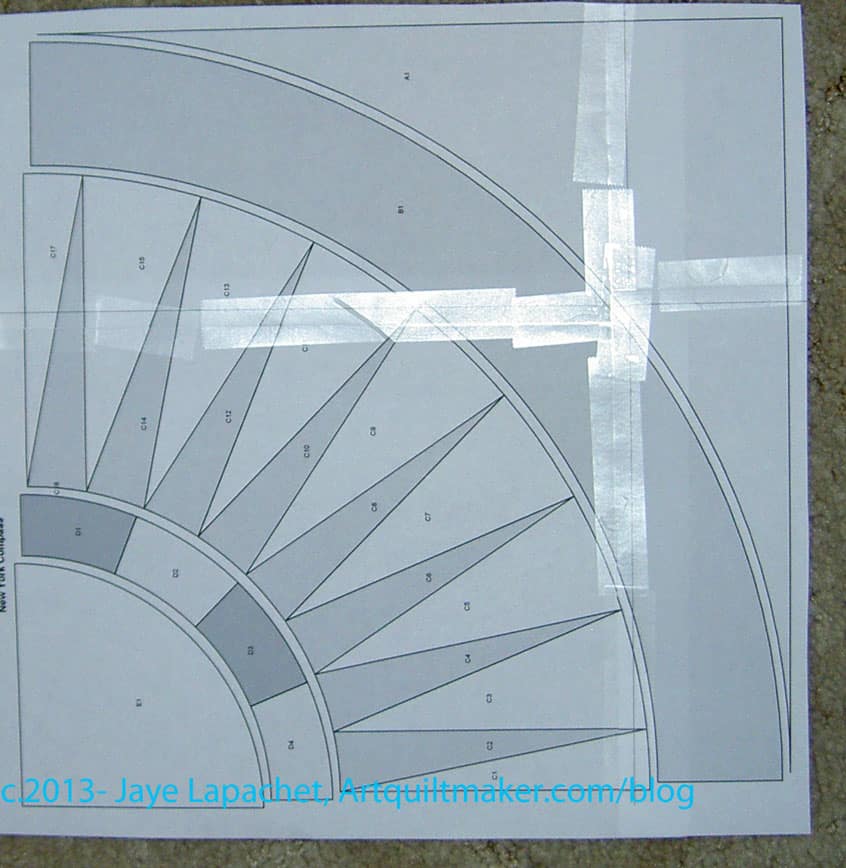
Pattern in 4 Pieces Print the pattern sheets (all 4). I only have 8.5″x11″ paper so the pattern comes out on 4 sheets. Use some kind of foundation piecing paper to print the pattern. Nota Bene: I keep a folder for all of my projects, so I like to print at least 2, if not 3 copies of the pattern. One I use to make the templates, one I will tape together and keep whole (you can use regular copy paper for this one) and one I will use for the foundations.
-
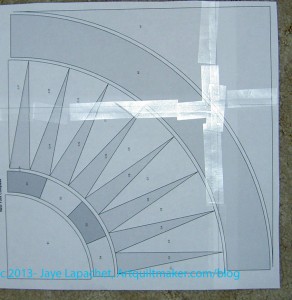
Tape pattern together Trim off the margins and tape the parts together. Note, the tape will not play nicely with your iron when you press the foundation pieced parts so USE A PRESSING CLOTH. A scrap of fabric or ugly fabric work great. Guess how I found out?
-
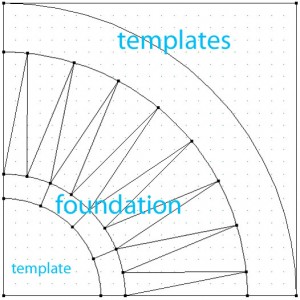
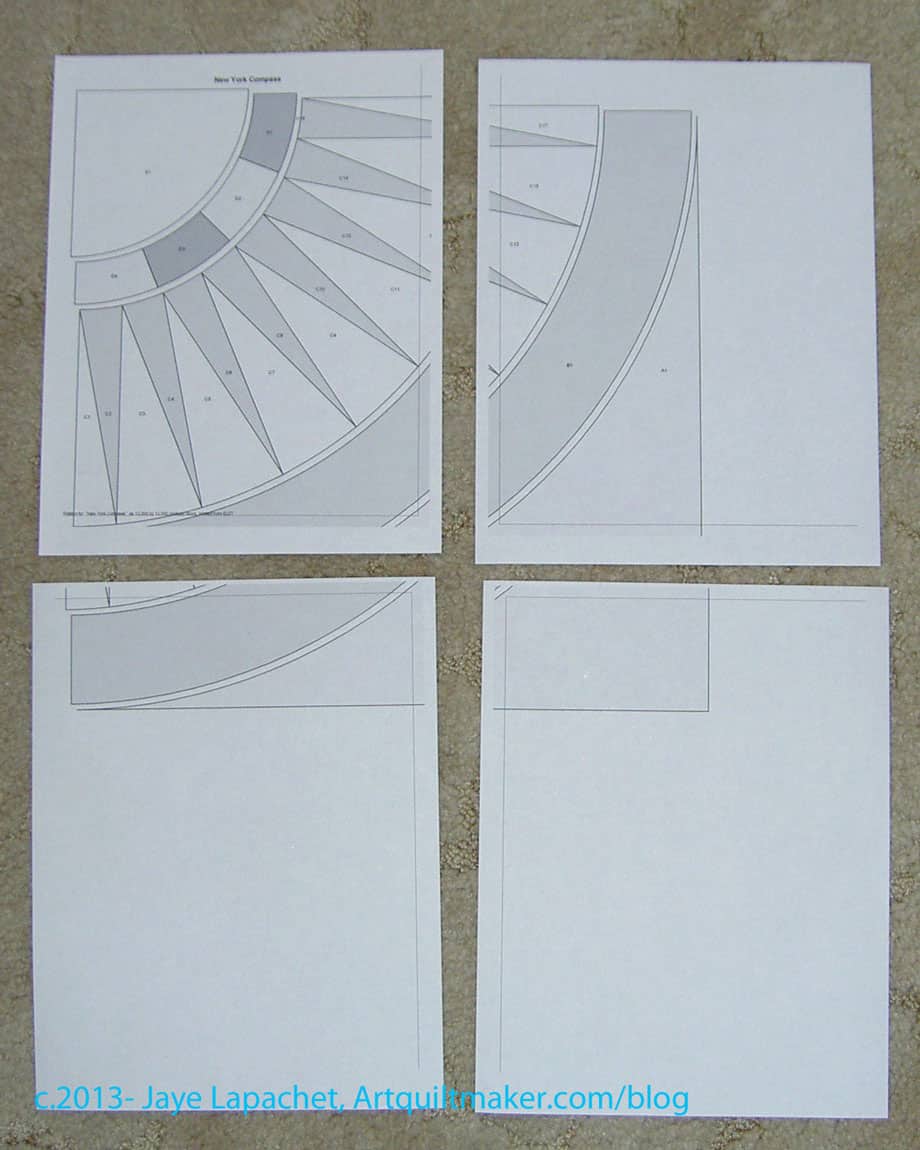
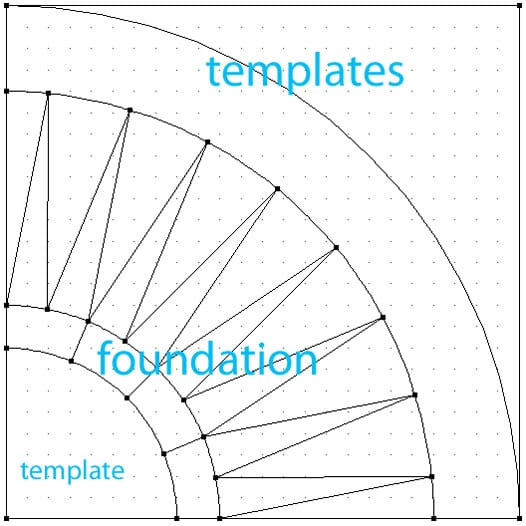
NY Compass Templates Above is how the templates shake out: 3 regular plastic backed templates and two foundation templates.
-
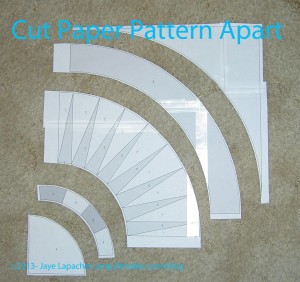
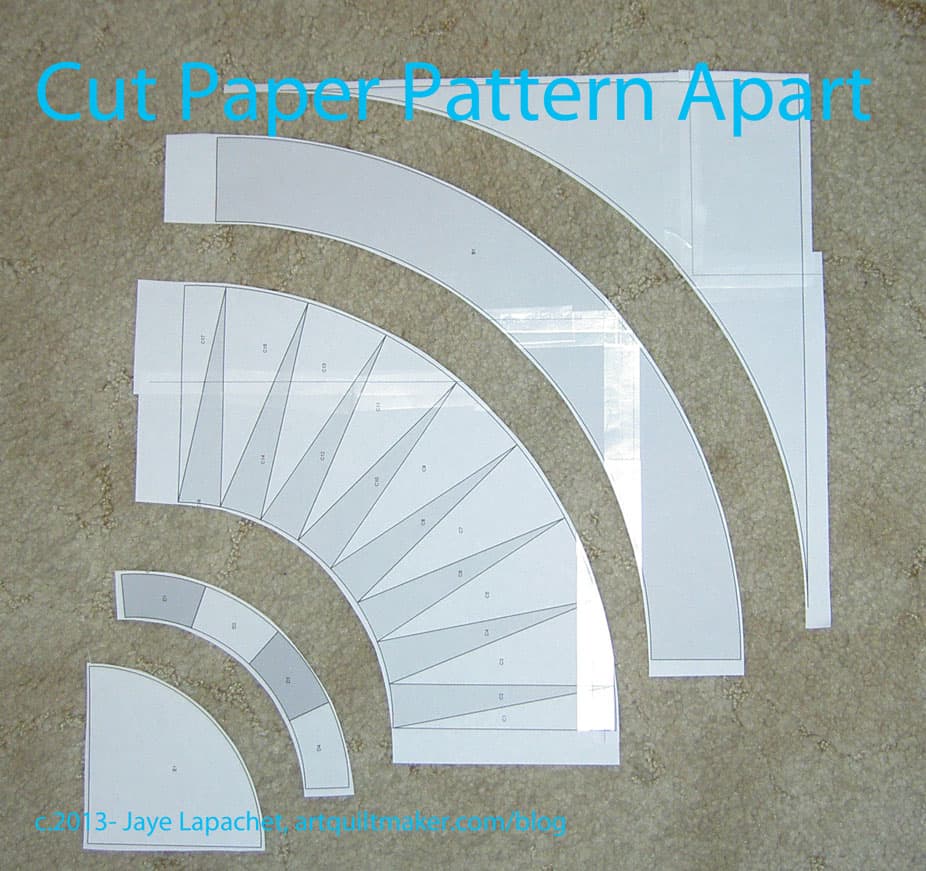
Cut Paper Pattern Apart Rough cut the parts of the pattern apart. You will have 5 parts. Two of them will be foundation piecing patterns and 3 of will need to be made into regular templates with template plastic.
-
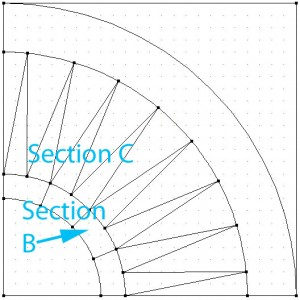
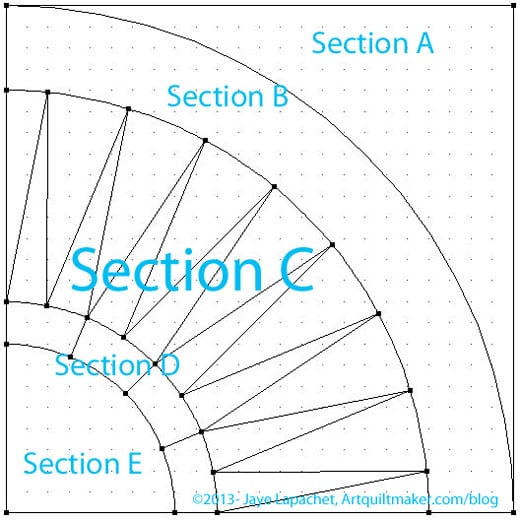
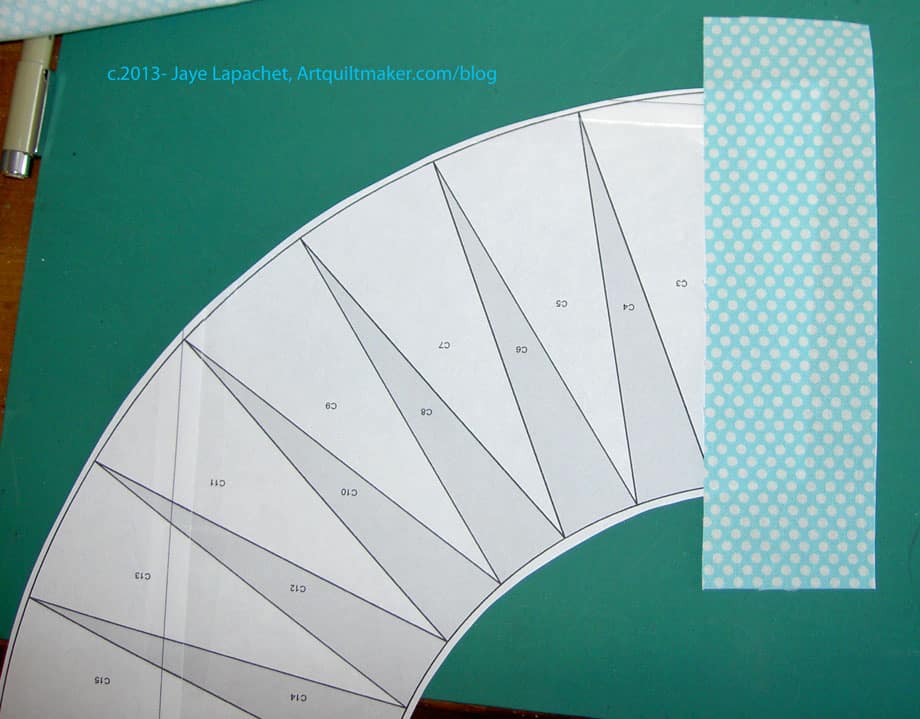
NY Compass Sections 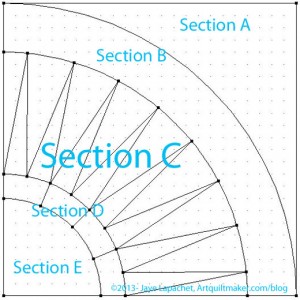
NY Compass Outline I am going to refer to the skinny spikes piece as Section C. Section C is in the middle.
- Make your templates. You must add a quarter of inch to your paper templates (not the ones that will be foundation pieced. If you don’t know how to make templates with template plastic, refer to my tutorial on Machine Applique’ Part 1. Make sure you put the plastic on the correct side (wrong side of fabric).
-

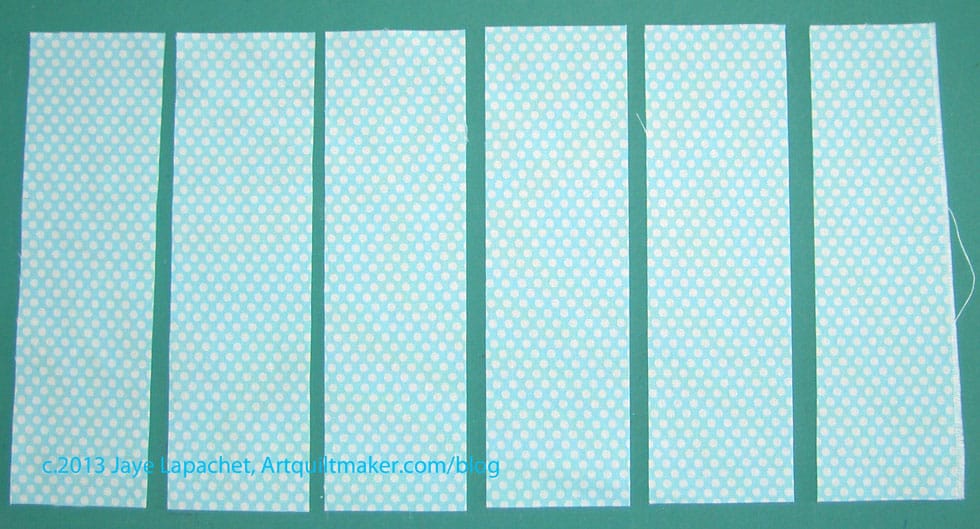
Cut rectangles for foundation piecing 2.5″ Cut rectangles for foundation piecing 2.5″x 6.5″. This is a generous rectangle. You aren’t going to save any fabric with this technique and you should worry more about coming up short, because ripping out stitches is a real pain.
- There is one tricky part about these templates. You will need to add a 1/4″ to the curve. The way you do that is to: A) glue the paper template to the largest piece of template plastic you have (you may have to piece the template plastic). B) Take your ruler and start at the left end of the paper template. Line the ruler’s 1/4″ mark up with the dark outline on the paper template (you should still have a rough cut paper template before you glue the paper to template plastic). C) Make a mark with a template plastic friendly pen at the 1/4″. D) Move your ruler slightly to the right and make another mark at the 1/4″ point. E) Follow the curved line of the paper part of the template with your ruler until you reach the far right side of the ruler. F) Cut along the dots you have made in as smooth a motion as you can using your paper scissors. You should now have a quarter inch seam allowance along your template. Repeat for all curved templates.
-
Cut your fabrics. Nota Bene: When you cut the fabrics for Section C, cut rectangles for these spikes at 2.5″.
-
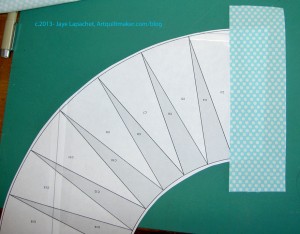
Check fabric strips Check to make sure you have cut your rectangles large enough. Take your Section C and lay it face up. Cover the first section (labeled C1 on my pattern) to make sure your rectangle covers the entire section C1 plus 1/4″ seam allowance around all sides.

Now go to Part 2 to learn the actual foundation piecing.
Tips:
- If you have to rip out stitches, rip them out from the fabric side, not the paper side.
Resources:
- Christine Thresh’s Paper Piecing Primer
- Cindi Edgerton’s How to Foundation Piece instructions
- Foundation Piecing video
- Paper Panache’s Foundation Piecing Instructions
- Paper Piecing the Carol Doak way
- Johanna Masko’s Flickr-based Machine paper piecing tutorial
What podcast are you referring to in this post? I just finished my first New York Beauty quilt.
Hi Jeff,
Thanks for reading and commenting. Frances is the hostess of the Off Kilter Quilt, which you can find on iTunes or at: http://offkilterquilt.podbean.com/.
Jaye
Great instruction for foundation piecing! I haven’t done any paper piecing for a long time but enjoyed it when I did.
Thanks for your comment! I am glad you found it useful.