Today we are cutting hexagons from strips to make the hexagon block for our sampler quilt. This tutorial is a follow-up to the Large Hexagon tutorial. The principles are the same; the sizes are different.
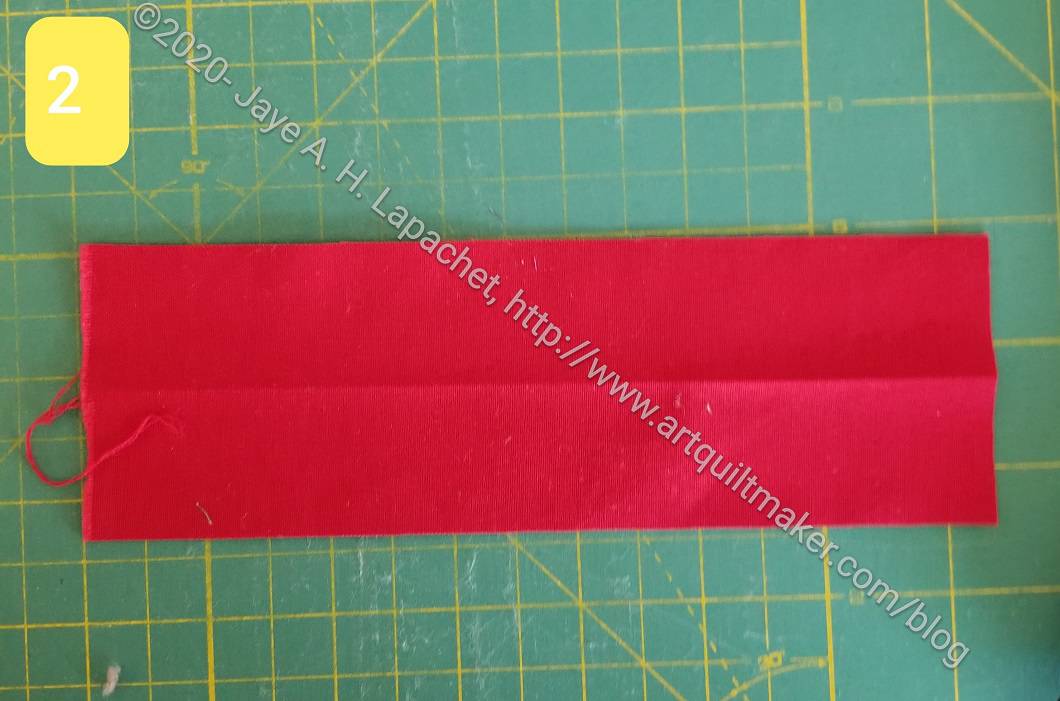
Cut your strip the unfinished size of your hexagon. In the example, I cut mine 2 3/8 inches. This is 1/8″ larger than I need, but I have a little wiggle room in this block. If you don’t have wiggle room, cut the strip the size of the unfinished hexagon
Strip cut to sizeFold your strip in half lengthwise
Fold your strip in half lengthwise
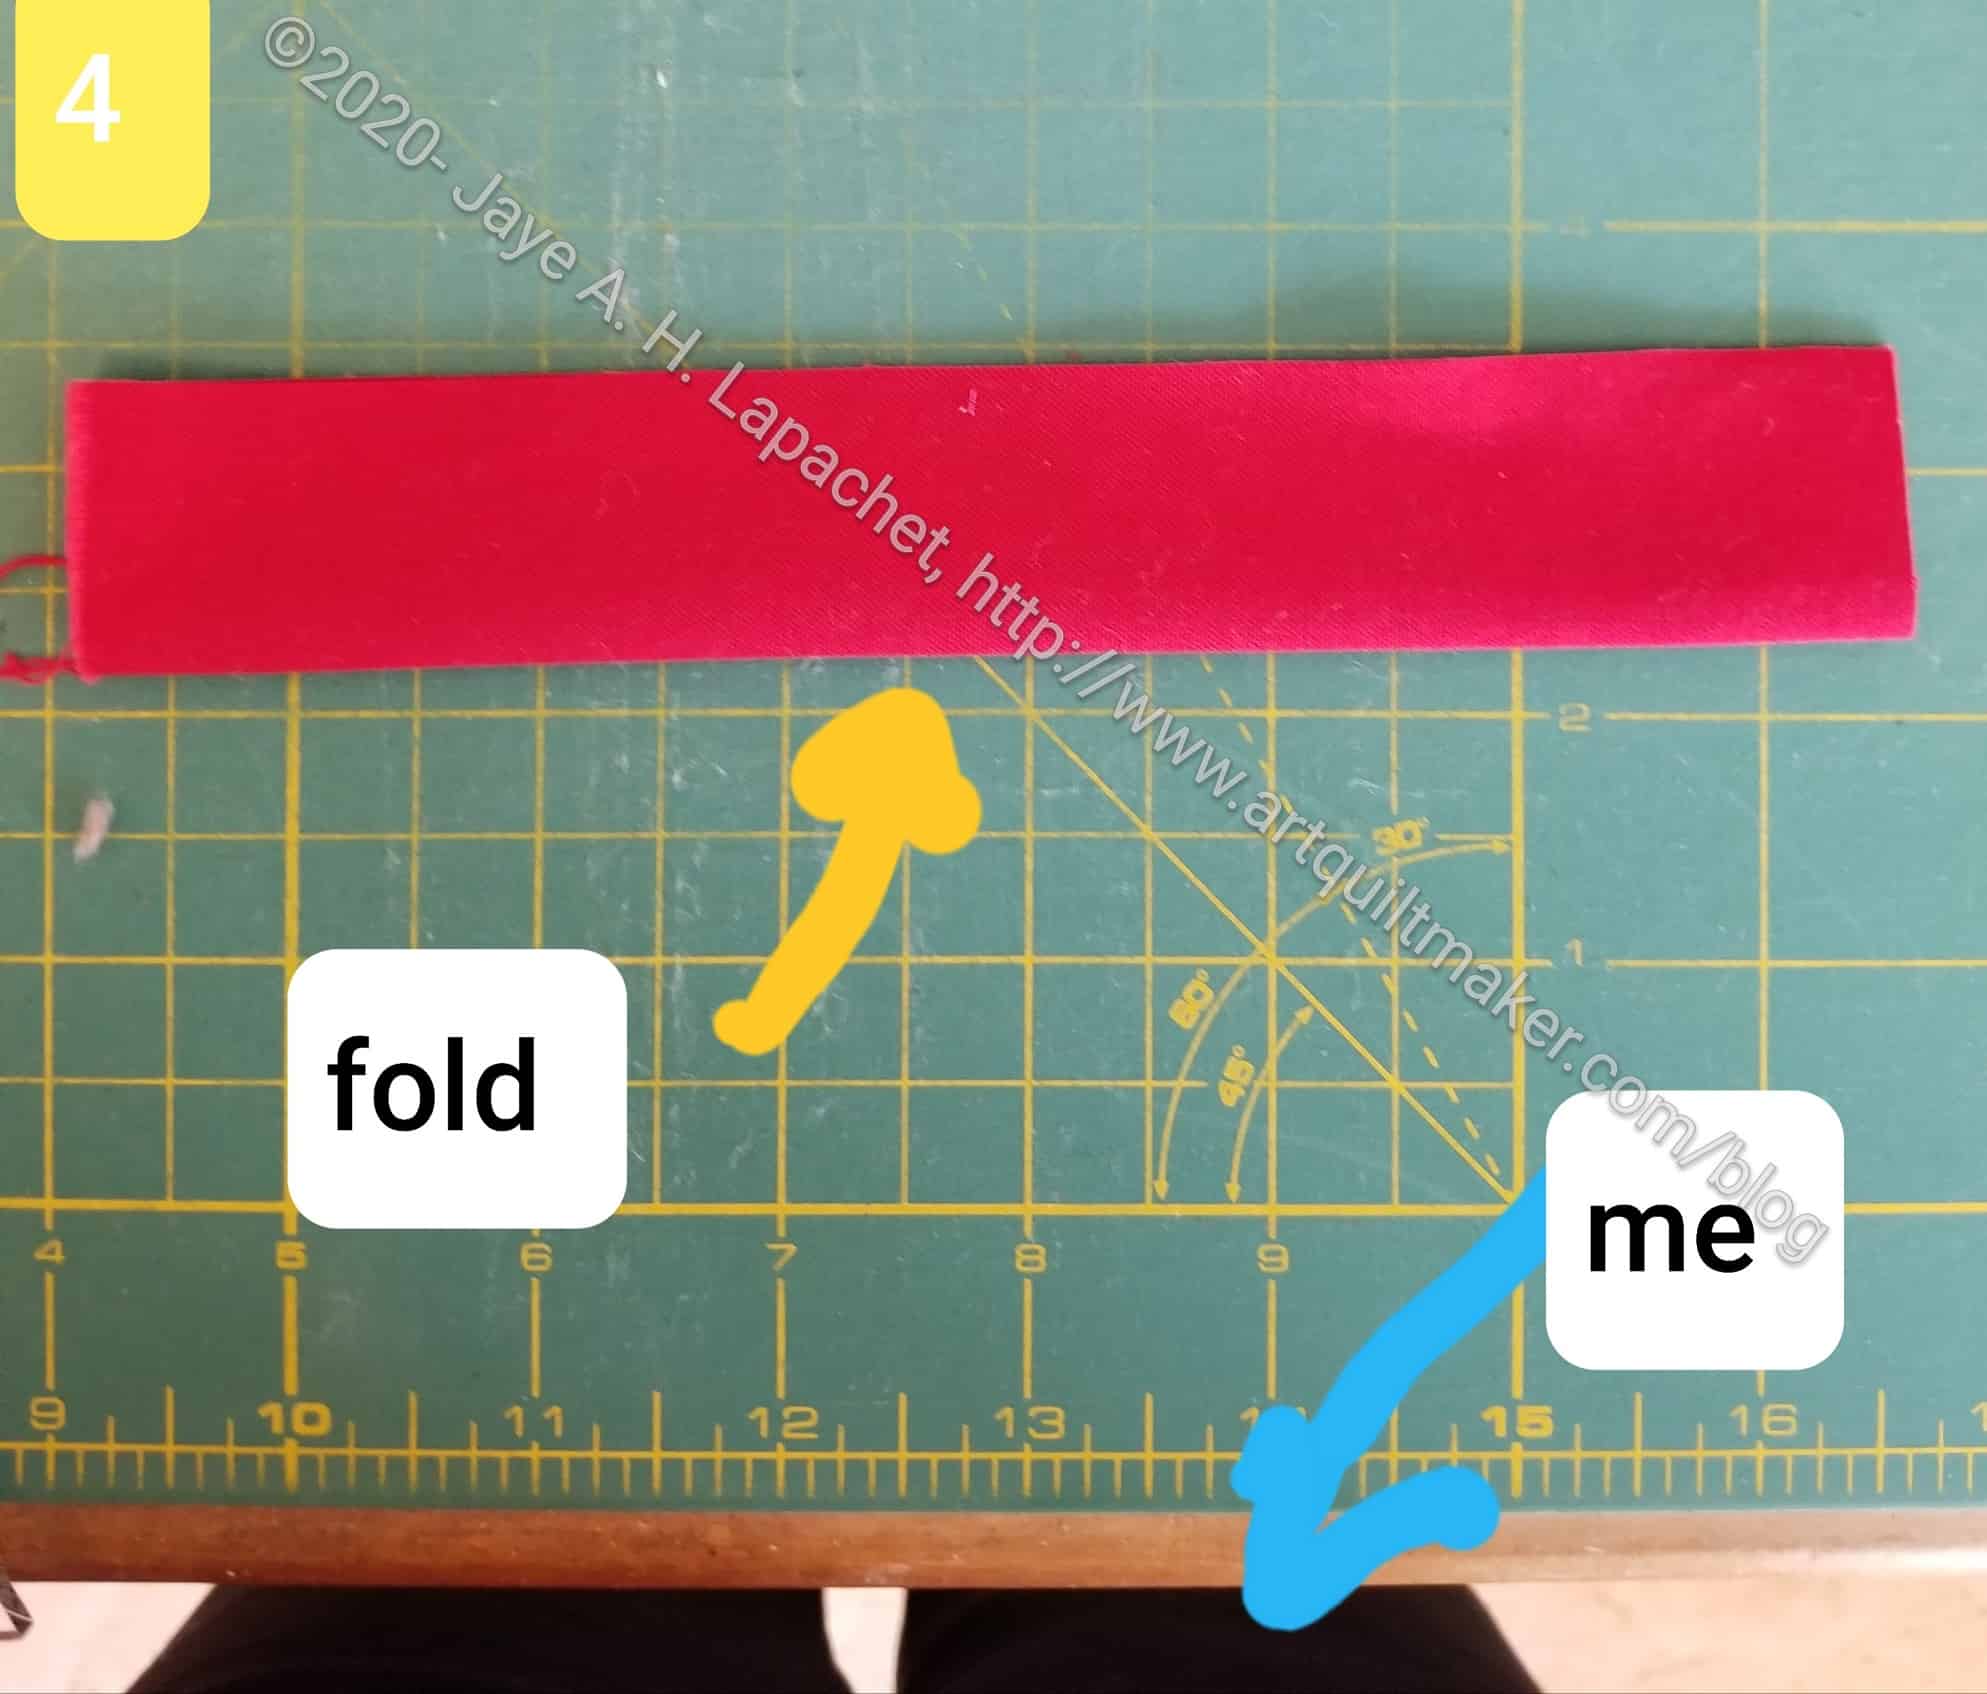
Position strip with fold near you
Position the strip so the fold is closest to you.
Line up Clearview ruler
Line up your Clearview ruler with the tip on the raw edge
Place post-it note on ruler
Place a post-it note on the ruler. Line up a post-it note with the fold of the strip
Move ruler up even with the raw edge
Move ruler up until the post-it note is lined up with the raw edge of the strip. N.B. I rotated the post it note, because I couldn’t cut with the edges hanging over.
N.B.2- Be very careful if you cut towards you on the left side. It is never a good idea to cut towards you, so I recommend getting a rotating mat. Place your strip on the rotating mat, make your first cut the rotate the mat and make your second cut.
Cut on both sides of the ruler
Cut on both sides of the ruler
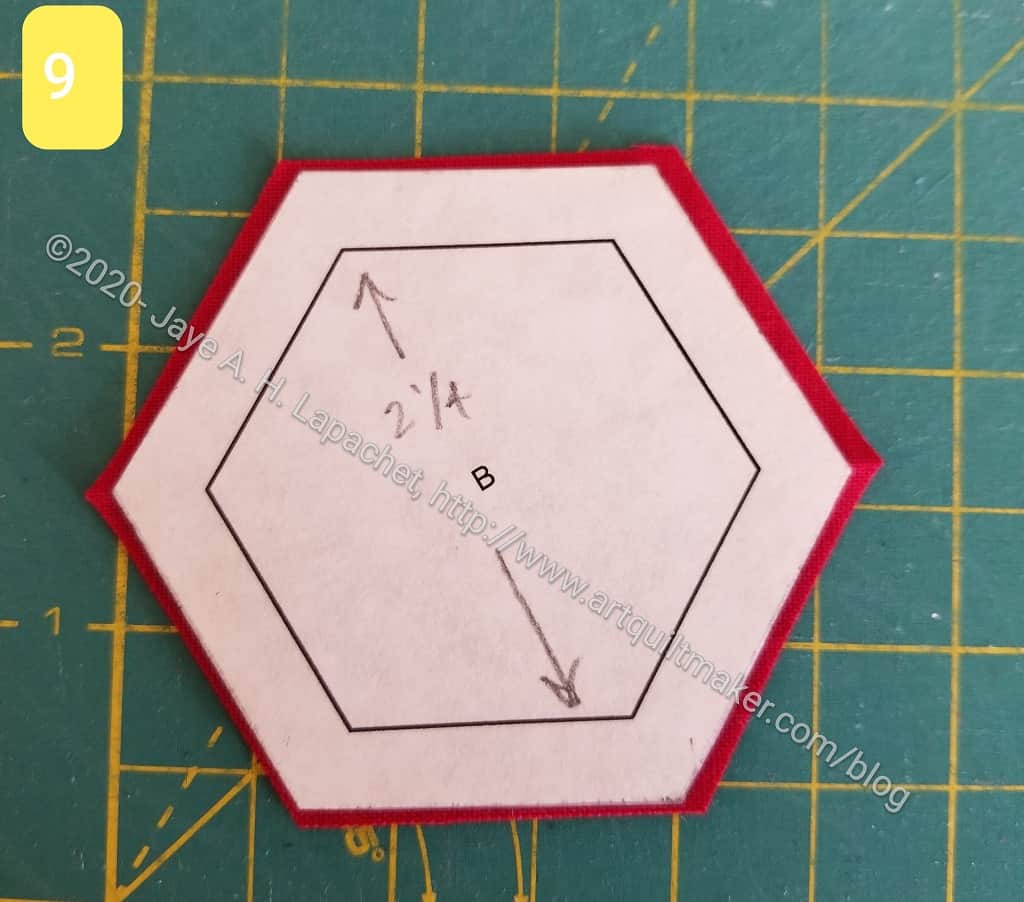
Perfect hexagonCompare size with your template
Your hexagon should be perfect. N.B. As I said above, I have a little wiggle room with this patch, so I cut it slightly larger, which is why the template looks a little smaller.
Move ruler so post-it is lined up with raw edge
Move the ruler along the strip and cut the next one
Note: you will not be able to cut every single bit of fabric. You will have small triangles leftover from in between the hexagons. You can use these leftover scraps to stuff pet beds.
**I use affiliate links and may be paid for your purchase of an item when you click on an item link in my post. There is no additional cost to you for clicking or purchasing items I recommend. I appreciate your clicks and purchases as it helps support this blog.
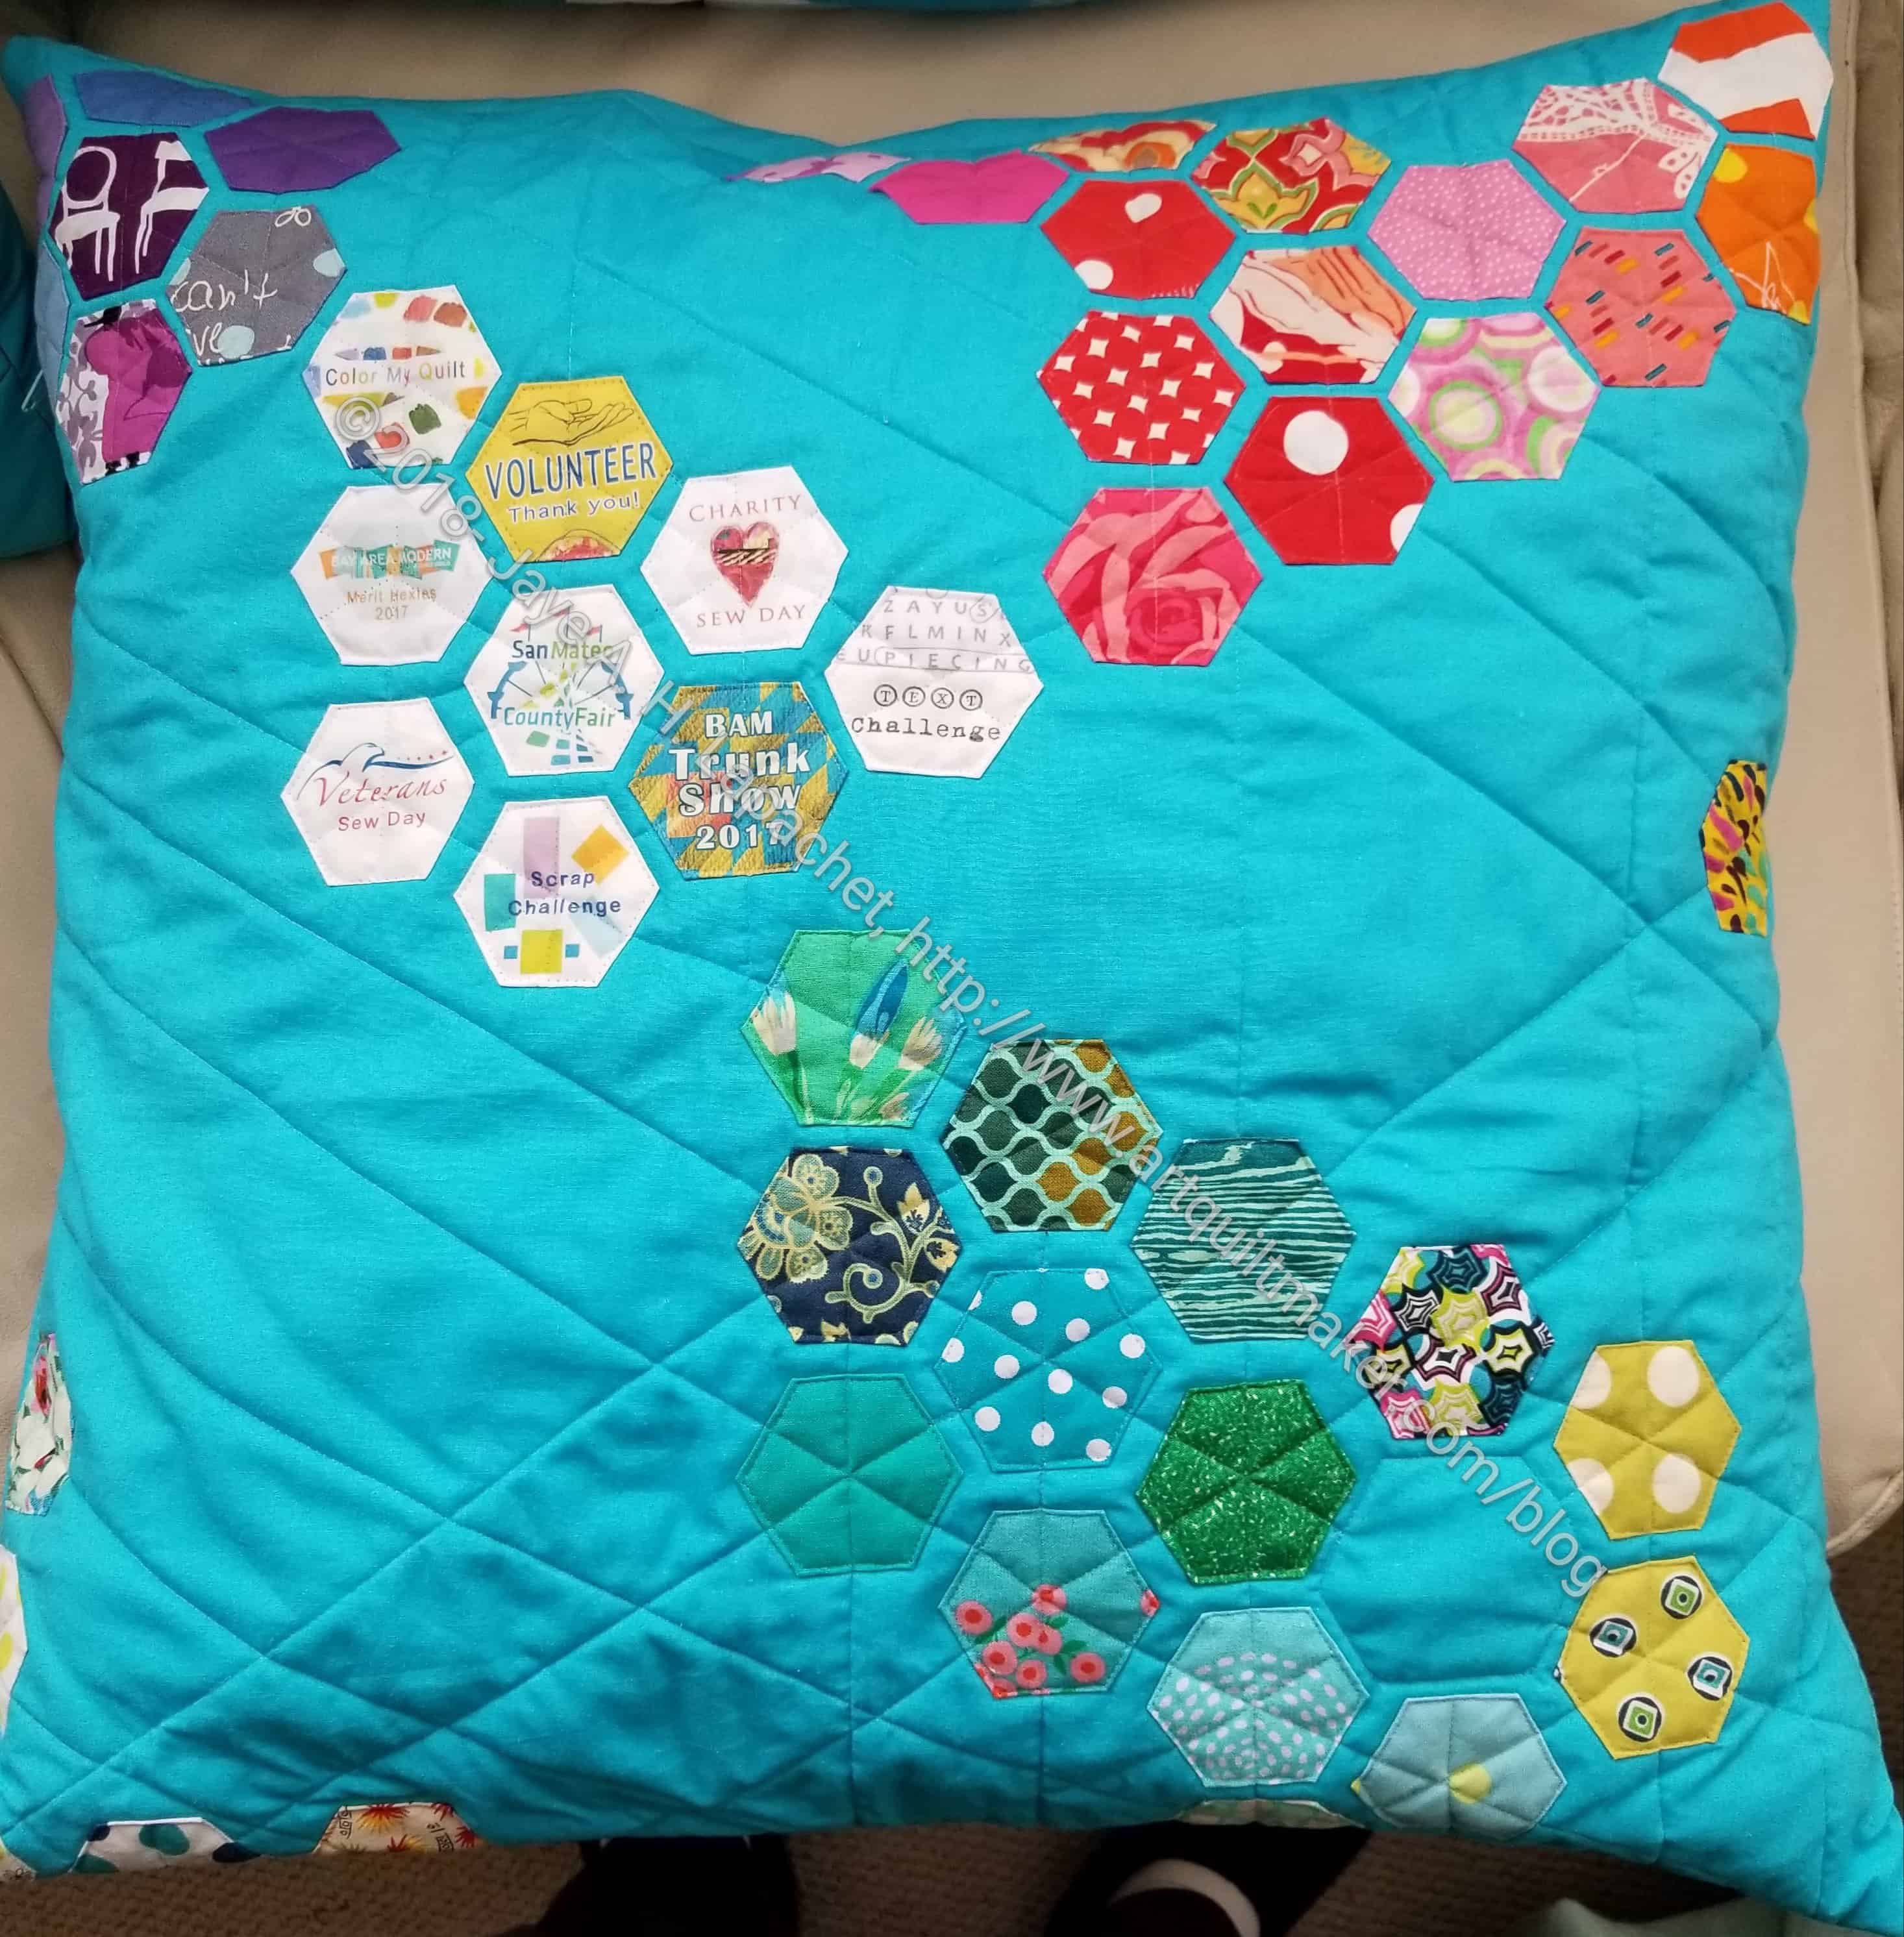
I totally forgot to post the finished version of my merit hexie pillow. The last time I posted about this was on April 4!
I don’t know exactly when I finished it, but it was not long after April 4.
I had to take all the papers out before appli-quilting them on to the background.
I also forgot to show it at the guild meeting. I’ll bring it with the Walking Foot WOW pillow (another thing I forgot to bring to show and tell) to the next meeting.
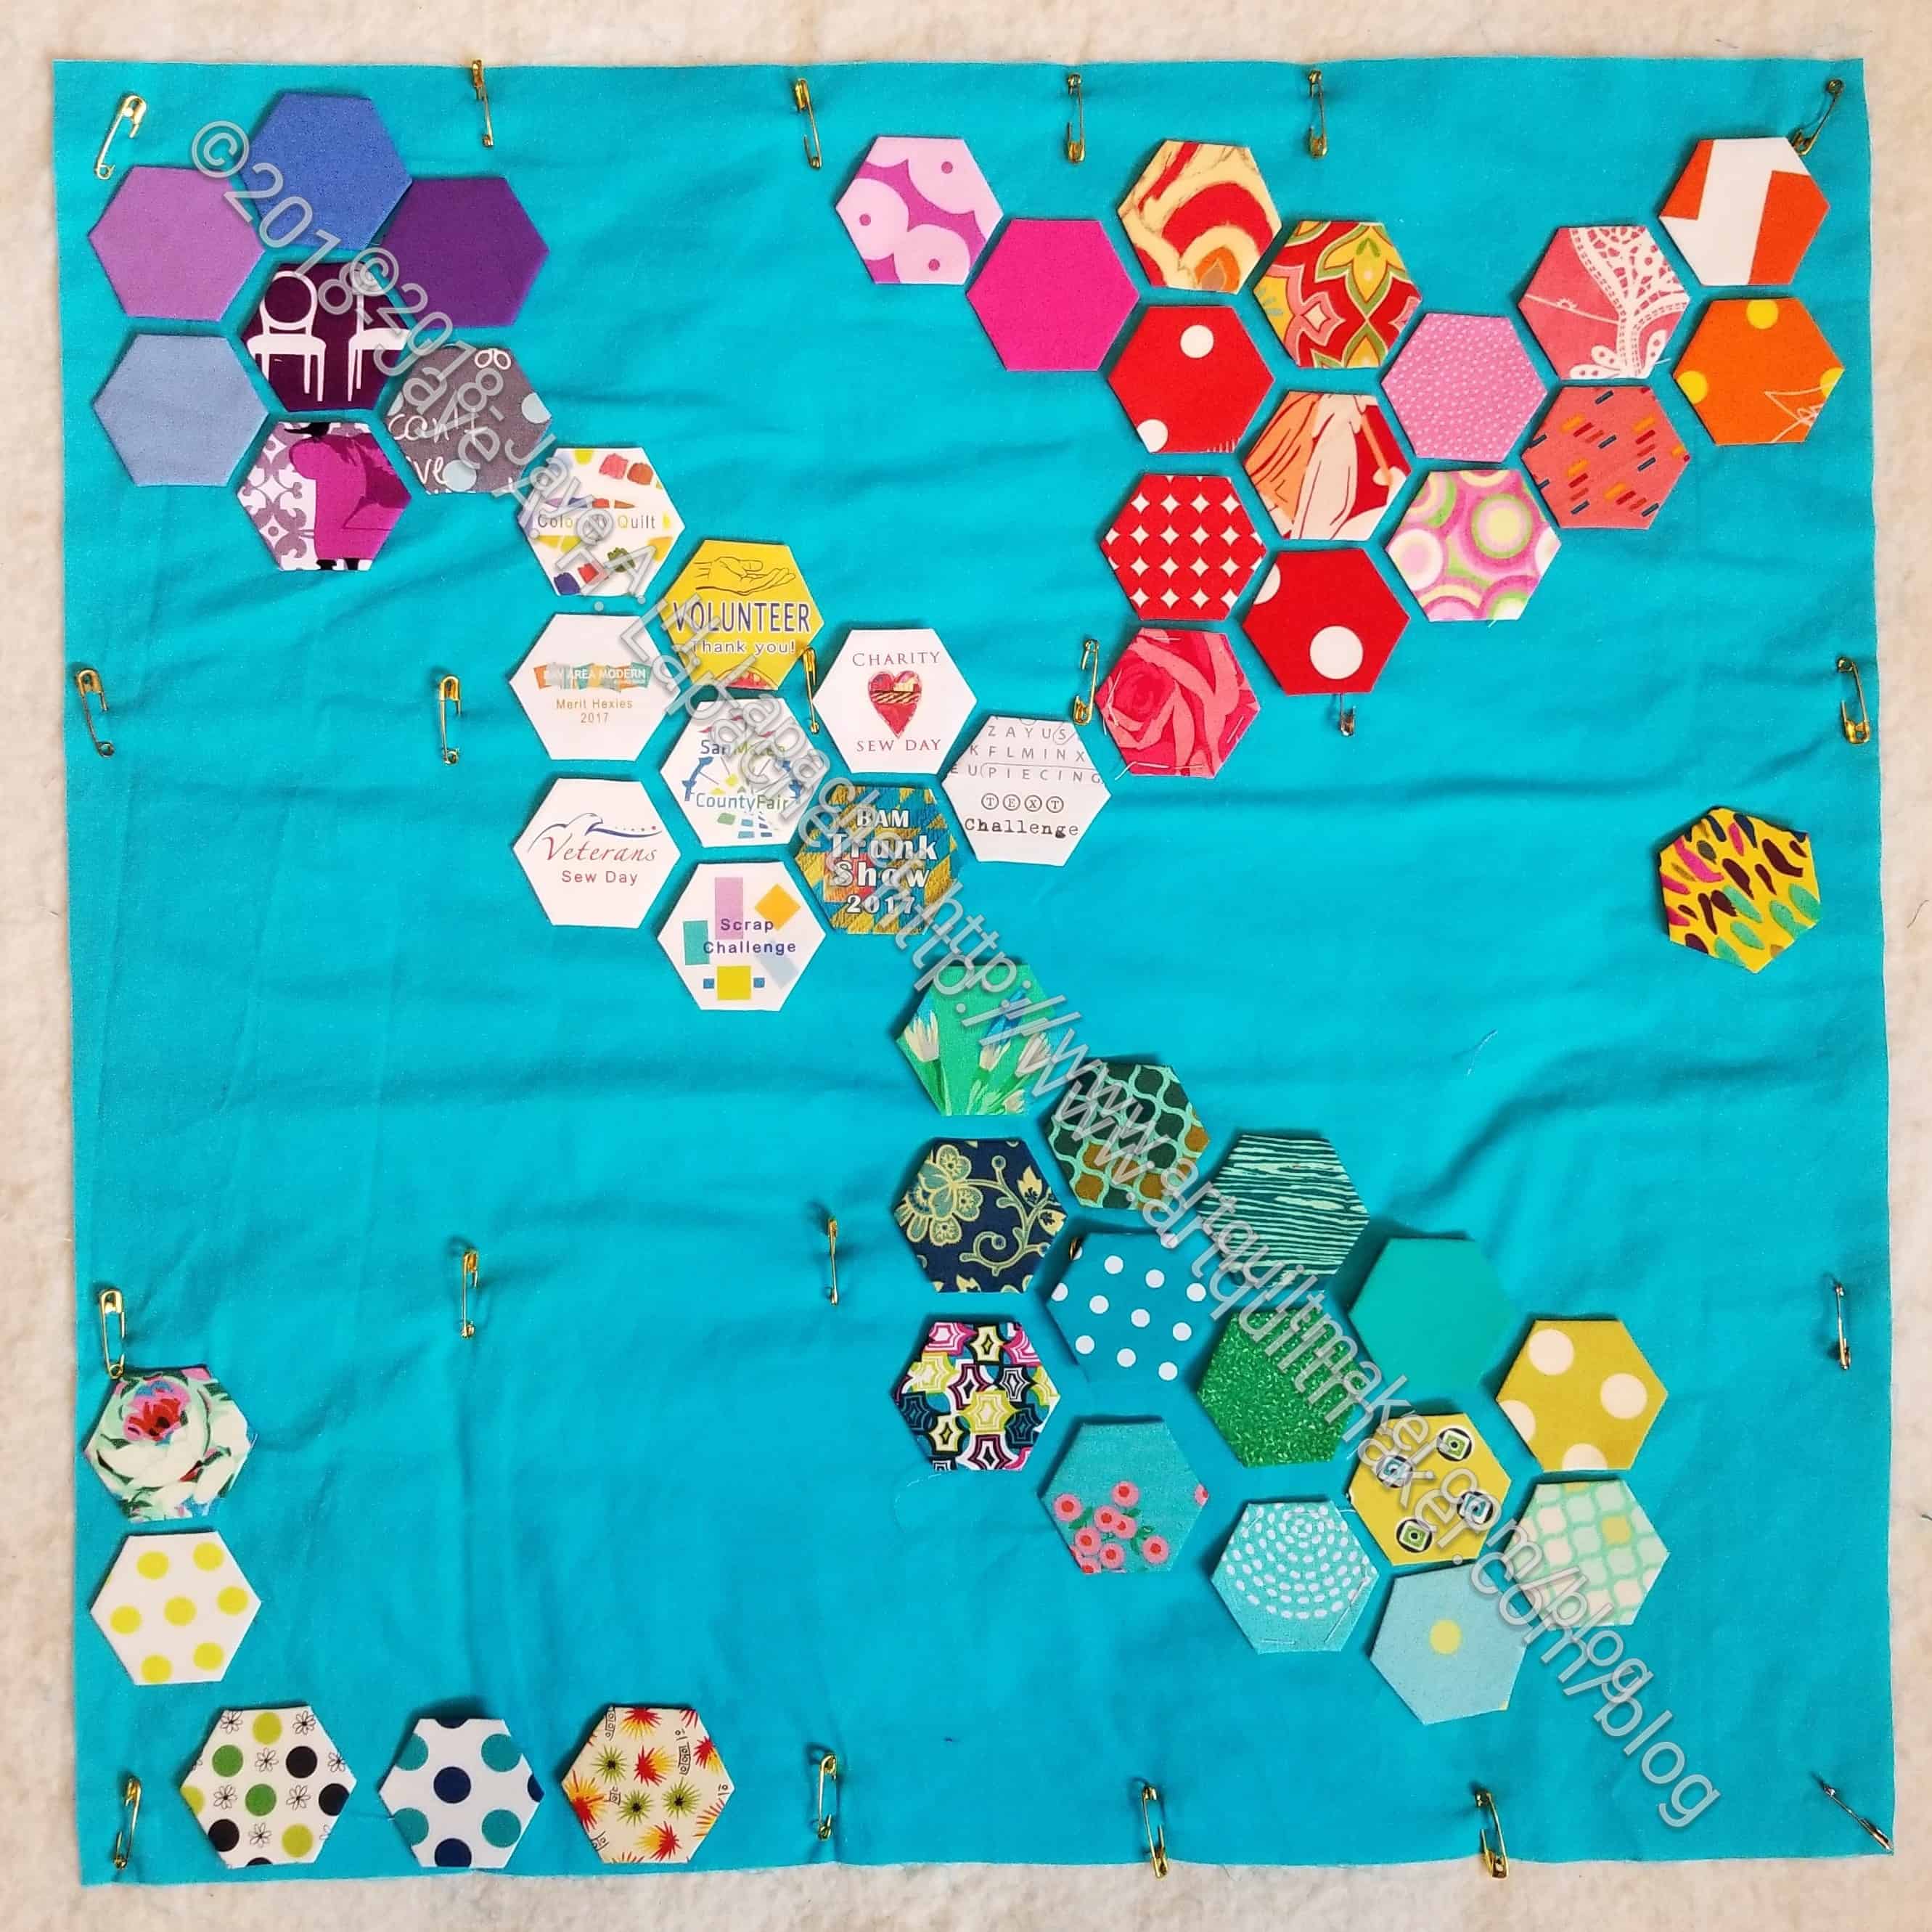
As you know we have been earning merit hexies in the guild. I had a few minutes before I had to get ready to go out, so I designed a layout for my 2017 merit hexies.
I used the leftover basted sandwich from the Walking Foot WOW class. I laid out my hexies in a couple of pleasing ways and finally decided on this layout.
I pinned everything in place and will begin appliqueing the hexies down soon. I might have another chance to install a zipper!
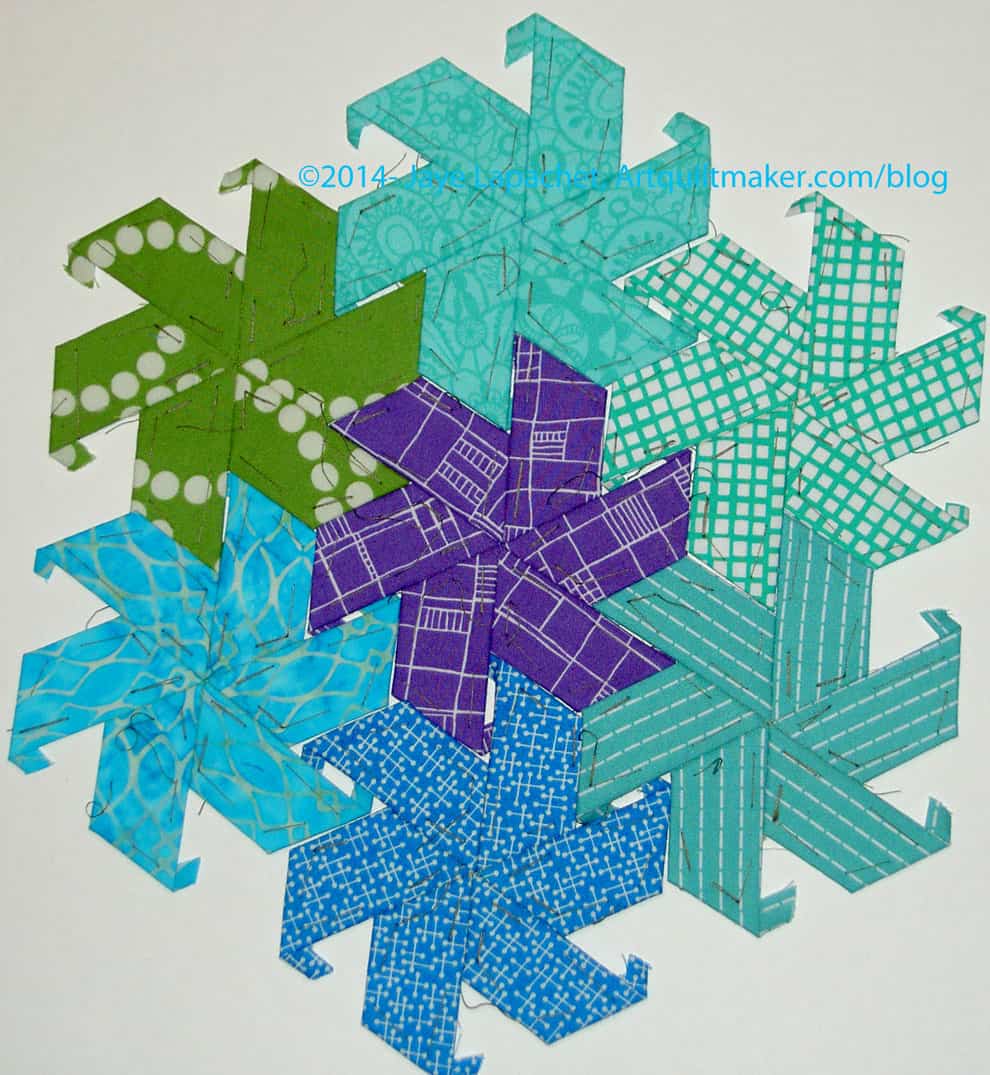
Gerre talked a bit about putting the Merit Hexies together in a project at the last meeting. This discussion was swirling around in my mind when I went looking through my media library (where all the photos I have posted to the blog live). Yes, I posted this photo back in February 2014, but with Gerre’s comments on my mind, it struck me anew today.
While I am not super bothered about sewing the merit hexies into something, I also don’t want them laying around for the rest of my life and then getting thrown out when I die. It would be interesting/fun to make pillows out of them, or cushion covers, and see how many I will make before the project peters out.
I thought a couple of things:
I could arrange my hexies in this shape on a pillow or bag.
I could make some extra Half Hexie Stars and make a pillow.
I really like the color combination here (is anyone surprised?).
Putting a straight edge on a cushion or small project would give me practice for the Half Hexie Star Quilt.
I kind of like the idea of a hexagon shaped pillow. I suppose I would have to stuff it and that would be a hassle.
Fabric scissors (see note on using a rotary cutter**)
thread
pins
Design wall or sandpaper board
Wooden kebab stick or similar item you can use with your iron
sewing machine
Optional
Mary Ellen’s Best Press
hand sewing needle
hand sewing thread
Important information:
Block is 12.5? unfinished, 12? finished
These directions use a quarter inch seam allowance.
You will be creating Y seams.
Chain piecing is not part of this tutorial.
Respect the bias.
Do not sew into the seam allowance.
Templates
1. Prepare pattern for your hexagon template by printing two copies of pattern.
Place one copy of the pattern in your binder, but you can use it as reference first. Rough cut the hexagon pattern out of the other pattern.
Add Seam Allowance if it doesn’t Print
Nota bene: Sometimes the seam allowance don’t print out, so you may need to add 1/4″ seam allowance to the pattern before rough cutting.
Glue the paper pattern (with seam allowances) using the glue stick (or other suitable adhesive) to the template plastic.
Fine cut the paper pattern you have adhered to the template plastic so you have an accurate template.
Gather your fabric and press it all. You can rough cut some pieces and press it with Mary Ellen’s Best Press to help deal with the bias.
Cutting
Place Templates Face Down
Place your template face down on the wrong side of the fabric and trace carefully around your template directly on to the fabric.
Cut using scissors.**
**Do not cut around your template plastic template with a rotary cutter. There is not enough protection for your fingers. I want you to be able to finish the block with no blood. A rotary ruler gives your finger some protection from the blade of your cutter cutter. If you use a rotary cutter, you may want to use a hexagon ruler, such as the Fons & Porter Hexagon ruler. The smallest hexagon on that ruler is larger than my template, but 19 of those will still fit in the 12.5″ block. You can also cut using a rotary ruler and rotary cutter by lining up the ruler on the line you drew around your template.
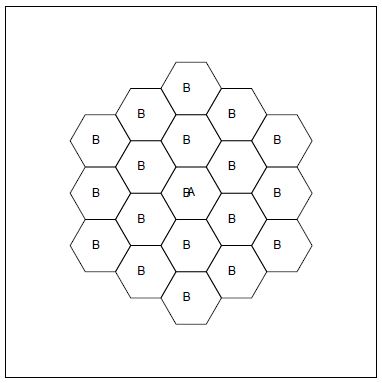
Cut 19 Hexagons
Cut 19 hexagons from your fabric.
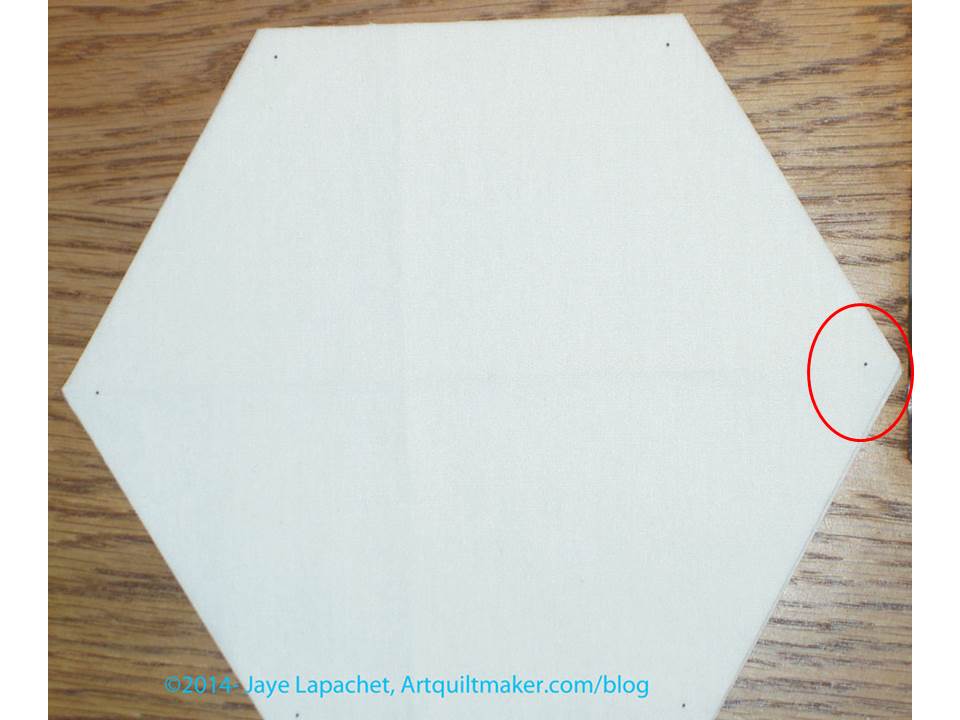
Mark your hexagons
Marking
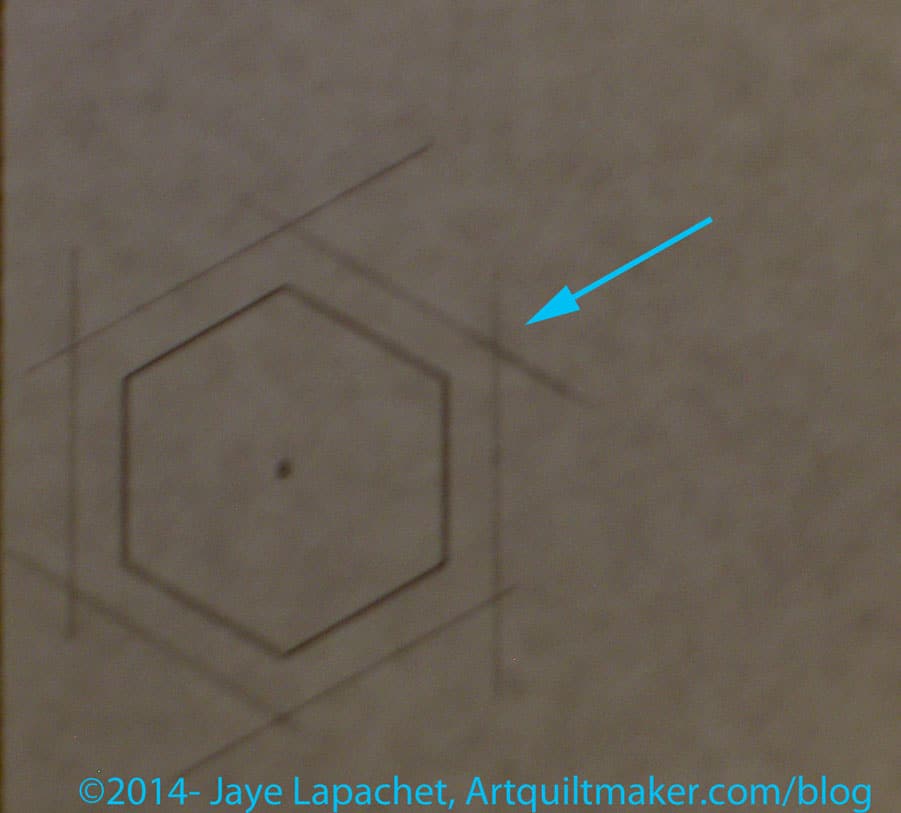
Now, mark your hexagons so that the Y seams will be easy to sew. As mentioned in the supply list, I use the Jinny Beyer Perfect Piecer.
Hexagon Markings
Line up your ruler in every angle and in every hexagon and make a dot.
You can also make a cross at the seam allowance by lining up a regular ruler along your cut edge and drawing a line near the angle. See the tutorial called Hexagons -Preparing to Sew, which gives more information.
Sewing
Remember: you will sew between the dots only NOT into the seam allowance. This is how you sew Y seams and we have done that in other tutorials.
Arrange Hexagons
Arrange your hexagons in a pleasing manner on your design wall or on a sandpaper board.
Hexagons right sides together
Take two hexagons, that will be next to each other in the final block, place them right sides together.
Put them under the presser foot, lining up your Perfect Piecer mark under the needle
Sew a few stitches, then backstitch.
Sew the entire seam to the second Perfect Piecer mark. Backstitch to secure.
Nota bene: You want to backstitch even though it is a bit tedious, because no other seams will cross the seams stitching the hexagons together. If you do not backstitch, there is a chance your stitches will come out before you get to the quilting part. You can also leave long tails and make a knot at every intersection.
I like to to sew my hexagon patches together in groups of three, thus we will need to add the third hexagon to the two you just sewed together.
Add 3d Hexagon -seam 1
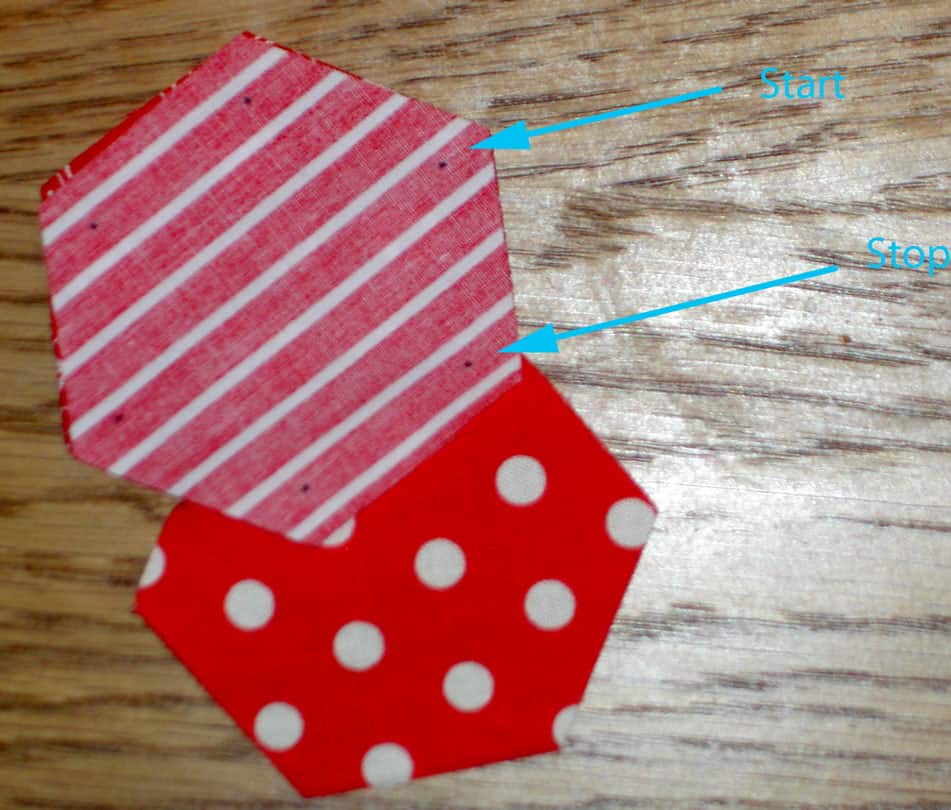
Lay the piece of two hexagons you just sewed on the table and place the third hexagon patch on top of top one, right sides together. Sew the third hexagon to the piece of two hexagons starting at the dot marked Start and stopping at the Perfect Piecer mark indicated as Stop. Backstitch as described above.
Remove from the machine and clip your threads.
Add 3d Hexagon -seam 2
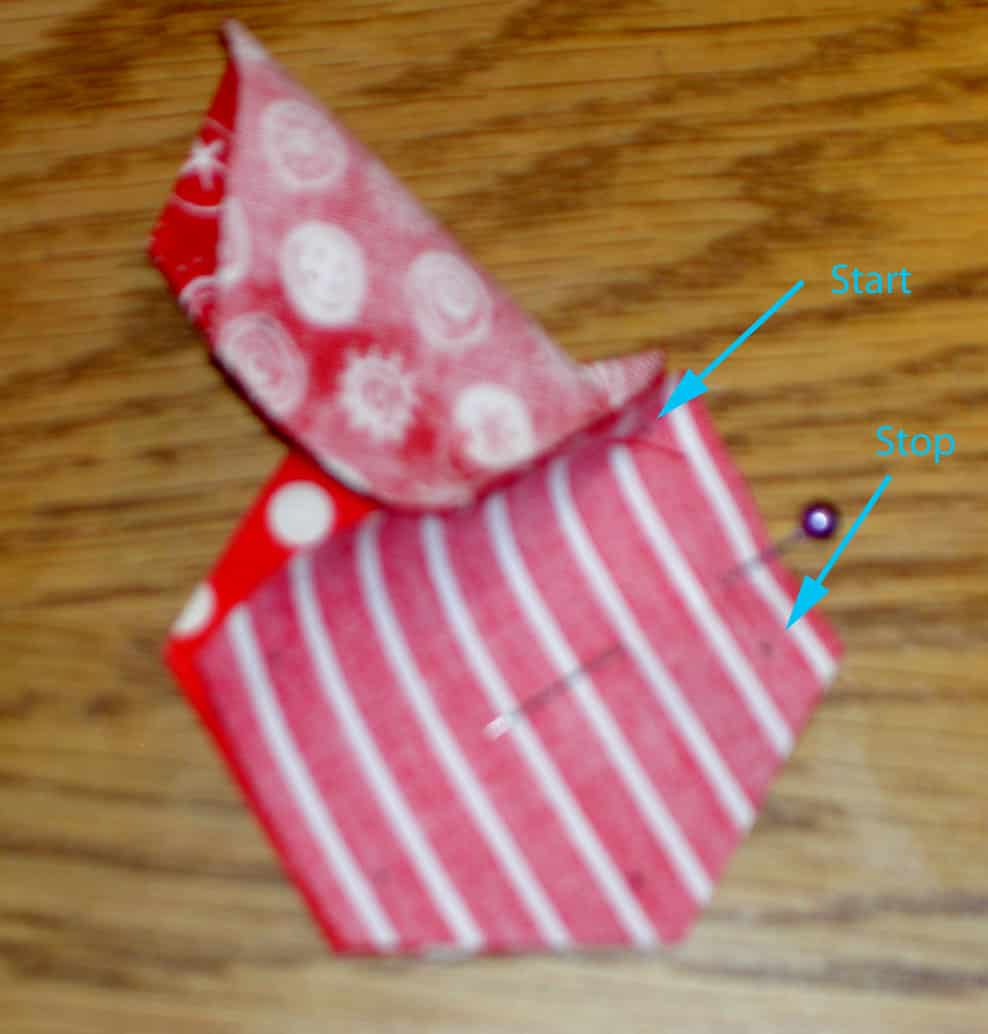
Now you are ready to sew the last seam to make a piece of three hexagons. Line up your third hexagon with the hexagon you didn’t sew a minute ago.
Pin. I put the pin in a place closer to the stop mark, so I can fit the sewing machine foot on the Perfect Piecer Start mark.
Nota bene: I don’t normally pin small hexagons, but when I am sewing the last seam it is useful.
The second hexagon will be kind of rolled up. Just keep it out of the way of the needle. You don’t want to sew it to the underside of the other hexagons.
Sewn hexagons on the design wall
I keep my pieces on the design wall (you can also use a sandpaper board) as I sew them in order to keep them in order.
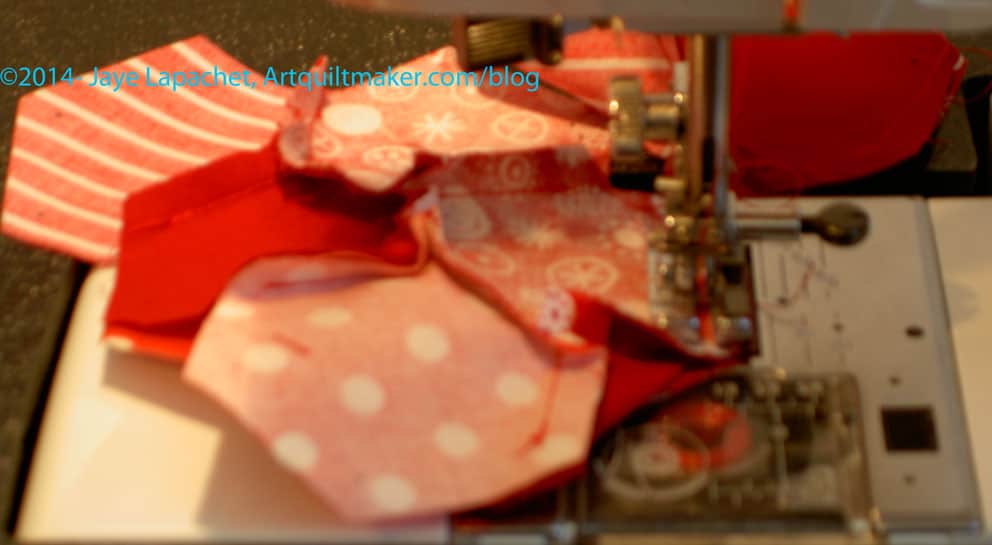
Sewing patches together
Keep sewing your patches together in chunks, then into larger chunks until you get all of them sewn together. Sewing groups of hexagons together is like sewing 2 or three together. Sew between Perfect Piecer dots. You just have to be carefully to keep the other, already sewn, hexagons out of the way.
Nota bene: It is useful to have a digital camera handy and take a photo of your layout in case of confusion while sewing. You can also number your patches.
More on sewing hexagons can be found in a previous post.
Press
For small hexagon blocks, I usually don’t press until I am done sewing all of them, because I want all the swirls to be orderly.
Press in a circular motionPress in a swirl to create mini hexagons
Press from the back, one seam at a time so all of the seams look like they are pressed in a circular motion. The center where the patches meet will look like a mini hexagon.
Pressed back of hexagon piece
When finished the block will have a lot of mini hexagons on the back.
Applique’
In order to prepare for applique’, you have to do something with the edges. If you want to do raw edge applique, you will need to trim the seam allowance off the outer edges, using the Perfect Piecer marks as a guide.
I suggest pressing the seam allowance on the outer edges in to make a clean edge.
Lay your hexagon piece right sides down on ironing surface
Lay your hexagon piece right sides down on your ironing board.
Use the Perfect Piecer marks as a guide. Fold and finger press the outer edges in.
Press edges in
Get your fingers out of the way and press using a hot iron so the edges is pressed permanently in. You a chop stick or kebab stick to hold the edge under the iron.
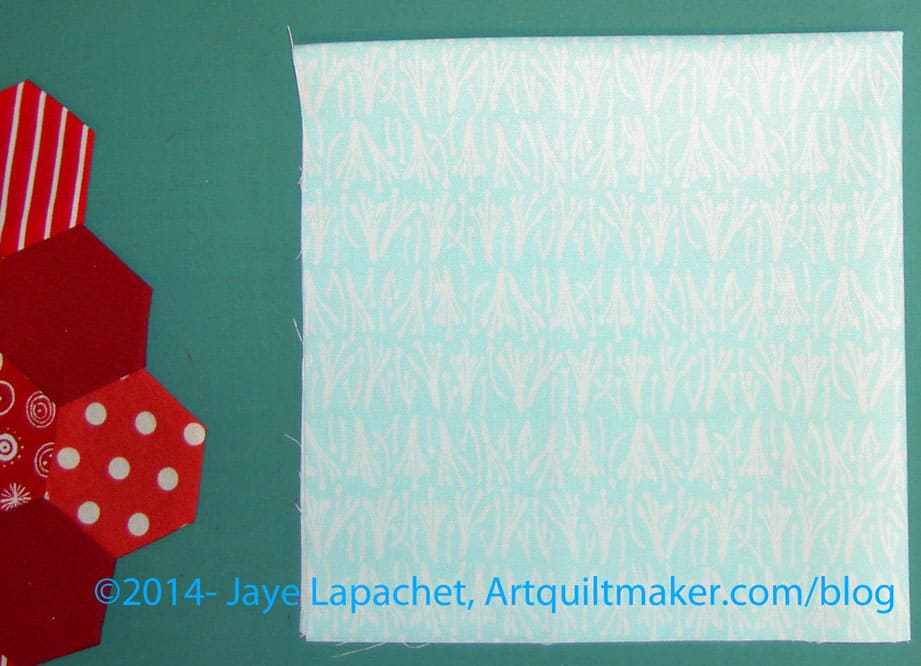
Once all of the edges are pressed under you are ready to place your piece on the background.
If you have not already done so, cut a background piece 12.5″ x 12.5″.
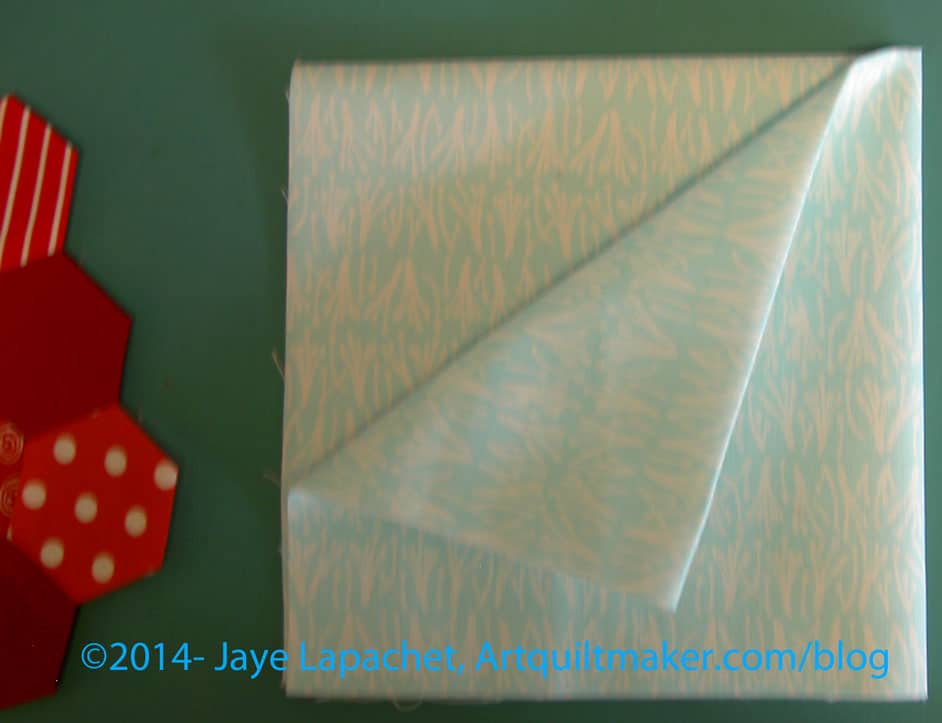
Fold background into quartersFold background into quartersFold background into quarters
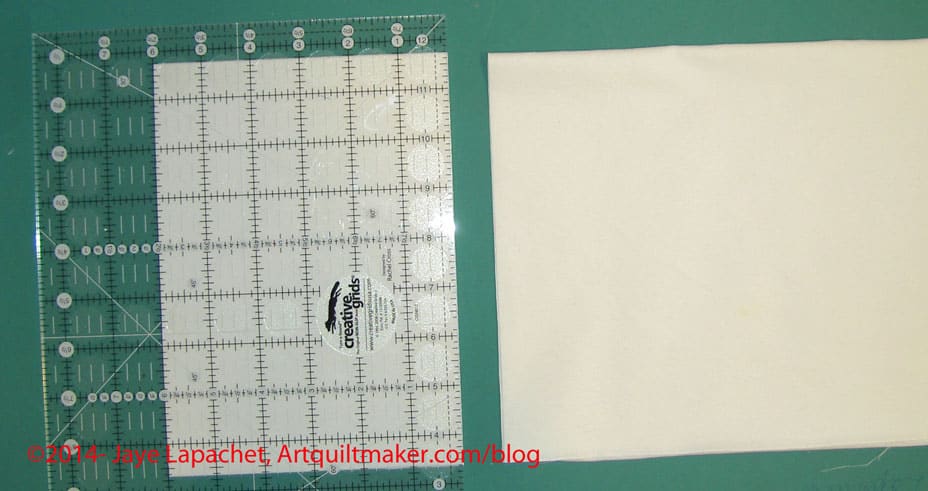
Fold in quarters and finger press just so you can see the lines. DO NOT press with an iron.
Using your finger pressed lines, center the hexagon piece, right side up, on the background.
This method is a great way to rotary cut large hexagons. You might be able to cut smaller hexagons, but I think it would be really fiddly. It is also a great way to get practice with Y seams as well as impress your friends with your machine sewing prowess.
I decided that I would do a more detailed post for those of you who might want to use this shape for a project of your own. That is not to say that you shouldn’t go and look at Little Bluebell’s blog. She has a lovely blog with lots of creative ideas.
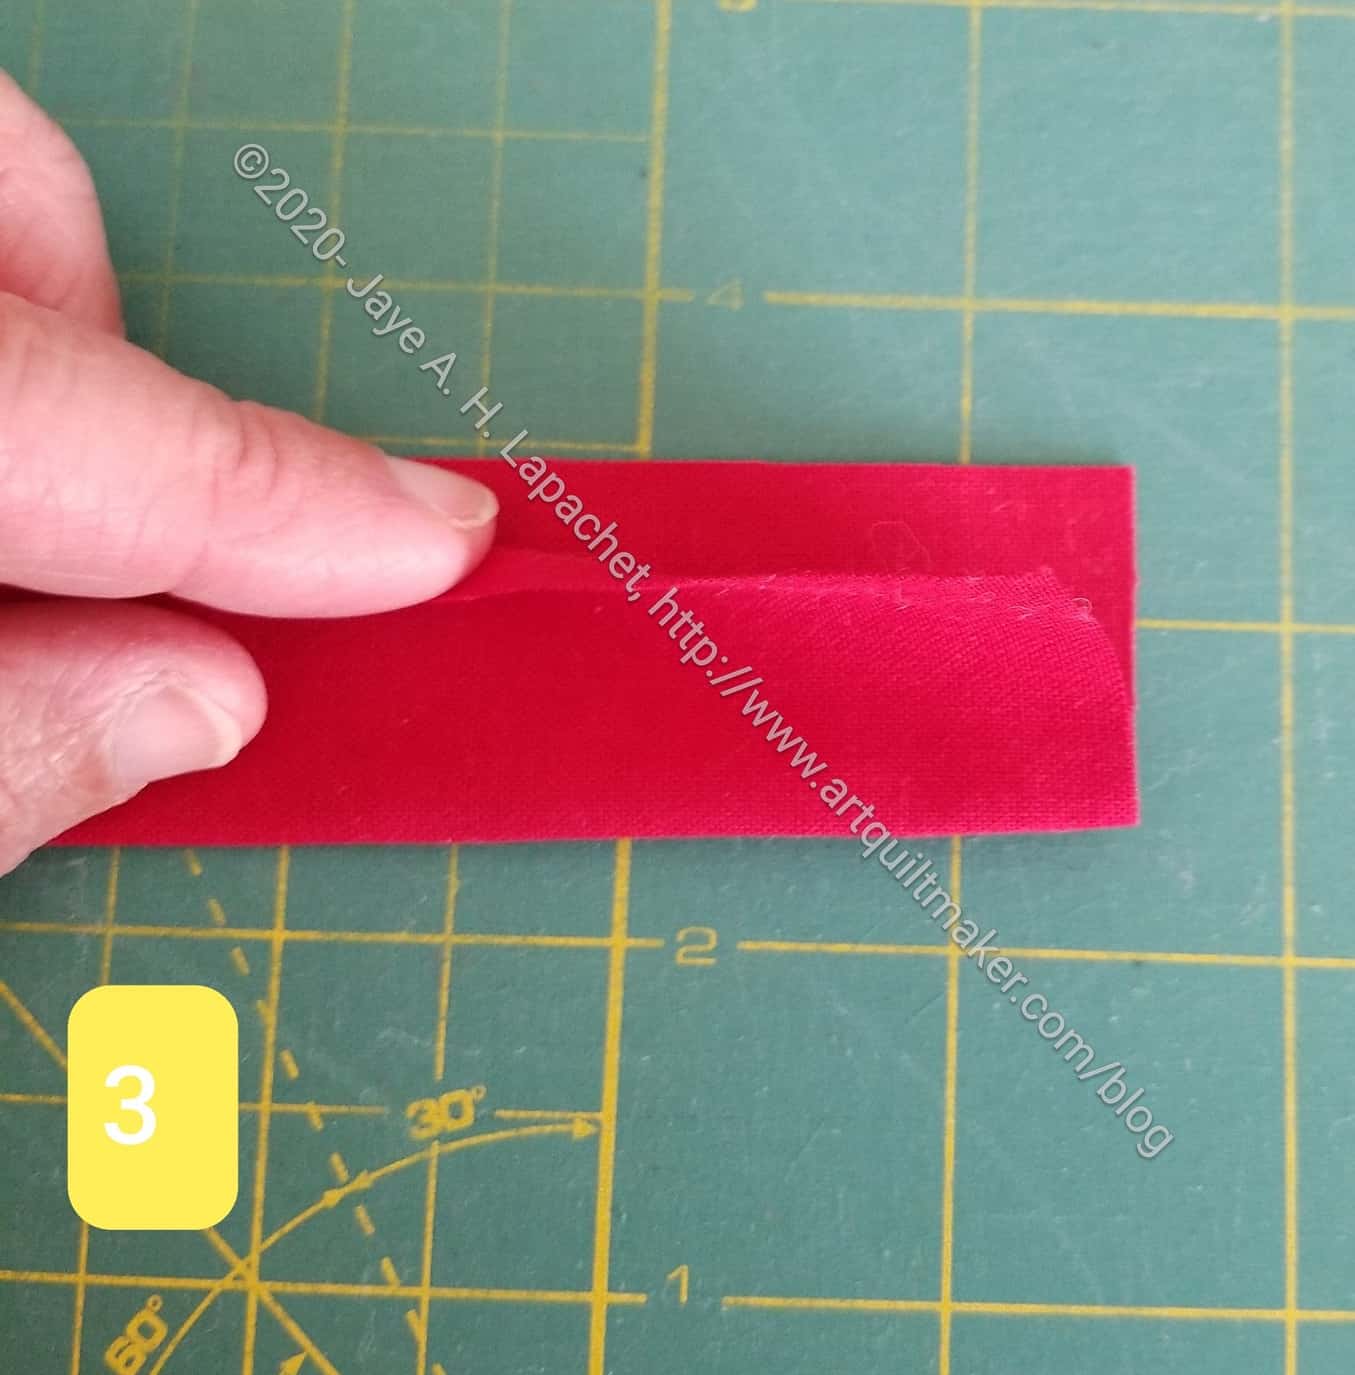
Next, unfold the strip, turn it so the long way is horizontal. Fold it so the crease is longways along the bottom (closest to you). In the picture above, you can see the curve of the fabric on the left hand side of the picture, which indicates where the crease should be.
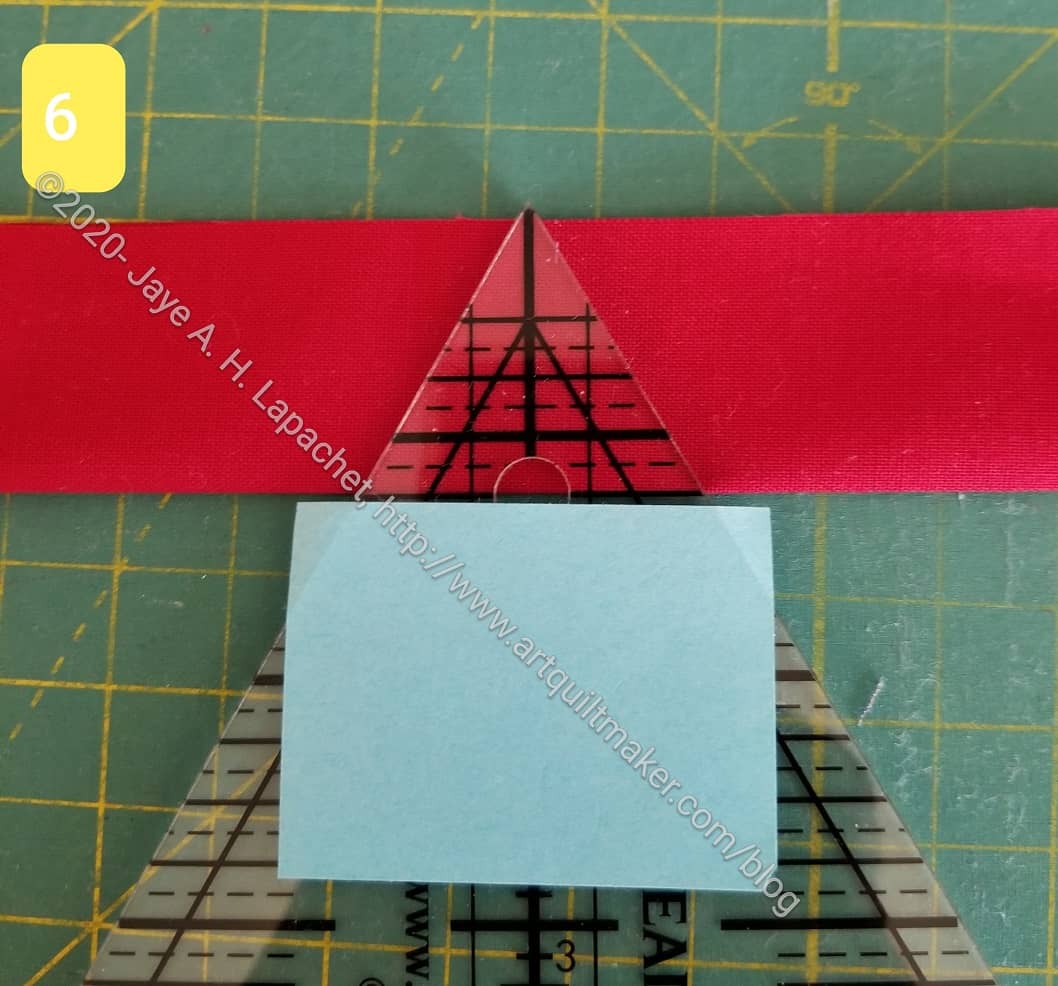
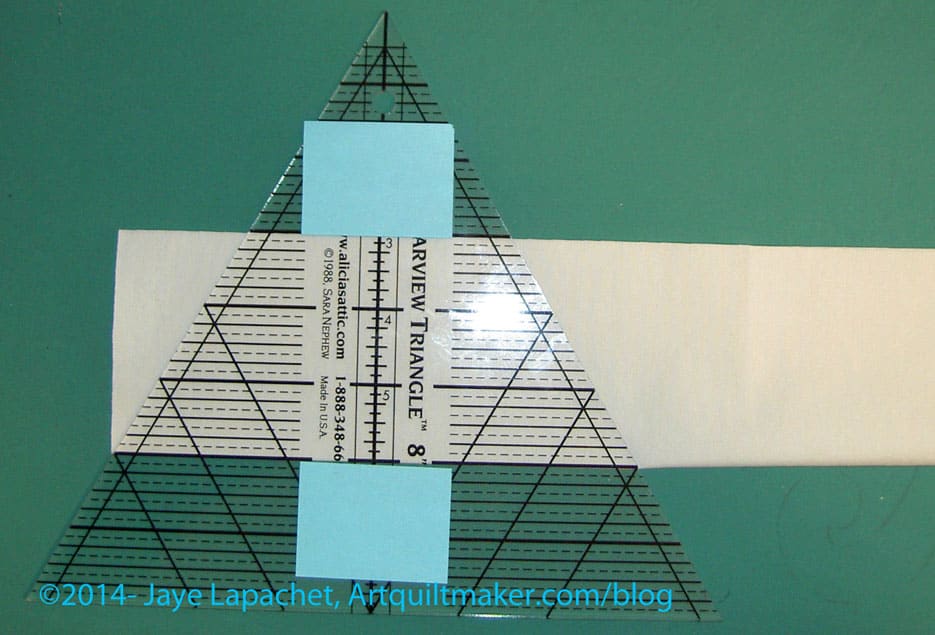
Place ruler
Follow the above step up with cutting. Place the Clearview Triangle ruler on the crease using the lines you have marked (using the technique described in the Kay Wood video). You must have this type of ruler. For example, I tried the Fons & Porter Pyramid ruler and that did not provide the right shaped hexagons.
In the photo above, I have marked my ruler at 3″ and 8″ using Post-it notes. You really only need to mark the bottom line, that which you place on the crease. I marked the top just to help me line up my ruler. Painter’s tape is another way to mark your placement line(s).
Nota bene: the above Clearview Triangle ruler does not have anything to help grip, so I recommend you add True Grips or something similar to the back of your ruler.
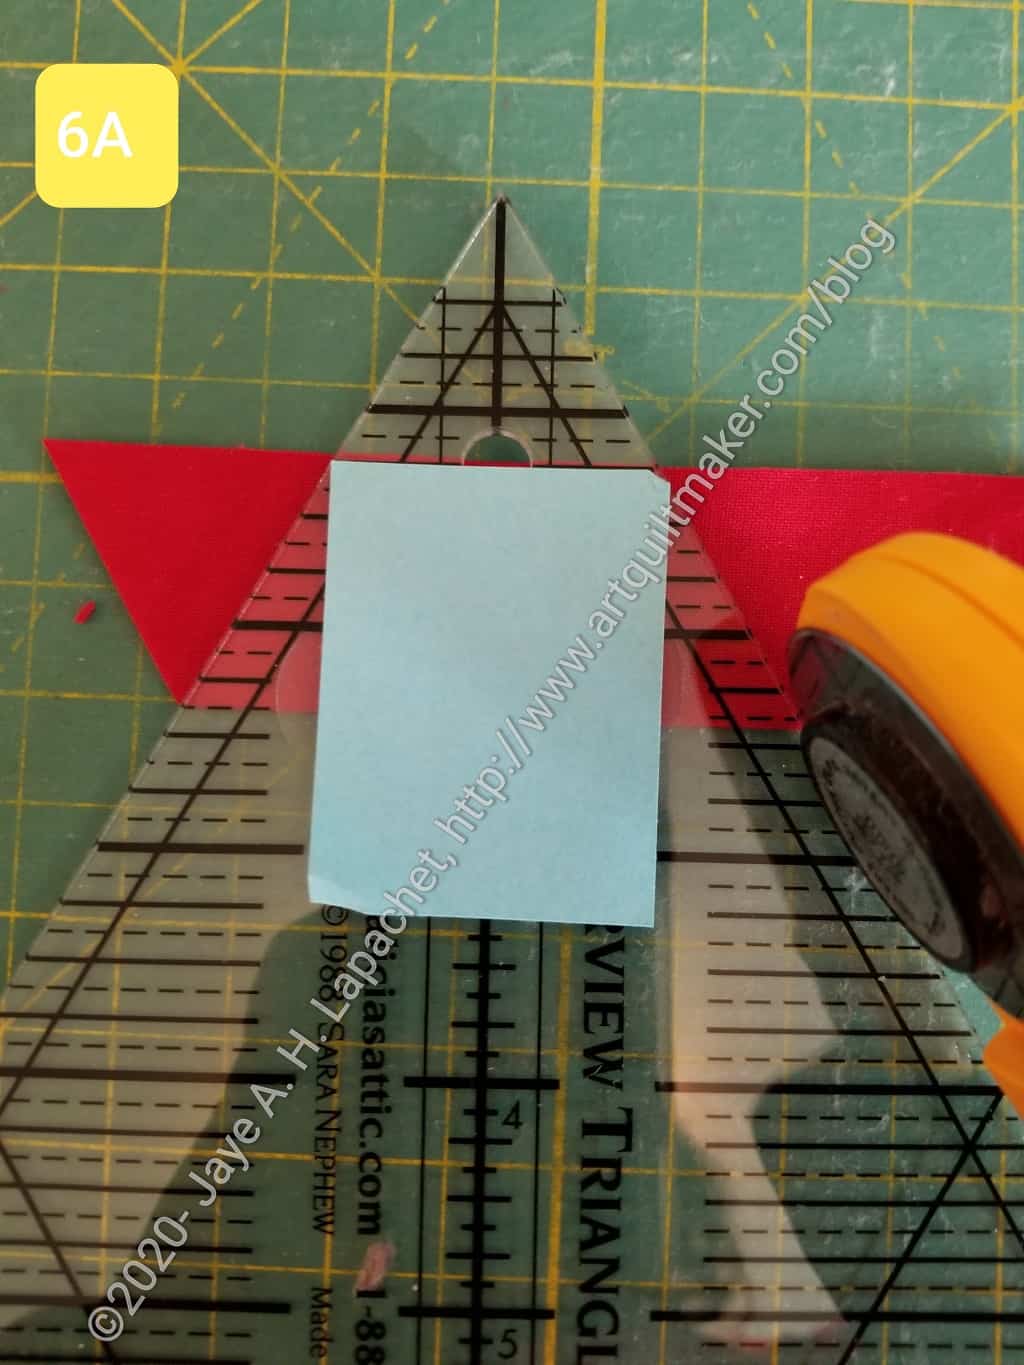
Cut
Now it is time to cut. If you are right-handed, line your ruler up on the left. Make two cuts to form your half hexagon shape.
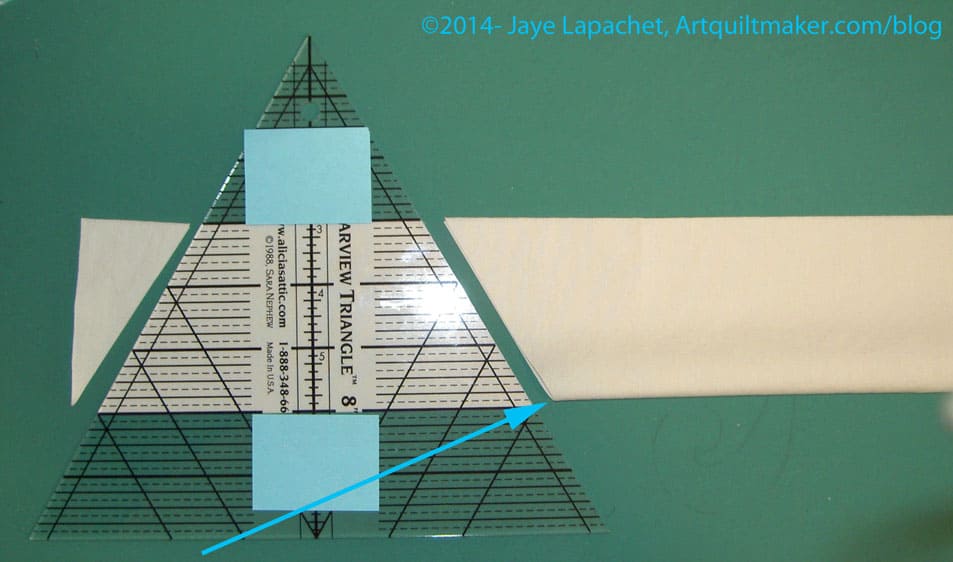
Line up your ruler
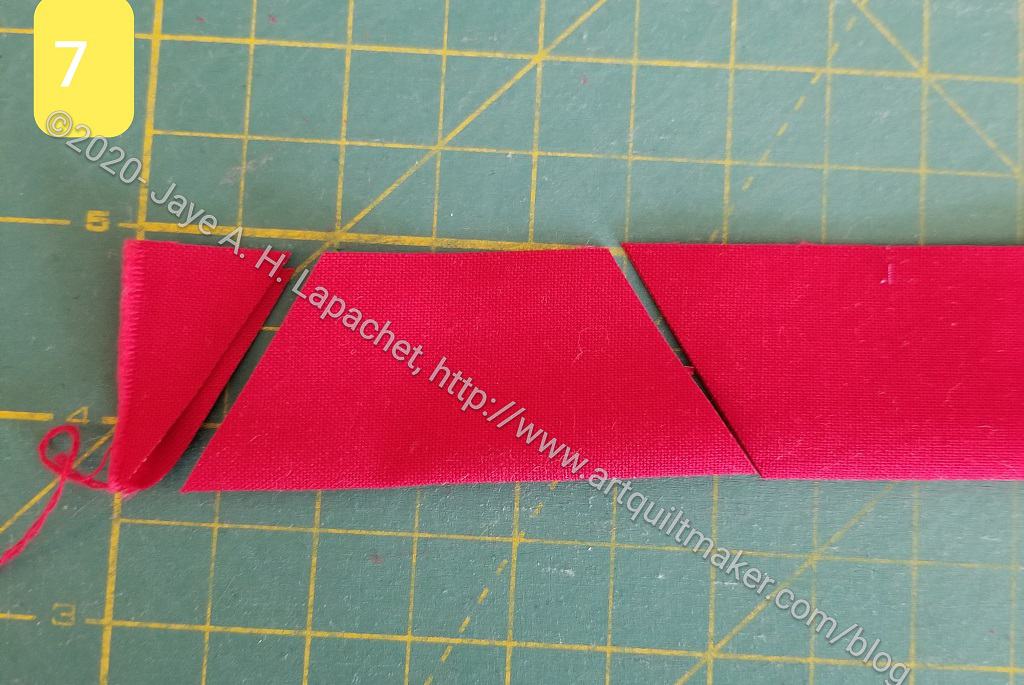
Next, line up your ruler to make the next cut. The left side of the ruler, at the end of your marked line should be placed where the arrow indicates. Cut along the whole strip. Do not turn the ruler upside down. You will end up with a weird shape that looks more like an hourglass. Little Bluebell has much better pictures of this step in her tutorial.
I am going to show you how to do this with 3 hexagons to start. Once you sew three hexagons, you can just sew the rest in groups of 3 then sew them to the other groups, sew them in rows or sew one hexagon to the group you have made. Let’s start with 3.
3 hexagons
Put them on your design wall or on your floor and gaze at them. See the V formed by the top of the 2 bottom hexagons? Pay attention to that. You will need it later.
Start with 2 hexagons
First, you sew two sides together. These will be two separate hexagons that you have already marked. Remember, you can mark with the Jinny Beyer Perfect Piecer and a Sewline pencil or with your favorite ruler and marking tools.
Put one Hexagon right sides together
Put the first 2 hexagons right sides together and sew between the marks. Don’t sew into the seam allowance. If you did sew into the seam allowance, rip out the stitches outside of the marks.
2 hexagons sewn together
When you open those pieces you will have 2 hexagons sewn together. YAY!
3 hexagons
Second, for the third piece, you have to do a Y seam. Remember that I told you to pay attention to the V? There will be a V where the two already sewn hexagons meet and that is where you will place the 3rd hexagon.
You will need to sew 3 seams total to completely add the third piece to the first 2 already sewn pieces.
Adding 3rd hexagon
Third, you line up the third piece with piece 1, right sides together, so that one side of piece three will be sewn to one side of piece 1. The side of piece one to which you sew should be one part of the V referenced above.
Fold over Hexagon 3 to hexagon 2
Fourth, once you have sewn one side of piece three to one side of piece one, you fold the neighboring side on piece three right sides together to the adjacent side of piece two. You will fold it on to the other side of the V. It looks awkward, but should line up exactly if you have not sewn into the seam allowance.
Fifth, sew the second side of piece three to the second side of piece two.
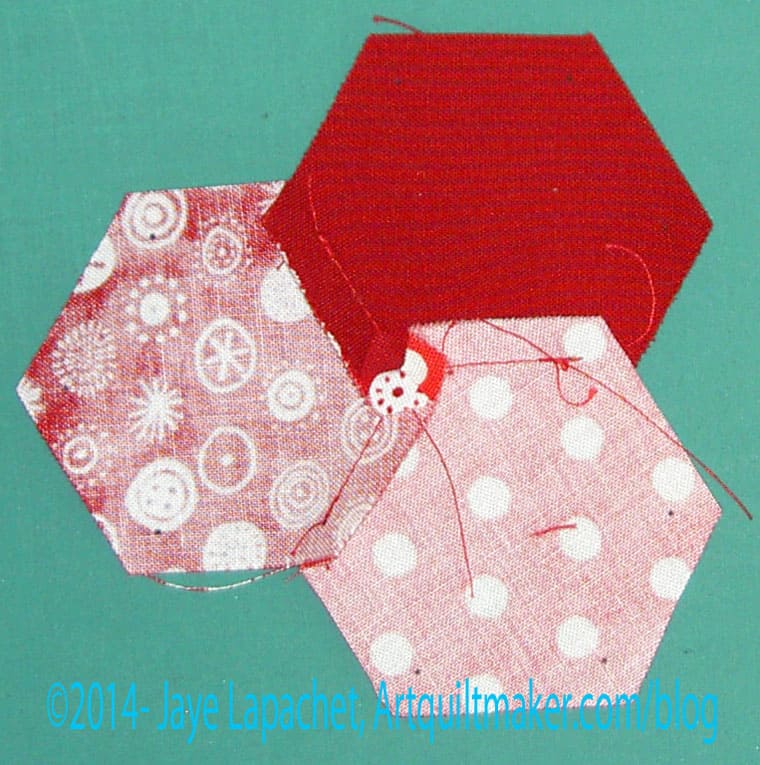
3 hexagons sewn together
Now you have 3 hexagons sewn together. AND you did a Y seam. That wasn’t scary, was it?
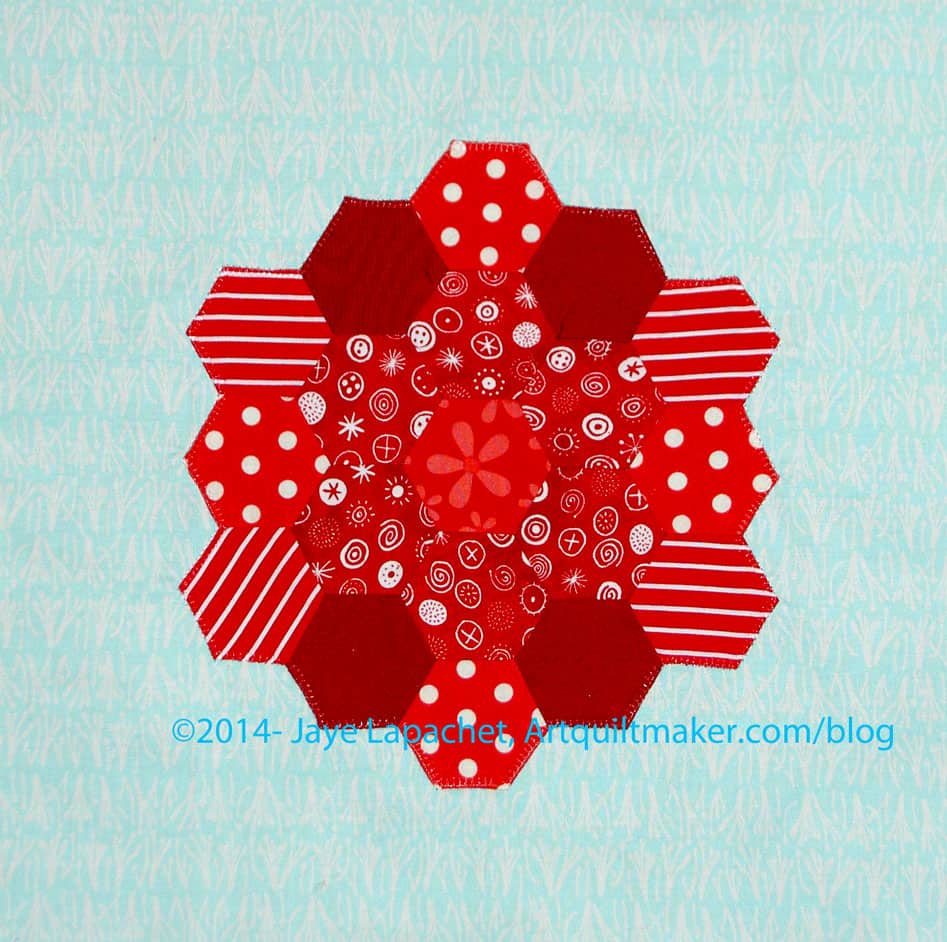
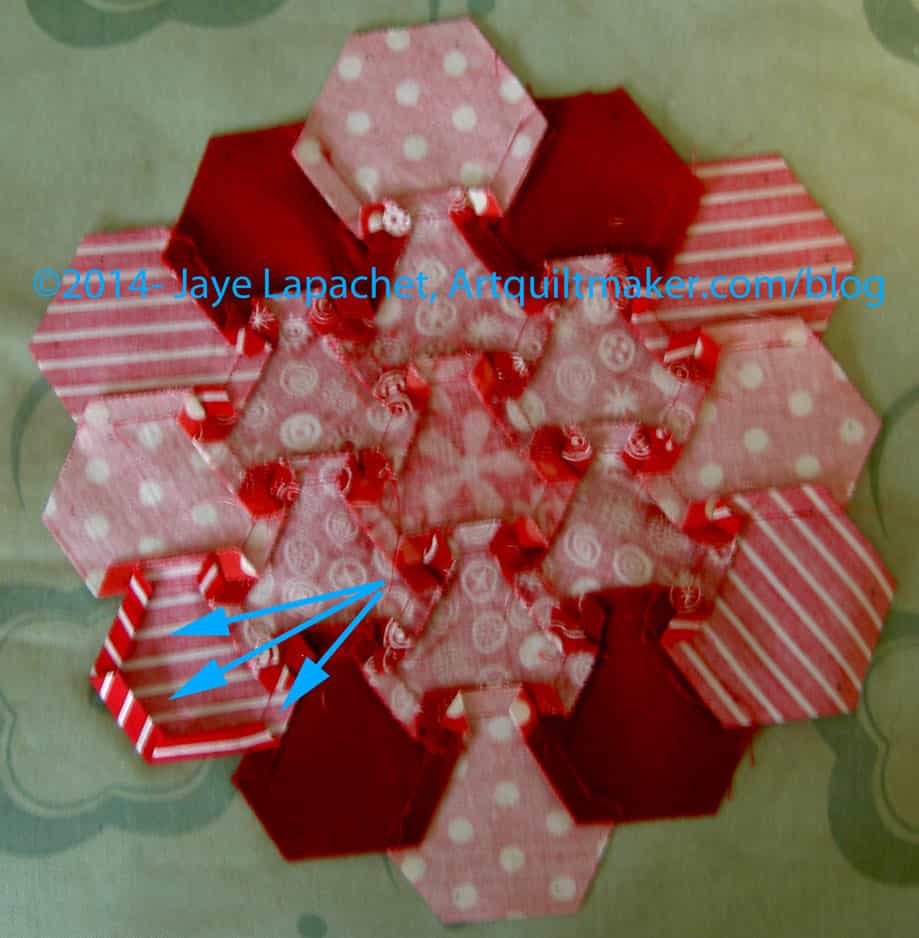
Hexagon Flower
Sixth, press from the back so all of the seams twirl in the same direction.
Yes, yesterday I finished the last details I needed to do to prepare the top for quilting. The tasks required were:
Finish back
Make binding
Trim top
Stay stitch
Saturday was a busy day, because I attended the CQFA meeting. I stayed after the meeting to sew with Sonja, Angela and Rhonda. It is good for me to hang with others and talk sewing. I am tending to work alone lately and am trying to get out of that rut.
During the sewing time, I worked on finishing some buttonhole stitching on one of the stockings and making progress on applying the sleeve to the Original Bullseye top. When I returned my mind was buzzing with an idea using the technique that Caroline taught based on Susan Carlson’s book, Serendipity Quilts. I worked on getting the design to the size that I wanted. That was about all I had energy for before I needed to go to bed. In the process, I ruined the cropping tool on Photoshop Elements. I know there is something I clicked, but I don’t know what it was and will have to take some time to find it and undo it. Ergh! All this is to say: 1) I didn’t work on the Attack of the Hexies on Saturday and 2) I have an idea for a new, small art piece, so stay tuned.
Yesterday morning, I had big plans to get up early, go to the gym, take a shower and get going on Attack of the Hexies by 10am. Famous last words! I didn’t get up until nearly 9 and I felt creaky. I have been dealing with a cold. While I am on the downslope of it, I am stilling fighting it off. I didn’t sleep well a few nights in a row and am trying to make up for that lack of sleep. I cut myself some slack.
After writing in my journal for awhile, I went upstairs and started sewing. I had to add a bit of fabric to one half of the back before I could sew the whole piece together. I did that and had to trim the whole back so that the piece was essentially square.
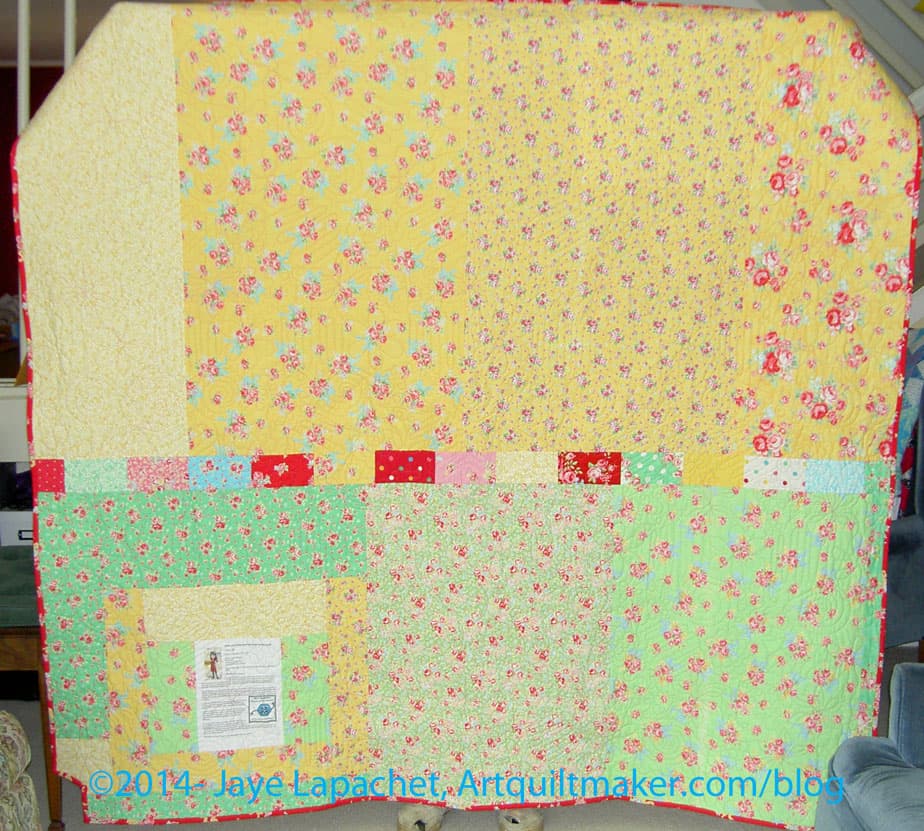
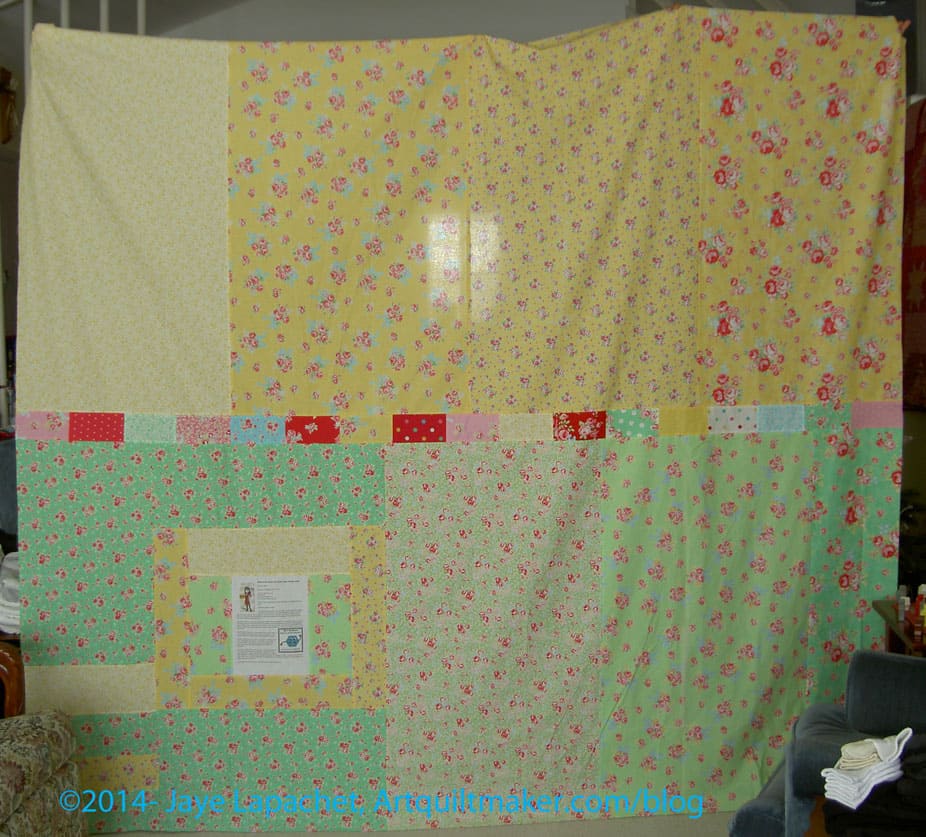
Attack of the Hexies Back
The line of bricks on the horizontal in the center of the back used to be hexagons, but I cut the leftover hexies up into rectangles and used them to add a little interest. The rest of the back is leftover yardage from the Flower Sugar line of fabric. I still have at least 5 yards of yardage left from that line. Not sure what I will do with it, but it will go into the stash and will show up again. There are two pieces that I really like.
Next, I made the binding. I used one of the pinky-reds from the line to provide a frame for the entire piece. I also made it a straight of grain binding. A lot of the border is on the bias because of the way I placed the hexagons as I added them to the piece. Basically, I didn’t pay attention to the grain line. I should have, but didn’t. I don’t do straight of grain bindings very often, because they tend to get kinks and near-folds in them as I hand stitch them on to the quilt. I like the ‘give’ that bias bindings have. It makes them very easy to apply by hand.
In this case, I want the edge to be stable. I don’t want it to get out of whack when it is quilted, thus, a straight of grain binding. We’ll see how it goes.
Trimming Border
Finally, and I don’t know why I did this last, I trimmed the border. It wasn’t straightforward, but I had to trim half of each hexagon one by one. I used the lines on the Clearview Ruler I discussed in the Hexagons Follow-up post to keep the who piece as straight as possible.
It wasn’t straightforward, because of the bias, so I just did it slowly and as carefully as I could. The piece will not be as straight as the Quilt Police would want, but they never made this quilt and I am happy with it. As you can see from the photo above, the border looks a little odd, but I like how it looks different.
The piece is now ready for quilting. I’ll take it to Colleen for quilting as soon as I can. I look forward to getting this completely done.
As I mentioned, all of a sudden, I am working fast and furiously on the Attack of the Hexies (Flower Sugar Hexagon). I spent all weekend trying, in vain, as it turned out, to finish the top, back and binding of Attack of the Hexies.
Attack of the Hexies border – in process
As I have said, Y seams are not hard, but they do take time. I decided to put a border on the piece and I needed to do it using hexagons. I don’t know another way to piece fabric into a hexagon piece without using hexagons. I could have cut off the hexagons on the edge, but I have always disliked that look for my own quilts and didn’t want to do that for this piece.
I also didn’t want to buy new fabric. Fortunately, I had enough of the Art Gallery solid Linen to use for the border. I didn’t even use all that I had, though my stock is significantly diminished.
The border is on the piece. I intend to trim it so the edges are square and still need to do that. I am all for wonky borders (Case in point: the Zig Zaggy Quilt), but not in this piece. I want the border to be square and subtle so that the center looks like it is floating on the border.
I am partway through the back as well. I lounged around for a long time on Sunday and didn’t have enough time to finish it. I had big pieces left over, so I didn’t have to piece a lot of small pieces together.
For months I didn’t work on the Hexies project, then on the first I just dove in and added rows. I am not sure why except that it didn’t require cutting. The hexagons were there, the piece was there and I needed something to sew.
I got my head around the Y seams and did it. I didn’t want to sew one hexagon on at a time and I had a row started, so I finished the row and worked on sewing the whole row on at a time. It was a lot of stopping and starting, but I just did it. I developed a system and kept at it.
Things I have to figure out:
How big to make it. It seems small now, but I know that if I fill my design wall it makes a pretty big quilt.
Whether to unsew a section where I sewed two of the same fabrics together.
How to finish the border – to square it off or leave it jaggedy. I am not sure I can face all those mitered binding corners
I plan to just work on it until I am done with the top.
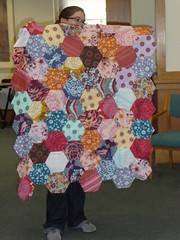
The last time I seemed to have written about this Flower Sugar Hexagon project was way back in 2011. I didn’t think that much time had flown by, but Pam has made two hexagons, so I guess it has.
My design walls have been empty for several weeks while I work on small projects; the 3D items not needing much design wall space. I also love piecing so much that I didn’t want to be tempted away from the small projects that have been on my list for awhile.
My mom came over for a visit with the Young Man after being on vacation and down with Grama for several weeks. When I arrived home from work she told me that she had raced upstairs to see what was on the design wall and was so disappointed to see NOTHING. She looked a little worried as well. I felt bad.
This hexie project has been on my mind and it occurred to me that I could put it up on the design wall and see what I saw.
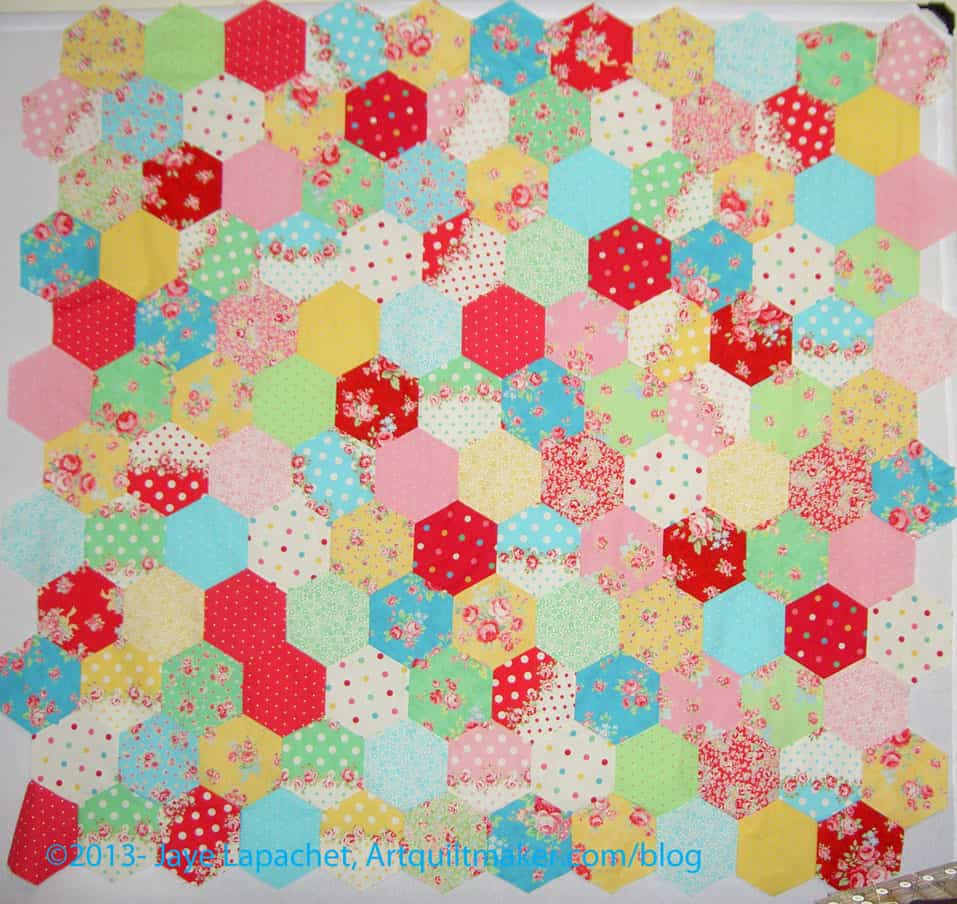
The only other photos I have of this quilt is laying on the floor. Laying on the floor is different, for me, than hanging on the wall. I seem to be able to see so much more when pieces are vertical. It must be the perspective or the angle.
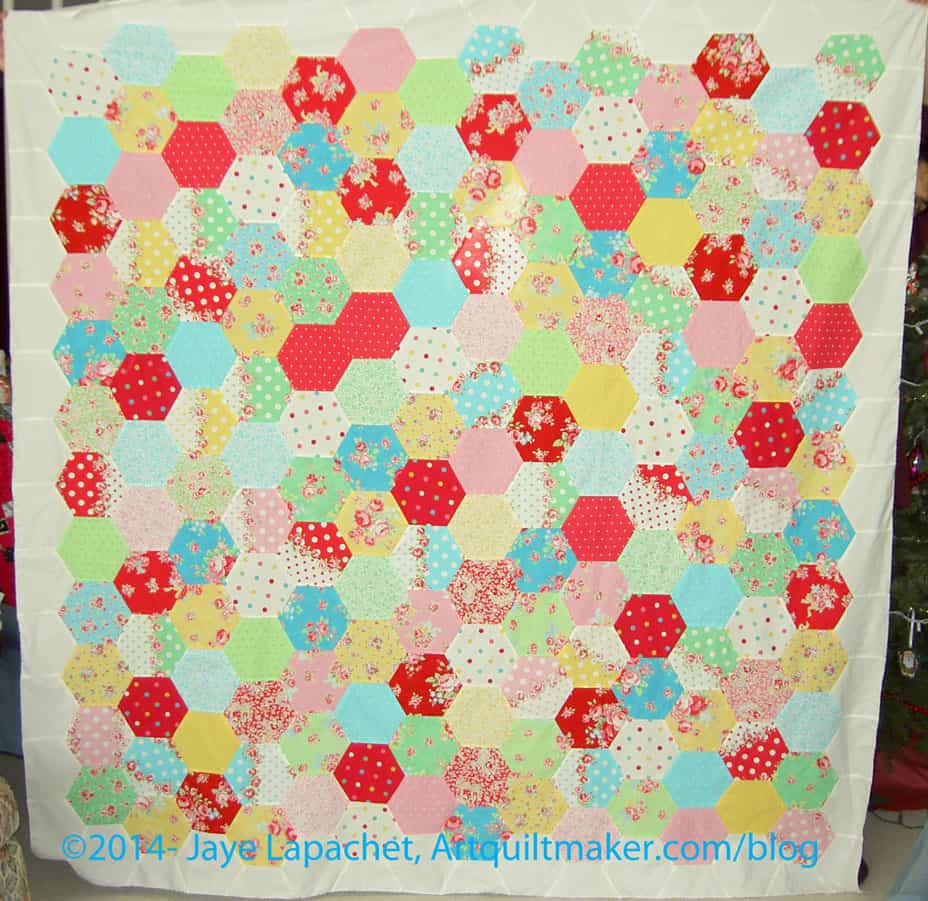
I found the piece and put it up on the portable design wall. Looking at it after not having seen it for awhile, I noticed some interesting things:
My balance of different fabrics is pretty good.
The piece is tiny. It is less than half the size of the Swoon. I have a lot of hexies to cut
This piece does cheer up the room.
As I said in one of the previous posts,Adrianne of Little Bluebell, introduced me to the cutting technique I used for these hexies. You can find the cutting instructions on her blog.
I hope I won’t think too much about sewing more pieces together. I still need to work on small projects.
As you may have inferred, I got two quilts back from the stand-in longarm quilter last week, so I had two quilts to trim and bind. I don’t enjoy these steps in the process, probably because I don’t have a good set up for dealing with them. Colleen usually machine applies the binding and trims the quilts for me, but I didn’t feel like asking the new person since I don’t know her that well.
Friday, before the weekend, when I was at work, I made a list of tasks I wanted to accomplish during the weekend and trimming and binding these two quilts were among them. All of the tasks I wanted to accomplish were what I call ‘finishing tasks’ – making backs and bindings, trimming, applying bindings. Unsatisfying tasks, IMO. Of course, I like the finished products and I don’t mind hand stitching the binding, but getting to that stage is an uphill battle for me.
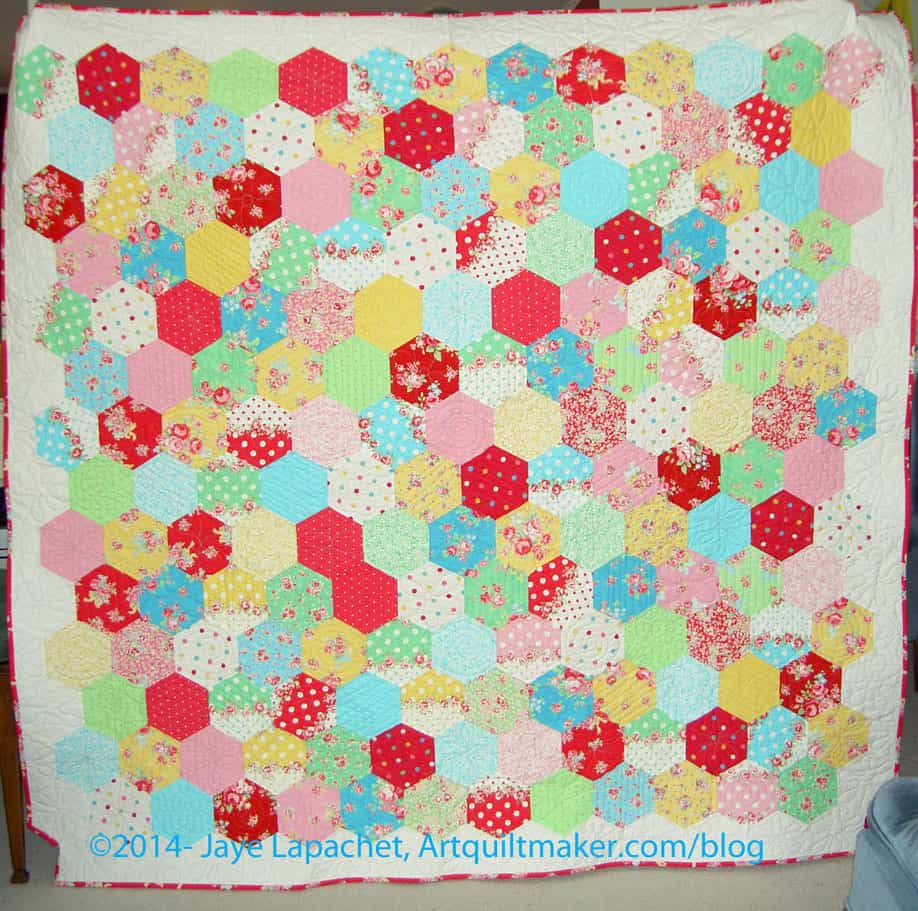
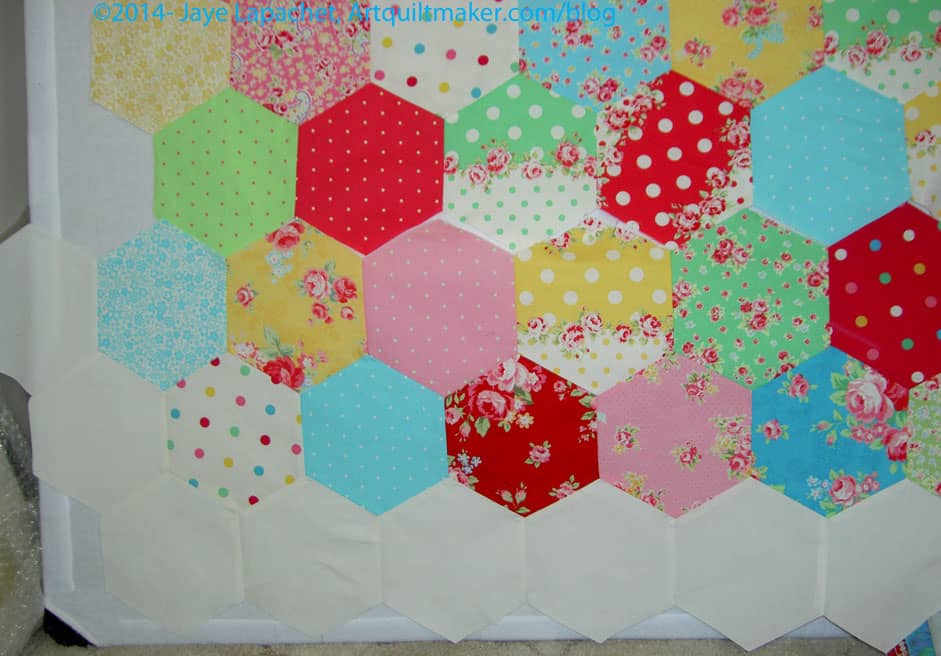
Hexagons, early October 2011
I buckled down and did the tasks and in between I added hexagons to the Sugar Flour Hexagon quilt top. I am not sure I will make a thousand hexagon quilts, but I making this one is really fun. The pieces are large enough so that it is not misery to machine sew the hexagons together.
I also enjoy the fabrics and, thus, the color placement. I thought of adding the hexagons in rows, but adding rows wouldn’t allow me to control the placement of the color in the same way.
I had fun with the blob, but want to make it more square, in anticipation of it actually being used for a quilt like purpose. I don’t know how large I will make it – I have plenty of fabric so that isn’t an issue – but I think, perhaps making the width in the neighborhood of how large I want the quilt to be would be a good idea.
Adding the hexagons was a really nice treat in between making the back, and binding and trimming Pavers and Stars for San Bruno #2.
There was an electrical fire in the building where my hairdresser has his chair. The shop is completely destroyed, but the fire alarm was called shortly after the fire started so it was contained. Nobody was injured. He was able get his appointment book and his scissors out, but lost his clippers, blow dryer, color, shampoo, etc.
As a result of this excitement, he is working from a temporary location. As I walked up the street I saw this mosaic tile art in the doorway of a Victorian. Hopefully, it will inspire you and your hexagons.
She asked “OK–you said sewing in a circle. What order do you do the seams, then? Sew piece 1 (center hexie) to piece 2, then piece 1 (center) to piece 3, then adjoining seams of 2 and 3?
I’m not positive I’d be able to keep track of my design if I sew in circles/chunks rather than rows. It’s sort of a mosaic-y thing. Once I get everything laid out, I’ll be able to tell better. It’s not a problem with method, just me knowing how best to make sure I get pieces in the right place!”
My response, slightly edited for clarity, was: If I understand what you mean, remember that the goal is to have no hexagon edges raw. This means that each side of the hexagon will be sewn to another side of another hexagon. This may be different on the edge of the quilt, depending on what the designer (you!) decides to do about borders, but for the middle, you want each hexagon edge to be sewn to another hexagon edge.
Remember: no sewing into the seam allowances!
I am going to show you how to do this with 3 hexagons to start. Go get 3 hexagons, I’ll wait.
3 hexagons
Put them on your design wall or on your floor and gaze at them. See the V formed by the top of the 2 bottom hexagons? Pay attention to that. You will need it later.
Start with 2 hexagons
First, you sew two sides together. These will be two separate hexagons that you have already marked. Remember, you can mark with the Jinny Beyer Perfect Piecer and a Sewline pencil or with your favorite ruler and marking tools.
Put one Hexagon right sides together
Put the first 2 hexagons right sides together and sew between the marks. Don’t sew into the seam allowance. If you did sew into the seam allowance, rip out the stitches outside of the marks.
2 hexagons sewn together
When you open those pieces you will have 2 hexagons sewn together. YAY!
3 hexagons
Second, for the third piece, you have to do a Y seam eventually (hope I explained clearly enough in the post how to do it). Remember that I told you to pay attention to the V? There will be a V where the two already sewn hexagons meet and that is where you will place the 3rd hexagon.
You will need to sew 3 seams total to completely add the third piece to the first 2 already sewn pieces.
Adding 3rd hexagon
Third, you line up the third piece with piece 1, right sides together, so that one side of piece three will be sewn to one side of piece 1. The side of piece one to which you sew should be one part of the V referenced above.
Fold over Hexagon 3 to hexagon 2
Fourth, once you have sewn one side of piece three to one side of piece one, you fold the neighboring side on piece three right sides together to the adjacent side of piece two. You will fold it on to the other side of the V.
Fifth, sew the second side of piece three to the second side of piece two.
3 hexagons sewn together
Now you have 3 hexagons sewn together. AND you did a Y seam. That wasn’t scary, was it?
Hexagon Flower
Sixth, press from the back so all of the seams twirl in the same direction.
In terms of keeping track of the pieces, because you want to sew them in a certain order, you need to lay the pieces out and look at them as you sew. I understand that many people don’t have a design wall. A design floor works just as well. You may need to pin your pieces together in the order you will sew them and take lots of photos. I also have pinned numbers to my patches or blocks so I know what order to sew in.
Let me know if you have further questions about the hexagons.
This is not a scary process. Just slow down a bit, follow the directions and you will be fine. You can do it!
Other:
Pam’s recent podcast about her hexagon project is posted on her site. she is very funny in calling this a Point and Laugh-a-long, which makes me laugh.
Sandy also posted a much more helpful and informative post that had actual content about how to do the project (not that Pam’s post was not helpful or informative, because it was) rather than just blathering on about process, which is what I tend to do. In Sandy’s most recent podcast she talks about the practical aspects of cutting hexagons and how she had success on the Kaye Wood method.
Here are a couple of different takes on hexagon quilts. This one from Random Thoughts do or di won’t work with the method we are using unless you figure out how to put the sashing in between the hexies. if you do figure that out, then you can use the directions all of us have posted to put the piece together. I don’t know if the sashing is more complicated than sewing a strip around the outside. This is a question I would ask TFQ about.
This photo from Sunset Sewing is a really nice variation of a hexagon quilt. I can’t tell whether it is a variation of the Spiderweb pattern.
This is one of the tops/pieces that inspired my hexagons…..well sent me over the edge, really, because I had been drooling over TFQ’s for quite a while.