Scrapitude Triangles

The newest clue for the Scrapitude mystery quilt has to do with triangles. The idea is to cut 5.25″ squares into quarter square triangles before sewing.

I didn’t, yet, do all the cutting as instructed in the first clue, partially because I wanted to see if I could find a better way, more preferred way to cut. I also didn’t want to delve into my stash completely yet. I still wanted to try and use as many scraps from my scrap bin as possible. Some of the drawers are getting pretty full.
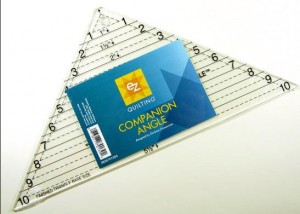
EZ Companion Angle Ruler

In order to cut from my scrap bin, I had to be able to cut from smaller scraps. I don’t have a lot of 5.25″ scraps laying around. It occurred to me, as I was thinking through this process, that I had a ruler that would make cutting the quarter square triangles a bit easier. I found the EZ Triangle Companion Ruler (I think I bought this for the Easy Street Mystery quilt) and the Fons & Porter Half & Quarter Triangle Rulers. Neither had been opened (ooops!), so I examined them and, for no particular reason, chose the Fons & Porter to try first.

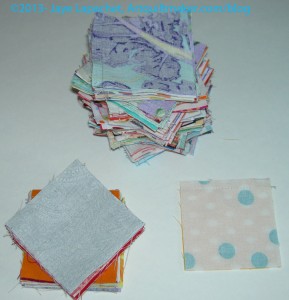
I cut one 5.25″ square the way Charlotte suggested so I had a sample. I used that to determine the size I needed to to cut using the HST/QST ruler. The directions on the Fons & Porter ruler tell you to cut a strip size of 2.5″ to get the size QSTs I needed. This cut off the tip of the triangle at the top (see that tiny black triangle at the tip of the ruler in the photo below?). I wasn’t sure why I would want to cut off the tip since it didn’t create the bunny ears. This made me wonder if that ruler would work. I didn’t want a hole at the point where those triangles intersected with other piecing.  Nobody was around to answer on Twitter, so I cut the strips 2.75″ and used that dimension as a guide for cutting additional triangles.

“Strips” is a bit of an exaggeration as I was using scraps. I tried to find scraps that were at least 2.75″ wide.
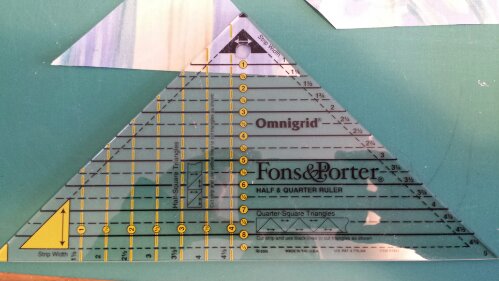
Fons & Porter Half/Quarter Square Triangle Ruler

Using this ruler took a lot longer than cutting already cut 5.25″ squares into quarters would, but I was able to use a nice variety of fabrics and I was able to clear out my scrap bin a little more.

I found that I had to have a nice straight cut line on which to line the correct cutting line.

One confusing thing, which I have found with other rulers, is where to put the fabric under the ruler. Some of the lines, including the one I needed to use, were quite thick. Do I line the ruler on top of the fabric with the bottom of the thick line even with the cut line? Or something else?

I just decided to be consistent. I can always trim.

If you haven’t done the triangle step of Scrapitude, I hope you’ll try using one of these rulers to vary your fabric selection.

Scrapitude Posts

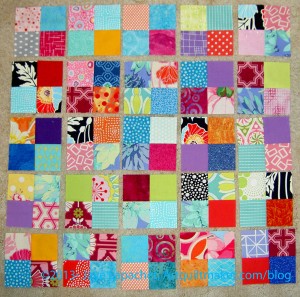
Scrapitude: 112 4 Patches

I spent the day Saturday doing laundry and working on four patches. I had really looked forward to a day in my workroom and, while I got that, I felt out of sorts. I am not sure why, but it just wasn’t the relaxing sew day I thought it would be. I sewed, but I didn’t enjoy it as much as normal.

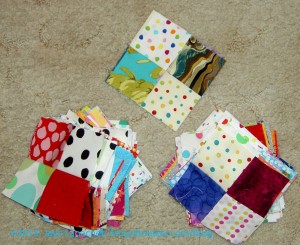
112 Four Patches
112 Four Patches

Still, I made progress. I finished the 112 four patches that were part of the first sewing step in Charlotte’s Mystery quilt. I had started them last week or the week before, so about half of the halves were sewn. I needed to do the rest and I had to cut enough pieces to make them.I alternated cutting and sewing. It works better for me.

I have to figure out how and where to store these. I don’t have a good sense of when the next step will happen.

Example Four Patches

As you can see, my background fabric is dots. I figured I would use some of the dots I have been collecting sinc they are just sitting there waiting for a project. As I mentioned, I had to cut much of the background from yardage. I rummaged through my scrap bins as much as possible. Now, I am pretty much left with weird shapes and smaller than 2.5″ squares in many of the colors.

I have to say that part way through making the 4 patches, I was ready to make some larger blocks and see where I was going. I got a little sick of 4 patches, which is sad, because I really adore the simplicity of four patches. There is a lot one can make with a four patch as a base. I think part of what is going on is that I am not organized in my sewing room right now. I don’t have a good handle on the projects I have going. I know what they are, but I don’t have the steps in my head.

I blame Super G.

If you haven’t been following along, I went down to SoCal for a week and that trip, along with problems with my machine, kind of ruined my flow. I’ll get back into it; it is tough, though. Learn from me: sew or pet fabric every day.

Since I finished the 25 4 patches already as well, I think I am ready for the next step. I don’t see it posted on Sandy’s blog, so I guess I’ll get back to some cutting, of which there is plenty left to do.

Previous Scrapitude Posts:

Why Should You Care: You can see that it is possible to get work done even if your machine is out of commission and you have a loaner. You can also see that it is possible to create some organization, even in a scrappy quilt.

Scrapitude Four Patches

I succumbed to the Siren call of the mystery quilt. Just like Jason and the Argonauts or Odysseus or the sailors passing Die Lorelei, I couldn’t resist their call and am working on the Scrapitude Mystery Quilt.

The Scrapitude Mystery Quilt was created by Sandy’s friend charlotte after the ladies in their guild begged. Sandy put out the [Siren] call and many of The Twilters joined in. I found an already cut batch of 2.5″ squares, so I joined as well. Lame reasoning, I have to say, because there are a whole bunch of other shapes I need to cut as well.

Scrapitude First 4 Patches

It turned out to be good, though, because I needed something easy where I could accomplish a lot in a short amount of time.

I only had about 3 hours to sew yesterday and was able to finish 25 four patches and make a huge dent in the 112 I still need to make.

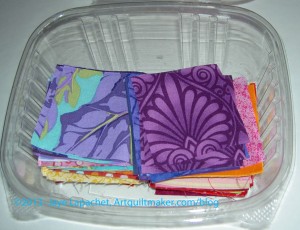
One of the first sewing directions was to make 25 four patches out of the foreground fabric (e.g. not the background). I found a container of 2.5 squares I had cut sometime ago and started out with those. I was able to make good progress and finish the first 25 pretty quickly.

2.5" Squares
2.5″ Squares

The next 112 would be a little harder and I knew that before even starting the sewing.  Part of the difficulty was that I hadn’t, yet, picked a background. Fortunately there were enough dots with white backgrounds already cut to sell me on the idea of dots as a background. I toyed with the idea of blacks on whites, but went with the dots. There aren’t enough dots in my life ever. 😉

There were a lot of orange squares in the container, so, periodically, I rummaged through my scrap bins and cut some other colors. A lot of what I was cutting were greens. It is fun delving into my scrap bin. First, I use up scraps, which is always a bonus. Second, I enjoyed thinking about the fabrics through which I was rummaging and the original projects for which they were used. I found a lot of Philip Jacobs prints and joyfully cut those up to use.

112 4 Patches in Progress

Now I have about half of the 112 finished. I have had to use some yardage for the background, but I  have plenty of dots, so it is ok.

Sandy has a tutorial on her blog on making 4-patches. Nonnie pointed out a very interesting 4-patch tutorial on the NZ blog, Bee in my Bonnet. I have not tried this tutorial and she doesn’t give sizes, so I don’t know how it works. It looks cool, though.

Why Should You Care: Perhaps you want to join in or use the directions for an activity for your guild?