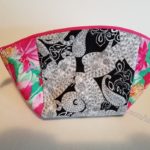
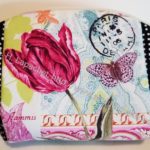
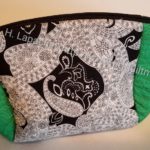
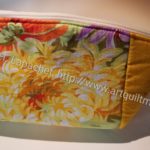
Finished: Hindsight Day Trip Cell Phone Wallet

Finished Day Trip Wallet

I am so excited about finishing this bag! I am not sure that is the right way to say it, but it has been a long time in coming. As mentioned, I bought Minikins Season 2 for the express reason of making this bag. Then, I was intimidated and didn’t feel up to making it.

A few years have gone by, and I have made several bags. This bag seemed right for a gift. I guess I was ready.

The bag was a challenge, but only because of the many layers, not because of the directions. The process is actually very easy. With the pattern and the video, it wasn’t hard.

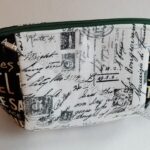
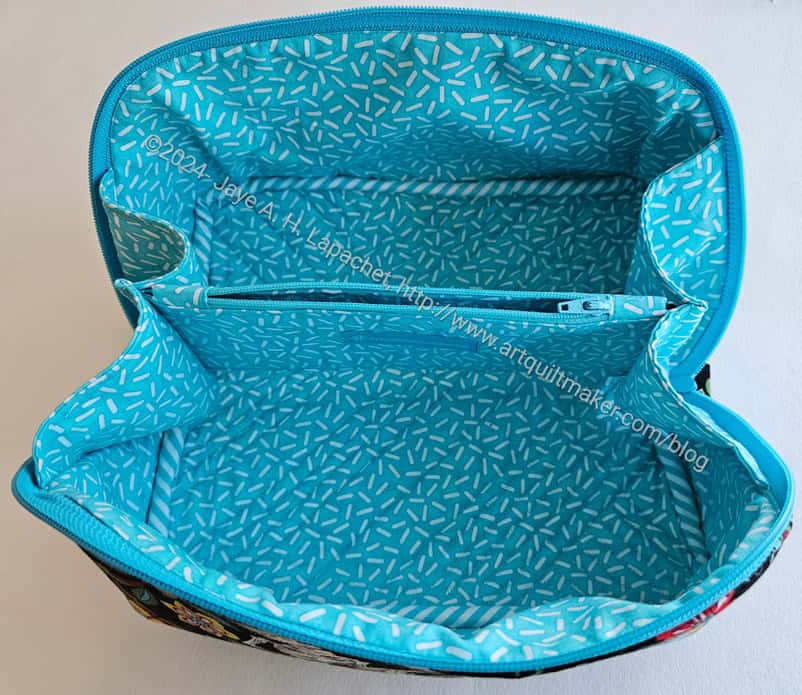
Finished: Day Trip Wallet - interior
Finished: Day Trip Wallet – interior

This bag is, basically, a small wallet that fits your cell phone. You could put this into a larger bag, but then take it out when you don’t need the whole bag.

This would be great for doing that since the strap is detachable. You could store the strap elsewhere or in one of the inside zipper pockets and take it out as needed.

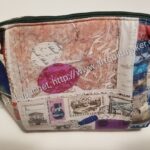
Finished: Day Trip Wallet - exterior pocket
Finished: Day Trip Wallet – exterior pocket

This is the first one that I have made, but I hope to make more. I wonder about the size of the flap for the cell phone pocket. I wonder why it is so small. It might interfere with stitching the zipper. I have asked in the Sew Sweetness group to see what others say.

I was a little worried that the pattern was designed when cell phones were smaller and a modern phone wouldn’t fit. I tried my large-ish Samsung phone in the pocket and it fits just fine. Whew! This is good as the bag is not that large and I wouldn’t want it to be enlarged so much that it wouldn’t fit in the larger bag mentioned above.

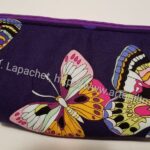
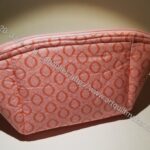
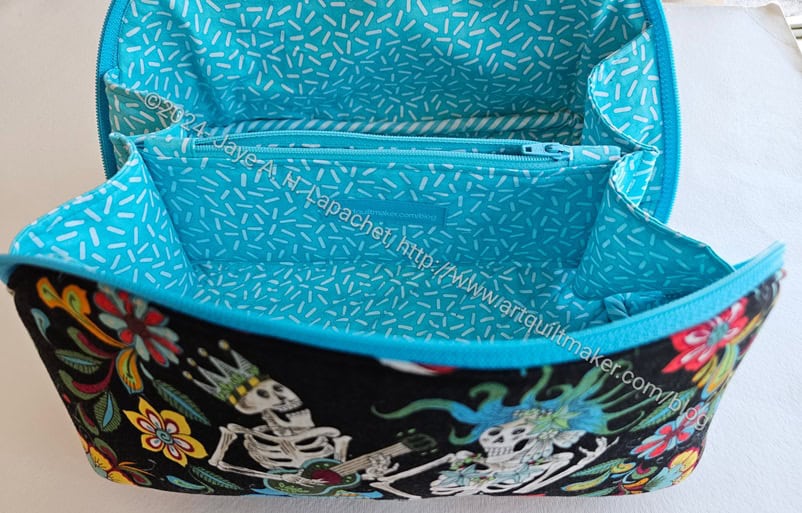
Finished: Day Trip Wallet - interior detail
Finished: Day Trip Wallet – interior detail

The inside has two sides, both with a zipper pocket and several card slots. Behind the top card slot could be a spot for cash.

I added the optional D-ring on the spine so there would be a place to clip keys.

I also used two different colors of zippers in order to give the recipient a visual cue as to where she stashed something.

Hindsight Day Trip Cell Phone Wallet

I think I could probably have put another cell phone pocket on the other side of the bag exterior. I am not sure how useful that would be, though more pockets are always better.

I am pleased with how this came out and am cutting out a second one. This one will be for my mom who needs something for her phone so her hands are free to maneuver her walker.


Day Trip Continues

Day Trip Cell Phone Pocket made

I am pleased to say that the Day Trip is progressing much better than I expected.

As mentioned, I was anxious about the difficulty of this project. I am carefully following all the directions and watching the video accompaniment when I have even a sliver of doubt. I am not having any problems! I am so excited.

In some ways, this is a meditative process for me. There are a reasonable number of pieces and I was able to cut them out relatively quickly. I decided that I wasn’t going to skip steps to get to the sewing faster. That attitude made the sewing, once I finished all the prep, go much faster.

Day Trip: Magnetic snaps

It has been awhile since I installed magnet closure. I added some Decovil Heavy scraps behind both pieces to reinforce the snaps. I hope they will hold.

Sara has a really good tip in this pattern about using the round template/reinforcement thingy that comes with the magnet closure for placement. It is so obvious yet I never thought of it.

Day Trip zipper installation

The cell phone pocket (above) is complete. I am working on installing the zipper that closes the whole bag. I had to cut the zipper to the right size. I really need to make some of those Center Street Quilts heart pouches in order to use up some of my leftover zipper pieces. This is a difficult part as the zipper really doesn’t like going around corners, but I went slowly and persevered. It’s the same challenge all the time. Am I getting better? Maybe. I should be after all those Hackney pouches.

I am really jealous of that skinny quarter inch foot Sara uses. I think it would make going around those corners easier.

At Bag Club on Saturday we talked about installing an interior zipper pocket. I did sort of a theoretical tutorial using the Sotak Handmade Purse Organizer as an example. Since it was already made, there was a lot of imagination required.

Day Trip: one interior zipper pocket

Funnily enough, I had to make two of these types of pockets on Sunday! They are a little fiddly, but really easy. I use Sara’s zipper pocket ruler for the measuring and drawing the box. She is not restocking her acrylic templates, so get them while they are still available. I checked other places and can’t find one like Sara’s. I found one from Arc Expressions (no affiliation) that I think would work, though you would have to use another ruler to measure pockets on larger bags.

Anyway, talking through the pocket installation on Saturday was really helpful on Sunday when I went to make the pockets. I had an idea in my mind about what I was doing. I made one (or more??) on the most recent Superbloom, so I was in good shape. I like having the process firmly in my mind.

One of the best things about these pockets is you can pull the bag right side out through this pocket. I love it when designers use that technique. You can add these pockets to almost any bag with a lining.

I am well on my way. Get this pattern and make one!

Finally! Day Trip Wallet!

Day Trip pattern photo

I bought Minikins Season 2 specifically for this pattern in March of 2020. At that time, I was a little scared of this pattern. Recently, I realized I wanted to make one as a gift.  Since I had the recipient in mind, I dove in to make it. This will match the Superbloom tote I finished a few weeks ago.

Day Trip for Diana start

I was still anxious that I wasn’t up to the task, so I carefully worked my way through the cutting and interfacing. I only forgot one piece! I am about to start working on the pockets, straps and tabs.

I am pretty excited that I am getting going on this project after almost 5 years!

Finished: Hindsight Superbloom!!

Hindsight Superbloom front

After years of whining about the Hindsight Superbloom, it is finally done. Apparently, thinking up someone to whom I could give this bag was the key.

I carefully fussy cut the panels, so those pink flowers were featured. I wasn’t sure how it would look, but it looks good to me.

Hindsight Superbloom - back
Hindsight Superbloom – back

I also remembered to machine sew on my label! Yay!

I like the way the handles look. That print is fun. The handles aren’t that comfortable, though. They seem to be made from some kind of polyester. I was trying to avoid sewing strips together to make the handles and that worked. I don’t think the recipient will be able to carry a lot of heavy items in the bag comfortably.

I used some dot fabric as the lining and it looks really fun. It also achieves my goal of being light colored, so easy to see the items in the bag.

The last photo (above, right) shows the bag closed. It has a recessed zipper. In that photo, the bag has all the small gifts I got for the family who are caring for my stepdad.

I think I might add a slip pocket or two to the next one I make.

Hindsight Superbloom - side pocket
Hindsight Superbloom – side pocket

One thing I love about this bag are the sides pockets. They are super cute. I don’t know if they are useful, but I think they would be.

I am really pleased with the way this came out. It went together really well.


Hindsight Superbloom

Hindsight Superbloom main body - in process
Hindsight Superbloom main body – in process

I finally started the Hindsight Superbloom. This is a project that has been on my list for a long time. I was excited to make this version at the time I made the first Superbloom. Somehow I lost momentum,  but recently I was inspired to pull out the fabric and the pattern and get busy.

Yes, I remembered to put my label on the bag before I started to assemble it! I am happy about that.

Hindsight Superbloom in process with handles

I had a little trouble with the handles as I was using webbing instead of making them from fabric. I eventually got them on the bag. UGH! I know why the process had to go the way it did, but I found it difficult.

I am always surprised at the size of this bag. It is quite roomy, but I always think it is bigger than it actually is.

So far, I am l loving the process. Those side pockets are awesome.

All the Cotton Candy

The other day I was thinking about a hand sewing pouch for my mom. In the course of that thought process, I looked up all the Cotton Candy pouches I have made.

WOW!

I have made a lot.

I think I have only made more Hackneys (14) than Cotton Candy pouches, but not many more. Clearly, I play favorites.

Gift Post: Sue’s I Spy Pouch

Sue's I Spy pouch - front
Sue’s I Spy pouch – front

I had a tough time deciding what to make for Carrie and Sue for Christmas. I don’t want to just make them anything. I want what I make to be useful. Eventually, after considering several Minikins patterns I hadn’t tried, I decided on I Spy pouches.

Is this a cop out?

No.

Sue's I Spy - back
Sue’s I Spy – back

As I have said before, these pouches are like eating potato chips for me. I can make one quickly. I also really enjoy making them. Because they are fast? Maybe. Mostly because they are useful.

Sue gets a color wheel on the back to help her pick out fabric. I also remembered to put a label on the pouch.

Some time ago I made Carrie and Sue Kit Supply Totes. The Hackney pouches I made for them fit nicely into the Kit Supply Totes. I thought the I Spy would fit nicely in it as well.

Gift Post: Carrie’s I Spy Pouch

Carrie's I Spy - front
Carrie’s I Spy – front

I know it’s been a week or so since I posted about gifts, but we are back to it.

I posted last week about Sue’s I Spy pouch. One of the differences I made is that Carrie got a whole color wheel in the front while Sue’s was on the back. One of the reasons I like this fabric is because it means they always have a color wheel with them.

Carrie's I Spy - back
Carrie’s I Spy – back

I found some nice zipper pulls in my hardware bag that I added. They are apples, which have nothing to do with color wheels, Carrie or Sue, but here we are. Zipper pulls, aside from being cute really help to pull zippers open.

Gift Post: Gerre’s Enigma Bag

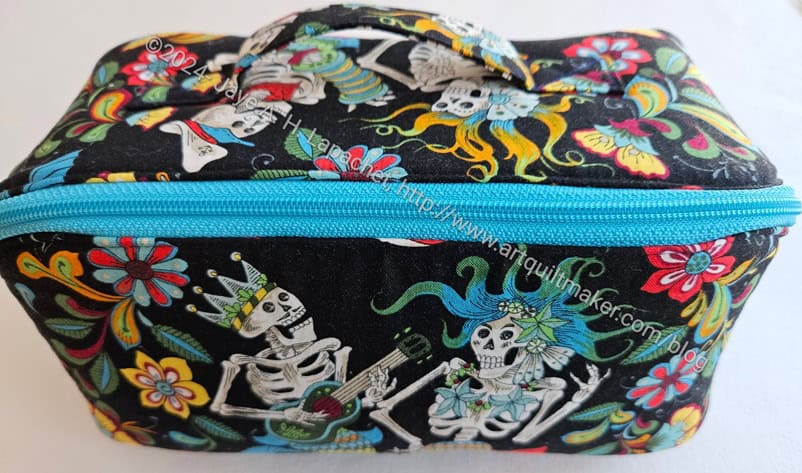
Skeleton Mermaid Enigma Bag

While I was making my sister’s Enigma bag back in July, I also made one for Gerre for Christmas. This is Enigma #6.

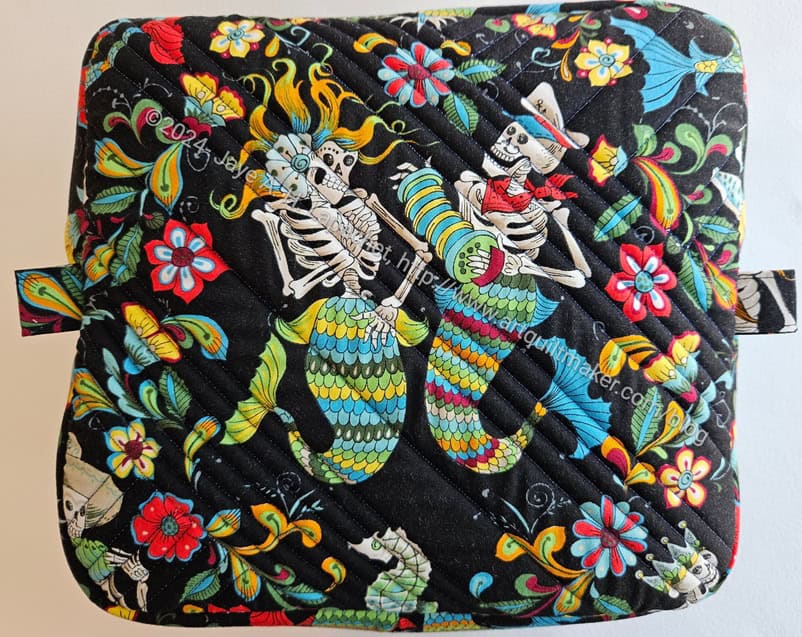
Skeleton Mermaid Enigma - bottom
Skeleton Mermaid Enigma – bottom

I didn’t use my ‘regular’ sugar skull fabric for this one. I used a fabric I bought on my trip to and around Portland and I can’t decide if I like it. The key is whether Gerre likes it.  I thought the seahorses and some of the ocean life were cool, but the skeletons started to creep me out after awhile. If she feels the same, I will make another one of these for her. I’ll have to see what she says. 

I am pleased with the fussy cutting on the bottom. I didn’t have a lot of the fabric and was glad I had enough to highlight the main motif.

Skeleton Mermaid Enigma open

I am also pleased with the way the inside came out. The stripes I bought at the Granary are perfect for the inside.

The pattern calls for a 2.5 inch wide binding. I made the binding 2.25 inches wide, which is my norm for quilting binding. I had to stretch the binding a bit in certain places and trim seams, but mostly the 2.25 inch binding worked well.

Skeleton Mermaid Enigma - interior detail
Skeleton Mermaid Enigma – interior detail

I figured out a great place to put my label on these Enigma bags. The label fits well in the middle of the inside pocket. The label isn’t tucked away unobtrusively and I am not sure how I feel about that.  I am not sure why I didn’t think of it before as it was also easy to install.

As with my sister’s Enigma bag, this one went together pretty easily. I like making the same bags over and over as they get better each time I do it.

Finished: Grab & Go Sleeve

Grab & Go Sleeve for Mom

I finished the Grab & Go Sleeve very quickly and sent it straight off to my mom so she could use it right away.

Both sides essentially look the same. The only difference is that I put a label on only one side of the exterior.

I also used some ‘webbing’ that Cyndi made me take from one of the Sew Day Free Table offerings. The webbing is made out of cotton rather than plastic, like the Tula Pink webbing I used for a couple of the Take a Stand bags.

Grab & Go Sleeve interior

Since this is for my mom, I dug out the Laurel Burch fabric I used for her Mustang Organizers and used that for the lining.

She received it on Wednesday and said that it fits her portfolio perfectly. She said she really liked it, which makes me happy.

If I can think of things for which to use these bags I’ll make more as they are a quick bag to make, especially if you use pre-made webbing for the handles.

Grab & Go Sleeve

Grab & Go Sleeve -exterior side

The Grab & Go Sleeve is a project from Minikins Season 1. Honestly, it is one I never thought I would make. I have at least two laptop bags, so I really don’t need anything else. Also, there is nowhere in the bag for the mouse or the cord.

However, it is a good bag for other things like files and notepads. My mom has a portfolio she is using to take notes during a series of appointments she has. She is using the project bag I made her to carry around her portfolio. It doesn’t really fit very well.

This project immediately occurred to me once I saw what was happening. I am not sure why as I really never thought about this bag before.

This project serves a second purpose as well. I want to make the Heartlands Backpack. It is a ‘choose your own adventure’ bag. The Grab & Go Sleeve is a lighter version of a ‘choose your own adventure’ bag. It has only a few pieces and not many options. I wanted to try an easy ‘choose your own adventure’ bag before I started the Heartlands.

Grab & Go Sleeve- lining with pockets

I decided to add some mesh pockets to the inside to provide a bit of organization.

I also added a D-ring (but rectangular) so she can clips things to the bag if she needs to do so.

Finished: Pink Project Cotton Candy

Pink Project Cotton Candy

I finished one of the Cotton Candy pouches and was reinvigorated after I did a better job than I did with the Slimline version.

I didn’t have the right length zipper in pink, but I thought the orange went with the fabric. I also thought I should have fussy cut the side panels, but didn’t think of it until later. Still, I am happy with the way it turned out.

I used similar fabrics to the fabrics I used in the Pink Project v.1. I wondered if I should make a whole set using the same fabric. I might have enough of that Denyse Schmidt Flea Market Fancy fabric to make a few more bags and pouches. It might bore me, though, to use the same fabric. I already have a different print chosen for the Chickadee. I don’t want to change that choice at the moment.

The inside is also a Flea Market Fancy print. I filled it with some self-care items and it was used to raise money for Phi Mu Foundation, which provides scholarships and disaster assistance to women. We made $80, which isn’t a lot, but the event was only attended by 9 people. I need to get some more self care items to fill up the next ones.

Finished: Blue Triangle Cotton Candy

Blue Triangle Cotton Candy

No, this is not pink, but I am still making it part of the Pink Project, at least for the time being. I don’t want to make a new tag for every project I decide to start.

I was so excited by the triangles that I wanted to use this fabric. I think it is a Carrie Bloomston fabric, but I can’t remember where I bought. I am pretty sure it was a recent purchase.

As mentioned, I am doing a blue version as well as a pink version for two different groups to auction off.

Blue Triangle Cotton Candy - side
Blue Triangle Cotton Candy – side

I wanted to cement my technique for the Cotton Candy pouch after the mistakes I made with the Slimline Cotton Candy. This is one of the pouches that I made. I decided to make one each for the two projects.

Blue Triangles Cotton Candy pouch inside

While I did better this time on lining up the pieces, I didn’t do as well on the zipper. I am not sure why. It looks really wobbly. Most people won’t notice, but it bugs me.

I wasn’t able to anchor the the sides to seam allowance like I did with the Hildegarde. That might be a challenge for another day.

Blue Triangles Cotton Candy zipper end

I did veer the zipper on one side of this bag, but not on the ‘top’.

I decided to fold over the zipper ends and place them where I wanted them rather than hoping for the best when I was veering the zipper. I think the ends look pretty good.

Next to work on is zipper installation.

Cotton Candy – More Starts

Cotton Candy Starts
Cotton Candy Starts

As mentioned, I started sewing some Cotton Candy pouches at Sew Day. I had cut them out as a reminder after I sewed the Slimline version of the Cotton Candy pouch wrong. I was a little angry at myself, because I want to work on new pouches – patterns I haven’t tried before. Even though I love the Cotton Candy pouch, I have made it many times. I felt, however, that I needed to remind myself how to get this pattern right.

I was pleased with the progress I made at our Special Sew Day. I would have liked to have made more progress, but forgot the zippers. When I got this far, it was time to clean up and go home anyway.

I thought I would try the triangle fabric fabric I bought at Bay Quilts recently and see how I liked it in bags.

Both of these will be for the Pink Project. I know one is blue, but I am doing a second batch for the local Alumnae Panhellenic group and want to use some different fabrics.

Slimline Cotton Candy

Slimline Cotton Candy Pouch

I made this Cotton Candy pouch for a friend’s birthday.

It ended up being a ‘slimline’ version as I sewed the side panels to the wrong end of the main panel and had to trim extensively. It worked out and she liked it so no harm.

However, I need to get this right. I have made so many of these pouches that I am shocked and amazed that I made such a big mistake. I am going to make some others to cement the process in my head.