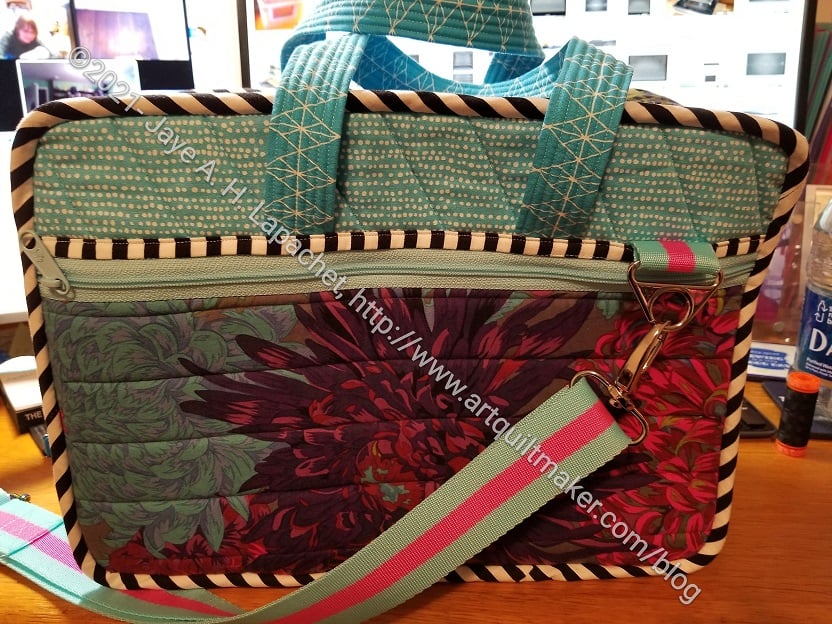
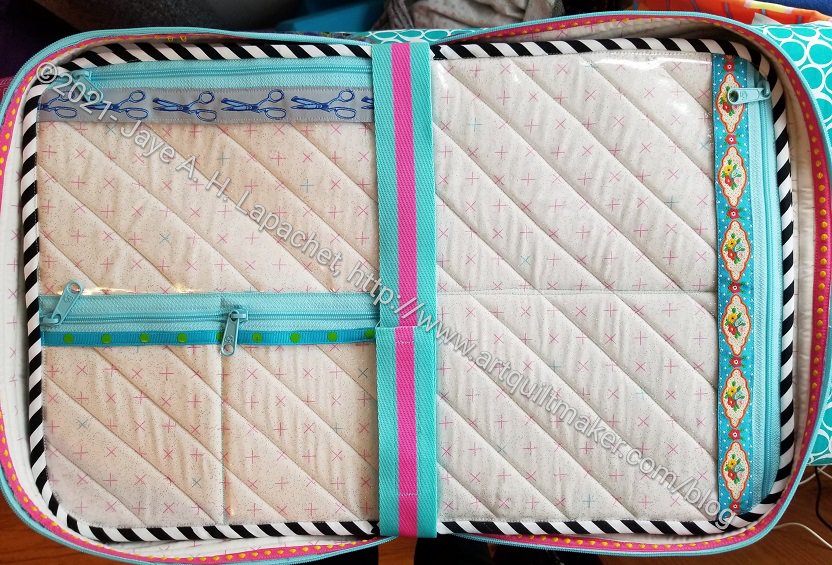
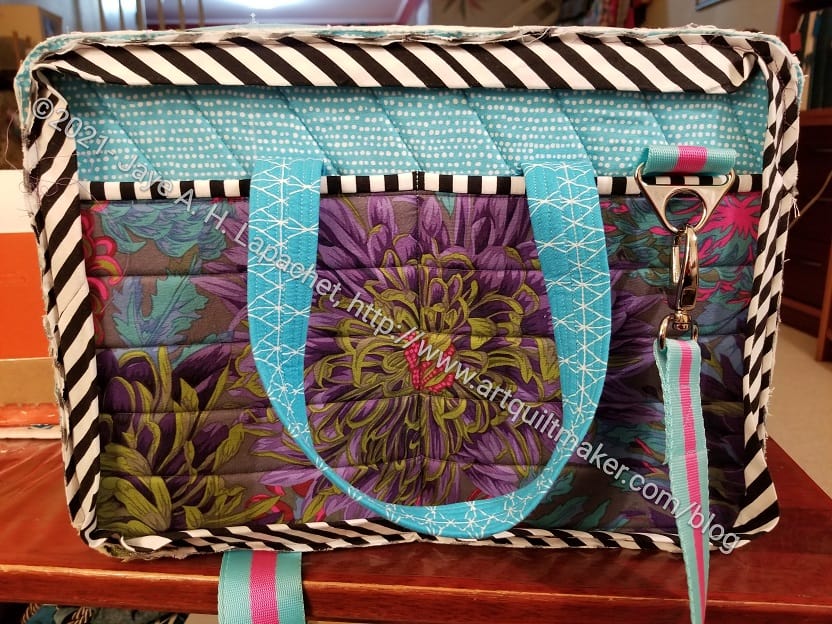
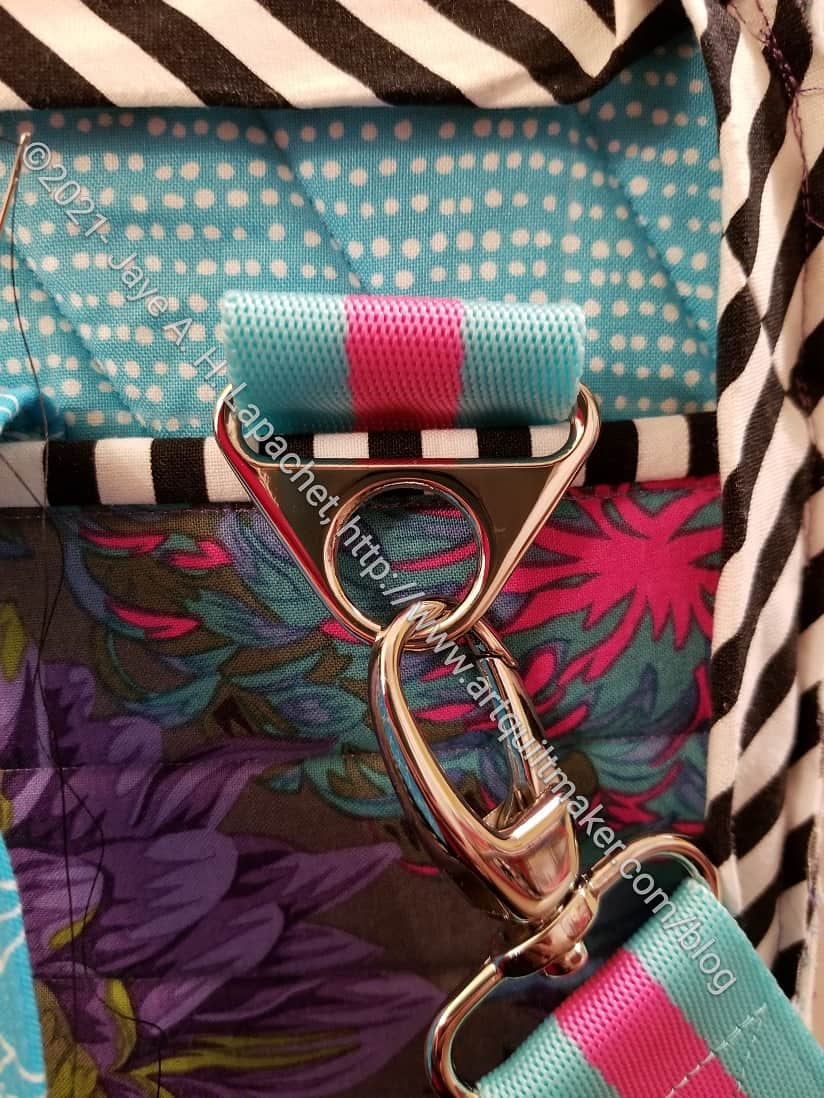
I finally finished the A Place for Everything Bag. This bag is not for the faint of heart. If I had known what it would be like, I might not have made it, but I am glad I did.
I have a love-dislike relationship with ByAnnie patterns. There are a lot of them. Many of the bag shapes are interesting and useful. I can’t, however, wrap my mind around some of the directions. This is not a surprise to those of you who have been reading for a long time. My brain doesn’t work like others. Videos have been helpful. In this case, I found that Annie skips some steps that are considered very basic. After looking through the basics videos, I emailed them and they gave me some suggestions, but also said they don’t have enough resources to do full length videos for every project. Sigh. I blundered through.
I spent a couple of evenings hand sewing the binding down. I know that takes time, but I couldn’t stand the thought of cramming the bag through the machine. I had the time so I hand sewed the binding. I looks great.
APfE: pages strapped in
The strap that keeps the ‘pages‘ in place was WAY too long. Instead of trying to figure out what was going on, I just cut it off, resewed the velcro and moved on with my life.
Despite the problems, I am pleased with the way this came out. I spent a lot of time on the details and it shows. The bag isn’t perfect, but it will be great for when I take the project to Sew Day next week.
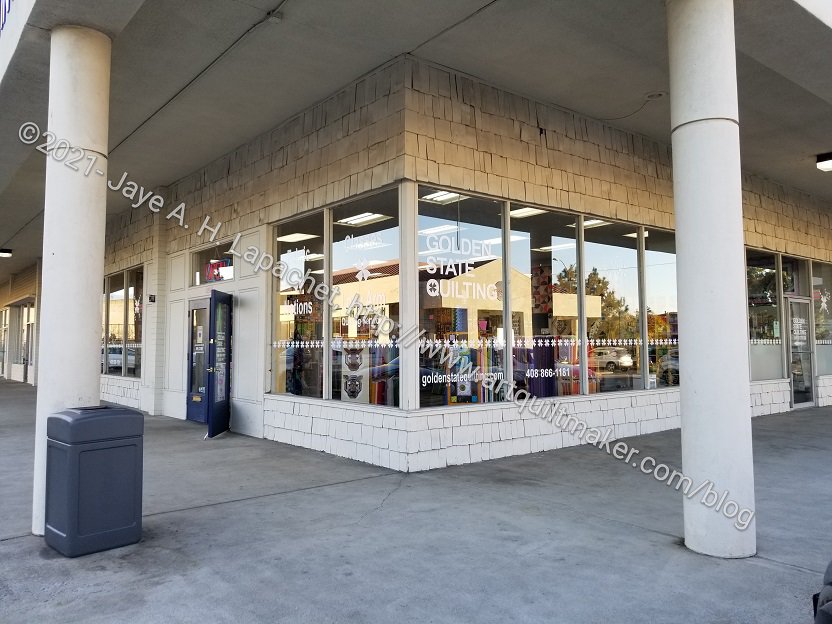
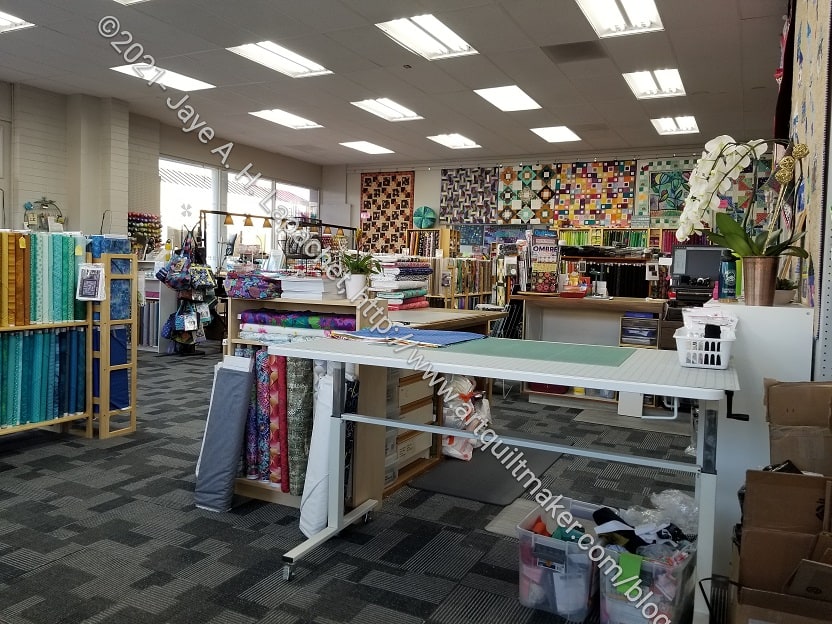
I have been wanting to stop by Golden State Quilting and look at their new space. They moved a few months ago. Since I almost never go anywhere on the weekends (when else would I sew?), I haven’t had a chance. On the way back from lunch and shopping with Friend Julie, I stopped off.
First, I checked to see if they were open. Some quilt shops are closing at 3pm now which is very inconvenient. A point in Golden State’s favor is that they are open normal hours, mostly 10-6. I followed Google’s directions there and found the old shop no problem. Fortunately, I had read that they moved only a few doors down from their new shop. Eventually I found it. The new shop is about 6 spaces and across one parking lot ‘street’ to the left of the old space. For some reason, I imagined it being to the right.
The corner space means a lot of light. That is good for choosing colors and makes the shop nice and bright.
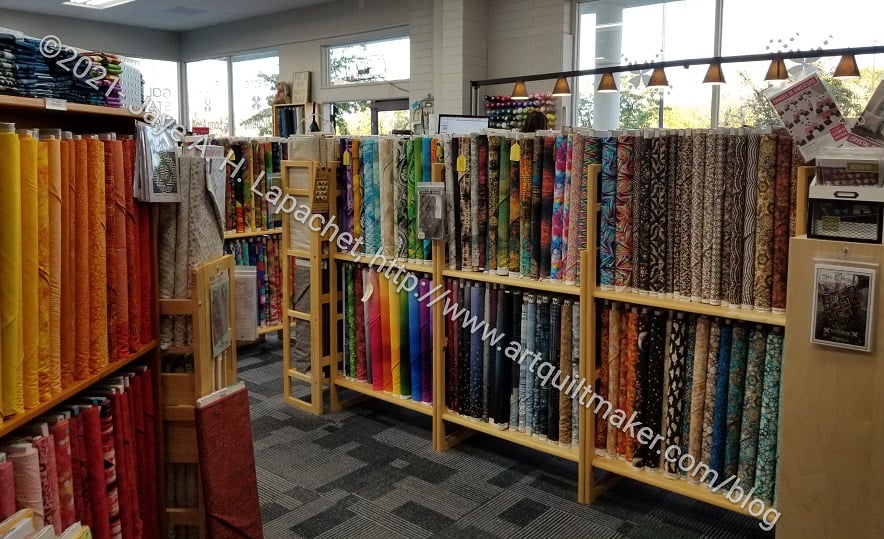
Golden State’s Kaffe selection
One of the reasons I went there is that they have a great selection of Kaffe fabric and I wanted some Shark’s teeth to use to make one of the Reiko Washizawa bags. I think I mentioned it the other day. I found the Shark’s Teeth, but when I was about to get it cut the bolt looked like the teeth were blue. They were, but one of the shop ladies found the black and white for me.
I thought the Kaffe offerings were a little thin, but with all of the supply chain issues, I can’t really complain. I think I also visited right before the new collections are set to be released. They did have a Kaffe puzzle that I was tempted to buy. I restrained myself since I value my hand sewing time right now.
Golden State’s notions
The shop has an excellent selection of notions, except thimbles. I have about 3 thimbles, but really only like two of them and wanted another as a spare. I am going to have to go to a fancy quilt show sometime and get one. I wonder when that will be?
The whole corner under the chicken wall hanging contains notions. That free standing rack in the middle is all rulers. I almost swooned. I love a wide variety of notions. To the right is a variety of interfacings and other miscellaneous notions.
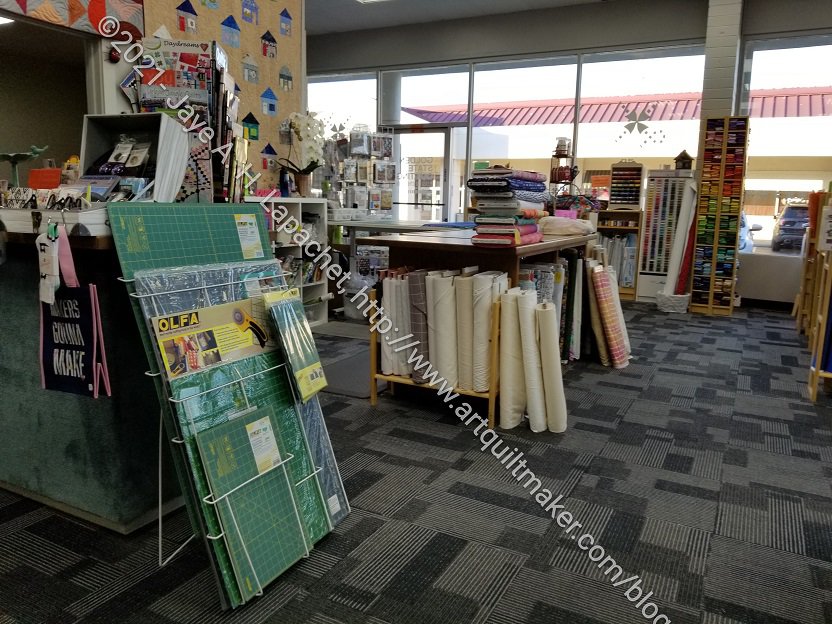
Golden State’s selection of Quilter’s Select tools
They also have quite a good selection of Quilter’s Select rulers and tools.
If I had had a gift certificate to Golden State, I might have bought another ruler or the rotary cutter, but I didn’t so I didn’t buy anything from this display. I am very partial to my OLFA squeezy rotary cutter**, but I am also interested in trying the Quilter’s Select rotary cutter.
I tried the new QS ruler I bought the other day and am pretty happy with it. It doesn’t move once you put it down BUT I also can’t slide it around to get it into the general area before the precise positioning like I do with other rulers. That’s a change. I probably would like a QS 4.5 x 8.5 inch ruler, but I didn’t see one, so I’ll stick with my Creative Grids 4.5 x 8.5** version.
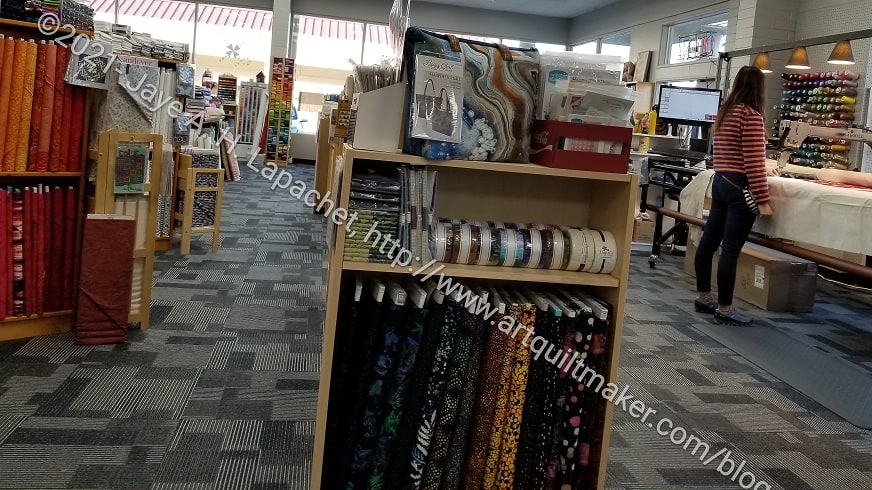
Golden State towards the front
Golden State also does longarming there. The machine was going the whole time I visited and that got on my nerves a little bit. This photo is taken from the entry to the Kaffe room/classroom area looking towards the front of the shop/the corner window. They have the longarm set up in the front of the shop to the left of the front door.
Golden State: from main windows twds Kaffe room
Near the cash register I saw some frames. These are similar to the ones I have used for the Retreat pouches and were the Emmaline brand. I have heard that bag frames are a little hard to find lately. Though I have enough for a few more bags, I bought a couple of the small Retreat bag sized. I’ll have to see what other patterns with which they can be used.
Next to the front door was a variety of different solids and tone-on-tone fabrics. Also, right in front of the front door was new fabric including Tula’s Daydreamer. I bought a couple of half yards for the La Pass project.
Golden State: near cash register
One thing about the shop is that they have a full complement of supplies. In addition to the items I have mentioned above, they have a couple of different design wall fabrics, different sizes of cutting mats and even some gifts.
You can see some thread displays in the background as well.
Golden State: some novelty fabrics
I was also impressed with the number and variety of novelty fabrics. Some were not to my taste, but in contemplating another college pillowcase project, I will need some. Looking at them is always better than ordering online for these types of fabrics.
One of the ladies there has a sharp tongue. I have had run-ins with her int he past, which is one reason I haven’t been there in a long time. She was, again, sharp this time, but I was a little more patient this time. I keep thinking that COVID has us all on edge and gave her a break. Very unlike me, but I guess we all evolve. Also, the shop is big so I could get a little space from her if needed.
January 2022 Golden State Quilting purchases
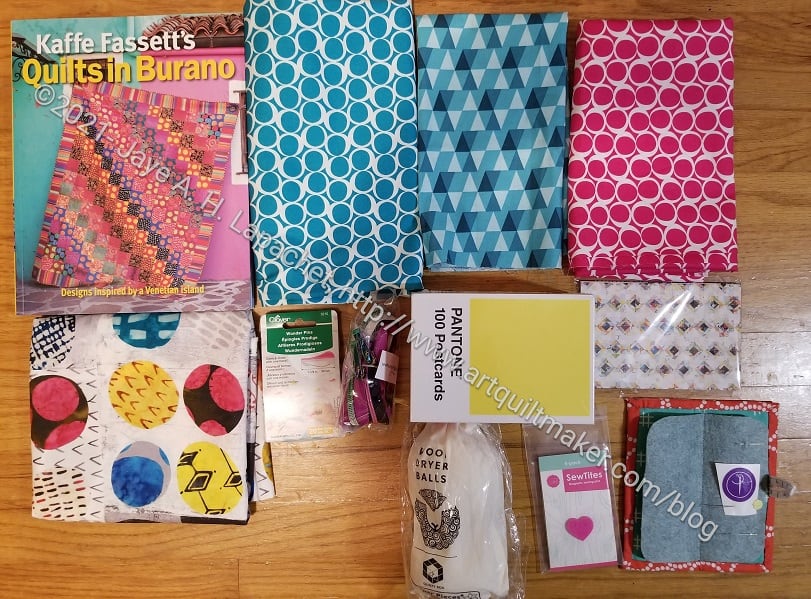
I know I showed what I bought the other day, but here is the stuff again. Everything has been washed and pressed and put away.
All in all, I liked the variety of fabrics and notions. I didn’t really see books or magazines. I must have missed them.
Address: 2435 Winchester Blvd, Campbell, CA 95008-4801
Masks required and hand sanitizer is available at the door.
Nota Bene: I like my OLFA squeezy rotary cutter**, because when you loosen your grip, the blade retracts. You don’t have to do anything to make the blade safe. I wish more rotary cutter designers would take this into consideration.
**Obviously, you should shop at local quilt shops. However, I use affiliate links and may be paid for your purchase of an item when you click on an item’s link in my post. There is no additional cost to you for clicking or purchasing items I recommend. I appreciate your clicks and purchases as it helps support this blog.
After not working on this bag much on Saturday, I decided to do as much as I could on Sunday. I was quick to remind myself that there were too many steps and I couldn’t possibly finish.
A Place for Everything Bag almost finished
I was right, mostly.
I was not able to finish the bag, but I made really good progress and the bag is almost done. I have to finish the binding.
The product came out pretty well. ByAnnie patterns do come out pretty well, though I wouldn’t suggest this bag for someone who hasn’t made a lot of bags. There are videos, but Annie skips over some of the parts she considers to be basic or easy. Of course, those were the ones I had the most trouble navigating.
A Place for Everything Bag – detail
I know the picture above looks weird because of the binding, but I am really pleased with how the bag looks, e.g. the fabrics that I chose. I am also pretty happy with the webbing, though I did have to make up some parts of using it as I went along.
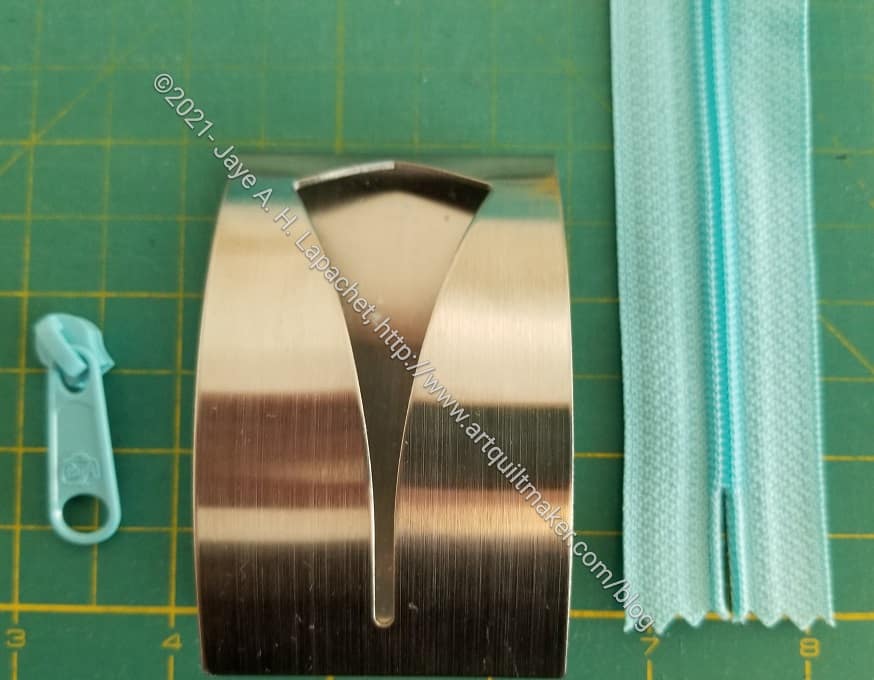
I love this hardware, especially, as I said, the triangle piece. I don’t think I really need the carry strap, but I wanted to make it. I can always use it for a different bag.
I am tempted to make a Take a Stand Bag that matches this one. I have to make one as gift, so I might as well make two, right? I need to finish some other projects before I do that.
Saturday turned out to be a kind of topsy turvy day. Once I finally got to the machine, I wasn’t really up for working on the A Place for Everything Bag. I felt defeated by it and wanted to just finish something.
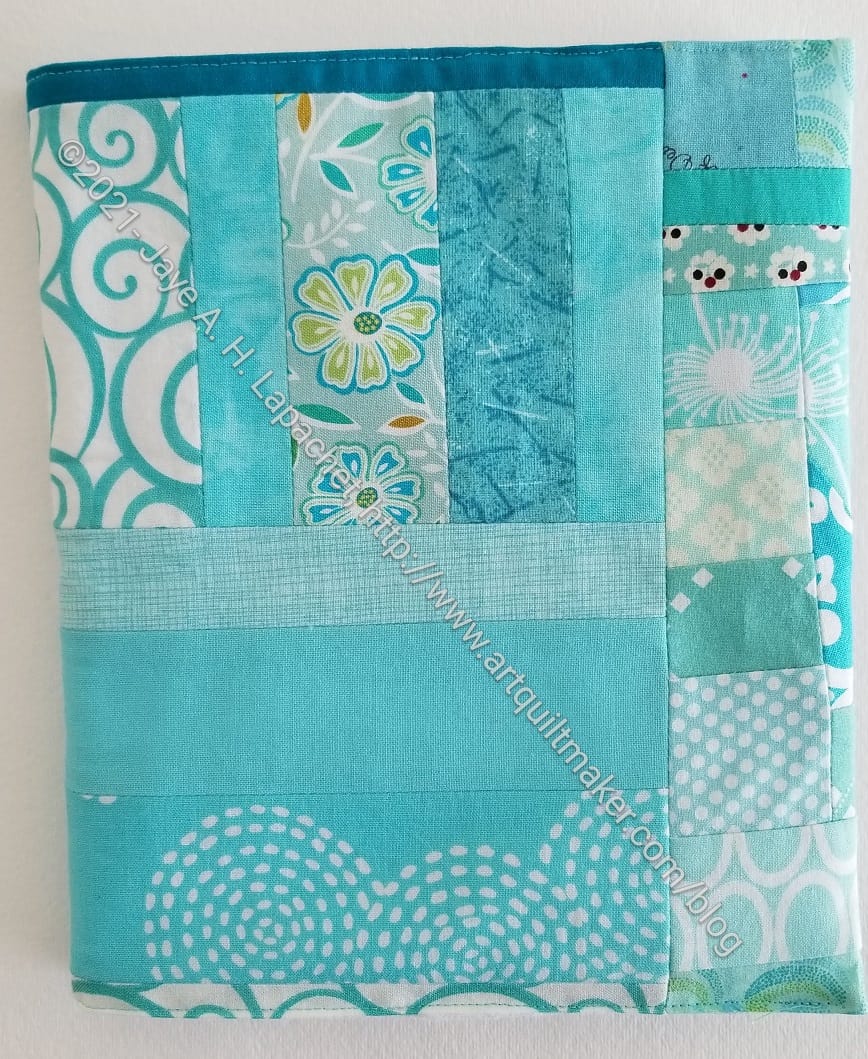
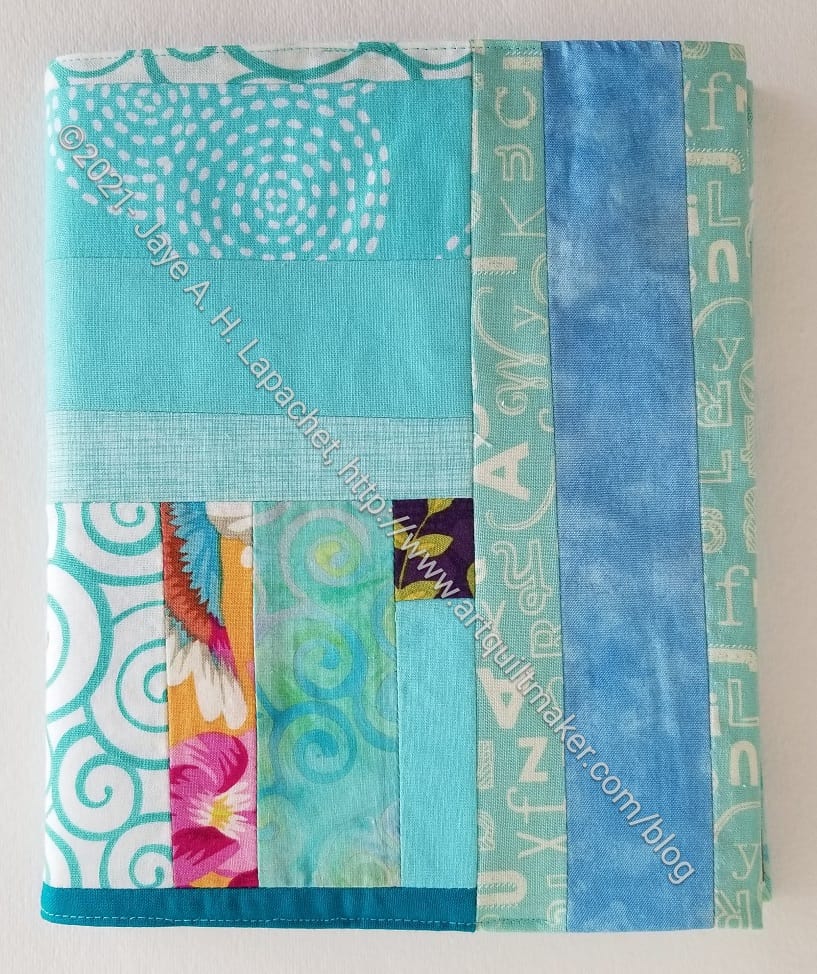
I needed some new journal covers and they are relatively easy to make. I found some already ‘made fabric’ in my blue scrap bin and stitched up a couple of journal covers.
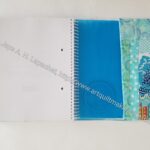
2022 Blue Journal Cover #1 (left inside)
2022 Blue Journal Cover #1 (right inside)
It is pretty easy to make these when the fabric is already sewn together, so this one when together really fast. The hard part was dealing with the flannel, which I have been using for the other side instead of regular fabric. I was running out of the yard I have had for awhile and had to piece bits together. After these two I will need to go back to interfacing a regular piece of fabric. Why buy more flannel when I have plenty of fabric?
2022 Blue Journal Cover #1 (back)
I probably should have used the made fabric for another blue donation quilt. I’m not really worried, though. There are always more scraps.
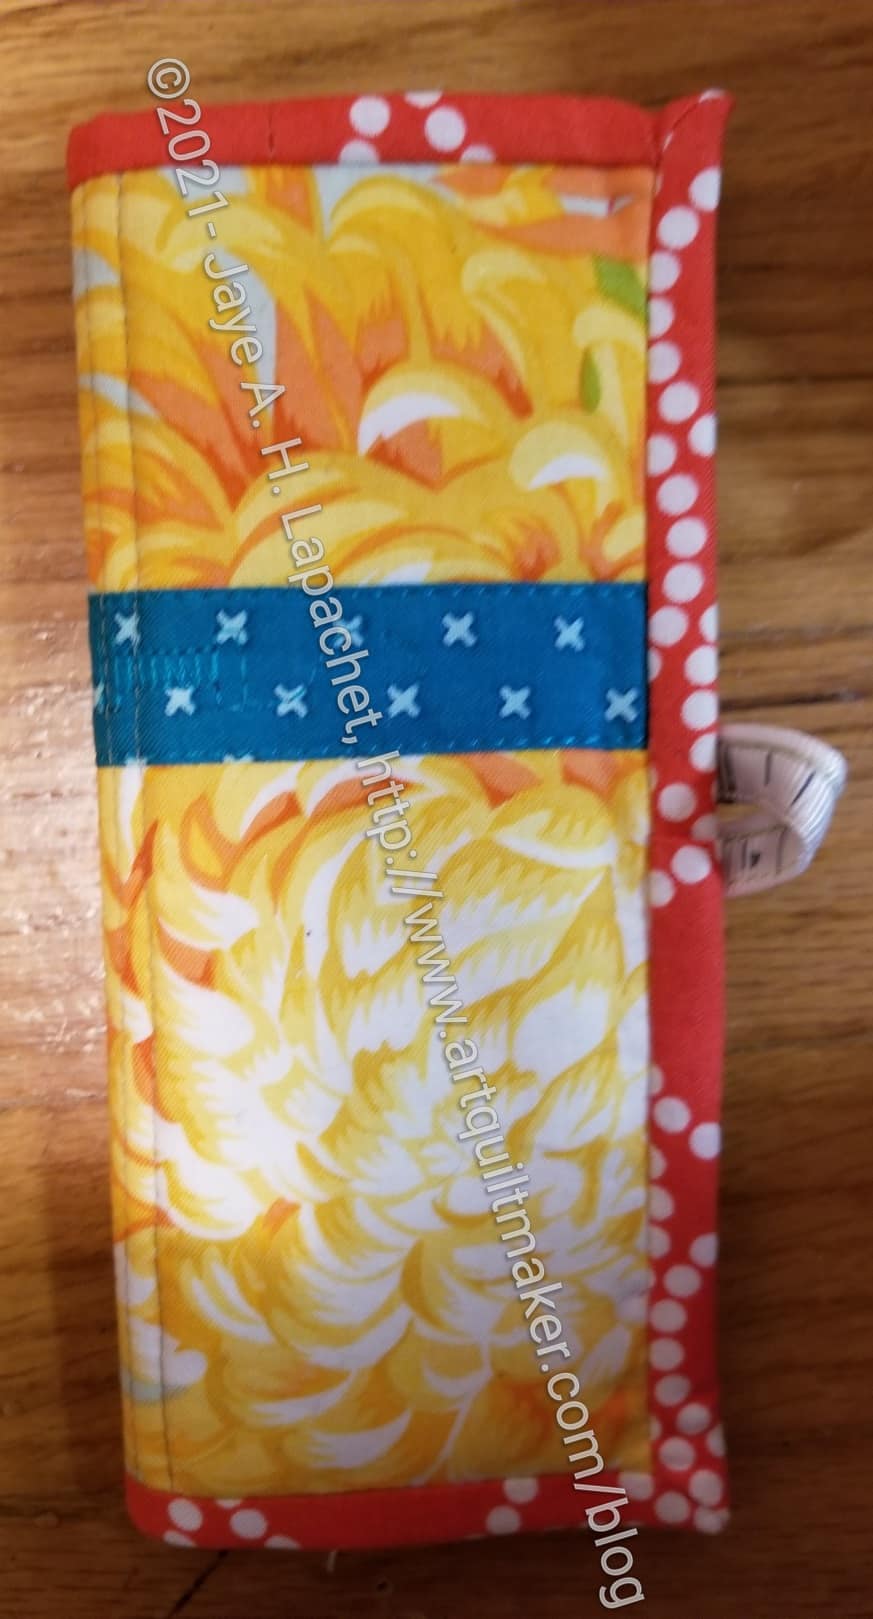
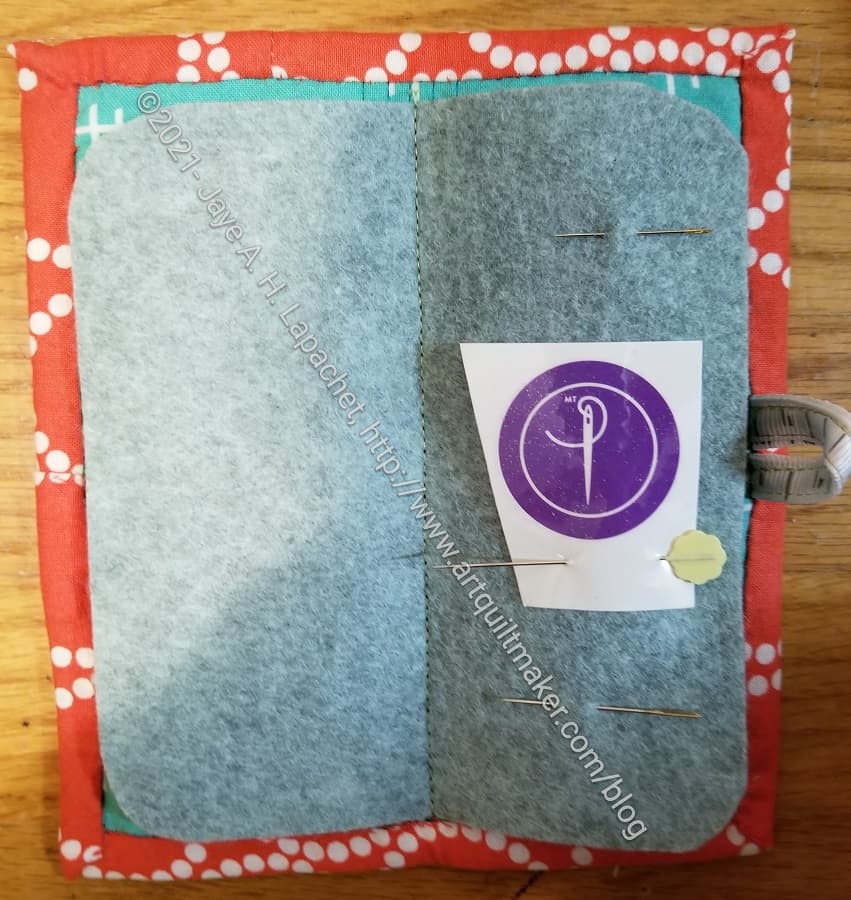
This is the Hold Tite Folio that Julie made for me for my birthday. I talked a little about it yesterday, but wanted to show you more of it.
Friend Julie chose a Philip Jacobs chrysanthemum print as my cover, which I like. The binding is also a favorite print. I love that dot circle fabric.
I didn’t really understand how to use the folio until I read Julie’s post. Unlike using the Sew Tites, you put the pieces together, and then stick them to the inside of the Hold Tite Folio. It doesn’t seem intuitive, but it works.
Hold Tite Folio (left)
Hold Tite Folio (right)
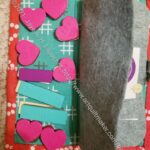
Hold Tite Folio inside
The folio has a piece of felt on the inside to keep the Sew Tites from sticking to each other. As you can see from Julie’s example, you can use the felt for pins and needles.
Julie said she used wool felt, but you can use any kind of felt.
Lillyella Stitchery has the tutorial for the Hold-Tite Folio . I think this is a GREAT ideabecause my Sew Tites, which I use a lot, are always clumped up into massive magnet blobs. I wrote about it before, albeit briefly. I still plan, as I mentioned, to make a couple.
My birthday was last week. Since I am a grownup now, I usually organize something fun to do. DH isn’t good at that, though he made a stellar effort this year.
January 2022 Modern Handmade purchases
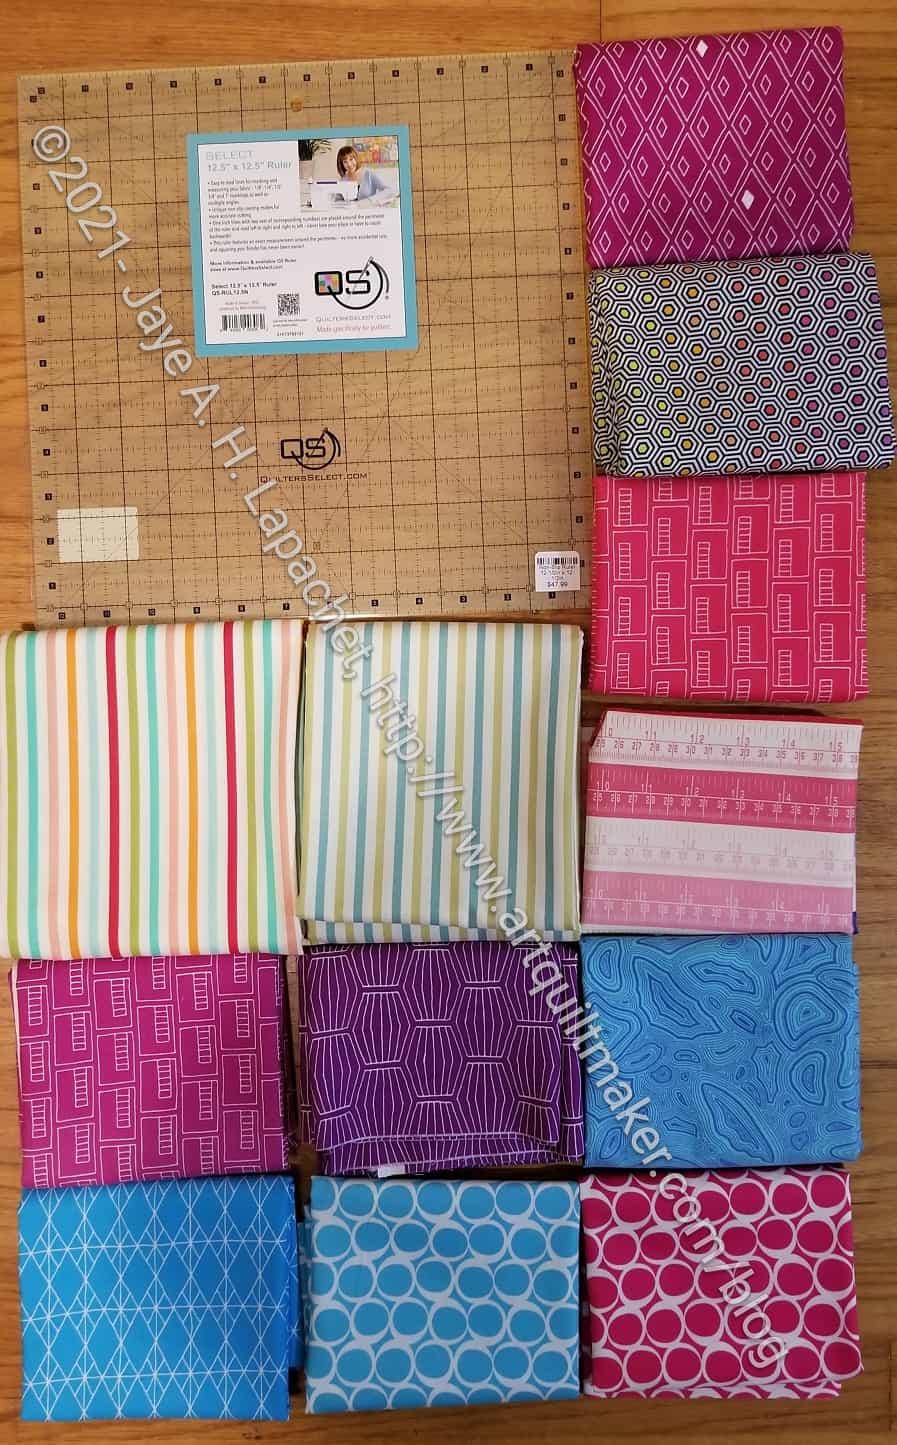
First Friend Julie and I went to Modern Handmade. It is a shop in Scott’s Valley and they have a small, but nice selection of fabric. We went there because the taco place nearby is really good, I had some gift certificates for Christmas and Julie always drives down the hill to meet me. I got a nice selection of fabric. I wanted to get more bag hardware and notions, but they didn’t have much of those. Julie bought a nice selection as well. She has more ideas about how to use her fabrics than I do at the moment.
One thing I am kind of excited about is the Quilter’s Select Ruler. I have been wanting to try one and having a large gift certificate was a great opportunity. My old 12.5 x 12/5 ruler annoyed me the last time I used it. That size was one of the few that Modern Handmade had, so I chose one. The price is pretty high as I mentioned last time I saw the Quilter’s Select products. Of course, I am excited about the fabric.
I am planning to make some pouches with the ruler fabric, probably for the door prize bags.
January 2022 Gifts from Julie
After we ate tacos, Julie gave me the gifts she assembled for me. One was a Hold-Tite Folio (bottom right in photo), tutorial (and GREAT idea) from Lillyella Stitchery. I talked about it before, albeit briefly, and even bought the pieces of steel LillyElla sells to make a couple. I haven’t made them yet, but Friend Julie did and she made one for me! Hers is great, but mine is better! I love the cover, which I will post about soon. I think I can use more than one, so I’ll probably make at least one for myself.
Also, we are going to do a special project with those Pantone postcards. I can’t wait to start, but we need to work out the details.
She also got me some cool metallic zippers from Sew Hungry Hippie. I want to make something with them right away. I have the color scheme I used for the inside of Gerre’s Retreat Bag on my mind for at least one of them. Not sure what kind of pouch, however.
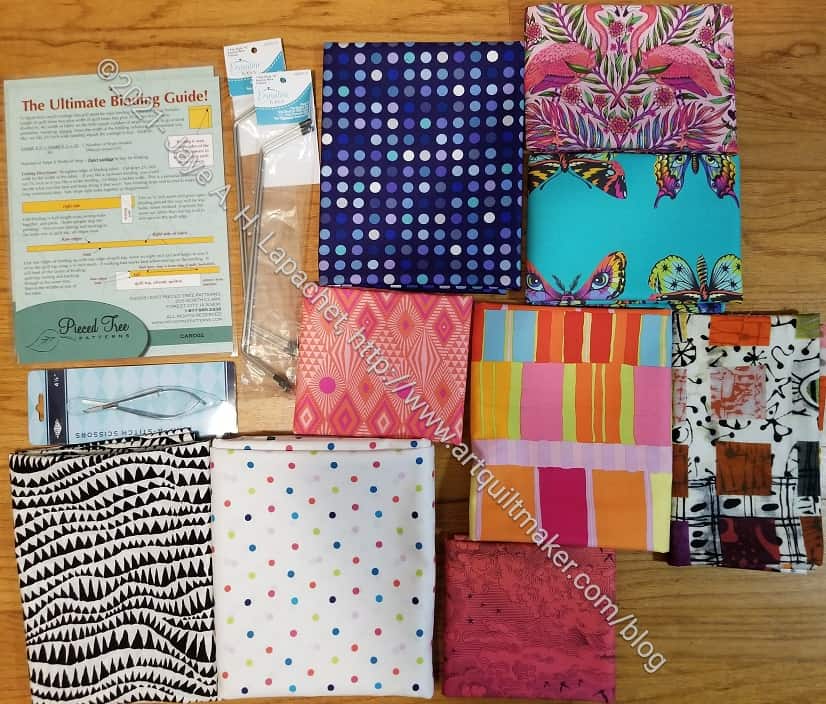
January 2022 Golden State Quilting purchases
I wanted to get home before rush hour started (it isn’t quite as horrible as before the pandemic, but people aren’t really taking public transport, so I try to be mindful), so I left Scott’s Valley at about 3. I decided to stop at Golden State Quilting on my way home. They have recently moved to a new, larger location.
I really like that blue dot and want to make some thing with it soon. I am not sure what. Another bag?
Patchwork Quilted Bags by Reiko Washizawa
One of the reasons I stopped was to get some Shark’s Teeth fabric (bottom left, above photo). I received a copy of Patchwork Quilted Bags** by Reiko Washizawa. I want to make that bag on the front with Shark’s Teeth on the sides and the Brocade Peony fabric in the middle. I wont’ be appliqueing anything to the bag. I just like the shape of it. I need to finish the A Place for Everything v.2 bag first.
DH offered to take me out to dinner at a local restaurant. One whole side overlooks the ocean so we were able to watch the waves we ate. This was our second time at that restaurant and I enjoyed it.
I received calls and texts from various friends. I talked to my Dad for awhile, but mostly about his health. I had a really nice couple of days.
**I use affiliate links and may be paid for your purchase of an item when you click on an item link in my post. There is no additional cost to you for clicking or purchasing items I recommend. I appreciate your clicks and purchases as it helps support this blog.
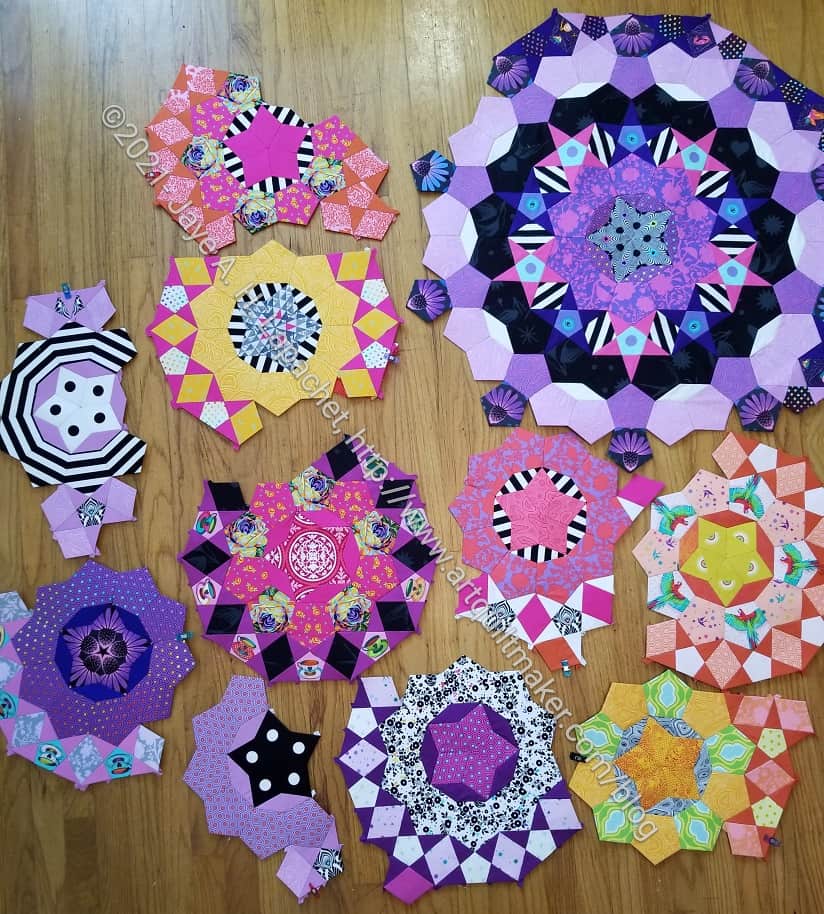
I am one third of the way finished with La Passacaglia! Can you believe it? I can’t. I am amazed that the time has flown by. Towards the end of 2022 I should be finished with the piecing.
I may sew some of the rosettes together where it makes sense, but we’ll see. I have about a week to get some bindings done before Month 7 is shipped.
I thought I was crazy when I committed to this project, but I don’t feel crazy now. I am really happy that I have the group to rely on and also my guild-mate Lindsay. This project is totally doable with these tools.
I can understand why people move on to another Willyne Hammerstein EPP** after they finish La Pass. The Half Hexie EPP I started some time ago seems super boring now.
**I use affiliate links and may be paid for your purchase of an item when you click on an item link in my post. There is no additional cost to you for clicking or purchasing items I recommend. I appreciate your clicks and purchases as it helps support this blog.
I spent Sunday working on the A Place for Everything bag. I despaired at making any progress, because the handle instructions didn’t seem to make any sense.I know part of this was that I had lost momentum. It makes me think I need to make the Take A Stand bag that has been on my list while I am in tune with ByAnnie bags.
Fortunately, ByAnnie has a series of Handles and Straps videos, which were very helpful. I’d like to see a list of the projects that use the techniques included under the various videos. There may be a list, but I haven’t found it yet. It took me some time to sort through them to find the one I needed. I used:
#5-Making an Adjustable Strap Using a Widemouth Slider : Watch step-by-step as Annie shows how to attach a widemouth slider to make a strap adjustable for carrying over the shoulder or for carrying cross-body.
#6-Making a Detachable Strap : Learn to attach the necessary hardware to make an attachable/detachable strap.
APfE: Adjustable Strap
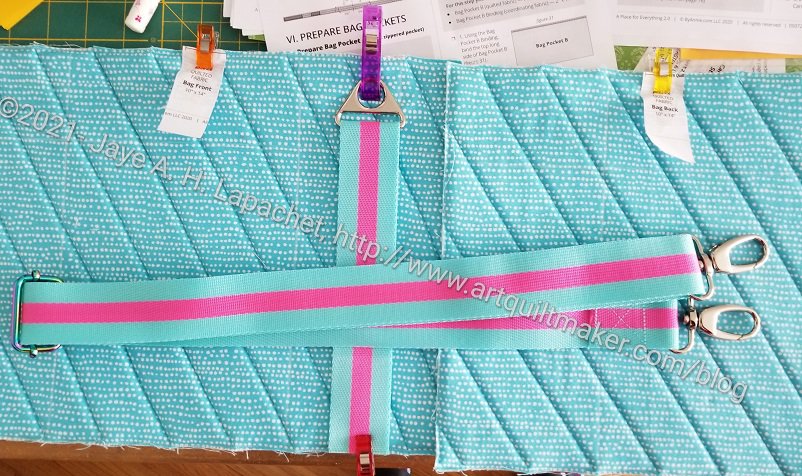
I finally got the adjustable strap made and am pretty pleased with it.
I am also super pleased with the triangle hardware. I have known about them, but don’t think I have used them before. This won’t be the last time! They are great, because they don’t roll around after installation like D-rings. I am in the process of installing them on the bag pockets. Once the bag is finished I will be able to clip the adjustable strap to them.
Webbing ends show
I didn’t follow the handle and strap making directions, because I decided to use the new Tula Pink webbing. I ran into a few problems. First, I ended up making handles from fabric and Soft & Stable, because I didn’t have enough of the webbing. Second, there were no instructions on finishing the ends of the webbing. The webbing frays/shreds like crazy, so some kind of sealing process needs to take place. I couldn’t find any tutorials or even any pictures of what others have done. I ended up using Aleene’s Tacky Glue** on the edges of some of the pieces and L’Oreal Miracle Base Coat** on others. I wanted to see the difference. I considered burning the edges, but was reluctant because of the smell and, also, I didn’t want the edges blackened at all. The webbing edges will show, regardless, and I wanted them to be as neat as possible.
Both worked well. The glue took longer to dry, but I worked on other things while it dried. I would recommend cutting the end and sealing it immediately. The cut end seems to spontaneously fray. I covered my work surface with wax paper**. I like the wax paper because one side is slippery-ish. It is covered in wax and while the glue sticks it doesn’t bond to the wax paper. I haven’t tried it, but parchment paper** would probably work as well.
In general, I found the webbing easy to work with. I was able to sew through two layers plus fabric and Soft & Stable pretty easily. I did put in a new needle and sewed slowly.
This bag takes a long time. Stay tuned for more progress!
Tula Pink video on how she deviates from the pattern to make more design decisions
Tula Pink video on applying ribbon to cover ‘connections’
#5-Making an Adjustable Strap Using a Widemouth Slider : Watch step-by-step as Annie shows how to attach a widemouth slider to make a strap adjustable for carrying over the shoulder or for carrying cross-body
#6-Making a Detachable Strap : Learn to attach the necessary hardware to make an attachable/detachable strap
**I use affiliate links and may be paid for your purchase of an item when you click on an item link in my post. There is no additional cost to you for clicking or purchasing items I recommend. I appreciate your clicks and purchases as it helps support this blog.
After finishing Month 6, I went back to month 3 and finished the last bits over the weekend. I am thrilled to be completely caught up.I didn’t have that much left to sew on Month 3, but in total there was a lot to complete and it seemed to take a long time. Those thin triangles are everywhere!
I do feel slightly bereft at not having anything to work on for La Pass. I gave myself a little shake, however and started working on Gelato’s binding, which has been waiting for months.
A long time ago, I made a quilt called Spiky Stars, which won one of the few quilt show awards I have won. I made it after taking a class from Doreen Speckman where I made the first Interlocking Triangles quilt. Ever since I finished Spiky Stars I have wanted to make another version using this technique. I have played around in EQ since v.4 with various designs, but never quite making one that works for me.
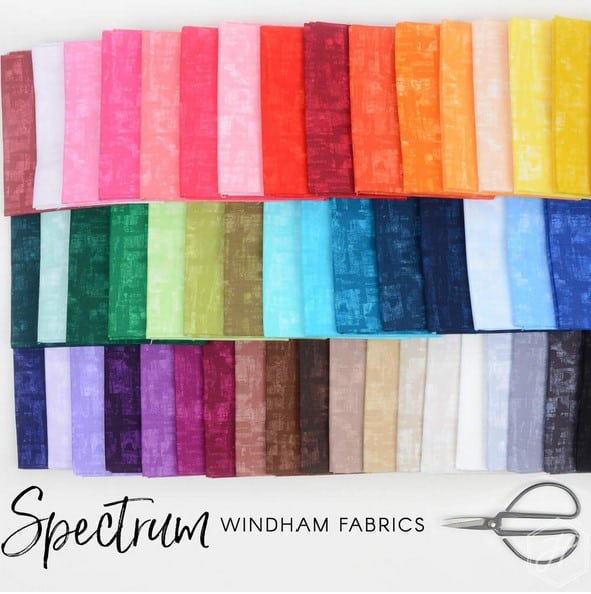
Spectrum by Windham
Recently, at Hawthorne Supply Company, I saw the Spectrum FQ pack by Windham. I decided that it was time to make another IT quilt and this was the impetus.
Since I ordered this FQ pack, I have been busily working on designs. I have made at least 15 different blocks, set them into a quilt design and decided that I need another small tweak. I made some good progress on Friday night and may have found my design. We’ll see.
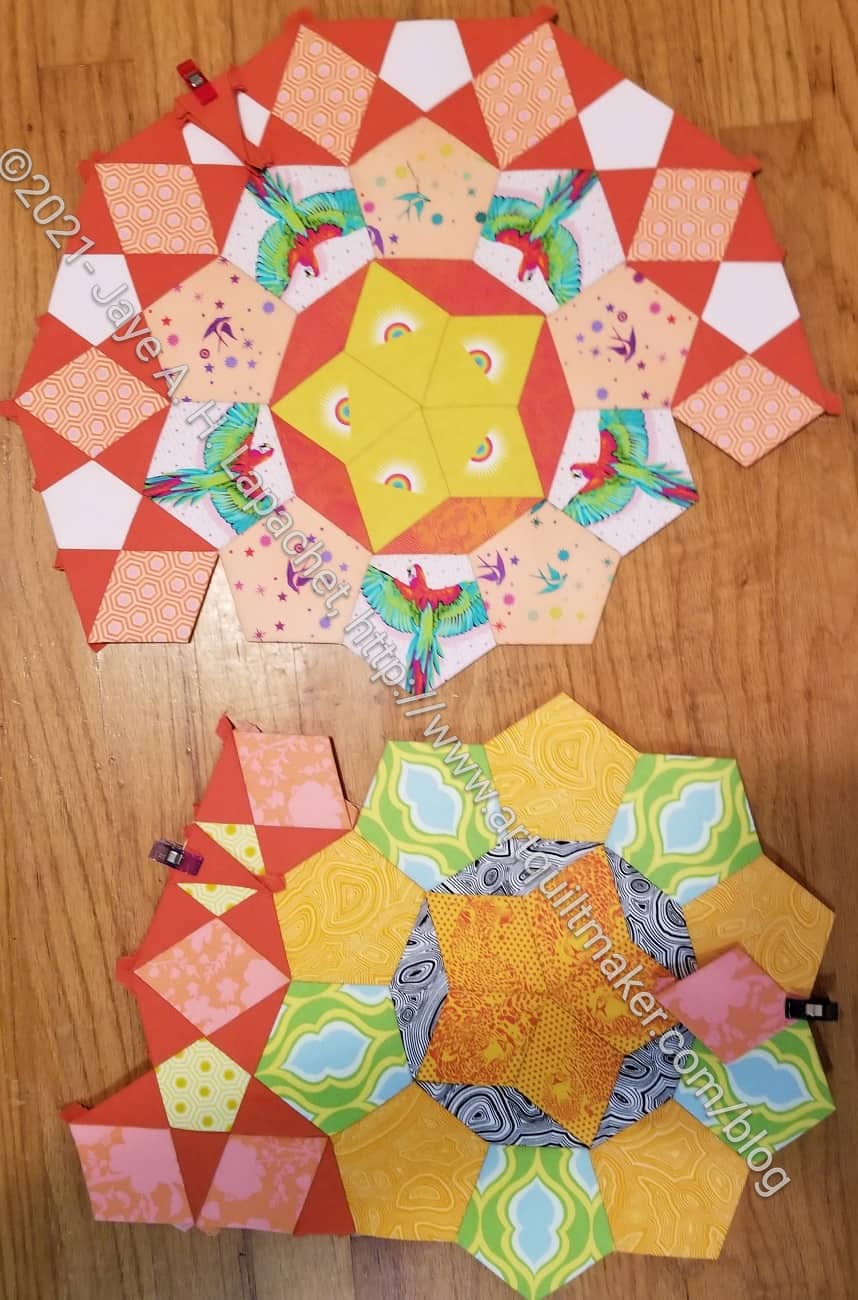
I finished the rosettes for Month 6!!! I can’t tell you how excited I am to report that completion. It really makes a difference sewing every evening for an hour or so.
I also notice that I am more in tune with the project. I am more aware of strategies to line things up and I don’t feel stressed about stitching fast, so I am making fewer errors.
Of course, the giant puzzle will come back at some point, but it won’t be before April, so I have more time.
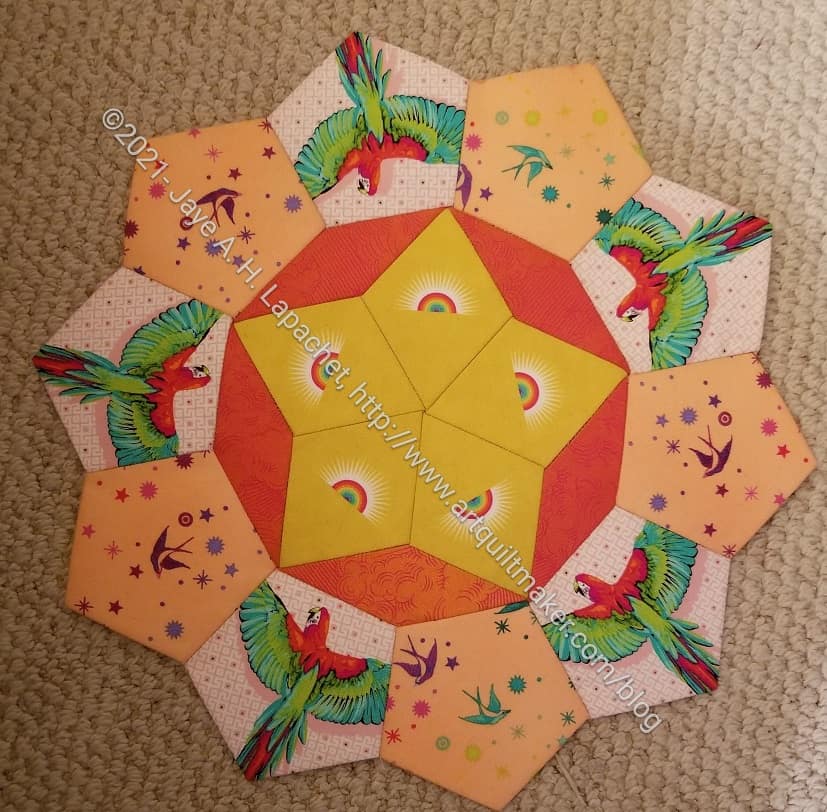
Month 6 – center of one rosette
First, I finished the center of one rosette and I was thrilled.
The colors aren’t really my style, but I was too exhausted to make any changes.
I do kind of like the fussy cut parrots. I know I have been saying that I am not using many of the animals, but I like the colorful quality of these parrots, so I used them. They don’t scream “this is a Tula quilt” to me. I may be deluding myself.
Lindsay pointed out that she didn’t like the alternating fabrics (pentagons). I realized it is not a favorite either. My go-to response is that in the grand scheme of the whole quilt, it won’t be that noticeable. Also, as I have said before, I bought the fabric option and I need to use it.
Now I am back to finishing up Month 3. I might be able to finish it tonight.
We are now 1/3 of the way finished with this project. Can you believe it? Time has flown by.
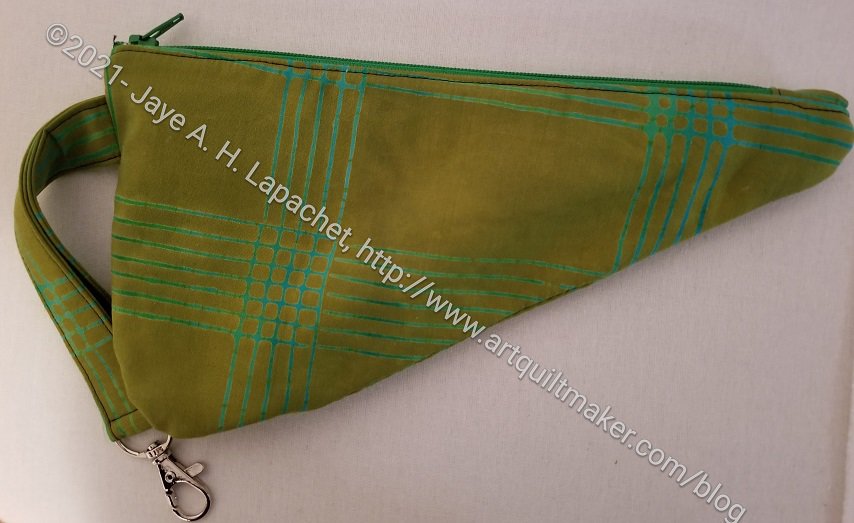
I got a bug in my ear to make some scissor cozies over the weekend. I’m not sure why, but I just went with it and made two. I didn’t like the way the tips came out, but I am pleased with the overall effect.
I made a scissor cozy for Julie and one for my Mom some time ago, so I had the directions, which I tried to use. There was some confusion, so went and looked up the pattern on Sotak Handmade’s IG feed. It turns out she has a YouTube tutorial now, so I watched that. She has tightened up the pattern and made a few changes, which worked well for me.
I used flannel for the inside instead of batting. I am not sure it made the corners much thinner. I might keep the batting away from the corners in a future version.
This one was for Maria just because. No particular reason. Making two was just as easy as making one. I added the leash.
I felt confused and exhausted the other day when I finally got the pieces I needed quilted and cut. The prep on these ByAnnie bags are not trivial.
Zipper pocket installation
I spent time on and off prepping pockets, then all day Sunday making the ‘pages’, which are a big feature of this bag.
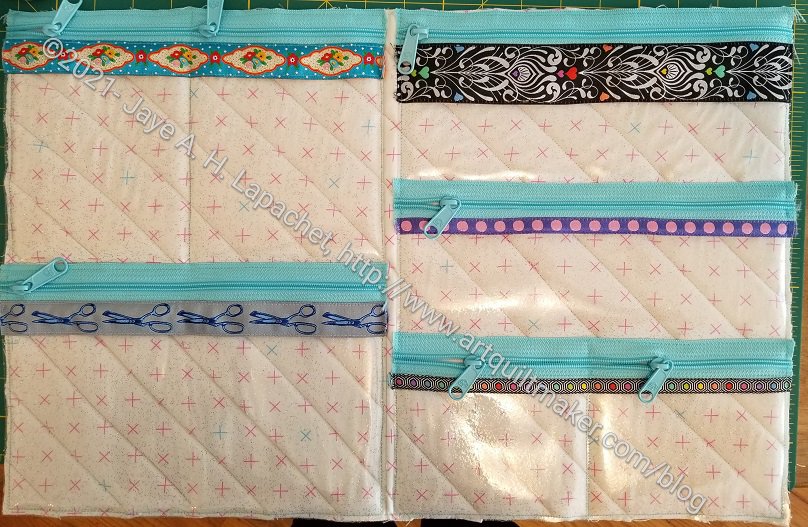
I chose to make all vinyl pockets, but with either type of pocket (mesh or vinyl), you have to add zipper heads to the zipper tape and then sew the zippers to the vinyl. There are a lot of pockets so it took forever. It took even longer, because, again, I used Tula Pink’s suggestion of covering the edges of the zippers with ribbon. I really like the effect, but it did take time.
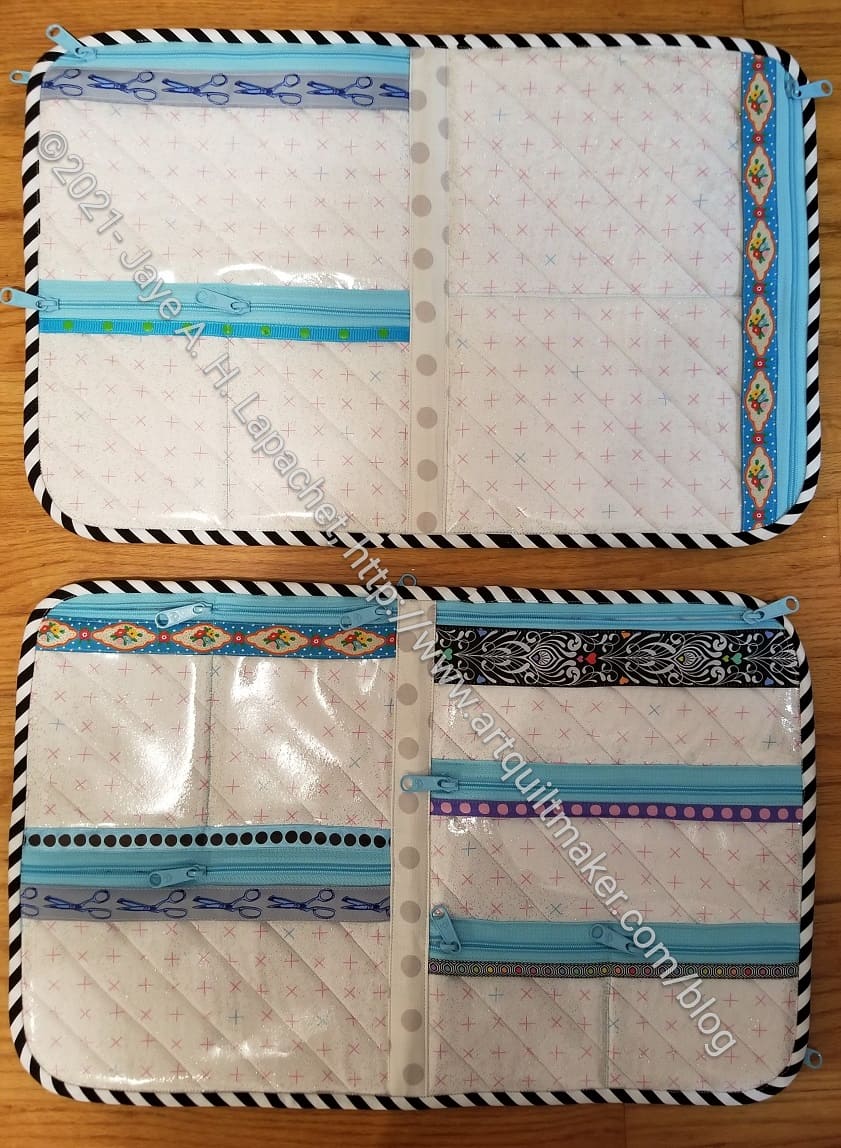
Finished Pages – front
I added a few more pockets than the pattern suggested. Fortunately, I was working on the project in little bits of time. This gave me time to think about the sewing before I actually did it. I realized that I would be sewing pockets to the back of a page that had pockets on the other side and that I had to be really careful. I only ran into problems one time and I was able to cover the part I didn’t like with ribbon. I am pleased, though, because I ended up with more pockets.
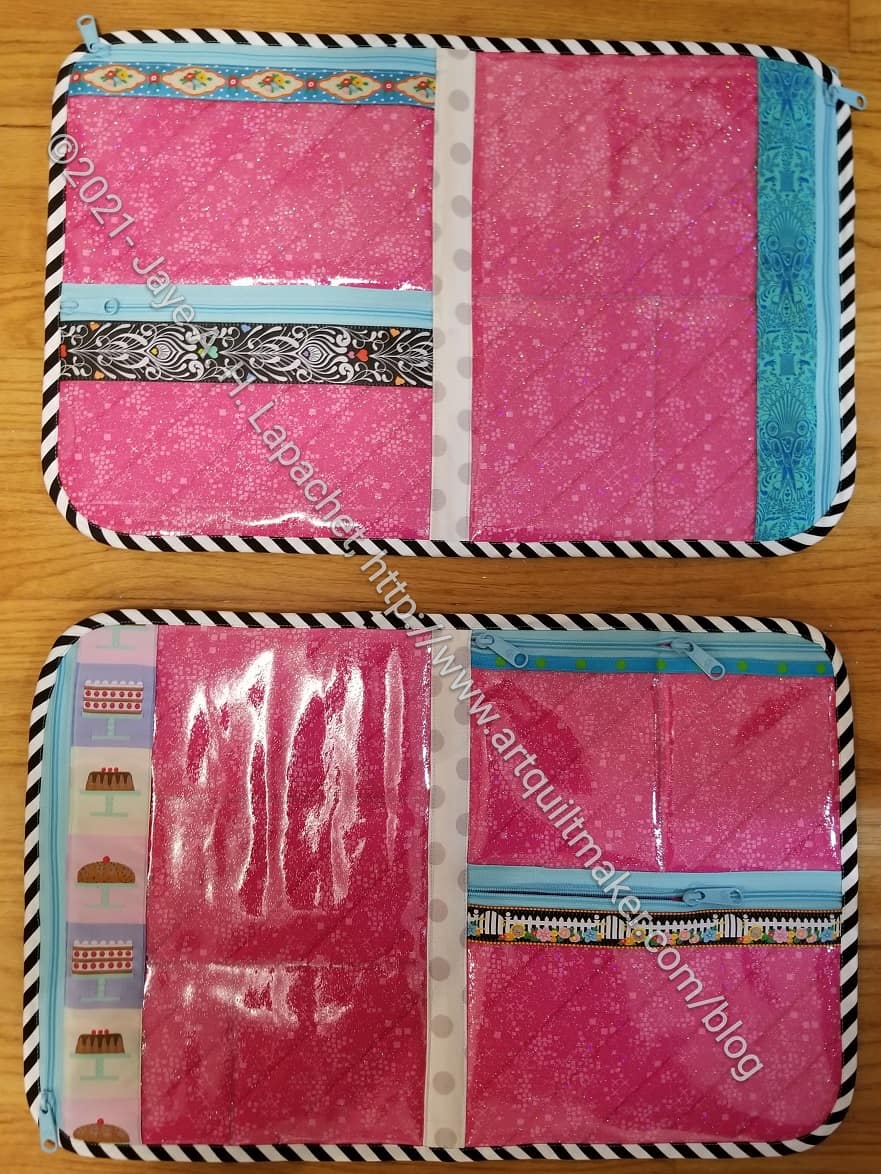
Finished Pages – back
There are two sets of page. Each full page has two facing half pages. The pattern suggests you can play around with the pages and put they type of pages you want, but the choices are limited by the sewing.
You have to put one of the full page pockets (see pink back, bottom left) behind the two or three pocket pages, for the most part. If I make this bag again (or additional pages to swap out), I will make sure there is a full page behind a page of pockets with 2 or 3 pockets.
The pages are done and I am really pleased. This bag is taking much longer than I thought. Forget about the months I just thought about working on it. These four pages took me about 8 hours just to sew, not including prep. People will make these bags for you on Etsy for about $200 and the money is totally worth it!
I have said before that adding zipper heads to zipper tape is pretty easy. I don’t do it that often, so I always have to look it up. The main tutorial I use is Sara Lawson’s tutorial. Sara provides a ton of detail and I would advise watching it at least once. I am writing a quick tutorial so you can see another version.
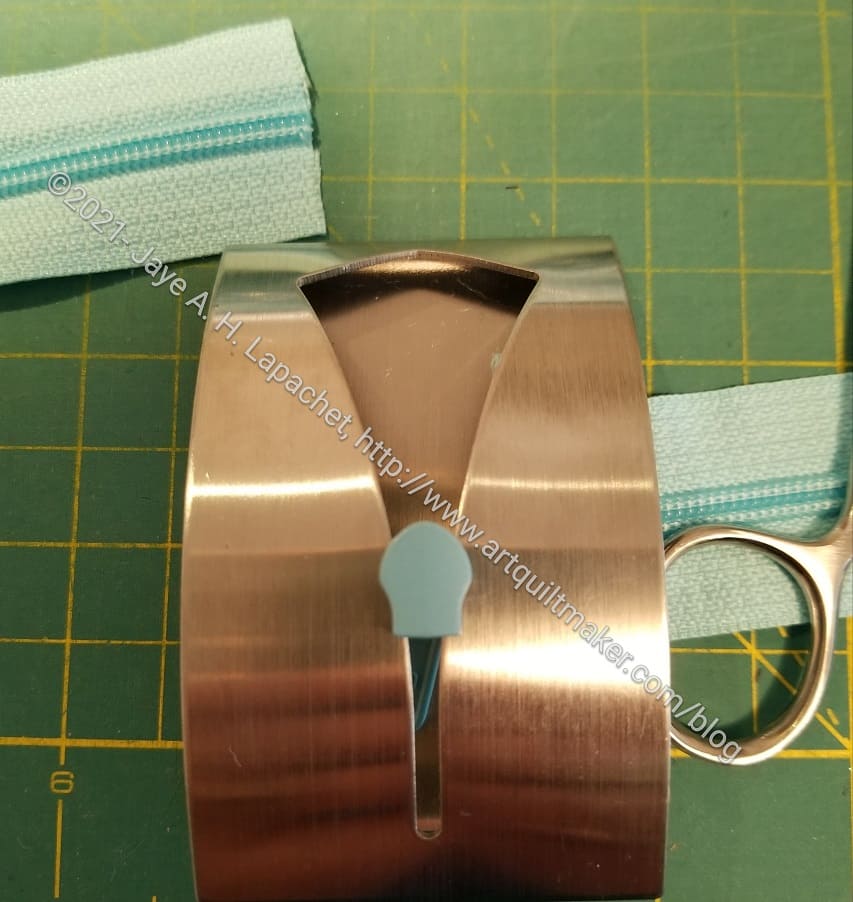
1. Place your zipper head face down in your towel holder
2. Flip your zipper tape wrong side up. N. B. This means that both zipper tape and zipper head are facing in the same direction, wrong side up
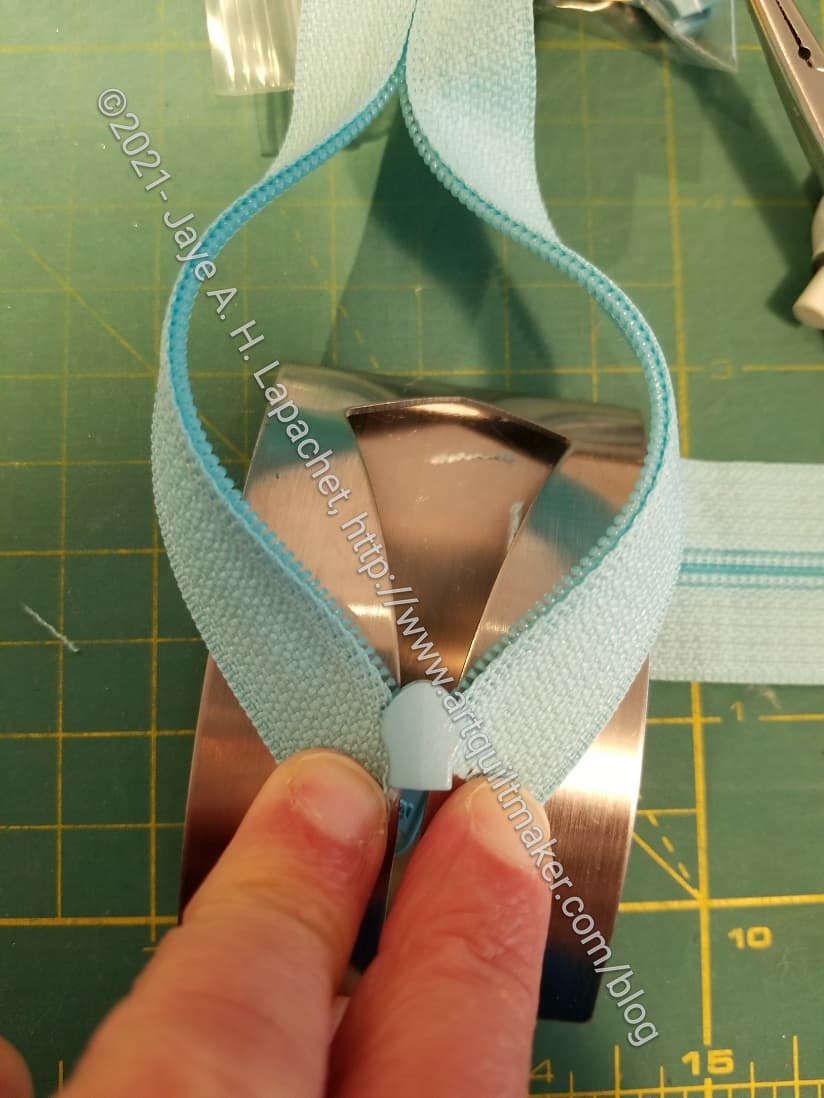
3. Pull your zipper tape apart 3-4 inches and configure in a V formation
Make a V with the zipper tape
4. Carefully place each end of the zipper tape into each side of the zipper head
5. Push the tape in evenly until you can pull from the bottom
Completed zipper head installation
Voila! You did it!
In the future you can find this tutorial on the tutorials page.
Resources:
Natalie from Sew Hungry Hippie has a video tutorial using a jig she sells
*N.B. : If you use a fork, you might want to get one at a thrift store and just use it for zippers rather than using one you eat with.
**I use affiliate links and may be paid for your purchase of an item when you click on an item link in my post. There is no additional cost to you for clicking or purchasing items I recommend. I appreciate your clicks and purchases as it helps support this blog.