Yes, I am reporting on another quilt top/back ready to quilt. The last one was the Triple Star.
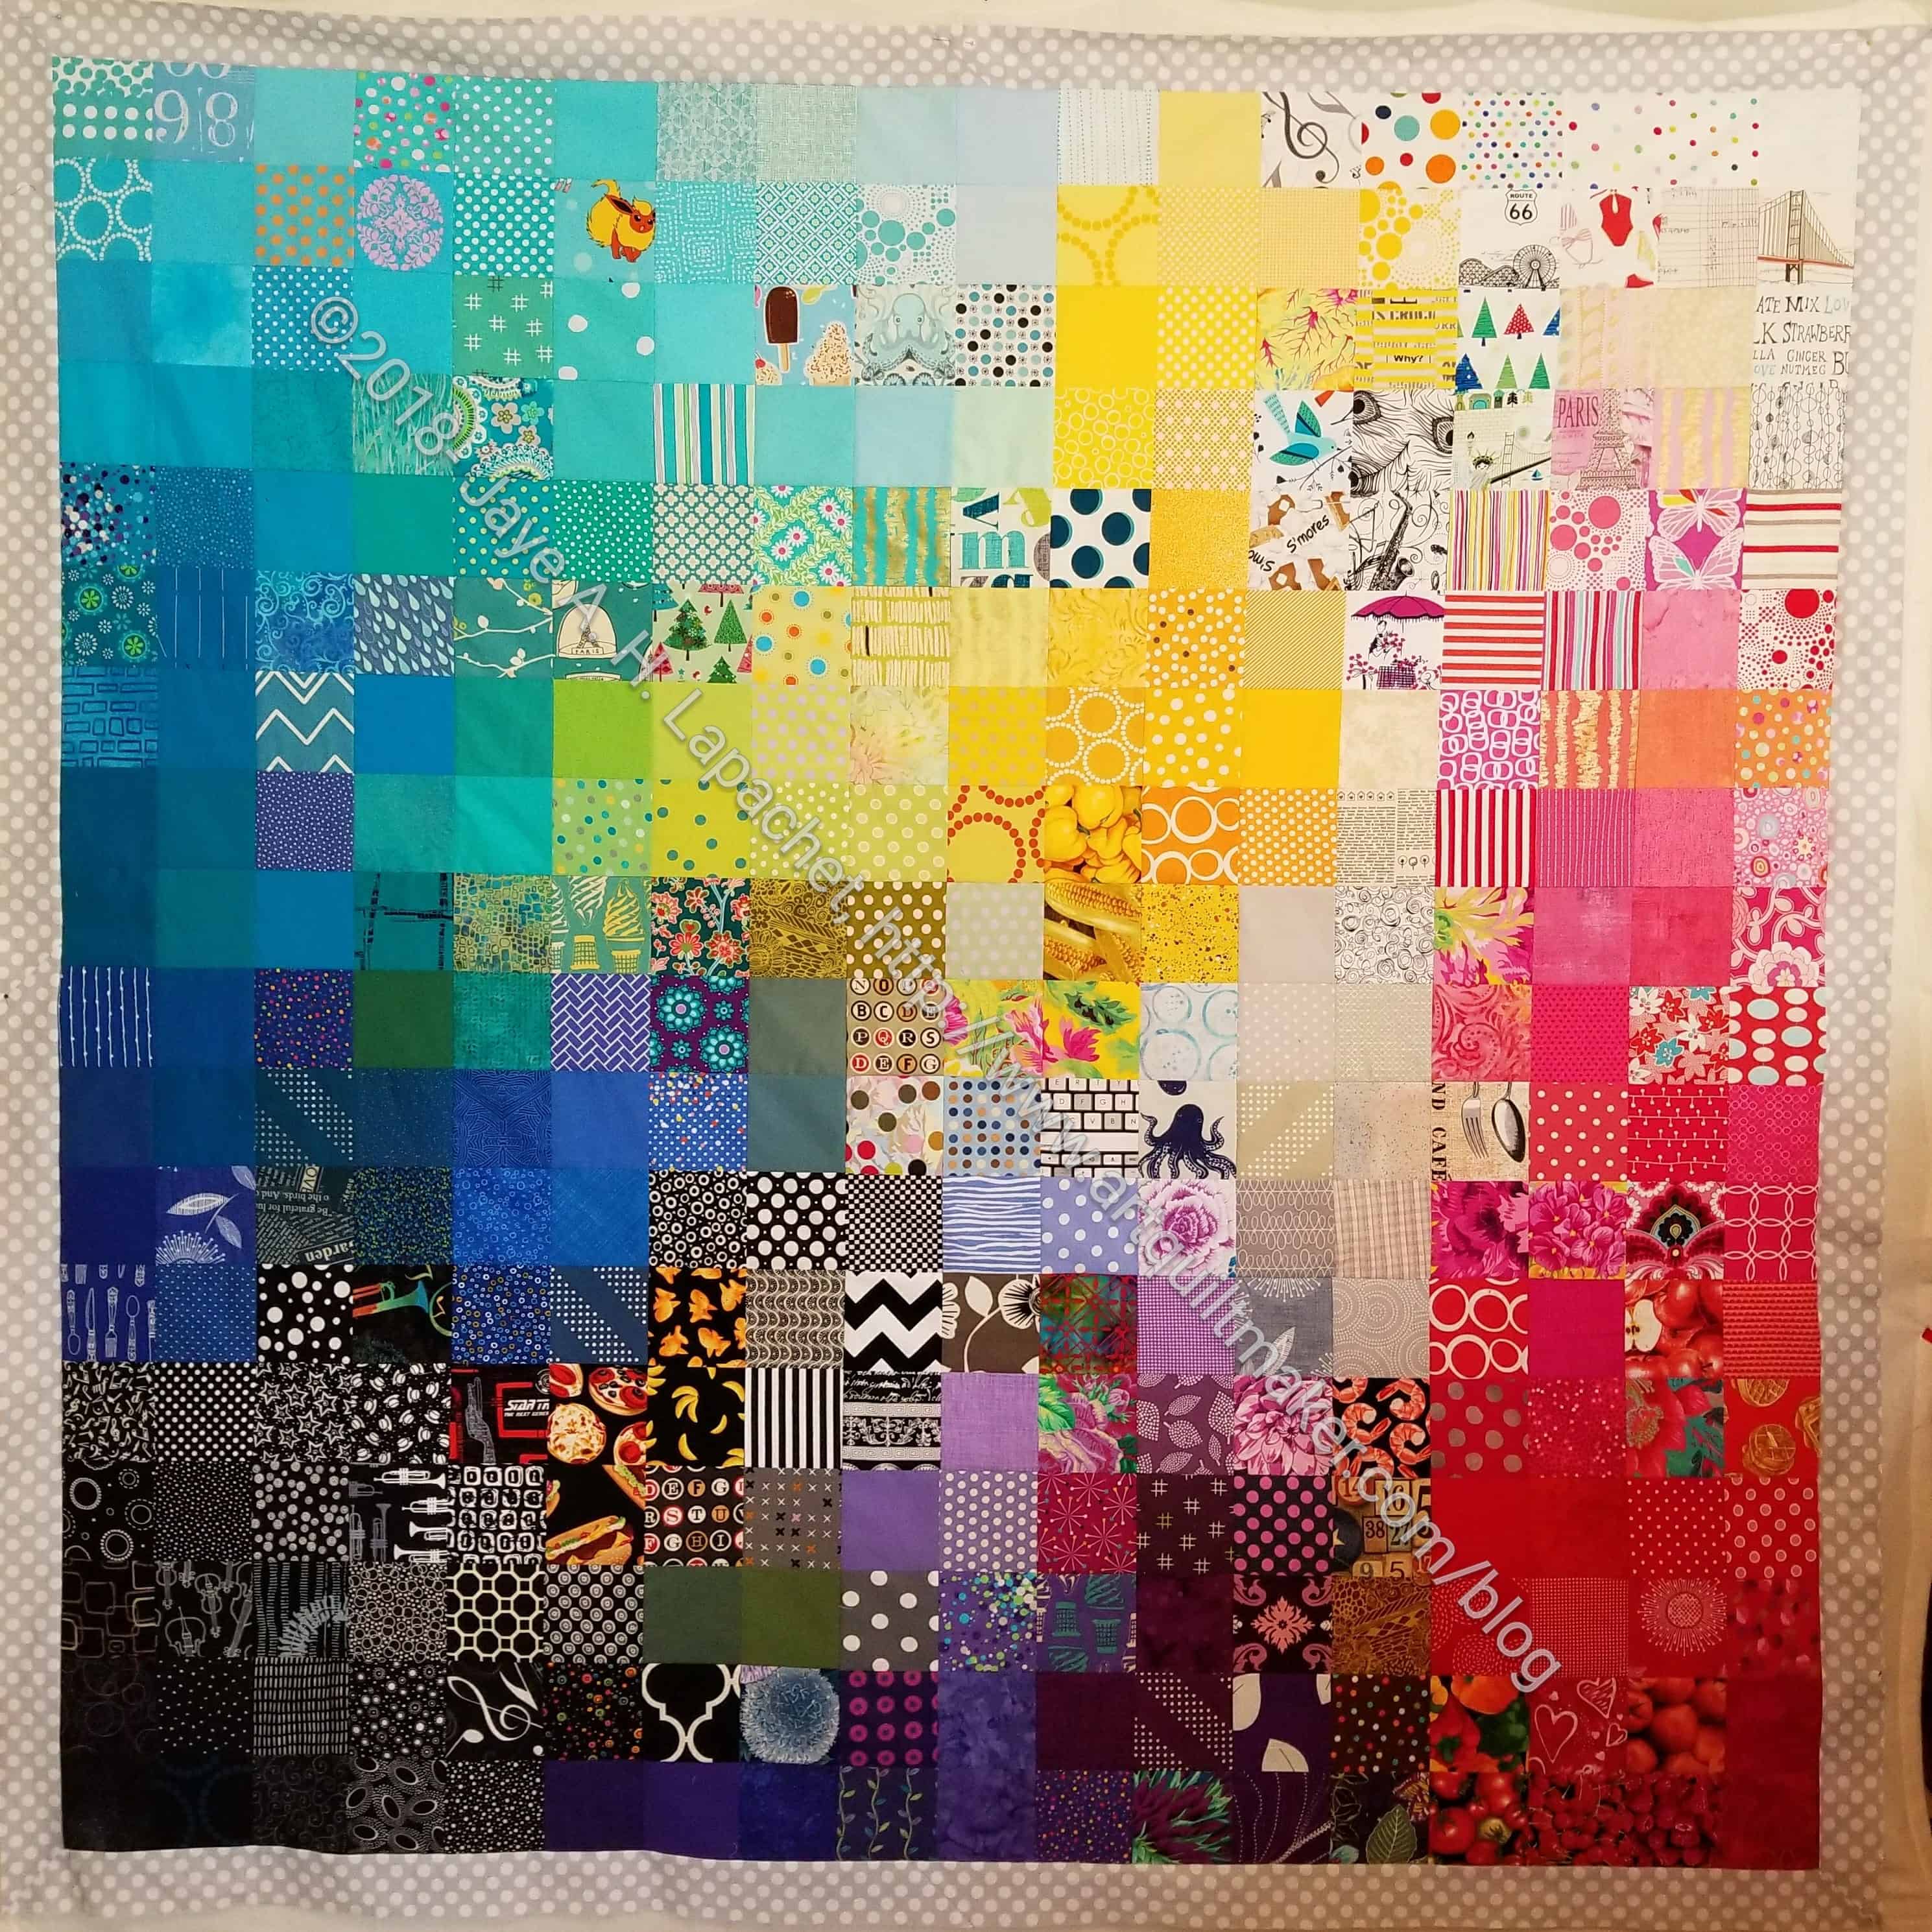
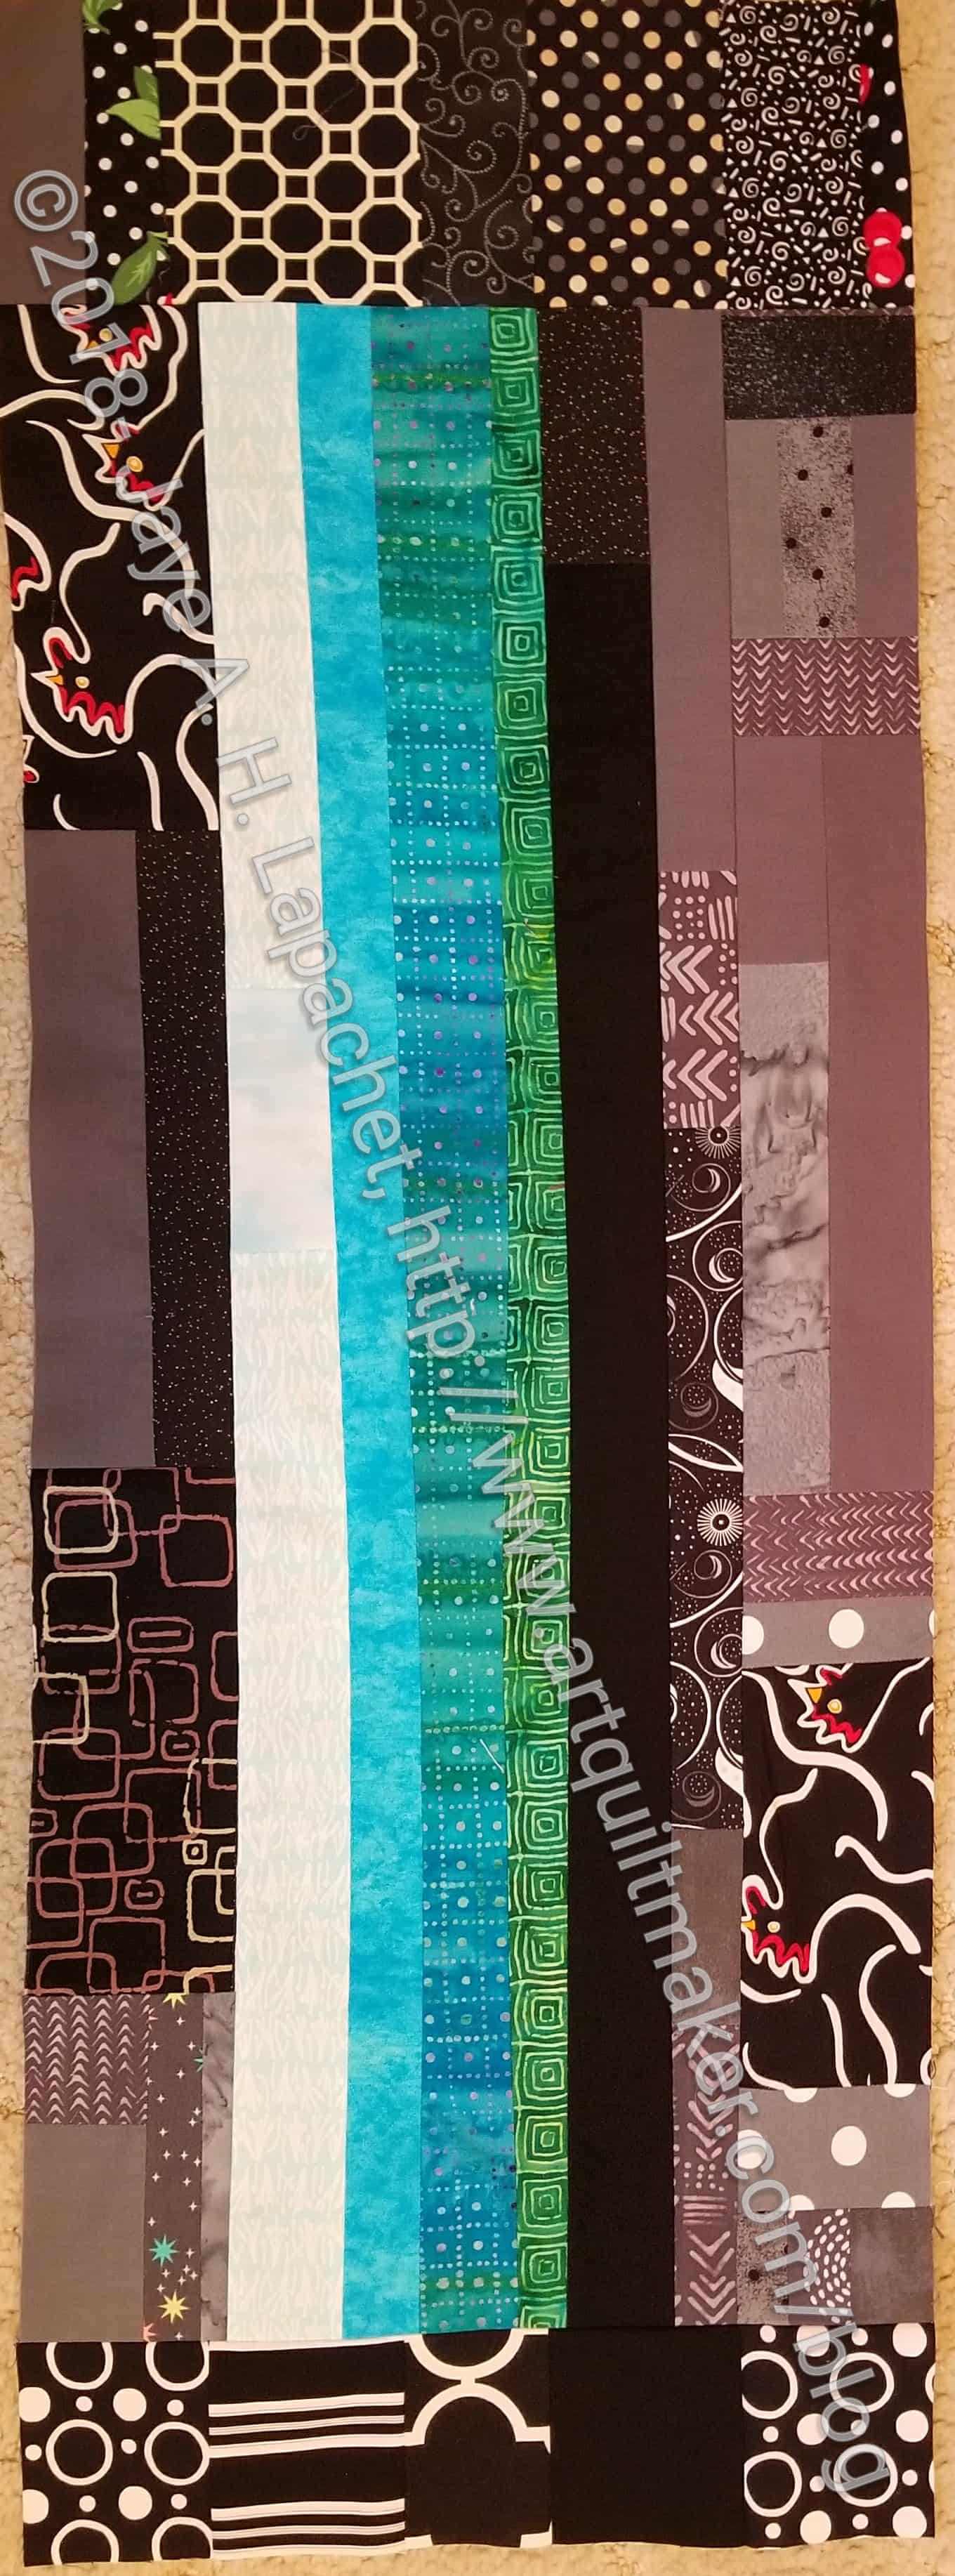
Fabric of the Year 2016 Top
Fabric of the Year 2016 is ready to take to Colleen. I spent enough time on gradating the colors together, but quickly realized that there were some prints that weren’t going to gradate and I needed to not beat my head against the wall.
I am pleased with the way it came out, but those blacks and browns are just a PITA and really, really irritating.
This quilt is affectionately called ‘Year of the Duck”, thanks to SIL#2.
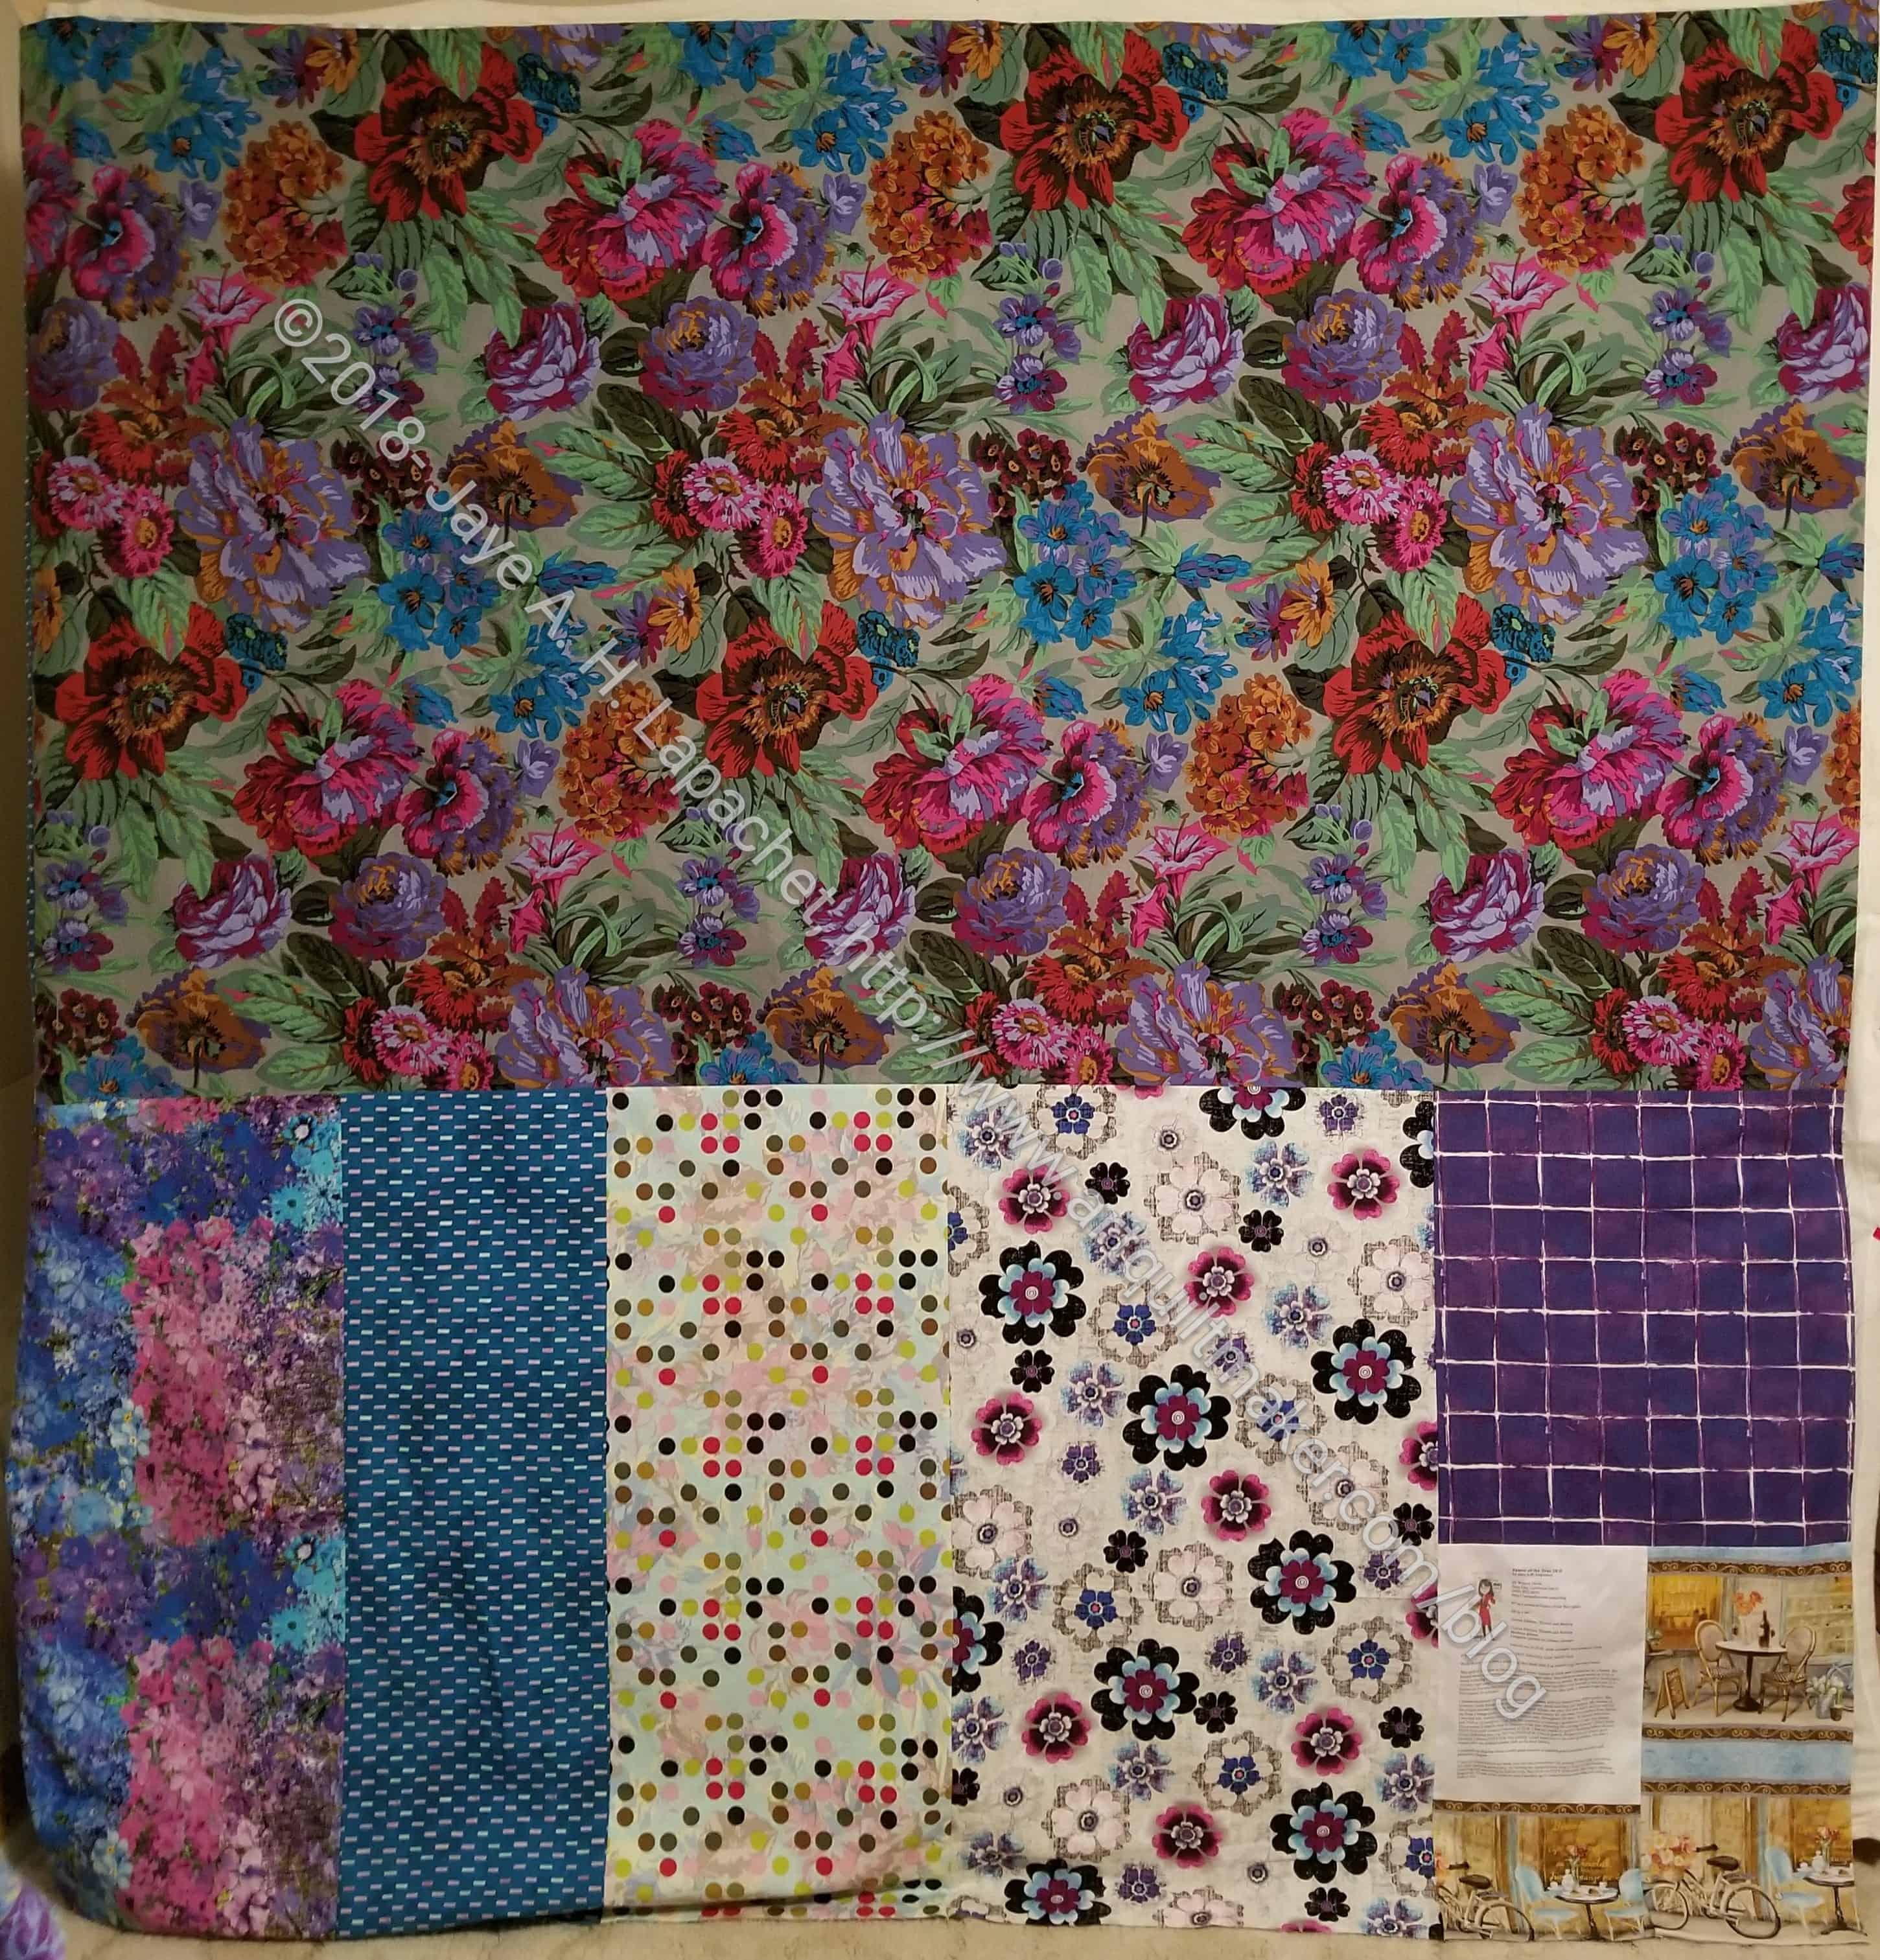
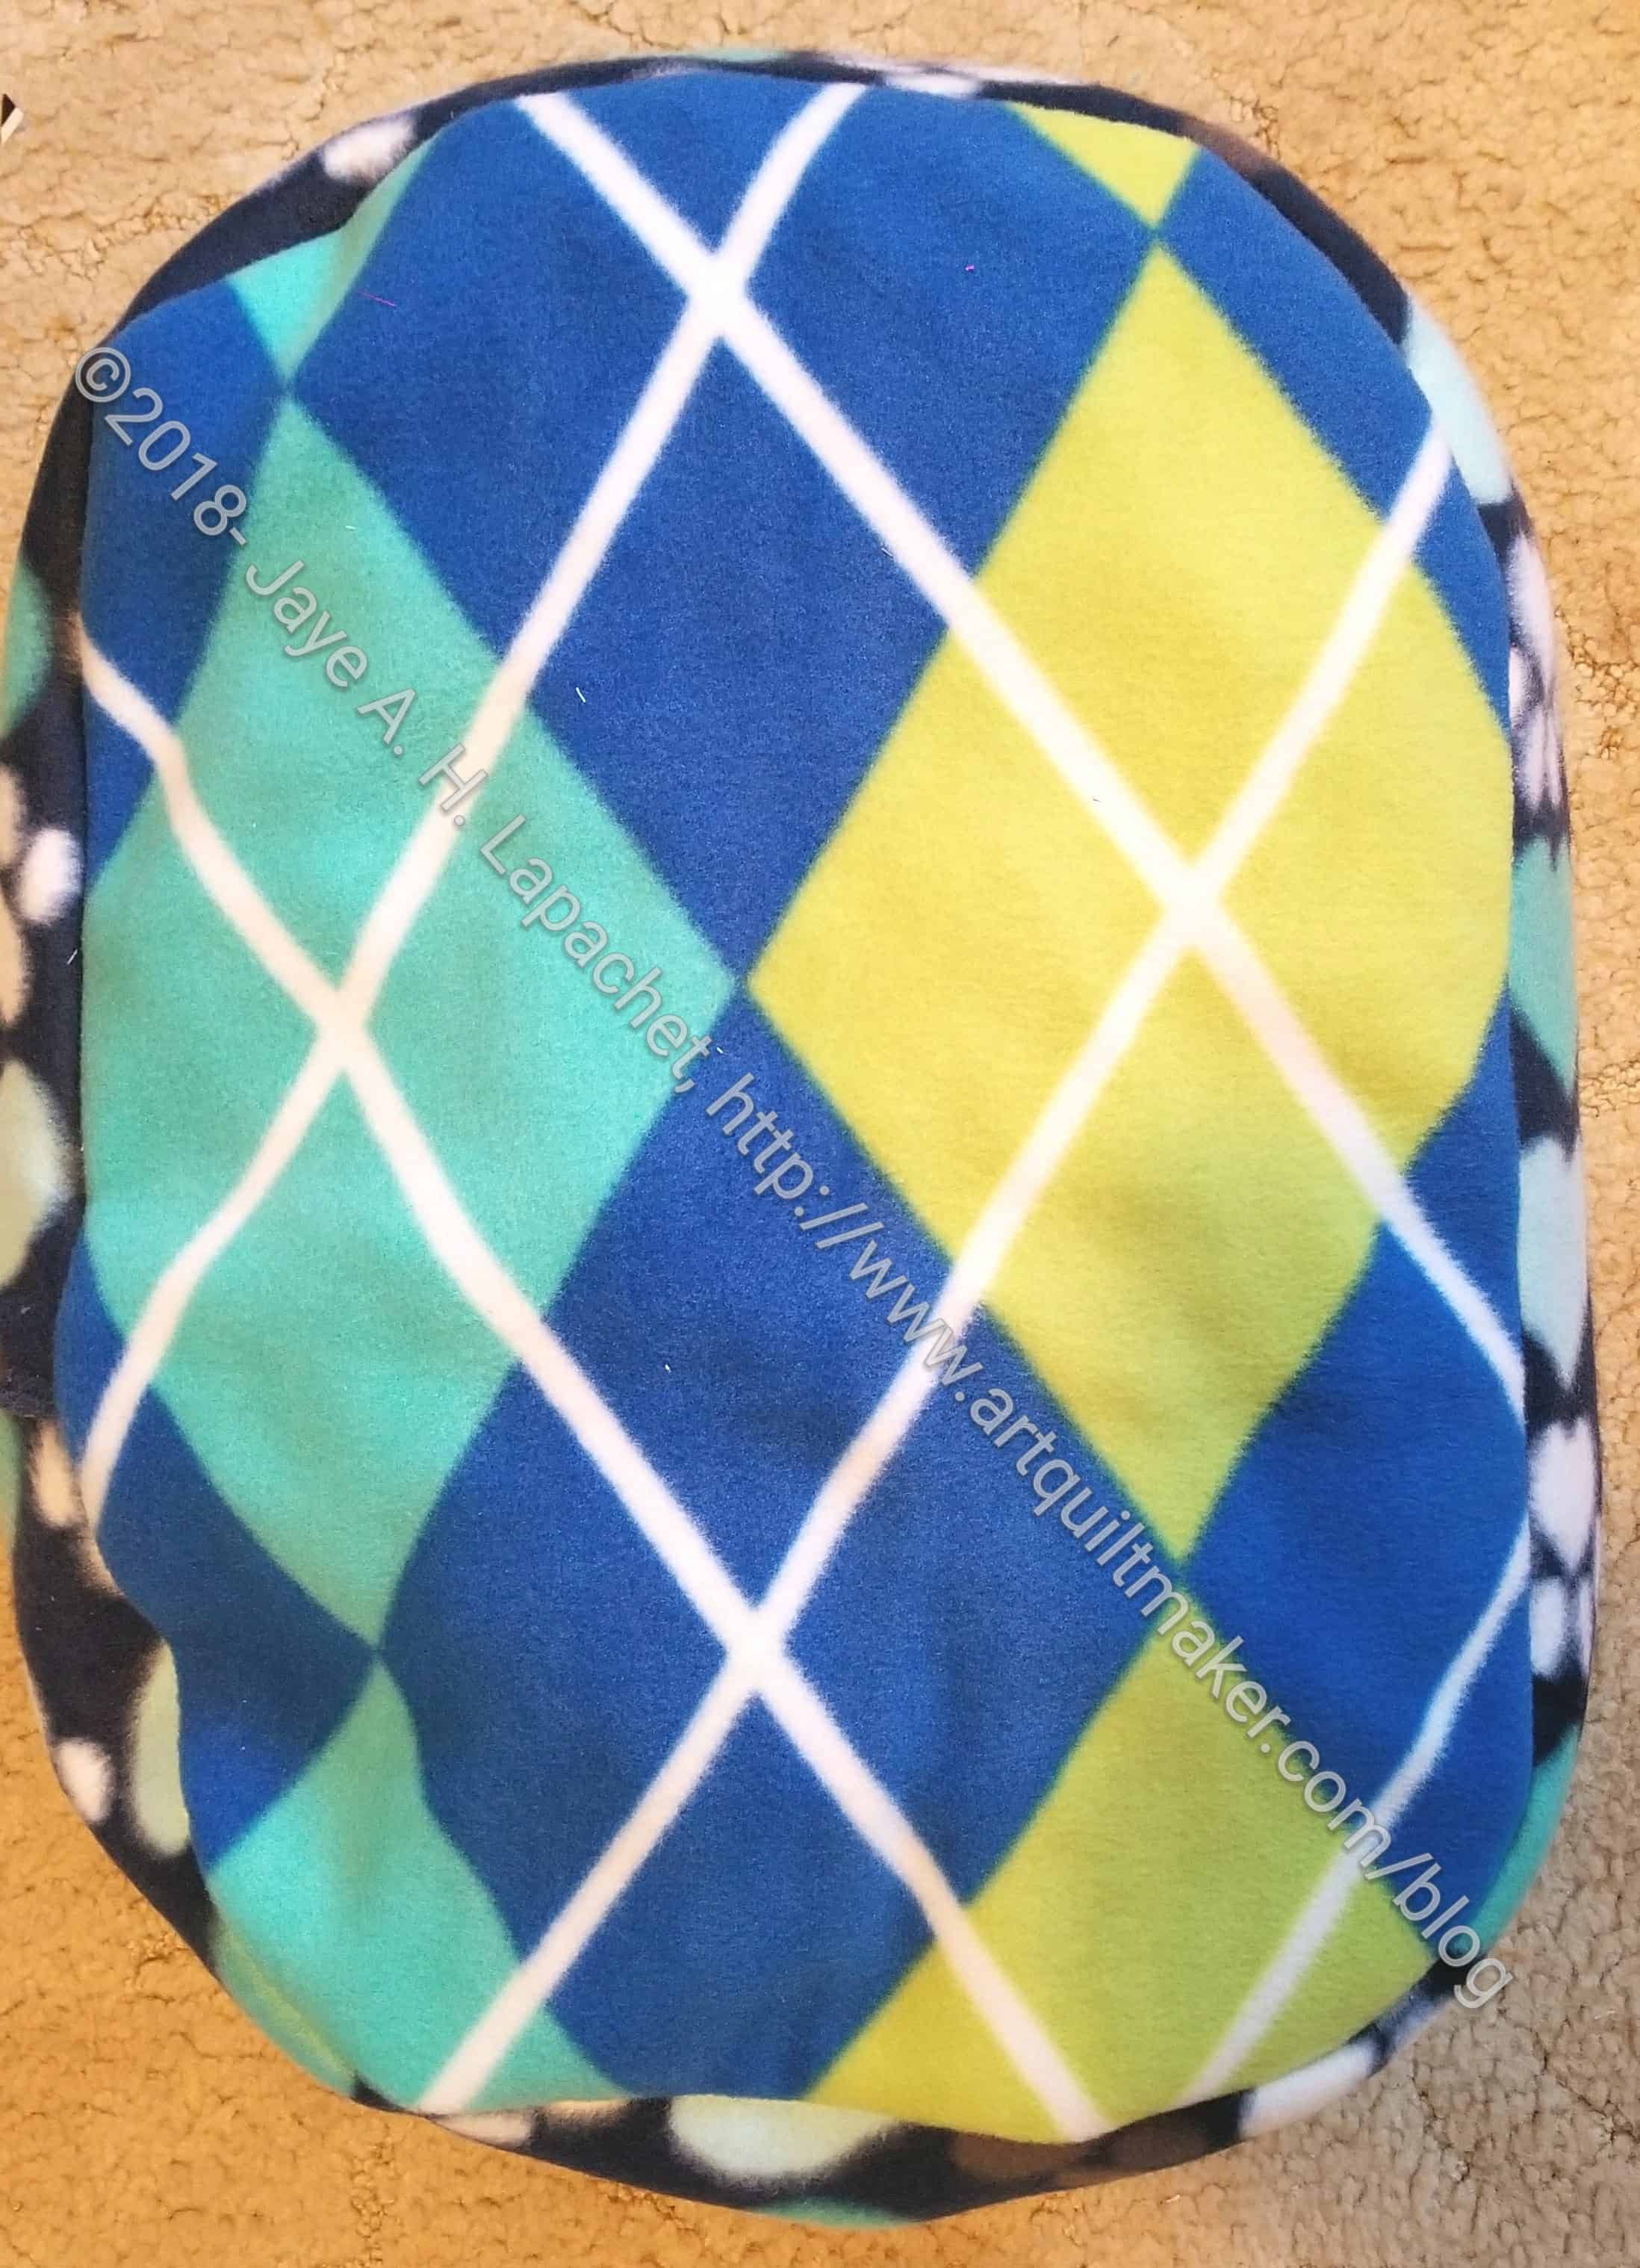
FOTY 2016 Back
I really wanted to use a certain Philip Jacobs fabric for the back, but I restrained myself, because I want to use it for something I can see or use more often. I compromised and used a lovely peony-old fashioned rose-some other kind of random flower print.
FOTY 2017 is coming up in the queue. Not next, but soon.
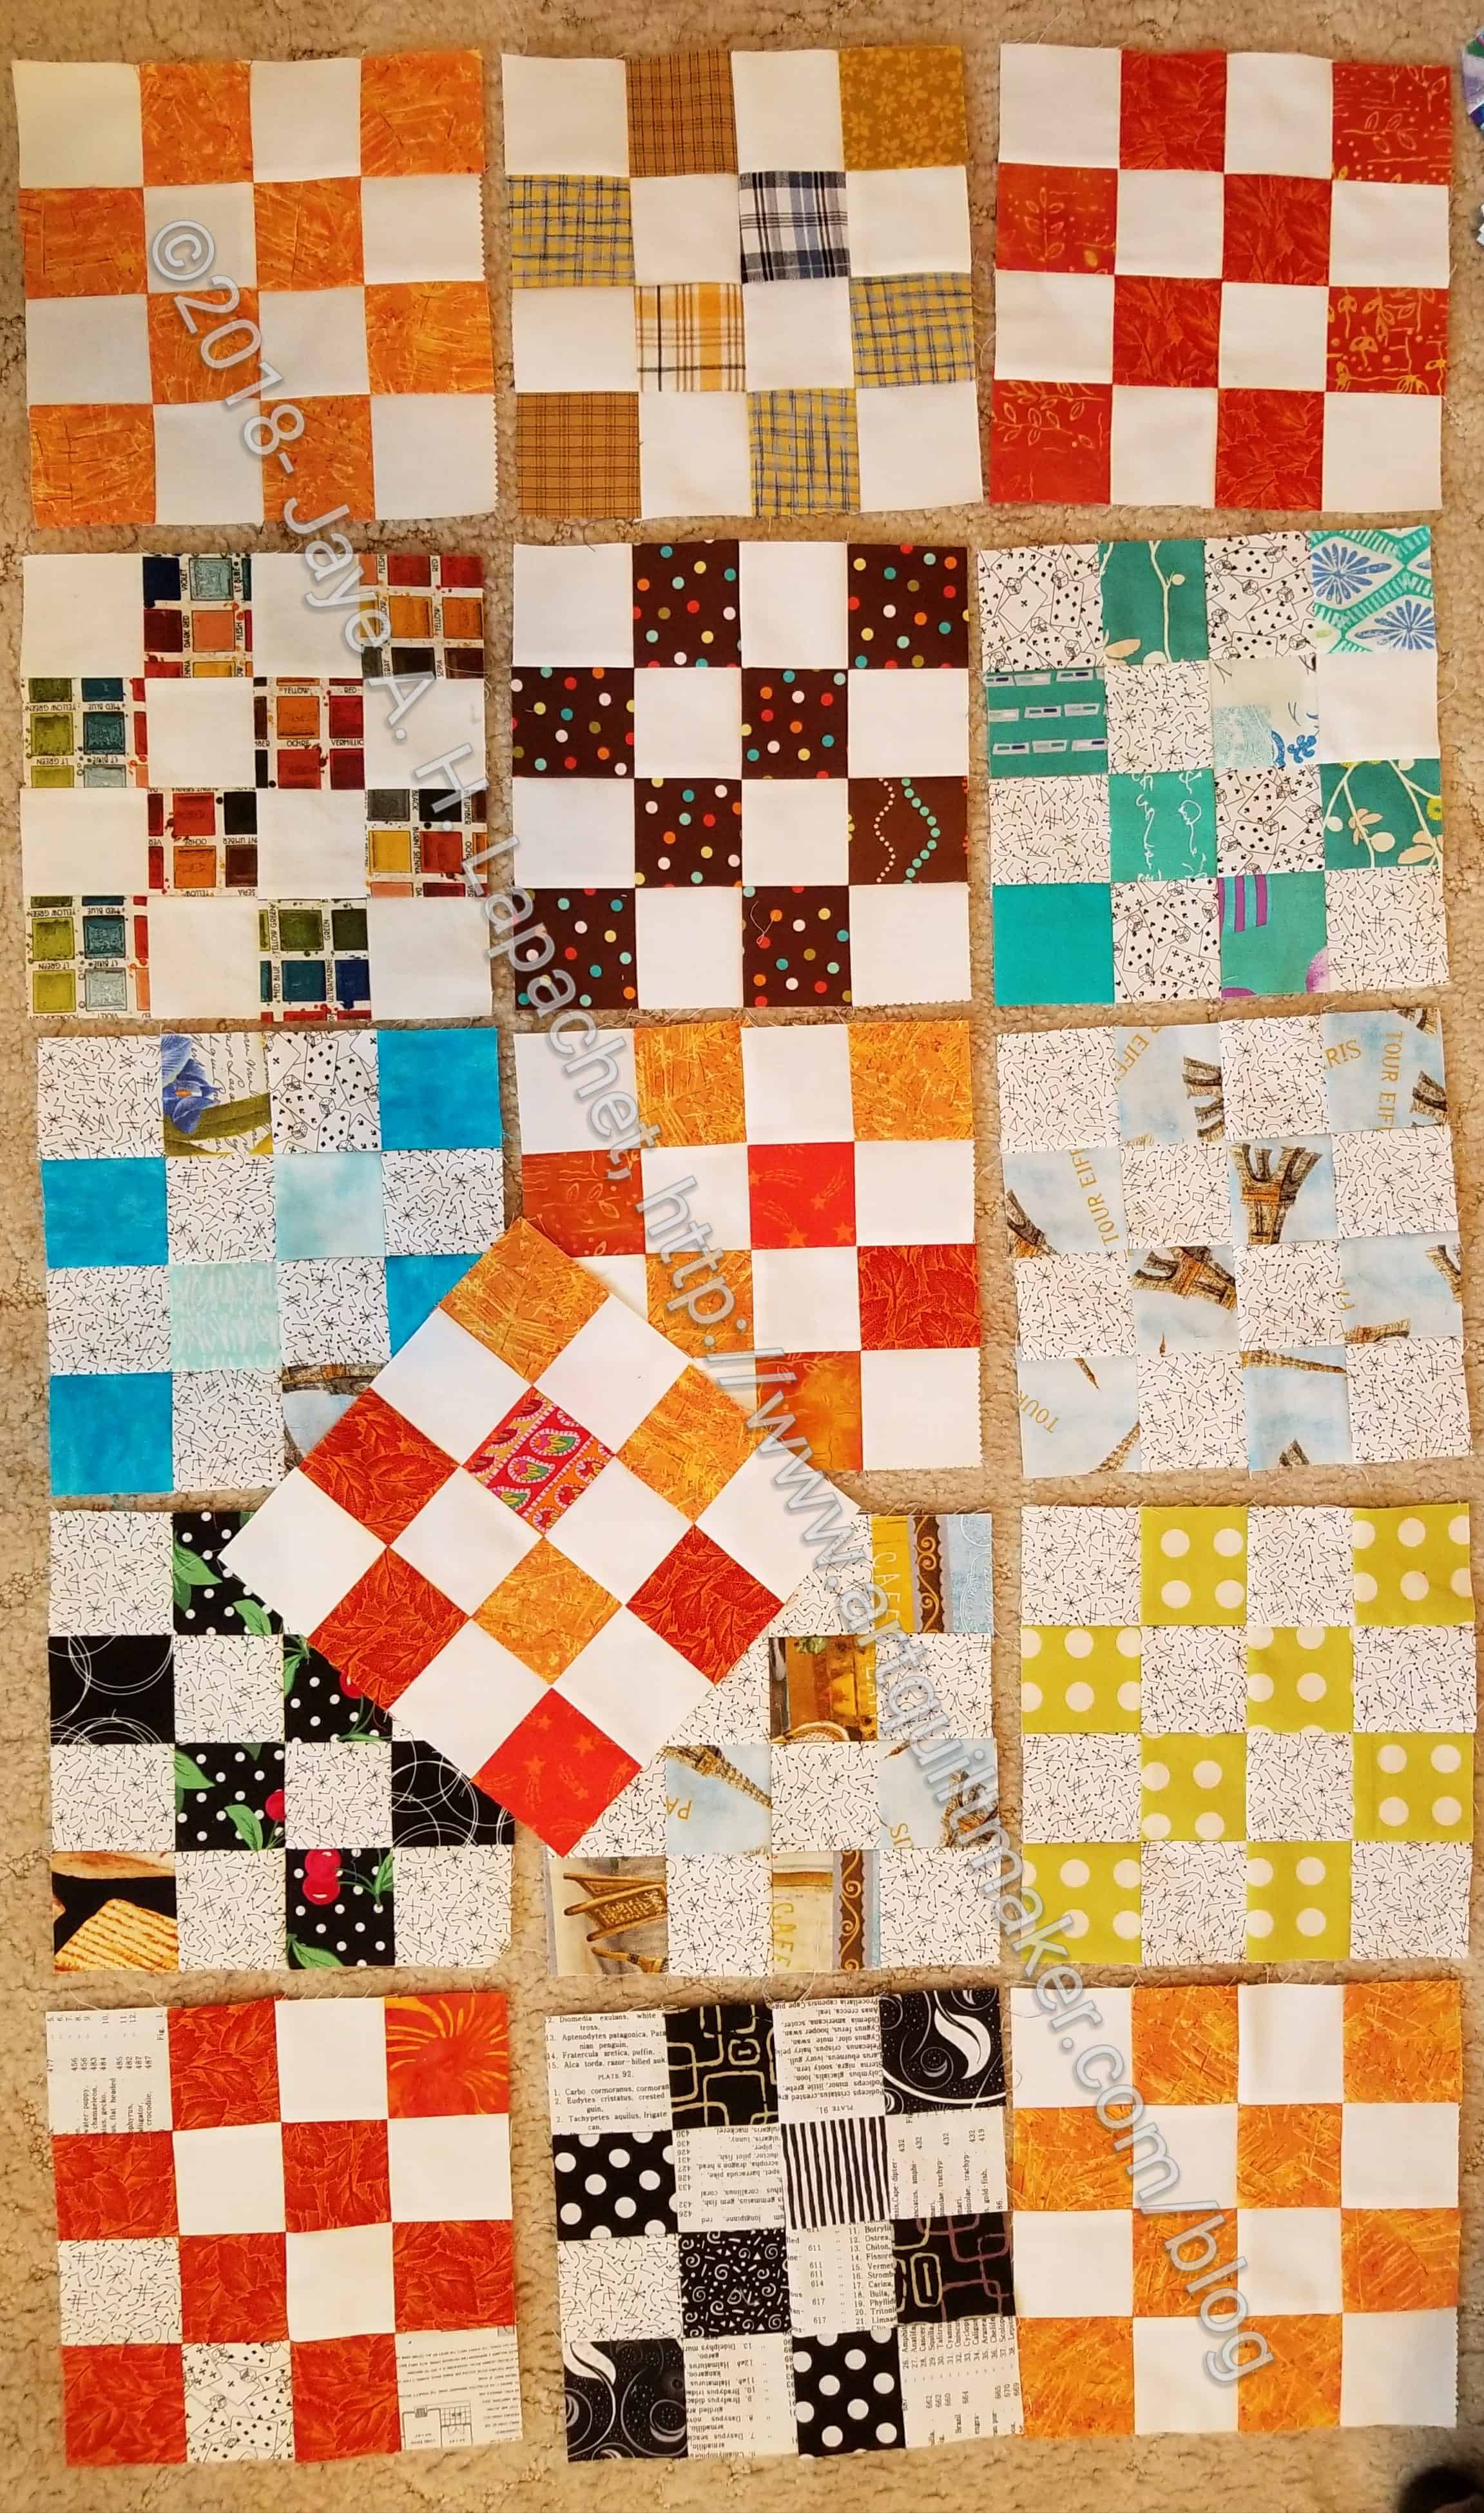
Here are more blocks from January. I think my total for January was 25. I would have loved to get to one per day, but 25 is not shabby.
While I did cut a few new fabrics, this group represents blocks made from the last dregs of my donation bin.
After using up all that I could, I got out the Acuquilt and my new 2.5″ die (Christmas gift) and cut a bunch of new squares from scraps on my cutting table. There will be some duplicate blocks, but I am back in the business of making donation blocks.
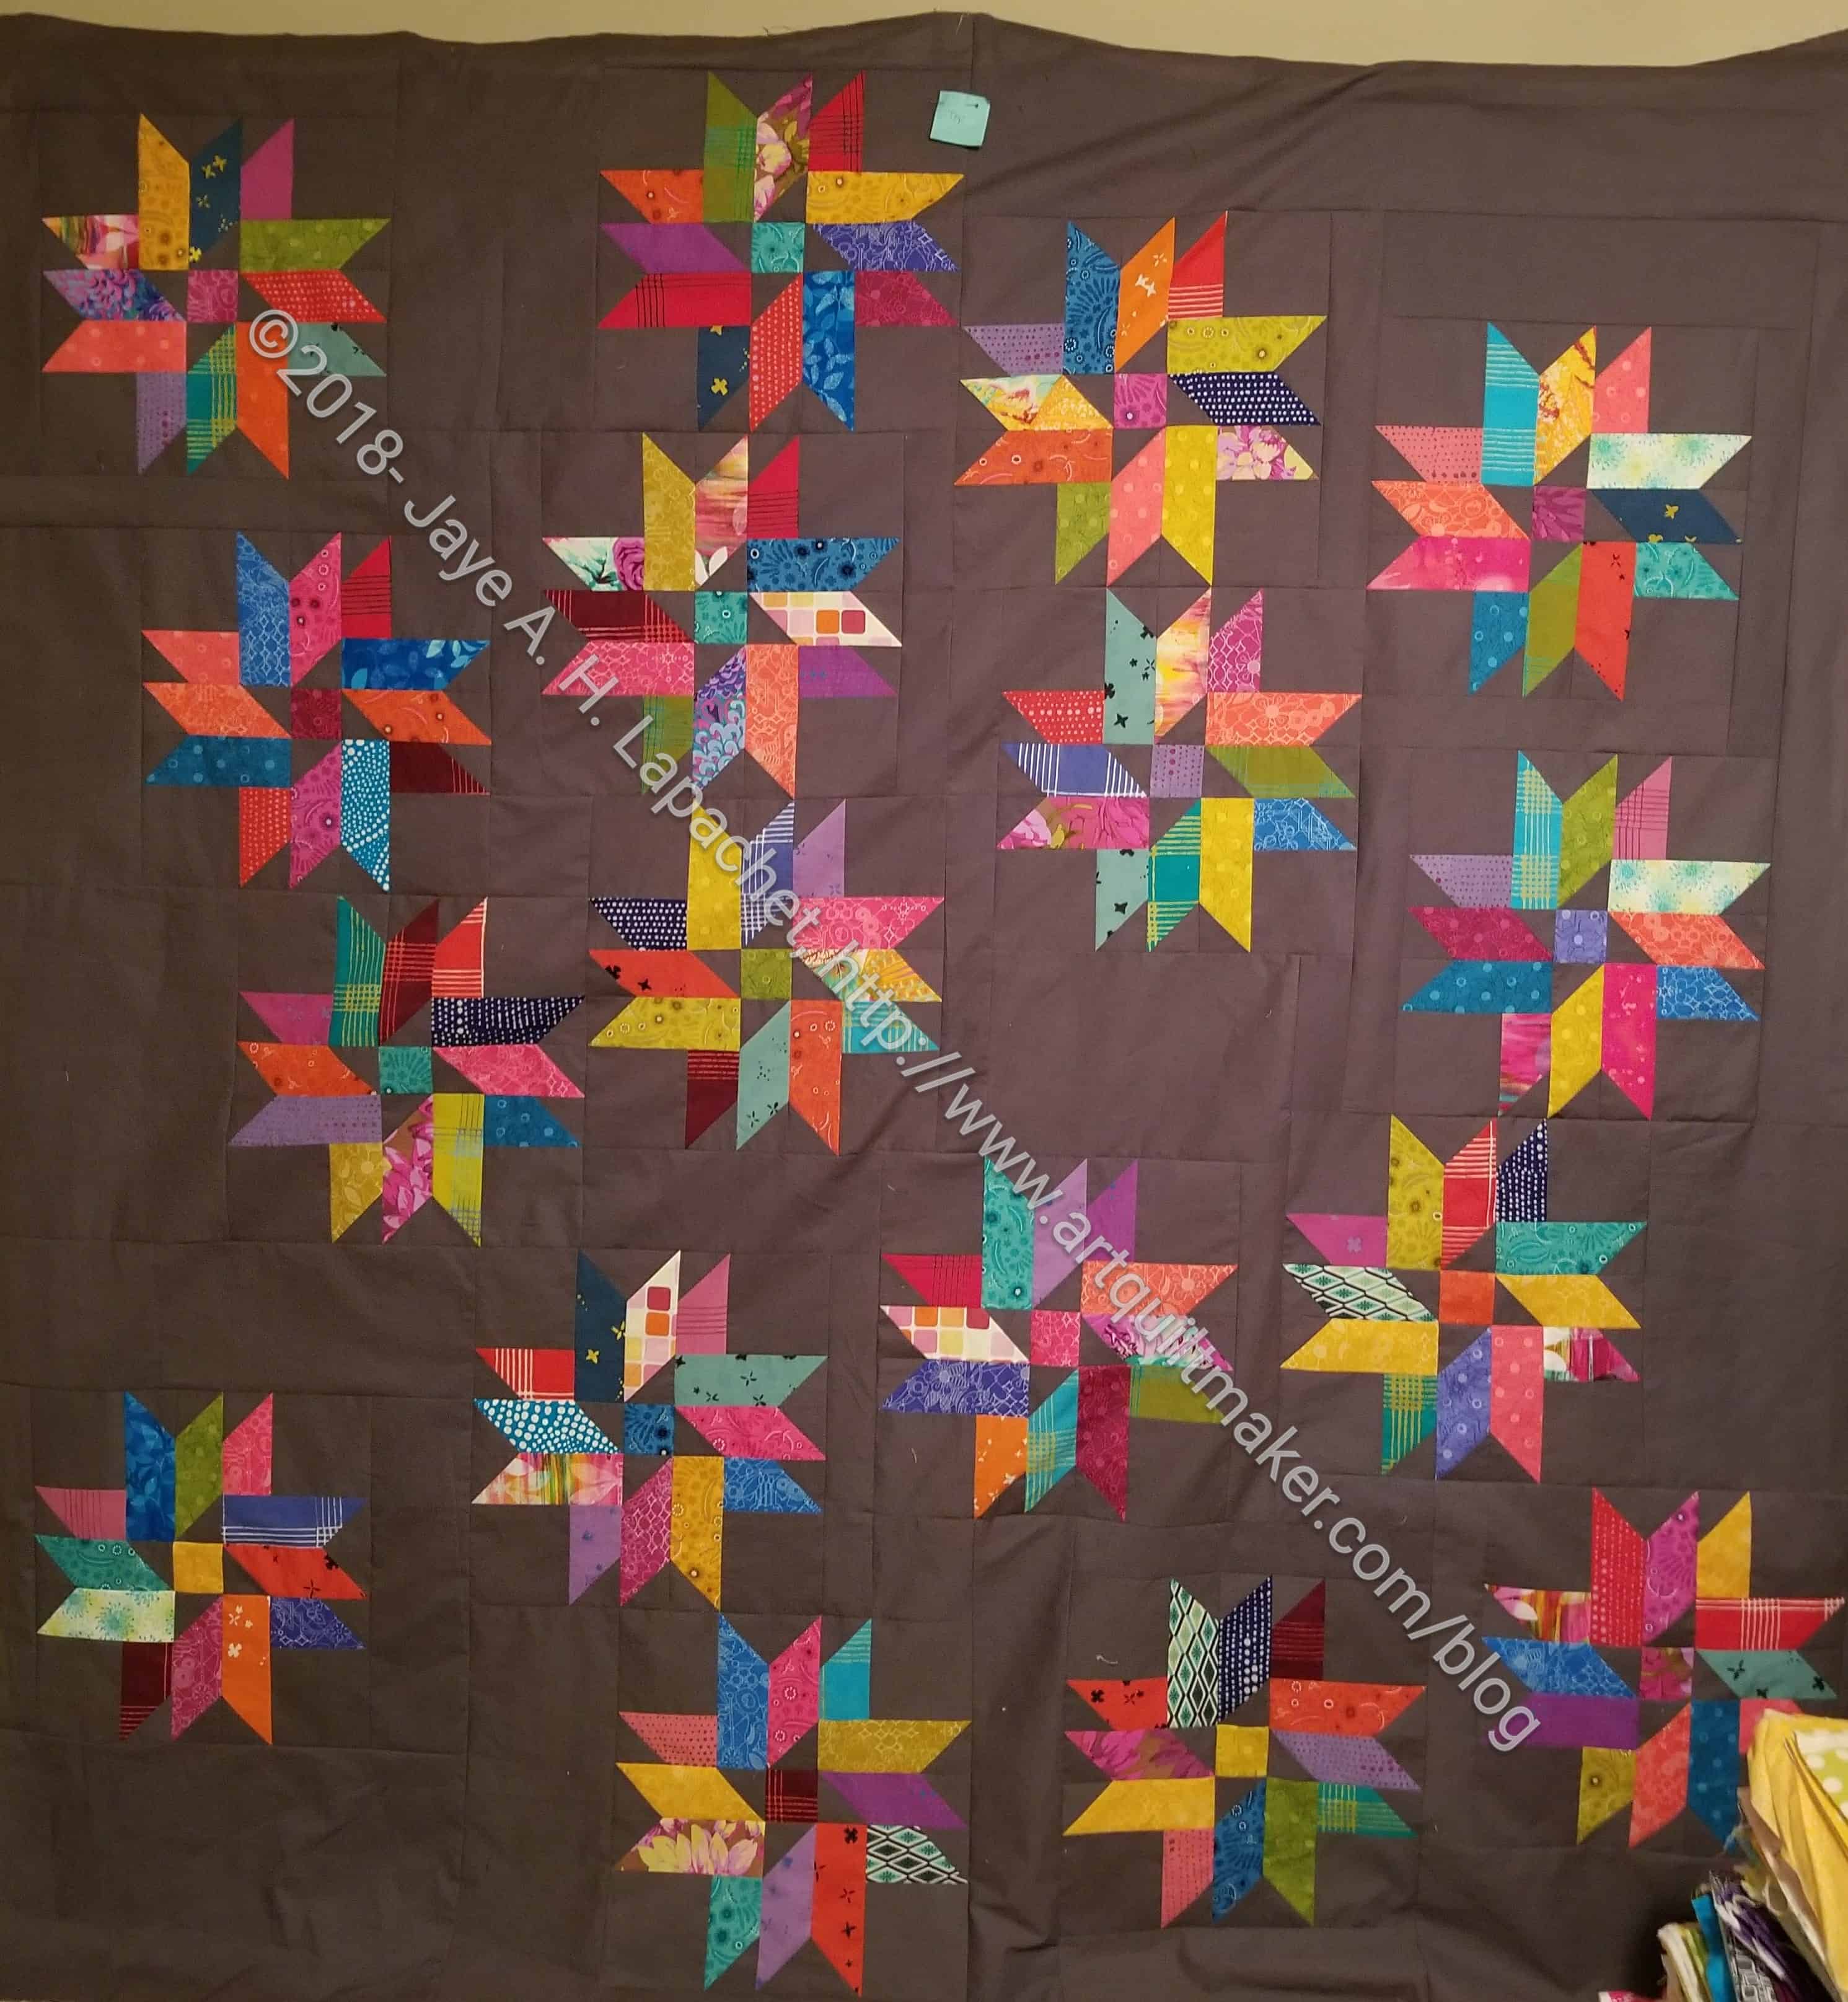
I finished the Triple Star top and back. The package is ready to go to the quilter, which will, once I get it there, make 4 quilts she will have of mine. I am waiting to finish another top before I take this one to her.
I used Sarah Goer’s Planned Improv technique to lay the quilt out, as I mentioned. It worked well, though I would have made some adjustments if I had a larger design wall. Some of the stars needed a bit more space. I just didn’t have the room I really needed to work.
Still, I am pretty pleased with the way it came out and am on to the next project(s). 🙂
I am behind a couple of pieces, but found the directions for this one that is due in March for Sue and decided to go for it.
Except for the colors, these were all fabrics and scraps that were laying out. Her idea was to highlight one color or a color group that represented us by neutrals. I thought this was a cool idea. I used the leftover greys from the Triple Star and Planned Improv pieces as well as some blacks for the Black and Red quilt.
There is a little bit of red in one of the prints, which doesn’t quite work with the rules, but it will have to do. I always think a little red in life is good (except during Big Game week).
Color My Quilt piece n.2 for Sue
I wasn’t quite happy with the piece I did, so I made a small one with some primarily white prints instead of just darks. I didn’t feel like mixing the darks and lights so Sue will get a bonus.
My scrap bag was about to fall and spill all over the floor. Not only that, but every time I walked by shards would attach themselves to my pants and come along for a ride. To battle these dueling demons, I whipped up a pet (cat) bed to secure the scraps.
I had the fabrics to make the bed for awhile and had just been avoiding the task. It was a quick task and my scrap bag now has space to slowly fill again
I spent some time last week sewing like a demon. It was a stressful week and the only way I could keep from yelling at fewer people was to hide in my workroom and sew.
It really was that bad, but we all have weeks like that and things are improving as they do.
This piece was on my small design wall and I really didn’t know what to do with it. It was a freebie, as I mentioned, but I didn’t want to waste it.One problem was the size. For a nephew’s quilt (all the nieces have theirs), it would need to be bigger. The Ta Dots and Stripes quilt is probably the smallest I can get away with for an actual adult person. That would mean more fabrics. I didn’t want to buy more Mostly Manor fabric and I probably have fabric that would look fine with the line.
I found a print that would go with the reds that I could use to make that one line longer and that was hopeful. It turned out, however, that I wasn’t in the mood to try and find other prints that would also work. I finally decided that I would turn it into a donation quilt. That meant the size was fine, I could sew it together, make a back and hand it off.
I sewed it together as leaders and enders and then found a piece of batting the right size. I hacked off a piece of one of my background fabrics and voila! Done.
Tim and I had lunch and I handed it over to him to quilt. He has a mini quilt pileup, but will get to it soon. Another project off the list.
As I said in January, I am working on getting my quilt house in order. This means finishing projects and tidying. I spent a lot of time last week doing a minor reorganization of my fabric closet. I bought a couple of project bins that will corral some of the stacks of fabric I am fighting with. I also made progress on some projects, which is the whole point of this exercise.
Terrain quilt – SIL and I made the top and back and Tim quilted it.
Mostly Manor HST top and back – ready for quilting by Tim
In Process
The ‘In Process’ is used to denote projects on which I am actively working or pretending to stitch. I try not to put away projects, because that will ensure I never work on them.
City Sampler – blocks all made. Need to sash the blocks and put the top together. Due to some issues I had with my seam allowance, some of the blocks are smaller than others, so I will have to adjust them in some way – either ripping and resewing, adding a piece or two to the block or with sashing. This is sort of a sticking point and while I consider this quilt ‘in process’ I hadn’t worked on it in awhile until I took the blocks to the BAM Sew Day and started measuring. Once I know what I am facing for each block, I can move forward.
English Paper Piecing Project– half hexies – I have mostly been knitting while I watch TV, but I did make some half hexies in anticipation of making another star.
FOTY 2016 – Squares are up on the design wall and being arranged.
FOTY 2017 – pieces cut. Need to layout and start piecing.
Still WIPs
I still have WIPs. Who doesn’t, after all? A project in the ‘UFO’ category means I am stalled. A nicer way of saying UFO is a WIP. The list is a lot shorter and the projects are newer, for the most part.
Aqua-Red Sampler – I need to lay the blocks out and put the piece together.
BAMaQG IRR – I will either quilt it and donate it to charity or use it for the Big Stitch class I am taking at QuiltCon.
Handbag Sampler – this is a project about which I had forgotten. I haven’t even found a picture of all the blocks. The blocks were teaching samples when I taught a sampler class the time before I started writing the quilt class sampler tutorials. I actually don’t know exactly where the blocks are, but I have an idea and will crawl up in the far reaches of my fabric closet soon and find them.
Lobster – I still have more stitching to do and then I need to quilt it.
Octagon 9 Patch: In the past week or so, I have started to sew pairs together as leaders and enders. I am not convinced this is a great idea, but I want to make progress, so I will make it work.
Pointillist Palette #4: Fourth is a series of 6 quilts; needs tiny square patches sewn together. No progress.
Pies and Points from Victoria Findlay Wolfe class. No further progress. I need to focus on this and it is not up high enough on the list yet.
Self Portrait: started in 2006 at a class at Quilting Adventures in Richmond, Virginia. I am stalled on this again. Again, I didn’t capitalize on the excitement I got from my career counselor and now the feeling is lost.
Stepping Stones #2 – I checked the design and have the border block designs complete. I will have to inventory what units I have that will be needed to make up the border blocks before I am ready to sew.
Under the Sea: class project; like the design and am happier with the colors. I had an idea for it, which didn’t end up working out. I would like to finish it soon.
Black and Red quilt – This came about because of two other projects. I made a whole bunch of bias tape as part of my failed attempt at doing the Mighty Lucky Club a few years ago. Another part of the inspiration came from my class with Tina of Little Blue Cottage fame. This was going to be for a nephew, but I think it will be for one of my SILs and BILs. I have rectangles cut and some bias tape ready. My next step is to sew the bias tape to the rectangles like pickup sticks. I don’t have any photos of this, so you’ll have to trust me.
Half Rectangle donation quilt – I want to work with half rectangles and the 16 patches we make for the guild. I have the blocks made and the cool ruler I thought would work for this project. Now I need to gather the fabric and just do it.
Small Projects in Process
Hansel and Gretel dolls and accessories for my little niece. The quilt is done and all the other pieces are ready to be stuffed.
EPP Travel pouch gift – Main pieces are all cut and I am sewing various bits together.
2 gift Sew Together Bags- most of the fabric is cut and the zippers are purchased
Another Sew Together Bag for me – most of the fabric is cut and the zippers are purchased
1 gift Sew Together Bag – nothing cut
Mel Beach quilted piece – I want to make it into a pillow cover
Theoretically, the Tarts Come to Tea is in the quilting process, though I haven’t worked on it in a while. See above.
Binding
Nothing at the moment
Hunting and Gathering
30 Something: I am still cutting 1.5 inch squares. I am pretty sure I have the 800 I need, but I am not ready to sew them together yet, so whenever I have a chance I cut more I cut more. It will give me choice when the time comes. I’ll have to think up a new name, too. My next step will be to figure out if I need to cut other sizes of squares and switch from cutting 1.5″ squares to cutting the new size.
Blue Gradation Quilt: cutting 2.5 inch x 4.5 inch blue rectangles. It has to end sometime. I wasn’t sure I was ready to put this together, but I think I am. I might do a couple of gradation quilts in a row just to get the practice.
Blue Lemonade: cutting blue, green, purple 2 inch squares. I used a lot of these squares for En Provence, so I am slowly cutting more.
Pink Gradation Quilt: cutting 2.5 inch x 4.5 inch pink rectangles
Spin Wheel: really not started, but supplies gathered. I might have to cut some more background fabrics. I probably have enough fabrics and just need to decide to start.
Windmill quilt: Still hunting and gathering. I am supposed to be cutting a variety of greys for the background, which required the purchase of a new template. I should be able to get going again
Other
Stepping Stones #3 using the Macaron pre-cuts from Hoffman. I have all the fabric in pre-cuts and am just waiting for space (and desire) in my schedule.
I’ve used just under 19 yards of fabric so far this year. Not shabby.
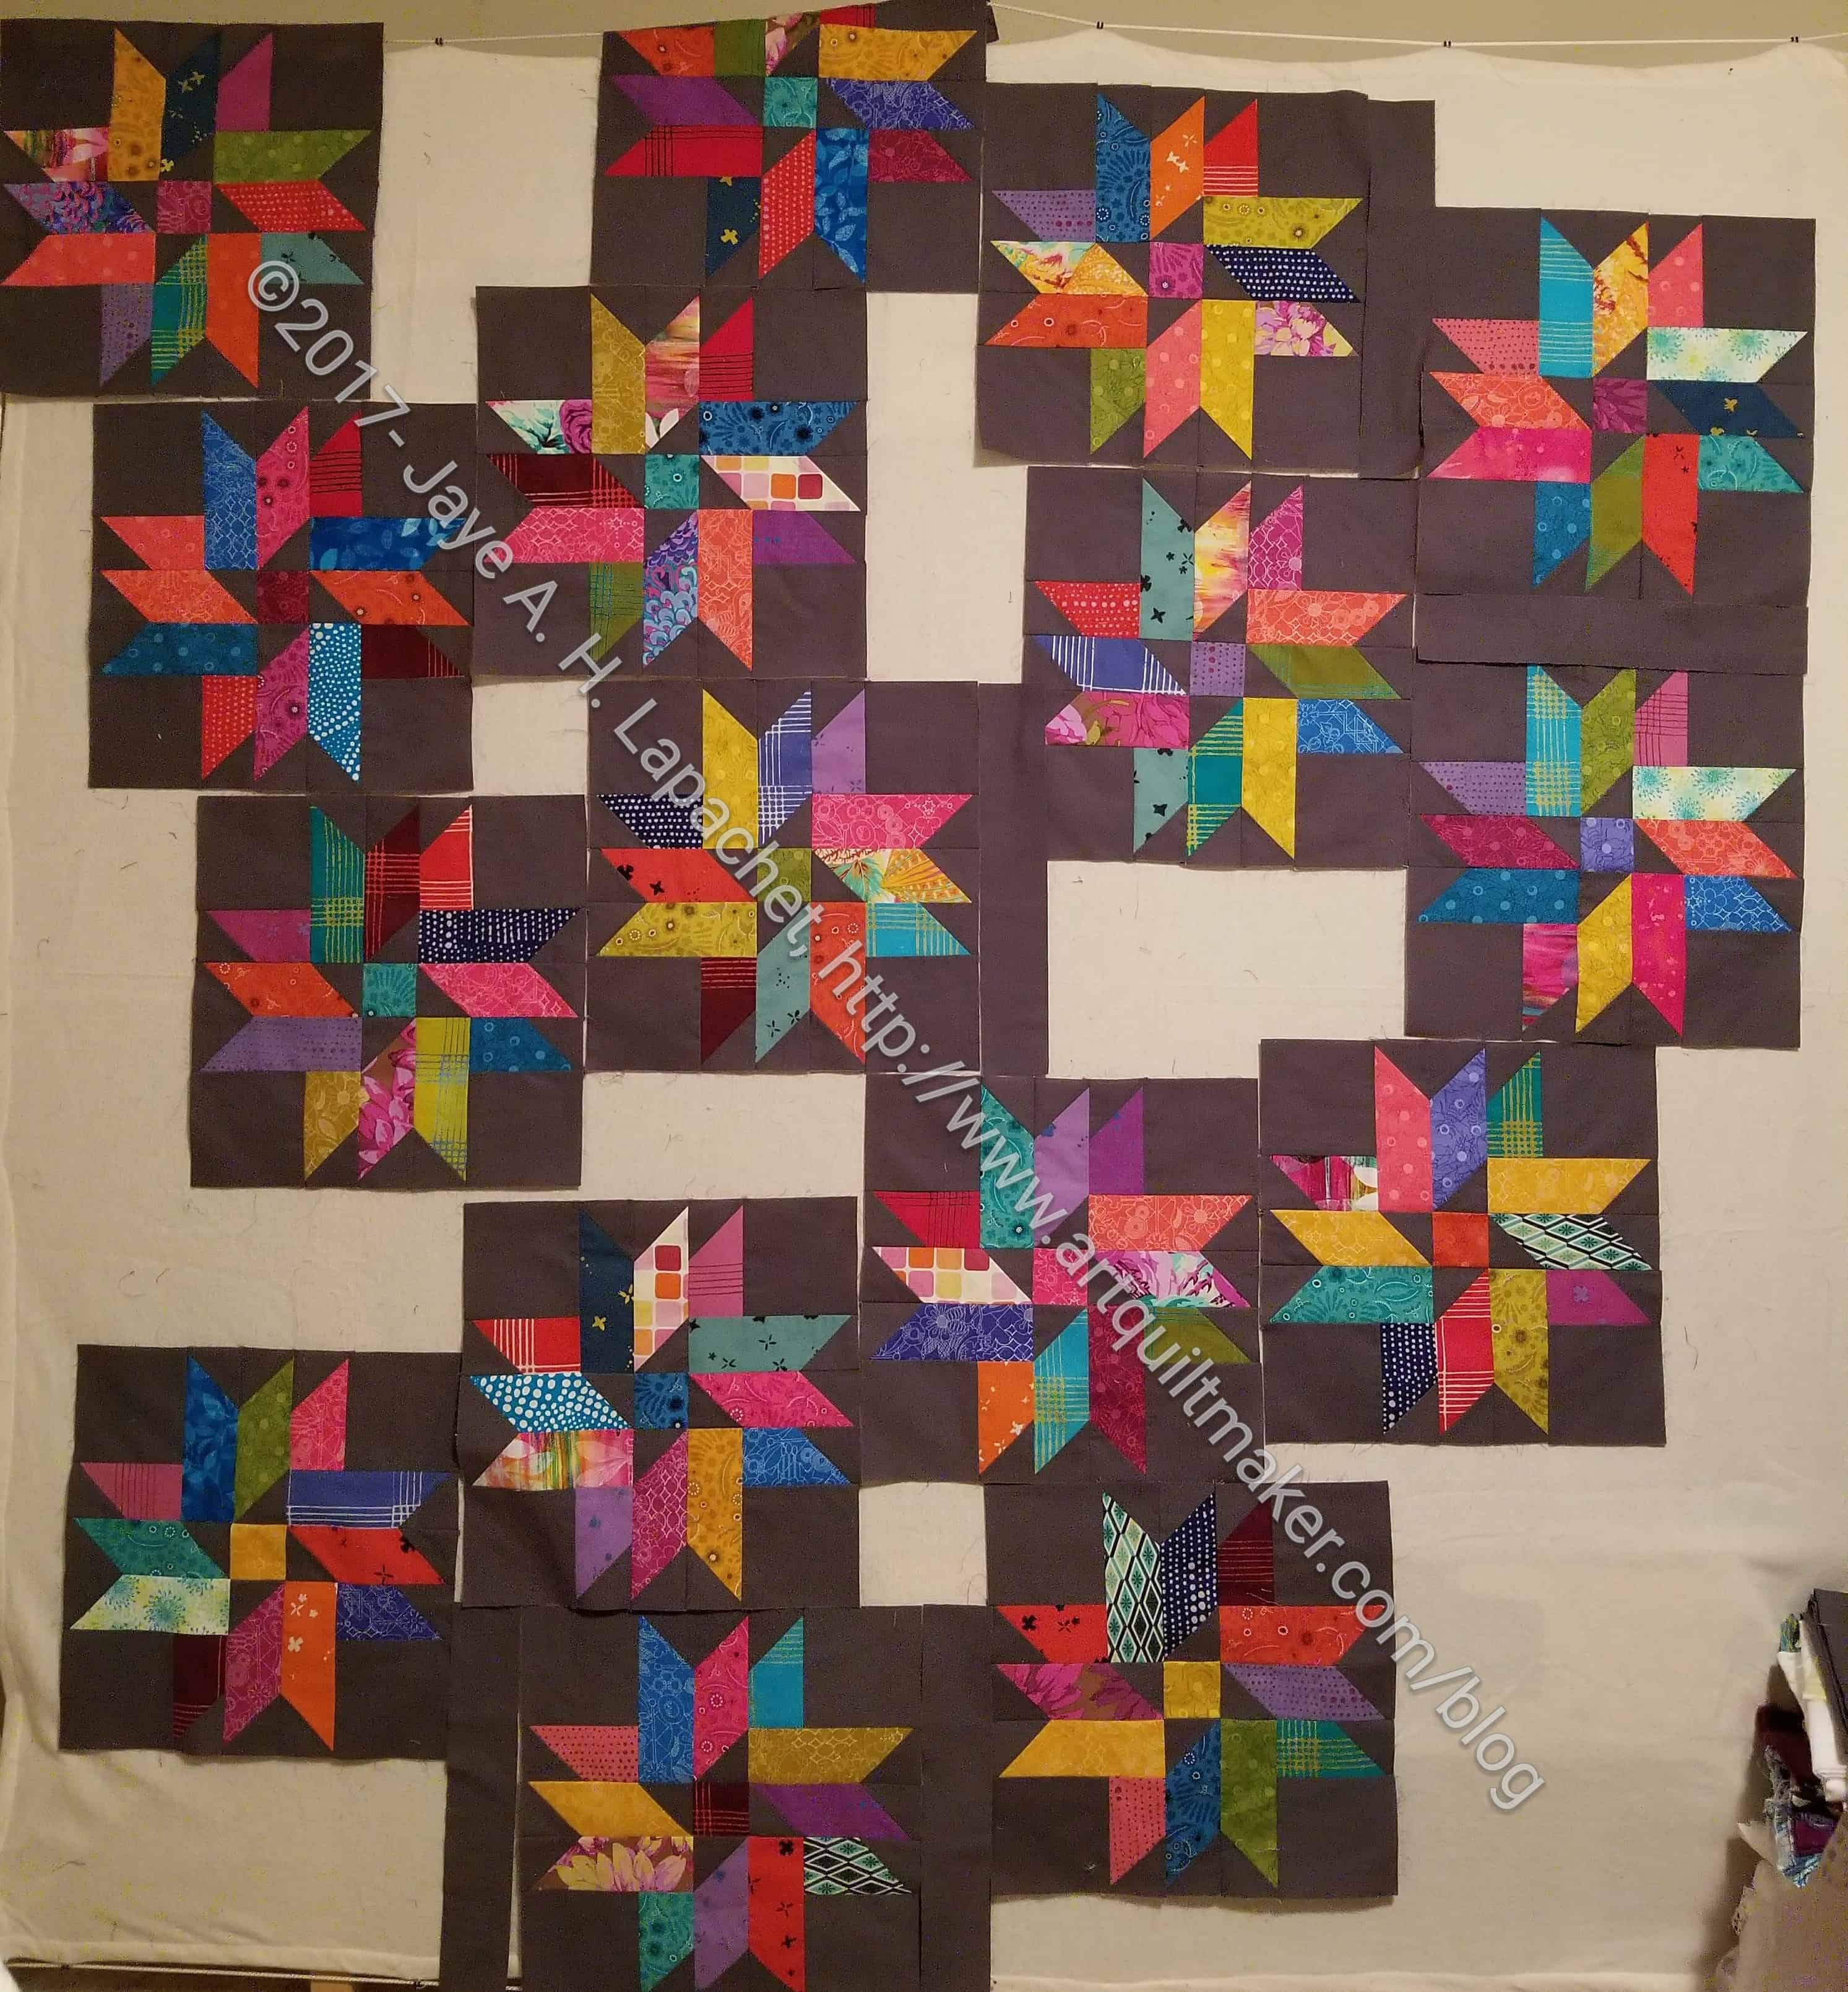
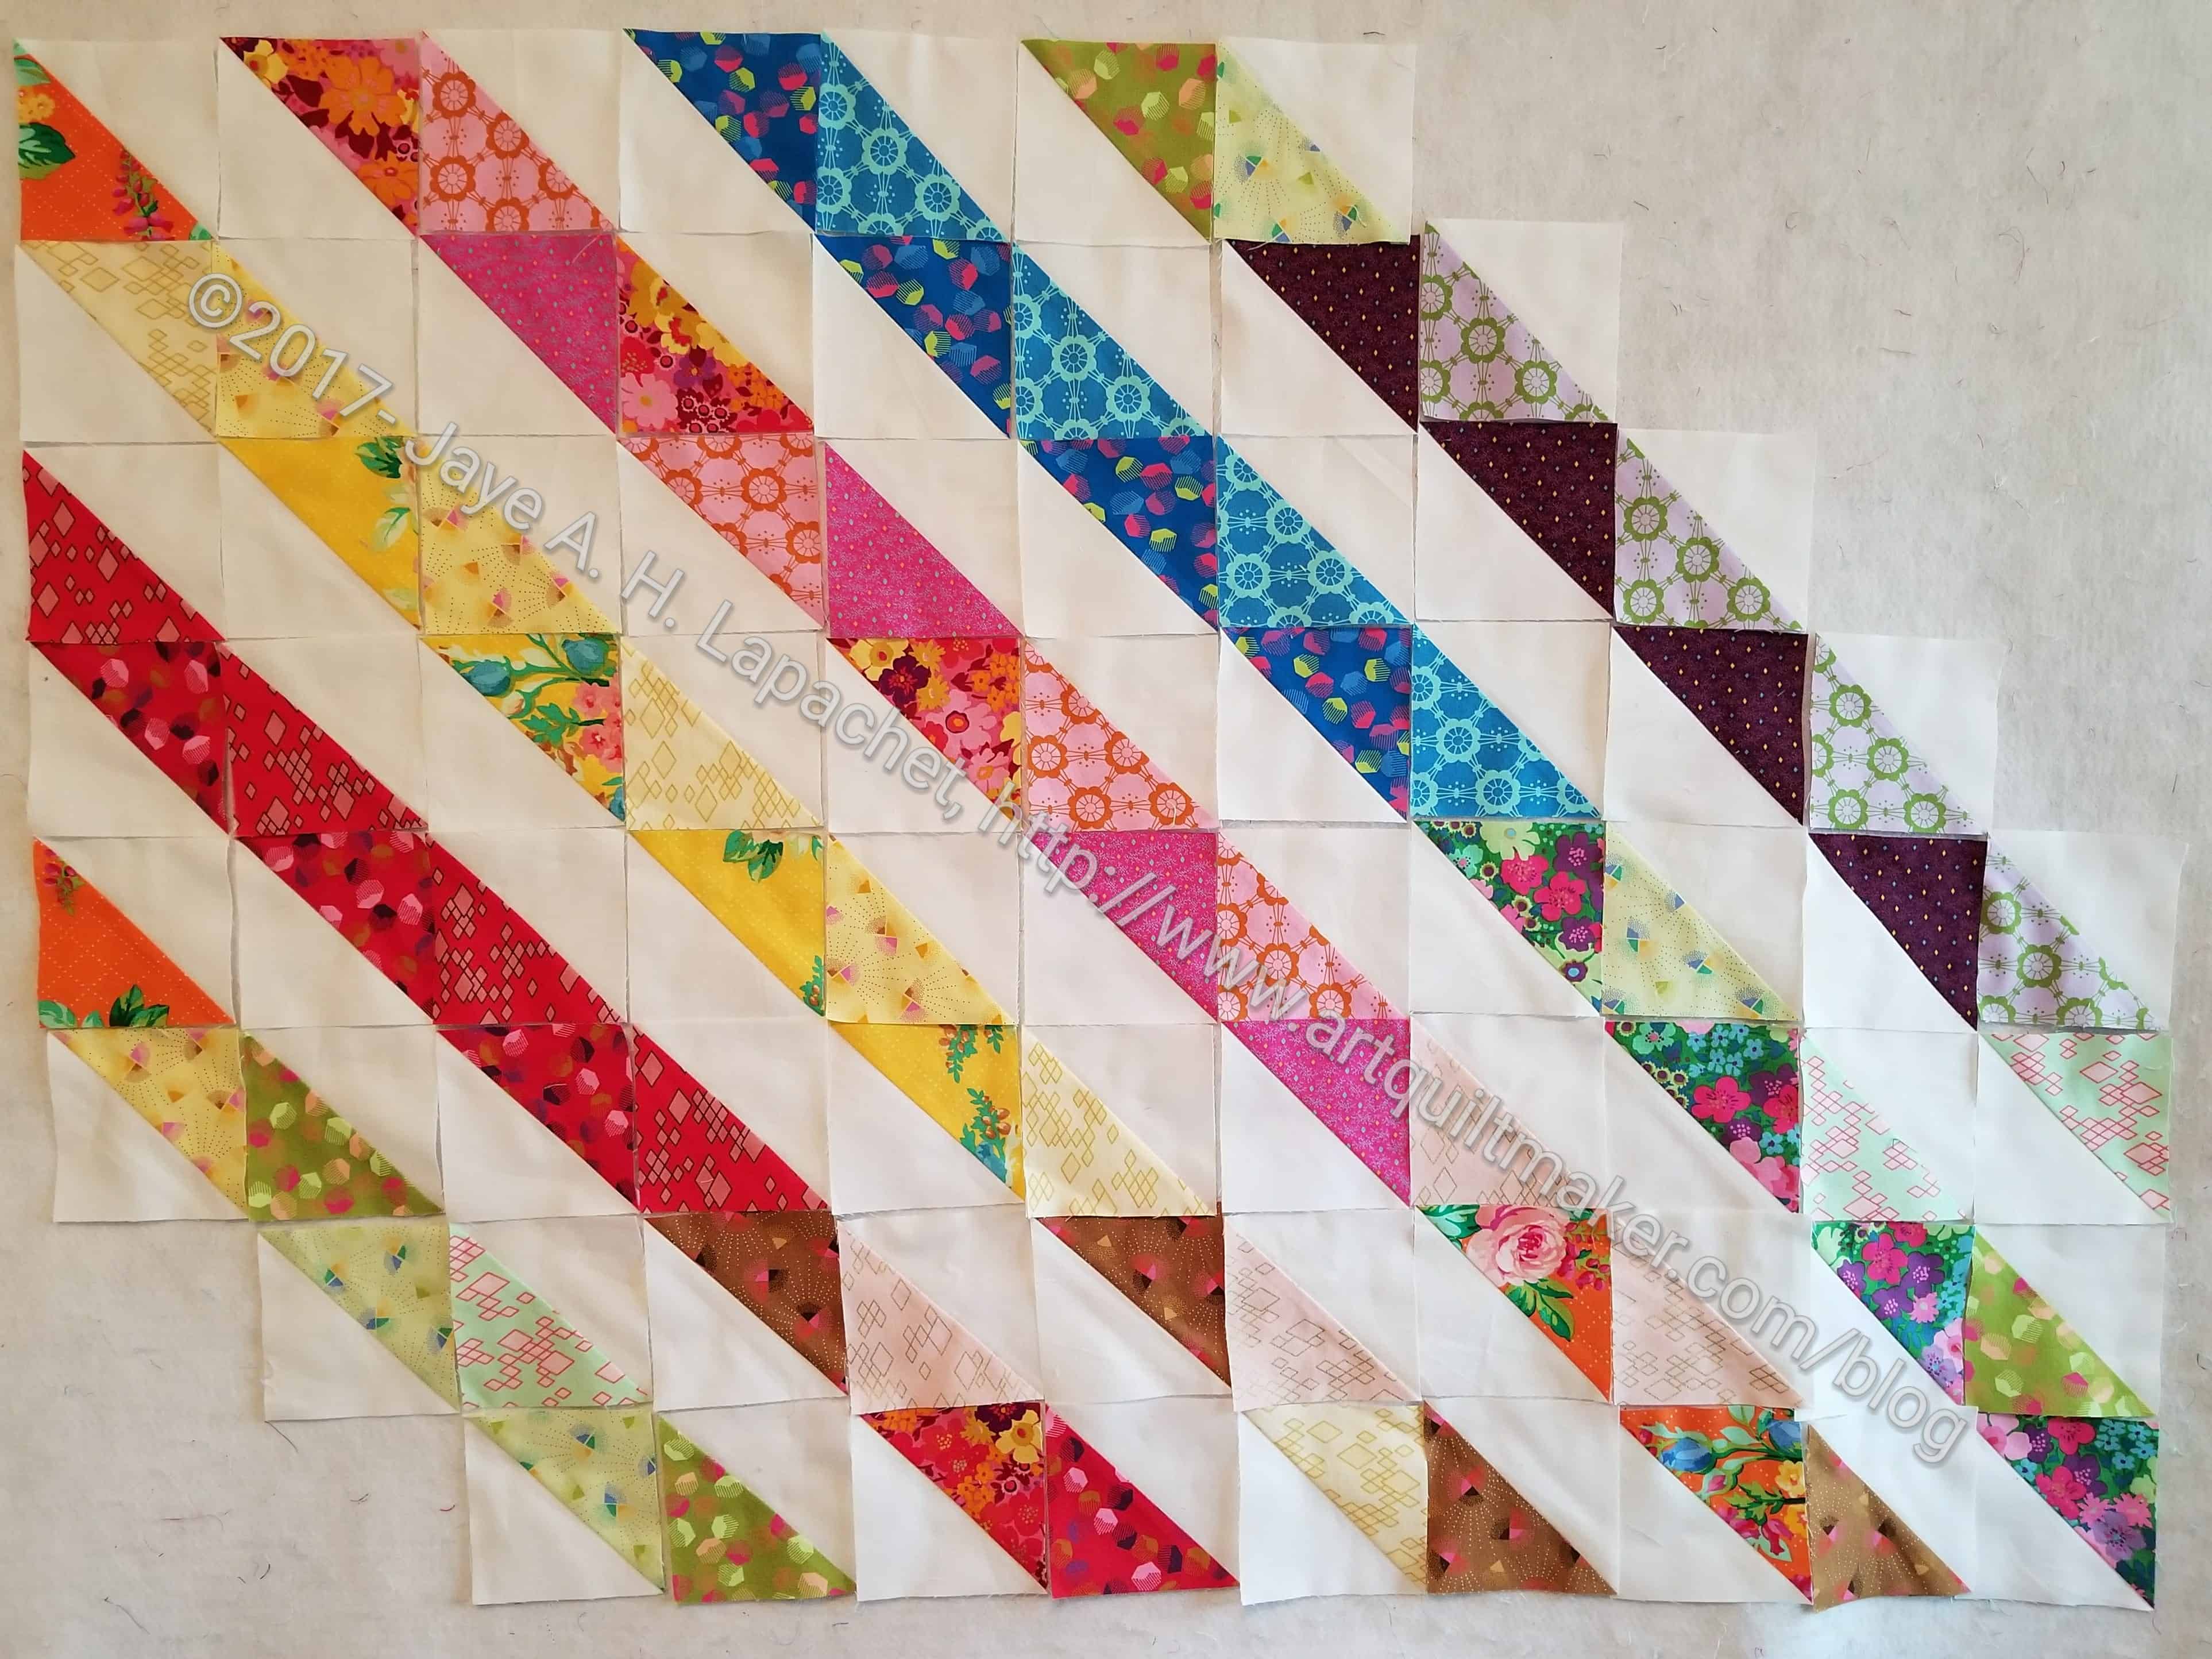
This is a very preliminary layout for the Triple Star. I had planned to use Kim Brackett’s straight layout from the book, Scrap Basket Beauties, but the thought of that type of layout just became too boring for me*.
I decided to use Sarah Goer’s Planned Improv method to layout these blocks. I thought it would work with a quilt in addition to just blocks. I got out some graph paper, taped it together and began drawing in the blocks.
Unlike the blocks for my Planned Improv Quilt, there will be spaces in between the blocks. I am also not starting in the middle and working out, which complicates the design. I had no trouble drawing out the design, but I think this quilt will be primarily made up of partial seams. Partial seams are not hard and some people equate them to Y seams (also not hard, check my tutorial), but they are really different. I have a tutorial on partial seams if you don’t know how to do them.
Stay tuned.
*I am not implying that the layout Kim Brackett shows is bad in anyway. I just didn’t want to lay my blocks out that way.
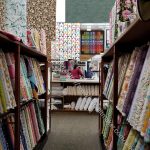
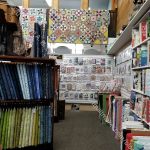
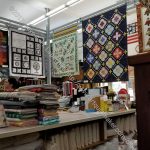
Boermas was the last quilt shop we visited and it was amazing. It isn’t exactly in Portland. It is about an hour and a half away in a quaint town called McMinnville. That day it was pouring rain and I had Mom drop me off at the metro station. I took the metro to the end of the line so Amanda didn’t have to drive all the way into the city to fetch me. It is a quiet and clean system and it was easy to take some time to write while I was riding.
Boermas Quilt Shop, McMinnville
Boermas Quilt Shop, McMinnville
Boermas Quilt Shop, McMinnville
Boermas Quilt Shop, McMinnville
Boermas Quilt Shop, McMinnville
Boermas Quilt Shop, McMinnville
Boermas Quilt Shop, McMinnville
Boermas Quilt Shop, McMinnville
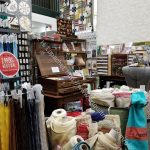
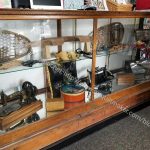
It was probably the largest shop we entered, though Pioneer Quilts was close if not the same size. I think it used to be a downtown department store at a time when all the major shops were on the main street to make shopping more convenient.
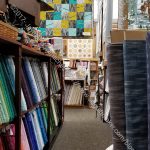
The store was three stories. The upper story seemed to be offices and staff areas. We didn’t go up there. The basement floor was all sale fabric. They had quite a lot, though their minimum was a yard, so I only bought a piece or two.
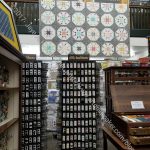
The street level floor was full of fabric. The aisles were narrow and full, but the place was scrupulously clean and did not seem disorganized. I could have bought a lot more than I did, but I made quite a dent in their stock. They had a wide selection of fabric styles – from Cotton and Steel to Civil War, etc repros. They had a large novelty fabric section, organized by theme, as well as about two aisles of batiks.
We had lunch at an American diner sort of place that uses historic buildings to house their eateries. The food is diner style and the building is historic. We also visited a yarn shop. I didn’t buy anything there though I sort of regret a couple skeins of a grey yarn variegated with turquoise. It was a fun day.
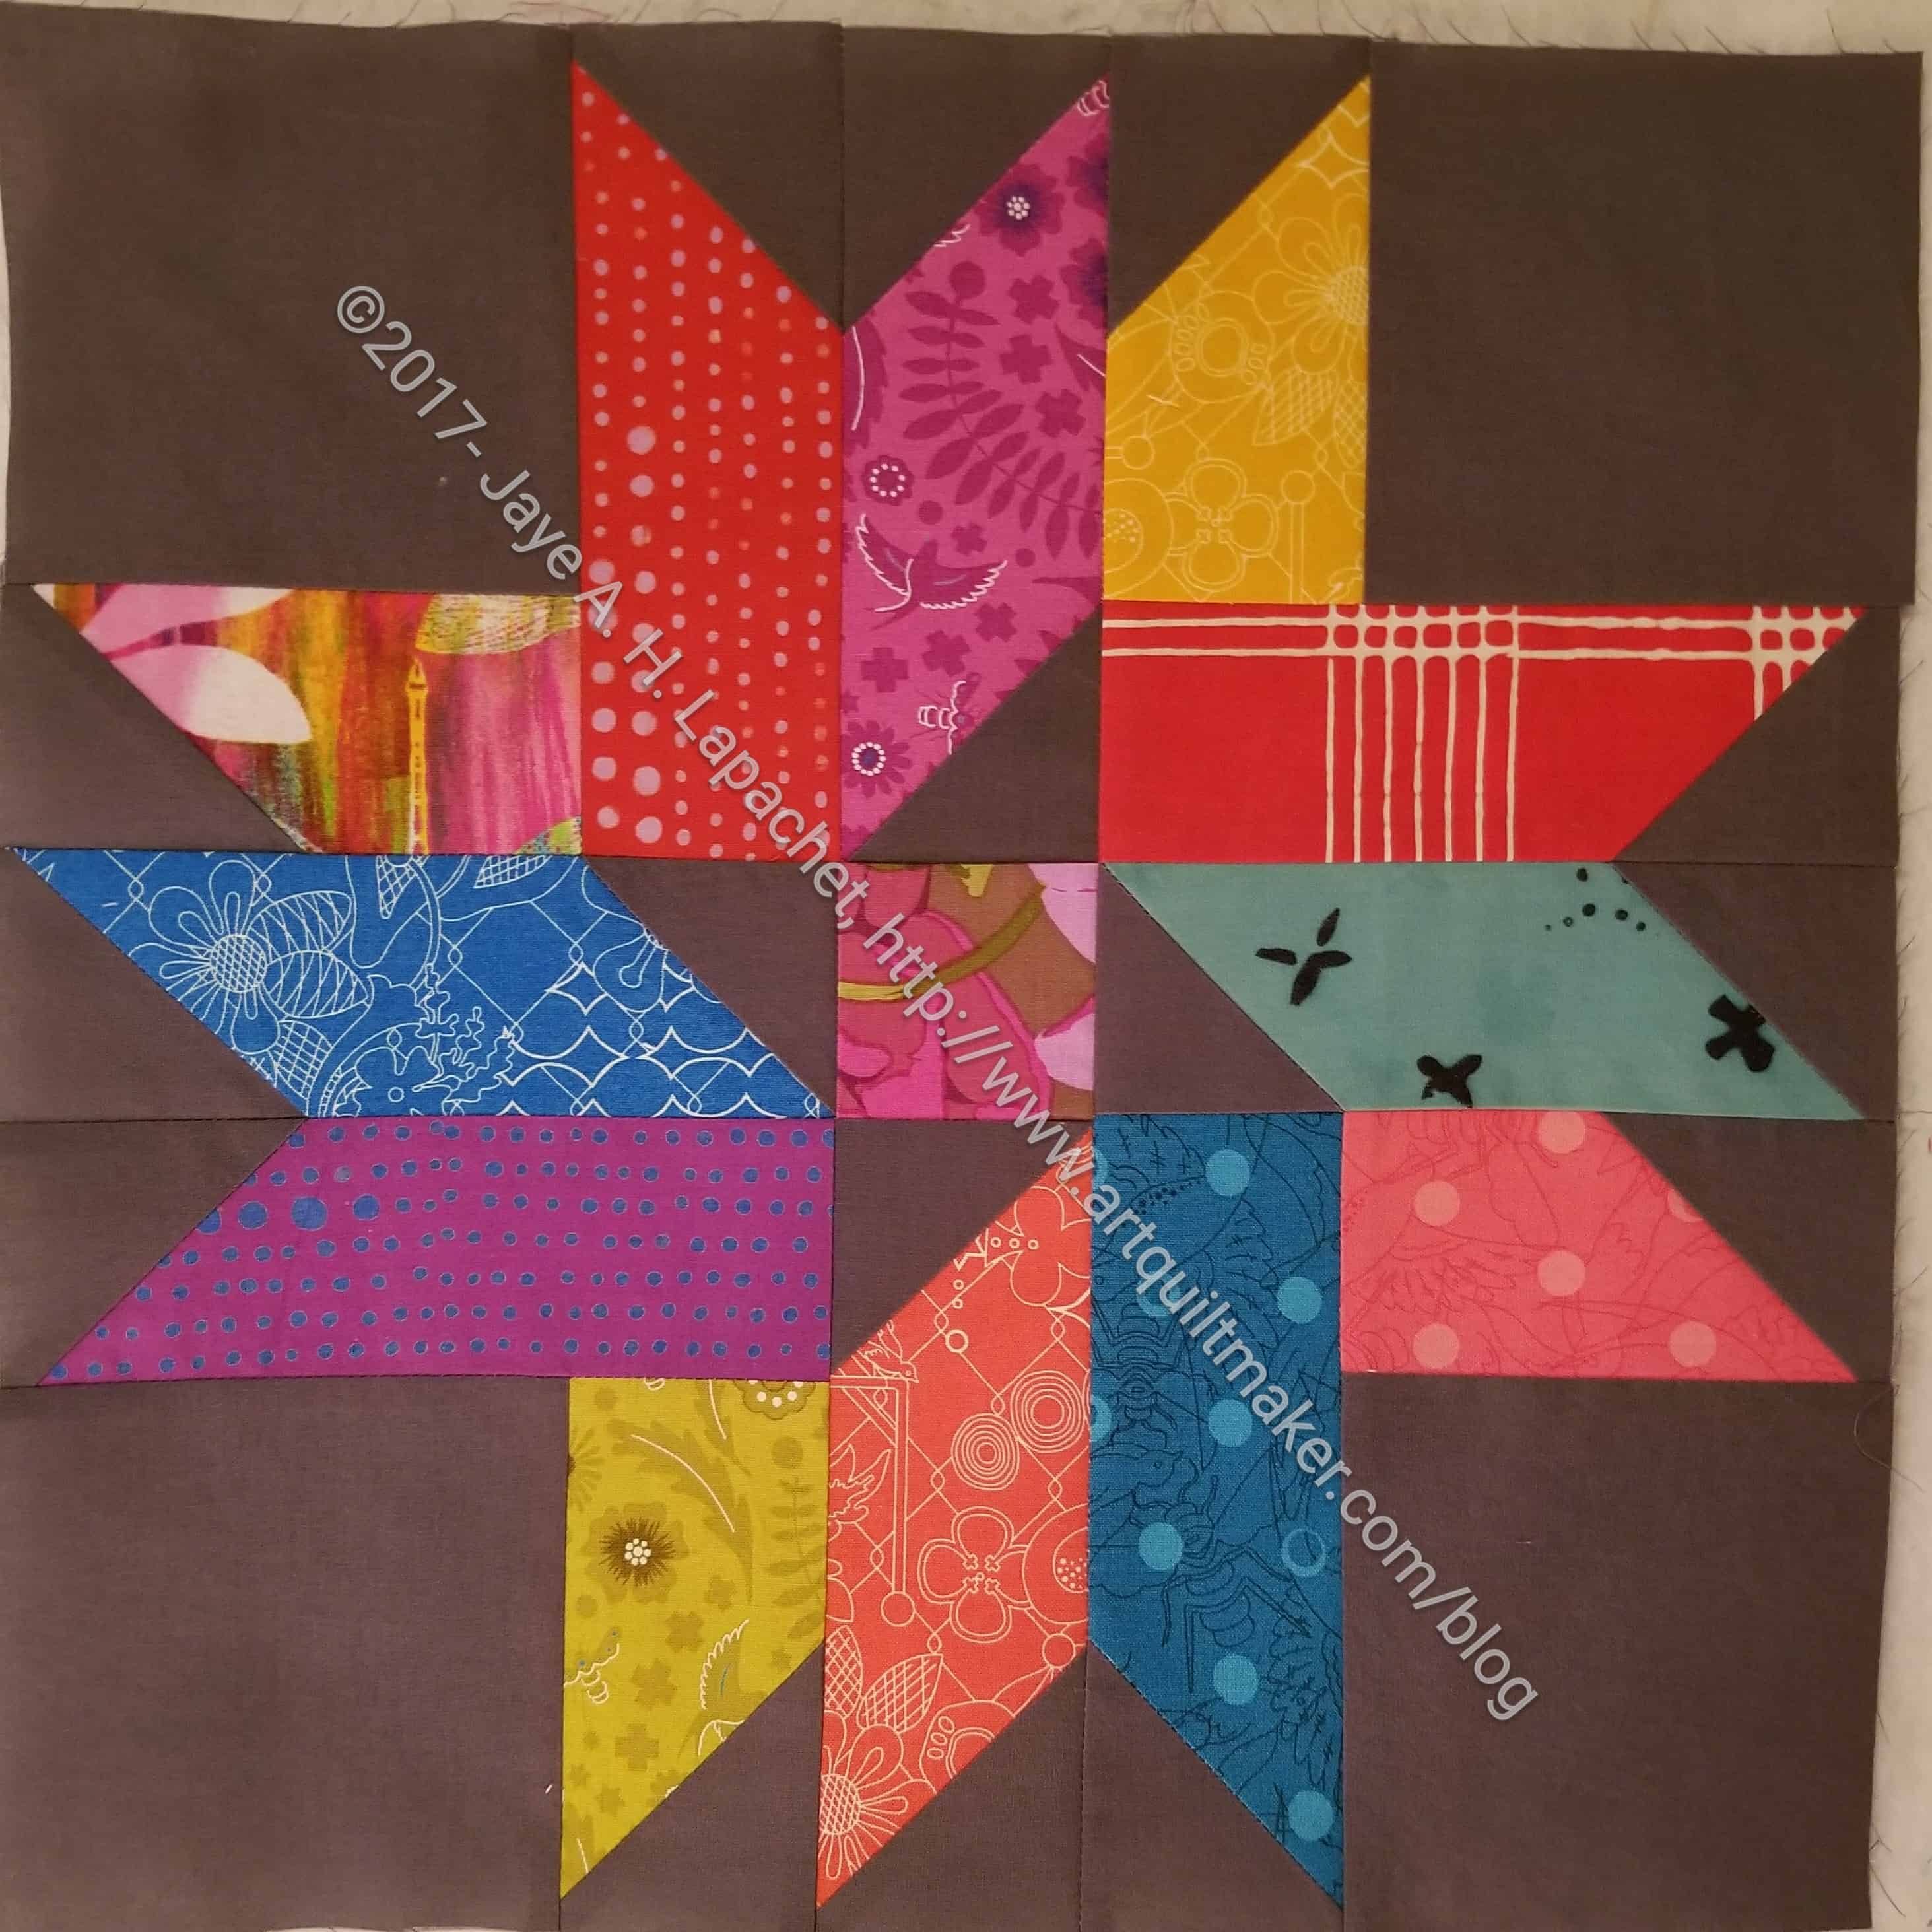
I decided on a layout for the Triple Star quilt and needed one more block to make it look mostly balanced.
I made it mostly from the leftovers that I didn’t use in the other blocks. This makes it heavily made from warm colors. I decided not to worry about it as it wouldn’t stand out with all of the other blocks.
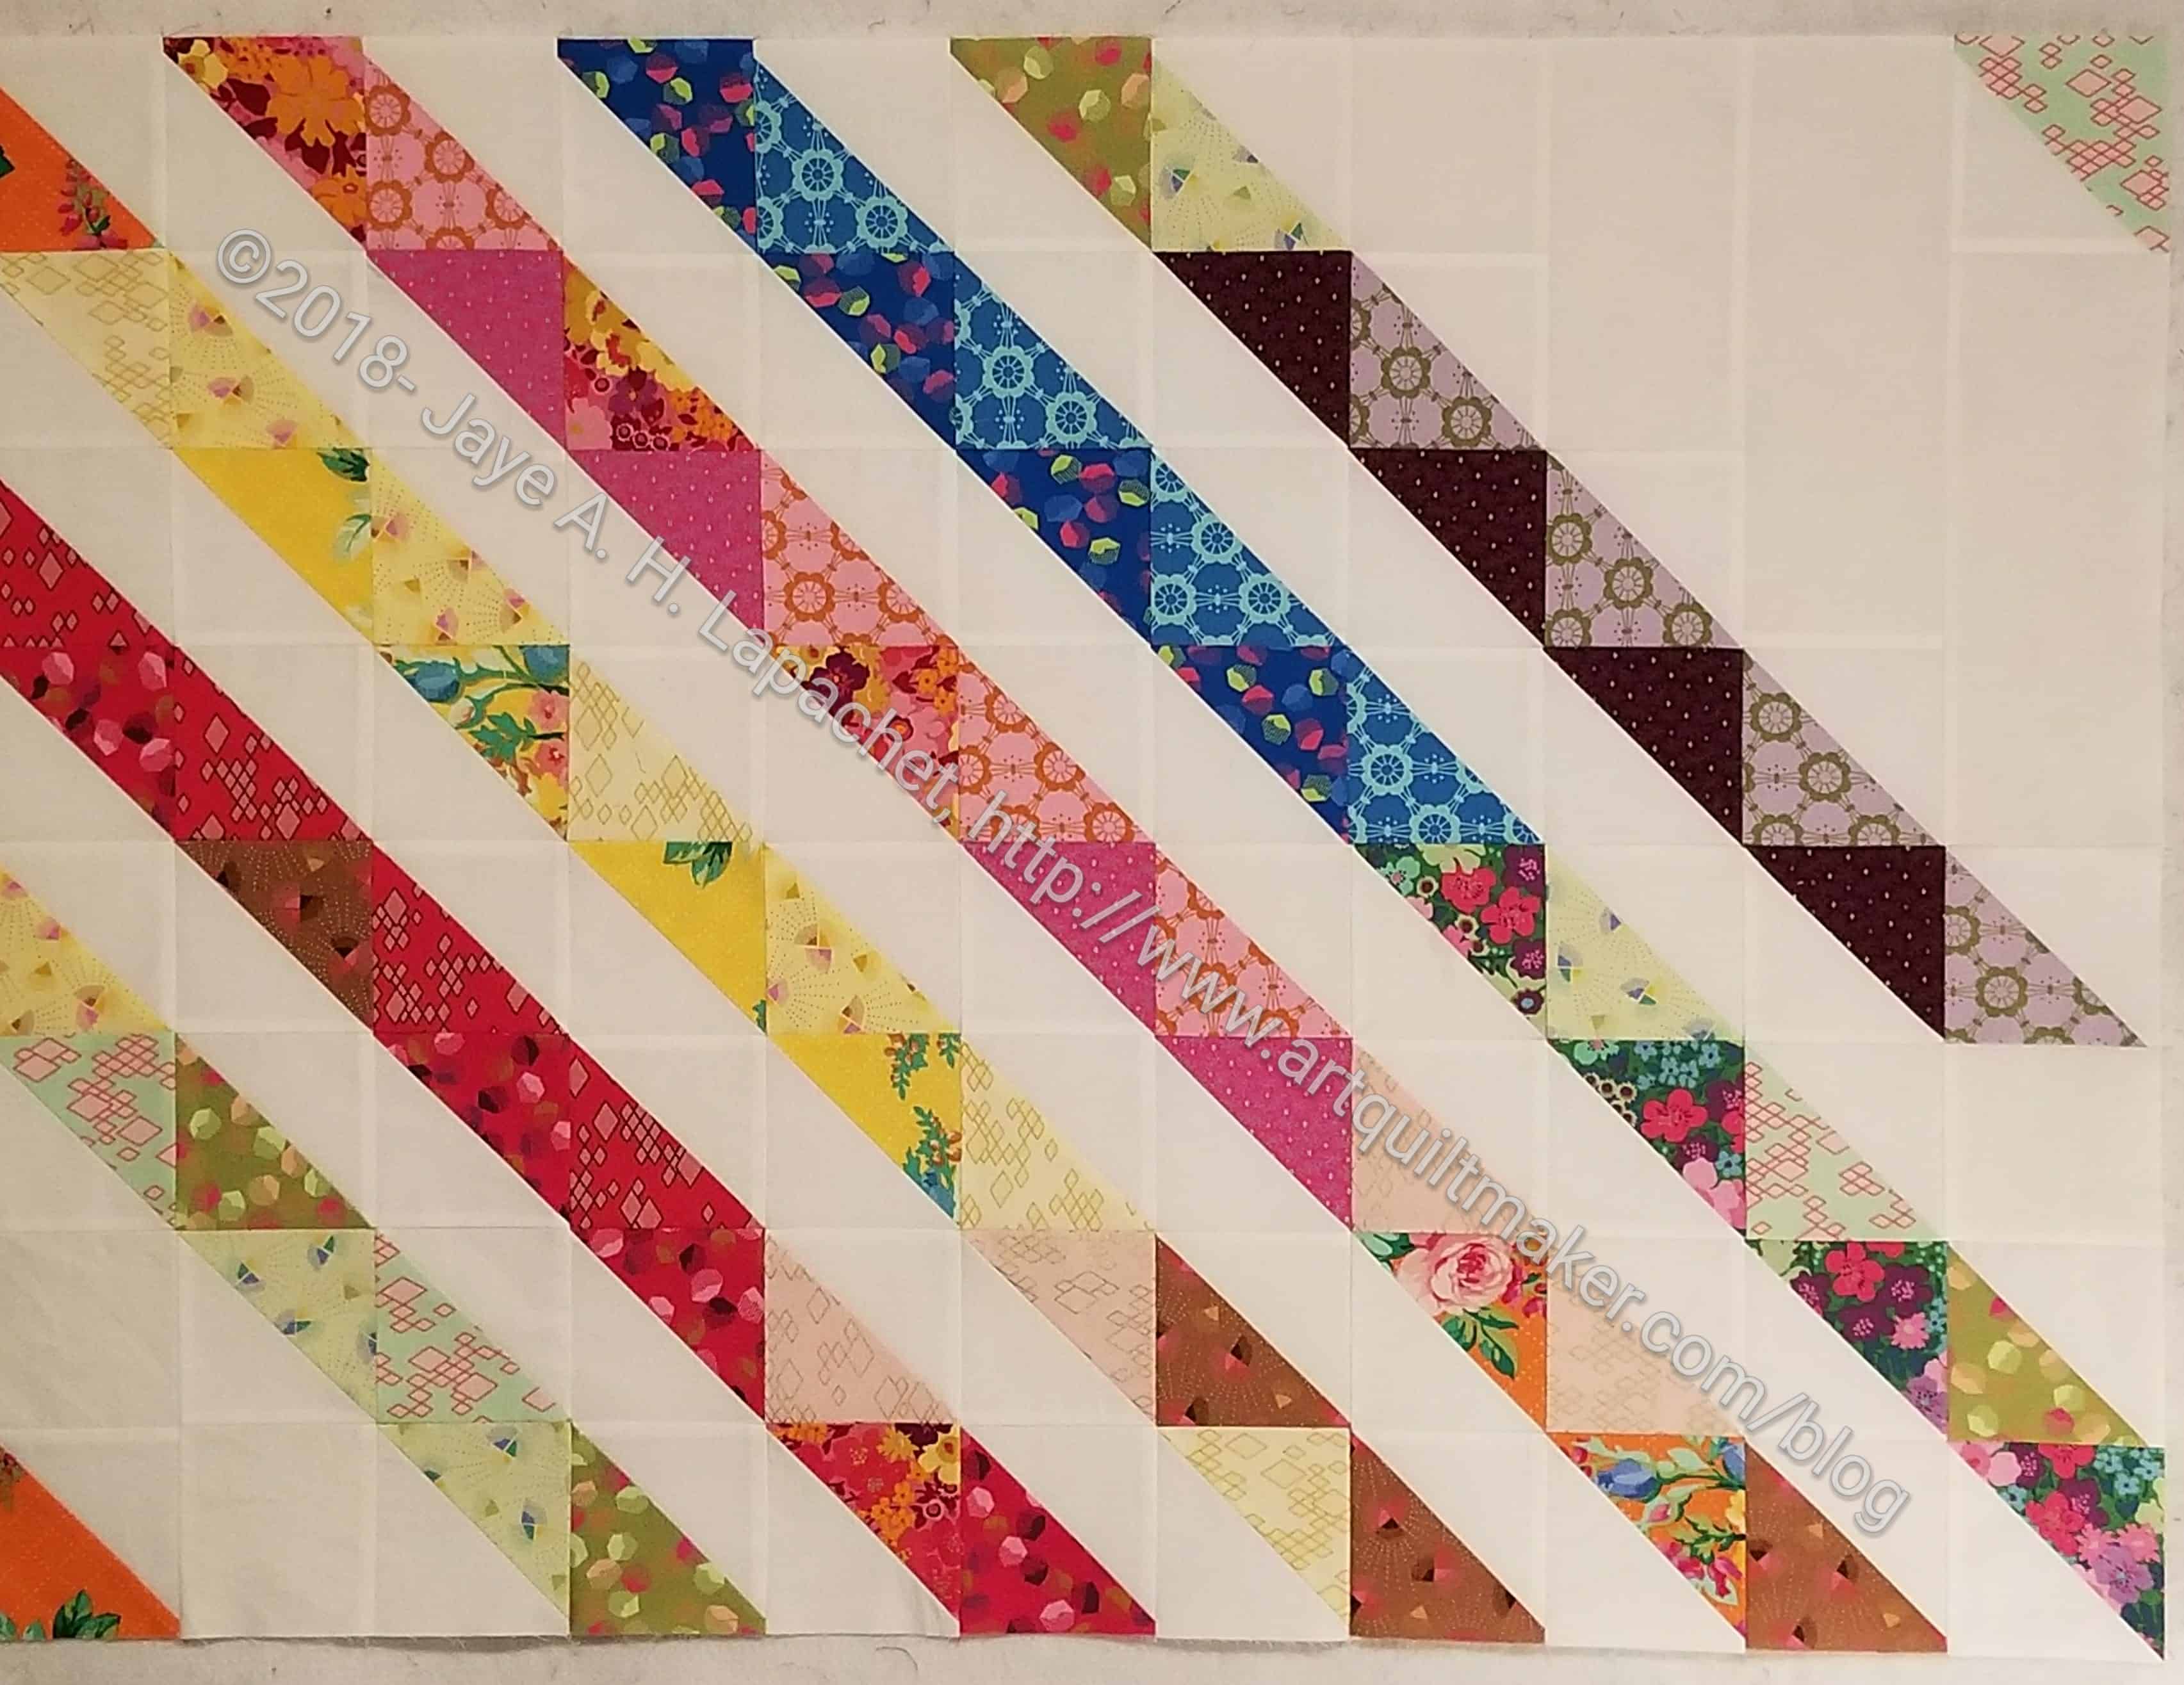
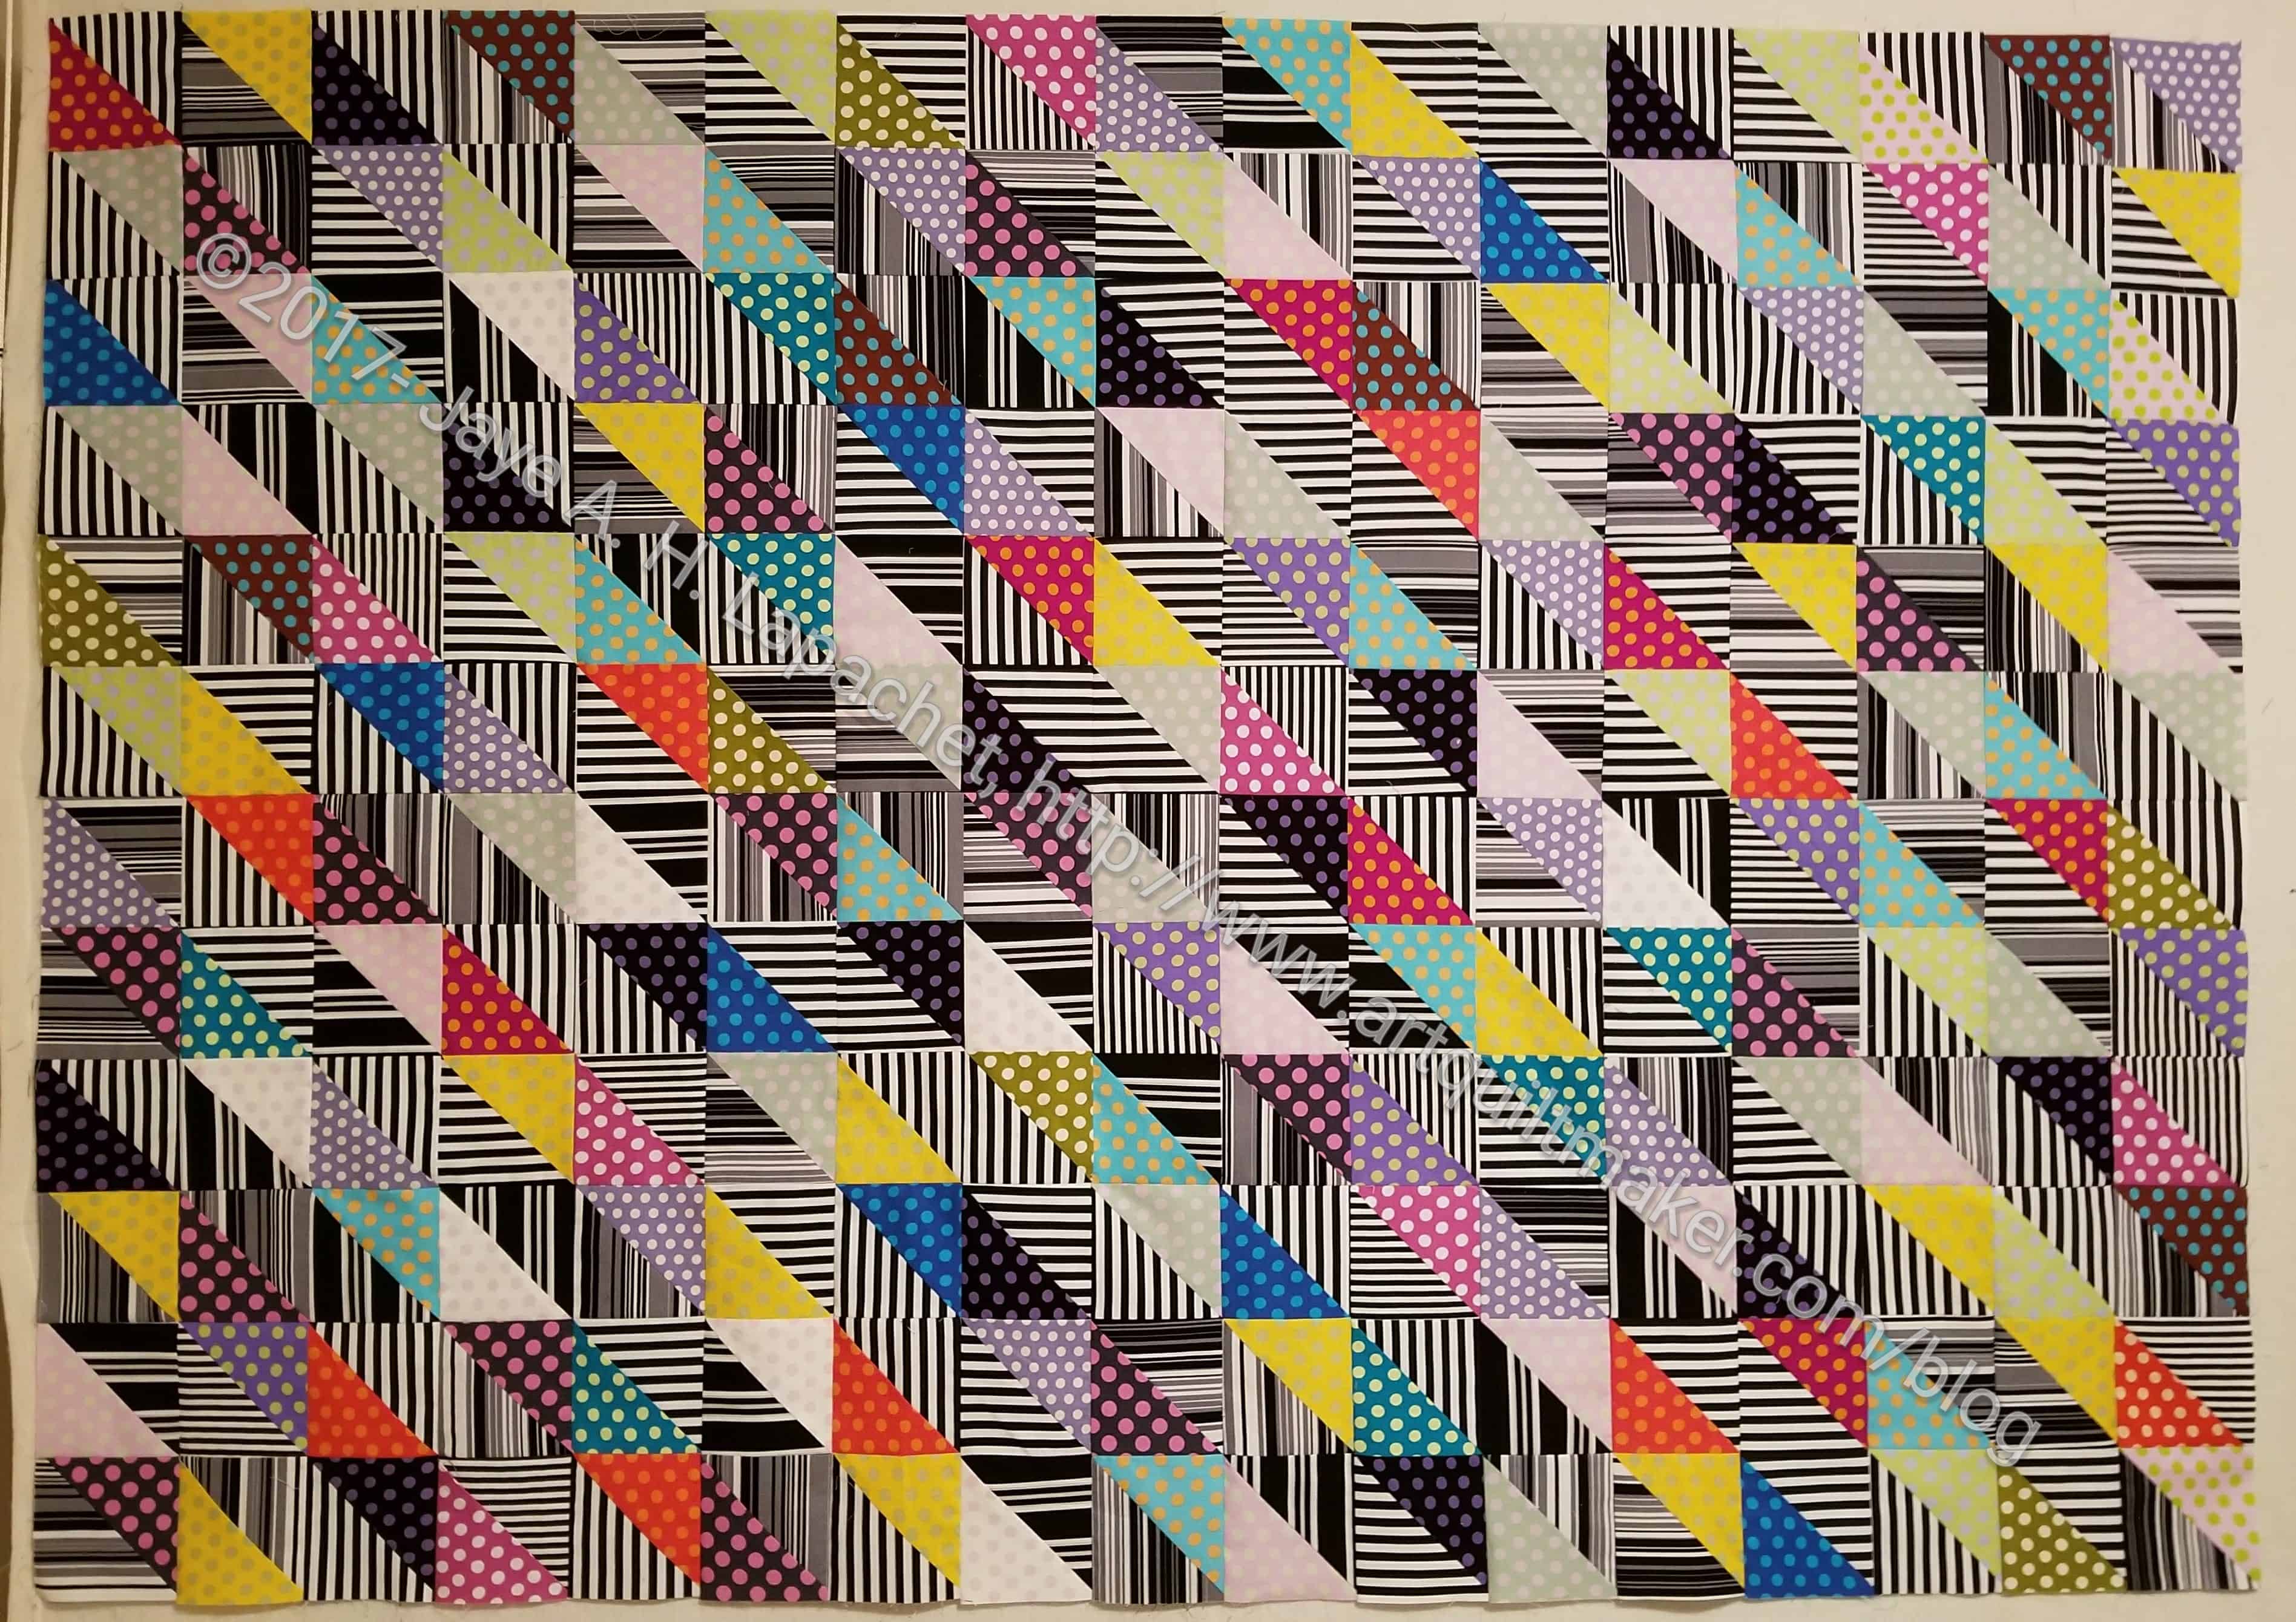
The Ta Dots and Stripes quilt top and back are finished and with Colleen ready for quilting.
As I said, this was going to be a donation quilt. It turned out to be much more appealing, though still an eye bender, than I thought so it will go to one of the nephews.
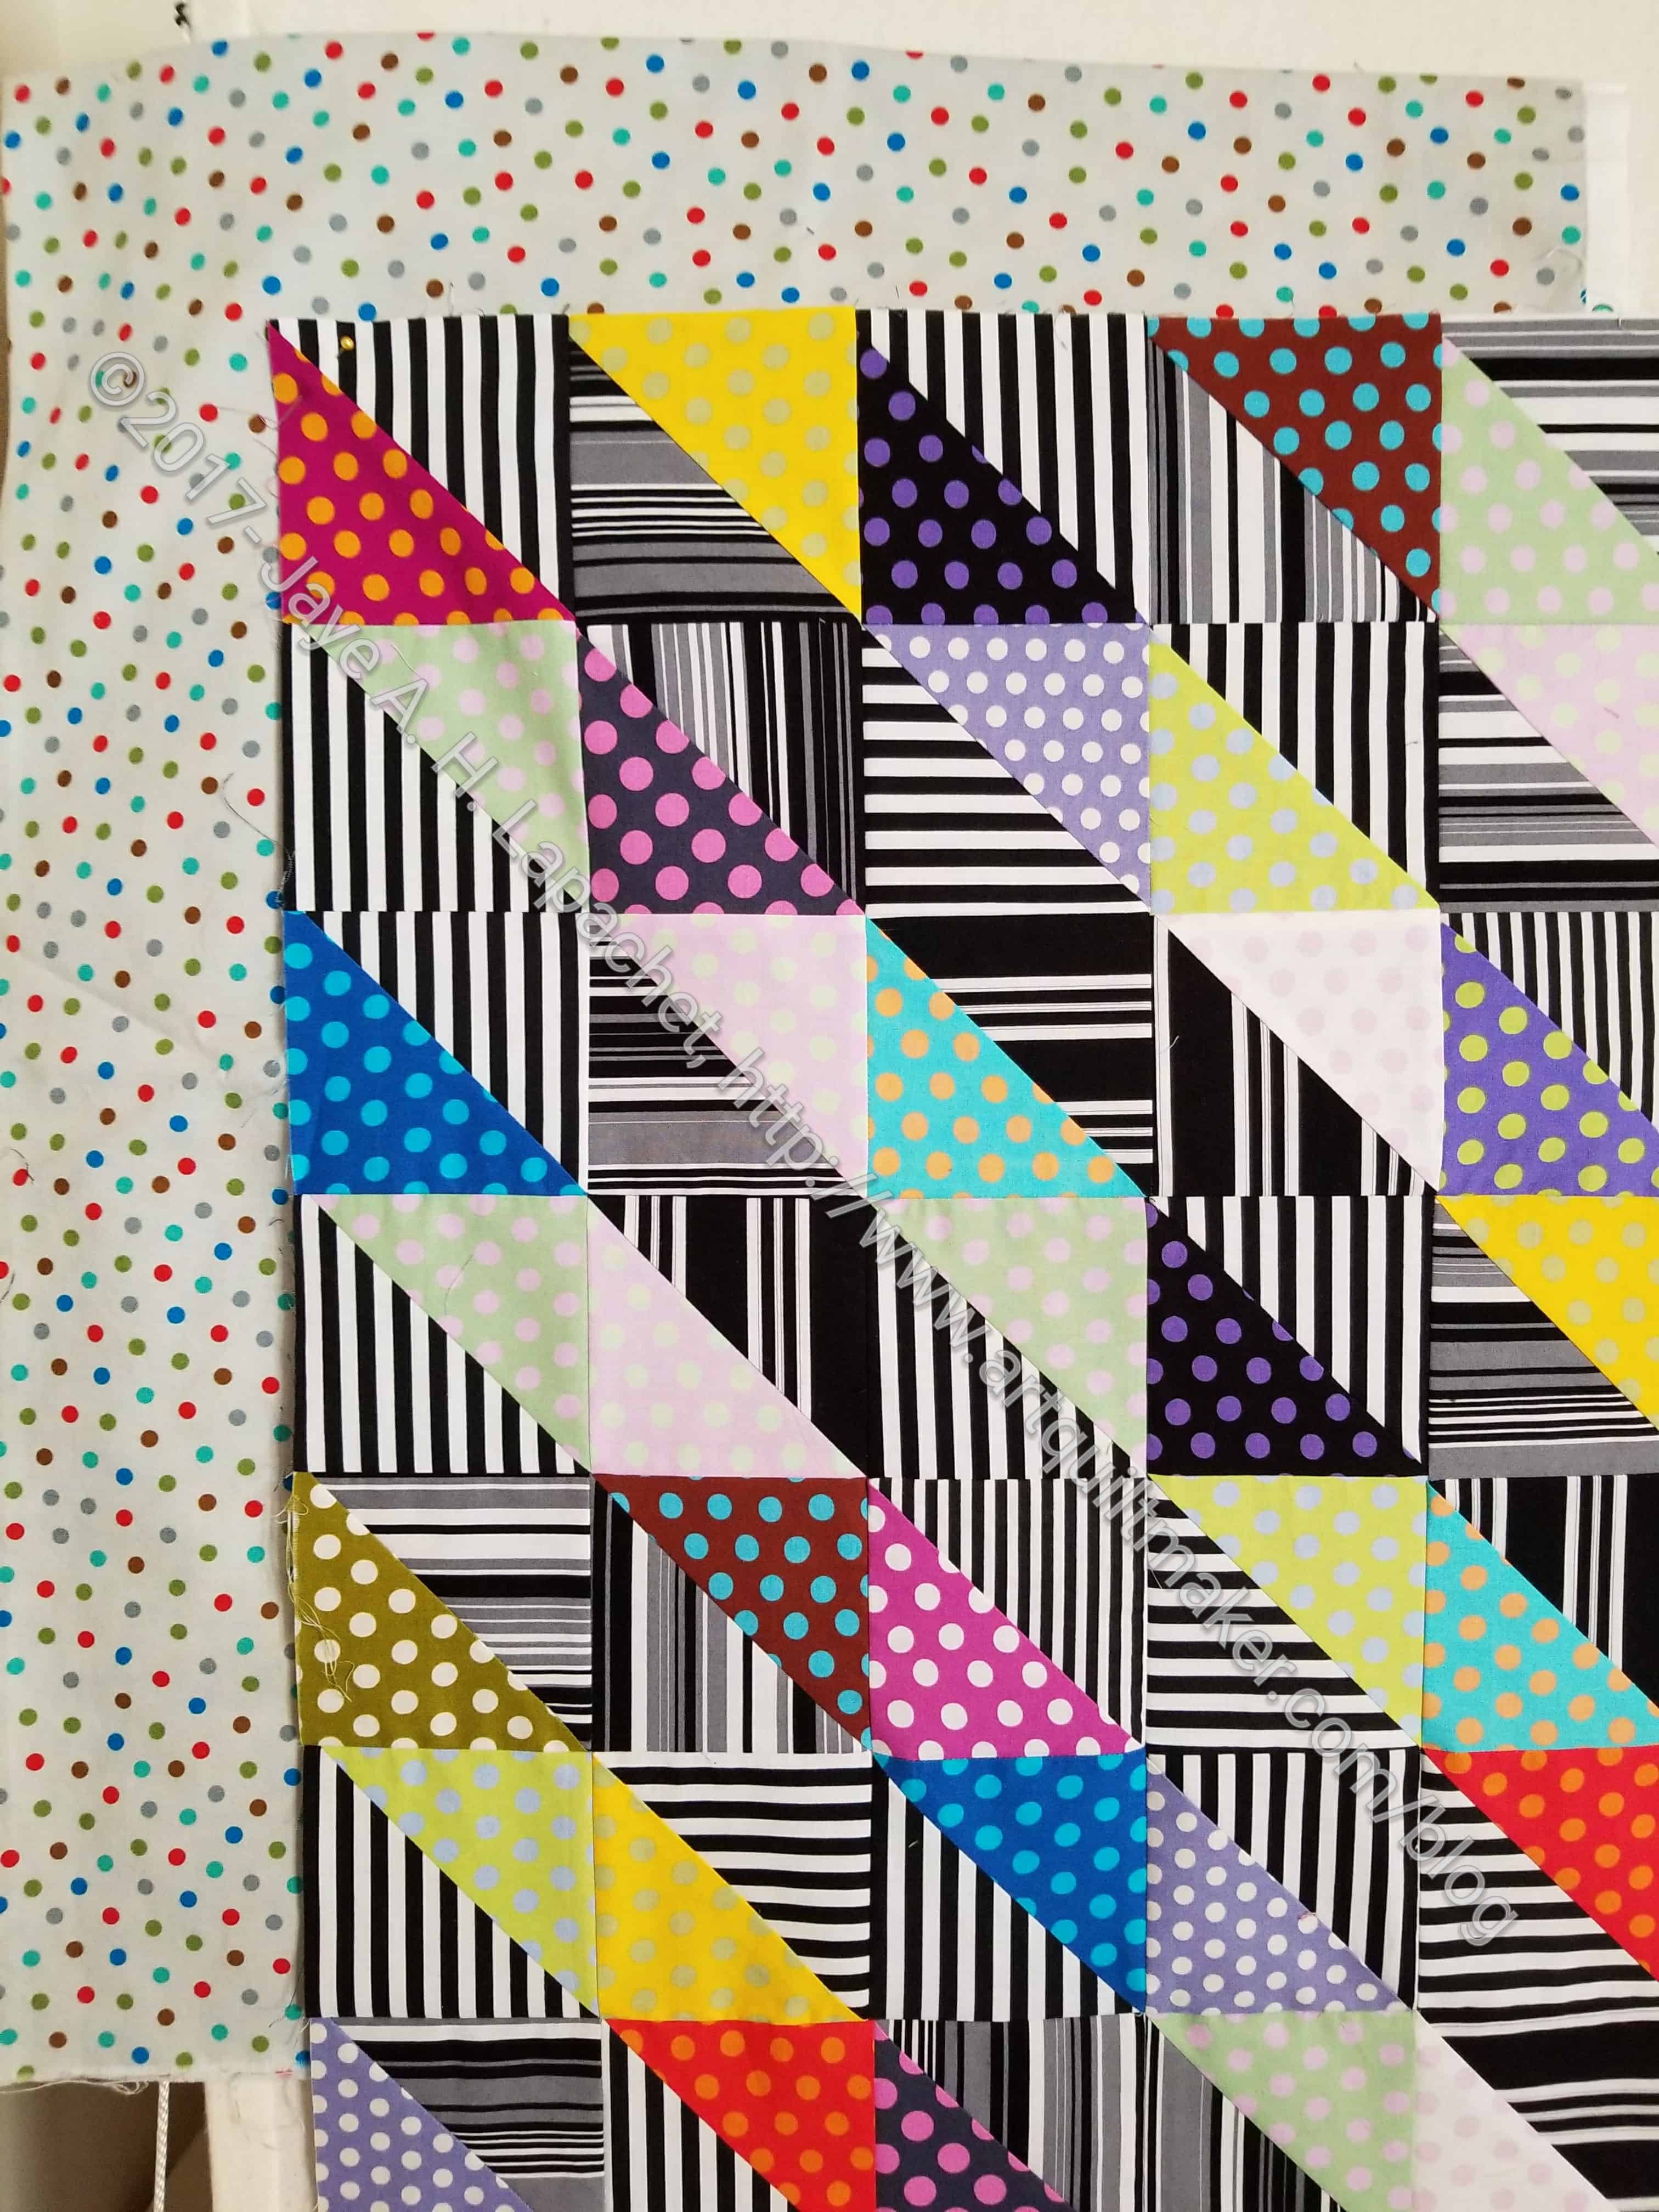
It is on the small size – about 45×60. I wanted a border to contain the chaos and make it a little bigger. I tried some fabric, but my IG peanut gallery nixed the idea and I had to agree. I couldn’t find a fabric print that worked and a solid was be too flat.
Ta Dots & Stripes Top – trying out borders
I tried a grey dot, which was ok, but not great. I like the fabric, but it just didn’t work with the activity of the quilt. So, no border.
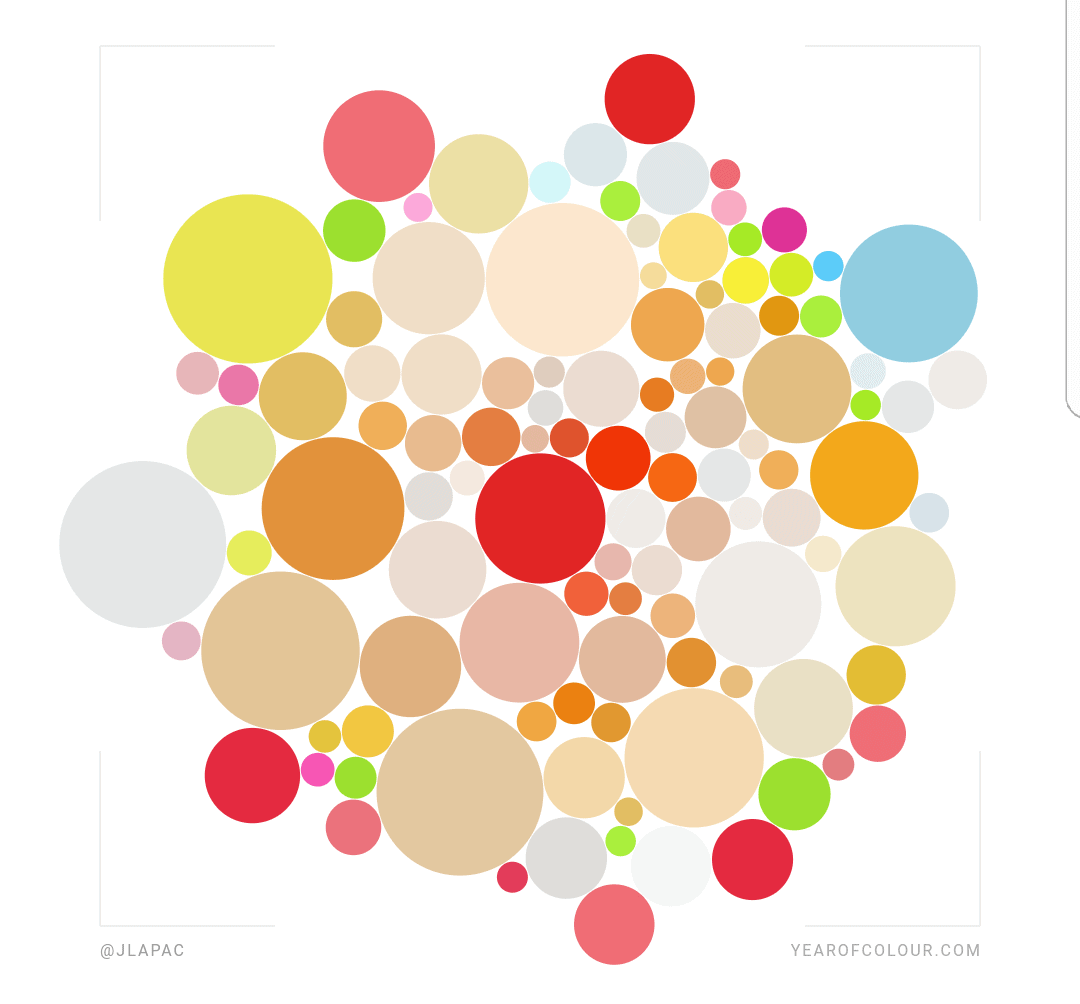
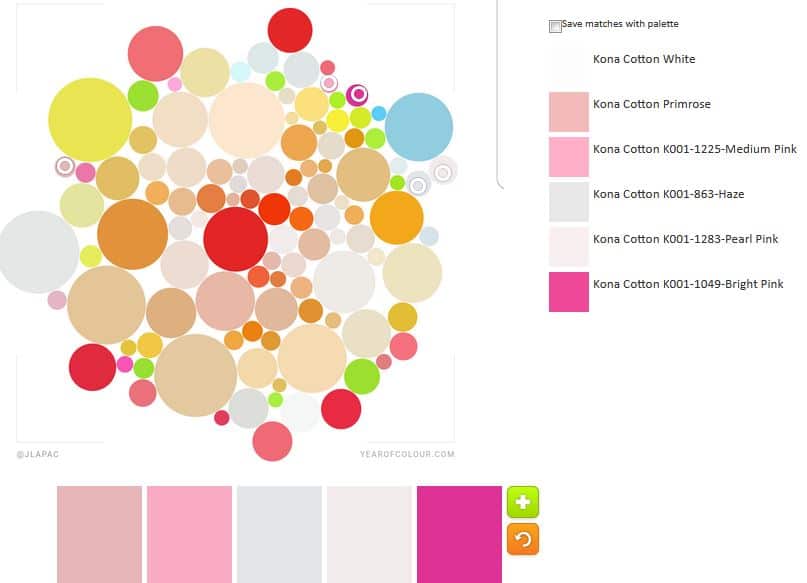
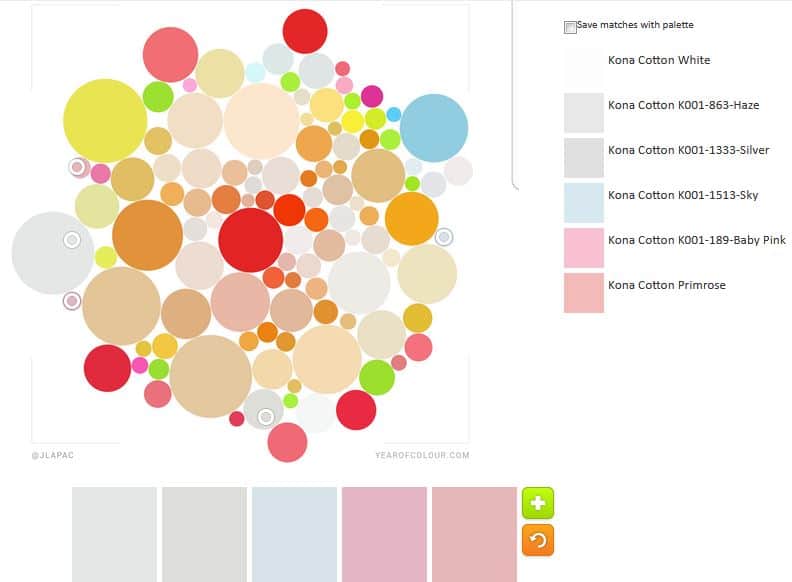
I am not being a snob by spelling color as “colour”. That is how it is spelled on the app/website. You can try it out Year of Colour and find out what colors you post most.
I have been actively seeking out brightly colored images so my palettes would be virtually neutral free. The one from last week was too much fun to limit to one week. Also, I was busy and had to get on.
The blue led me to try an all pink palette. I threw in some very light purplish colors as well – Haze and Pearl Pink – before I got to all pink, because I thought they were pink circles. They, as I said, turned out to be very light purplish colors.
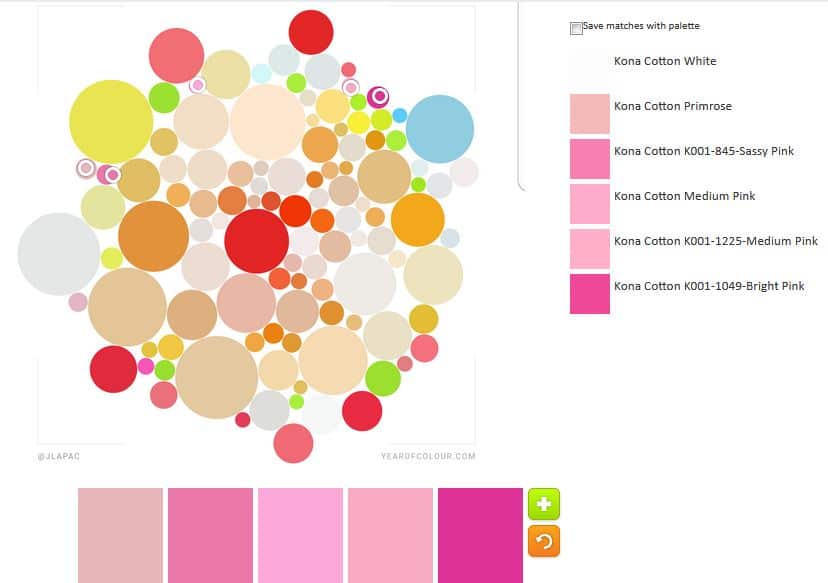
ColorPlay Jan 26 n.6
I did make it to an all pink palette. Very cheerful!
ColorPlay Jan 26 n.7
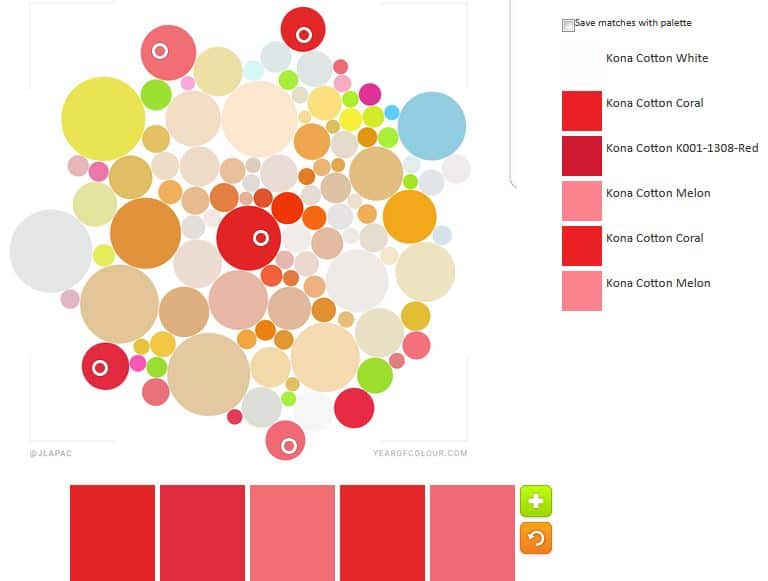
The pinks made me think of red. The palette above has some more pinky-reds/dusty rose colors – Coral and Melon – thrown in with the reds.
ColorPlay Jan 26 n.8
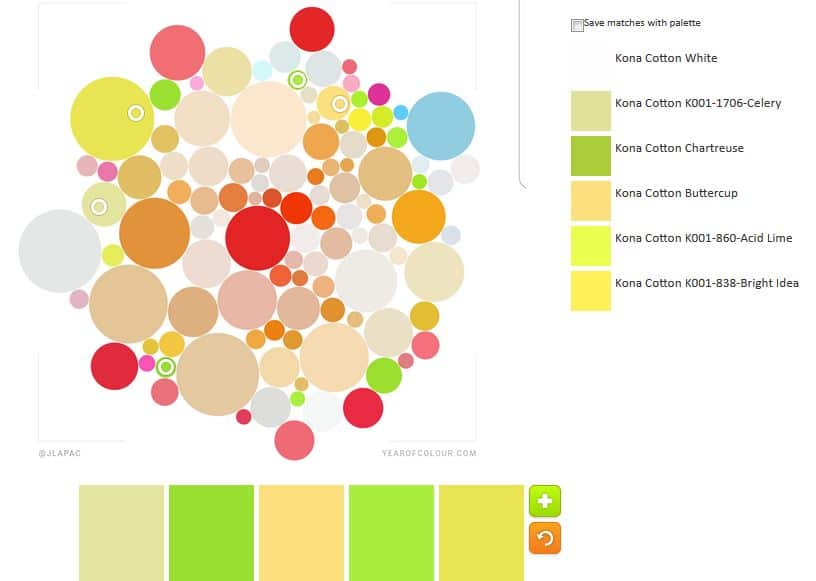
I tried an all green palette and couldn’t find/use enough greens. I barely use green in my quilts anymore. I had to add in the yellow so I didn’t have duplicates.
ColorPlay Jan 26 n.9
The pink and light purple palette from above made me think that there might still be possibilities, so I tried to go very light. Think this would make a lovely baby quilts.
ColorPlay Jan 26 n 10
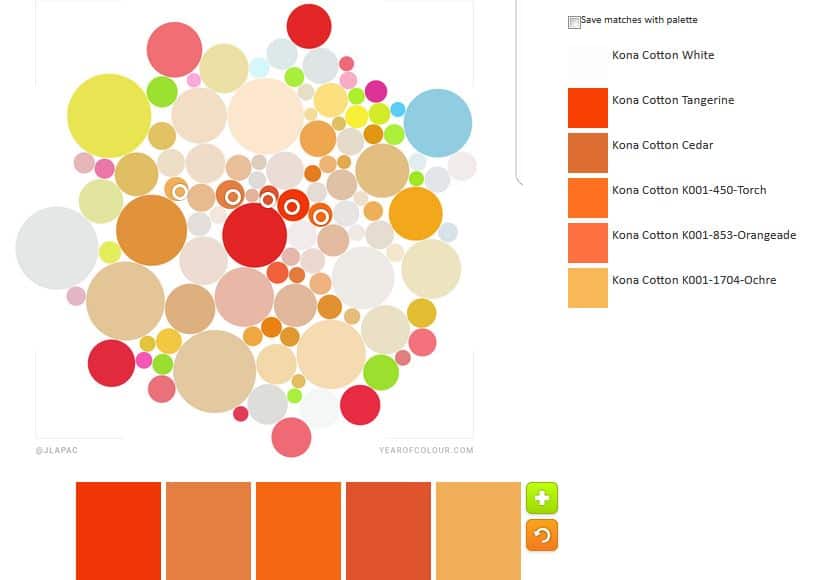
As I said, I could have gone on forever, but I made one last orange palette for your quiltmaking pleasure. the oranges aren’t very bright, so the whole palette looks very Autumnal rather than Creamsicle
You might see this image again. I don’t think I even scratched the surface of this image. I think I can make many more palettes.
This quilt might have been a freebie from the Mostly Manor Lozenge quilt, but it might also be something that I pass along to someone else to work on.
What I have now is not large enough to make much of a quilt with. I need to find fabrics to go with the Mostly Manor fabrics I have already used and make more HSTs to make it larger. I could just add some white squares, make a back and call it a donation quilt. I am not sure at this point. I like the what I have so far, but don’t want to spend time making something that won’t be satisfying. I am not saying that this is an ugly quilt; I am saying that I don’t think I want to spend time on it. Even if I finish it as is, someone will like it.
Periodically, I am actually able to take advantage of some of the benefits of my MQG membership. Last week, I watched a webinar with Malka Dubrawsky on using prints called Creative Webinar: Printed and Patched: Designing with Patterned Fabric with Malka Dubrawsky.
My overall first impression was that there is an assumption that modern quiltmakers don’t use prints. I see a lot of MQG people buy lots of FQ collections. Wasn’t there some crazy hullabaloo over Heather Ross and some castle/princess collection a few years? Blueberry Park is pretty popular as well.
I tried to take this weird impression and set it off to the side so I could gain some knowledge from the webinar.
Malka said that prints have graphic information. There seemed to be another assumption that we are used to using small scale prints because they read as colors. She talked about using larger scale prints as graphic messaging. Dubrawsky said that using a variety, both large and small scale prints, creates interest.
She divided the presentation up into points:
spaces
movement
color/color contrast
common print
random
I think that I may have missed one or two points, but I got some good information out of these, so the webinar was worth my time.
When Malka talked about spaces she was talking about dividing up the quilt’s surface into different spaces. She, then, talked about using prints in those spaces. You can also organize blocks as spaces or into spaces to use prints.
Movement went right past me.
She used Color / Color Contrast as a different type of organizing tool, which I thought was interesting. One example was dividing up a quilt into warm/cool. Again the idea was about organizing fabrics on the surface of the quilt so you can use printed fabrics. I don’t find this to be necessary in my work, but I thought the concept was interesting and it might be worth trying.
She encouraged makers to create rules for ourselves to use prints so they make sense across the surface. I do this with my quilts in general.
I had no idea what Dubawsky meant by Common Print. She was referring to using different colorways of the same prints all together. I have always loved this concept. I often like having all the prints in all the colors. Remember my Half Moon Modern drama? Malka says that it allows for easier color and shape focus.
She said that using prints can produce ‘hidden treasures’ that don’t show up when you use solids. Prints create another point of interest, more to look at.
Random: hard to make work, but can work. This was difficult for the presenter to explain and I can understand why. She threw out:
“Simple shapes, colors go together, big spaces. Active background electrify prints rather than toning them down. Focus is on color rather than design.”
Overall message is that makers need to organize your fabrics and design so that they work on the surface. She said that design is really important and I was thrilled.
She encourages people to make their own FQ packs.
Yay! She uses batiks all the time. She calls them modern batiks – modern, bold, graphic designs. Malka also said that she doesn’t really like the older style, watercolor-y batiks. I got the impression that it was the motifs on the surface of the fabric rather than the batik process she didn’t like.
To start: Pick (buy or create) a fabric collection you really love – she buys entire FQ bundle- and then play around with different ways of organizing fabrics. Small/large prints or warm/cool colors. Use a simple geometric design. Challenge yourself. I also got the impression that she was saying to be brave.
Her new designs will be available on Feb 1 on her website as PDFs. Printed patterns will be available Feb 20. She is also doing kits.
A recording of this webinar is on the MQG site for your viewing pleasure, if you are a member.
In 2015, I created a list of gift ideas. As mentioned at that time, I like the idea of giving and making sets of gifts: choosing a fabric and then making a number of items from that fabric. Since then there are lots of new patterns and ideas. As I was making a gift basket of sewn items last year, I came across a few other items that I thought would make great additions to my list and be useful as well. I decided to update this list and get the ideas out to you again.
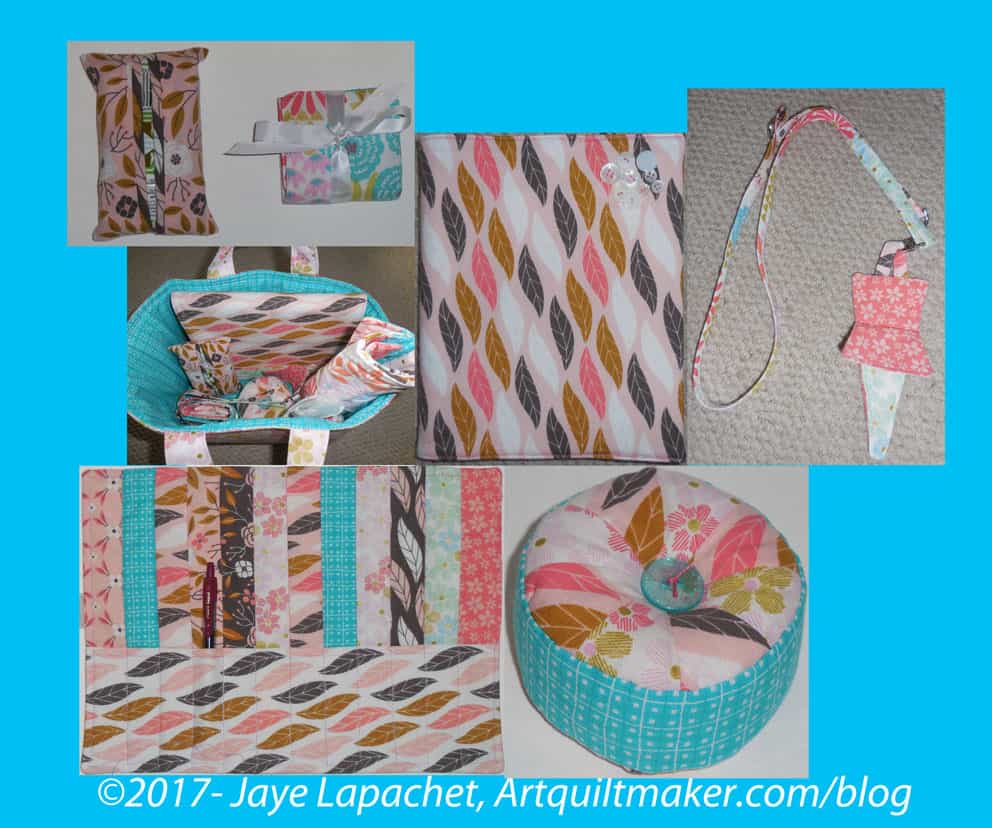
Mary’s Gifts
You might remember that I made a set of gift items in February of last year for my friend, Mary. They look great all together in the One Hour Basket, IMO.
The point is not to use the patterns I use, but to make the gifts in whatever pattern YOU like. This is a list of gift ideas. You can use my pattern suggestions, but using your own will make the gift more personal. There are about a gazillion patterns for a variety of useful bags and sewing items. I am sure you can find some lovely items to make if you look through your pattern drawer.
You might be wondering why I am talking about this in January when you just finished with the holidays. Simply, you will need time to make everything without getting stressed out.
Pincushion – Fig Tree Quilts Petit Gateau pincushion pattern. I like this pattern, because the pattern makes sense, is not difficult and looks like a pincushion. I have made several and they go together very quickly. I use wool roving and some of the Beanie Baby plastic pellets to fill it. I buy both at Beverly’s when they are on sale and keep a supply on hand. The pellets give the pincushion some weight. I don’t use walnut shells, because so many people are allergic to nuts. The only issue I ever have with this pattern is to find an appropriate button to put on top and bottom. Often I make these and don’t think ahead and then find myself wanting to finish, but have no appropriate buttons. Of course, there are plenty of pincushion patterns out there and you should use your favorite.
Needle case – many people don’t do handwork and so this is an inappropriate gift, but it is so cute! Regardless, I find that a bit of hand sewing is needed at various times- in front of the TV, in the car, etc. I found the pattern in the Spring 2013 issue of Modern Patchwork. It was designed by Rashida Coleman-Hale of IHeartLinen. I wasn’t able to find a pattern for it on her blog or the web. The pattern is in RCH’s book, Zakka Style, according to Frances Newcombe from Belly Buttons Boutique. You may be able to find I copy of that magazine on Etsy or eBay. I am sure there are other needlecase patterns out there.
Tissue case – This isn’t something that I would really use, though that might change. It is a nice stocking stuffer or small hostess gift. I got the idea to make them from Valerie over at Evening in the Garden blog. I made a few, which you can see in December gift posts. I used the YouTube tutorial that Valerie used. I found that these make great boutique or Secret Santa Shop items since they are very quick to make.
Lanyard – these are great for guild meetings, but also for hanging scissor sheaths, keys, pens, etc. Think of a chatelaine’s key ring.
One thing that goes well with a lanyard is a nametag. You can make a regular lanyard or one that can hold a phone, credit cards, cash, etc in addition to the nametag. The Little Cell Phone Wallet has most of the features named above except for the nametag part, but you could make a nametag with a pinback and clip it to the Little Cell Phone Wallet
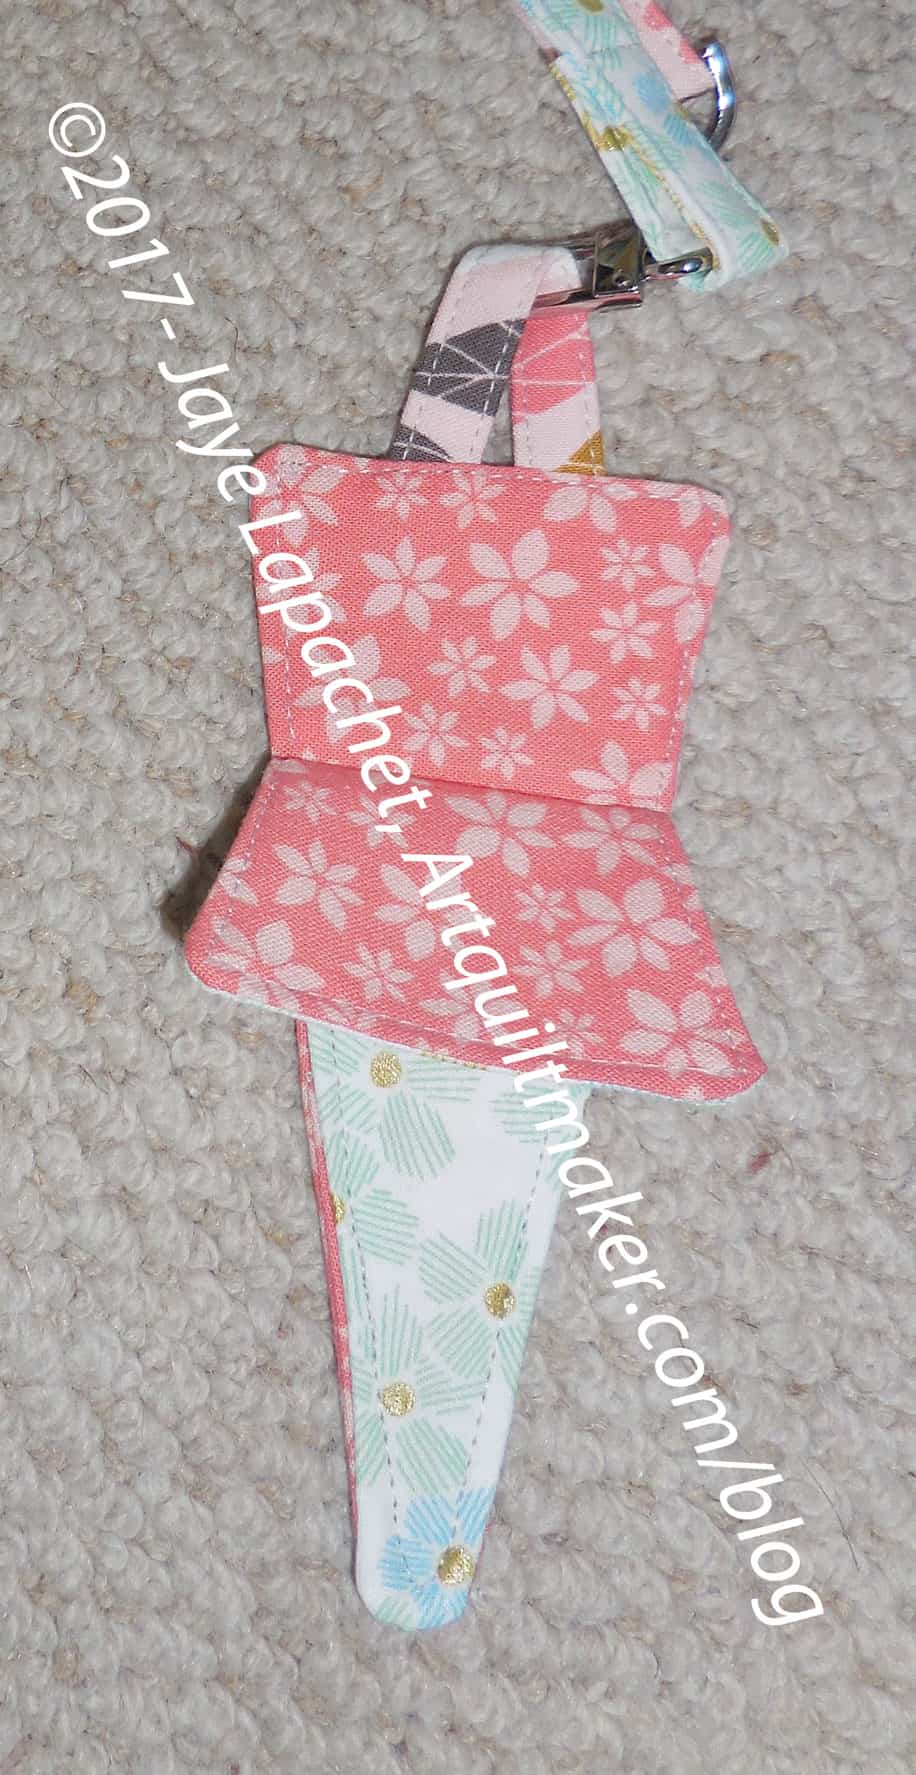
Scissor Sheath – as mentioned above, a scissor sheath can be added to the gift pile and adding a ribbon or fabric hanging loop on it enables the owner to hang it from a lanyard.
Journal/Sketchbook Cover – you can adjust the pattern to accommodate a number of sizes of journals. This pattern, as you have seen many times on this blog, is for a 6.5in x 8in Miquelrius journal.
Pencil roll – I love the pattern by Pink Chalk, but it is no longer available. If you can find it somewhere, such as Etsy, buy it and keep it safe. It is useful and fun even if you are not pen hog like I am. I have made, perhaps, a dozen of them and I want everyone to love them. I always put a few pens in to give people an idea of how to use them. I reported on one of my pencil roll posts that this project took me about 3 hours to make. (updated 1-26-2017)
An Alternative to the pencil roll is a tool holder. I haven’t actually made one of these yet, but I do like the pattern. I like the idea of having my most used items all in one place and viewable to so I don’t have to dig for them.
I also find the Little Cell Phone Wallet by Valori Wells to be useful when I am wearing the Schoolhouse tunic. It does not have pockets and the Little Cell Phone Wallet provides a handy adjunct pocket for my mobile phone and hotel key or similar. It also fits nicely into a gift basket.
You could also add a Sidekick from Jinny Beyer’s store. It is good for handwork and I could have used it on my trip this past weekend. I have the pattern, but haven’t made it yet.
Project bag – Jeni Baker Drawstring bag (pattern to purchase). The pattern has multiple sizes. This is good to keep project supplies together. She also has a tutorial for one size – Example
Tote bag – There are lots of different tote bags that I have made. I really like the Jane Market Tote (pattern to purchase). I also like the Eco Market Tote from Favorite things (pattern to purchase). I made a version of that bag with Heart fabric and it is still a great pattern. I have another one in mind. Including a tote bag in your gift selection is a nice way to package all the gifts. Choose any pattern that you like.
One Hour Basket – An alternative to a tote bag, especially for a group of small gifts is the One Hour Basket. This is a free pattern by Hearts and Bees which you can download from Craftsy. She has a new pattern with different sizes as well.
You can use the One Hour Basket or any of the tote bags instead of gift wrapping. Put a pretty ribbon on it and your recipient will be thrilled.
Themes:
You can also think up themes and find patterns that fit the theme. For example:
Kitchen: apron, mugrug, potholders, kitchen towels, casserole carrier, roll basket
Bath: makeup bag (zipper pouch), towels, tissue cover, stiff holder for TP and such
If you have a machine embroidery machine, the options open up even more. You can monogram some of the larger pieces or add other appropriate embellishments. Get sewing!