I was able to finish the top and back of one donation piece during the Retreat. This will be a small quilt, but the Community Giving team has an organization that makes boxes for new mothers. They want small quilts that fit in these boxes, so I don’t feel as bad about making a small quilt.
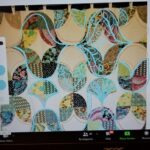
Peggy made a few of these with the 16 patch blocks I made earlier this year after seeing Cheryl Bricker’s quilts in the presentation at the meeting. I decided that I would make one as well since I had some 16 patches I had made and giving them to Peggy wouldn’t do much for her except add to what she had to store. This was a better option, though the blocks aren’t super cohesive.
I am thinking of making one of these with charm squares. It would go faster and be larger.
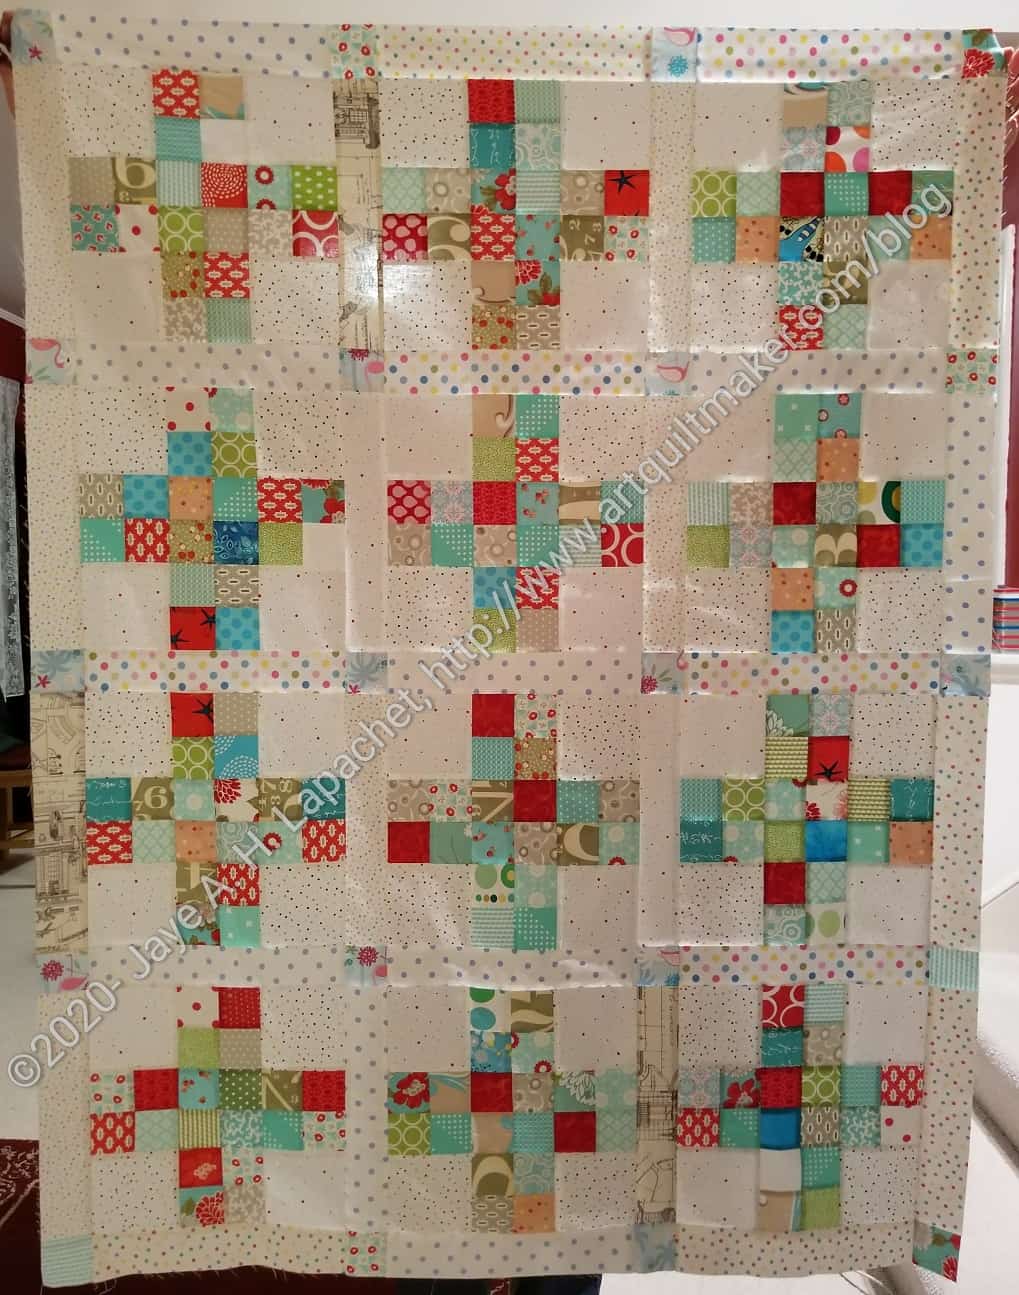
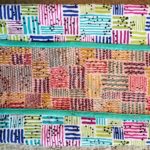
I finally got my act together and put Traffic Jam #2 together. Seeing Peggy churn out donation quilt after donation quilt at the Retreat really kicked me in the backside. I got the blocks out and just started sewing them together. I had to find fabrics for sashing, so I did that and eventually sewed it all together.
I have to make the back, but I can do that this week, then it will be ready to go.
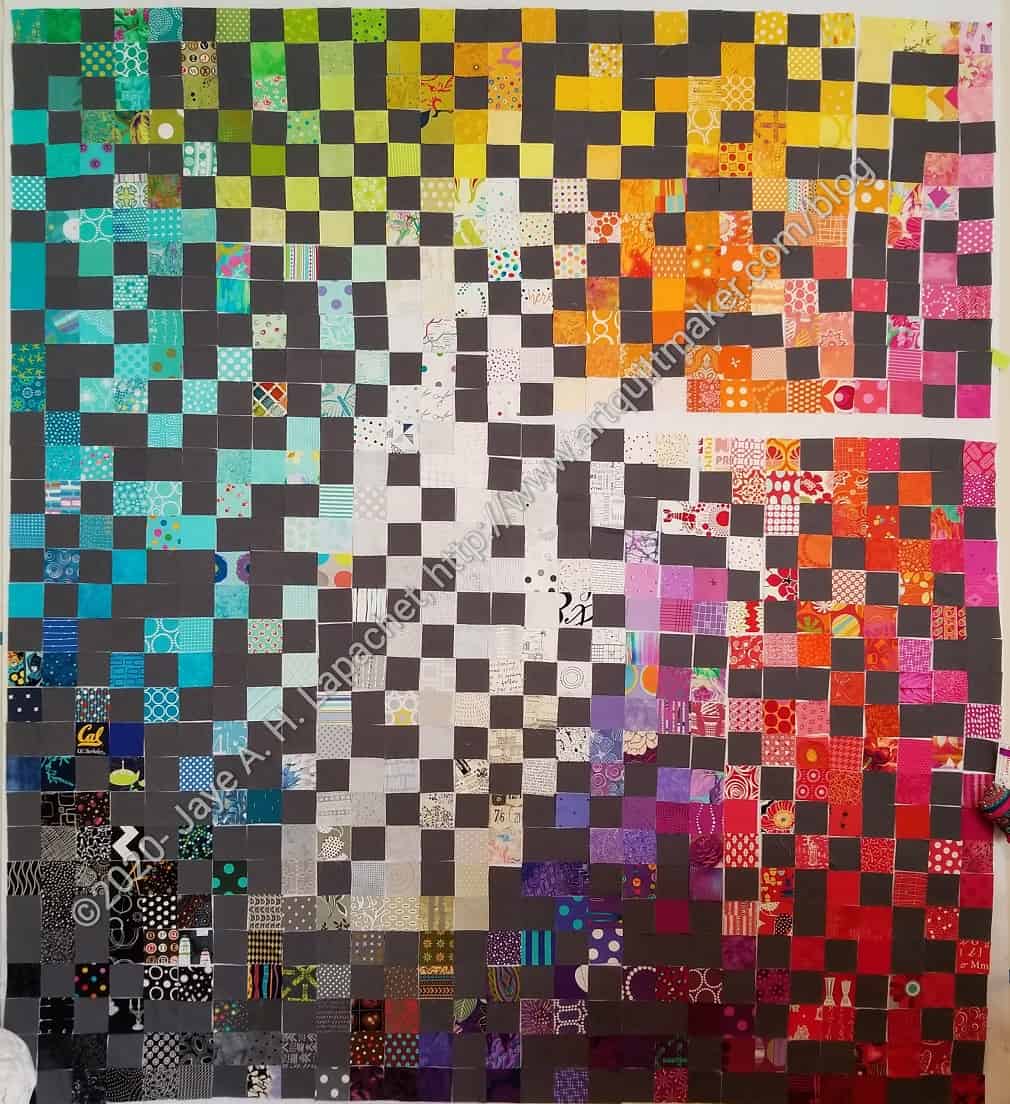
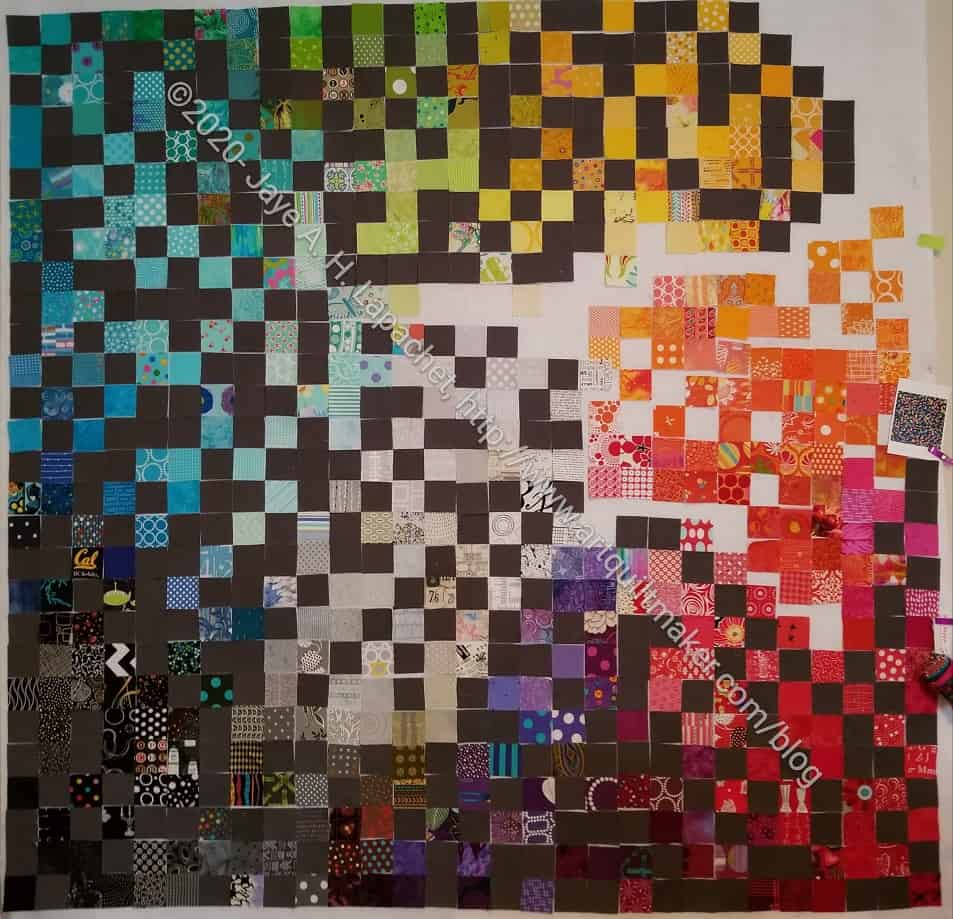
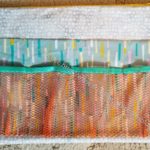
I finally had a good amount of time to work on Fabric of the Year 2019. I had to redo the math. I spent a lot of time on Saturday sticking squares up on the wall, adding rows and trying not to fall of a stool.
This was really the first time I had gotten on a stool since my foot injury. I have a very stable step stool, which made things easier.
As soon as I got going, I really made a lot of progress and I am happy about that. I still have to rearrange some of the squares, but all of the squares are on the design wall so I am much closer to sewing than I was. Perhaps later this week?
Today we are cutting hexagons from strips to make the hexagon block for our sampler quilt. This tutorial is a follow-up to the Large Hexagon tutorial. The principles are the same; the sizes are different.
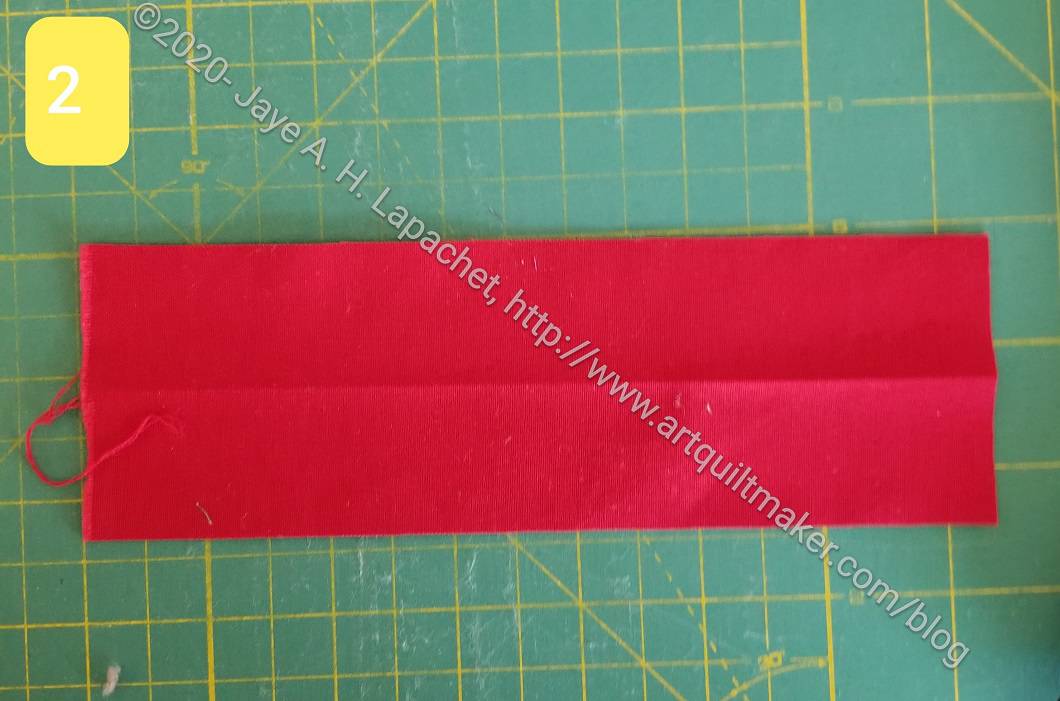
Cut your strip the unfinished size of your hexagon. In the example, I cut mine 2 3/8 inches. This is 1/8″ larger than I need, but I have a little wiggle room in this block. If you don’t have wiggle room, cut the strip the size of the unfinished hexagon
Strip cut to sizeFold your strip in half lengthwise
Fold your strip in half lengthwise
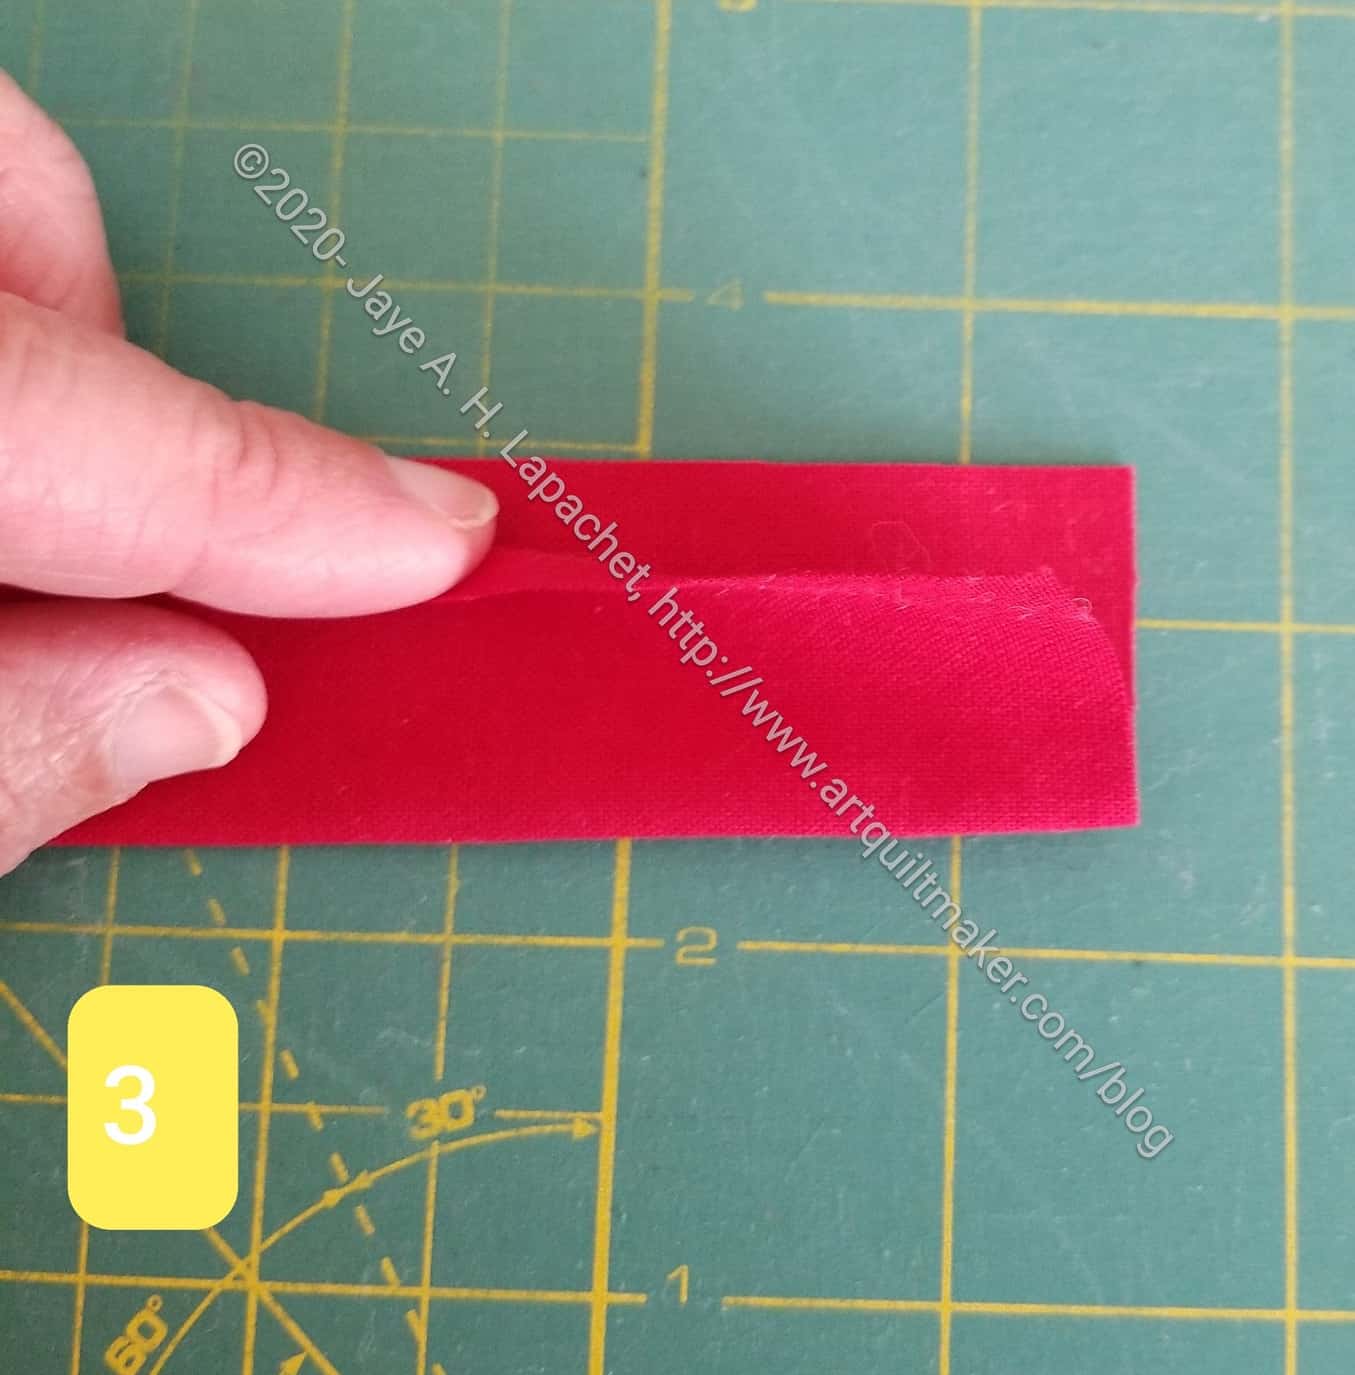
Position strip with fold near you
Position the strip so the fold is closest to you.
Line up Clearview ruler
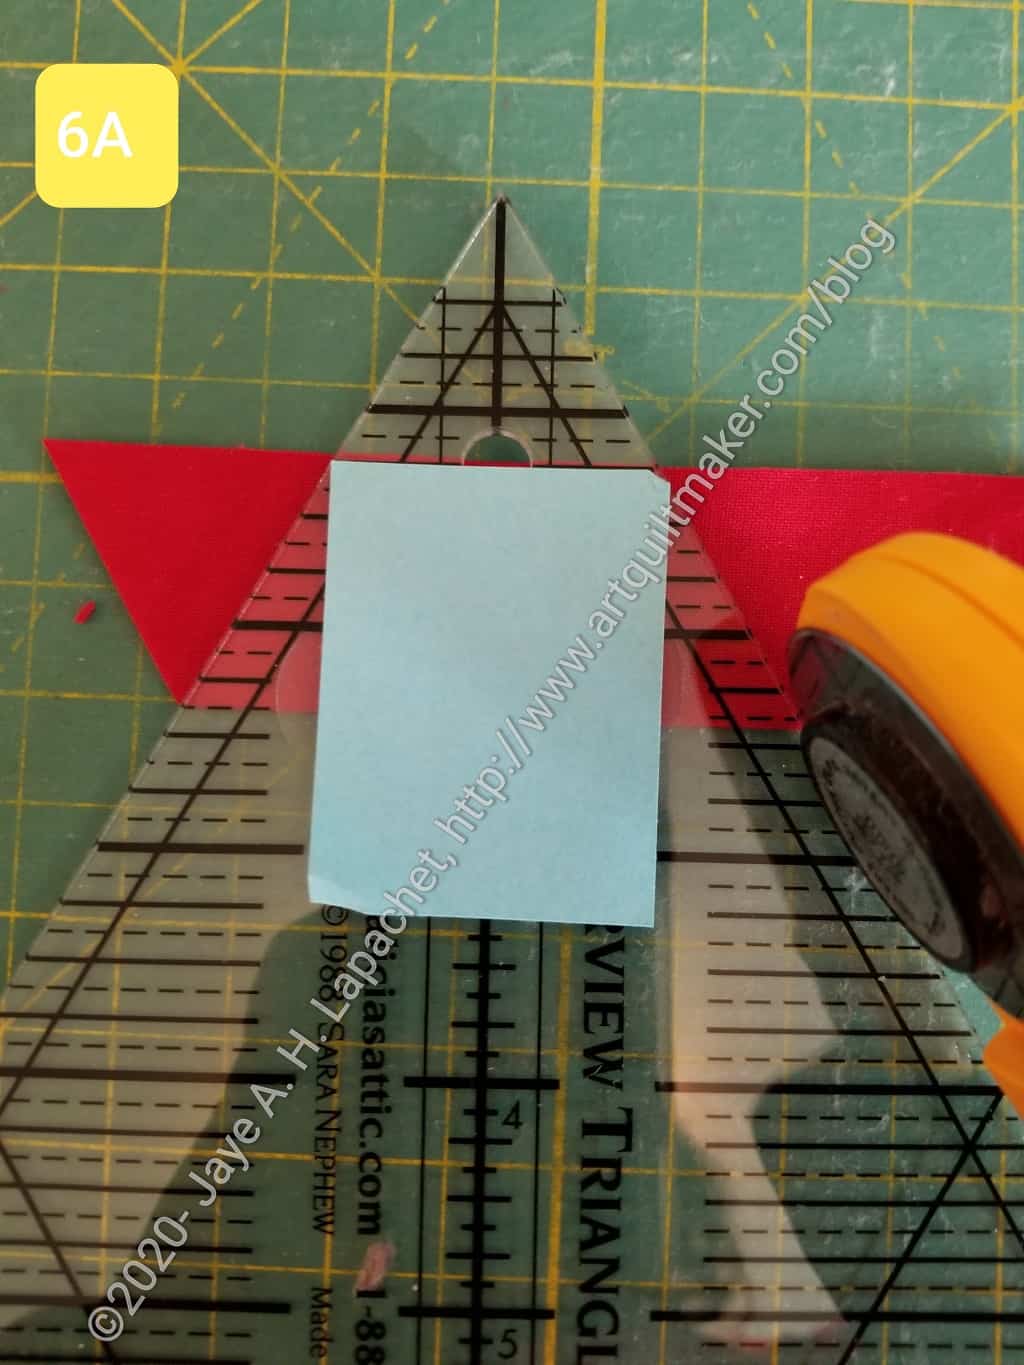
Line up your Clearview ruler with the tip on the raw edge
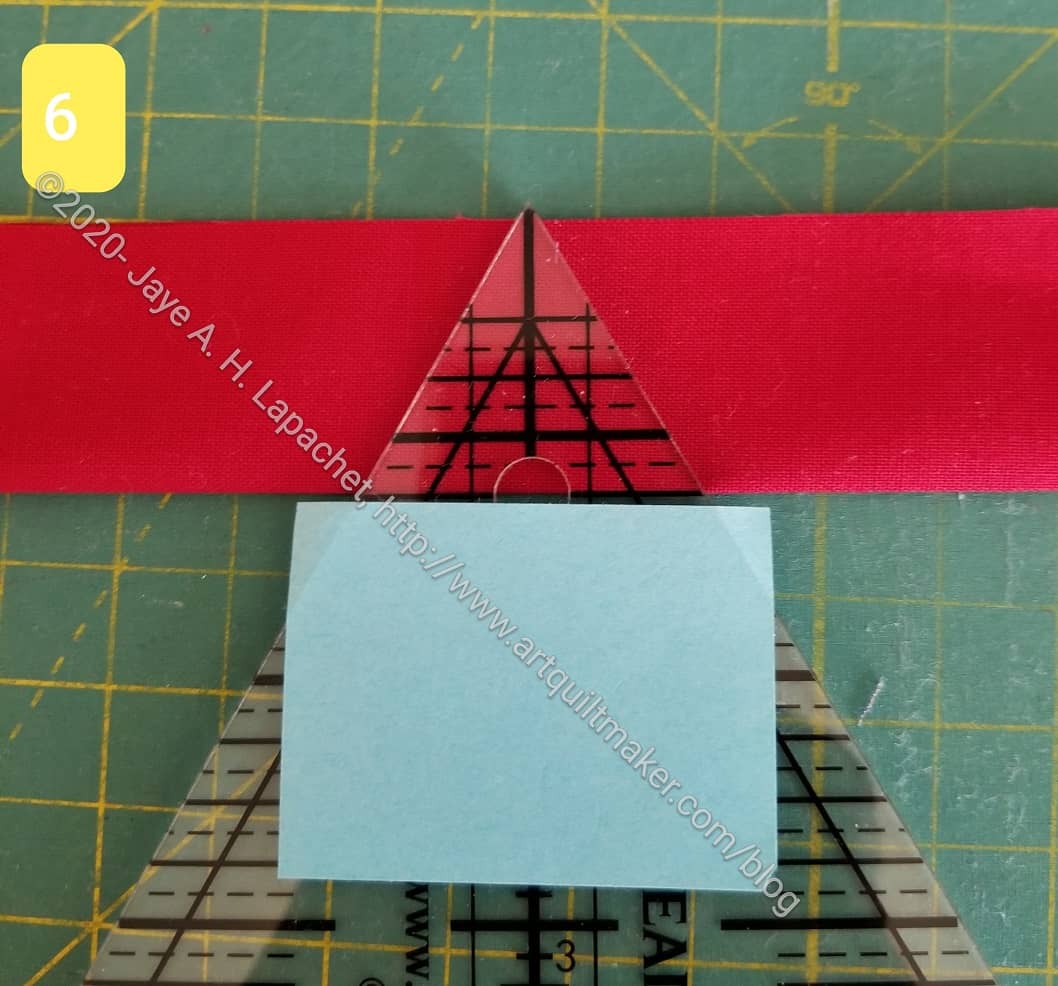
Place post-it note on ruler
Place a post-it note on the ruler. Line up a post-it note with the fold of the strip
Move ruler up even with the raw edge
Move ruler up until the post-it note is lined up with the raw edge of the strip. N.B. I rotated the post it note, because I couldn’t cut with the edges hanging over.
N.B.2- Be very careful if you cut towards you on the left side. It is never a good idea to cut towards you, so I recommend getting a rotating mat. Place your strip on the rotating mat, make your first cut the rotate the mat and make your second cut.
Cut on both sides of the ruler
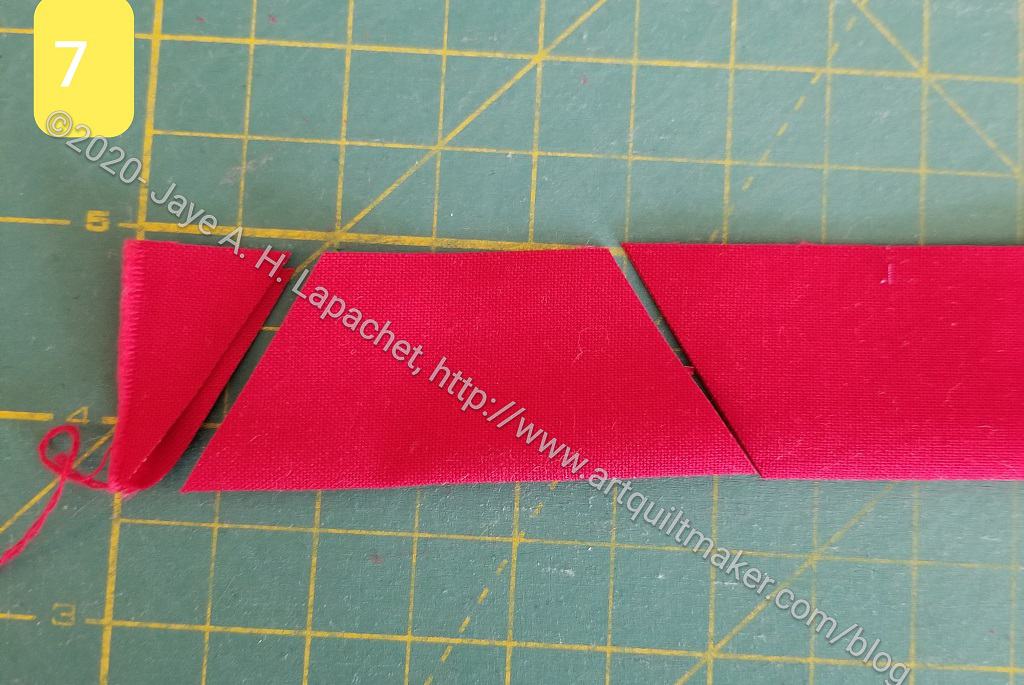
Cut on both sides of the ruler
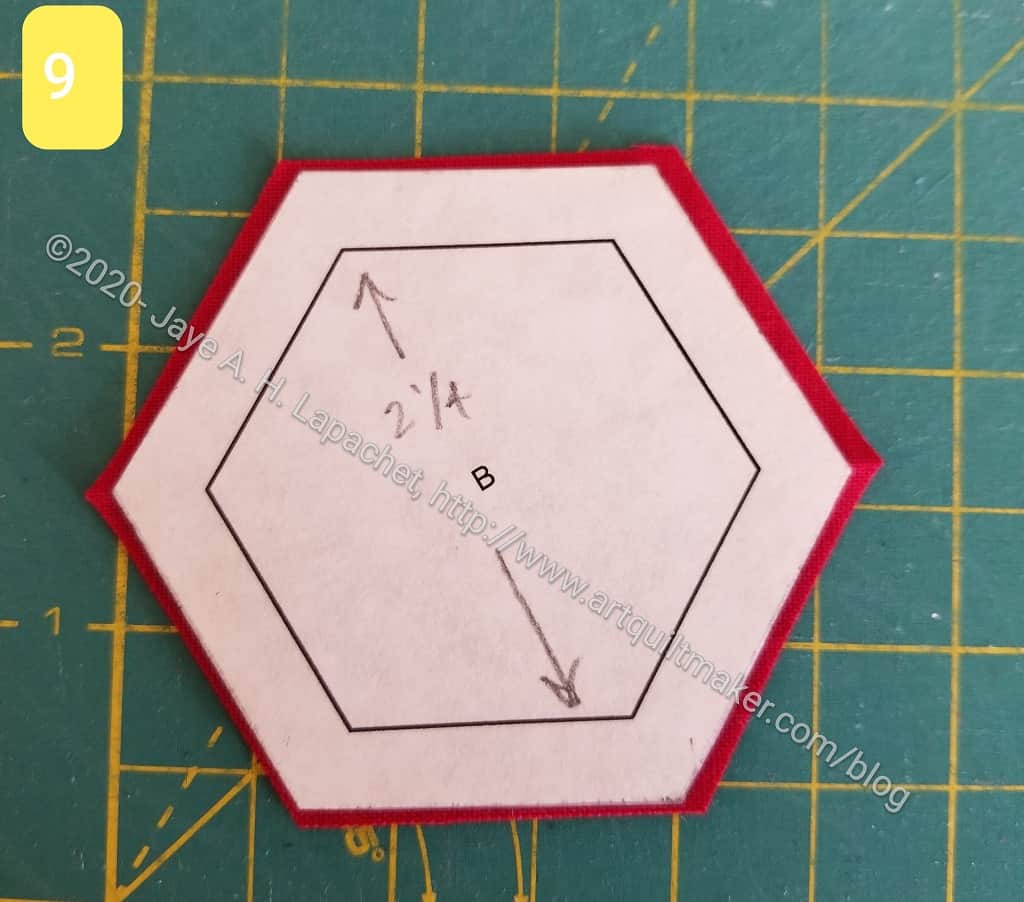
Perfect hexagonCompare size with your template
Your hexagon should be perfect. N.B. As I said above, I have a little wiggle room with this patch, so I cut it slightly larger, which is why the template looks a little smaller.
Move ruler so post-it is lined up with raw edge
Move the ruler along the strip and cut the next one
Note: you will not be able to cut every single bit of fabric. You will have small triangles leftover from in between the hexagons. You can use these leftover scraps to stuff pet beds.
**I use affiliate links and may be paid for your purchase of an item when you click on an item link in my post. There is no additional cost to you for clicking or purchasing items I recommend. I appreciate your clicks and purchases as it helps support this blog.
It has been a little while since I worked on this, but I finally got back to it. I had to do the math, which I was trying to avoid. Finally, I just did it.
That gave me a structure, so I started putting all the squares up. I had to redo the bottom left hand corner to add some greys that were hiding. I had to remove some duplicates. I still have to rearrange a bit to add more pink and a bunch of purples that came out of hiding as well. Still, I am making progress and will soon be able to put this piece together. YAY!
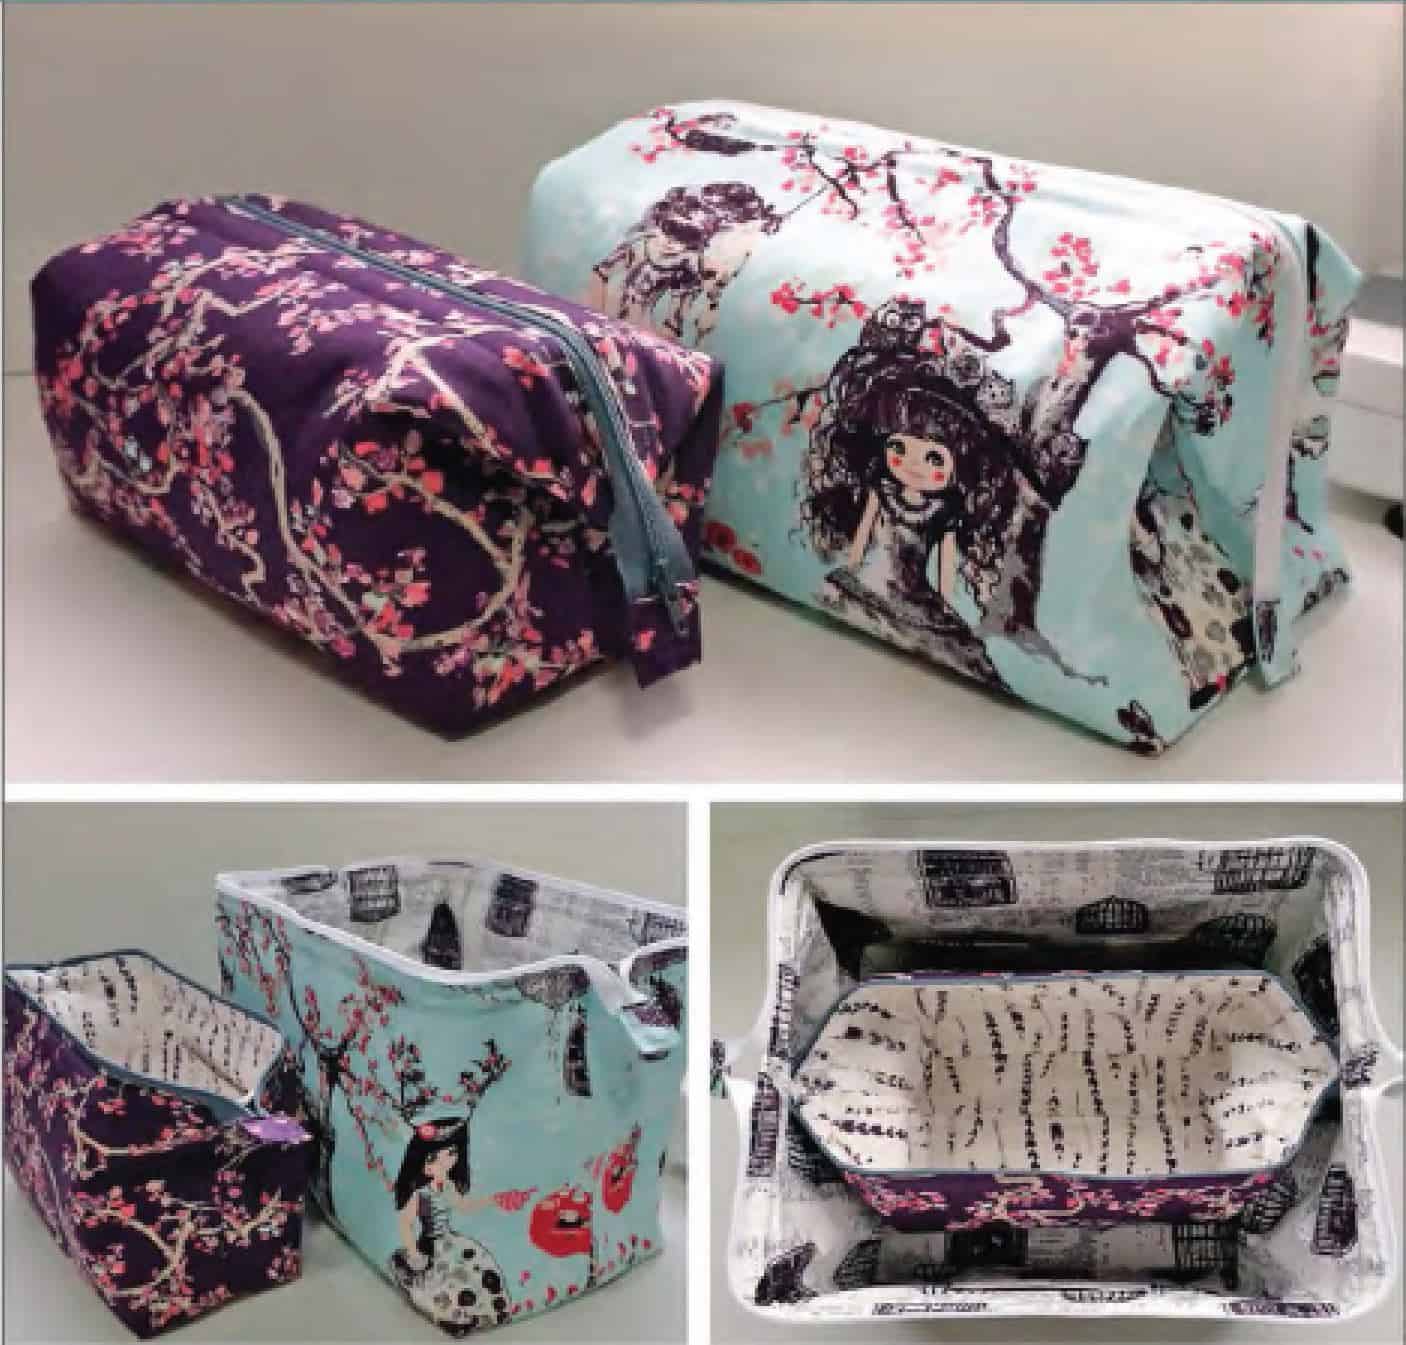
Mary and I were talking about something else when I remembered the Retreat Bag she and I decided to make. Neither of us have done it, but we both have all of the supplies, including the wire frame. This is a free pattern from Emmaline Bags. The pattern shows the frame you need and that is not free, sadly, but having a free pattern is helpful. And we have to support women owned small businesses.
Emmaline Bags Retreat Bag -free pattern
The bag really doesn’t have anything to do with Retreats – as in going away to sew – I think that is just the name.
I also noticed that Laura Coia of SewVeryEasy has a video on how to make the bag with the addition of an outside slip pocket and handles. This video is linked from the pattern page on the Emmaline site. I also saw a video from Birdcage and Thread that shows how to make this bag. The techniques in the two videos are a little different and one might work better for you. It’s good to have a choice.
I have two frames, so I can make two of these with the supplies I have on hand. I have been trying to think about what types of items/supplies I would store in this pouch and haven’t come up with anything yet. I could make one, or both, as a gift.
I am also thinking it might need a handle, leash or shoulder strap.
I seem to have a strong desire/need to finish things. I know I should be more enamored of the process. I have been trying for years to be more about the process, but I think I am sick of looking at things in my workroom and need to just make the projects and be done with them. OR fall in love with the process once I have tried it and go back for more.
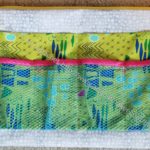
Despite a lot of ripping, I finished the Mega Pinnie on Sunday in the mid-evening. I thought it would be a quicker project than it turned out to be :(. Now I am going to have to scramble for some content this week.
I am pleased with the way it came out, however, and think someone at the retreat will enjoy it.
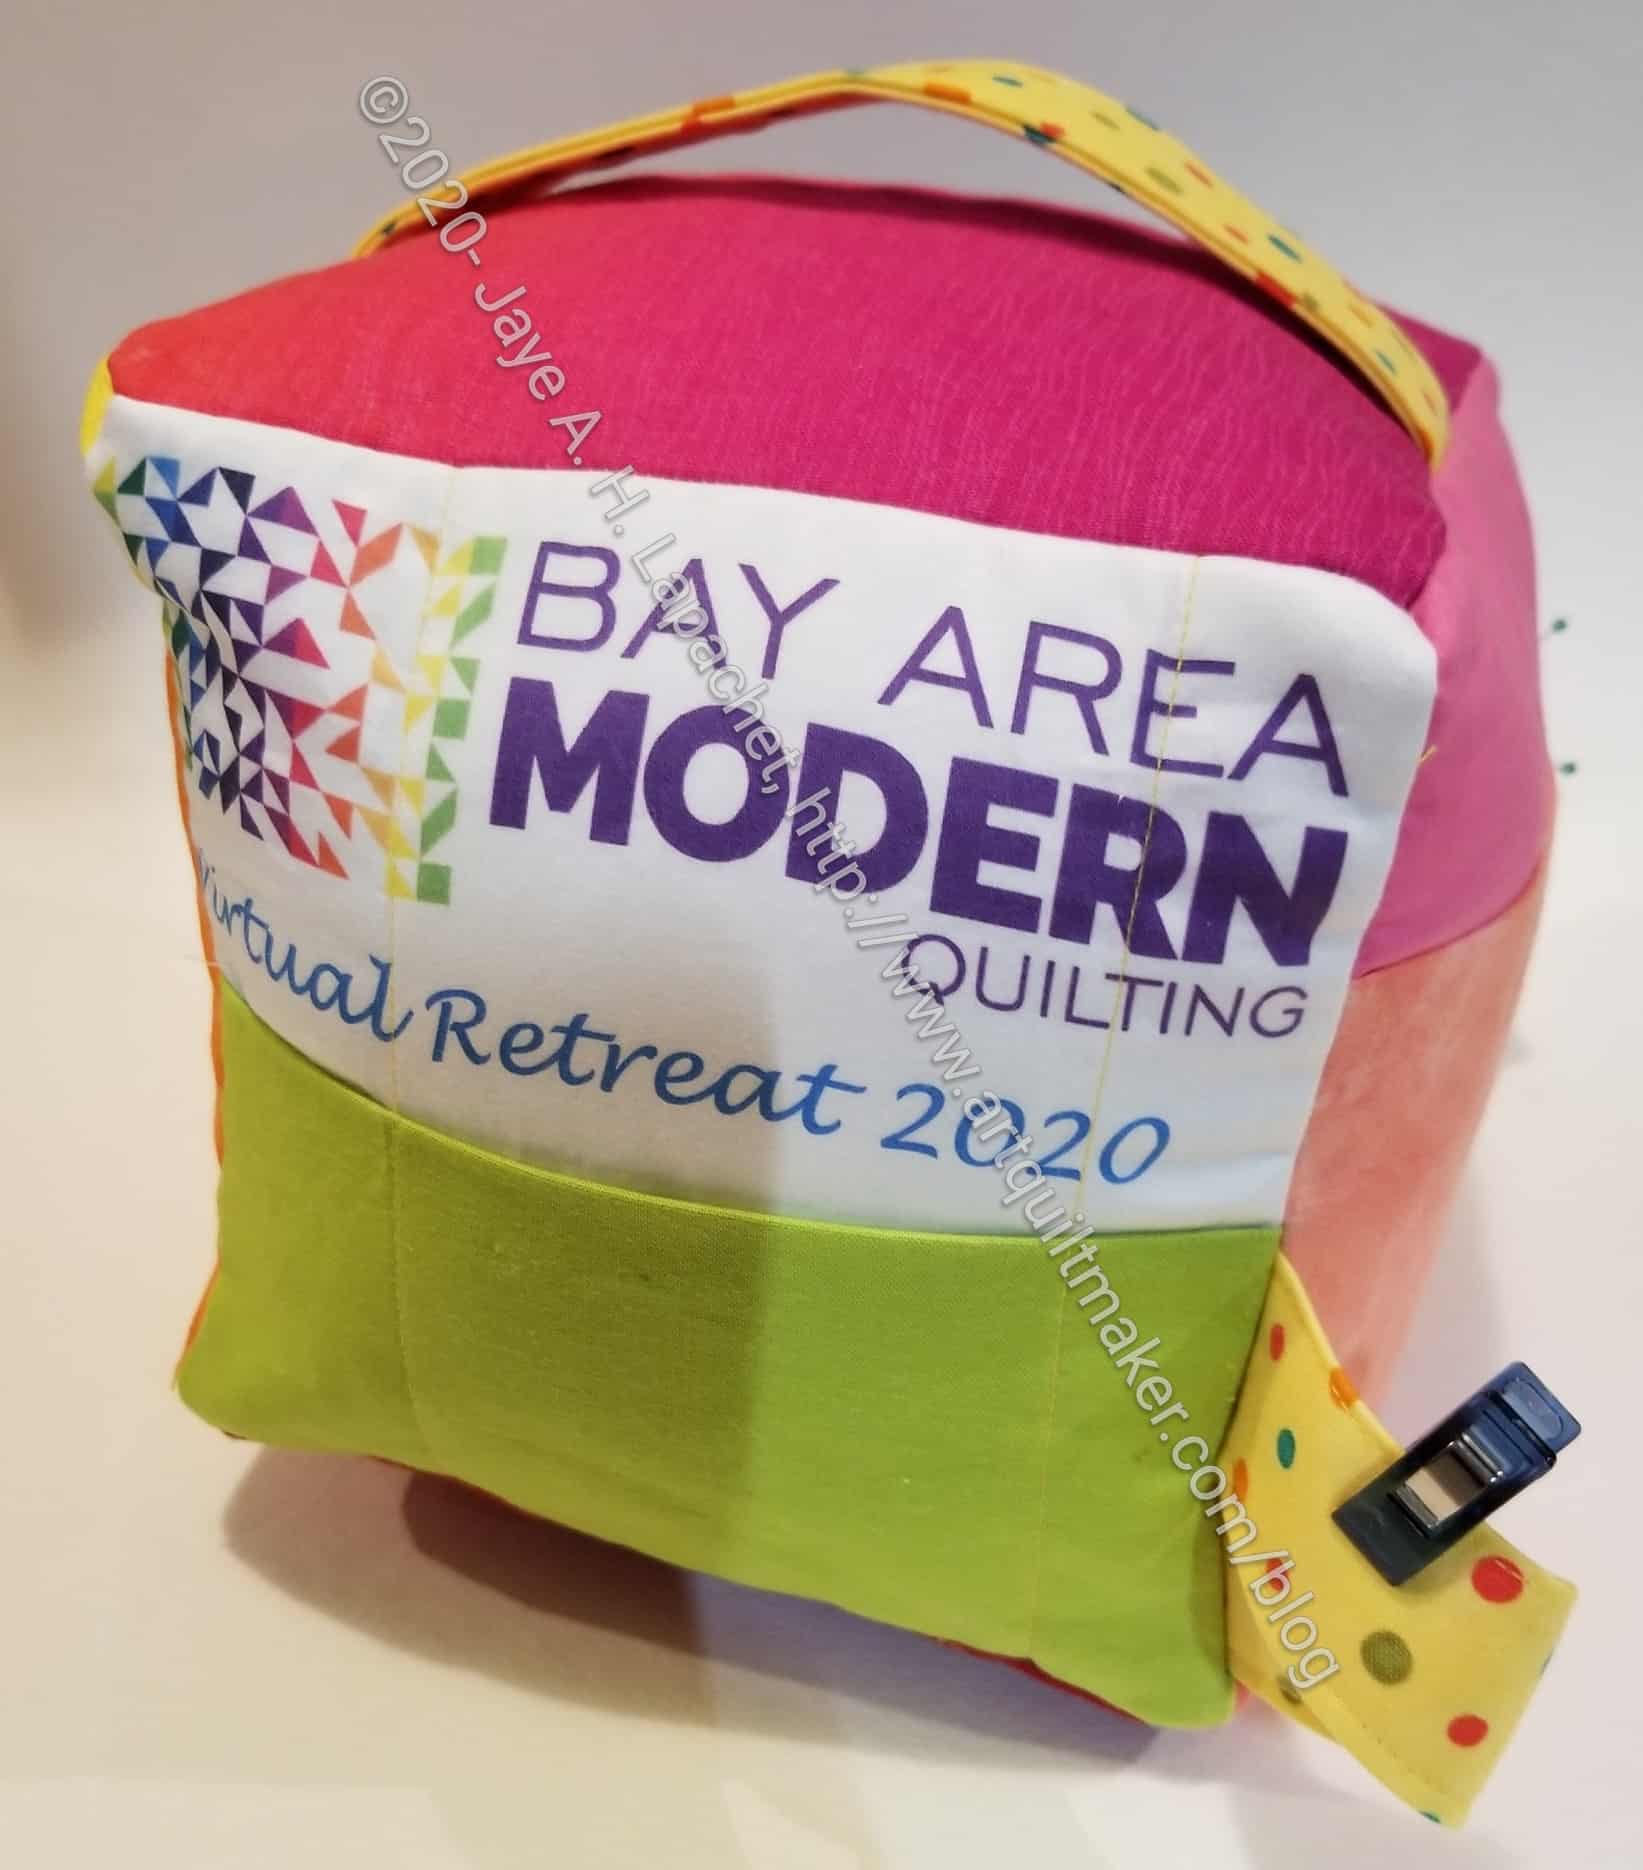
When I was printing my last label, I had some extra space, so I decided to print the BAM logo on some fabric and use it for part of the Mega Pinnie. It will also be a souvenir for the Retreat. I adjusted the size of the pocket on that side so the words wouldn’t be covered up.
BAM 2020 Retreat Mega Pinnie – finished
I made the handle a little smaller than the pattern called for this time, so I had an extra piece. I decided to sew it in as a way to attach the Mega Pinnie to another bag or a place for clips. I didn’t think about putting a lobster clip on this time. I completely forgot!
I did make a super cute Mini Pinnie! I really like the fabrics and the way the Mini Pinnie came out. I think it is a cheerful addition. I also made the needle safe a little different this time. I sewed it to fabric RST, then turned the piece and top stitched. It worked ok.
BAM 2020 Retreat Mega Pinnie – finished
I forgot to top stitch the pockets, but that isn’t critical; it just makes the piece look a little nicer.
This is kind of large, but I think I might try and make one using charm squares. It would be smaller and might not work for some tools, but might be more convenient to transport.
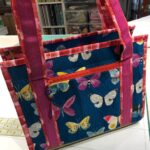
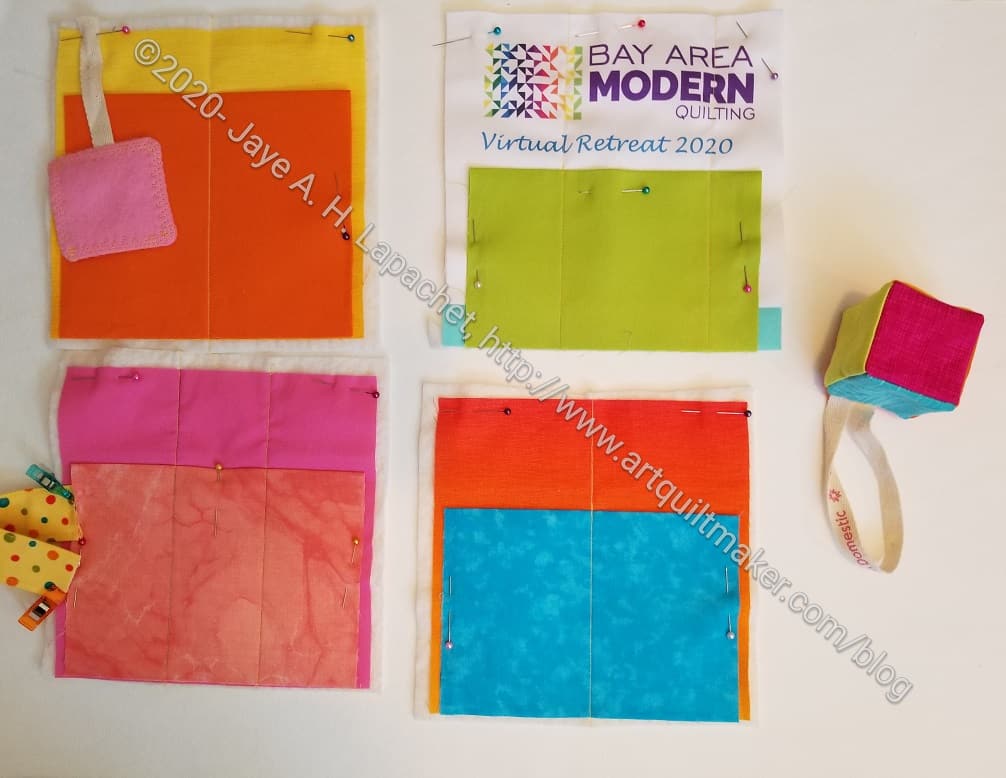
I decided that I needed to get busy on the Ultimate Carry All Bag. The BAM Virtual Retreat is this weekend and that would be a good time to finish- or at least make progress- the bag.
Ultimate Carry All Bag Front Pocket
Ultimate Carry All large Pocket #2 back- examples
Ultimate Carry All large Pocket #2
Ultimate Carry All large Pocket #2 back
Ultimate Carry All large Pocket #1
Ultimate Carry All large Pocket #1 back
Ultimate Carry All Bag: Short Front Pocket
The last thing I worked on was the front pocket. I did it wrong and it is still in that state. That is the first thing I need to work on once I get going again. I also want to make one of these for myself, to replace my current Quilt To Go bag, and I am thinking of making the front pocket for that bag at the same time I finish this one. I know I would be skipping a bunch of steps, but at least one piece would be done.
Lynette said that she is working on a different way to add the binding. Since I am scared of that binding based on Cyndi’s and Mary’s experience, I am waiting for her to try it.
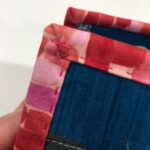
Mary’s Ultimate Carry All Bag
Mary’s Ultimate Carry All Bag-binding detail
Mary’s bag looks really good and she went around the binding by doing part of it by hand with some exceptional detailing. Her example is one I am considering. I have done a number of bag bindings by hand when the bag was too unwieldy for me to do it by machine. I also get better results by hand on awkward shapes. I am not scared to sew the binding by hand.
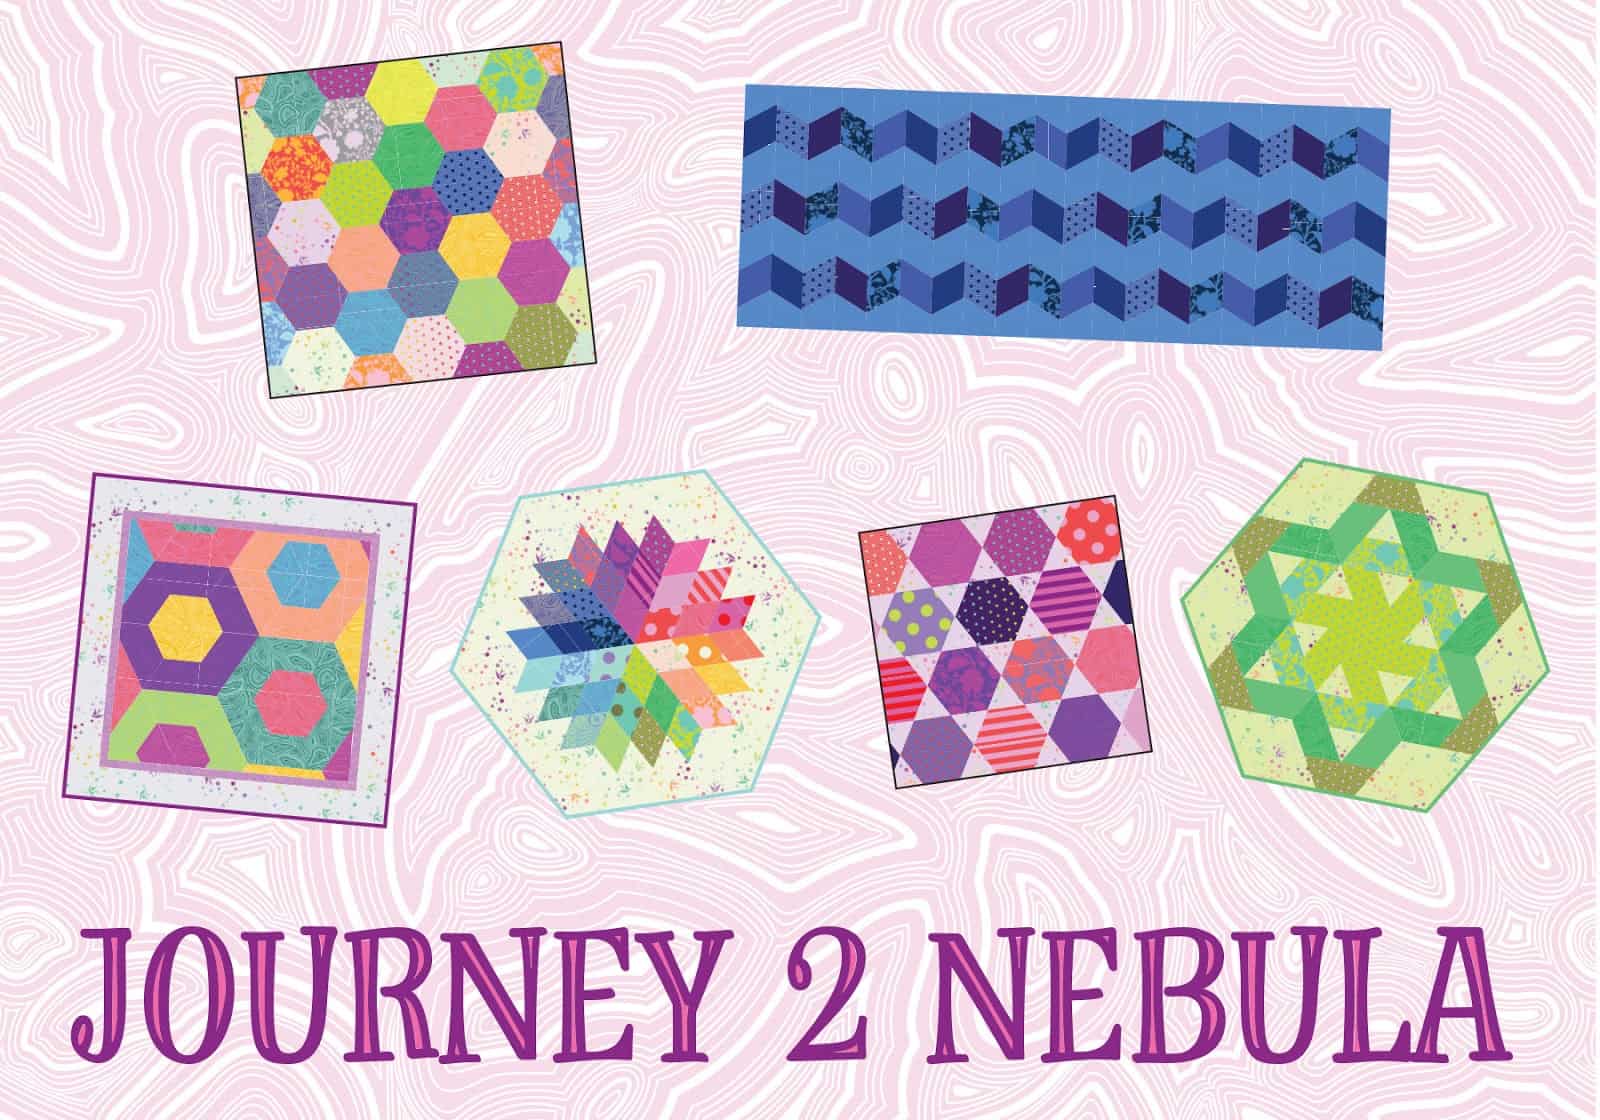
Writing about this project makes me want to work on it. Of course, I have to keep up with the Journey2Nebula as well.
We had a guild meeting on Saturday. Our speaker was Christina Cameli. She is a machine quilter and I wasn’t that excited, but I really loved the presentation and her.
She had the guild send photos of several people’s quilts. People sent quilts where they needed help with the quilting. I was amazed and impressed with her suggestions.
I liked her because she was very calm and listened to the people engaged with her. The presentation seemed to be about the quilt and not about her. She used Adobe Draw to write/draw on the images. This was an effective way to show what she was thinking.
Gerre’s suggestions from Christina Cameli
Gerre’s suggestions from Christina Cameli
Gerre’s suggestions from Christina Cameli
I really liked her suggestions for Gerre’s quilt. Christina asked what Gerre was thinking and what kind of quilting she enjoyed, such as FMQ, walking foot, straight line, etc. This is a quilt Gerre started in the Jen Carlton Bailly class. I love the bold prints she used. Christina suggested putting leaves and flowers in the curved pieces. I thought that was brilliant and Gerre liked the idea, too. I thought the idea was really innovative, but fit in with the spirit of the design.
Melinda R’s scrapbuster quilt
Melinda showed a scrapbuster quilt. Melinda talked a little about her thoughts. Christina shared that she felt like the brown vertical strips were bars and she suggested wavy lines to soften them. I thought the brown lines were quite dominant so this suggestion was a good idea. I couldn’t get over the thought that this was the back of a quilt and not the front. Of course, it isn’t my quilt, so my opinion means nothing.
Maria’s Radiate quilt
I am not sure how Maria felt about these suggestions. I am not a fan, though I think the vertical lines in the upper left are effective.
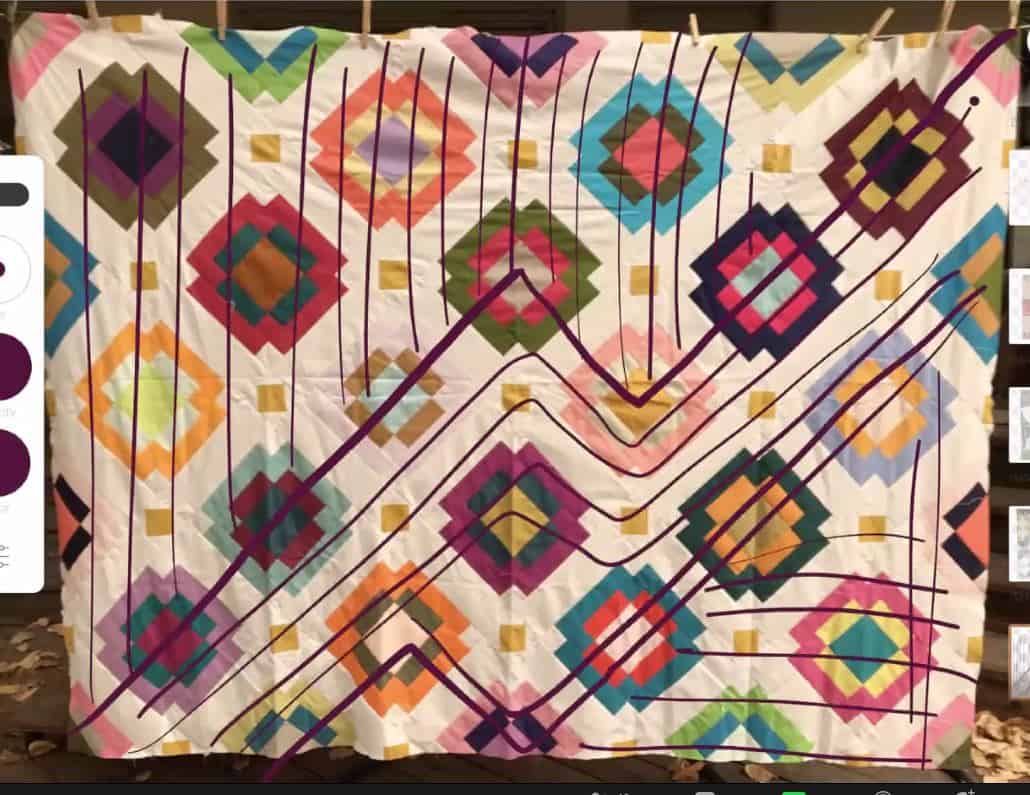
Pati’s Graphic Black & White
Pati had a bold, graphic quilt to show. I thought the lines following the stair step piecing what what I would do. I really like the diagonal lines Christina suggested. They are unexpected, after seeing the stair step quilting, but fit in with the implied diagonal on the checkerboards.
Christina really thought outside of the box, but not in a weird way. The quilting designs she suggested were in line with what the quilt needed.Ii was very impressed.
You can find Christina on Instagram at @afewscraps. I was impressed with the four books she has written, the multiple online classes and television demos before I knew she was also a nurse-midwife and the single mom of two kids. I am even more impressed with her now. Her books are:
**I use affiliate links and may be paid for your purchase of an item when you click on an item link in my post. There is no additional cost to you for clicking or purchasing items I recommend. I appreciate your clicks and purchases as it helps support this blog.
I said that I would make a Mega Pinnie for the upcoming Retreat. Since the Retreat starts on Friday, I needed to get busy.
Retreat Mega Pinnie in progress
I started selecting fabric and cutting out the pieces late on Saturday, after the meeting, then sewed on Sunday. I am pleased with the look. It looks pretty cheerful, which I think we all need.
I used up all of my Beanie Baby pellets, so I need to get more before making anymore gifts than need weight. I don’t think I have any pincushions to make.
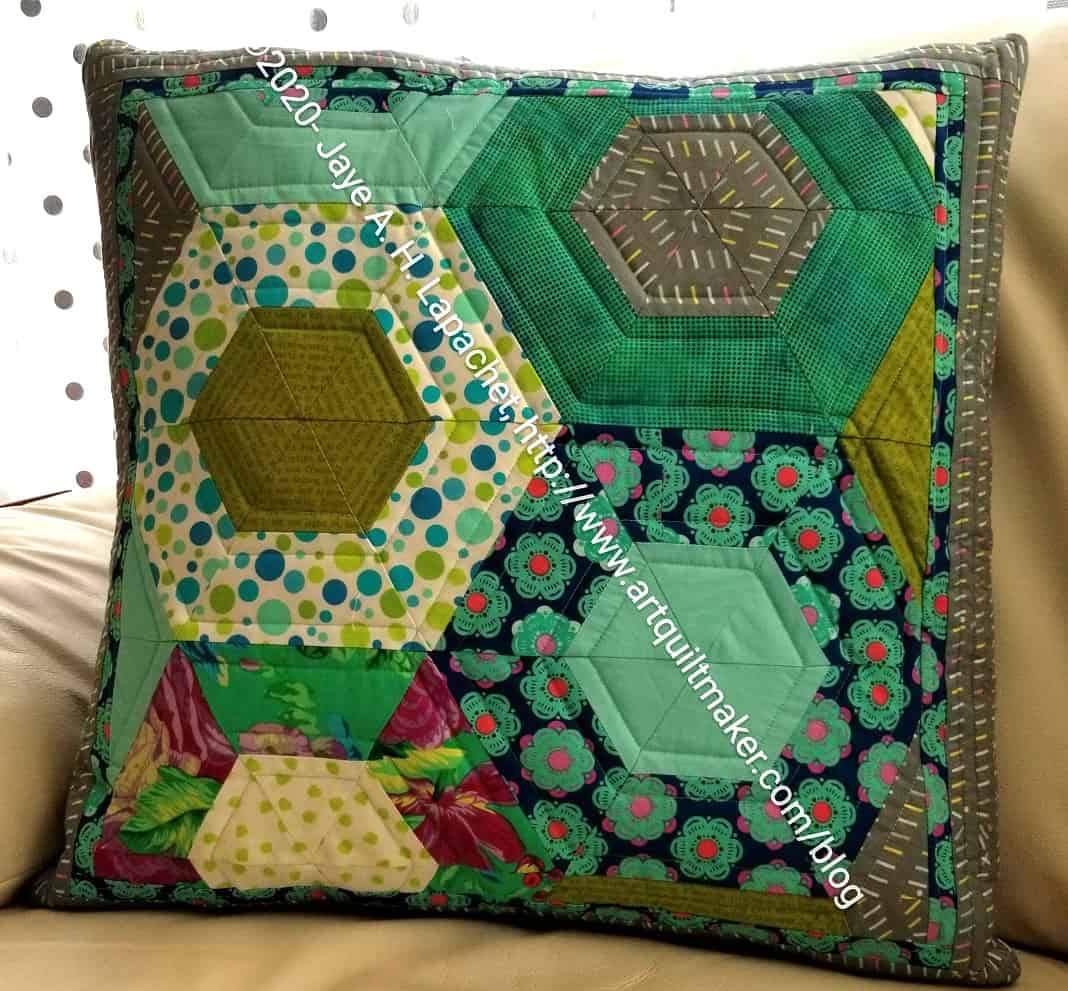
After quilting the Jawbreaker pillow top, it didn’t take much time to make it into a pillow. Once again, I used the Spoonflower directions for inserting a zipper. These directions create some flaps to cover the zipper. I haven’t used this tutorial in awhile so there was some ripping and a tiny bit of cursing, but all-in-all, the directions were straightforward and easy to follow.
Jawbreaker cushion cover
I actually like this technique. The seam lines don’t take away from the overall effect like they do in half hexagons. I can’t think of what kind of project I would make with these in the future, but it is a future technique I would like to explore a little more. Perhaps a table runner?
I didn’t like cutting off perfectly good pieced elements, but that was the design so I followed it.
So far, I am ok with the fabrics I chose. I am not 100% sold on the layout, but I am ok with it. I have seen some in the Facebook group that I really don’t like. I don’t sincerely dislike mine, so I can live with it. We’ll have to see.
Rock Candy – Pieces cut out
I wasn’t very excited about using the rulers for this project. This project requires the Sidekick or Super Sidekick. The directions said to turn the ruler over and cut from the wrong side at certain points. There are no lines on the wrong side and I worry about the distortion. It seemed to work ok.
I also didn’t like the large size of the Super Sidekick for the small-ish diamonds. Amy didn’t have the Sidekick, as I may have mentioned, and I didn’t want to buy it so I had to suck it up. I did try the Creative Grids Lazy Angle ruler she included. I tried it as it is smaller and fits my hand better. Unfortunately, I couldn’t figure out how to use it for cutting these diamonds with the Jaybird pattern. It is configured a little differently and its use wasn’t intuitive. C’est la vie.
According to the schedule, I don’t have to start sewing until Tuesday, but I may sew it together any way. We’ll see.
**I use affiliate links and may be paid for your purchase of an item when you click on an item link in my post. There is no additional cost to you for clicking or purchasing items I recommend. I appreciate your clicks and purchases as it helps support this blog.
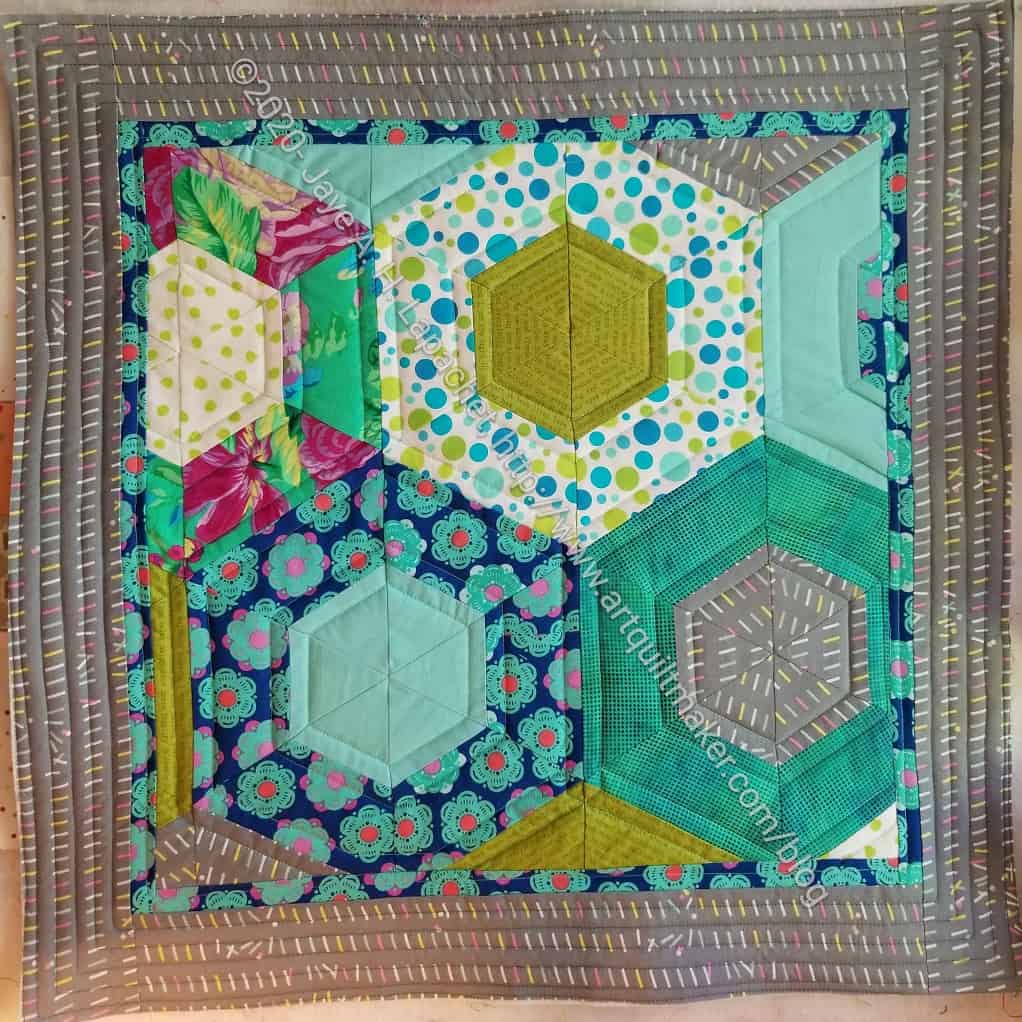
I spent some time earlier this week quilting the Jawbreaker. I made good progress on it, but it took me longer than Lucky Charm. Finally, after a second session, I finished it. i swear I have quilted more this year than in a long time. All the projects are small, but I am still quilting them.
Jawbreaker Quilted
Jawbreaker is evenly quilted, but has less quilting than Lucky Charm. I used the Rotary Even Foot and that worked pretty well. I just did straight line quilting – nothing fancy.
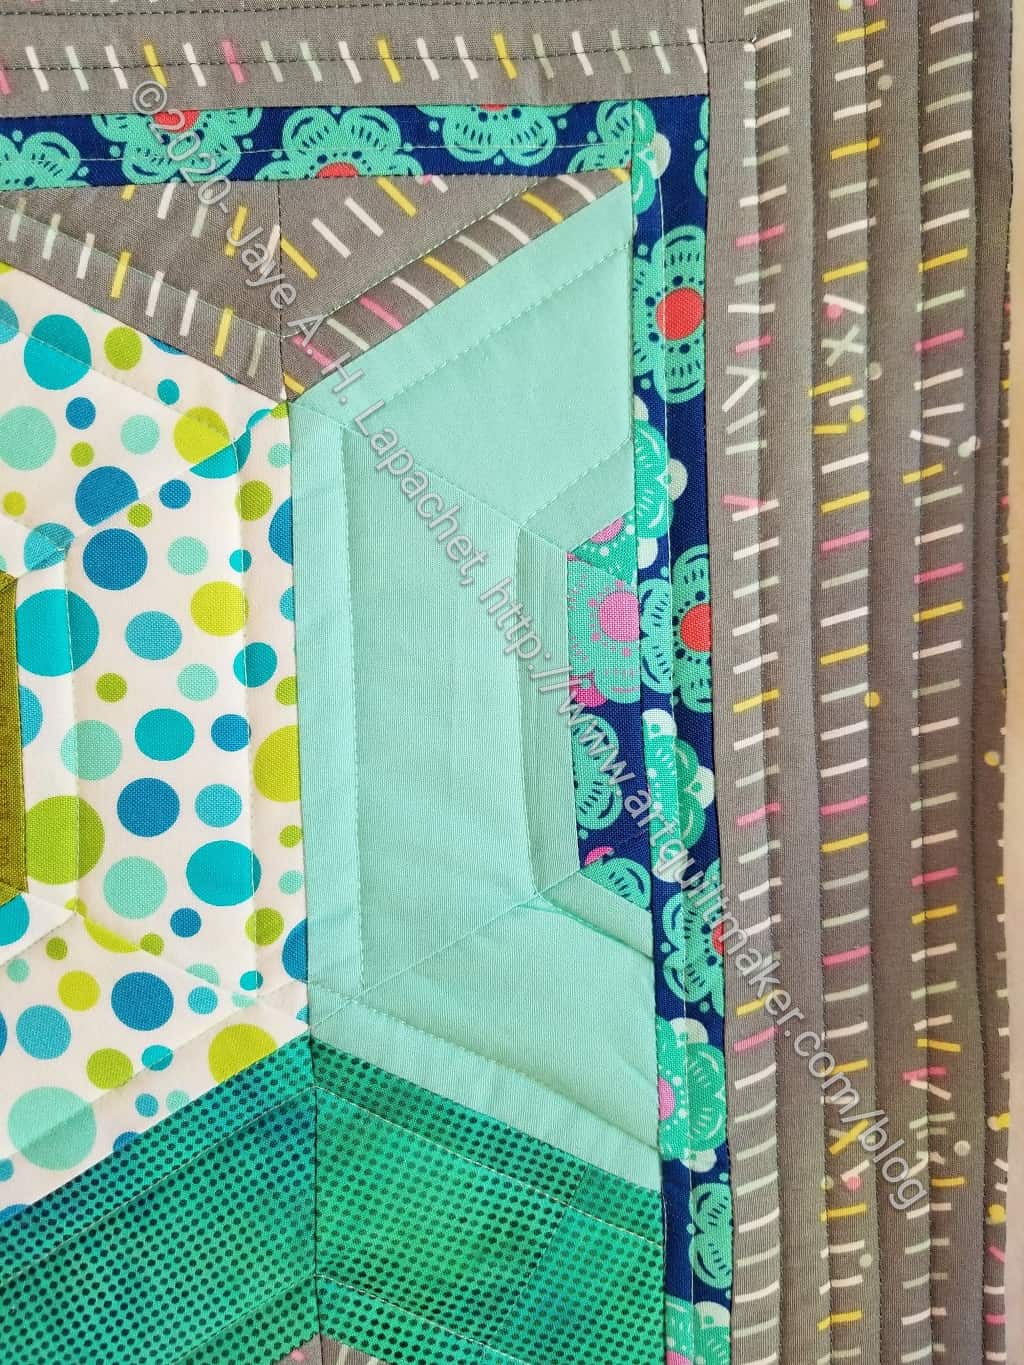
Jawbreaker quilted – detail
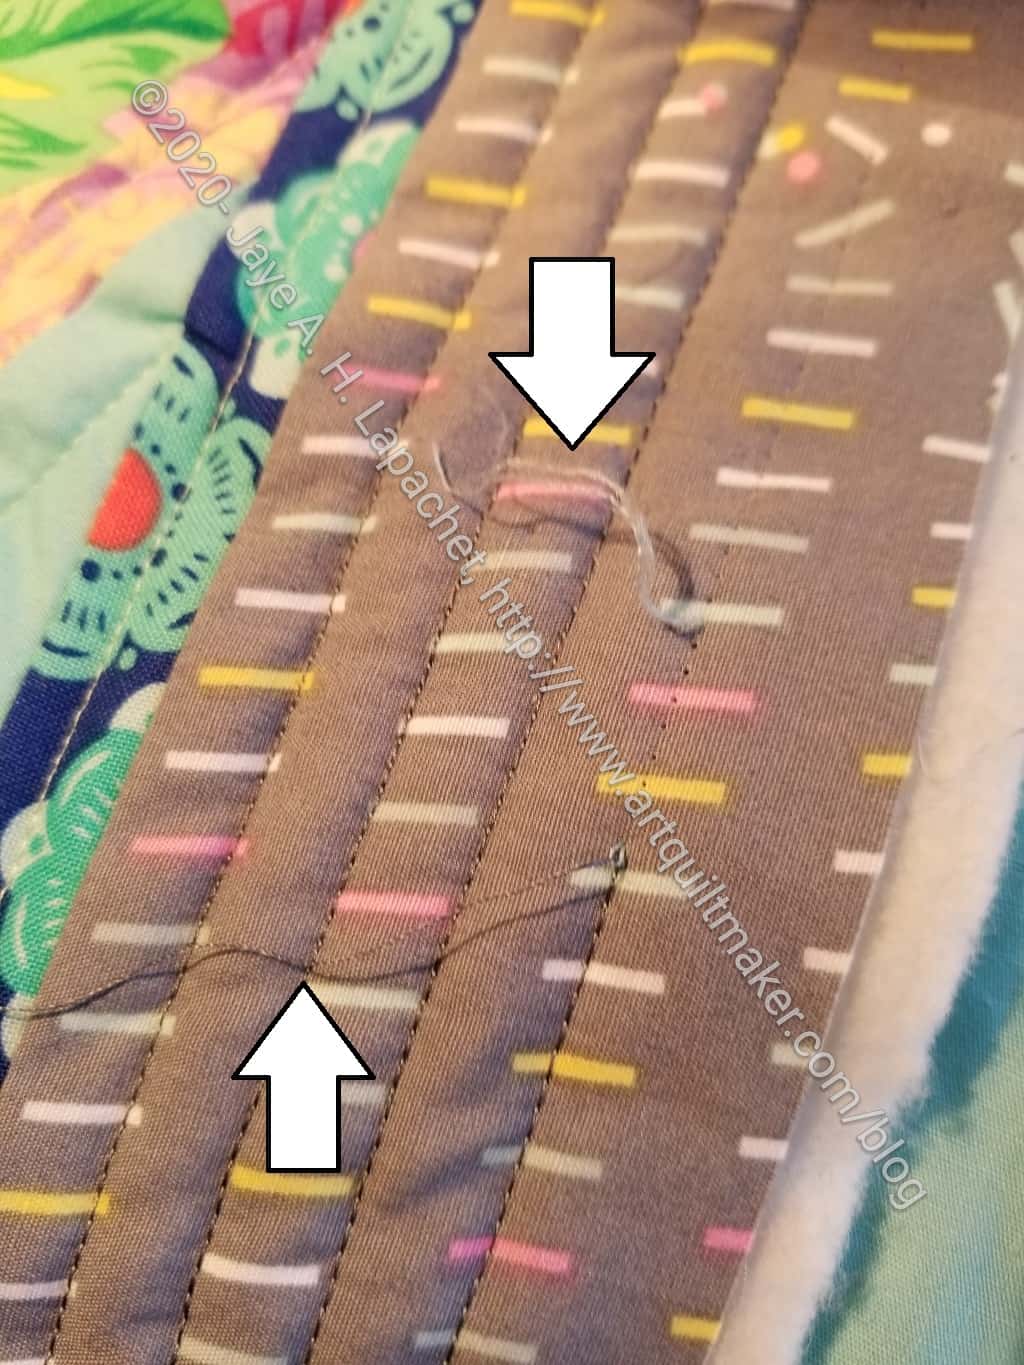
One thing that made me a little crazy is that the light green thread I used shredded periodically.
Jawbreaker thread shredding
It didn’t shred all the time, but I noticed it at least twice and I found it strange. I very seldom have this issue with Aurifil. In the photo, you can see that the charcoal was fine, but the light green was shredded.
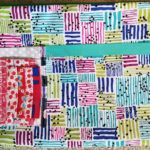
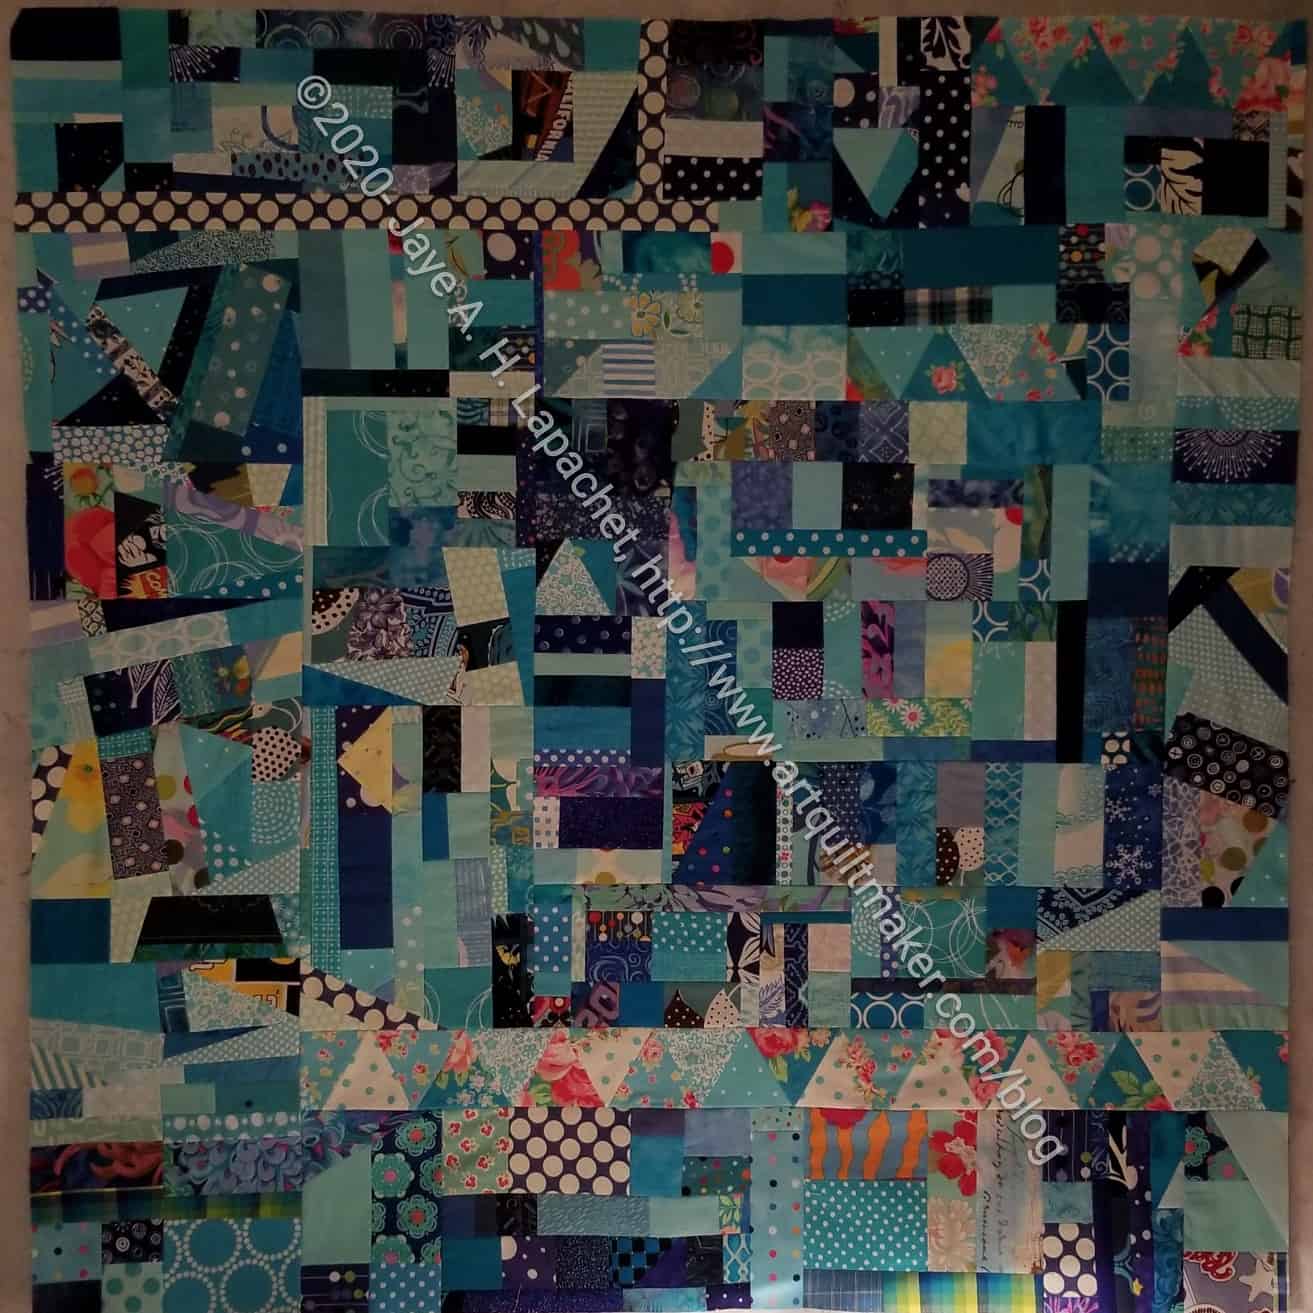
The good news is that I have finished the Blue Improv donation top. The bad news is that it isn’t going to end up as a donation top.
My SIL came over on the weekend and when I showed her this top in progress, she examined it minutely. Then she said that if this were pillows, it would look great on her sofa. Why not? I really like this top and would love to see it on a regular basis. I am going to make the top into pillows. They will be about 20×20. I was thinking of making 4 of them, but I may make two and have both sides be improv pieced.
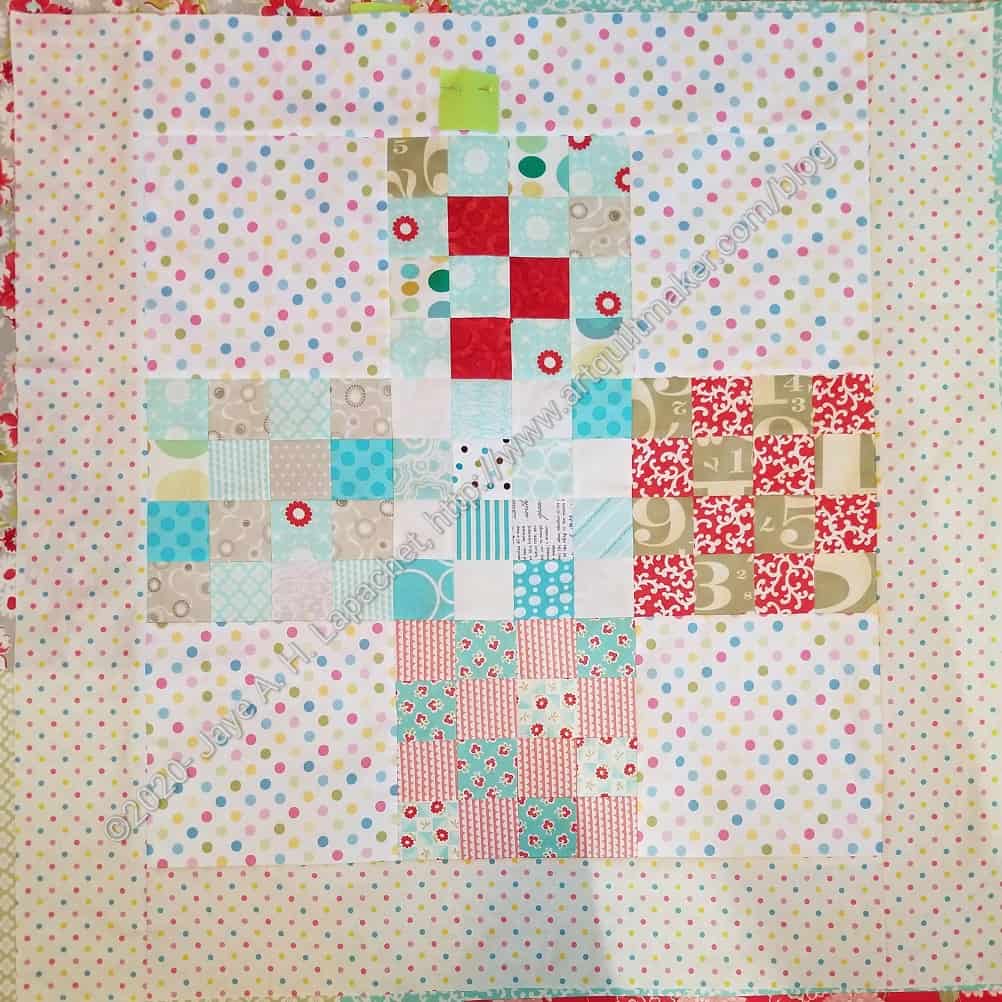
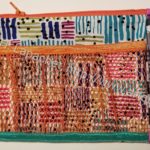
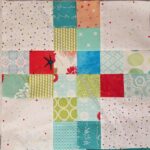
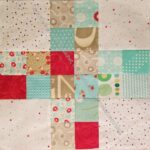
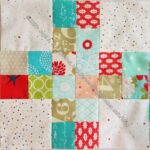
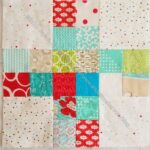
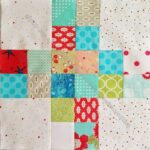
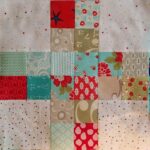
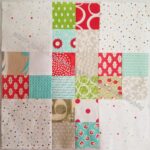
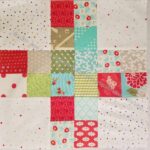
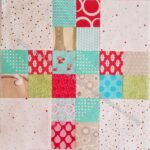
I have all of the Traffic Jam #2 blocks done. That doesn’t mean I am able to show you them all, but most are available for viewing. Somehow I am missing 5 of the blocks
Traffic Jam 2- Block #11
Traffic Jam 2- Block #10
Traffic Jam 2- Block #9
Traffic Jam 2- Block #8
Traffic Jam 2- Block #7
Traffic Jam 2- Block #4
Traffic Jam 2- Block #5
Traffic Jam 2- Block #6
Traffic Jam 2- Block #3
Traffic Jam 2- Block #2
Traffic Jam 2- Block #1
Now I need to find some sashing fabric and put the top together. I think I’d like to try making one of these tops with a darker background. Not necessarily black, but with a color rather than just white.