As part of the Flower Sugar Hexagon/Attack of the Hexagon piece, I mentioned the cutting and referred you to Little Bluebell’s blog. Her cutting instructions are great and you should definitely look at them. You should also look at the Kay Wood video. I wanted to do a little more explaining on the cutting, thus this tutorial.
This method is a great way to rotary cut large hexagons. You might be able to cut smaller hexagons, but I think it would be really fiddly. It is also a great way to get practice with Y seams as well as impress your friends with your machine sewing prowess.
I decided that I would do a more detailed post for those of you who might want to use this shape for a project of your own. That is not to say that you shouldn’t go and look at Little Bluebell’s blog. She has a lovely blog with lots of creative ideas.
Supplies
- fabric
- rotary cutter
- rotary mat
- ruler
- Clearview Triangle ruler
- True Grip dots or similar (to keep the above ruler from sliding)
- Post-it notes
- Jinny Beyer Perfect Piecer
- Pigma pen
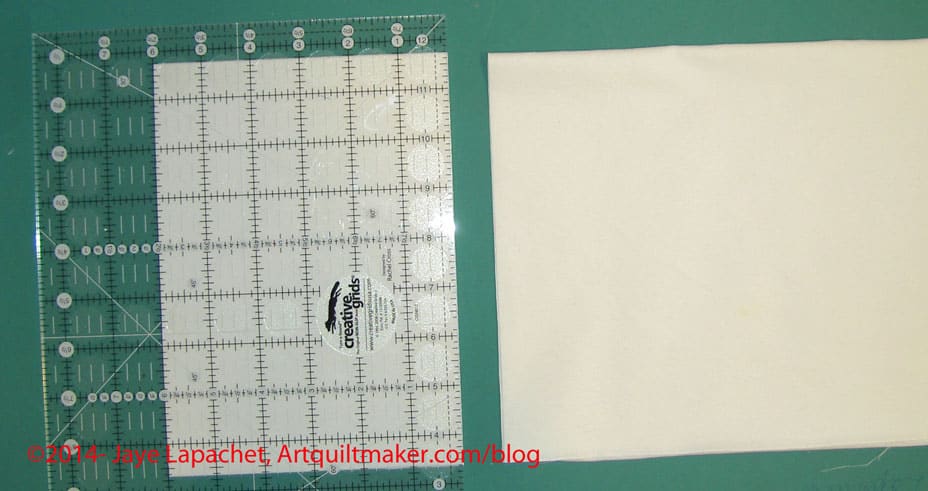
First, cut a 6″ strip from yardage.

Next, unfold the strip, turn it so the long way is horizontal. Fold it so the crease is longways along the bottom (closest to you). In the picture above, you can see the curve of the fabric on the left hand side of the picture, which indicates where the crease should be.
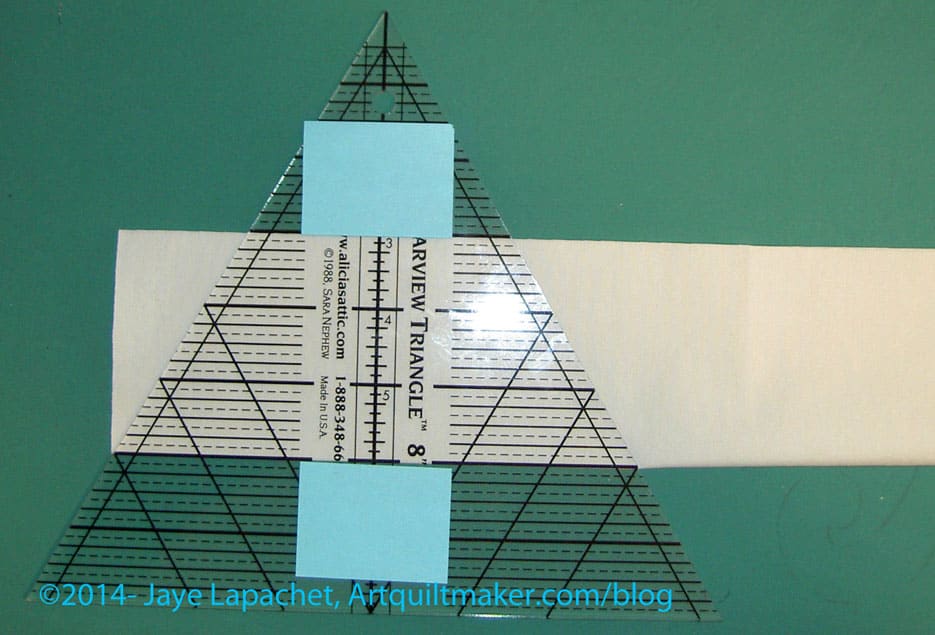
Follow the above step up with cutting. Place the Clearview Triangle ruler on the crease using the lines you have marked (using the technique described in the Kay Wood video). You must have this type of ruler. For example, I tried the Fons & Porter Pyramid ruler and that did not provide the right shaped hexagons.
In the photo above, I have marked my ruler at 3″ and 8″ using Post-it notes. You really only need to mark the bottom line, that which you place on the crease. I marked the top just to help me line up my ruler. Painter’s tape is another way to mark your placement line(s).
Nota bene: the above Clearview Triangle ruler does not have anything to help grip, so I recommend you add True Grips or something similar to the back of your ruler.

Now it is time to cut. If you are right-handed, line your ruler up on the left. Make two cuts to form your half hexagon shape.
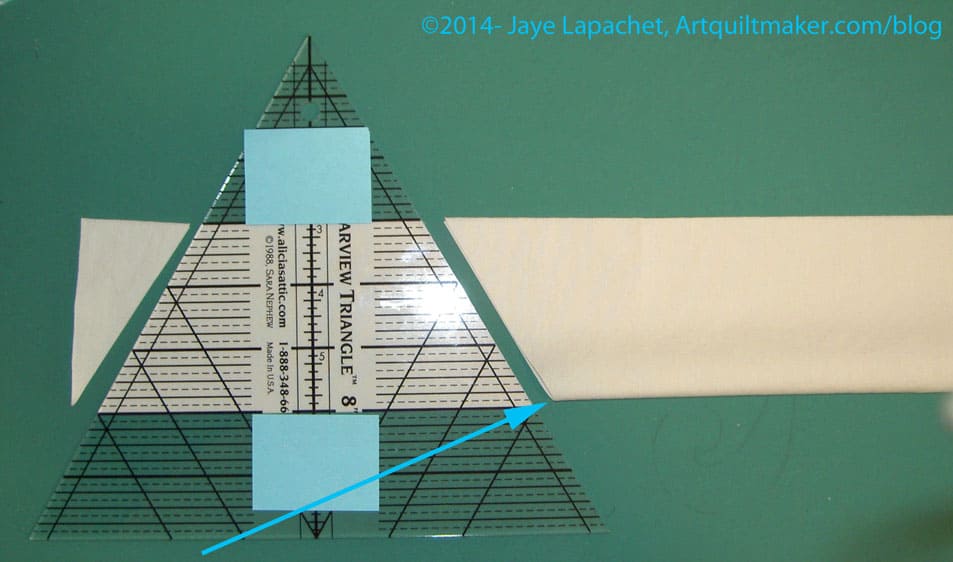
Next, line up your ruler to make the next cut. The left side of the ruler, at the end of your marked line should be placed where the arrow indicates. Cut along the whole strip. Do not turn the ruler upside down. You will end up with a weird shape that looks more like an hourglass. Little Bluebell has much better pictures of this step in her tutorial.
Unfold your hexagons. Sigh! Great job!

Now, mark your hexagons so that the Y seams will be easy to sew. I use the Jinny Beyer Perfect Piecer
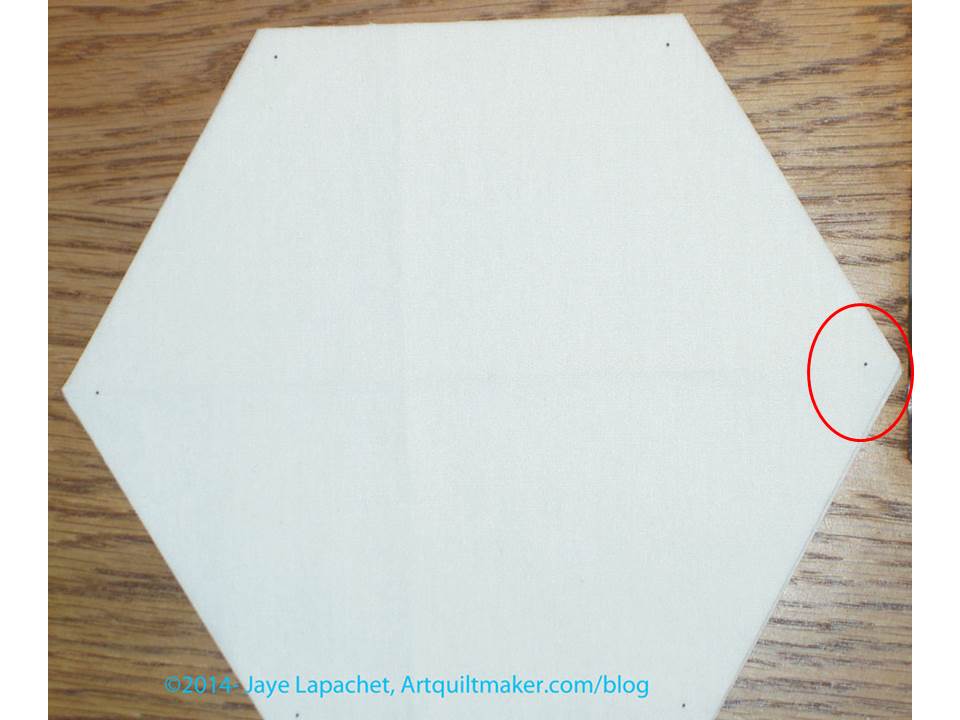
Line up your ruler in every angle and make a dot
You will sew between the dots only NOT in the seam allowance. This is how you sew Y seams and we have done that in other tutorials.
The rest of this tutorial comes from the Hexagon Clarification post.
Remember: no sewing into the seam allowances!
I am going to show you how to do this with 3 hexagons to start. Once you sew three hexagons, you can just sew the rest in groups of 3 then sew them to the other groups, sew them in rows or sew one hexagon to the group you have made. Let’s start with 3.

Put them on your design wall or on your floor and gaze at them. See the V formed by the top of the 2 bottom hexagons? Pay attention to that. You will need it later.

First, you sew two sides together. These will be two separate hexagons that you have already marked. Remember, you can mark with the Jinny Beyer Perfect Piecer and a Sewline pencil or with your favorite ruler and marking tools.

Put the first 2 hexagons right sides together and sew between the marks. Don’t sew into the seam allowance. If you did sew into the seam allowance, rip out the stitches outside of the marks.

When you open those pieces you will have 2 hexagons sewn together. YAY!
Second, for the third piece, you have to do a Y seam. Remember that I told you to pay attention to the V? There will be a V where the two already sewn hexagons meet and that is where you will place the 3rd hexagon.
You will need to sew 3 seams total to completely add the third piece to the first 2 already sewn pieces.

Third, you line up the third piece with piece 1, right sides together, so that one side of piece three will be sewn to one side of piece 1. The side of piece one to which you sew should be one part of the V referenced above.

Fourth, once you have sewn one side of piece three to one side of piece one, you fold the neighboring side on piece three right sides together to the adjacent side of piece two. You will fold it on to the other side of the V. It looks awkward, but should line up exactly if you have not sewn into the seam allowance.
Fifth, sew the second side of piece three to the second side of piece two.

Now you have 3 hexagons sewn together. AND you did a Y seam. That wasn’t scary, was it?

Sixth, press from the back so all of the seams twirl in the same direction.
You have sewn hexagons together. Hooray!
Thank you so much for this tutorial. It is really helpful. I would have never thought about the ruler you used and to visualize the process for sewing them together a good review and it’s actually pretty easy. Hexies continue to be hot in quilting.
I’d love to see what you make. A table mat would be a good trial project.
Actually there is no need for a triangle ruler, you can use the reqular one and it’s 60 degree marking for one side and the cutting mat marking for the other…
Good idea! It is easier with the ruler, though. Let me know how it goes with the 60 degree line.