Secret Santa

Jane Market Tote
Jane Market Tote

I went back and forth about whether or not I should post this on my blog before the BAMQG party, but I have so little to post these that I decided to go for it. I don’t know all of you as well as I would like, but I don’t think the recipient is a reader. Perhaps she will be after receiving the gift.

I agreed to make a Secret Santa gift for the BAMQG Holiday Exchange. It was hanging over my head, so I decided that Saturday would be the day to start. I actually cut out all of the pieces on Friday night and put most of the interfacing on as well, so the sewing went pretty easily.

I decided to make another Jane Market Tote for the gift. It is a good pattern – useful and nicely shaped. I am also familiar with it since I made over a dozen of them since I bought the pattern. The other bonus was that a shopping bag was on the giftee’s list.

Perfect.

As I said, I cut out the pieces on Friday night. I also decided to try adding some ShapeFlex stabilizer to see if that would give it some body.

As an aside: Have I said how much I like ShapeFlex? I love it. It is so easy to work with. It is not thick. Now, I am almost out again and am now thinking of buying a bolt. Crazy?

Anyway, I was able to put ShapeFlex over all the pieces except one, so I was really ready to sew on Saturday morning. So, Saturday morning, which was really about 11am since I slept so much, I sewed. The bag went together really well. I tried very hard to make it look nice. I used a star pattern on my machine to finish the top of the bag. I also put the handles inside rather than outside after the bag is finished, as the pattern suggests.

It is a nice bag, but I also decided to make a little needlecase and put that in the bag as well. I know it is not necessary, but I have some leftover scraps from the bag. I also found a pattern in Modern Patchwork for a needlecase that doesn’t look too difficult. Stay tuned for that.


Scrapitude Continues

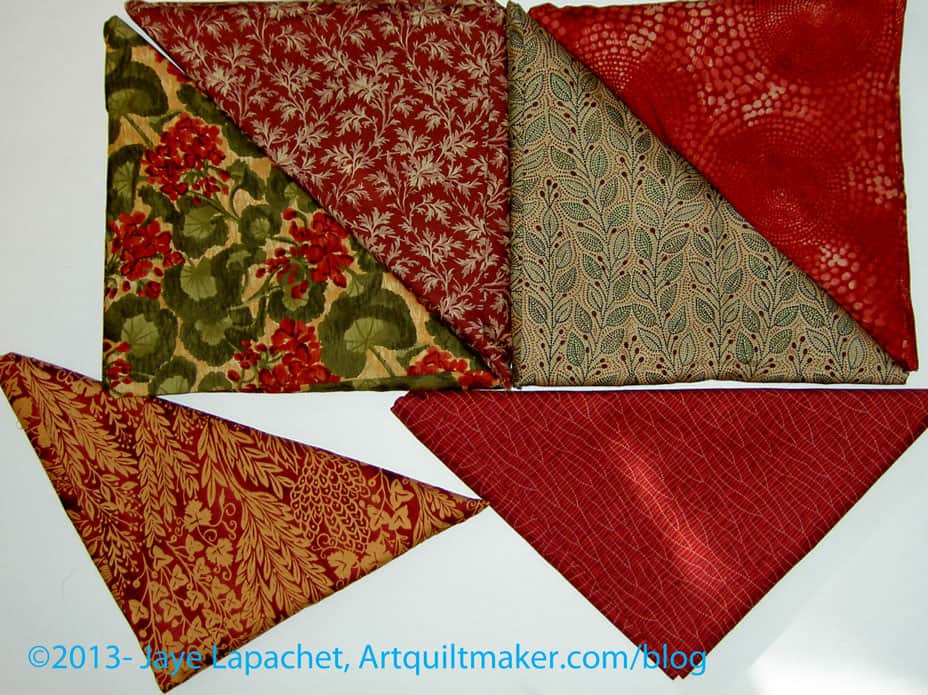
Scrapitude Triangle Segments

I spent the day home alone yesterday. DH is at a retreat for the Natives and the Young Man had a band review.

I got up up at 4:15 to get the Young Man to his 5:30 call time for the last band review of the season. DH usually does this chore, but we made it and did ok together.

I was kind of shocked, but when I got home at about 5:45am, I went back to bed and slept for another 3 hours, fitfully, but slept. I am usually not good at going back to sleep if I have been woken up in the morning. It was still pretty dark out, so perhaps my body thought it was still night?

It is kind of strange that I am getting some days home alone. I have always had one here and there, but they are getting a lot more frequent now that the Young Man has a life. The day was also a lot better than my last day home alone. I worked steadily on sewing projects, which was great. I made quite a bit of progress — perhaps not the progress I have made in the past, but I feel like I am really back in the saddle.

The bad part of the day was that my back hurt so I kept a hot pack on it all day, which meant I kept going down to the kitchen and heating it up. While the hot pack was heating up, I would do 2 minutes worth of dishes. Now my kitchen isn’t a huge pigsty from the massive pot of sausage soup I made.

I finally finished all of the triangle segments for Scrapitude. The photo above shows the last 24 or so, which took me forever.

I heard through the grapevine that Scrapitude Clue #3 is posted. I just went and took a look at Sandy’s blog and it is true! One of the things about not cutting everything up front is that I am not ready to go on the next step. I do get to break up the cutting with sewing, though.

I just need to work on this at my own pace.

Scrapitude Posts

Finished Donation Quilts

I missed the BAMQG November meeting. I wasn’t really up for it after my family emergency. I think I will miss the December meeting as well. Bleah, but we’ll see.

HOWEVER

Pink Donation Quilt
Pink Donation Quilt

I looked at the photos and two of the quilt tops I made were turned into quilts. I was thrilled to see them.

This is the pink one I finished in August 2012. If you click on the photo and make it bigger, you can see the circle quilting, which looks great.

Looking at the piece finished makes me re-evaluate the design again. I think I would take out the dark sashing pieces if I could have see it finished as I was piecing.

Impossible, of course, but a lesson for another day. still I hope that someone really enjoys it and I am so glad that a BAMQGer collaborated with me on this piece.

I haven’t made as many donation tops this year, but I can always try again next year.

Orange & Grey Donation quilt

Someone also finished the Orange and Grey donation quilt. Again the circle quilting is awesome. I am so pleased to see how well this quilt turned out. It is so great to see my tops turned into something I really love the collaboration!

Thanks to the BAMQGers who finished up these quilts.

Book Review: Bead Embroidery Jewelry Projects

Bead Embroidery Jewelry Projects: Design and Construction, Ideas and InspirationBead Embroidery Jewelry Projects: Design and Construction, Ideas and Inspiration by Jamie Cloud Eakin

One of the first things I noticed was the extraordinary drama of the first piece in the book. It is large, paired with the right clothes and the model is looking straight at the reader daring him/her to object, or, perhaps, say anything. This led me to the table of contents, which is illustrated with thumbnails of the various projects. Many of the pieces, including the Panel Collar necklace (pg.52), the Waterfall Necklace(pg.97), the Royal Vines Necklace(pg.101), and others are all quite large. The first piece and these supporting ‘actors’ tell the reader that this is a designer with whom to be reckoned.

My first impression is supported by the first line of the Introduction, which reads “One of the premises I live by is ‘Life is too short to wear ordinary jewelry.’ and I am sure many of you agree.” I have always wanted a mantra like that! These two things set the stage for the book. The pictures of all the pieces throughout the book are dramatic and make the pieces look large, though some idea of actual side is implied in the pattern instructions.

This book has 29 projects, but these projects are further expanded by, in some cases, several variations. The nice thing is that the variations are included right in the table of contents. While the reader may not want to go straight to the variation after opening the book, their inclusion in the table of contents gives the variations some stature, prominence. With the variations, the total project count is 45.

The ‘Basics’ section in this book is called Basics of Design and Construction, which includes design as an important element. The design piece has a few exercises to get you started. Design tools are, then, combined, somewhat, with construction. Prominent in this section (pg.12-13) is the use of neck forms and collar forms. The contents of a Standard Necklace Kit is briefly discussed and then the Basic sections goes to The One.

The One (pg.16- ) is described as the star of the show, a single focal point that is described as “a beautiful simplicity to a single focal embraced by bead embroidery.” In this section, the reader is back on to design with some definitive examples. This section is filled with tips such as “use your closet and the colors inside to help with your design choices.”

I was slightly alarmed when I found that the above section was immediately followed by projects without very thorough directions. First, there is an instructional section at the back of the book (pg.149-154) and all of the patterns have a variety of types of instructions.

Throughout the book, the author tips on different aspects of the projects, including how to execute certain stitches and hiding thread when beading around corners. Most of the patterns are 2-3 pages. The supplies are clearly enumerated. The focal beads look quite special in these pieces and I think the reader might have some concerns about matching the quality of the imagery. The focal beads and color are integral to the success of the project. I am sure that readers will have fun seeking out the special beads!

Picking my favorite project was difficult. I don’t wear these types of pieces. I found aspects of various pieces drew my attention. With some, I was attracted by the colors. Others had appealing shapes.
as I started to look through them.

The end of the book has a small gallery of projects, by different artists. There is also a comprehensive index, which also warms my librarian heart.

Use the colors and shapes from this book for inspiration and thanks to Lark Books for sending it to me.

View all my reviews

Creative Prompt #233: Butter

I must be in a ‘B’ mood – Bloom last week, Butter this week, Blossom a few weeks ago.

Post the direct URL (link) where your drawing, doodle, artwork is posted (e.g. your blog, Flickr) in the comments area of this post. I would really like to keep all the artwork together and provide a way for others to see your work and/or your blog.

We are also talking about this on Twitter. Use the hashtag #CPP

The Creative Prompt Project, also, has a Flickr group, which you can join to  post your responses. I created this spot so those of you without blogs and websites would have a place to post your responses.
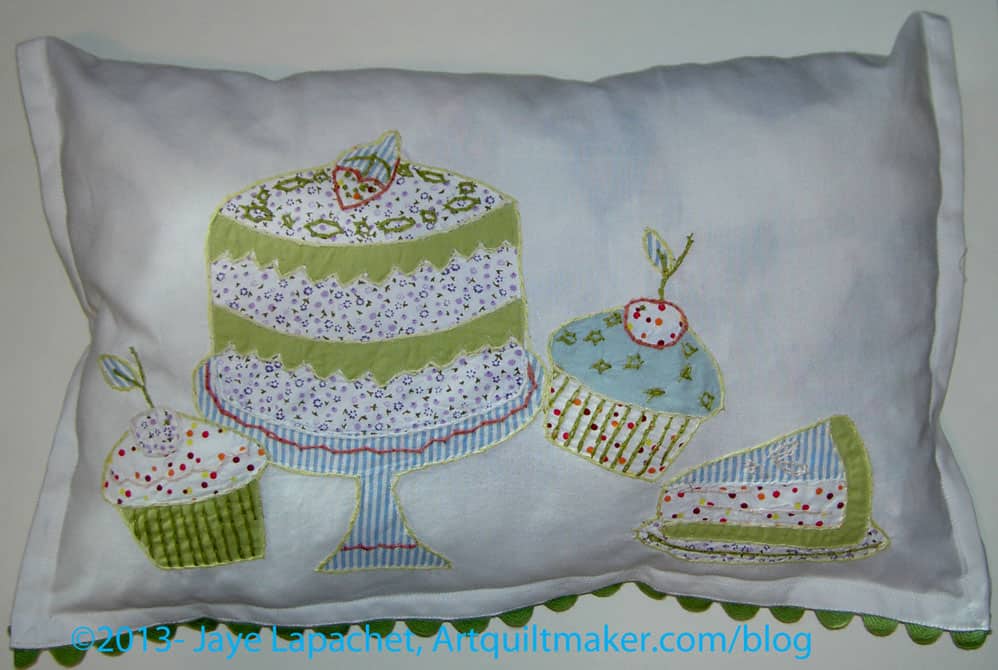
Butter someone up

2011 film starring Jennifer Garner

topping to spread on toast

cocoa butter

light yellow color

Definition: “Butter is a dairy product made by churning fresh or fermented cream or milk. It is generally used as a spread and a condiment, as well as in cooking, such as baking, sauce making, and pan frying. Butter consists of butterfat, milk proteins and water.

Most frequently made from cows‘ milk, butter can also be manufactured from the milk of other mammals, including sheep, goats, buffalo, and yaks. Salt, flavorings and preservatives are sometimes added to butter. Rendering butter produces clarified butter or ghee, which is almost entirely butterfat.

Butter is a water-in-oil emulsion resulting from an inversion of the cream, an oil-in-water emulsion; the milk proteins are the emulsifiers. Butter remains a solid when refrigerated, but softens to a spreadable consistency at room temperature, and melts to a thin liquid consistency at 32–35 °C (90–95 °F). The density of butter is 911 g/L (56.9 lb/ft3).[1]

It generally has a pale yellow color, but varies from deep yellow to nearly white. Its unmodified color is dependent on the animals’ feed and is commonly manipulated[citation needed] with food colorings in the commercial manufacturing process, most commonly annatto or carotene.” (Wikipedia)

Use a pound to make pound cake

ingredient for baking

hot buttered rum

Almond butter

butter pecan

smooth as butter

your bread and butter

butter churn

peanut butter

buttermilk

lip butter (Sephora)

butter flavor (as in movie popcorn)

Butter is better

Nursery Rhyme:

Betty Botta bought some butter;
“But,” said she, “this butter’s bitter!
If I put it in my batter
It will make my batter bitter.
But a bit of better butter
Will but make my batter better.”
Then she bought a bit of butter
Better than the bitter butter,
Made her bitter batter better.
So ´twas better Betty Botta
bought a bit of better butter.

Belly Butter

butter cookies

Round Robin Round Three

Kelly's Round Robin
Kelly’s Round Robin

I also have Kelly’s piece and it is time for me to work on it. As soon as I tidied Kathleen’s piece out of the way. I need to keep  Kathleen’s piece for a little while as Kelly is still working on setting up her studio.

I put her piece up on the wall so it has a chance to speak to me. Nothing yet. I thought Chris’ piece needed space. I wanted to retain the freshness of Kathleen’s piece and Kelly’s piece…..

I don’t know. There is definitely personality. There is definitely movement. Kathleen’s Flying Geese really add a lot to this piece. This is a rich piece as in it has a rich look. The idea of a Persian rug comes to mind, though it doesn’t look like a Persian rug, and that isn’t quite right, but I think the closest I can describe is that it just has the feel of a Persian rug.

There is also an element of a royal banner. i can see this piece on a long pole being carried in front of a large group of men on horseback wearing the royal colors.

I don’t think it needs space. I think the richness needs to be continued, and perhaps some more points. I am just not sure how. I’ll keep looking at it and see what I think about.

What do you see?

Book Review: The Farmer’s Wife Sampler Quilt

This review has been on my To Do List for a long time. I know  the Farmer’s Wife project is no longer the rage in the quilt community, but I think it is an interesting book, and well worth your time.

The Farmer's Wife Sampler Quilt: 55 Letters and the 111 Blocks they InspiredThe Farmer’s Wife Sampler Quilt: 55 Letters and the 111 Blocks they Inspired by Laurie Aaron Hird

I like all block dictionaries. I like them because I can always find a new block and each new block starts me on a fun creative adventure. The Farmer’s Wife Sampler Quilt: 55 Letters and the 111 Blocks they Inspired is no exception and it includes letters! I love letters even reading other people’s letters!

The introduction is called The Changing American Culture of the 1920s and discusses “a time of political and technological changes.” It is an interesting and tantalizing way to begin a quilt book, especially for someone who enjoys quilt history. This page mentions the Farmer’s Wife magazine, a source of some of the quilt block patterns mentioned in Jinny Beyer’s The Quilter’s Album of Patchwork Patterns, which I reviewed a few weeks ago. I commend Krause Publications for allowing Laurie Aaron Hird to include it.

The Changing American Culture of the 1920s is followed by a page called 1922 Farmer’s Wife Contest. I have read quite a bit on quilt history, but don’t remember this contest being mentioned, probably because it was not a quilt contest. It was a contest asking for people’s opinions about being a farmer’s wife. The interesting part is that the organizers asked women to “talk it over with your husband, your children and your friends. Consider not only financial side of the question, but the moral and physical viewpoint and the things that make for real happiness.” The way I read this is that the organizers, and I am not looking at the complete list of directions and rules, assume that their readership is smart and their opinions worth knowing. I love that!

The responses are summarized VERY briefly on page 12 and then the author launches into “How to Use this Book” which is followed by the letters and the quilt blocks.

The first few sections are short, interesting and well worth taking a few minutes to read. The response letters are concentrated in the middle section of the book followed by some minimal piecing directions in the back.

This book includes a CD, but I don’t know what is included as mine is broken so I can’t look at it. (Nota bene: It broke after I got it; the book didn’t come with a broken CD).In the introduction the author says she includes “larger versions of the quilt assembly instructions” and “…you can print templates from the CD-ROM that accompanies” the book. (pg.13)

The author describes the respondents to the contest as “articulate, optimistic and visionary…” (pg.12). After reading a few of the letters, I have to agree, even though I know they were putting their best foot forward in order to win the not insubstantial prize money.

I do have a few problems with this book. The idea is that you make these blocks with templates. The author made her quilt by hand piecing all the blocks. I really have no problem with templates or hand piecing. You all know this is true after reading about my adventures with the Flowering Snowball. The problem is the crazy way I have heard of people using templates to cut pieces for this project (which has taken hold in the Modern Quilt community). I heard and seen quiltmakers make templates and then rotary cut around a thin piece of paper and a bit of template plastic. I am scared of my rotary cutter as it is. This sounds like a recipe for disaster to me.

The basic problem I see is that there are no rotary cutting instructions (though you can buy an EQ6 or EQ7 CD with all the patterns on it and print the rotary cutting instructions). I am not against templates or hand piecing. I understand the need to slow down, quilt more slowly, take your time. However, in this day and age, I think it is important to include rotary cutting instructions, because almost everyone cuts with a rotary cutter. Quiltmakers just do not use scissors to cut out pieces very often anymore.

There are also no line drawings of the blocks. I think this is a problem, especially for beginners. People need to be able to see the pieces without the colors or fabrics the author chooses. Fabrics can interfere with seeing the shape of the pieces or how the pieces fit together. While the maker may want that after a block is pieced, it is important to make that choice. Yes, the reader could look up the line drawings in Jinny Beyer‘s book, but why not just have a small line drawing available with the color pictures of the blocks? Cost probably.

I am not that fond of the fabrics used and would love to see an alternate color way included in the book. It can be done in EQ7 (with the add-on CD) pretty easily, but it would have been a nice bonus.

I like the idea of this book and think it is an easy and interesting way to dip your toe into quilt history. I would like to make this quilt, but with more Jaye-like colors – lots of pinks and turquoise, I think. 😉

Related Links

View all my reviews

More Scrapitude Triangles

Scrapitude Triangle Segments

In my last Scrapitude post, which seems like I wrote it an eternity ago, I talked about making the triangles more scrappy using a special ruler. I am glad I decided to make it scrappier, because even the few fabrics I used multiple times seem like I used them too much. Once I see what these sections will be used for, it might make no difference. Or I may need to remake some. I’ll just have to wait and see.

Don’t get me wrong, I don’t want the new sewing part of Scrapitude posted, because I haven’t finished the last step and I still have cutting to do. Read that last sentence as I am behind. I still really want to know what the blocks will look like so I can make better decisions about fabric choices. This is the ‘fun’ of a mystery quilt, I suppose. I am enjoying the fabric choices I have made so far.

I spent some time on Saturday sewing the segments together. I have 104 of these triangle segments, which means that I need 24 more. I have some foreground fabric, but all of it has been used several times, so I think I need to cut some different ones. I am probably in the same position with the backgrounds, though I know I haven’t cut enough yet.

Once I am done with the triangle segments, I’ll get back to cutting. I think I have some more 2-7/8s squares to cut. My cutting plan got interrupted when I left town and now I don’t know where I am with any project, which is why it was easy to get the Round Robin done. I could start and finish.

I saw that Daisy posted some photos of her Scrapitude progress on her Flickr stream. Good fabric choices. I like the triangle segments she has made. Her photos reminded me that I still need to do those segments with the squares and two triangles. Sigh.

Scrapitude Posts

More Round Robin Progress

Kathleen's Round Robin Piece
Kathleen’s Round Robin Piece

After recent events keeping me away from my machine and last weekend’s fiasco of sewing and ripping, I decided that I would make progress this past weekend. I decided I would sew and make progress.

I did make progress. Small progress, but we have to rejoice in the small successes, right? I finished my part of Kathleen’s Round Robin piece. I am really pleased with how it looks. For one, I am pleased I was actually able to do something. Two, I think I did a good job echoing the shapes from the center.

I hung the piece I got from Chris up on my design wall so I could look at it. It spent a few weeks up there and as I was looking at it, the Kaleidoscope shape in the center stood out, especially those long thin triangles. Also, the fabric with that jade green in the Kaleidoscope in the very middle caught my attention. From those two thoughts, I worked on my design and fabric choices.

Kathleen's Round Robin in Progress
Kathleen’s Round Robin in Progress

I used foundation piecing for the blocks for the corners in my round. I designed the corner blocks using EQ7 and then printed the foundations out. The Carol Doak paper I got some time ago is great. I printed right on to it and it worked like a charm. I was able to rip out paper with a minimum of torn stitches. It might not be the most cost effective (I don’t know) but for the limited foundation piecing I do, it worked great.

You can see from the ‘in progress’ photo that I used three blocks to make up the corners and then filled the middles of each side in with white. I had a hard time figuring out the measurements. They weren’t standard so the center white piece is different than the blocks. Not everything lines up nicely either, but I think that can be the nature of round robins. I think it will look fine once finished and quilted. I don’t think Kathleen will mind. At least I hope she won’t

Kathleen's Round Robin detail
Kathleen’s Round Robin detail

The detail shows the fussy cutting of the green, gold and white fabric very well. After I finished, I thought that replacing the green (closest to the white) with white might have kept it fresher, but I think it would have had the problems I mentioned above.

After doing all the piecing, I decided I like the way, viewed from some angles, the center piece looks like it is on top of the part that I added. I also think the corners look a bit like stylized flowers.

I think that the next person will need to get back to the orange – well, I should say that if I were doing the next round, I would use some more orange. I can’t tell you how tempted I am to add some orange.

It didn’t turn out exactly as I imagined and I am thinking that that green makes it look a lot more 1930’s than anticipated. I also think that more white might have been better, but I paid special attention to fussy cutting the alternate fabric in my corners and I wanted it to show. If I had added some white to the corners, that gold, green & white fabric would not have stood out as much as it does. I am pleased with the way it came out.

Now on to the brown one.

Thinking about #BFSI

I am terribly behind on podcasts and I don’t know when I’ll be able to catch up. This means I haven’t heard whether any of the podcasters are organizing a Black Friday Sew-in.

BFSI Giveaway?
BFSI Giveaway?

I will not be shopping on the 29th, so I will be tweeting while I am, hopefully, sewing.

I have a couple of gifts I will be giving away and I will be working with Lark Books to see about giving away some books as well.

As with my other giveaways, my request will be substantive. In a way, I guess this is fair notice about the potential quilt games I may be playing with you. One thing I will probably do is ask you something about your UFOs. That means that you may want to count up your UFOs, think about the status of them, how you might be stuck, etc.

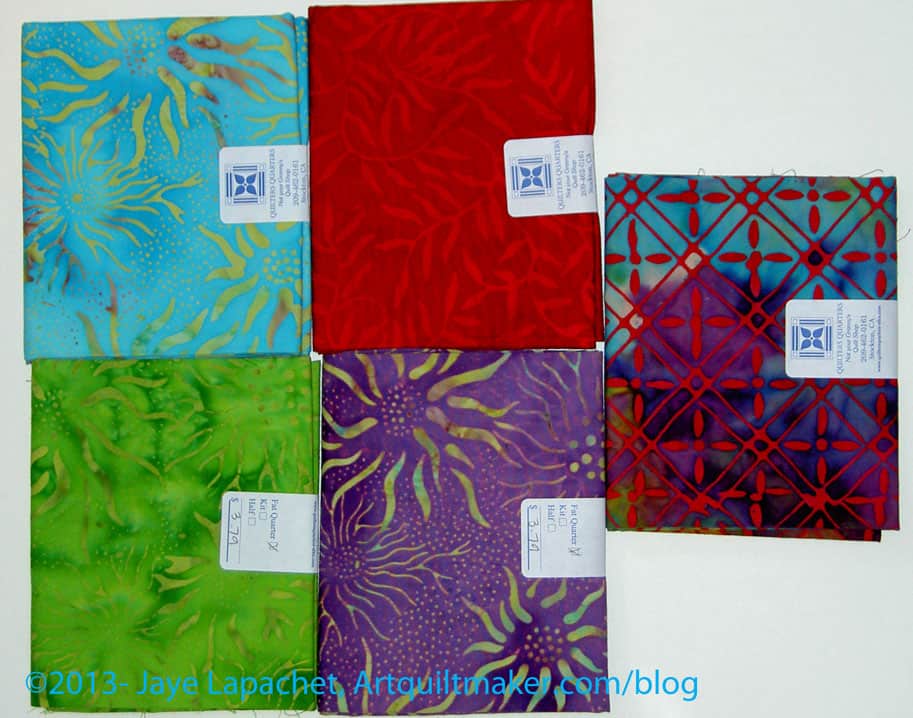
FQ Pack
FQ Pack

This is not completely selfish of me. Yes, I am interested in what your are doing, but I also think that your comments could start a discussion that could result in renewed interest in your project.

I hope.

Book Review: Shaped Beadwork & Beyond: Dimensional Jewelry in Peyote Stitch

Shaped Beadwork & Beyond: Dimensional Jewelry in Peyote StitchShaped Beadwork & Beyond: Dimensional Jewelry in Peyote Stitch by Diane Fitzgerald

One of the first things I noticed was the feel of the book. It is a paperback, but it has a bit of a heft to the cover, making the book feel as if the cover wouldnt’ be damaged immediately.

Upon opening the book, I was enchanted by a photo of a group of bead starfish. they look like they are photographed on a piece of Styrofoam, but it isn’t obvious and it is the perfect background. I love these little starfish.

Both are, of course, irrelevant to the content. As with her previous books, Diane Fitzgerald makes a brief introduction and then gets on the with the projects. This book is STUFFED full of projects, 43 in all. If you want a peyote stitch project book, you won’t be disappointed.

Unlike Diane Fitzgerald’s Favorite Beading Projects Designs from Stringing to Beadweaving, which I reviewed before, there is a ‘Basics’ section, which includes the contents of a Basic Beadwork Kit, understanding the Peyote stitch, general techniques (including unpicking!), and recognizing patterns. Chapter 1 is brief, but seems to be fairly comprehensive.

After Chapter 1’s intructions, there is what I would call a practice/basic pattern. It is a basic triangle (as 60 degree triangle, if you want to translate the patterns to quiltmaking), which is a component of many of the projects in this book. I see immediately, in the Oh My Stars! necklace (pg.18), a pretty and delicate piece, that this triangle is used. It is clear from leafing through the book that mastering this first pattern will go a long way towards success with the other patterns.

Throughout the book, the author shows very clearly how to put the beads together into the larger units needs to make the various projects. In looking at these images, I am sure a clever quiltmaker could apply beads to a quilt project in the same manner and achieve a great, if flatter look. This book can also be used as a good source of inspiration as it has wonderful pictures of different beads used as well as different pieces.

The Temari Beads necklace (pg.23) gets the reader early into the dimensional aspect of the book

I was hard pressed to pick a favorite project as I started to look through them. I liked many of the projects as objects, but weren’t my style in terms of wearing. If forced, I would choose the Rivoli Bracelet (pg.104). I like the sparkle and flash and think it would go well with what I wear to black tie events. I also think the construction is interesting. The Navette Pendant (pg.132) is also something that I might wear. The construction makes it look like a very large gem and I can see people doing as double-take as they see from the middle distance. Aside from the eye bead, which I liked and was a bit repelling, the Eye of Providence (pg.142) is appealing. I can see wearing the Eye of Providence with Roses(pg.145) pendant.

Chapter 6 covers pointed ovals. While the shape can look a bit weird and eyelike, I did like the variety of options presented in the book, especially the Eye of Apollo necklace (pg.133). This shape and the projects shown really look like jewelry to me.

Each project has a good description of the supplies required along with the nice photos. Variations are mostly shown, though not always described. The reader can get a brief idea of what the project looks like in slightly different colors.

The end of the book has a gallery of projects, by different artists, but all, presumably made in the peyote stitch.

As I said, this book has a whopping 43 projects. At an MSRP of $27.95, that is about $.65 per pattern. If you want to try a lot of different techniques, this is a good buy.

Enjoy this inspirational book and thanks to Lark Books for sending it to me.

View all my reviews

Onward HO!

My machine is back from the spa and seems to be running only when I press the foot pedal.

I put on The Girl You Left Behind audiobook and drove down to San Jose to pick up the machine. It is about an hour each way for me, so I want the machine to be right when I go to get it. I know many of you have dealers that are far away and can sympathize.

I have to say that I don’t think they take very good notes at the dealer because they gave me another new foot pedal just in case. They did that last time, too. It makes me wonder how they keep their business in business.

I told the repair guy/owner of the shop that I would demand he come and pick up the machine if it didn’t work. Clearly, I can’t force him to do anything, but it sounded good.

This whole machine drama has made me think about opening a sewing machine repair shop in the City. It would be so nice if there were one closer. The place I bought my machine from closed a few years after I bought my machine after a number of family tragedies. Of course, I know nothing about repairing sewing machines, but why should that stop me? 😉

Obviously, if I were really going to do something like that, I would need to do a lot of research.The quiet of the drive down to the shop was good for me. I am a little impatient with people these days and I am pretty sure my work colleagues were glad to see the back of me at the end of the week. Listening to the book made me not have to think too much. My brain is tired.

Now I am going to put on Still Life by Louise Penny (yes, I am listening to it a second time, as I think I missed half the story in the drama of last week) and figure out if I remember how to sew.

What are you working on?

Creative Prompt #232: Bloom

I apologize for being MIA last week. It was a tough week. I am back in the saddle, so get your paints, colored pencils, crayons and needles out!

The bloom is off the rose

Definition: “Bloom, one or more flowers on a flowering plant” (Wikipedia)

algae bloom

Bloomberg Business, Financial and Economic news (a stretch, I know)

blooming garlic

Post the direct URL (link) where your drawing, doodle, artwork is posted (e.g. your blog, Flickr) in the comments area of this post. I would really like to keep all the artwork together and provide a way for others to see your work and/or your blog.

We are also talking about this on Twitter. Use the hashtag #CPP

The Creative Prompt Project, also, has a Flickr group, which you can join to  post your responses. I created this spot so those of you without blogs and websites would have a place to post your responses.
Biology

  • Bloom, one or more flowers on a flowering plant
  • Algal bloom, a rapid increase or accumulation in the population of algae in an aquatic system
  • Bloom, a collective noun for a large group of jellyfish
  • Epicuticular wax bloom, a whitish haze due to small crystals of wax, occurring on the surface of many fruits
  • Bloom syndrome, autosomal recessive human genetic disorder that predispose patient to a wide variety of cancer

Technology

Art and art conservation

People

Places

Music

Entertainment

Businesses

Other uses

  • “Blooming”, a less offensive version of the term Bloody
  • Chocolate bloom, the appearance of a white, mouldy-looking film on chocolate
  • Bloom’s Taxonomy, a classification of learning objectives

Round Robin Progress

The Round Robin isn’t going exactly as planned and I have two at my house while Chris has none. I am not sure what Kathleen has. Fortunately, we are flexible and working through it.

Kathleen's Round Robin
Kathleen’s Round Robin

This is a pretty and fresh piece. That white is very stark and helps the other piecing float. As I stared at the piece, I knew I wanted to maintain that bright freshness.

Finally, I came up with an idea. I plan to add some Kaleidoscope-esque bits to the corners.

That was rolling around in my mind from the beginning, but I couldn’t figure out exactly how I wanted to do it. I was finally struck with a technical plan over the weekend and began the process of foundation piecing.

As I mentioned on Twitter, I sewed the same seam 3 times and ripped it out 3 times, then quit. I think I was trying to use a piece of fabric that was too small and my stubbornness (work, dammit!) got in the way. That one foundation is shredded, so, hopefully, I have learned my lesson.


Stay tuned for more details.