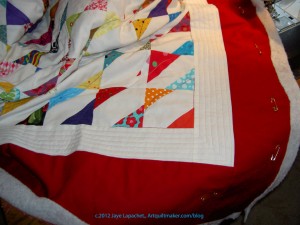
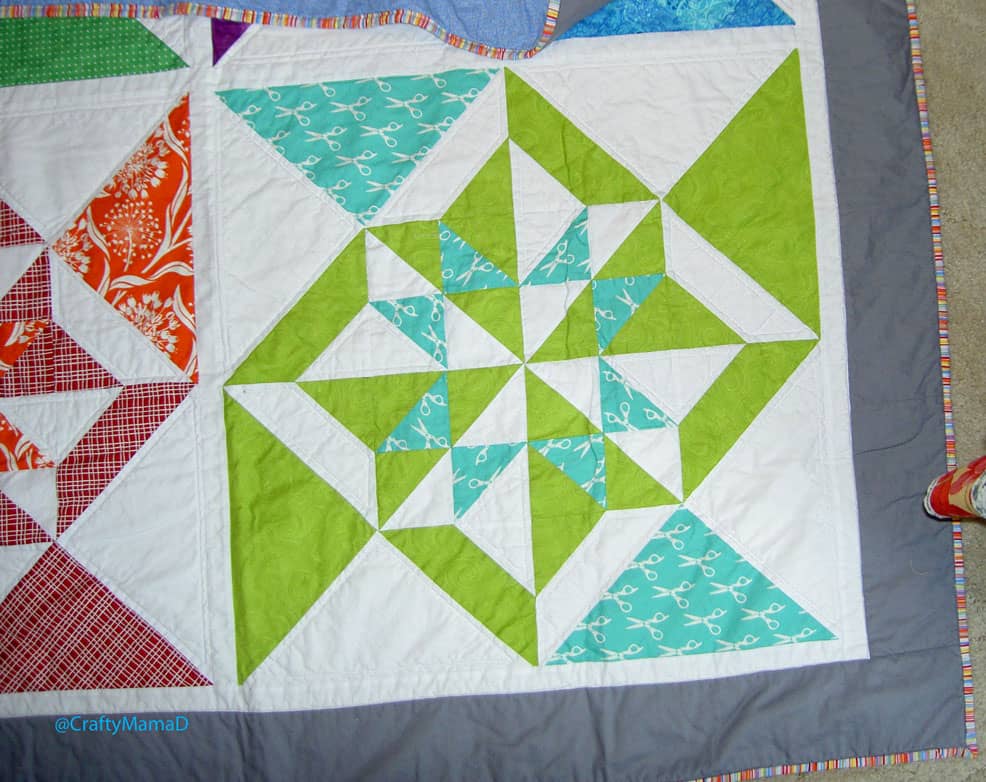
I spent several hours last week quilting the Corner Store.
Yes, she who does not normally quilt large pieces quilted a large quilt.
I went easy on myself, because my shoulder is acting up again and I didn’t want to be crippled when I had so much to do for the holiday. My pile of quilts to be quilted is getting ridiculous (7 that I can remember), though, and I wanted something to give to my BIL to provide some comfort while he goes through radiation treatment.
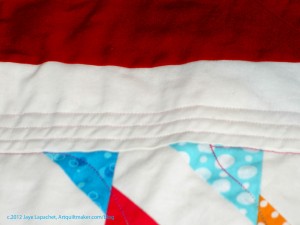
Quilting the 1st Border
I used to be a good quilter (not like Colleen, but I could hold my own). I stopped quilting large pieces when I hurt my neck and am way out of practice. I wanted to go easy on myself and I didn’t want to try anything too ambitious, so I stuck with straight lines and gentle curves. I have to admit that my original idea for the first border (white) was to fill it with a line of large circles. I couldn’t fix the tension enough to make it look good, so I went with the straight lines. It kind of looks like a frame, if you squint.
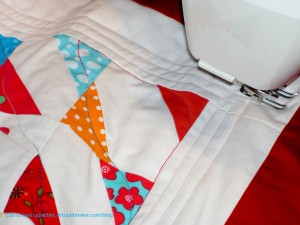
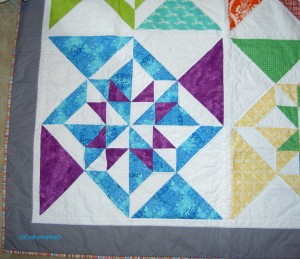
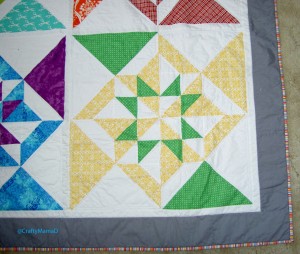
Corner Quilting
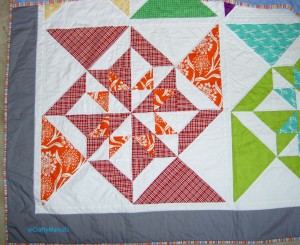
In the last photo (left), you can see some of the quilting in the center. I used a Valdani variegated thread that I bought in Chicago several years ago. I don’t really like variegated thread, but it works in certain circumstances.
You can also see how I used the walking foot to measure the space between the quilting lines. I kind of like doing that as it seems to be a consistent measurement.
The quilt won’t win any prizes, but if it provides some comfort, I will be happy.
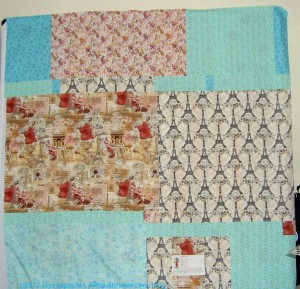
I wrote about my second Jelly Roll Race quilt a few days ago. I don’t remember if I hadn’t made the back yet, or, for some other reason, I just didn’t post about it. Probably the former, but that seems like an eternity ago, so I really can’t say.
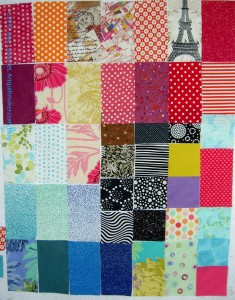
I had a number of pieces of Paris related fabric that I bought specifically for the back of this quilt. Lil Sissy loves Paris, so it seemed appropriate.
I am actually kind of eager to quilt this. I need a basting fairy.
While I am making progress on preparing to sew the FOTY 2012, I still have a pile of fabric to press, not to mention the other pile I have to wash AND press. There is no way for me to get it all done, but I will get as much done as possible before I start sewing at the CQFA Retreat in January.
I do enjoy this process, however. I like seeing these photos and thinking about what I made from the fabrics.
I have FOTY 201o hanging in my hallway and I keep walking by thinking “I need to find that fabric; it would be perfect with X project.” That is really fun.
I have never counted this as a project, but I think I have to admit that it is. I now have 13 blocks, this one being the latest. I also have #14 on the Design wall.
I decided that I would make the last few blocks and sew this piece together. I have had my fun and would like to finish this piece.
I don’t hate the process, so it won’t be a chore or anything. I just want to move on, especially with the Star Sampler looming.
I guess I also have to admit that, while I am pleased with the progress I have made on clearing out old projects, I want to clear out more lurking projects. I don’t want anymore 10 year+ projects hanging around.
You might remember that I made a pincushion for a Modern Quilt Guild swap (and sent me into an orgy of pincushion making), which was organized by the Kansas Modern Quilt Guild. You can see the pincushions that were sent in to swap on Flickr. Not all of them are up there yet, so go back and look later.
The photo, left, was posted to the BAMQG Ning site (members only) by Adrianne. I tried to find the original source, but couldn’t, so I may swap it out, if I find it later. My pincushion is in the upper left hand corner a tiny bit in from the exact left.
I love the creativity, but I have to say that I am pretty pleased with the way my pincushion turned out. It looks like a pincushion and is cute, but not cutesy, if you know what I mean.
I haven’t received a pincushion yet, but others in the guild have so I am waiting with bated breath.
Take 5 minutes to do any kind of artistic response: poem, doodle, quilt, pastel, pencil. ANYTHING counts. No rules; just do it!
Post the direct URL (link) where your drawing, doodle, artwork is posted (e.g. your blog, Flickr) in the comments area of this post. I would really like to keep all the artwork together and provide a way for others to see your work and/or your blog.
The Creative Prompt Project, also, has a Flickr group, which you can join to post your responses. I created this spot so those of you without blogs and websites would have a place to post your responses.
Princess Diana
Pretty, pretty princess
Disney princess
Definition: Princess is the feminine form of prince (from Latinprinceps, meaning principal citizen). Most often, the term has been used for the consort of a prince or for the daughters of a king or sovereign prince.
For many centuries, the title “princess” was not regularly used for a monarch’s daughter, who might simply be called “Lady” or a non-English equivalent. Old English had no female equivalent of “prince”, “earl”, or any royal or noble title aside from queen. Royal women, or women of the nobility, were simply addressed or referred to as “Lady” or “The Lady Firstname” for a particularly highborn woman.
As women slowly gained more autonomy and respect in European history, the title of princess became simply the female counterpart of prince; it does not necessarily imply being merely married to a prince.[citation needed] A princess may be a hereditary, sovereign, head of state in her own right.
The traditional meaning still applies in Europe in the sense that an untitled or at least non-royal woman who marries a prince will almost always become a princess with the possibility of eventually becoming Queen Consort, in nations where that title exists; but a man who marries a princess will almost never become a prince, unless his wife is expected to inherit the higher title of Queen regnant. If that is the case, then on her inheritance of that sovereign title, he will often become a prince (or remain one if he was already a prince).
In many of Europe’s royal families, a king would grant his heirs actual or theoretical principalities to train them for future kingship or to give them social class. This practice has led over time to many people thinking that “prince” and “princess” are titles reserved for the immediate family of a king or queen. In fact, most princesses in history were not immediate members of a royal family but rather women who married into it.
Yes, I rearranged the way this post was structured. You will get to see the year’s roundup soon, but I wanted to highlight the finishes on this list, too.
I came across last year’s end of year post and realized that I surpassed my previous goal of 9 quilts finished in one year last year when I finished 10 quilts. If I want to surpass another significant goal, I will have to finish at least 11 quilts this year. There is no hope for me now. Oh well, I did make a lot of progress on projects and that pleases me. I also had fun, which is the goal, right?
Still WIPs
Aqua-Red Sampler – Frances and I finished our fusible machine applique’ blocks and I am supposed to be preparing the next class on curves.
The Tarts Come to Tea: I haven’t quilted on this since April 2011. I really do need to work on the quilting. I was making good progress and then got sidetracked. Quilting the Whole Cloth quilt sort of got me back in the swing of quilting, so perhaps there is hope for this piece.
Garden: I started this piece in a class with Pamela Allen in 2006. I also used this piece for my beading demo for the 2012 EBHQ Voices in Cloth show (March 17). I made the facing and started to stitch it down. After stitching down the facing, I need to make a sleeve and finish about 2″ of blanket stitching that I noticed wasn’t complete.
Pointillist Palette #4: Fourth is a series of 6 quilts; needs tiny square patches sewn together. Mrs. K. gave me more PP fabric and I won some from a giveaway. I think it is a sign that I need to work on this.
See: needs satin stitching. Small, also a possibility for finishing.
Spiderweb: Top is together, binding is made. I am working at ripping out the foundation paper (what a pain and what a mess!). I need to make a back and then take it to the quilter.
Under the Sea: class project; like the design, but not the colors much.
Flower Sugar Hexagon: sewed more hexagons together. Sewing Y seams is a bit of a chore, so I get tired of doing it after awhile.
Young Man’s t-shirt quilt: have cut up the t-shirts and am still in the process of applying fusible. He cleaned out his drawers and found some more t-shirts to add to the quilt. Oh Yay! <– just a bit of sarcasm. He asked me again for another quilt, so I think this one is next in line. I plugged in his heating mattress pad, though, which should keep him quiet for a bit longer.
I still have a few more WIPs than I do finished projects. Again, I have made progress on clearing out old projects and I am pleased.
Ready for Quilting by Checkbook
Original Bullseye: Top and back are finished. Needs binding and quilting. I think loopy feathers quilted in the border will set off the blocks fine.
Flower Garden: The flowers were too spiky. This is going to Pam for a cat bed.
Pineapple: will remake blocks at a later time with more care.
Moon and Stars: This quilt was barely a quilt and was not interesting. I realized I didn’t want to devote time to it. So, I finally just decided to give up and get it off the list. I will send it to Pam for a cat mat.
Hunting and Gathering
Spin Wheel: really not started, but supplies gathered. Cutting fabrics as I go. TFQ does not consider this a UFO and made some good points to that end, which is why I have moved it to the Hunting and Gathering section. She says, and I have to agree, that quilts are not ‘projects’ until the sewing starts. OK. I’ll go with that.
Stepping Stones #2 using Bonnie & Camille fabrics Bliss, Ruby, Vintage Modern: made two blocks, but still on back burner while I decide on the background colors.
I am pretty pleased. I have 8 projects off the list and 9 others with a definite plan.
I am still mulling over whether I want to continue this update into 2013. I, of course, want to create some kind of disposition for all of the quilts and projects on the list. However, I do want to think of a new focus for 2013 and I don’t want it to be the same focus year after year. Stay tuned while I decide.
I am redoubling my efforts to do good with fabric. To that end, I am thinking that I would like to finish the Patchwork Wheel blocks before Christmas and, thus, I need to think about layouts.
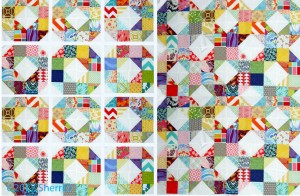
I mulled publicly sashing this piece in the last post and was pleased to receive an email from SherriD with her Photoshop handiwork allowing me to see the effects visually.
I like the space between the blocks that the sashing provides and I have plenty of Kona Snow to make sashing. I am not quite sure if Kona Snow will match the background used in the blocks, though, and that might be an issue.
The sashing-less version is much more chaotic, but it does look like roads winding through a town.
Thanks, again, to SherriD for taking the time to create this image for me.
“What were you thinking?????” is what I hear being screamed at me and you have every right to scream. No rending of garments or tearing of hair, please.
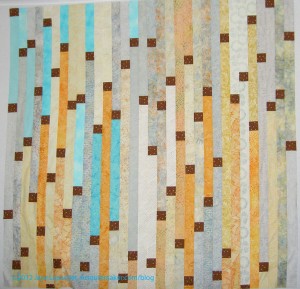
In certain respects, quiltmaking is an intellectual challenge for me. I want to know what makes the techniques tick, why fabric behaves the way it does and, often, what happens if….. The intellectual challenge in this case is to figure out how to make a Jelly Roll Race quilt not look terrible, to have some sort of control over what seems, essentially, to be an uncontrollable technique in terms of design.
In the back of my mind the little quilt voice was telling me to try the Jelly Roll Race technique again. It is hard to face that reality, but I have to. I don’t like failing at something unless I understand why and this is a mystifying technique.
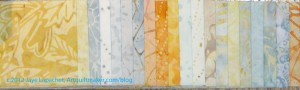
Bali Pop Strip Set
I bought one of the Hoffman Bali Pops at PIQF (or shortly after, perhaps). I think that the first thing that makes a Jelly Roll Race more successful is to buy one with batiks. Batiks blend together really nicely and they have a depth that is subtle. I really liked the calming colors of this particular combination. I am not much of a beige person, but I was ok with the beiges in this collection, because they tended towards yellow or gold and went with the other the fabrics very well. I would buy this collection again. In fact, working with these colors and fabrics made me ask myself why I don’t buy more batiks. I don’t know if I could find the stock numbers of this particular collection and buy them all, though I suppose it is possible. I need to just buy more batiks.
TFQ was here and she arranged all the strips for me. It was very helpful, because I didn’t think to do it before hand, but really needed to do so.
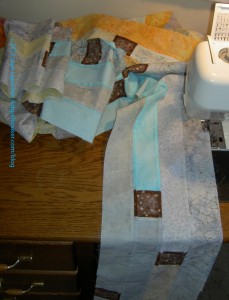
Sewing LOOOOONG Seams
Why I say I lost my mind is that this type of quilt is a pain in the neck. I forgot how much thread this technique uses and how long the seams are. I went through at least 2 bobbins of Aurifil! Ironing the piece was stultifying! This technique is just plain tedious.
We did cut half of the strips in half, which made the process more tedious. I can’t say whether it made the top more interesting or not. I need more data to decide on that point.
I do think I had some success with this quilt top, though, so some tips:
Use batiks or blendy fabrics.
Arrange all the strips in the order you want to sew them. I suggest placing the same fabrics next to each other, so they don’t end up on top of each other.
Add 2.5″x2.5″ square to the end of each strip. It adds interest to the quilt and helps move the eye around the design field.
When you fold the first long strip in half to sew the halves together to start stacking the strips, don’t be afraid to adjust the strips so that the 2.5″ squares don’t butt up against each other right off the bat.
Keep all the strips on the machine in one long chain until all the strips are sewn together. The way I did it was to sew the 2.5″ square to the strip, do the same for the next one. Continue. As soon as convenient, sew strip 1 to strip 2.
Iron seams open, but fingerpress first. This method creates less bulk
Optional: cut the long strip into lengths of about 63″ and arrange them the way you want and then sew them together. TFQ’s idea was to sew a few strips together see how it was going and then rearrange them before sewing them all together. Good advice I didn’t take.
I may try this again despite the tedium of the long seams, because I made my husband do some math (will see about making it pretty and posting it sometime) to try and figure out how to keep like fabrics from butting up against each other as the rows are sewn together.
I saw this on Mark Lipinski‘s Facebook page. Thanks, Mark, for being in the loop and sharing this great opportunity.
Here is YOUR chance to help the families in Newtown…
Becky at Quliter’s Corner quilt shop in New Milford, CT is collecting pillowcases for the children at Sandy Hook School. She is trying to collect around 600. Please pass this message to any sewing friends. Pillowcases can be mailed to her at Quilters Corner, 312 Danbury Rd, New Milford, CT. 06776.
HOW TO MAKE EASY, FAST PILLOWCASES: http://yhoo.it/Uq5AHj
Here is one way to help the students at Sandy Hook Elementary. I have written about pillowcases in the past. The pattern I like to use is the Twiddletails pattern. I like it because of the French seams, but the pattern can be a little tricky to understand.
What fun fabrics do you have that could help to brighten a child’s day? I have some Mexican food fabric that is great for boys!
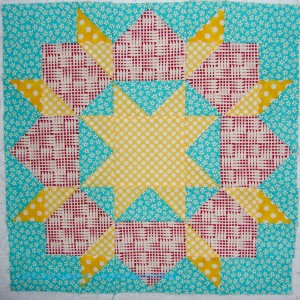
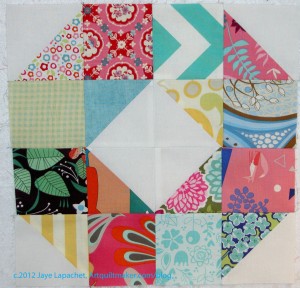
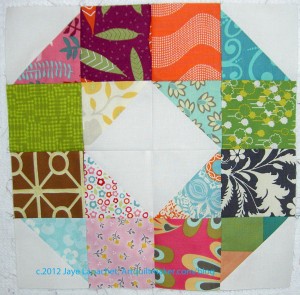
I am continuing to work on the Patchwork Wheel blocks. As I have said, I need 20 and I have about 12, so not much more work. There are a few seams in these so each one takes a bit of time.
These are very bold blocks. I am just using the kits I was given. I may add some solids or some tone-on-tones to the last few blocks. I could scatter those as yet unmade blocks throughout the quilt top and perhaps they wouldn’t look too out of place.
In a way, this is my first truly modern quilt. I assume all of the fabrics are considered modern fabrics. I don’t know really as I am not an expert on modern fabrics.
The combination is really bold. The choices the person who prepared the kits made a lot of bold choices with these fabrics.
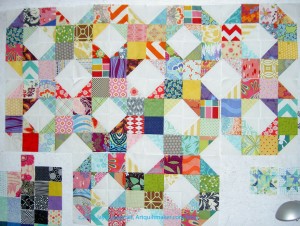
I’ll have to think about whether to put sashing between the blocks or preserve the interesting secondary source that is produced when the blocks are set right next to each other.
I had the pleasure of being involved in a very sweet gesture recently.
You may know that the History Quilter lost her dad earlier this year. I am fortunate enough to still have my parents, so I can’t imagine her pain. Being a public figure like History Quilter generates a lot of empathy. That empathy generated a quilt for her from Melissa of Sew Bittersweet Designs, Shanna of Fiber of All Sorts and Jenna of Sew Happy Geek. Susan met all of these wonderful women via Twitter and her podcast.
Lower Left CornerUpper RightNavy Star VariationLower Right
In the strange quirks of the Internet world meeting the Real World, I met Melissa at a BAMQG meeting. She had the quilt and I offered to send it to Susan for her. Susan received it and loved it. How could she not?
It is such a sweet gesture and I am pleased to be a part of it.
Take 5 minutes to do any kind of artistic response: poem, doodle, quilt, pastel, pencil. ANYTHING counts. No rules; just do it!
Post the direct URL (link) where your drawing, doodle, artwork is posted (e.g. your blog, Flickr) in the comments area of this post. I would really like to keep all the artwork together and provide a way for others to see your work and/or your blog.
The Creative Prompt Project, also, has a Flickr group, which you can join to post your responses. I created this spot so those of you without blogs and websites would have a place to post your responses.
basic frosting recipe
butter cream
fondant
To be covered with a coating of Frost; also Frosted. This was the original and primary meaning of the term; most other usages are derived from it, directly or indirectly. Derived forms would include references to anything frost-like in appearance (see below).
Icing (food), the sweet glaze used in confectionery
Frosting (roofing), the effect of frost on mortar as result of freezing conditions, causing it to crack as the moisture in the mortar expands limiting the life of the roof
Frosting appears a white, salt-like substance on the paint surface. Frosting can occur on any paint color, but it is less noticeable on white paint or light tints.