2-in-1 Case #2 in Process

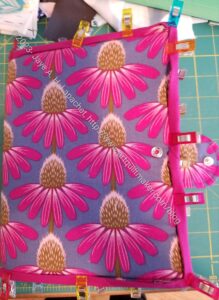
2-in-1 Case #2- closed - in process
2-in-1 Case #2- closed – in process

I started another 2-in-1 Case almost immediately after finishing the first one. As mentioned, this is an easy bag and I wanted to get it right. This one looks a lot better and is more functional.

I was pleased with the fuchsia binding. I thought it was a less distracting choice than the black and white, though I do like a good black and white stripe.

I made certain to the get the closure in the right place. I used a slight different process to sew it on. I put the female half of the snap in then, before sewing the tab to the back, I snapped it together. This helped me align the tab with the female part of the snap on the front. Then I pinned the tab to the back and sewed it down. Somehow the measurements in the pattern didn’t work for me.

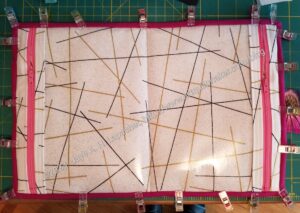
2-in-1 Case #2- open - in process
2-in-1 Case #2- open – in process

I used the same fabric for the inside as I did in #1. It’s a nice bright white. I am pretty sure I bought it with Amanda when we were out shopping in Portland one time.

I used longer zippers as well- 9 inch instead of 8inch, as the pattern suggests.  I had to be careful not to hit the metal parts, but the zipper was fully enclosed in the tabs and the binding, which looks better. I will probably use a longer zipper next time and cut off the excess. It seems like a waste, but then I won’t have to worry about that metal zipper end. Hitting with a needle is no picnic.

Almost done then I send it off to be wrapped for the guild door prize.

2-in-1 Case Completed

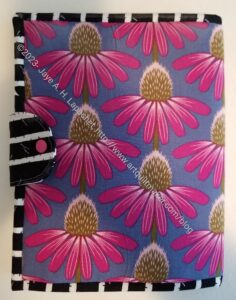
2-in-1 Case #1 Finished

This project started off so well and wasn’t difficult. There was one crucial line missing from the directions that threw me off.

That line was “Remember, this needs to open like a book”.

It is perfectly usable. It would work very well for someone who was left handed. As you can see the opening is on the left. If the directions had said “Remember, this needs to open like a book”, I think I would have been able to better picture the directions in my mind. Instead there were a lot of words describing flipping the exterior in different ways, which was confusing.

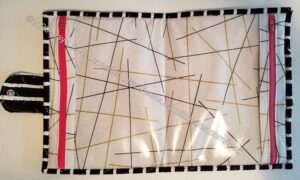
2-in-1 Case #1 interior

Also, I used a snap instead of the magnetic clasp called for, which I know had an effect.

I also added a piece of foam in addition to the fusible batting. I like the heft. I might try two layers of fusible batting next time. Yes, there will be a next time. I think this is a useful pouch/booklet, but also not difficult, so it is a good item for a door prize.

Despite the problems, I found this a fairly easy project. It also gave me practice in using my Snap Setter. I always wonder what my DH thinks I am doing when he hears me pounding away. I am always amazed that the tool doesn’t break.

Two in One Case Door Prize

The Door Prize team decided that we would make small, but more interesting pouches and organizers such as those in Aneela Hoey’s Stitched Sewing Organizers** book. I reviewed this book soon after I received it.

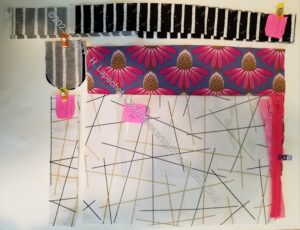
Two in One Case cut
Two in One Case cut

In getting ready for Sew Day, I looked through the book and decided to make the Two in One Case as a door prize. I don’t think I have made anything from this book, though I have made Aneela Hoey patterns such as the Inside Outside pouch, the Boxy Clear Pouch and the Speedy Pouches.

Aside from some strange language for the tab, cutting this project out was pretty easy. There aren’t a lot of pieces so it looks like it will go together quickly.

I thought of making the Fold-up Sewing Folio, but it was a lot more complicated, so I thought I would start with this one.

I need to work on some other projects, but I think I should be able to finish this pouch soon and get it off to Carrie in time for the April meeting.


**Obviously, you should shop at local quilt shops and small businesses. However, if you are too busy or can’t find what you need there, I use Amazon affiliate links and may be paid for your purchase of an item when you click on an item’s link in my post. There is no additional cost to you for clicking or purchasing items I recommend. I appreciate your clicks and purchases as it helps support this blog.

Gift #7: Boxy Clear Pouch #2

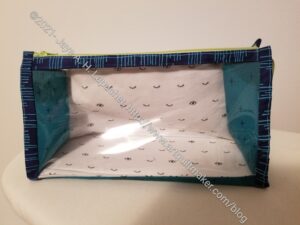
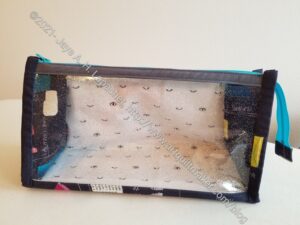
Tim's Boxy Clear Pouch
Tim’s Boxy Clear Pouch

I finished another Boxy Clear Pouch right before Christmas. This one is for Tim and I gave it to him when we had an after Christmas Sew Day. It is the same pattern as the ones I made for my students. The difference is that I used fabric that will coordinate with the Sew Together Bag I made him last year.

The Bernard
The Bernard

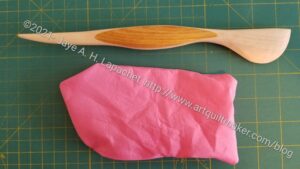
Inside I put a point turner from Modern American Vintage. Remember I talked about them in a recent Various & Sundry post? (Ignore the pink pocket in the photo; that is from an unrelated project.) The company have some beautiful tools. They make wooden point turners, seam rippers and Hera markers. Often wooden tools are over the top, but these are simple,  gorgeous and amazingly functional. Tim is a great friend and my bagmaking buddy, though he makes fun of me for the complicated bags that I make. Every bagmaker needs a good point turner. I have several different ones and this is the best. I know Tim would like it as well.

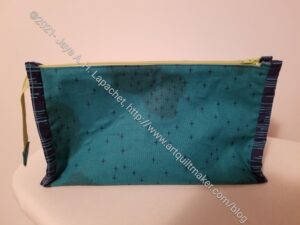
Tim's Boxy Clear Pouch - back
Tim’s Boxy Clear Pouch – back

Aneela Hoey’s patterns are pretty well written. The thing I don’t like about this pattern is the binding on the ends. It looks great in the end, but is a hassle to hand sew down at the end of the project.

I think this is a useful bag, because you can see what’s in it.


Gift #6: Boxy Clear Pouch

Color Wheel Boxy Clear Pouch

This is a gift I made for Sue, one of my students. I put a small Altoids tin handwork case and a pin inside.

I used the Boxy Clear Pouch pattern from Aneela Hoey. It is related to the Inside Outside Pouch I made for myself. The difference is fewer zippers. I think I like the Inside Outside pouch better, though this is in no way a terrible pouch. It would be great for a small knitting project.

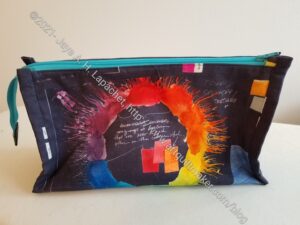
Color Wheel Boxy Clear Pouch - back
Color Wheel Boxy Clear Pouch – back

I am pleased with the fabric I used. It is Carrie Bloomston fabric. I am constantly referring to the color wheel when we are in class. Sue will have a color wheel with her if she keeps this pouch around.

New Inside Outside Pouch

I was over at Tim’s house sewing the other day and he commented that I do like my complicated bags. It’s true!

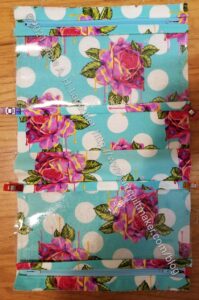
Inside Outside Pouch Exterior

I saw an Inside Outside Pouch in the La Pass group made with the dripping rose fabric and I really liked it. I have been wanting to make one for ages, but haven’t had (or maybe made) the time. The Inside Outside Pouch is a stand-alone Aneela Hoey pattern. You might remember that I made one before. It has a lot of zippers.

The issue isn’t really the sewing. It is the cutting out. No matter how hard I try I do not want to spend time at home cutting out fabric. It’s really stupid, I know; I just can’t seem to get over not wanting to spend any of a long stretch of sewing time cutting.

I went over to Tim’s the other day and took stuff to cut out there. That’s where I cut out the fabrics for two Inside Outside Pouches. It seems to go so fast when I am with him. I guess we chat and laugh and the time seems to fly by.

I came home and sewed and made a good start. I am partway through the exterior. It is much easier the second time around.

Speedy Pouches

I am in the process of making some of Aneela Hoey‘s pouches. I pulled this pattern out at the last minute to make some gifts that I was woefully behind on making. Although I am not finished, I am pretty pleased on how these are coming out.

The pattern I am using is called Speedy Vinyl Pouches. If I weren’t trying to make 5 at once, they would have been much speedier. 🙂 Still they are fairly quick to make. I bought this pattern on spec after seeing another one of her patterns, the Boxy Clear Pouch that Angela made and looking through the site. Of course, I want all of her patterns, but I am trying to make the patterns that I have, so I limited myself.

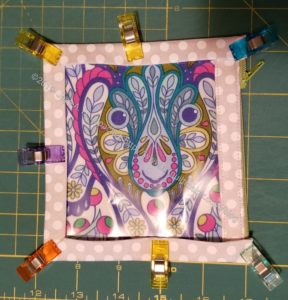
Speedy Pouch Gift
Speedy Pouch Gift

The materials are pretty easy to gather up from what you have around the house, except for the zippers. I didn’t have 4″ zippers, but I did have 5″ or 6″ zippers and I just cut them off. It worked fine. Well, it has worked fine so far. We’ see when the pouches are finished.

The thing I really wanted to tell you is that the pattern is great! It is very clearly written, has a great font and is easy to follow — even for me! There was one line with the binding that I didn’t understand, but I made my own way and it seems to work. I guess we’ll see when I sew the binding down.

As you can see, I cut the fabric the wrong way, so the zipper is on the side. Oh well! One thing about this pattern is the orientation of the fabric. She is clear about it. I was trying to use scraps and cut the wrong way, then didn’t have more, so I am going with the flow.

Once I started working on this pattern, I thought I might be able to suggest the pattern to the Bag-a-Long group as an alternative to the ones the designer of the Ultimate Carryall Bag sells. I have nothing against her bags, but I think people might like an alternative to those pouches. I am not sure if this pattern will work as I can’t see a way to add a leash. I could add something as a zipper pull with a lobster clip on the end, but I am not excited about that option. I am going to consult with Lynette on Saturday.

Book Review: Stitched Sewing Organizers

Stitched Sewing Organizers: Pretty Cases, Boxes, Pouches, Pincushions & MoreStitched Sewing Organizers: Pretty Cases, Boxes, Pouches, Pincushions & More by Aneela Hoey

Lynette has been bringing a variety of sewing organizers, pouches and organizers to Show and Tell over the past year or so. As you know, I like making bags. I admired and asked Lynette about the various projects as she brought them in. One day she asked me if I wanted to borrow this book. She had an extra copy. I jumped at the chance. It sat on my shelf for awhile, but today I finally har the opportunity to read it.

Short answer: great book, go buy it now.

One thing I really liked about this book were the thumbnail photos of all of the projects right at the front of the book (pg.4). The thumbnails have the page number of the project alongside.

In the Introduction the author, Aneela Hoey, says “I have become addicted to making sewing pouches over the last few years. I think it is the combination of being able to create something both stylish and at the same time practical…” (pg.7). I like this explanation, but for myself I like these types of useful organizer patterns for gifts. I like to give things I make as gifts, but I don’t always like to give a quilt on a deadline. These pouches , holders, trays and pouches make good options.

The first 25 pages cover Materials and Supplies (pg.10-13), Tools (pg.14-15), Basic Sewing Techniques (pg.16-23) and a section called “Making the Projects” (pg.24). The final 100ish pages are instructions for making the projects.

Hoey talks the materials and supplies section as items that are useful to have on hand (pg.10). She suggests using the best fabrics and discusses interfacings in such a way that makes the reader understand why she uses the products she is using. I also like that she tells us exactly what her favorite products are, including brand (pg.11), and why she likes them. The author’s instructions about vinyl are a little different than Vanessa of the Crafty Gemini, but probably work just as well. She does not mention special machine feet, which can be useful (pg.12).

Except for a few items, the tools mentioned are very basic. Every quiltmaker will have them already, which means a quick start to making most of the projects! The items I probably don’t have, and with which I am least familiar, are the fusible tape and a drawstring threader (pg.14-15). It is always good to learn how to use a new product or tool.

In the Basic Sewing Techniques section, Aneela talks about some standard machine settings she uses such as “slow speed setting,” “needle down,” etc (pg.17). I thought this approach was a clever way of getting around the tendency to try to teach people to sew in 10 pages or less. The author also includes a well illustrated tutorial on installing zippers (pg.18-19). This tutorial can easily be supplemented by some YouTube videos or in person learning with guild-mates. I liked that the author included some basic directions for trimming corners (pg.20), “sewing the gap closed” (pg.21) and inserting a magnetic closure/snap (pg.22). These are skills which are expected in some patterns, but which aren’t often covered in books. I thought they were pretty useful.

In the “Making the Projects” section, the first page covers what Aneela means by certain terms and how to use the project sheet at the back of the book (pg.24) . This means the reader has something to which to refer, if s/he does not understand some terminology.

The project part of the book is divided into four parts and starts with a section called “Small Things” (pg.25). This is where it would be nice to have more thumbnails of the projects in this section. Project include a needle book with a tie closure (pg.26-29), a fold-up pouch (pg.30-33), tape measure cover (pg.34-37), and a green tomato pincushion (pg.38-40).

One of my favorite projects from the book, the Fold-Up Sewing Folio (directions pg.42-49), kicks off the “Cases and Folios” section (starts on pg.41). Of course, it would be the longest pattern in the book up to this point! 🙂 In this section, Hooey shows how some of the smaller projects from the Small Things section can be used along with the cases and folios.

The Two-in-One Case (pg.50-54) looks like it would be a great gift. The author uses different closures on each project, including a button and button hole (pg.55-62). While a good learning experience, I would probably stick with sew-in magnetic closures despite my rule that says I should make the pattern as it reads the first time. I did buy about 30 magnetic closures at one point by accident, which are taking up space in my supplies box.

The Pouches section starts on page 63 with a lifestyle shot of all the project in this section. YAY! That works for giving me an idea of what is included in the section. It is interesting to see what can be considered a pouch! The first project is the “See-it-All Pouch” (pg.64-68) reminds me of the Crafty Gemini Roadtrip bag. I know there are a limited number of variations in all bag and pouch type projects. I am not suggesting fraud of any kind. I think it is interesting to see the difference between the two patterns. A maker could certainly add a lobster clip and D ring as suggested by Crafty Gemini to Aneela’s pattern and have a different look. The corners on Hooey’s pattern are very professional looking.

The Drawstring Pouch (pg.74) would make a great gift bag. The other projects in this section include the Triple Pouch (pg.74-82), the Boxy Pocket Pouch (pg.83-90) and the Big Zip Pouch (pg.91-94). I really like all of these projects and would consider sewing all of them. I finally noticed while reviewing this section that the project name is printed at the bottom of the pages, throughout the book, covering that project. Very useful feature!

The final project section is called Boxes and Totes. On the section’s title page, Aneela Hooey included another lifestyle photo of all the projects. Hooray! Again, I like it because it gives me a frame of reference. From this section, I especially want to try the Fabric Boxes (pg.96-100). They are great for organizing the little things that clutter up my sewing and cutting tables.

This is a great book. I can imagine making most, if not all, of the projects included. For me, this means good value for dollars spent on the book (even though it is a loan!). Because the topic is bags/pouches, I don’t mind it being a project book. I still do need the directions for making 3D items.

I would highly recommend this book if you want patterns for gift items or if you want to organized your own sewing supplies for on the go sewing. Go buy a copy now!

View all my reviews, including the non-quilt books I read