Cutting Circles

Adrienne's blocks with Julie's circles
Adrienne’s blocks with Julie’s circles

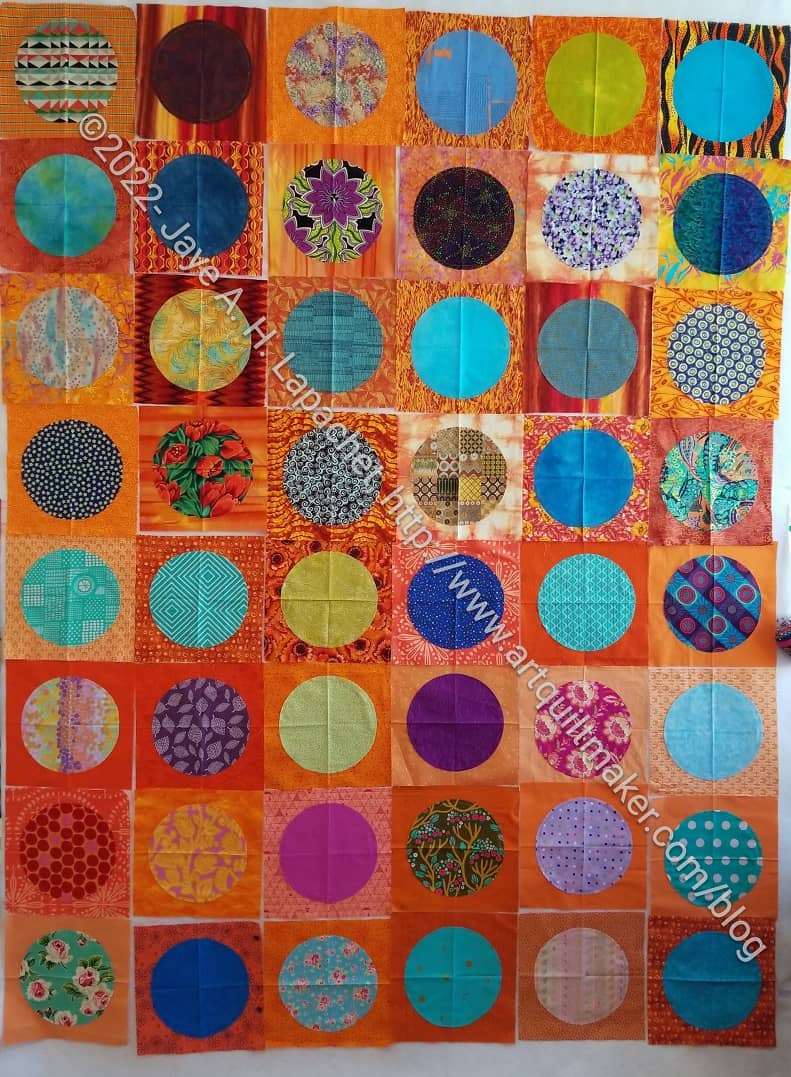
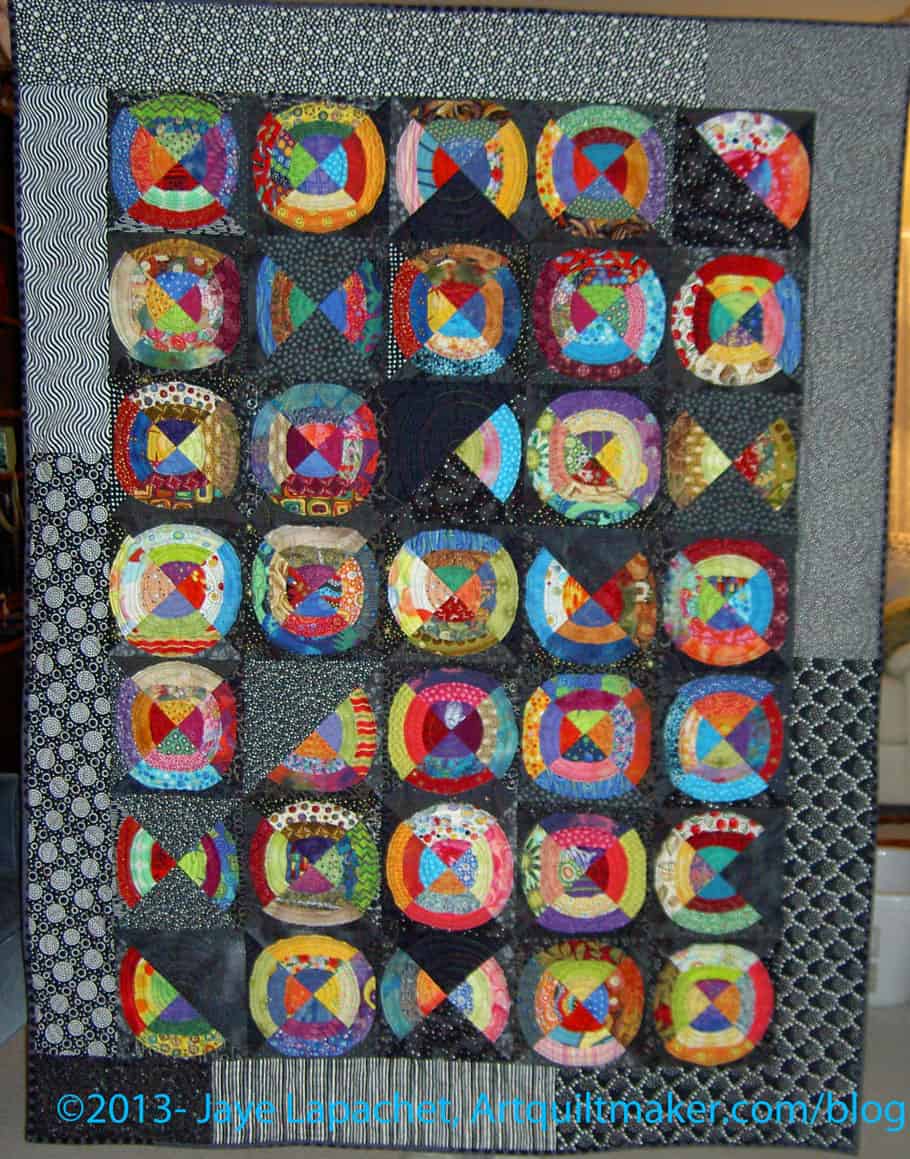
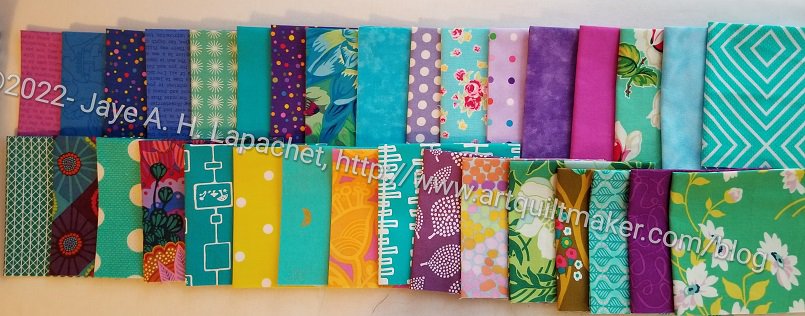
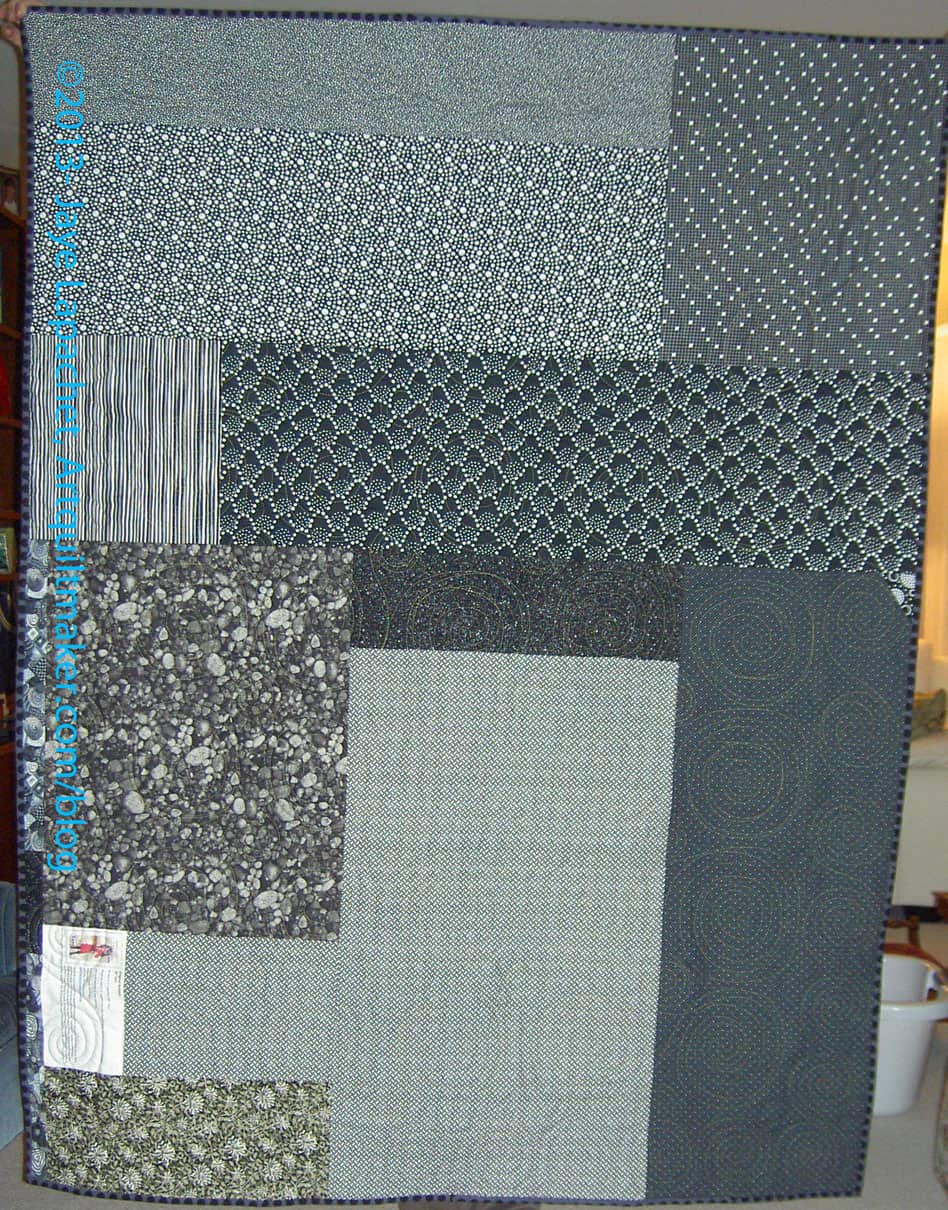
I talked about Adrienne’s Bullseye blocks a little the other day. Once I put the whole thing on the design wall, I could take a look at what I had to work with. My first impression was that the piece was dark. Adrienne selected darker backgrounds than I did. Then Julie used some darker fabrics for circles.

These are not bad choices by any stretch, just different than what I selected.

Adrienne's bullseye with 2d round circles
Adrienne’s bullseye with 2d round circles

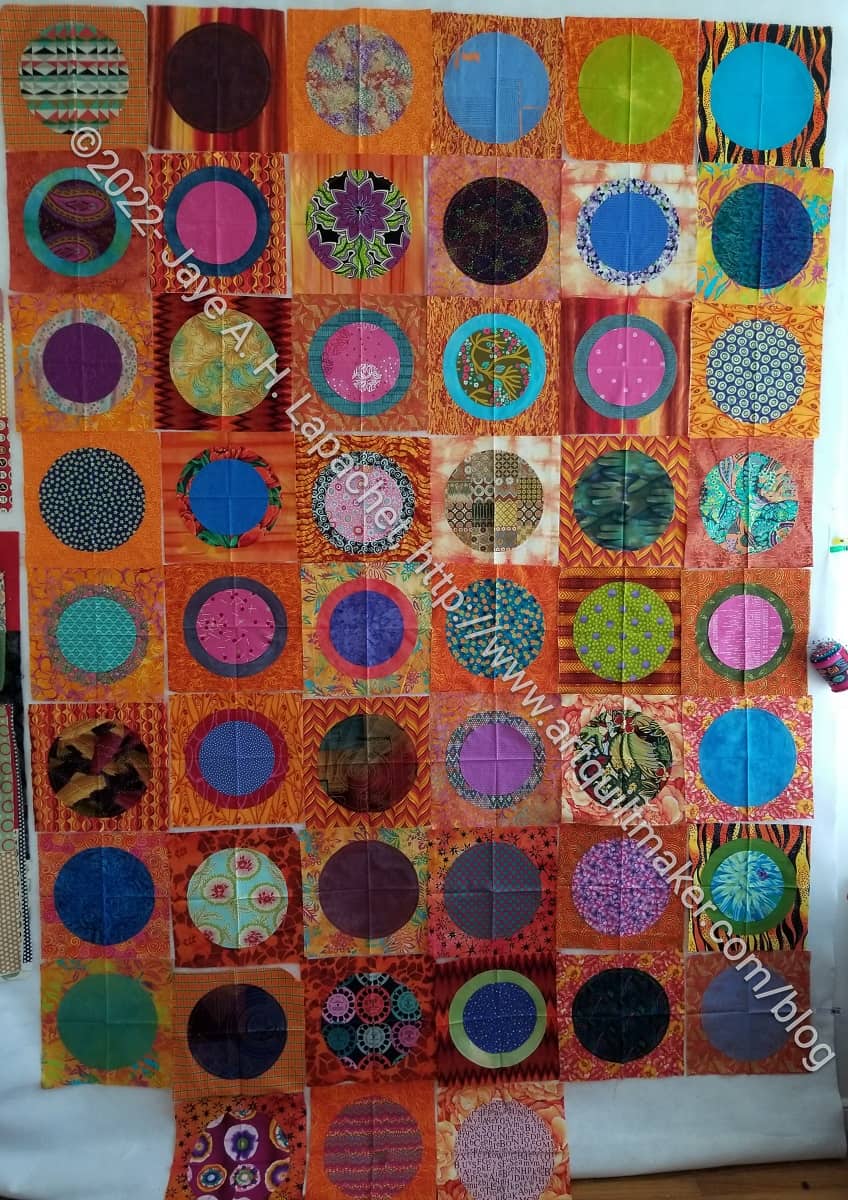
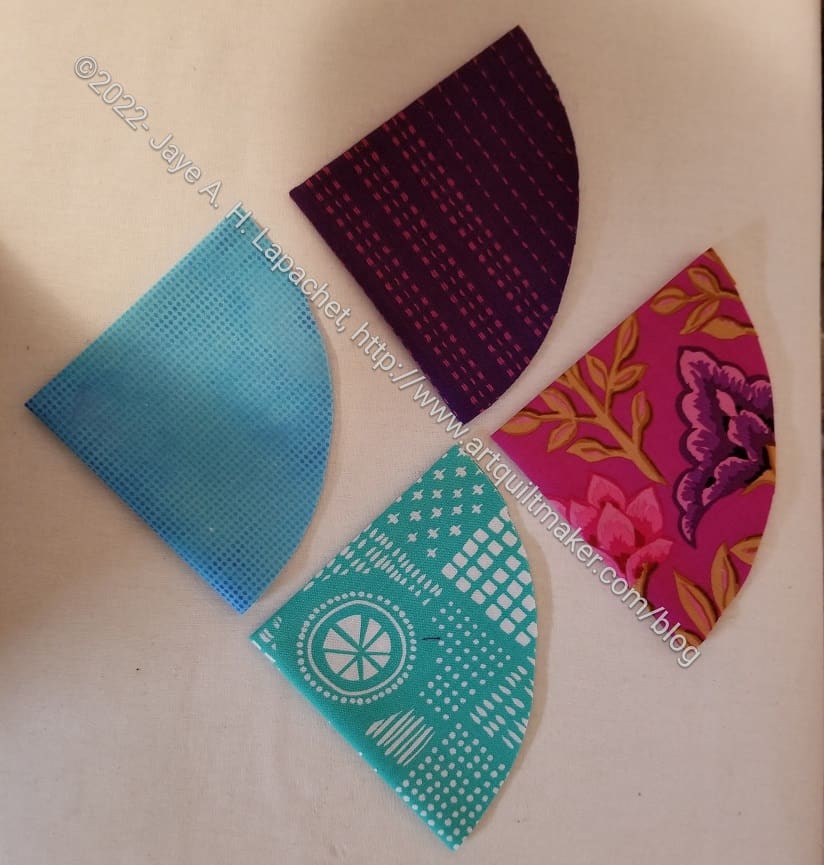
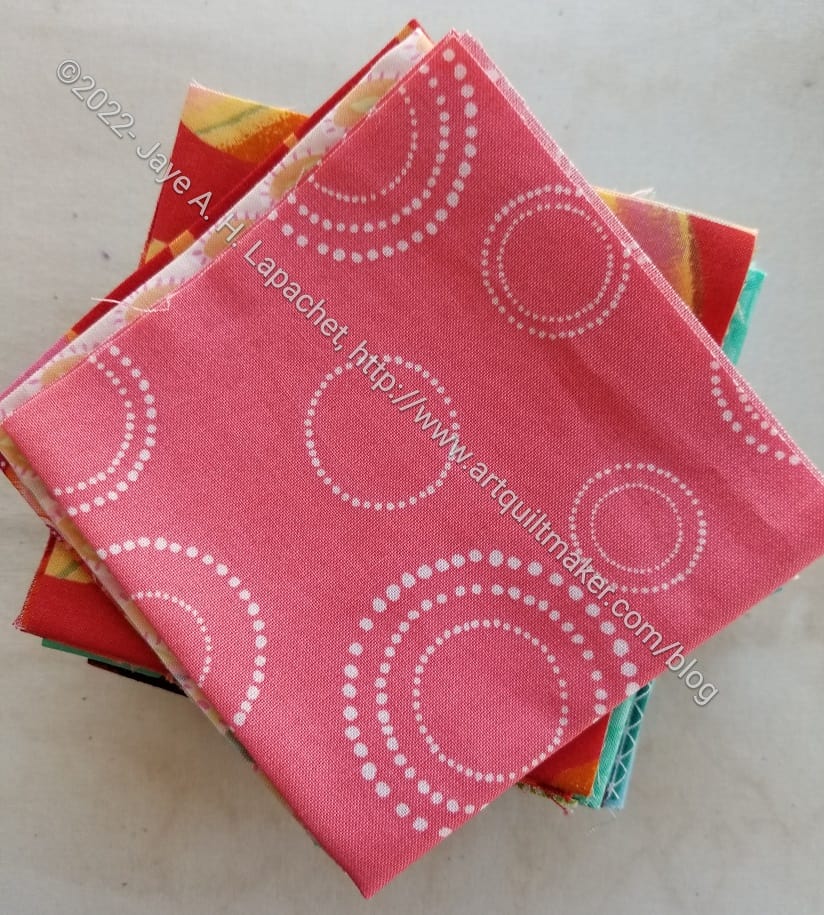
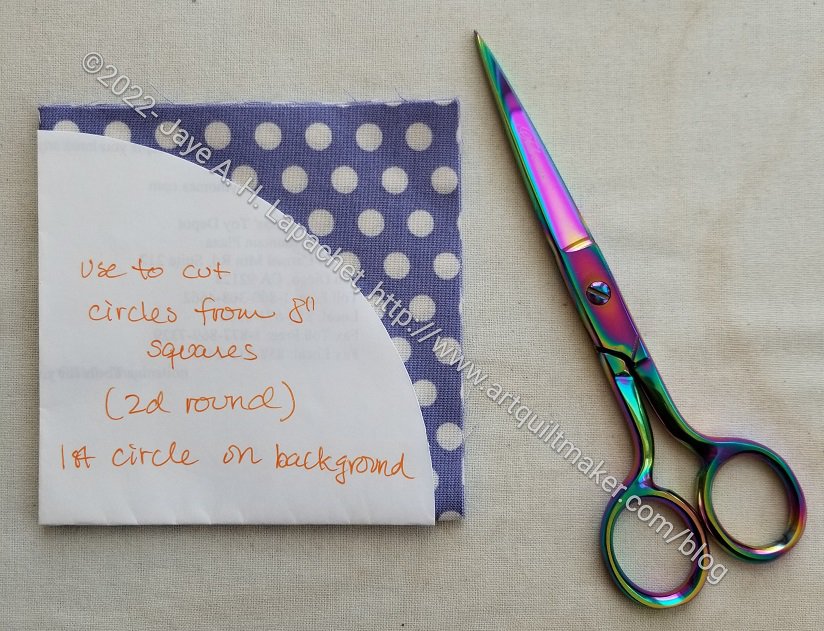
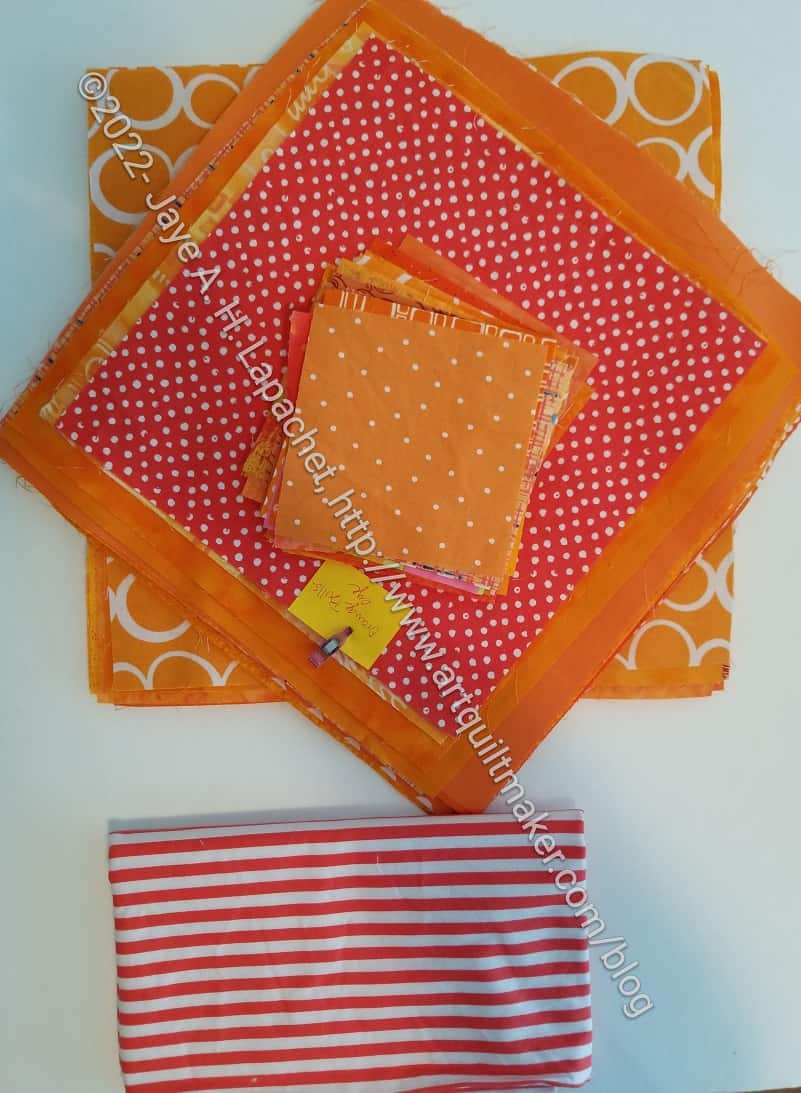
The first thing I did was cut a bunch of pinks. I wanted to lighten up the piece, but also didn’t want to slap pink on any old block. I cut circles from the fabrics and tried them out in different places.

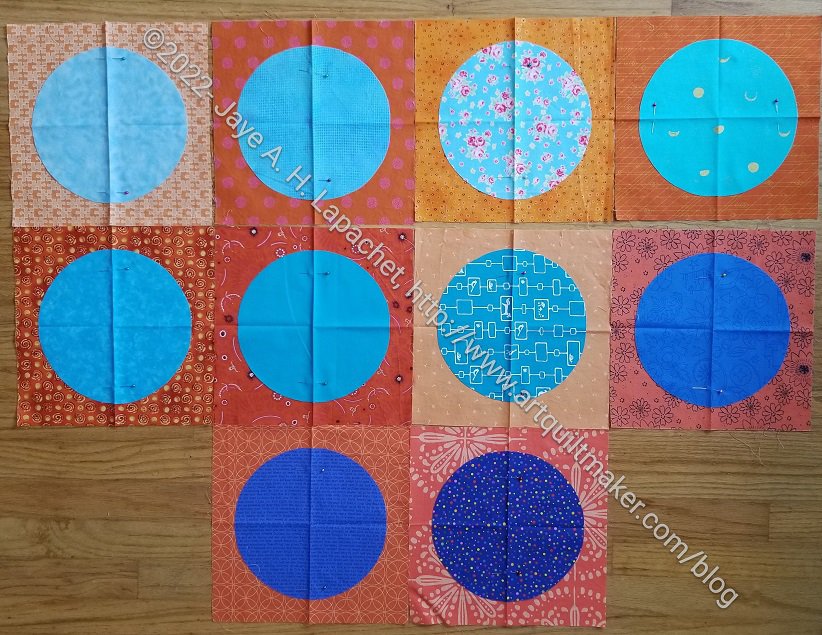
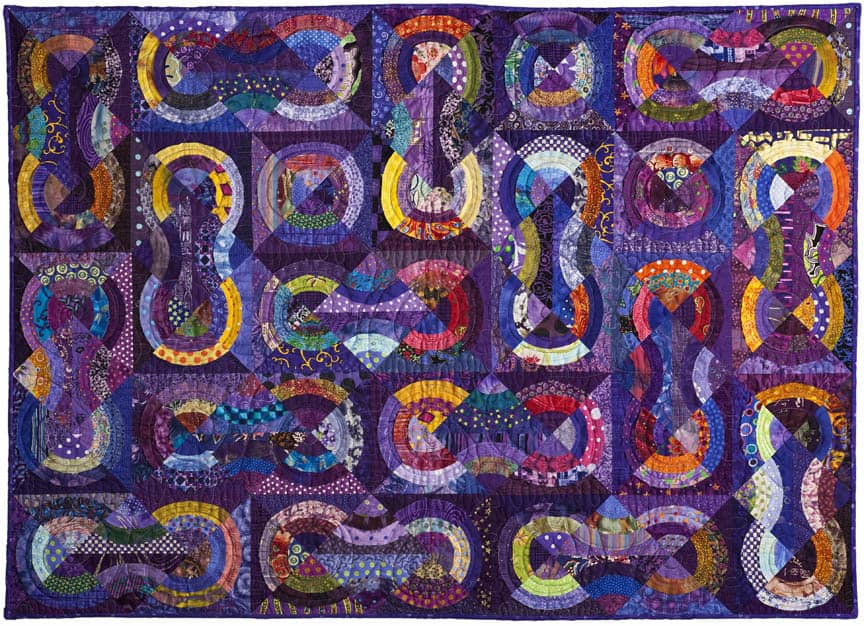
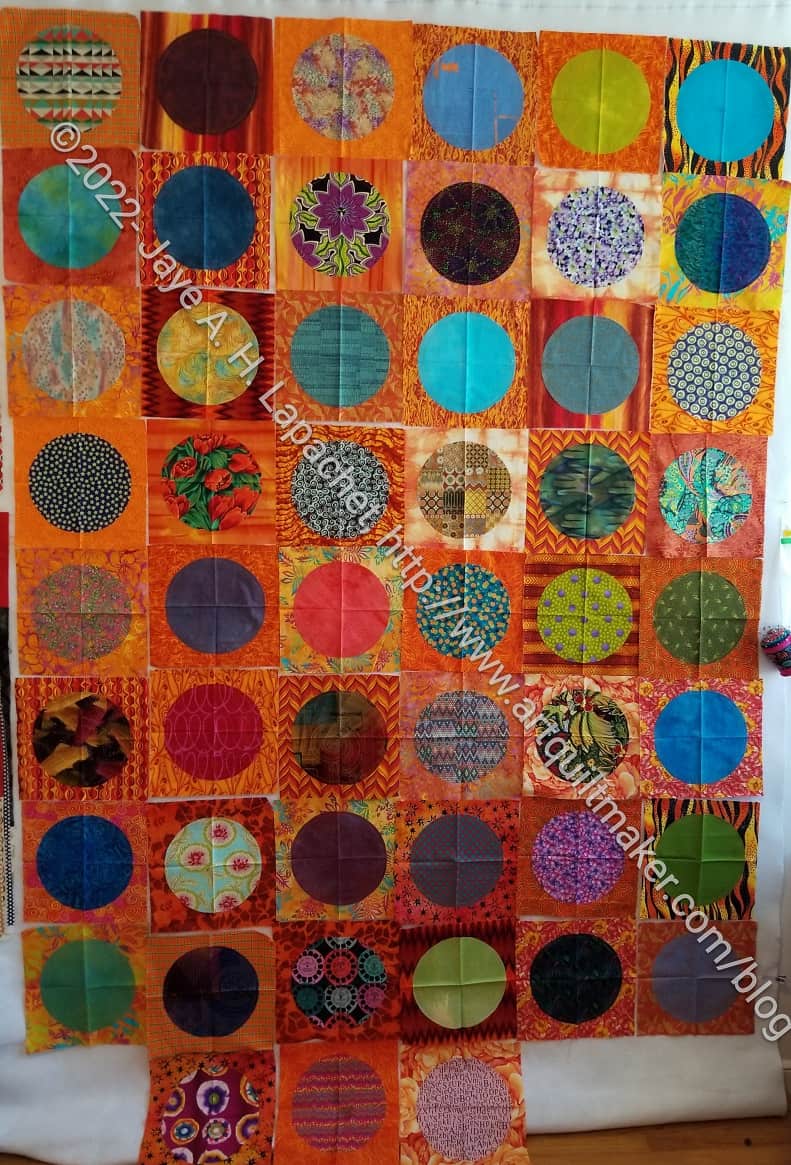
The blocks are not in the place they will end up in the final quilt, so I matched the pinks to the circles that Julie cut. This helped me to work on the other blocks as well. As I chose each fabric for the second circle, there were fewer blocks to complete and the choices became clearer.

The picture on the left doesn’t show all of the second circles selected, because I am still in the process.

Orange You Glad Half & Half

Half & Half Orange You Glad

I put the blocks I with Friend Julie’s backgrounds on the design wall so I could look at at them. I took them off, cut out the back and put the block on the ironing board to be pressed.

Half the blocks are Friend Julie‘s backgrounds and half are Adrienne’s. The top four rows are Adrienne’s backgrounds and Julie’s circles. The bottom four rows are Julie’s background and my circles.

Adrienne's blocks with Julie's circles
Adrienne’s blocks with Julie’s circles

I decided to look at them together as I moved Julie’s off the design wall. It turned out that I needed to put Adrienne’s blocks on the design wall to select the fabrics for the second round of circles.

I only had cut about 10 squares to make circles for Adrienne’s blocks. I thought I had cut all I needed, but I am glad I didn’t. I ended up looking at each block to decide what it needed.

My first thought was to lighten it up.

Orange You Glad Applique’

Julie's Orange You Glad - 1st round
Julie’s Orange You Glad – 1st round

I spent Saturday getting down to Orange You Glad business. I had started the applique’, but needed to get it done as I wanted to send the package to Adrienne on Tuesday. I had some other packages to mail and wanted to make one trip.

These are Julie’s backgrounds and my fabrics for the circles. I am pleased with how they look.

This is also the large first quilt I have put up since my design wall was re-installed.

Orange You Glad in Process

Cut Circles
Cut Circles

I have finished cutting out the circles and am now starting to pair the circles with the backgrounds. I hope to sew these this week in the evenings.

I didn’t really sit down and cut all of the circles at one time. Each time I had a break or a few minutes free I would cut 1 or 2. I finally completed the task a few minutes at a time over a few days.

Backgrounds and circles paired

The pressed cross is so I can line up the circles in the middle of the background. I prefer to line the circles up exactly even though this is a bit of an improv process.

Now I am not sure if I want to press the creased out then sew or just leave them in. I’ll have to press creases in again later, but I don’t want the creases to interfere with the sewing. I want the circles to be flat along the background.

Orange You Glad: selection

I have sorted the ‘ready to sew’ backgrounds by the color of the circles. This is a selection of the blues. I want to match the thread color to the circle so it doesn’t show up much.


Orange You Glad Circles

Orange Bullseye squares - 1st Round
Orange Bullseye squares – 1st Round

The other day I talked about completing my squares for Orange You Glad. Now I am on to cutting.

Mostly I grabbed handy fabrics and cut squares out of them, then folded and pressed them. I didn’t spend a ton of time deciding on whether a certain fabric would fit in with the orange. I did eliminate fabrics as I was choosing, if they were too close to orange and wouldn’t show up or were obviously not suited to the project. I also eliminated all browns, blacks, predominantly white fabrics and fabrics with too much white in them.

How I cut circles
How I cut circles

I used templates I made when I cut circles for one of the previous versions of the quilts, Seeing Red, I think, but maybe Passionate Purple.

The paper template is a circle I made the right size by using a compass or a plate. I don’t remember as I had to use both for different sizes of circles we agreed upon for this project. The circle template is folded into quarters.

The scissors have to be sharp. I want a smooth cut the first time. I hold the paper in place with my left thumb and fingers, but you can also use WonderClips or pin the template in place.

Friend Julie has some great photos of making the templates, using the templates and holding them in place in her blog post today.

All the Bullseyes

I have a spot in my gallery for the Bullseyes, but it is unsatisfactory and I need to rewrite the page.  This needed, yet still undone, update spurred me on to show all of the bullseye quilts here.

I realized in looking at them that they are another color project like the Fabric of the Year quilts.

Finished: Original Bullseye

Original Bullseye: The black background provided a way for the other colors to shine out from the black.I like having each circle separate. I remember thinking how clever I was to include partial circles as well.

Seeing Red
Seeing Red

Seeing Red: The red background is bright and cheerful and I do like the way the loops are continuous.

Feelin' Blue
Feelin’ Blue

Feelin’ Blue: we decided that trying different shapes would be a good idea. I had to add background pieces to prevent jagged edges or partial squares. While I like this quilt, I prefer the circular versions.

Finished: Passionate Purple

Passionate Purple: this one might be my favorite, though all of the different quilts bring something special. I like the way the loops are finite and that they are different sizes. I hesitate to duplicate the idea for the recent orange version, but I am sorely tempted.

I really want to make quilts in this style from all the colors with my friends. I don’t want to do them by myself. The element of surprise when others add the rounds is part of the fun.

Orange You Glad – First Round

Or maybe this is the second round?

Julie's Orange Background squares
Julie’s Orange Background squares

I received Julie’s orange squares last week and have been diligently cutting the fabrics that I will applique’ to the top. I had many of them cut, but not all.

First round circle fabrics

The background squares are 10″ and, during this round, we are supposed to applique’ an 8 inch circle to the top. I do this by first cutting 8.5 inch squares, then cutting a circle from the square.

I am using mostly cool colored fabrics, as you can see. I selected these from the stacks in my fabric closet, but may switch some out if I don’t like the way they look.

Looking at the fabrics I chose alongside Julie’s backgrounds has got my mind working on which to pair. I feel excited!

Friend Julie and Adrienne are, presumably, doing the same to my squares and Adrienne’s squares.

We have a month to applique’ the circles to the backgrounds. This is a fun project.

Orange Bullseye

I thought the last bullseye I sewed with Julie and Adrienne was Passionate Purple. I looked back on my blog and found that the Original Bullseye was actually the last one that I finished. I am not sure when I started that one, but from my various blog posts, it sounds like I had stuck it somewhere and then found it again. The Original Bullseye was part of the project with Adrienne and Julie, but it was the kernel that started the whole Bullseye project.

Passionate Purple, Feelin’ Blue (I don’t think I actually wrote a post when this quilt was finished), and Seeing Red are all part of the series.

We are now working on an orange bullseye. We will cut 48 squares of fabric at 10″ and then send them on to the next person, who will add a circle and send it on to the third person who will add another circle. Then the squares will come back to each of us. We will add another orange circle, cut the blocks into 4 and keep two. The other two quarters will be sent to each other.

Orange You Glad squares

Friend Julie has also started cutting and I think she landed on a good name, Orange You Glad. I have finished cutting my squares, but will press them so the centers are clear and to make it easier for my team members to line up their second circles. I cut my squares bigger so I can square them up, if necessary, later.

I also started cutting the small squares for the last  round. I am getting ahead of myself, but I couldn’t help myself.

In order to find enough squares, I rummaged through my entire fabric closet. I found a lot of orange in random places and will take this opportunity to rearrange it.

I am considering the strip for the binding, though it isn’t quite the right color. I’ll have to see once the top is done.

Orange You Glad?

Finished: Original Bullseye

Finished: Original Bullseye

After about a gazillion years of not working on this project, it is finally done. OK a gazillion is a little bit of an overstatement, but when I work on a project for many years, it can feel like a gazillion.

I finally finished the Original Bullseye. It was started in 2001. I think that I started it soon after I joined the Quilt Mavericks. I finished it this year, so the duration was 12 years.

I am pleased with the way it came out. Colleen did a great job quilting it.

The other thing that I realized is that this is a great size. It easy for my quilt holders to hold it up and for me to photograph it.

Some of the fabric is pretty old and I noticed that one of them is pretty see through. If I had realized that would happen, I wouldn’t have used it. Live and learn.

Finished: Original Bullseye back

Two Quilts Return

Two Quilts Ready for Binding

I hope that, later this week, you will see another finish.

I went and got two quilts from Colleen last weekend while we were out car shopping in her neighborhood and both are ready for binding. I decided to sew the binding on the Original Bullseye first since that project has hung around much longer than the T-Shirt quilt. Also, I am planning to give the T-Shirt Quilt to the Young Man for Christmas. He hasn’t noticed it has returned, which means he isn’t clamoring for it, which means it will be a great gift.

Original Bullseye detail

Colleen did a really nice job on the quilting of this piece. It is flat as a pancake despite all of the bias edges of the circles.


T-shirt Quilt detail

Colleen sees a lot of quilts so I was very pleased when she, and her Mom, Elaine,  complimented me on the border. That is a border that is a pain to make, but very effective. I discussed the making of it in a previous post.

I wanted to show the detail, because of the quilting. I told her to do something basically all over, but not to ignore the difference between the t-shirt ‘blocks’ and the sashing. I am pleased with what she did.

Original Bullseye Top

Original Bullseye Top

I finished the borders for this Original Bullseye over last weekend (12/1). I thought for sure I would be able to finish the back as well, but the headache hangover kept me sewing at a snail’s pace. Also, I had to clear off the cutting table before I could sew.

For some reason, finishing this particular top makes me really feel like I have made true progress on the 26 Projects list.

This top has been hanging around so long (12 years!) that I know I am acting like I finished the whole quilt. I wonder how I will feel then!

Original Bullseye back

I got a bug in my ear to clear out some projects on Friday and made the back for this piece. I am pleased with it and think it matches. It isn’t really very special, but is interesting. As an added bonus my white on black bin has some space in it!

I have to say that I am resolved not to let projects languish for years. In the recent past, I think I have been plowing through projects once they get past the hunting and gathering stage and I hope to continue that practice.

Fortunately, I have friends with better memories than me. Julie wrote a nice overview of our Bullseye project and reminded me that I started this quilt in 2001. Last post on this subject.

Original Bullseye FOUND!

Original Bullseye
Original Bullseye

What once was lost is now found!

I climbed up the ladder into the fabric closet to pull down the Spiderweb blocks. I had hoped no ladder would be required, but no such luck. Here in Northern California everything is stored vertically. I was in the process of squishing my hand getting Spiderweb blocks out of a plastic tub when I saw my mixed media box. Idly, I wondered if anything was in it.

Yes, after lamenting and wailing for so long, I have finally found the Original Bullseye. It was in the mixed media box I made back in 2007. Really, nothing fabric should be in that box and I have no idea what possessed me to store this quilt top there. Desperation and lack of enough storage space (or too much crap), I suspect.

I was sure that the last time I wrote about this quilt was about a thousand years ago, but happily, it was only last winter.

Original Bullseye - detail
Original Bullseye – detail

The quilt is much smaller than I remembered, but, then, again, the quilts I have made lately are much bigger than what they should be.

Now that it is found, I can put a border on it and finish it. I see my eye wandering to the size and wonder if I should make more blocks to beef it up a bit.

Regardless, I can certainly finish this quilt now. Yay!

Original Bullseye Border

I don’t always start a quilt and finish it right away. Often, I start a quilt in order to work through an idea and then I get stuck on one part. Putting it away is a good way to let the project and idea percolate. Such is the case with the Original Bullseye.

Original Bullseye
Original Bullseye

The Original Bullseye is back in my crosshairs, mostly because of the Dale Fleming class. If found some directions for the border I want to make in QNM (I think), but the directions were  a little arduous, so I didn’t start right in. However, since taking the Dale Fleming class her wave directions have been rattling round in my mind. I think I am going to use them to make the border for this quilt.

Original Bullseye Border Idea

I haven’t done it yet, because I still mulling over colors and whether to put more circles in the border.

One silly thing that is keeping me from doing this is whether I have enough freezer paper. That is not the main hinderance. I have some other quilts higher on the top of the list. I do feel like I am getting close to moving forward on this project.