Knitting Box Un-Fail?

Knitting Box - A new view

Last week I discussed the Knitting Box. I thought it was a hopeless failure and I would have to go back to the drawing board.

My fabulous readers came up with some solutions, including a list of comments about “portable knitting sacs” (thanks, Jessica!) and using a pattern for a take out box (as in Chinese take out). On Jessica’s list, I found the Port-a-Pocket and the Knit Knack Sack. One lady also described how to make something similar from a CD. I couldn’t exactly follow her directions, but my go back to them if the failure cannot be repaired. Knituition also had directions for a knitted wrist yarn holder. Sarah on Ravelry shows a slight variation of Knituition’s wrist yarn holder. Halcyon Yarn also has a wrist yarn holder, which, not being much of a knitter, looks like a torture device to me. I will only subject my SIL to that as a last resort. Finally, there was something called a waisthook. I have no idea how this works and am also thinking torture device!

One of these hints led me to the portable knitting pouch, which is made from fabric and up my alley. I also found a Yarn Traveler bag, which is interesting, but doesn’t quite fit the belt criteria. The portable knitting set was also a source of inspiration.

Potential Amount to Sew

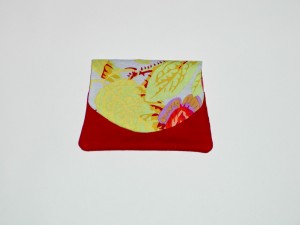
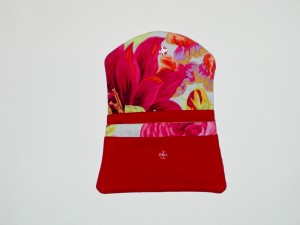
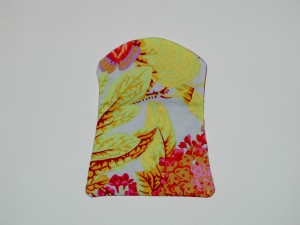
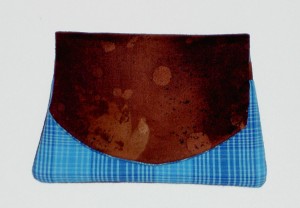
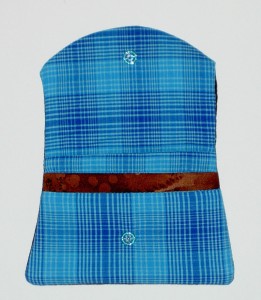
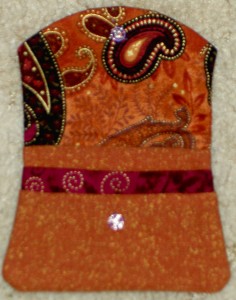
I decided to bring it with me on the trip to Mother’s Day brunch and show it to the intended recipient. My SIL agreed with me that the Mirkwood Designs pattern has style and I should try and salvage it if I could. My SIL and niece played around with it in the car and we all brainstormed on how it could be salvaged. First, they found a different way to fold it (above). This way of  folding it keeps the box together pretty well. It is actually probably the intended way to fold it. The bad part is that the parts still aren’t strong enough to hold a ball of yarn. An idea they had was to sew up the side about an inch, so that the box will already be partially shut.

Beaded and Sewed
Beaded and Sewed

I think sewing it up a bit is a good idea. I used some Perl cotton so that it doesn’t matter if the stitching shows. If I put some beads on the end of the Perl Cotton I won’t I have to try and hide the knot. My only concern is that they would get stuck on stuff as my SIL moves around with the box on her belt.

I will probably put something on the top to keep it together. I talked about buttons. My niece suggested snaps and SIL suggested velcro. I’ll see what I have around and try them.

I always say that more brains are better and this is a perfect example of more brains getting involved helps a lot. Thanks, all!

Knitting Box Fail

I have been trying create a portable knitting bag for my SIL.  The idea is that she can put the loop on the ‘box’ through her belt and the bag/box part will hold a ball of yarn. The point is that she can knit while standing in line and her ball of yarn won’t roll away.

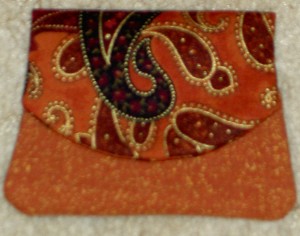
Finished Piece
Finished Piece

The engineering part of this has been a challenge. I didn’t see the one that she saw and only had it described to me. I searched the web for a pattern (didn’t go to the Library and look through their patterns). I wasn’t sure what to call this thing, so searching and looking in indexes was hard. I thought I was golden when I found a truffle box pattern over at Mirkwood Designs (great podcast, BTW).

Various Pattern Bits

Not only the pattern seem like I could blow it up and use it, thus eliminating the need to deal with proportions, but it also has style. The copy center at work helped me blow it up. Then I traced for the fabric and traced it again for the interfacing pattern and traced the square one more time for some Timtex-like stiffener.  The short answer is that I couldn’t make it work. You should make the designs at Mirkwood Designs as truffle boxes, though, because I am sure they are fabulous made out of the right materials for truffles. Her recipe for the truffles sounds fabulous, too.

I have to admit that not everything works the way I intend it. This is one of those things. I am not giving up, but I have to regroup and start over.

Finished Piece
Finished Piece

I am not sure why it doesn’t work, but it doesn’t. One thing I do know is that the sides aren’t right. The piece has style, but no functionality. The idea was that the curves would slightly overlap the straight edge and keep the ball of yarn in. Alternatively, I thought I could also put a cute button on each side with some ribbon to wrap around it, which would keep the thing closed.

I don’t consider failing a bad thing. I am not happy about it, but failure helps me learn and that is good.

Now, back to the drawing board. Need a failed project?

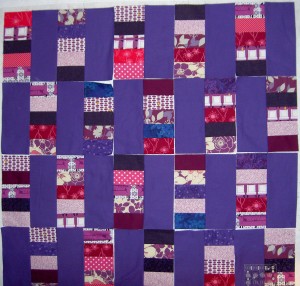
Jennifer’s Quilt

Jennifers Quilt -full

I didn’t find this quilt when I searched for it on my blog, so I think I may never have written about it. That wouldn’t surprise me since it was made in about 2003, before the blog.  Perhaps I’ll start dredging up old quilts and showing them to you.

TFQ and I made it back in 2003 for a very special person in my life named Jennifer (yes, another Jennifer!).

It is part of a series of quilts TFQ and I have made in a pattern we call Diamond chain. The pattern originally came from the Spring 1997 issue of McCall’s Quick Quilting and did not list a name for pattern (only a name for the quilt). We changed the pattern somewhat, so we call the overall pattern “Diamond Chain.” It is similar to a Jewel Box. andwe  have made at least three  quilts (Get the Red Out!, Ocean Avenue, Punk Rock Quilt) in the same pattern. I think TFQ and I have made all the different quilts in the series together.

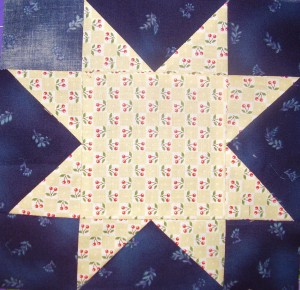
This is a pattern that is a kind of single Irish chain and anything could go between the chains: stars, applique’, basket, any block. I would like to try to make a version where stars are in place of the on point squares (half square triangles).

I think this is also the pattern that we started working on the self-bordering concept.

I found out that Jennifer died on Thursday and I felt particularly sad. Not at all because of the quilt, but because she a person who really cared about me. She taught me the value of me. She took care of me, taught me to rest and taught me that if I took care of myself I could better take care of my family and others who depend on me. She cared about me in a way that was so valuable, because she didn’t want anything back from me. I didn’t get to say good-bye and that is very difficult.

I mostly don’t make quilts for people anymore, but I do on occasion and I was glad that I made this one. She told me about a month ago, when I last talked to her, that she thought of me whenever she used it and felt like she was getting a hug from me. That is one of the nicest things anyone has said to me about something I have made.

Birthday Extravanganza

I am REALLY fortunate to have wonderful friends and family who are willing to give me books and quilt related items that I love. I really received a lot of gifts; so many I will have plenty to write about and read and think about during the gift giving drought that is the rest of the year.**

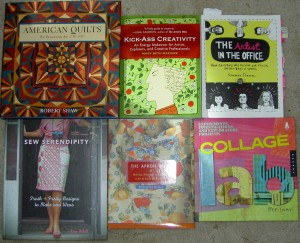
Birthday books - 2010

My birthday was a week and a half ago and the gifts just keep coming. Julie gave me some fabric, a book, some note cards and some little things while at the retreat over the weekend.

The Quilter’s Album of Patchwork Patterns by Jinny Beyer came from a gift certificate I actually got from TFQ for Christmas. I think of it as a birthday gift to myself! Thanks, TFQ!

Art + Quilt came from DH. I have been borrowing TFQ’s copy and now I have my own. I am pretty excited about some of the exercises in the book.

Sew, So Cute by Mary Engelbreit came from Julie. I have wanted this book because of the apron on the front. I love it. It has some much style. I can’t wait to make that apron. Perhaps I will add it to my gift arsenal?

The bottom three reading material came from my sister. The Crafty Chica book has a very cheerful layout. I also like the pocket bag, which is made out of tablecloth vinyl. I love the tote on the front of the Sew News magazine and Artful Blogging often has links to great new blogs.

I really like they style of that tote bag on the front of the Sew News magazine. I looked at the directions last night and they are a little cryptic. I am going to look up the designer at some point and see if there is some additional explanation before I dive in. We’ll see.

I am so fortunate to have so much new reading material and project ideas. it is nice not to have to get these books out of the library and read them quickly. I really enjoy dipping in and out of books, especially quilt books. Thanks!

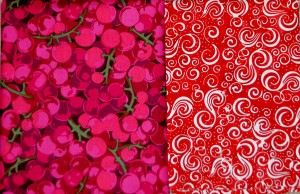
Fabrics from Kim
Fabrics from Kim

That wasn’t all, though. I also have some fabric to go along with the project ideas. Above are some pieces that my sister bought for me. they are colors that she loves, so I wonder if she is angling for another bag or a quilt or something? Hhhmmm.

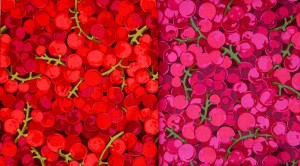
Jeanne Gifts
Jeanne Gifts

Here is the wonderfulness that came from TFQ. Her gift was right on time, actually early, and I opened it as soon as I could get it in the door. The journals (Miquelrius) will not go to waste. I think I have to write more so I can get through them faster. 😉

The pink and red fabric (on the right in the middle) is a Malka Dubrowsky screen print (batik, maybe?). The funny part of about that fabric is that I bought TFQ some of Malka’s fabric as well. We roared with laughter about that! Great minds, you know. 😉

I have only glanced through Creative Time and Space, but I love the Voodoo lounge podcast, which is also by Rice Zachery-Freeman. I am reading Life is a Verb and really like it. I will write a full on review when I finish it. One thing I already like about it is that the author says that she created large margins so people could create ‘marginalia’. I have done one of the exercises she suggests and enjoyed it. Unlike Maisel’s book, I can do them in the 20+ minutes I carve out for creativity every day with minimal technology requirements.

Julie Card - front
Julie Card - front

I loved all the gifts and cards and phone calls and emails I received, but this card is really special. One thing I really appreciate is when people give me some of their precious time. When someone takes the time to make me something, like a card, or when they take the time to write me a letter, it is most appreciated. I  love it when someone sits down and writes me a real letter about things they are doing and observing. Even if those things seem mundane, I love hearing about the day to day things in others lives. Mailing the letter to me with a real stamp in a real envelope is one of the best presents I can receive. I love it that Julie took the time to make and write the card.

Julie Card - open
Julie Card - open

I had to cut off the writing because is personal. Isn’t Julie creative? She put flags on the inside, too. I really like this card.

I am so fortunate to have such generous, thoughtful, wonderful and creative friends.

**Do Valentine’s Day, my anniversary, and Mother’s Day count? 😉

Dolores’ Pencil Roll

Pencil Roll Open
Pencil Roll Open

Dolores, a member of CQFA, faithfully arranges a retreat every year. Every year it is better and better. I had in my mind that I would make her a pencil roll as a thank you. After last week, I didn’t think I would have the time, but, I started it on Sunday, thinking that I could finish it at the retreat and she would be none the wiser.

I didn’t do any piecing on this one, which made it go very fast. I think it took me less than an hour and a half from start to finish. I may be dreaming, though,  as I didn’t really time myself.

Pencil Roll - back
Pencil Roll - back

I am not sure what colors Dolores really likes. She has been working in neutrals and especially black and white, so I chose a black and white FabMo upholstery fabric for the back. The FabMo upholstery samples are a good size. I think you could make two smaller ones from one of the  samples. I had a good sized strip left over that may make its way into another pencil roll that I need to piece.

Pencil Roll - strips

I thought some red and black and white for the inside strips and the front pocket would be great. I just couldn’t do all neutrals. I had to add some color.  I think it looks really nice and am pleased with how it came out.

I am concerned that I will run out of friends who need/can appreciate pencil rolls! I see some blog giveaways in my future!

Pencil Roll Closed
Pencil Roll Closed

I forgot to put a label on it. Either I will forget it or try to hand sew one on.

Unrelated notes:

* I have no Internet at home at this time, so if I am a little slow responding to comments, I apologize! It makes it a challenge to get blog posts up as well!

* Remember to leave a comment in the One World One Heart post for a chance to win!

Serendipity Puzzle

Serendipity Puzzle-full

I went to visit with my friend, Kathy, and her 2YO daughter, Jessie, on Friday afternoon. We had tea.

I made Serendipity Puzzle using a Dutchman’s Puzzle block in 2008.

I finally was able to take a picture at their house at the end of our visit. The image is a bit trapezoidal, but the reality is that I am just not tall enough to get it nice and square.

Jessie uses this quilt as a ‘wallow’ for her stuffed hippo.

Happy Birthday, TFQ!!!

Nota bene: TFQ: if you have not opened all of your gifts, stop reading now!!! Go open them and come back.

Yes, my good friend TFQ is 39 again today…with some years experience. 😉

In addition to the gifts I have been collecting for her, I also made her a couple of things. Did you guess journal cover and pencil roll? I am so predictable, I know.

Journal Cover
Journal Cover

The black and white fabrics, from Lonni Rossi‘s Paint Box collection, are the fabrics I used to make Marilyn’s Multi-tasker while I was visiting TFQ in November. She admired those fabrics and that stuck in my mind.

TFQ is an excellent colorist. She can put fabrics together in the most amazing ways. I strive to be like her, which requires cultivating more patience and determination in my quiltmaking process. If I want to make something for her, I feel like I need to really do an excellent job of picking colors, thus the clue that she liked these fabrics gave me confidence.

Using only those black and white fabrics together was too depressing, especially in winter. I had to add the dots. They cheered it up quite a bit.

Journal Cover- front

One of the things I like about some of the prints in the this [relatively] new Lonni Rossi line is the screen printed look. Note the black circle on the white fabric. It really looks like a screen print when you see it up close. It doesn’t have that icky, plasticy sticker feel, though, you find with some screen printed-like fabric.

Journal Cover - back

The small rows of lines under the circle also have that screen printed look. It is much more subtle in the white/grey on black colorway.

I didn’t want a repeat of the size problem I had with my mom’s journal cover, so I ripped out the bottom stitching three times until I was satisfied with the fit. I don’t know if I got it to fit perfectly, but I didn’t have to cut the journal’s plastic cover to get the journal cover on it, so I was satisfied.

Journal Cover - piecing

Lately, when I have started a journal cover I just start piecing until I get a piece big enough for the outside. I use this type of piecing for a warm-up or when I only have a few minutes to sew or when I need a little bit of thinking time. Usually I want to achieve a certain look. With my blue journal cover, I wanted to use a variety of blue fabrics because I liked them and wanted to see them all the time. I also wanted a calming effect.

In this case, I only had scraps of the Lonni Rossi fabrics left and needed to make the best use of them. I wanted it to have a somewhat cohesive design and, finally, but most importantly I wanted it to appeal to TFQ.

Pencil roll - closed

I have started to think of pencil rolls and journal covers as sets. I also love this pencil roll pattern so much that I am looking for excuses to make it. Of course, time is the issue on that front.

Pencil roll - open
Pencil roll - open

This is a rather large pencil roll – 18 slots, I think. When I use my pencil roll, I prefer to put pens in every other slot rather than each slot. I find it easier to get the pens out.

For the moment, this is the last gift to which I have committed to make. When I say committed I mean to myself. There is one I am thinking about making, but I need to finish the FOTY 2009 blocks first. Look for a post on that project later this week.

Gift Post #8: Journal Cover #2

Full cover, open
Full cover, open

This is the journal cover I made for my mom for Christmas. It goes with the pencil roll and bag I also made. She really liked it, which is nice.

I might make it a little bigger for her, because the journal didn’t quite fit. I have to ask her about that. I don’t know if she will use up the journal the way I do, so it may not be necessary.

I am working on another journal now and I ripped it out twice to make sure it fit properly.

Gift Post #7: Denim Bag

Denim Bag
Denim Bag

This is a denim bag I made out of of an old pair of jeans for my stepdad, The Big Guy. I made one of these in high school that I carried around and embellished. I am not really sure what happened to that bag or whether there are any photos of it anywhere. I stitched around the edges of the pockets with embroidery floss and embroidered flowers on my version.

I wanted to do something like that on this bag, but really ran out of time. I had a lot of gifts to make, as you know.

The shoulder strap is pretty wide. I made it that wide because of the seams and because I thought it might be a little more comfortable for him to carry. The straps will be a good opportunity for him to embellish.

I really had a hard time sewing through the denim and all of the layers in various places. The 9K did NOT like the denim. As a result, I couldn’t do as much topstitching as I normally do on bags. Both of the issues I ran into allowed me to go with the flow, though, and I billed it as a joint work in progress.

The Big Guy is VERY creative. He works in various media including leather. He has made leather slippers before, so I thought the bag might be a good canvas for him to stitch on. He loved the idea! I am looking forward to seeing what he comes up with.

New Year’s Day Work

AKA Gift Post #6

I am pleased [with myself] to say that 2010 started out with a sewing bang. I finished the bag for my aunt (she never reads this blog as far as I know, so I don’t feel bad about posting it even though I haven’t sent it off yet).

Jeri's Bag
Jeri’s Bag

I started this bag way back in December 2009, but with one thing and another wasn’t able to finish it until Friday. I feel bad, because it was intended to be a Christmas gift. My aunt really loves purple, so I made this bag in purple for her. In terms of fabric selection I had a couple of things I wanted to accomplish and some limitations to deal with. First, I was limited in my fabric choices because of the size of the pieces of fabrics I had available. For a long time I have purchased half yards and FQs. These are fine for quilting, but I am finding that they are barely adequate for bag making. I intend to try the Mini-Multi (AMH’s pattern for the Multi-tasker tote that I resized)This limitation directed me to more plummy colored purples.

Also, I wanted to try a bag where I didn’t use fabrics with a ton of contrast. I think Marilyn’s Multi-tasker was pretty successful. That one wasn’t boring to make. Thus, I wanted to try another interesting combination of fabrics that were also not wacky looking and my aunt wouldn’t feel bad about carrying around.

I am pretty happy with the way this bag turned out. It looks nice and does not look wacky. I made the pockets and straps at the beginning of the process even though AMH says to make the straps at the end of the process, right before I am supposed to attach them. I think my process worked better for me, because once I got past the tedious, fiddly parts, I was able to put the bag together relatively quickly. I like to get all the fiddly parts done, so I can move through the process quickly as I tend to get bored if I have to keep going back to the fiddly bits periodically throughout the process.

Jeri's Bag - detail 1
Jeri’s Bag – detail 1

I think the combination of fabrics is a good one. The colors work well together and there is some interest in the combination. They are all older fabrics, so an added bonus is that I delved into the fabric closet and used some stuff that has been hanging around. I think Auntie would have preferred less plummy and more purply colors, but the bag is what it is.

Jeri's Bag - detail 2
Jeri’s Bag – detail 2

AMH does not make her pockets fully lined. Another change that I have made is that I make them fully lined [by cutting a piece of fabric, folding it in half (right sides together), sewing around, turning] before sewing them on to the bag. I think this method makes a nicer finished product and doesn’t take much longer. I want to remember next time to add a label to the pocket. It seems like a good place to include a label.

Jeri's Bag - detail 3
Jeri’s Bag – detail 3

I am still liking the cell phone pocket, which I learned to make from the Sweet Harmony bag, so I added one to this bag as well.

Cloth Napkins
Cloth Napkins

I have bought some of the fruit and vegetable fabrics, that seem to be popular, recently. I had a joint project with my mom in mind, but decided I liked certain ones too much to give away, thus I made napkins. Perhaps I am making a series after taking a look at the raspberry napkin I made in 2009? The cake fabric and the pots and pans fabric is from my collection of fabric for backs. Those pieces are large, so I can make FQ napkins with no problem and no piecing. In general, I don’t really like making napkins. Turning the pieces and getting the seam crisp are really frustrating and I am generally not successful at it. I tried a couple of different methods this time and am progressing. I do enjoy using the new napkins! I also enjoy looking at the cake fabric. My sister wants a set, but I don’t know if I have it in me to make a SET. Perhaps I can make one a month for her, then give her a set of 12 for Christmas? We’ll see.

In a way I wanted to set a trend for 2010 of major league sewing. In 2010 I want to make major progress in the sewing-quiltmaking-bag making department. I think I did well last year. Still, I want to do better. Not necessarily in terms of numbers of projects completed, but improvement in my processes. Oh, and I would like to see major improvement in my organizational systems. I am not committing to anything on that front, but would like to see it. We’ll see about that.

Gift Post #5: Cardholders

We give small and/or handmade family gifts to DH’s siblings (5 of them) and his cousins (5 on one side, 1 on the other side) plus small gifts to a few hangers-on who attend our Christmas Eve celebration. This year DH and I made cardholders. Just so you don’t have to do the math, I made about 14 cardholders.

Original Card Holder

DH’s mom has a cardholder in the shape of a Santa (oddly shaped, but Santa nonetheless) that I have long admired. She bought it from a door to door salesman in the 1950s or 1960s. She may have told me the name of the company, but I don’t remember. I have wanted to replicate it for a long time and decided that this year would be the year of the cardholders. I also quickly decided that I was not going to make the cardholders in the shape of a Santa.

Original Card Holder - detail

I searched the web to get some ideas and found very few ideas online. Apparently, this is not a popular gift. I did find a few, but no free patterns that I liked.

What I find were ideas for shapes. I decided that a long rectangle with a pointy bottom would be easiest to sew and look the best.

DH and I sat down with the measurements of felt (72″ wide) and an idea of what I could sew in a reasonable amount of time. He did most of the heavy math lifting while I stuck to the practicalities of sewing.

Once we had the dimensions down I set about cutting and figuring out the sewing process as I wanted to do as much assembly line sewing as I could.

Testing Ribbon Trims

I have a can full of various odds and ends of ribbon. I use that ribbon when I make gift bags. Some of the saved ribbon is too short for gift bags so I got it out to test trimming the pockets. Above is some really interesting French gold ribbon that I sewed on to a pocket. I liked it, but thought it was a bit wide.

I have several rolls of 1/4″ ribbon in red and green that I got when I cleaned out my Aunt’s craft room after she died. Since I have a lot of it, I used quite a bit to trim various pockets, even though I thought it was a bit thin. The best size turned out to be 7/8″ ribbon, which DH got when I sent him to the store to get some silver ribbon.

Assembly Line Pocket Trimming

I got the assembly line figured out eventually. Above it looks like I am just putting a bunch of pockets on a line of ribbon and sewing. Actually, I cut the pieces of ribbon, wrapped them around the pockets. This enabled me to sew through two layers of ribbon and one layer of felt to anchor the ribbon and keep it from fraying a bit. As soon as I was done sewing one, I would put the next pocket very close to the one exiting the presser foot and keep sewing.

Figuring out color schemes

You know my rule is to “make visual decisions visually”, so we laid out all the cut pieces and rearranged them until we were happy with the color combinations. After this step, I got down to being serious about trimming the pockets.

Measuring pockets
Measuring pockets

Once all of the pockets were trimmed, I sewed the sleeve and then pinned them to the back, measuring down from the sleeve’s seam line (above).

Cardholder: pinned & ready to sew

The pockets required more thinking to sew on. I ended up pinning as many as I had cut and trimmed and then sewing like colors on. First I sewed all the red pockets. That left some cardholders with white and green pockets only trimmed and pinned. Once I completed all the red pockets, I changed thread and worked on green, then white. This method prevented me from having to change thread (to match a pocket color) every 5 minutes.

One evening I was home alone, so I took all the cardholders down to the TV and embellished them with buttons, sequins and beads. It was nice to do a little handwork and get away from the machine for a couple of hours. I also think it gave them a bit of a one-of-a-kind look.

Little did I know that DH was surfing the web and had embellishment ideas of his own! He found patterns/templates for some stars, ornaments, mittens and holly.  Again, I hauled all of the cardholders downstairs and we figured out what would go where.

Holly Embellishment
Holly Embellishment

It was very clear that the red buttons I sewed on a whim would make excellent holly berries. I would have liked to put some kind of spine or shading on the holly leaves, but ran out of time to figure that element out. These are some of the cardholders we made.

First Completed Cardholder

This is the first completed cardholder. We gave it to our friends, Eric and Yar, when we went to their Christmas party at the beginning of the month. They also invite us over for dinner every year and we have yet to reciprocate. Now that the dining room is painted, I think the time has come.

This was is more plain than the later versions. I should call it subdued!

Hanger detail
Hanger detail

We are using some Lucite rods, that didn’t work as quilt hangers, to hang the cardholders. They look nice, were easy to cut, did not need finishing other than a bit of sanding and work very well.

2 Mittens & a Star
2 Mittens & a Star
2 Stars, Mittens & Holly

I had to pay attention to what color embellishments went on which color of pocket or background. If I didn’t, the embellishments wouldn’t show up. This war particularly tricky for the mittens, because of the white cuff. I tried some other colors, but they didn’t look right. This is why the embellishments ended up on the two middle pockets on the card holder on the right, above.

Holly & Gold Ribbon
Holly & Gold Ribbon

The gold ribbon in the card holder on the right, above, had a papery feeling. I didn’t like the feel of it after I put it on. I had to chalk it up to experience, though, as those were some of the first pockets I embellished and was still in the learning process.

Embellishments

Ribbon trim
Ribbon trim
Stars
Stars
Mittens
Mittens
Gold Sequins
Gold Sequins
Buttons & thick ribbon

I also made one with a winter theme, rather than red and green, for a family that celebrates both Christmas and Hannukah.

Winter theme with Holly

Here are the two winter themed card holders I made with one of the holly versions. I had fun embellishing the blue and white with silver beads, sequins and pearls.

Winter beading - large detail

The beading does help keep the embellishments on as well.

Winter theme - detail, small

I thought the turquoise snowflake added a bit of shading or interest to the Winter card holders.

One of the good things about making many of a project is that you know how to make it well. I would say that I am a master card holder maker now, if there is such a thing!

Gift Post #4: Journal Cover #3

Julie's Journal Cover - full

Here is the journal cover I made for Julie. It is a companion to the pencil roll I made for her birthday. This is actually the third journal cover I have made and this one went together the fastest and looks the best. My only problem was putting it together backwards, so the tree I wanted on the front ended up on the back.

Julie's Journal Cover - front

No matter. I tried to think of it as a design challenge after my initial disappointment. I fussy cut a tree out of the small piece of fabric I had and raw edge appliqued it to the front. I thought that Julie could handle the raw edge stitching.

Julie's Journal Cover - in process

The main green fabric is an old Marrimeko print, as I may have mentioned. The directions I used are a combination of the pattern from Allpeoplequilt.com, the directions on the Exuberent color site (they don’t print well) and my own trial and error and notes from previous journal covers. I use the Miquelrius journals, so those are the journals I bought and for which I made covers. Hope all of the recipients like them!

Gift Post #3: Sweet Harmony Bag

I love my sister dearly, but she is hard to shop for. She buys what she wants, so I always have to think early and creatively. I found this Basic Grey fabric and just knew I had to use it for a gift for sissy. She is an invertate scrapbooker and LOVES Basic Grey paper. It started the whole thought process, actually.

Sweet Harmony - Full

On my week away, TFQ tempted me with doing a joint Sweet Harmony Bag by Amy Butler. My idea was that we would each make one at the same time. However, it turned out that we worked together on one bag.

This is probably the last time I will make an Amy Butler pattern.  I purposefully did not write the review right away, because I wanted to give the shock time to wear off and give the piece a fair hearing.

While the finished product turned out really well, the directions were overly complicated and the pattern promoted extreme wastefulness.

Here are some tips  and things to be aware of when making this pattern:

  1. Trace the pattern pieces on tracing paper and keep the originals all together on the pattern sheets.
  2. Trace the pattern pieces again, but smaller (approximately 3/4″ will work) for the fusible fleece and interfacing pieces. If you don’t do this, the pattern will tell you to cut them full size and then trim them down. Thus, this direction promoted a lot of waste in the interfacing, Peltex and fusible fleece.
  3. Make a separate pattern piece for the inside pocket as well. This is a combined piece and it is just too confusing not to have a separate pattern piece.
  4. Make a chart (Excel or the Google Docs Spreadsheet feature would work) of the pattern pattern pieces you will need and which fibers you need to cut them out of. I didn’t know to do this and ended up laying all the cut pieces out and reading the list over and over while counting pieces.
  5. The designers seem to have a problem with naming pattern pieces consistently. In Step 4G, they ask you to do something to a Lining Panel. This was the first time I had ever heard of this piece.
  6. This pattern and the directions don’t always make it clear which layer (fleece & interfacing or interfacing only) the designer wants you to work with.
  7. Sweet Harmony Org System
    Sweet Harmony Org System
  8. Directions should have included a rotary kit (cutter, mat, ruler). The instructions do not include these tools, but they make the process much easier. I understand that the pattern isn’t necessarily targeted at quiltmakers, however I think many sewists now have rotary cutting kits as part of their tool arsenal. If you only sew garments and accessories (e.g. no quilts) and do not have a rotary cutting kit, I think you should go and buy one. What do you think?
  9. Use tailor tacks to mark dots.
  10. Handbag pattern includes a 20″ zipper in the list of supplies needed. Then the designer wants you to modify this zipper to make it about 8″ shorter. I don’t know about you, but I don’t know how to modify a zipper. I also did not want to modify a zipper. I barely know how to put in a zipper. TFQ who has LOTS of garment sewing experience and she didn’t know how to modify a zipper with confidence either. This is another bit of waste. I ended up omitting the zipper (it’s for a an inside pocket), but I would recommend buying a 12″ zipper and not modifying anything. The pattern also gives the pattern pieces for a tote bag, which I did not make, and I believe that the 20″ zipper would work with the tote bag. I think they were trying to save space on the pattern by not listing two supplies.
  11. The marks for the magnetic snaps are below and to the left of where they actually should go.

    Sewing piping to outside pocket
    Sewing piping to outside pocket
  12. The pattern asks you to make much more piping than you actually need. You will really only need about 25″.
  13. Finally, there are not enough pictures, despite the price of the pattern, so I would recommend giving yourself plenty of time and using nice fabric. You may never make it again, so you want to like it!

I think that making all the tote bags I have made really helped in understanding the pattern and how to follow the directions. The final product is really nice and looks very professional. I als learned how to make a pocket that has a little tuck so larger things will fit and you can actually pull it out.

Outside & cell phone pocket
Sweet Harmony Inside

Gift Post #2

Flower Tote
Flower Tote

Remember this tote? I wrote about in a post way back in March. I ended up giving it to my mom so I get to visit with it periodically as she brings it over when she comes to visit with the Child.

The financial situation has not improved much, but my mom said in no uncertain terms that we were going to exchange gifts. We didn’t last year and she said it was really hard, so I decided to work on making some her, and a few others, some gifts.

I am not always a fan of giving homemade gifts, because I don’t want to give people things that have that homemade dorky look. I also like giving people things they will actually use and I don’t know yet know how to make iPhones or a Wii.

I have been working REALLY hard at making my fiber stuff look professional. It will never look like it was made in a factory, which I don’t want either.  I press really well, poke the corners carefully and am careful about stitching, so I think they look good. In any case, I am not embarrassed to give things I make away.

Mom's Pencil Roll
Mom's Pencil Roll

I decided to make my mom a pencil roll since I thought she would use it and I had a lot of fun making Julie’s during my week away. Kathy‘s patterns (well, at least this one) are fabulous. As I mentioned in a previous post, they are very well written and easy to understand.

Mom's Pencil Roll Open

The most time consuming bit of this project was cutting the strips. I was kind of at a loss on fabric choices until I found the flowered fabric and the turquoise, both of which I used on the tote I made for her. Perfect! She’ll have a little set!

Stitching all the parts together after layering and turning them is also fairly time consuming. I do that topstitching very slowly after marking the lines on the pocket with a white pencil.

For the inside, Kathy says to use flannel, which I didn’t have, so I used batting and it was a little bit thick o sew through. I can’t say I would absolutely not use batting again, but it wouldn’t be my first choice. If I make another one, I’ll try a couple of layers of interfacng, though I suspect that would make the piece too stiff. We’ll see what I have in the fabric closet that might work.

Strips sewn for Pencil Roll #2

Above is a picture of how the strips look sewn together before the whole thing is layered together. One thing I needed to remind myself about was to turn the strips with a strong motif around so it would show after the pocket was applied. I didn’t choose fabrics that would lend themselves to arranging the strips in a colorwash design, as Julie did with mine. I am happy with the arrangement and the idea of making his pencil roll into part of a set.

Gift Post #1

Grama's Grab Bag
Grama's Grab Bag

I mentioned that I am trying to make as many gifts as possible for the holidays. I am having fun doing it, but I wish that I had started earlier. I wasn’t sure what to make Grama since all she really likes to do is shop and play bingo. I decided to make her a ‘Grab Bag’ from the All People Quilt pattern.

She has started bringing bags back to the grocery, so I decided to make her this bag. I knew how to make it since I made it for a gift previously and could use a couple of FQs, if necessary.

Grama's Grab Bag in process

I found the older Jinny Beyer border print and a floral for the inside and think that it turned out well. I know she doesn’t read blogs, so I am not worried about ruining the surprise by posting this before Christmas.