Although everything went along very well, I finished up sewing on Sunday somewhat dissatisfied. I think I felt like I figured out the sewing and was done, but here was a bunch of pieces on my design wall that were not a quilt top.
I turned off the sewing machine and lights and left the room. I ate dinner, worked on my puzzle and thought about this quilt.
I decided that one issue is that I don’t want to keep it. I am making it because I wanted to use the Pop Parade by Metro for P&B Textiles fabrics. I also think the design is clever. Still, I don’t want to keep it and didn’t know who should receive it. I have four-ish more quilts to make in the Niece-phews series. None of the people who will be getting a quilt seemed right for this one. I thought about giving it the YM. He is always up for a new quilt. Finally, I received an email from a friend. She is going through a tough time and needs a quilt. Voila!
This quilt is also a cautionary tale about saving fabrics for the perfect project. When I bought Pop Parade, I was pretty excited about them. Now, not so much. The dots are great, the other motifs are great, but the colors are somewhat dull. I see it especially in the pinks. I prefer bright clear colors.
I didn’t have enough of the Pop Parade to make this quilt, so I added in some other fabrics and that makes the overall look better. I love the text and low volume fabrics I am using for the background. I was kind of upset I had chosen those if the quilt wasn’t going to someone I like as I am using up large pieces of them. Now I am excited that my friend will receive it. I am sure she will like it.
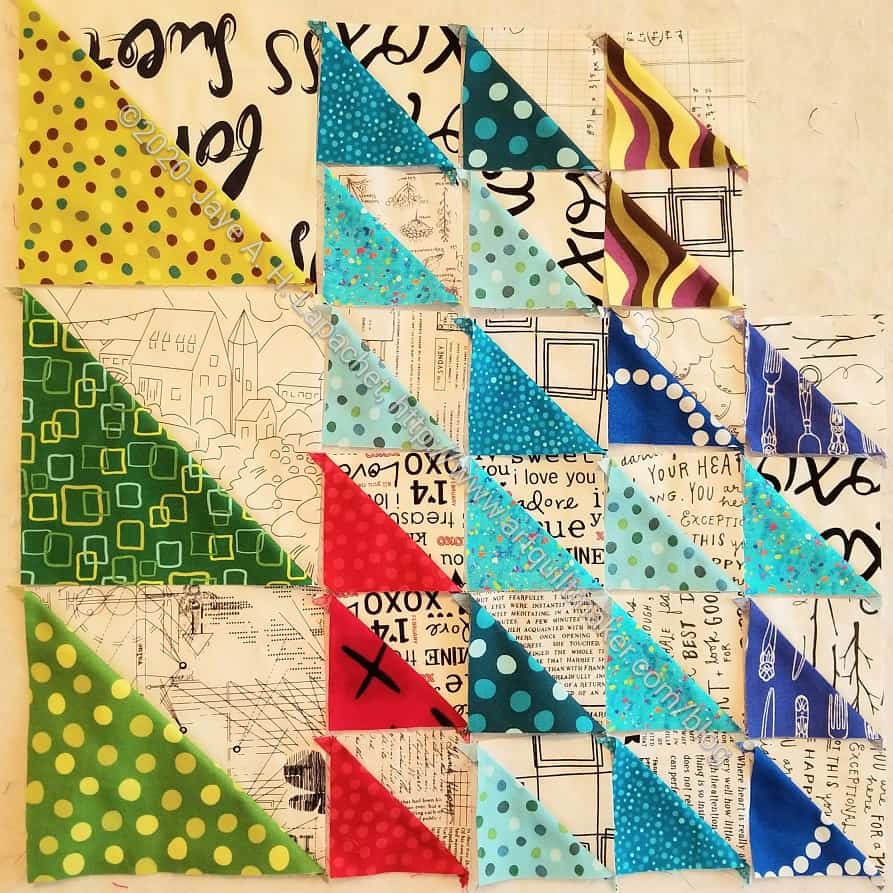
As you probably guessed from the Folded Corners Ruler tutorial, I am generating a lot of triangles. As the triangles are cut off the squares, they are ready to sew into Half Square Triangles.
Pop Parade HSTs
So, I sewed them into HSTs. I couldn’t think of a design, so I put some of them up on the design wall so I could look at them. Now I have an idea of what I might do with them. I don’t think they will fit together as is, so I have to add some sashing or something.
The picture shows only a small fraction of what I have sewn so far. Depending on how large the final piece is, I may donate it to the guild. However, I might make it a Niece-phews quilt.
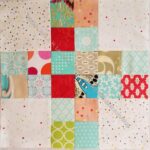
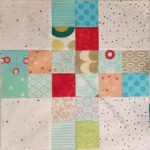
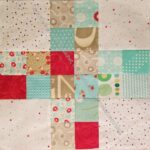
I have rummaged through my dots drawers numerous times since I bought Pop Parade by Metro for P&B Textiles. Recently, the collection caught my eye and that is what I am using for my latest quilt.
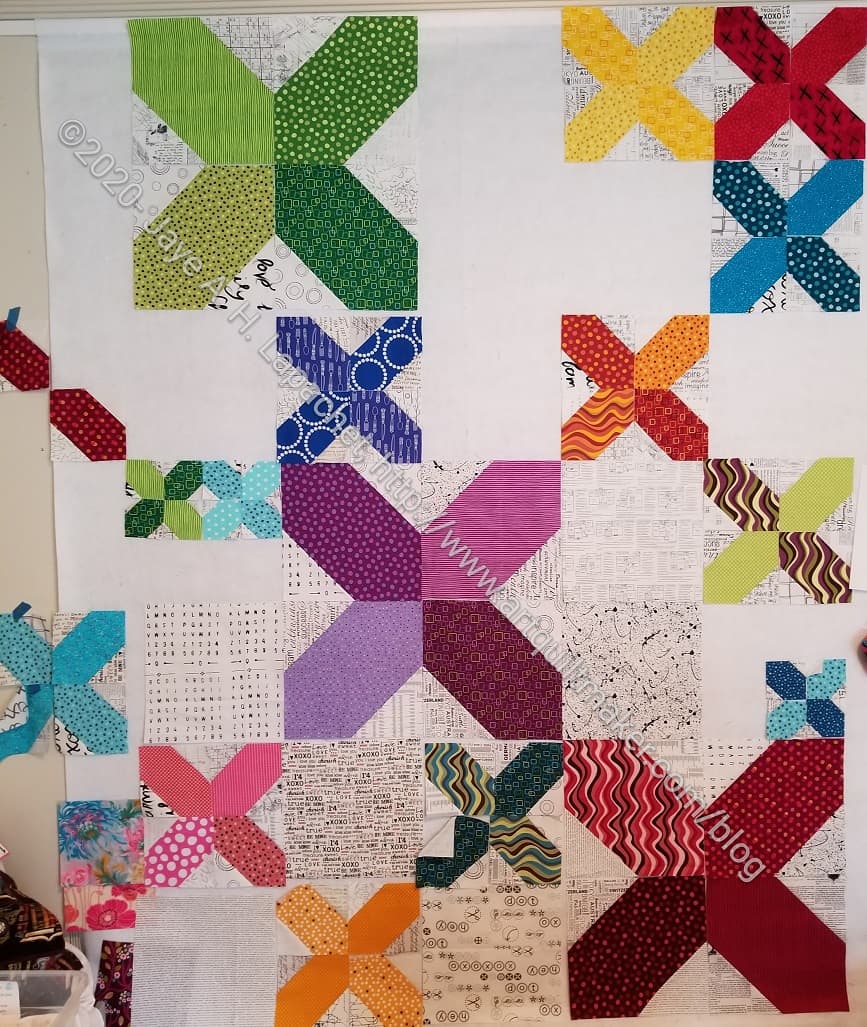
This quilt is from the book Quilt Big** by Jemima Flendt. I tried to borrow it, but nobody had it, so I ended up getting a deal on it in Kindle format.
This quilt had a rocky start. The Kindle format didn’t make for easy reference to the pattern. I finally figure that out and started cutting, but got confused by the directions, so I pulled all the fabrics I planned to use, then started cutting again. That made more sense, but not a lot. My confusion continue. Finally, I printed out a copy of the layout, looked up the sizes of squares I needed and cut using those two aids. After figuring out the folded corners ruler, I sped along.
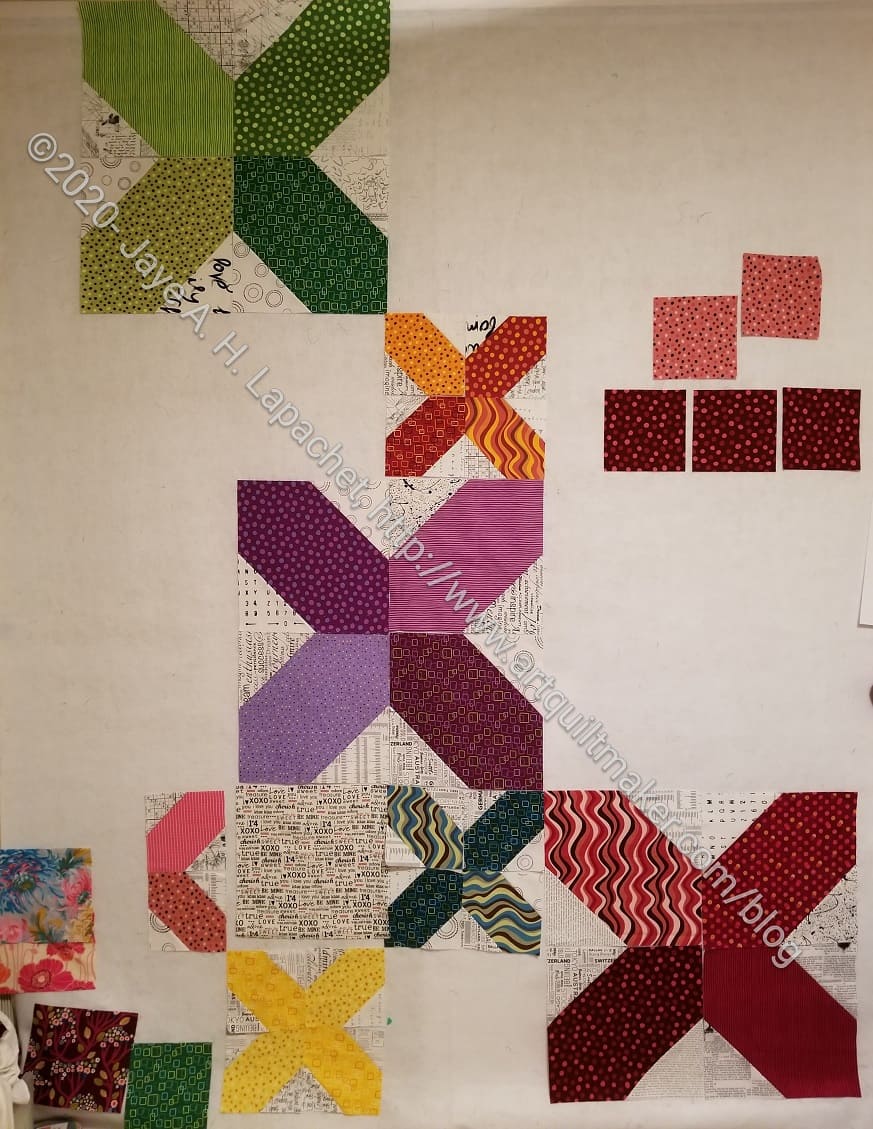
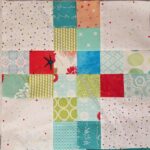
X Quilt- Saturday work
I made good progress on Saturday. I thought I might finish cutting and sewing the blocks together. HAHAHAHA!!! There was a lot more cutting than I anticipated. I guess I got oriented to the pattern on Saturday.
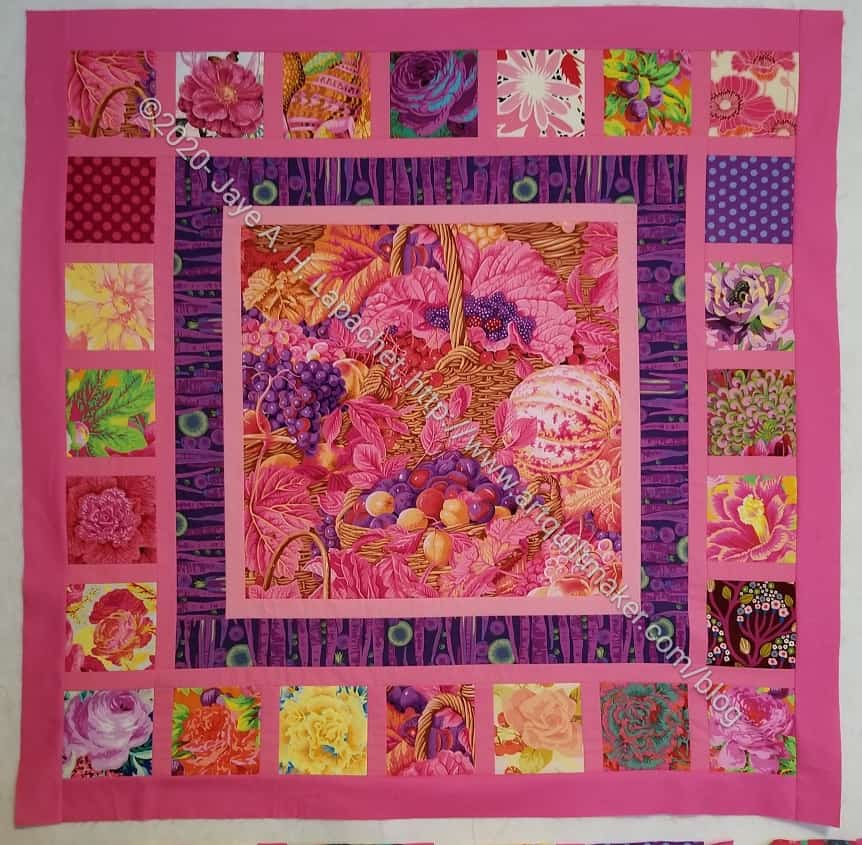
I didn’t have much time to sew on Saturday, but I did have enough time to finish the Pink Kaffe top. I am pretty excited about this finish. I really like the top. I am not sure how or where I will use it, but I love the flowers and the pink
I am using a different quilt for this tutorial, but I have faith that that won’t make a difference to all of you intelligent readers and students who have been following along with my various sampler class tutorials.
Supply List:
blocks
fabric for sashing
fabric cornerstones (I used scraps, but my cornerstones were only 1.5 inches square)
Please note that we are only talking about sashing in this tutorial. We are not talking about borders. I will do a separate tutorial for borders in the future.
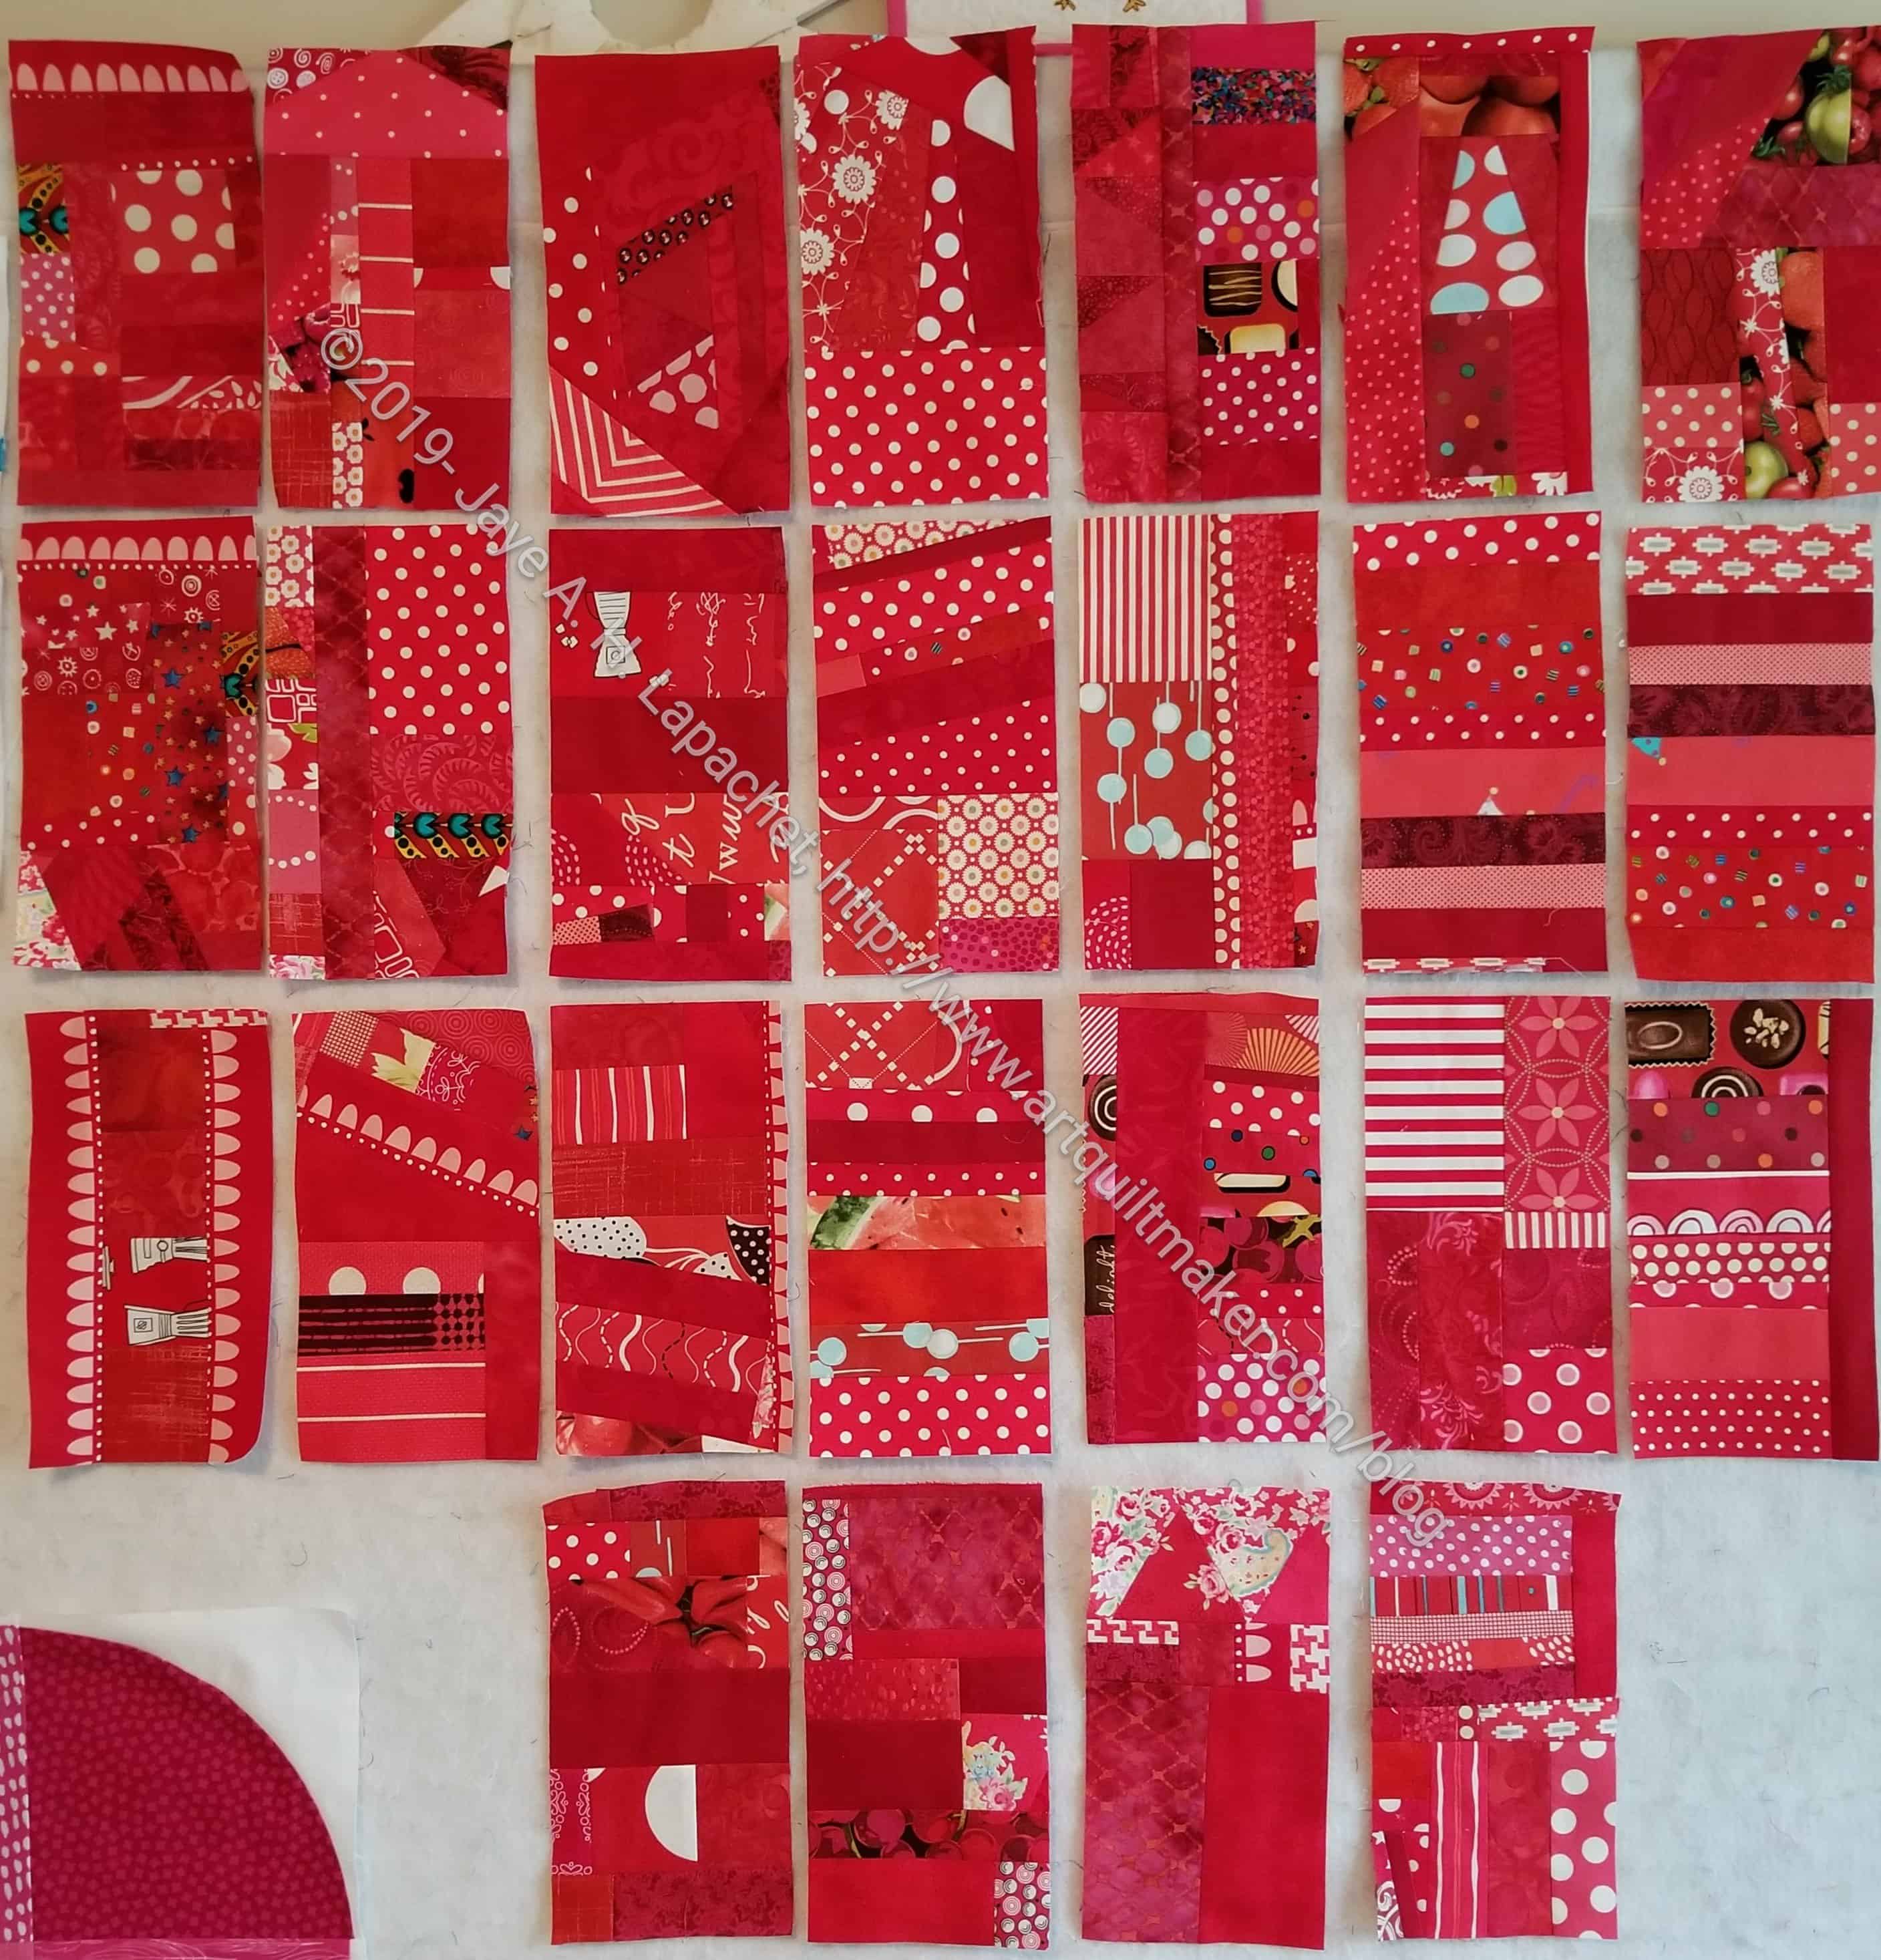
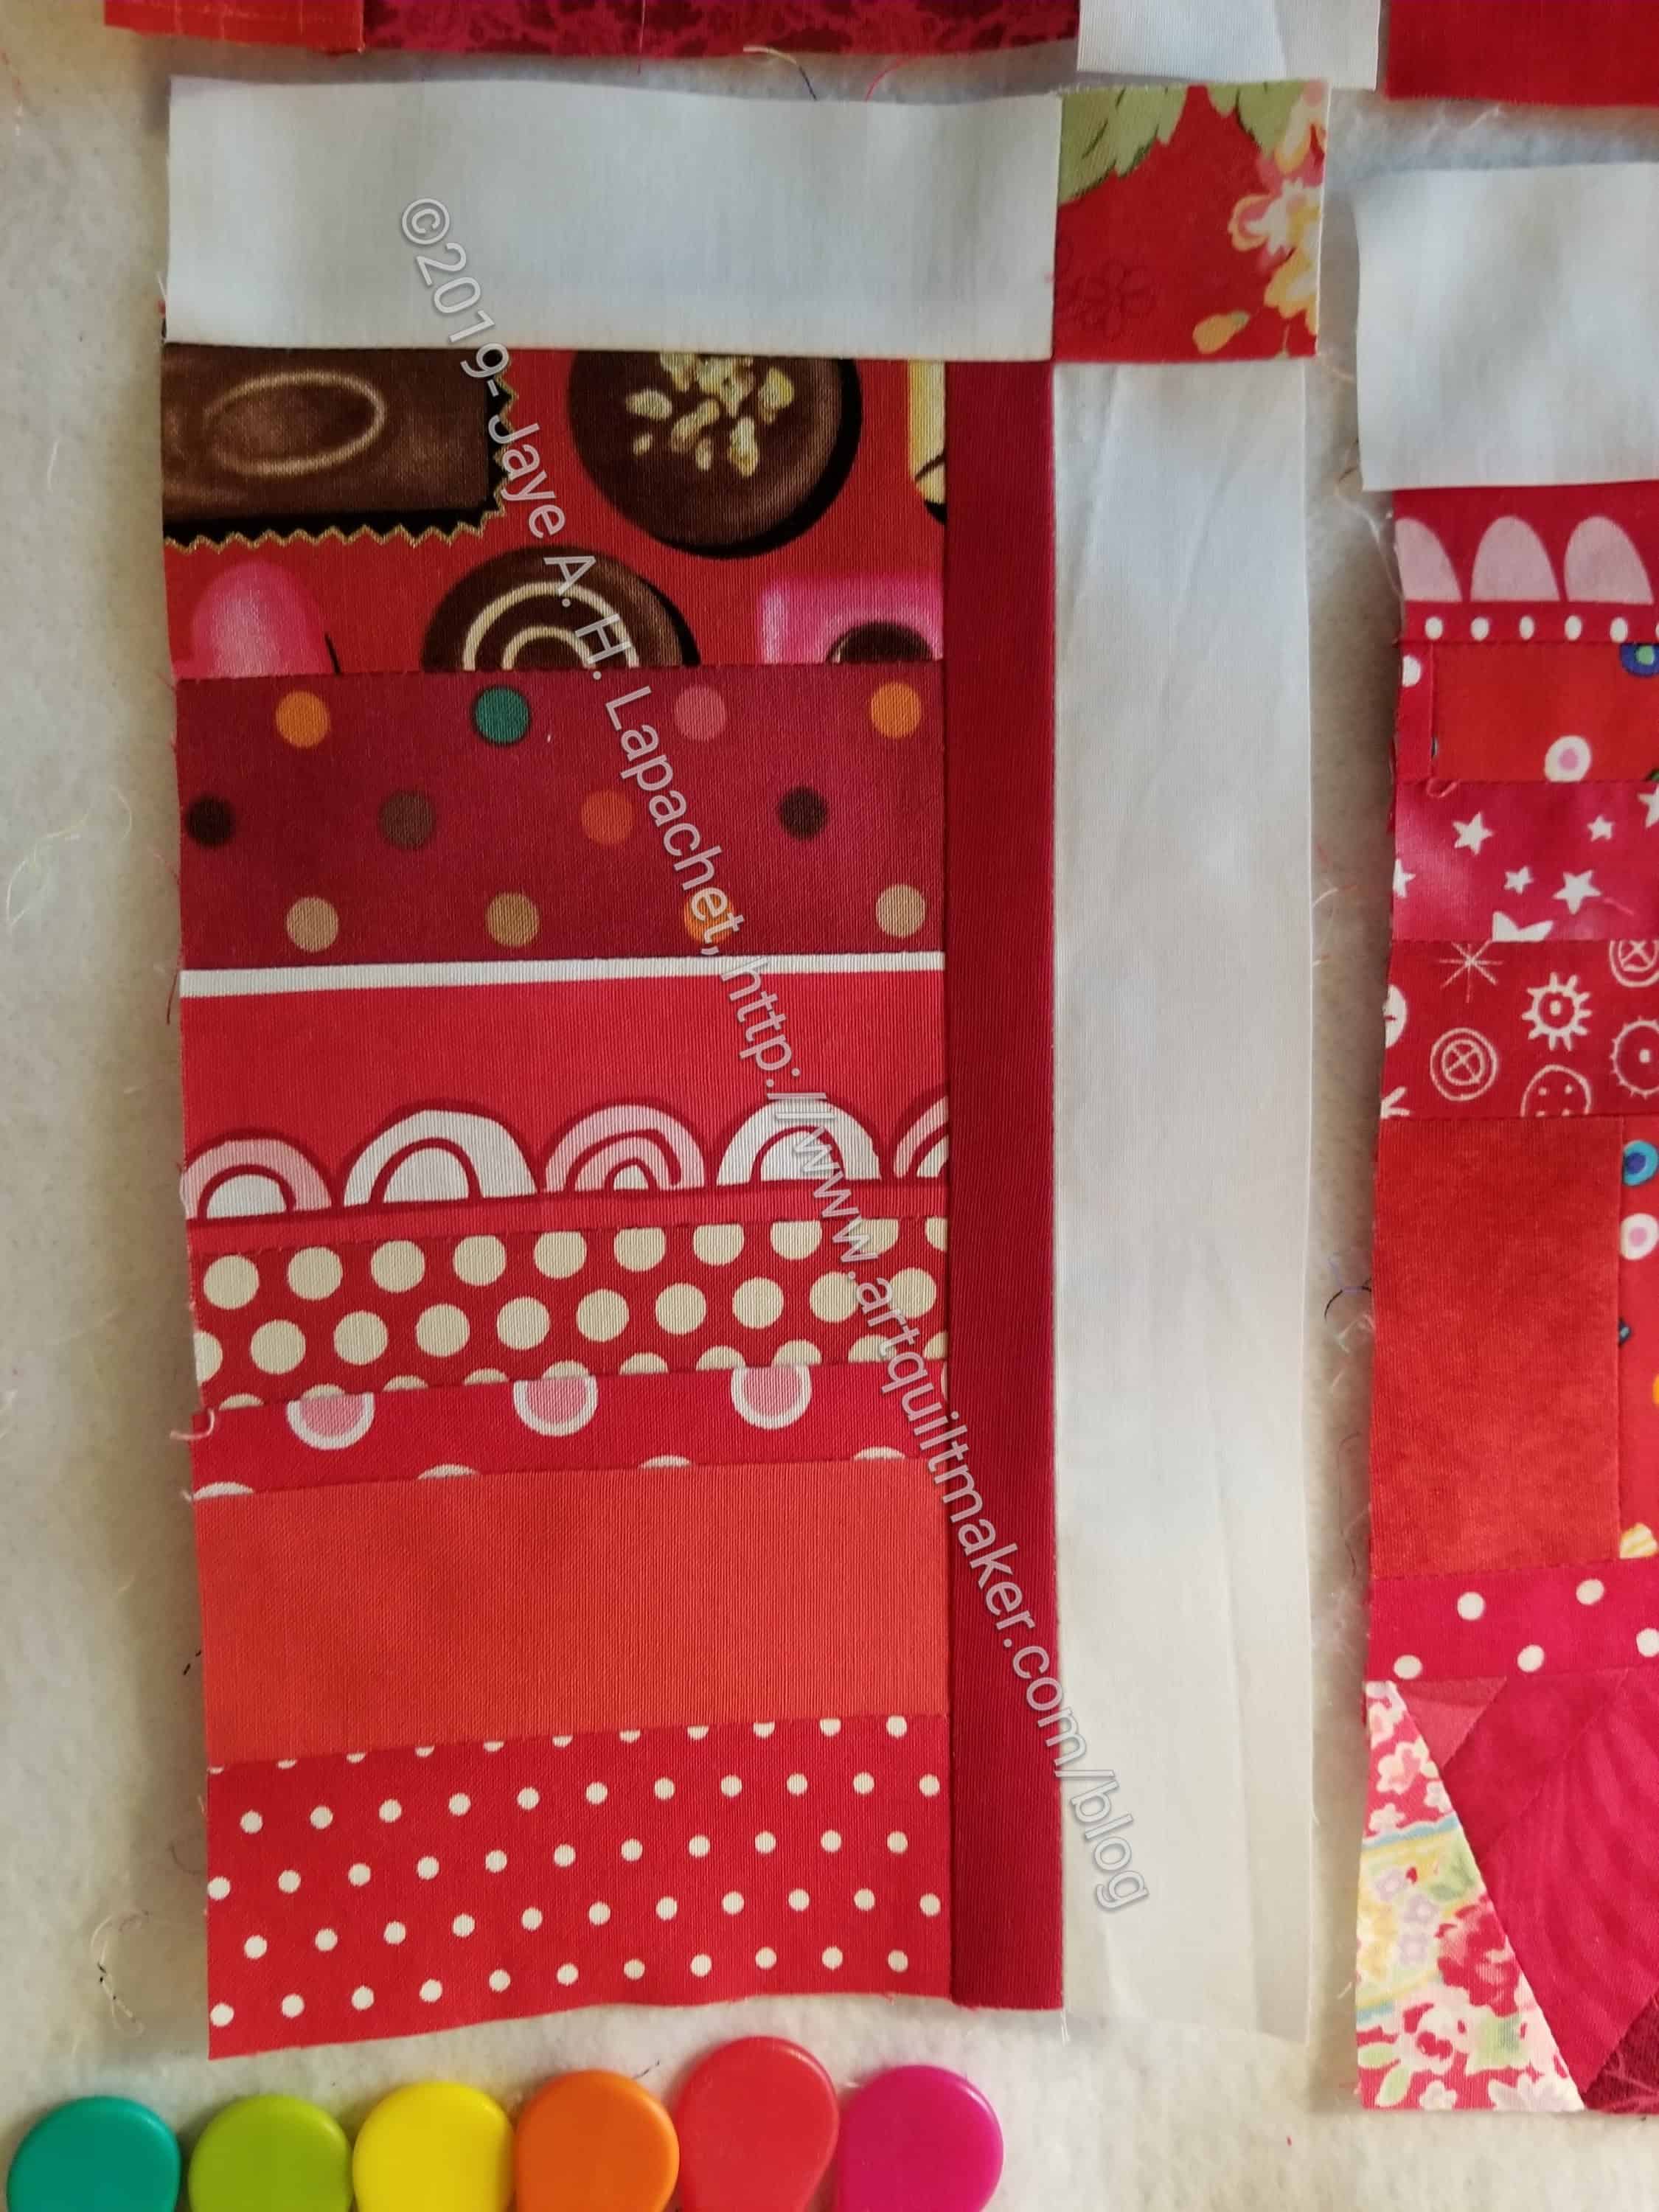
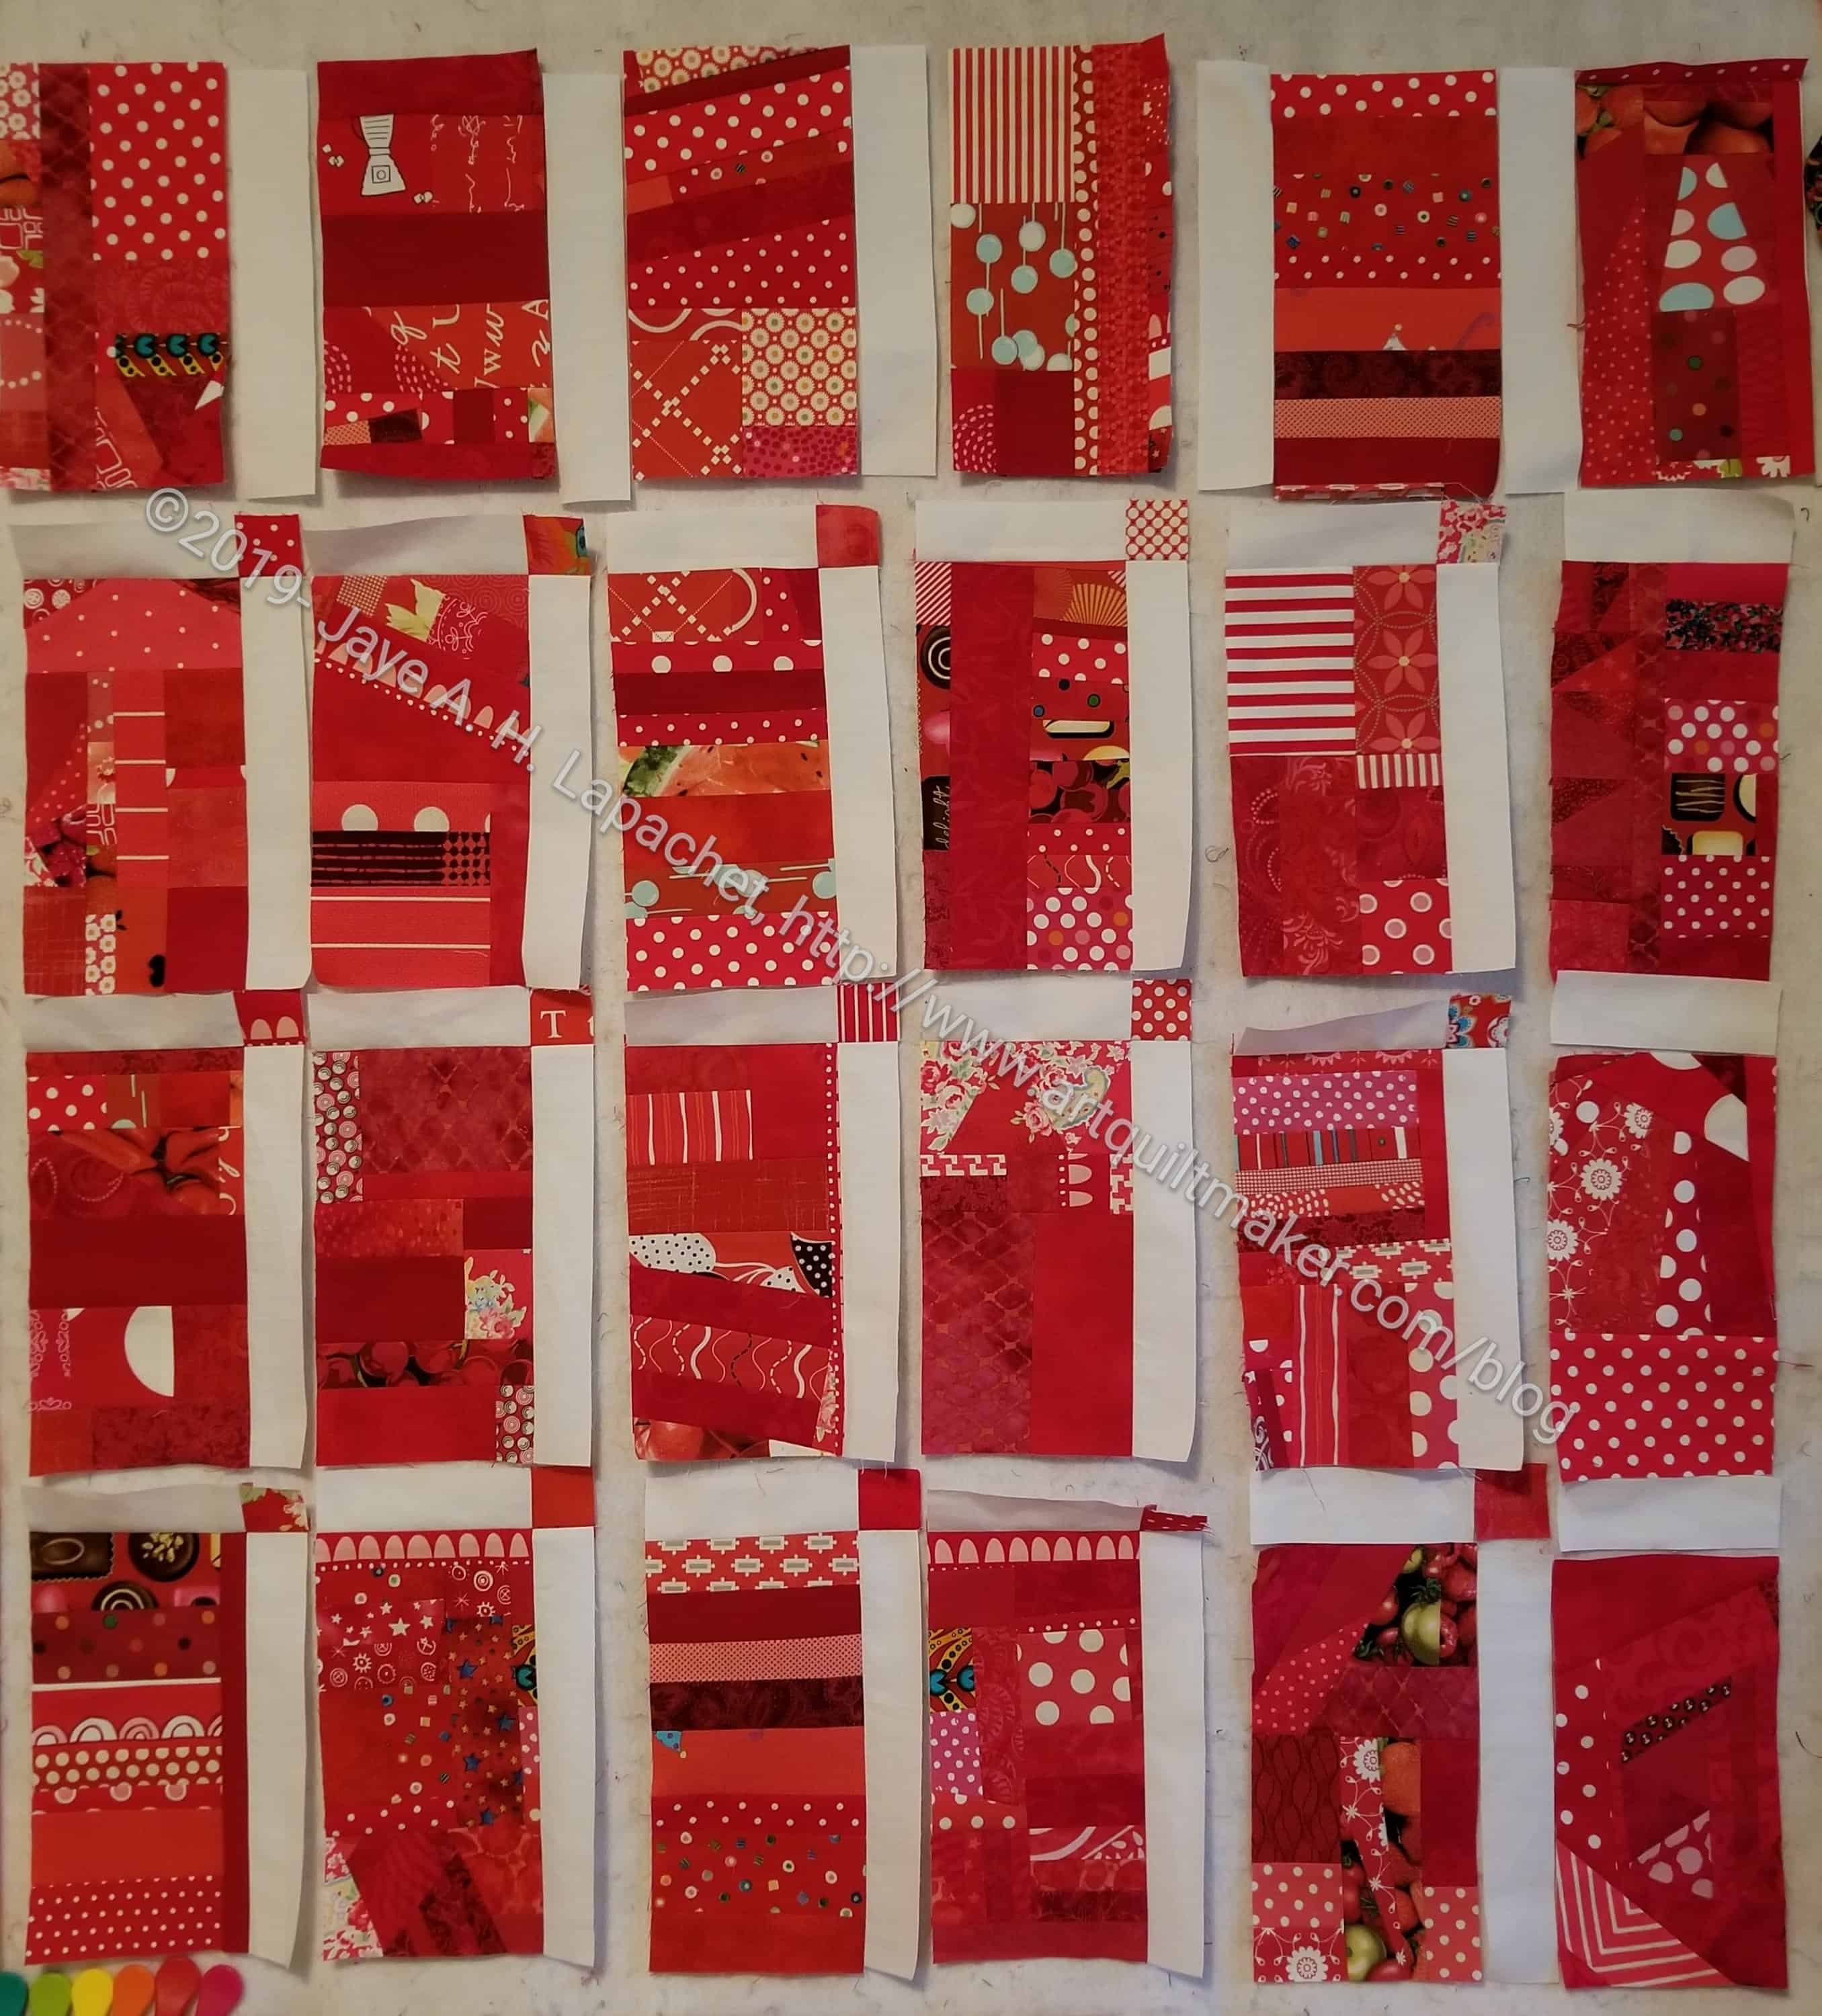
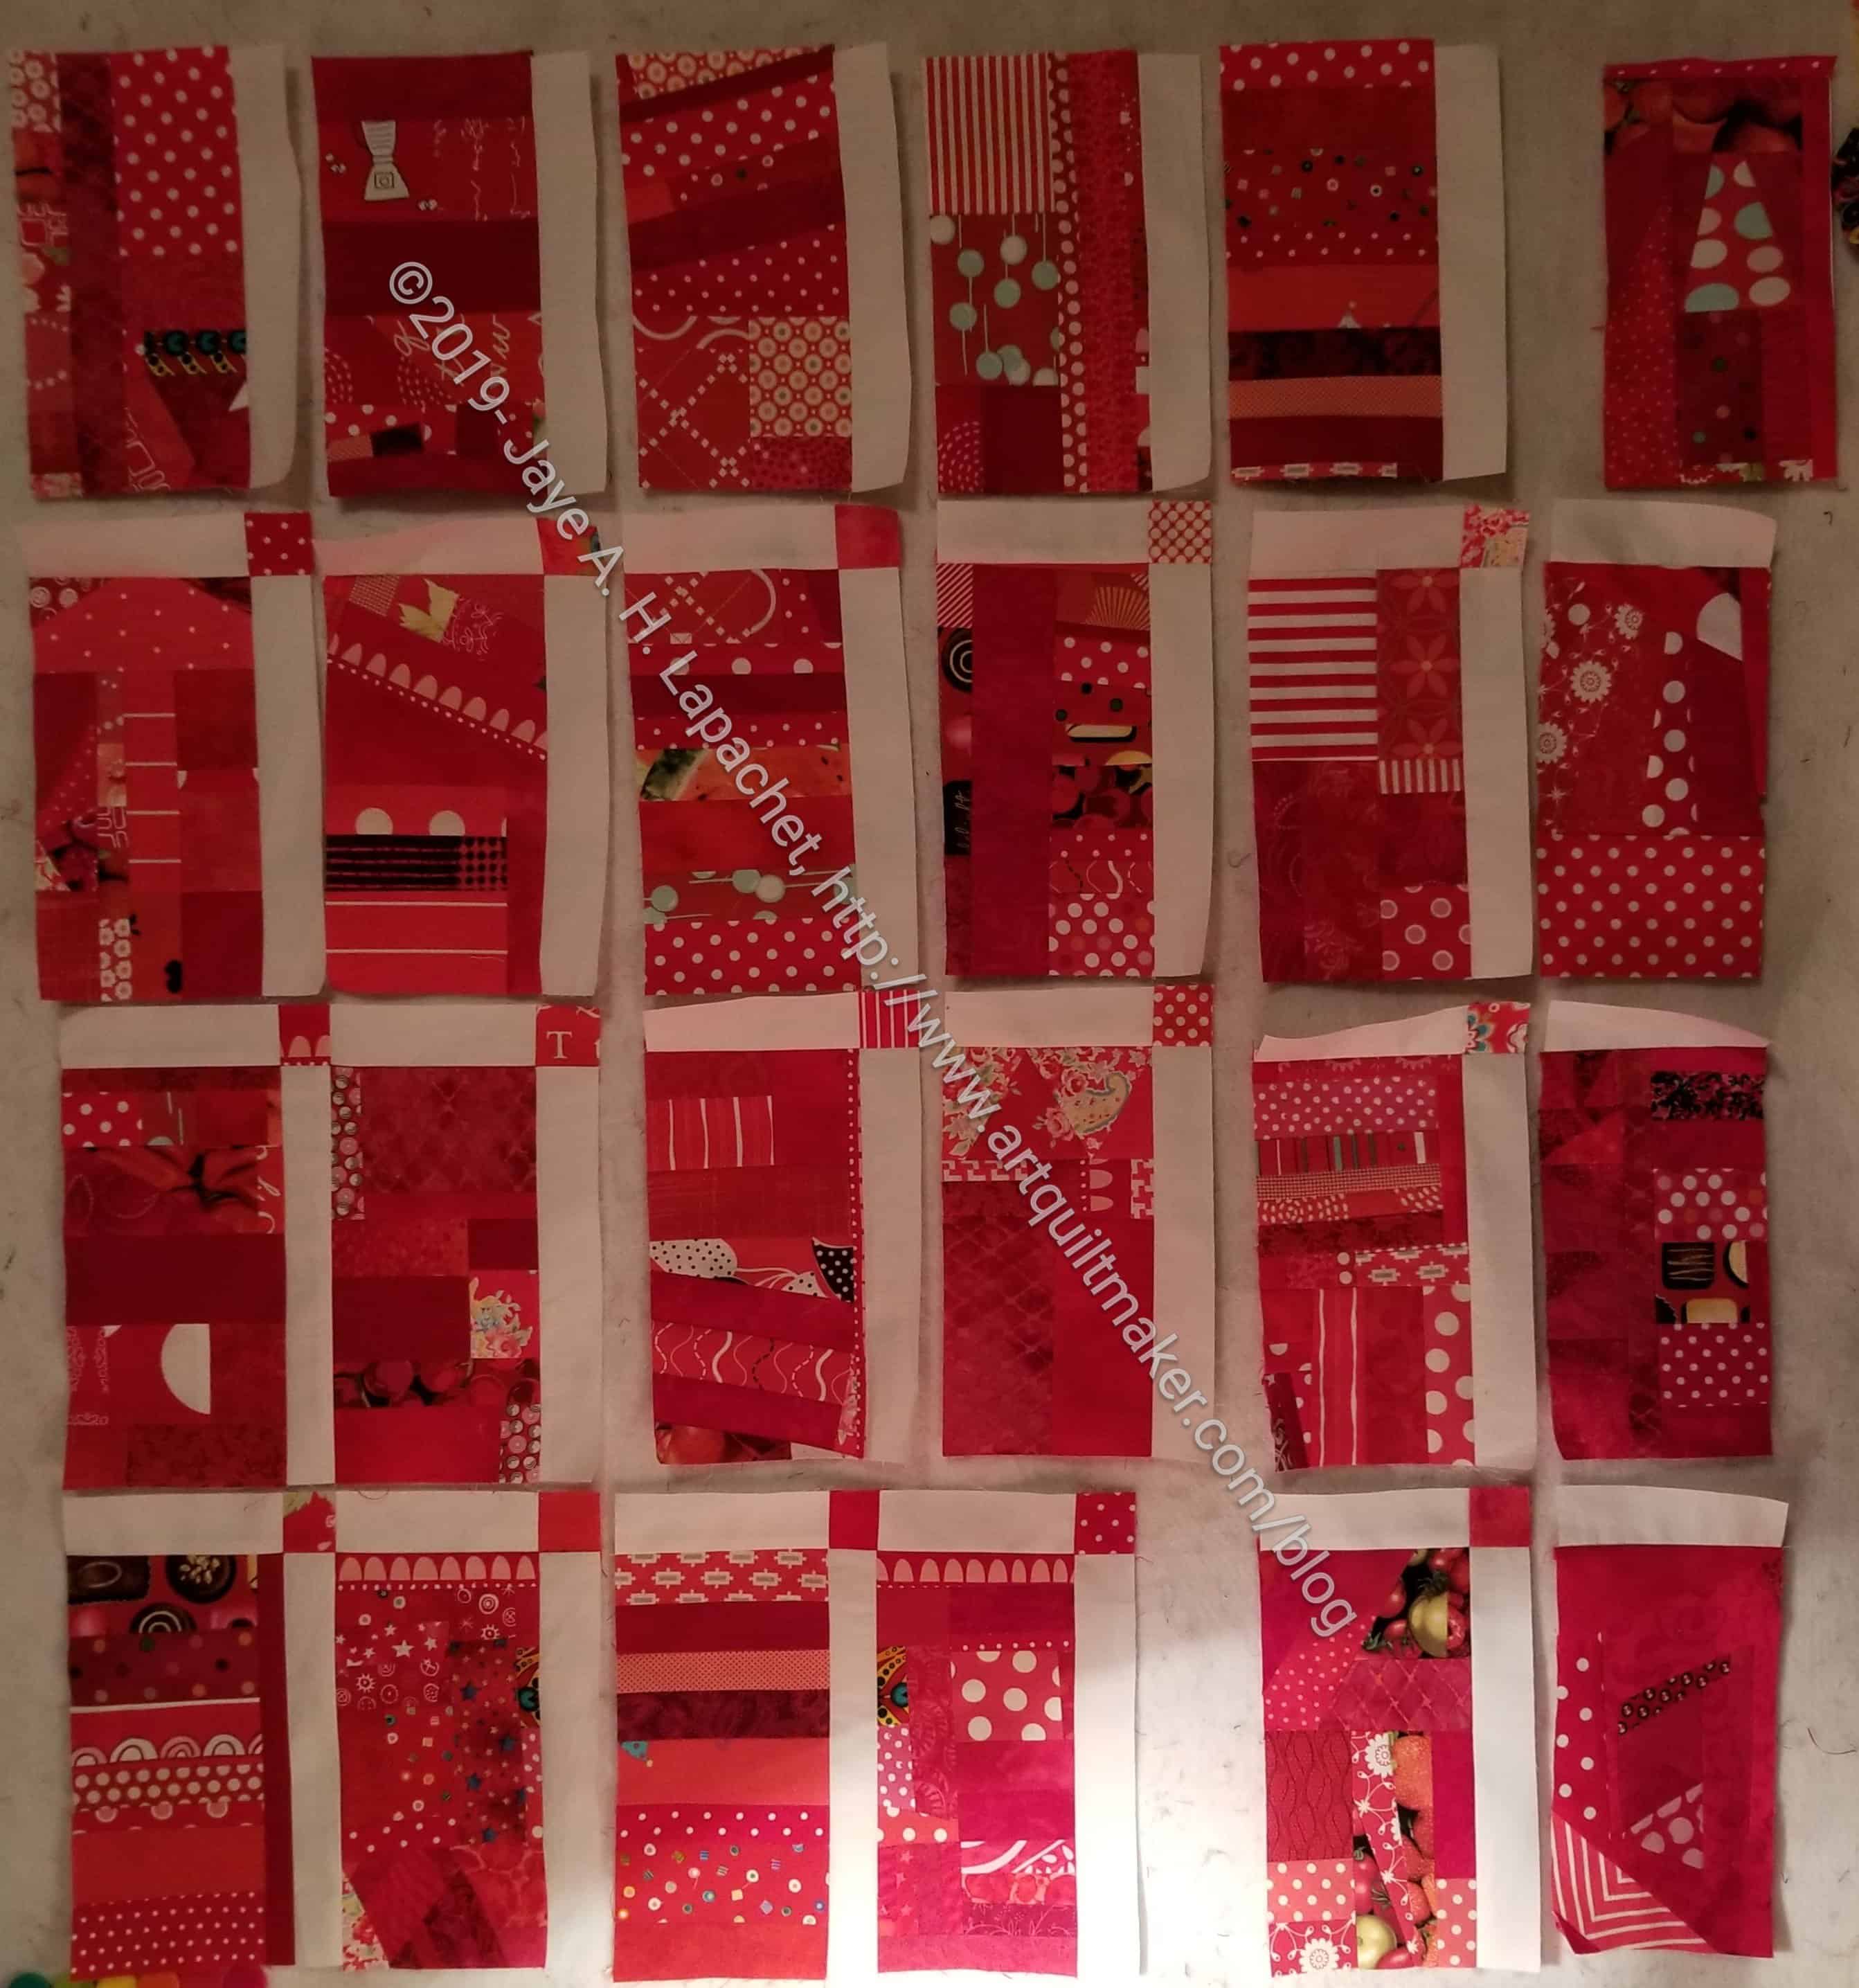
Red Strip Donation Blocks
I started out with the above group of donation blocks. I have been setting these with plain blocks of the same size. I decided that I wanted to do something different with these blocks. Sashing is the answer. Having something between these blocks prevents the seams from getting too thick and hard to sew. Also, it allows each block to shine a little bit rather than being part of a mass. Adding sashing or plain borders or nothing is a design choice. For any quilt, it is important to decide on the look and feel you want.
Even if you put the same sized plain blocks between these blocks, the method I will show you works the same way.
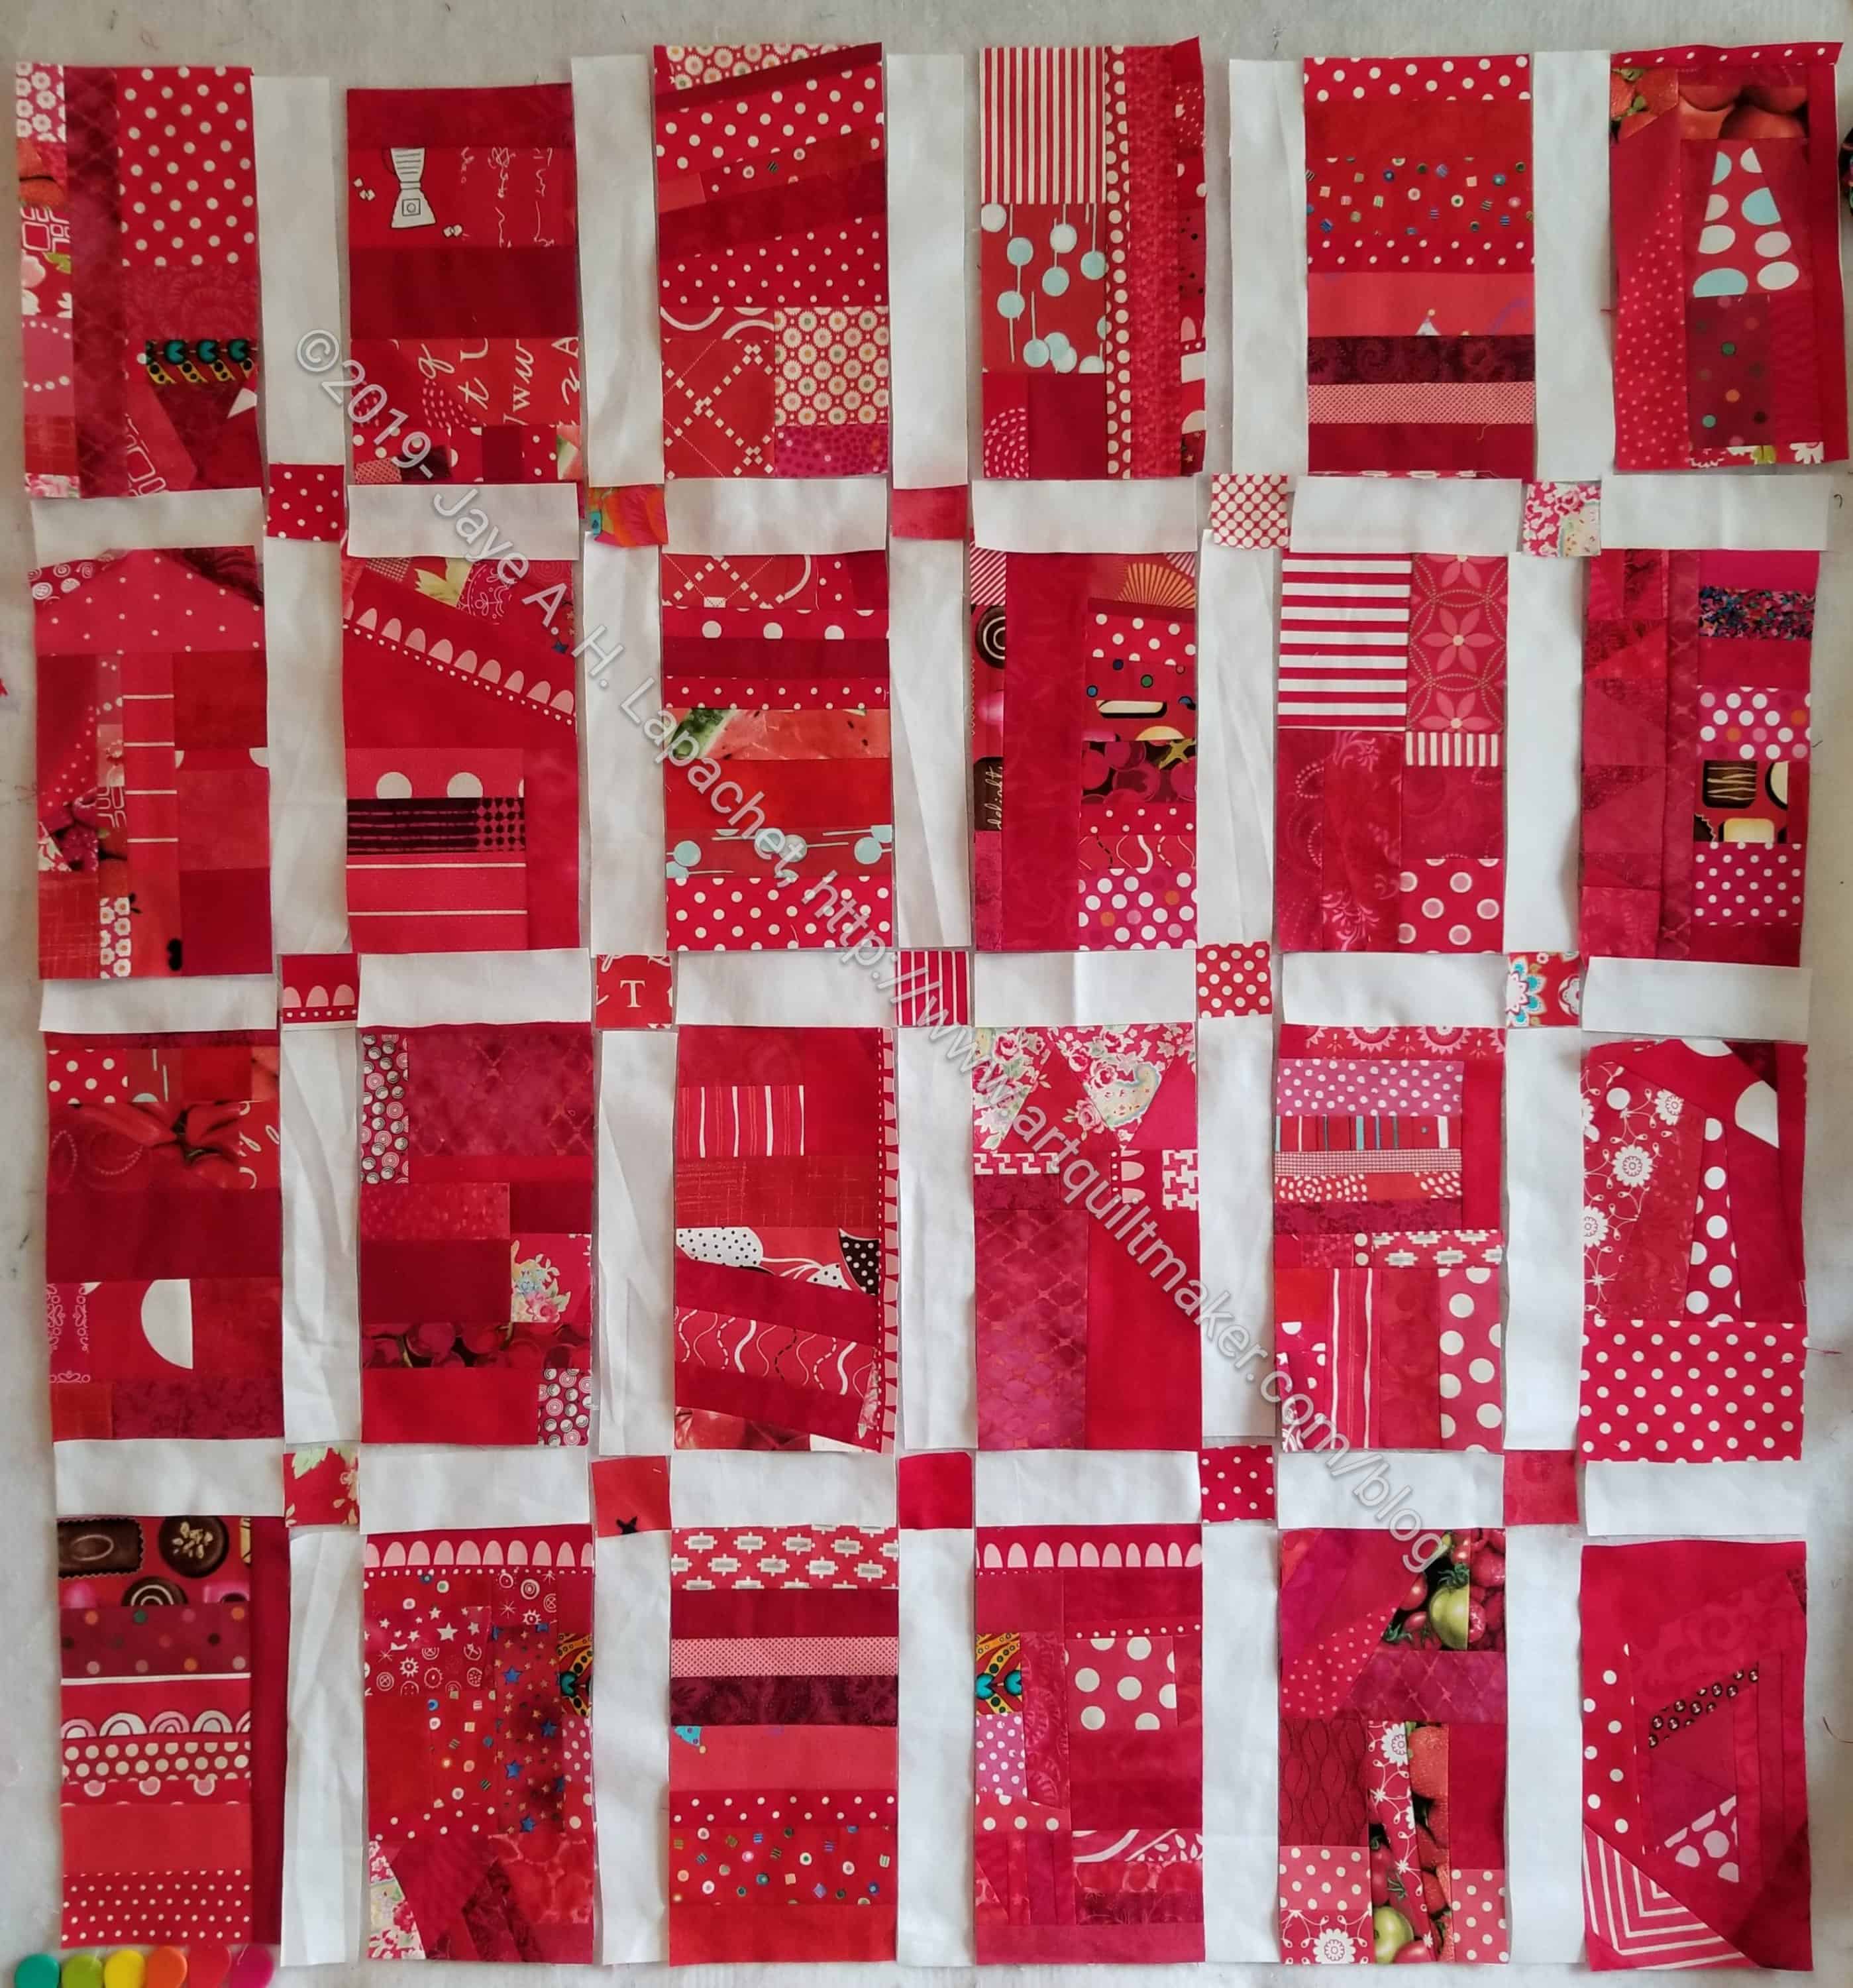
Blocks with Sashing & Cornerstones
The first step is to cut sashing and cornerstones. The photo above shows all the sashing and cornerstones cut and laid out on my design wall.
If you don’t want cornerstones, cut your top sashing the same size as your block + side sashing – 1/2 inch seam allowance (1/4 inch + 1/4 inch = half inch). The formula is:
Block size + vertical sashing – 1/2 inch seam allowance = finished size of top sashing without cornerstones
I can’t tell you the exact size, because I don’t have your blocks in front of me. Use a calculator. I do.
Also, notice that my top and side rows are different. I plan to put a straight strip of fabric across the top and sides as a border, which means I don’t need sashing for the top or sides.
Once you have all of your sashing and cornerstones cut, it is time to sew. I like to start in the bottom left hand corner. I start there because it is closer to my sewing machine when all the blocks are on my design wall. As I sew, the blocks shrink (because of the taken up seam allowance) and get closer to where I am sitting.
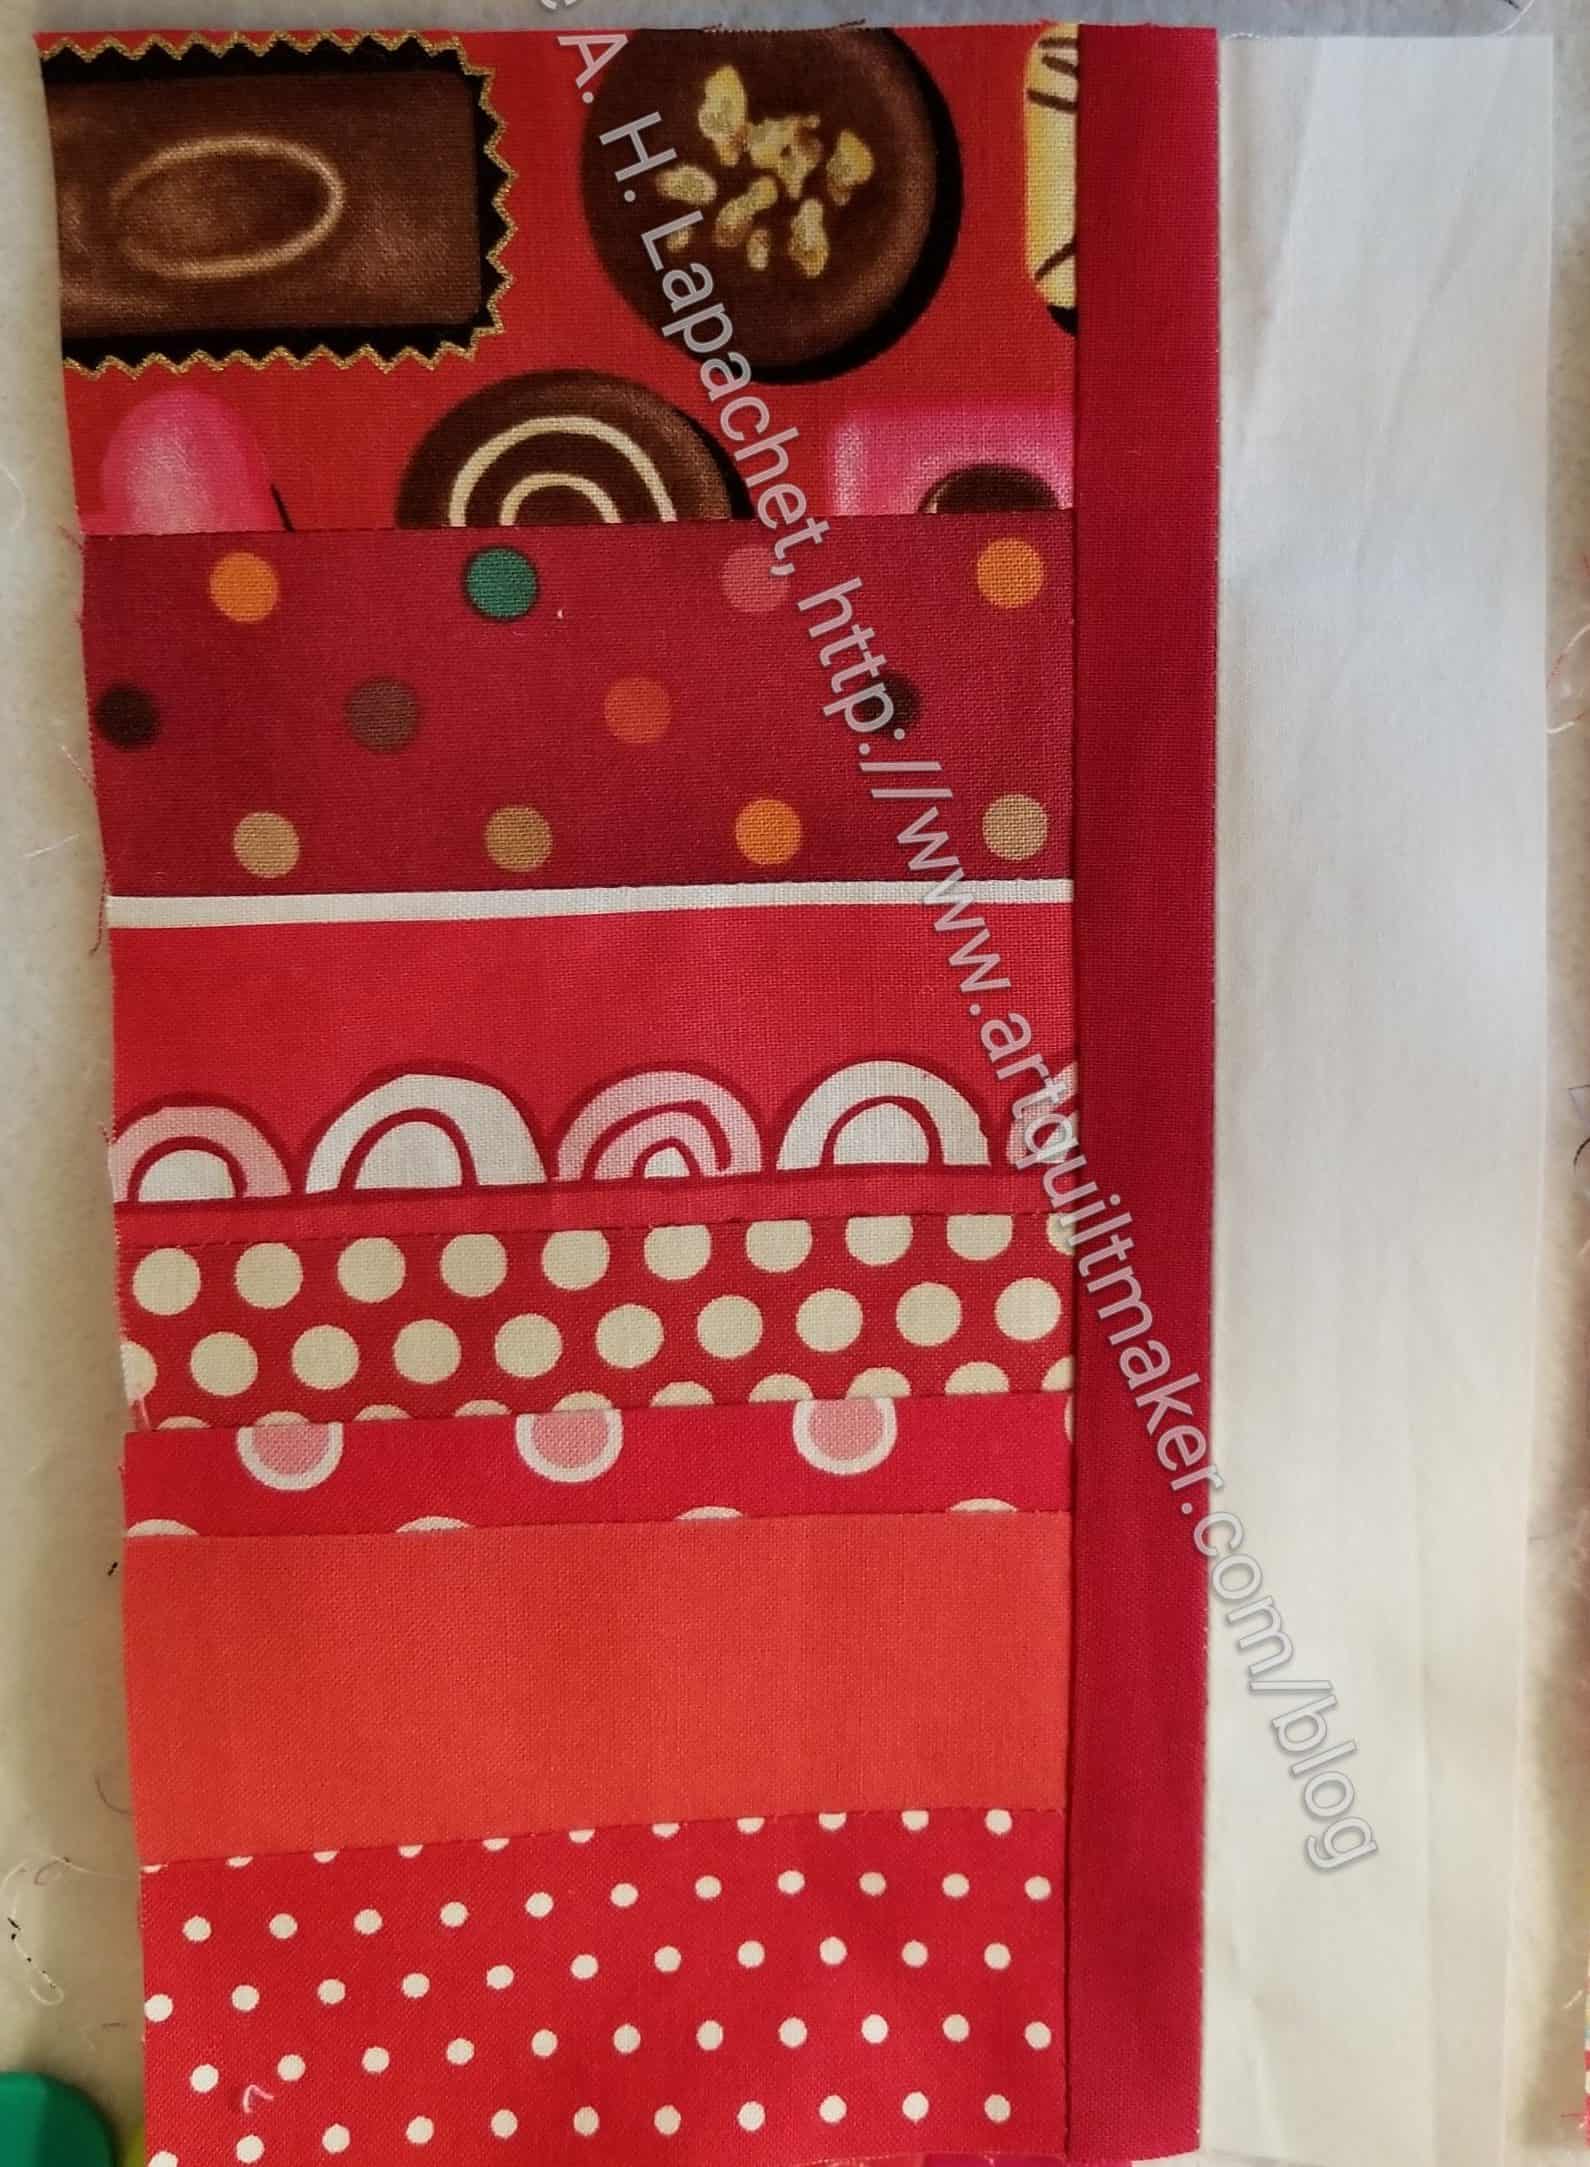
Sew vertical sashing to right side of block
First, sew one vertical sashing piece to the right side of your block.
Press to the red.
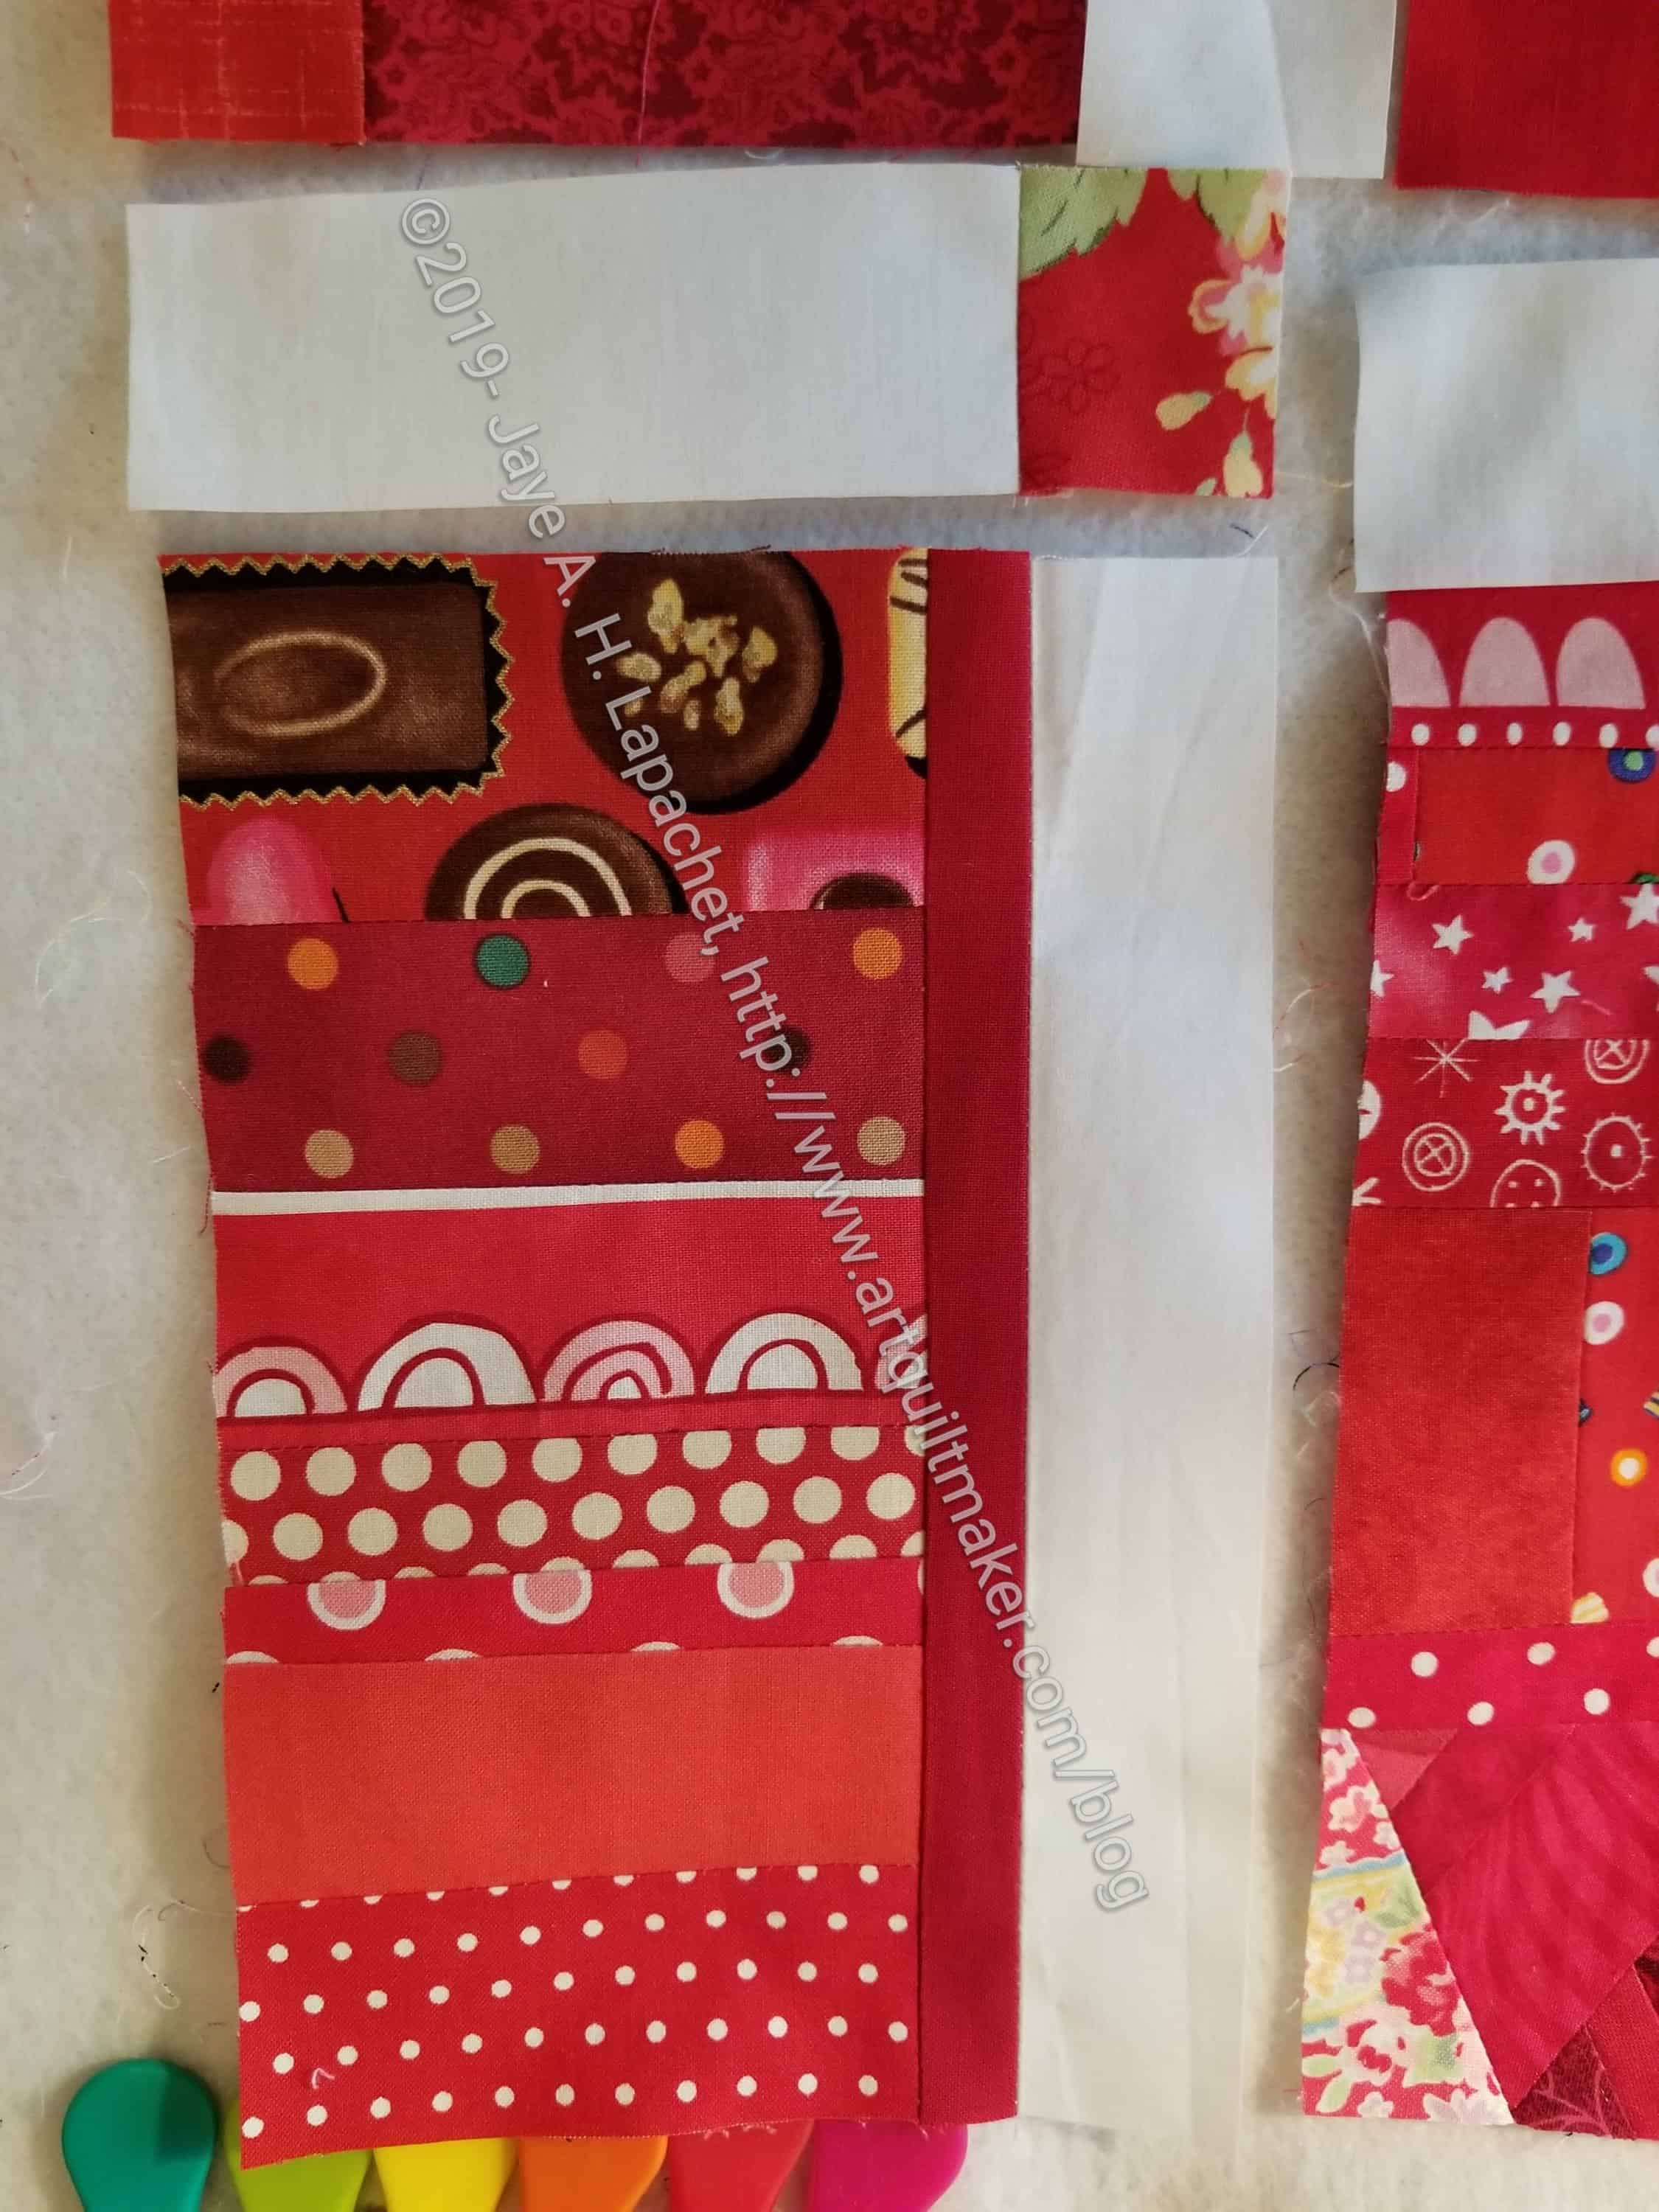
Sew top sashing to cornerstone
Next, sew one piece of the top sashing to a cornerstone. In the above photo the sashing is white and the cornerstone is a red flower fabric.
Take your new little sashing + cornerstone piece to the ironing board and press to the red.
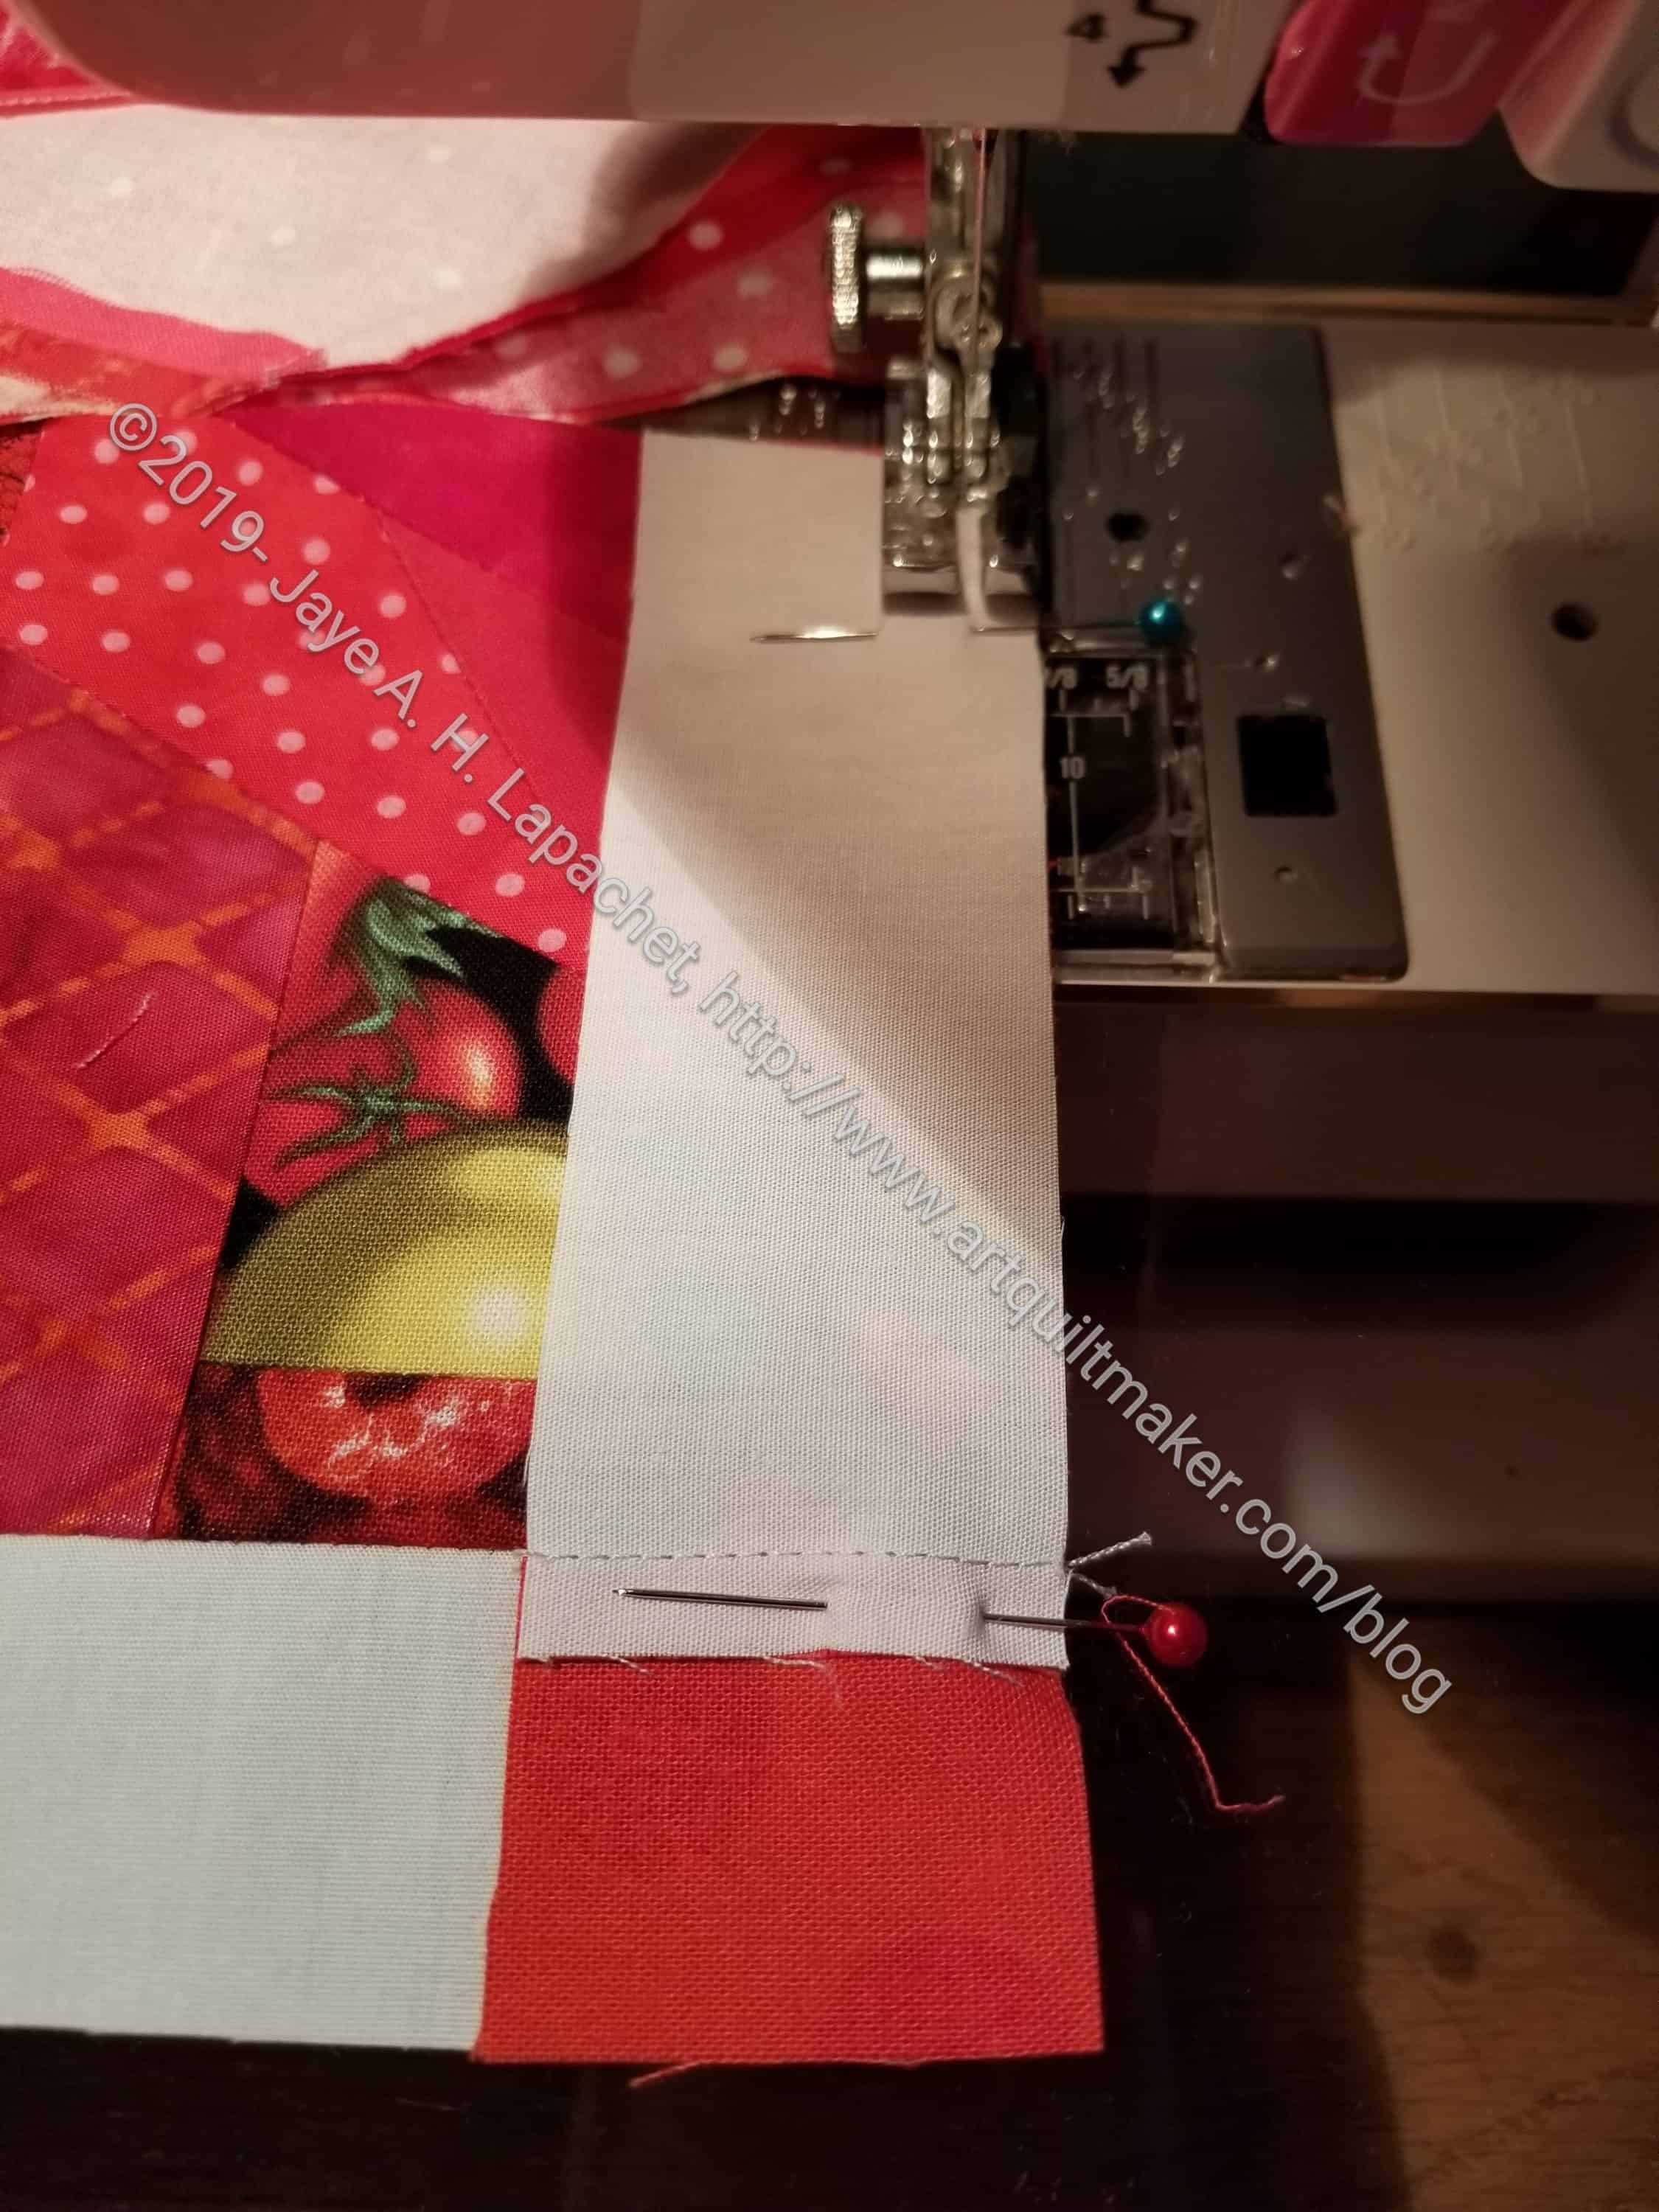
Now, nest the seams and pin the top sashing/cornerstone piece to the block with vertical sashing.
The top sashing should be on the top of the block as it moves through the sewing machine. Sew the top sashing to the block.
Top sashing sewn to block with vertical sashing
Sew the side sashing and the top sashing/cornerstone to all the blocks as described above.
IMPORTANT: The top row, as mentioned above, in my quilt, is different, so just sew the vertical sashing to the blocks in the top row and the top sashing to the blocks on the right edge.
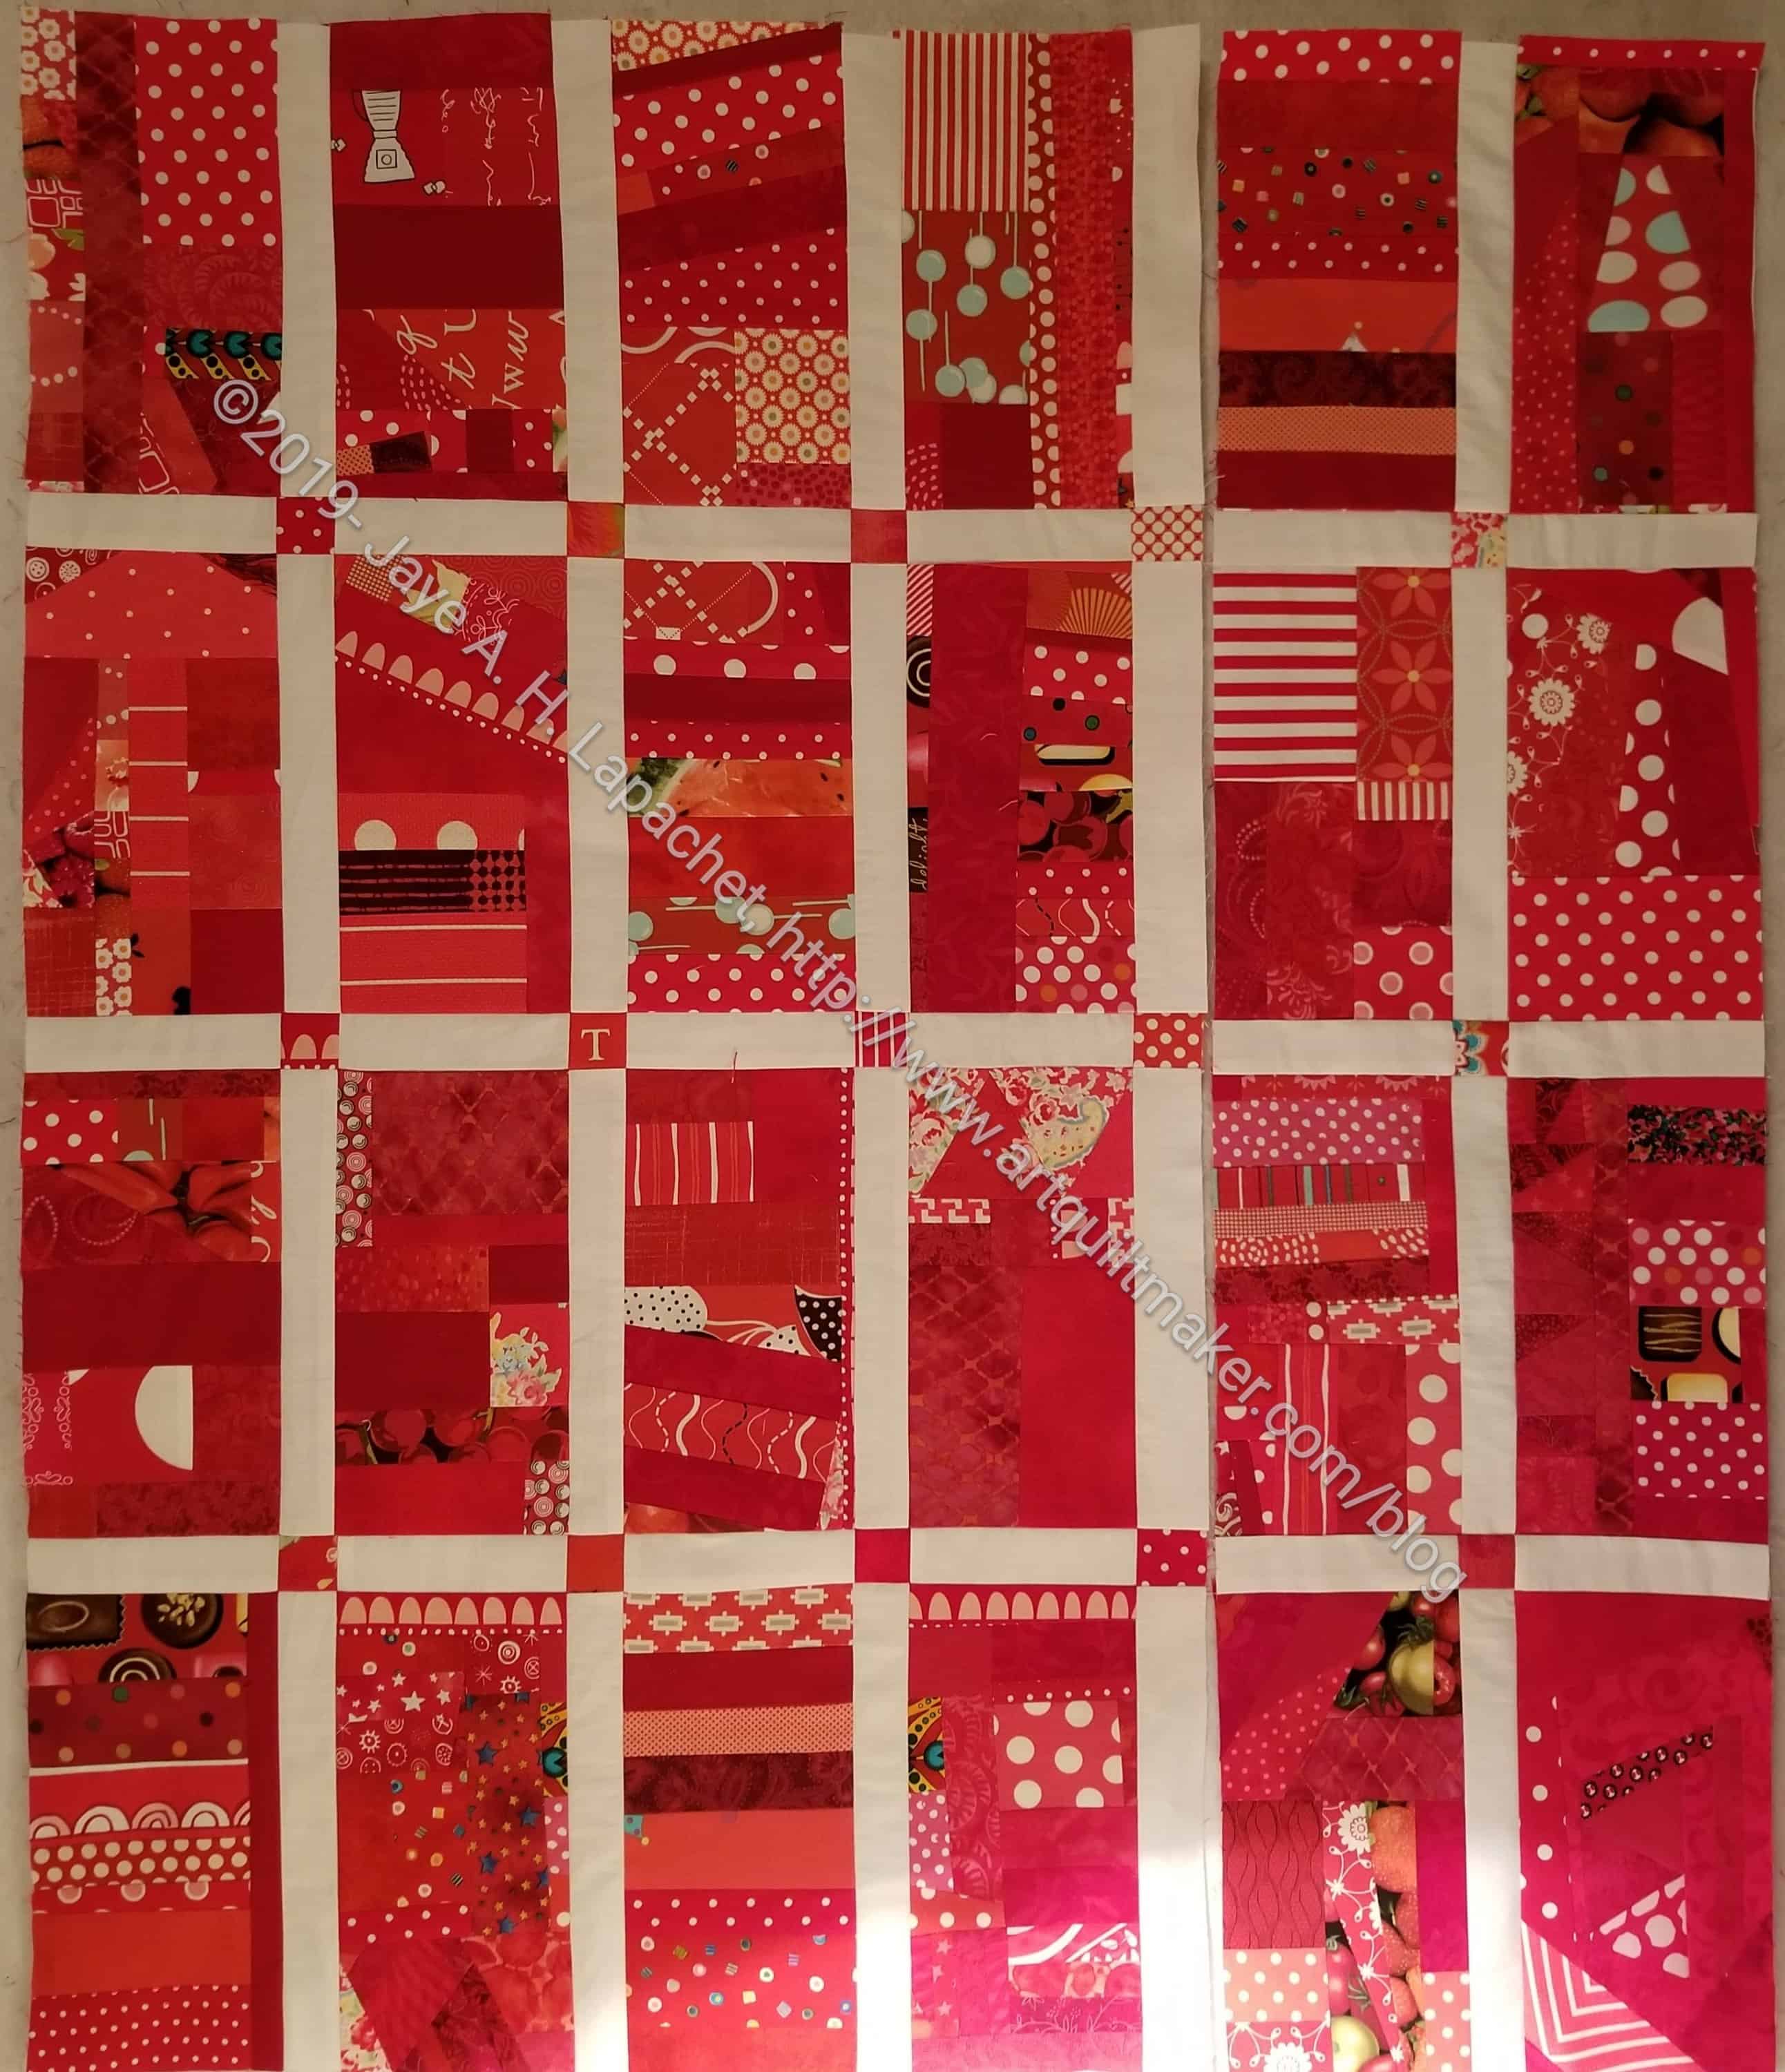
All of the blocks have sashing/cornerstones sewn to their correct side
Once you have sewn all the sashing on to the blocks, you will begin to sew the blocks together. This is chunking. I have talked about it before. I ‘chunk’ because 1) I don’t like sewing long rows together and 2) it keeps my piecing more precise.
Take two blocks with sashing & sew them togetherPin blocks together, matching seams and sew
First take the two blocks in the bottom left hand corner, pin them with matched points and nested seams. You will pin them together so that the top white sashing is sewn to the red cornerstone. The white vertical sashing will be sewn to the red block.
Sew them together. I pin in the seam allowance so that i have a better chance at the seams matching up. When I take the pins out as I am sewing, chances increase that the seams won’t match. In general, to increase my chances of perfectly matching seams, I try to sew towards the seam allowance, but that didn’t work on this quilt, because I pressed towards the red. Use a stiletto to keep the seams in place for as long as possible.
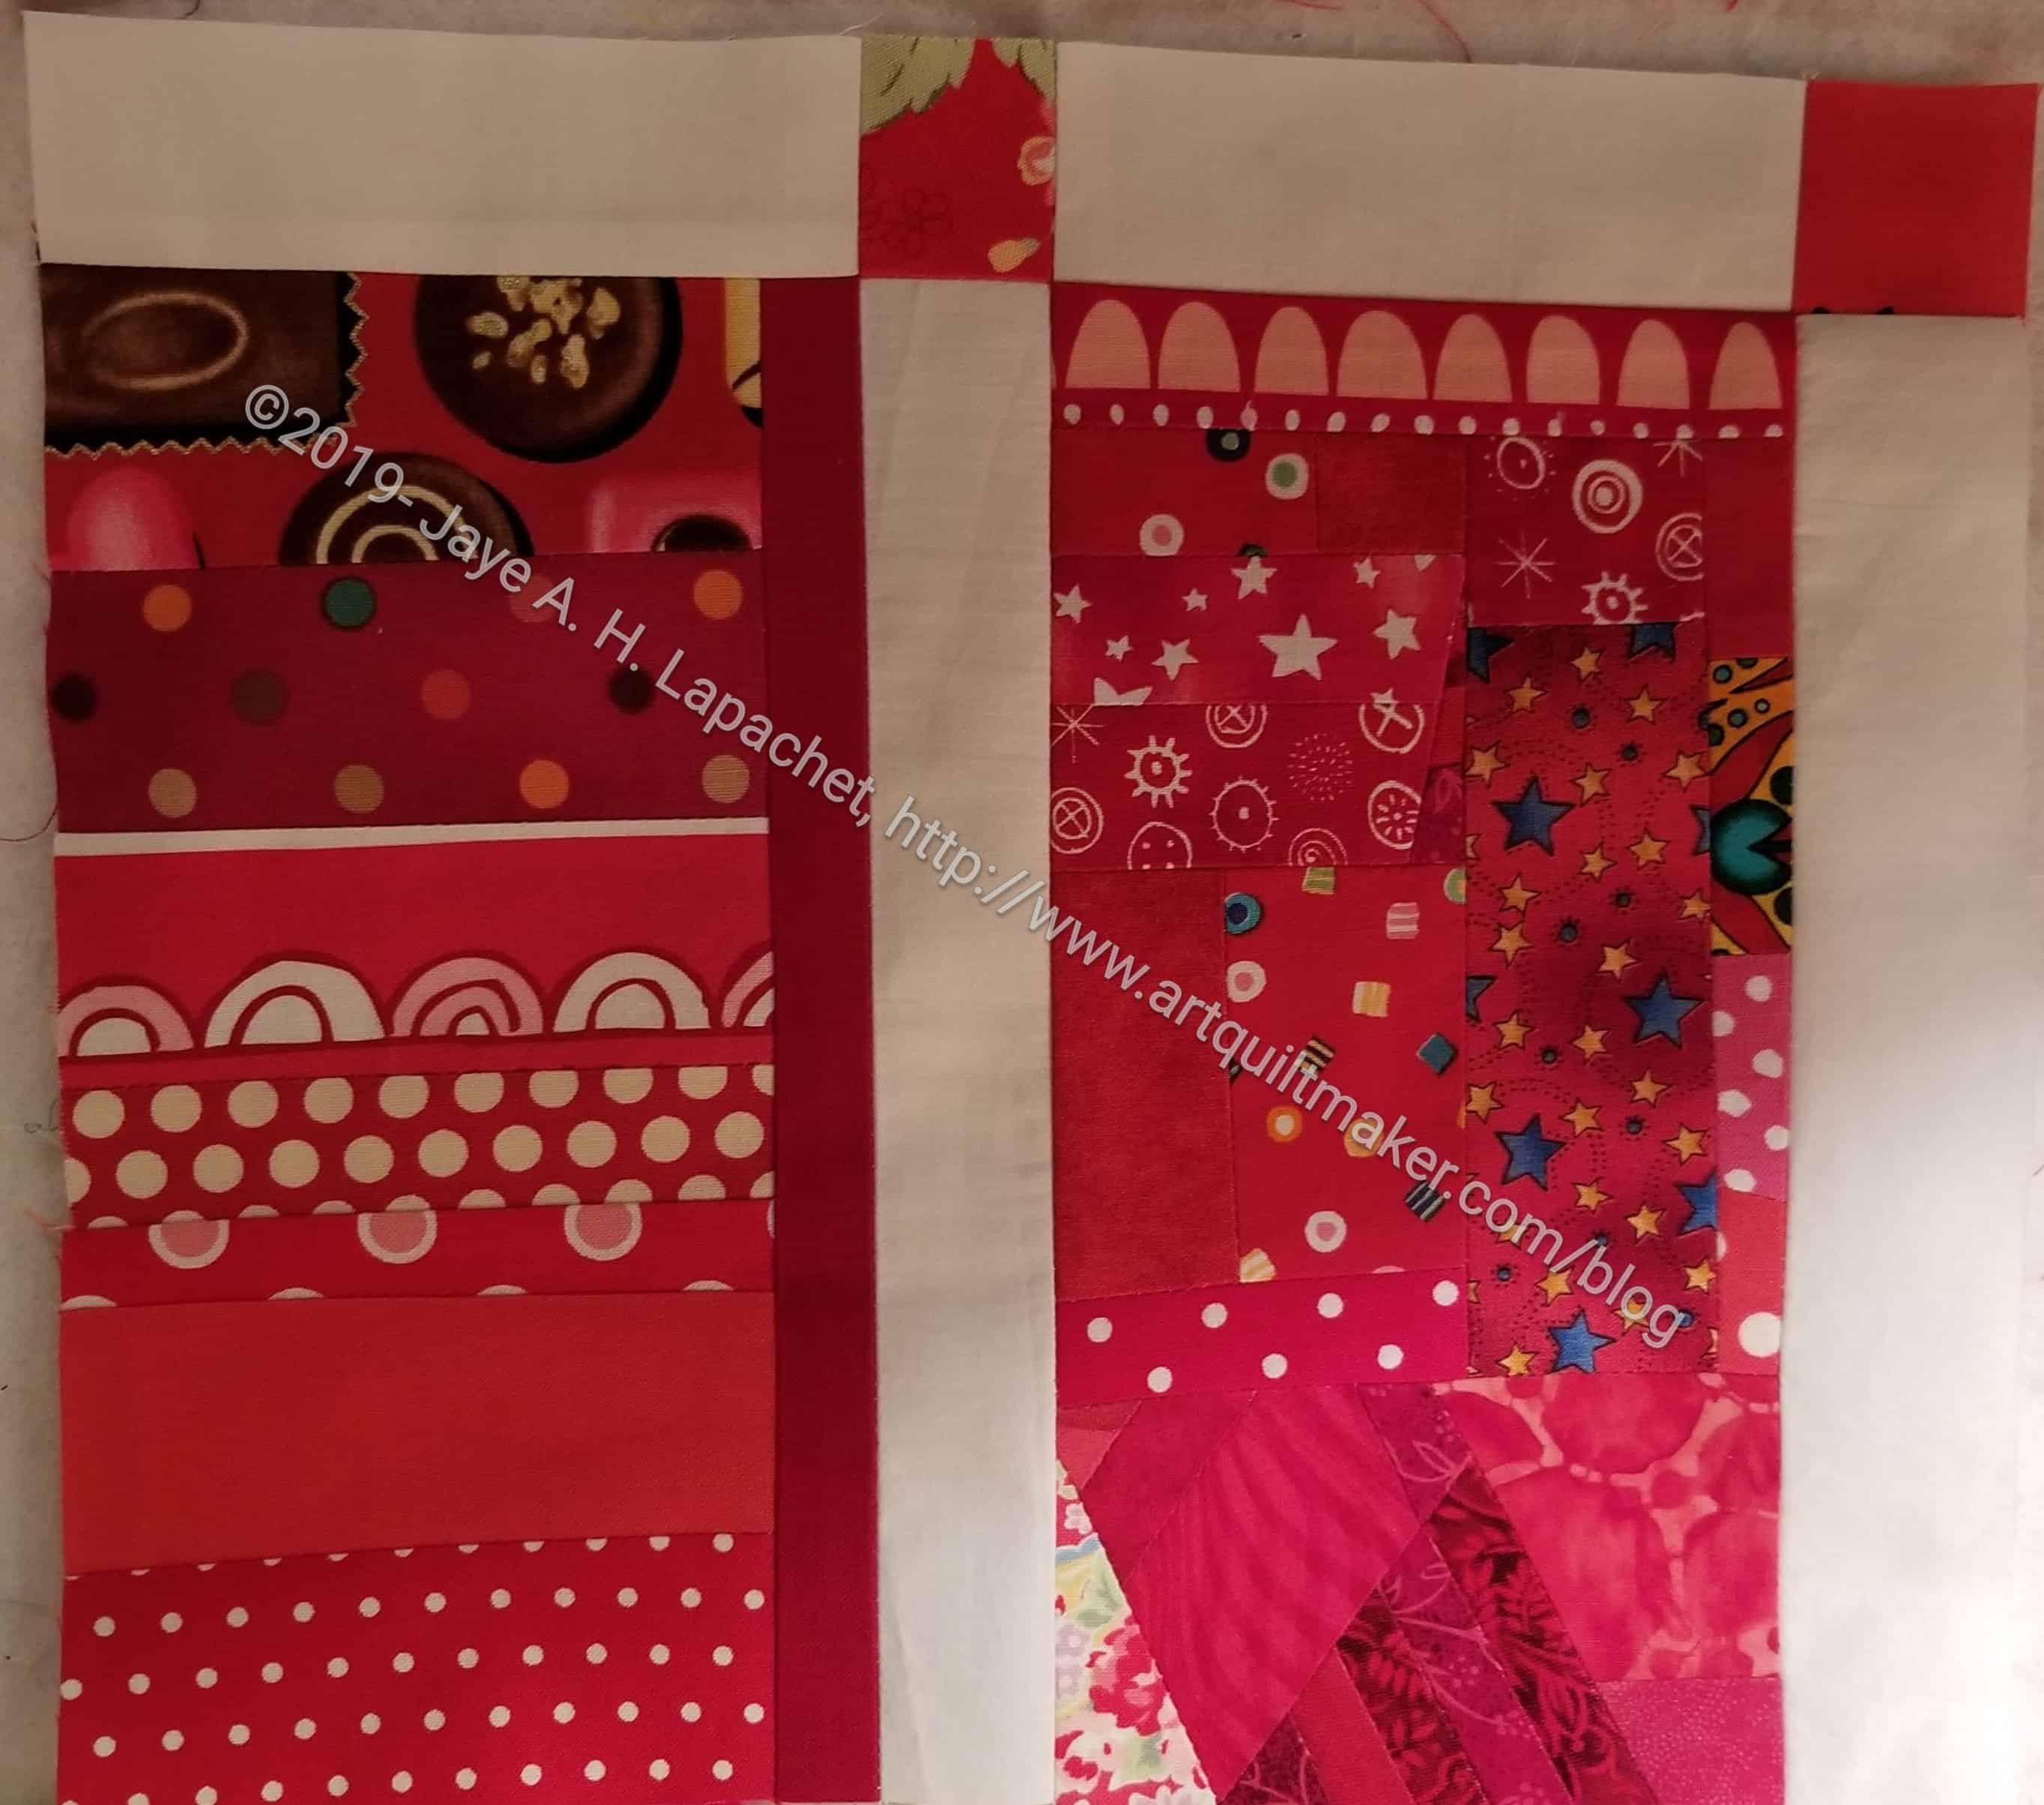
Two blocks with sashing sewn together
Now you have a block with sashing on two sides.
Once you have sewn all of the sashing and cornerstones to the blocks, you will have completed the first step in putting your quilt top together.
Sew sashing to top of blocks on the right edge only
On the right edge of the quilt, you will only sew the top sashing to the blocks. As mentioned before, there will be a border without cornerstones in my quilt, so I don’t need vertical sashing or cornerstones on the edges. If you want cornerstones in your border, follow the directions above for all blocks.
One long seam left
After you have sewn the various blocks together, you will have one long seam left.
Finished Center with sashing
Once you sew that seam, the center of your quilt top is done.
I know that the common way of sewing a quilt together is sewing it together in rows then sewing all the rows together. Using the row method is easier to explain than ‘chunking’, but, as I said above, my method is more precise.
**I use affiliate links and may be paid for your purchase of an item when you click on an item link in my post. There is no additional cost to you for clicking or purchasing items I recommend. I appreciate your clicks and purchases as it helps support this blog.
After writing the Spiky 16 Patch Tutorial I decided to try adding another round of HRTs to my regular block to see what would happen.
I am still using the Split Rects ruler** (By Deb Tucker) from Studio180 Designs for this project, so you will still need to review the how to use video.
Double Spiky 16 Patch in process
The photo looks like a bit of a mess because the pieces are all overlapping and I need two more HRTs for each block.
I have a lot going on and this has been my leaders and enders project, so I haven’t worked on it in a week or so.
Double Spiky 16 Patch in process detail
I like the look of the double row of HRTs. The outer HRTs are pretty large!
I am not sure if I will make more of these blocks for this project, whatever it is. If it is a donation quilt, I have to make it larger
**I use affiliate links and may be paid for your purchase of an item when you click on an item link in my post. There is no additional cost to you for clicking or purchasing items I recommend. I appreciate your clicks and purchases as it helps support this blog.
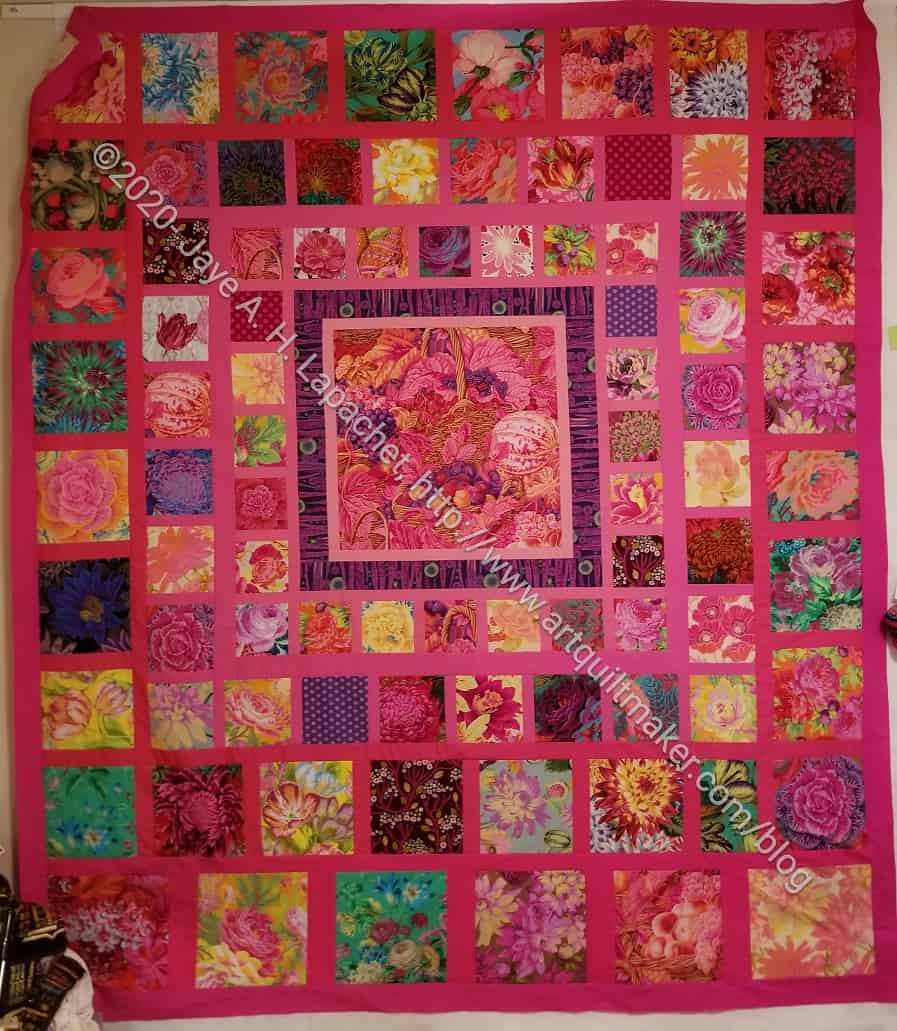
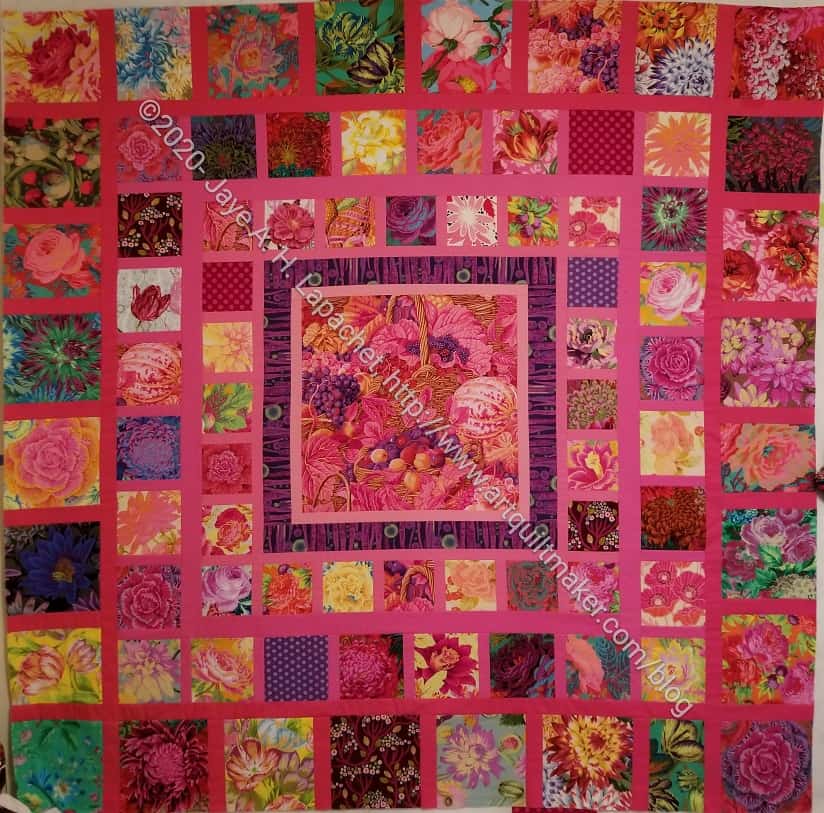
I really want to call this quilt something like “My Childhood Bedroom”, but the “Pink Kaffe Quilt” seems to be sticking as the name.
Pink Kaffe Quilt through border 8
I made more progress over the weekend, but wasn’t able to finish the top. I tried, but had some measuring issues. While I worked them out, it took longer than just sewing some long seams.
Still, the top is looking nice and, as an added bonus, it sticks really well to my design wall.
I am really enjoying this quilt. When I talked about it after I started cutting, I was happy. This quilt is just a joy to work on. I don’t know why for sure. The only thing I can think of is that I love all the fabric.
Pink is not a great color for my decor or for an adult woman, but I love pink anyway. I am thinking of this quilt as a complete indulgence in my love for pink and Philip Jacobs flowers. I am not worrying about how it doesn’t fit in with my home decor. I am really loving selecting and fussy cutting the flowers, getting reacquainted with some of my Philip Jacobs fabric and using fabulous solids.
I know I talked about my plans a month or so ago, but hadn’t started it yet. After thinking about this quilt for awhile, I finally started it and it is making me super happy.
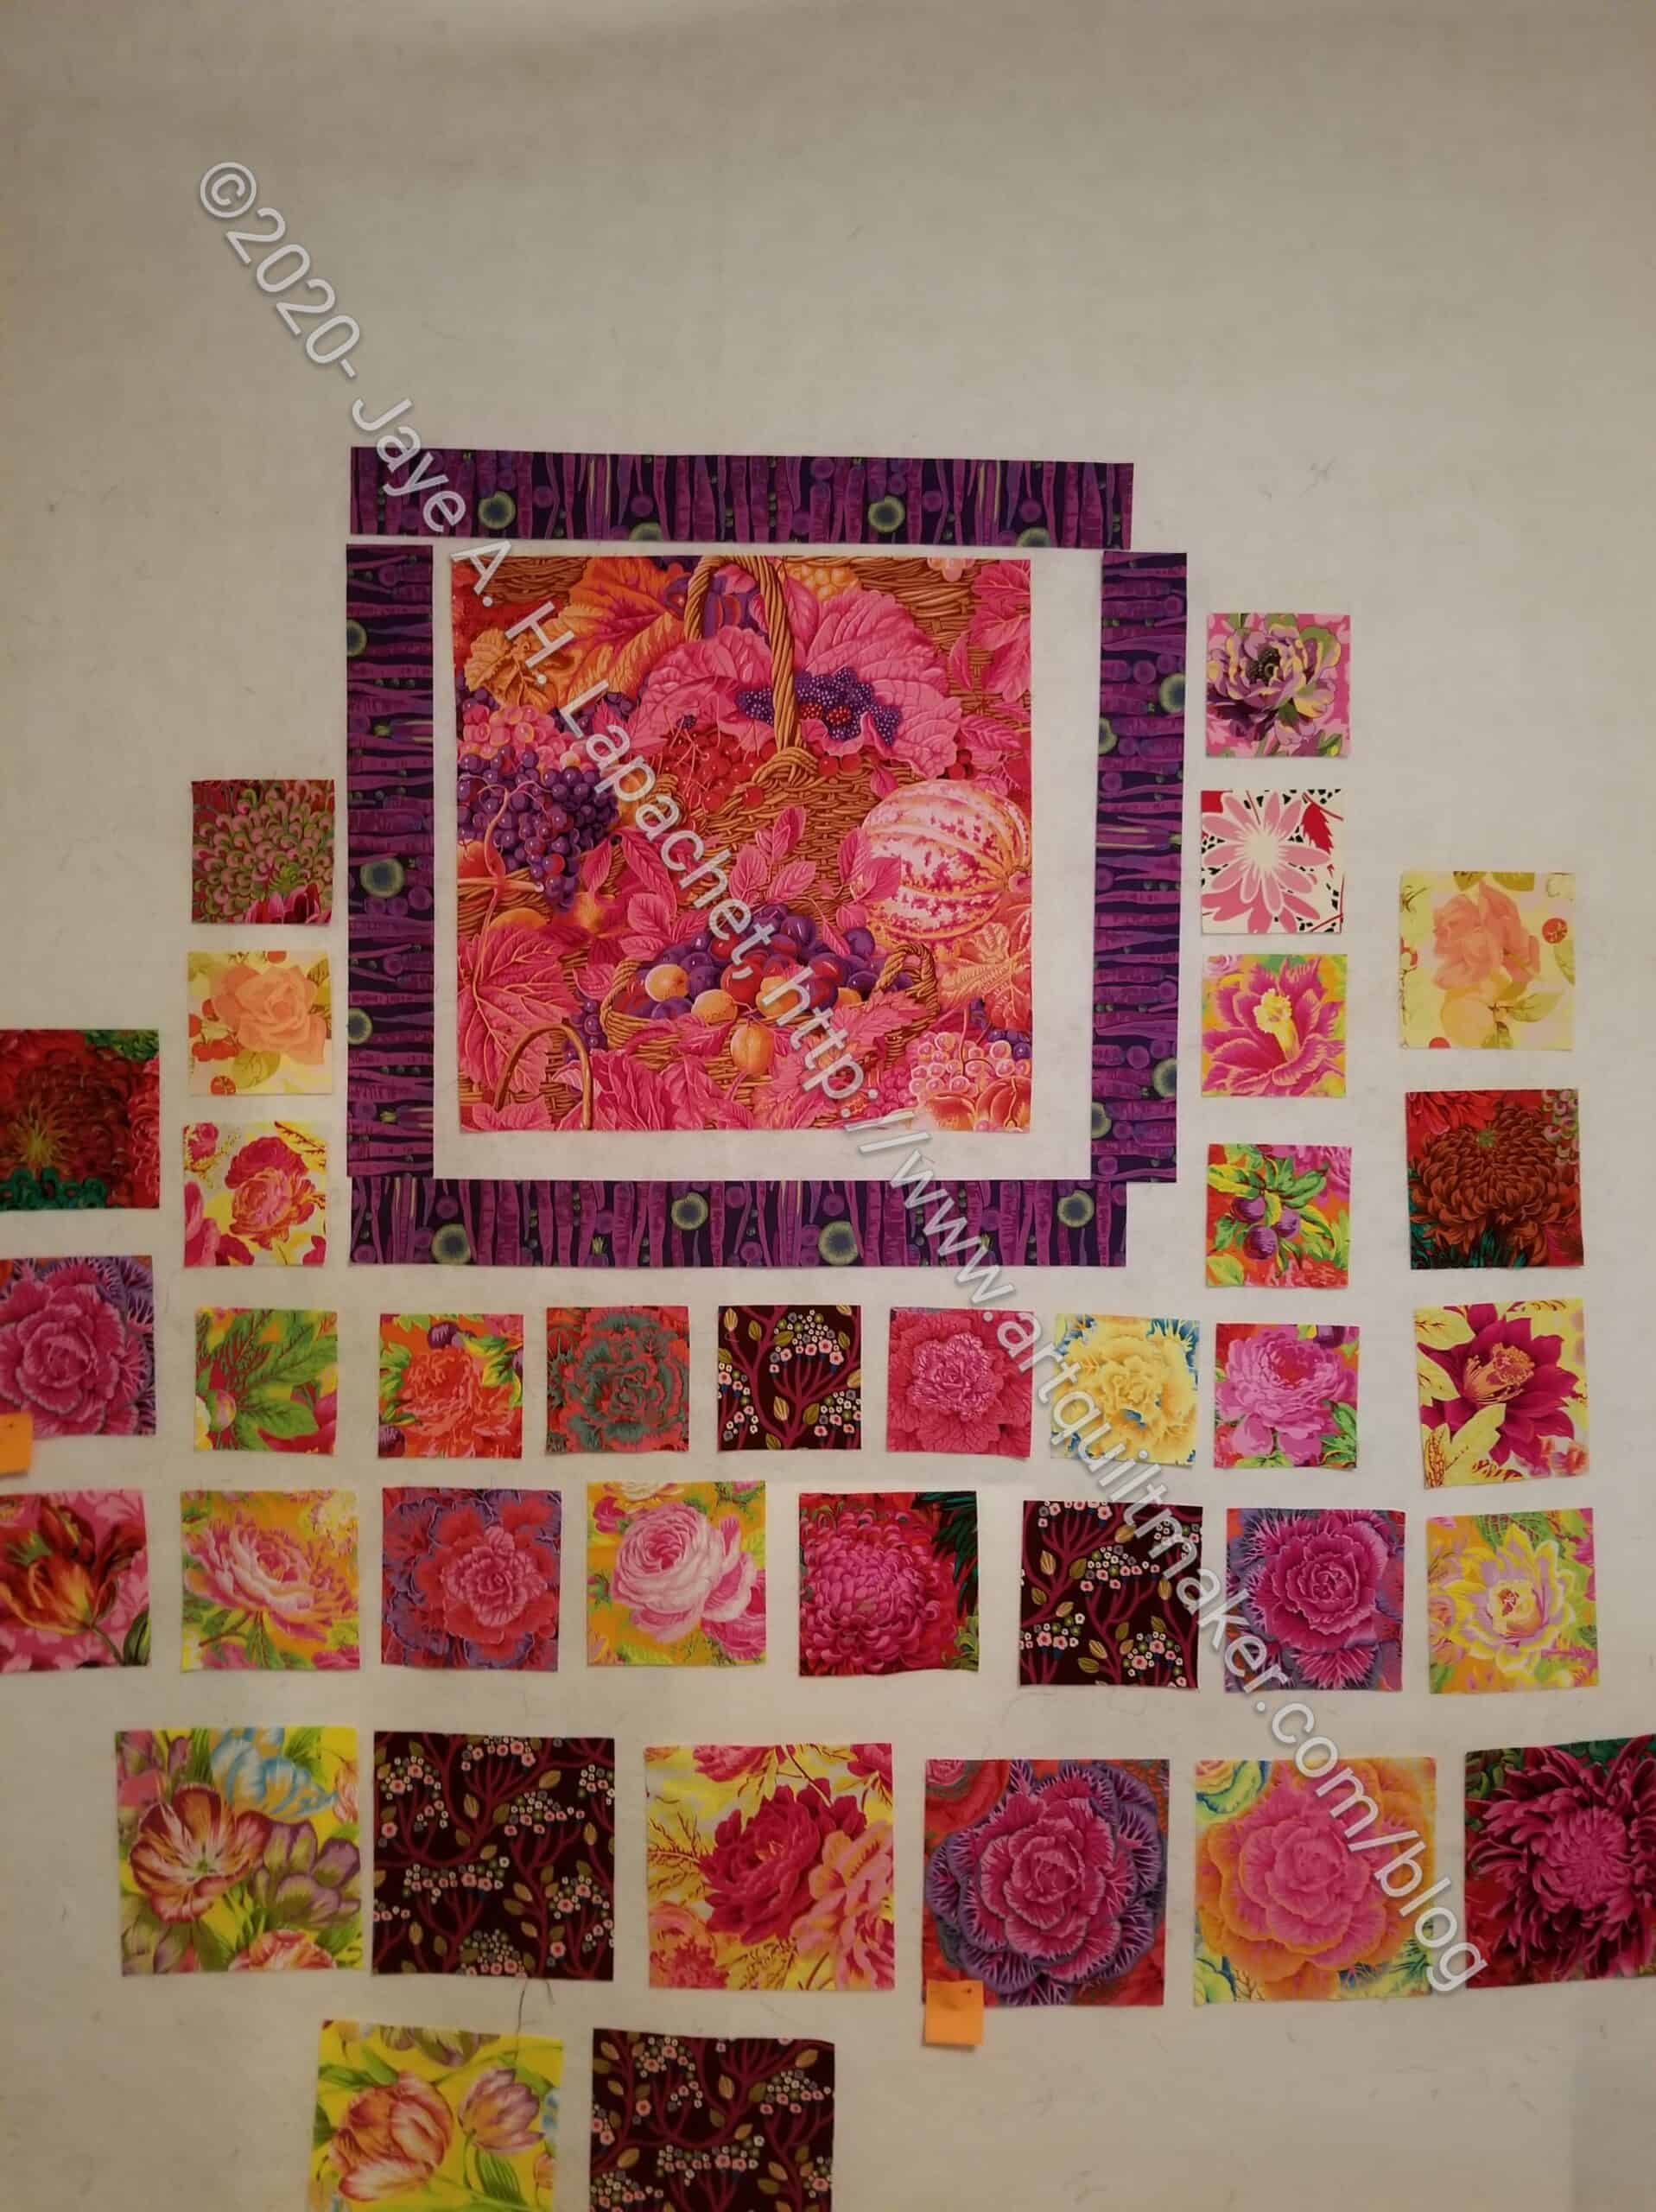
I am following the directions in Kaffe’s book, Quilts in the Cotswolds**. However, I am not using many of the fabrics he suggests. I am pulling out the Philip Jacobs fabrics I have stashed for awhile and have not yet used for backs. I am fussy cutting flowers from them and arranging them in a pleasing way. I have also used, so far, one Anna Maria Horner print and one Martha Negley print. I’ll probably had more different prints. The flowers are by no means in their final location. I want to spread them out so the pinks are not all together. For now I am placing them in the order I cut them so I can easily count them.
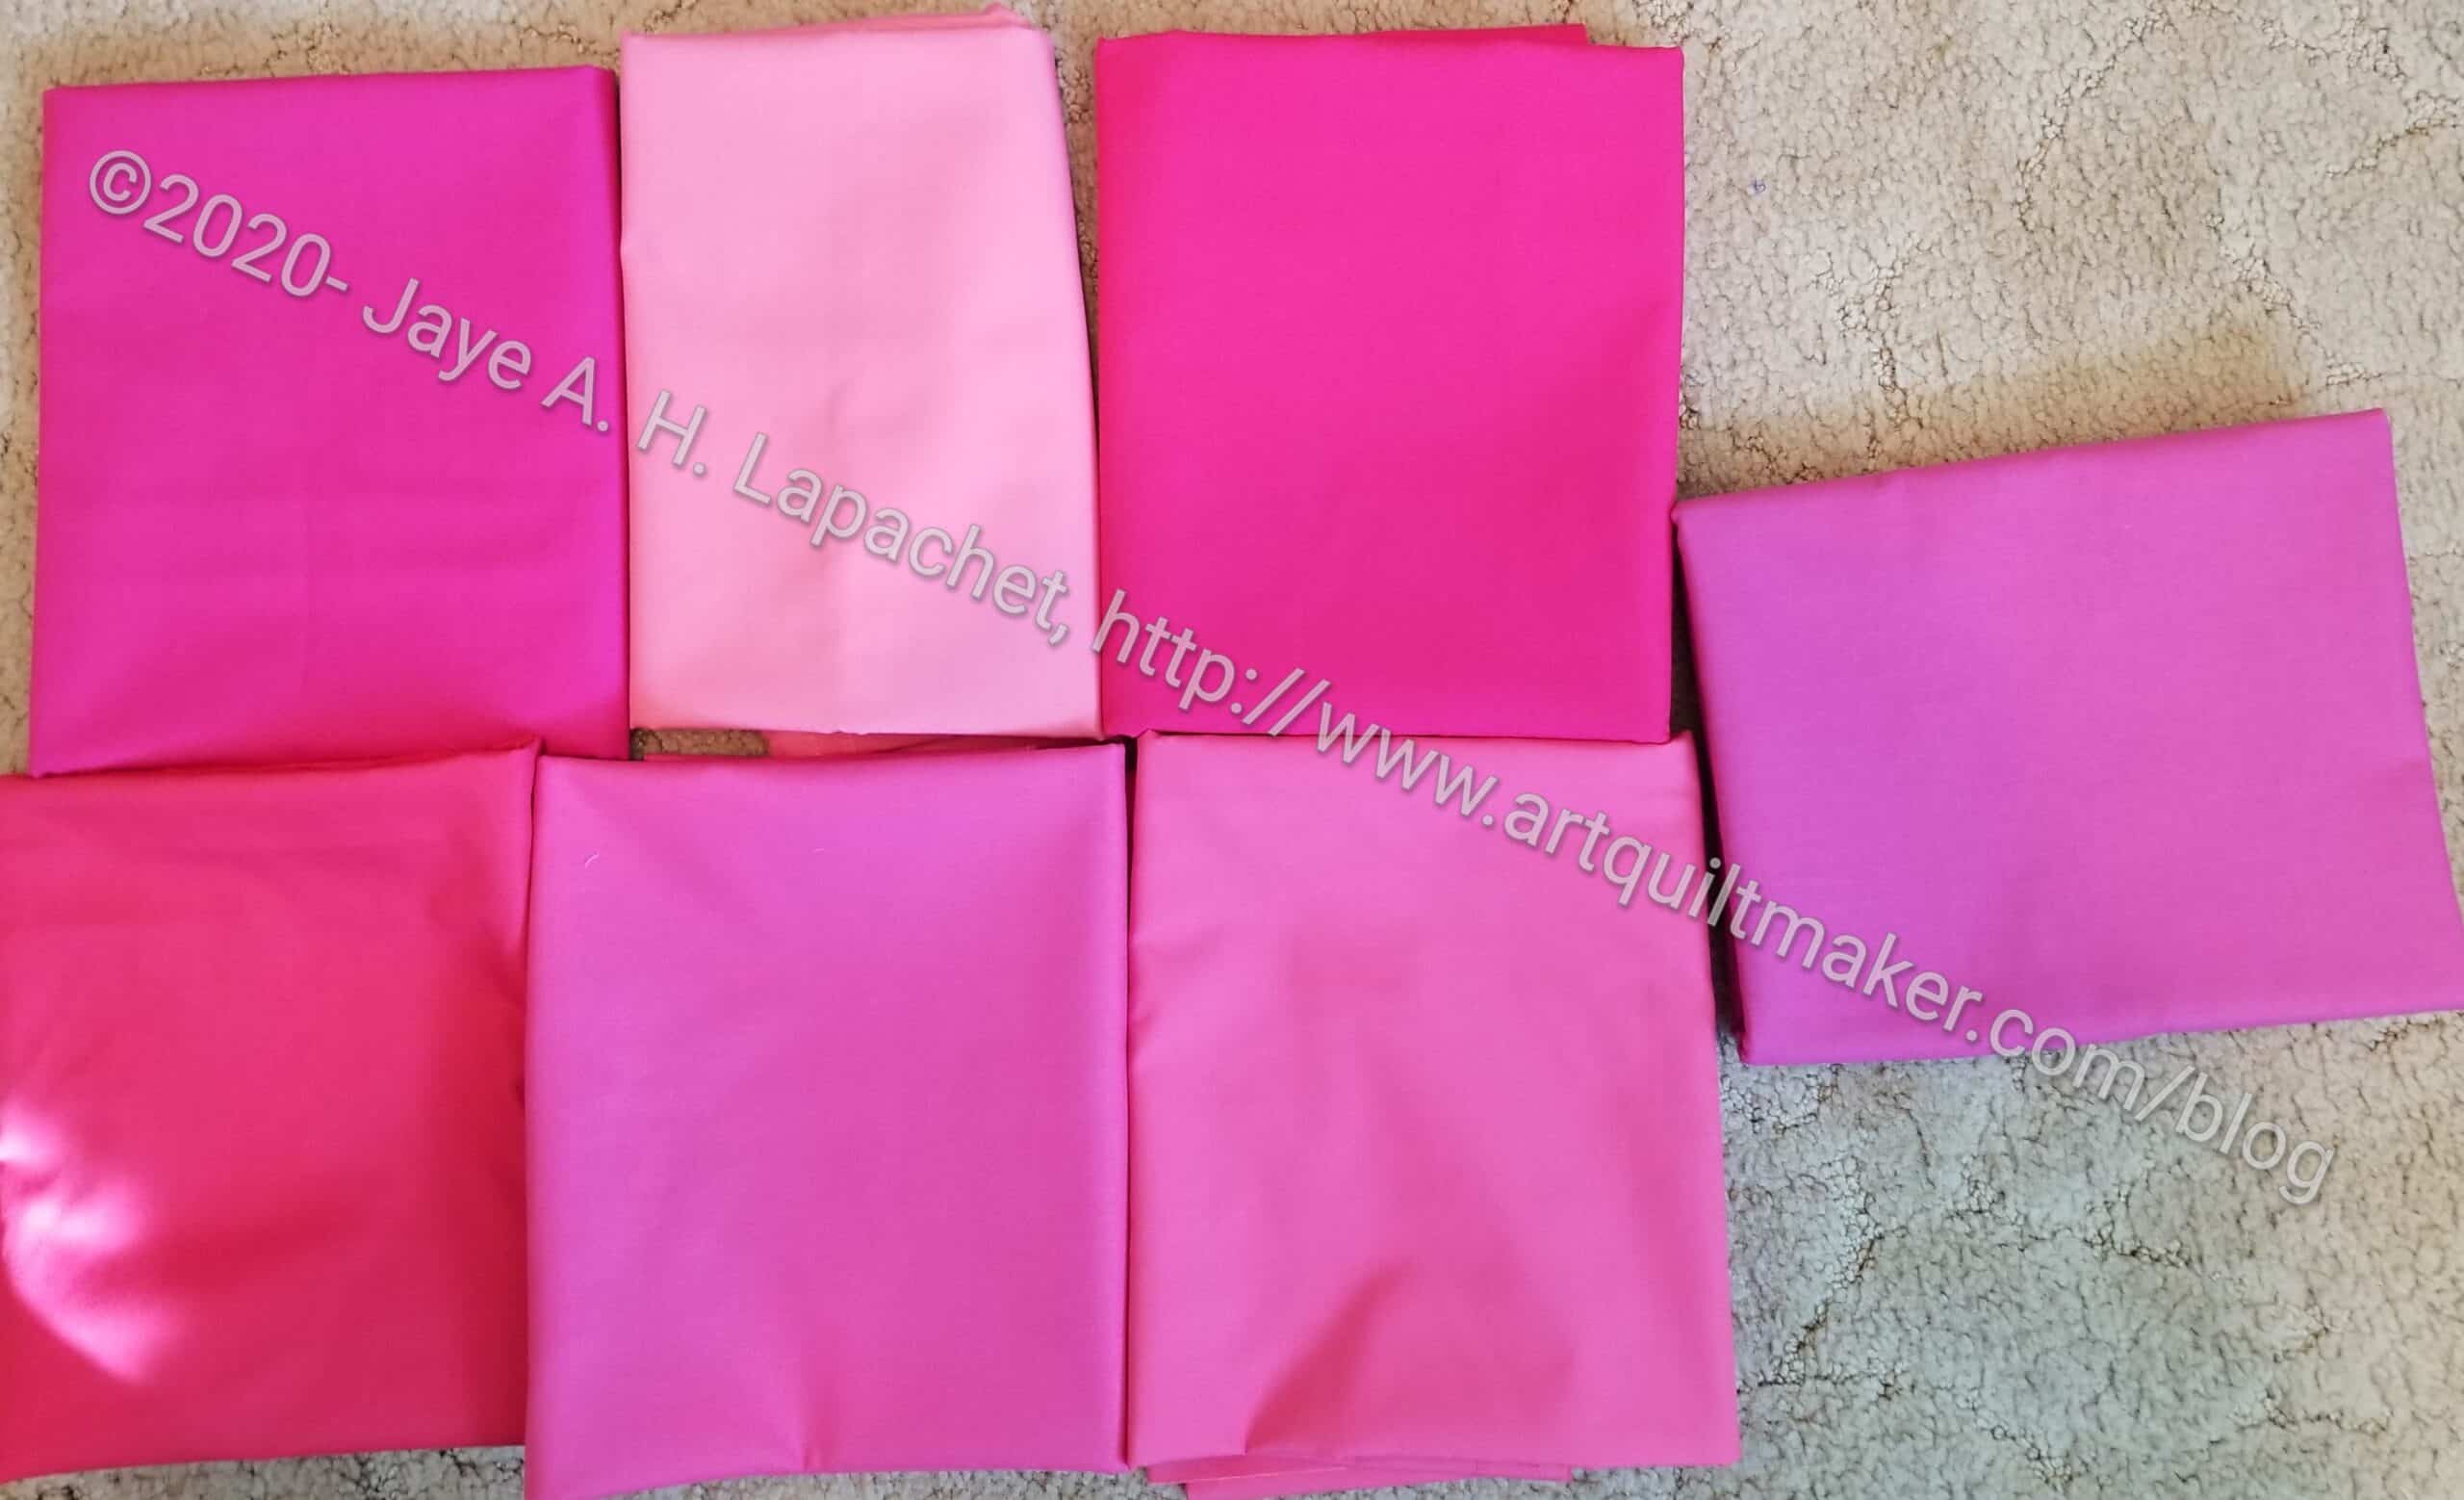
Stash Fabrics Art Gallery solids
For the sashing, I am using solids I recently purchased from Stash Fabrics. I plan to arrange them in gradation order and use a different solid for each section, gradating out from light to dark.
Every day I have been spending a little time cutting. I may need to sew some pieces and parts together to gain space on my design wall, but that is a decision for another day. In the meantime I am enjoying showcasing the beautiful flowers.
**I use affiliate links and may be paid for your purchase of an item when you click on an item link in my post. There is no additional cost to you for clicking or purchasing items I recommend. I appreciate your clicks and purchases as it helps support this blog.
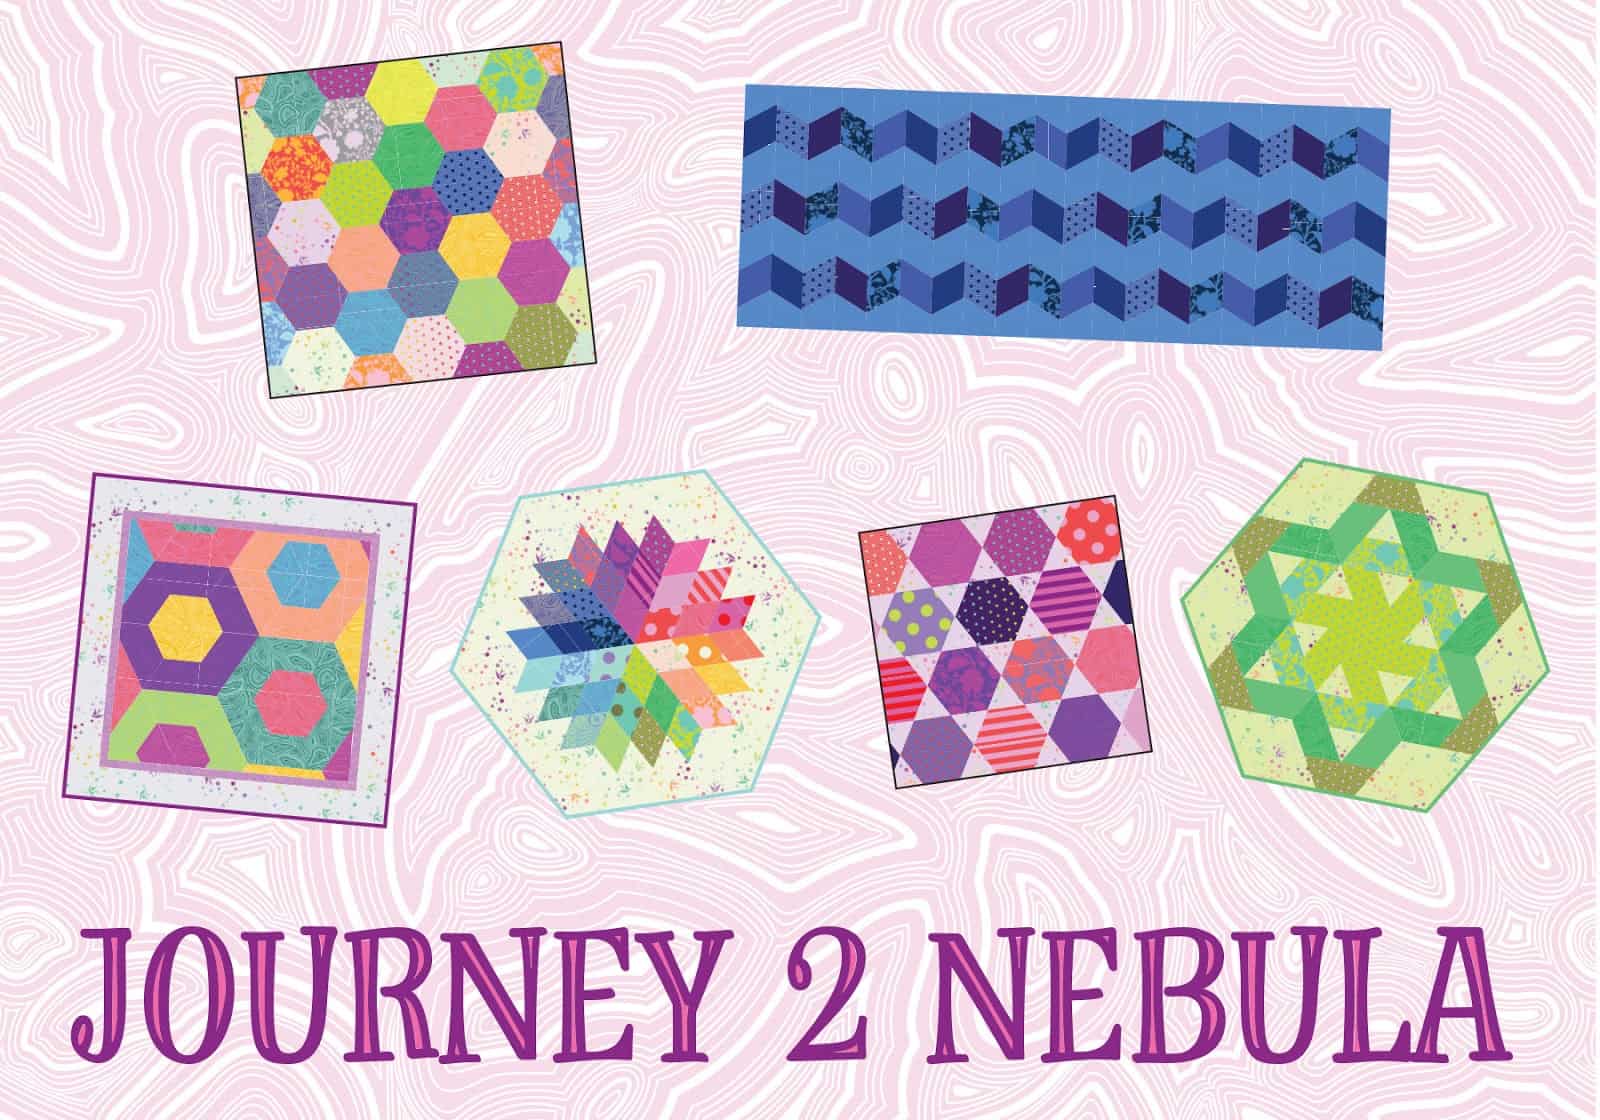
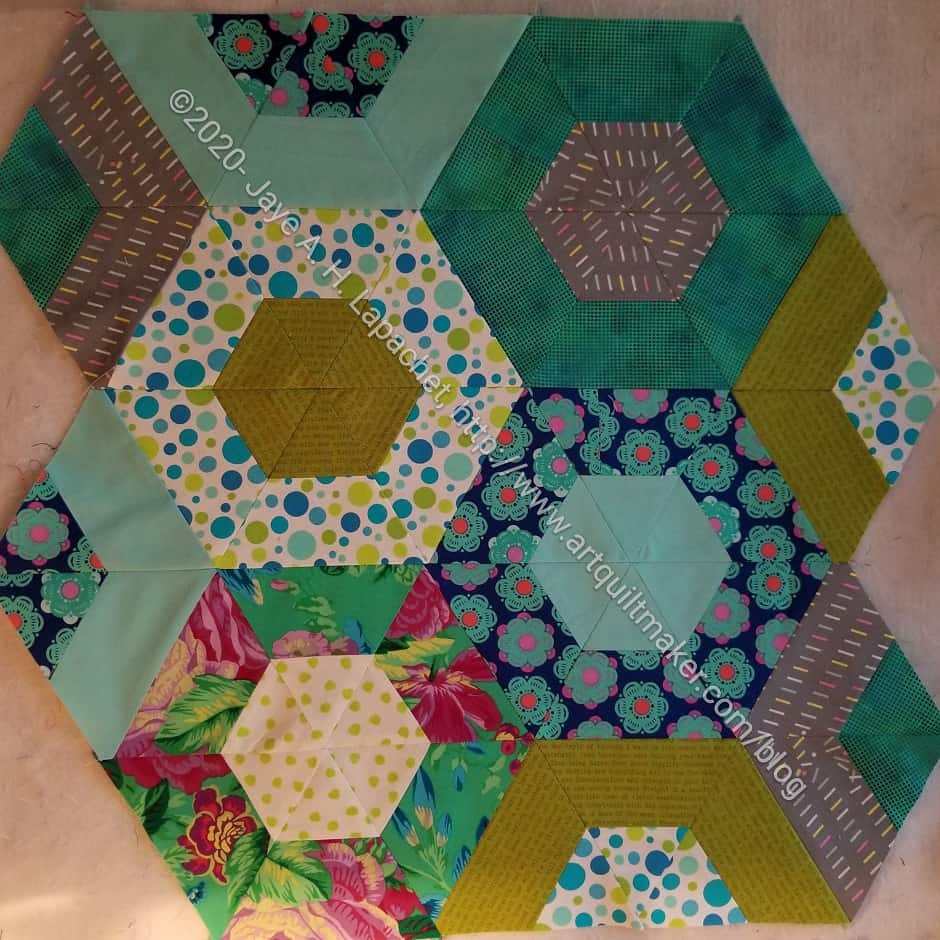
The last Journey 2 Nebula project (except for the bonus project, which I am not doing) is Gazebo. I sort of did the whole project in order to do this one for myself. By the time I finished Candy Dish, I was kind of sick of the whole thing. All of the projects were well received by their recipients, was a relief. I don’t know what my problem was. I enjoyed it until December-ish.
I think life ended up overwhelming me. Big surprise since it was December!
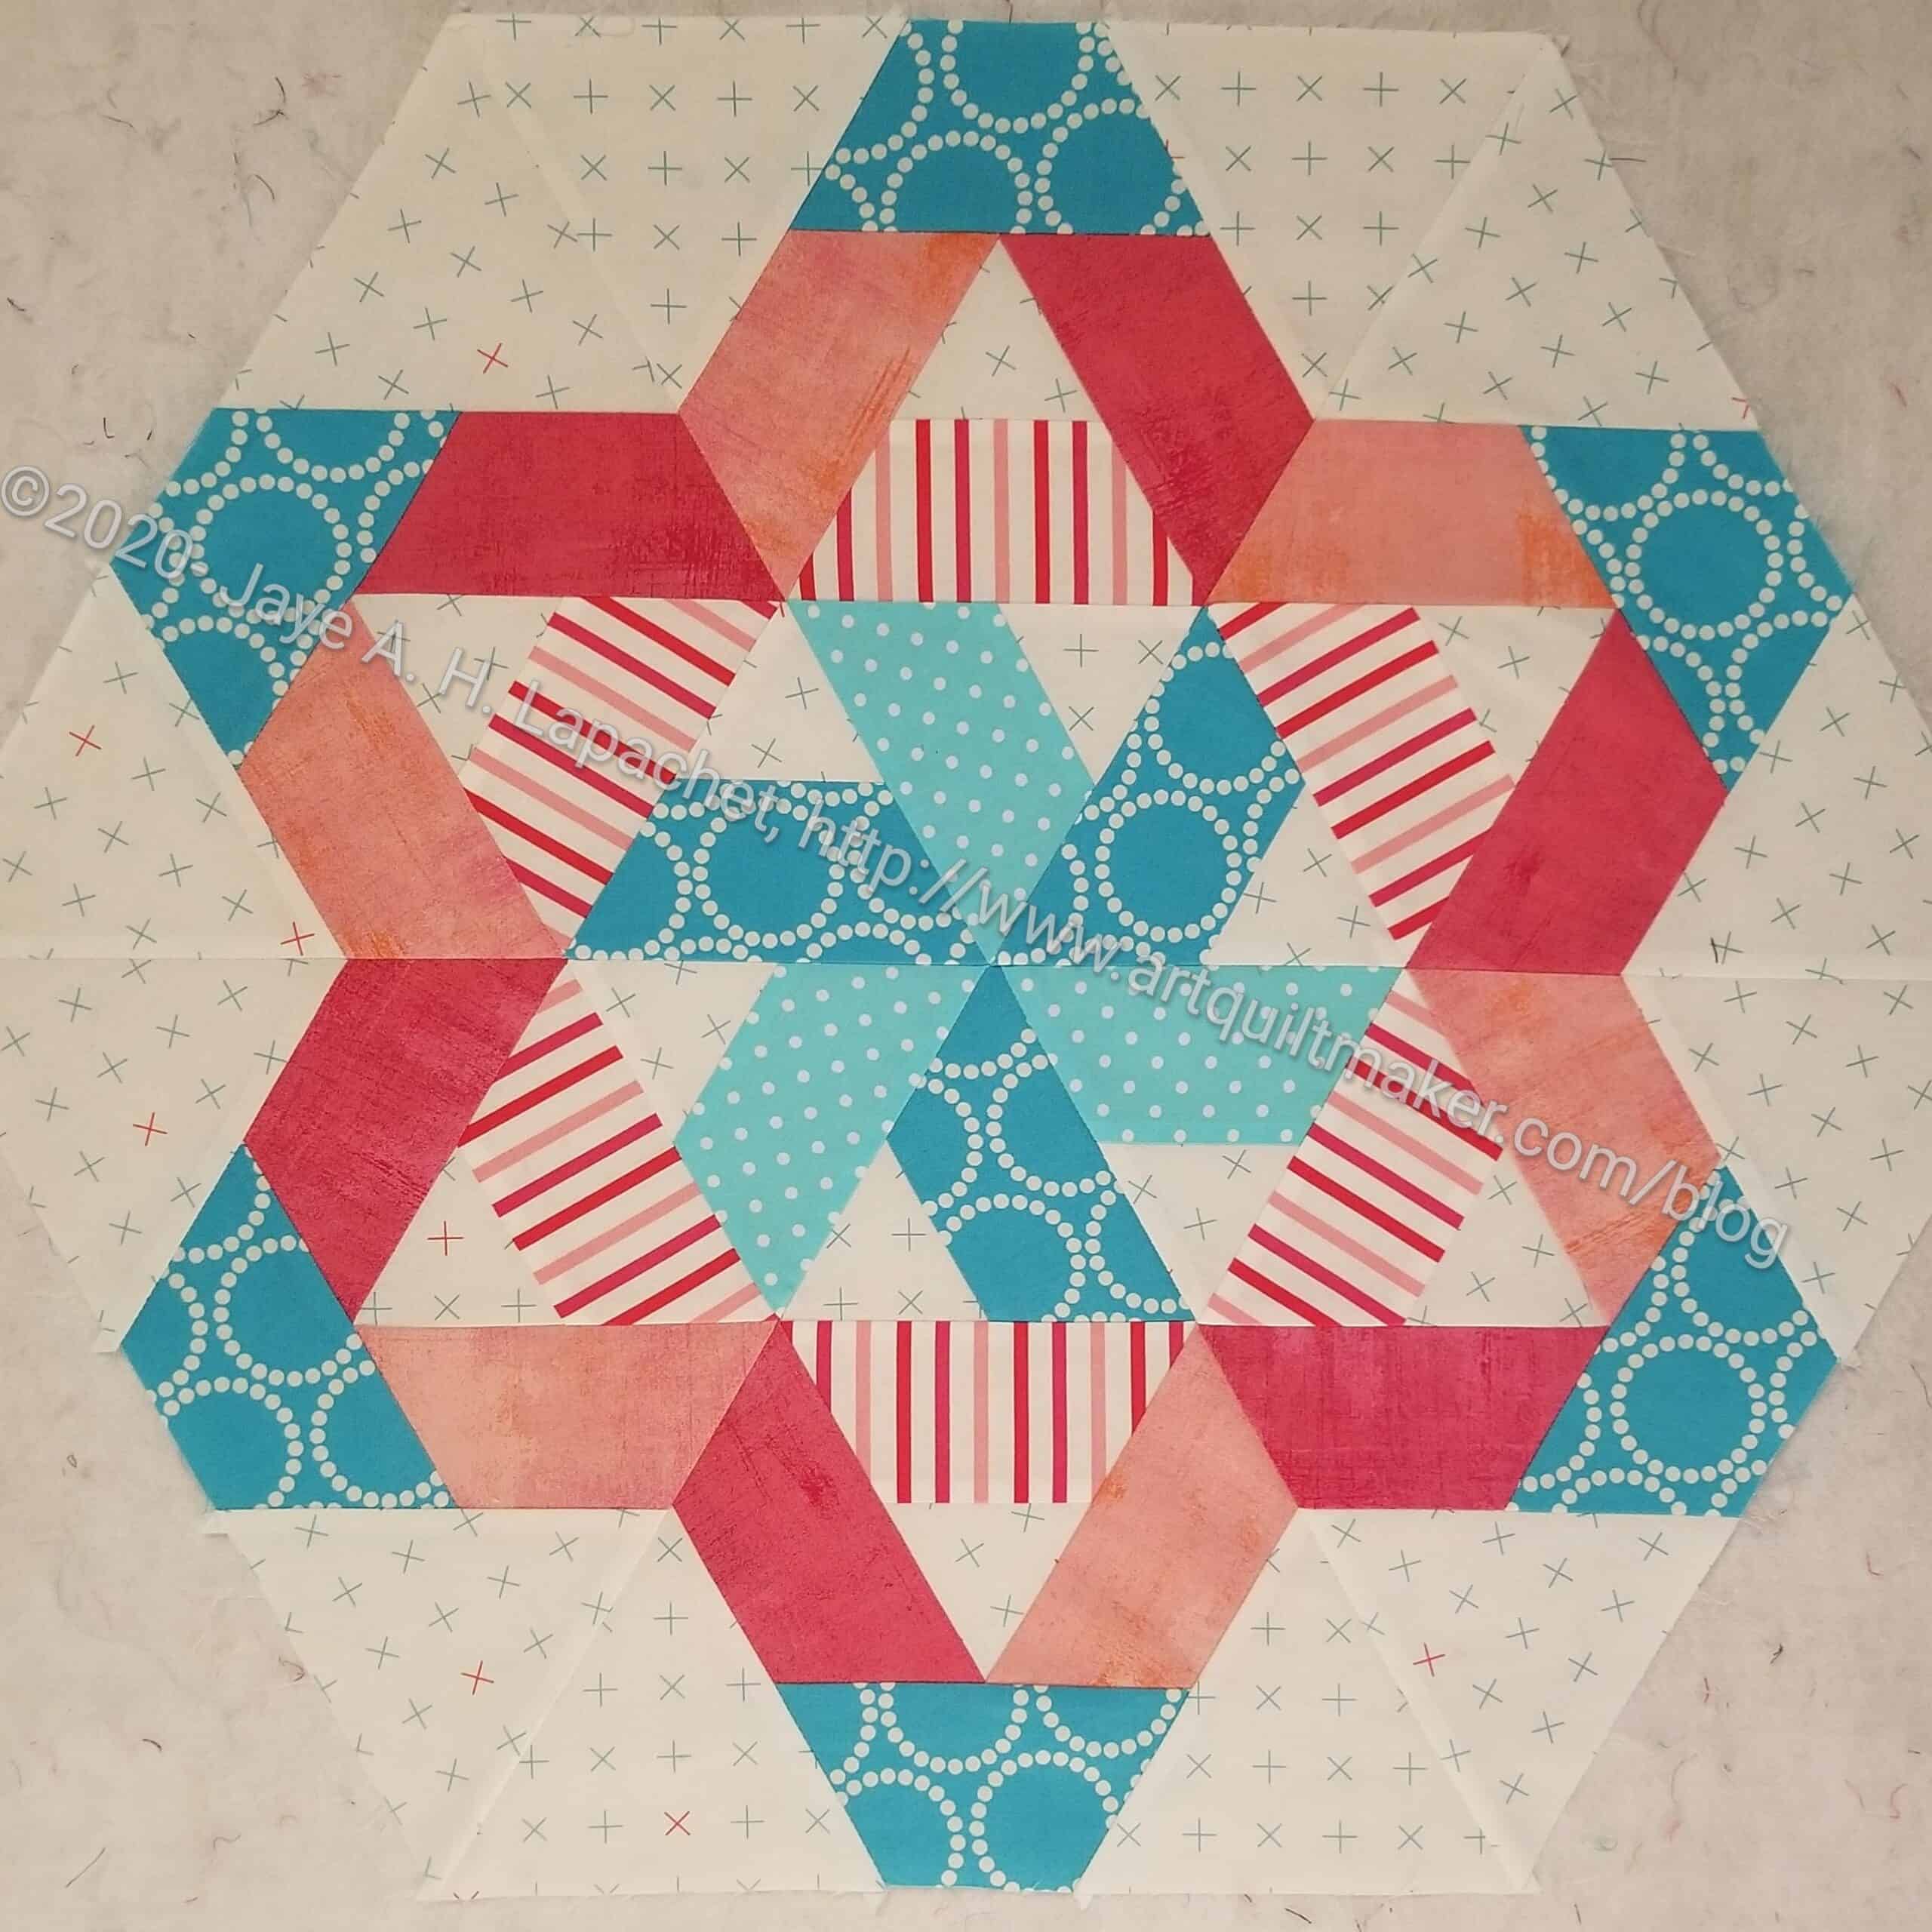
Gazebo Progress
However, I like this design, so I decided just to cut it out and do it. I started after lunch one day. I was able to get the whole thing cut out and pieced by the end of the day. I was also able to make the back and start quilting it.
I worked hard on the fabrics. Since this was for me, I really thought about the look I wanted and am pleased with my choices.
Part of the process is ripping and I had to rip as I was very close to finishing the FOTY 2019 top.
The quilt top started out correct. It is not sewn together completely in the photo (left), but all of the pieces are where I wanted them.
I continued sewing -and it is a lot of sewing to get these Fabric of the Year quilts together- to make chunks.
FOTY 2019 – Letters upside down
When I had about 12 seams left, I realized that something had happened. I had reversed a section somewhere along the process.
I can tell because the letters (white on red serif print) are upside down. I try to get the directional prints going in the right direction when I make these quilts. They do have a top and a bottom. I was nearly done sewing the quilt together. I could have gotten the quilt done before dinner if I had just continued. The question, however, becomes “will I notice this forever?” In this case, the answer was yes.
One good thing about this type of quilt is that I could rip out that one section, resew it and finish the quilt, which is what I did.
Except that I also tried to figure out where I went wrong. I know that on November 14 that section was oriented correctly. On November 23rd, it wasn’t. Sometime in that 10ish day period, something happened and that chunk was turned upside down.
It is hard to keep these pieces correctly oriented. By ‘correctly oriented’ I mean in the place I want them. Most people wouldn’t notice and in 10 years, I might not notice either. I notice now, however.
It is fixed and the quilt top is on its way to being finished.
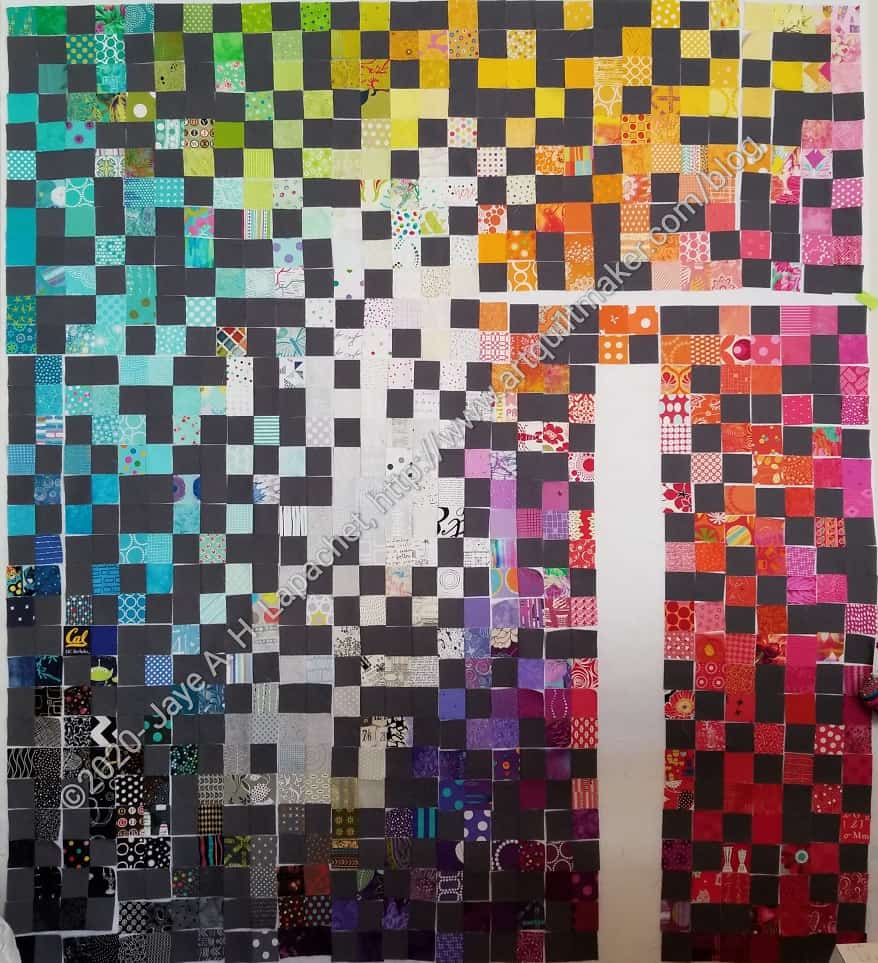
I finally made progress on the Journey2Nebula projects. I had started Candy Dish right before the Big Blog Blow-up and then didn’t make much progress. I also haven’t started the last project, Gazebo, which is sad. I really like that project and wanted to do that one most.
Candy Dish Cushion Top
I still have to trim Candy Dish and make it into a cushion cover, but I finished the piecing over the weekend in between working on FOTY 2019.
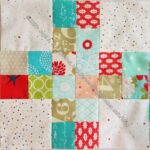
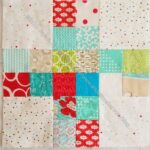
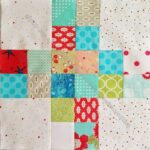
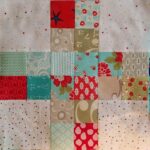
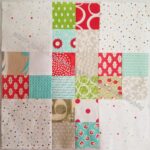
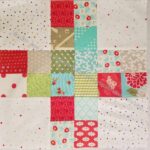
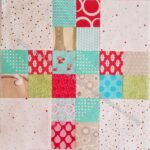
I have all of the Traffic Jam #2 blocks done. That doesn’t mean I am able to show you them all, but most are available for viewing. Somehow I am missing 5 of the blocks
Traffic Jam 2- Block #11
Traffic Jam 2- Block #10
Traffic Jam 2- Block #9
Traffic Jam 2- Block #8
Traffic Jam 2- Block #7
Traffic Jam 2- Block #4
Traffic Jam 2- Block #5
Traffic Jam 2- Block #6
Traffic Jam 2- Block #3
Traffic Jam 2- Block #2
Traffic Jam 2- Block #1
Now I need to find some sashing fabric and put the top together. I think I’d like to try making one of these tops with a darker background. Not necessarily black, but with a color rather than just white.
I worked on the Jawbreaker pillow top over the weekend in between working on my donation projects. The Journey2Nebula video for this week’s piecing is available. I didn’t wait for it as I had time and want to keep progressing. Also, I have done this kind of piecing before and will do it when I eventually make the Spin Wheel quilt. I have done this kind of piecing before.
Jawbreaker pillow top
I should have pressed the way I normally press rather than pressing open partly and pressing to the side partly. I worked out the issues, but bouncing between the two methods wasn’t helpful. My fault.
I think the piece looks good and I will probably be able to finish it this weekend, so I can stay on track with the series.
I was annoyed again at the partial blocks, but watching the video made me understand Julie Herman’s thinking about the design choices. I may even follow the rest of the pattern!