Ever since I started the 26 Projects WIP/UFO eradication project, I have made good progress. Where I used to have 26 UFOs, I now have many fewer.
Forcing myself to power through quilt projects (and bag projects) rather than stopping and letting them ‘marinate’ is much better for my process. It also prevents me from adding new UFOs to the pile. Aside from a few projects, such as Pies & Points, it has worked very well. Backs and bindings now seem less arduous to complete.
UFOs left to marinate, for me, means that I forget what I was thinking, sometimes the fabric or other supplies go missing or get used for other projects accidentally. Supplies going missing or being accidentally used for other projects makes the process much worse. It always takes me time to get back in the groove of a project, which is generally difficult and often depressing. Nothing seems as terrible from a few years away, but I often discover the problem quickly and still have to deal with it. Time does not always heal all ‘wounds.’
In working on the 26 Projects, I have completed a lot of quilts. Looking at my first list shows me quilts I know are finished. It also shows quilts that are still on the to do list. Most worrisome of all are the projects I don’t remember finishing or giving away, which means they may still show up in some box somewhere.
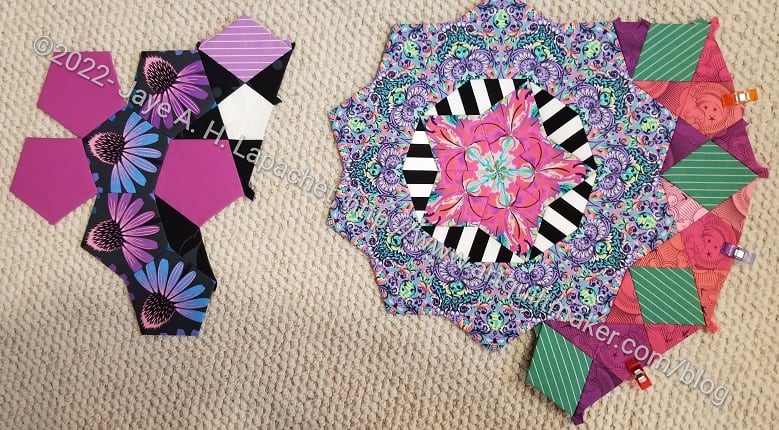
I found, though, that the projects aren’t going to work on themselves, thus I have taken out the Tarts and started working on it. I am focusing my mind on one section at a time, mostly, and that helps me not get overwhelmed. This is also when it would be great to have two machines set up. I would like to be able to switch to a piecing project quickly to take a break from machine quilting.
I have found, though, that working on one project does not prevent me from working on another. You know I often use leaders and enders to make progress on more than one quilt at a time. If I want to start a new project, I do, but I don’t put away the old one and I really try to finish the old one before becoming engrossed in the new project.
I don’t think UFOs are bad and if your process includes a number of UFOs, great! I think we will all have UFOs. For me, the length of time they are on the list are the issue.