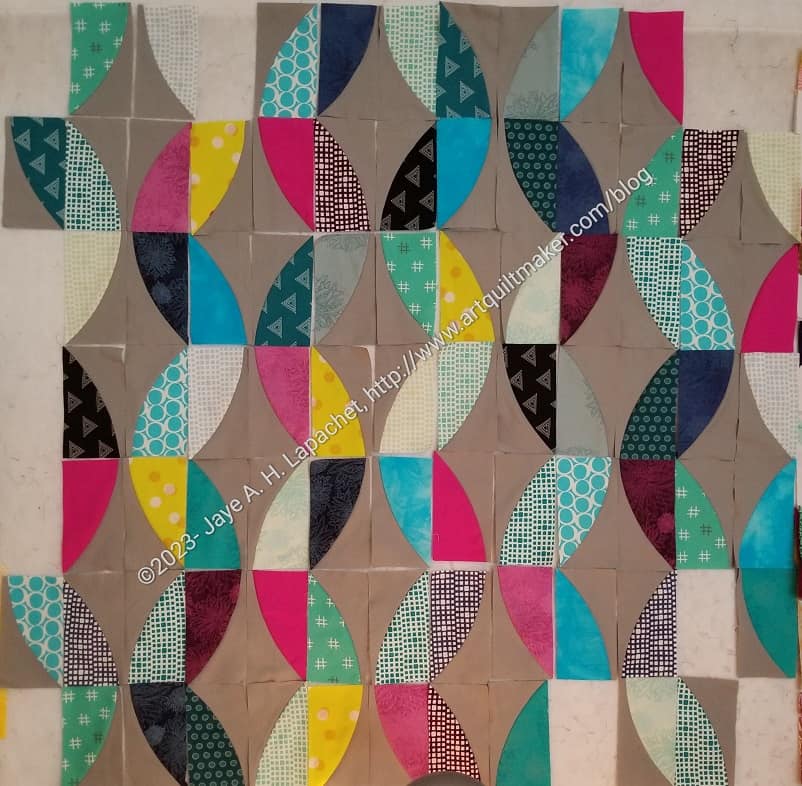
The Metro Twist is going. I need to make more blocks, so it is going slowly. I have some more pieces cut so I can sew more blocks; I just need some time to do it.
I am in a place where I feel like I have too many things going on at once.
Commentary about works in progress, design & creativity
The Metro Twist is going. I need to make more blocks, so it is going slowly. I have some more pieces cut so I can sew more blocks; I just need some time to do it.
I am in a place where I feel like I have too many things going on at once.
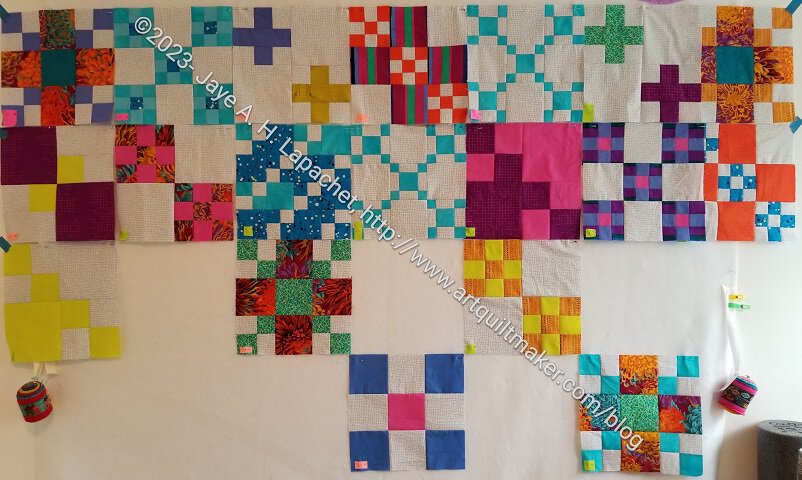
I am working to make ongoing progress on the Scrappy Celebration. I now have two full rows and ideas for more blocks.
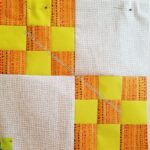
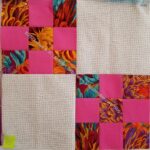
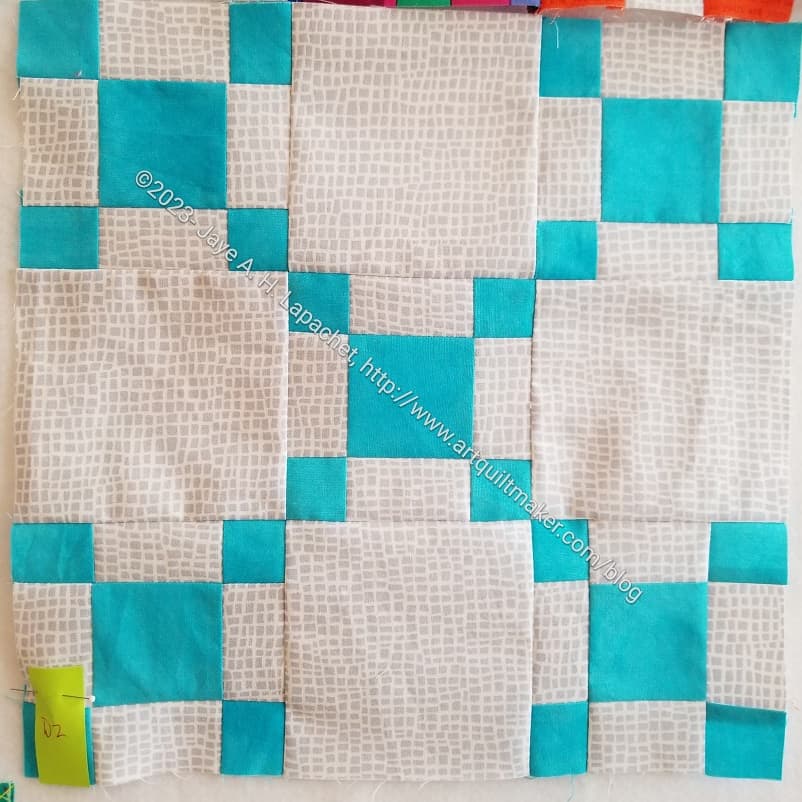
I made the 9 Patch with large center with a different fabric this time. I wanted to do it before and I may switch this particular block with the D2 block. I was inspired by the other 9 Patches within a 9 Patch block to use the orange for the larger patches.
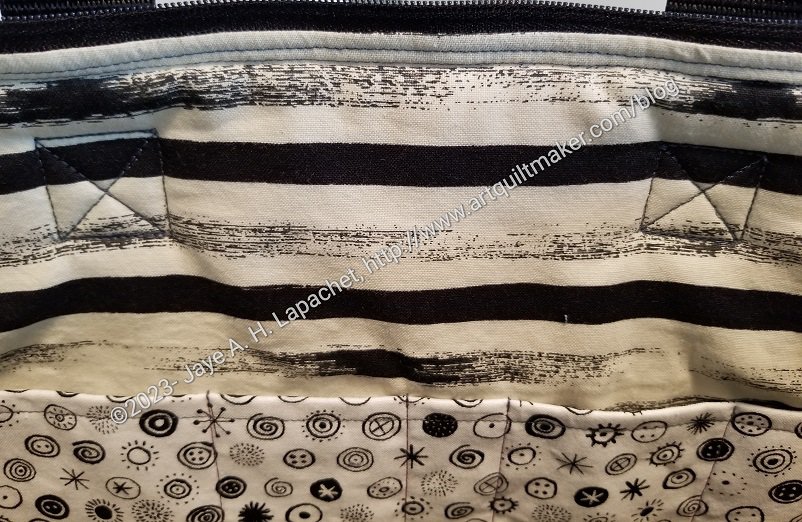
Cyndi and I talked about the Ultimate Carryall Bag and travel bags in general at Sew Day. It made me start thinking about whether the Ultimate Carryall Bag was the best bag for the job.
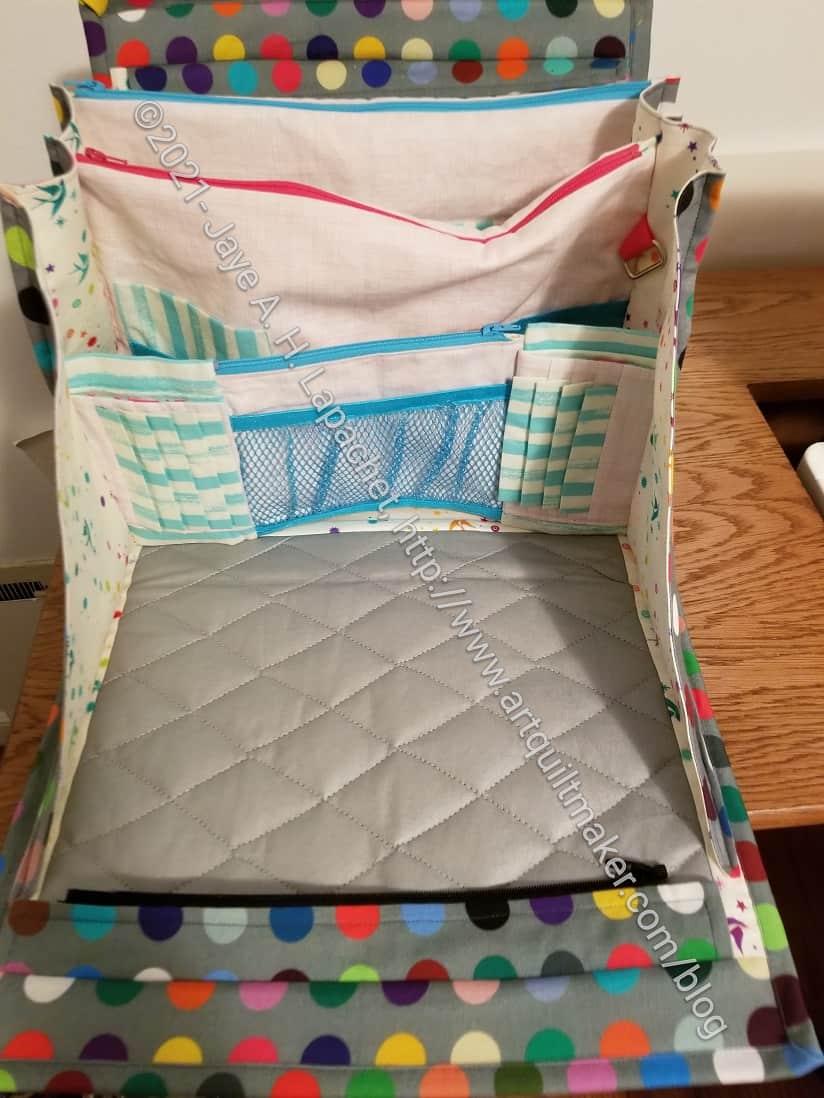
I have been using my UCAB as a go bag / travel tool bag since I finished it. it is working ok, but I don’t love it. I forgot to put SF101 on the large pockets so they are particularly saggy. This is not a design problem; it is a construction problem. Ideally, I should make another one for myself, but the directions are so terrible that, even with my notes, I don’t have it in me to sew another one.
It is also kind of bulgy at the front when the whole thing is zipped. That could be because I overfill it.
My discussion with Cyndi got me thinking about the ideal travel tool bag.
I plan to make a Sheffield tote for myself. In fact, at Sew Day, I had some fabric out that I want to use, so I took the opportunity to cut those pieces as a start.
I haven’t decided if I will put the very outside pockets on it. I can see where they would be useful, but I can also see how items would fall out. If I do not include them, the Sheffield will look very similar to the Quilts Illustrated Tool Tote pattern I made in 2018. You can see a comparison of the two bags in a post I wrote in 2021. One thing I thought is that I could make the sides of Sheffield taller. I think I need to make a few more before I try that.
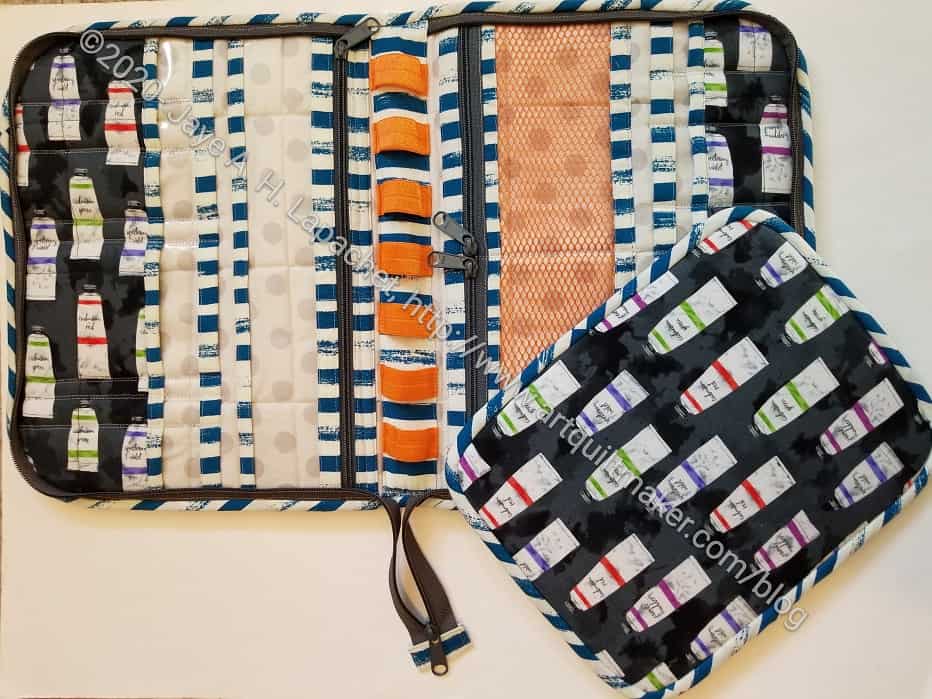
Another idea is to use the Kit Supply Tote and a Running with Scissors folio together. I have the Kit Supply Tote and could make a Running with Scissors folio for tools and it might fit inside the Kit Supply Tote.
I would have to carefully measure all of my tools so I could make the openings the right size and all of my tools would fit. I would somehow need to incorporate the Take a Stand Bag into this mythical system. As mentioned on the ByAnnie website, the Running with Scissors folio can be draped over the Take a Stand bag so you can see all of your tools. Also, I have the fabric quilted to the foam already ready to go. It makes good sense to make another Running with Scissors and try it out.
The Oslo Tote is a possibility as well. I am pleased with the way it came out, mostly, but it doesn’t have a top closure. I think it is also a little small for what I need and want.
I could redesign the inside of the Cavalcade Bag and make sure I can fit my Tupperware tool box inside it.
Both from the Crafty Gemini Organizer Club, I also have the Ultimate Project Bag and the Retreat in a Bag. I don’t think these are exactly the tool and supply totes I am seeking. I plan to make them soon, but am not sure how to incorporate them into my travel needs.
The All Rolled Up Tote could also be a good tool tote. I also like the fabric I used. I wouldn’t be able to put a pad of paper or large-ish rulers in there, but it would hold all the scissors, etc that I need.
I have also seen the Sew Awesome Travel Companion Tote. This bag has potential. I might have a similar bag pattern already, but the roominess of this bag means I could store other bags and my Tupperware tool box inside it.
There is also the Crafter’s Carry All Bag. It has similar attributes to the Sew Awesome Travel Companion Tote, but also has negative reviews. Reviewers say it is short on diagrams.
What I really can’t understand is why there is so little competition to the Ultimate Carry All Bag? None of the bag designers, besides Quiltessa Natalie has designed something like this.
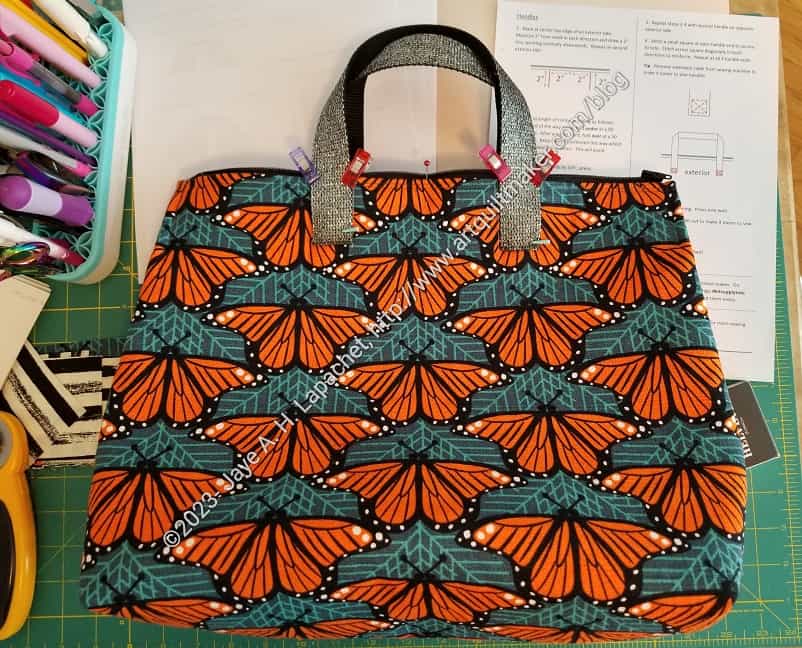
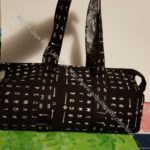
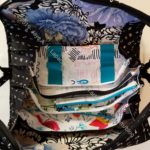
I cut out a large version of the Kit Supply Tote by Aneela Hoey at one Sew Day in the past. I checked and can’t find a date when I did it. Still, I decided, over the weekend, that it was time to put the bag together.
Overall, this is a pretty straightforward tote. Directions are provided for two sizes and both are put together the same way.
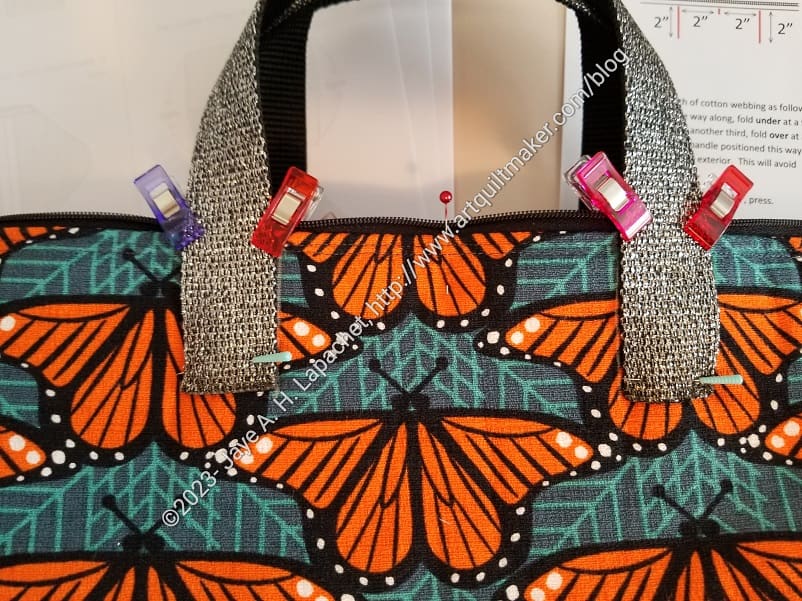
Towards the end, I chose one of the webbing handle materials from Sew Hungry Hippie.They are a glittery black or silver overlaid on black. Very glittery
It was hard to sew on the previous lines from the front. I was using a charcoal thread color that matched pretty well. I sewed the handles on a little bit from the top/exterior, counting stitches carefully until I had one line of stitching sewn in a square.
Thereafter, I took the bag out of the machine and sewed from the lining side. I could easily follow the stitching by sewing on the previous lines. I am pretty pleased with how the stitching came out.
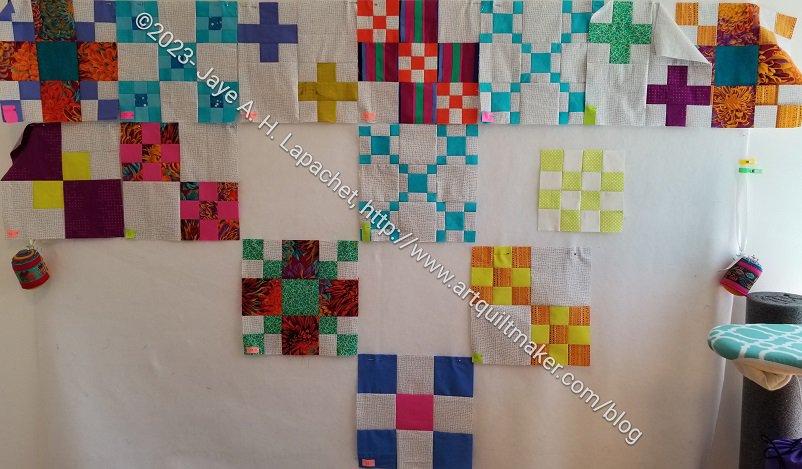
I focused on getting some more blocks done for Scrappy Celebration over the weekend. My design wall is looking good even if I have to layer some of the blocks. I do need to move them all up and will probably do that today.
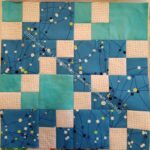
After encouraging my sewjo a little bit with the Spiky 16 Patch, I made some more blocks for the Scrappy Celebration quilt.
I have to admit I was dreading this block a little bit because the first one took so long to sew. I concentrated on chain piecing this one and it went more quickly.
I did forget to use the other blue fabric, so it looks the same as #1. Still, it is done and I can move on to other blocks.
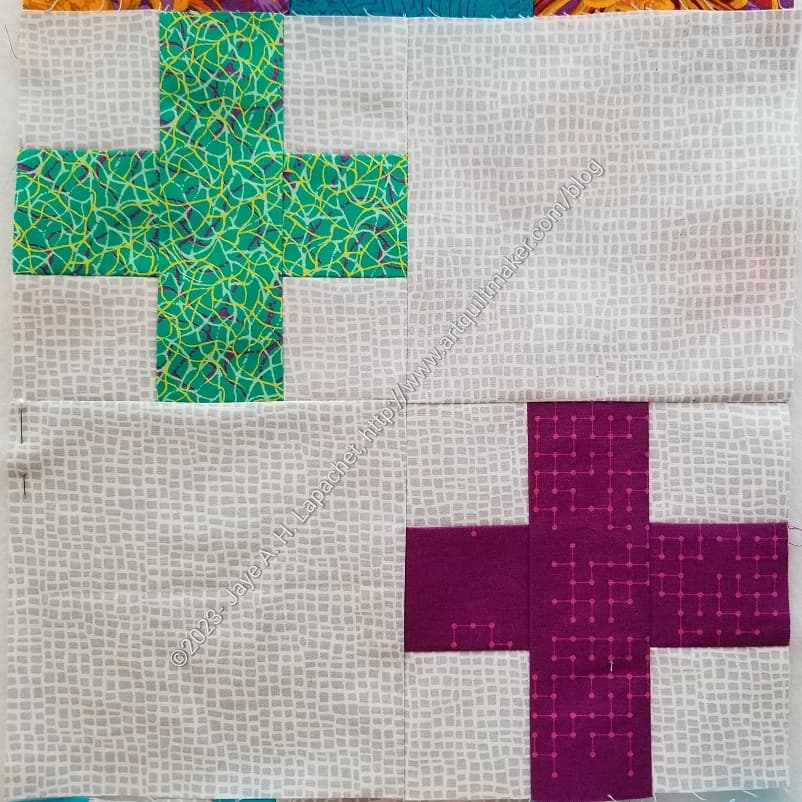
I also made the second Plus block, which completes the top row. Unlike the 9 patch above, I have decided to make the Plus blocks different colors. Well, I have decided that the pluses will be different colors. I have been longing to use that emerald green again, so here it is.
I like the combination of the red-violet and that emerald.
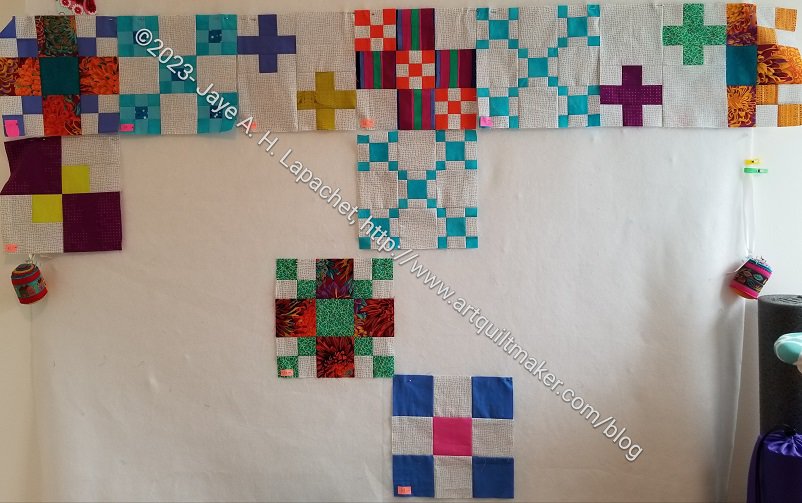
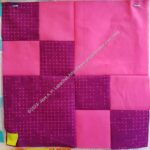
I moved some of the blocks around so the completed block layout I have looks different now.
Not a lot of progress, but over a small hump and progress is progress.

So, I know this Enigma process must seem interminable. It seems like it is taking me forever to finish it and I have to keep reminding myself that working all week prevents me from sewing much during the week. Today I have time off and I will use it for sewing.
As an aside, I enjoyed my trip, but I am frothing with excitement thinking about actual sewing. AND, then, being able to actually sew.
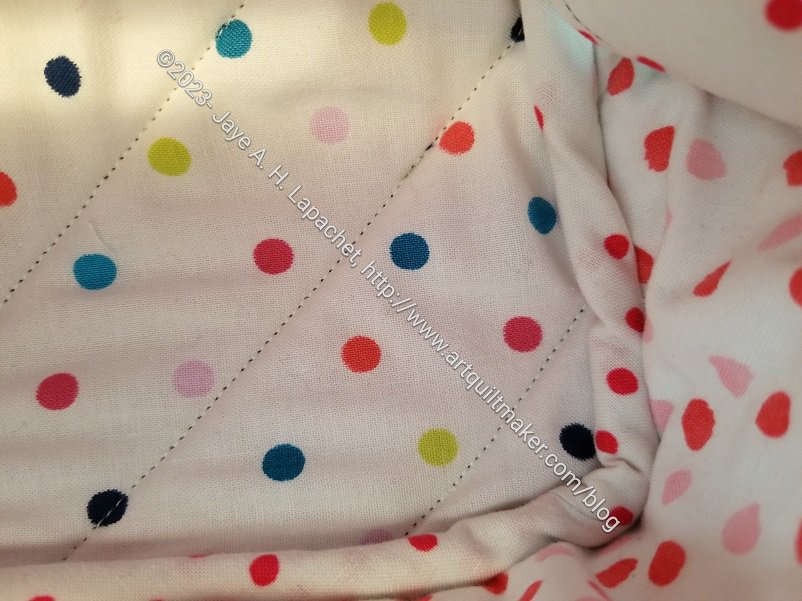
The photo above shows the inside of the pouch. The intersection of the bottom and the side panels has a binding. This is a challenging method of finishing a bag. Sara doesn’t use it very often. When she does, I know there was no other way. The video shows Sara easily sewing the binding by machine. I took the coward’s way out and sewed it by hand. The part by the zipper was really hard. Zipper tape is no joke to sew through.
I have only a step or two left to do and I hope to finish today so I can still post it on the sew-a-long and possibly win a prize.
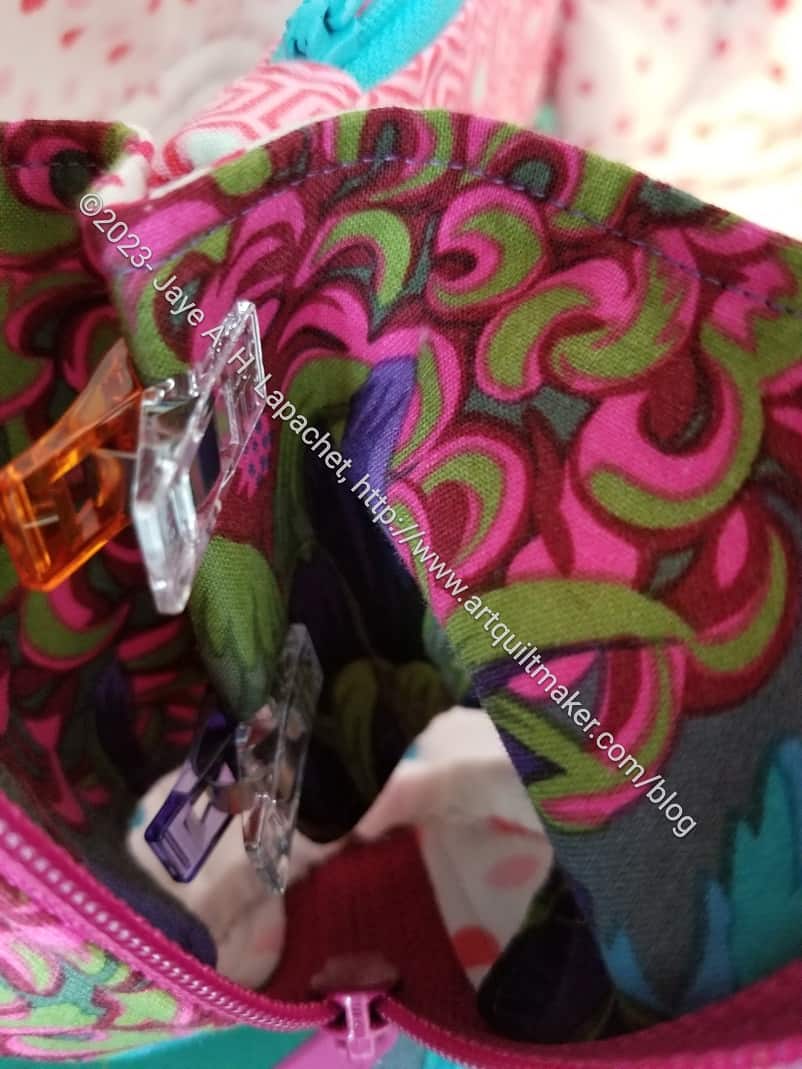
Next, I will sew the inside pocket.
I used the video more for this bag than other bags. I didn’t try to understand directions that were confusing. I just went straight to the video. I kind of feel like I cheated, but I also don’t care that much.
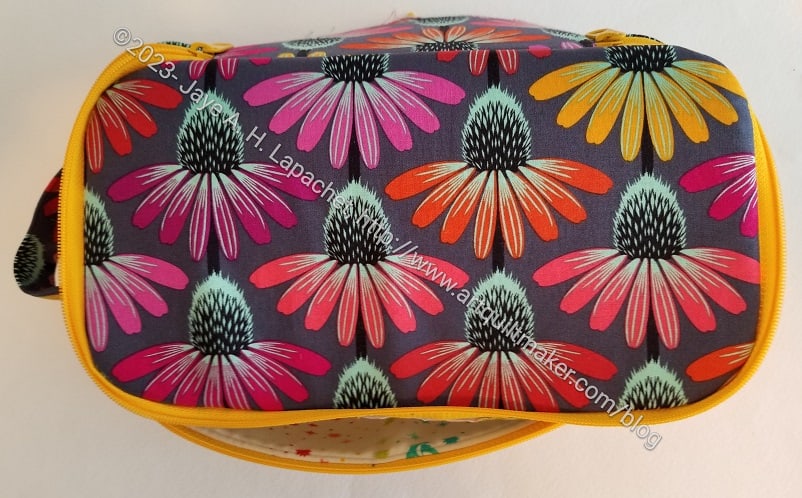
As soon as I finished the two Color Wheel Hackneys, I started another. I have decided to make a number of these as gifts. I have to say that this one went a lot quicker than the others. It is a clear indication that practice does make perfect.
I am pretty pleased with how the coneflowers look. I picked the zipper color to go with the yellow coneflower, but also because I wasn’t sure when I would use a yellow handbag zipper otherwise. I think it looks good so far.
I talked about the Hackney lining hack a bit ago. It is for this one. The lining is a little saggy so far, which I have to figure out. Otherwise, I think the piece is looking good.
Yes, I am making another Hackney pouch. I like the shape of this pouch/bag. It is fun and a bit unusual. The process of assembly is also providing me with a challenge even after making several of them.
Yes, it is another gift. I might make one for myself. We’ll see.
This time I am working on perfecting a version that is most useful and that I like. As I might have mentioned, I don’t like the mesh pocket, because I don’t like the way it comes out. Mostly, I don’t like the zipper tabs and how thick they are. They are hard to sew and thus the seams look wobbly.
I tried a vinyl pocket, which was ok. I haven’t heard how useful it is, but will ask next time I see the recipient.
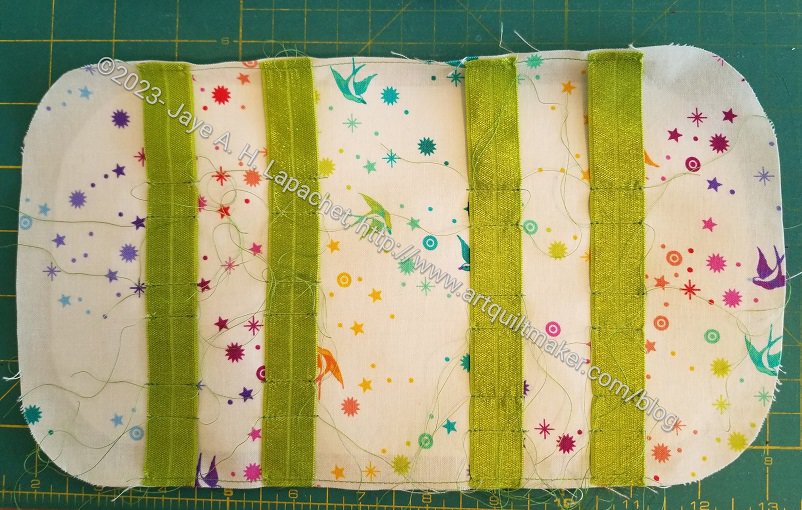
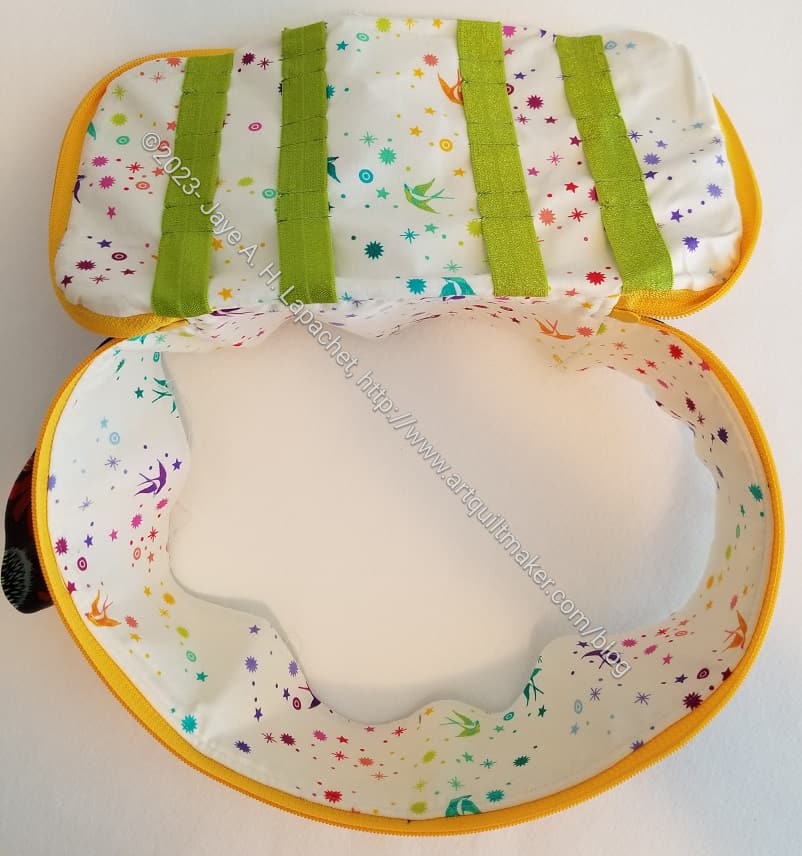
This time I used doublefold elastic to make a tool holder.
I cut the doublefold elastic the same width as the lining, then basted it to the top lining piece.
I marked the places where I wanted the recipient to be able to slide tools in. I used a half inch size for each pencil or pen or whatever. I put an inch between each set of marks. These had to be mirrored on the second strip of elastic. I also made the marks on the second set of elastic off from the first set so the tools (or pens or whatever) wouldn’t interfere with each other.
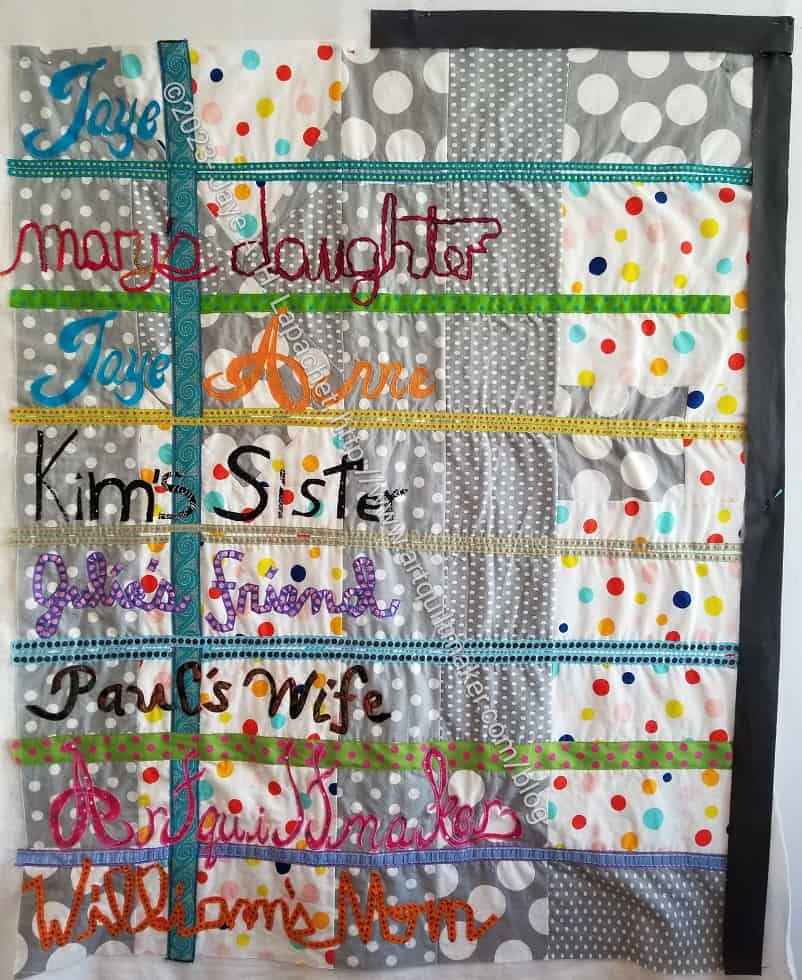
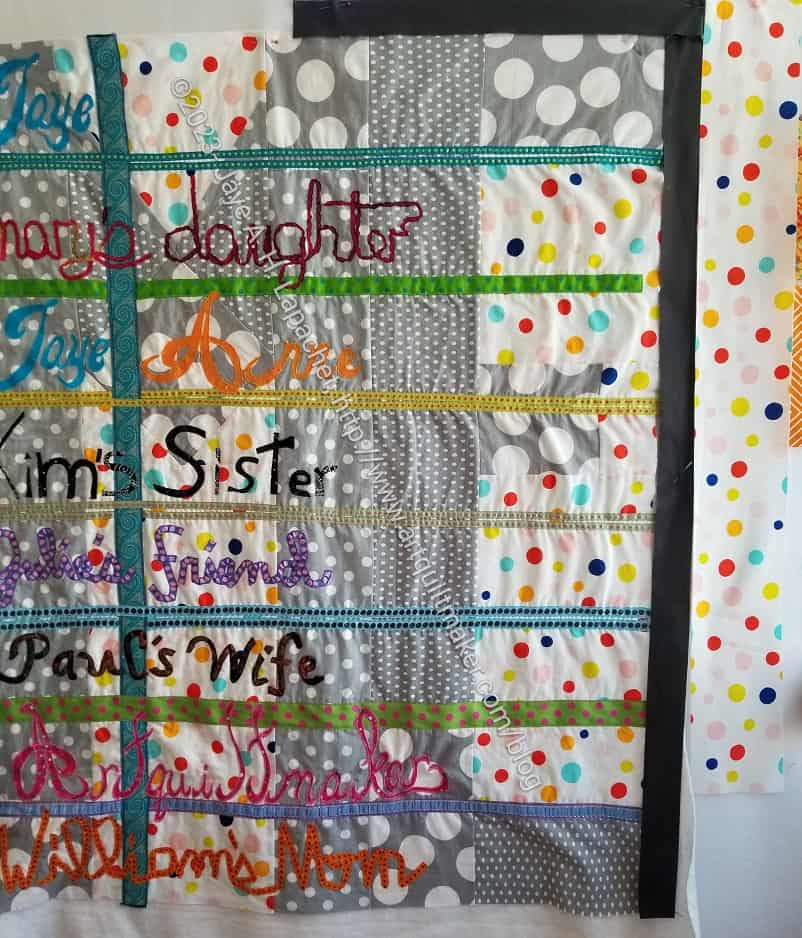
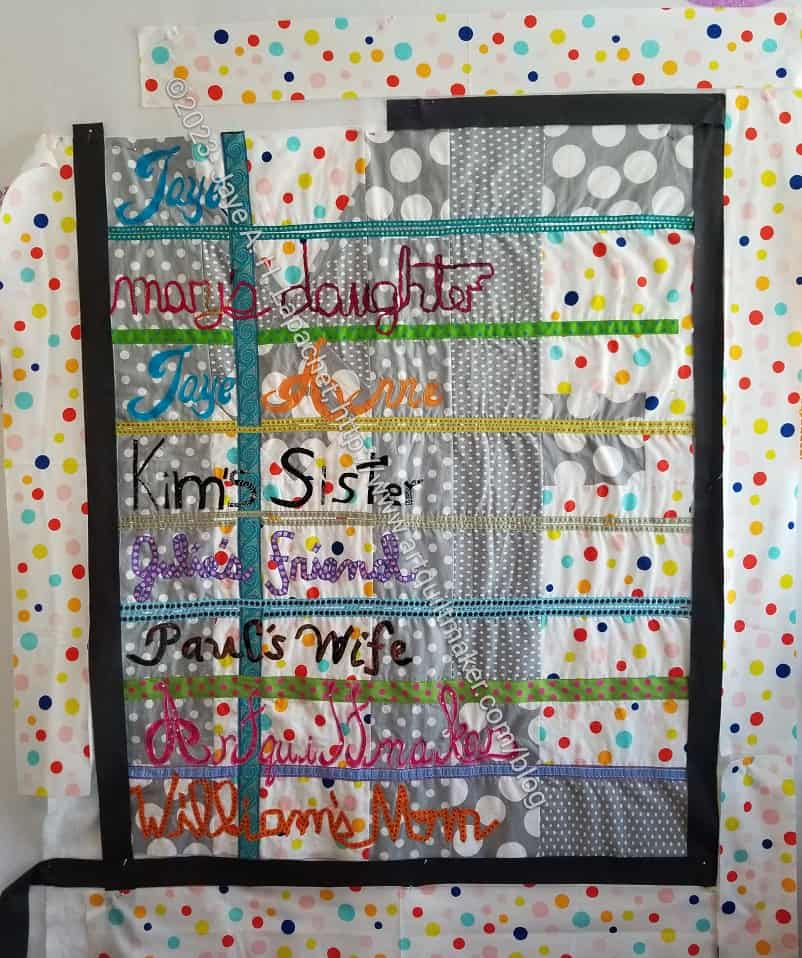
Who Am I? has been hanging on my design wall for weeks and I am really sick of looking at it. The concept was stellar IMO, the design choices I made were good, so I really don’t know what the problem was.I don’t know why I didn’t want to work on it, but I didn’t. The other day, I finally forced myself to work on it.
I was tempted by other projects, but I forced myself to stay focused. I know I need to enjoy my quiltmaking, but I do not enjoy having quits languishing.
I thought about adding a small dark border so the first thing I did was try that. I had some Tilda charcoal I am going to use for Stay Tuned, but I have enough to use for for this project as well. Also, since I know what it is, I can always buy more.
As an aside, the Stay Tuned fabric palette has not been decided, so I may as well use fabric I have for projects that need it now.
I wasn’t sure the charcoal would work completely, but I kept on. I added some further border strips using the dotted background fabric (colors on white).
Putting a little of the white dotted fabric up gave me more confidence that I was on the right track. I decided my ideas were good ones, so I started sewing.
I wanted to frame the center, but also smooth out some of the wrinkles from the applique’. I carefully measured and put on side pieces that helped to square everything up. I don’t think the quilt is completely square as I couldn’t cut much off of either side.
Laying out the whole charcoal gave me the idea of doing something a little different on the bottom. I wanted to anchor the design a bit and I thought making the bottom a little heavier would work.
I worked on this for about 8 hours the other day. I was able to get it done and get the binding made.
Not much is happening in my workroom. I was gone and work has tired me out.
Still, the design wall isn’t empty.
The pink blocks are the start of a future donation top. I talked about it a few weeks ago. I really enjoy looking at them and having them on my design wall. They make me so happy. I plan to get back in the saddle and make more soon.
On the left bottom are random Color Strip donation blocks. Currently yellow and green. Those will turn into something after I finish the pink donation top. Maybe another rainbow top. Some of it relies on how many scraps I have and what Color Strip donation tops I have already made. We’ll see.
Above those random blocks are three blocks. One is a really old foundation pieced circle Mariner’s Compass block from a Barbara Barber class. I don’t see a post about that class. I know I took at PIQF, but heaven knows when. I really should look it up and finish that thing, if for no other reason than to get it off the design wall.
That Rock Star block (white background with curves) is still on the design wall. I talk about the process of that block in the linked post. It uses the Wonder Curve ruler from Sew Kind of Wonderful. Clearly, I am not making the whole sampler nor am I making more of those blocks. Maybe I will, but for the moment, the block is taking up space. I still can’t find a picture of the final Rock the Block Sampler. Oh well.
Finally, the block with the turquoise background is one of the sample blocks I made for my most recent students. It’s too big to go in the file, so there it sits.
On the right side are the Pantone Project blocks. Most of these are from Julie. I really need to get back in the saddle and choose more fabrics.
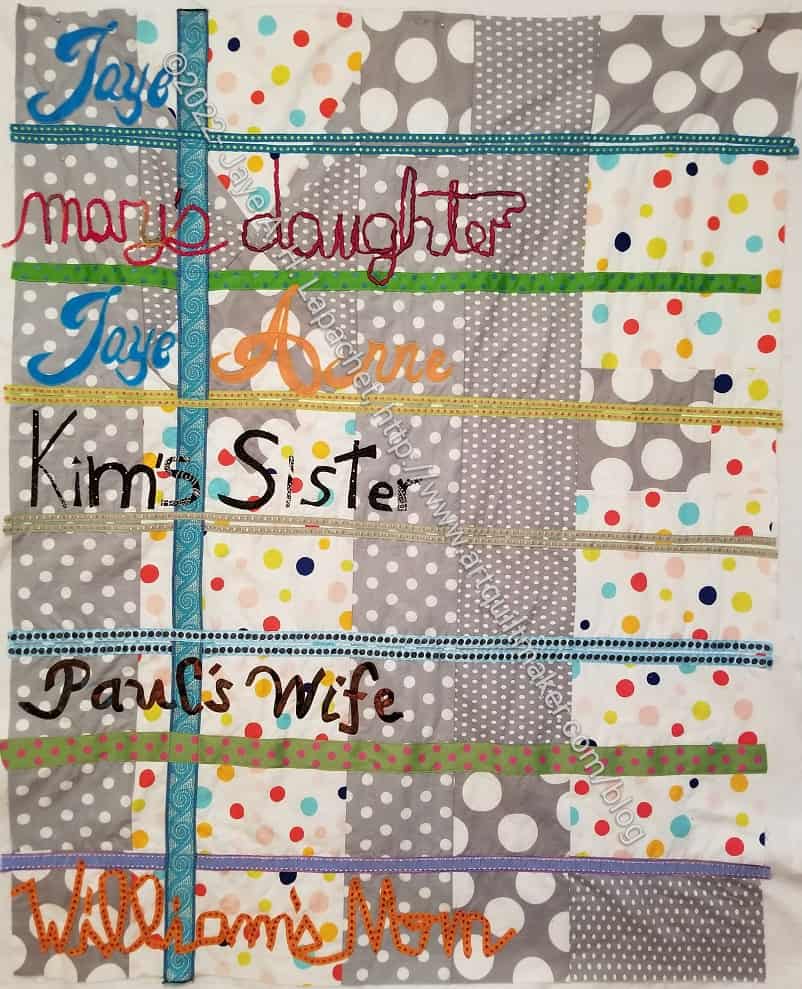
I really made a lot of progress on Who Am I? Despite taking a day off of my winter break to do other things, the quilt is looking good.
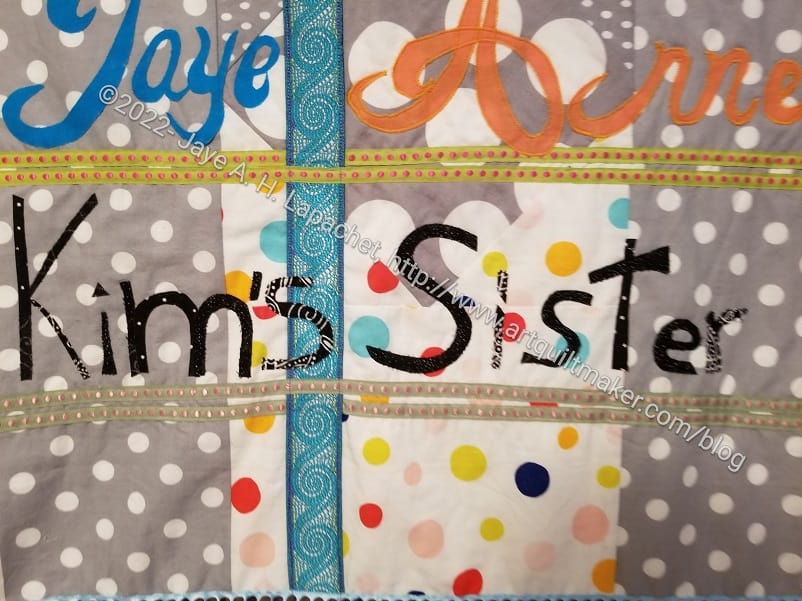
I added ‘Paul’s Wife’ using bias tape and it took me just as long do straight stitch down those letters as it did to satin stitch the two other lines. I didn’t enjoy it and don’t think the bias tape worked as I had hoped. I think it looks fine, but I probably won’t use more of it for the other lines.

I made some good progress during my winter break from work. Can you believe it? It wasn’t even that terrible. I worked pretty quickly, which meant I got almost all of the satin stitching I needed to finish done in one afternoon. It was amazing. Again, I was kind of shocked at why I was balking at ….sooooo muuuuccchhh saaaatttiiinnnn stiiiitccchhhiiiing…… It wasn’t super fun, because there were a lot of loops and swirls to stitch around and I am out of practice. I had to go over some spots a second time to smooth them out but, all in all, it went relatively quickly. Now it is over.
I am using a variety of techniques in addition to the satin stitching.
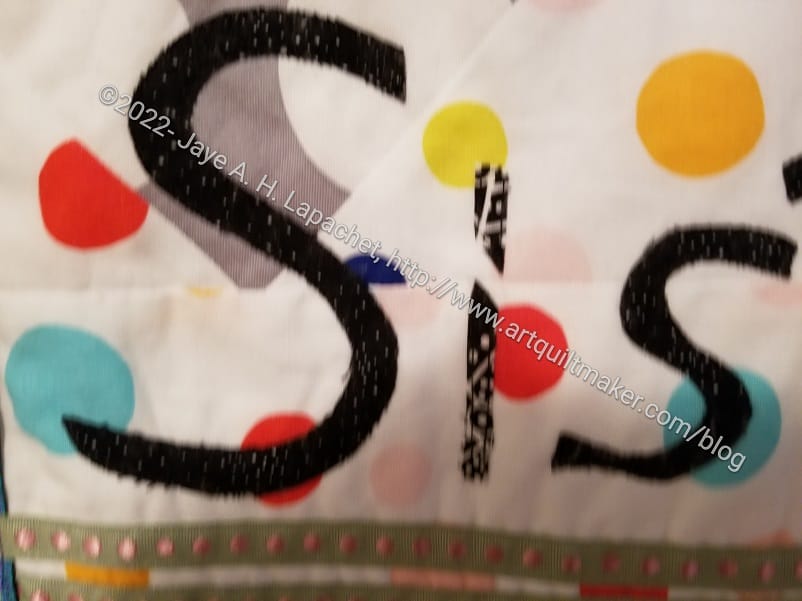
The black letters are attached using a straight line, raw edge applique after I fused them to the background. This quilt will not be washed, so that type of treatment is fine.
The two parts that have been stitched down for a long time, ‘Mary’s daughter’ and ‘William’s Mom’, are sort of couched. I pinned ribbon into place, then stitched it down. I made some 1/4 inch some bias tape that I will use for one of the other lines.
Hooray for progress!

As mentioned the other day, I had cut only enough pieces for one (of three!) Month 16 rosettes. The M16 process is taking me forever. I cut and basted at Sew Day, but I guess I didn’t make as much progress as I thought. I was cranky and irritable that day.
Or it feels like it is. The other day, I left work at 4 and started cutting and basting.
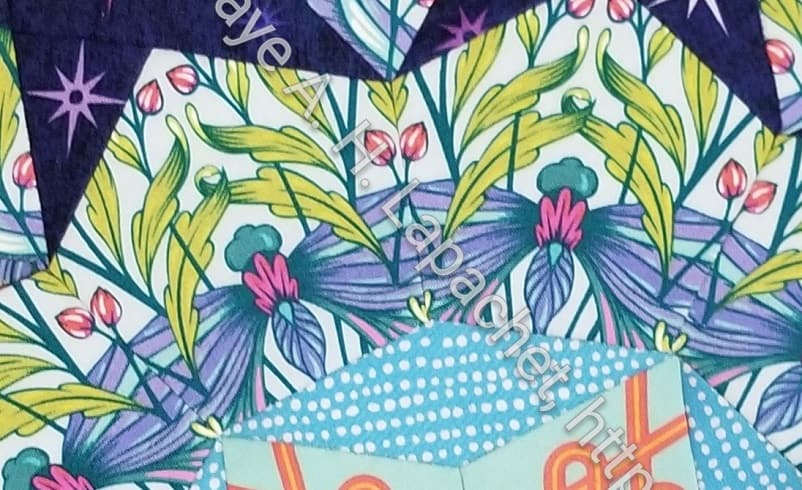
I used the same fussy cutting layout for the pink rosette as I did for the blue part of Rosette #1. I like how the blue one looks and hope the pink one will look similar.
I also didn’t use the snake heads for the green rosette. I used the fabric, but cut the flowers out of it and avoided the snakes. Apparently, insects are ok, but snakes are categorized with animal heads in my quiltmaking mind.
I also rearranged the colors quite a bit. One of the remaining M16 rosettes will have more spikes.
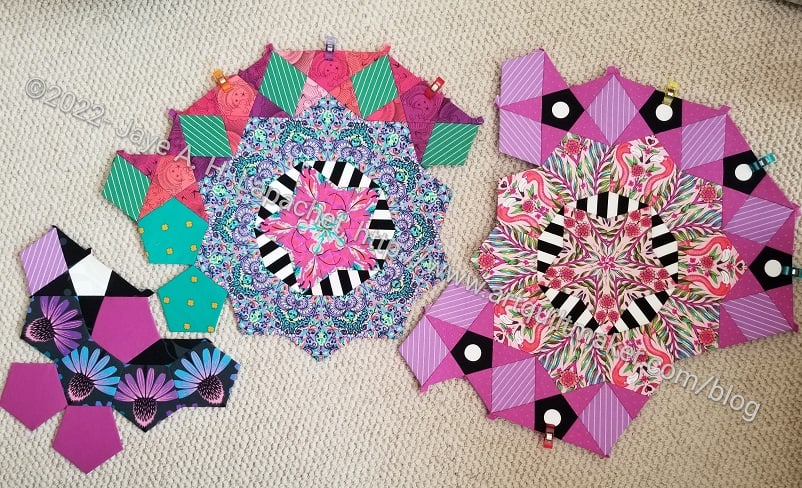
I finally finished Month 12. I redid so many parts that it seemed to take forever.
I am not a huge fan of these rosettes and may redo them.
Now I am waiting for Month 13. I plan to sew some of the rosettes together while I wait, but I have to lay them out and haven’t done that yet.
Pink Door can’t send out Month 13 at the time they normally do, because they are using Parisville, Tula’s new line. They aren’t allowed to send out the new fabrics before a certain date. I understand, but it is frustrating, because it puts me off my basting schedule.