The one objection I have to Center Street Quilts patterns are that she doesn’t cover the zipper with the lining. I know this is super petty and have been told so by people to whom I have mentioned this quirk. After all, zipper tape doesn’t fray and if you use a matching thread, the thread doesn’t even show.
Binding the Holland Pouch
I didn’t have a lot of thread colors with me, but I had one that matched the zipper I chose.
The picture (right) shows how the pouch is finished when the lining and exterior fabrics are quilted. You have to bind the edges from boxing the corners. I have done this by hand before. This time I did it by machine. Again, with matching thread, it would look better. I need to practice this.
I am almost finished. This will be a Christmas gift for the YM.
I went to Portland again last week. My original plan was to help the YM settle into his new apartment. He hasn’t found one yet, so I helped him job search instead. Mom didn’t go this time, which was weird. I tried to embrace the weirdness and I did ok. It was nice to be on my own.
Black Cat Holland Pouch cut out
In my off hours I sewed. I brought my sewing machine and a few projects. The first thing I started was the Holland Pouch. This is a basic boxy bag, which I bought at Stitch in Ferndale in July. I bought the pattern as I thought it would be a good gift and I was too lazy to try and find a similar free pattern.
Center Street Quilts directional fabric chart
One of the things I don’t like about Center Street Quilts patterns is that she doesn’t cover her zippers on the inside of the bag. I gave myself a talking to after a discussion with Amanda about this point. First, the zippers won’t fray. If I use a coordinating thread color, it looks fine. So, I am mostly over that. I have to say that CSQ had a GREAT chart showing how to deal with directional fabric. I am in love with this chart. It was so helpful and I am convinced that my cat fabric will not be upside down.
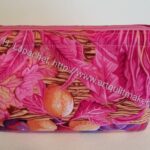
I made another lined Drawstring bag from the Jeni Baker In Color Order pattern as a gift bag for a friend. I was pleased to use the Anna Maria poppy fabric. Can you tell she loves pink?
This one is the Artist size, which is slightly larger than most of the drawstring bags I have made. The size I normally make is called the Project size. I just wanted to try something different this time.
The Artist size is one of the sizes that comes in the paid pattern. As a side note, Jeni Baker has an annual Lined Drawstring Bag Sew Along. It’s coming up in November 2024. It’s hard to find another great way to get familiar with the pattern.
I am still struggling with the ties and really need to figure that out. These look fine, but I always struggle.
I filled the bag with some self care supplies. She said she really liked everything. My friend’s mother died right before her birthday and this was a great way to let her know I was thinking about her.
As mentioned, the Hildegarde Notions Trunk is finished.
I have to confess that the end of making the Hildegarde wasn’t as smooth as I would have liked. The Velcro was the challenge.
The photo left shows the dividers in the interior. They velcro to the side strips of Velcro, which I sewed to the lining. The problem is that the I sewed the wrong side of the Velcro to the sides. It was the same side of the Velcro that I used on the dividers, so the dividers didn’t stick very well. Yes, I should have checked I had the right part of the Velcro, but I assumed. Always a problem.
Resewing the Velcro
The Hildegarde looked really good, so I thought about not changing out the Velcro. I decided, in the end, that I would never be really happy with it-and I really like this bag, for once-, so I ripped the lining apart and sewed the correct Velcro sides to the lining sides.
The Velcro strips are originally sewn before the lining is sewn together, so it is very easy to sew them to the sides of the lining. I used the sewing holes to place the new strips of Velcro and took my time. I didn’t want to take the whole lining apart, so I unpicked as little as possible. I used some washaway tape to hold the strips in place and resewing worked pretty well. Later, I realized I could have changed the Velcro pieces on the dividers, which probably would have been a lot easier.
In my defense, I rarely use Velcro, so I forgot to check that I had the right Velcro side. I won’t make that mistake again. At least I hope I won’t!!
I am glad I did, because now I am super happy with it and the dividers actually work!
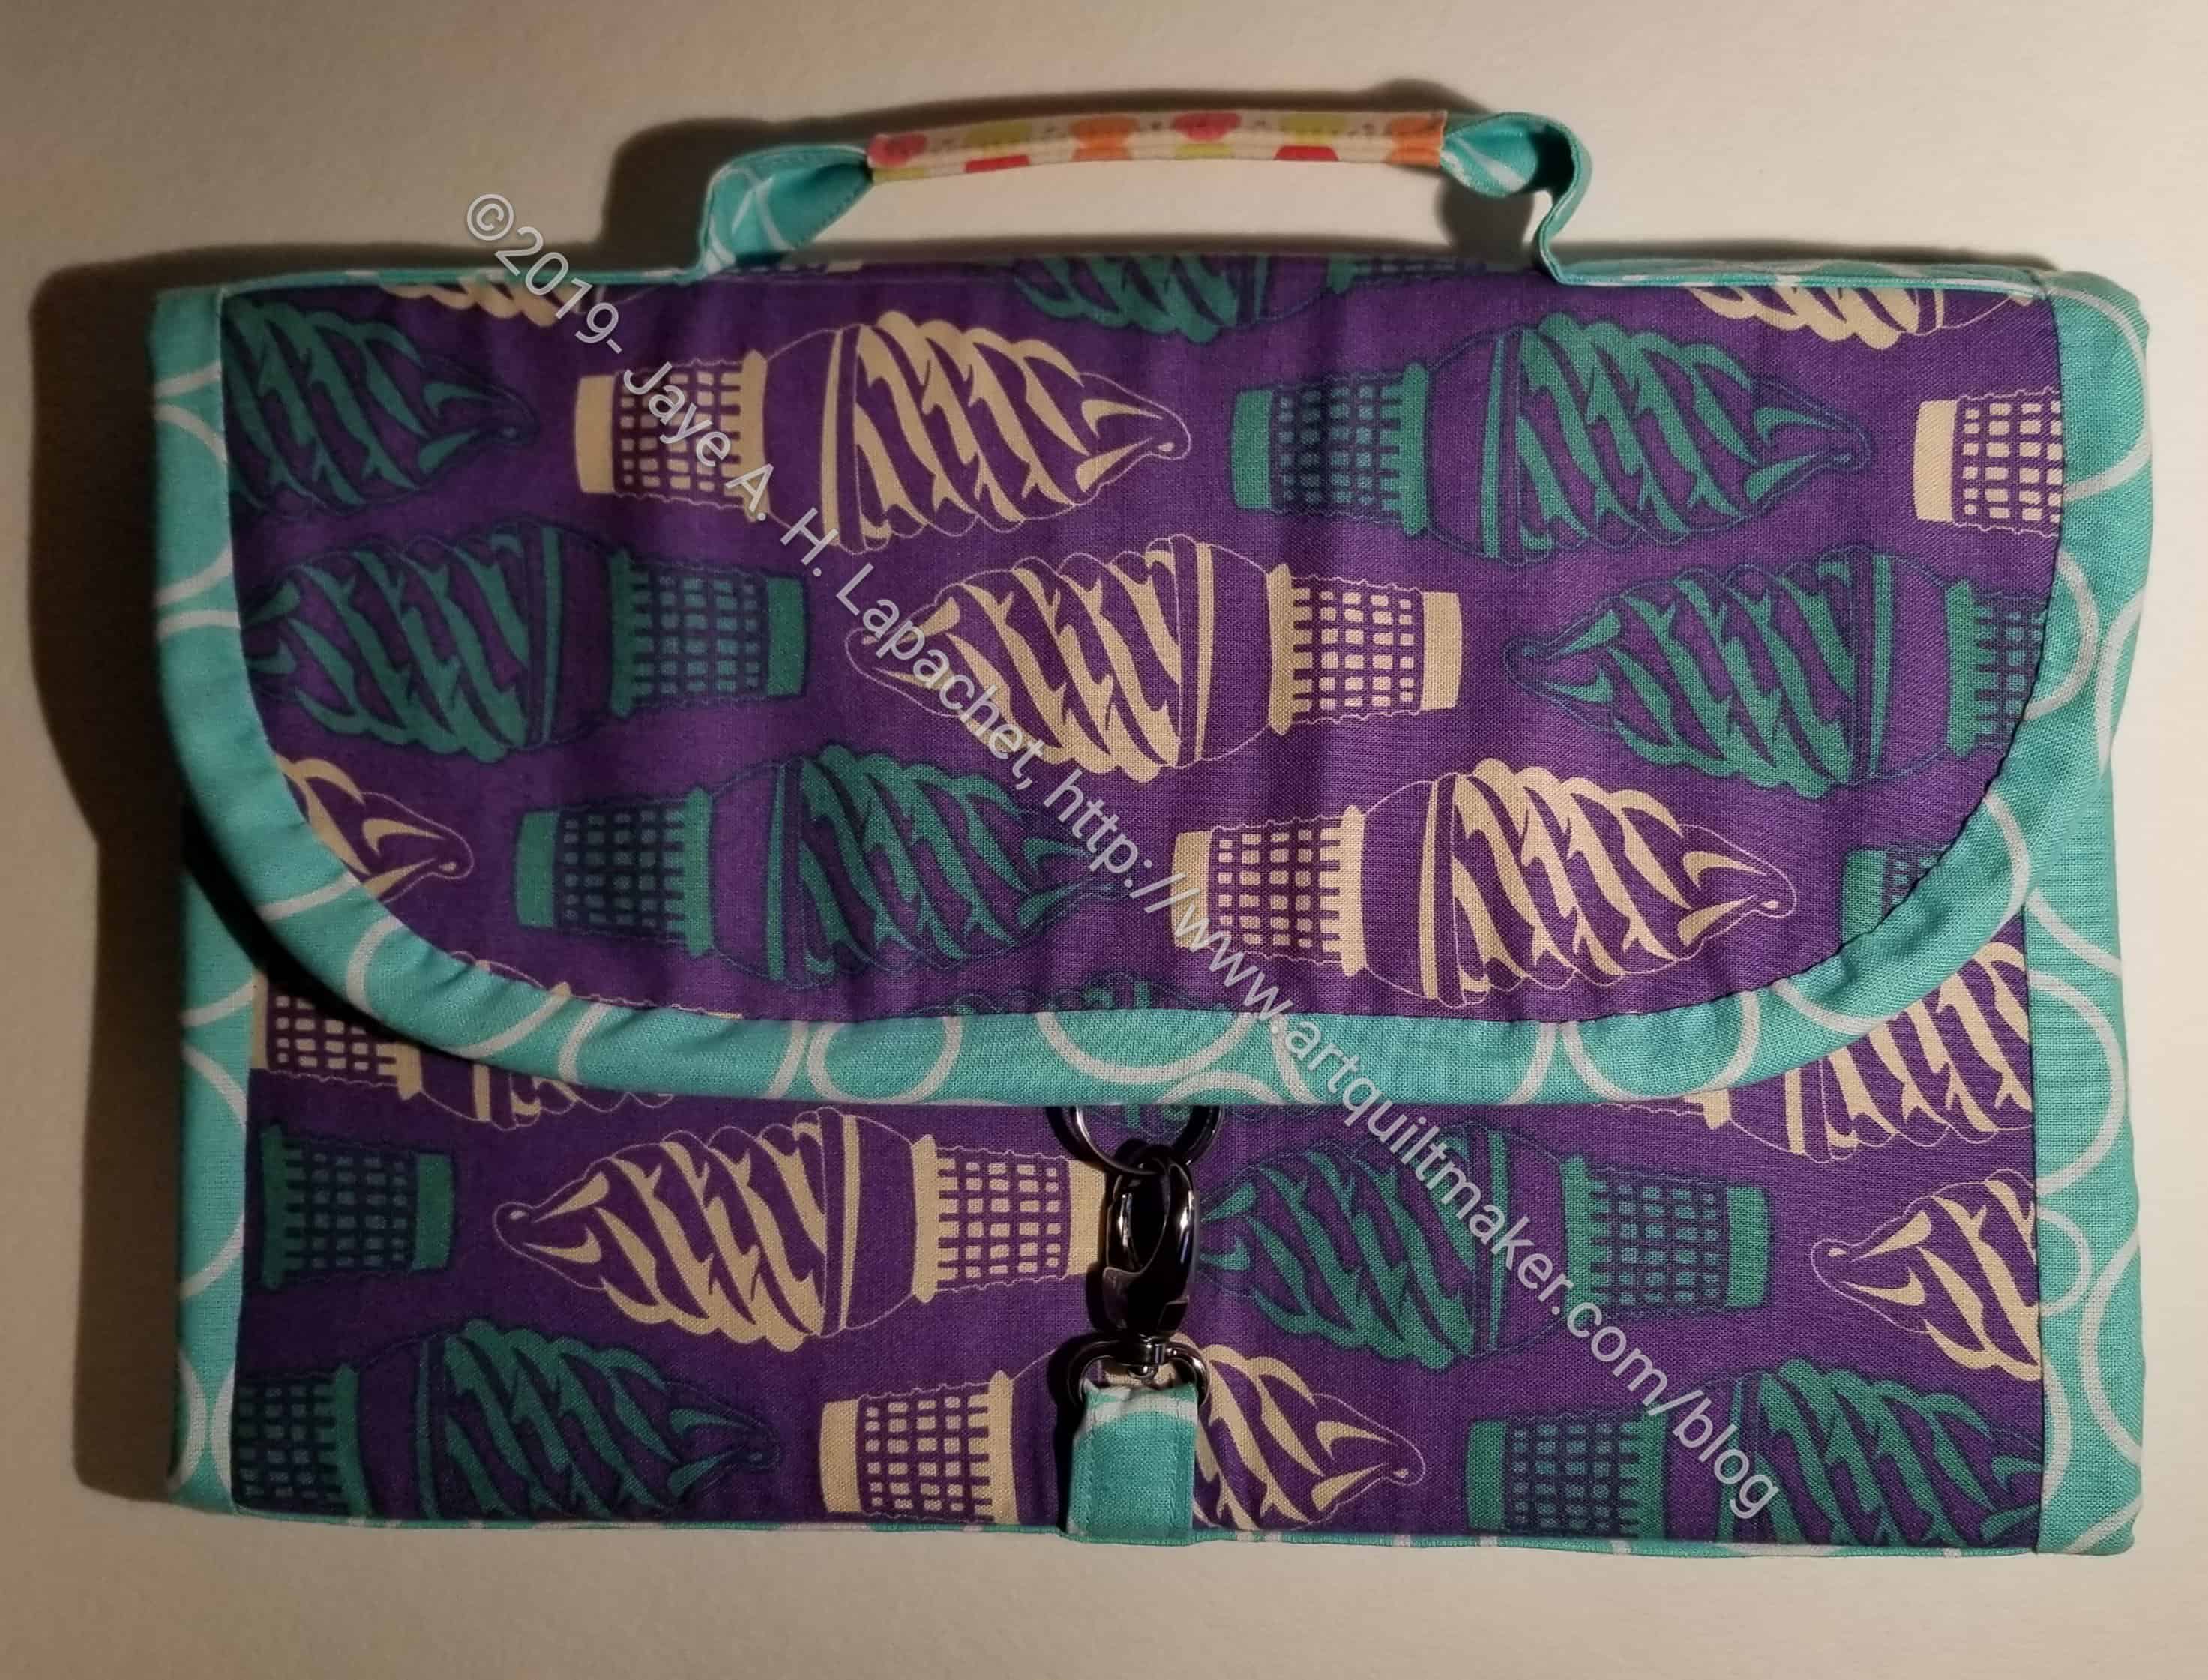
Hildegarde Finished – front (closed/exterior)
It turns out I had to unpick the turning opening a second time, because I forgot to put the Peltex in between the lining and exterior. Again, I thought about whether I really needed to do it, but the bag was saggier than I wanted, so I did it. I had to insert the Peltex around the stitching of the lining to the exterior. It wasn’t easy, but it was doable and the bag doesn’t look as saggy. The reason this happened is that I didn’t notice the last page of the pattern! In my defense, half of the second to the last page was blank so I thought that was the end, though I did think it ended a little abruptly. I have made a note on my pattern in case I make this bag again.
This bag has taken a long time to finish. I am not sure why, because it came out really well and I really like it.
It is quite a large bag, for one with a handle. The finished size is 12.75 inches in length x 6 inch tall by 5.75 inches deep.
Hildegarde Finished – front (closed/exterior)
I am pretty pleased with my fussy cutting. The fabric I chose, a Heather Bailey print called Aflutter in pink. I find it very cheerful. It is from an old line, so I don’t know if you can find it again.
I worked really hard on lining up the birds on the top and in the front panel. I can’t remember doing that kind of fussy cutting before. Sara models fussy cutting on her sample in the pattern.
Hildegarde Finished – back (closed/exterior)
I think the little bit of top stitching on the back looks really good as well. I used pink for most of the topstitching, but there is also a bit of white as well.
I like the plethora of birds on the back.
Hildegarde: Interior with dividers
Remember I said that I thought the dividers were unnecessarily complicated? They weren’t. They now seem super useful. I am glad I took the time to follow the directions and make them. I wonder if I could (should?) put another mesh pocket on the other side of the divider?
I don’t often use Velcro and this application went better than expected. I seem to remember sewing Velcro in the past and having it stick to the bed of the machine or the foot or something. I had no trouble sewing it this time, which was a relief. I think the design using the movable dividers, works very well.
Hildegarde Finished (open/interior)
I found a good place for my label, as well. It is not really hidden at all. I like the placement.
I also like how open this bag is. It is like an ‘open-wide/wide mouth bag. I am able to see everything inside.
Side note: when I went to get a label for this bag, I realized I only had two Wunderlabels left. Another thing for my To Do list.
Hildegarde Finished – front pocket – open
I was pleased with the way the front pocket came out. I think the elastic technique worked out very well. I haven’t tried using it for thin tools, but I will. One thing I was thinking about the design is that the tools stored in this pocket would be available without opening the main zipper. I think that would be a good thing.
I plan to use this bag for notions to take to Sew Day and Retreats. I plan to place it inside the Crafty Carrier . I am not sure how I will use this large open space with the movable dividers. I need a lot more space for long thin tools like pencils, tweezers, etc. Rotary cutters will go well in the mesh pockets, I think.
I know it seems like this bag is taking forever. It is sort of, but I have been diligently working on it a little at a time in between working and managing the house. This is turning out to be quite the complicated bag. In addition to all the pieces I had to cut there is a lot of other prep before I am able to start sewing the actual bag itself together. Oddly, I am not in rush to finish. Usually, I am, but for some reason I am ok with how long this project is taking.
I am sure it will be worth it.
Hildegarde interior detail
After all the cutting and interfacing, I had to make the dividers. These dividers were a little complicated and I wonder if they were unnecessarily complicated? I guess I’ll see once the whole bag is together.
I am pleased with the front section elastic. I thought the way Sara told makers to put this together was really clever. I am a bit confused about the top part – the ‘slots’ are larger – but I am sure it will work out. I have to wait and see.
This is a Sew Sweetness pattern. It is part of Minikins Season 4 bundle. You can see the various projects I have made from the Minikins patterns on the Minikins page.
I made a little progress at the last Sew Day on this bag. I mostly did prep, which needed to be done. I have to admit that I prefer to cut and do prep at Sew Day. It just means I have less to haul around. I was happy to make some progress, especially progress that was useful.
Hildegarde lid
When I got home I was able to get going on the lid.
I know that the trunk of the tree on the handle doesn’t exactly line up with the trunk of the tree on the top, I am still ridiculously pleased with how this came out. I am pleased with the pink and pleased with the fabric I chose.
Hildegarde lid complete
The next day, I worked on making the whole top/lid. Above is just the exterior.
In the photo, left, you can see the hinge and the zipper completely attached. I think this method of construction is the same one used for the Hackney bags.
Hildegarde mesh pocket
Again, I had some trouble with the mesh pocket. I am not sure why. It could be that I measured wrong somewhere. There was some ripping, but, in the end it came out ok. I really want to try another mesh pocket right away, but it will have to be for another type of bag as I am not ready to commit to another Hildegarde right away.
I know the mesh pocket looks a little wonky, but it really isn’t. I measured the binding on the top mesh carefully, so it would be even on both sides. It just looks a little weird in the photo.
Center Street Quilts has a video for her Stella pouch. I like the way she makes her zipper tabs and would like to try that method next time. I think that method would work for any type of zipper and give me some flexibility as to size. Of course, it would be helpful if I cut everything properly. I always think I do, but I have to explore the possibility that something was too small. Perhaps I’ll cut out the top of a Hackney and try this pocket again while my thoughts are fresh in my mind.
This is a Sew Sweetness pattern. It is part of Minikins Season 4 bundle. You can see the various projects I have made from the Minikins patterns on the Minikins page.
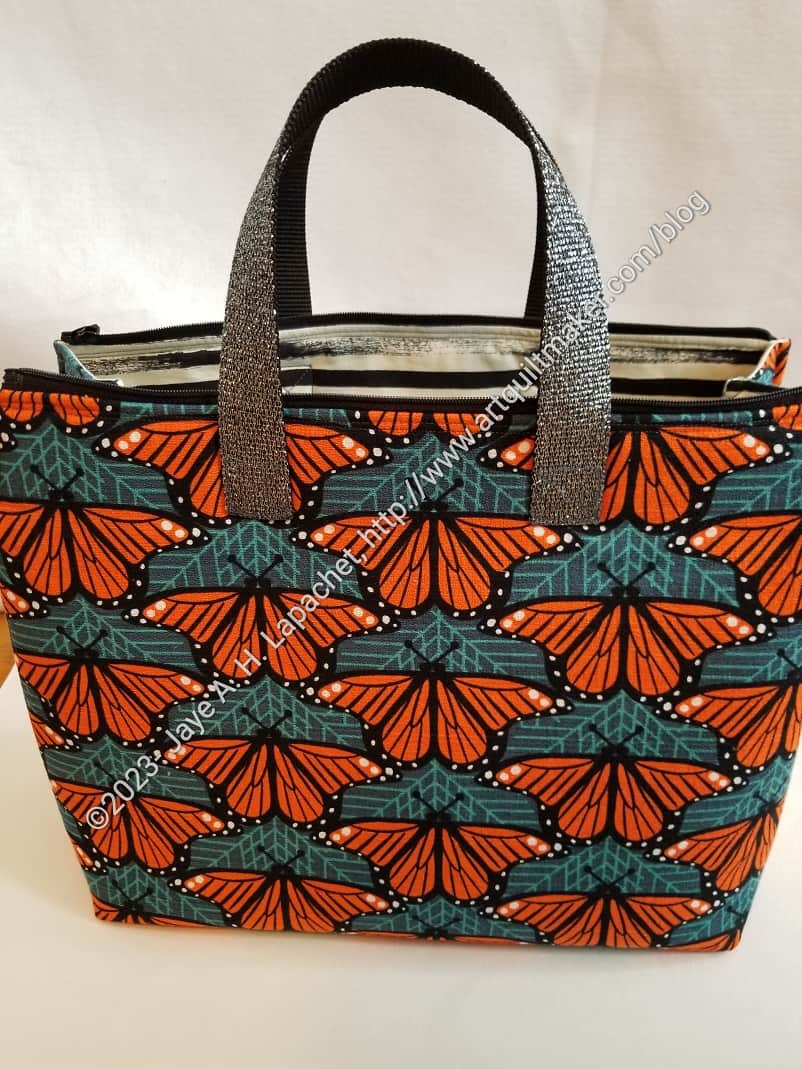
One of the points of the Pink Project is to provide me with a way to test out bag patterns I haven’t made before. A week or so ago, I talked about making some Superbloom totes. I do want to make more Superbloom totes, but I don’t want to miss the chance to test out a larger bag pattern. I decided to make a Chickadee backpack as the main large bag for the Pink Project v2 instead of a Superbloom tote. I’ll make a Superbloom for the other group and also one with the Hindsight fabric.
I didn’t make a large bag for the Pink Project v.1. I used a bag that I received at the last Convention I attended.
The Chickadee backpack is another Sew Sweetness pattern. It came out last year. There is a lot of cutting and I haven’t felt like I had the brainspace or the time to make one. I wanted to, but I also wanted to make some changes:
crossbody strap instead of backpack straps
d-rings so the top handles fold down out of the way
more pockets
I know that it is better to, first, make it as the pattern indicates, thus I thought making it for the Pink Project would be a great idea.
I am starting to think more about gifts, not just the Pink Project, but upcoming birthday and holiday gifts. The Classmate Tote** by Atkinson Designs has been on my mind for some reason. Perhaps I need to make one for myself!
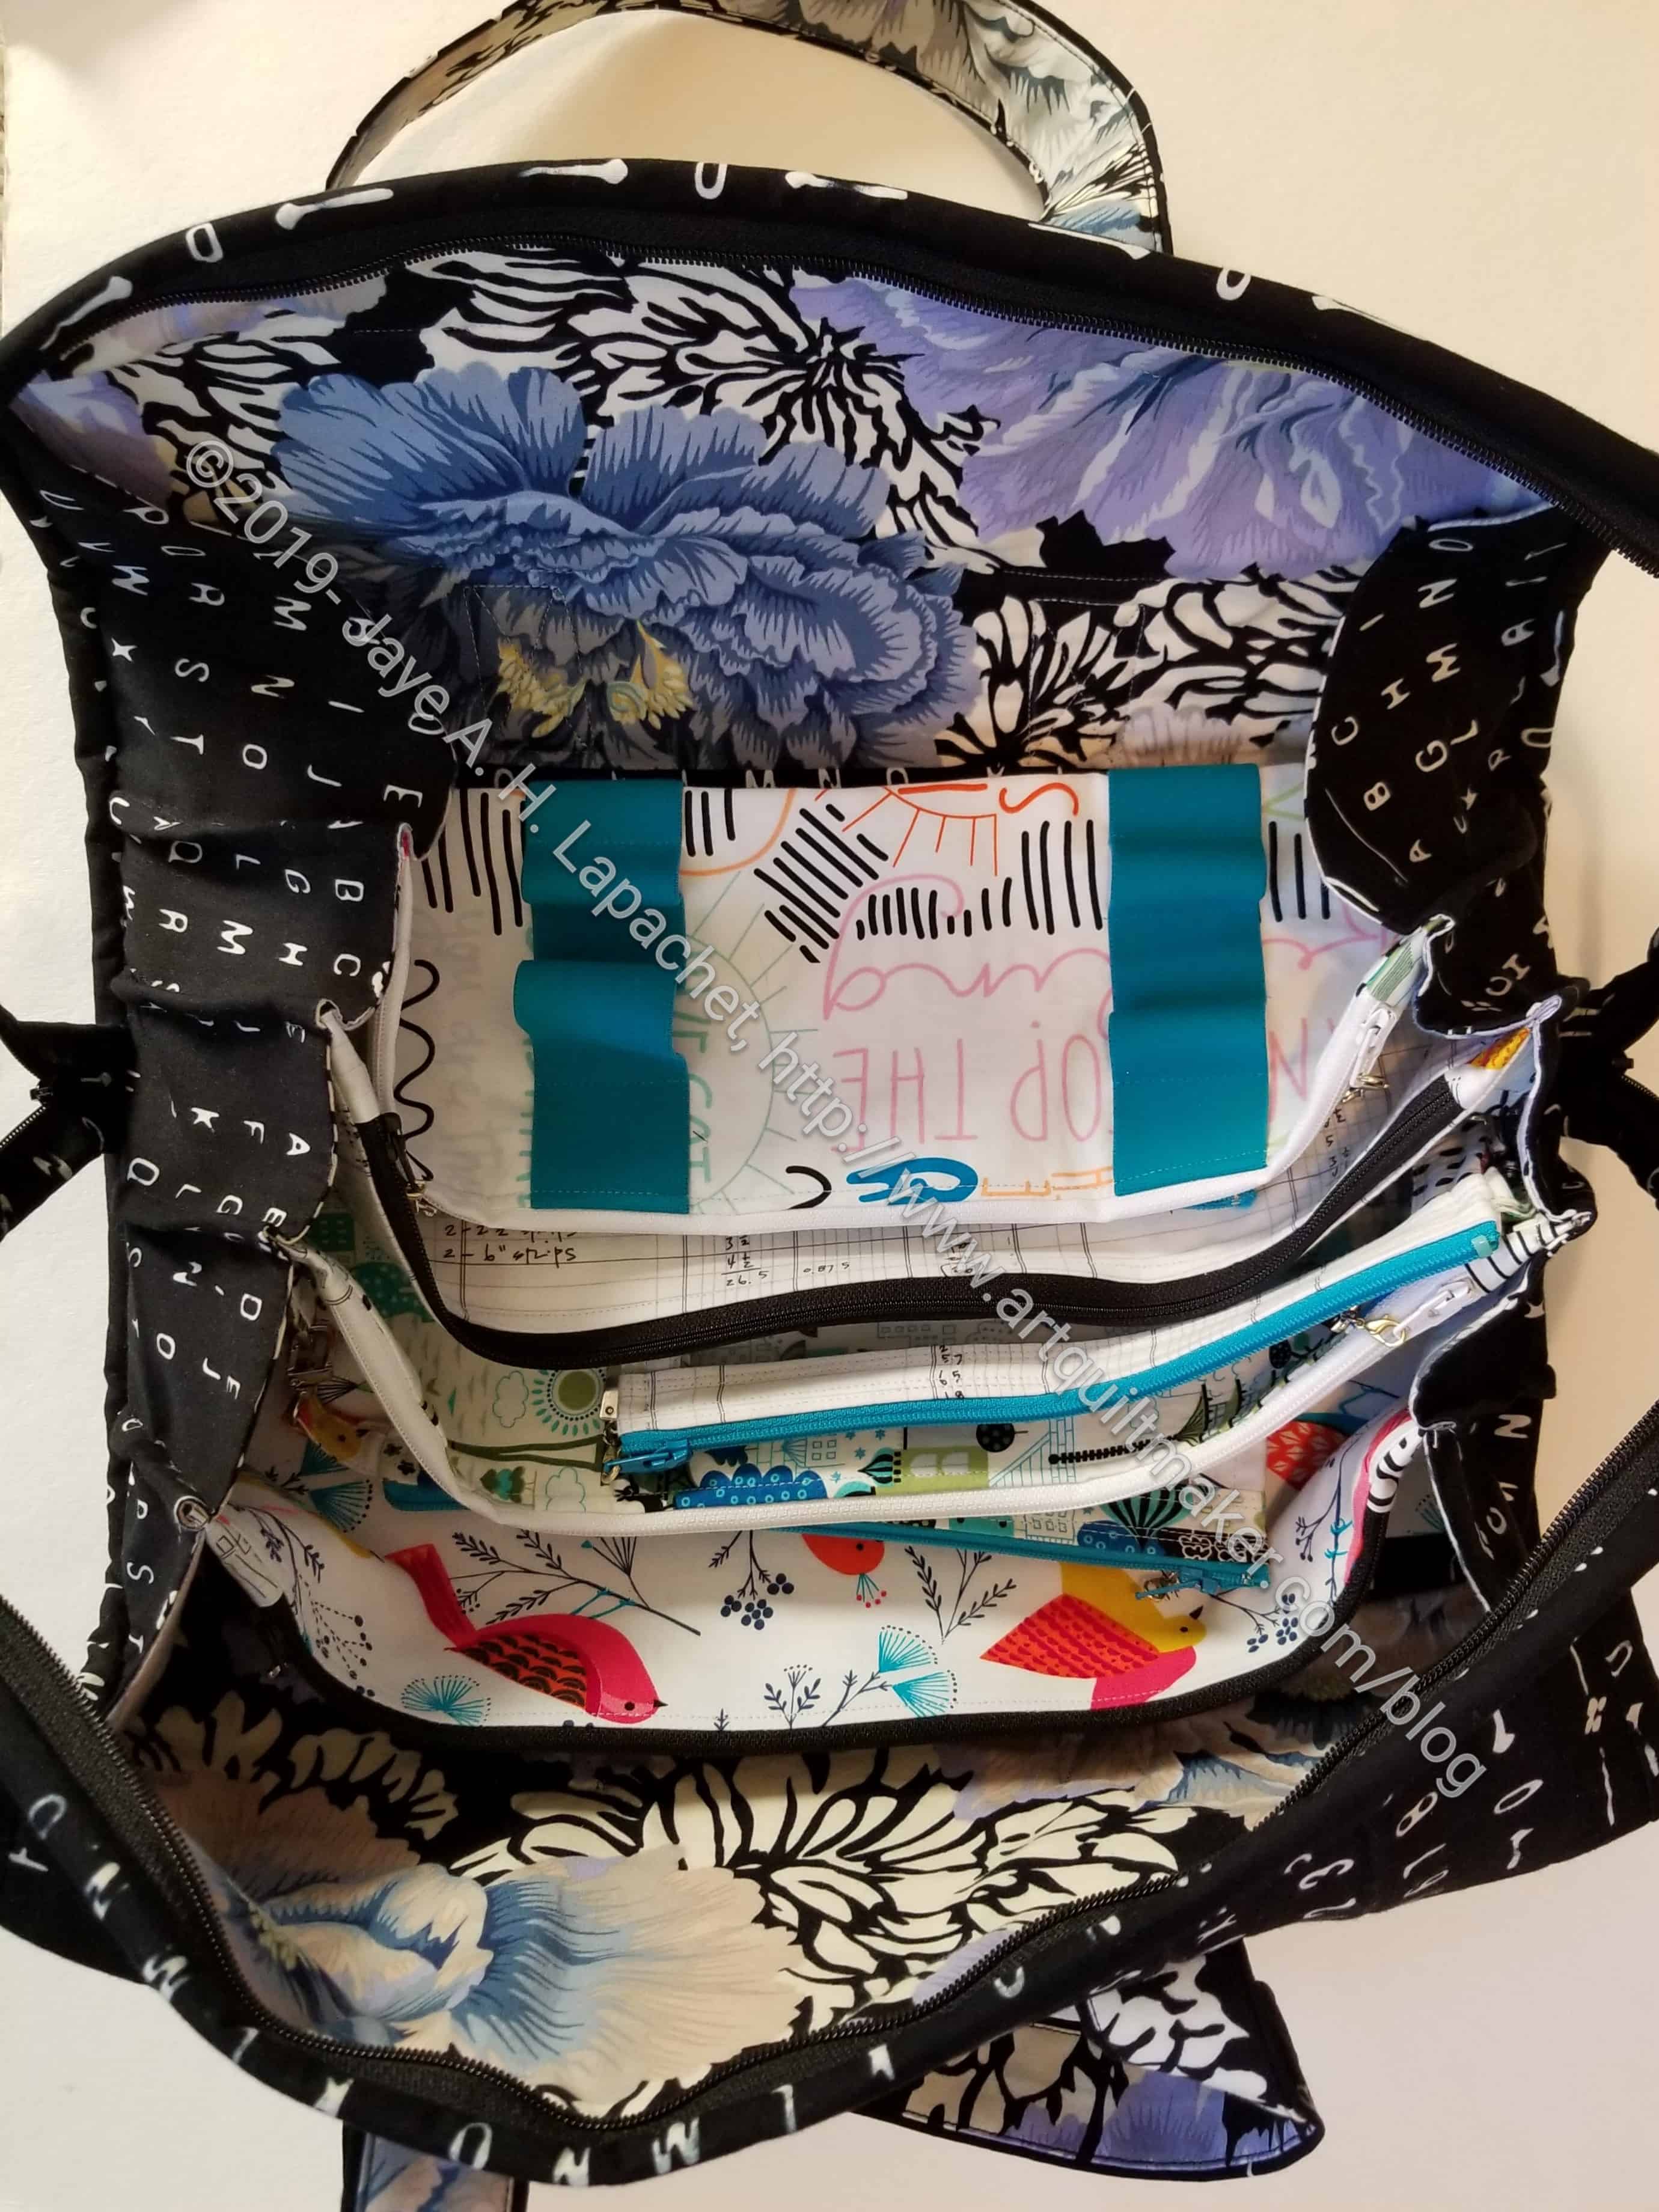
Gerre’s Classmates Tote- open
I like making useful bags. As you know I have made two of them before, one as a swap gift and one for Gerre. I like the idea of this bag and I think it is useful.
There are a couple of things I need to remember, if I decide to make one of these again. The pen holder is too small for *my* pens, so I need to make sure to measure my pens.
Gerre’s Classmates Tote
The other thing is to make sure the binding goes with the the interior and exterior. I have to admit that I really like getting to the sewing part. That means I sometimes take shortcuts in choosing fabrics. It is so stupid, because I love shopping for fabrics and I enjoy the fabulous motifs of different fabrics. So, the reminder is to make sure all the fabrics go together.
**Obviously, you should shop at local fabric, knitting shops or quilt shops. However, if you can’t, please know that I use affiliate links. I may be paid for your purchase of an item when you click on an item’s link in my post. There is no additional cost to you for clicking or purchasing items I recommend. I do not recommend items I don’t like. I appreciate your clicks and purchases as it helps support this blog.
I want to use some of the fabric I bought on my vacation for Superbloom totes. I was really pleased with how the first one came out. I have had plans for another one using the Anna Maria Honorable Mention fabric, but I haven’t gotten around to making it yet. Now I have at least two more I want to make. Good thing I bought the templates.
Superbloom for Auntie
The first one I plan to make will use these fabrics. The far left black and purple linen/canvas is from Bolt. I bought the iris print at Stitch in Ferndale. It is a good choice for my aunt who loves irises. I am not a huge fan of the background color of this iris print, but I didn’t see any others. In general, I know that there is a colorway with a black background, but that won’t work for the lining of a bag.
Superbloom for SMCAP
Next, I plan to start another project like the Pink Project, but for a different organization. This time I will use blue fabrics as a base. The fabric shown will provide good scope for fussy cutting.
The Superbloom tote will be the bag in which all of the other pouches are carried. I don’t know which other pouches I will make yet. I have to make this one first since it will be a great donation even if I don’t make anything else.
Superbloom fabric for the Pink Project v.2
Finally, I will also use this pattern for the Pink Project v.2, I think. It is possible that I will try a different pattern, but for now I am planning on making yet another Superbloom.
I am waffling, because I could use this fabric to try out the Chickadee Backpack or the Cavalcade Travel Bag or any number of other tote bags that I have purchased. We’ll just have to see how I feel.
Yay! I finished the Carrier in time for the next Sew Day. Yes, I am finishing a lot lately. It feels great, though I still have a lot to finish.
This is a large bag and it is simply a bag. There are no ironing pads or tool holders and there aren’t 45 pockets. I even forgot to put a leash in it with a lobster clip!
As mentioned previously, I thought it would allow me to be modular in my transport of tools and supplies to Sew Day.
Finished: Crafty Carrier – front/handles
There are 8 pockets, six on the outside and 2 on the inside. The inside pockets might have been better as vinyl pockets. I had already added Soft & Stable** as the interfacing. This means that the first time out, I was reluctant to add another layer to some already thick seams.
With this bag, I was already considering whether or not I needed an industrial machine. The top stitching around the handles and the edge was difficult, but I lengthened the seam allowance and that worked pretty well. I really don’t want additional machines hanging around. If I had a larger workroom, maybe, but I don’t.
The pattern called for ‘heavy interfacing’. Peltex 70** was suggested. As you know, I have yards of Soft & Stable and I know how that works. I haven’t tried Peltex 70, that I remember. I also know how to work with Soft & Stable, so I went with that interfacing. The bag stands up, which I like, so I call it a win.
Finished: Crafty Carrier – interior
The lining isn’t as tight as I would have liked. I should have used a larger seam allowance. I trusted the pattern maker and the lining was very saggy baggy. I went back and increased the size on some of the seams I could reach once the bag was all together. That made it better, but not as I would like it. I have to review the directions in a different pattern, which is rumored to include anchoring the lining in the seam allowances. Stay tuned for that.
I also painted Odicoat** on the bottom. Not photo since you can’t see it in a photo. I put on two layers after the bag was completed and I don’t see any harm to the bag. I don’t see much, if any, shrinkage. When I do this again, I’ll still pay attention.
I still have to migrate all of my ‘going to Sew Day’ tools and supplies to this bag. That’s a project for another day this week.
Making bags is always a learning experience. I learn something every time. I need to remember to incorporate my preferences into each bag regardless of what the pattern says.
**N. B. : Obviously, you should shop at local quilt shops and small businesses. However, if you are too busy or can’t find what you need there, I use Amazon affiliate links and may be paid for your purchase of an item when you click on an item’s link in my post. There is no additional cost to you for clicking or purchasing items I recommend. I appreciate your clicks and purchases as it helps support this blog.
I got a border print thinking it would be great to use in a bag. I like the idea of the denser motif being at the bottom and thought it would be a great look for a bag.
After thinking about it, I decided that the free Retreat Bag pattern from Emmaline Designs, enlarged, would be a good pattern to use. I couldn’t find information on the enlarged version I had seen, but got a video from a friend that was really helpful.
I am pretty sure I saw a bag using a border print. I am also fairly sure I took a picture, but I can’t find it. I am starting to put inspiration in a tool called Notion, so I hope it helps eventually.
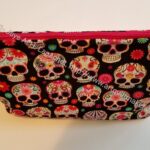
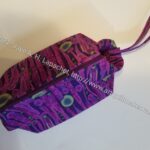
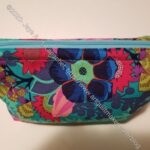
Large Sugar Skull Retreat pouch
Large Retreat pouch -aerial view
Retreat Pouch #2
Retreat Pouch closed
I thought I had made more of these bags, but I have only made four. It is a good pattern and I can now find the frames (Small = Style A**; Large=Style B**) on Amazon.
**N. B. : Obviously, you should shop at local quilt shops and small businesses. However, if you are too busy or can’t find what you need there, I use Amazon affiliate links and may be paid for your purchase of an item when you click on an item’s link in my post. There is no additional cost to you for clicking or purchasing items I recommend. I appreciate your clicks and purchases as it helps support this blog.
While I am thrilled that I was able to complete the Ultimate Carryall Bag, it isn’t working for me as a tote for hauling tools to Sew Days and Retreats. One reason it isn’t working is that I forgot to interface the inside pockets and the quilt weight fabric alone cannot stand up to my hard use.
It occurred to me that the one thing that worked for my old Quiltmaking go bag (going to Sew Days/Retreat system) was that the tote bag I used allowed me to be modular. I could put in my Tupperware box of tools as well as rulers and other things as needed. In the Ultimate Carryall Bag, items have their dedicated space and other, less used, supplies I need have to be crammed in where they can fit. The UCAB is bulging.
Finished: Kit Supply Tote
Yes, I have the Kit Supply Tote I made to replace the UCAB. My original idea was to make myself a Running with Scissors Tote (RwSt) using some of the quilted fabric/foam that Colleen quilted for me to organize my tools inside the Kit Supply Tote. I still have to measure to make sure the RwSt will fit in the Kit Supply Tote! I just haven’t gotten to the measuring or the making yet. I have the pattern** on my cutting table as a reminder.
All Rolled Up tote with handles: open
This problem has been on my mind for awhile. I have searched through my patterns as well as available patterns to see if I could find another bag that would work. The UCAB is pretty unique in its design as a quiltmaking/sewing tote. I really haven’t seen anything else like it. The All Rolled Up Tote is a great bag, but somehow I have never considered using it for this purpose. Perhaps I should. It currently holds a lot of embroidery supplies.
Crafty Carrier by Ellie Mae
I was thinking about the problem again as I was organizing the fabric and patterns I bought on my trip.
Awhile ago, I checked Etsy to see what was available as ready made or in pattern form. I found some bags that might work. One was the Crafty Carrier by Ellie Mae Designs. I came across the pattern and pulled it out.
I bought this pattern a long time ago, on a previous trip to Portland, at a shop called A Common Thread. (N.B.: I don’t know if that shop is still business.)
Crafty Carrier exterior in process
While I have a lot of projects in the queue, I started working on this bag over the weekend. Sometimes I have no self control about what I work on!
I cut out everything and interfaced almost all of the pieces on Saturday. Then Sunday, I started to sew. I am making good progress. The picture shows the exterior (inside out) without the bottom
I am using a lot of canvas and Essex linen-type fabrics. You can see the Echino I bought at PIQF. I am thrilled to be using fabrics so soon after purchase!! It is so fun to buy fabrics and use them right away.
The inside doesn’t have many pockets, so I added two, but also thought about keeping it empty so I could put other carriers inside for the modular idea. I could have put an inside zipper pocket, but I didn’t think of it and it might be a bit too late.
Anyway, progress. I think I’ll have to make the Running with Scissors tote sooner rather than later. Having one with my various tools organized and together would allow me to tuck it into whichever bag I was taking to class, retreat or Sew Day.
**N. B. : Obviously, you should shop at local quilt shops and small businesses. However, if you are too busy or can’t find what you need there, I use Amazon affiliate links and may be paid for your purchase of an item when you click on an item’s link in my post. There is no additional cost to you for clicking or purchasing items I recommend. I appreciate your clicks and purchases as it helps support this blog.
I decided at the last moment to make a storage bag for the baby quilt that was off to San Diego earlier this week.
I wanted to use the Jeni Baker of In Color Order drawstring bag pattern, but for a variety of reasons it wasn’t available. I have made enough of those drawstring bags that I have an idea of how to make them.
I used the steampunk fabric from Feather Your Nest in Gresham. The fabric paired well with some black and white stripes I had available. It is also perfect for my niece.
This pouch is for Lindsay’s daughter, A. A has a new brother and I didn’t want to bring him a gift without one for her. Mama loves Tula, so she got some Tula fabric in her bag.
This is a cute little pouch that is good for a little girl, though I don’t think it is good for much else. At least I can’t think what I would use it for. How would you use it? The first one I made went into the Pink Project Bag.