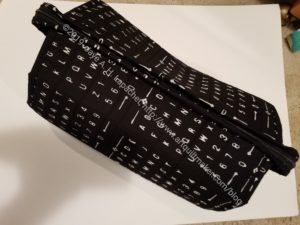
I am thrilled to tell you that I finally finished the All Rolled Up Tote!
Yep. Finished. Done. Complete.
It was a big project. Not difficult, but with a lot of steps. The steps made it somewhat daunting. I say daunting only because the project was unfamiliar and the sheer number of steps seemed impossible to complete. I had done most of the techniques before, if in different patterns, so that wasn’t the problem. I have a new appreciation for video tutorials.
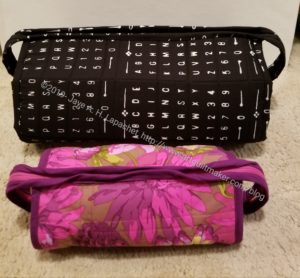
The Tote is HUGE. I didn’t really understand how huge until I had sewed the main parts of the project together. It is really hard to understand the size without seeing the thing in person. I have included a photo with my most recent Sew Together Bag side by side with the the All Rolled Up Tote for comparison. I know many of you are familiar with the Sew Together Bag.

I am thrilled that I made such a complicated and different project. It is similar to the Sew Together Bag, but the construction was different in some places.
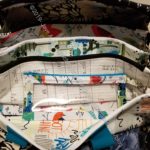
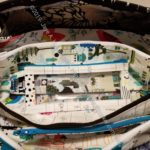
The other thing I did differently was the front panel (see blue/turquoise vertical strips). This panel calls for a 1/4″ piece of elastic to be installed horizontally. I didn’t want any pens I might want to carry around to be accidentally opened and bleed on to my fabulous Philip Jacobs fabric. I also thought the 1/4″ inch elastic was not sturdy enough and looked a bit cheap. I decided to install wider elastic, which I happened to have, having bought it somewhere along the line. I measured out a few items that I might want to have with me, if I carry this around as a project bag, and sewed the elastic down. I think it looks nice.
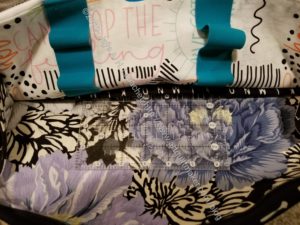
One thing that was hard to understand without the video was the sleeve. I tried to understand it before watching the videos and it was a mystery. Finally, I watched the videos and could see what it was for. There is an extra area below the pockets (thus the changes in construction in comparison to the Sew Together Bag) where one can store flat items. I put a ruler halfway into the sleeve (see right), so you can see the sleeve. I haven’t tried filling this bag yet as I haven’t quite decided how I will use it, so use of the sleeve may change once I decide.
My pouches fit nicely in the Tote. Of course they are the correct size, but my lobster clip plan worked well. It was pretty easy to clip and unclip them from the D-rings on the tote. Crafty Gemini shows putting WonderClips into one of the pouches, which might be a good idea, since I could take the pouch out and put it somewhere if I knew I had to refill it because I had used my ‘on the go’ supplies (like clips) for a project. I also think that these little pouches might make good small gifts. They do require a lot of steps, but are unique as well.
One issue I had with the pouches was zippers. I happened to have zippers that were the exact right size. Crafty Gemini doesn’t say anything about having zippers the right size. In terms of whether we needed to secure ends or add a zipper tab. I might do that next time just to make sure everything was sewn together tightly. I am concerned that the zipper ends will come out.
Some of the problems I had with a recent Sew Together Bag were alleviated by the pattern’s suggestion that makers hand sew on the second side of the binding. I did hand sew the second side of the binding. It took me somewhere between 4-6 hours, I think. I am pleased with the way the binding turned out. No sloppy looking stitching because of multiple layers and a cranky sewing machine.
I am I still contemplating handles. Some of the other people in the Organizer Club who made this project added handles, but I wasn’t completely happy with their design. If I were to add handles I think that I would like to add them all the way around the bottom of the project in a loop design. I imagine that these would not go over the top of the bag, so access would not be impeded.
Off hand I can’t think of other changes I would make to another version of this bag, but I have the feeling I want to make another one. *I*, of course, don’t need another one, but I am sure I know someone who needs it as a gift.
Well done, Jaye. It looks like a really useful bag, pretty too.
Thank you! I haven’t figured out how I’ll use it, but I have some ideas.
Did I see that some of the flower fabric that was in a special apron you made, also in this bag? I really like that fabric too. It is very elegant!
You’ve inspired me to make more gifts for others as well. It is so fun to give something I’ve created. My kids have enough quilts they say, as they all live in the south. hahaha
It is the same designer, but a different fabric, I think. The one in the bag is a black, grey and white.
That looks like a very handy bag, but it is quite big! I didn’t realize it would be that large, thanks for the comparison pic with the sew together bag. I could see how the addition of some sort of handle would be a good idea.
I am not yet sure how I will use it, mostly because of its large size. I am leaning towards storing my embroidery threads, Perl Cotton and other supplies in it. For the right project or storage idea, I agree that it would be quite useful. I am still mulling over a handle.
I just came across your blog!
Great job on your All Rolled up Tote!
And I am happy to read that some of the issues, and additions you mentioned are on my list of things to include/clarify in a future re-write of the pattern!
Tammy