I can’t wait until this bag is done, but I also haven’t worked on it much! I know, really I do, that they don’t get done by magic. The side shown above is half sewn together.
Sugar Pop Chubby Charmer side 2
The side show above is completely sewn together.
I was really busy working on FOTY 2010 over the long weekend. I tried to work on it every spare moment I had, because I don’t want it lingering. I want to finish that baby and take it to the quilter. Since I am using the Chubby Charmer (CC) piece as leaders and enders, I didn’t get much work done on it, because I just used other FOTY 2010 diamonds as leaders and enders.
I was thinking about the inside of the CC, the straps and the filling, however. I think that I will add some interfacing to the straps as well as batting just to give them a little more substance. If I have enough fabric I will use the icky green/white dot (bottom photo, 3rd fabric from the right, 2 up from the bottom) as the inside. I may only have half a yard, which won’t be enough.
I was also thinking about using some leftover batting instead of the fusible fleece. I have batting scraps and would have to buy fusible fleece. I wonder if there would be a noticeable difference? I don’t remember the fusible fleece sticking all that well when I made the first Chubby Charmer. I do remember it being stiffer, though. I could add fusible to the batting I have. I do want this one to stand up like the first one does, but I would also like to use what I have. I’ll have to think about it.
I figured out why the other layout didn’t look right. In very tiny writing at the end of the first instruction, the pattern said “repeat for side 2.” I generally skim directions, so I didn’t see it the first time around and had to carefully read every word to find that crucial piece of the process. I am glad I did!
Sugar Pop Side 2
I picked out a dot to go with these fabrics. The charm pack didn’t have quite enough squares for the pattern, but that shouldn’t be a problem. However, I didn’t finish FOTY 2010 at the retreat, so I will have to put this on the back burner until I do finish it.
Remember this bag? I was reading the Martha Stewart blog and saw it referenced again there. This version by Liesl of City Weekend fabric by Moda and her own company, Oliver + S. I am not a big fan of that green, but the whole look really works. I need to get the pattern out and make it! I have all hardware and have for awhile. Love those dots. I wonder if I have them? 😉
Every horizontal surface in my workroom is covered, mostly with fabric, but other stuff, too. I don’t have large enough horizontal surfaces, but that is no excuse. I have so many things going on. On the top of my list is sewing!
I am trying to pick out fabric for my latest Anna Maria Horner Multi-tasker Tote. I’d like a new one for spring and it just isn’t going well. I tidied up a little after I got home from CQFA, but I still don’t have enough space to work.
Option 1
Option 2
Option 3
Option 4
Option 5
Final Selection?
Option D
Option A
Option C
Option B
Cell Phone Pocket in Progress
AMH MTT in Progress
I had three fabrics ready to make the next Anna Maria Horner Multi-tasker tote and one of them disappeared or I lost it or misplaced it. To make matters worse, I don’t remember which one I had selected. Bleah!
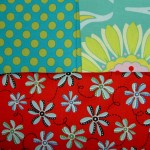
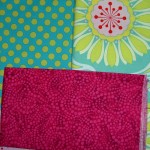
I was looking for a red or a pink to bring out the middle of the flower, but am considering another green to encourage subtlety. I looked at pattern on the fabric as well as the color and I am not really sure any of them work. The above are some that I tried out to see if I liked them. I think I need a red with a little more pink.
Final Selection?
Perhaps you like the above?
No? I found more fabric choices in the pile behind the door. they caught my eye when I was wandering in and out. This area is like the Tollbooth in the Phantom Tollbooth and they haven’t been on my radar since my sister moved a bunch of stuff around in my workroom.
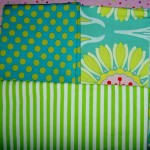
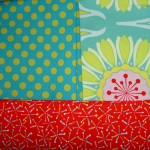
Option A
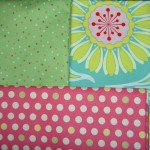
I definitely like the pink dot better. It is a lot of dots in the piece, however.
Option B
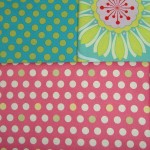
The small dot kept catching my eye as I looked at some of the other choices. It was on the top of my ironing board because I had just ironed it. I kind of like the lavender/pinkish color.
Option C
Stripes don’t work for me. Well, actually, the stripes work, but the color of the stripes doesn’t work. Too Pepto Bismally.
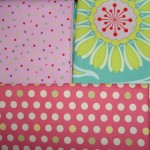
Option D
Too much green?
I really wanted to get going on that tote today. It has been too long since I sewed. Since I couldn’t decide on colors, I was stuck. NOT!
AMH MTT in Progress
I have plenty of fabric and had just come across the perfect green to make the straps for another AMH MTT, so I started in on that and got pretty far after I made the straps.
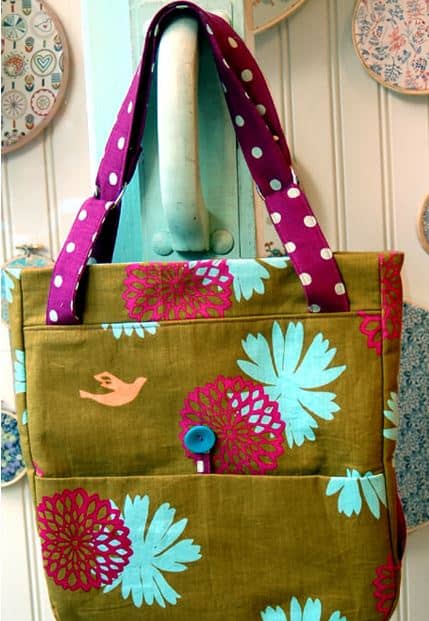
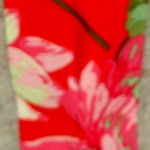
The reddish pink fabric is a Martha Negley for Rowan fabric from the Variegated Garden collection will be used for the exterior. This particular print is MN-40 Dahlia.
That fun dot is the inside. As you can see I have the pockets pinned and ready to sew, but haven’t sewn them yet. I was tired.
I added a cell phone pocket, which is the smaller pocket also waiting to be sewed on.
Cell Phone Pocket in Progress
Sorry, this photo is bleary. I have been up and down the stairs (4 flights) at least 8 times to fix photos and I am not doing it again. This idea is from the Sweet Harmony bag. The dimensions of this pocket are 4″x5″. I cut it 8″x5″, sew around the outside with right sides together, turn it and then sew it to the lining of the AMH MTT bag. The way I make it fit the cell phone is that I pin the bottom so that it measures only 3″, which makes a pleat.
I was walking back from lunch the other day. I am always on the prowl for the perfect bag and saw a display of luggage I had never seen before. I looked closer and really couldn’t figure out the purpose of these suitcases. Finally, I stepped back and looked at the store’s sign and found it was a pet store and these carriers were for pets! I was amazed at the complexity.
The other day my sister sent me this picture of her dog, Cherry in the tote I made. I never thought of using the Eco-Market totes as dog carriers, but I am sure it was much cheaper than one of the pieces of luggage I saw downtown. Doesn’t Cherry look cute and sweet? She is sweet, but only intermittently. My Sis saved her from a bad home and she has to contend with 3 other dogs, the smallest of whom is 3x her size!
I hope her little claws don’t rip through. The bag has already been back and forth a time or two.
I realized that one of the reasons I like making the same tote bag pattern over and over is that I am trying to understand it. I want to understand it so I can change the pattern to suit my needs and also incorporate the techniques into my own design bag of tricks.
Completed Bag, Nov. 2009
The Anna Maria Horner Multi-tasker tote is no exception. As I mentioned in a previous post, I love the way this tote goes together. Above is my completed Multi-tasker tote #2. This will be a gift for a friend of mine. I used Lonni Rossi’s new fabric line in the black and white colorway. You can buy them at Back Porch if you want some.
I used a FQ pack and had to piece some of the fabrics together to make them large enough to fit the pattern pieces. The pattern calls for more yardage than an FQ pack, however I only had a FQ pack of the fabrics and am always up for a challenge.
Nov. AMMTT in progressBernina Bliss
I always enjoy using TFQ’s Bernina 1230. It is a tough little machine that has never really given me any problems. Now I know how to wind the bobbin and rethread. TFQ better watch out or I’ll just take it over! 😉
It doesn’t have the bells and whistles that mine does (I miss the auto needle up button!), but it does bags very well. I also like the button holer.
I always have a tough time maneuvering the fabric through the sewing machine as the layers increase. Towards the end of the process I was sewing through about 8 layers of fabric or seams or interfacing. I found that TFQ’s machine was powered right through with no grunts, groans or complaints.
Nov. Tote, detail
The pattern doesn’t call for as much interfacing as I put in, but I like my bags to have some body, so I put interfacing on the exterior and lining pieces. I omitted it from the pocket panels.
I am pretty pleased with how it came out and hope my friend is as well. I am going to size this pattern down so it fits me better. If it doesn’t work, then I probably won’t make anymore of these totes, despite the great way they go together.
I had no idea I would ever need a book called the Illustrated Dictionary of Math. I now find that I actually might. I have mentioned Craft Nectar before and Weeks Ringle does not disappoint. She talks about the usefulness of this book in constructing oval tote bags. I might actually want to do that someday. You never know.
For example, did you know that the Illustrated Book of Math will give you the formula for the circumference of an oval if you’ve designing a totebag with an oval bottom?
I spent some time sewing yesterday in between soccer and a movie. As a result, I finished the Anna Maria Horner Multi-tasker Tote. I keep thinking of it as the Julie tote, since Julie looked high and low and found the blue Denyse Schmidt fabric for me. She may get a gift. 😉
AMH MTT, finished!
As I mentioned in my review, the construction of this tote is amazingly elegant. Putting the straps on was no exception. There is a part where you fold over the top and that becomes the channel for the straps. I am still completely in awe of AMH and her ability to imagine the construction of this bag.
In the photo below, I tried to show you the channel. Aside from having to turn the straps inside out, which is a big pain in the patootie, I got the straps on and the bag ready to carry stuff in a couple of hours.
AMH MTT, detail
My only concern is that the way the straps are held on means that I won’t be able to carry heavy stuff in it. I don’t plan to use this for groceries, but I routinely carry:
I don’t think the above list is outrageous…. I do have to have my stuff with me.
I plan to make another one now that I know the drill. I have ideas for different ways of combining fabric. I ended up buying some of the Peltex 2 from SewThankful (I think), so I need to do something with it. This Multi-tasker tote bag is a nice change from the Eco Market tote.
If I didn’t think Anna Maria Horner was a goddess already, I do now. I spent the day on Sunday, minus a short chauffeuring task, with the Multi-tasker Tote (AMH MTT), a recent pattern from Ms. Horner. As I suspected, I did have trouble understanding the directions. It is the way I learn and not completely about the directions. I do think there were a few tiny parts that could have been clarified just a little bit more. I know they have a certain number of pages they can use to create a pattern and have to worry about font, enough photos, etc, so I really am not going to complain too much.
In all fairness, I think making 20 or 30 of the Eco Market Totes gave me a feel for what should be going on in the tote making process. Doing a multitude of those totes and making little changes in the pattern made me understand the bones of tote-making. The AMH MTT is much different than the EMT, but in the end they are totes and their goal is to carry things.
Multi Tasker Tote Pattern
In general, however, this is an amazing pattern. The way it goes together looks completely mysterious one minute and the next minute it is gorgeous and elegant. I was completely blown away, because it made me think about tote bags in a new way. I don’t think it is a beginner pattern, however I would say that any intermediate sewist who has a few tote bags under her belt could use this pattern to make a bag.
AMH MTT in progress, detail
In the above photo, you can see the bit that is folded over to accommodate the straps, including my lovely top stitching. 😉 I haven’t finished the straps yet, so there is another photo of this project to which you can look forward!
AMH MTT, Step #8
One of the steps I had trouble with was step #8. I really couldn’t figure out what the directions were trying to accomplish. Finally, I realized that she wanted me to sew the bottom of the pocket together! To accomplish that I had to pop the pocket (pattern piece is called pocket panel) out a certain way. When you do orient the section correctly, the whole thing looks like the section above.
Box corners
Remember I mentioned the gusset tutorial in the Bag Bazaar book? I didn’t have a chance to try it out. I found AMH’s directions to be stellar. You press a crease into the side of your bag, then you line up the bottom seam with that crease and you have a perfect triangle. I drew a line (not part of the directions), because of my A type personality. Perfect box bottom. I did it before I realized what was happening and was amazed at the results.
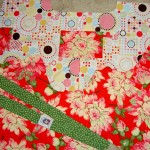
I love the fabrics that I chose for the current tote, individually. I am not happy with the two of them in combination in this project. Too many flowers, I think, which means that none of them stand out. Yes, I will be making another! As I mentioned in a previous post and as you can see from the photos, I used the Denyse Schmidt fabrics as a trial run.
MTT #2 Bag Fabric
My biggest challenge with this project is the requirement of Pellon Peltex Double-Sided Fusible Ultra Firm Stabilizer #72. I didn’t have any in my fabric closet, which didn’t worry me. I sewed and fused two pieces of Timtex together and the put Steam-a-Seam 2 on the outside and fused it to the bag. Having a stiff bottom is GREAT! It makes the thing stand up and much less floopy. Using my jerry-rigged method, I could easily see where something already stiff and fusible would be a lot easier. I searched the web and found it by the yard for $10+. I also found a bolt of it for $99+. Huh! I can’t make another of these using my jerry-rigged method, because I am out of SAS2. I have to decide whether to get a bolt (seems like overkill) or pay, what seems like, and exorbitant price for a yard. Anyone of you have any perspective on the price of Pellon Peltex Double-Sided Fusible Ultra Firm Stabilizer #72?
Kristin LaFlamme reviewed this pattern on her blog as well. It is a very complete review. She mentions a couple of the inconsequential typos I also saw and does some interesting things using recycled materials. Her rendition of the pattern makes me think about adding additional pockets to the outside. Adding a pocket to the outside would be especially successful when I don’t have a focus fabric (as shown on the pattern above) or fabric suitable for broderie perse.
This was another pattern from All People Quilt called Grab Bag. We were invited to a party on Sunday night. I whipped one up to bring to the guest of honor. I have wanted to test this pattern, so it seemed like a good opportunity.
I struggled a bit with some of the directions, especially the last few dealing with the handle finishing. Eventually I figured out what they were trying to tell me, but not without a fair amount of ripping. It was a good exercise in patience for me. I am sure companies like All People Quilt struggle with making the directions short AND easy to understand. For my part, I am glad for some of these free patterns.
I used an old large flower print for the outside and a Marimekko for the lining.
There are two major changes, and one minor change, that I would make on future Grab Bags:
I used regular batting like I use for quilts. I wouldn’t do that again. It makes it puffy, which is sort of cool, but I don’t like the fact that it doesn’t drape very well. I would like to try an interfacing to see how that drapes. I see experimentation with interfacing in my future. My other idea is to only put the batting on the bag part.
I would also make the inside just a bit smaller than the outside. The directions say to use the same pattern piece. It is fine (and much easier to write a pattern, I am guessing), but the bottom of the lining bunches up inside the bag. Not much, but enough to not look very professional.
The pockets are an odd size as well. I would make them a tiny bit larger, heightwise.
Grab bag detail
Above is a view of the inside. You can see a bit of the pockets and the Marimekko print.
I am pleased to have tried two new bag patterns. I think it has allowed me to feel sufficiently successful and warmed up to try the Anna Maria Horner Multi-tasker tote, I discussed in yesterday’s post.
As you know, I have been thinking of branching out from the Eco Market Tote bag pattern that I have a been using for the past 1.5 years. I saw the Over the Top bag in a recent issue of Quilts & More magazine. That mag is on Facebook, so I get more notifications about what they have going. I saw their promotion for Quarterly Challenges, which reminded me of this bag. A couple of things came together, including watching their little tips video, so I downloaded the pattern last Friday and made the bag, mostly, on Saturday.
Batik Handbag
I am pleased with the way it came out. It is the perfect size for a small handwork project tote. As with all things I sew from a pattern, I found that the first piece is really a test piece. I rely heavily on TFQ and her garment sewing experience when it comes to 3D projects, so deciphering this one alone was a challenge.
There were a few things I didn’t really understand in the pattern and, thus, skipped. I don’t see that it made much difference in the long run. There were some things that the pattern said to do that I would do differently a second time. I would add more stiffness to the bottom, perhaps something like Timtex. The pattern says to sew only to the dots, which are about 1/4″ away from the edge. This makes sense for the bottom seams. It is necessary in order to put the Y seams together. It isn’t necessary on the top of the bag and actually turned out to be a pain. since the top seams weren’t crossed by another machine stitched seam, they started to come apart after I had the bag mostly together. I ended up hand stitching the tops of the seams.
I think that this pattern has a lot of opportunities for embellishment, which could be fun. I keep thinking of a picture I saw in either thr3fold journal or Quilting Arts, where Laura Kemshall did a beaded edging on one of her bags.
In anticipation of loving this pattern, I bought enough magnetic clasps to make 4 bags total. After making it, however, I am not sure whether or not I will make any more. In some ways I want to make the bag again, so I can perfectmy construction techniques. On the other hand, I don’t think they style and size would be that useful for me, so I am not sure I want to have a bunch of them hanging around the house. They may, however, make nice gifts.
As you may remember, I bought some fabric at Always Quilting on the day I went to longarm.
After finishing the Clear tote, I looked around for my next project. I had tote bags on the mind, so out came the fabric and off I went.
I cut out two totes. This is the one where the main outside part of the bag is made with the flower print from the Ginger Blossom line by Sandi Henderson. I have used the stripe fabric from the same line for the accents and the lining [inside].
One GREAT thing about this project, aside from geting a new tote bag out of the work, was that I learned to use the button hole function on the Jem. It is much easier to use than the button hole function on the 9000. Now I don’t have to go to Seattle in order to make button holes! TFQ’s machine makes GREAT button holes. The Jem button holes will be a suitable facsimile, not as good as going to Seattle, but suitable.
I have enough of the stripe to make another bag. It is already cut out, but I didn’t do very well making two bags at once, so I just cut both out and lined them. Once that was done I limited myself to sewing one at a time. I’ll sew the other one this weekend.
I also have some blue flowery fabric that I bought for a tote. Perhaps I will get that done as well. It feels like a good time to make tote bags. TFQ asked me if I was still using the Favorite Things Eco Market tote pattern. I am, but she made me think that, perhaps, I should dig out those other tote patterns I have purchased over the past year and try one of them out. I really want to try the Liesel tote. I am a really big chicken when it comes to 3D things, so I’ll have to gear up.
As you may recall, I made this lining for the Cupcake Tote, but ended up not using it.
After finishing the Eggplant/Lemon tote and embellishing the Chocolate Flower Tote, I, once again, turned my attention to this troublesome lining. It wasn’t intentionally troublesome, but the colors turned out to be a problem.
I looked through my fabric, not really sure what to pick. I pulled out these dots from the Timeless Treasures Basix collection. I love these dots, though I love the ones with the white backgrounds more. I thought I would use them, but when I looked at the three pieces together, I decided that making visually decisions visually was a good idea. The colors in the cake fabric didn’t go with the dots. No purple or pink in the dots and no turquoise or orange in the cake fabric. Too bad, because I have a lot of black dot fabrics that I haven’t used at all. The outside fabrics had to go with the lining, though.
After looking carefully at the focus fabric and looking through my black and white fabrics, I found this red batik and this violet dot.
This is the grouping that I picked. I wanted the fabrics to all go together without being too matchy-matchy. I also wanted to use some dots. The violet dot is very thin and I don’t like it forpiecing. I don’t have much of that red batik, but think it will be nice as an accent. I completely ignored the aqua pockets that I already sewed to the inside of the lining. Nobody will see them much except the owner.
I worked on some totes this weekend. The Chocolate Flower tote was completed this summer (wrote about it on July 26), but something was missing. In general, I am also not liking the big blobs of fabric that the big outside pockets tend to become. I found a random piece of ribbon with the perfect colors. I used it to embellish the tote’s outside pocket last night. When I auditioned it, I thought the ribbon made the green in the flower print stand out. In future totes I want to work on making the outside pocket less of a big blob.
My newest tote is the eggplant/lemon tote. I started it on my summer vacation, but didn’t work on it again until this weekend, . The lemon flower fabric is from a recent Moda collection (Fresh Squeezed by Sandy Gervais??). I love the colors in the vegee/eggplant fabric. It is a very fun fabric that I would, probably, never use in a quilt.
Here is the inside of the bag. I have started to put large pockets on the insides of all the bags in addition to the small pocket. They are very useful.
Here is the finished cupcake tote bag! The cupcake fabric is that which I bought from Clemetine’s Dry Goodsa few months ago. I originally thought I would use a black cake fabric for the inside and I went so far as to construct it, but decided that it really didn’t go with the delicate aqua of the outside and changed the lining to this lovely turquoise cake with stands fabric. I bought that fabric at Capital Quilts AND at one of the shops in Connecticut while I was there.
Since I have not been able to figure out how to use the buttonholer on my machine, the buttons are decorative only. I put them there to break up that large expanse of pink. I have to go and get some more of these buttons as I love them. They have some style! They are vintage buttons from Britex and there are a couple of different styles available made out of the same material.
Before I put the large white buttons on, I tried these pewter teapot/coffee cup buttons. They were ok, but the bag required some bolder embellishments. This is the original lining for the cupcake bag. I decided, eventually, that it just didn’t go with the light aqua and abandoned it for the turquoise gateau fabric lining. I’ll use this for another bag. Not sure which yet.


 Before I put the large white buttons on, I tried these pewter teapot/coffee cup buttons. They were ok, but the bag required some bolder embellishments.