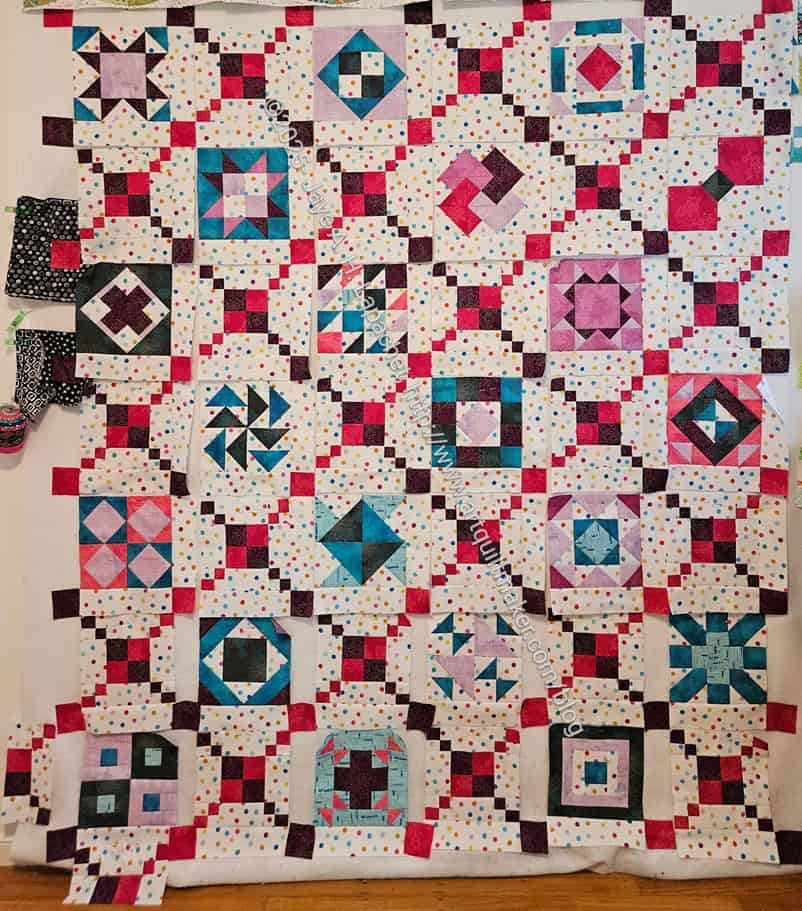
I spent some time assembling Patchwork Palooza the other day. I haven’t finished yet, but I am making progress and I enjoyed the process.
I wasn’t sure about the sashing, but think the blocks needed some space between them. Some blocks, where I used the background fabric as their background, are floating now, which I think looks nice.
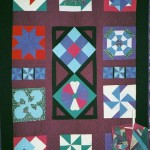
All Patchwork Palooza blocks
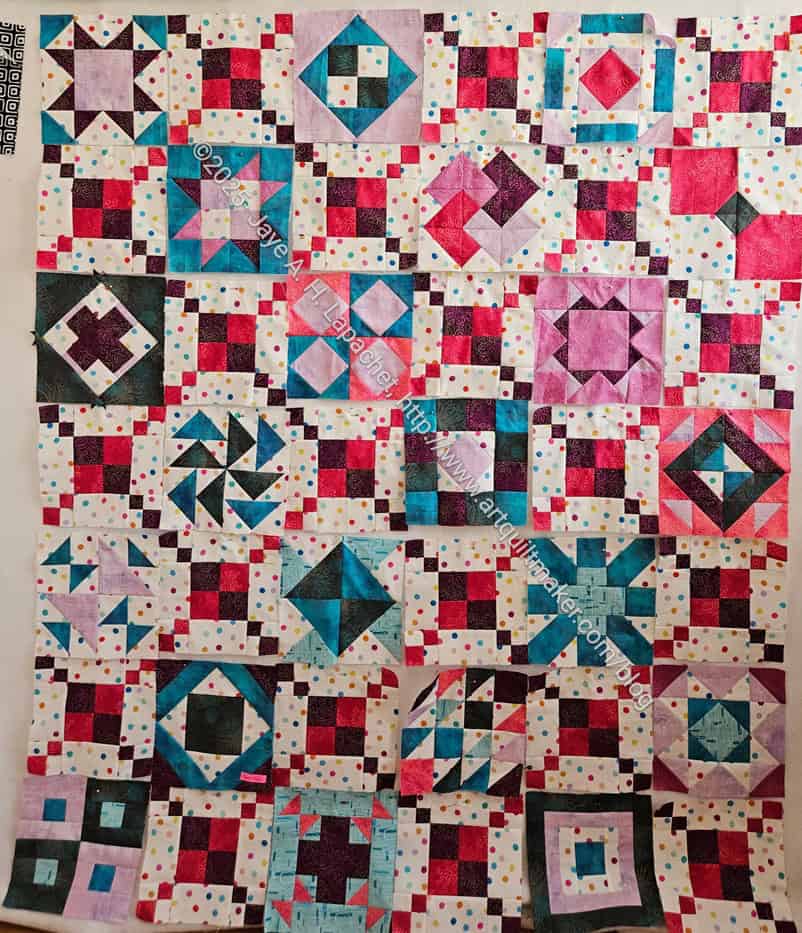
The blocks looked very crowed when I put them all up on the design wall right next to each other. Now
I put them up according to the layout of the project. I changed around a few of them and may change a few more, but we’ll see. With the limited palette I used, it is hard to keep similar colors away from each other.
I also decided to finish out the Irish Chain effect. You can see what I am thinking in the lower left hand corner of the photo at the top. I took apart some of the extra alternate blocks and made them into border blocks.
Of course, I am not following the finishing instructions, so I am not sure how big it will be in the end, but somewhere around 72×84. A good size.
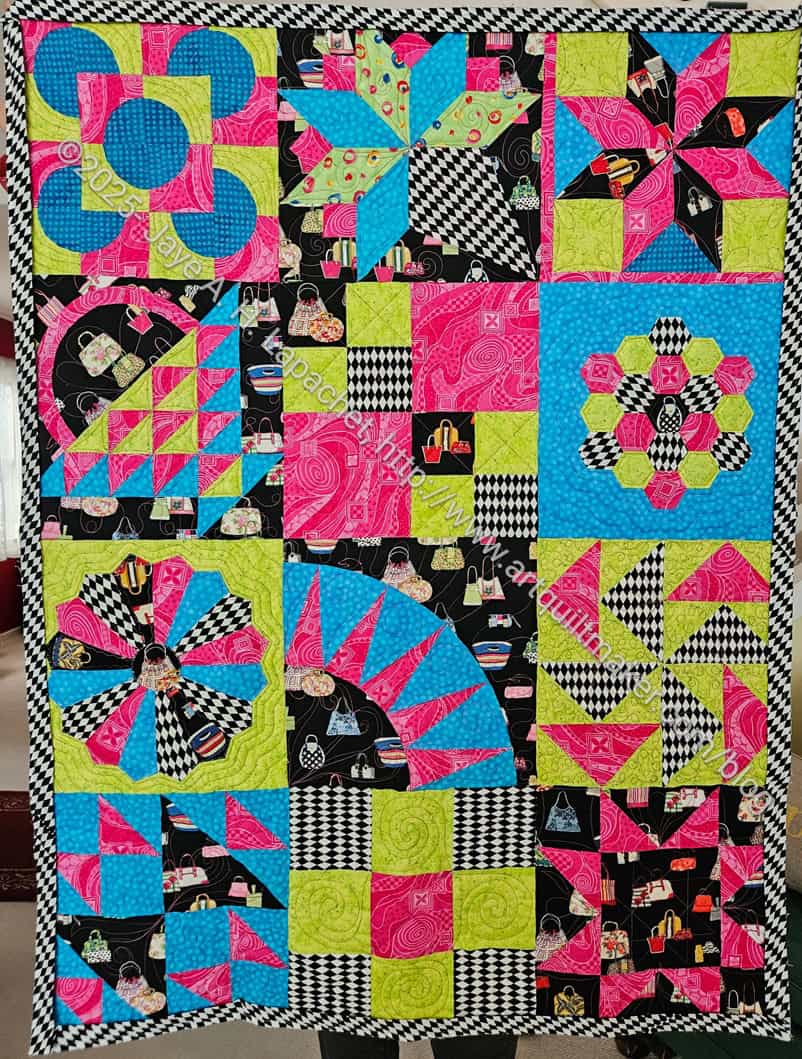
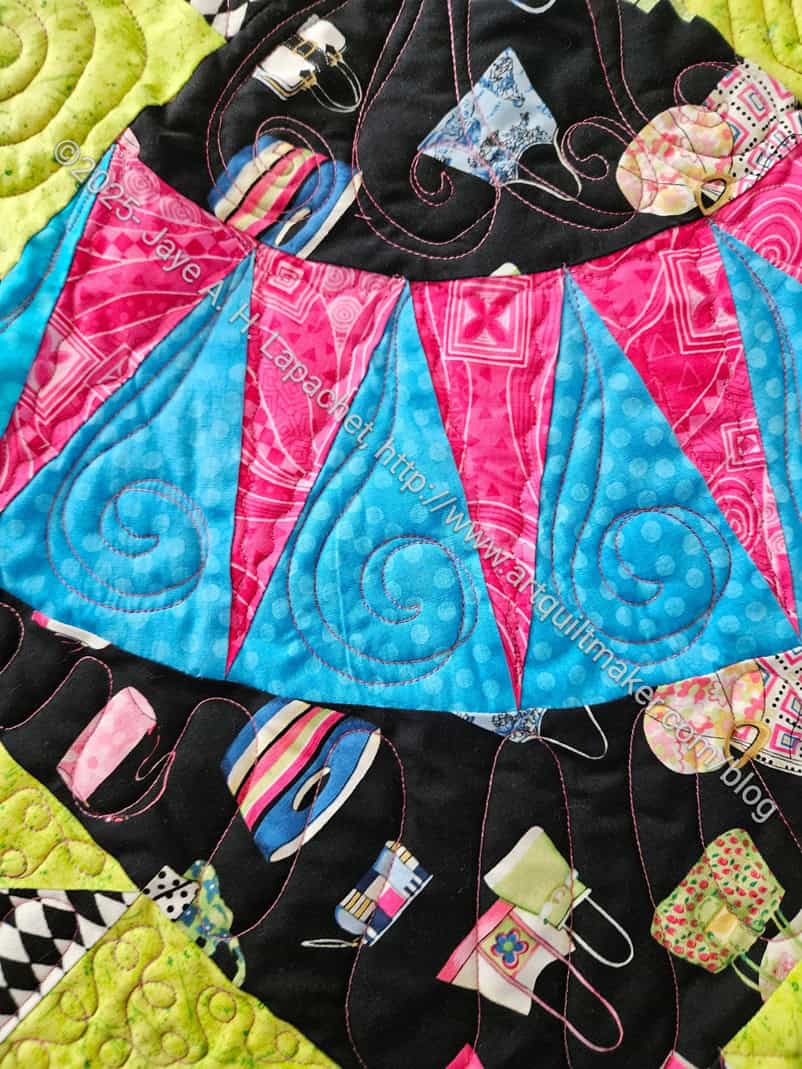
The Handbag Sampler is back from Colleen. She was able to drop it off for me when she did an errand in the neighborhood. It was great not to have to drive to her place.
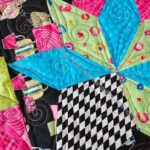
I wanted this ready for the BAM BOM start at the meeting yesterday. I had to stitch the binding on quickly. It was a little challenging, because I used a black and white diamond patterned fabric for the binding. That meant that choosing the thread to be invisible was a challenge. I ended up with white and was very careful about getting the stitches on the underside of the binding so they wouldn’t be visible. They were fairly hidden on the white fabric, but screaming against the black.
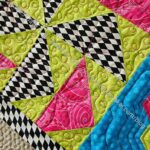
She quilted a lot of different motifs in different places around the quilt. The swirls/spirals in the background of the New York Beauty are a particular favorite.
Working on this quilt and the Patchwork Palooza make me want to start another sampler. How many samplers are too many?
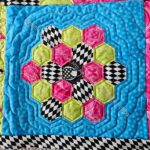
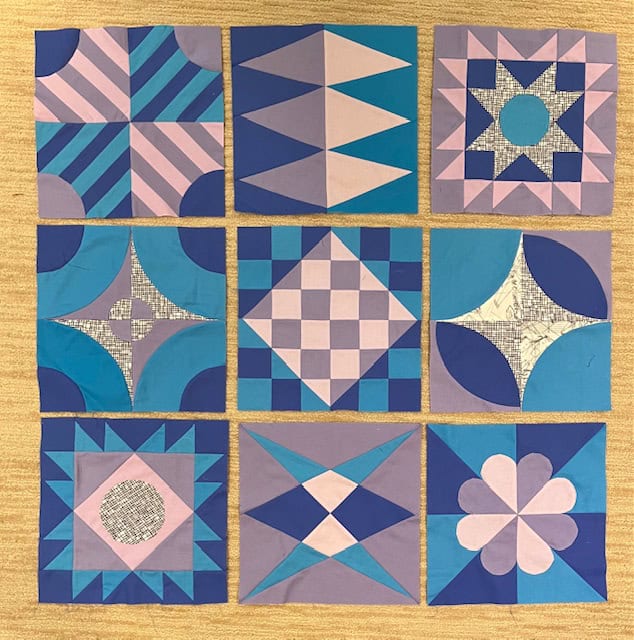
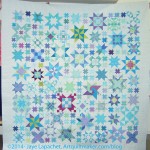
As you know, I am a fan of samplers. They can be so interesting to look at and very fun to make. This is one of the most unique sampler quilts I have ever seen. SueG has made this fabulous piece as part of a Libs Elliot online class.
She said the blocks are really hard, but the instructions were really good. She also said there were various options for making the blocks – different techniques and methods.
The flower in the bottom corner reminds me of that curve I struggled with on the Pearce Sling.
I was thinking as I talked to Sue about this quilt that Ruth McDowell’s Piecing book** would have been a great pre-work for this sampler. I am not sure Libs Elliot has heard of Ruth McDowell.
Sue is fearless when it comes to piecing. She is one of the stars of my students. I am so proud of her.
**N. B. : Obviously, you should shop at local quilt shops and small businesses. However, if you are too busy or can’t find what you need there, I use Amazon affiliate links and may be paid for your purchase of an item when you click on an item’s link in my post. There is no additional cost to you for clicking or purchasing items I recommend. I appreciate your clicks and purchases as it helps support this website.
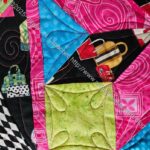
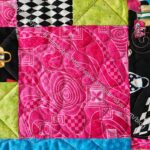
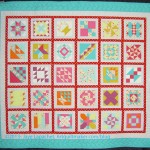
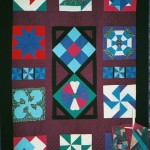
I finished the Handbag Sampler and it is now with Colleen getting quilted. I am pleased with the way it came out. I am even more pleased that it is done.
I am kind of amazed at the colors and fabrics I chose for this quilt. It is super bright and there is a lot to look at.
I rearranged the blocks before I sewed it together. I thought I needed to move some of the diamond fabrics away from each other. They were sort of concentrated at the bottom of the quilt, so I moved the Nosegay block to the top.
I have to admit that I feel slightly bereft finishing this quilt. I have others on my to do list, but this one seems like it might be the oldest.
My appointment with Colleen is coming up quickly and with Triumphant well on its way to being finished I went looking for the Handbag Sampler. That project was found a year ago and nothing has happened, so I decided to sew it together and get it quilted as is.
OMG! I have no idea what the deal is with this project. It has hide and seek in it’s seams. As mentioned, I couldn’t find the blocks. I KNOW I put them somewhere easy to find. I took boxes off the top shelves of the fabric closet and looked through them again. Stay tuned for some posts on the projects <insert eye roll here> I found.
Handbag Sampler July 2025
No dice so I started working on zipper pouches, but I couldn’t get my mind off of these blocks. I had a couple of more ideas for where they could be, which didn’t pan out, so I looked through my project boxes. I found them, eventually, in a box of random blocks. They were easily accessible, but not visible. Now they are on the design wall and will be sewn together soon.
I am not putting them away until the top is done and it is ready to go to Colleen’s.
I have a lot of lists. One of them is in my journal. I get great satisfaction drawing a line through my to do items. I haven’t drawn a line through a project that has been on my list in awhile. You know I have been sewing, but not on those list projects.
I really want to cross at least one thing off one of my lists. I prefer to cross something off that has been hanging around for awhile. For some reason the Handbag Sampler came to mind. I was really pleased to find the blocks last year. Yet it is still unpieced.
I also found some of the fabrics I used for the piecing. Still nothing happened. I have decided to sew 9 of the blocks together, put one on the back and call it done. The colors are really different from my other samplers, which shows the versatility of block quilts. Still, I am not excited about the project any more and would just like to get it off the list.
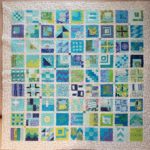
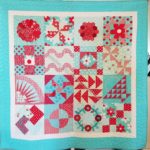
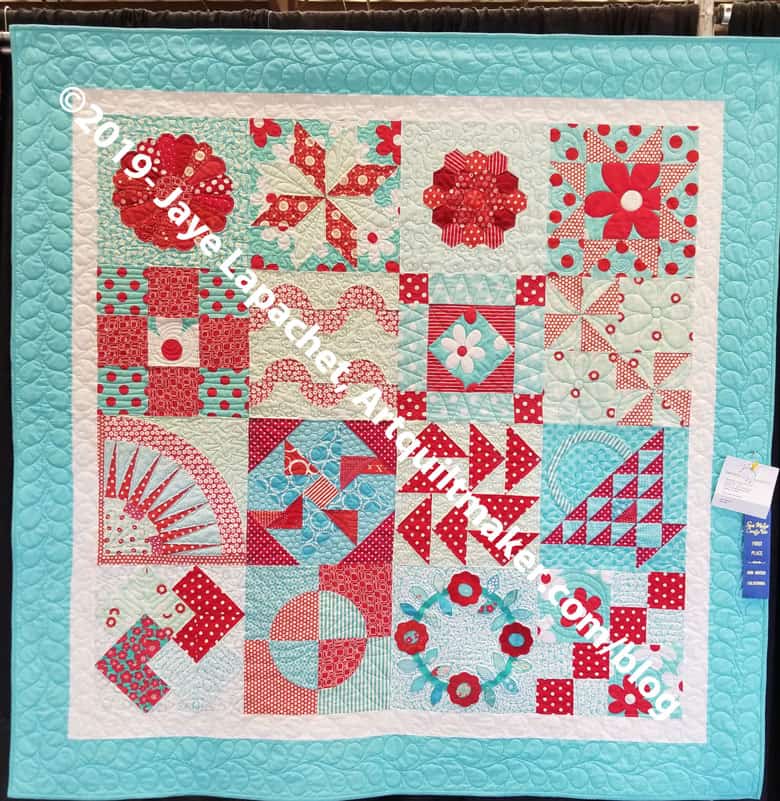
Aqua-Red Sampler with prize
Finished: City Sampler- front
Sampler
A-B-C Challenge with 1st Place Ribbon
Finished: Star Sampler
While only a couple of these have the same blocks, they are all different types of samplers. I am fond of this style of quilt, because they don’t get boring to piece and I can use a variety of fabrics. I actually like projects like the Star Sampler. It is fun to find all different ways to modify one block.
I know people think samplers are old fashioned and boring. I don’t agree. I think the colors used are the key. I used great colors in the A-B-C Challenge. Actually I like the colors in all of my samplers, except for that burgundy in my first sampler. What did I know?
As you know from the Sampler Quilt class tutorials, I am very fond of people learning all the quiltmaking techniques. It is a way to be free from the tyranny of always having to use a pattern.
NOTE: I am not against quilt patterns and I feel we should all support quilt designers.
Y Seams demo sample
However, at some point quiltmakers will want to make a quilt design they have thought up themselves. To do this, we need to know all the techniques. Thus, I couldn’t say no when SueS asked me to do a Y Seams demo for the guild. As usual, I had to overachieve. I posted a handout to the guild members only site*. Most of the information is in the Y Seams tutorial.
I made a whole bunch of step outs and notes to tell people. I won’t be actually sewing. That didn’t work out well when I tried to show a demo of leaders and enders, thus the step outs.
*N.B. If you are in the Bay Area and want to join, click the join button on the guild site. We also have a Zoom option, though the demos and Bag Club are not always available via Zoom.
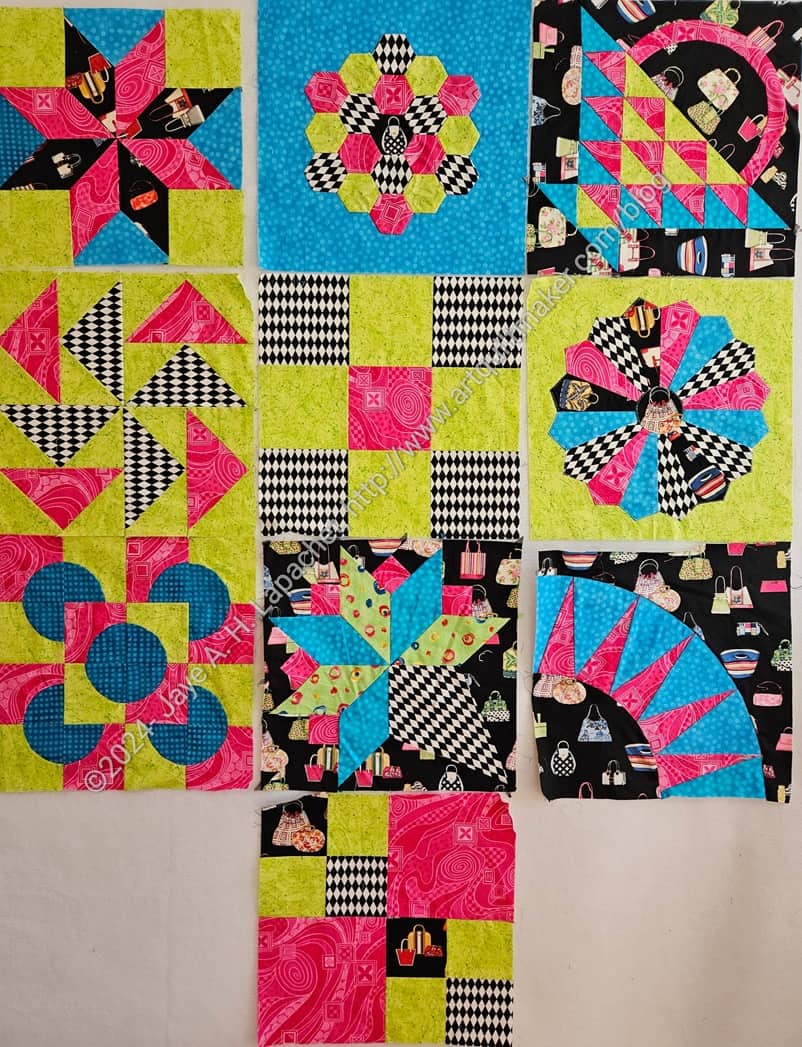
I finally found the Handbag Sampler blocks!!! They were in a bin at the top of my fabric closet
I need at least a few more blocks, which means I have to find the fabrics I used. I have the focus fabric, the handbag fabric, but the others weren’t with it. I haven’t looked for them, but I am confident that they are together and I didn’t use them for something else.
This sampler start has a really different look than the Aqua-Red Sampler and the Original Sampler, though many of the blocks are the same or similar.
I updated my Sampler Quilt Class page so that the blocks are also listed in the order I teach them. It’s a good time to revisit your skills or learn something new.
Last time I taught, I used the quilt below as an example. If you want me to teach you and your friends via Zoom, get in touch.
I am using a different quilt for this tutorial, but I have faith that that won’t make a difference to all of you intelligent readers and students who have been following along with my various sampler class tutorials.
Supply List:
blocks
fabric for sashing
fabric cornerstones (I used scraps, but my cornerstones were only 1.5 inches square)
Please note that we are only talking about sashing in this tutorial. We are not talking about borders. I will do a separate tutorial for borders in the future.
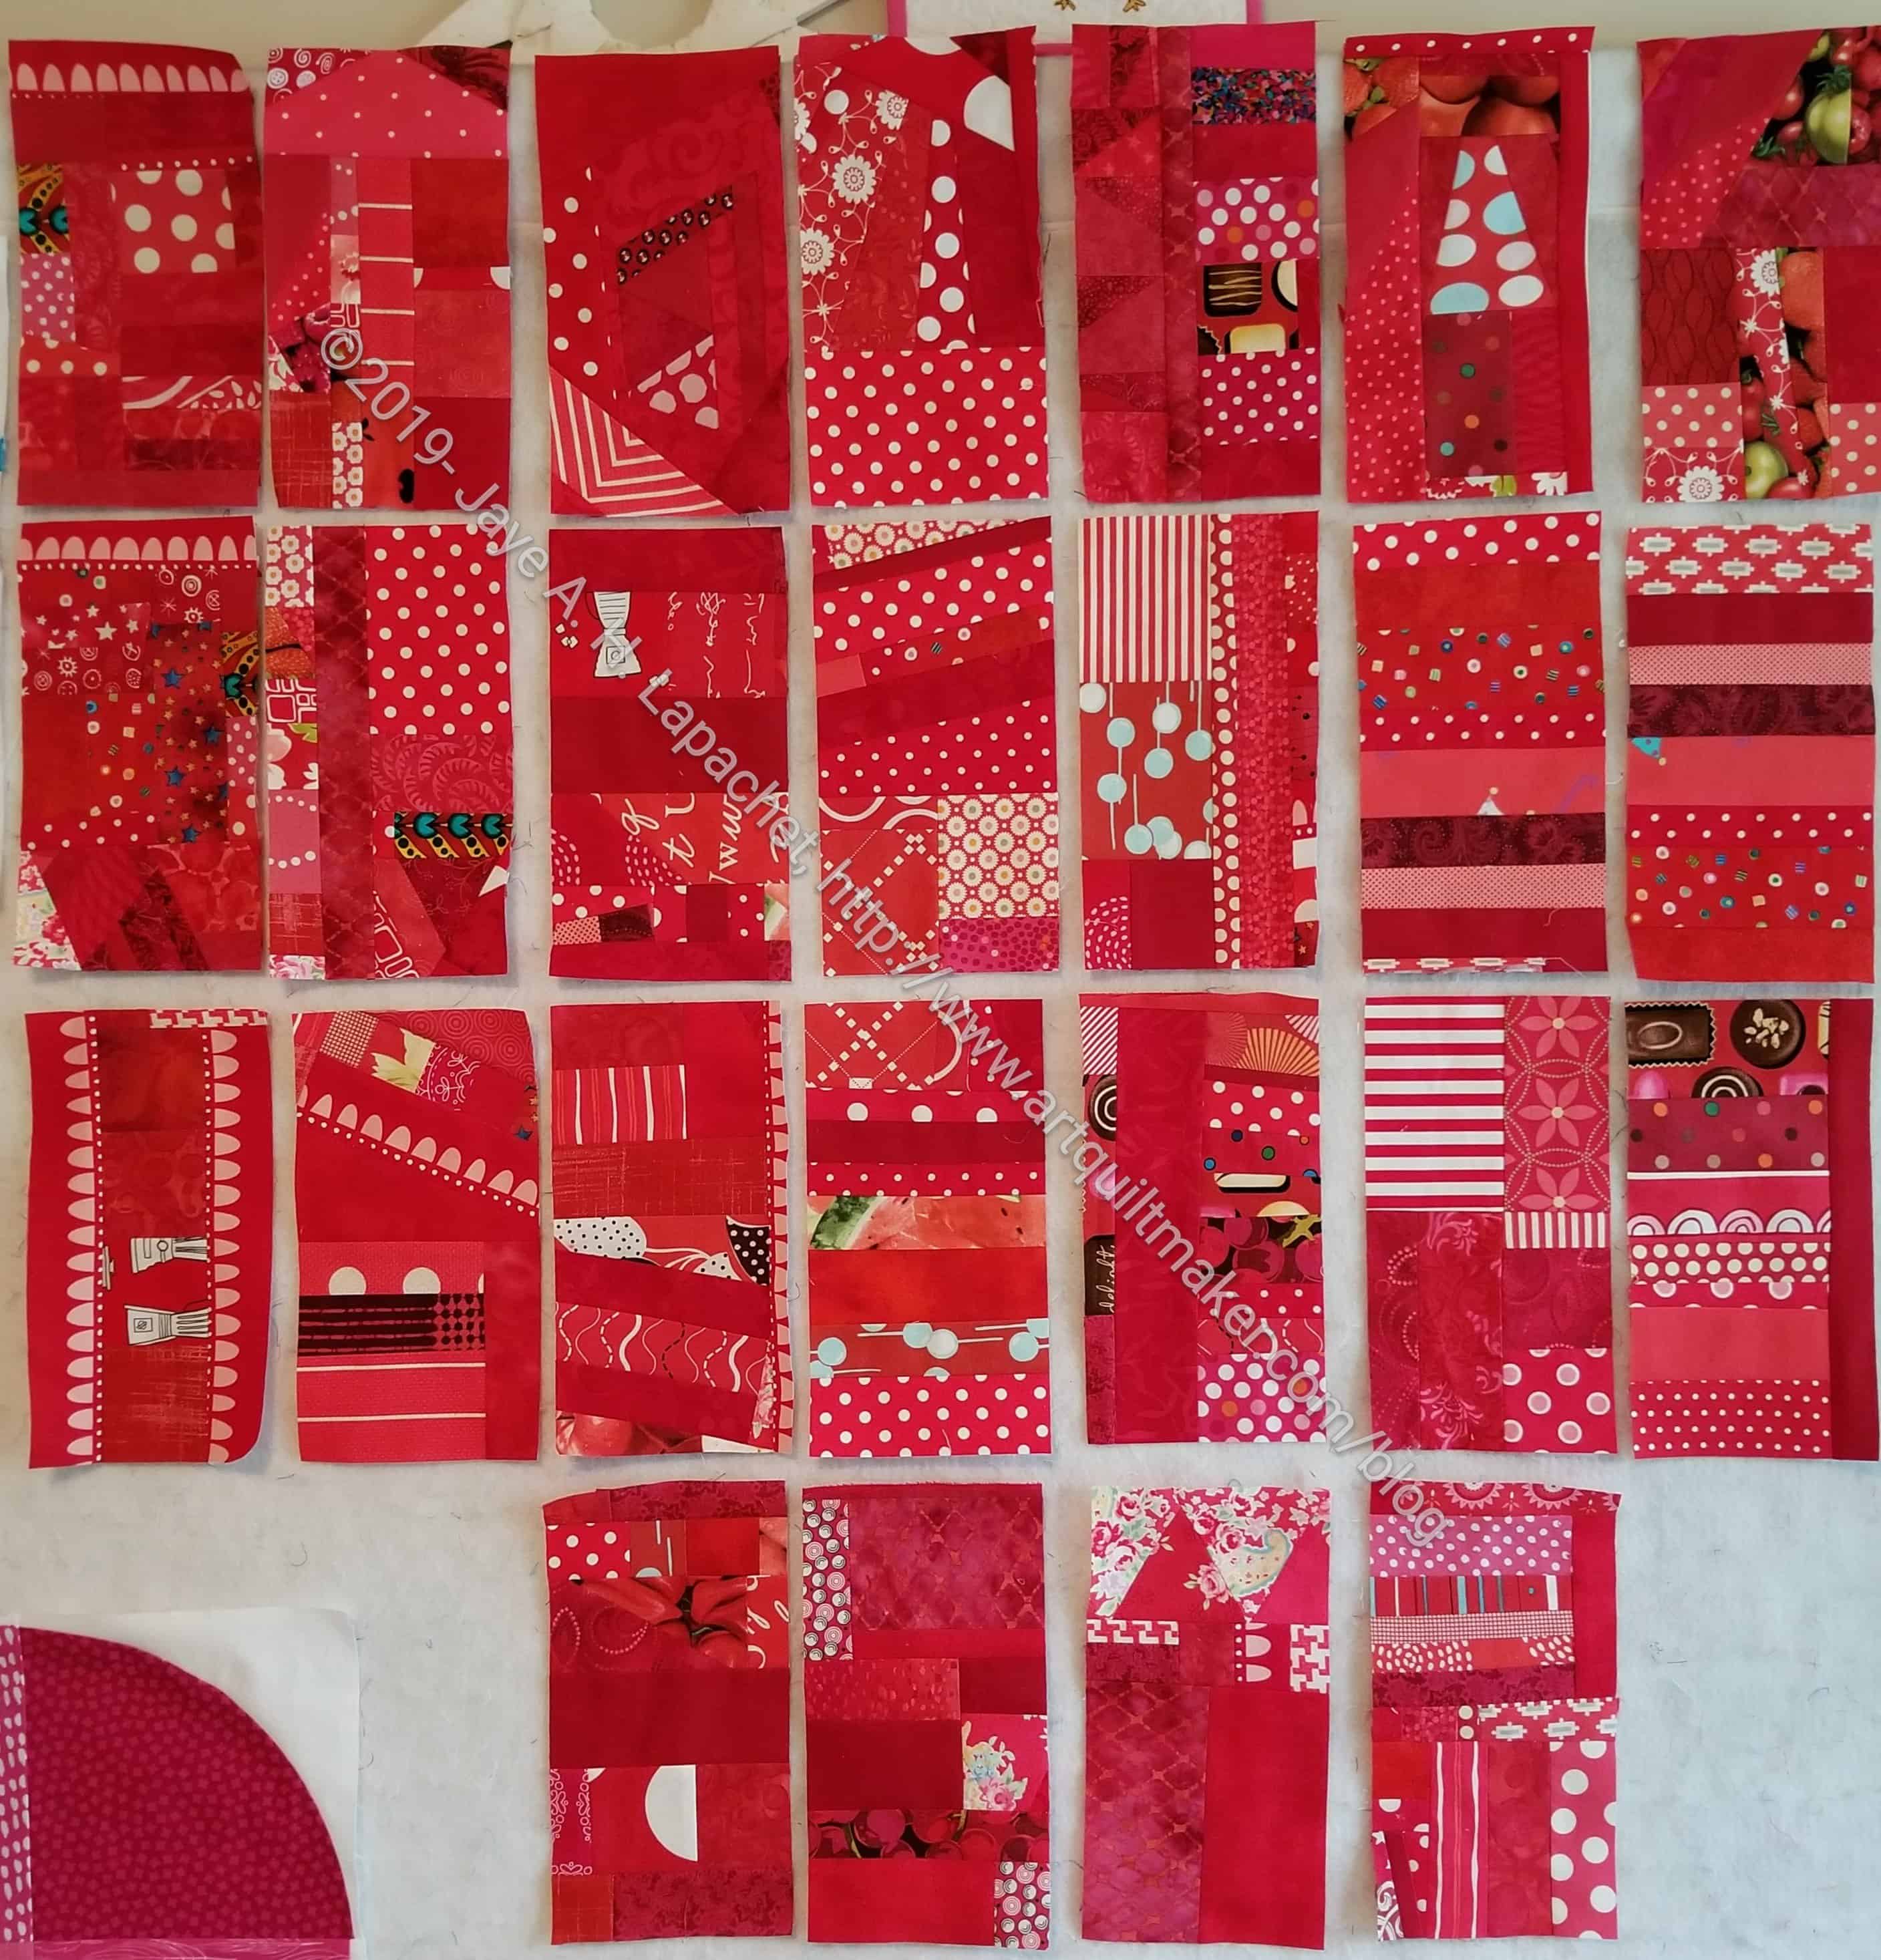
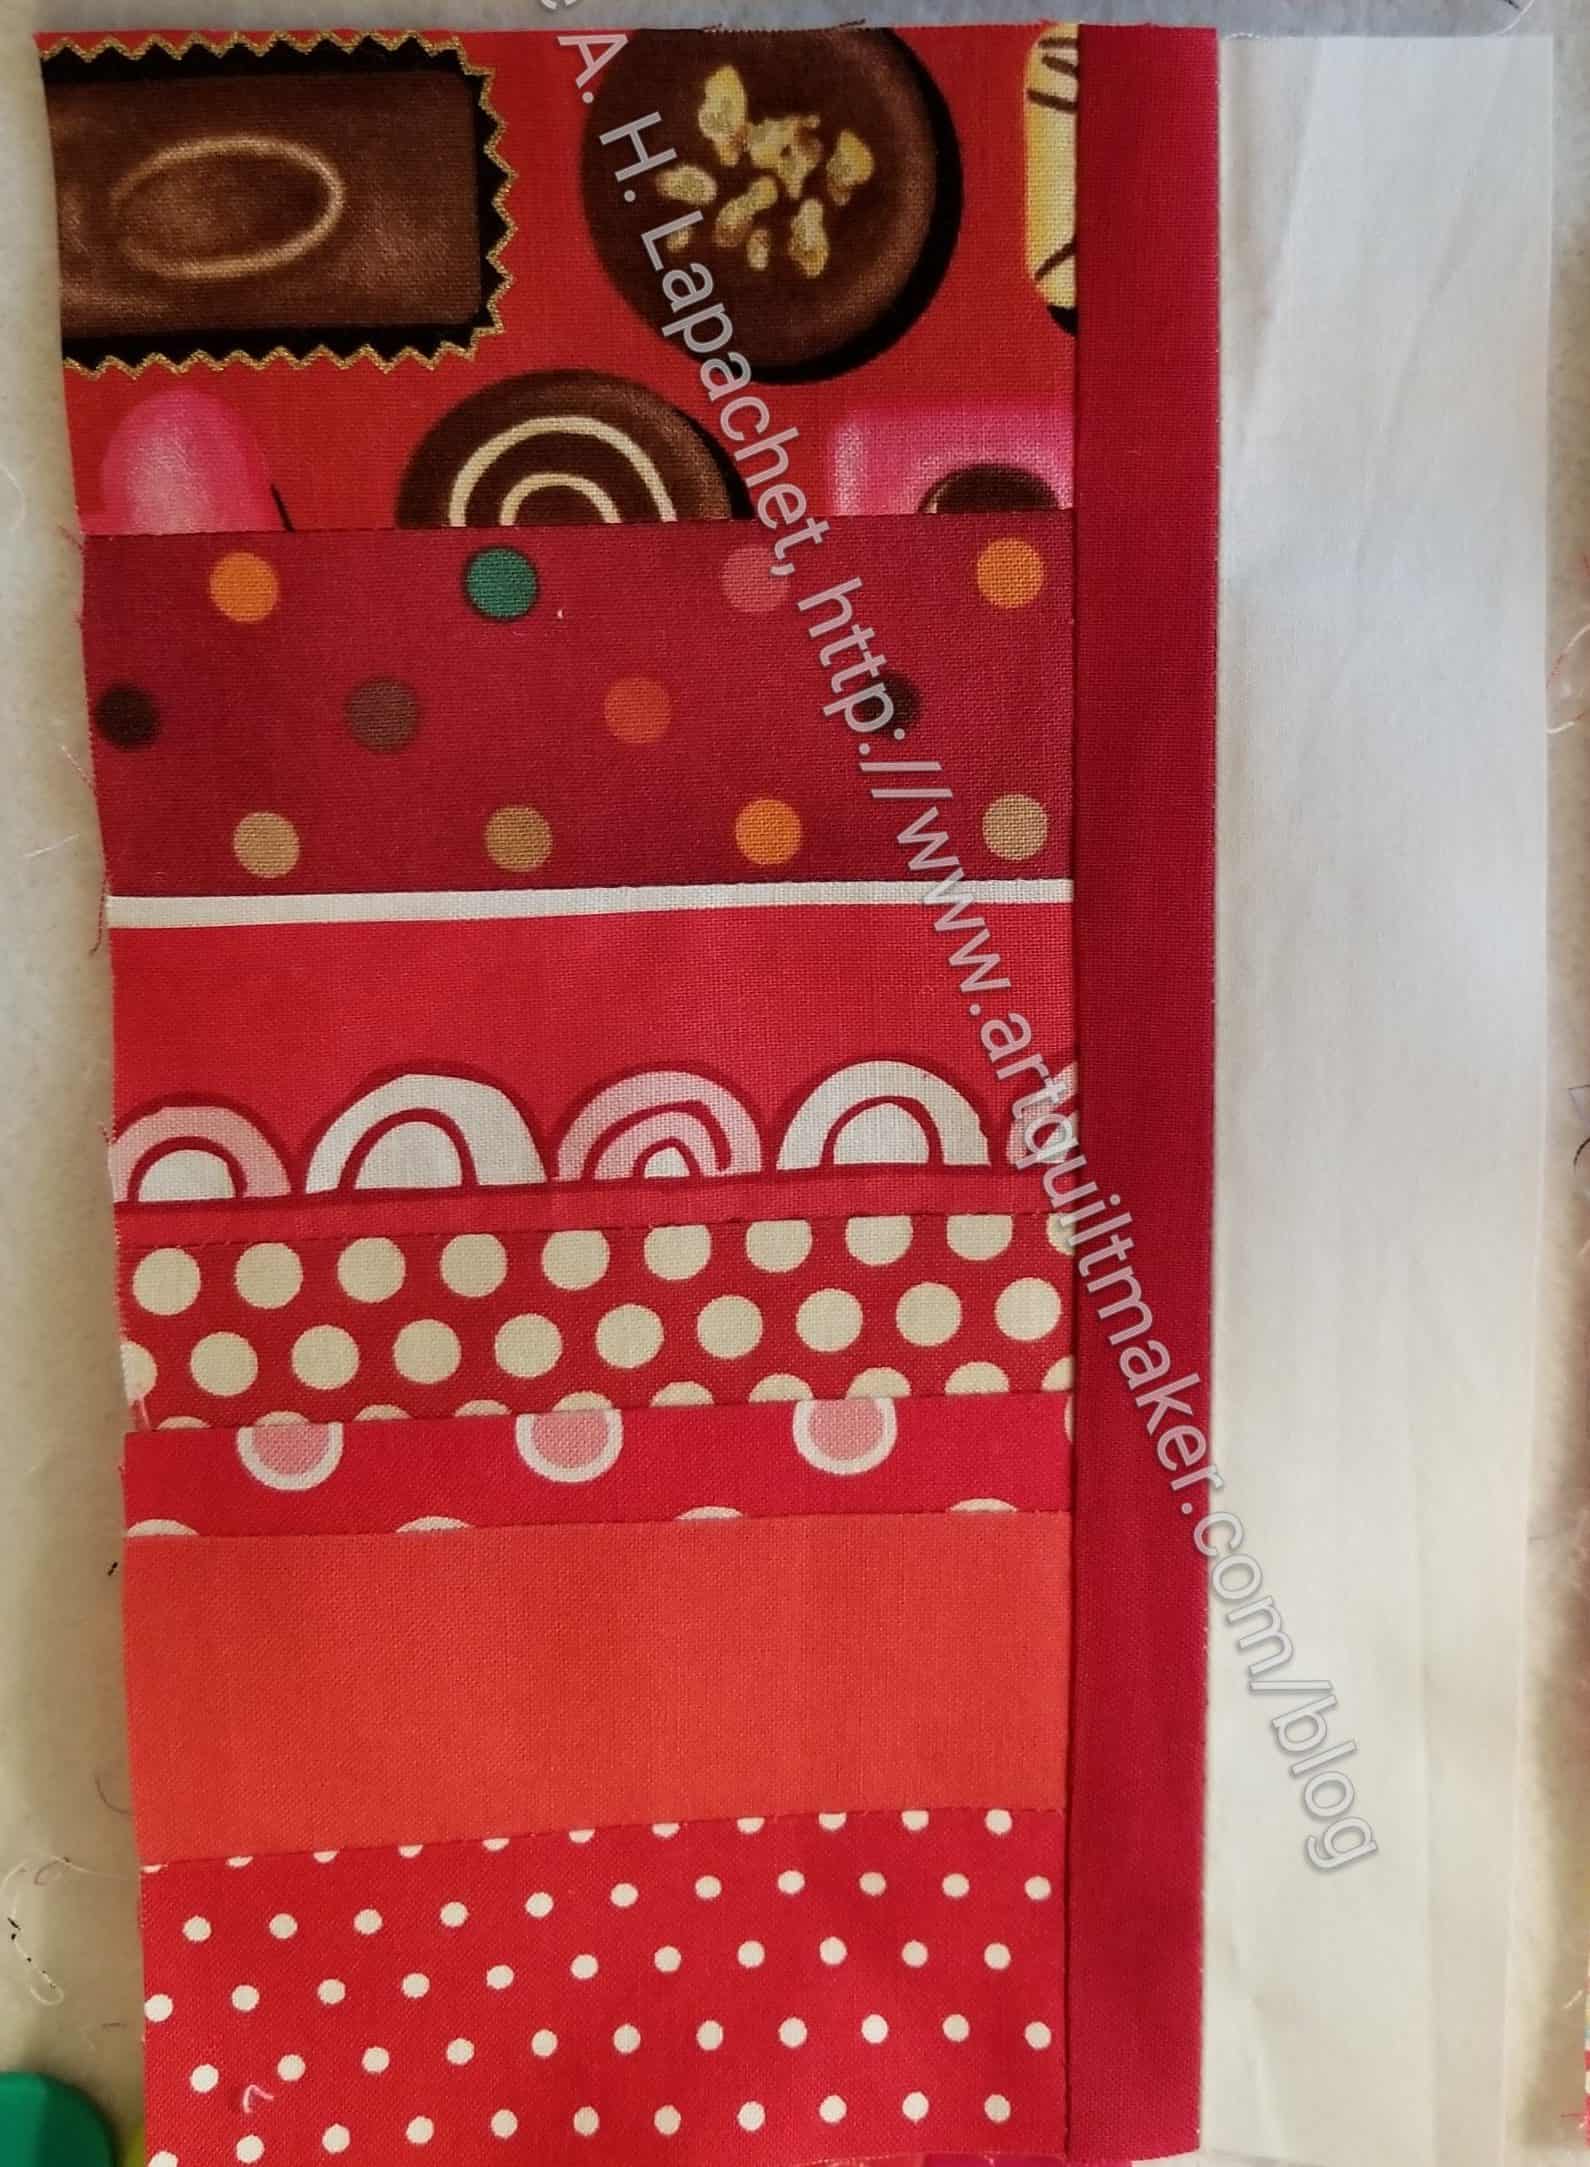
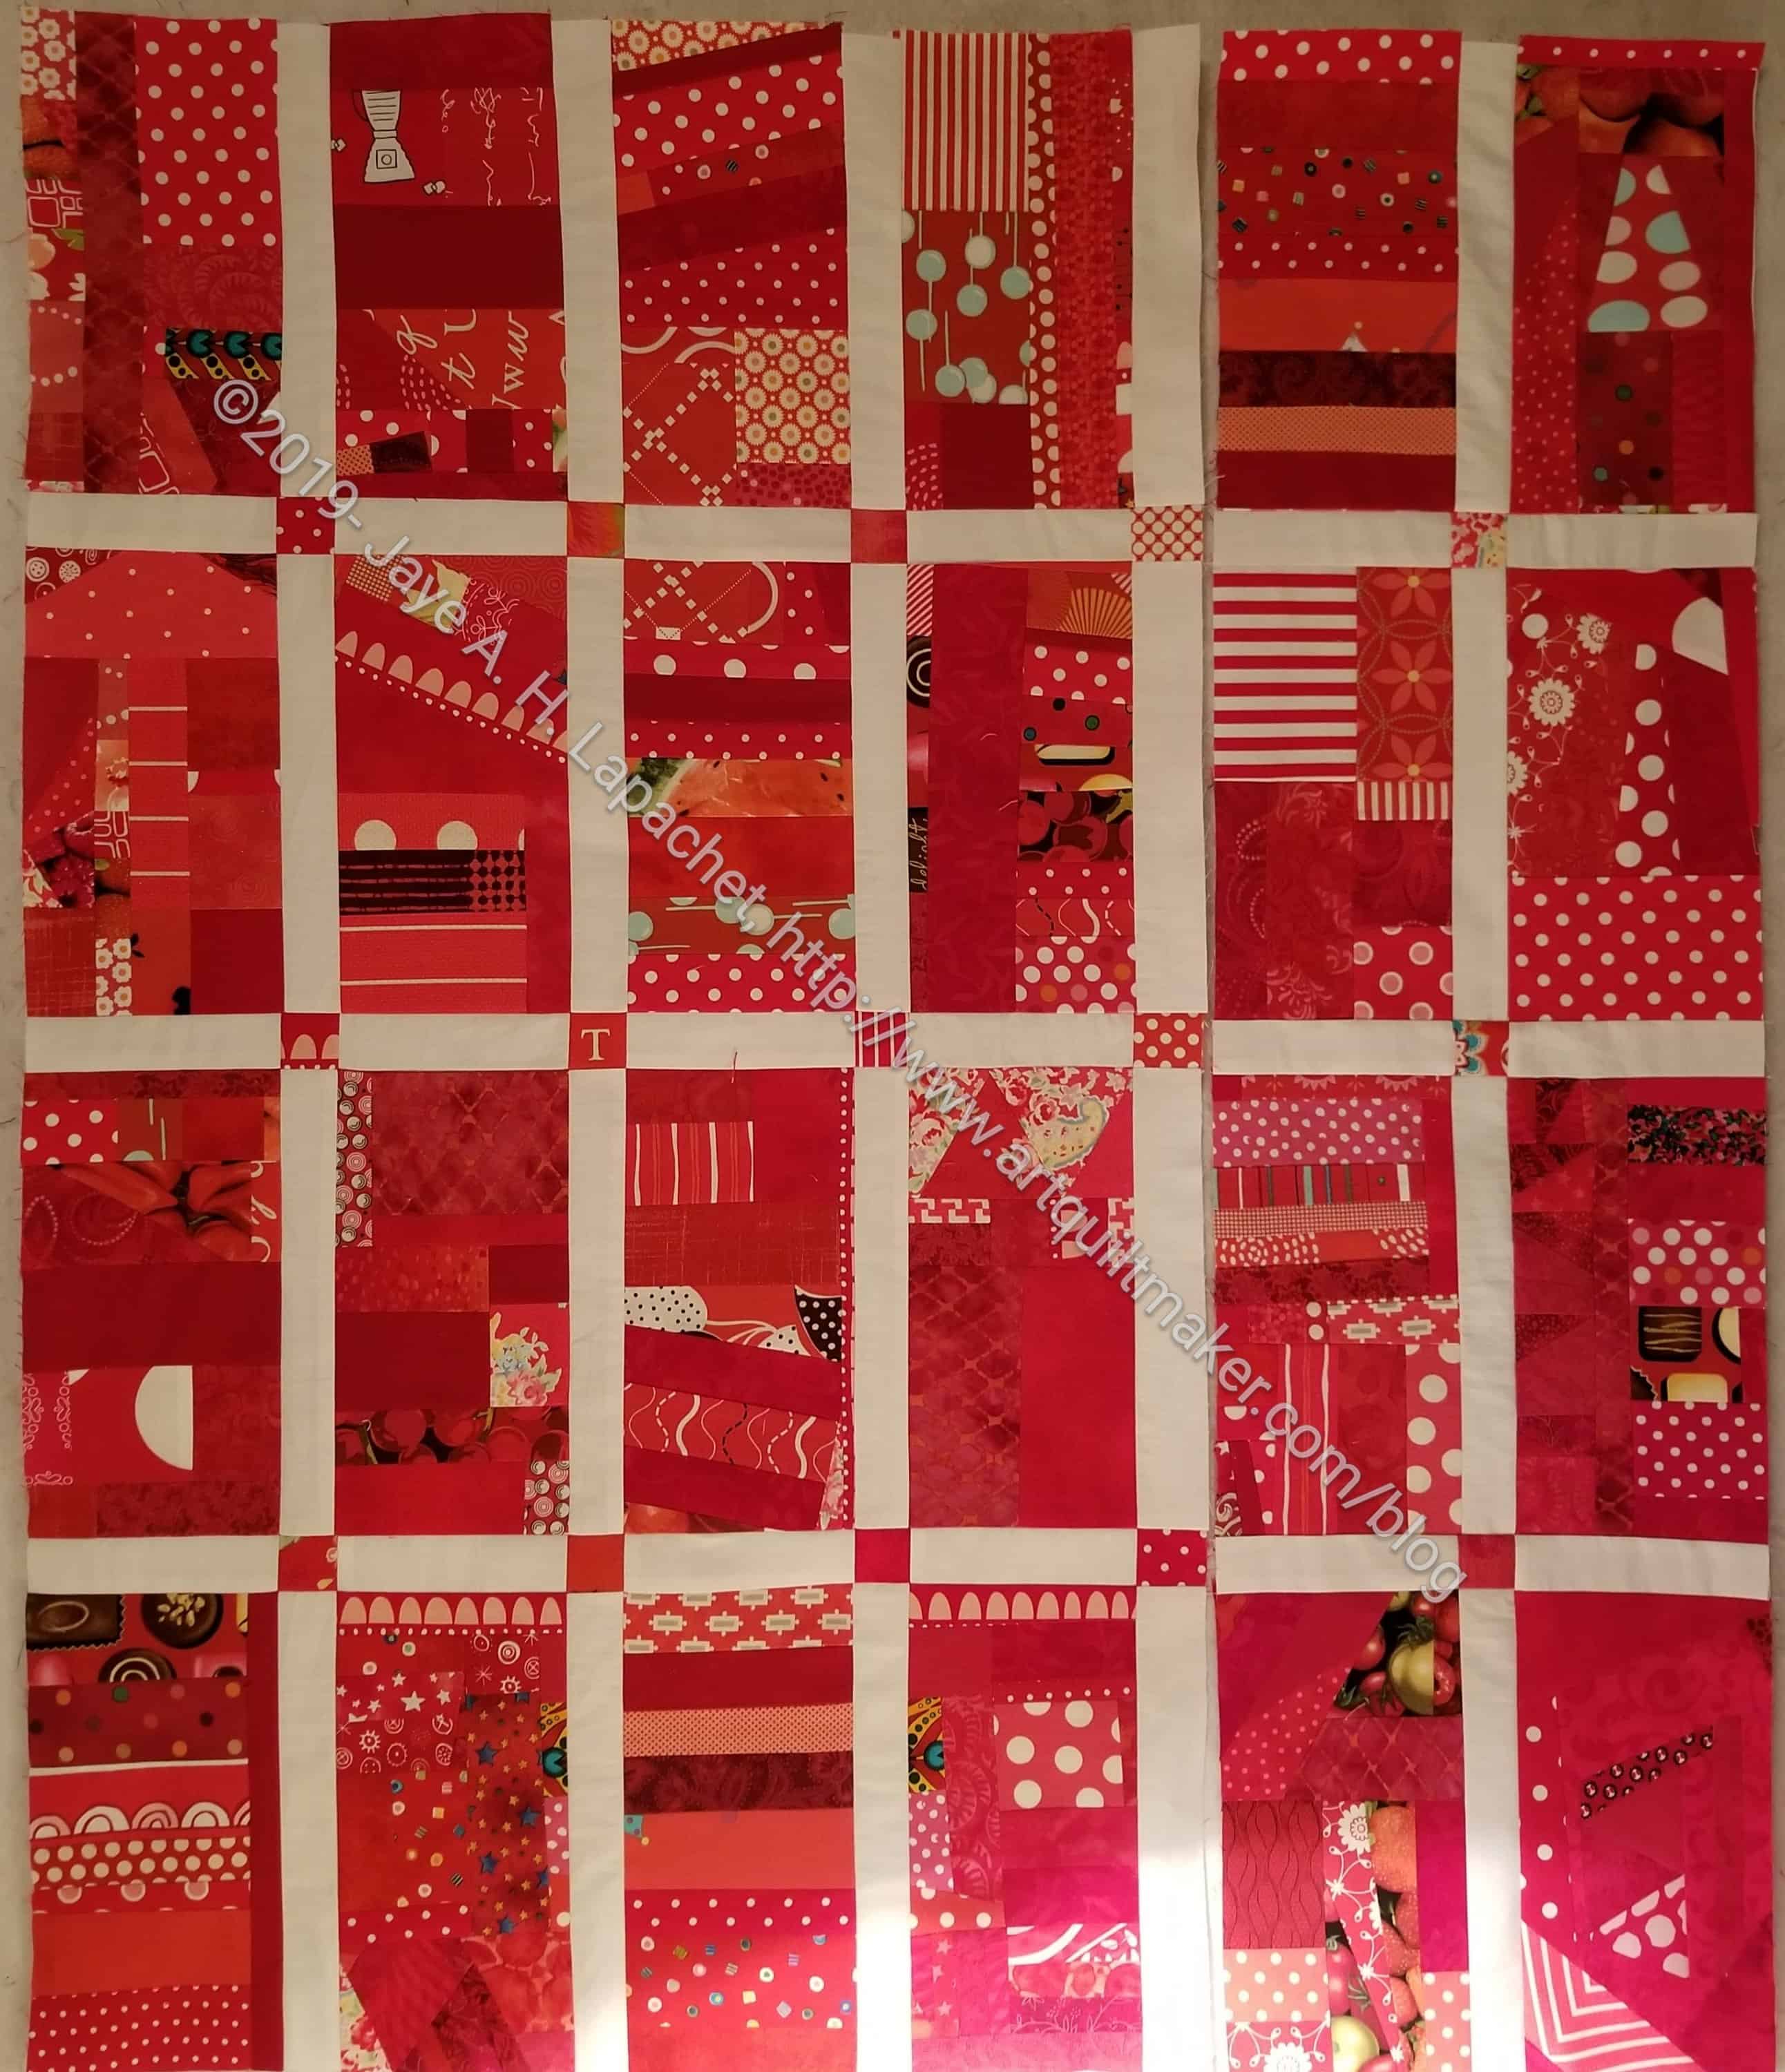
Red Strip Donation Blocks
I started out with the above group of donation blocks. I have been setting these with plain blocks of the same size. I decided that I wanted to do something different with these blocks. Sashing is the answer. Having something between these blocks prevents the seams from getting too thick and hard to sew. Also, it allows each block to shine a little bit rather than being part of a mass. Adding sashing or plain borders or nothing is a design choice. For any quilt, it is important to decide on the look and feel you want.
Even if you put the same sized plain blocks between these blocks, the method I will show you works the same way.
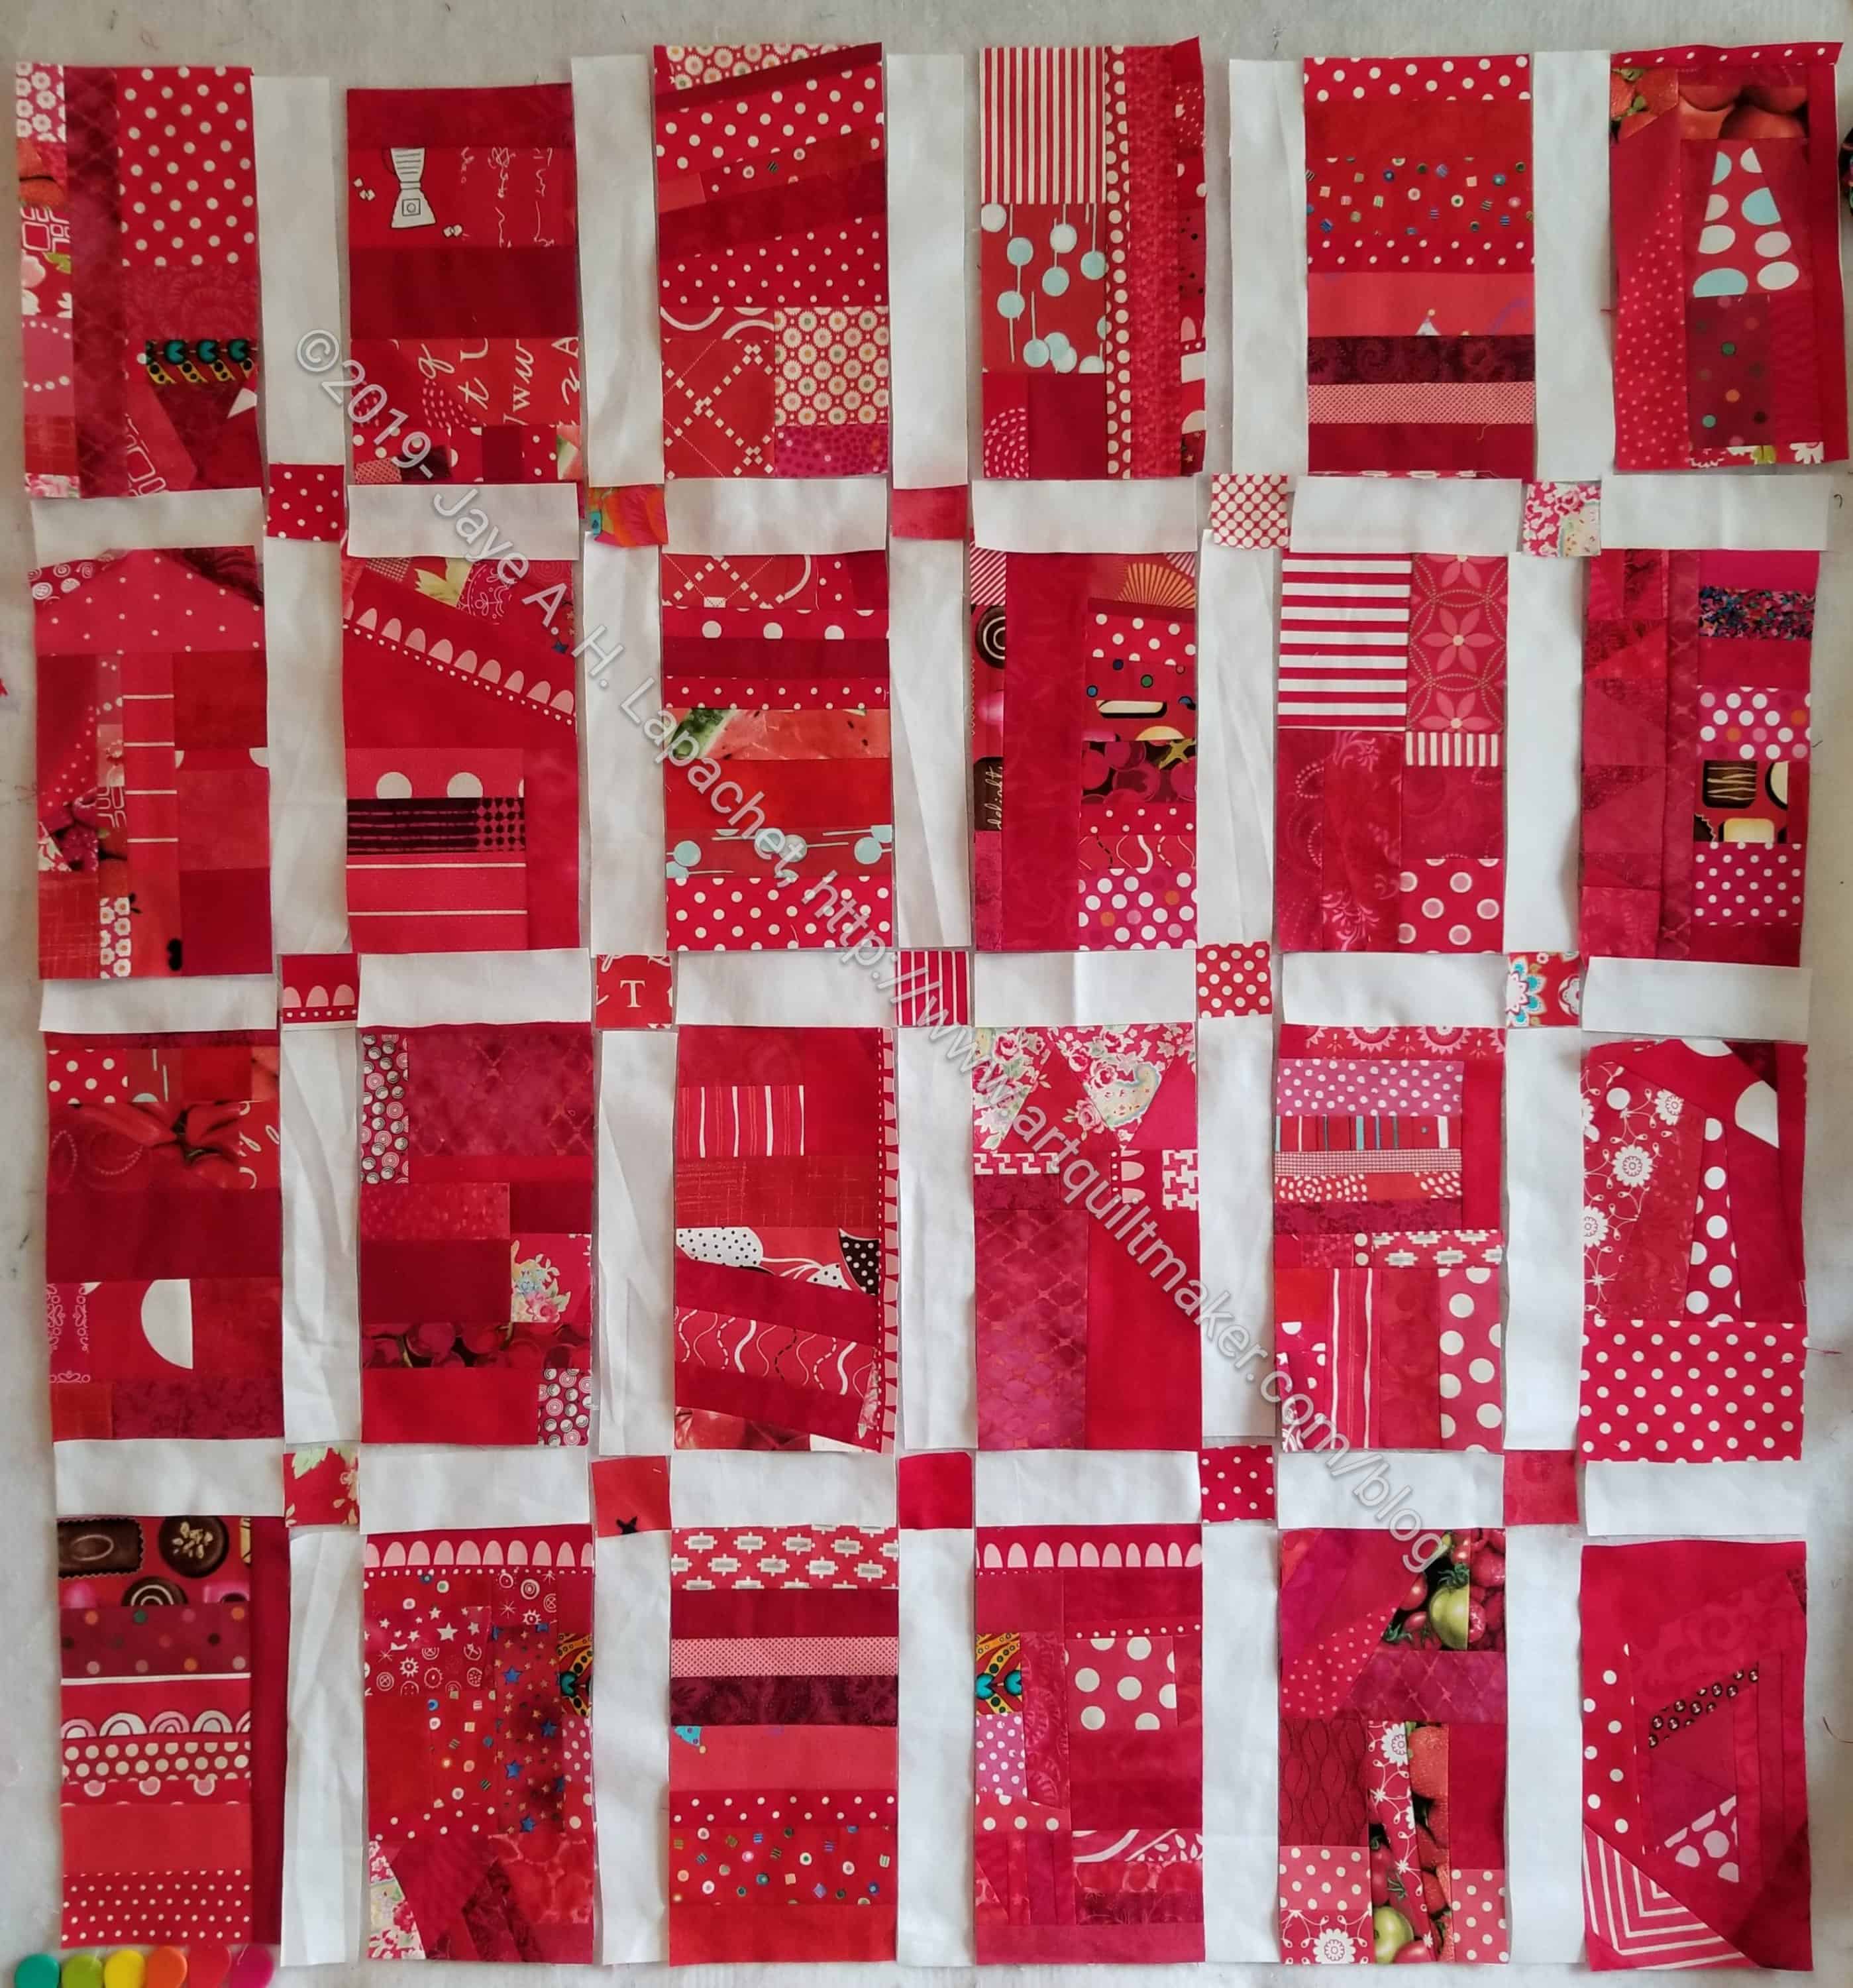
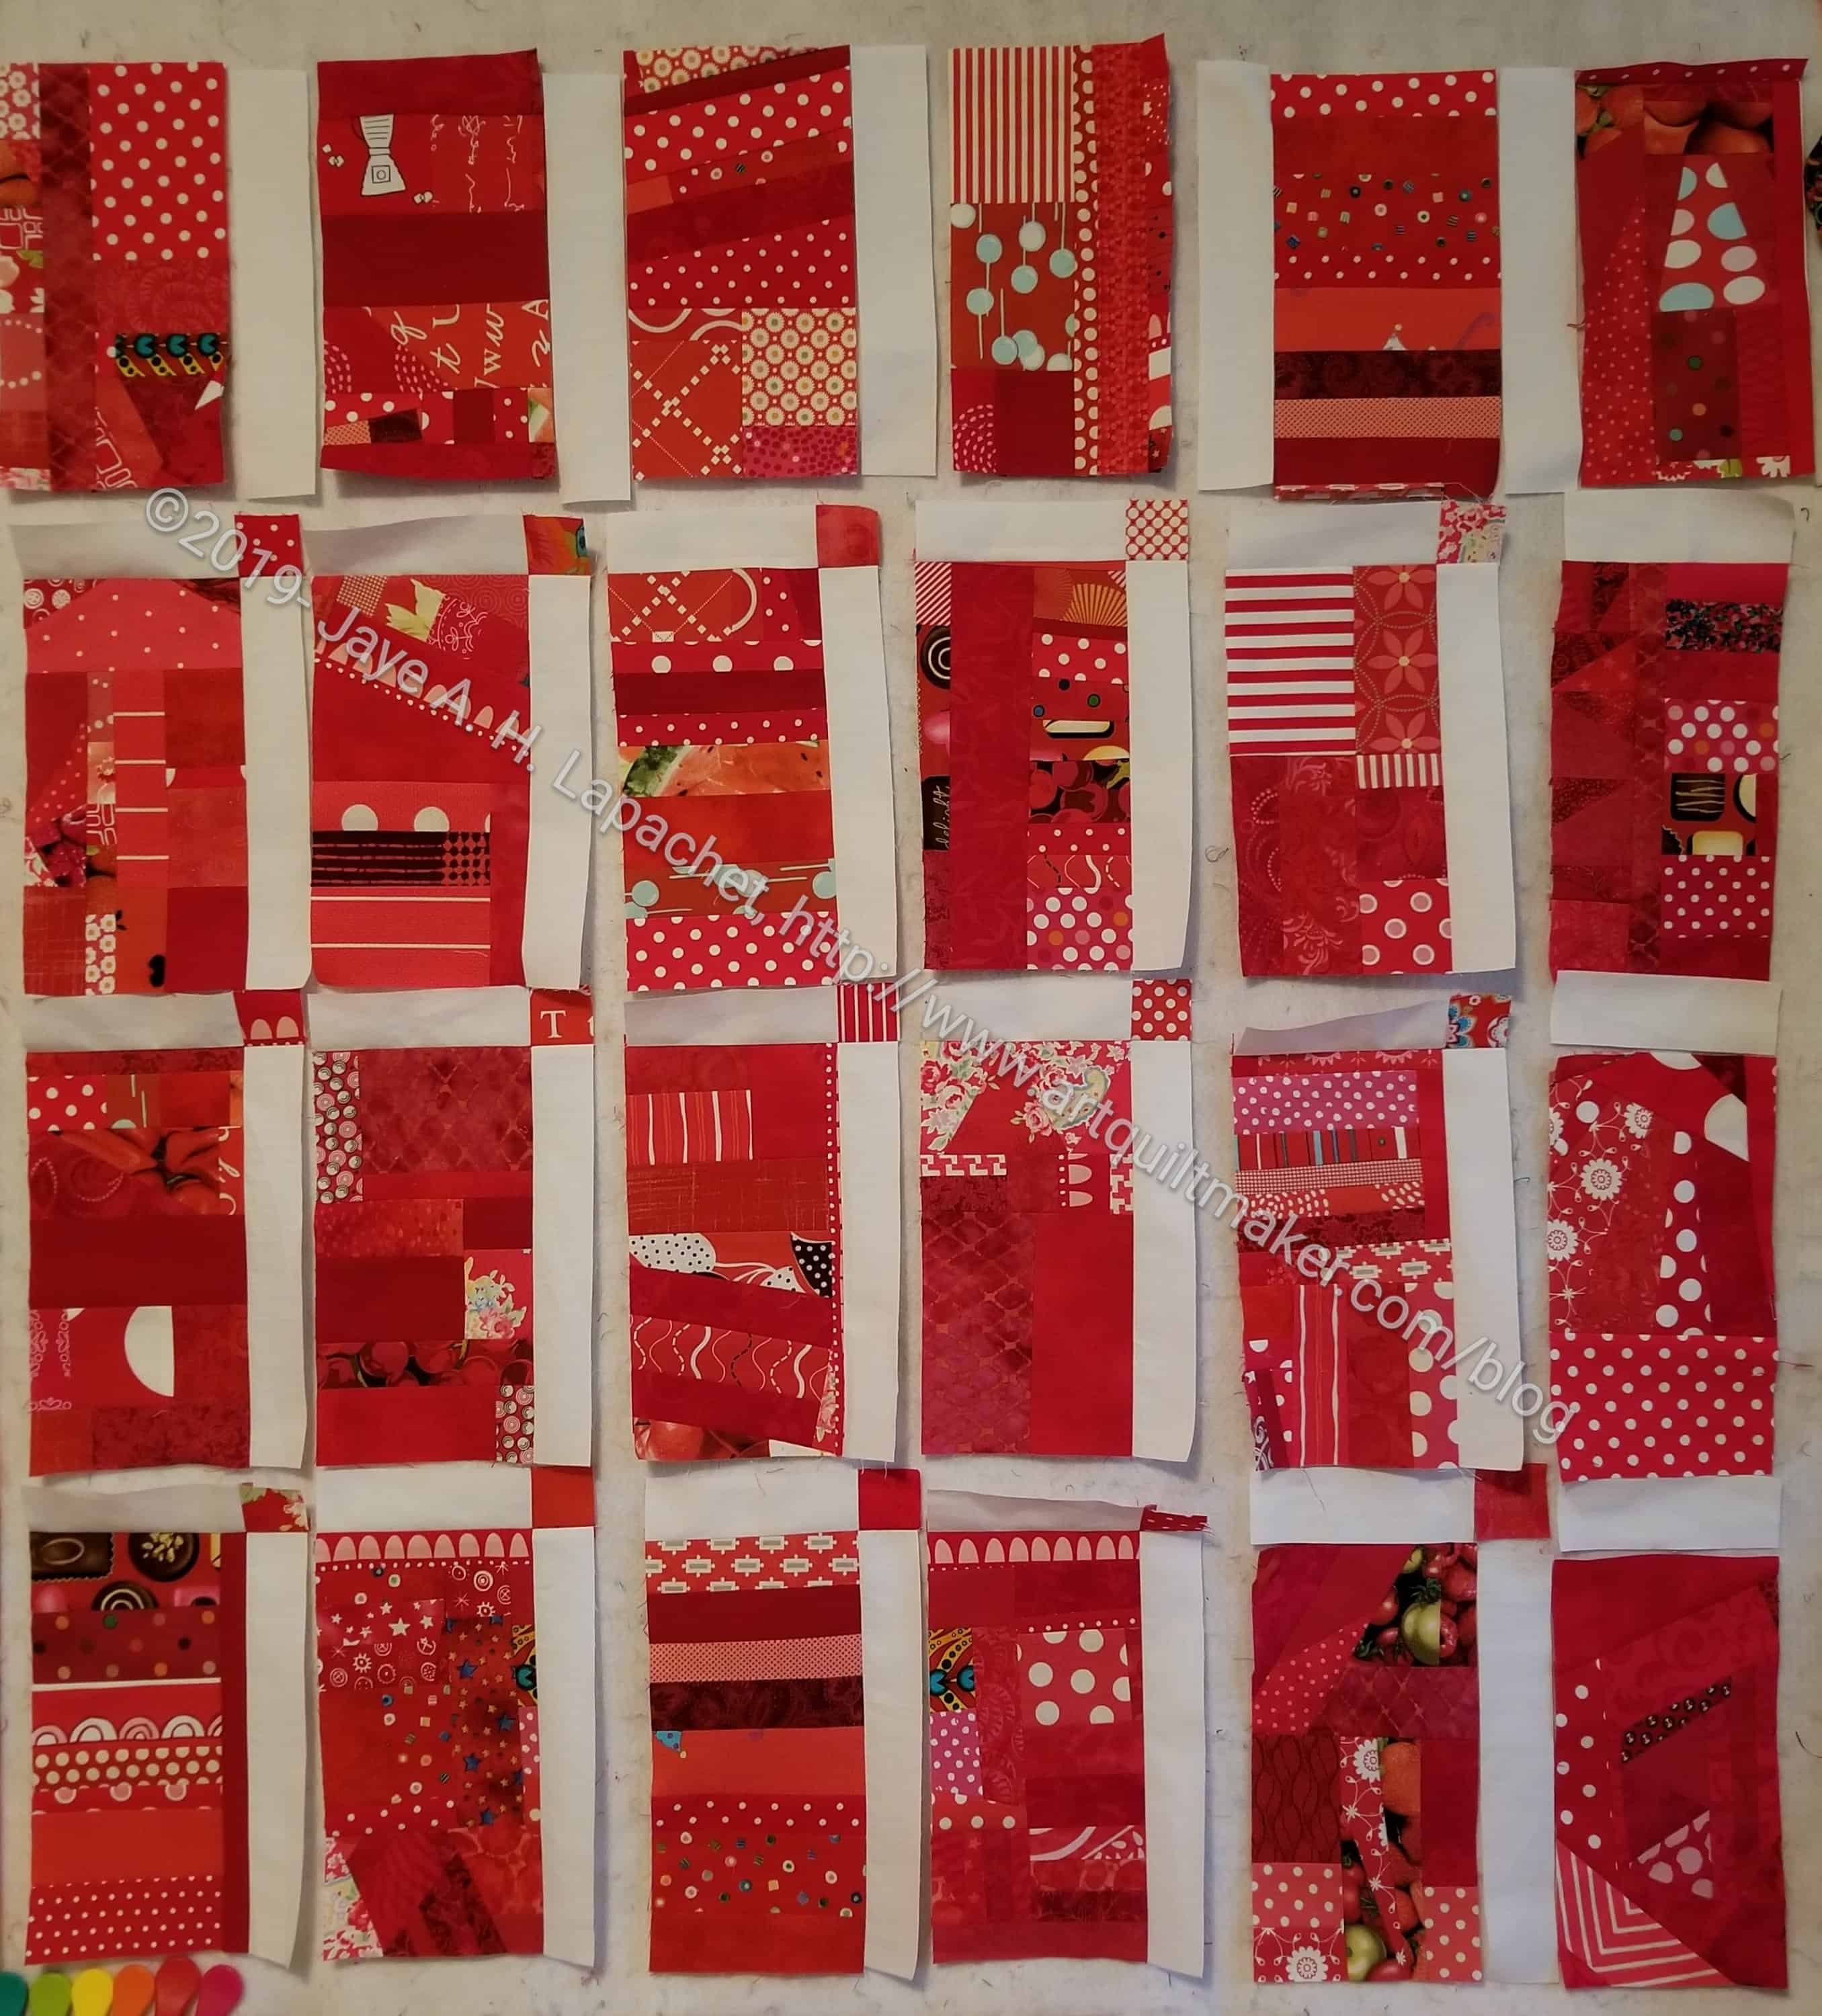
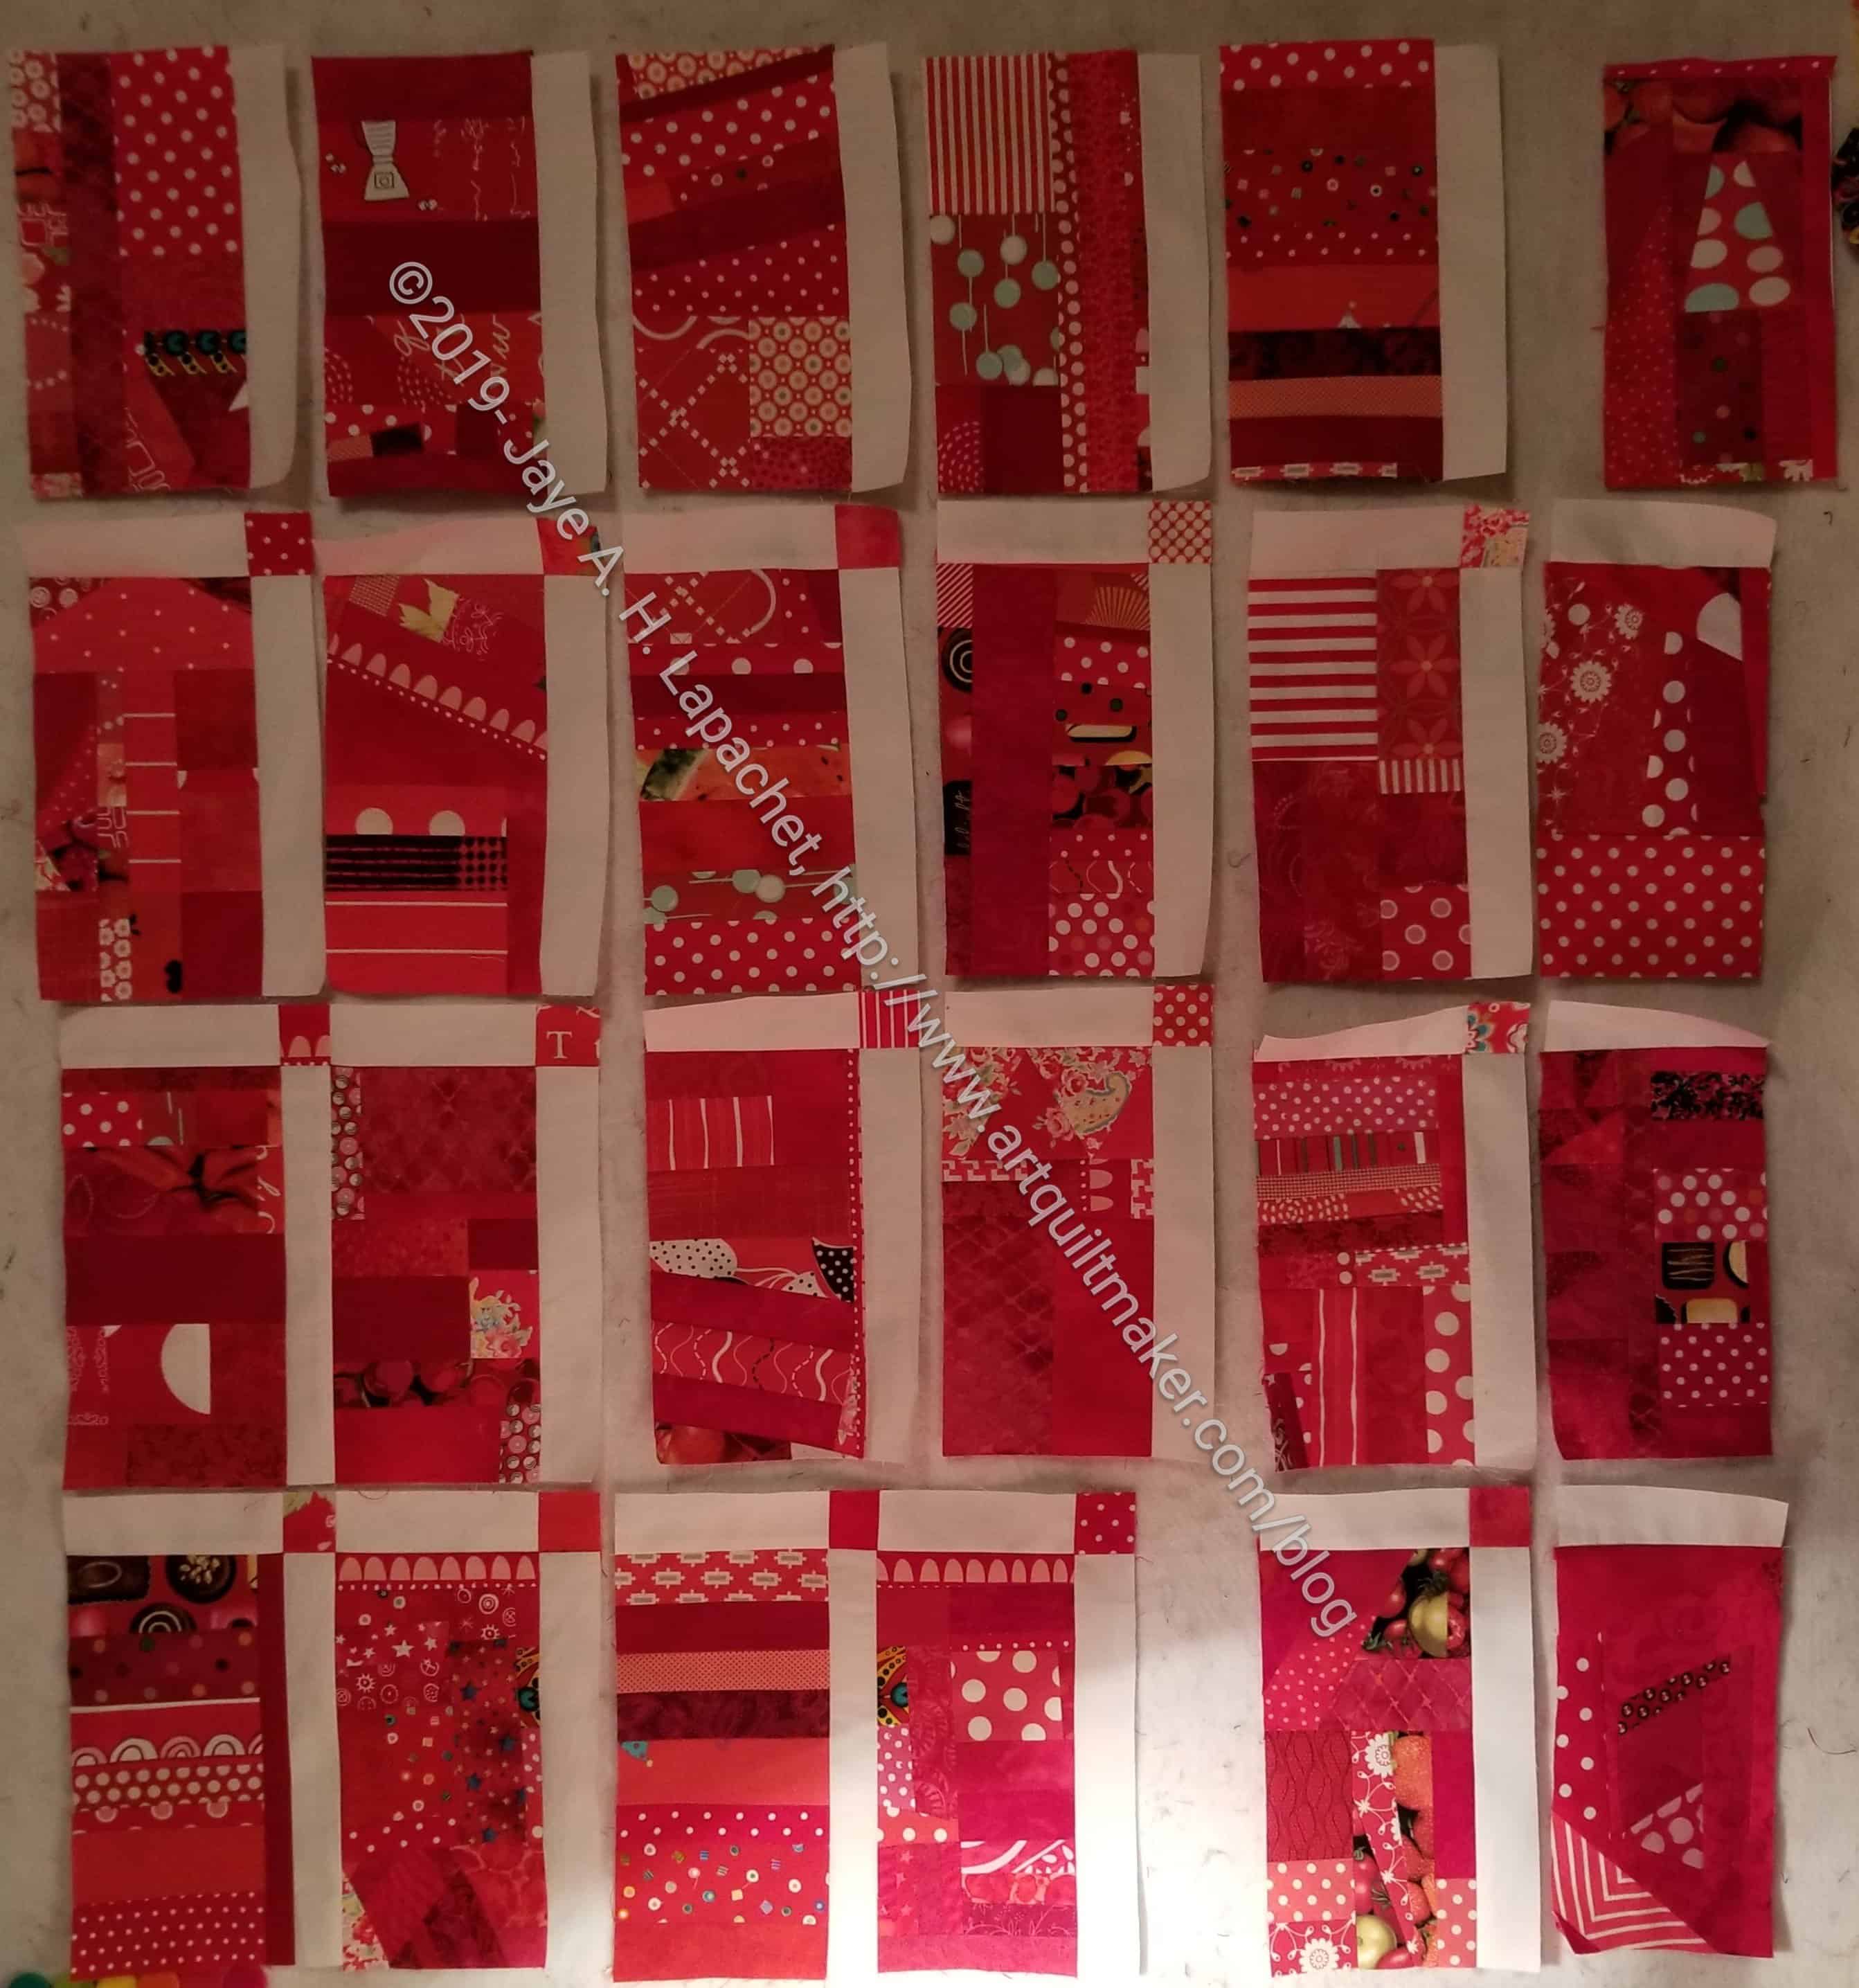
Blocks with Sashing & Cornerstones
The first step is to cut sashing and cornerstones. The photo above shows all the sashing and cornerstones cut and laid out on my design wall.
If you don’t want cornerstones, cut your top sashing the same size as your block + side sashing – 1/2 inch seam allowance (1/4 inch + 1/4 inch = half inch). The formula is:
Block size + vertical sashing – 1/2 inch seam allowance = finished size of top sashing without cornerstones
I can’t tell you the exact size, because I don’t have your blocks in front of me. Use a calculator. I do.
Also, notice that my top and side rows are different. I plan to put a straight strip of fabric across the top and sides as a border, which means I don’t need sashing for the top or sides.
Once you have all of your sashing and cornerstones cut, it is time to sew. I like to start in the bottom left hand corner. I start there because it is closer to my sewing machine when all the blocks are on my design wall. As I sew, the blocks shrink (because of the taken up seam allowance) and get closer to where I am sitting.
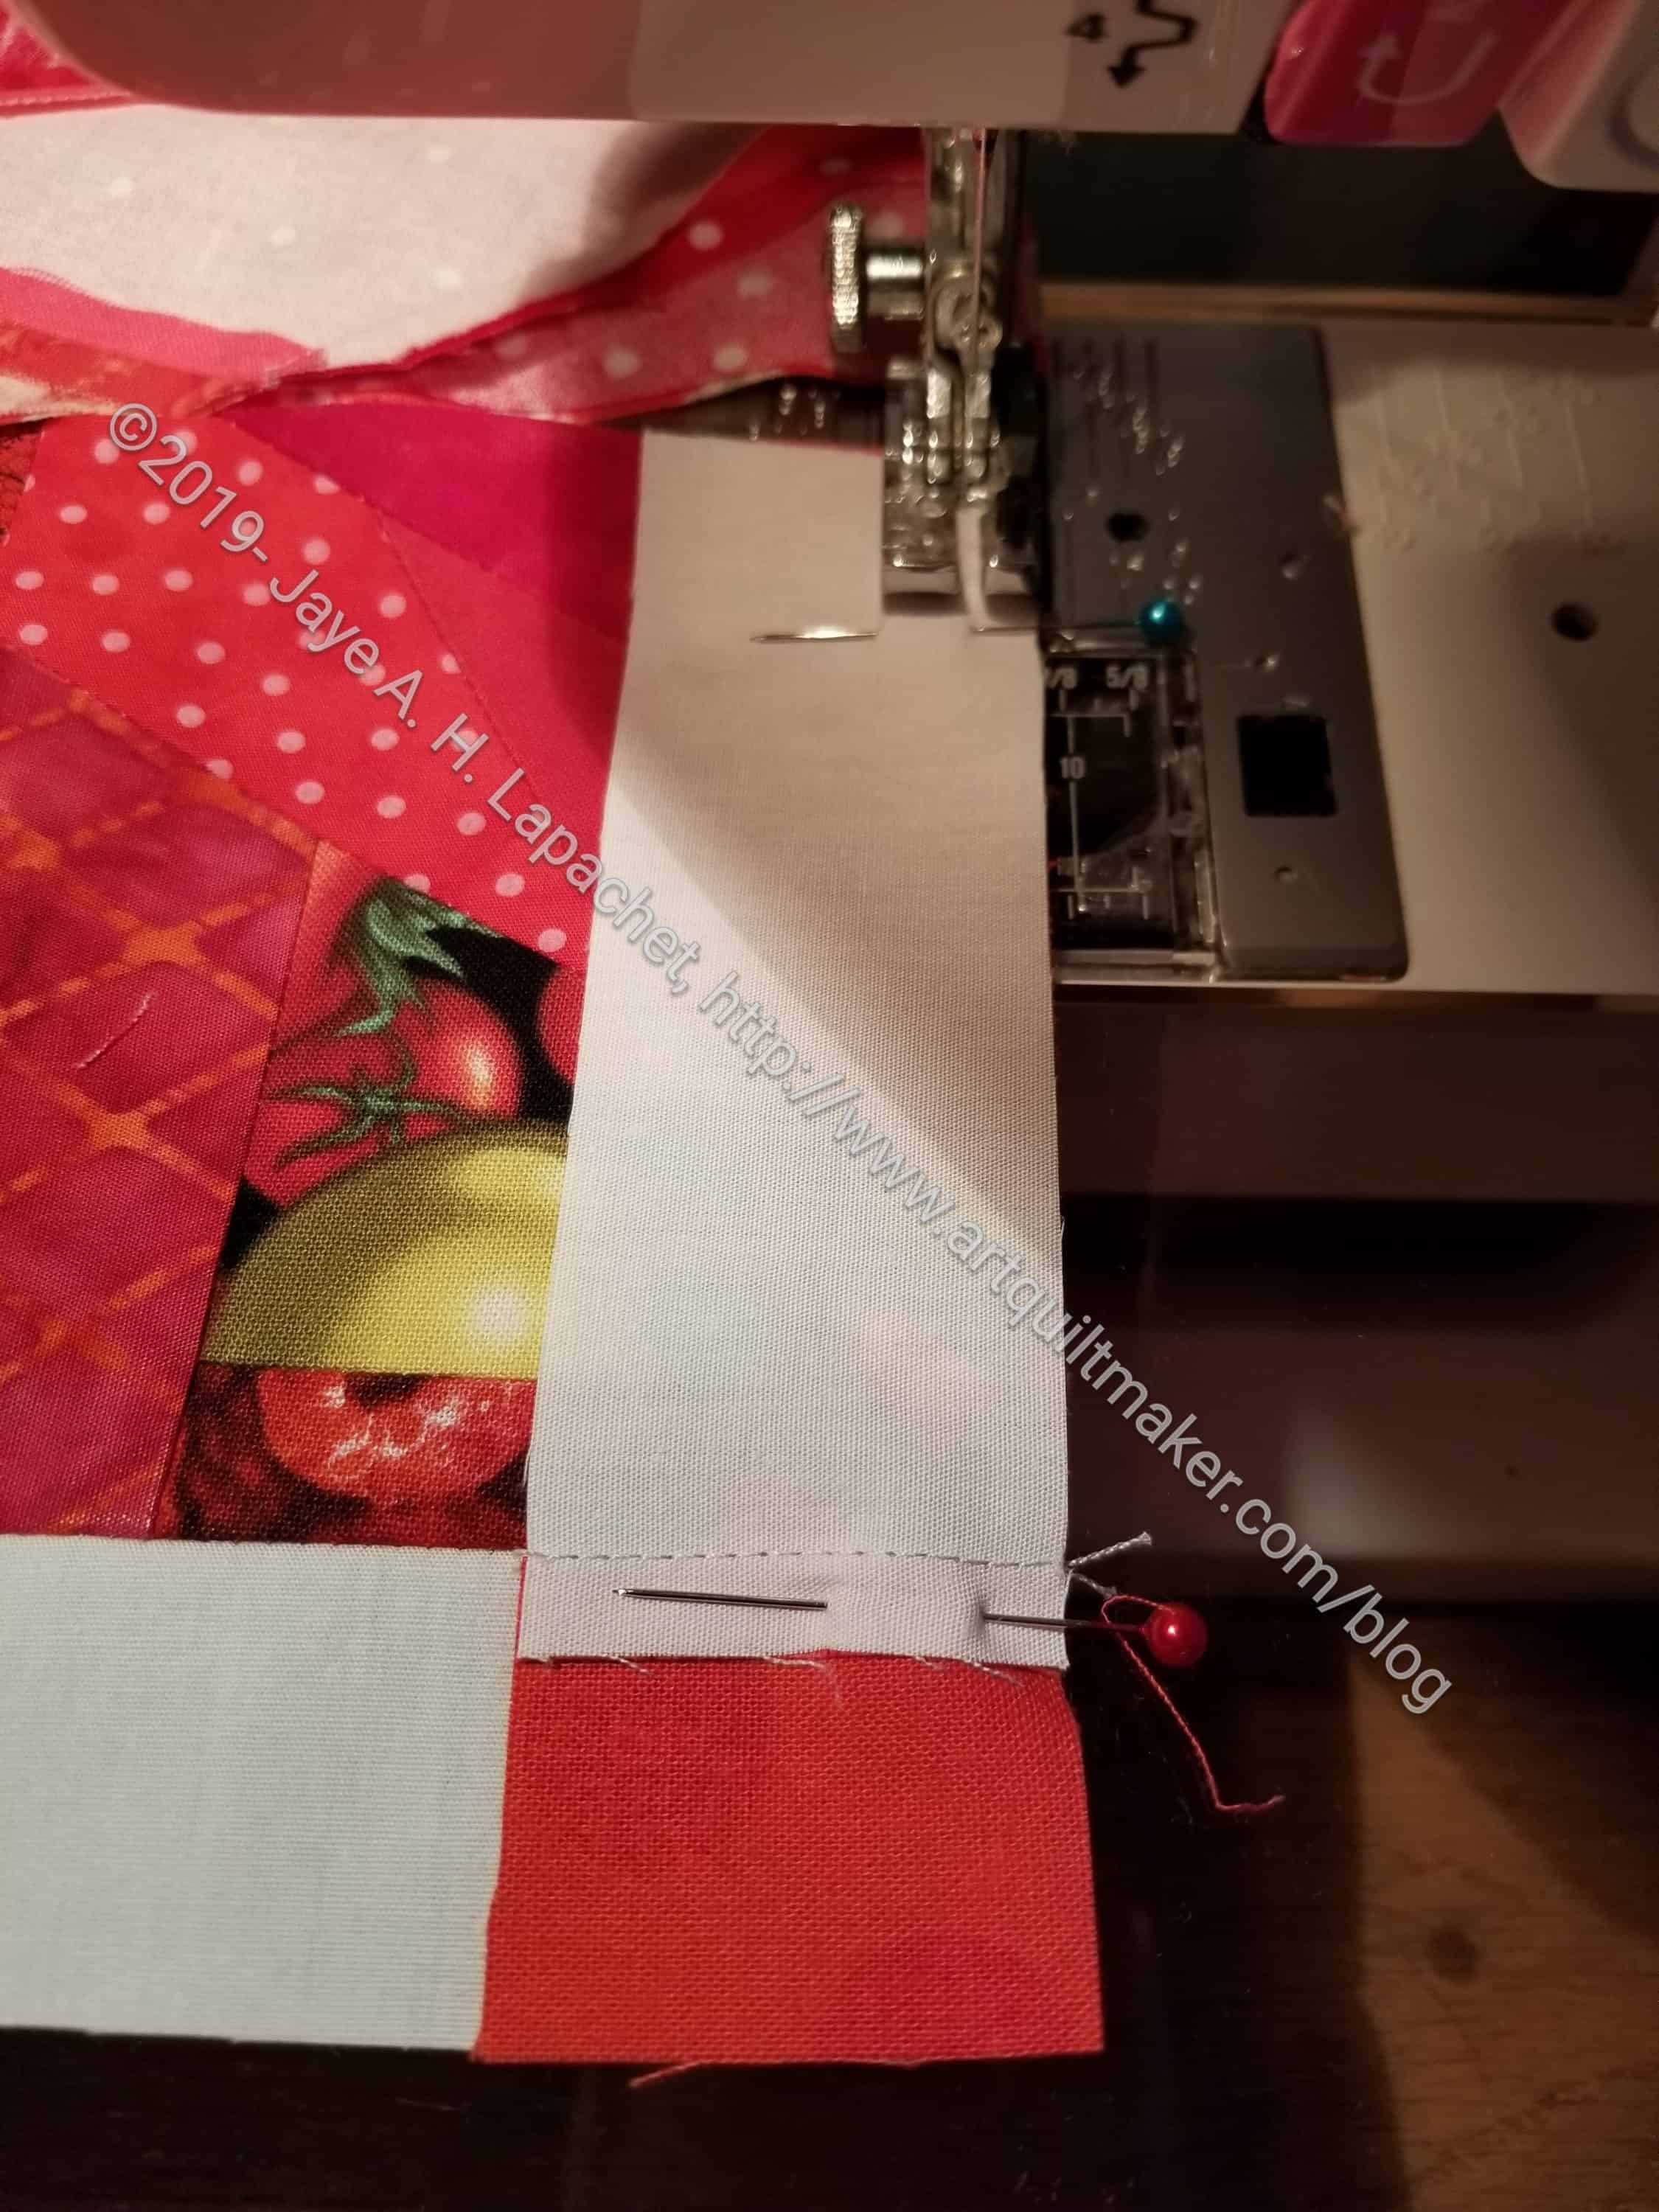
Sew vertical sashing to right side of block
First, sew one vertical sashing piece to the right side of your block.
Press to the red.
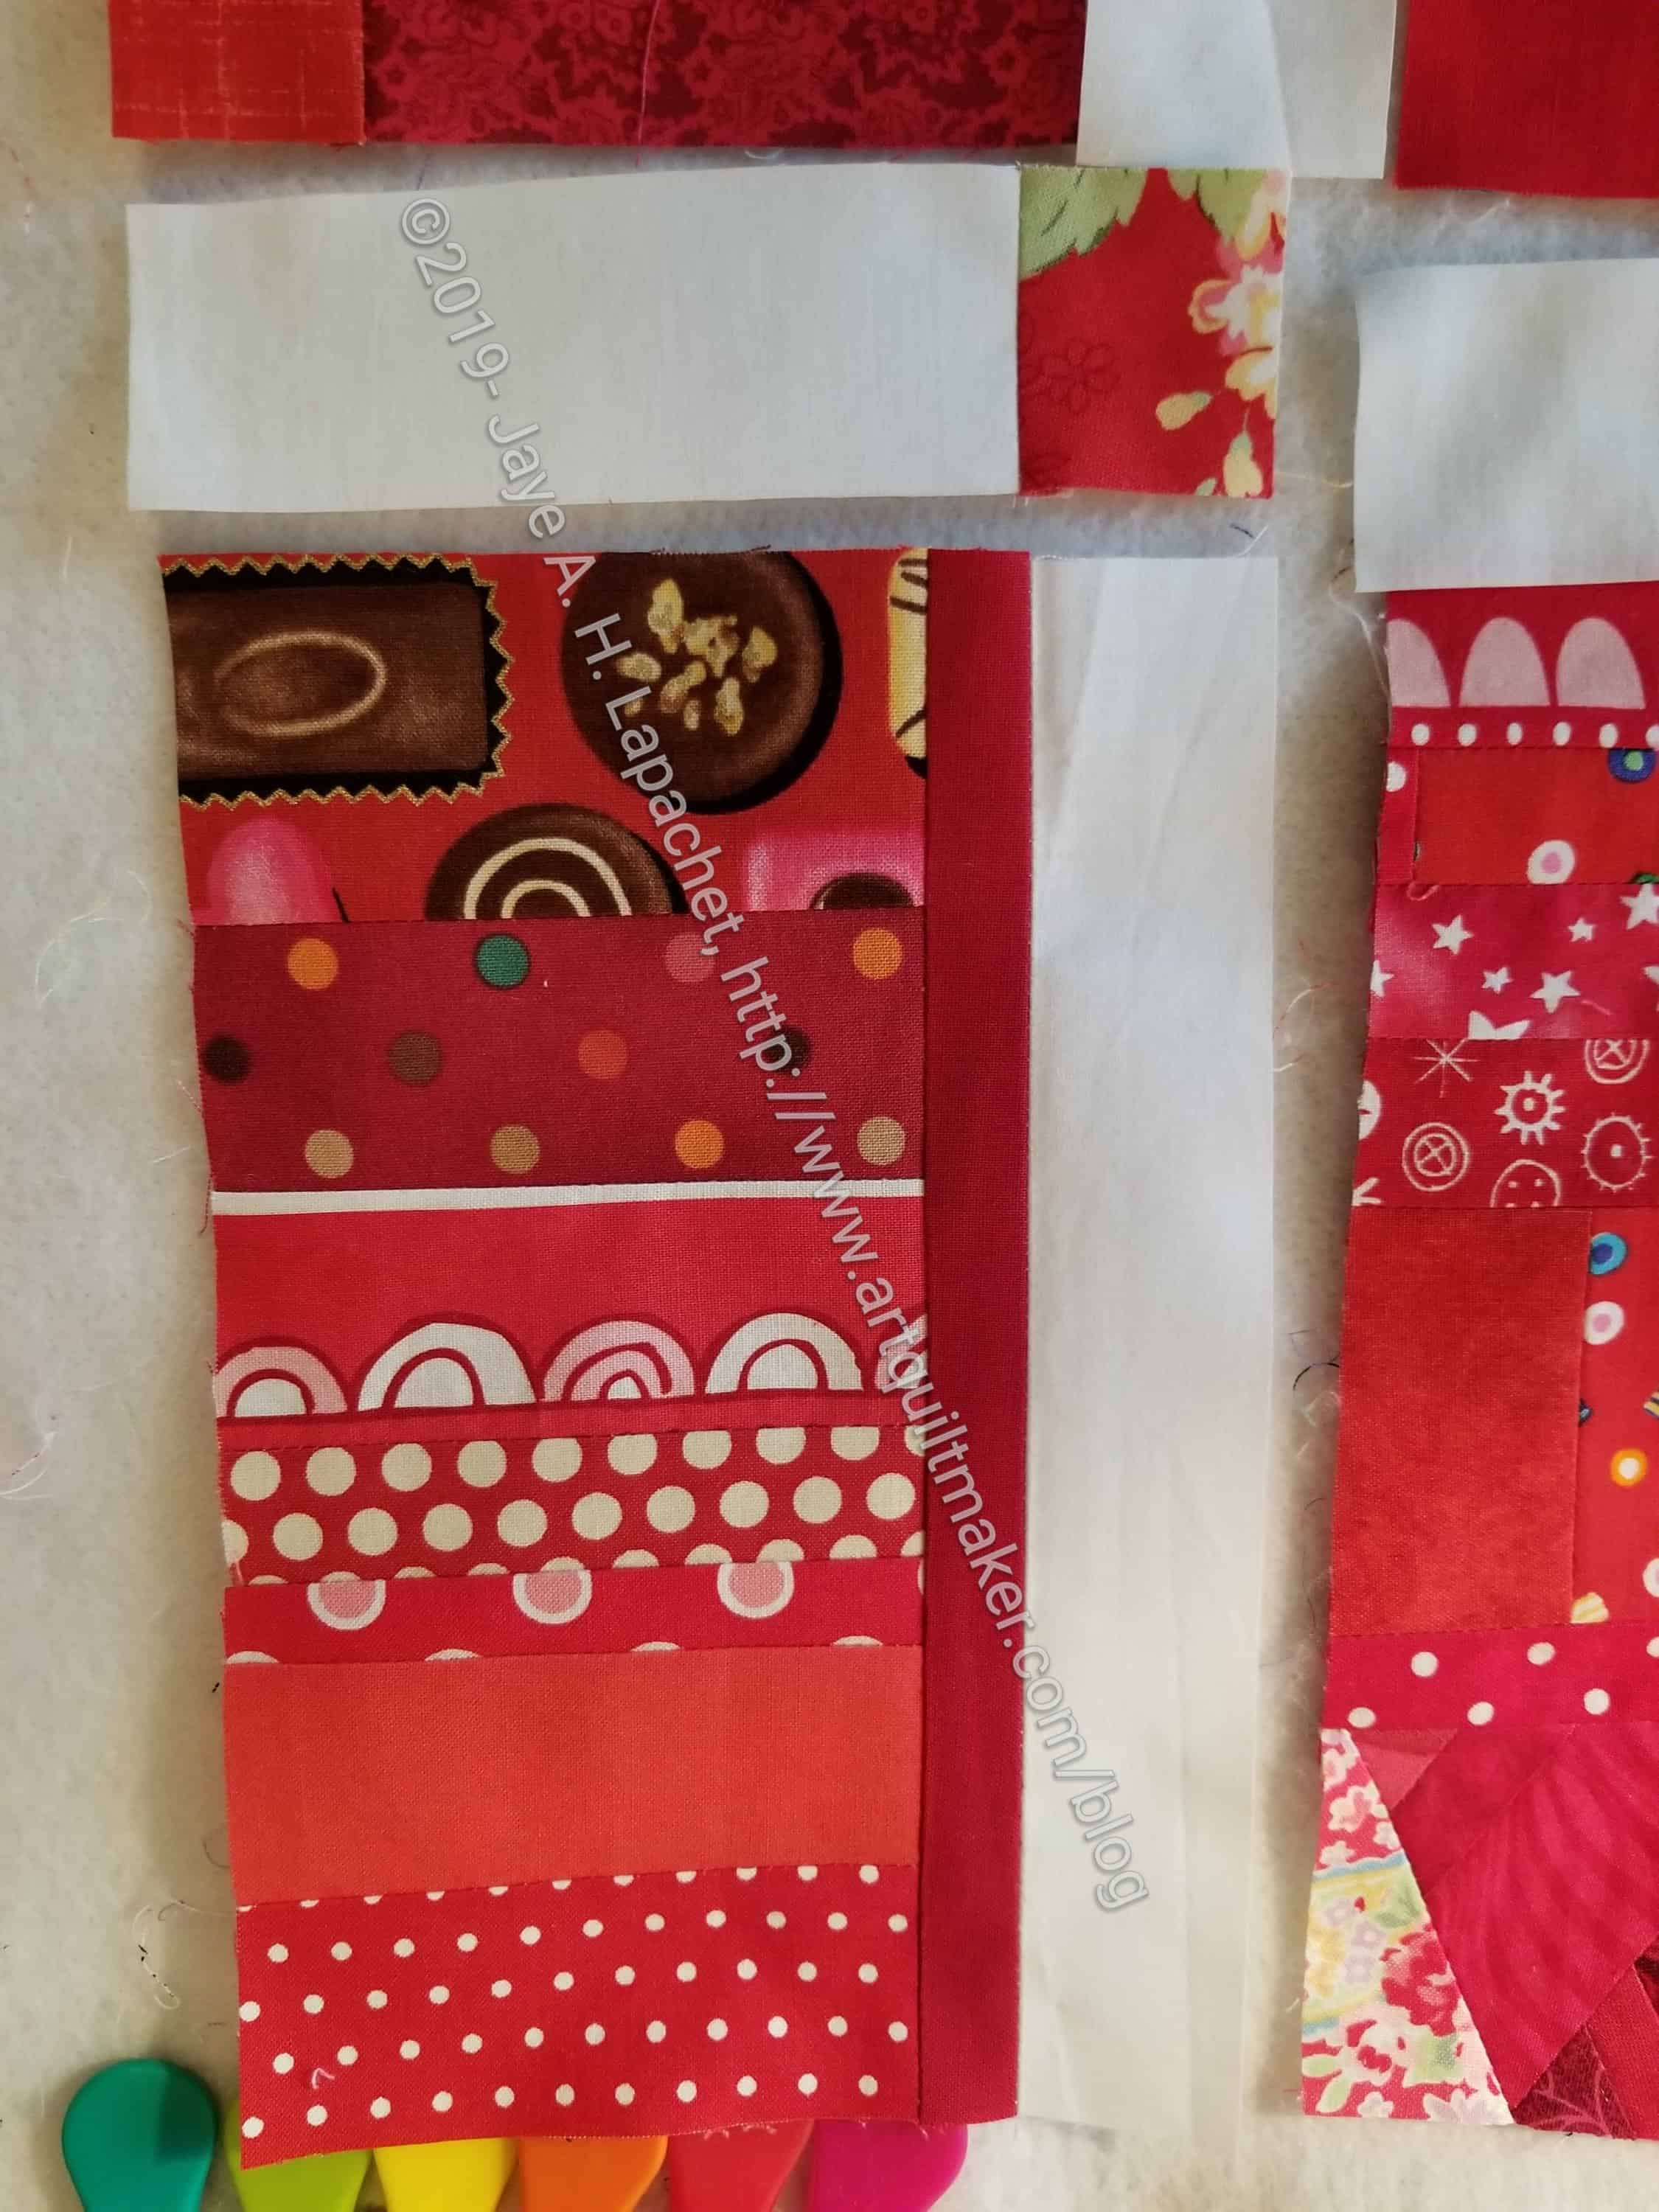
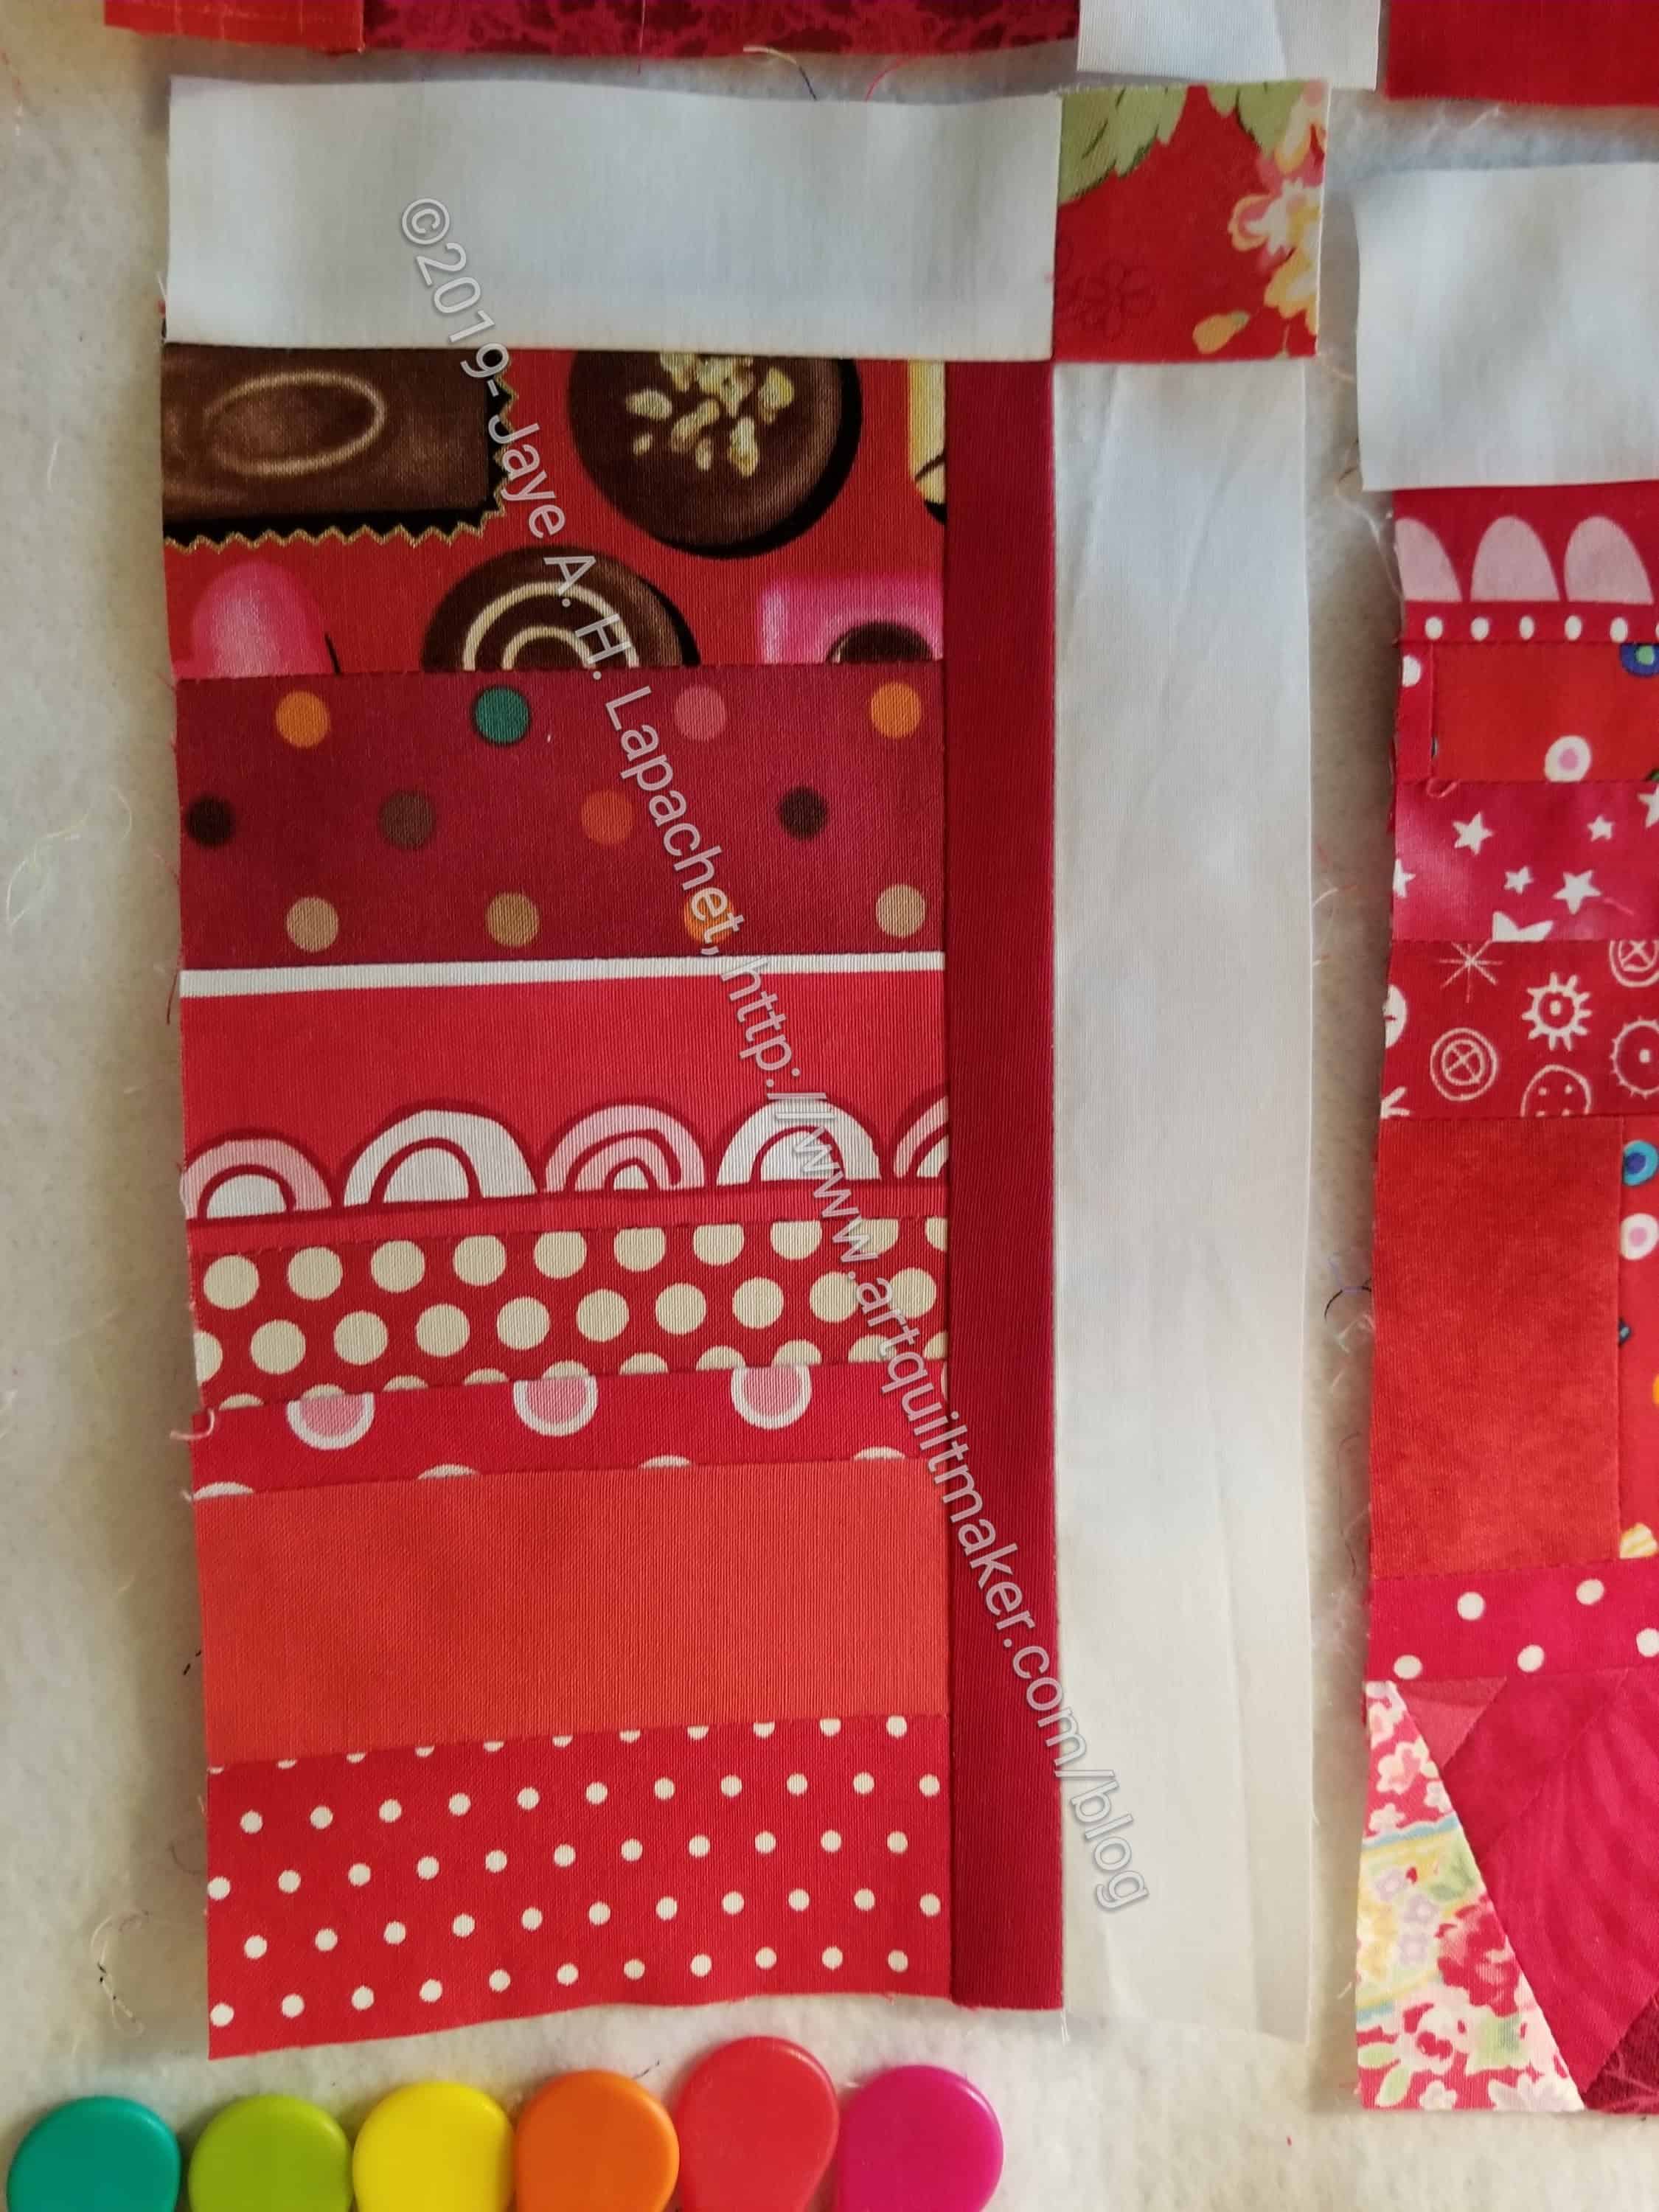
Sew top sashing to cornerstone
Next, sew one piece of the top sashing to a cornerstone. In the above photo the sashing is white and the cornerstone is a red flower fabric.
Take your new little sashing + cornerstone piece to the ironing board and press to the red.
Now, nest the seams and pin the top sashing/cornerstone piece to the block with vertical sashing.
The top sashing should be on the top of the block as it moves through the sewing machine. Sew the top sashing to the block.
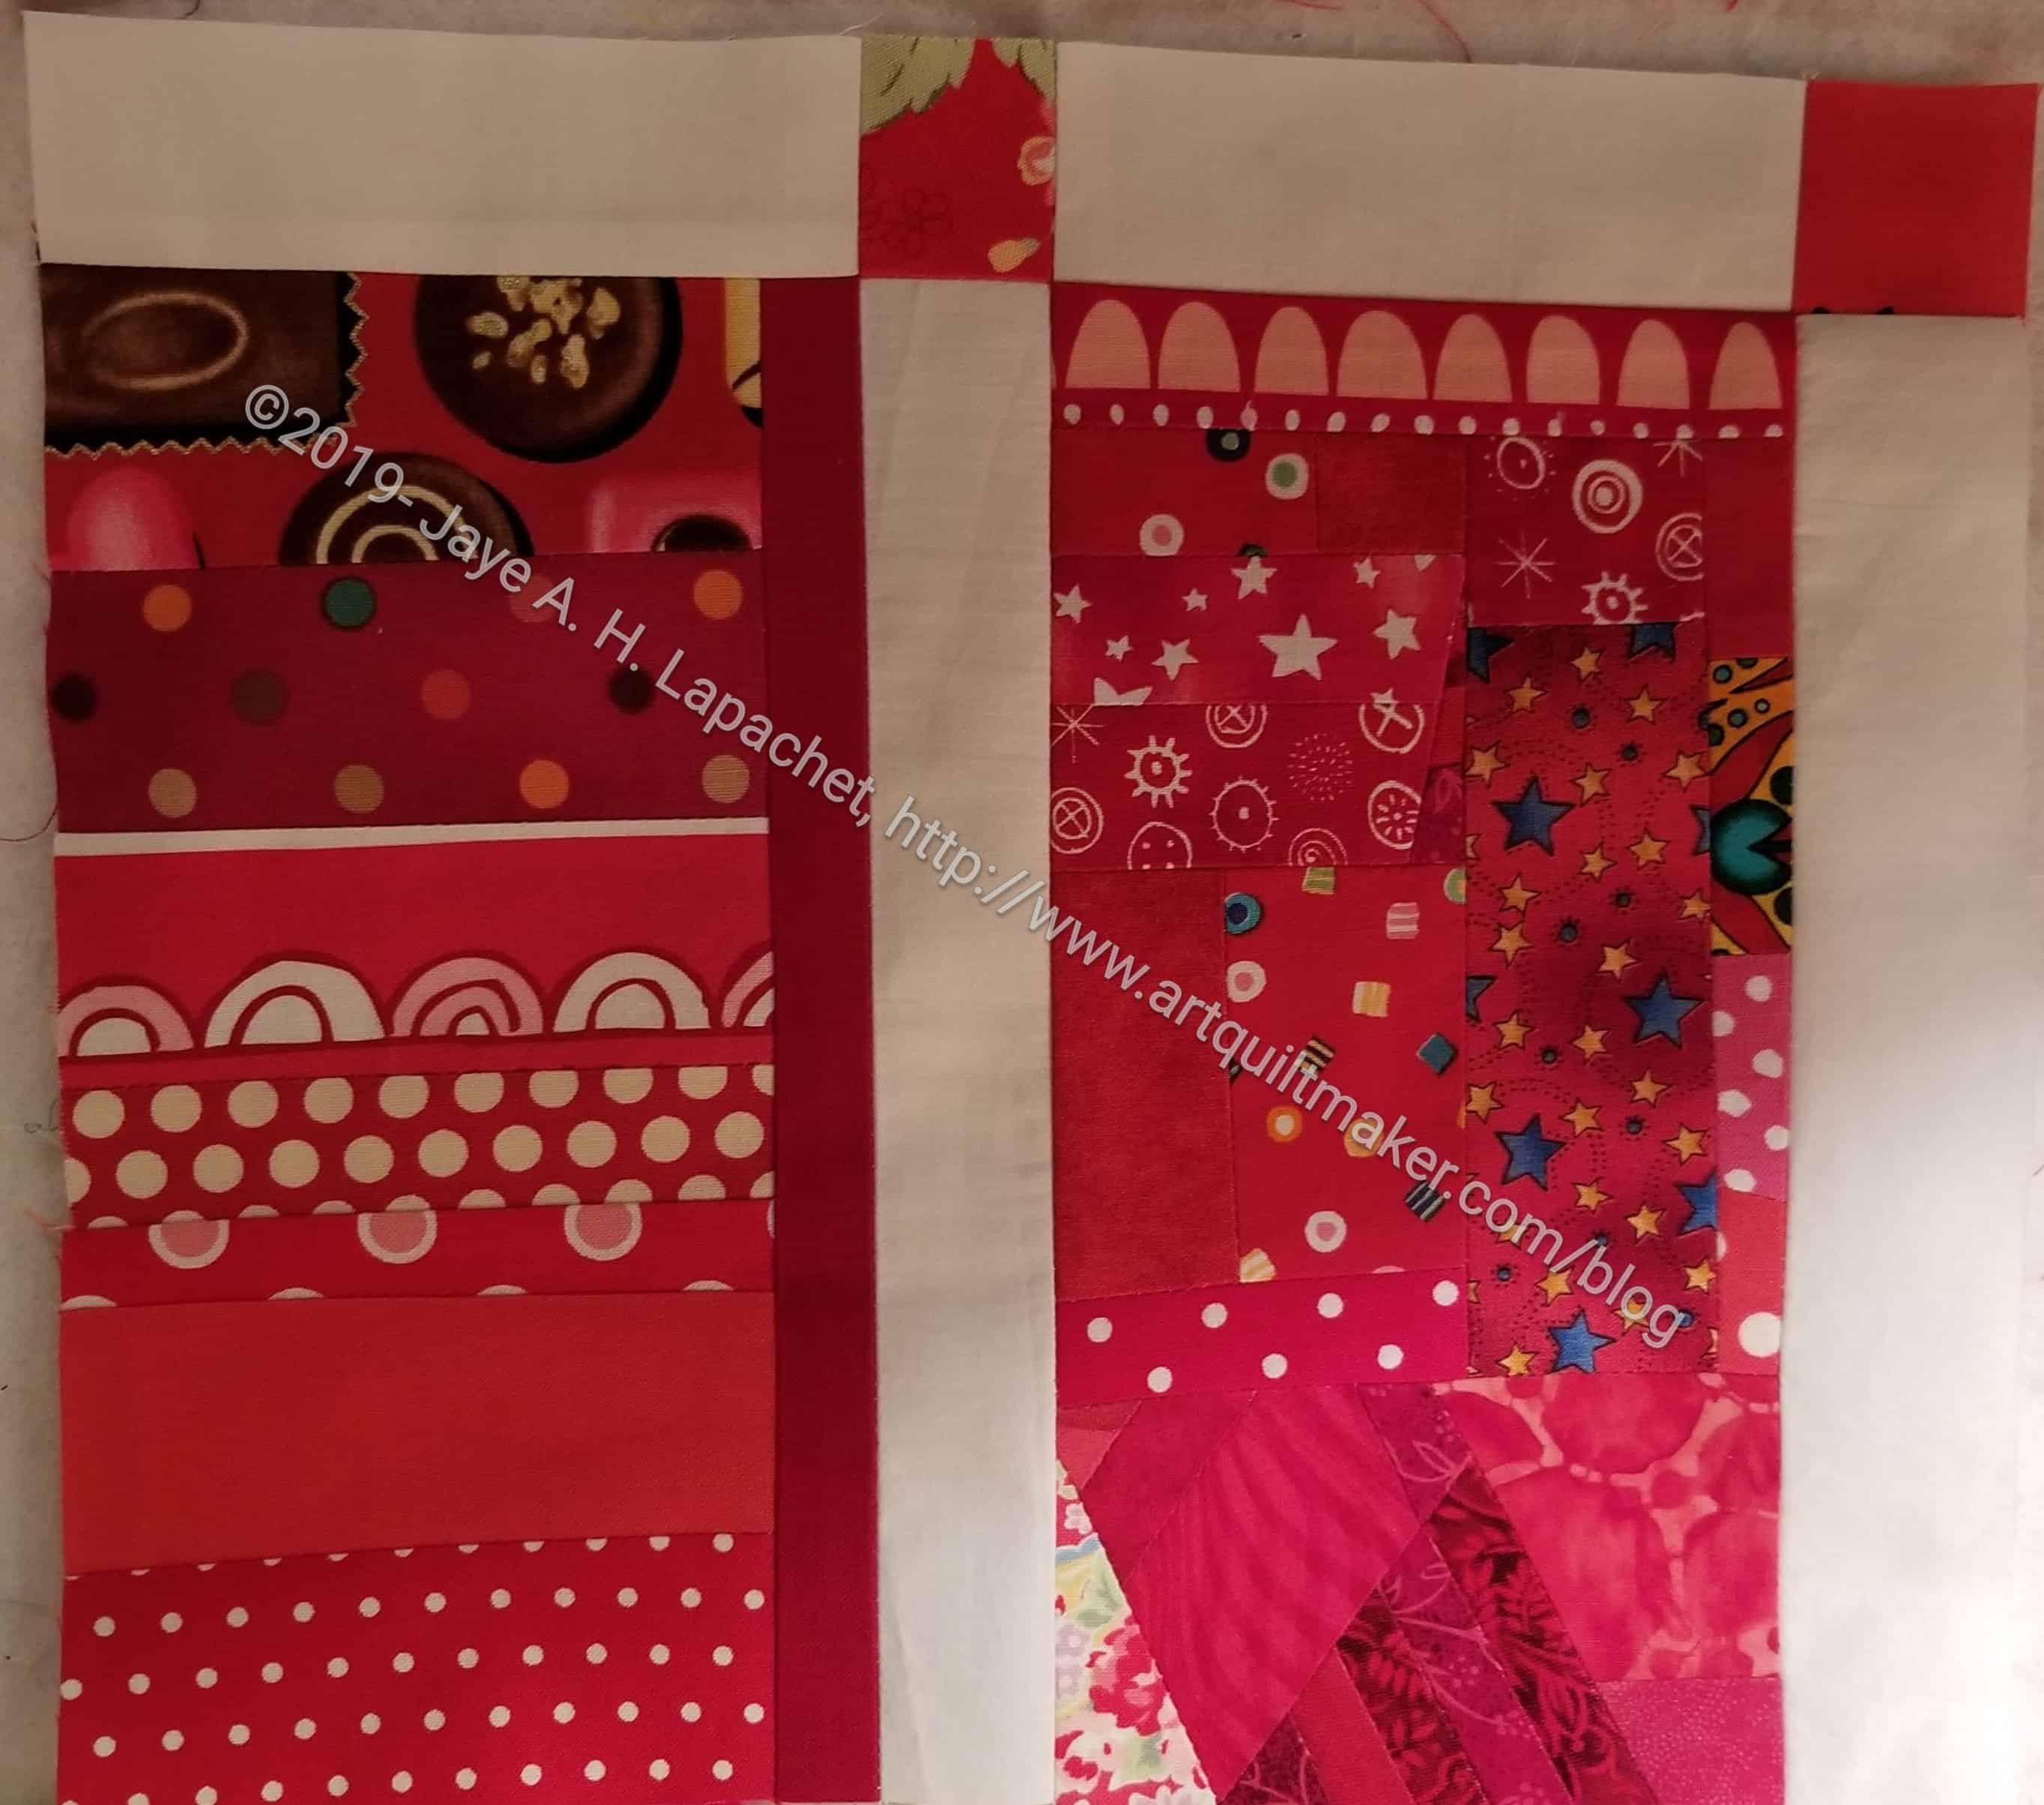
Top sashing sewn to block with vertical sashing
Sew the side sashing and the top sashing/cornerstone to all the blocks as described above.
IMPORTANT: The top row, as mentioned above, in my quilt, is different, so just sew the vertical sashing to the blocks in the top row and the top sashing to the blocks on the right edge.
All of the blocks have sashing/cornerstones sewn to their correct side
Once you have sewn all the sashing on to the blocks, you will begin to sew the blocks together. This is chunking. I have talked about it before. I ‘chunk’ because 1) I don’t like sewing long rows together and 2) it keeps my piecing more precise.
Take two blocks with sashing & sew them togetherPin blocks together, matching seams and sew
First take the two blocks in the bottom left hand corner, pin them with matched points and nested seams. You will pin them together so that the top white sashing is sewn to the red cornerstone. The white vertical sashing will be sewn to the red block.
Sew them together. I pin in the seam allowance so that i have a better chance at the seams matching up. When I take the pins out as I am sewing, chances increase that the seams won’t match. In general, to increase my chances of perfectly matching seams, I try to sew towards the seam allowance, but that didn’t work on this quilt, because I pressed towards the red. Use a stiletto to keep the seams in place for as long as possible.
Two blocks with sashing sewn together
Now you have a block with sashing on two sides.
Once you have sewn all of the sashing and cornerstones to the blocks, you will have completed the first step in putting your quilt top together.
Sew sashing to top of blocks on the right edge only
On the right edge of the quilt, you will only sew the top sashing to the blocks. As mentioned before, there will be a border without cornerstones in my quilt, so I don’t need vertical sashing or cornerstones on the edges. If you want cornerstones in your border, follow the directions above for all blocks.
One long seam left
After you have sewn the various blocks together, you will have one long seam left.
Finished Center with sashing
Once you sew that seam, the center of your quilt top is done.
I know that the common way of sewing a quilt together is sewing it together in rows then sewing all the rows together. Using the row method is easier to explain than ‘chunking’, but, as I said above, my method is more precise.
**I use affiliate links and may be paid for your purchase of an item when you click on an item link in my post. There is no additional cost to you for clicking or purchasing items I recommend. I appreciate your clicks and purchases as it helps support this blog.
I always wonder if I should put these types of posts under the general #TBT (Throwback Thursday) posts. I suppose it would sync with other sites, but somehow I feel like my own system works, too.
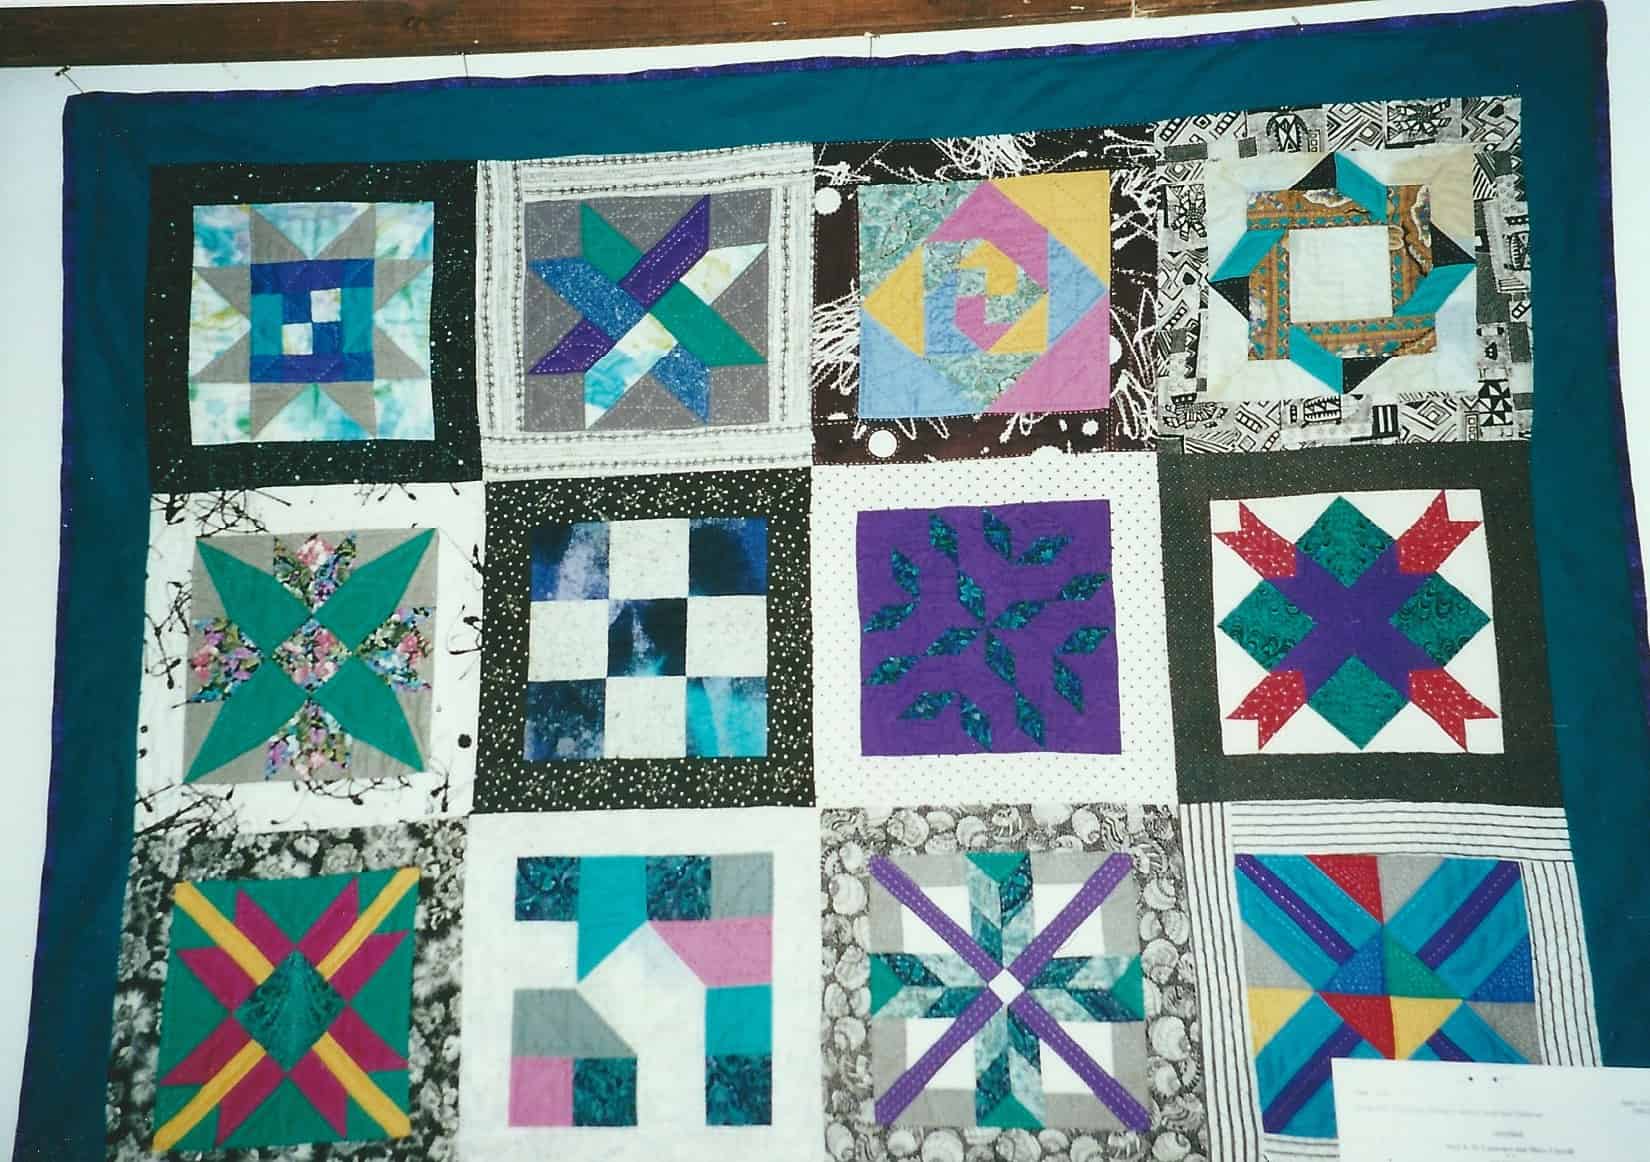
Fort Mason Sampler
Over the weekend, I did some chores that had been languishing, including scanning a bunch of photos I found while clearing out boxes and drawers during Lent. Some of the photos were of quilts I just hadn’t seen in awhile. Others I didn’t have digital photos of for this site. One was a sampler I did when I took a drafting class at Fort Mason just after I got married.
I made the top and gave it to my mom who quilted it. Many of the fabrics I used were from my first Sampler quilt, which, at the time, was still unquilted – well, the quilting was in progress. I knew, even then, that quilting was less appealing than piecing and my mom liked the quilt.
The point of the class was quiltmaking, but more specifically drafting blocks. I talked about this topic a little in my review of The Quilters’ Album of Patchwork Patterns. I am much more familiar with how blocks are structured, but at the time, this was a challenging part of the class. I haven’t seen the quilt in a long time and in looking at the blocks, I am much less confused by how to draft them. I am not sure I could do it the way the teacher taught me at the time, but I could do it, I think.
Fort Mason Sampler Wreath
My favorite block was the wreath type block. I really tried hard to make it look woven. I see some of the fabrics in that block are from one of the the Pointillist Palette quilts, so I must have already been working on those at the time.
Shortly after I finished the binding on Metroscape, I started and finished the binding on this sampler. I am pleased to have another finish! With this finish, I am crossing something off the list that has been on it for a long time. That feels great.
I showed it at BAM last Saturday and I was gratified at the response. I don’t think this sampler looks fuddy-duddyish, but I wasn’t sure how that more modern audience would take it. They liked it and it makes me want to pull out the Handbag Sampler and get back to it. I do think I would like to make some smaller blocks to go in a new sampler I might start, like the Star Sampler.
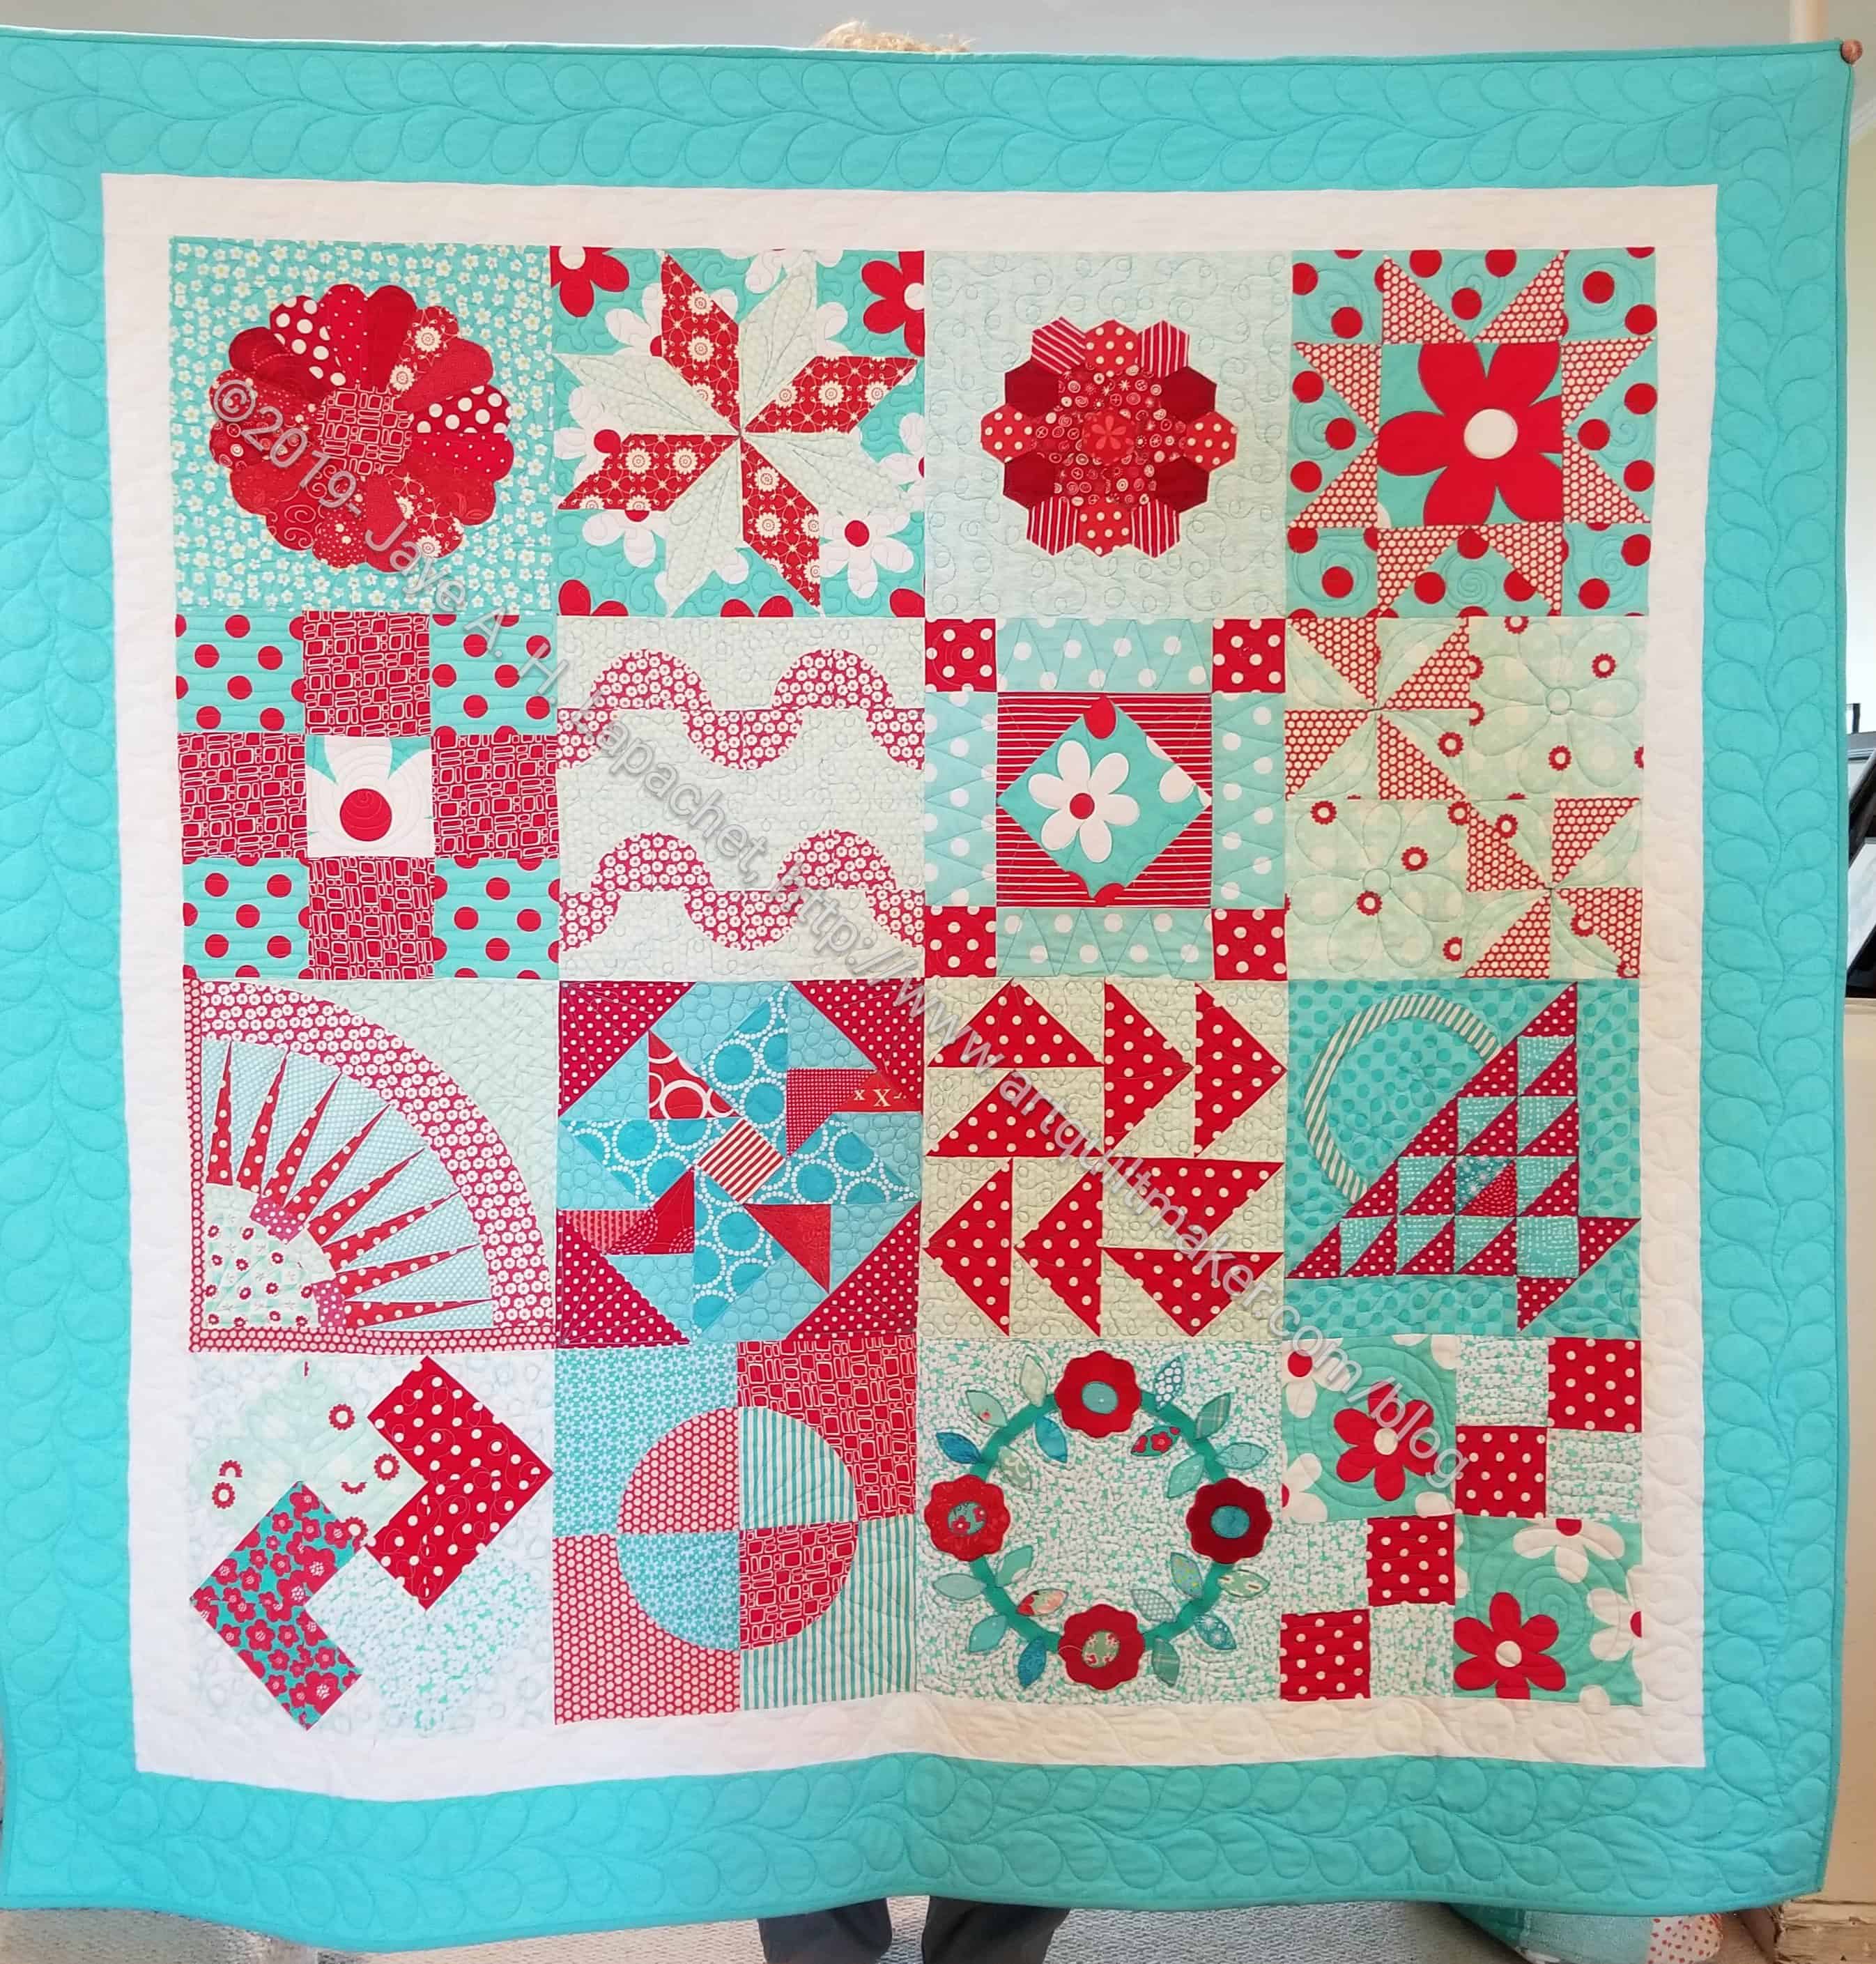
I worked hard last week on the Aqua-Red Sampler and got the top and back finished. WHEW! I didn’t fight with it as much as I had over the past month, but it wasn’t all peaches and roses either.
I probably would have made the white border thinner, if I had it to do other again, but I am not ripping it out. I think it works.
I ended up choosing the solid border, mostly because I didn’t have enough of the daisy fabric and I didn’t want to fiddle and fight to make it fit. I am pleased with it.
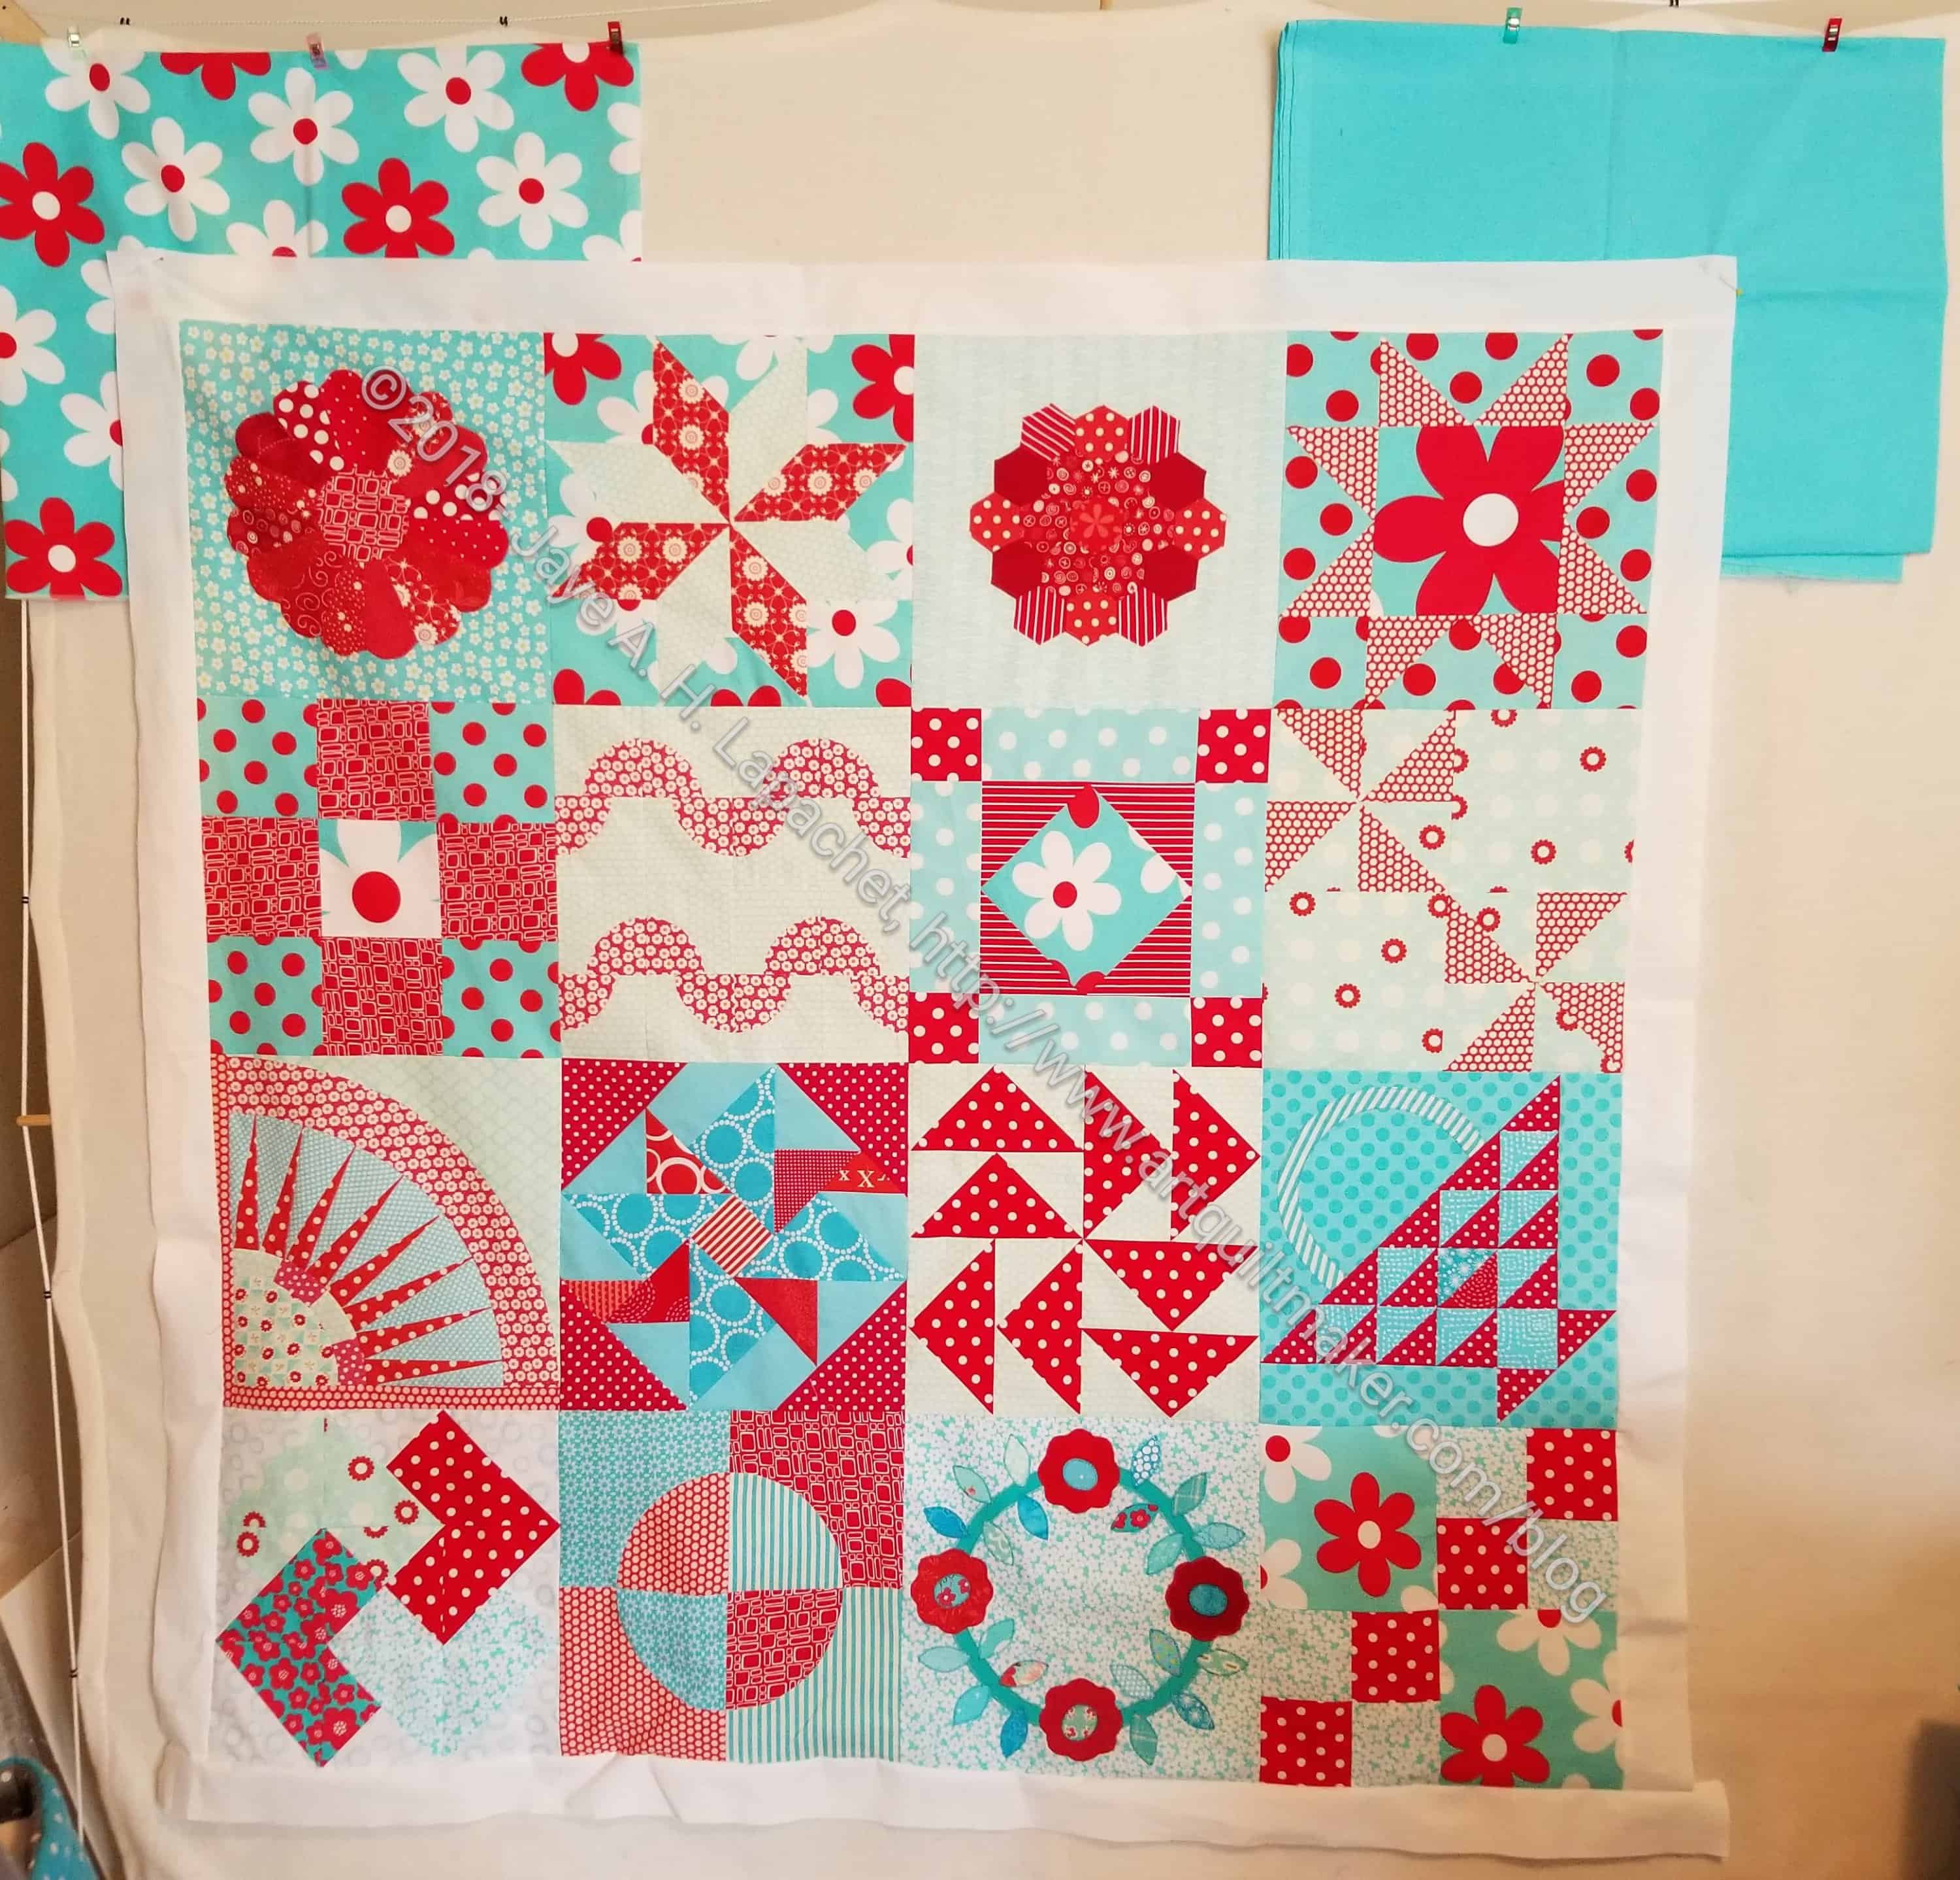
I worked hard on the Aqua-Red Sampler quilt over the weekend. It was great to have a nice long weekend. I made a lot of progress and will be glad to get this quilt out of my hair.
You will notice that I rearranged the blocks since my last layout. I also did not include the Cathedral Window block. It was just too thick. I have another test block from this quilt and I think I will make a pillow from the two of them.
I made a new block and needed to rearrange the blocks because of the colors. I didn’t want all the big red dots and daisy fabrics lumped together in one area. This quilt has been one problem after another and I hope that the borders will cut me some slack.
I found a bright white (Pure Elements Snow, which is different from Kona Snow) that picked up and highlighted the other bright whites in the blocks. I tried not to include too much cream where possible. I’m not sure about the width of that white border (2.5 inches). I may rip it off and make it smaller. That is not my first choice.
I thought the daisy fabric would be exciting, but I would have to struggle with making sure I used every scrap if I can’t find the rest of the stash of it that I know I have somewhere. The solid turquoise would be a solid choice. By that I mean that it would work, it would probably hold in all that is going on in the quilt.
I decided to make this block after finding I needed one more block to complete my Aqua-Red Sampler. I have never made one of these, so I thought “what the heck?”. I had seen some directions for it and it caught my attention. As mentioned, I had to cobble together instructions from at least three different tutorials to be able to make the block. Below is my version. The tutorials I referenced are noted below.
Finished Block Size: 12 inches (12.5 unfinished)
Supplies
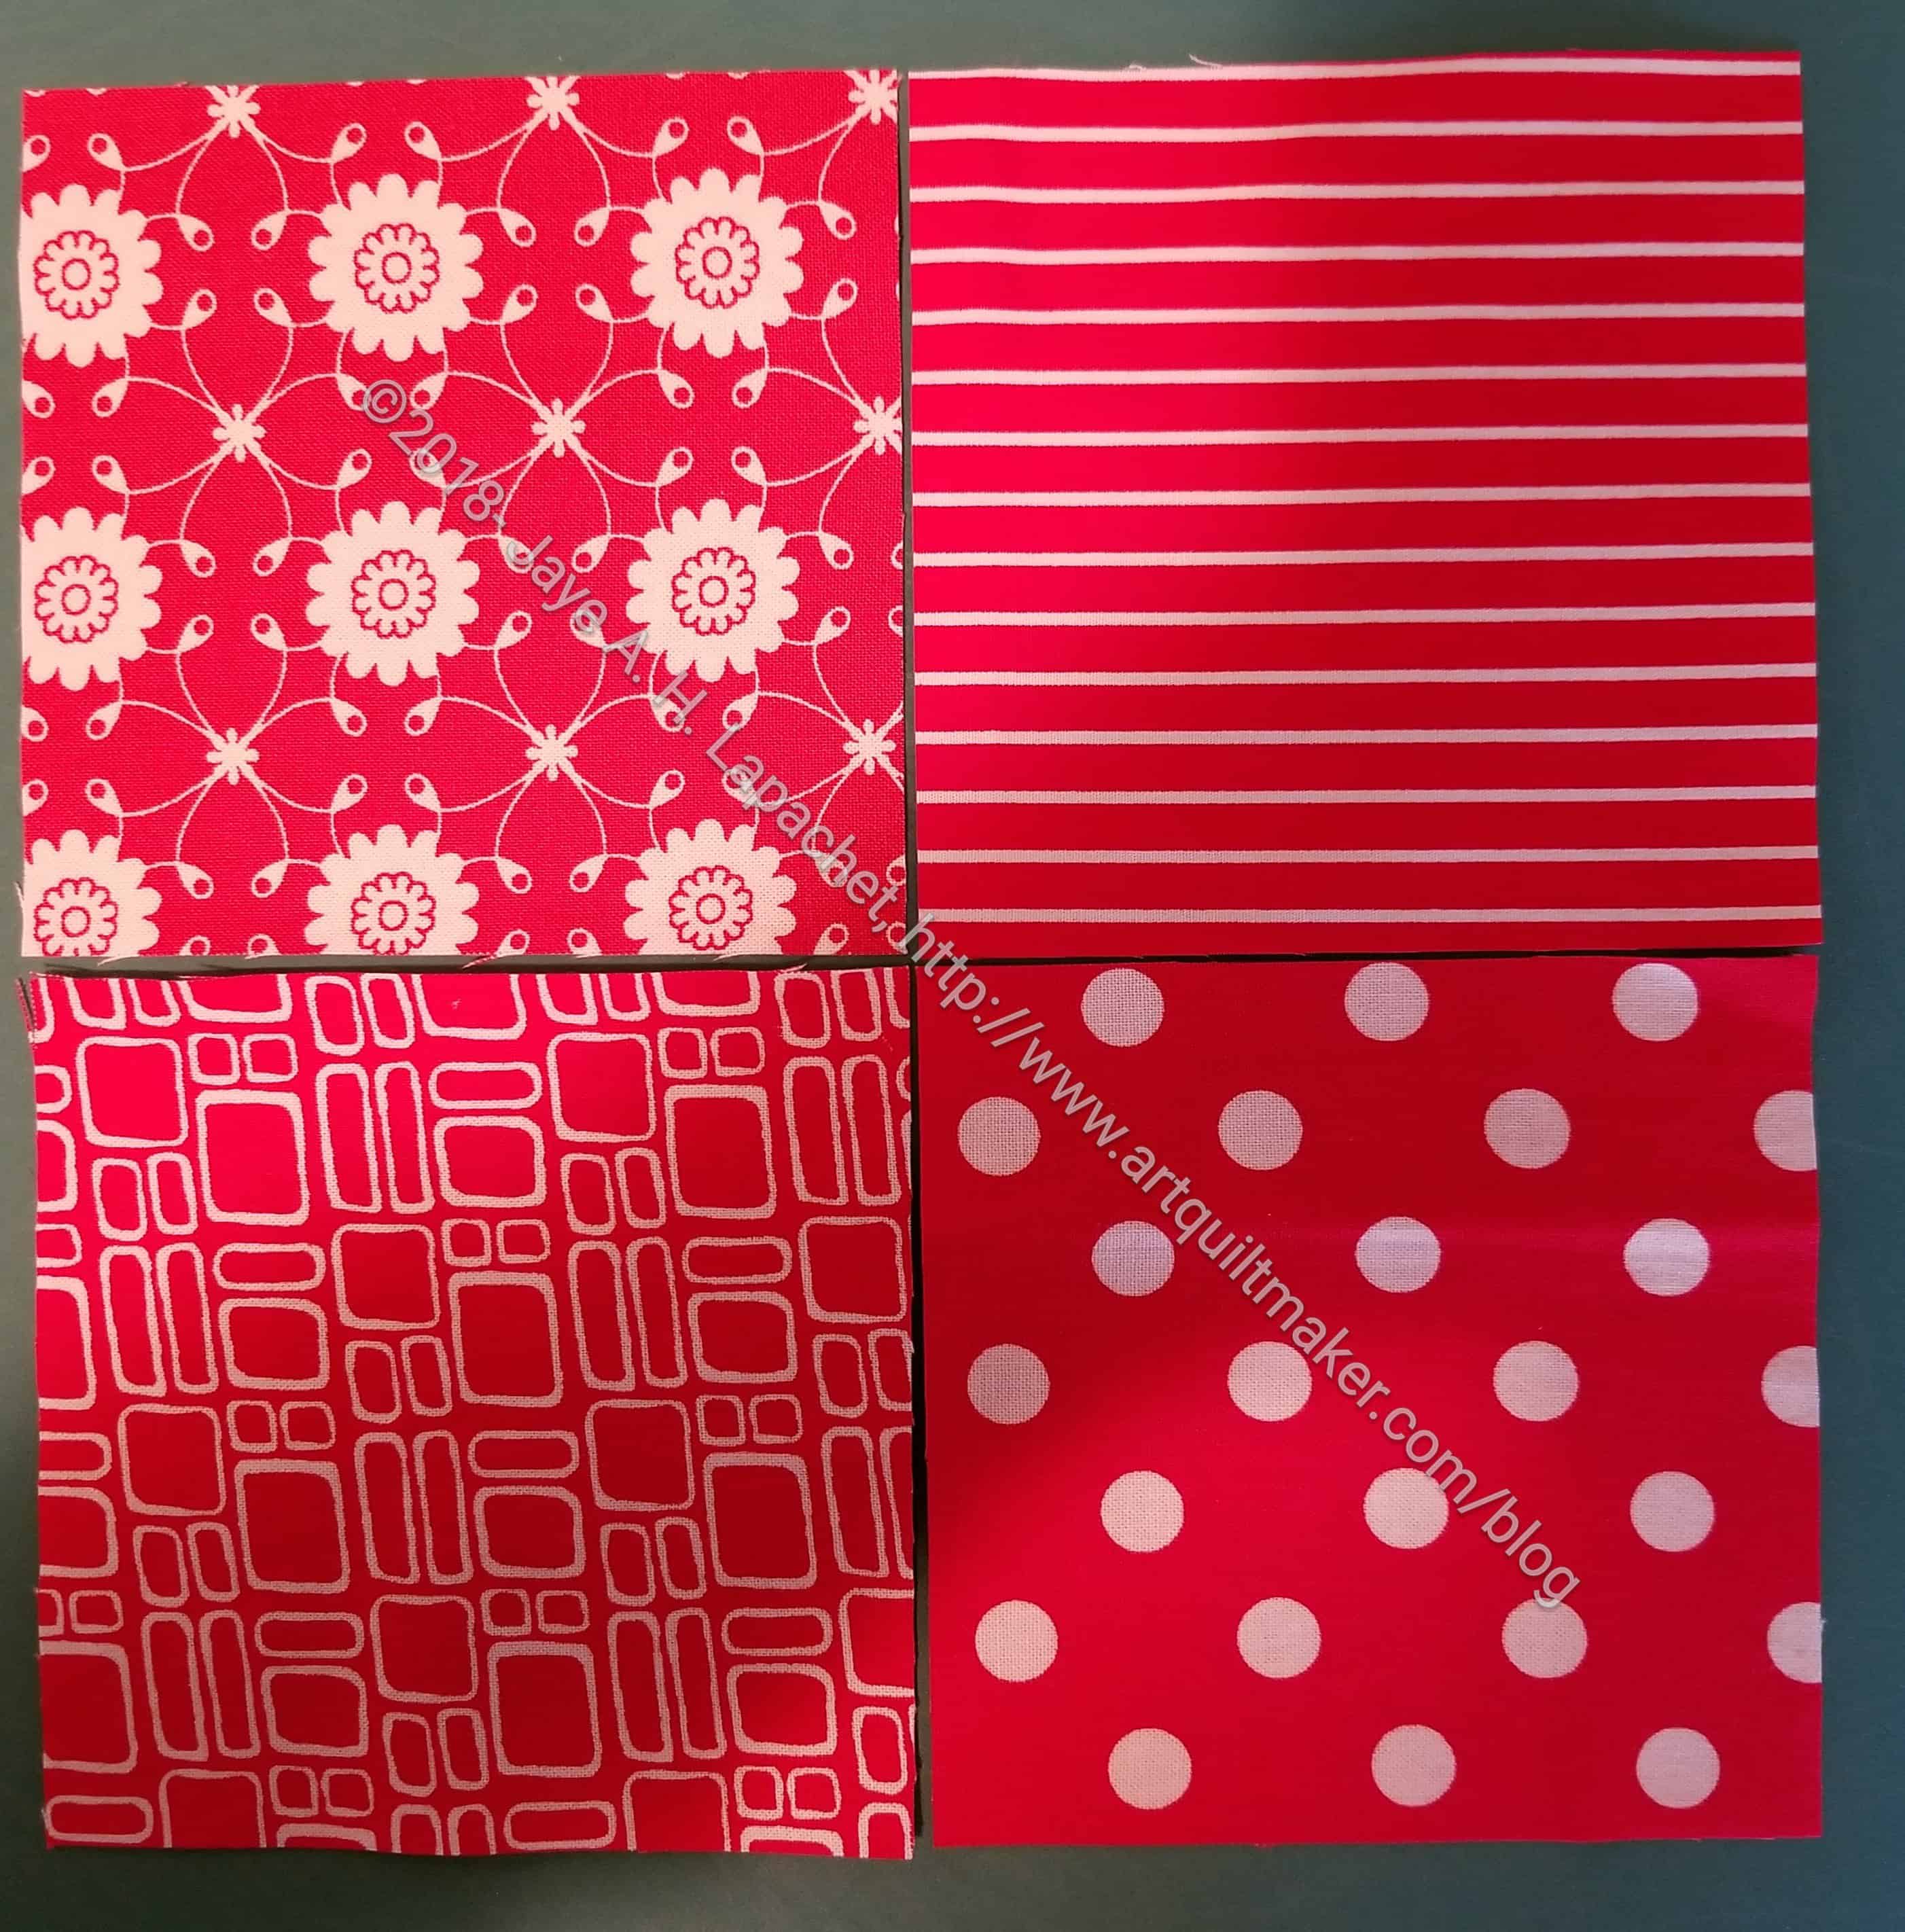
Fabric
In this tutorial, the background is turquoise and the foreground is red.
Thread – you might want to use your regular piecing thread for the first part of the directions, then switch to a thread that matches the background fabric for sewing the curves shut
A pen or pencil you can use to draw on fabric (I like Sewline pencils)
Stiletto or dental pick type instrument (something thin and pointy)
hand sewing needle
Instructions for making a 12″ (finished) Cathedral Windows block
1. Cut 4 squares of background fabric 12.5 inches by 12.5 inches
4- 4 x 4 inch foreground squares
2. Cut 4 squares for inset pieces 4 inches by 4 inches.
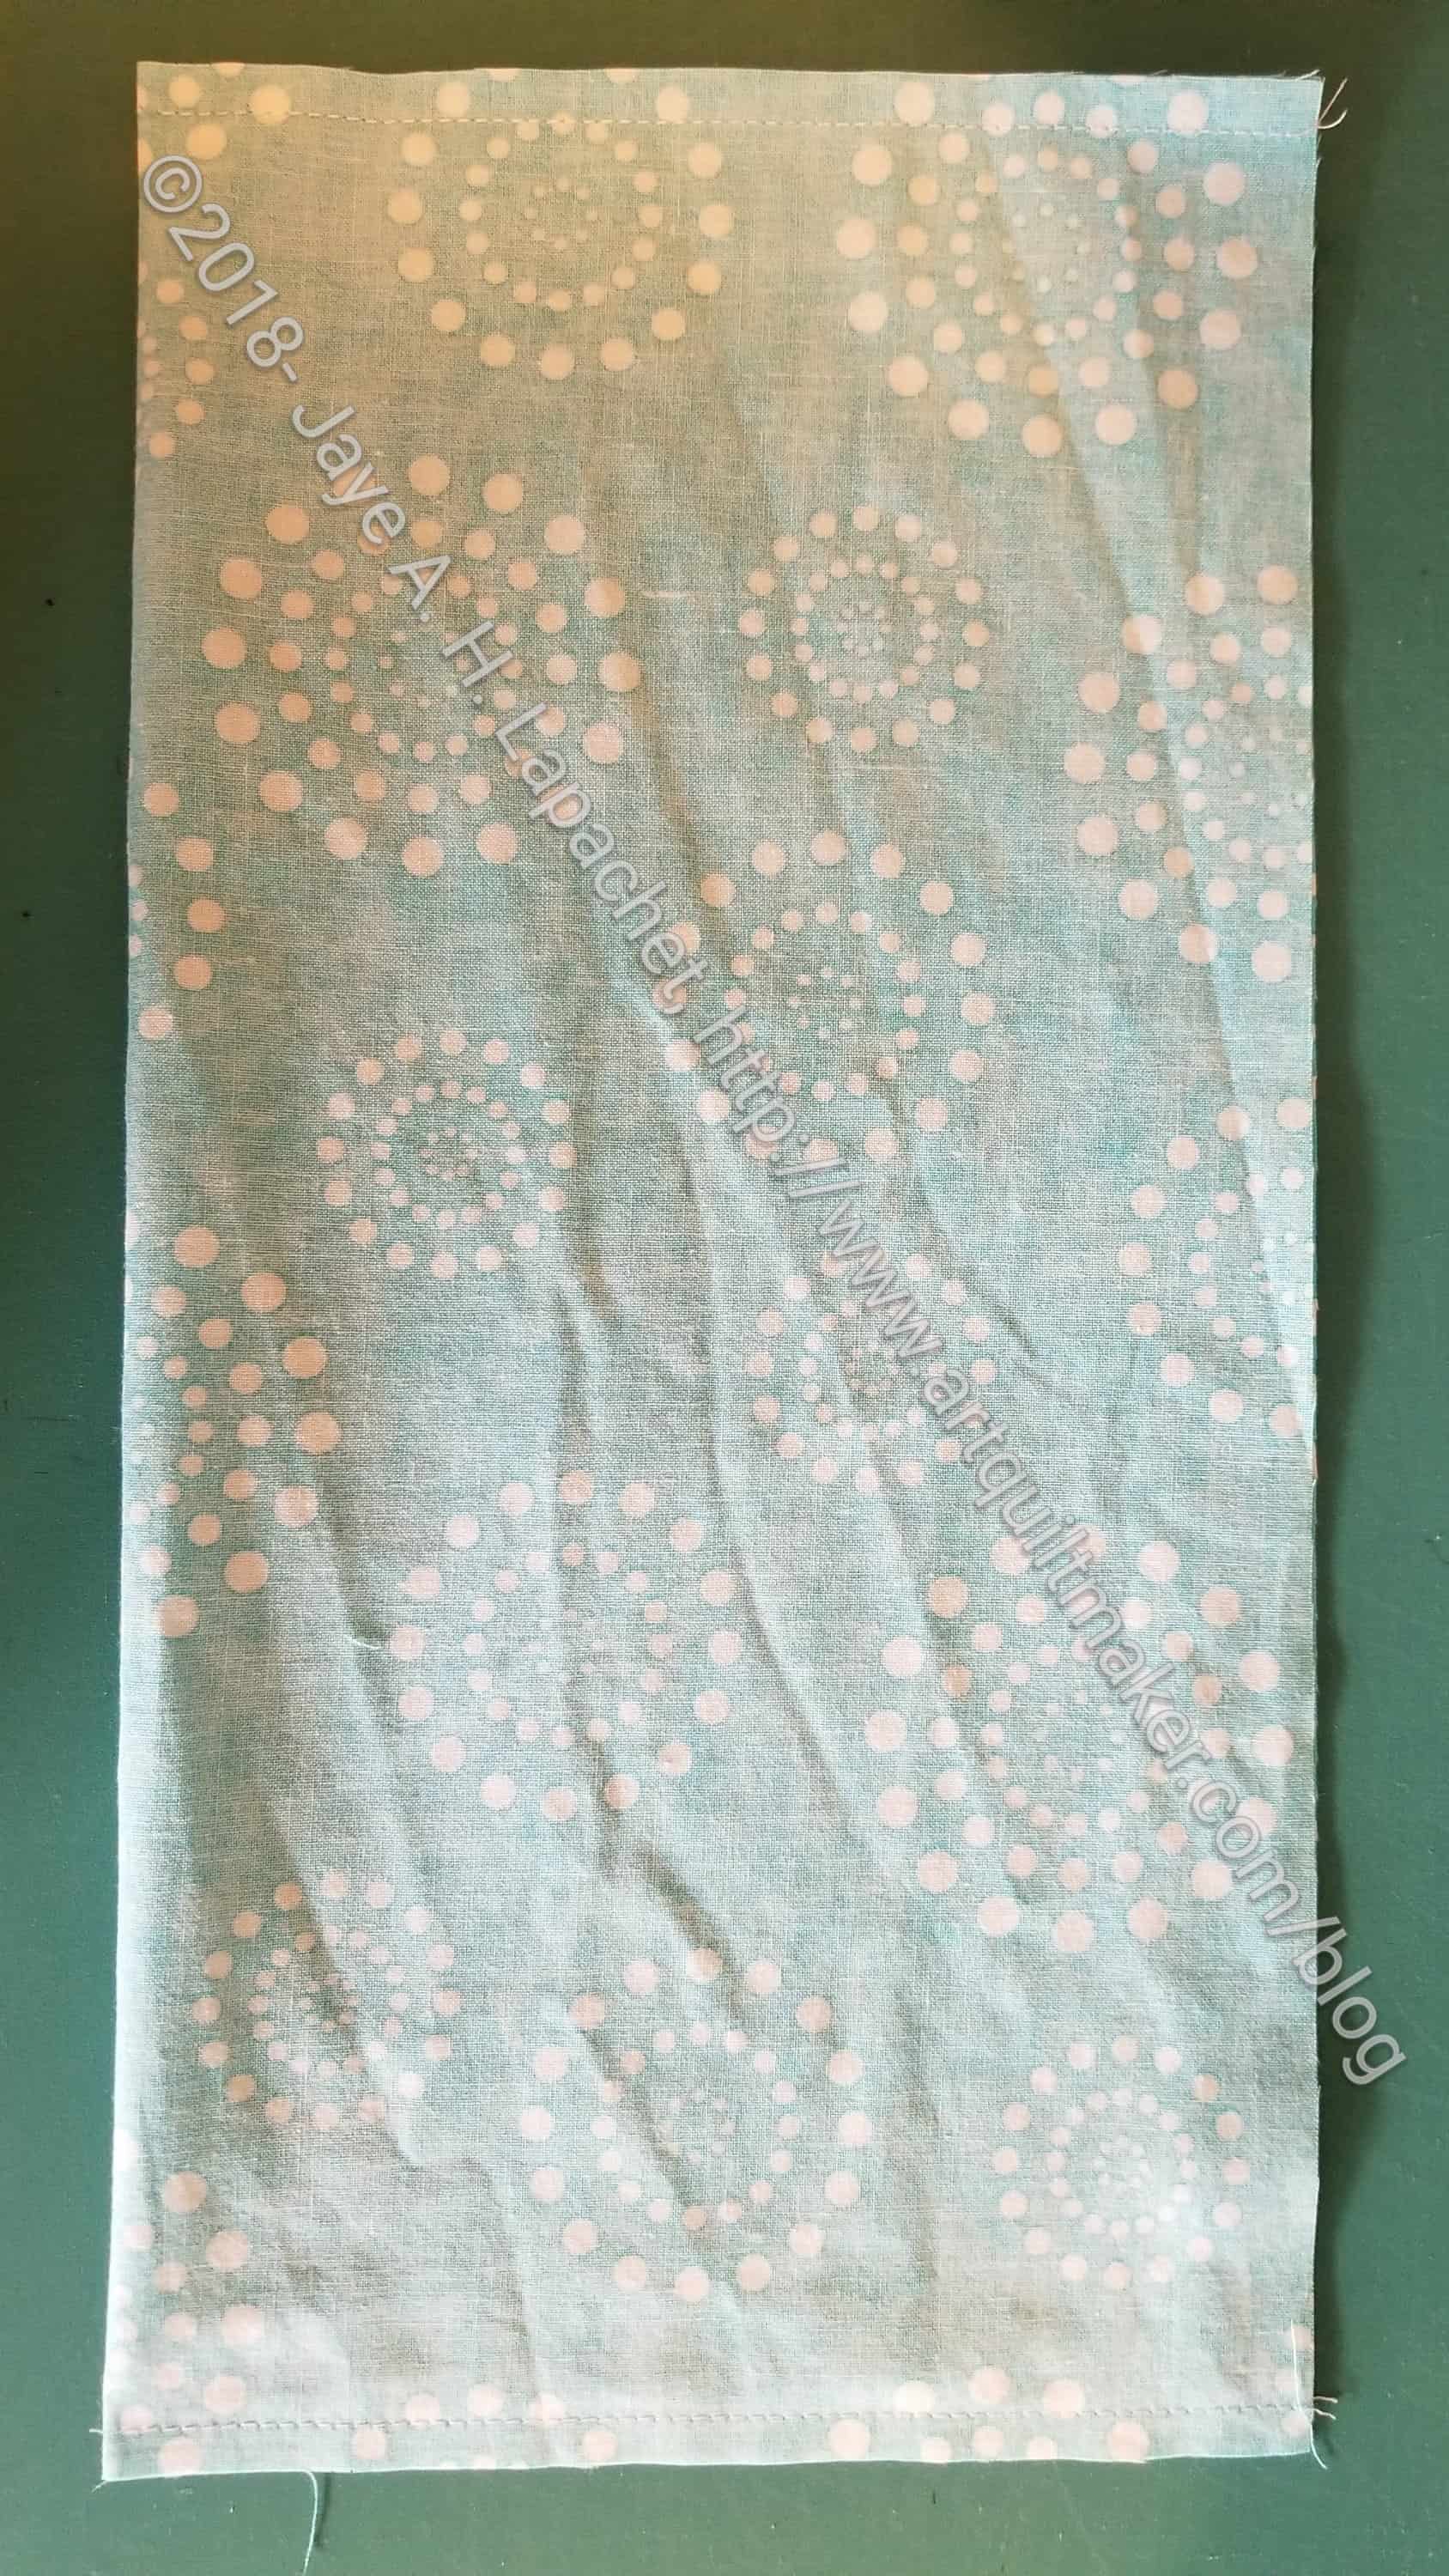
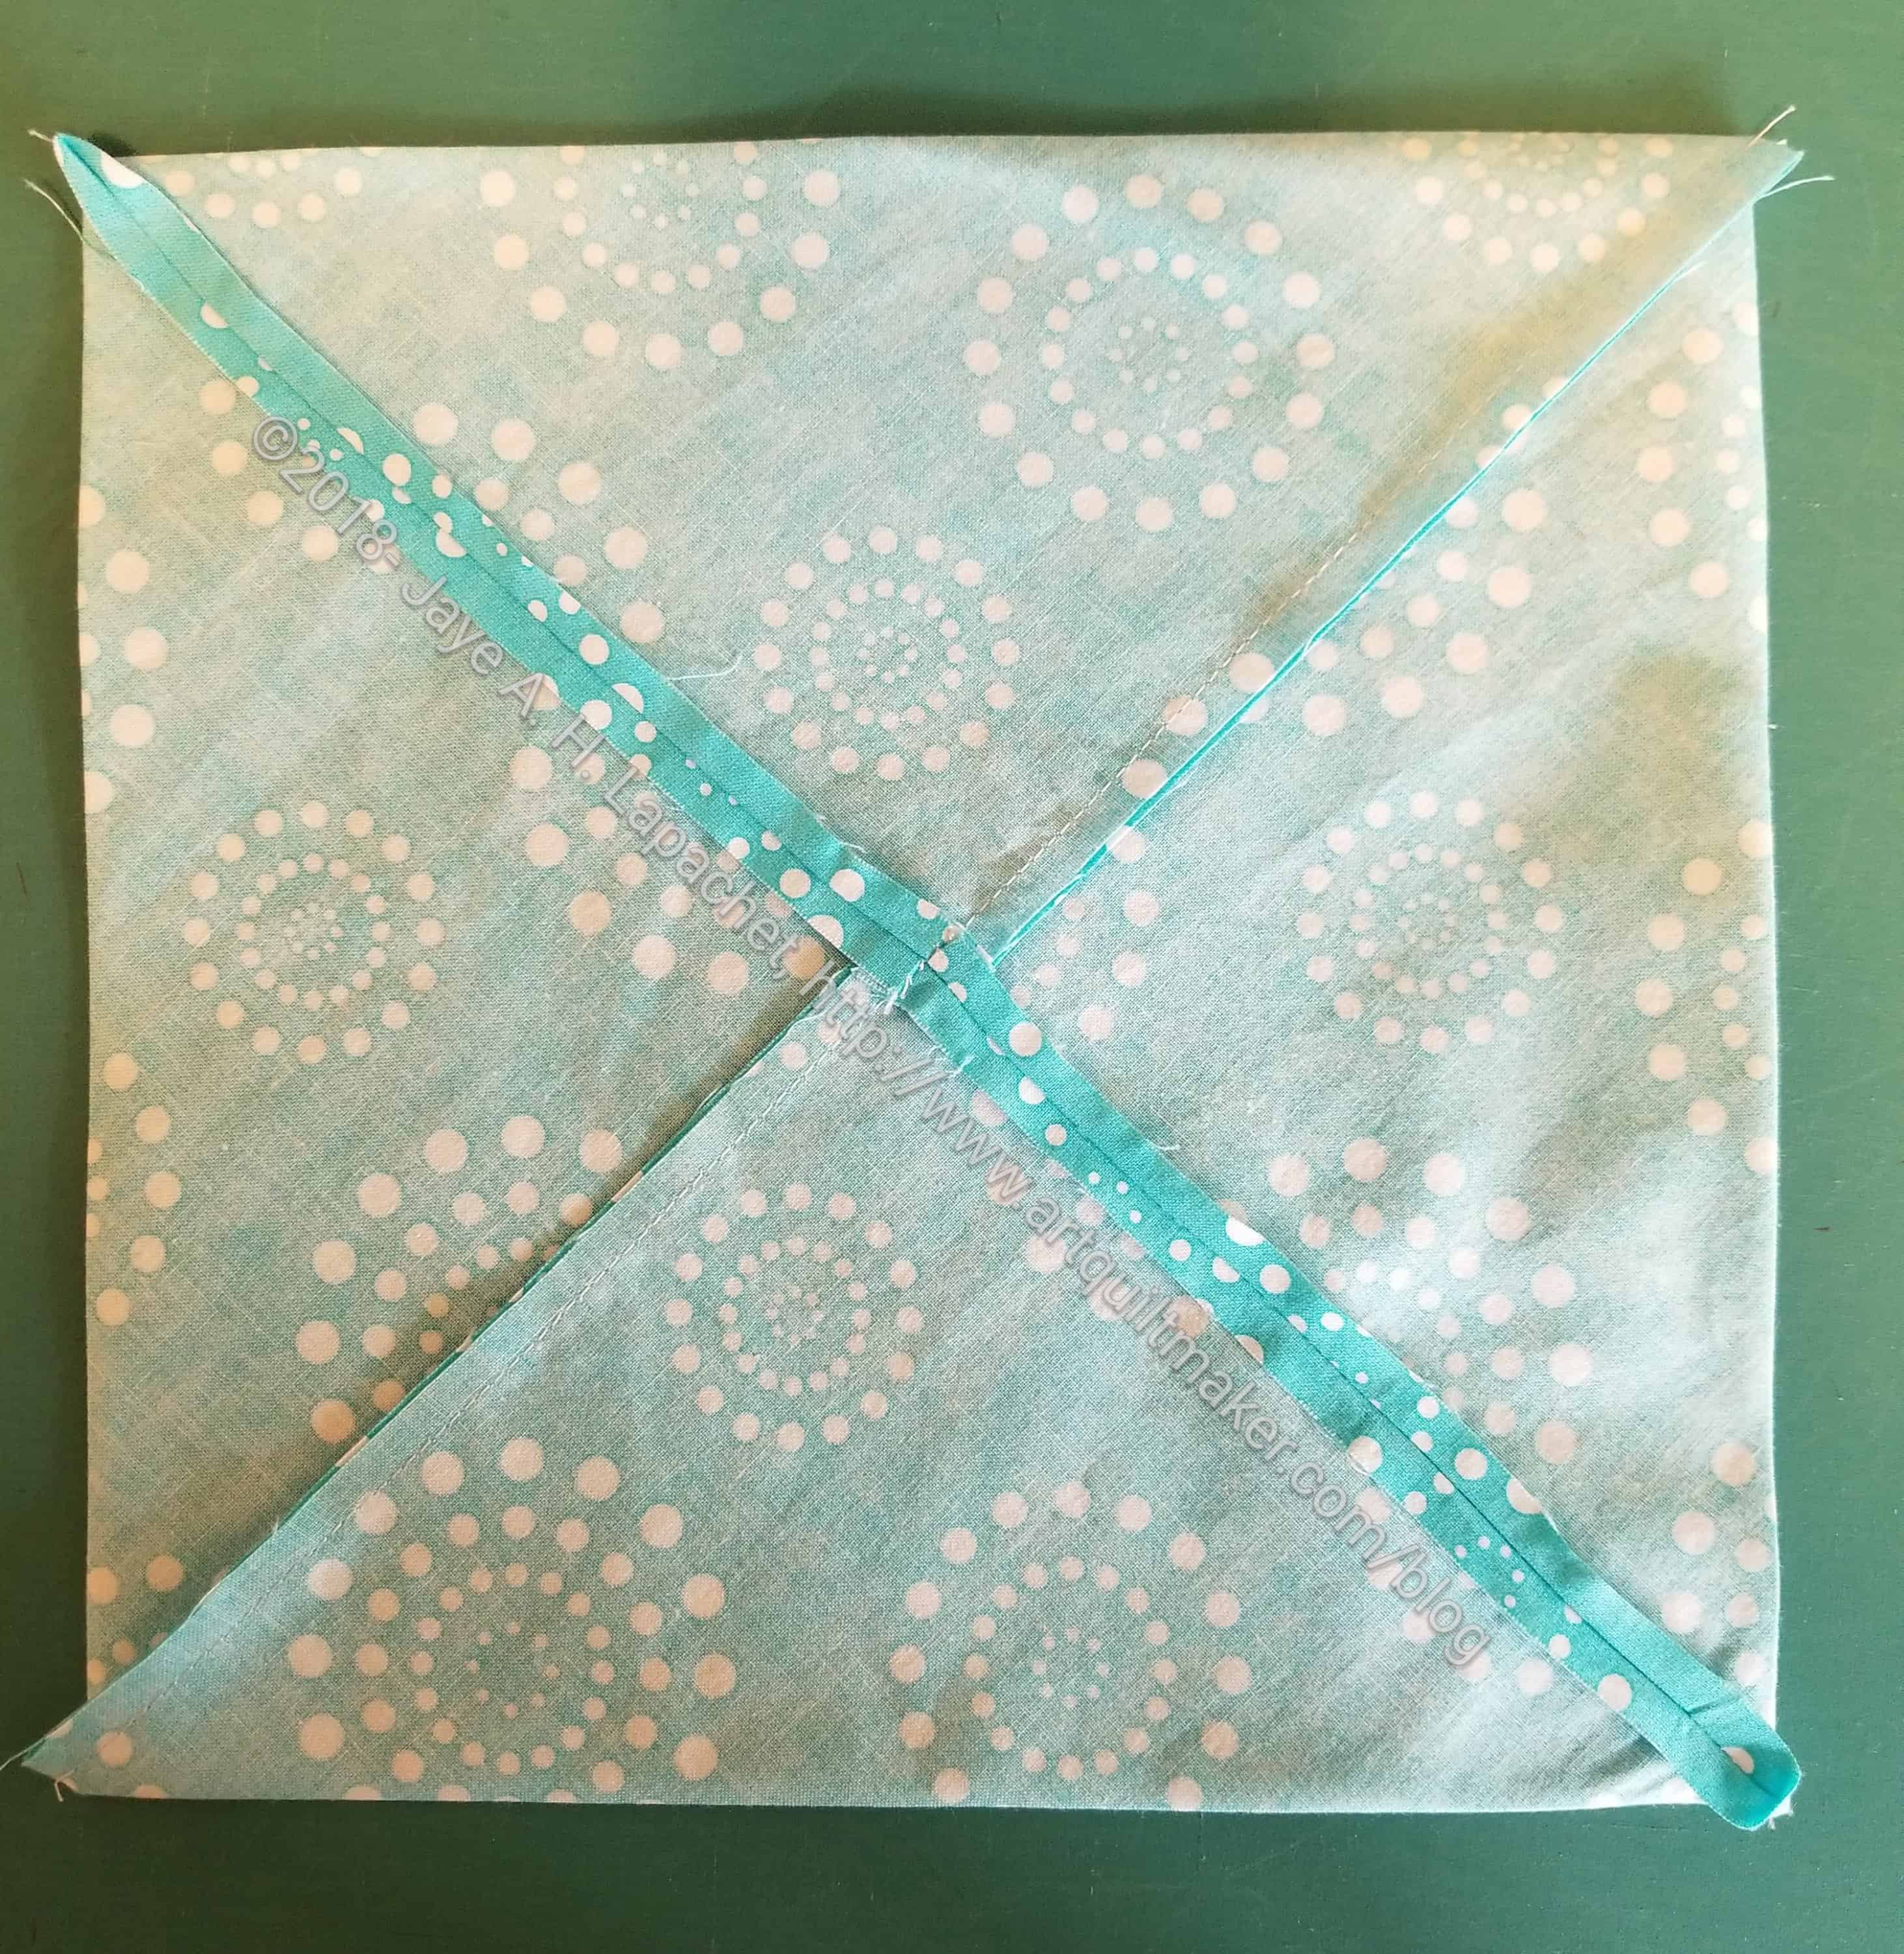
Fold 12.5×12.5 inch squares in half
3. Fold each of the 4 background squares in half. This will make your 12.5 x 12.5 inch squares into rectangles (e.g. do not fold NOT along the diagonal).
Hint: I sew all four one after another, but you can sew one at a time, if you prefer.
3A. Sew along the short side, backstitching at the beginning and the end.
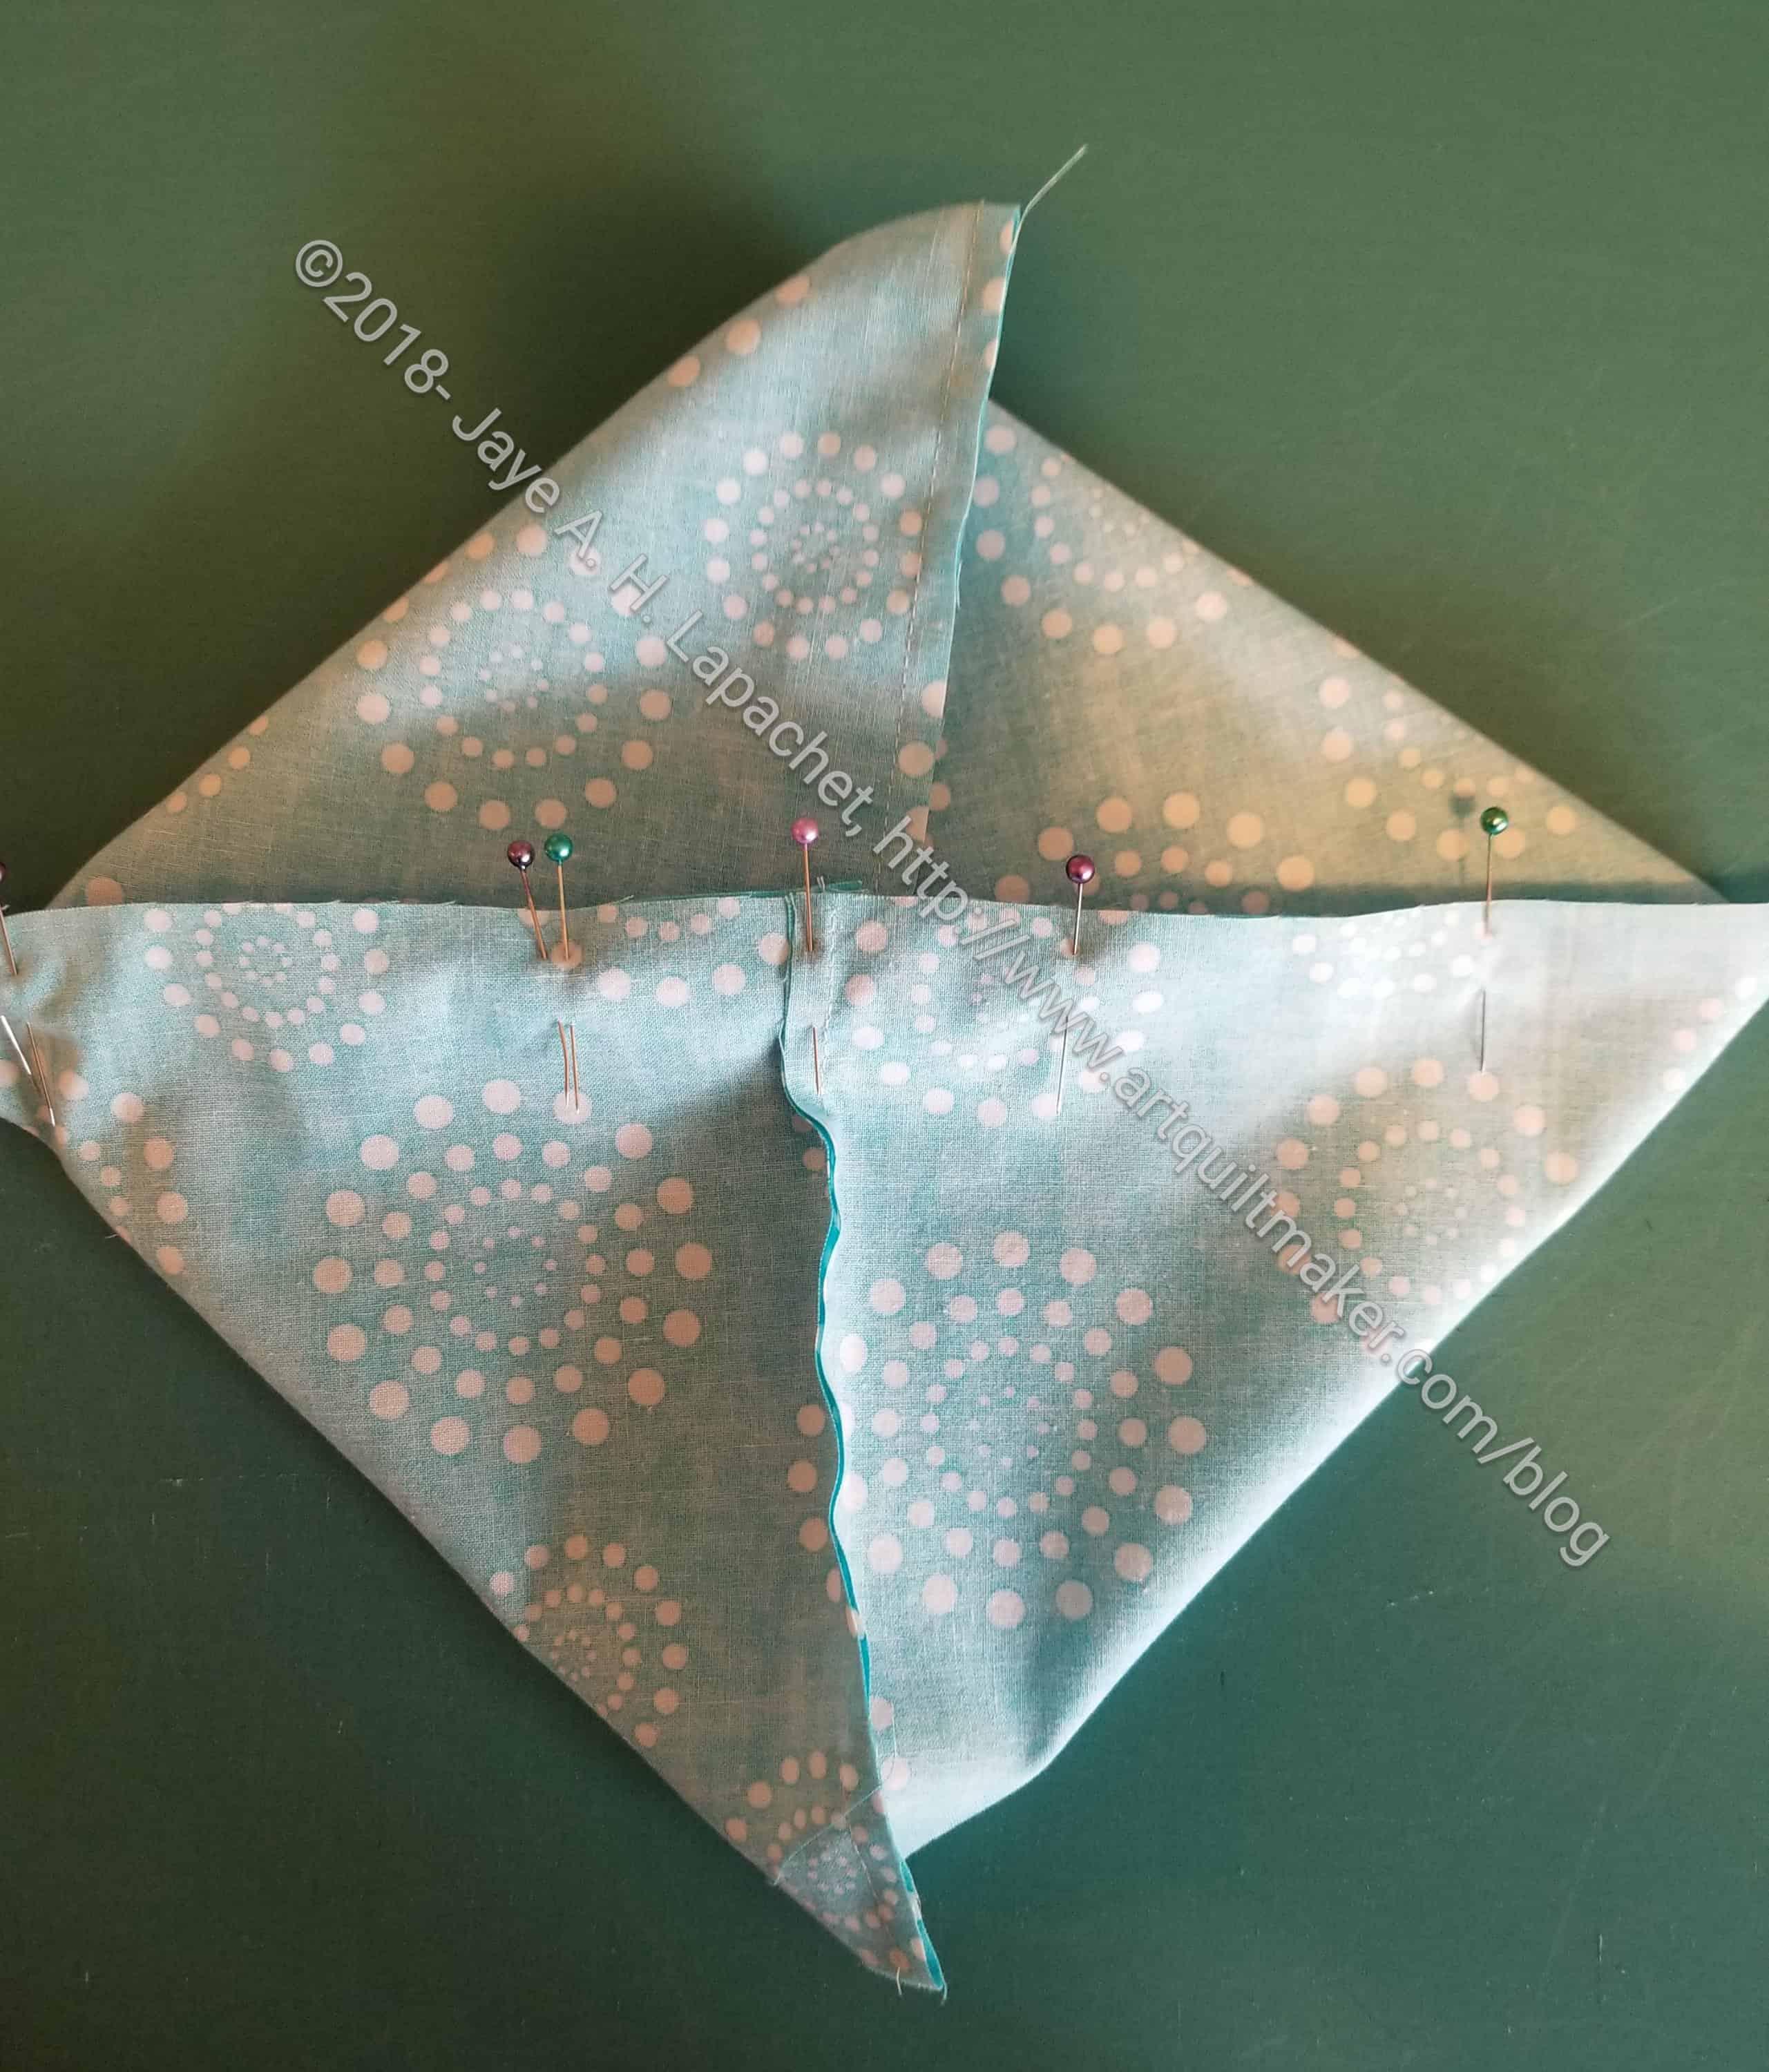
Open up rectangles & match edges
4. Open your rectangles and match up the raw edges.
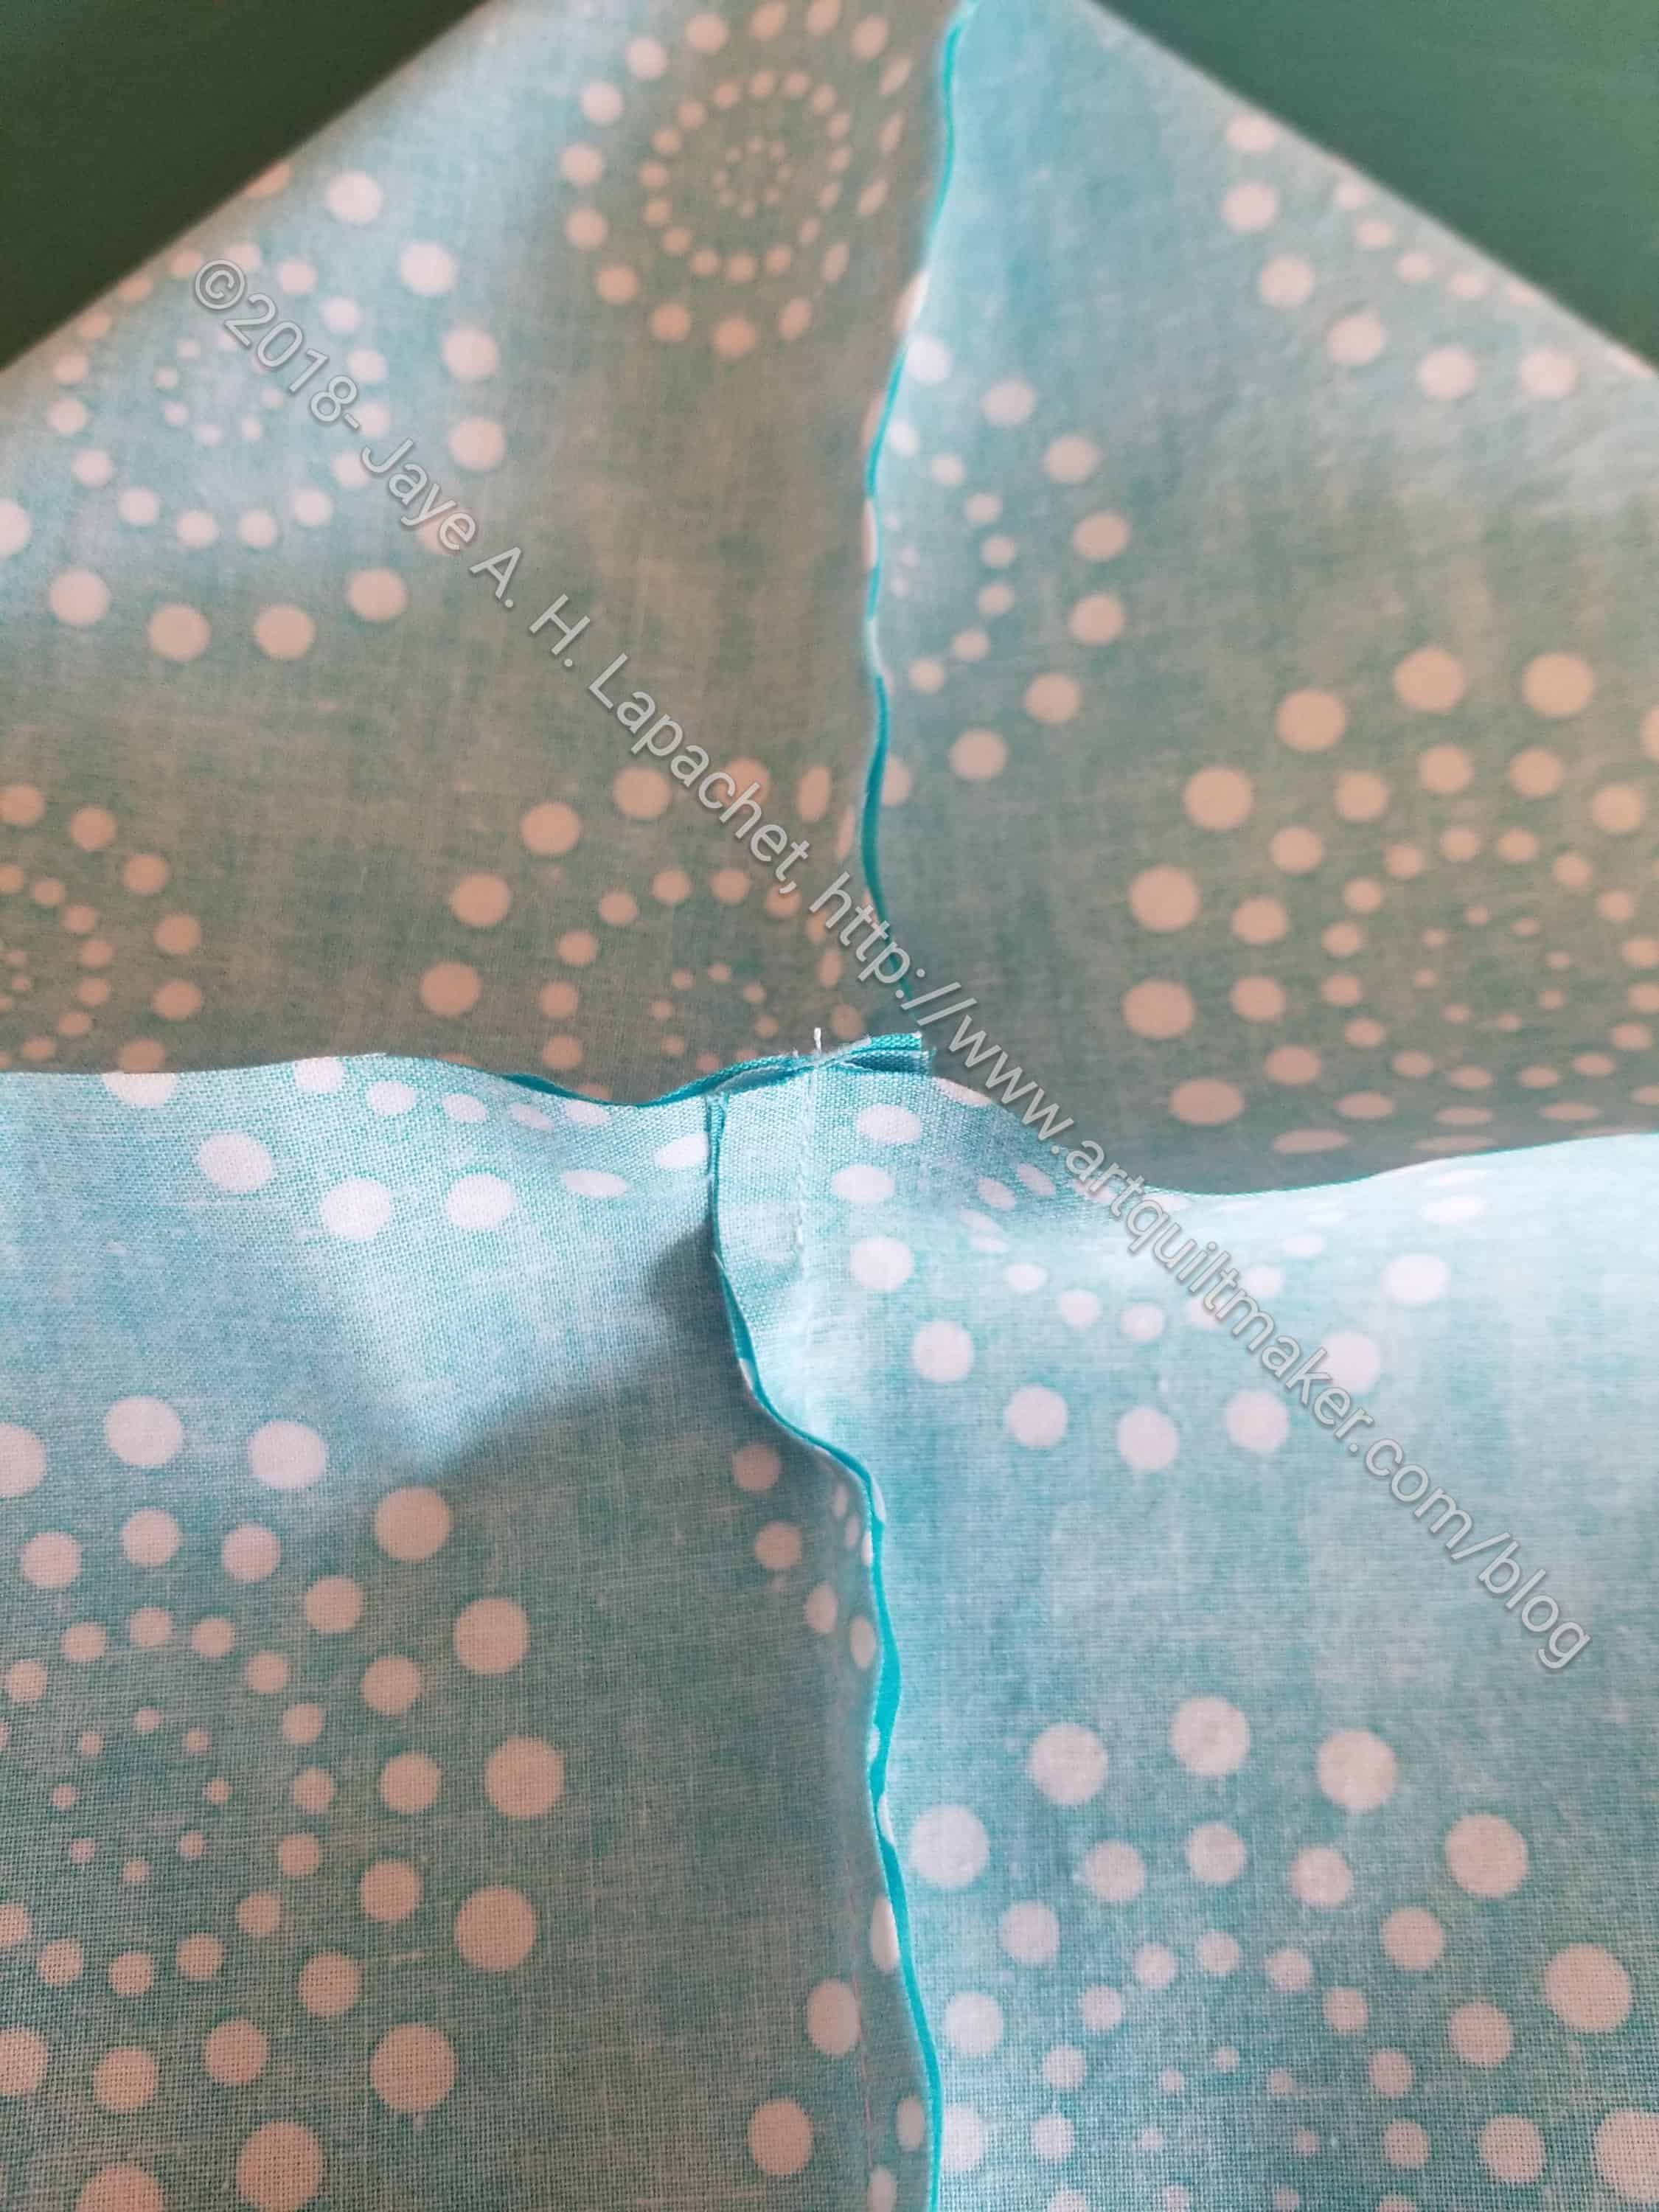
Match edges and nest seams
Hint: I nest the center seams and pin, starting in the middle
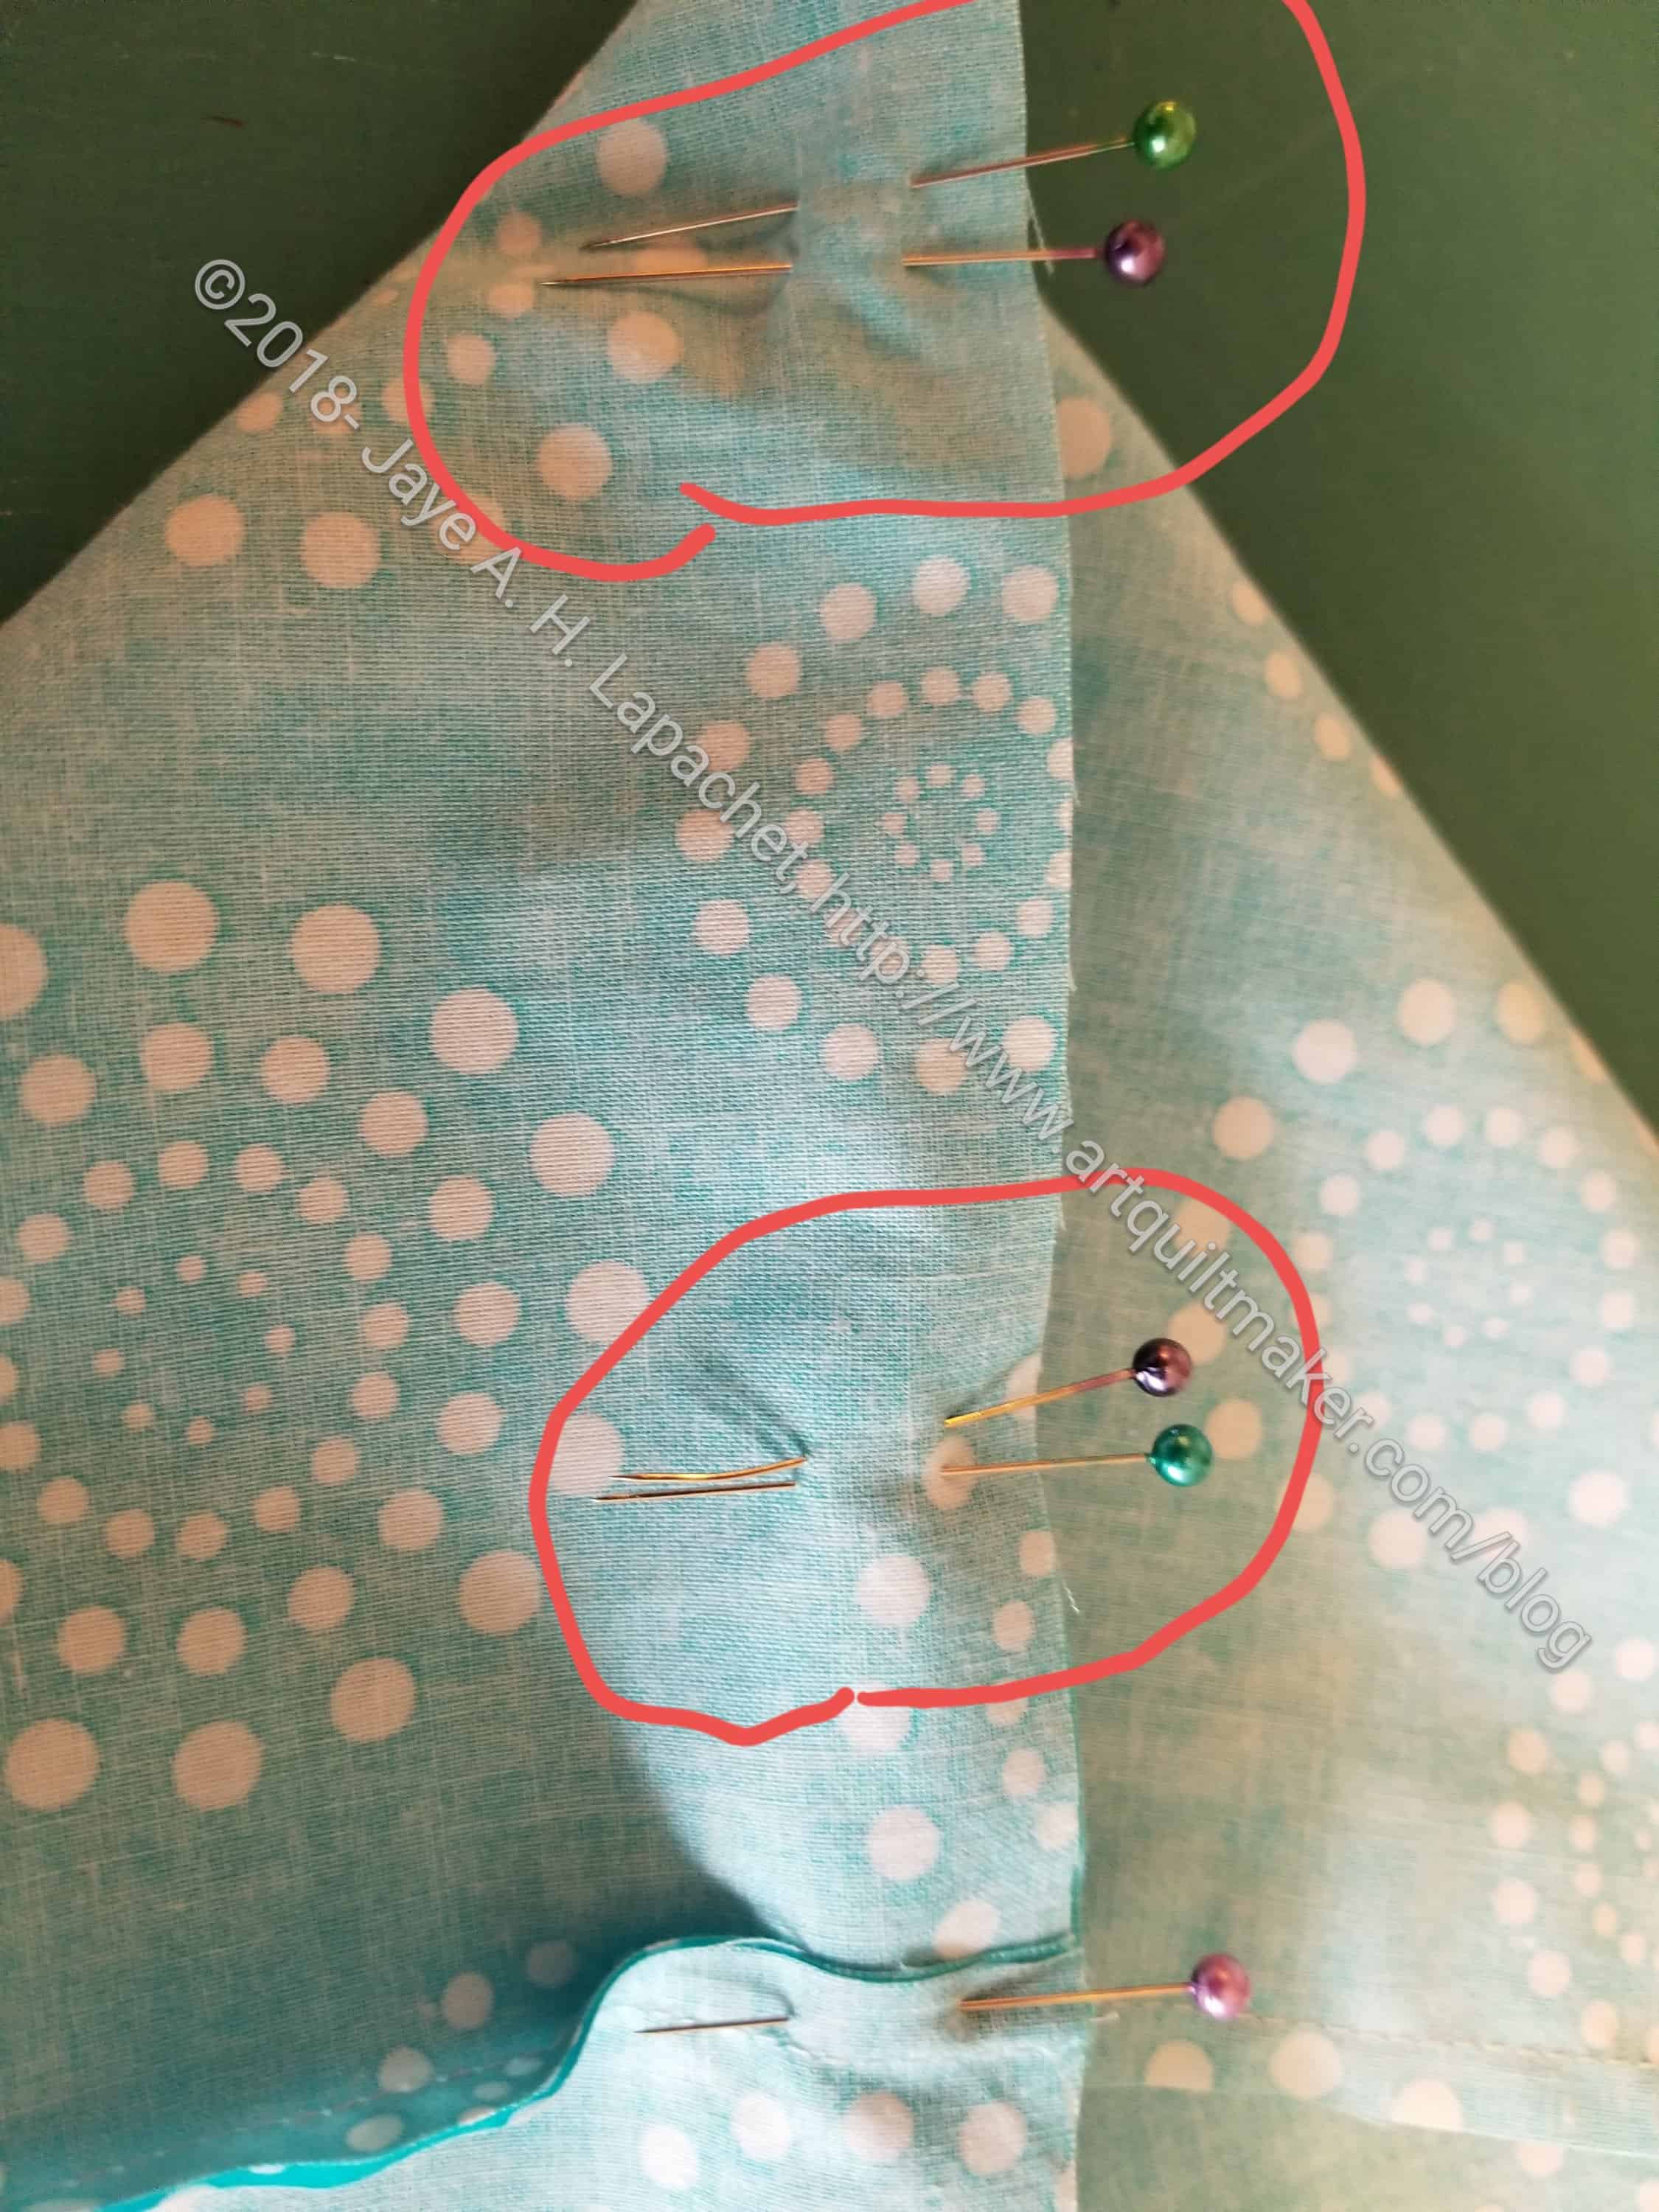
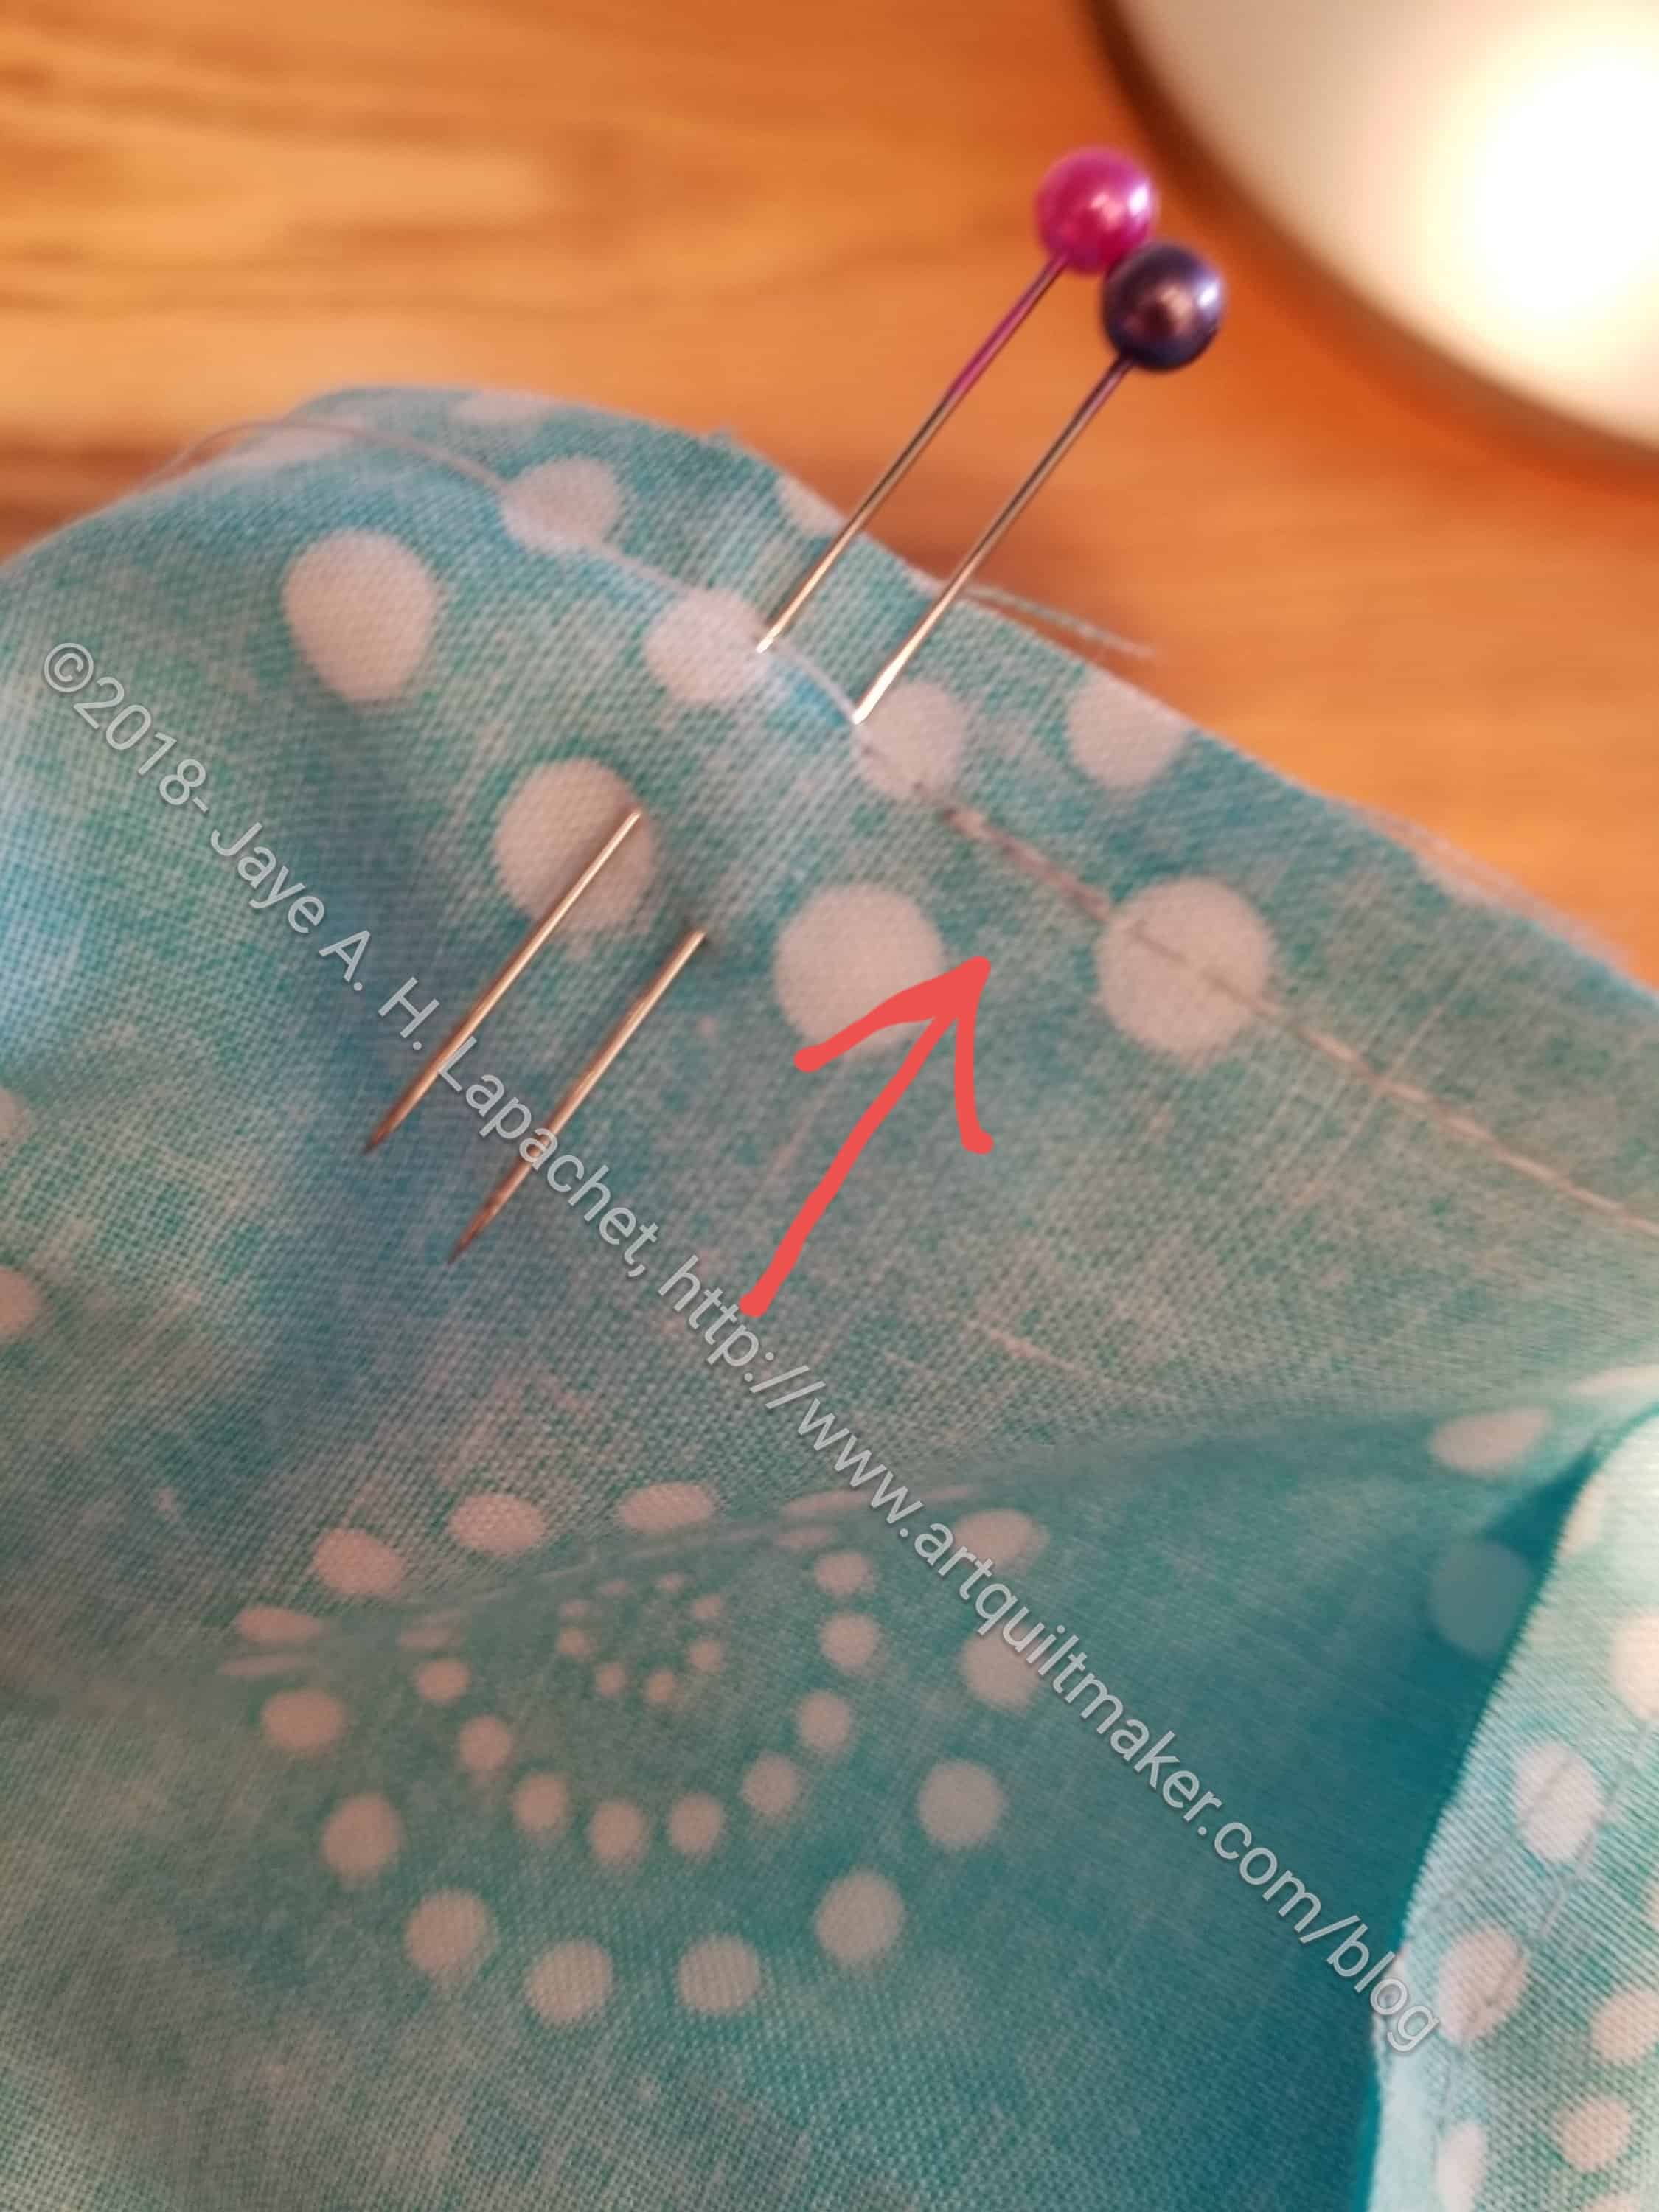
Leave openingPin edges closed, leaving an opening for turning
Hint: leave an opening 2-3 fingers wide for later turning. I mark this with two pins right next to each other.
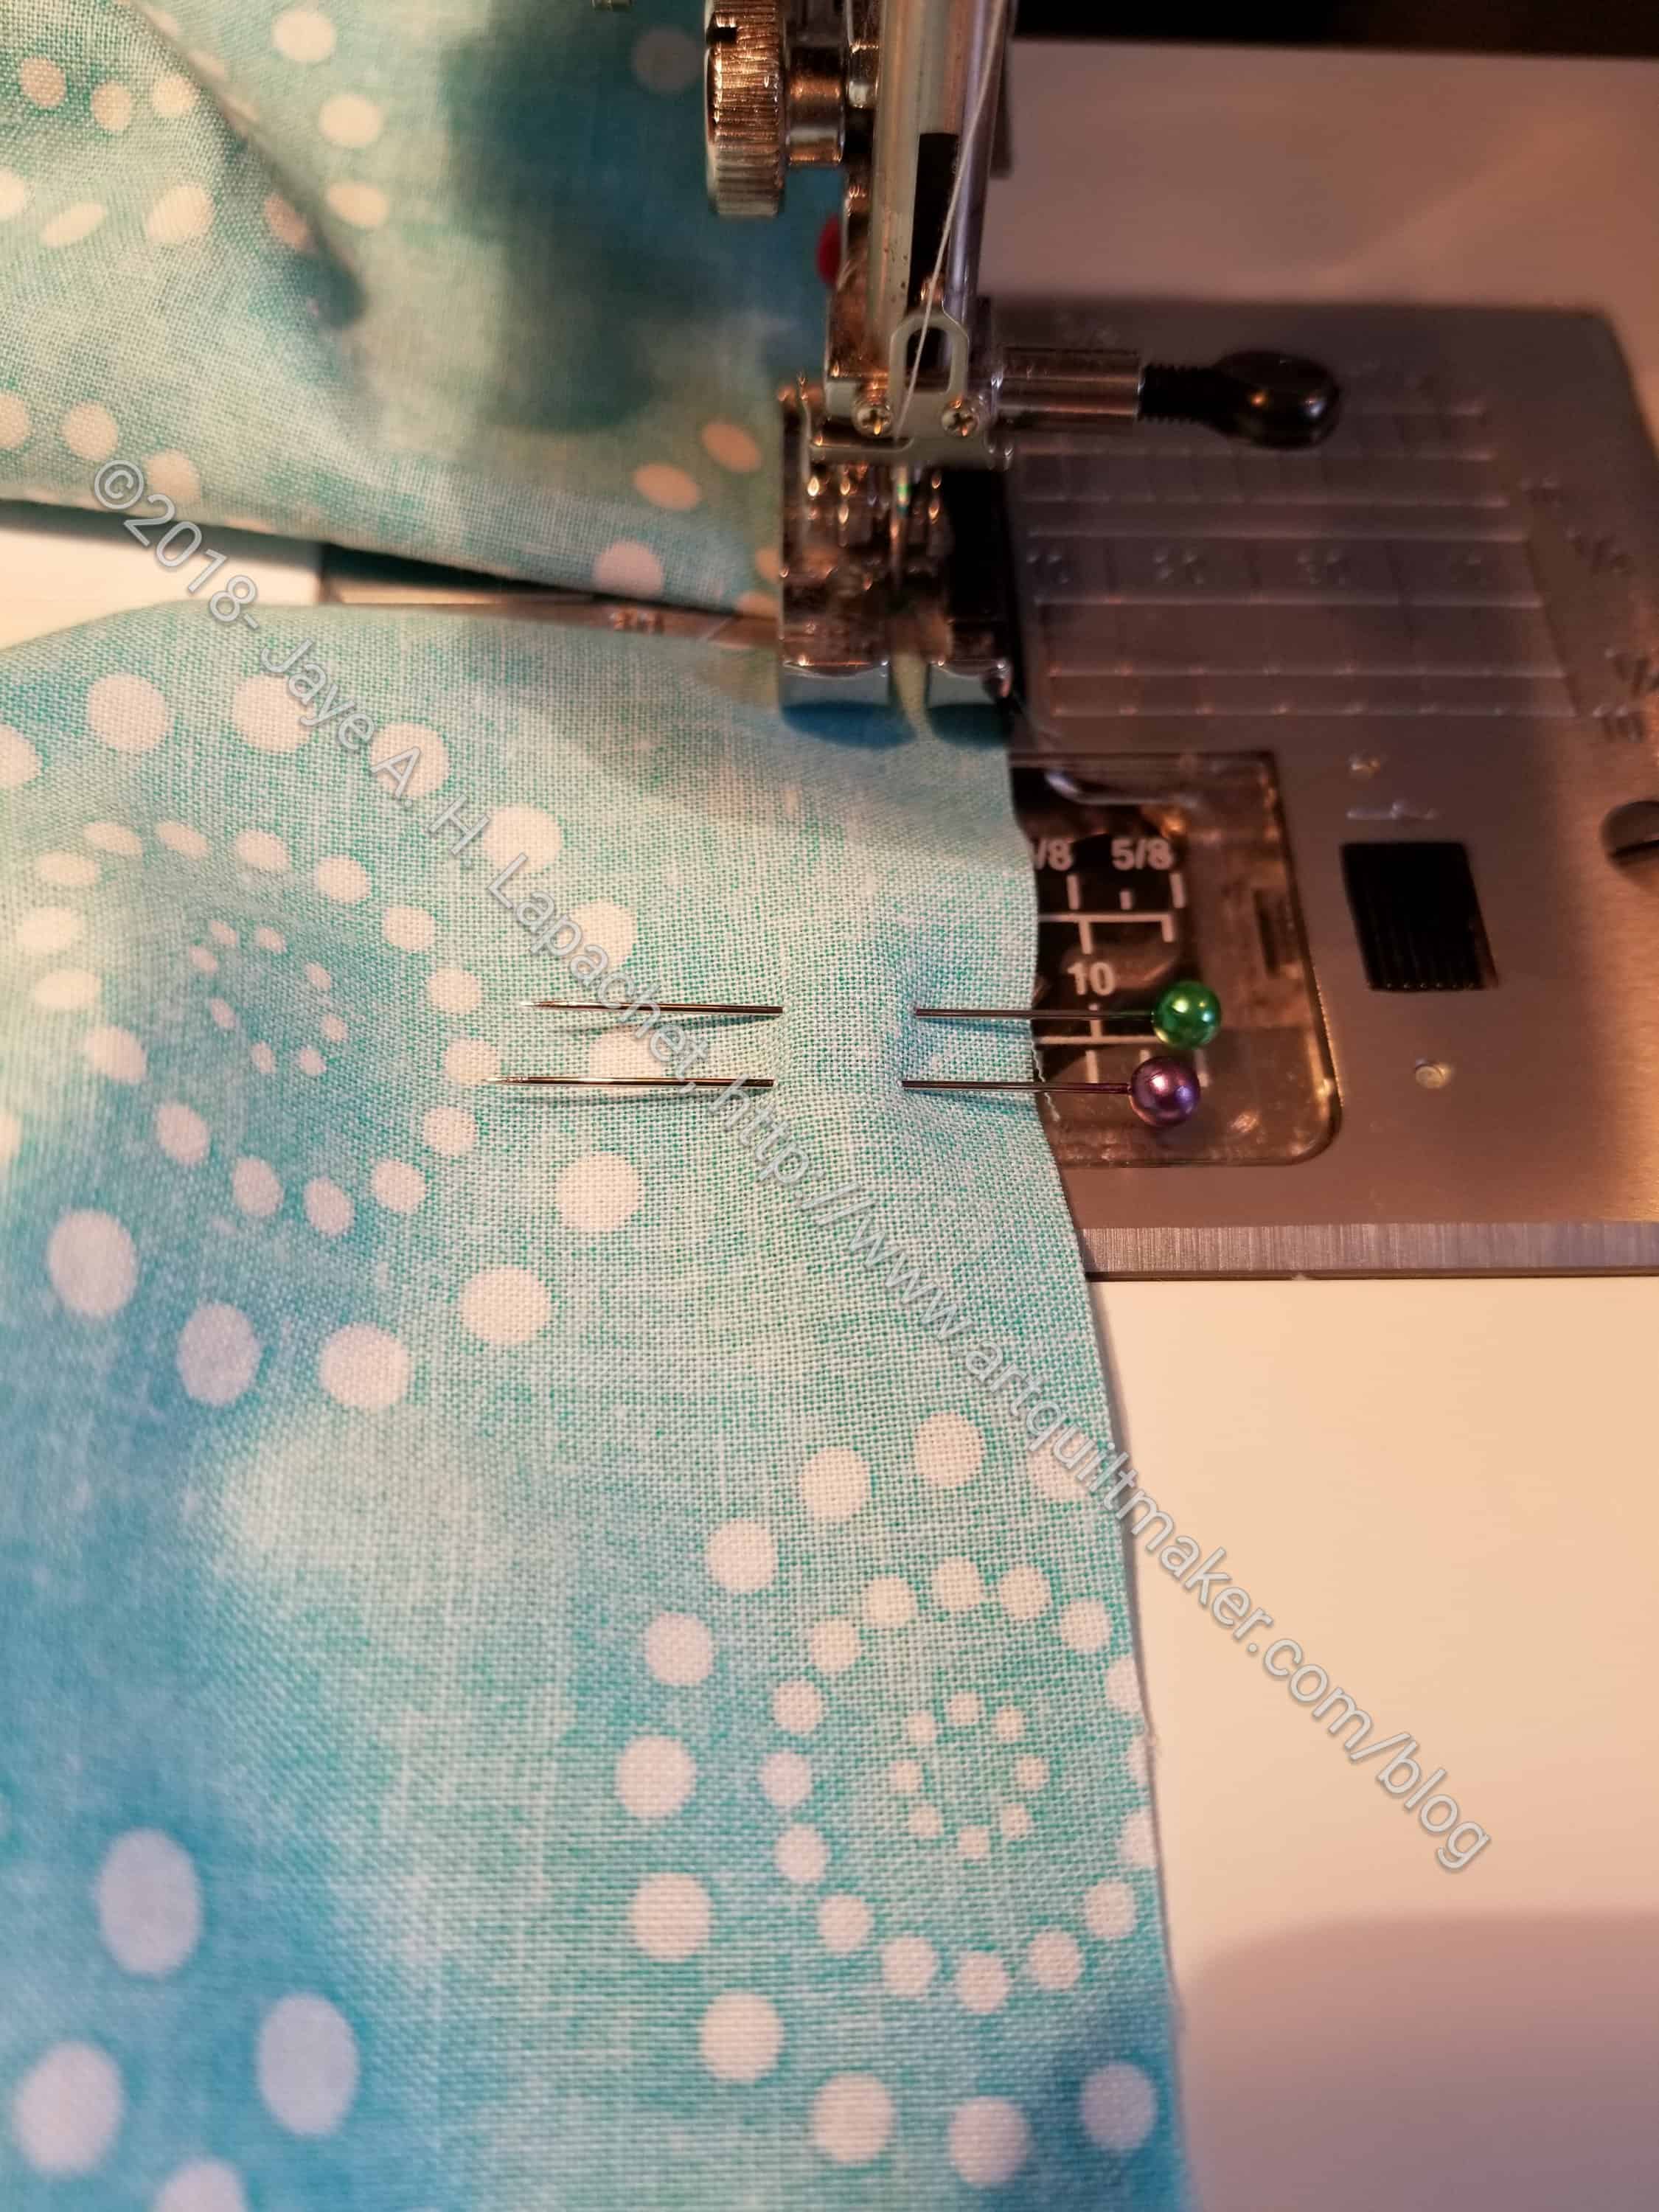
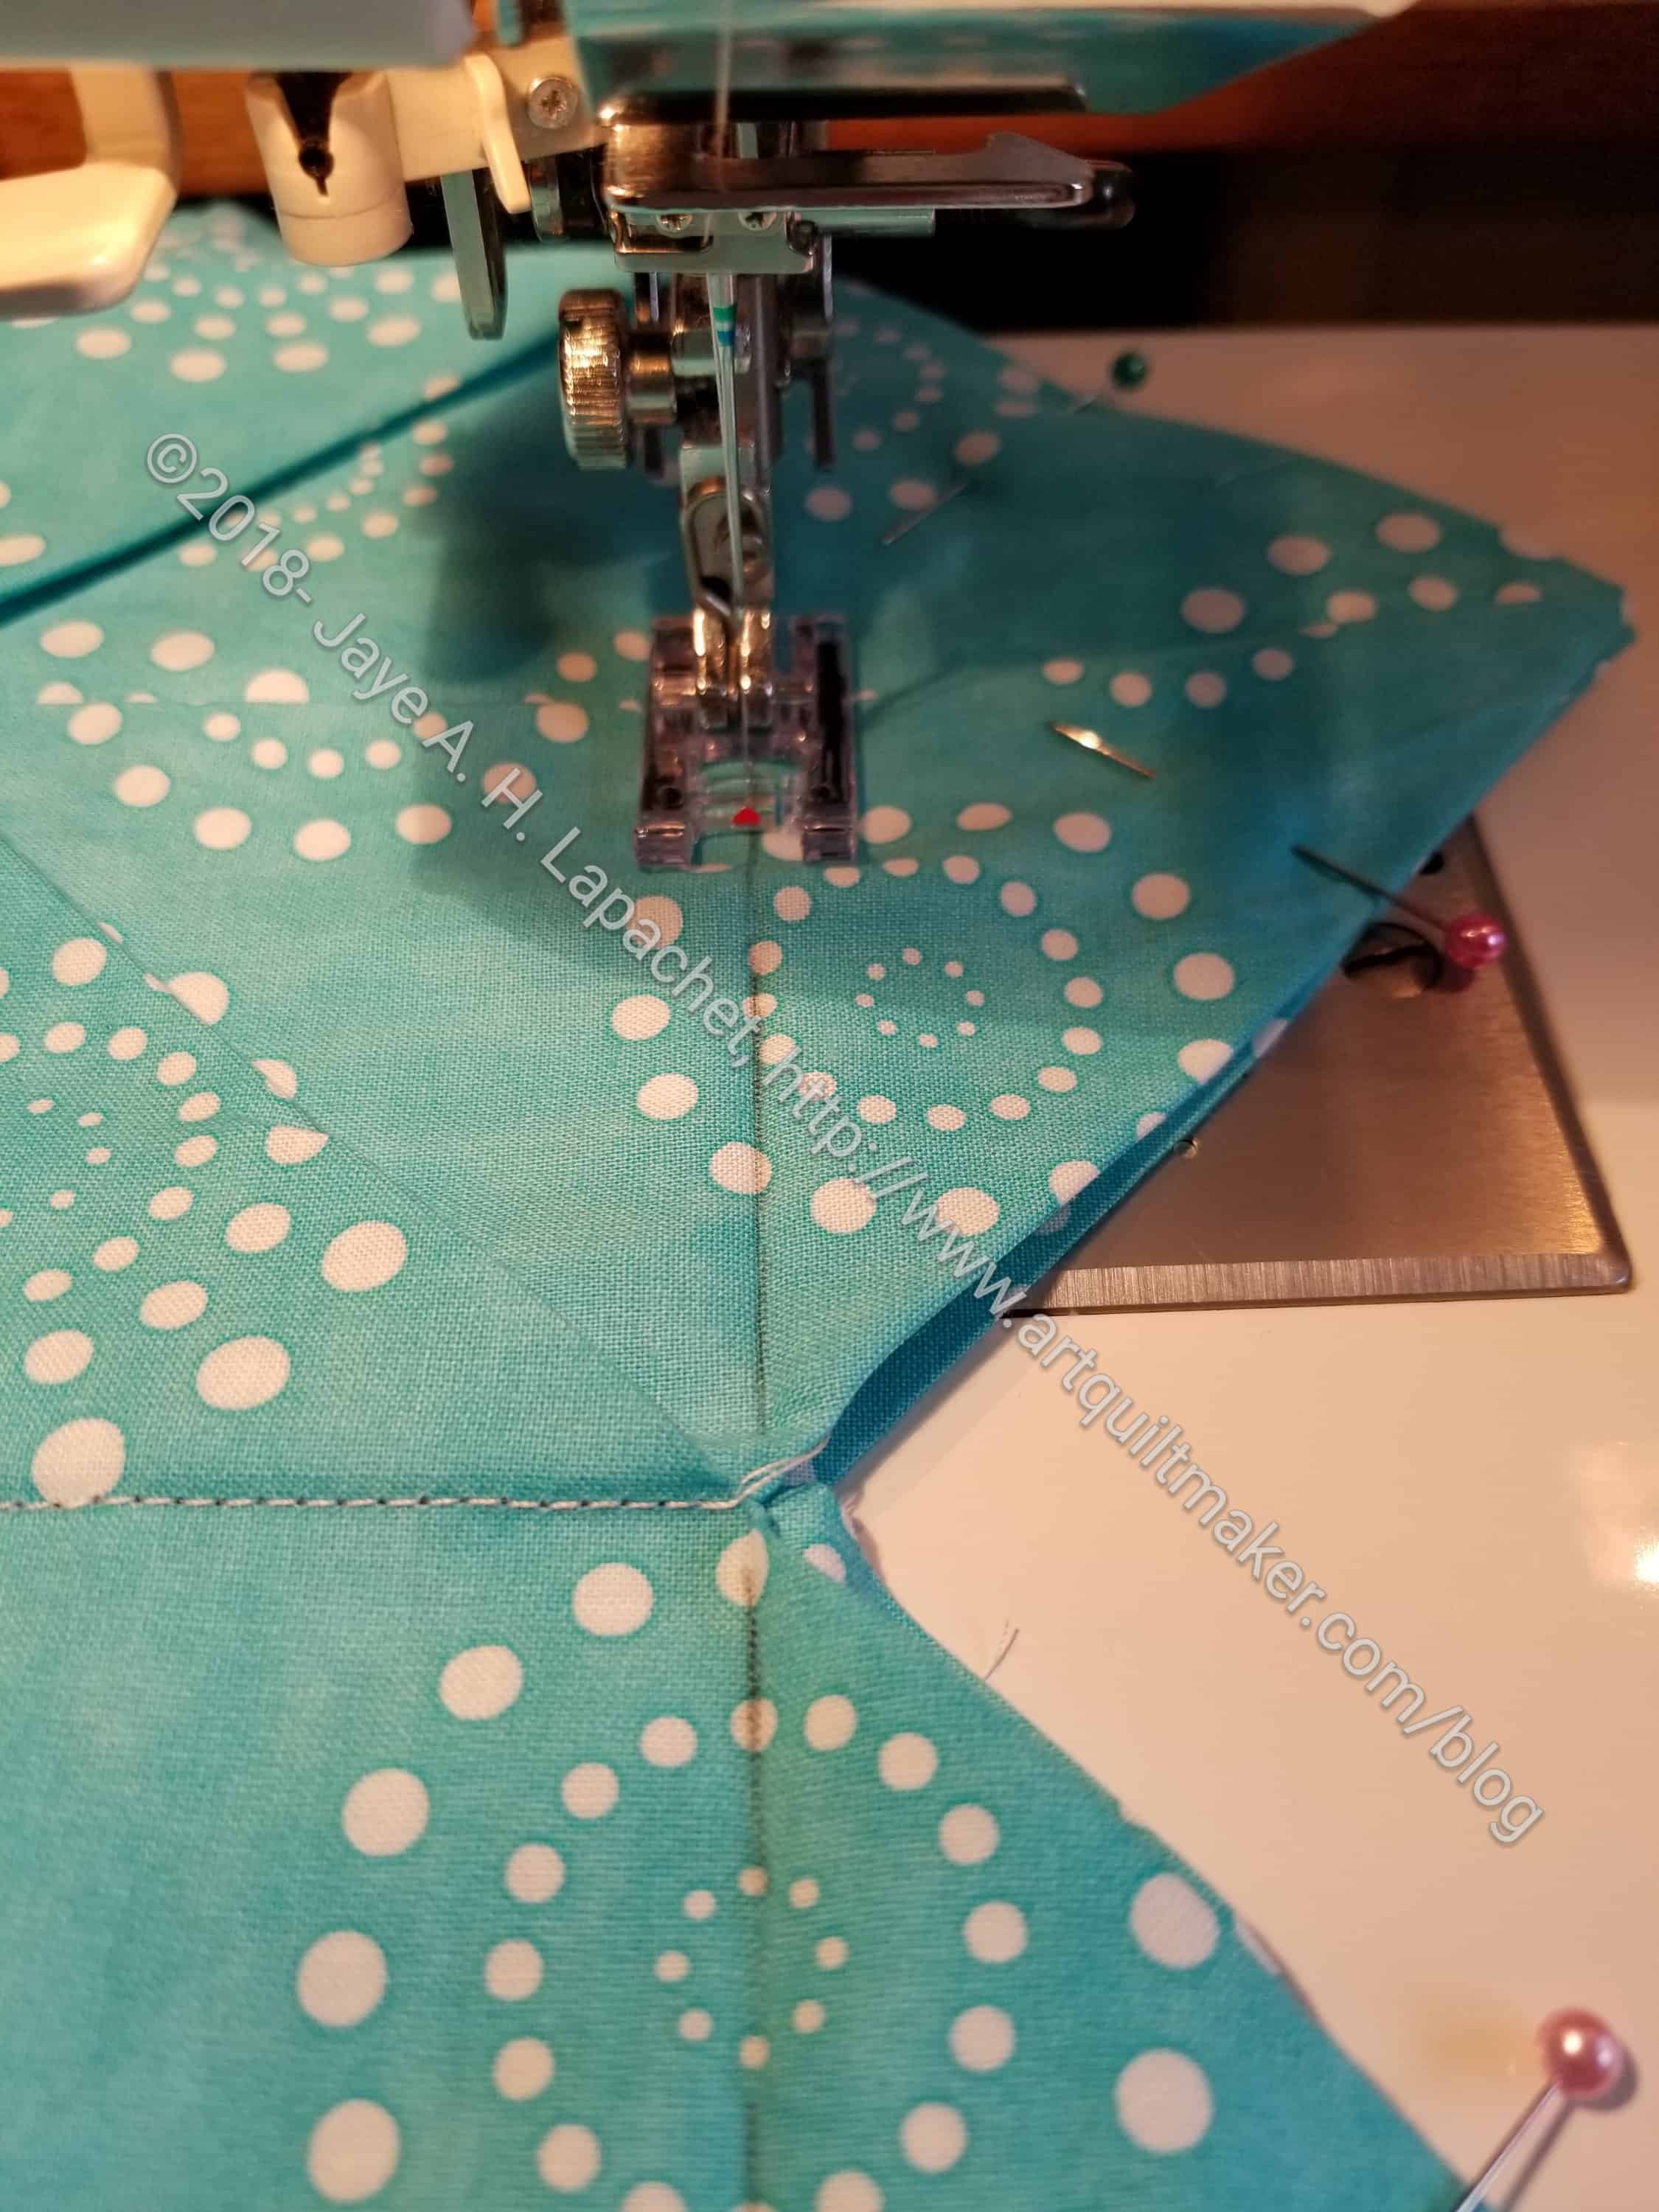
Sew seam shut
5. Sew your pinned seam shut except for the opening you have left.
Backstitch at beginning and endBackstitch at beginning and end
Hint: I backstitch at the beginning and end of the seams including next to the opening. Yes, it is a hassle to start and stop, but I don’t want the edges of the seams to come apart when I turn.
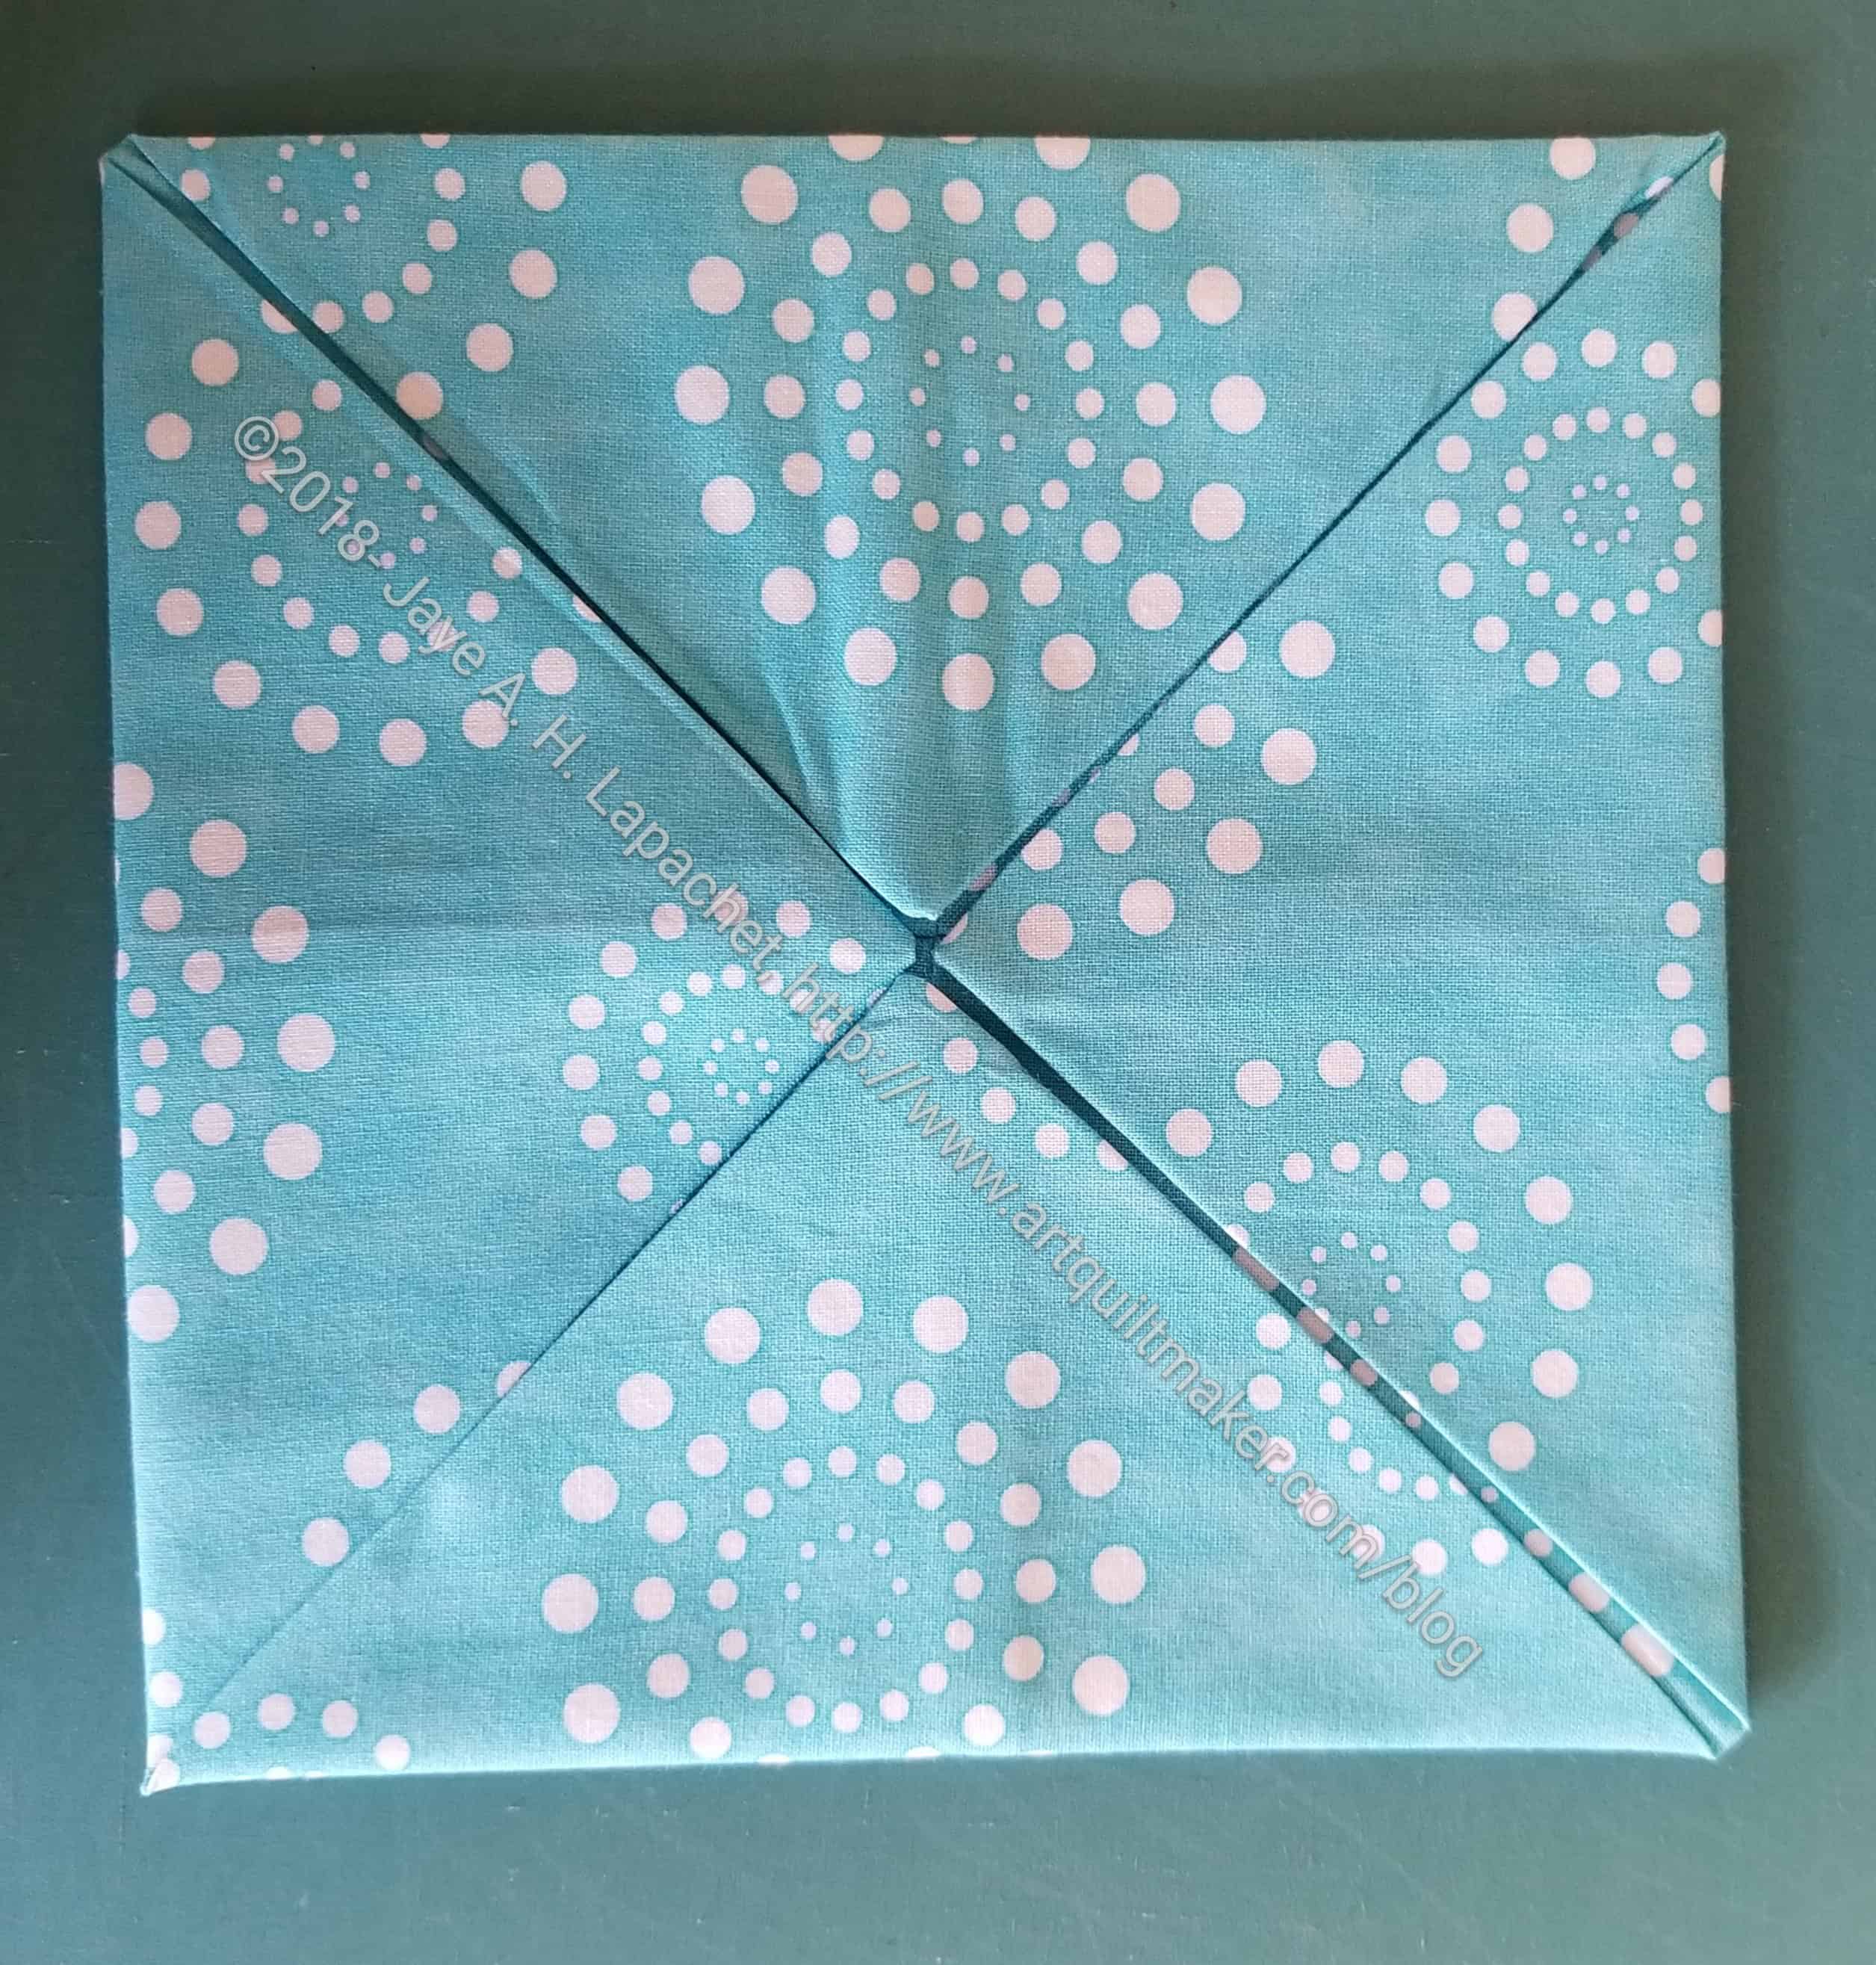
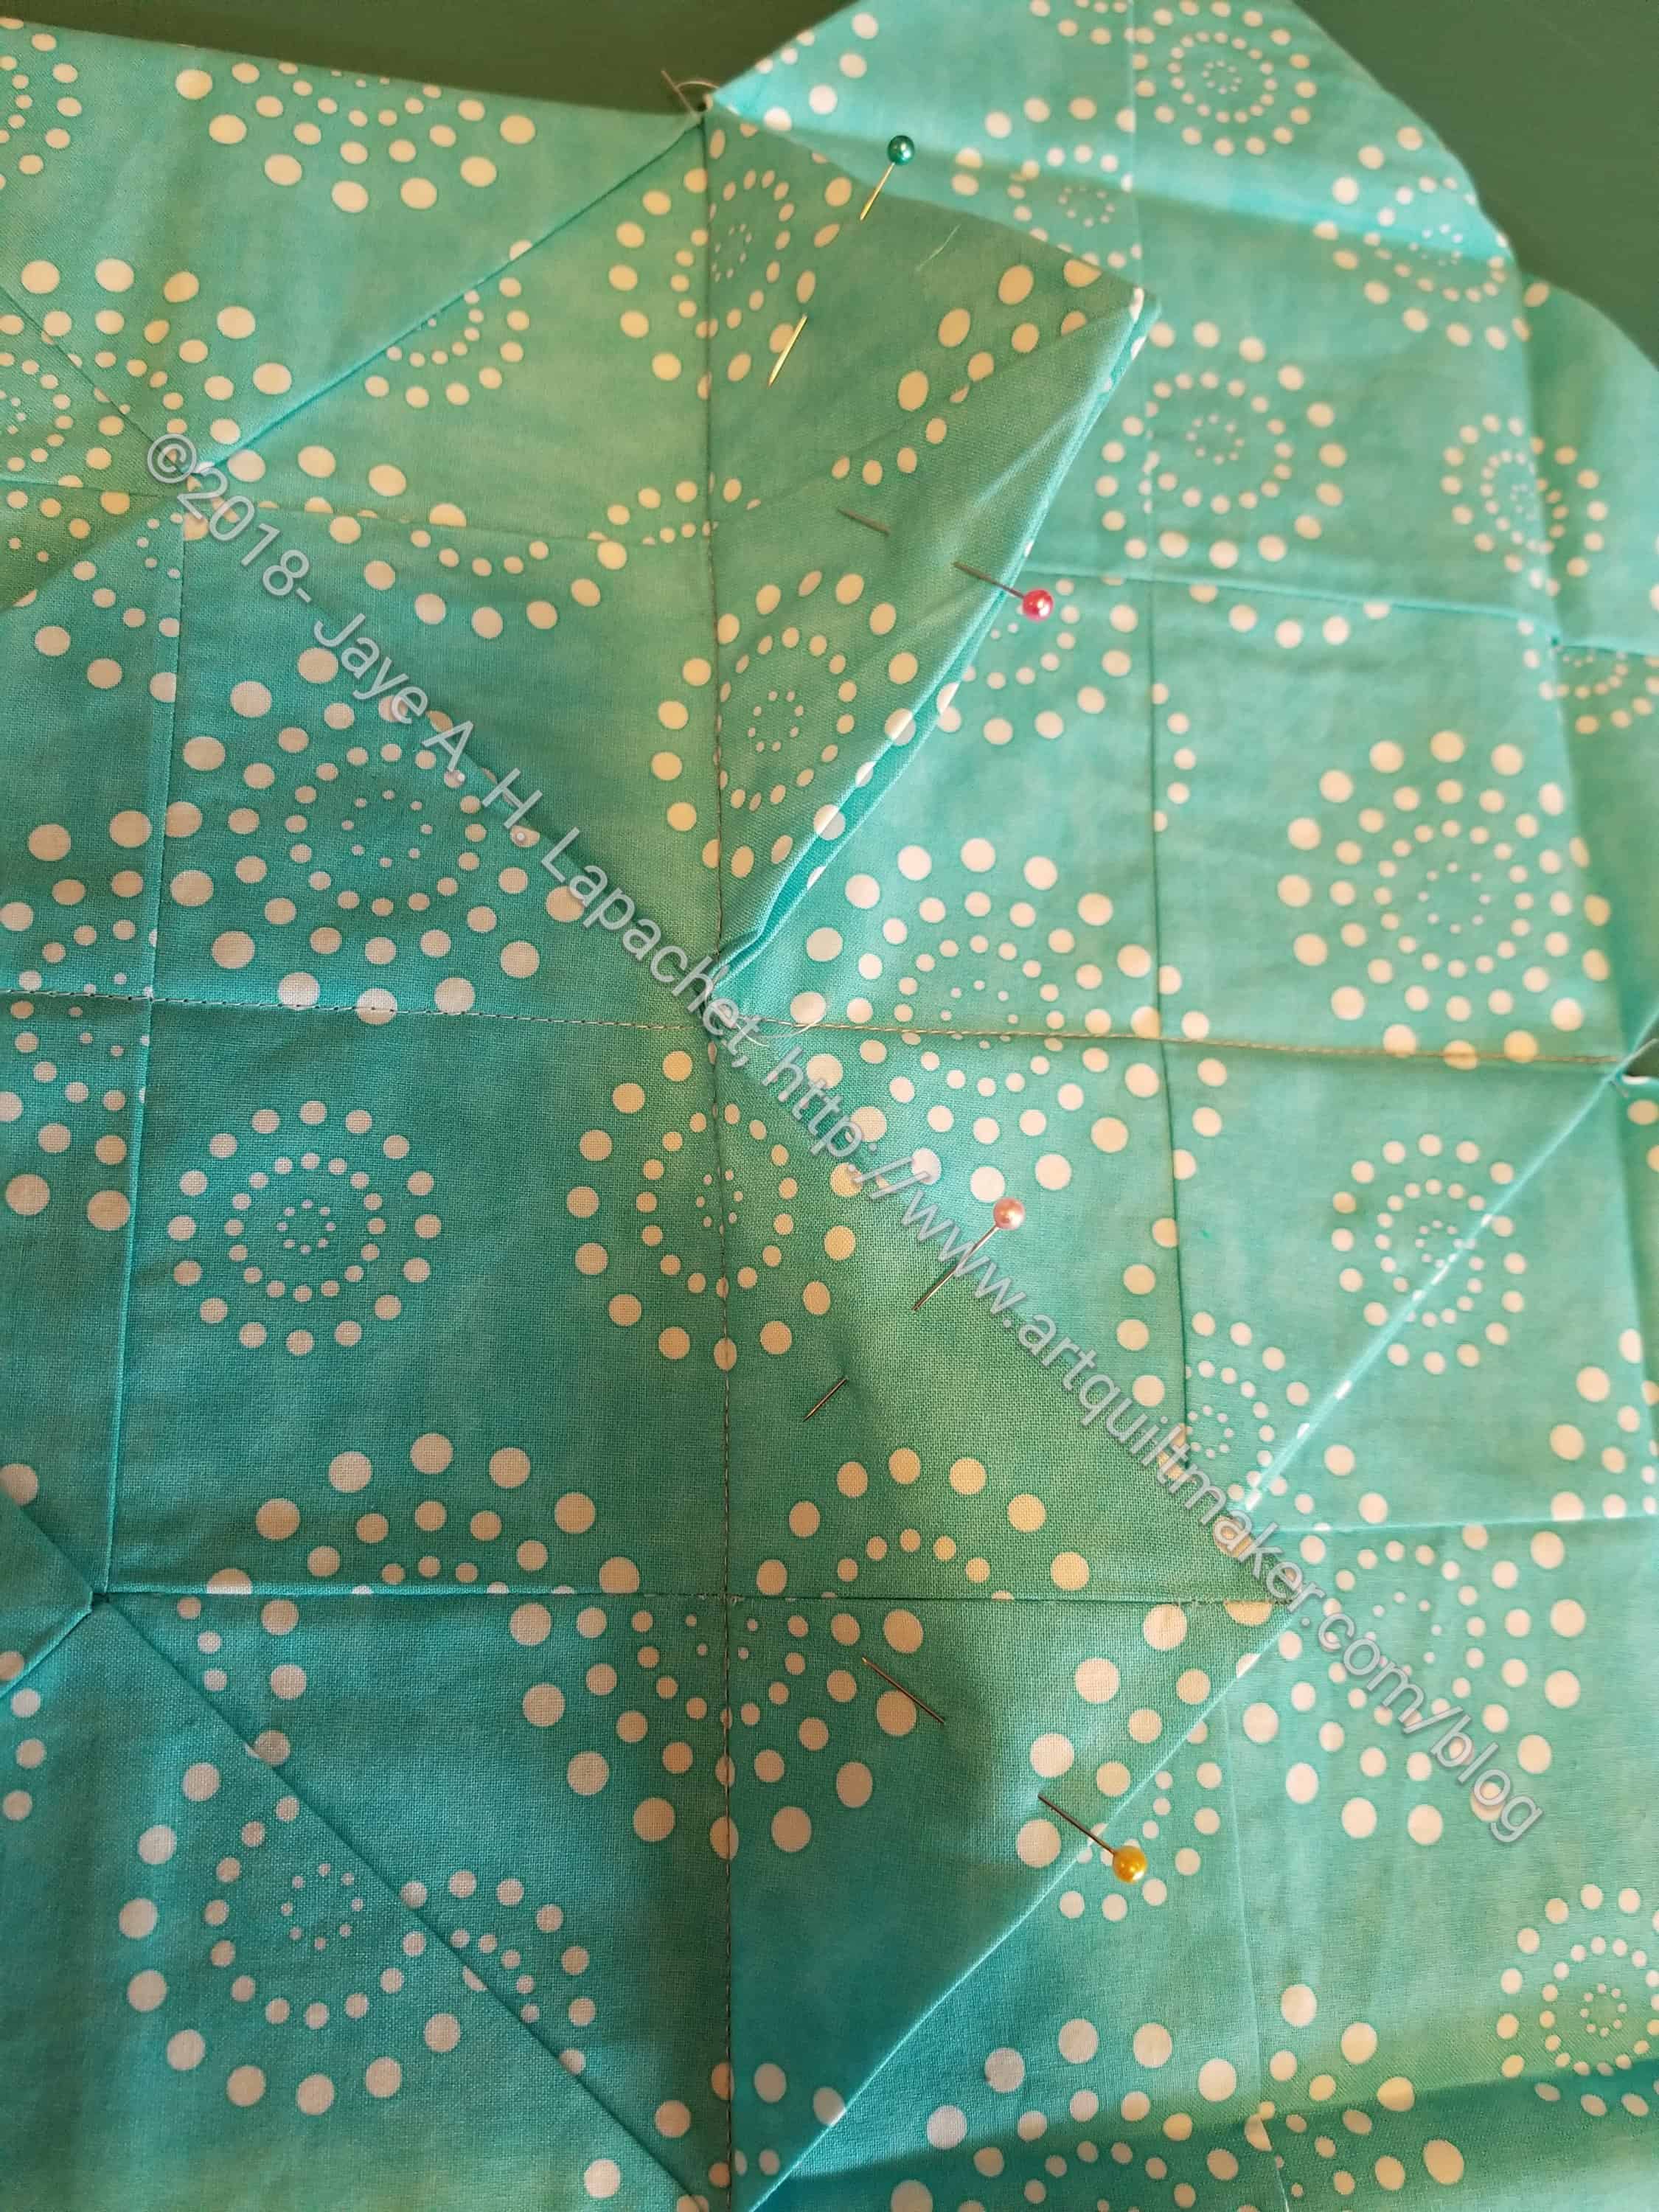
Smooth out blocks
6. Place recently sewn squares on the ironing board and smooth out wrong side out (above). They should make nice squares.
7. Press nested seams in opposite directions from the center out.
Press seam open to minimize bulk
8. Press long seams in one direction, being careful to line up edge of opening as best you can. You can press this seam open if you want.
You should now have 4 nice flat squares with wrong sides out.
9. Turn squares right sides out.
10 Poke out corners carefully. I use a knitting needle whose mate broke.
Your squares are now on the bias, so be careful when you handle them.
Press right side
10A. Press
Press
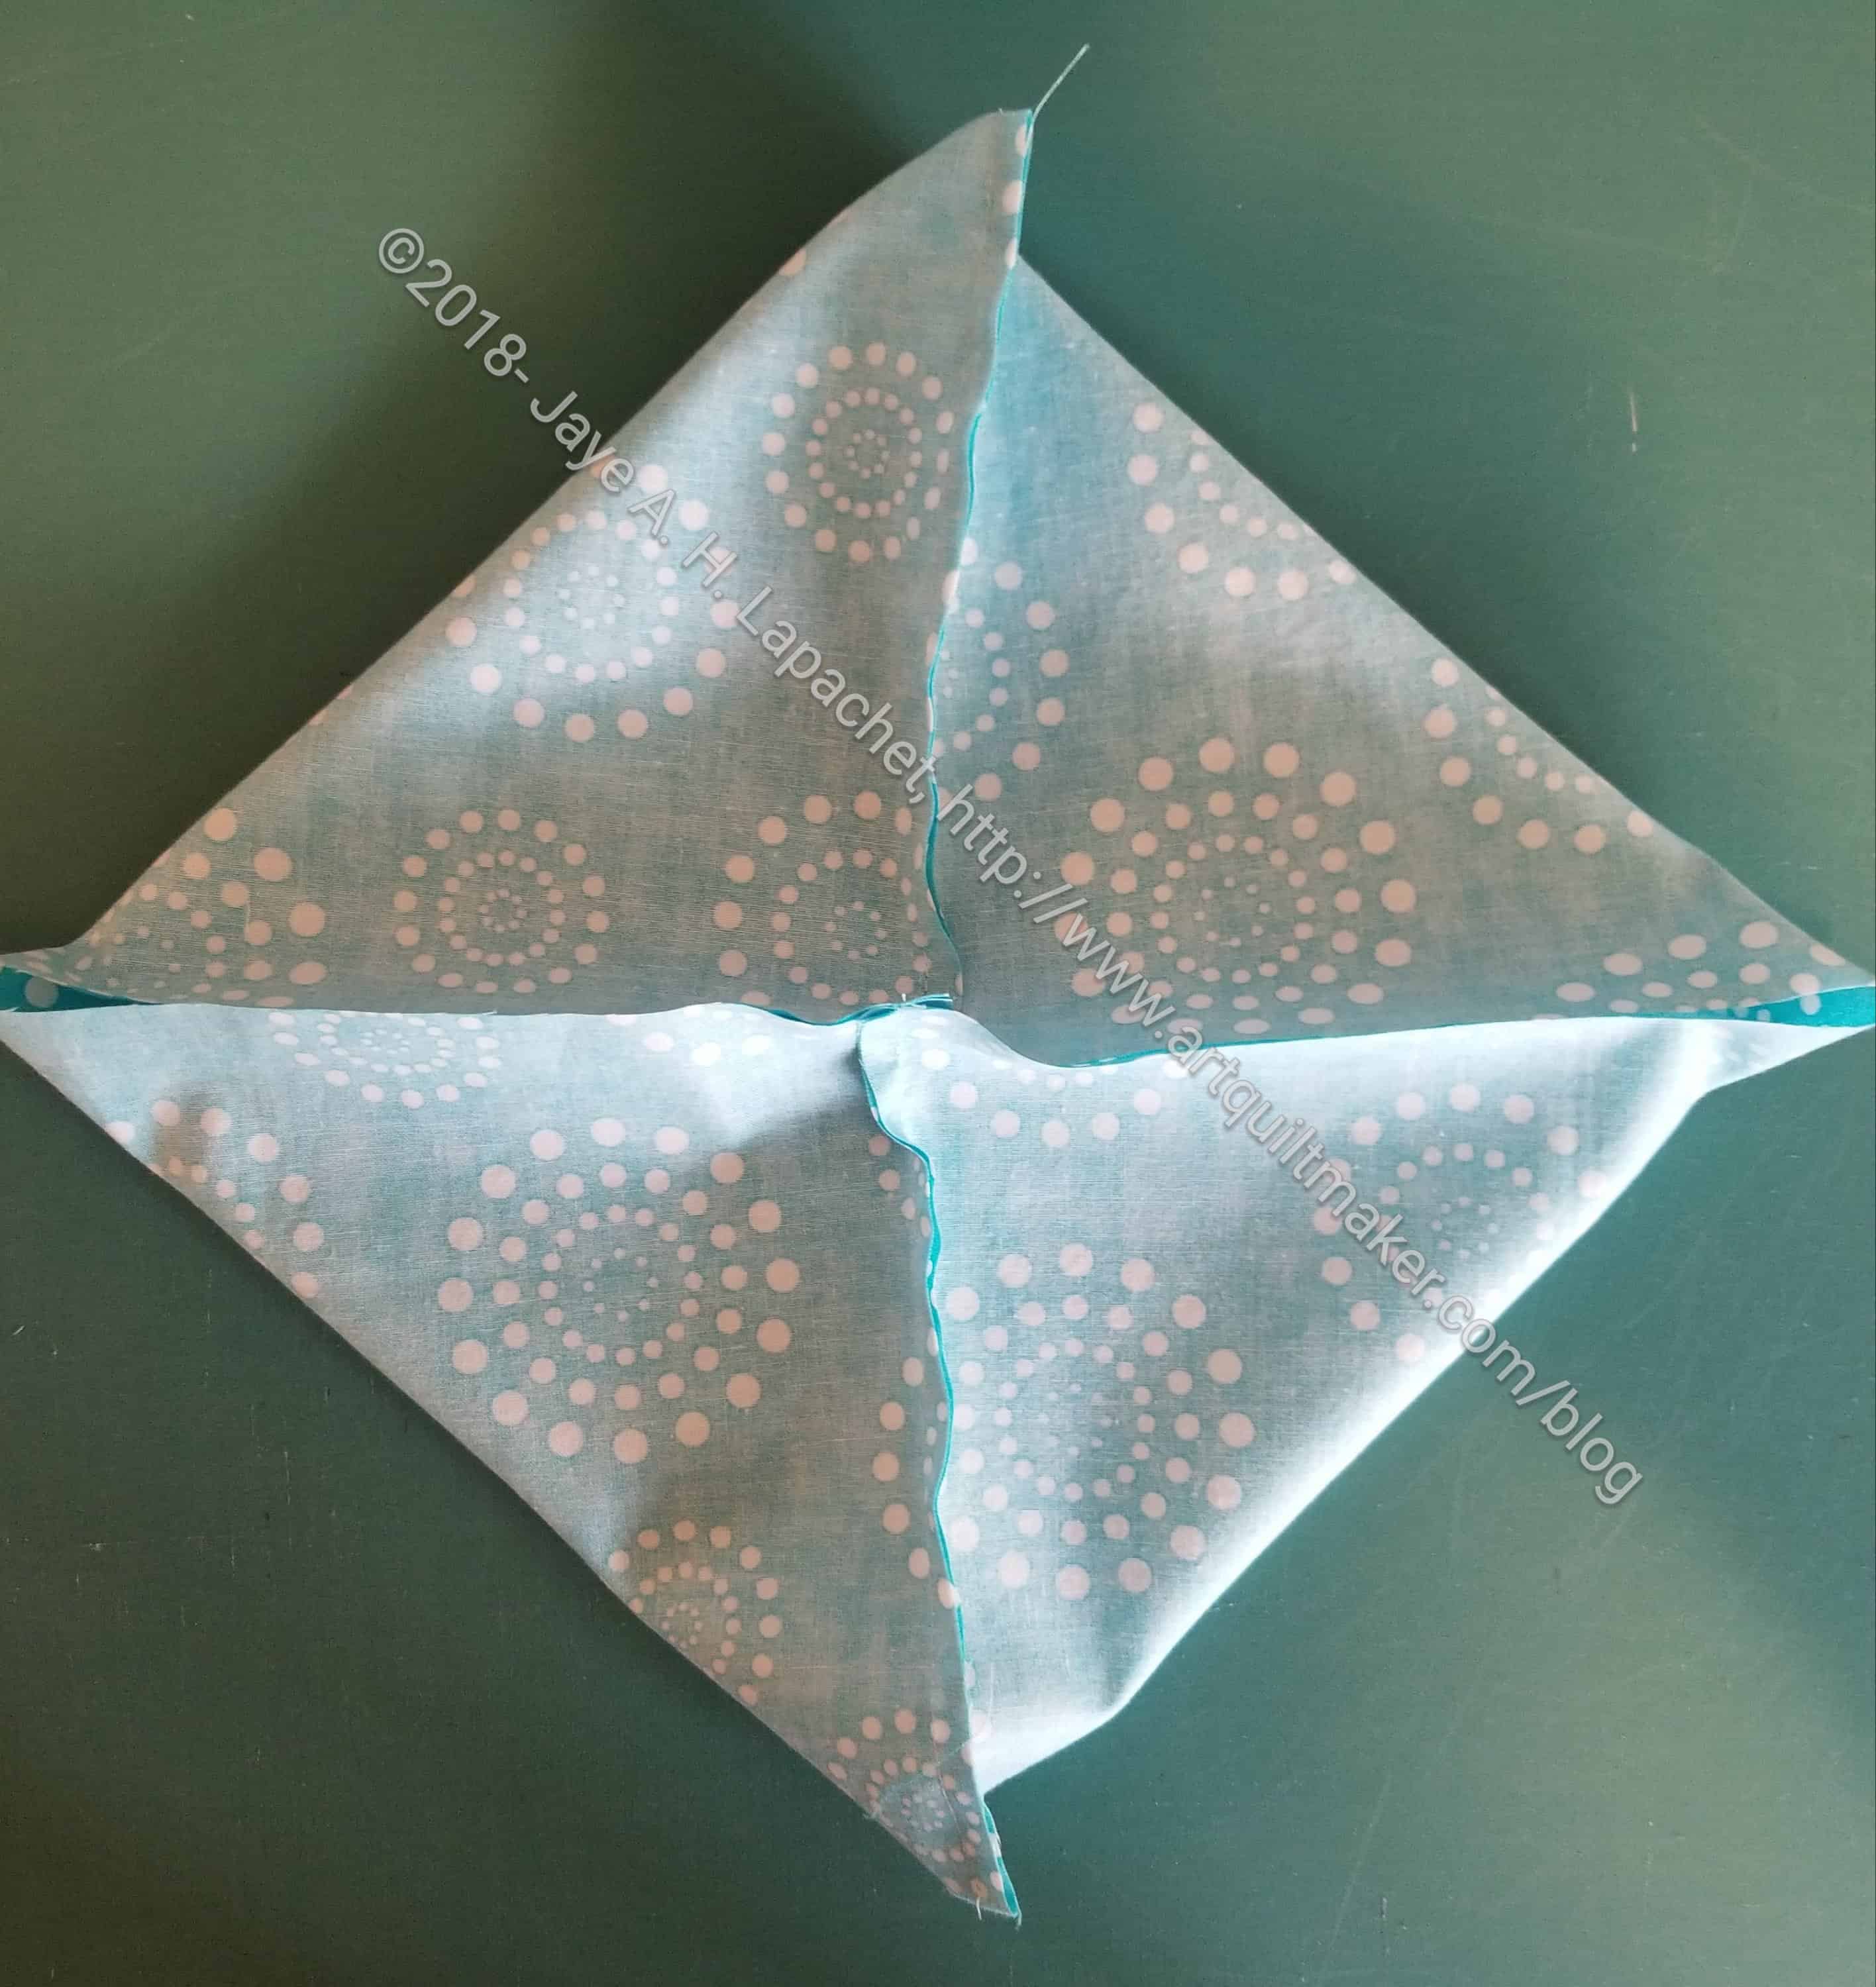
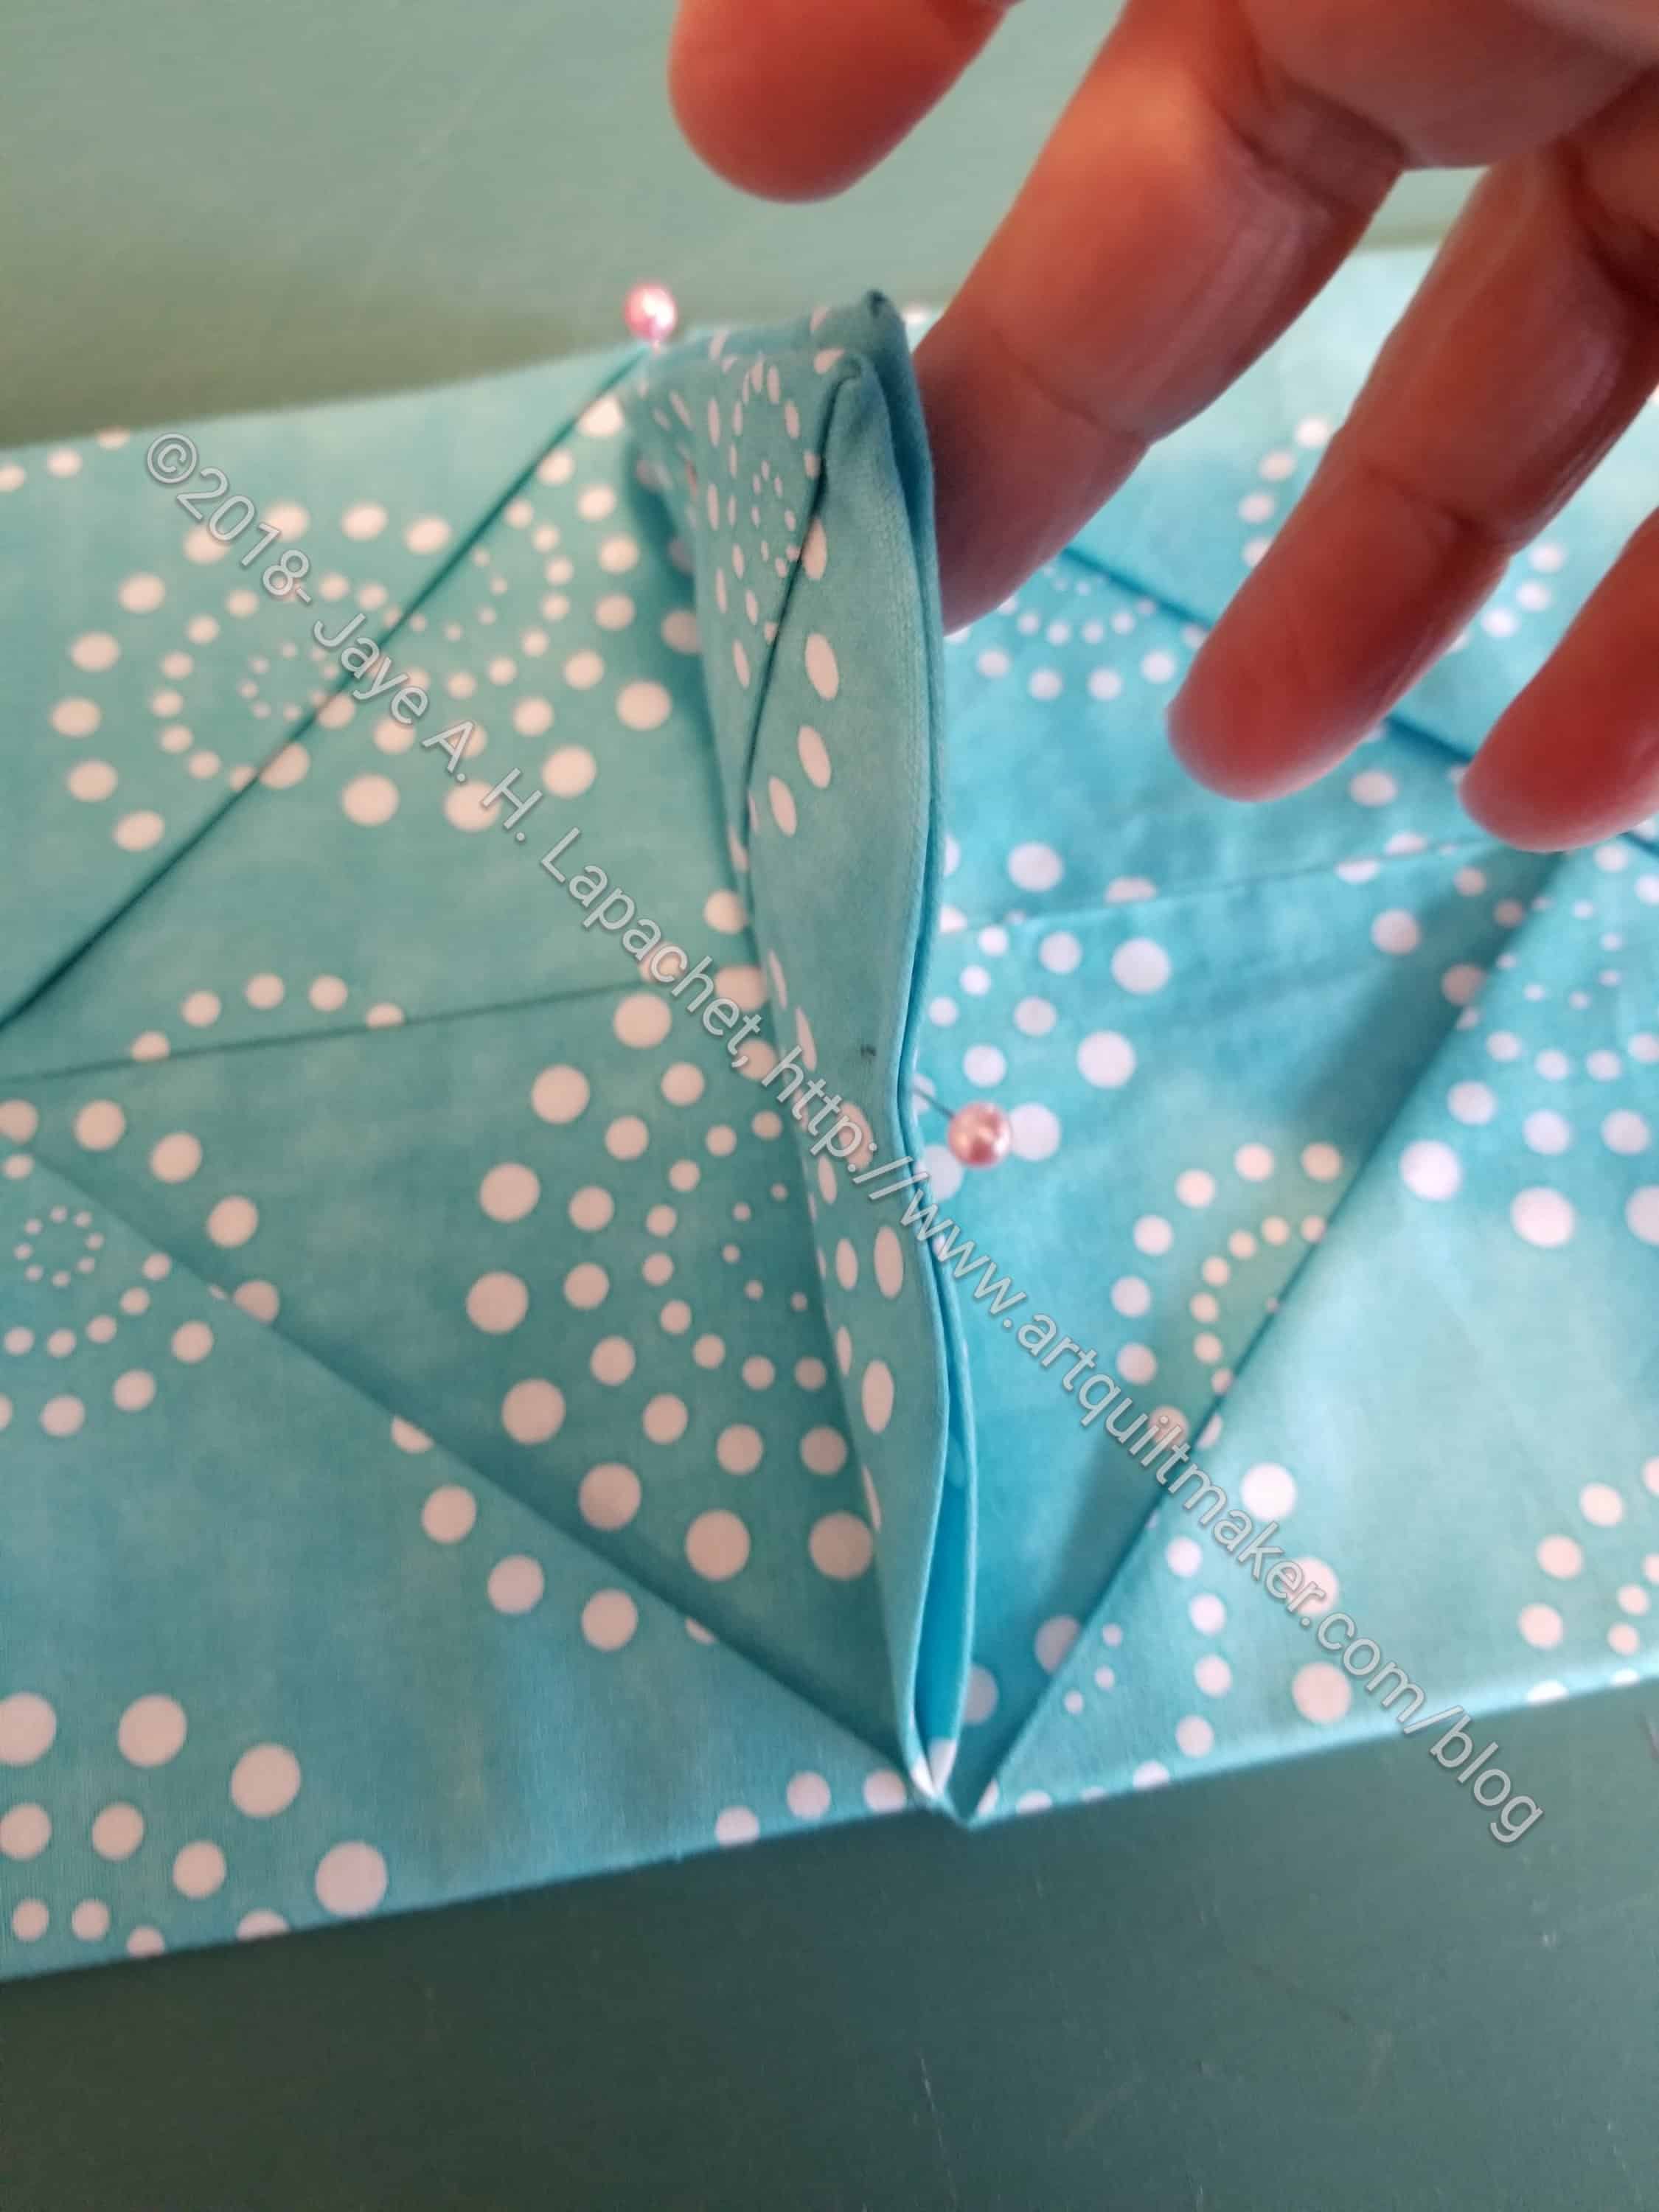
Corners folded in
11. Fold corners into the center. Do this with all four corners and make a new square. The square should be 6 inches.
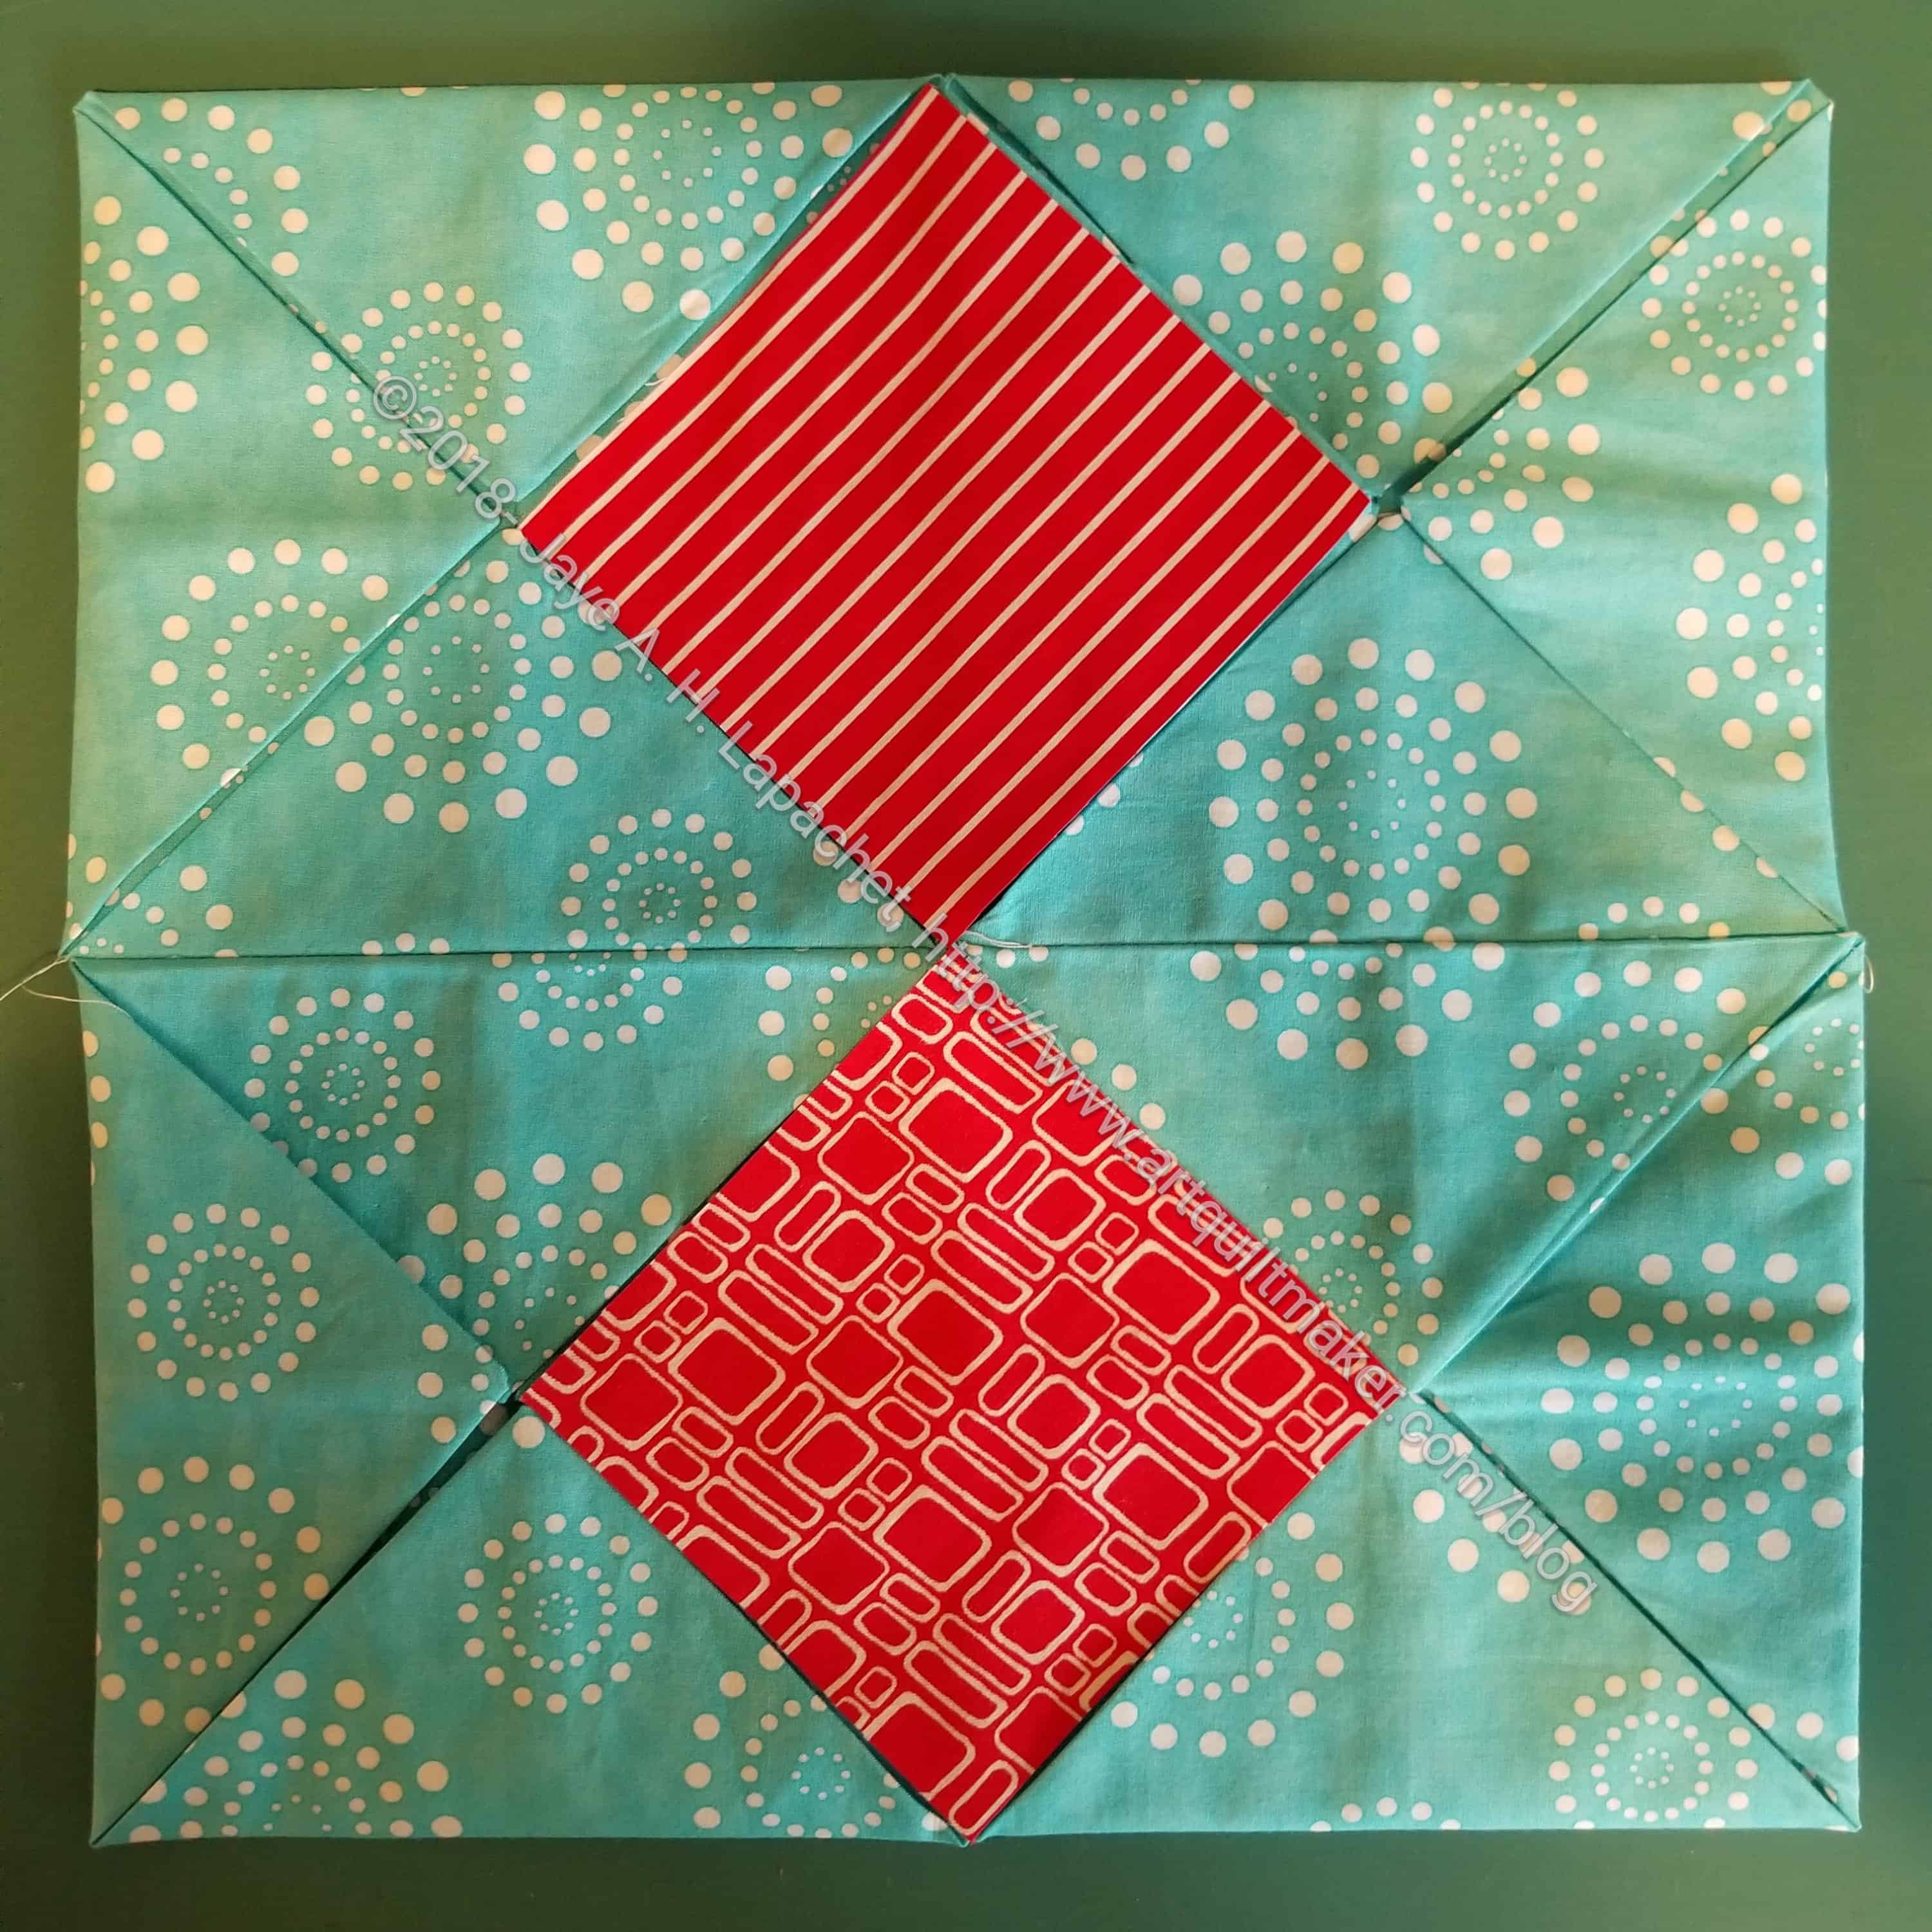
4 blocks laid out in a 2×2 grid
12. Lay out the blocks in a 2 x 2 grid, so you can see what you have
Pin triangles together
13. Pin the center triangles of the two top triangles together. Do the same for the bottom triangles. Now your 2×2 grid will be pinned together in two rectangular sections
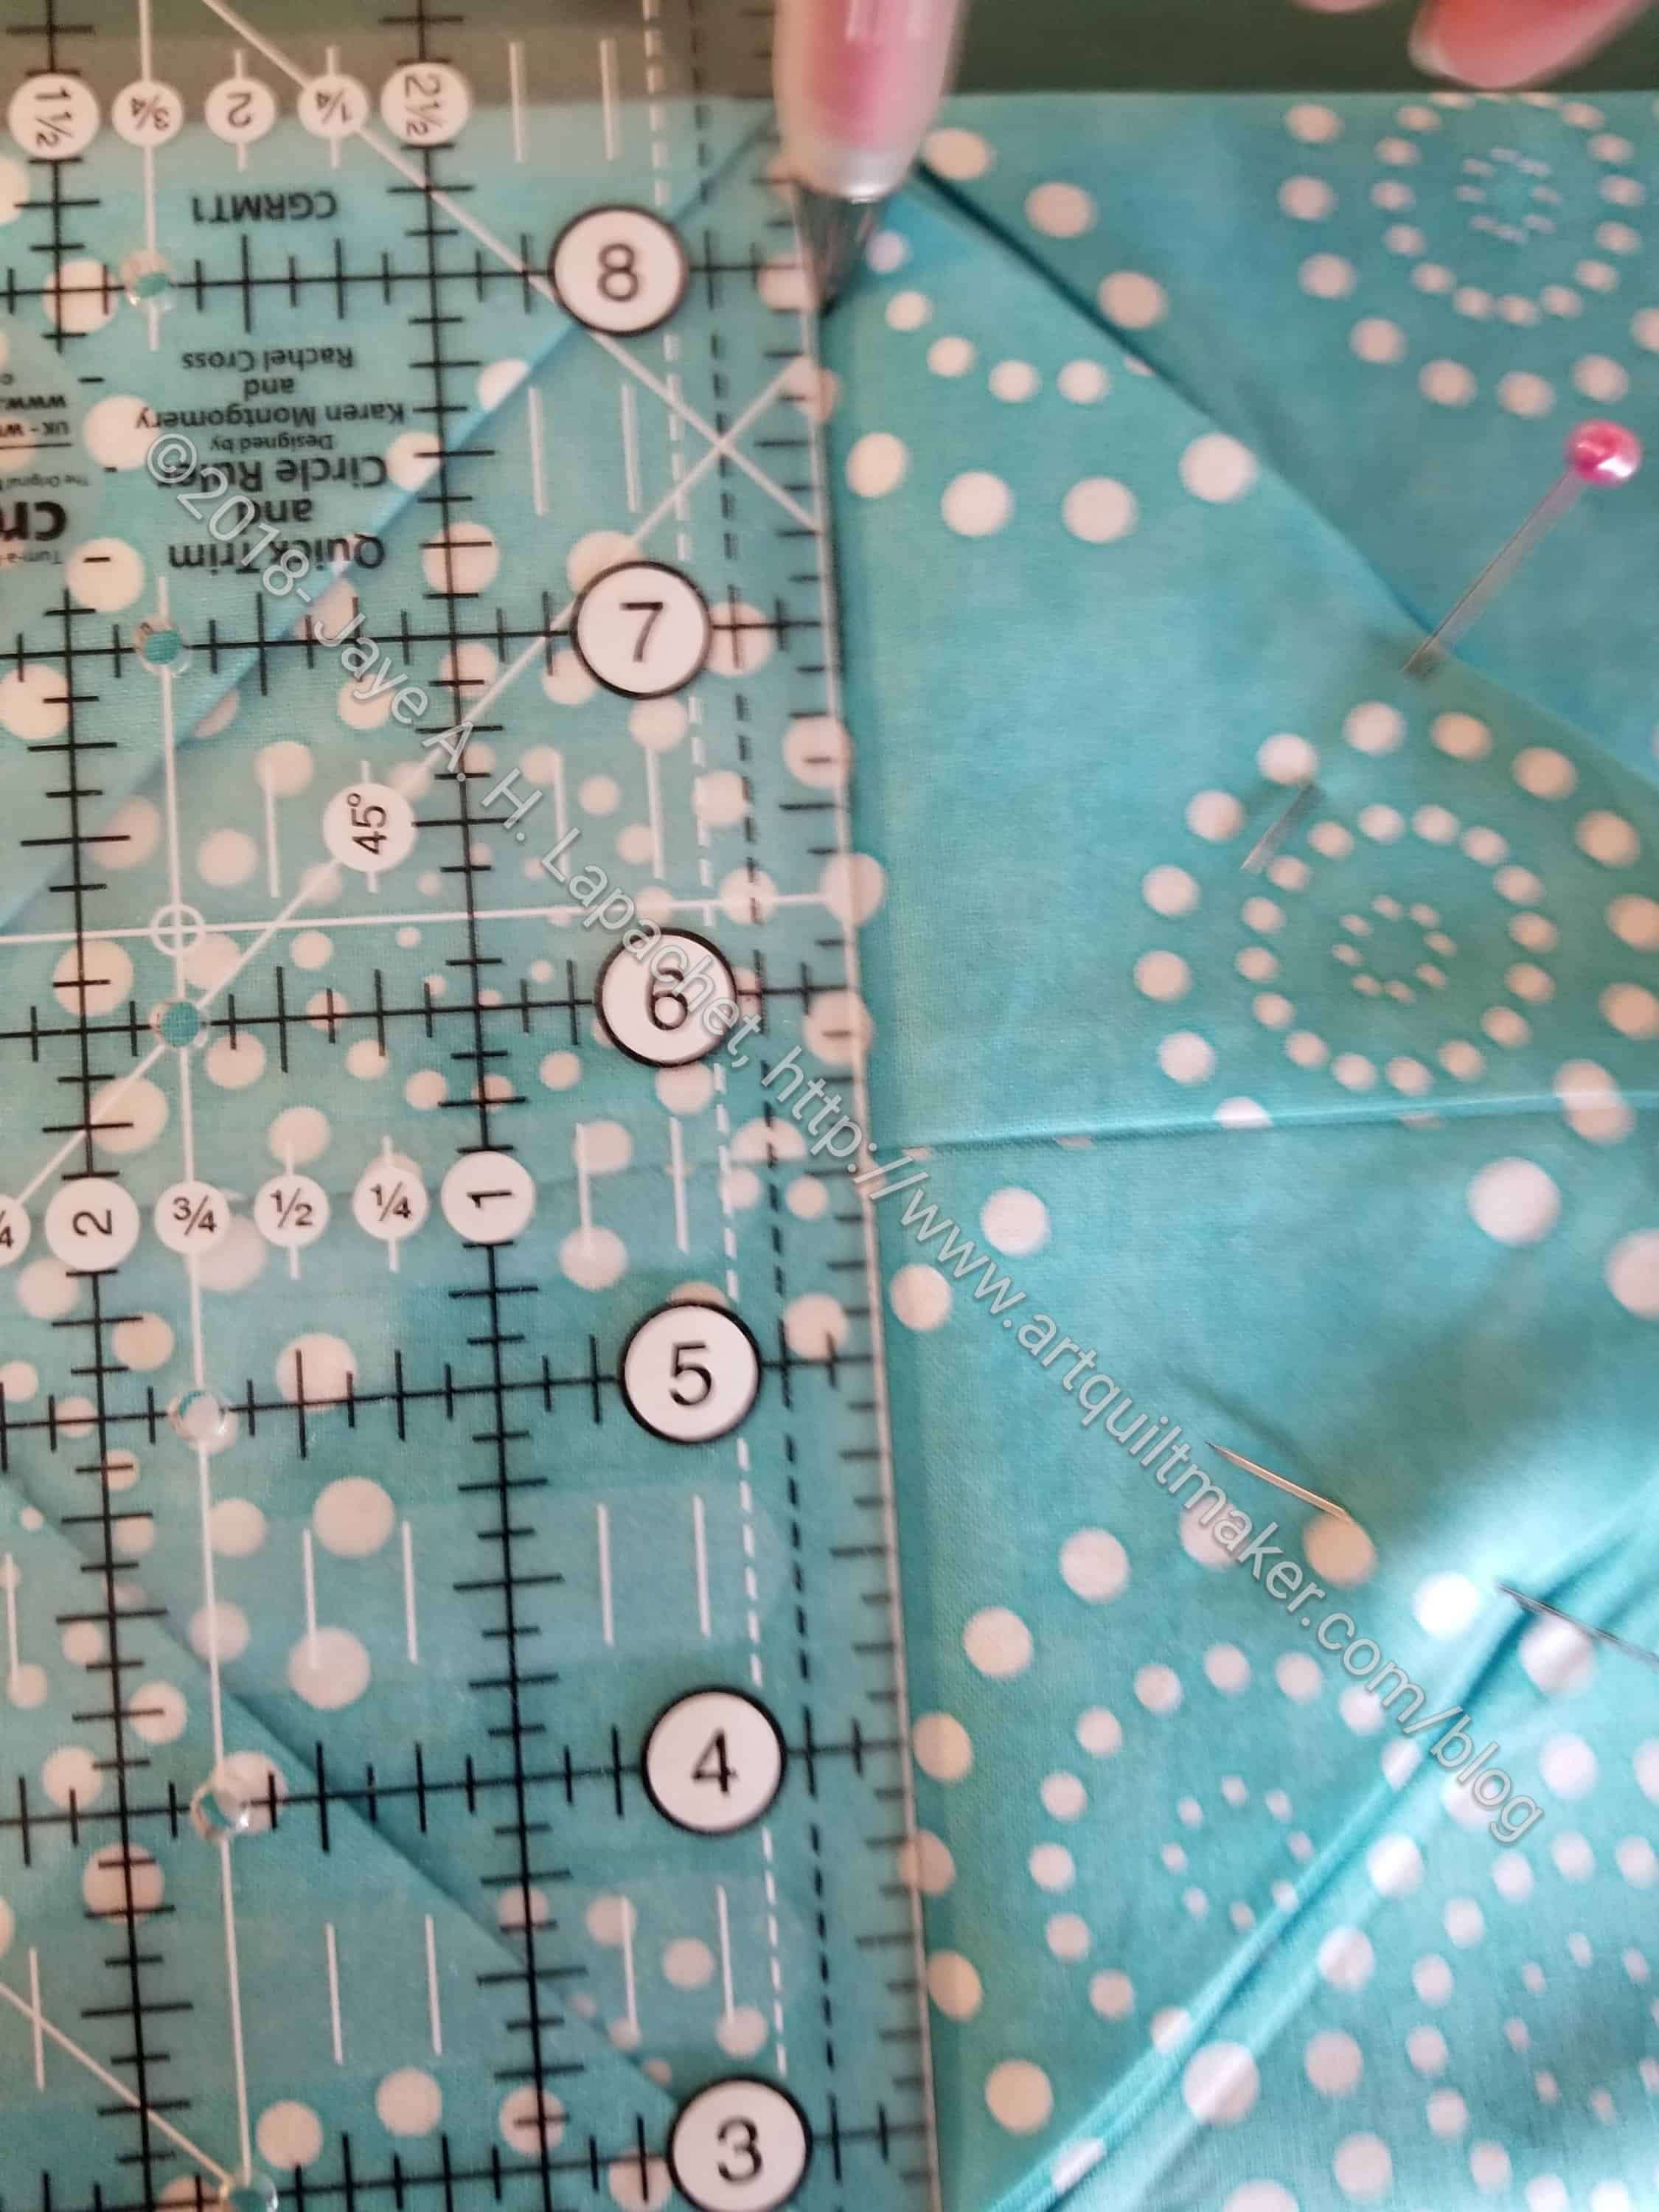
Draw a line in the crease
14. Using a ruler (I use a 3.5 x 12.5 Creative Grids), and your marking implement (I like Sewline pencils), draw a line in the crease under the triangles you are about to pin
Line up squares
15. Line up squares with backs together and triangles pointing to the right.
16. Put your applique’ foot on your sewing machine.
17. Sew along the crease on both sets.
18. Lay out the 2×2 grid again. Now you will have two ‘rows’. You are going to sew the rows together.
Pin them together
19. Fold up the top triangles from the bottom row and the bottom triangle from the top row.
Draw another line between the two ‘rows’ in the crease
20. Draw a line along the crease at the bottom of the two triangles.
21. Sew along the line. After, you will have your 2×2 grid of squares sewn together and the triangles will be flapping around.
Start laying out your foreground squaresForeground squares laid out
22. Take your foreground triangles and lay them on top of your background
Tuck flaps over foreground
23. Tuck the flaps in towards the center and pin in place. Watch out that the edges of your foreground squares don’t show. Make the edges curve slightly
Note: this was confusing to figure out and it turned out that I did not have all the sewn triangles in the right place. After you sew the triangles together, make sure you flatten them back in their original places, e.g. one layer of background on top
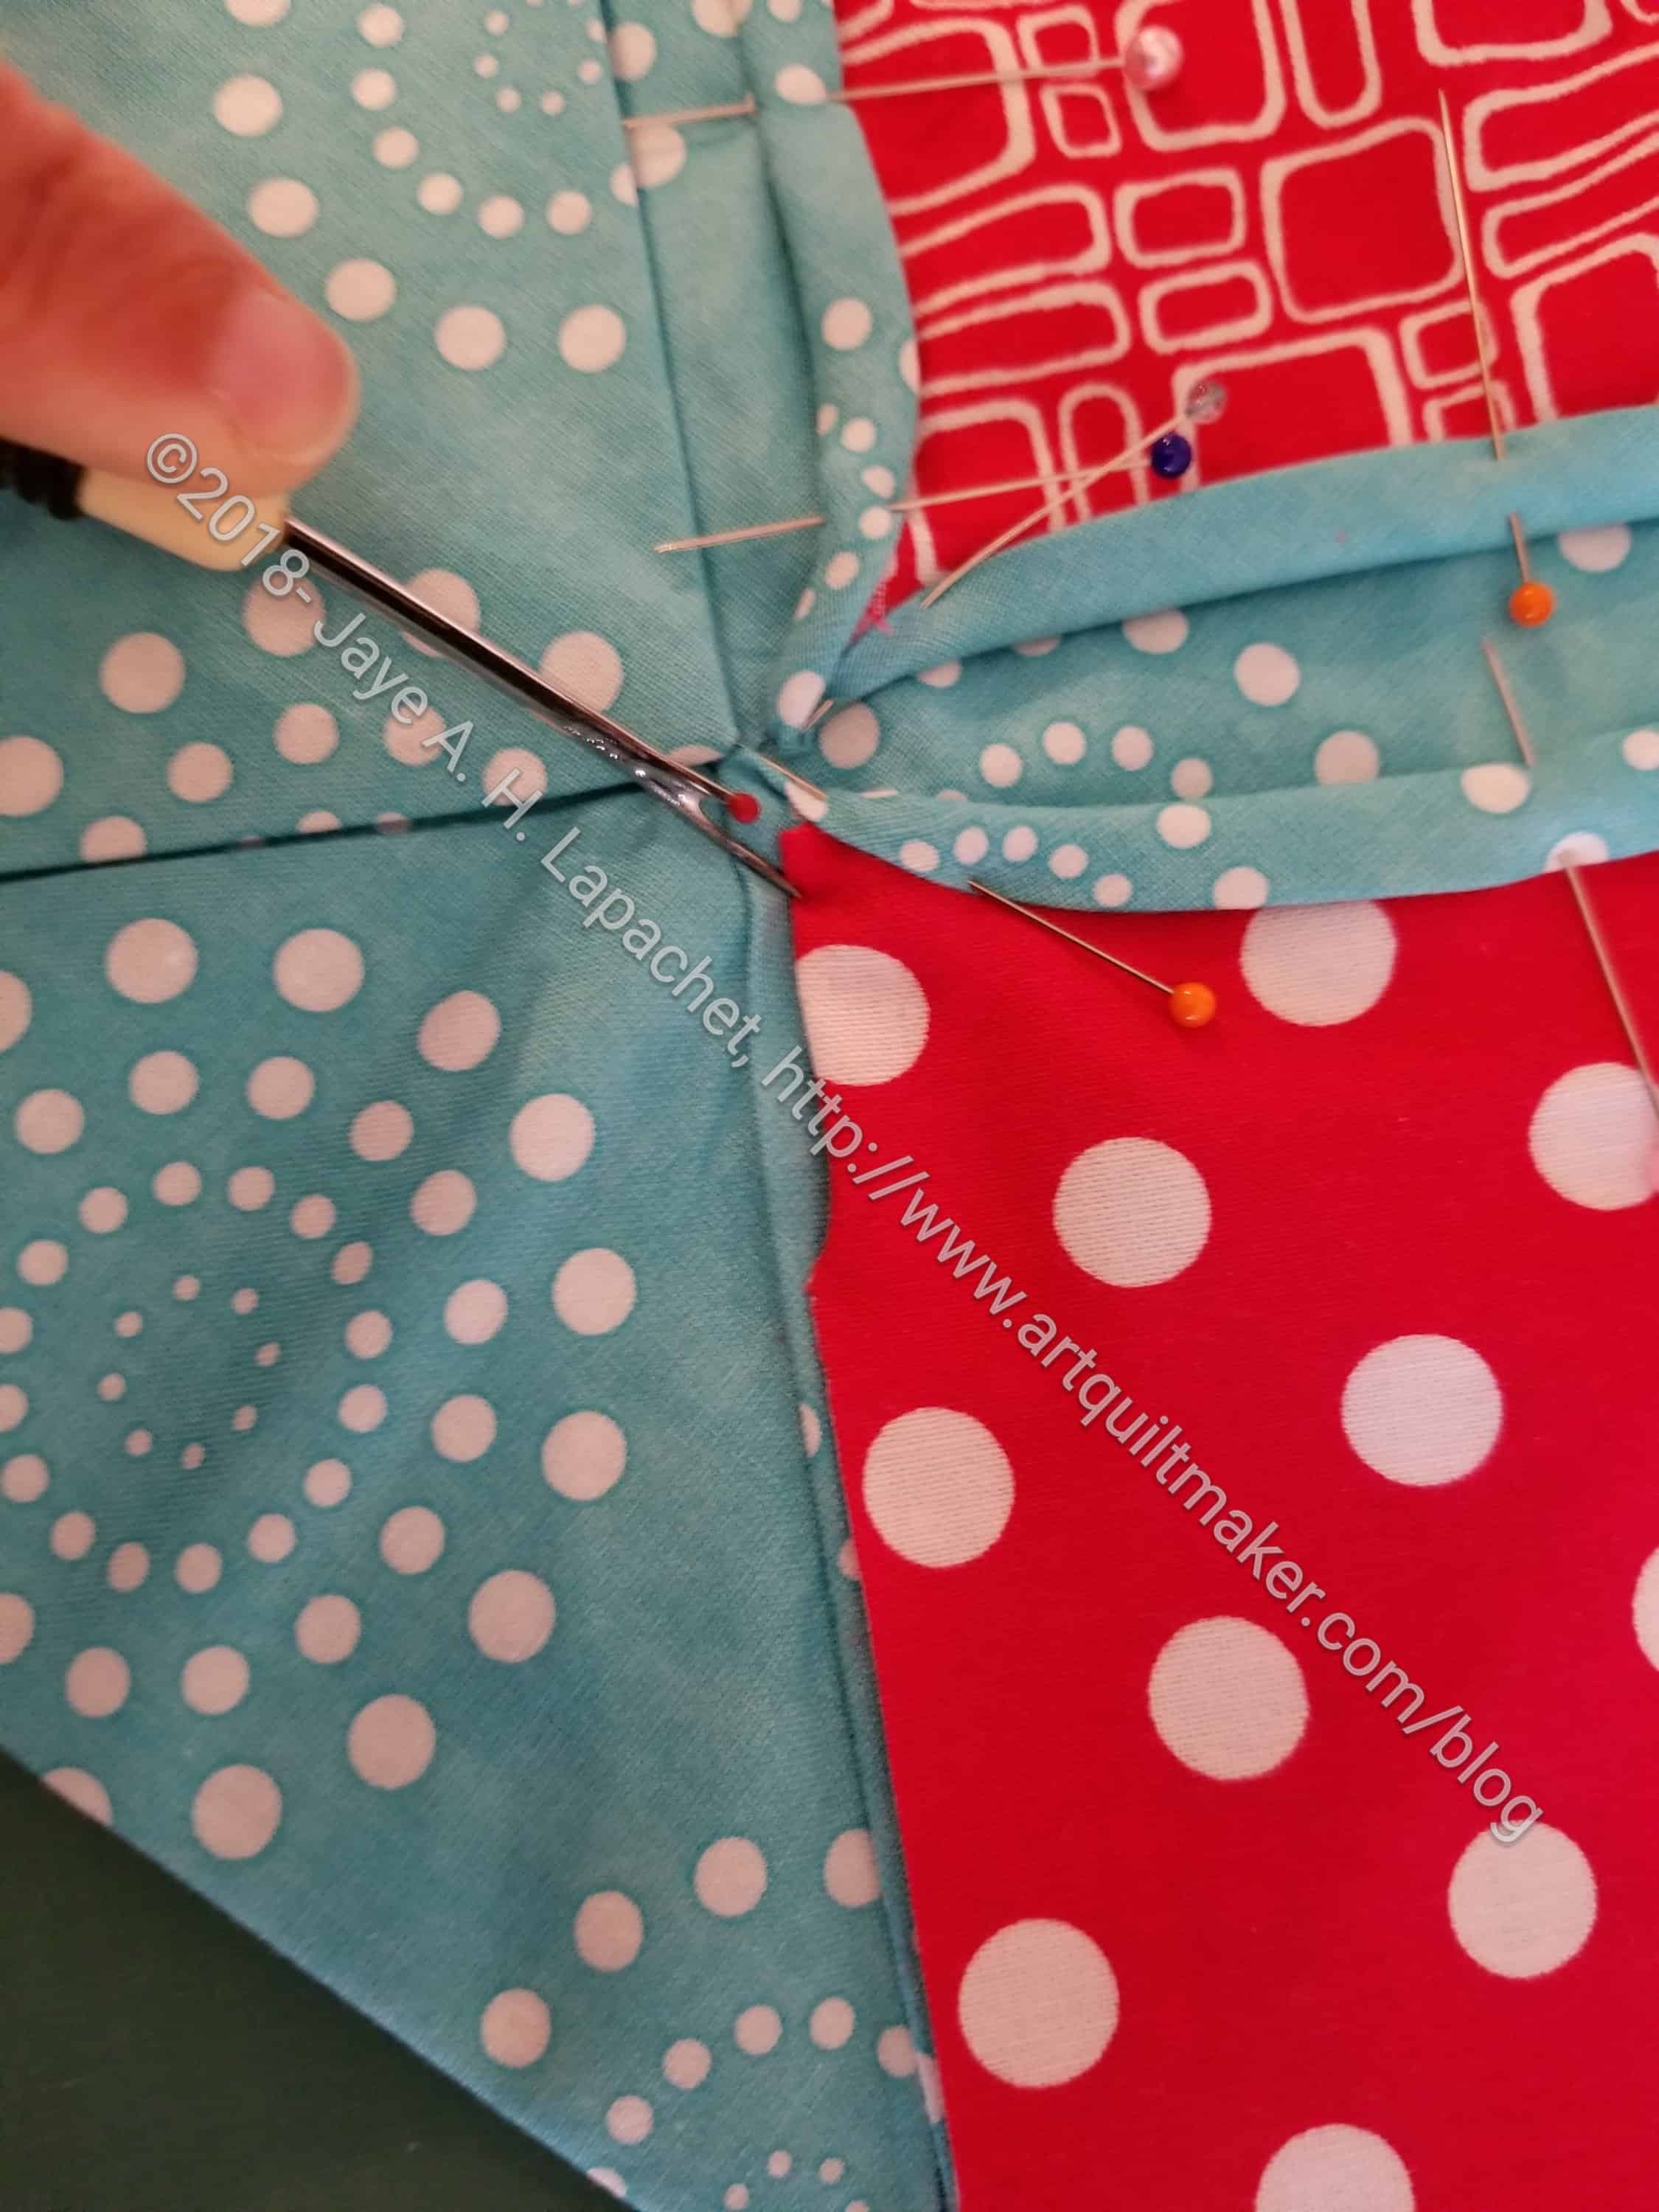
You may need to use a stiletto
Note: I had to use a thin sharp tool, like a stiletto or dental instrument to tuck in some of the foreground edges. I sometimes use a seam ripper, which is a very bad habit, because if you aren’t careful, you can rip your fabric. You can definitely trim the foreground fabric, but trim a little at a time very, very carefully
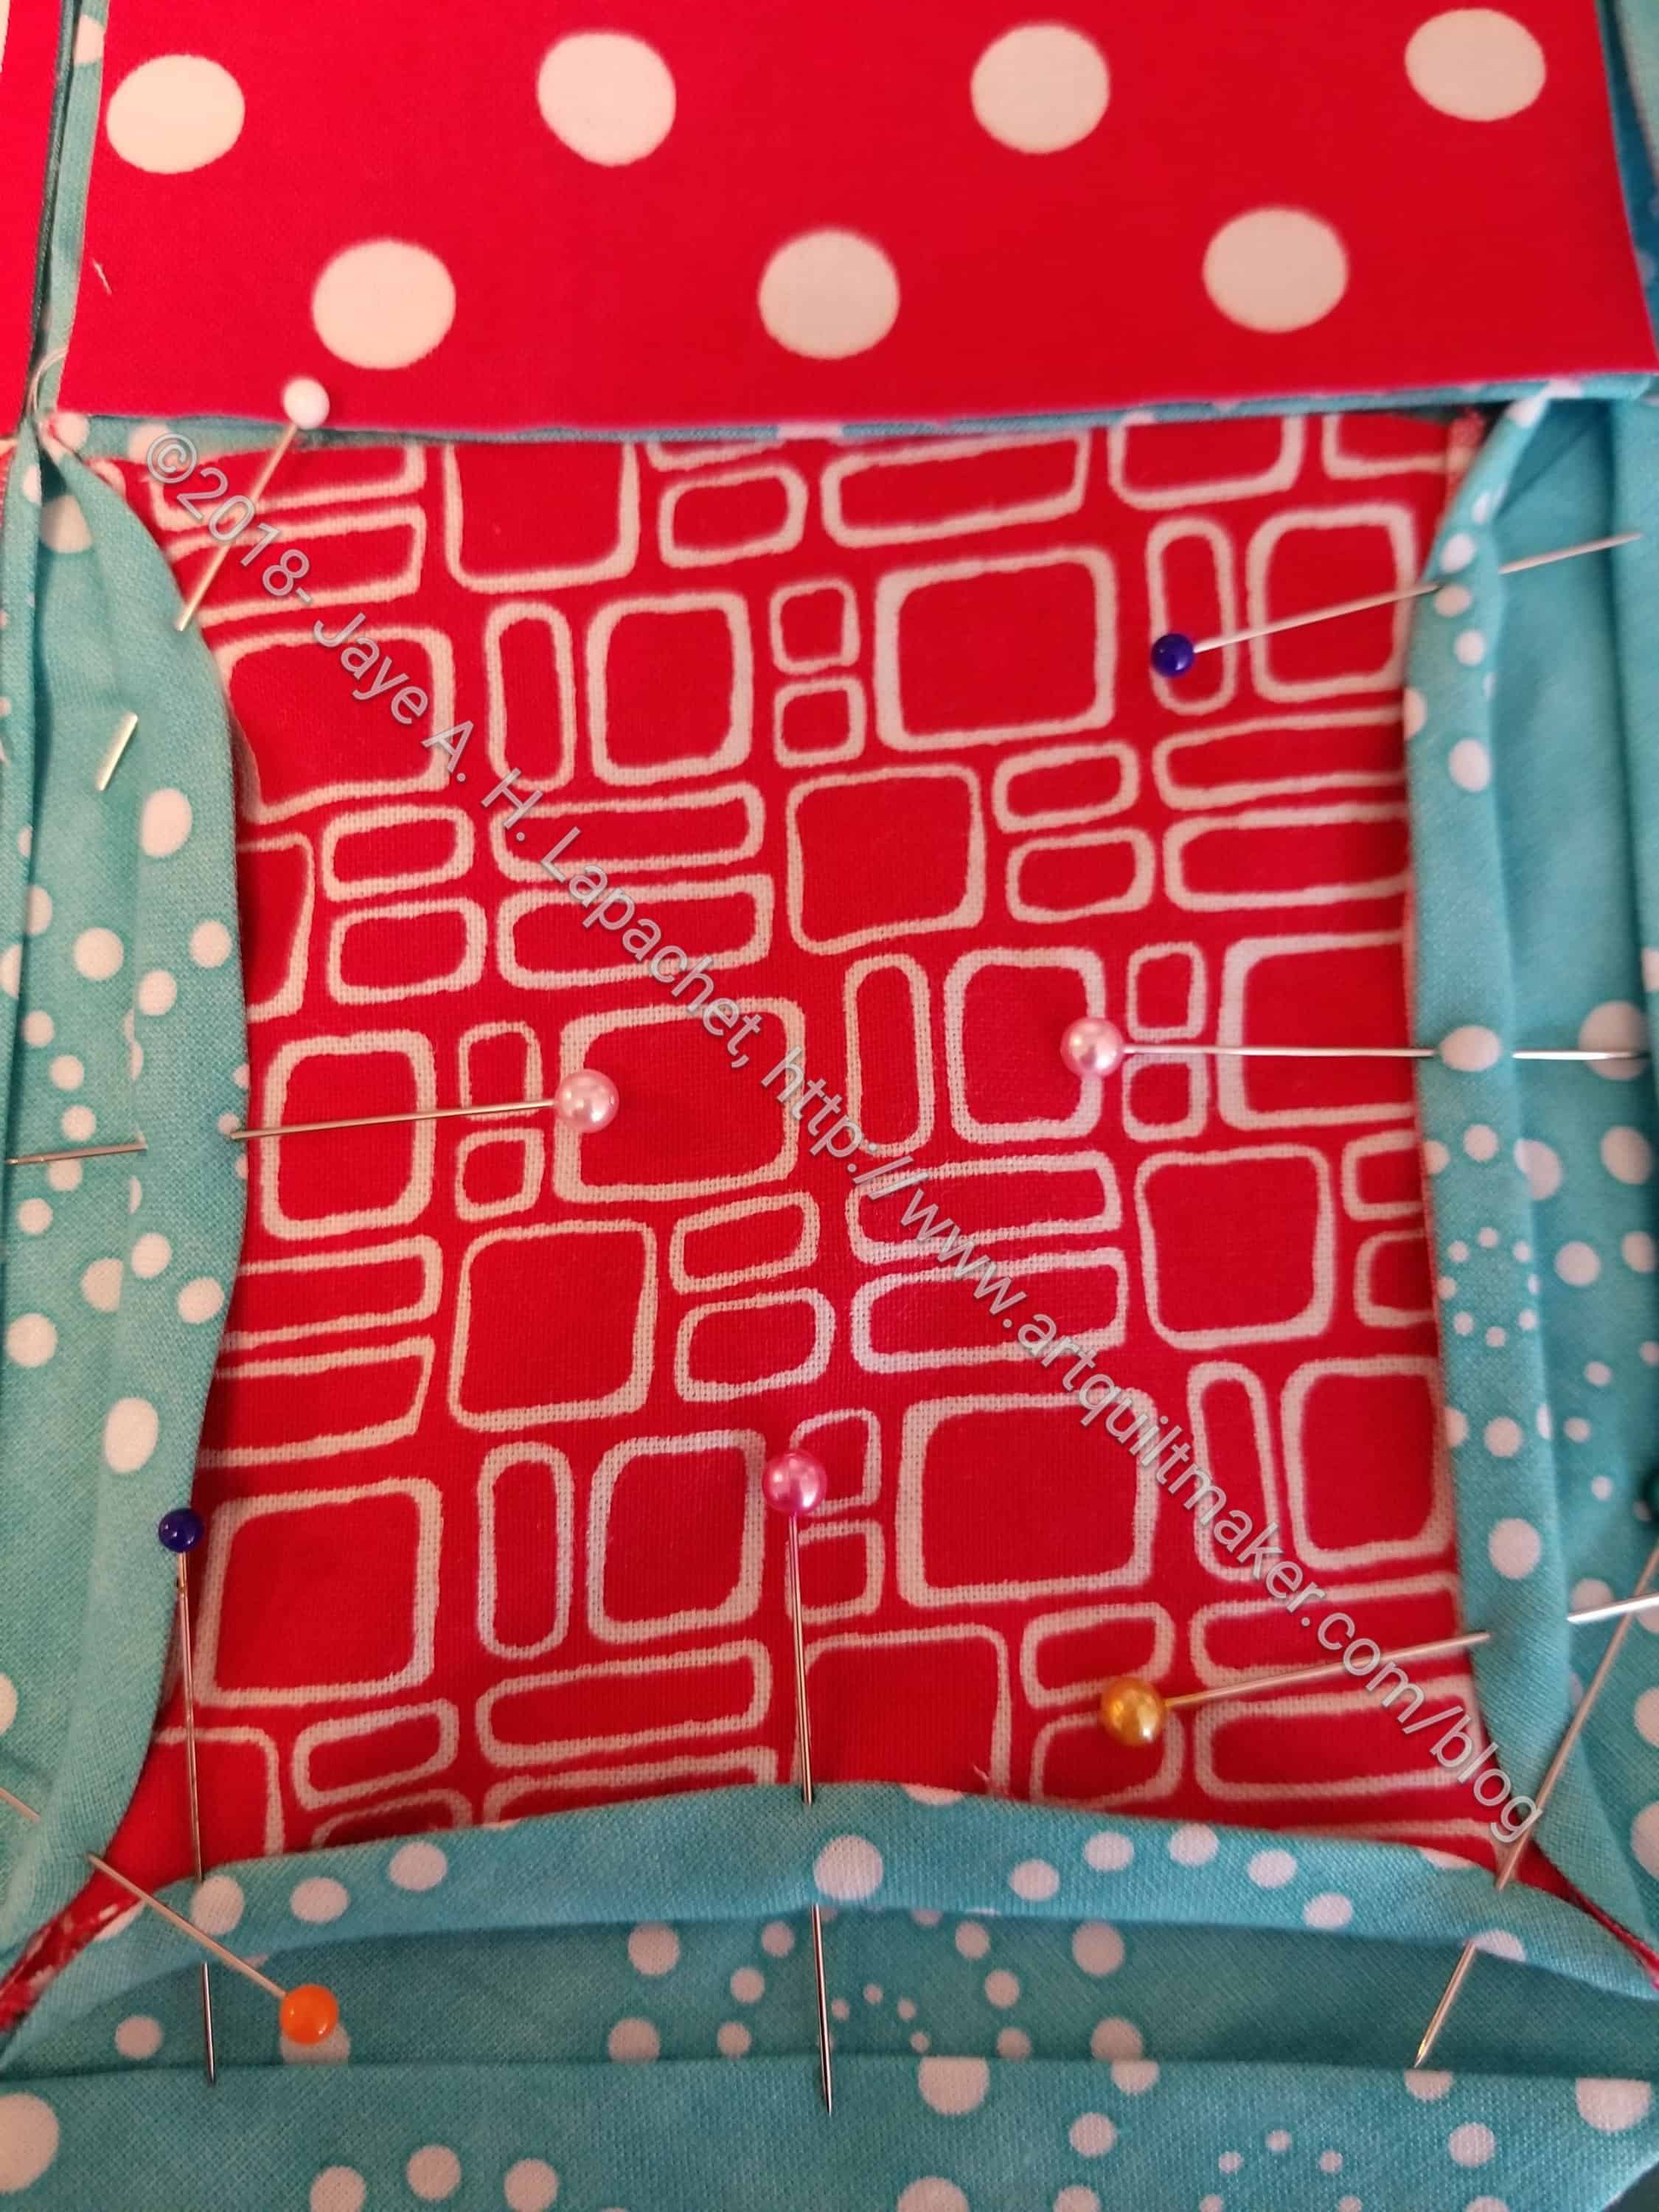
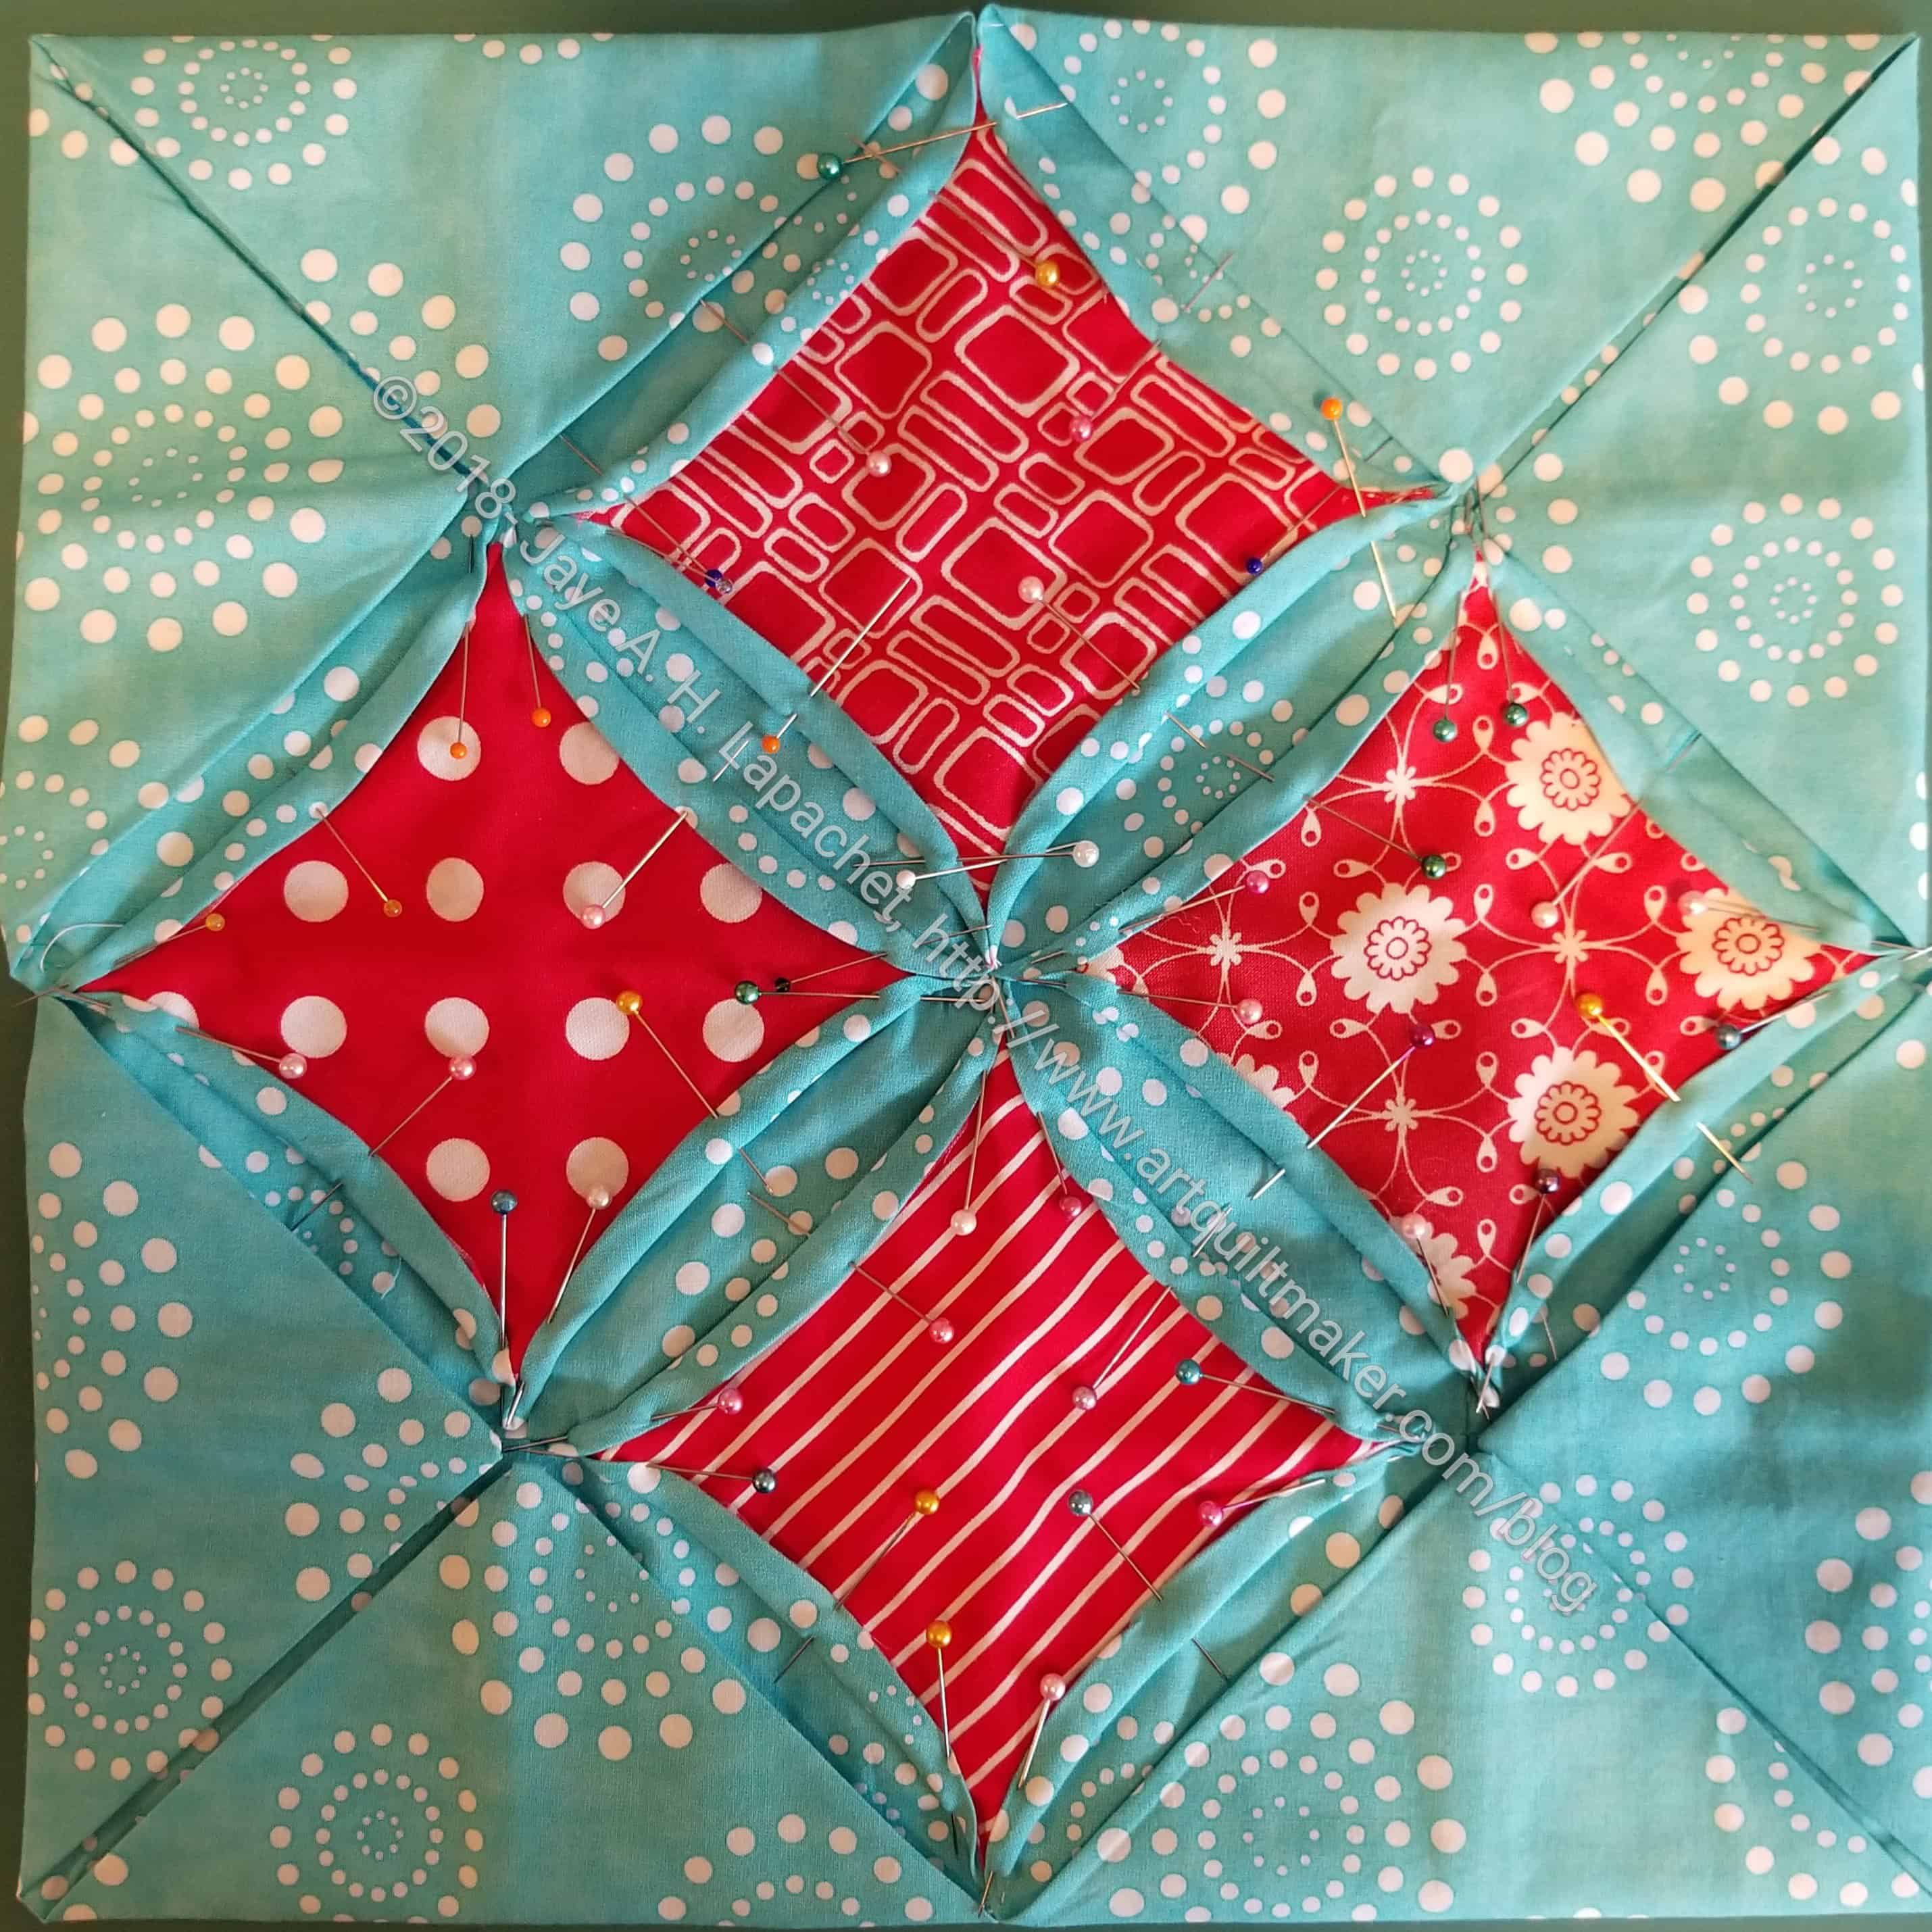
Pinned and ready for sewing
24. Pin each edge in three places with the heads of the pins facing the center of the foreground fabric. This is not micro management; this technique will allow you to sew as long as possible with the pins in place
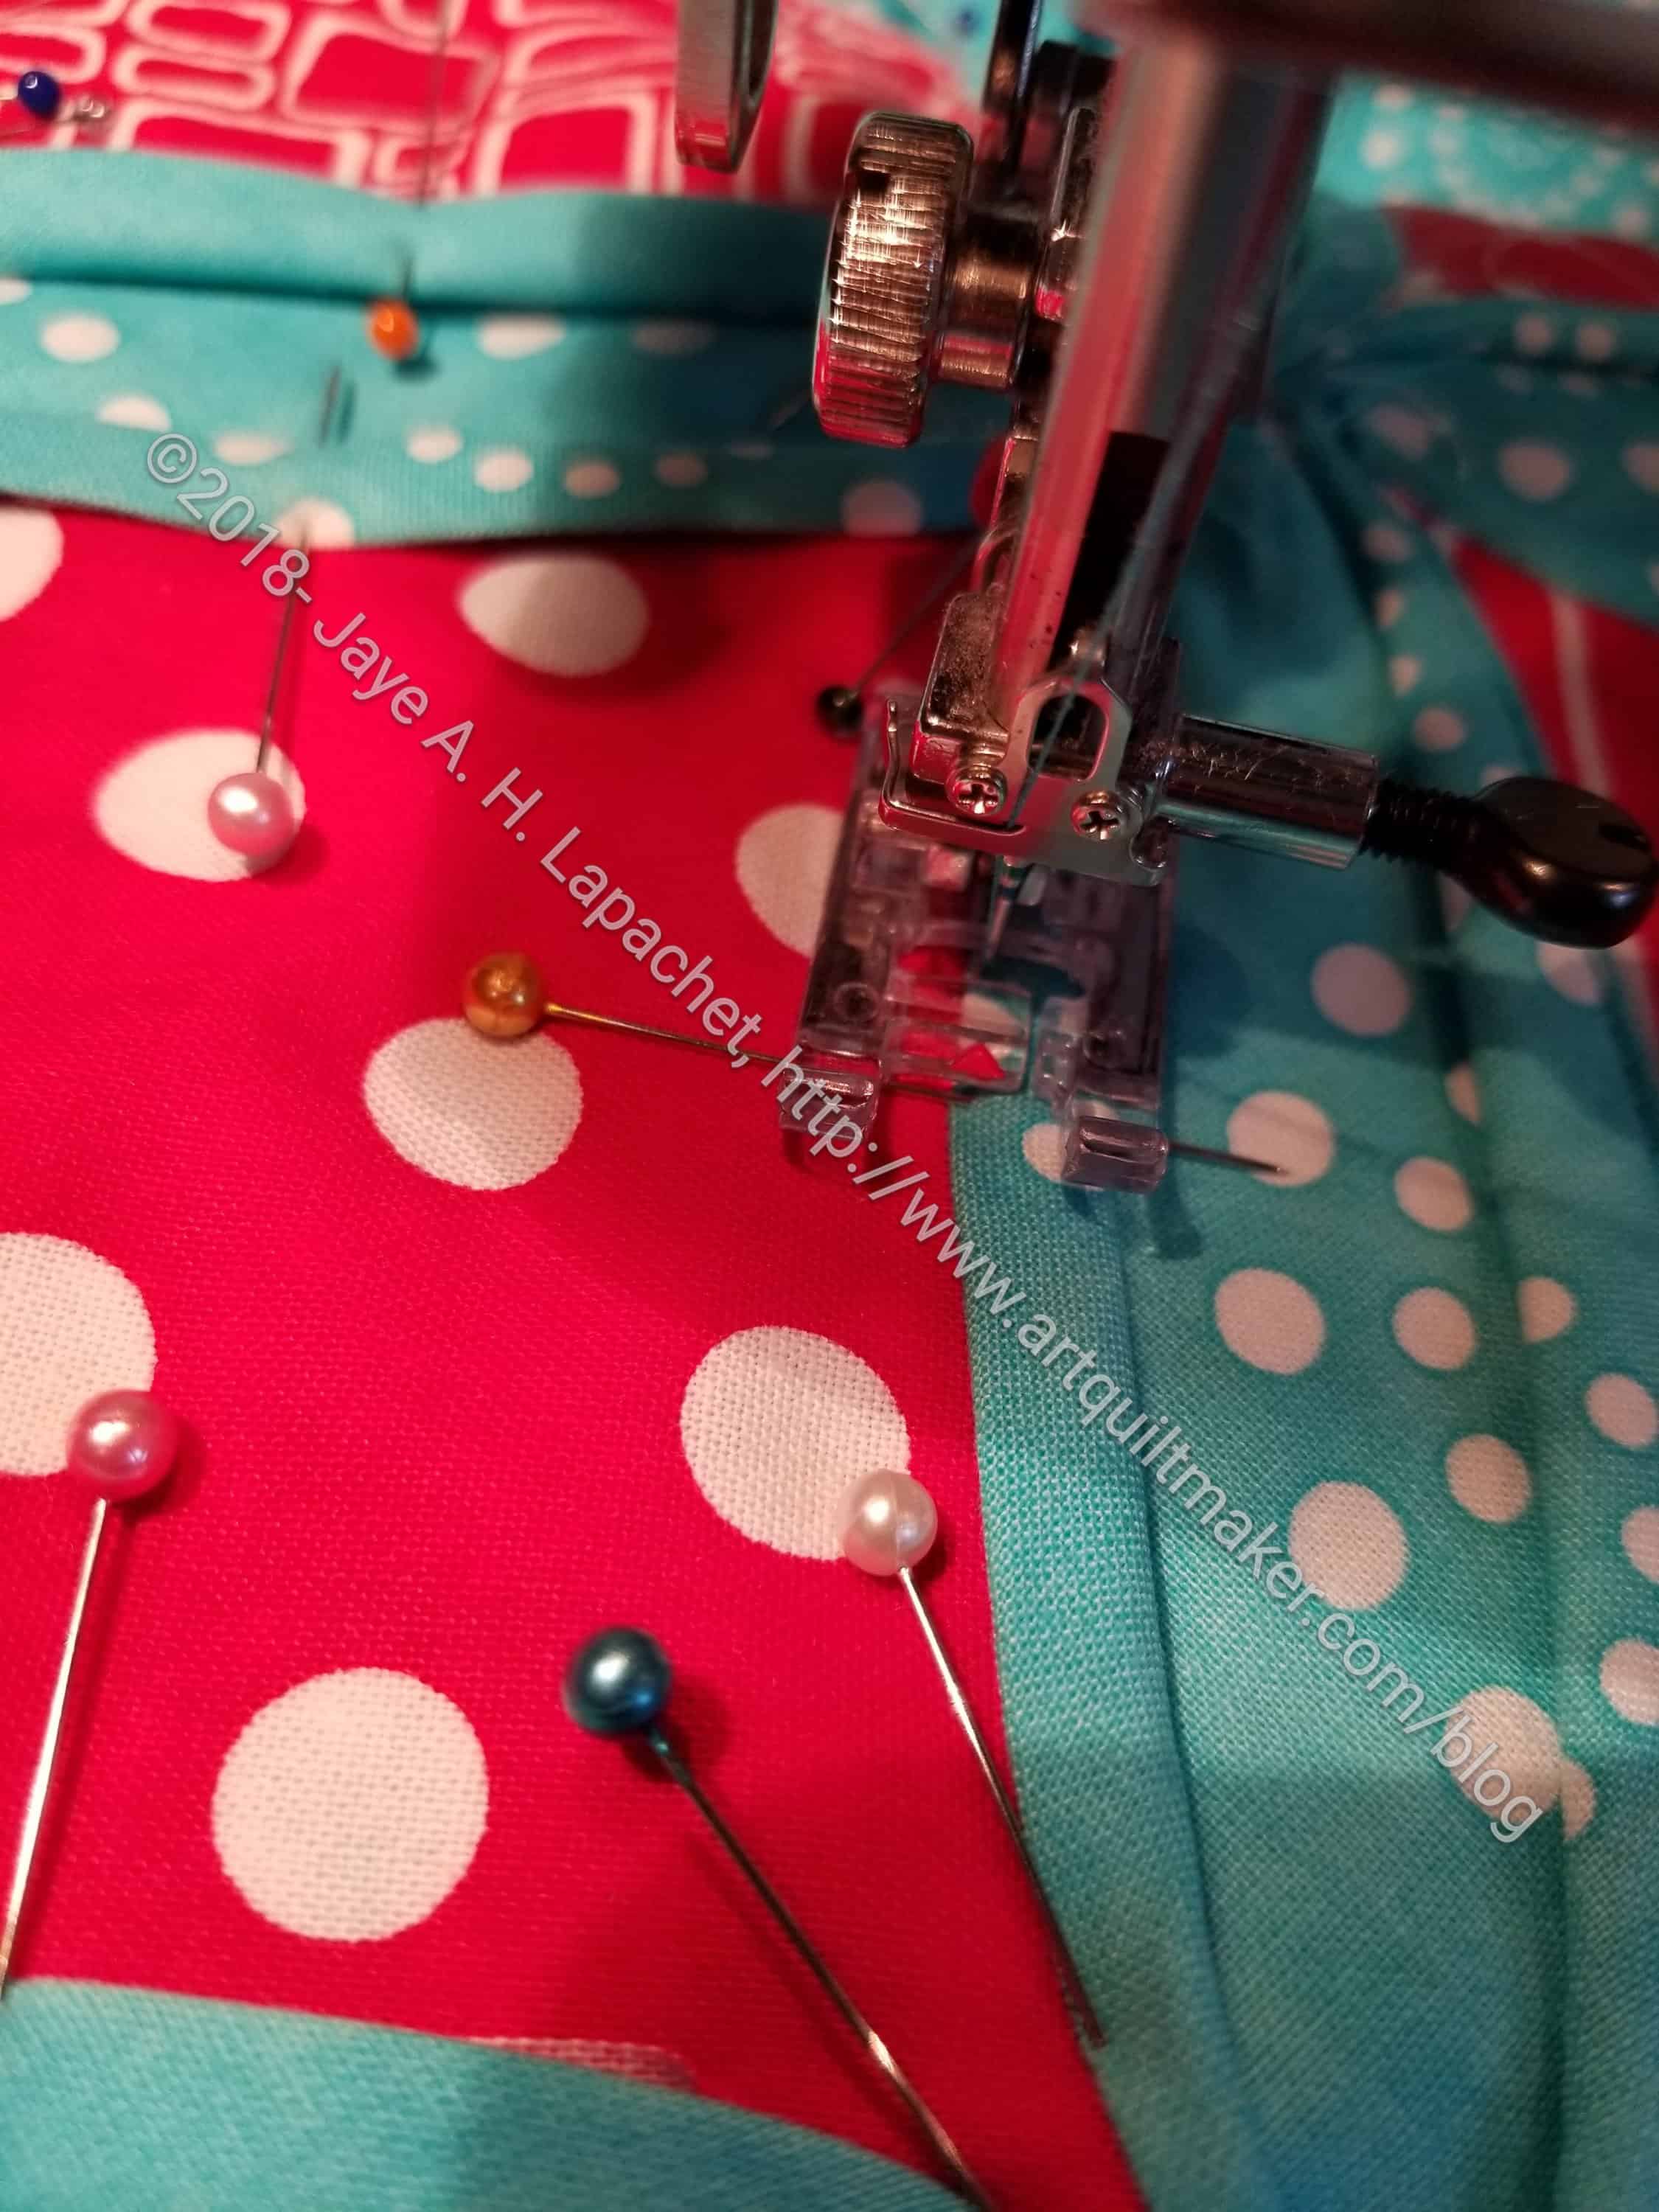
Sew close to the edge of the background fabric
25. Sew very close to the edge of the background. I sewed slowly and carefully. I used the above mentioned sharp tools when I needed a little help. Leave LONG tails so you can knot off and hide the threads
26. Handstitch the other triangle flaps closed with a few stitches. The other tutorials said to use the machine, but 2 stitches is a pain and an irritant on the machine, so I hand sewed the flaps closed when I was sinking threads.
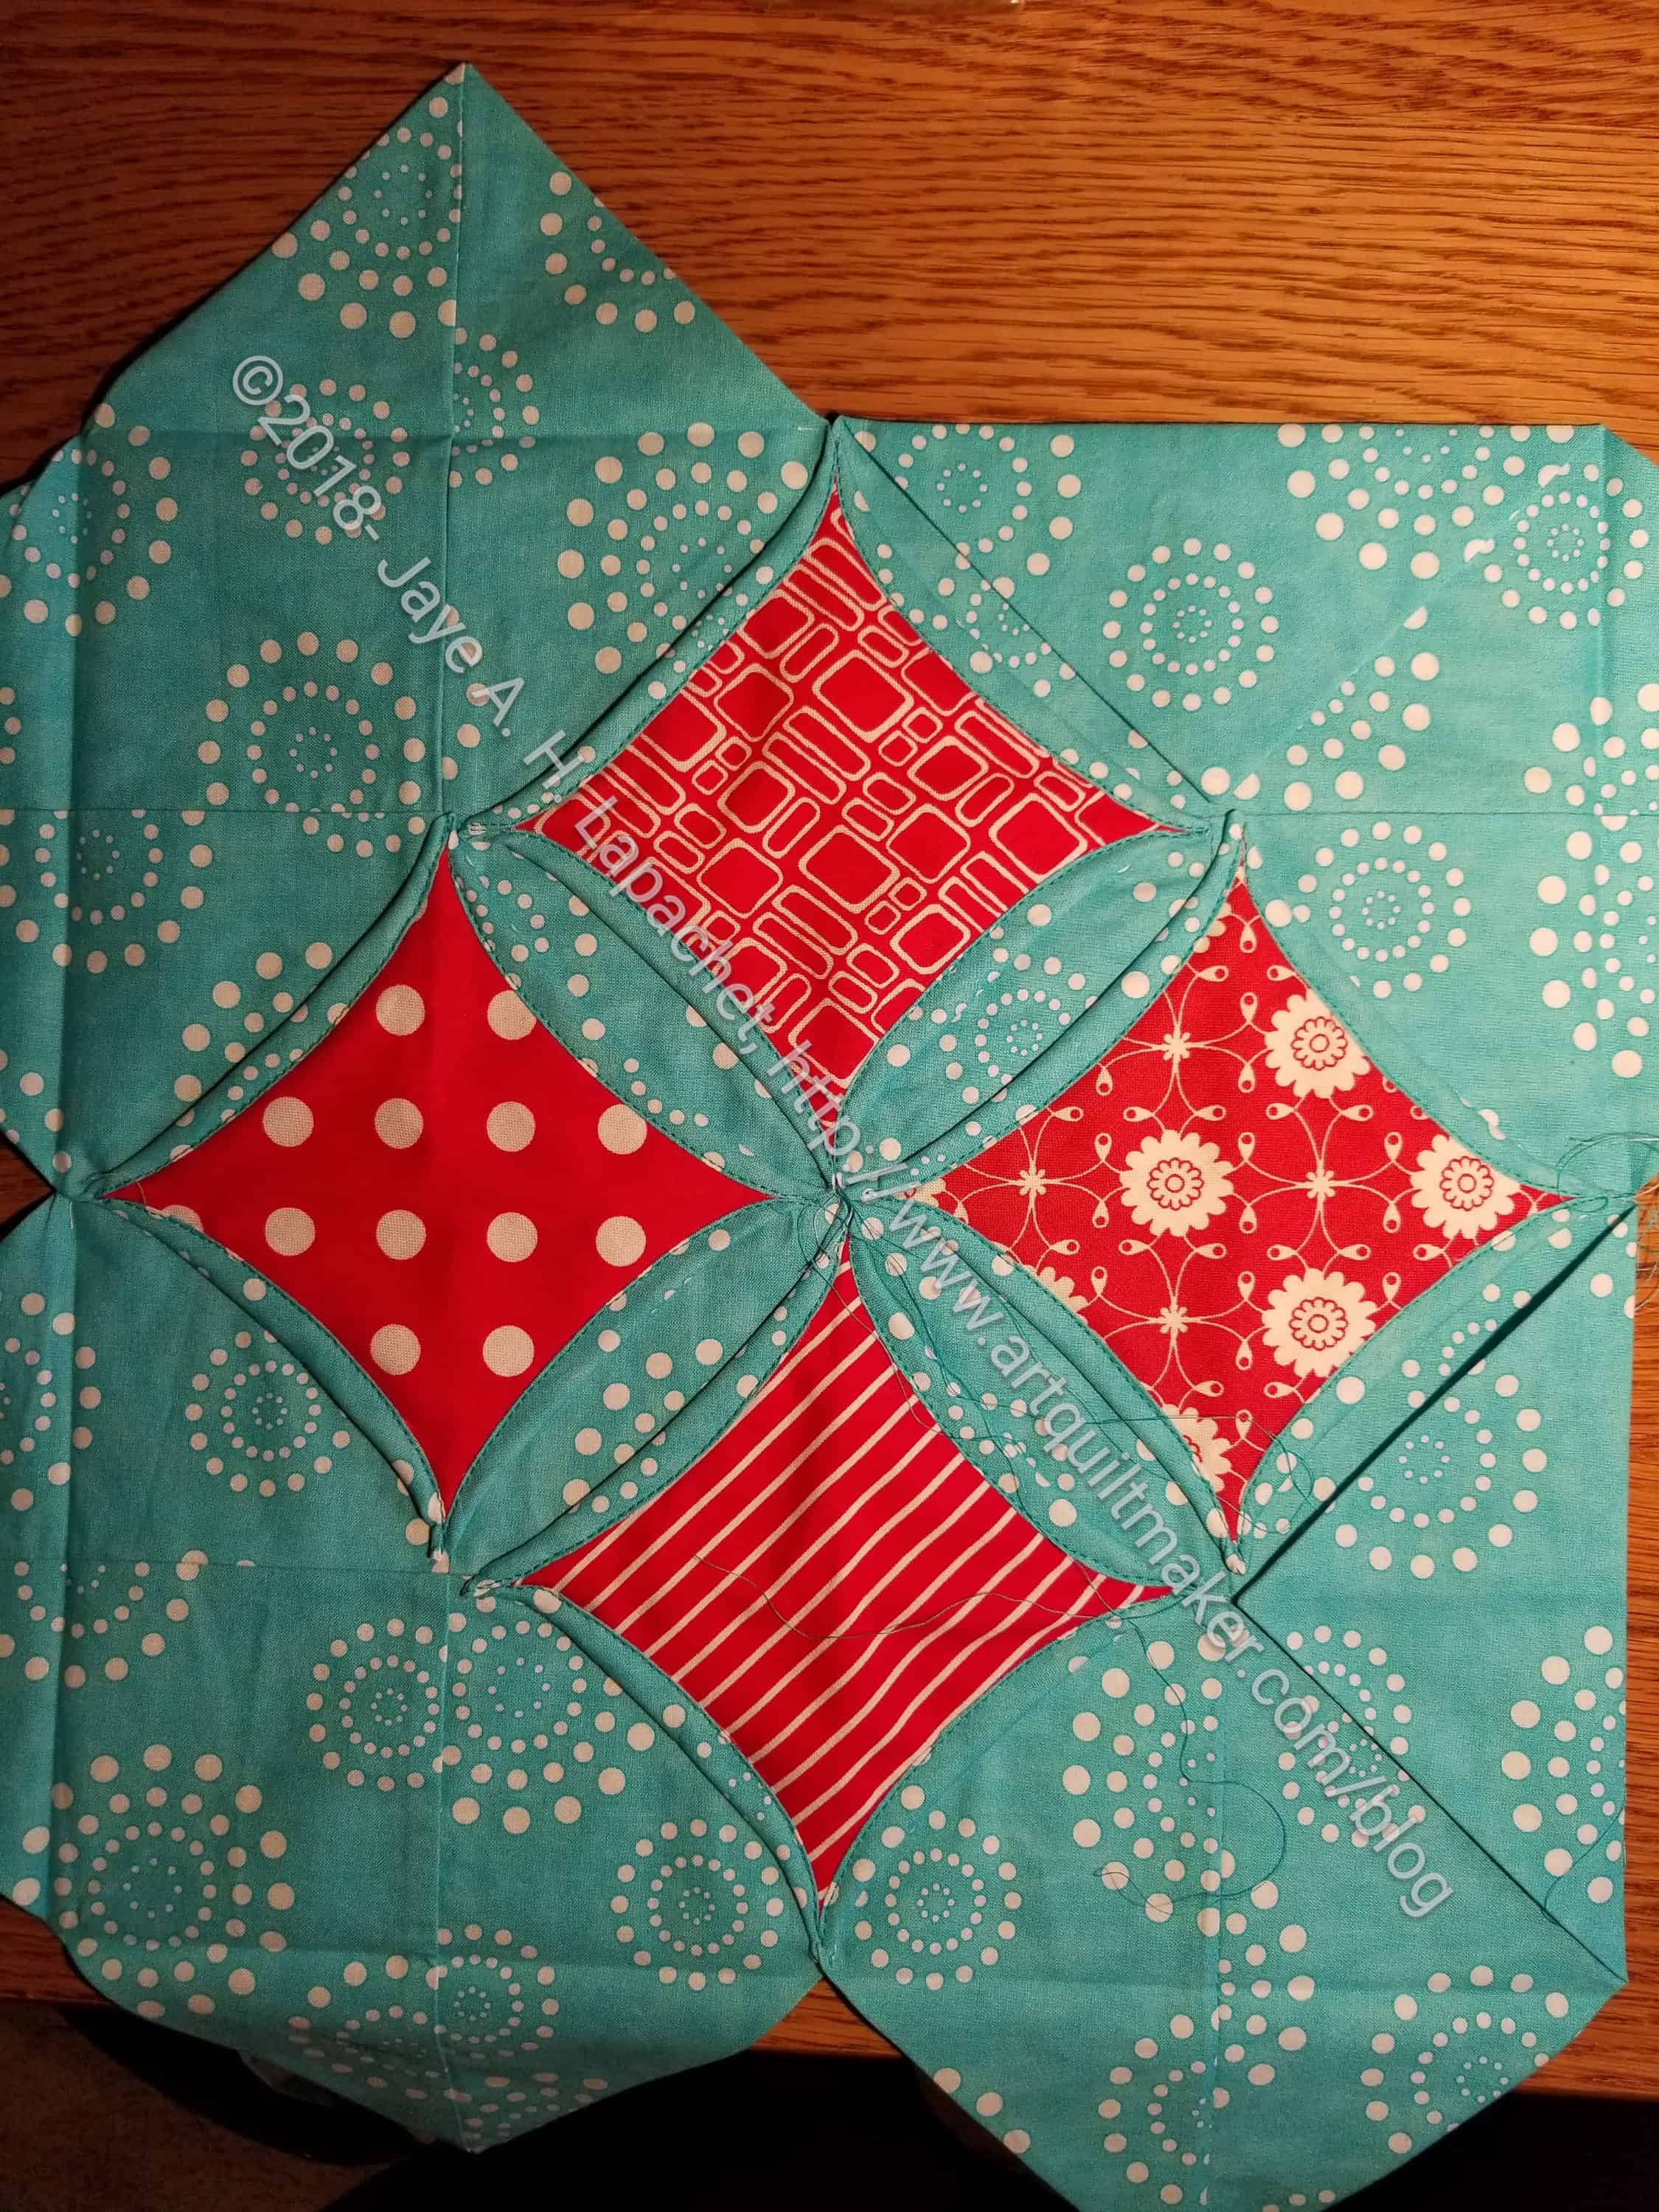
Cathedral Window Block in process
I never thought of making it before, but this block did kind of take my fancy. This is kind of a strange block, partially because of all of the layers. It is lumpier than I expected. Warn your longarmer about it.
Resources:
Fons & Porter Cathedral Window block– I originally found the instructions in one of their magazines as part of their ‘learning to quilt* series’. I had to go looking for other instructions when I found the directions had no sizes or actual cutting instructions. Directions are brief.
Lovely Little Handmades Cathedral Window block – uses a printed background, so you can see how that works. Most people use white, so it was a little confusing for me when I wanted to use the blue.
Sometimes Crafter Cathedral Window block – some missing detail, but has the instructions for cutting the right sized patches. I also don’t like it that the viewer cannot enlarge the photos to see the details.
*Nota bene: not sure if this is the correct name, but it describes the basic idea of the series.