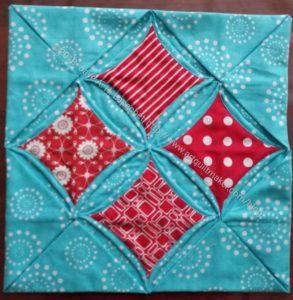
I decided to make this block after finding I needed one more block to complete my Aqua-Red Sampler. I have never made one of these, so I thought “what the heck?”. I had seen some directions for it and it caught my attention. As mentioned, I had to cobble together instructions from at least three different tutorials to be able to make the block. Below is my version. The tutorials I referenced are noted below.
Finished Block Size: 12 inches (12.5 unfinished)
Supplies
- Fabric
- In this tutorial, the background is turquoise and the foreground is red.
- Thread – you might want to use your regular piecing thread for the first part of the directions, then switch to a thread that matches the background fabric for sewing the curves shut
- Seam ripper (I use a Clover ergonomic seam ripper)
- Sewing machine
- 1/4 inch foot
- applique’ foot (foot with a center mark)
- square ruler at least 12.5 inches square
- long ruler at least 12 inches long (I use a 3.5 x 12.5 Creative Grids)
- snips or scissors
- Pins
- Iron
- Ironing surface
- Tool to poke out corners
- A pen or pencil you can use to draw on fabric (I like Sewline pencils)
- Stiletto or dental pick type instrument (something thin and pointy)
- hand sewing needle
Instructions for making a 12″ (finished) Cathedral Windows block
1. Cut 4 squares of background fabric 12.5 inches by 12.5 inches
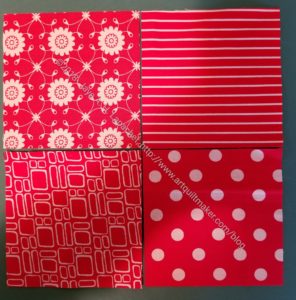
2. Cut 4 squares for inset pieces 4 inches by 4 inches.
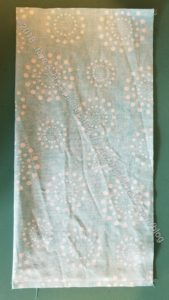
3. Fold each of the 4 background squares in half. This will make your 12.5 x 12.5 inch squares into rectangles (e.g. do not fold NOT along the diagonal).
- Hint: I sew all four one after another, but you can sew one at a time, if you prefer.
3A. Sew along the short side, backstitching at the beginning and the end.
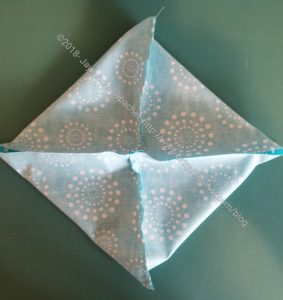
4. Open your rectangles and match up the raw edges.
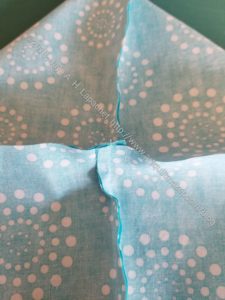
- Hint: I nest the center seams and pin, starting in the middle
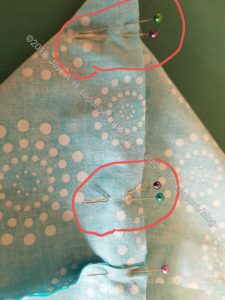
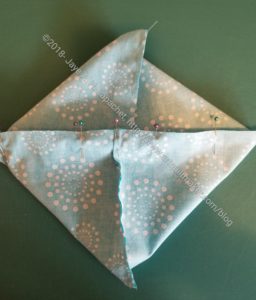
- Hint: leave an opening 2-3 fingers wide for later turning. I mark this with two pins right next to each other.
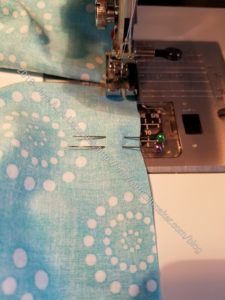
5. Sew your pinned seam shut except for the opening you have left.
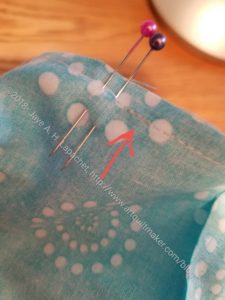
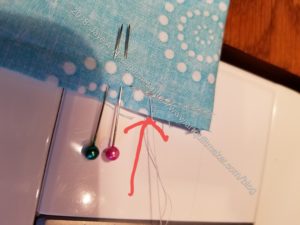
- Hint: I backstitch at the beginning and end of the seams including next to the opening. Yes, it is a hassle to start and stop, but I don’t want the edges of the seams to come apart when I turn.
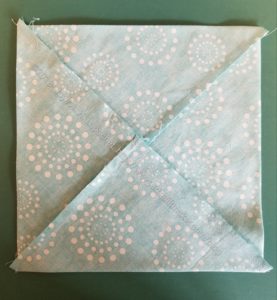
6. Place recently sewn squares on the ironing board and smooth out wrong side out (above). They should make nice squares.
7. Press nested seams in opposite directions from the center out.
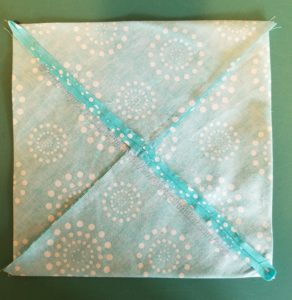
8. Press long seams in one direction, being careful to line up edge of opening as best you can. You can press this seam open if you want.
You should now have 4 nice flat squares with wrong sides out.
9. Turn squares right sides out.
10 Poke out corners carefully. I use a knitting needle whose mate broke.
Your squares are now on the bias, so be careful when you handle them.
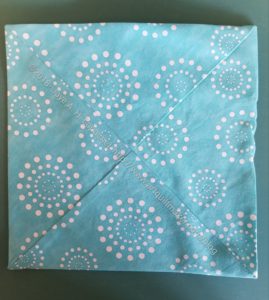
10A. Press
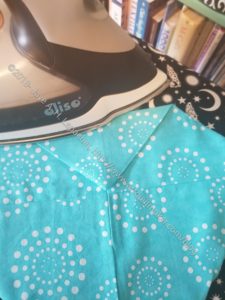
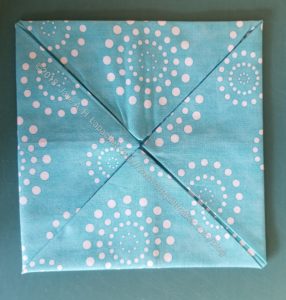
11. Fold corners into the center. Do this with all four corners and make a new square. The square should be 6 inches.
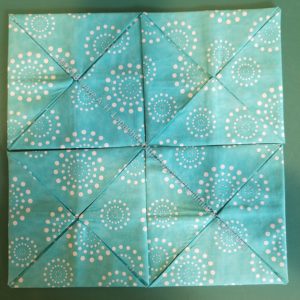
12. Lay out the blocks in a 2 x 2 grid, so you can see what you have
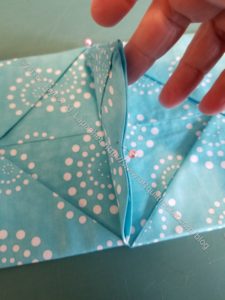
13. Pin the center triangles of the two top triangles together. Do the same for the bottom triangles. Now your 2×2 grid will be pinned together in two rectangular sections

14. Using a ruler (I use a 3.5 x 12.5 Creative Grids), and your marking implement (I like Sewline pencils), draw a line in the crease under the triangles you are about to pin
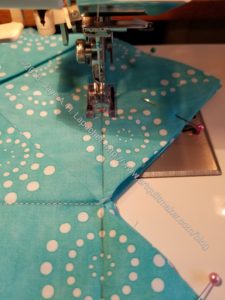
15. Line up squares with backs together and triangles pointing to the right.
16. Put your applique’ foot on your sewing machine.
17. Sew along the crease on both sets.
18. Lay out the 2×2 grid again. Now you will have two ‘rows’. You are going to sew the rows together.
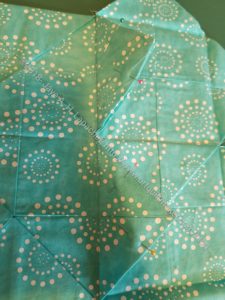
19. Fold up the top triangles from the bottom row and the bottom triangle from the top row.
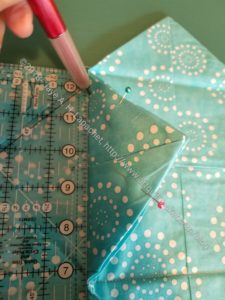
20. Draw a line along the crease at the bottom of the two triangles.
21. Sew along the line. After, you will have your 2×2 grid of squares sewn together and the triangles will be flapping around.
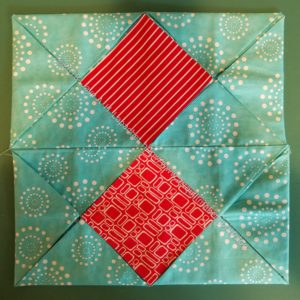
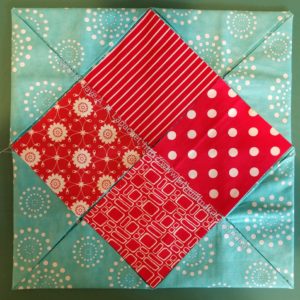
22. Take your foreground triangles and lay them on top of your background
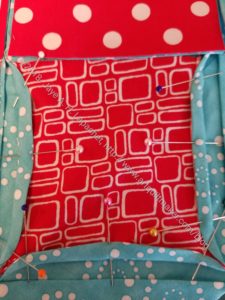
23. Tuck the flaps in towards the center and pin in place. Watch out that the edges of your foreground squares don’t show. Make the edges curve slightly
- Note: this was confusing to figure out and it turned out that I did not have all the sewn triangles in the right place. After you sew the triangles together, make sure you flatten them back in their original places, e.g. one layer of background on top
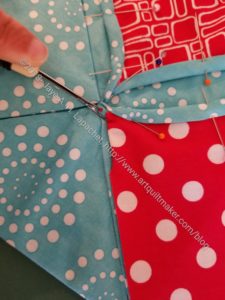
- Note: I had to use a thin sharp tool, like a stiletto or dental instrument to tuck in some of the foreground edges. I sometimes use a seam ripper, which is a very bad habit, because if you aren’t careful, you can rip your fabric. You can definitely trim the foreground fabric, but trim a little at a time very, very carefully
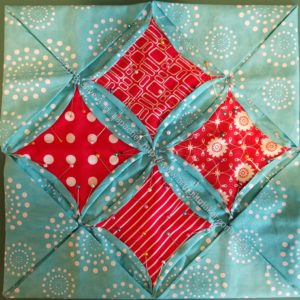
24. Pin each edge in three places with the heads of the pins facing the center of the foreground fabric. This is not micro management; this technique will allow you to sew as long as possible with the pins in place
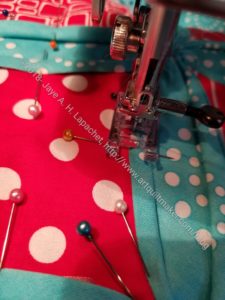
25. Sew very close to the edge of the background. I sewed slowly and carefully. I used the above mentioned sharp tools when I needed a little help. Leave LONG tails so you can knot off and hide the threads
26. Handstitch the other triangle flaps closed with a few stitches. The other tutorials said to use the machine, but 2 stitches is a pain and an irritant on the machine, so I hand sewed the flaps closed when I was sinking threads.
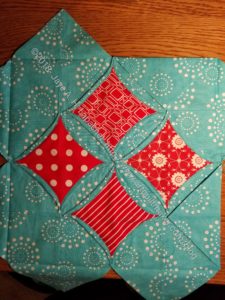
I never thought of making it before, but this block did kind of take my fancy. This is kind of a strange block, partially because of all of the layers. It is lumpier than I expected. Warn your longarmer about it.
Resources:
- Fons & Porter Cathedral Window block– I originally found the instructions in one of their magazines as part of their ‘learning to quilt* series’. I had to go looking for other instructions when I found the directions had no sizes or actual cutting instructions. Directions are brief.
- Lovely Little Handmades Cathedral Window block – uses a printed background, so you can see how that works. Most people use white, so it was a little confusing for me when I wanted to use the blue.
- Sometimes Crafter Cathedral Window block – some missing detail, but has the instructions for cutting the right sized patches. I also don’t like it that the viewer cannot enlarge the photos to see the details.
*Nota bene: not sure if this is the correct name, but it describes the basic idea of the series.
You said to warn your long-arm quilter. I wondered why you said that and then recalled that you are treating this as a single block in an assortment of different blocks in a quilt. If you make a Cathedral Window quilt out of all the same block, I don’t think anything else needs to be done. It is “pre-quilted” right?
I can’t imagine putting a backing on my quilt. It is so heavy already!
Great tutorial btw. I know how hard they can be. I thought yours was really well put together!
I never thought of a Cathedral Window quilt as being pre-quilted, but I think you are right. I am glad you like the tutorial. Thanks.