I made good progress right before Christmas on these bags. I wanted to finish them, but life got in the way.
I was pleased when I attached the lining to the exterior and saw how the embellishment lined up. YAY! It looks like I knew what I was doing!
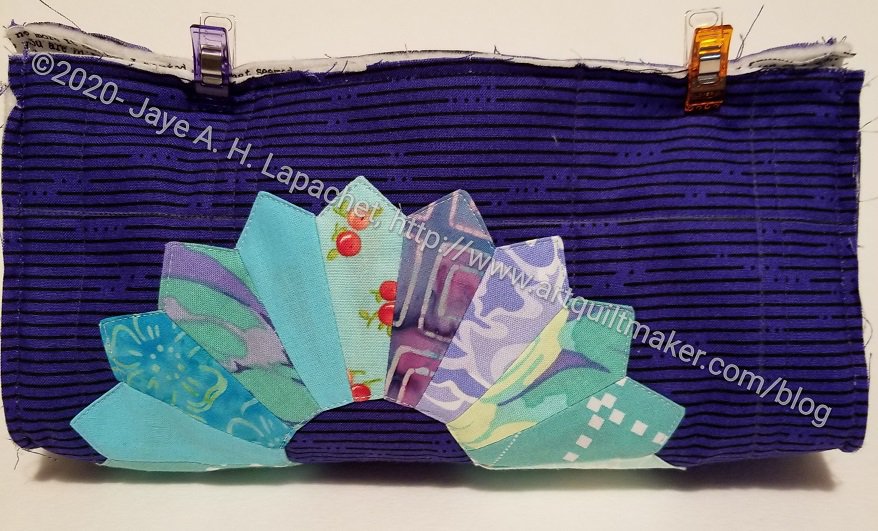
Dresden Plate 2020 STB
The Dresden Plate version came out pretty well also. I like how just part of it shows. I am pleased with the colors, though I wonder if I should have backed the Dresden Plate. I think that dark blue of the exterior is showing through some of the lighter blues. Not a huge deal, but something to consider in the future.
Hexie 2020 STB
I need to adjust my hexagon version a little. Almost the entire motif is on the bottom of the bag and mostly unseeable. 🙁 I am still considering taking the exterior off the lining, ripping out the hexies and re-appliqueing them to the exterior higher up. That is a lot of ripping. I think it is more likely that I will make a new hexie motif and add it to the front where it can be seen. If the exterior fabric weren’t a blender, I would be fine with leaving it as is, but it is a little boring compared to the others.
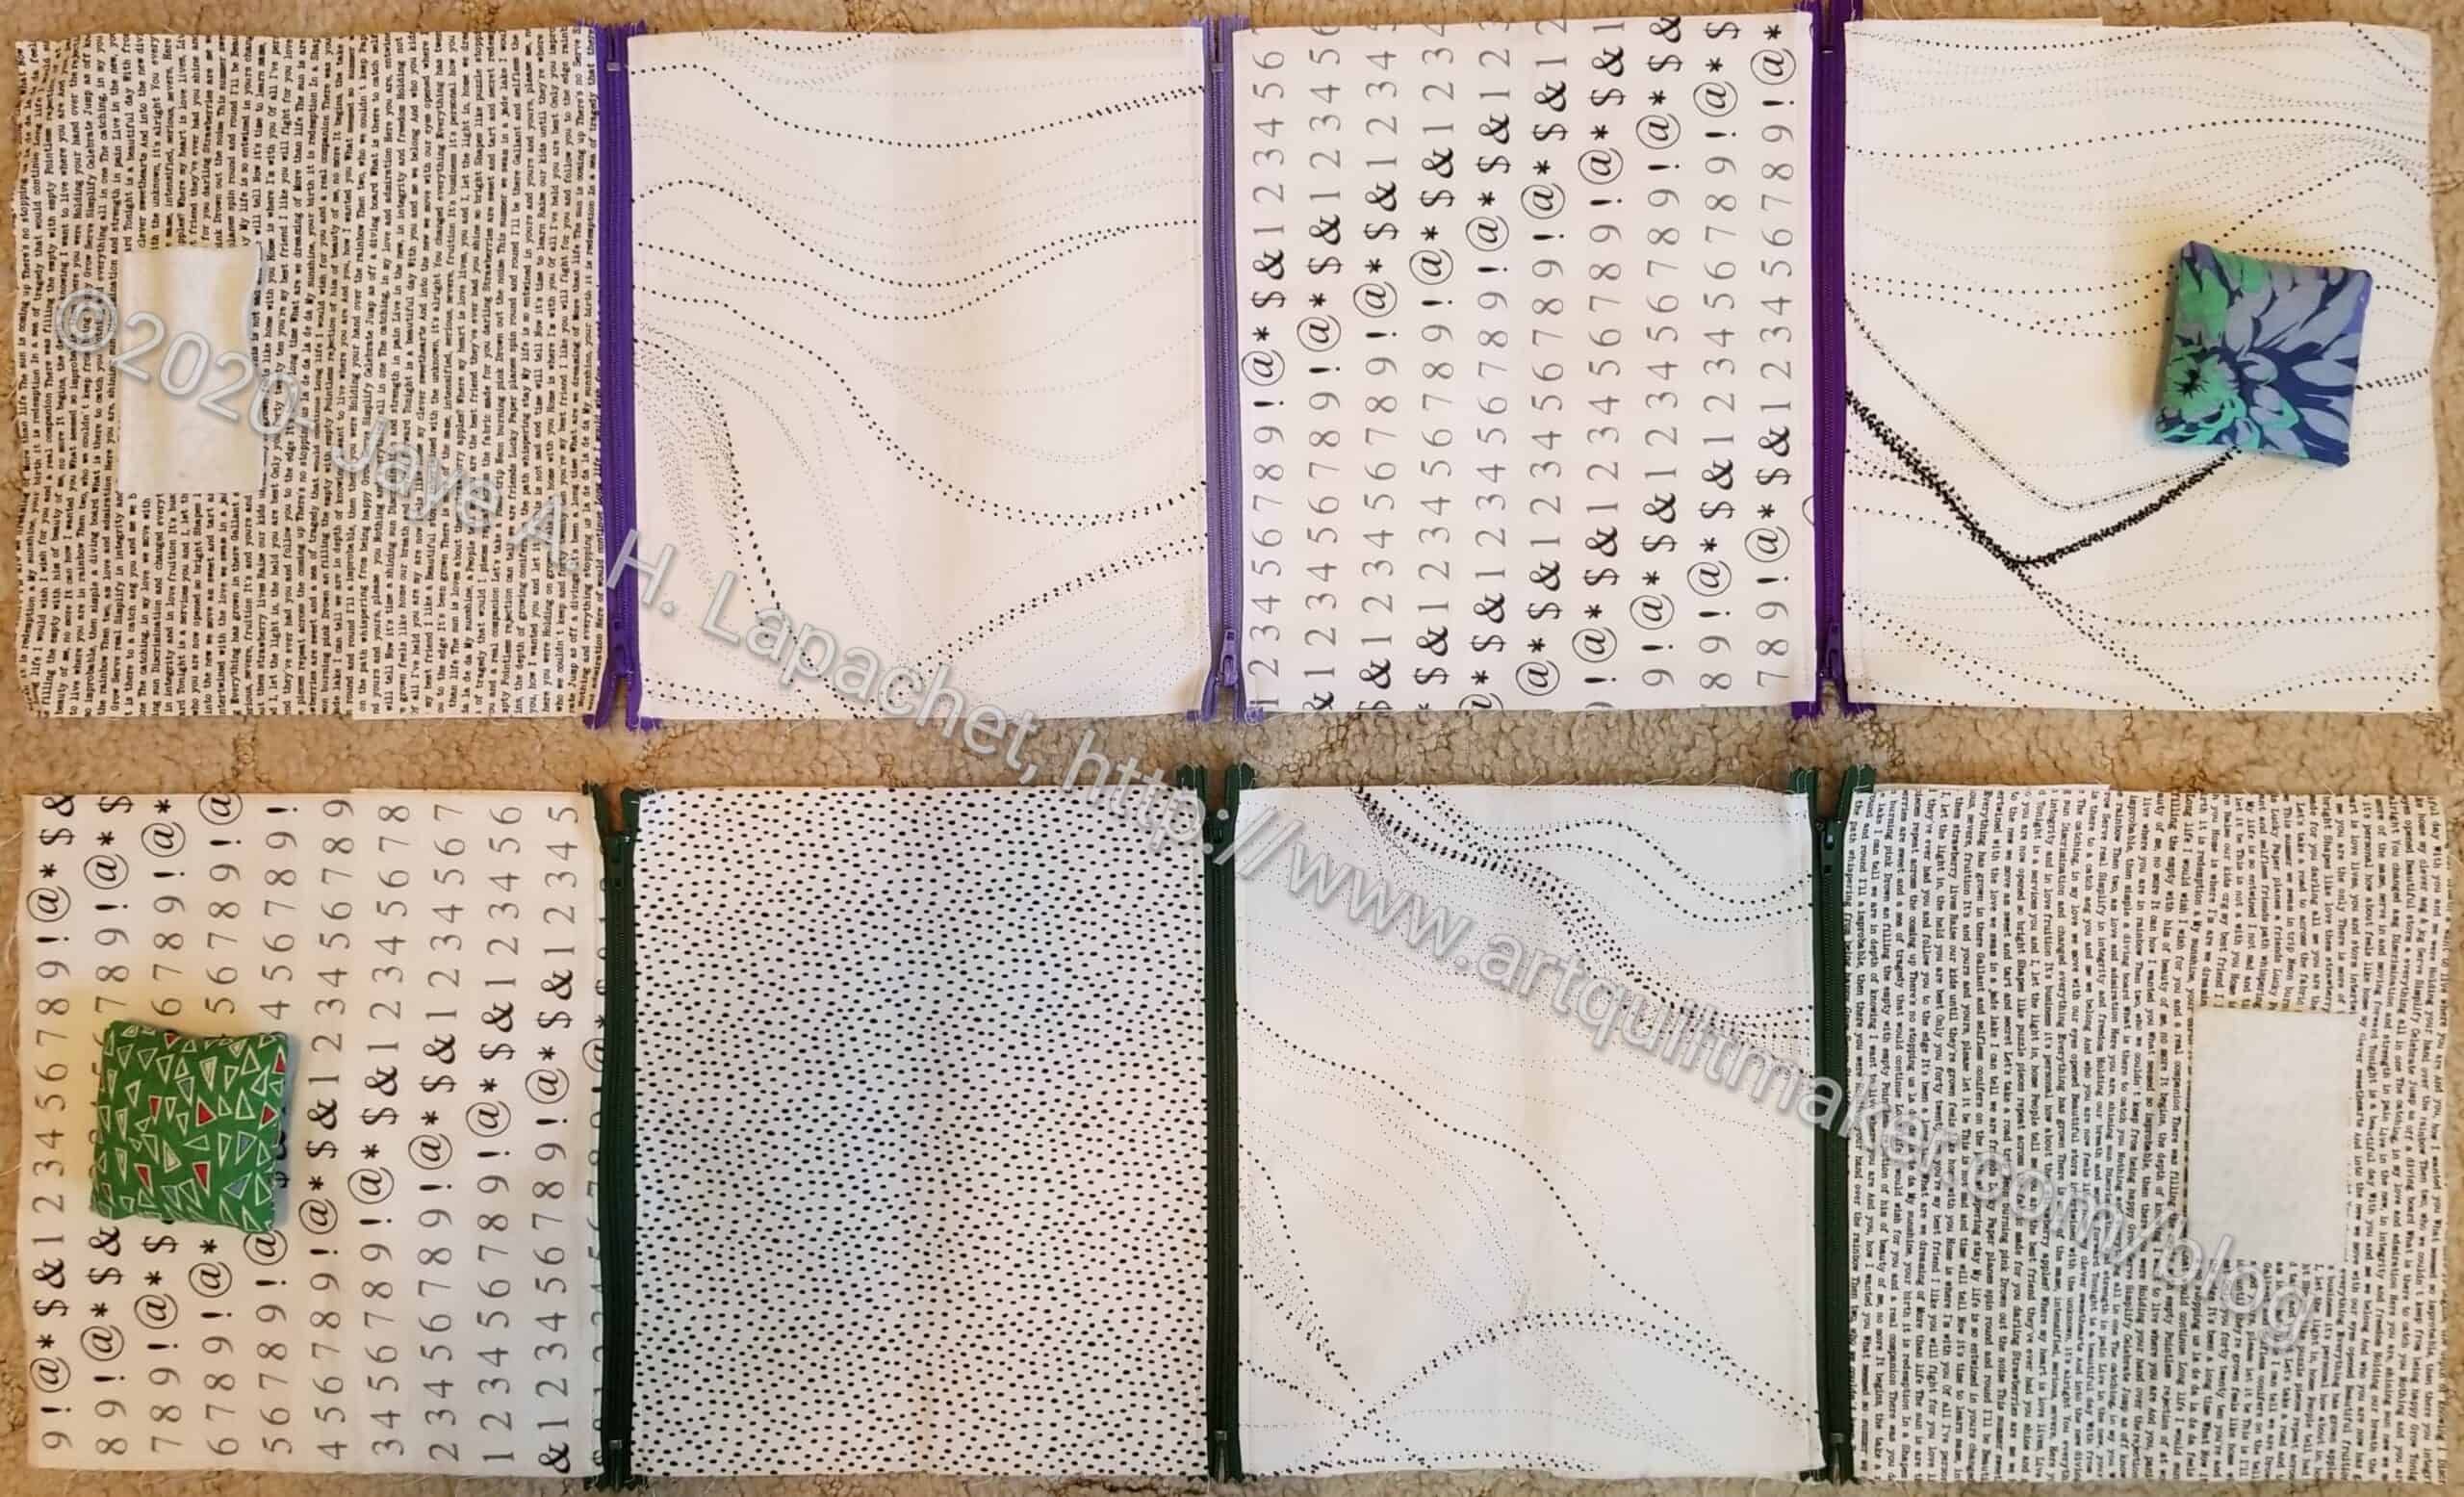
I made good progress on the linings before Christmas. I spent one whole Sunday putting the linings together. As I think I have mentioned, I really need more horizontal surfaces to layout my projects.
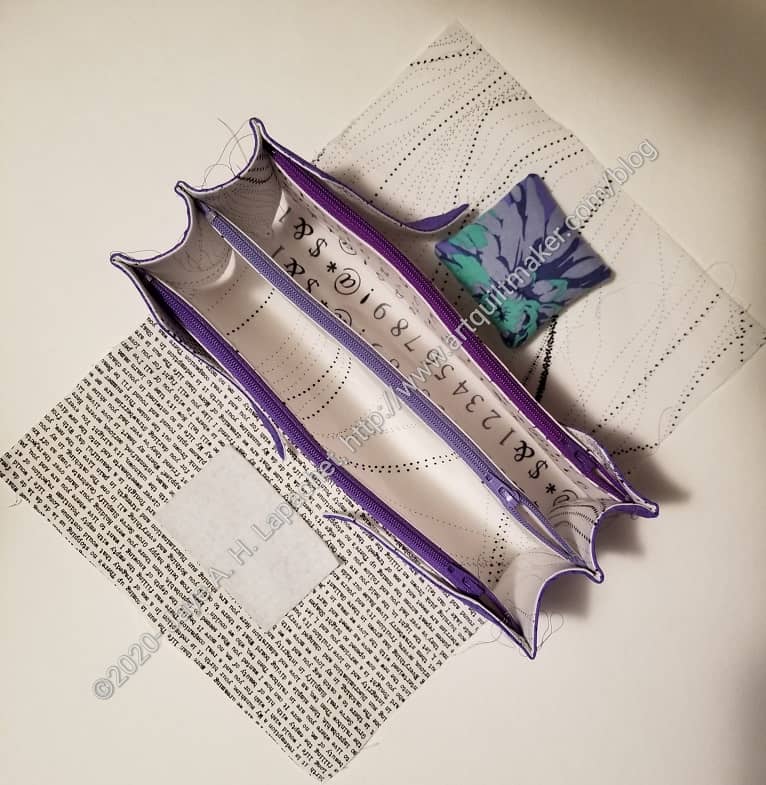
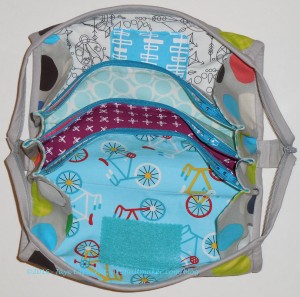
I am pleased with how it sewed up into a 3D lining in a relatively straightforward manner. I used a denim needle this time and the sewing went a lot better. I don’t want to say it was easy, but I didn’t fight with the layers as much as I did last time.
I think the white looks very clean and fresh.
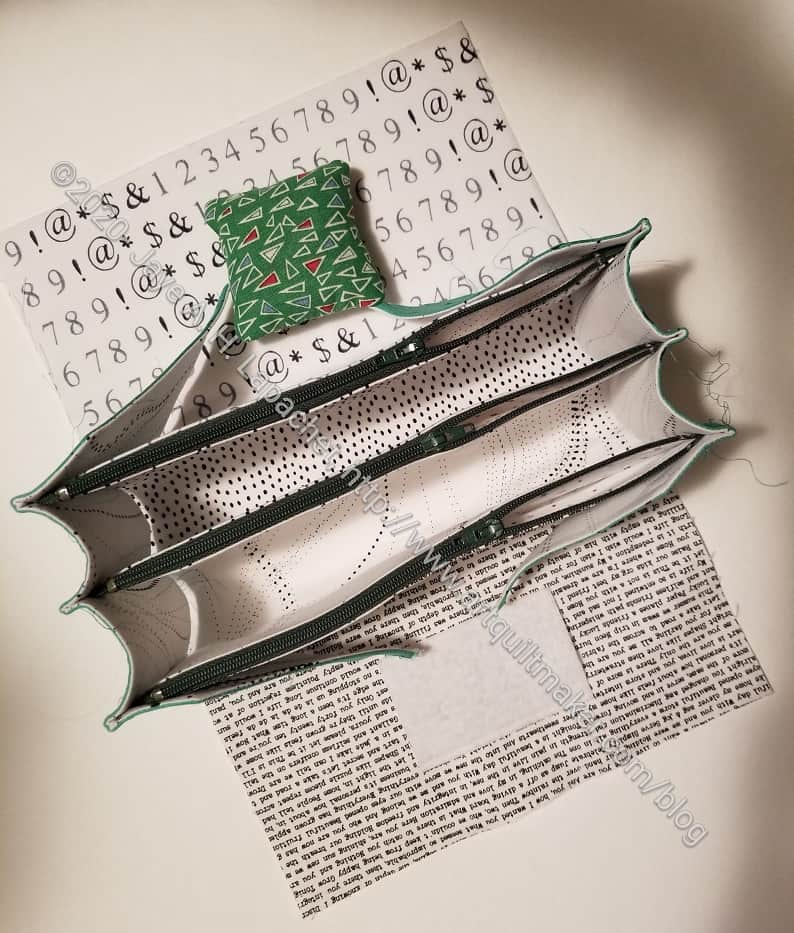
Green Lining – STB 2020
The green version looks good, too. i used a scrap of a vintage feedsack for the pincushion. I don’t know if the recipient will appreciate that touch, but I like it.
The zippers for the inside are forest green. A little boring, but the recipient likes green so….
I have to say that as much as I complain about the Ultimate Carry All Tote, the way she makes the pockets to minimize the layers would work very well with this bag, too.
I am really not disliking this process as much as I have in the past. It is possible that I should say, I am not struggling as much as I have in the past.
After a good day of gift sewing on Saturday, I got back to the Sew Together Bags, finally.
As you know, I am making three. I spoke with Gerre on the phone on Saturday.While we talked I was able to get the pincushions stuffed and stitched to one of the panels. It is a good quiet task and I hadn’t spent the time to do it before Saturday.
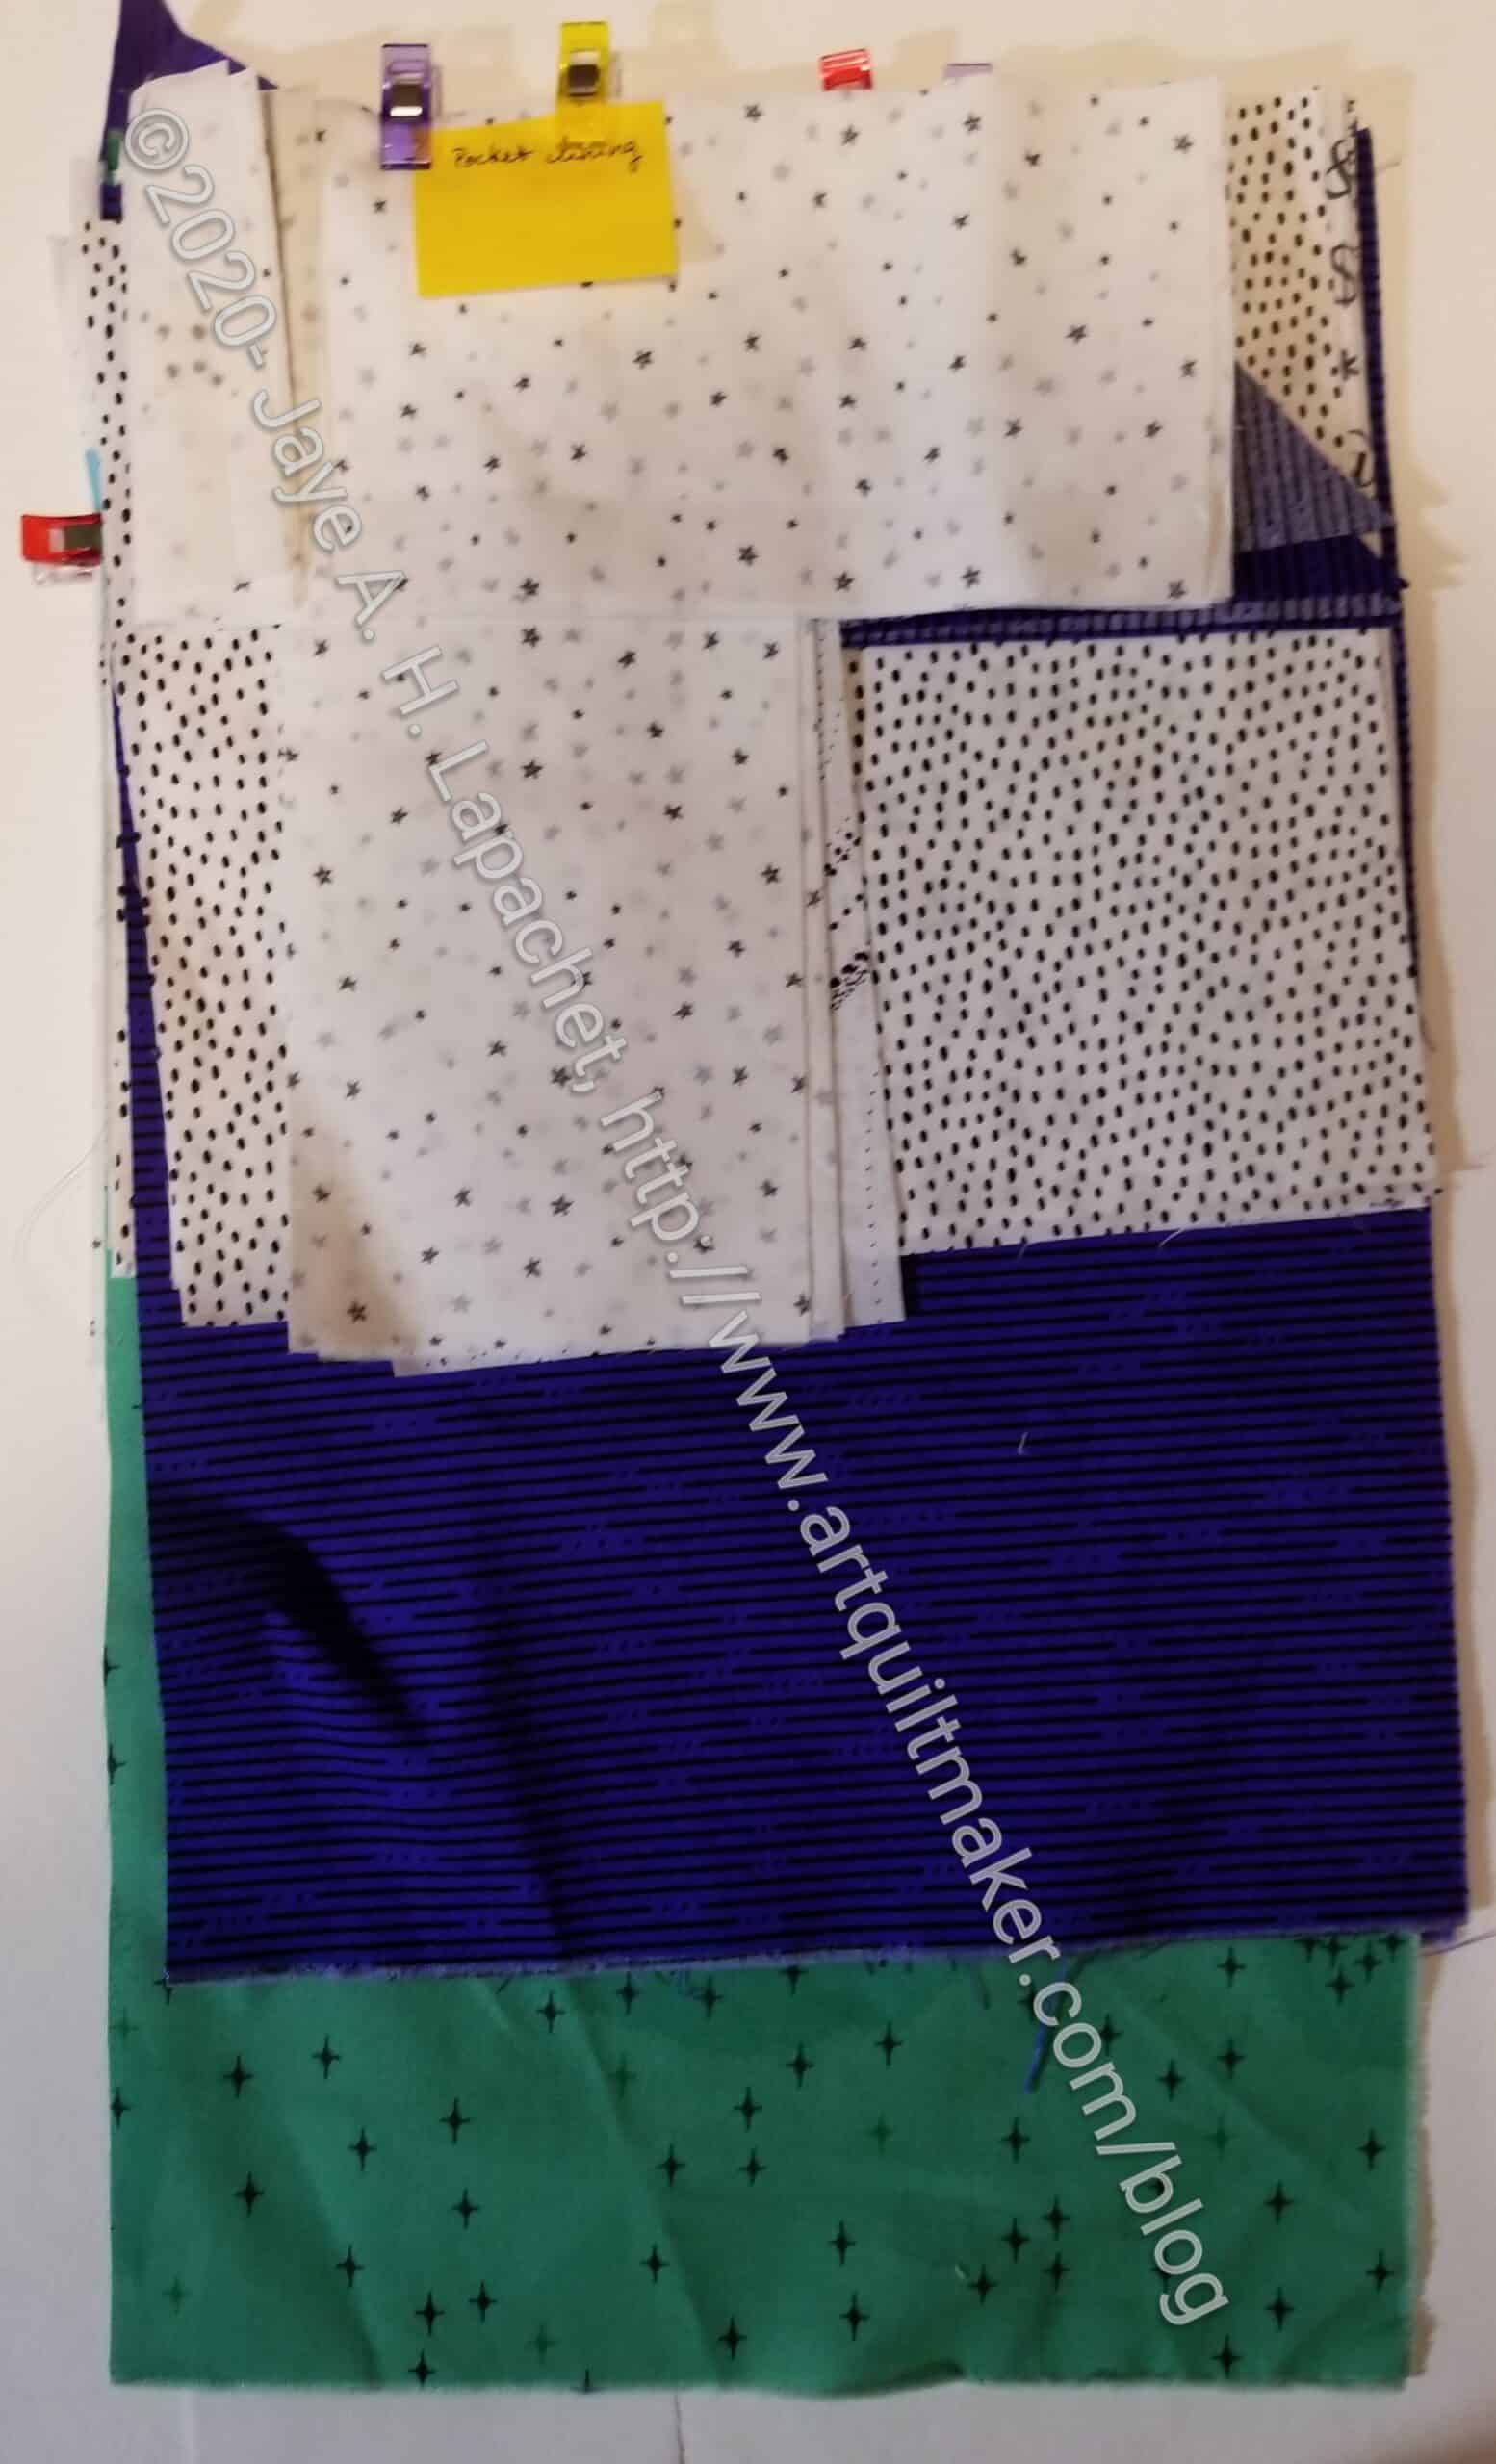
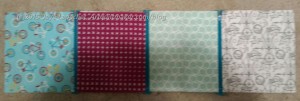
Once Gerre and I finished getting caught up, I set to work sewing the lining together. As you know the lining is made up of the 4 pieces you see in the photo plus 6 pocket linings as well, which are on the bottom.
I did have to resort to the Quilt Barn Sew-a-long tutorials, which were really helpful. I saved them as PDFs and was able to make some annotations that are helpful.
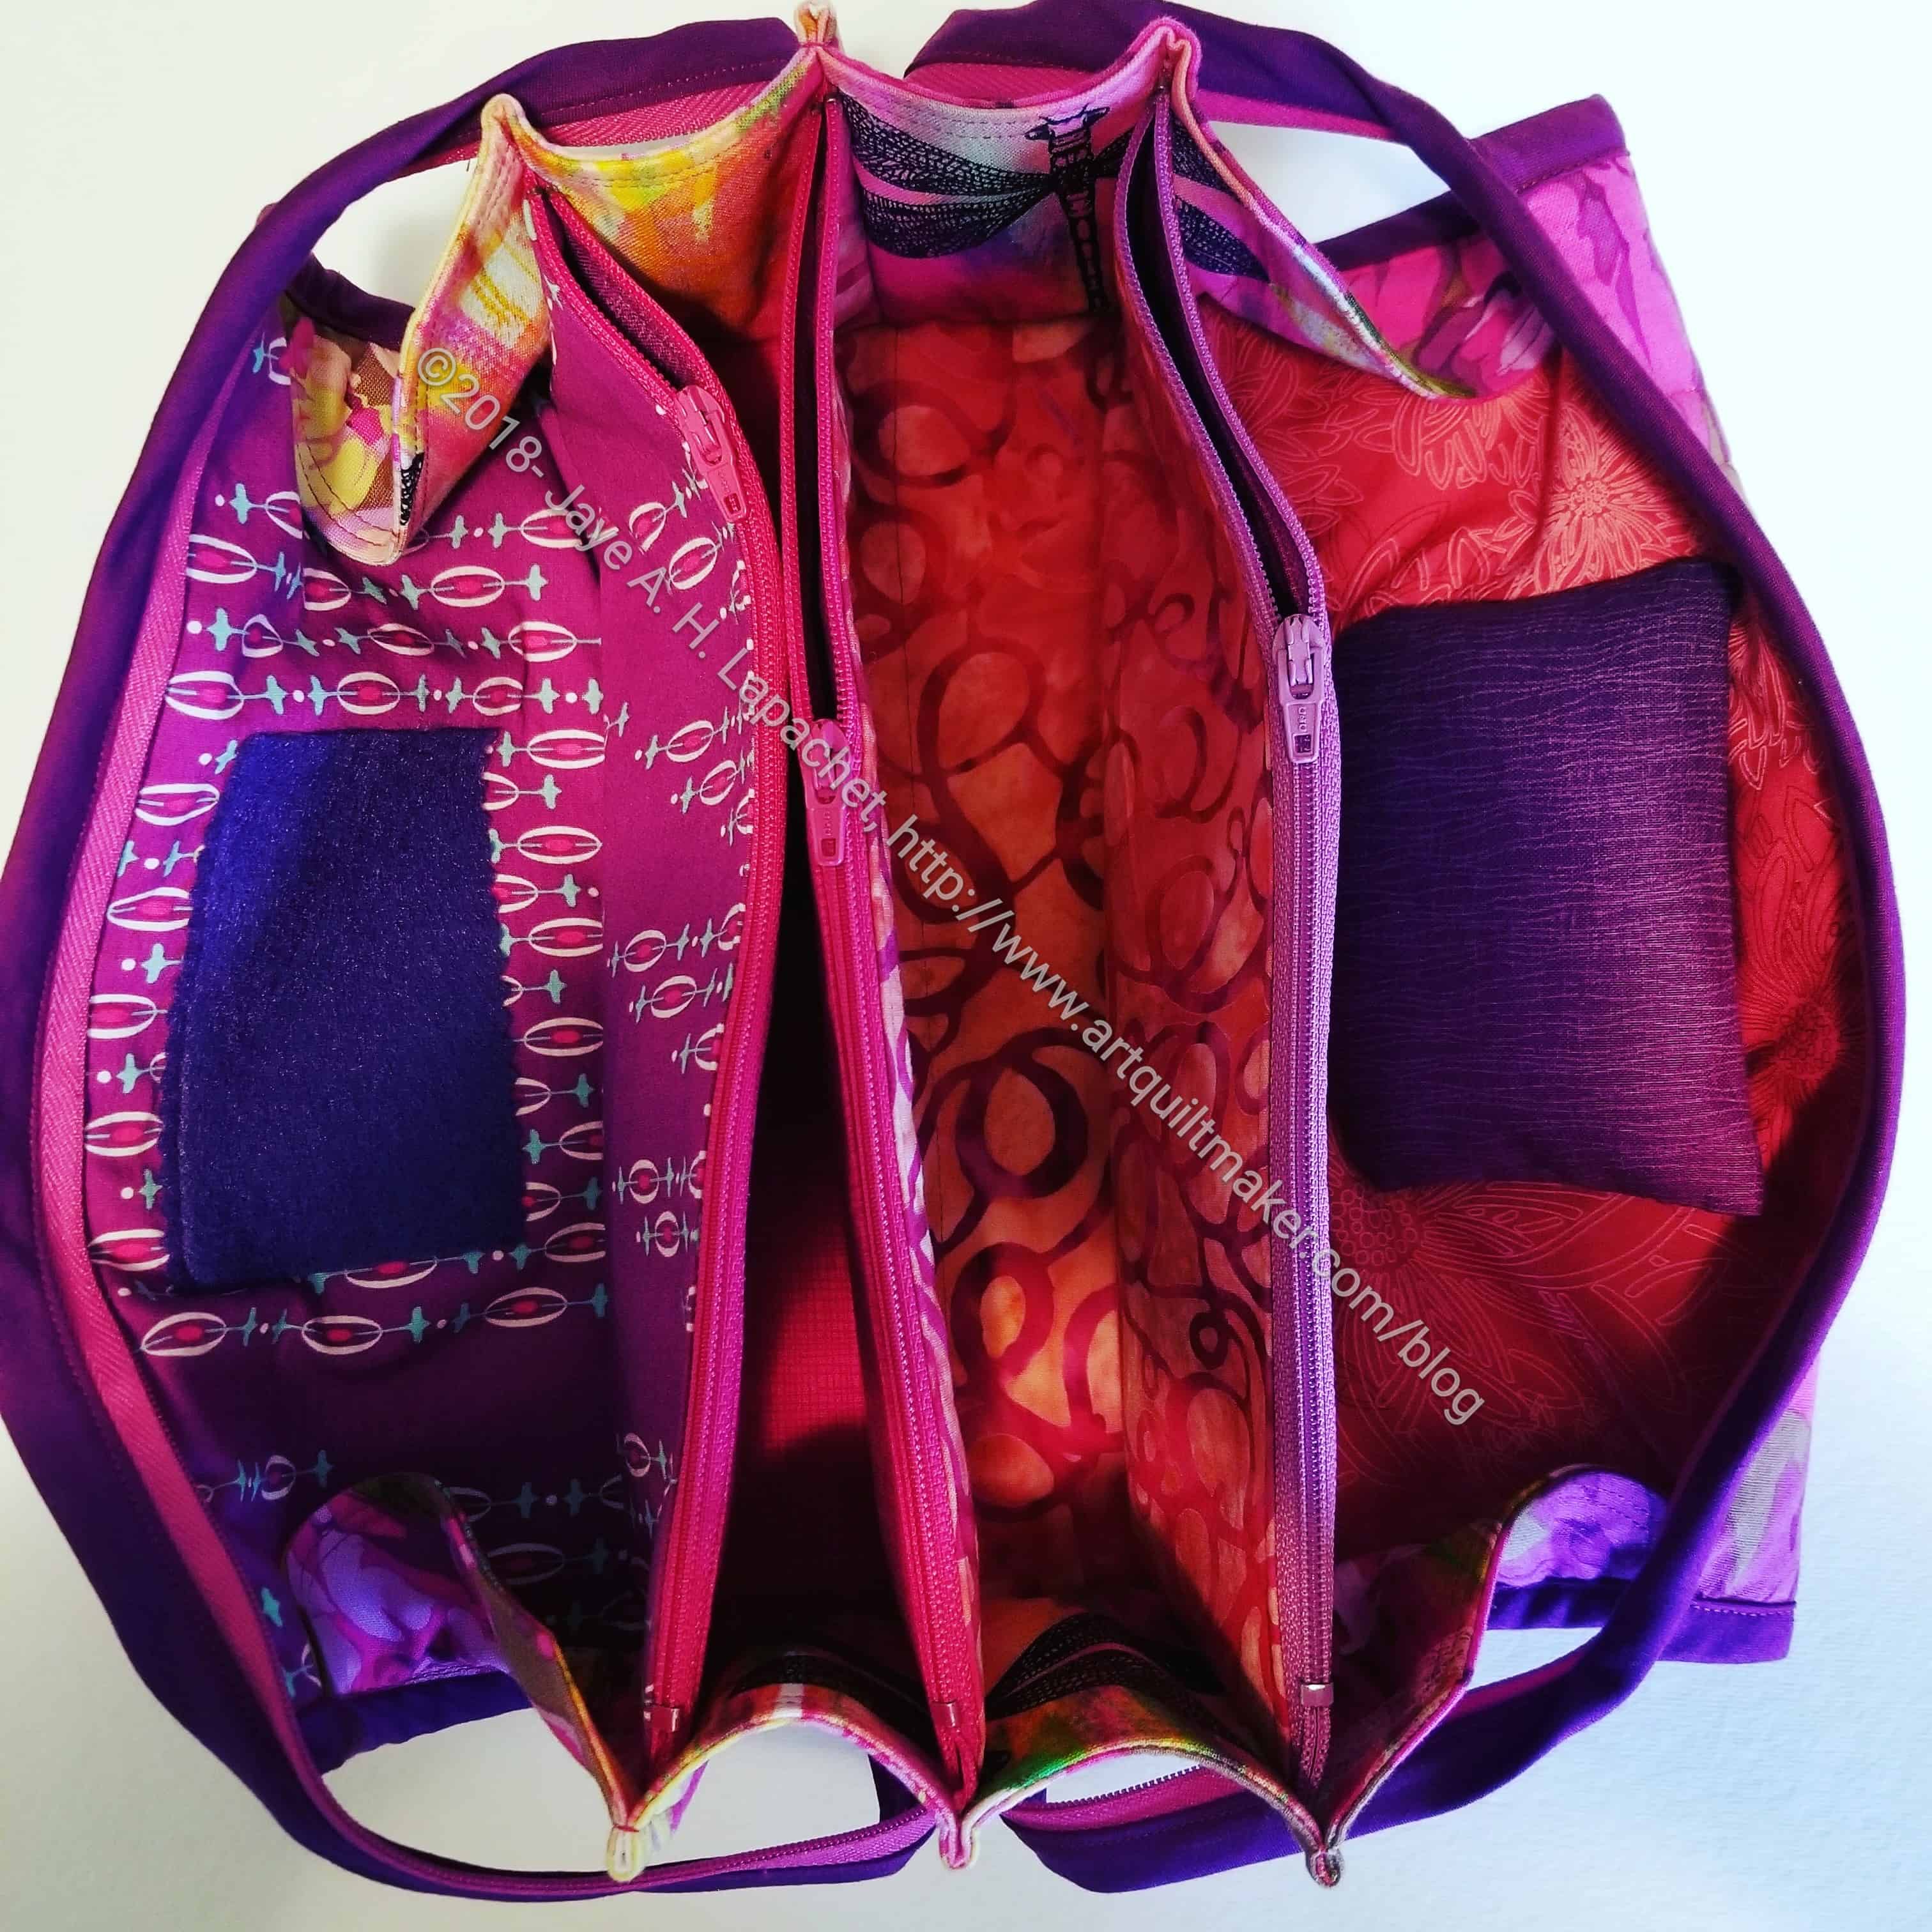
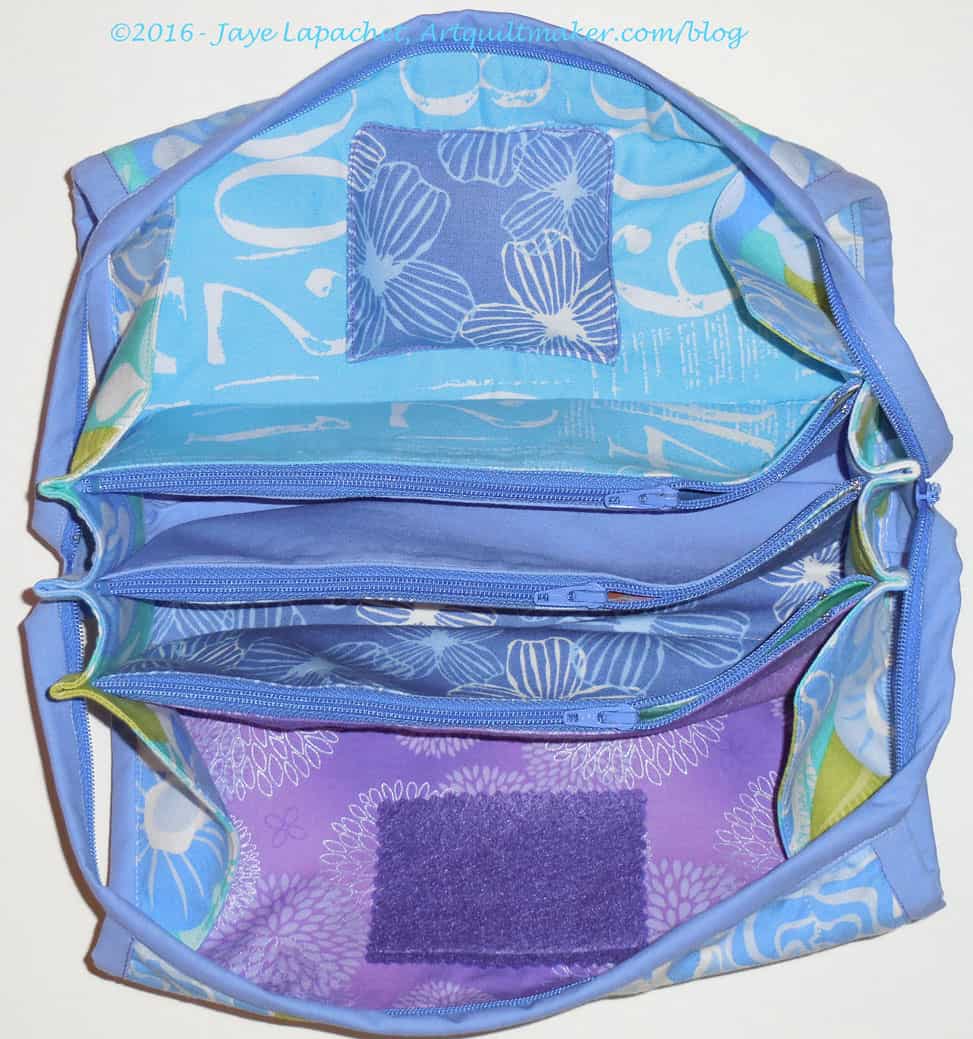
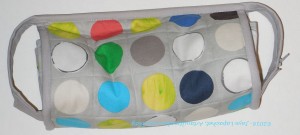
Embroidery Sew Together Bag Open
Seeing the way the all white linings look, I think I will add some color next time. I like the red-violet inside of my embroidery Sew Together Bag.
I was also able to make some progress on the third lining. I didn’t quite finish, however.
I finally sewed the embellishment down to the third of the three Sew Together Bags I am making. I also received the zippers so I can proceed. Last time I received the zippers in two days and this time it took over a week. I guess the mail is really jammed up.
While I was waiting, I appliqued this strange hexagon design on to the outside of the third STB exterior. I think it kind of looks like a DNA strand. I think it will be ok once the bag is complete and rolled up.
I really need space to layout the fabric pieces so I can move forward, but I just don’t have that space, so I have to make the best of it. As soon as I finish the Sheffield bag, space constraints will lessen.
I finished two of the exteriors for the Sew Together Bags I am making. I have quilted the third one, but still need to make the embellishments.
I was able to quilt all of them as leaders and enders while sewing together the chunks of FOTY 2019.
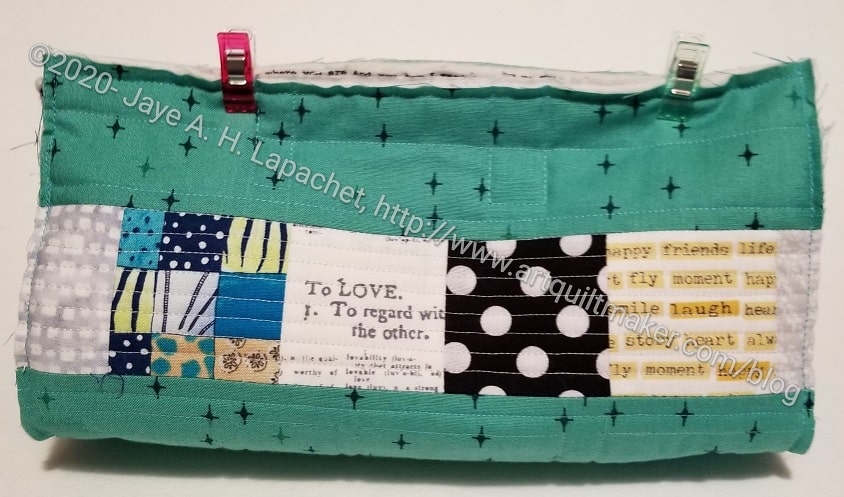
The first one shown includes the mini Dresden Plate I talked about the other day. I made the Dresden Plate for class and added it to the exterior. You might think the placement looks weird, but I didn’t want any of it to be cut off. I wanted it to look ‘modern’ as that is an aesthetic the recipient appreciates. I also wanted as much of it as possible to be seen, so I placed it within the seam allowances (fingers crossed) and above the center line. You may be able to see the pins I used to mark the center.
I appliqued it on using straight stitching this time. My center circle is slightly un-circular and I will have to see if I do something about that.
Embellished Exterior for Sew Together Bag #1
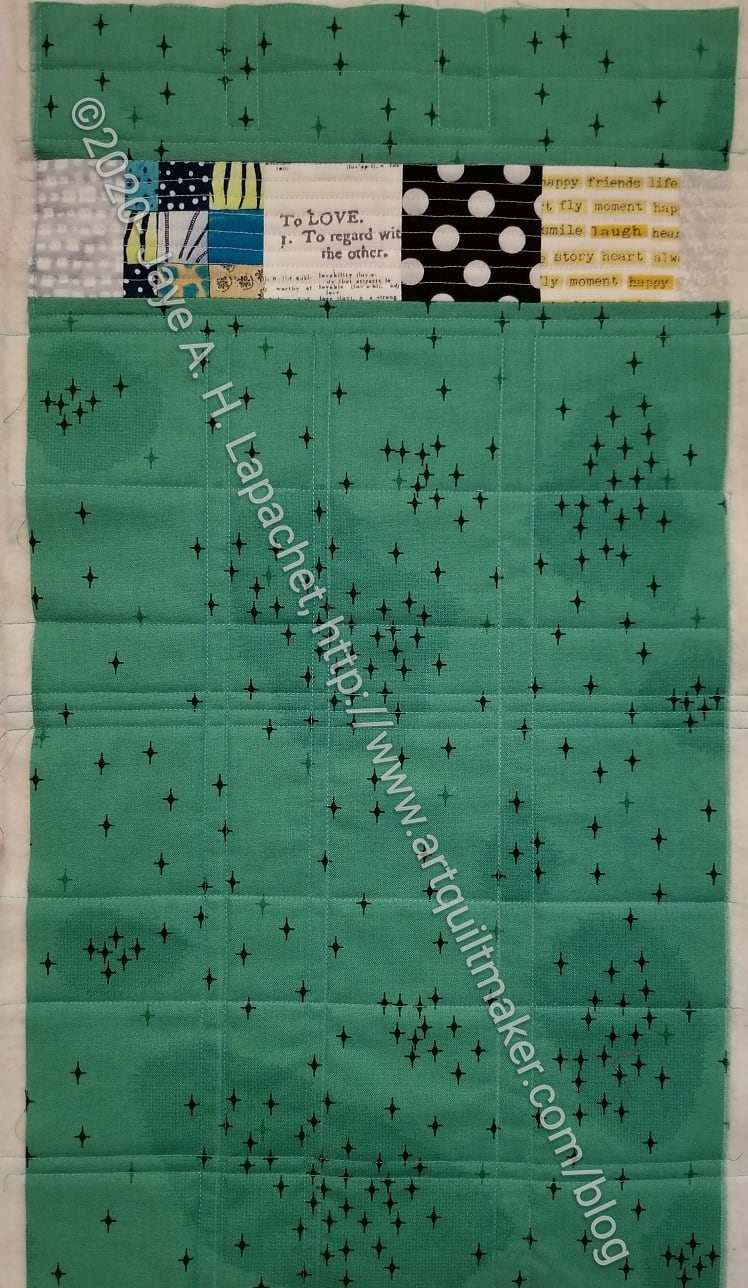
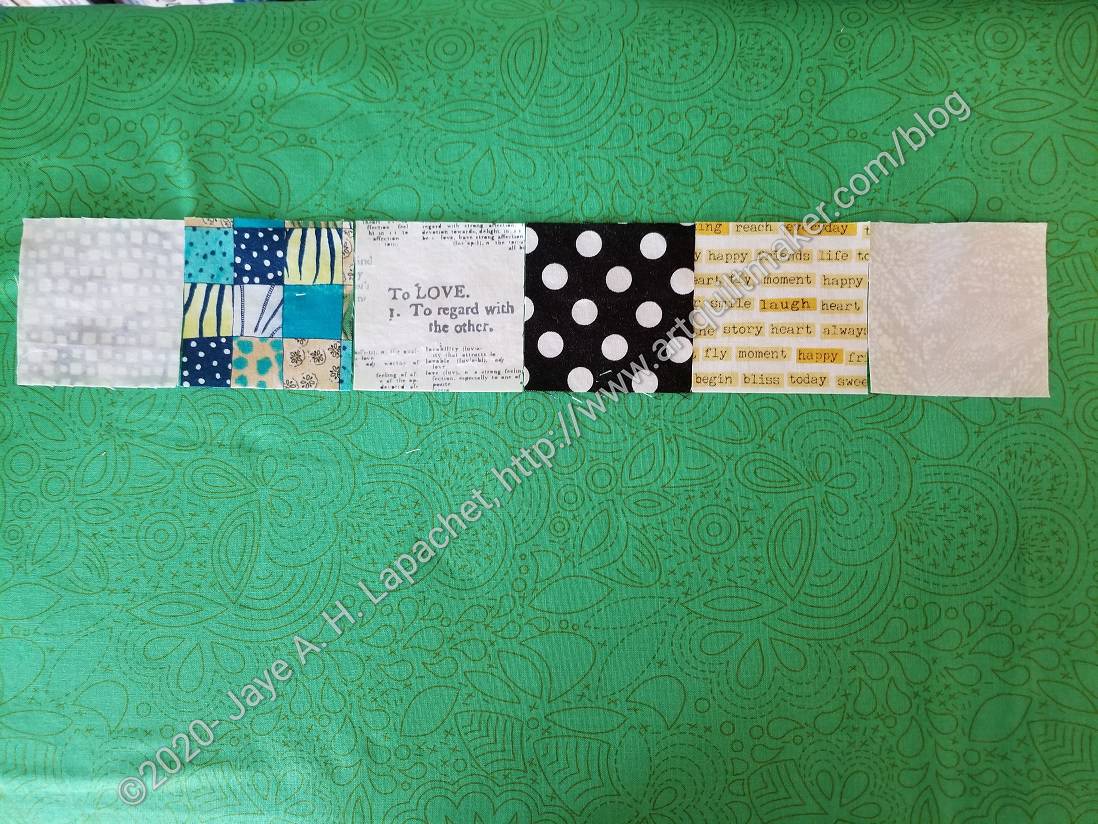
The second one shown is using a simple line of 2.5 inch squares, some of which have been truncated, because of the size required for the bag. I like the 2.5 inch squares I chose. I think t they go well with the green, but the text prints also have happy thoughts.
The quilting on all three is very simple, straight line quilting. I think I have done more quilting this year than in the previous few years. I don’t feel any better about it, but I am not embarrassed by my efforts either.
I want to be clear that mostly I felt like trying out some new things and thanking some friends for being friends, which is why I decided to make these. It’s not like I don’t have 3,000 other projects in process.
I decided to make some Sew Together Bags as gifts. I know I have whined and complained about making them before, but I was reminded how useful they are when I was using my Embroidery Sew Together Bag for Craft Night. I have a couple of friends for whom I want to make something special and these will also be useful.
I know I should be working on the UCAB! I can’t seem to get myself to do it, but I really need to get it done.
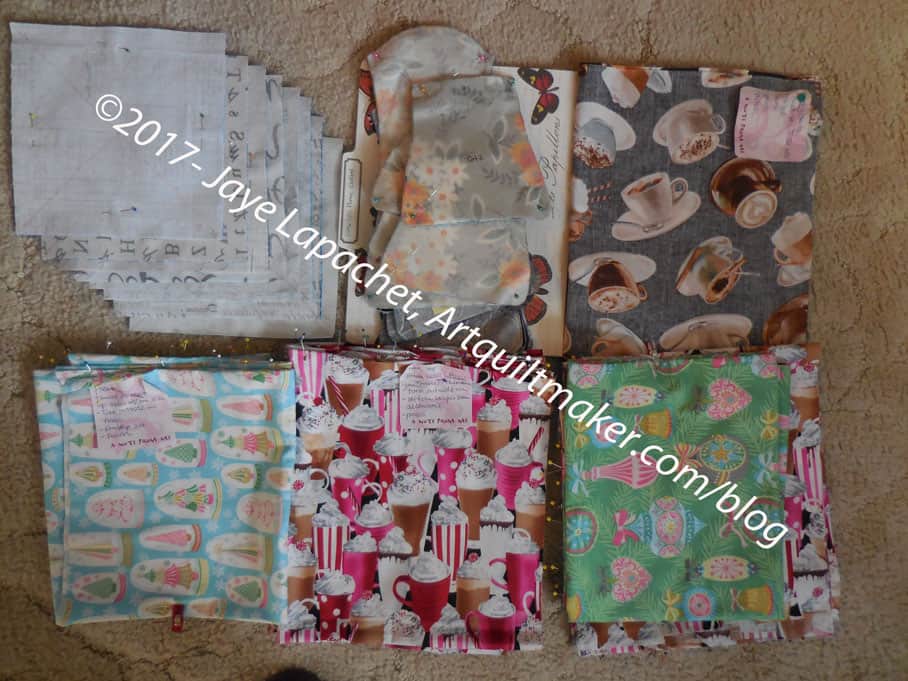
Cutting for STB gifts – November 2020
I spent the day on Wednesday cutting the pieces. I didn’t get all the way through the fusible nor did I have time to quilt the outside, but I am much farther along than I was before I started.
I didn’t bring the binding fabric, so I have to cut that, but all the other fabric pieces are cut.
Even though it is fiddly, I do want to make a pincushion for each bag. I have added them to all of my Sew Together Bags and I think it is a very useful feature.
Piecing for Sew Together Bag Exterior
One thing I am going to do is to try and embellish the outside. I am going to add a little piecing to the exterior. The pattern, which I have said is basic at best, talks briefly about ’embellishing’ the outside, but doesn’t give specifics. Since I have two Sew Together Bags of my own, I measured the outside of one of them and have an idea of where to place the added piecing. It will look something like the above example.
I read some of my posts again and found that this is a hard project. I have some good advice for myself. I will try to take it. 😉 I know that I will be able to do them relatively quickly.
Finally, I can show you the third and final Sew Together Bag. My SIL n.3’s birthday is today and I already gave her the bag. She is not a quiltmaker, but I am sure she will use it for something.
Sew Together Bag for SIL #3
I am really pleased with how this one came out. I think it looks really great. I am tempted to keep it. I won’t, though.
With this STB, I have made a total of 7 Sew Together Bags. I am not sure I will make any more, though there is talk in the guild about making more for gifts. And the Crafty Gemini Organizer Club has a project that looks suspiciously like the Sew Together Bag. Sigh.
FYI: To see the All Rolled Up Tote, you can take a peek on the Organizer Club site or on Craftsy, as it is the design of someone who is not the Crafty Gemini and available there for purchase. If you want the video tutorial, Crafty Gemini is your best hope. I haven’t made it yet, so I can’t give you anymore details.
Anyway, I am taking a break from Sew Together Bags for awhile. I may be completely done. We’ll see.
Beth’s Sew Together Bag
I really like the yellow binding on this one. SIL #4 likes yellow so I distinguished this one from the other Cal version with yellow binding and more yellow fabric.
I included another fussy cut pincushion as well as a variety of blue and gold zippers.
As a reminder, I used the Quilt Barn Sew Along Tutorials to clarify points around making these bags. These posts are critical to my success with this project.
For some reason, I thought it would be a good idea to make 3 Sew Together Bags at once. At a point towards the end of the process on the first 2018 bag, I concentrated on finishing one at a time.
I know I decided to make one for my SIL because she had some random carrier for her supplies at Craft Night and didn’t have the supplies she needed. I don’t mind lending supplies or thread or whatever. However, I thought a Sew Together Bag would be great for her. It just took me forever to finish it.
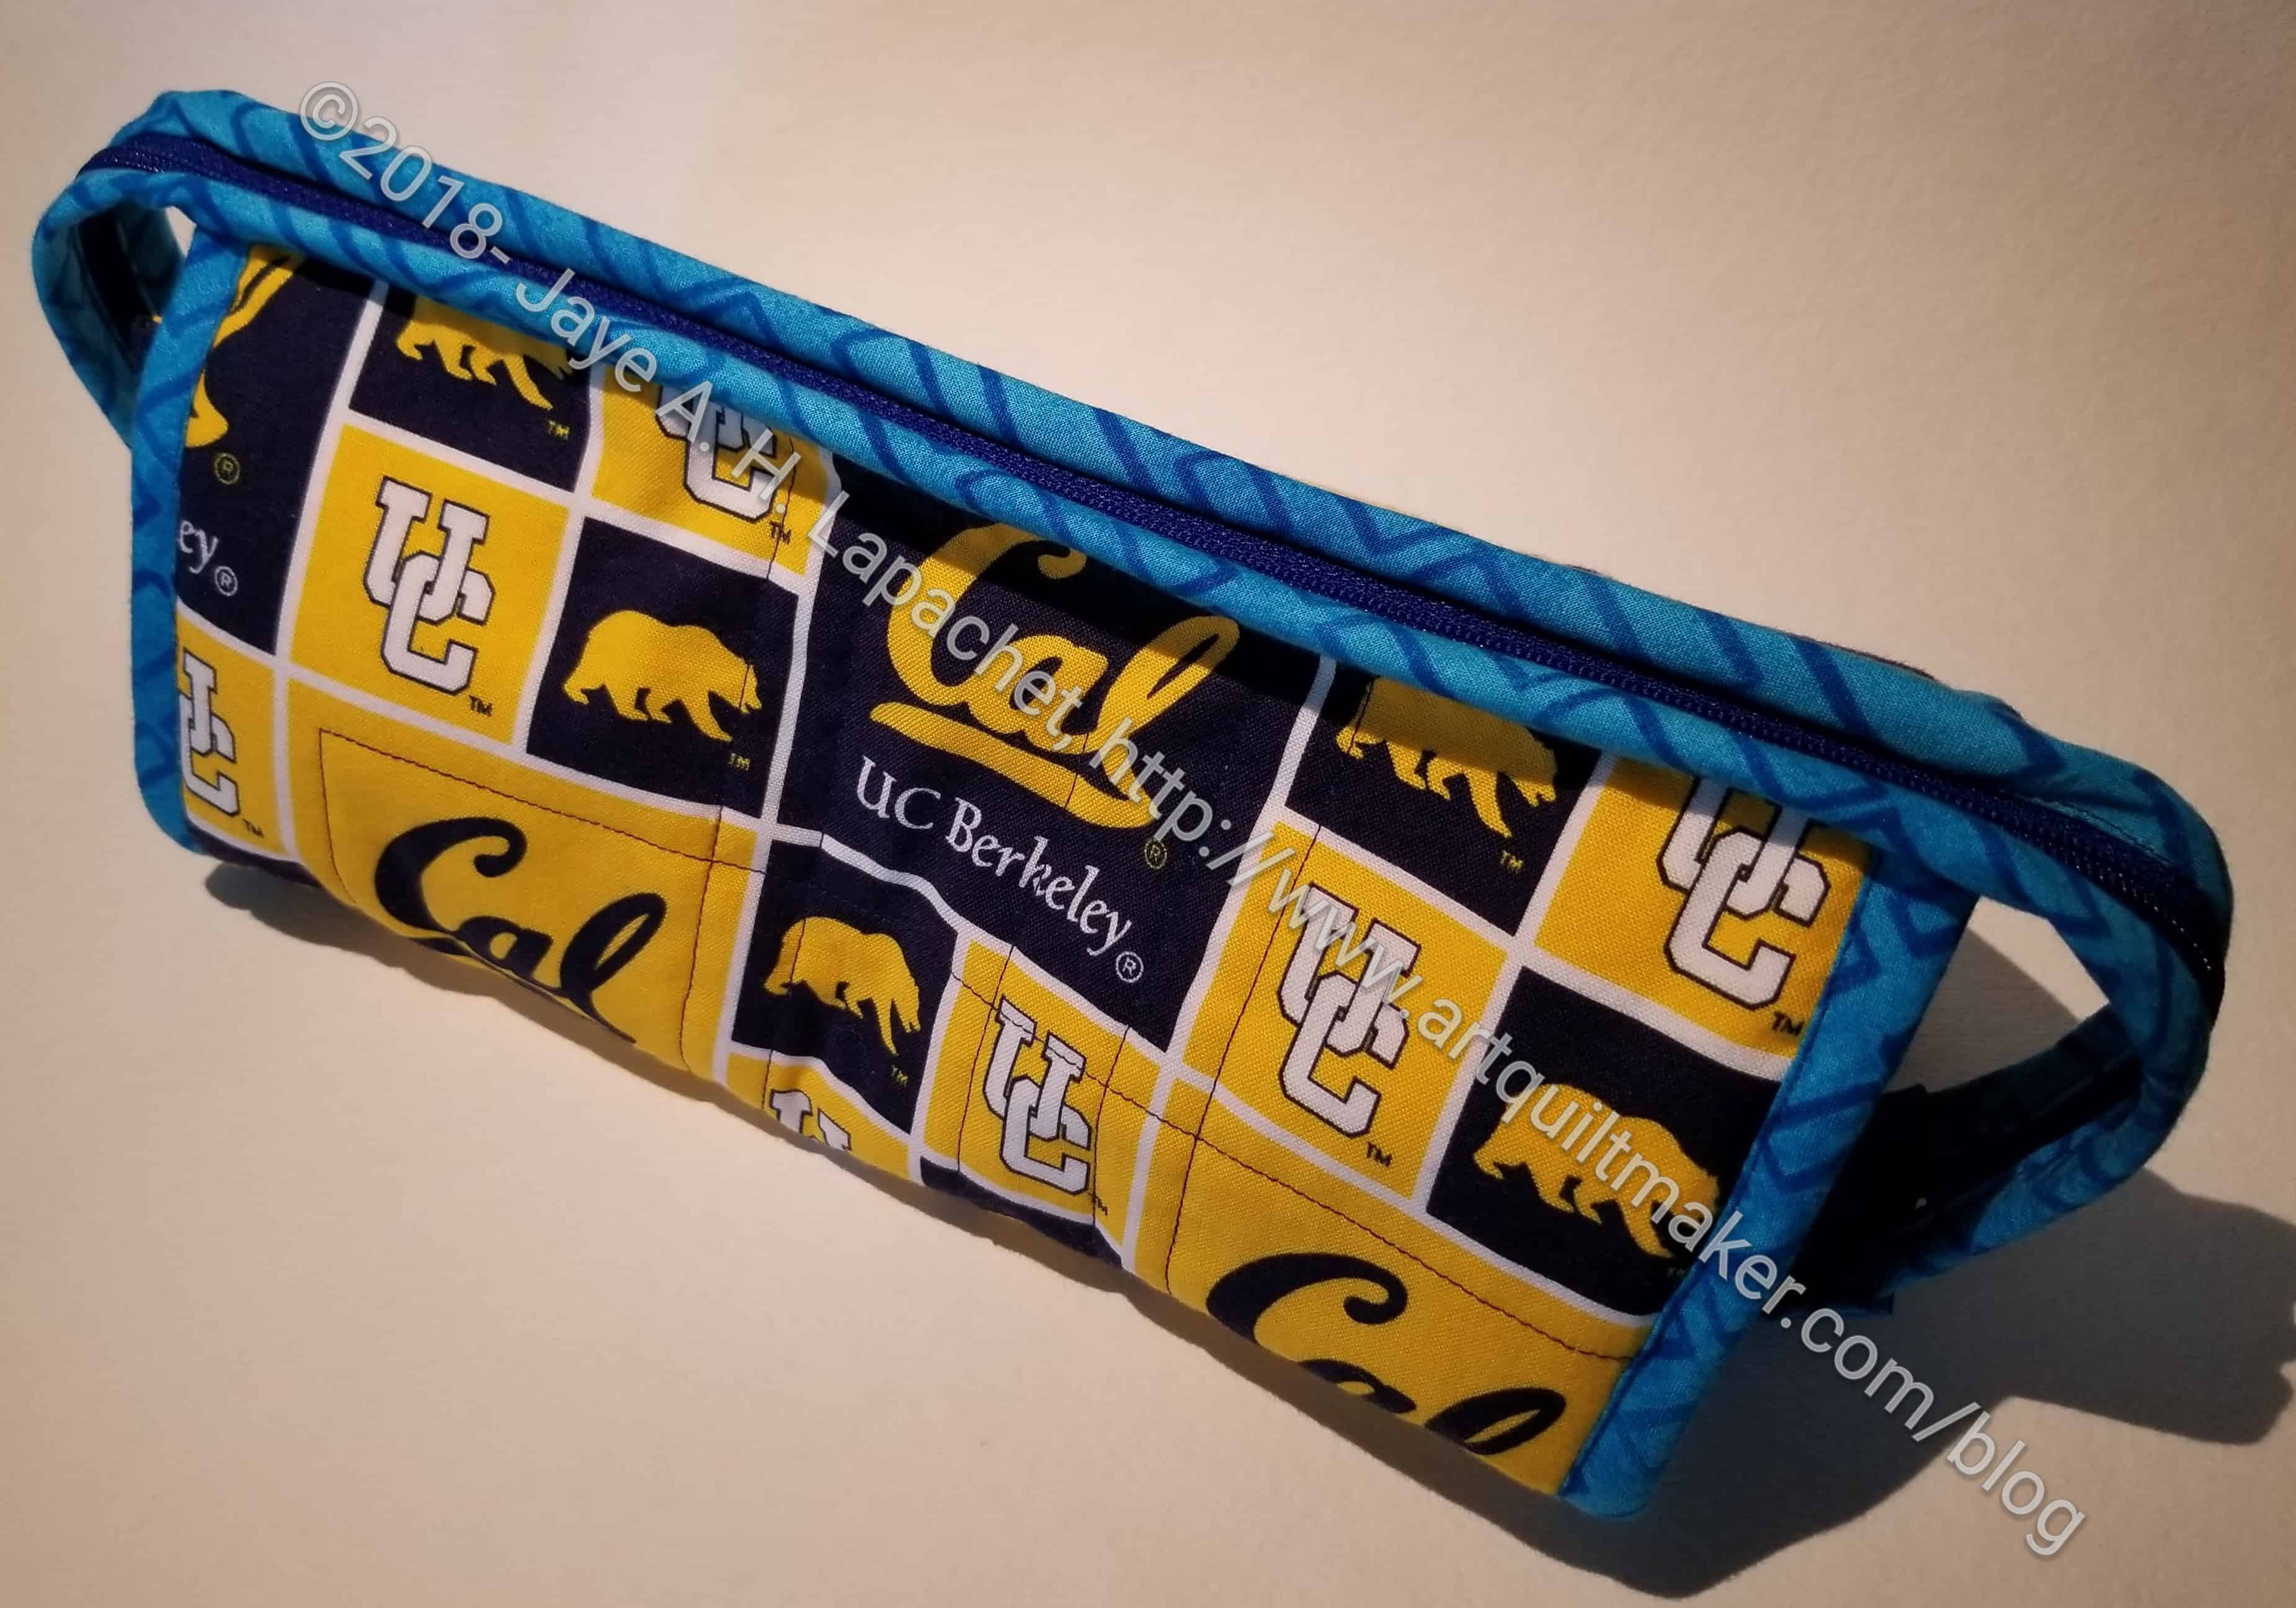
SIL #2’s Sew Together Bag – outside
The outside is Cal fabric, because I knew she would like it and because I have a ton of it.
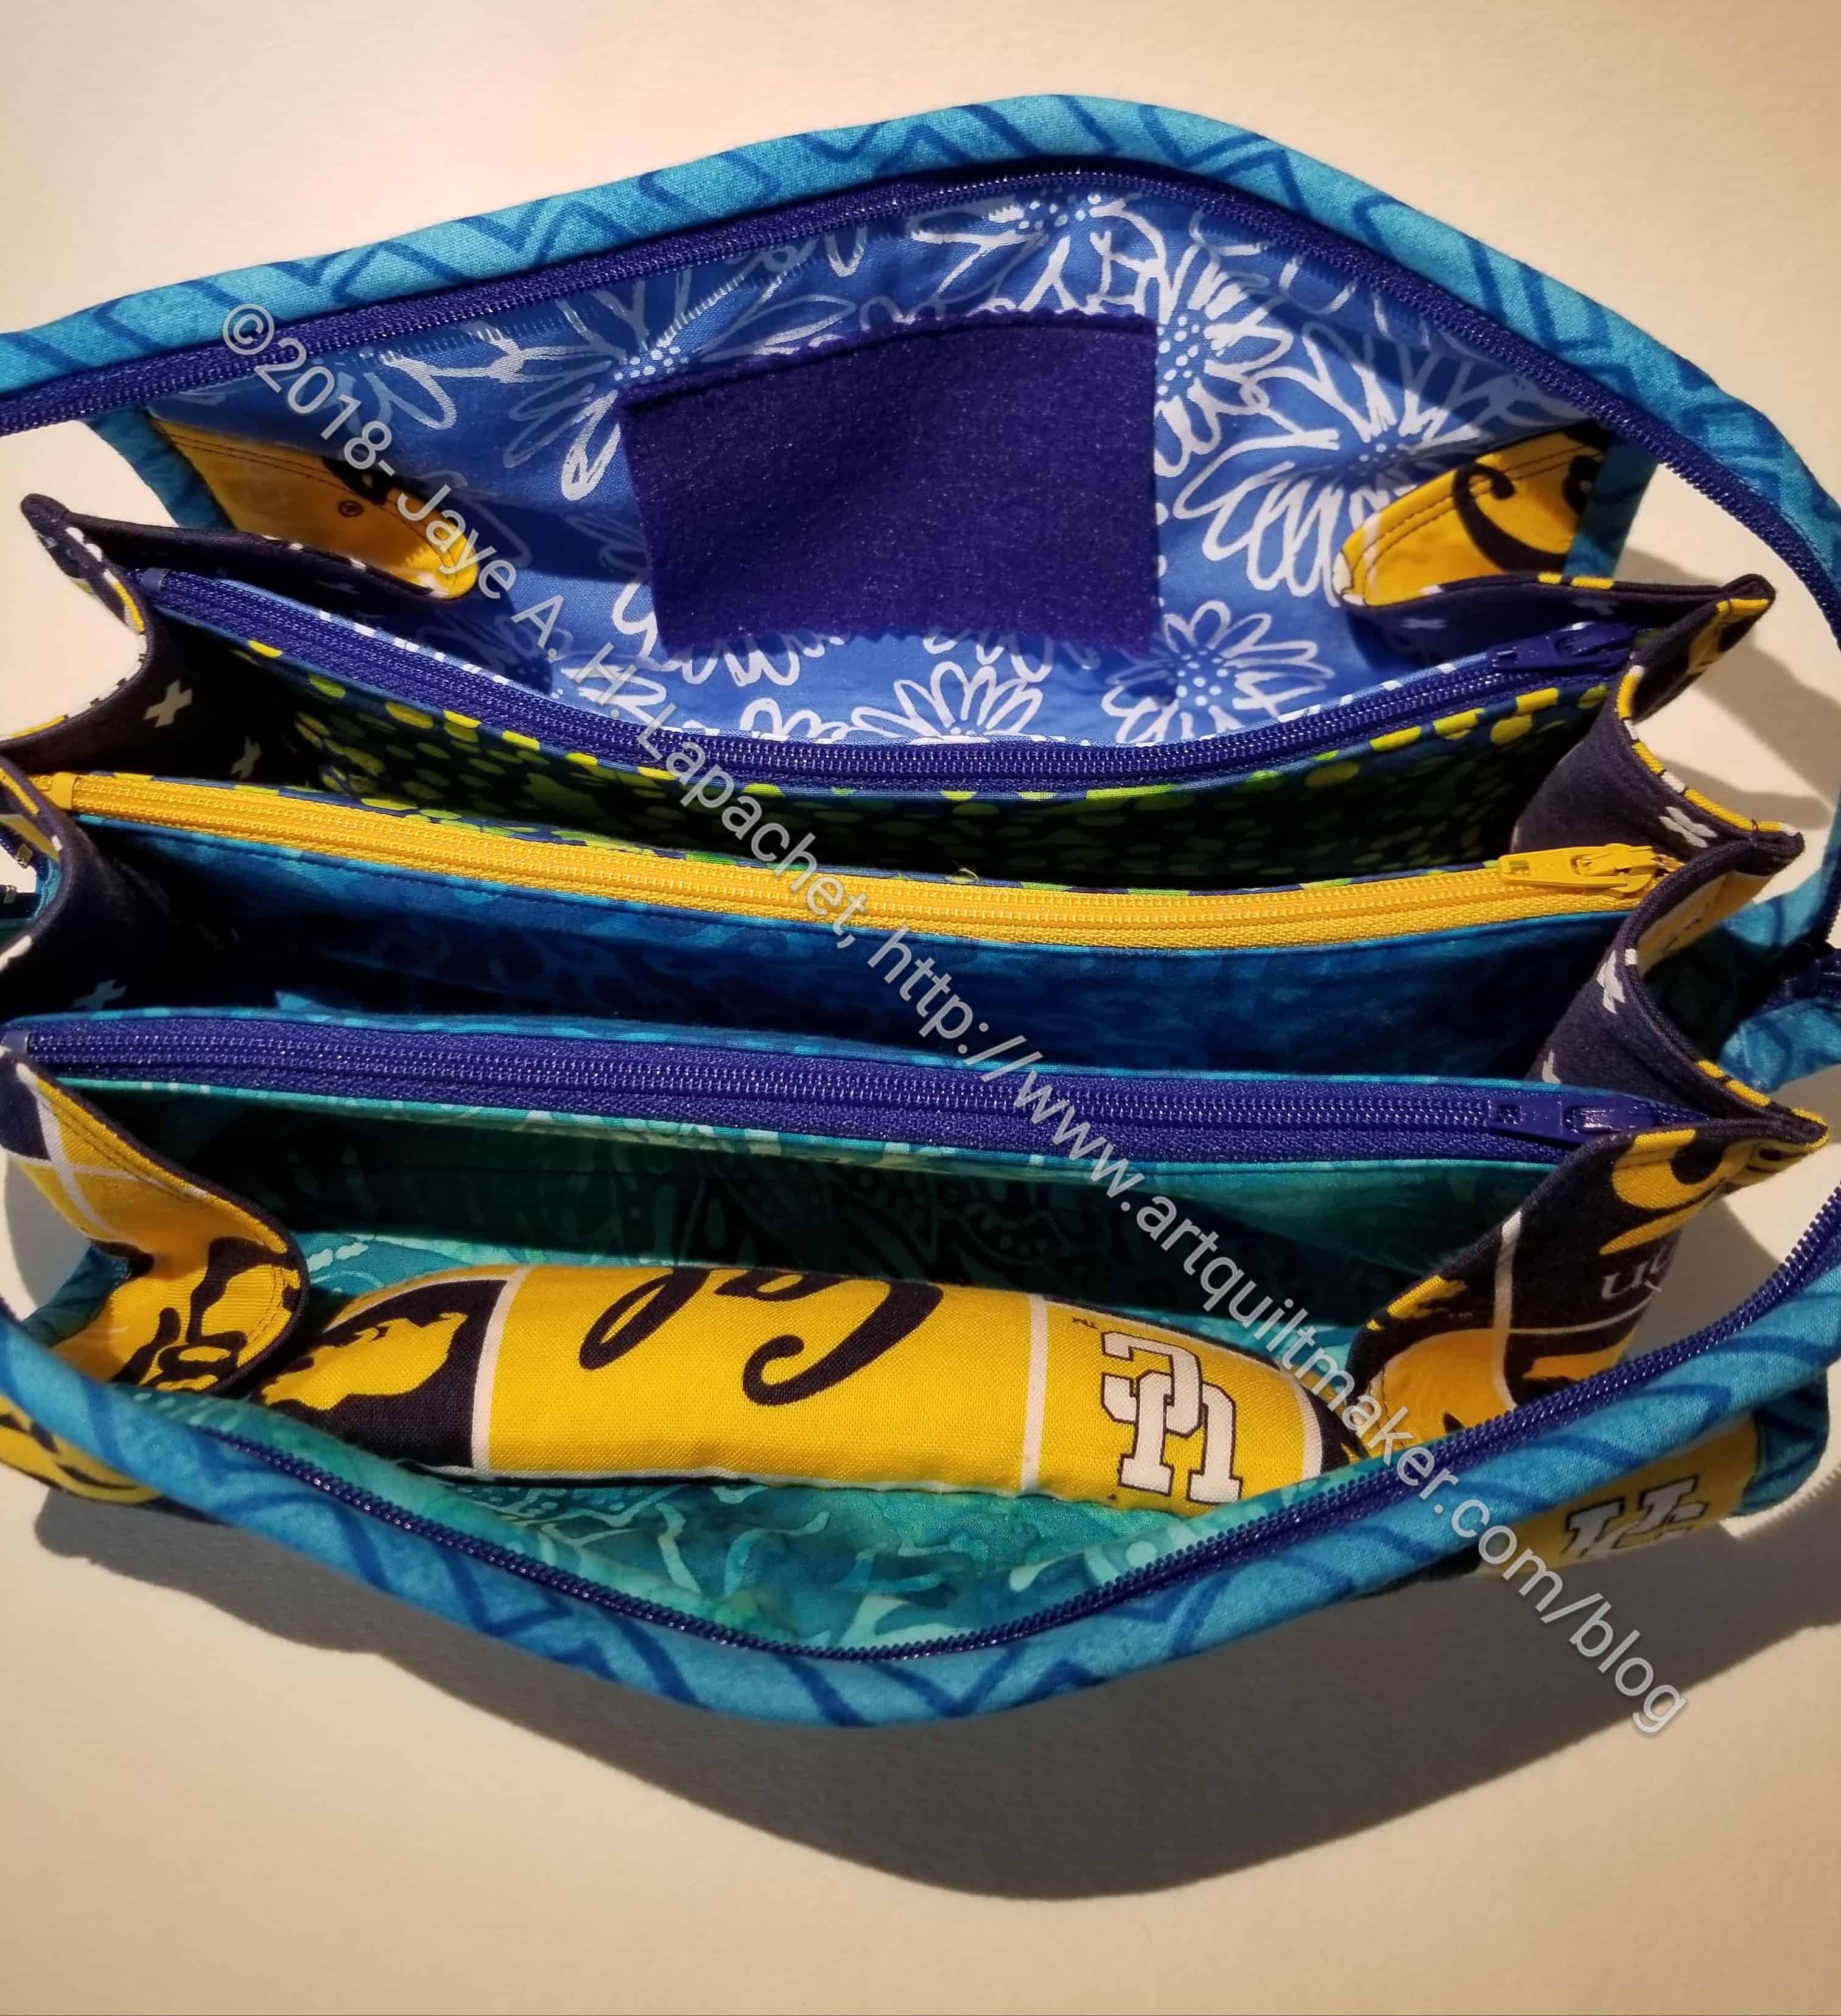
SIL #2’s Sew Together Bag – inside, zippers closed
Otherwise I used various blues I thought she would like with some yellow accents. Blue is the main color on this one. I also chose a variety of zipper colors to add interest.
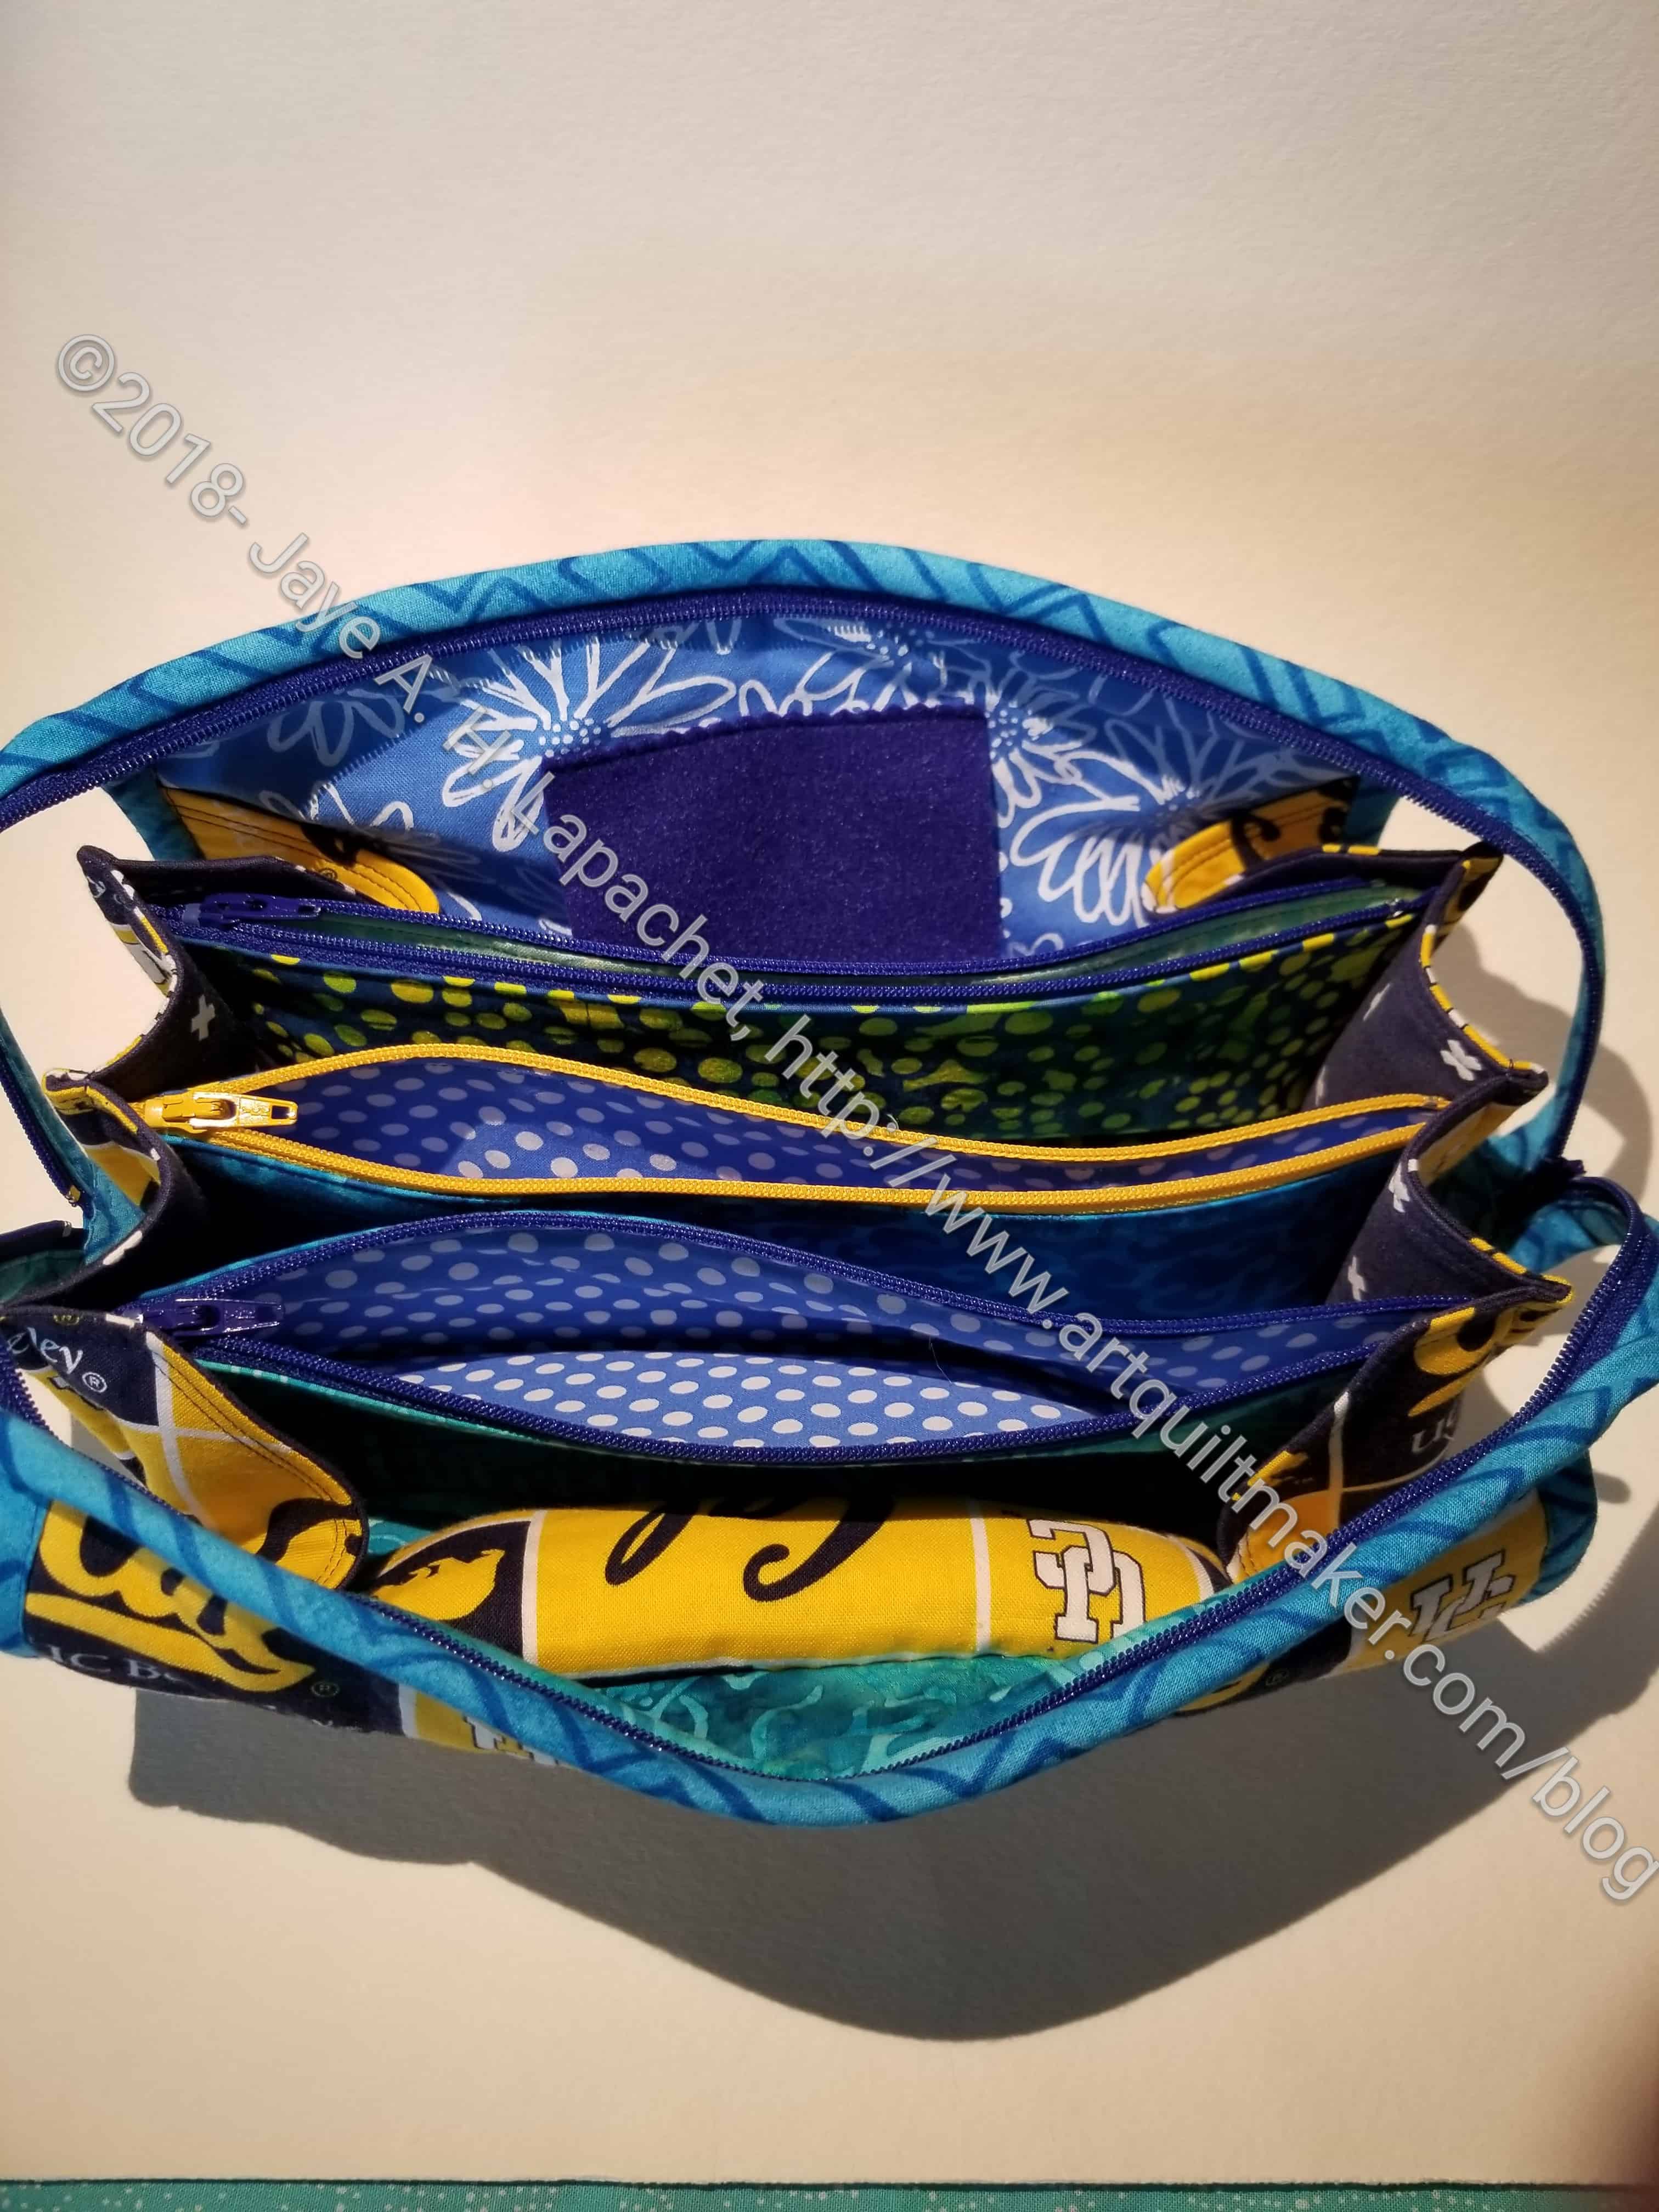
SIL #2’s Sew Together Bag – inside, zippers open
I fussy cut the Cal fabric for the pincushion, of which I was proud. Even though her birthday is today, I gave the bag to her yesterday.
Finally! I finished my Sew Together Bag a few days. I can’t wait to fill it with my embroidery items, but I will wait until I show it at the guild meeting. I am really pleased with how it came out despite the problems I had with the stitching.
This bag and the gift Sew Together Bags have been on my list for a long time. As usual, the cutting took forever. As I mentioned, last week, after the March Sew Day I decided to get busy and get these done.
PJ Sew Together Bag in process
I remembered, after laboring for what seemed like hours, why it has been awhile since I made any more of these. The layers you have to sew through is daunting. These are very useful bags, but a pain to make.
Last time I made some I had the following advice:
Think the strips for the long zipper would lay better if they were on the bias.
The bag needs some feature to which Wonder Clips can be clipped.
I tried a few different things and cannot get the top stitching to look good where there are many, many layers.
WonderClips are a godsend for making this project. I used about 12. They are not listed on the supply list, but I think they are essential for this bag.
Make the pincushion (mine is a little too large on this one) and the exterior at the beginning of the bag making process. It is such a hassle to stop and do the fiddly bits when you are so close to finishing.
Use a two sided zipper pull
I tried out my bias advice. The binding strips still do not lay completely flat once the bag is sewn together. It could be the difficulty of stitching through so many layers.
I would also add: make sure you don’t get an invisible zipper. I had to rip out the stitching on the main zipper several times before I got it to a point where I could stand to look at it.
I am almost finished with this bag. I am working on two others and am not sure I will ever make this bag again. I’ll probably forget the drama and make more at some point when my rose colored glasses are back on.
I decided it was time to make another Sew Together Bag for my embroidery/Big Stitch stuff. I actually decided a long time ago and just finished cutting everything out on the last Sew Day at the beginning of the month.
Sew Together Bag Panels
My first Sew Together Bag is getting stuffed and I use it a lot. I might actually have to make another one for EPP as well, but that might be going too far. The point is to have everything handy in the bag so I can grab and go. this means, I need multiple pair of scissors, etc, and I am not sure I want to buy more. We’ll see.
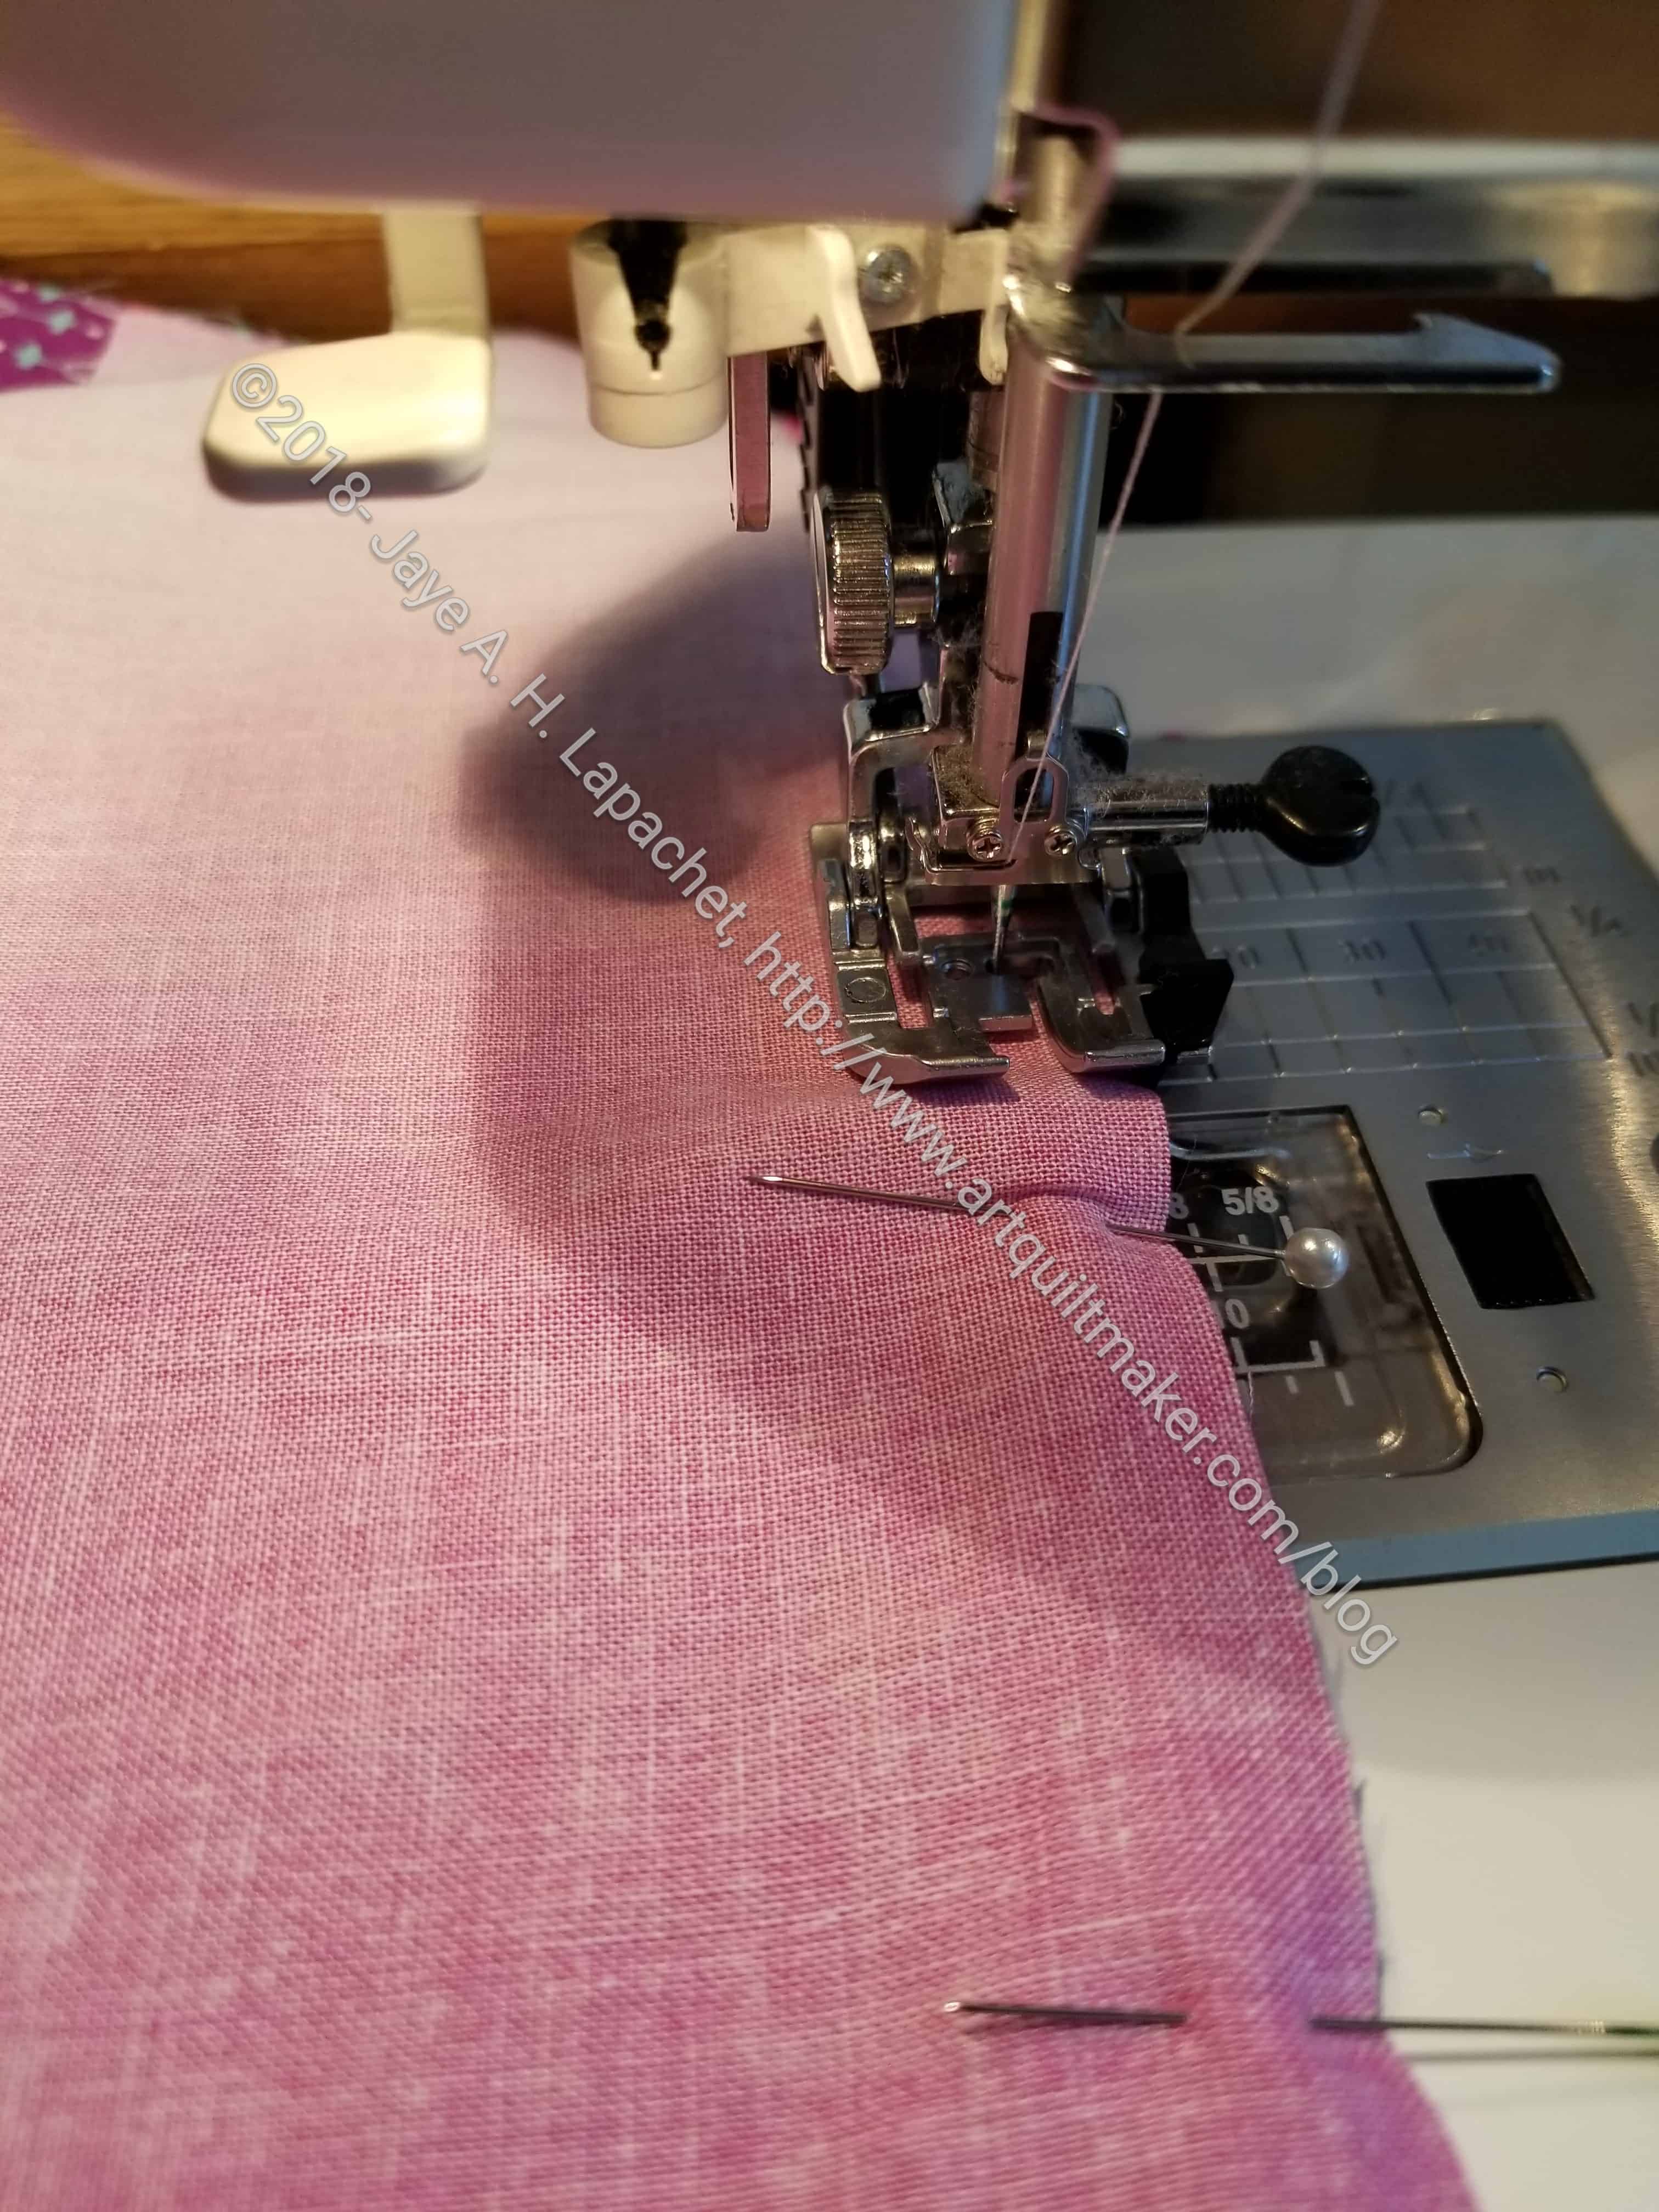
Sew Together Bag/Walking Foot
I am using the Quilt Barn tutorials again and the process is going pretty smoothly. That is not to say there hasn’t been some ripping and bumps, but all-in-all, the process is going well. They suggest a walking foot and since I bought all those new walking feet, I decided to take their advice this time. It is nice! The zippers are causing me very little hassle.
I went back and forth on what to bring to Sew Day. I thought for sure I would bring my machine. We are having a heat wave, which means record temperatures. I was hot and not really in the mood to be dragging a ton of stuff around, so in the end, I just brought projects to prep/cut out.
Sew Day Prep Completed
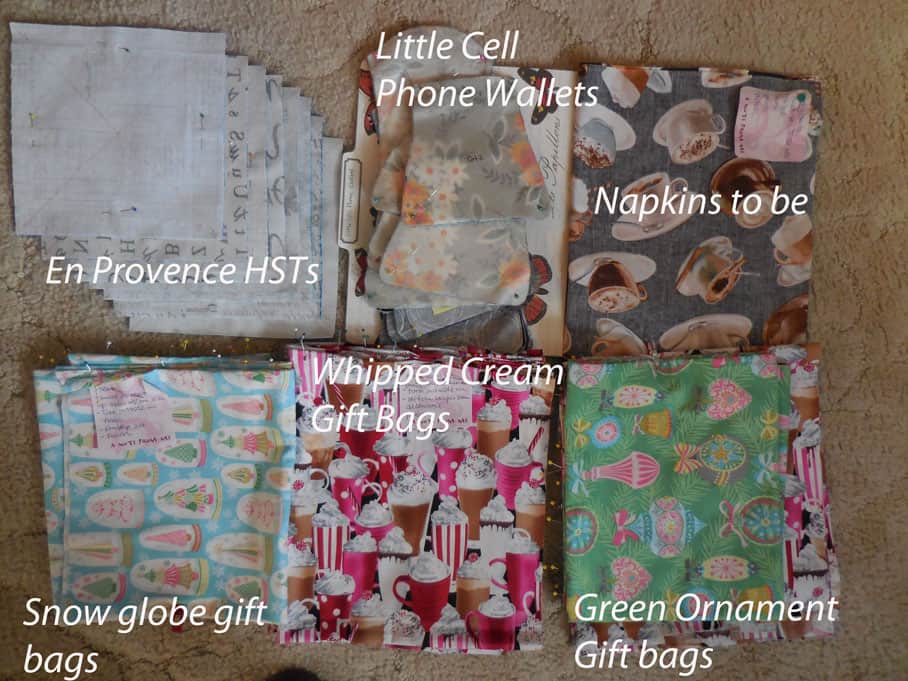
This focus was a good move. I was able to cut out or prepare 5.25 projects, which means it is time to sew again – HA! Not that it is ever time NOT to sew:
Finished trimming Dots & Stripes HSTs
Prepped En Provence HSTs
Cut out Napkin fronts
Cut out gift bags
Cut out 2 more Little Cell Phone Wallet bag parts
Started prepping more Sew Together Bags
Sew Day Projects
I found another stash of HSTs that go with the Dots & Stripes HSTs I mentioned last week. They will make the piece larger, which is always good. I trimmed the last few I didn’t have time to trim at Craft Night and trimmed this new stash. Some progress.
I had cut the squares for the En Provence HSTs on Friday night, so I had sixteen less things (fabrics) to haul to sew day. I pinned the squares together and drew the lines in preparation for sewing using my Triangle Technique at home.
I grabbed the coffee fabric, which had been hanging around for awhile. I always intended it to be napkins, but I get tired of making them after a few. I had never gotten to cutting this fabric. I did on Saturday and yesterday I had an idea of what backing to use and who they will go to as a gift. I need to get to work.
It is hard to know whether to count cutting out gift bags as one project or one per fabric. I counted using a hybrid method. There were three different fabrics and I will end up with probably 7 bags total.
I also found the fabrics for my last two cell phone wallets. Now all of the pieces out of all the fabrics are cut. I need to start sewing, because I really miss not having the matching bags when I wear my tunics and dresses.
Finally, I started three more Sew Together Bags. One will be for me. I will use it for embroidery. The other two will be gifts. I only got one step of pieces cut, but it is a start. After making three at a time last winter, I think it takes almost the same amount of time to make three at once as it does to make one at a time. As you know the cutting of the pieces is the worst part. The weird thing is that the fabrics I want to use for the exterior have disappeared. I can’t move on to sewing until I find those.
Anna and Nicole, who I had never met came and showed off their projects. Anna is making a table runner with a Lone Star block in the center. She is using nice soft colors. Nicole is hand quilting a beautiful log cabin quilt made from a lovely combination of blues and greens. The fabrics looked like batiks, but I didn’t look that closely.
Mary had surgery on her elbow so mostly chatted with me, but did a little bit of handstitching. She also met with the Retreat committee.
Bonnie was making nametags for the Retreat with help from Nancy.
Marti was making round mug rugs. I have been thinking of making a couple of mug rugs for the Puzzle Guys at work, so she inspired me.
Lynette was working on zipper pouches she will donate to a holiday boutique to raise money for the Belmont Senior Center.
Others were there as well. We tried to keep cool and had some fans to help. It was a fun day and I am glad I went. I feel like I accomplished stuff.
I have Sew Together bags on the mind. I don’t know why, but I want to make more. They are somewhat frustrating, the directions are vague, they take a bunch of zippers and all sorts of special gymnastics to make.
Purple Chair Sew Together Bag – zipper tabs
Still, they are pretty. I see mine, which is one of the most useful bags I have made, and I want to make more. I use mine all the time. It has exactly what I need for EPP as well as basic hand sewing, so I can grab it and go. I might want one for every outfit. 😉 I keep looking around and at people critically and wondering if I should make that person a Sew Together Bag.
One thing I like about the one I made for myself is the fabrics. I really chose well. I might choose something different for the outside of mine, but I think it is great and I absolutely LOVE the fabrics on the inside. I am so glad I chose fabrics that I thought more of than “this will be fine”
TFQ Sew Together Bag – open
I know that not everyone is as smitten with these bags as I seem to be. I think it is more about the making of them than anything else. They are very satisfying to make (as long as you use the Quilt Barn sew-a-long tutorial in conjunction with the directions), and, as I said, useful. I love making quilts, but there is only so much usefulness you can get when you have too many wall hangings and not enough walls.
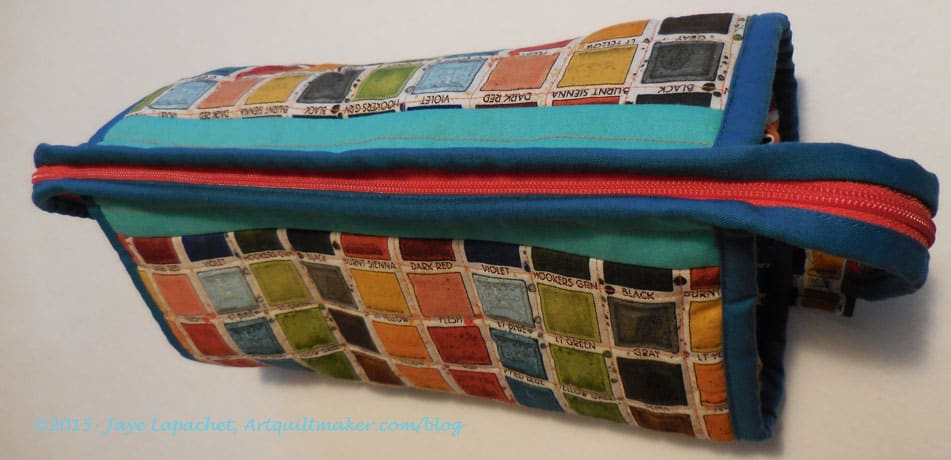
Finally! I made a Sew Together Bag for myself. I haven’t filled it up with my English Paper Piecing materials as of this writing, but I will have done by the time you read this.
I am not sure why I chose the paint can fabric for the outside. It was waiting to be ironed and it kept beckoning me. I couldn’t resist and it was perfect. It feels like a good outside for a working bag. I also think I won’t wonder why I chose it.
I didn’t mean to match the top, but I did a pretty good unintentional job, don’t you think?
Jaye’s Sew Together Bag -some fabric choices
I chose the inside fabrics very carefully. I wanted fabrics that I loved. A lot of these are new or new-ish fabrics, but have the feel of old favorites. All the choices has to be light for the inside so I can see the tools that fall to the very bottom. I did choose one dark violet/magenta Karen Lewis fabric. It isn’t light, but I think it will be fine.
As I mentioned the other day, I made this one at the same time I made TFQ’s. After I cut all the pieces I sewed the steps for one and then the next until the end when I had to get TFQ’s done because she was coming to visit and I needed to gift it. I finished mine in a few quiet half hours over the weekend after the fun and games with TFQ.
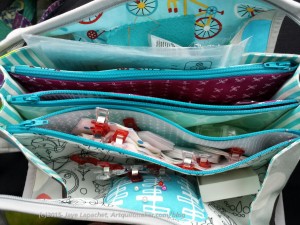
My Sew Together Bag – open
I added a couple of pinks for the inside of the pockets, but they are hard to see unless you have the bag with you.
Jaye’s Sew Together Bag – closed, side view
I tried one thing on mine to try and cover up the stitching of the side panels to the lining. (If you look at the photo above, the area I am talking about is a vertical line of binding on the ends just in from the curvy handle). At the end of the process, when I was putting on the binding strips, I sewed the binding to the bottom first then wrapped it around to the top. I still had to deal with the thickness, but I was able to see where I had stitched and could make an attempt to cover it.
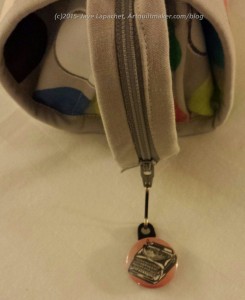
Sew Together Bag with zipper pull
I received a zipper pull for Christmas and decided to put it on the bag. Why not? I had it. It would make the long zipper easier to pull and it would look cool. Also, I wouldn’t have a random zipper pull floating around the house.
It fits perfectly and looks cool (at least to me!). One problem is that the zipper pull is one sided. When I open the long zipper to access my EPP materials, the zipper pull ends up on the other side of the bag upside down. I know this is silly. It would be better to get a two-sided zipper pull. Since I already had this, I am going to continue to use it but I would advise you to get a two sided zipper pull if you are out buying one.
I have an idea of making one using beads for the next STB, but we will see.
Upside down zipper pull
I filled the bag on Friday. I took my regular handwork bag and put some items from that bag into my new Sew Together Bag. I took all of the stuff I might need for English Paper Piecing. I may have mentioned that I intended all along to use this for my English paper piecing project. Two problems I had in the filling: would I get a second pair of Gingher snips to put in my regular handwork bag? I also forgot thread. I meant to go upstairs and get another spool and I just forgot, or got distracted. That forced me to go to quilt shops over the weekend. 😉
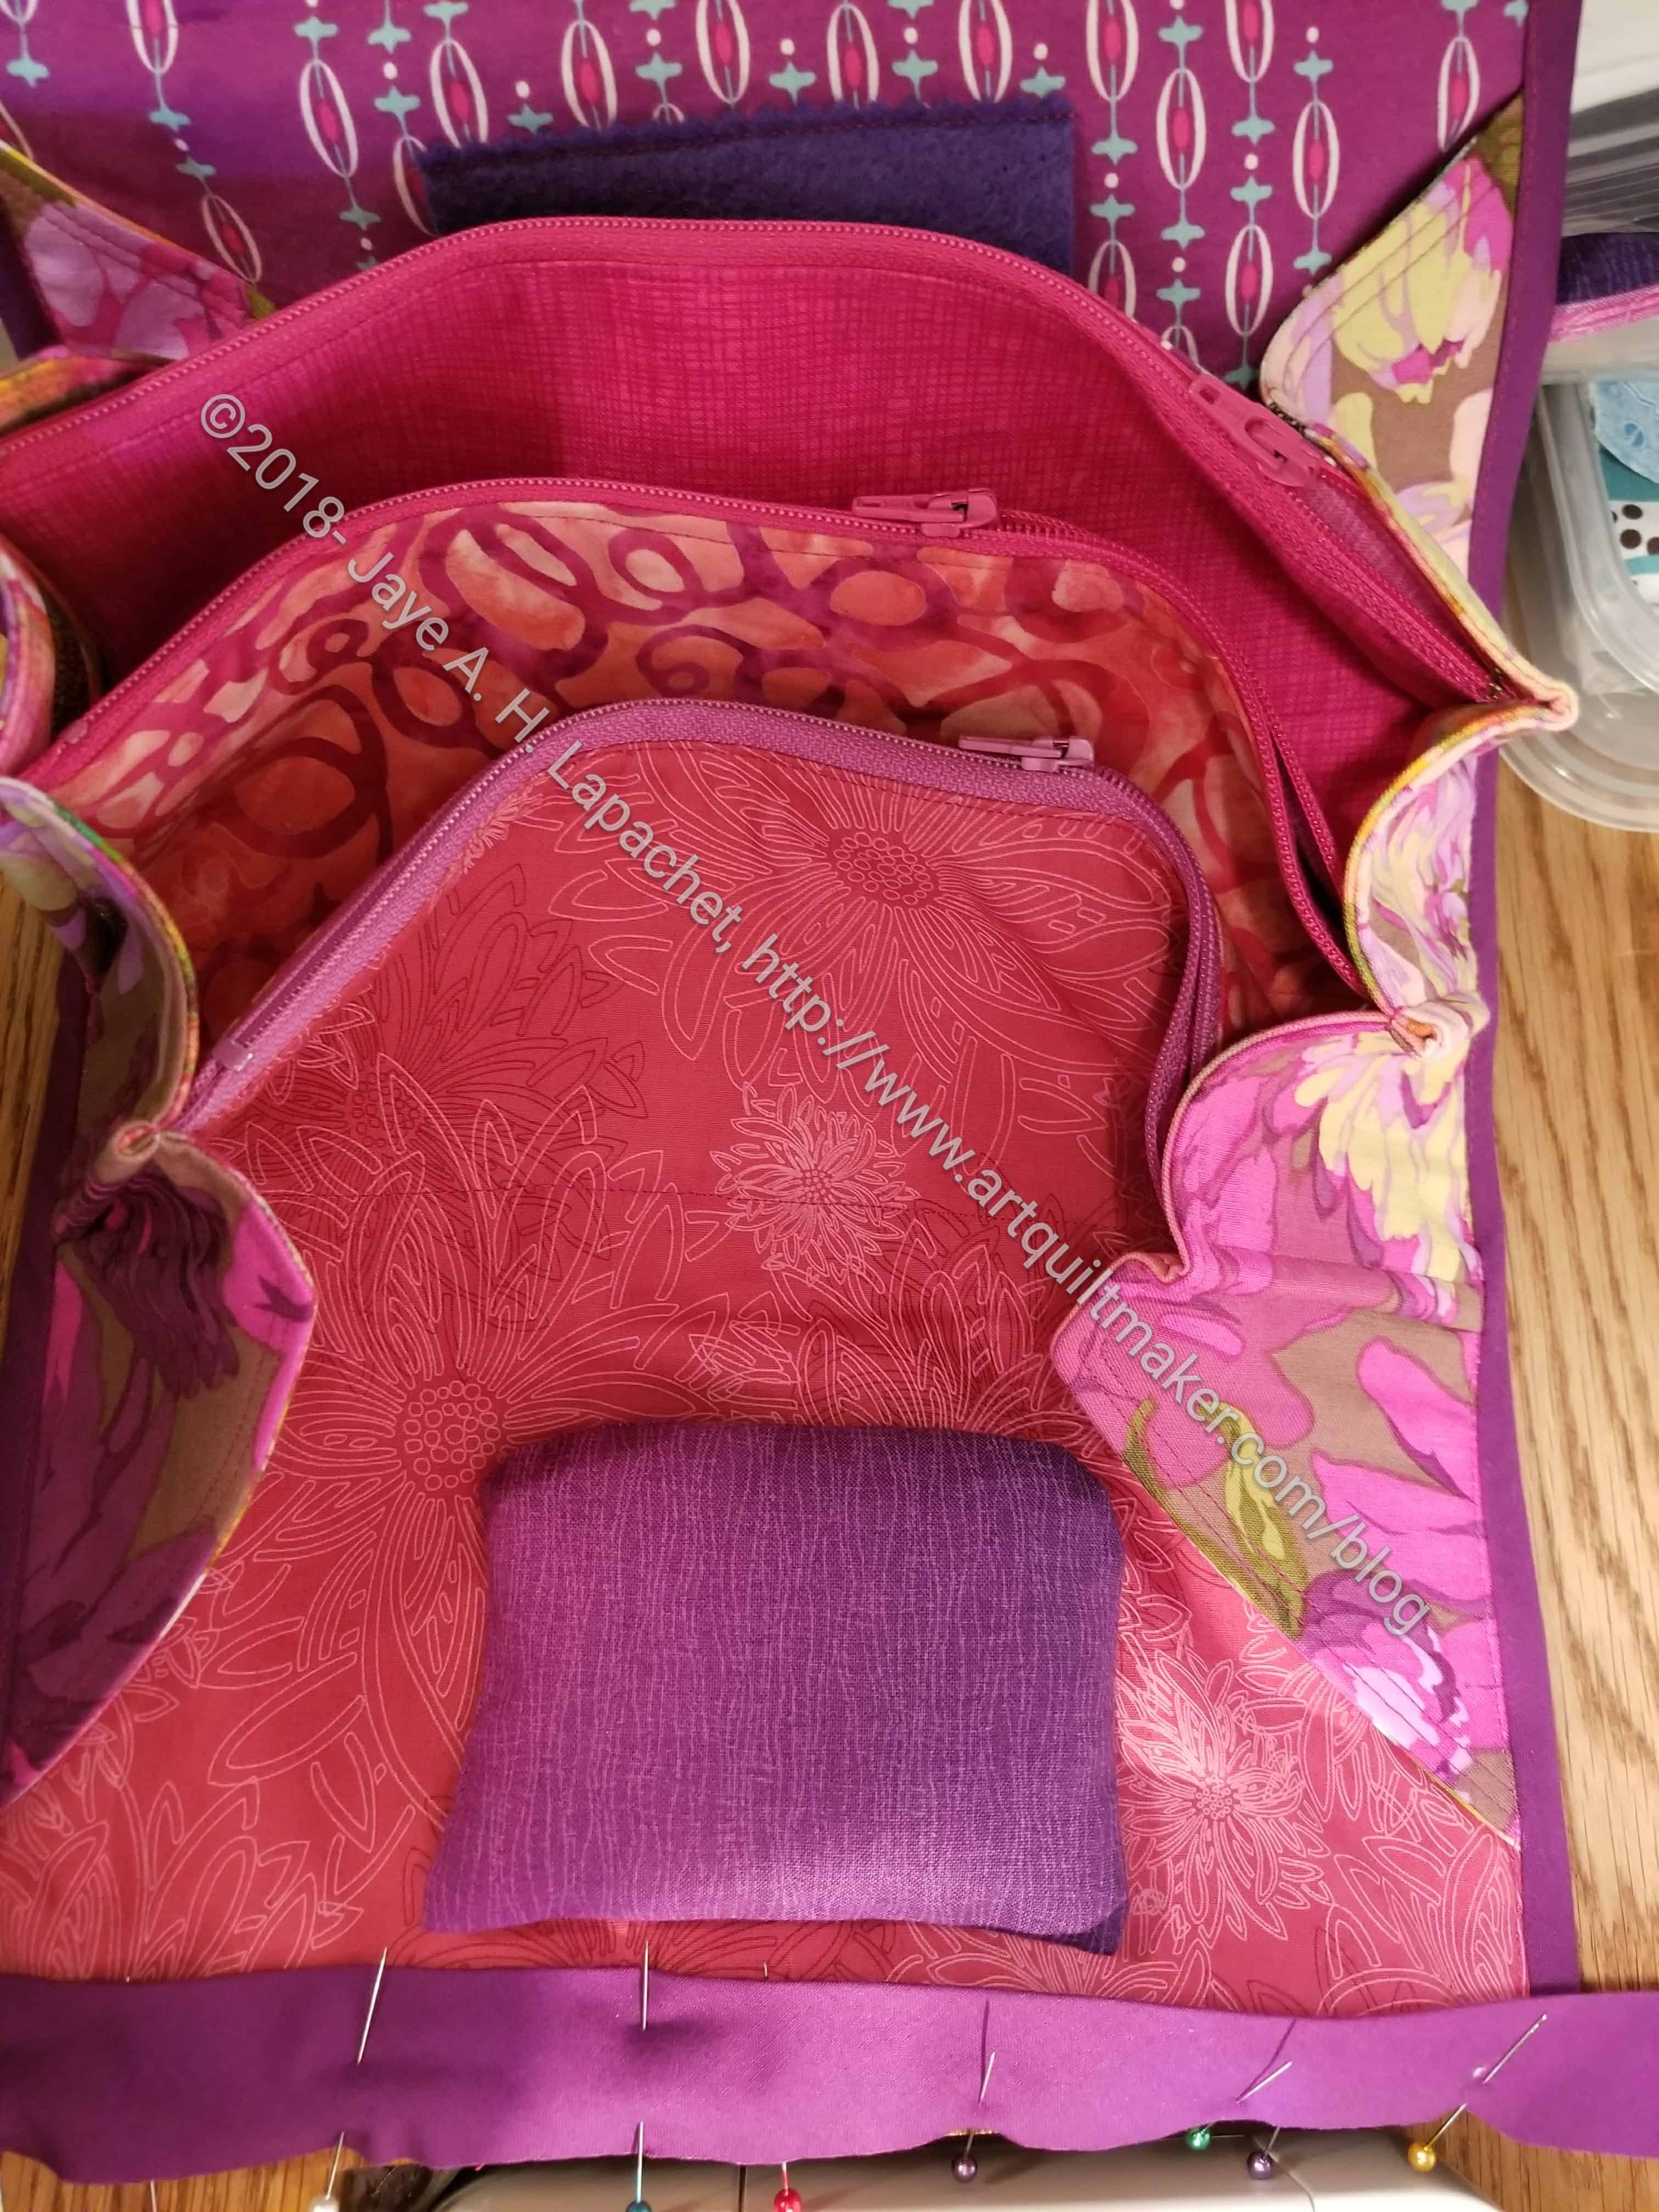
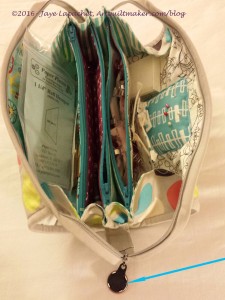
Sew Together Bag in my lap
In using the bag in the car, I found the best part to be the ‘tray’ that the bag formed in my lap. With my old handwork bag, it didn’t open as far as this one so my lap was my tray. Also, everything was sorted into pockets. As I got used to where my tools and supplies were located, I found I could work relatively quickly. I finished on two EPP stars in the car, placing the bag with the pincushion towards me. I found it to be very useful and convenient.
Some Observations
I think the strips for the long zipper would lay better if they were on the bias.
The bag needs some feature to which Wonder Clips can be clipped.
I tried a few different things and cannot get the top stitching to look good where there are many, many layers.
WonderClips are a godsend for making this project. I used about 12. They are not listed on the supply list, but I think they are essential for this bag.
Make the pincushion (mine is a little too large on this one) and the exterior at the beginning of the bag making process. It is such a hassle to stop and do the fiddly bits when you are so close to finishing.
Use a two sided zipper pull
I have an idea for one more that I want to make, but it isn’t a requirement and I think I will let the feeling lie for awhile.
After making this bag 4 times, I am tempted to try the Bionic Bag just to see the differences. I am trying to restrain myself. I need another bag pattern like I need a hole in my head.
I know you have to be wondering if the gift madness ever ends. One thing is that I know LOTS of fantastic people with birthdays in January. I don’t give all of them gifts, but the ones for whom I do make gifts mean the ‘holiday’ season seems to stretch well into January. It is easier just to continue the numbering of the gift posts as the making often starts in December or before.
For this particular bag, the making started last week. The planning, hunting and gathering started well before, but the actual making had to wait until I had finished some other projects.
TFQ Sew Together Bag – closed
I wanted to make 2 more Sew Together Bags, including one for me, so I decided I would make both at one time. After the cutting, which still seems to take me forever, but was easier doing two at a time, I got started. I was surprised to find that I plowed through the same amount of work on two STBs in the same amount of time as I had on the second STB. Don’t get me wrong! I referred frequently to the Quilt Barn Sew-a-Long posts as the process is complicated and not firmly ensconced in my head. Seriously! Those posts are life savers.
I wanted this Sew Together Bag to match the Multi-tasker Tote I made. One birthday – a set of gifts. As I mentioned, I didn’t have any more of the black batik. I decided to use the Multi-tasker Tote lining fabric as the outside. I used the dark for the Multi-tasker Tote, because it doesn’t show the dirt as much, but with the Sew Together Bag, it probably would just stay at home with handwork materials in it and not be on the floor of the bus, etc.
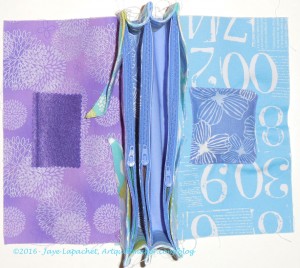
Pocket Panel Showing Fabrics
In addition to the lining fabric, I chose the fabrics carefully. I wanted them to be really pretty and interesting. I also wanted each section to be different, so that the differences would provide visual cues when searching for supplies or tools. I am particularly pleased with the fabrics I chose for this STB.
The violet fabric on the left has a bit of an Asian feel, which is not normally my style. I was particularly attracted to that fabric when thinking of TFQ. I was pleased that she like it as well.
I still had trouble with the thickness of some of the steps. I tried not sewing all the way to end of the side panels so I could flatten them out. The idea was good, but the flattening didn’t work out. I also thought of trimming the batting away from the edge of the exterior. By the time I got to that point, it was impossible to trim the batting. Foiled on both attempts! TFQ suggested using ShapeFlex instead of batting next time (will their be a next time???). I thought it might not provide a sturdy/thick enough exterior, but I might try it.
TFQ Sew Together Bag – open
I am pleased with this version, especially with the colors of the pocket panel. I hope it is useful.