Gift Post #5: STB #2

Purple Chair Sew Together Bag - closed
Purple Chair Sew Together Bag – closed

I had plans all along to make a second Sew Together Bag and after I finished the first one, I was even more determined. I started it on the Sunday after Christmas (December 27, 2015) and finished the first 4 steps that day. I left the finishing steps to the next day, so that I could try and do my best work.

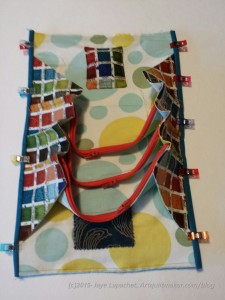
I had trouble with the sizes of the pieces again, so many of the pieces were too big. Better to big than too small, I suppose, but it is still annoying when the pieces don’t line up.

I am also not that happy with the topstitching, but since the colors matched better than the first one, they aren’t as visible.

Purple Chair Sew Together Bag - open
Purple Chair Sew Together Bag – open

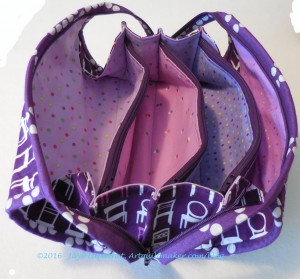
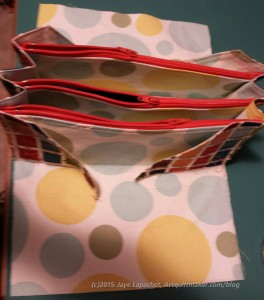
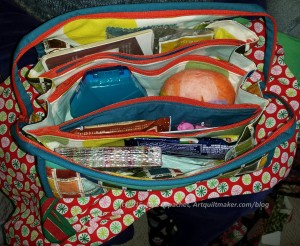
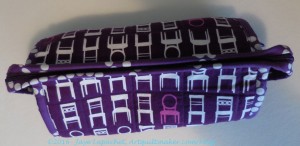
One of the things I like about the Quilt Barn Tutorial is the fabrics that they chose. The fabric for each section is different. I thought having different fabrics in each section would provide a good visual cue for the person using it, e.g. “my EPP papers are in the dot section,” etc. that is why I used, mostly, different fabrics in each section. I wanted this STB to go with the other items I made for Julie last year, so the internal zippered sections do have some of the Lizzy House Pearl Bracelets fabrics on the inside.

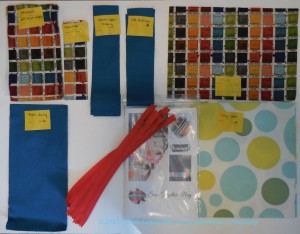
I don’t have many light colored purple fabrics except for dots. Julie isn’t as much of a dot fiend as I am, but I think she liked the fabric choices.

Purple Chair Sew Together Bag - zipper tabs
Purple Chair Sew Together Bag – zipper tabs

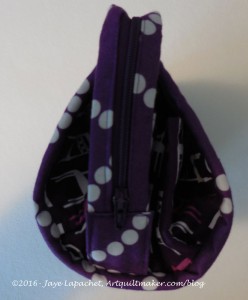
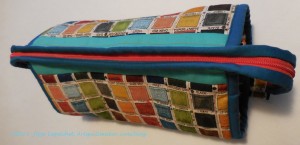
Finally, I was particularly proud of the zipper tabs at the end. I thought they looked really good.

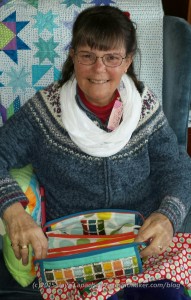
Julie said she thought it would be useful. I know she doesn’t do a lot of handwork, but it is a large-ish bag and can hold her things for the retreat later this month.

I am pleased when people like the gifts I give them, but I usually make a gift because I want to make it.

I am still on the fence about STB #3 as I am not sure the potential giftee will like it and these bags are a lot of work. I am going to cut out mine at the BAMQG meeting today, so I will be making that one soon. I hope to get it finished so I can use it for my EPP materials during the next NSGW trip in a few weeks.

Gift Post #3: Sew Together Bag

Watercolor Box Sew Together Bag

I made this Sew Together Bag for my mom. I like the way it turned out, but had some issues making it.

This is a challenging pattern. The combination of the zippers and the layers which need to be sewn together combine to make this project a challenge.

The first problem I had was with the directions. Because cutting is a good activity when I am away from my workroom, I decided to cut out the bag when I went to Reno to visit Kathleen. First, I read through the directions. The first page talks about “embellishments.” When I think of embellishments, I think of beads, buttons, charms, stitching. I think these things are included in what the directions are getting at, but I think the designer really meant special piecing and quilting.

I wanted to quilt this piece a little to give the outside some heft, but the directions were very unclear on whether I was supposed to quilt the exterior and the batting or add a backing/lining piece and quilt through the three layers as I would a quilt. I ended up making a two layer sandwich (no backing) and quilting that. The piece ended up too small and I am not sure whether I quilted too much or whether I cut the piece too small. I’ll have to check and see if I cut it wrong when I made the next one.

Pocket Panel with attached Side Panels

I thought I would be defeated by this pattern when I got to the pocket panel. I had no idea what the designer was trying to say when she said to put the four pocket pieces together. The section isn’t difficult to actually do, but explaining how to do it is difficult and I could not understand the pattern. I looked at the Sew-a-Long blog post describing this step and that helped a lot. This is the hardest step IMO.

After doing the pocket panel, the thickness began to kick in and wreak havoc with my attempts to make the piece look professional. I think someone with a Juki or other pseudo-industrial machine may have an easier time.

Matching Colors, Ordering Thread

I was stymied for a bit because I didn’t have the correct colored thread. I wanted the thread for the binding to match the binding. I ordered from Red Rock Threads and had the thread in a few days. Hooray for great customer service and fast shipping.

Once I had the thread, I was able to finish the bag. It was slow going, but I did it.

Wonderclips holding it all together

WonderClips are not mentioned on the supply list, but I found them to be invaluable when holding the piece together to sew on the binding.

Matching Thread
Matching Thread

I really could not have gotten through this pattern without the archived sew-a-long directions and all of the photos showed in the Quilt Barn blog. Click on the link, print the blog posts and keep them with your pattern.

Mom and her STB
Mom and her STB

Mom really liked the bag, for which I was very grateful.

She opened it on Christmas and filled it up with her small gifts and stocking stuffers to transport home.

Filled STB
Filled STB

I did struggle with the construction, but felt confident enough to make a second bag, which I have started and am a step plus some thread weaving in from finishing. I just bought zippers to make two more.


Random Update: STB

SBT Prep DONE!
SBT Prep DONE!

I have a couple of Sew Together Bags (SBT) on my list of Projects To Do. I have mentioned before that I find the prep of bags to be daunting. Unlike quilts, you can’t really cut as you go. It is a little frustrating to do that, if nothing else. Still cutting out bunches of pieces is no picnic either. I did a lot of cutting on my trip to Reno and that helped me, not only move forward on projects (even though I can’t show them just yet), but also be inspired to make other projects of the same kind. At the moment, I am just being inspired. I have not yet cut out other projects since I have a couple from that mass prepping session to sew.

SBT: big zipper section

A few of us on Facebook have, coincidentally, SBTs on our list of to dos and we have been sharing tips and tricks. It is very helpful. One helpful tip was that there was a sew-a-long done by The Quilt Barn a few years ago and it still posted. I had some problems seeing it on my mobile device, but no problem from my computer. It really helps on the first zipper step, which is all the farther I have gotten on the sewing part of the project. Still, it is nice to see the other ladies finish and post their SBTs as well as the progress they are making.