I decided that I would try to make the Metro Twist larger.I have a possible recipient for this quilt and I want it to, at least be lap sized.
I have plenty of foreground fabrics, even though most are fat quarters. I needed to find more of the background fabric. It is always a challenge with solids. Since I buy limited solid brands, I thought it was doable.
Normally, I write the brand and color in Sharpie on the selvedge, but the grey I used for Metro Twist didn’t have it. Either I cut it off and tossed it or never wrote it down.
I also didn’t have a picture of the grey with other purchases. Usually, I photograph my purchases so I have some hope of finding fabric and supplies again.
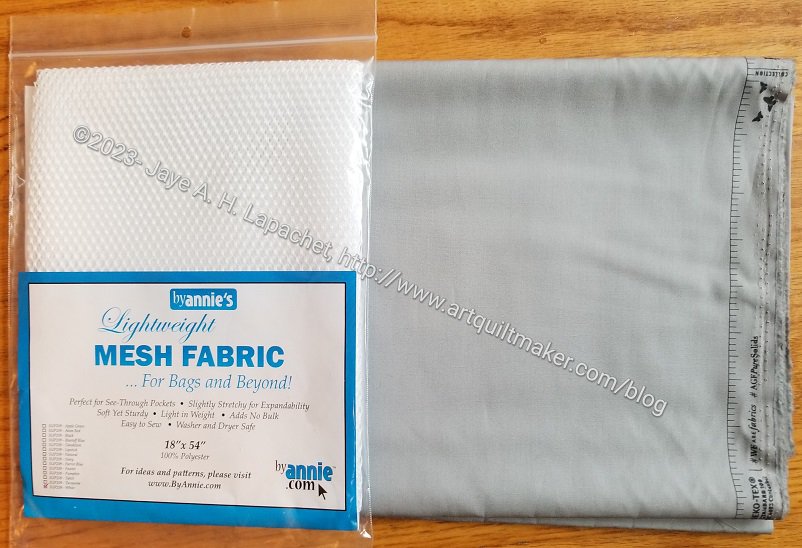
Austin Sewing Pure Elements Ash + mesh
I looked at my color cards and thought the background might be from Pure Elements. I bought some Pure Elements Ash first, but when it arrived, I could see that it wasn’t quite right. I can use it for something else, but disappointing nonetheless.
Back to the color cards. This time I pulled them all out, but immediately put back the Kona color card. I very rarely buy Kona and I knew this wasn’t it. I have the American Made Brands color card. Bingo! I bought some of one of their Gray. I am pretty sure that is the right fabric. I suppose I’ll see when it arrives.
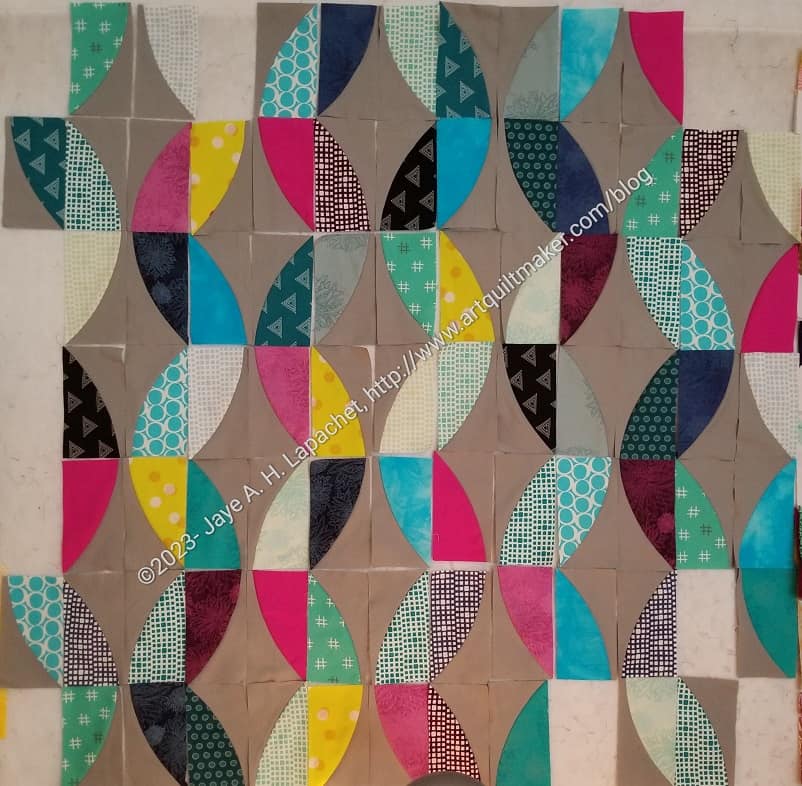
I haven’t worked on the Metro Twist for a few weeks as I tried to catch up on Scrappy Celebration and The Pantone Project. I was able to make some progress this past weekend with the background pieces I have already cut. I have a bit of the background left and want to save it until the reinforcements arrive in case I need it and can’t find the right solid.
The Metro Twist is going. I need to make more blocks, so it is going slowly. I have some more pieces cut so I can sew more blocks; I just need some time to do it.
I am in a place where I feel like I have too many things going on at once.
The next Sew Day will be a Super Sew Day/Meeting combination. As mentioned, I will be assisting Amy to teach the Metro Twist pattern.
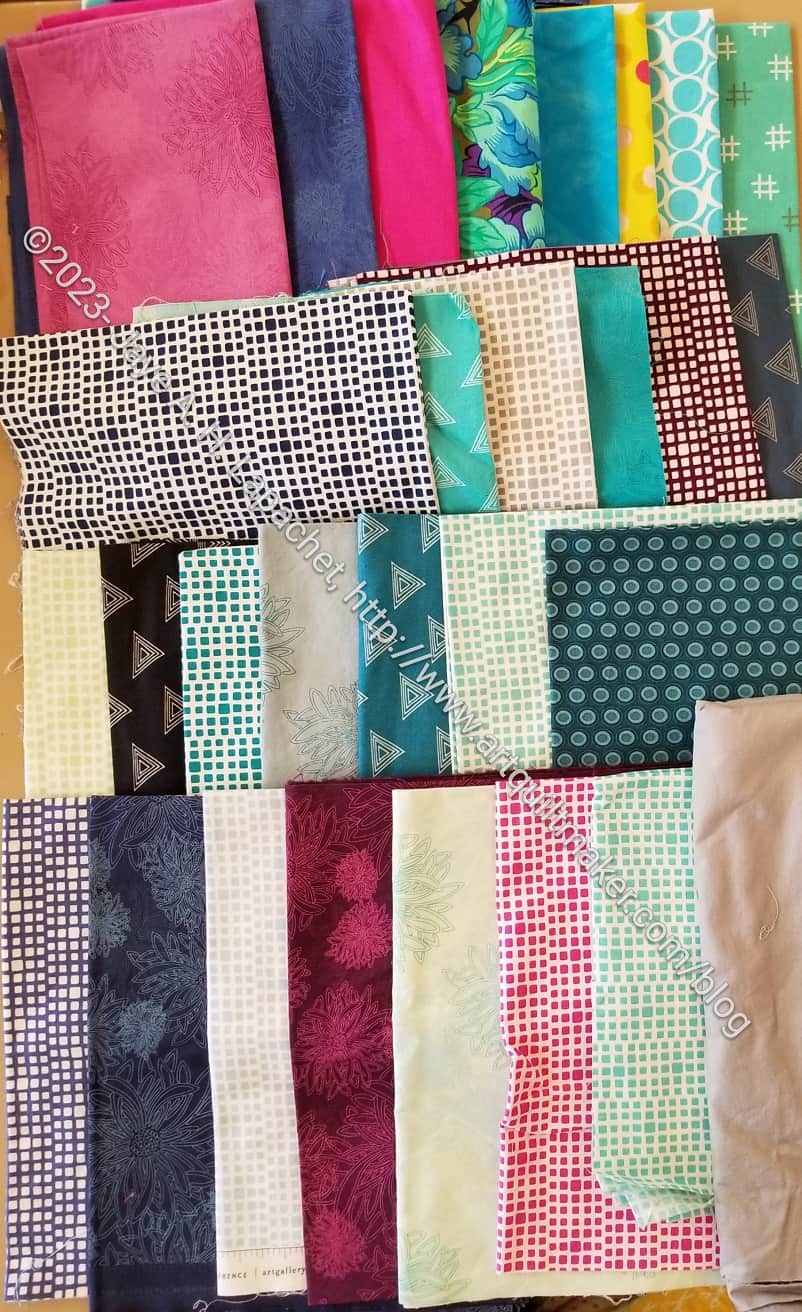
Metro Twist Fabric Pull
One thing I did was look through the fabric pulls that I had saved. I chose one with a large number of prints to use.
A lot of these are Art Gallery fabrics. I may not use all of the grid fabrics and I may change out the focus fabric (4th from left, top row), which I added quickly before I took these to Sew Day. There is already a lot of green in this quilt and that might send it over the edge. Still, maybe not, we’ll have to see as I cut and start putting blocks together.
Metro Twist** is another pattern by Sew Kind of Wonderful that uses their Quick Curve Ruler**. You might remember that I made Metroscape** a few years ago with this ruler.
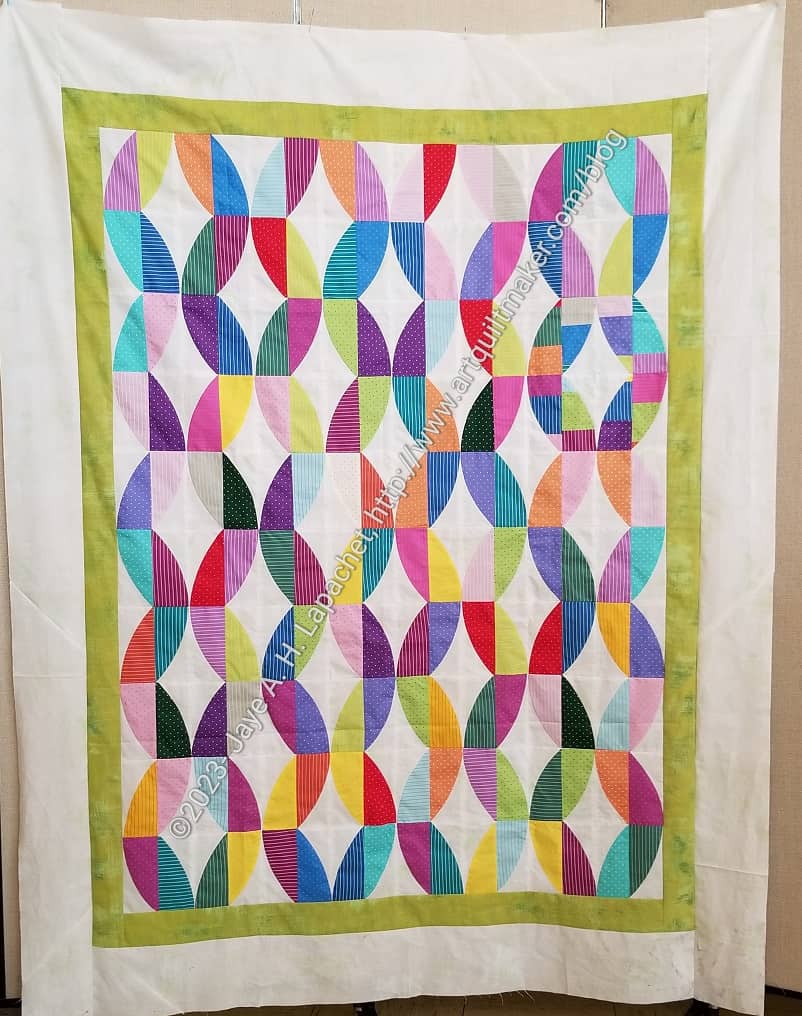
At the last Sew Day, she was putting on borders and preparing the top for quilting. I was able to take a photo of the quilt and it looks great!
I didn’t really realize how popular this project was until I heard that Amy will be teaching the guild how to make it at the next Super Sew Day, in July. I also had a clue when Mary C said that a bunch of people bought the pattern and the ruler after seeing Amy’s quilt.
I talked to Amy and offered to help her teach. She hasn’t told me what she needs me to do yet, but I am kind of excited about it. I really need to find some fabrics I want to use. I love Amy’s choices of Tiny Dots and Tiny Stripes, but I don’t want to copy what she did.
The quilt on the cover of the pattern isn’t super appealing and I don’t think the Tula All Stars (if even still available) would work for this pattern.
**Obviously, you should shop at local quilt shops and small businesses. However, if you are too busy or can’t find what you need there, I use Amazon affiliate links and may be paid for your purchase of an item when you click on an item’s link in my post. There is no additional cost to you for clicking or purchasing items I recommend. I appreciate your clicks and purchases as it helps support this blog.
My class is designing circle quilts. I decided that I had better try some of the rulers I have been suggesting my students try.
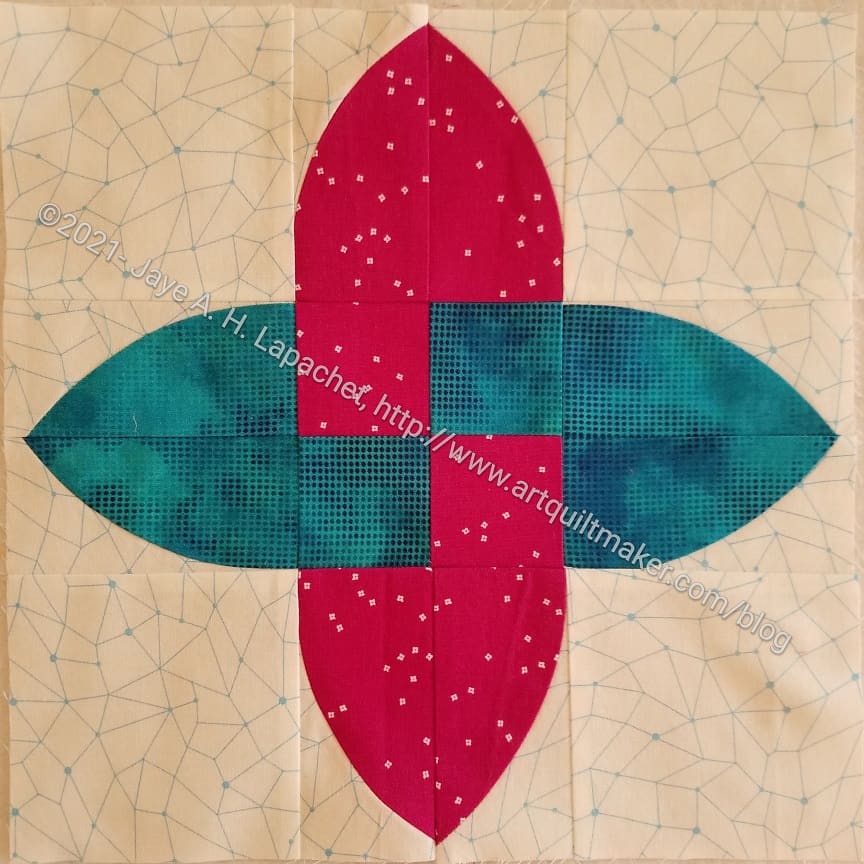
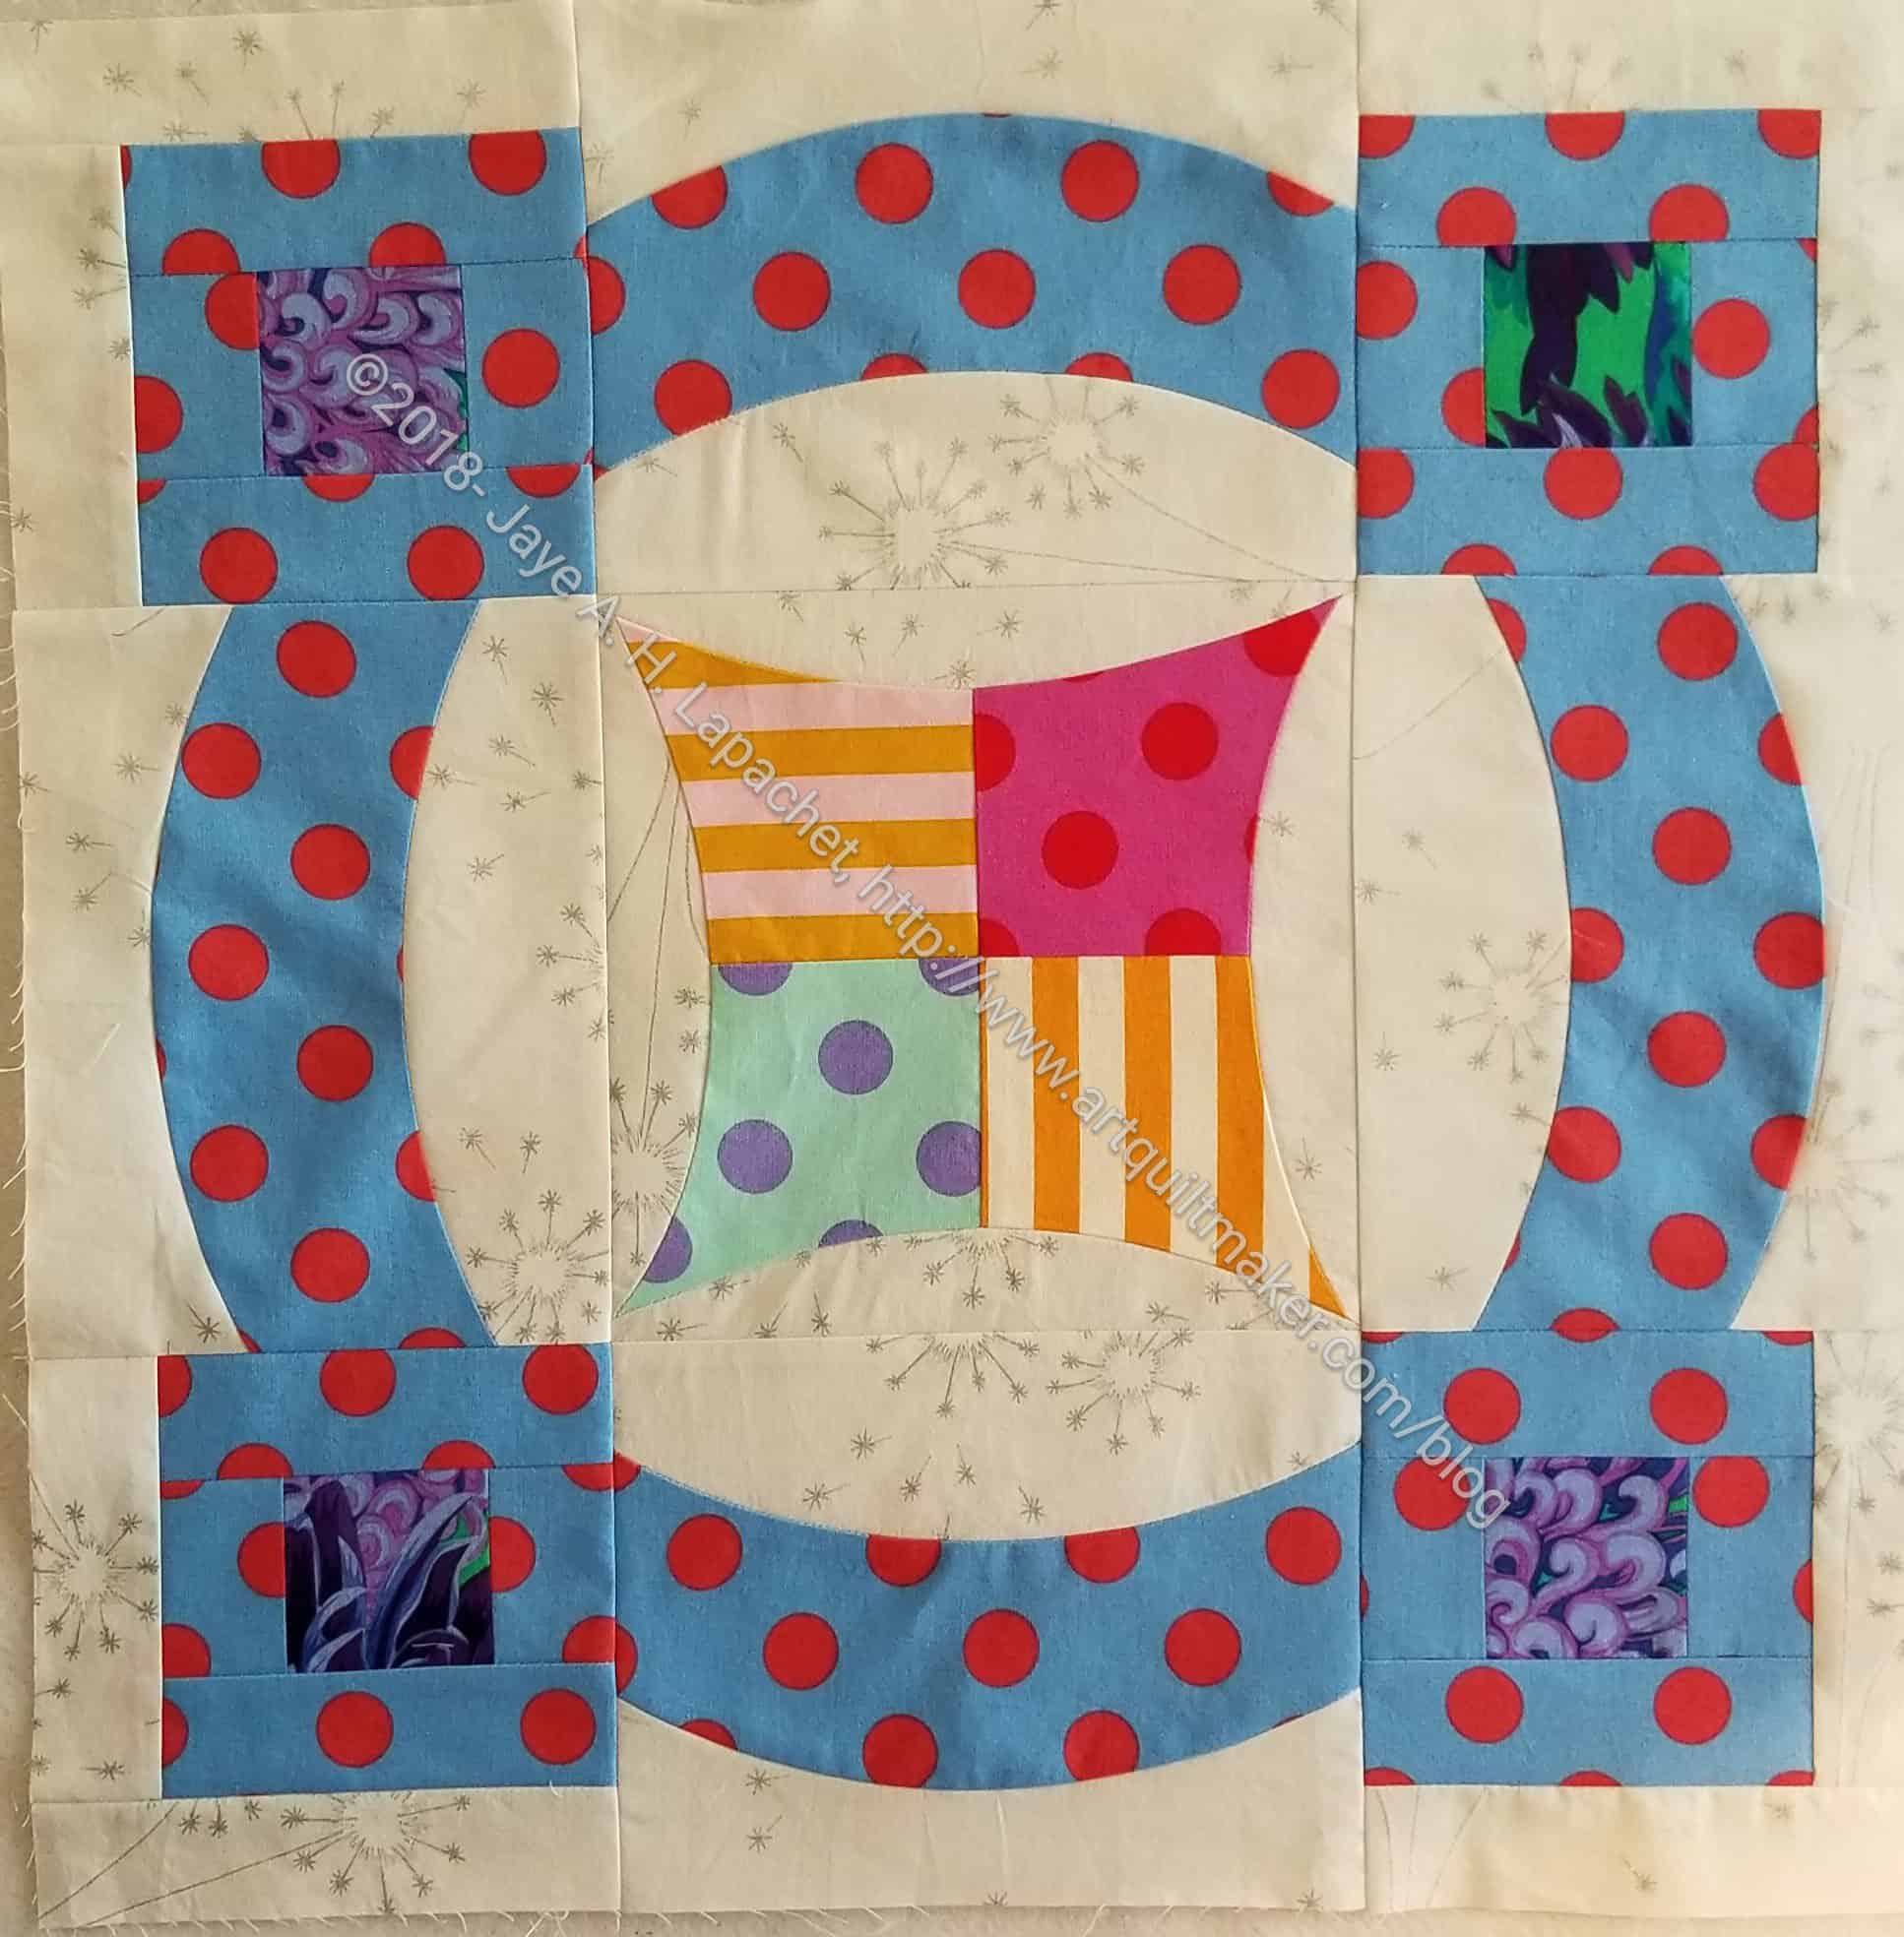
Rock Star Block Finished
I tried out one of the new blocks using the Wonder Curve ruler. This is one of the blocks from their recent sew along. Sadly, they do not have a photo of the finished quilt in their IG feed. I think it will probably be a pattern sometime in the future. I wasn’t super enamored of their sampler, but I did like this block. I did think it would be a good test of the ruler, so I made one over the weekend.
I am still liking the blue and red-violet combination that I used in Frolic!. This blue is more turquoise than the blue-violet I used in Frolic!, however the combination is interesting. Also, the fabrics were handy and I didn’t have to rummage.
This is the first Sew Kind of Wonderful project I have made since Metroscape and Mod Lights. As I mentioned when I made those projects, I really liked the Quick Curve ruler and the mini Quick Curve ruler. The Wonder Curve ruler does those nice petal shapes, but I didn’t feel the love quite as much with this ruler. It could be that it was new to me and I only had a block pattern for directions. I didn’t watch the Live demos.
I am interested in seeing what patterns the SKOW team produces. I wouldn’t make or put the Rock the Block sampler together like they did. I didn’t think the design worked, though the individual blocks were appealing. You see the sampler top finished in a video at minute 5:30.
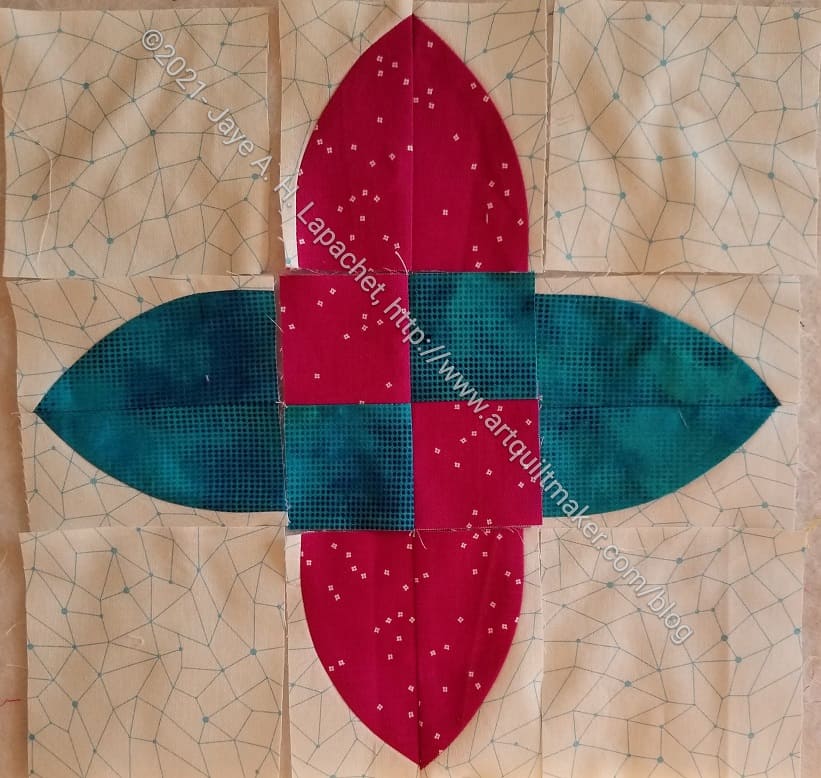
Rock Star block in process
This block, after cutting the petals and putting the individual units together is a regular 9 patch. I thought about making a quilt with these blocks, but it doesn’t have enough appeal at the moment to make me do it. I do like the way the center layout makes the block look woven.
I am pretty impressed with SKOW, in general. Their rulers work well.
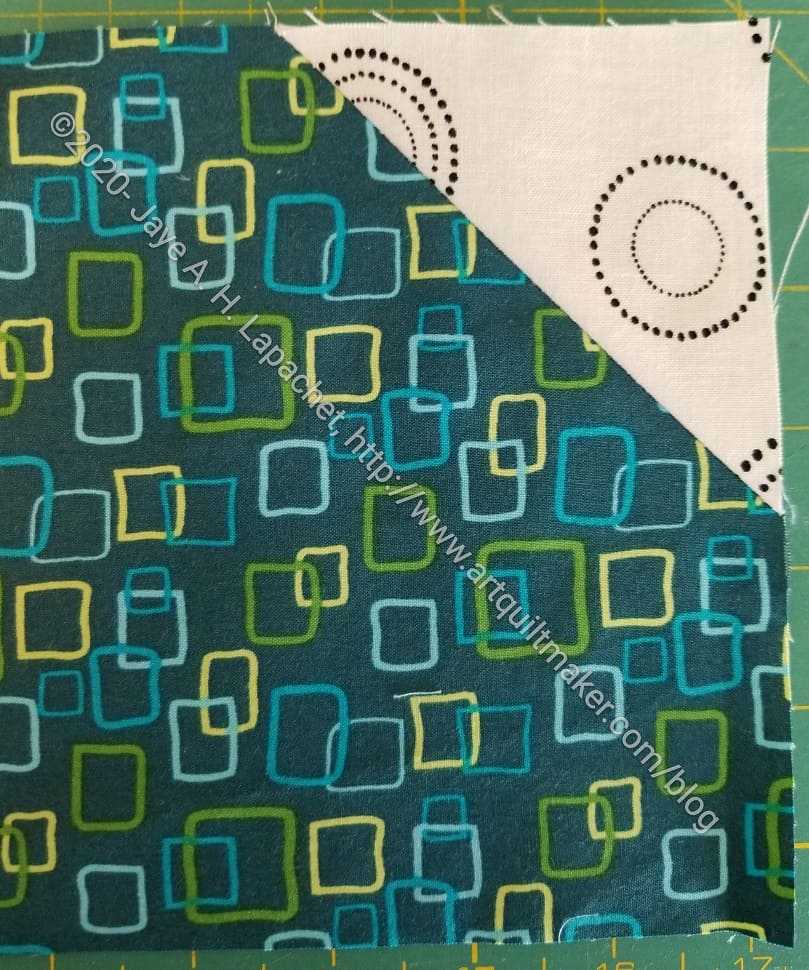
I bought Doug Leko’s Folded Corners Ruler** awhile ago but didn’t have a reason to use it until Saturday. I started working on the X Quilt last week. I was really struggling with the way the pattern was written. After reading a Bonnie Hunter post about Valentine’s Day where she mentioned this ruler**, I dug it out. I watched a video, started using it which resulted in the X quilt process moving along. I also felt happier.
Folded corners are often referred to as “flippy corners”. This ruler makes them easy. I was amazed to find that they sew up perfectly. I watched the Fat Quarter Shop video demo to get me started.
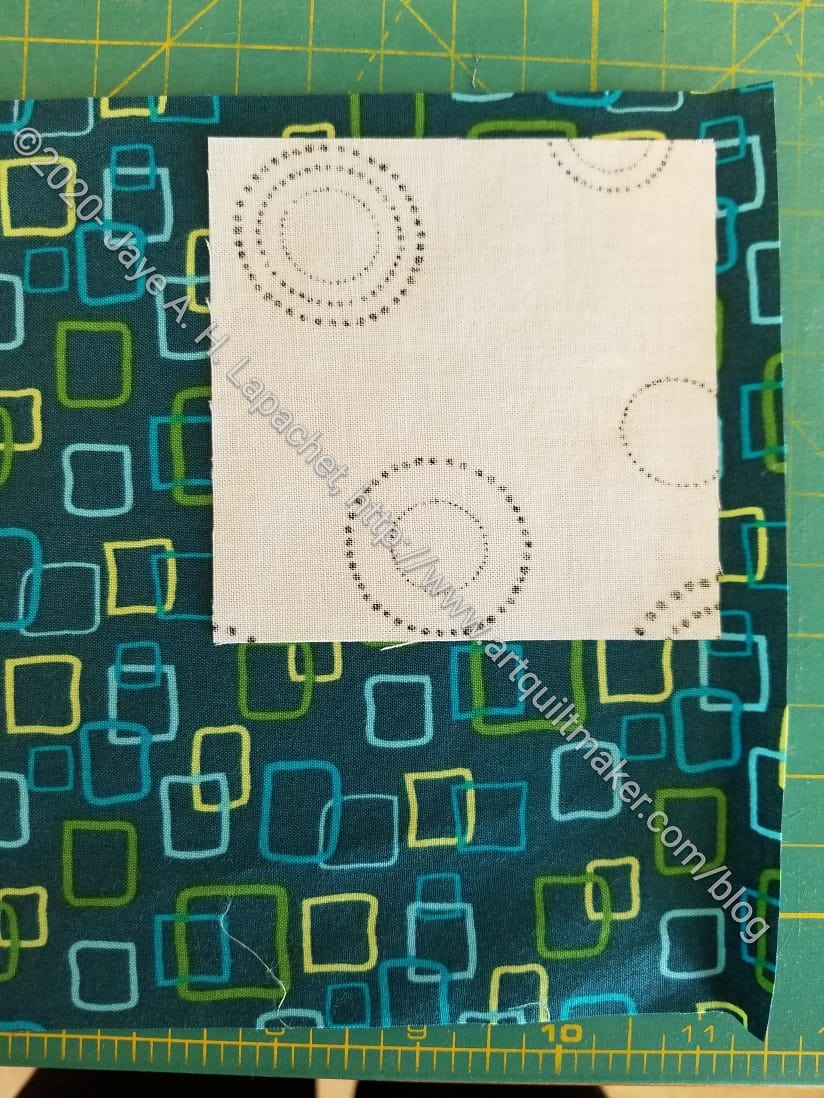
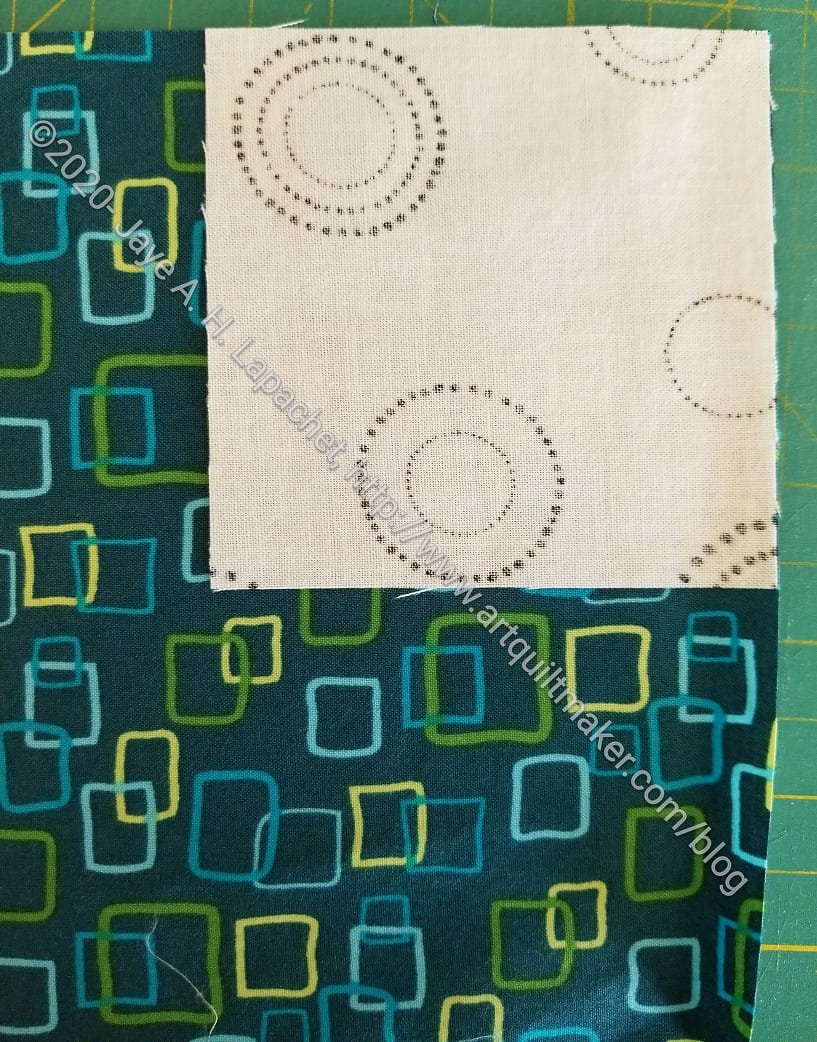
Two squares to join
First you need the two squares indicated in your pattern. I used a 6.5 inch square and a 3.5 inch square. These sizes came straight from the pattern. These sizes were one of three pairs of sizes I needed to make the quilt. I used the same process on all the sizes and it worked perfectly regardless of size.
My smallest sizes were 3.5 inch square and 1.5 inch square (for the corner). I was concerned that the 1.5 incher would be too small, but it worked just as well as the others. N.B. I did have to make sure that the small pieces did not get caught in my machine, but it was made easier because there were no dog ears. Doug Leko does have a mini version of the ruler** I mentioned, but I don’t have it and didn’t’ investigate the differences. I also noticed that Creative Grids has a ruler that purports to do the same thing**.
Line up two squares
Make sure right sides are together. Line up your squares so the corners are straight. You do not want to see the bottom square on the top or right when the pieces are lined up.
The above step requires fairly accurate cutting. By that I mean your square should be square.
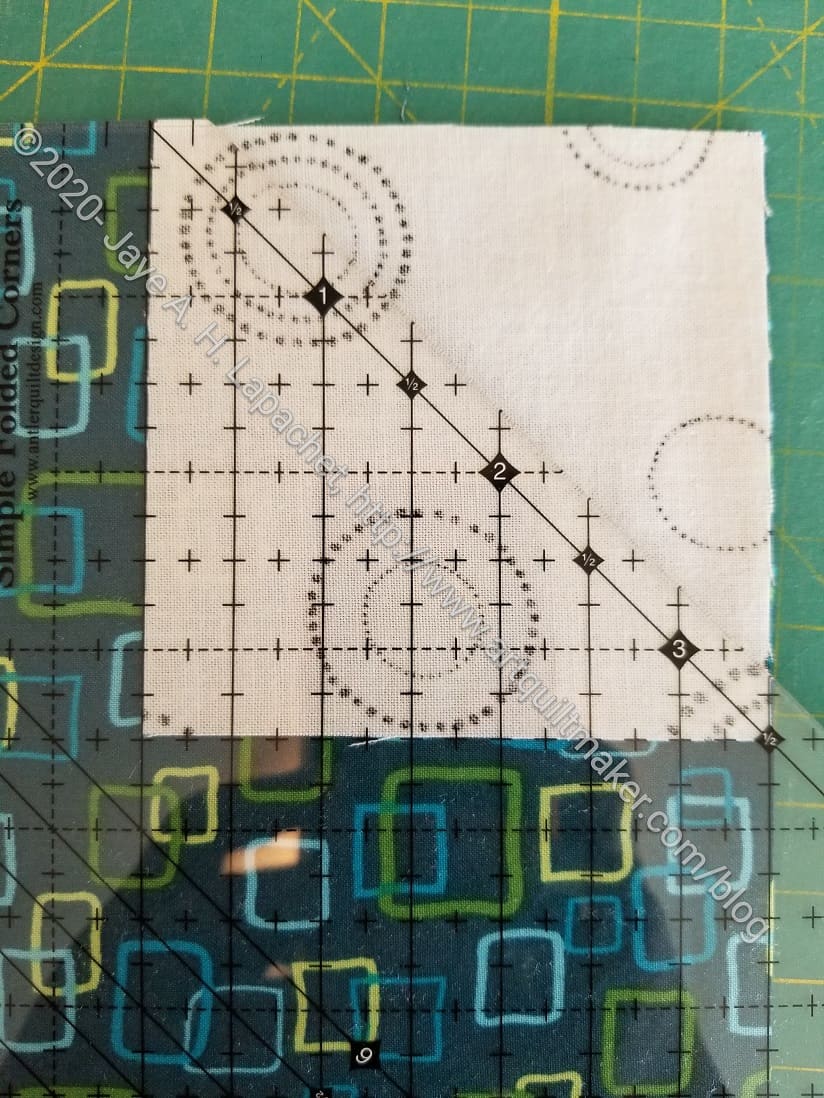
Line up ruler
Place the ruler** on the two squares. Line up the solid line on the left and the XX line on the bottom with your top square.
Lines to use
When you line up the ruler, there is a solid line on the left. It is the first solid line on the left and connects with the diagonal line. This is the line you place on the left side of the smaller square. The diagonal line should be corner to corner.
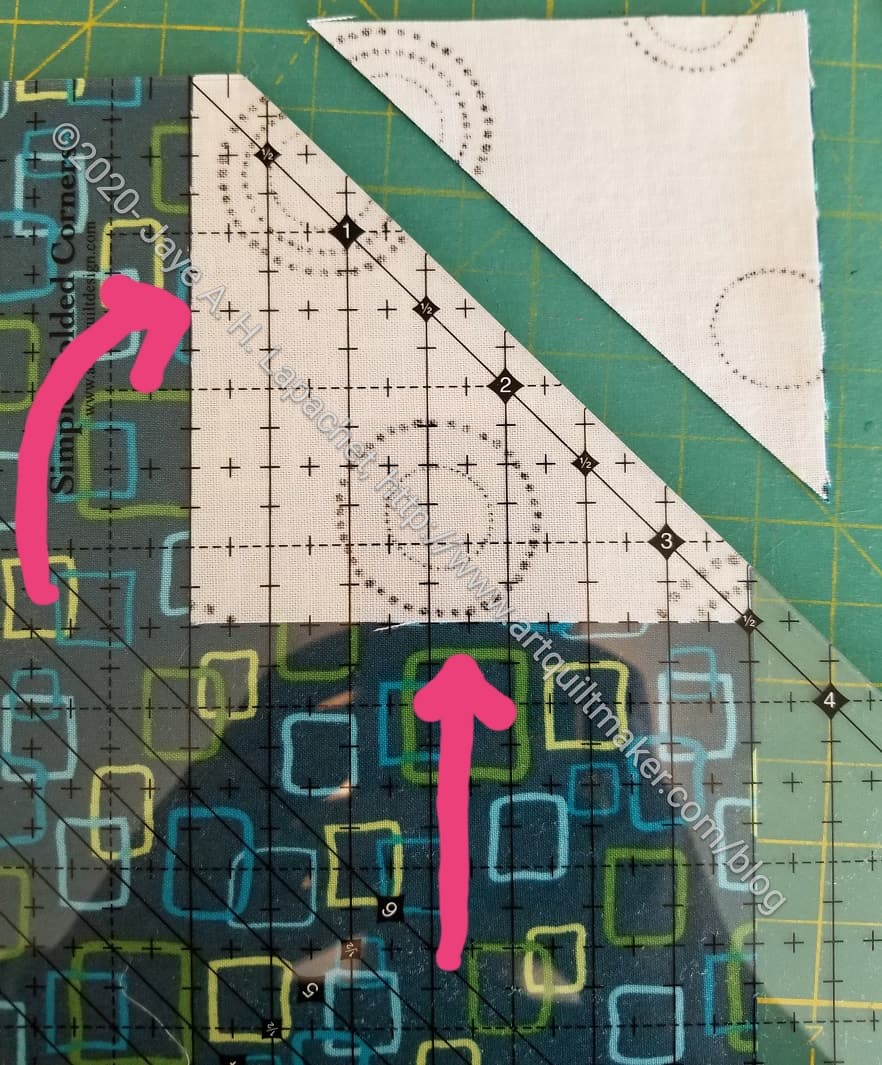
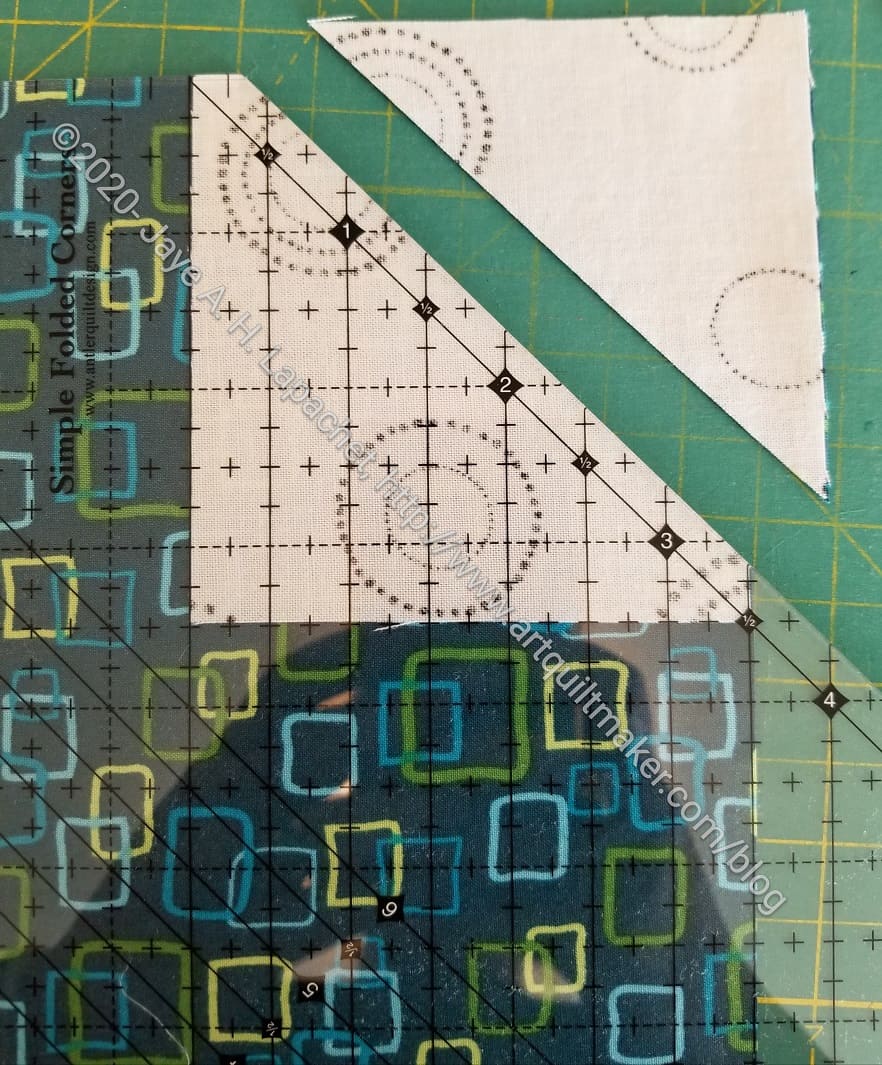
Cut on the diagonal
Cut on the diagonal. The ruler includes the diagonal seam allowance. This is a great feature of the ruler so you don’t have to guess where to sew like you do when drawing a diagonal line. Also! No drawing of diagonal lines. I have a lot of corners to add for the X quilt so this is a bonus. It saves me a little time.
Pin then sew
I like to pin, then I sewed along the diagonal.
Press.
Perfect corner!
Perfect! You might think that I picked the most perfect one, but I didn’t. First, I didn’t know what was going to happen when I started taking photos for the tutorial. With very few exceptions all the corners came out lined up perfectly. Where they didn’t (1 or 2 only), I think it was because I didn’t press the fabric properly or didn’t cut accurately.
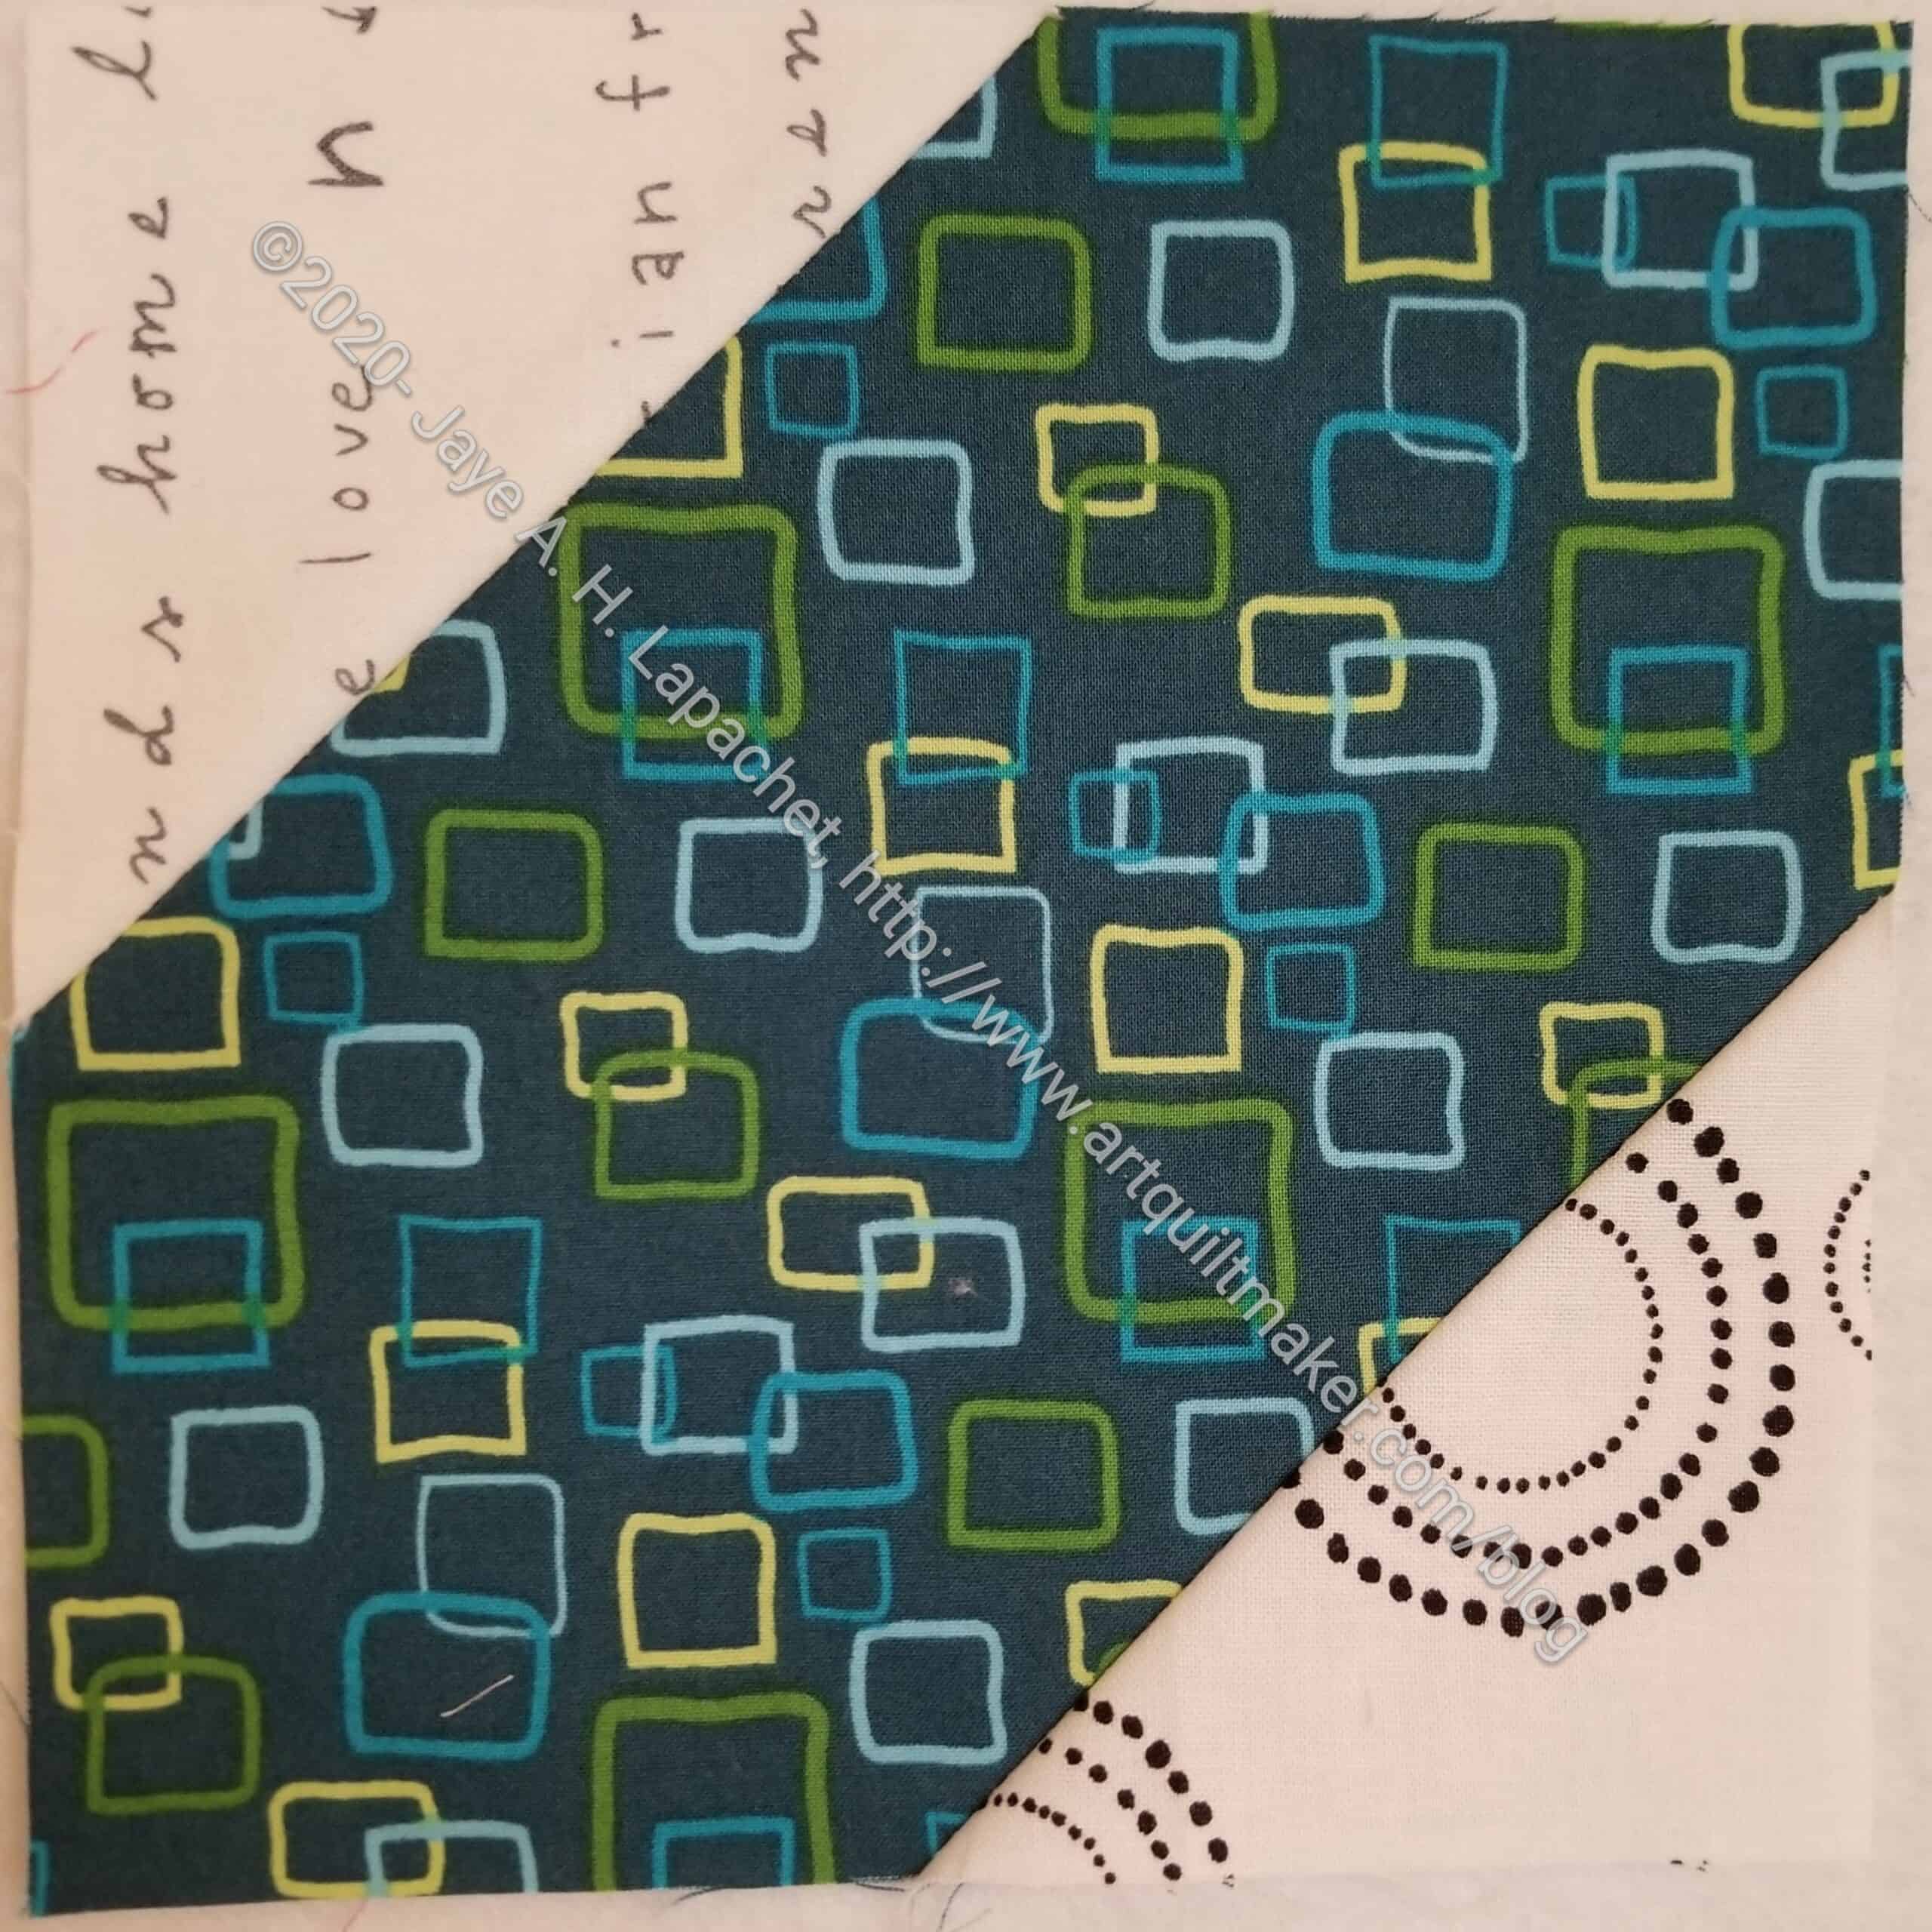
Whole Lozenge Block
The whole block came out really well, too.
I love the idea of specialty rulers. I often buy them with hope and don’t take the time to learn to use them. Or they turn out to be not as promised- not as helpful, hard to use, etc. This ruler works really well. I am super pleased not to have to draw 2 zillion diagonal lines!
**I use affiliate links and may be paid for your purchase of an item
when you click on an item link in my post. There is no additional cost
to you for clicking or purchasing items I recommend. I appreciate your
clicks and purchases as it helps support this blog.
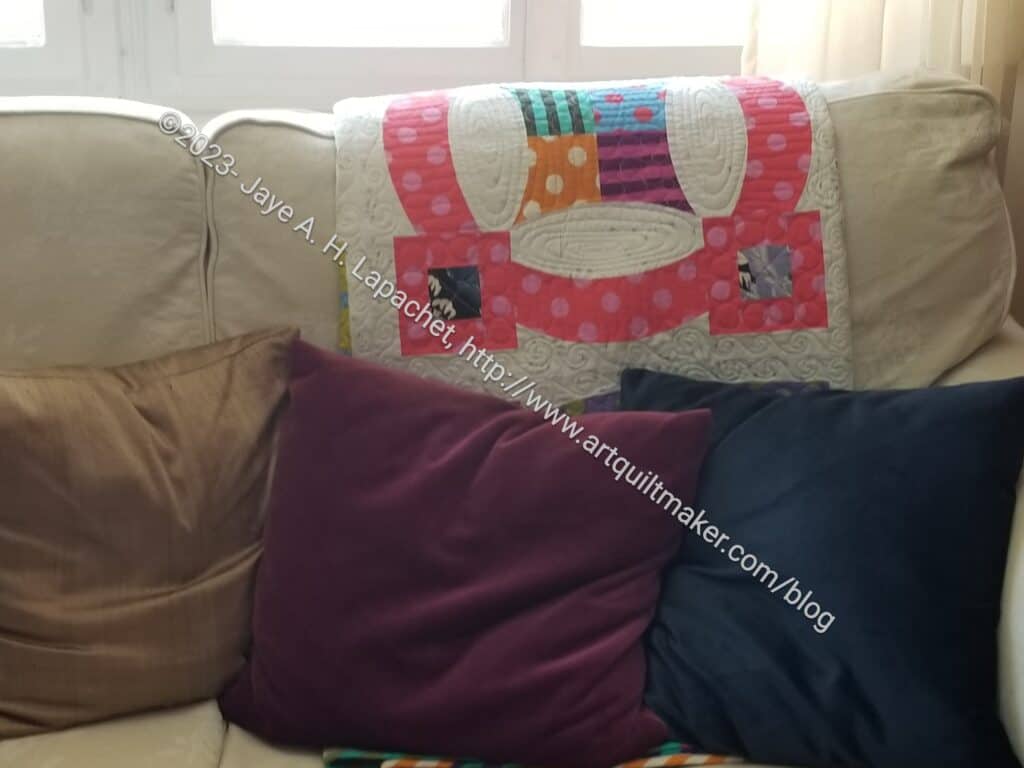
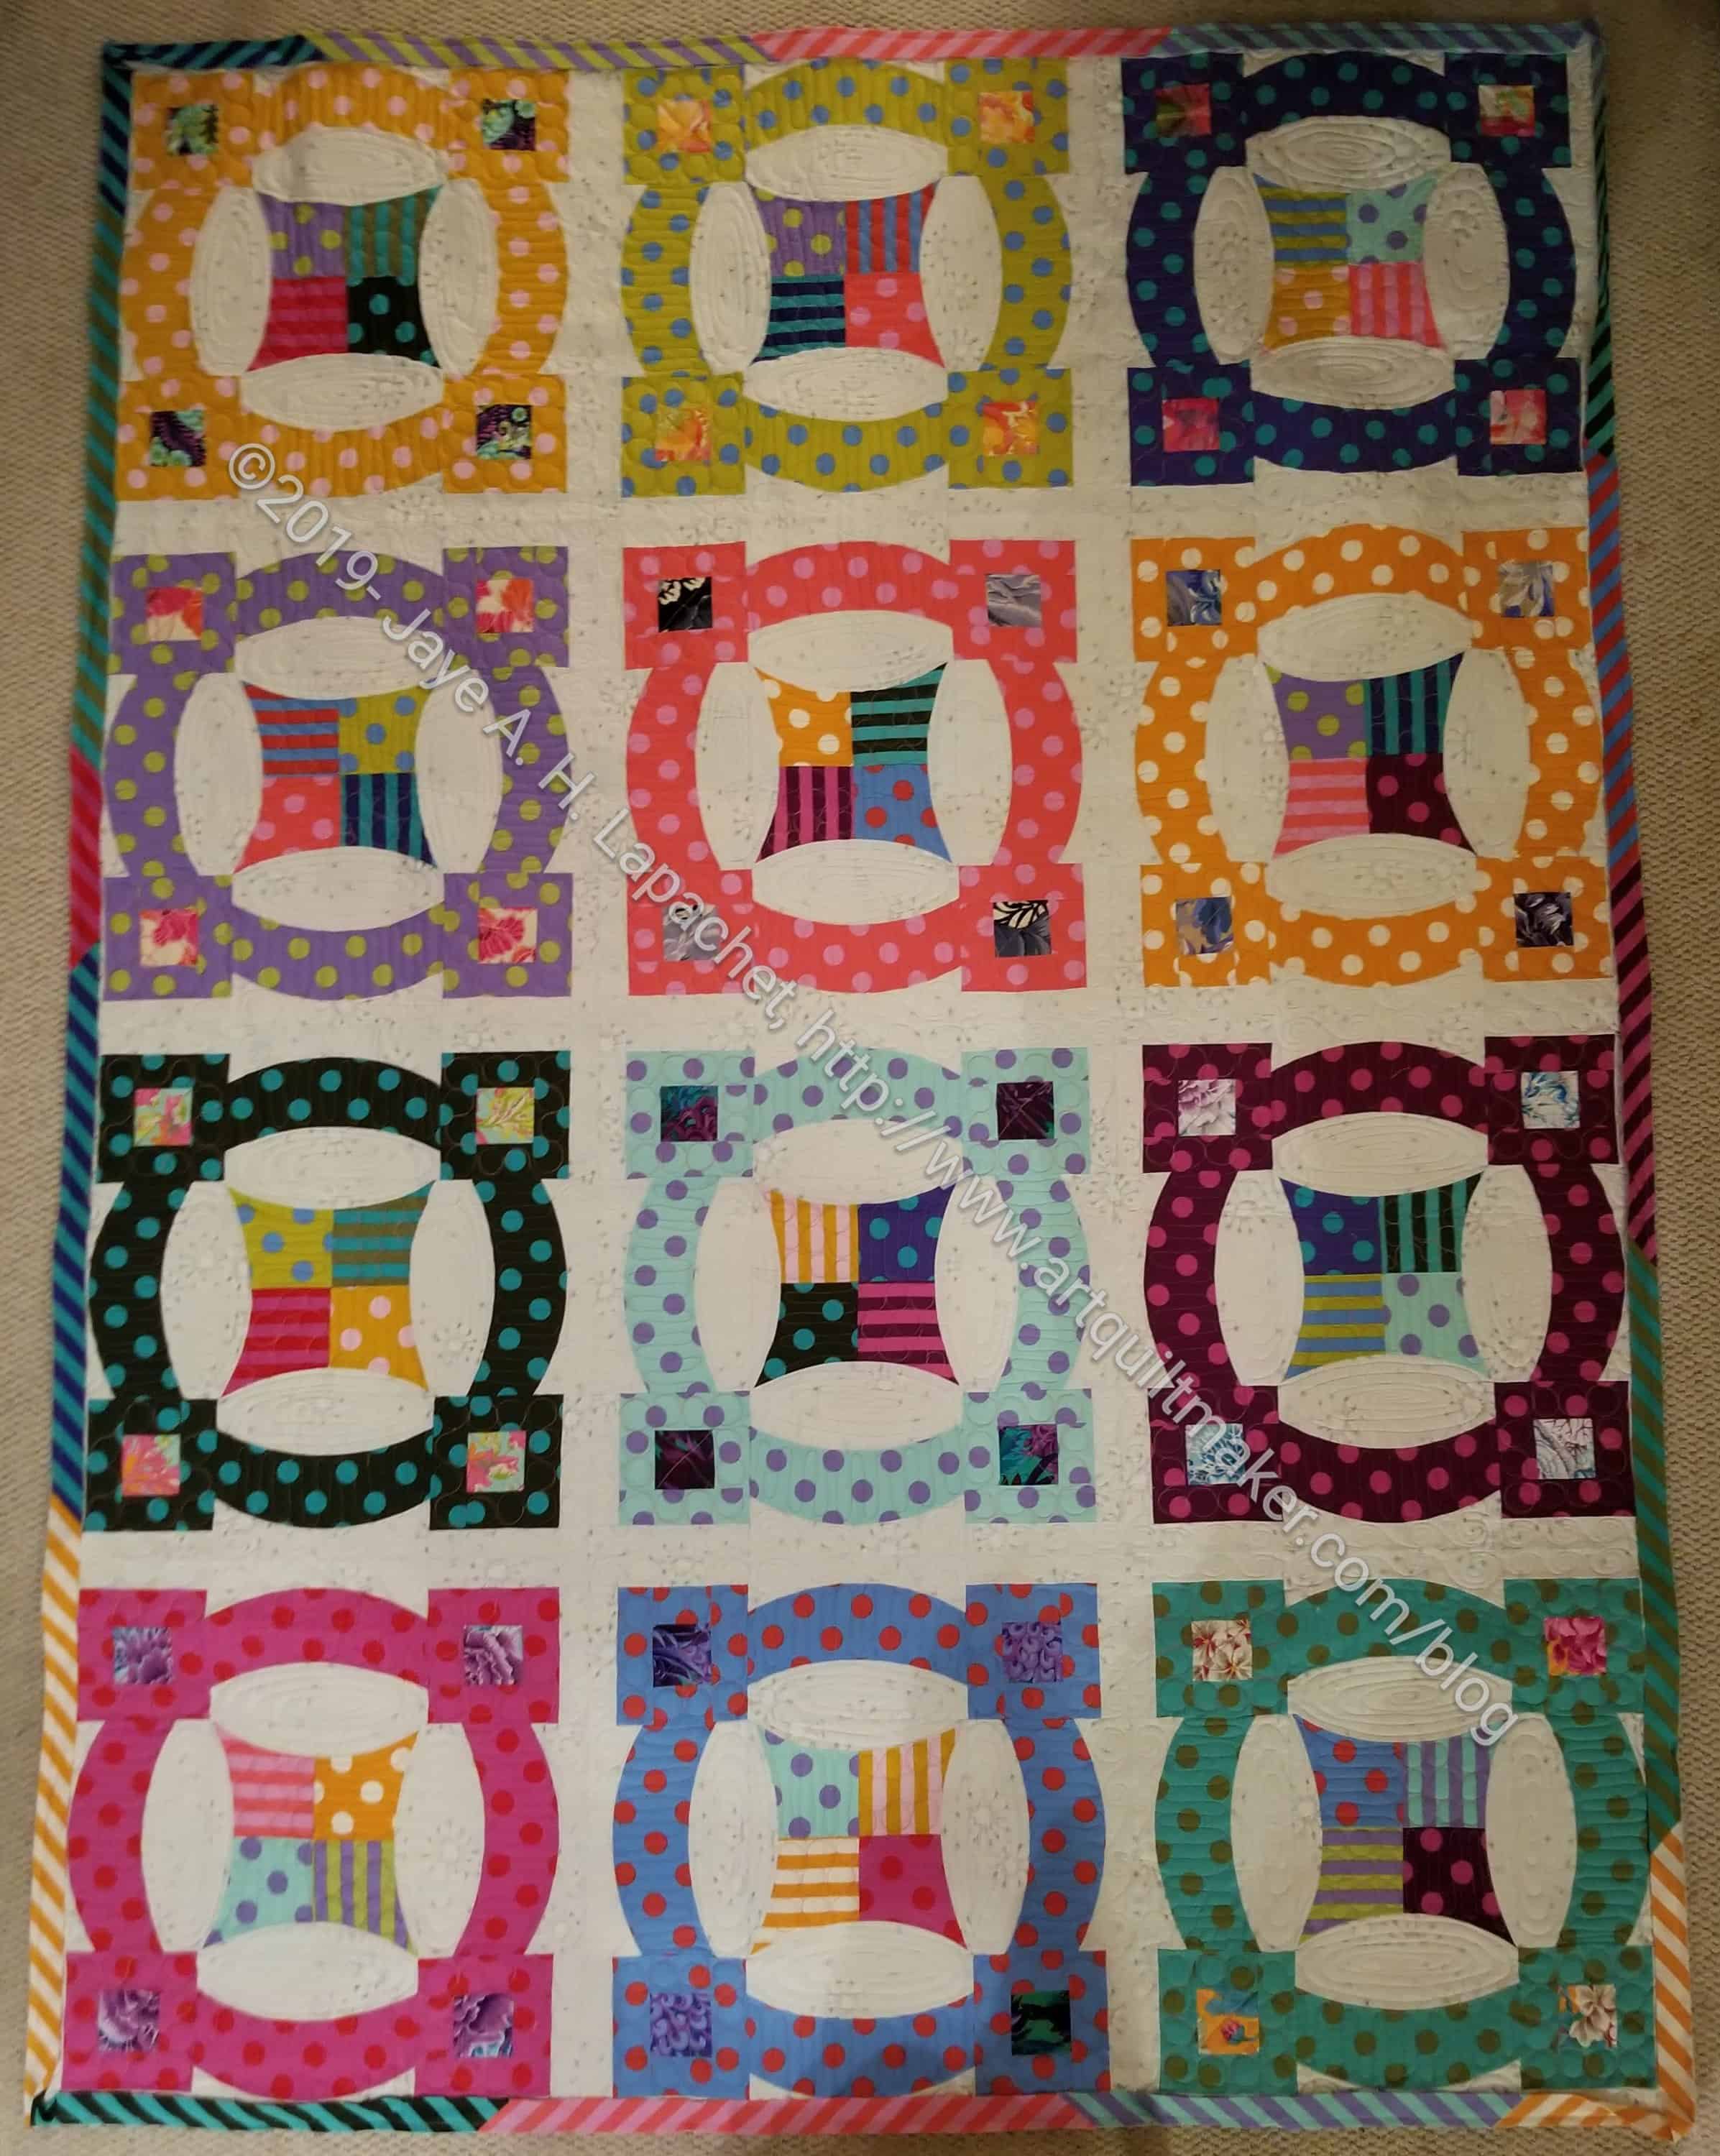
I finished Metroscape a few weeks ago. I didn’t post it sooner because I just had the chance to snap a photo before I took it to guild last week.
I am still pleased with it and was encouraged to enter it into the fair, which means adding a rod pocket. I don’t have much else to add so I just might. It will, at least, impress a few people because of the curves. The machine quilted category is a tough one, but with the curves and the bold fabrics, this one might have a chance to win.
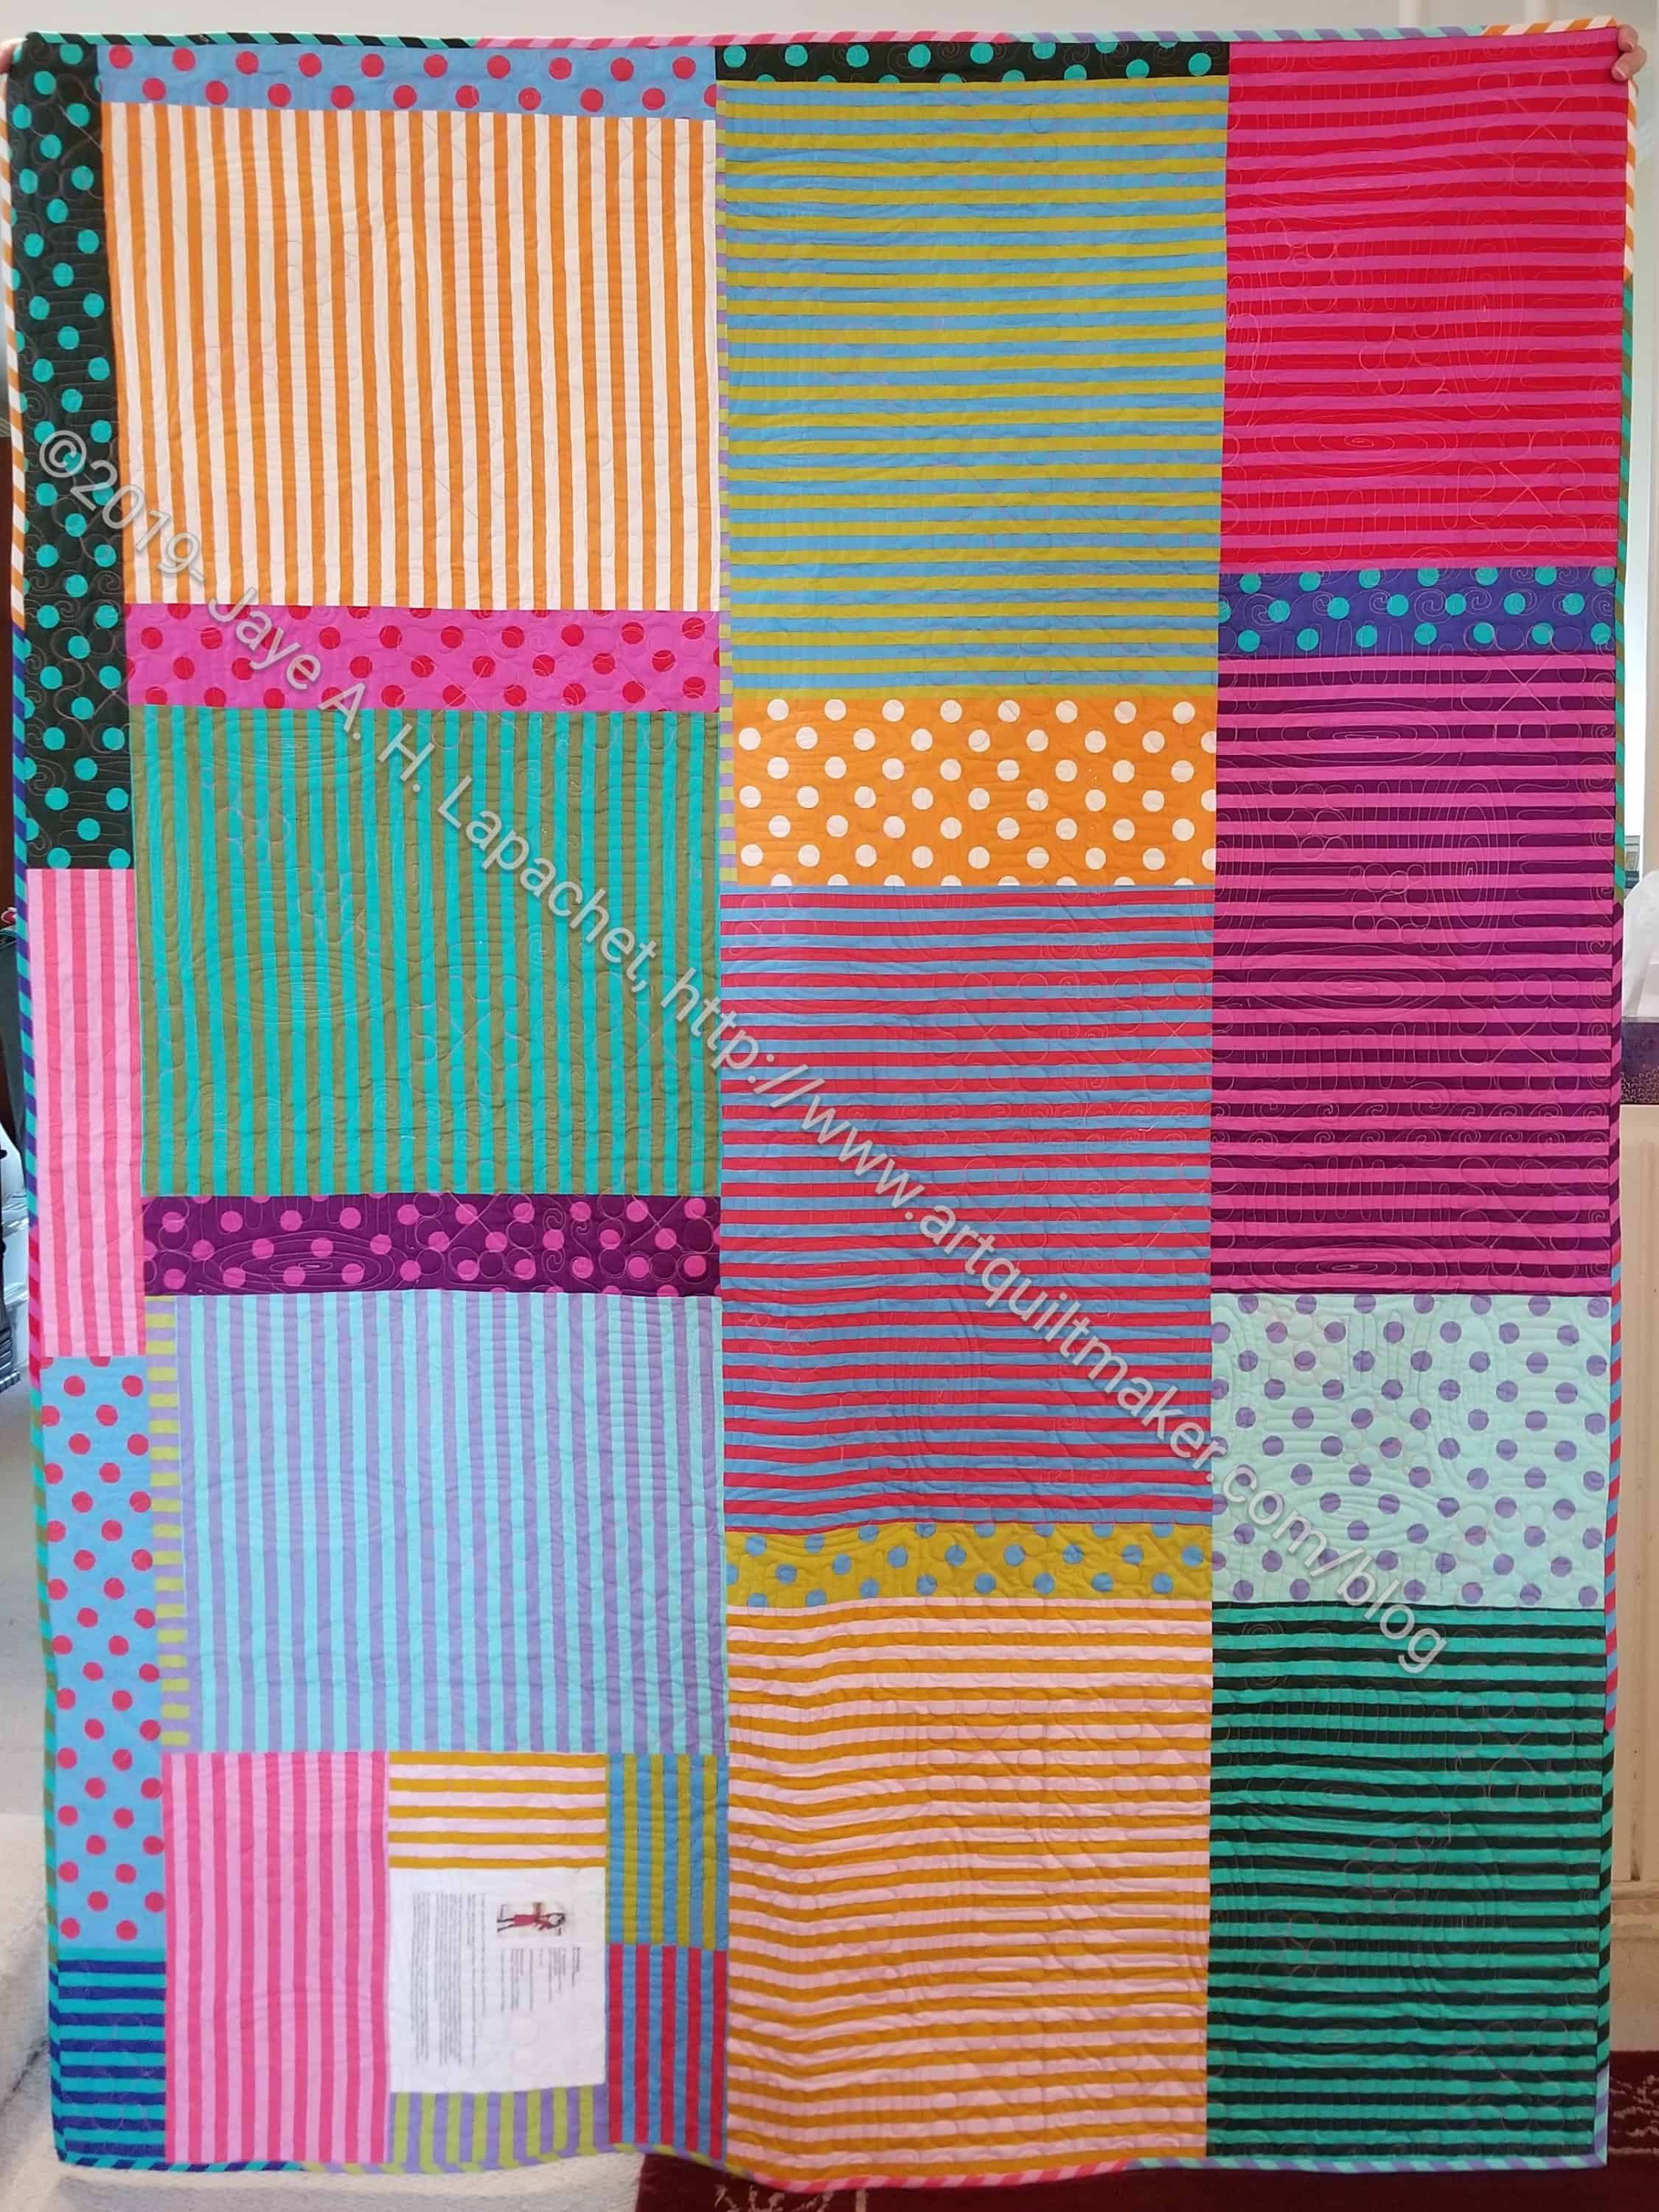
Metroscape back – finished
What this quilt makes me think about now is what to do next with the Quick Curve Rulers.
It isn’t that long ago that I was sewing the blocks for this piece. Now the quilting is done and the binding is machine stitched. I am ready to hand sew the back of the binding and be finished.
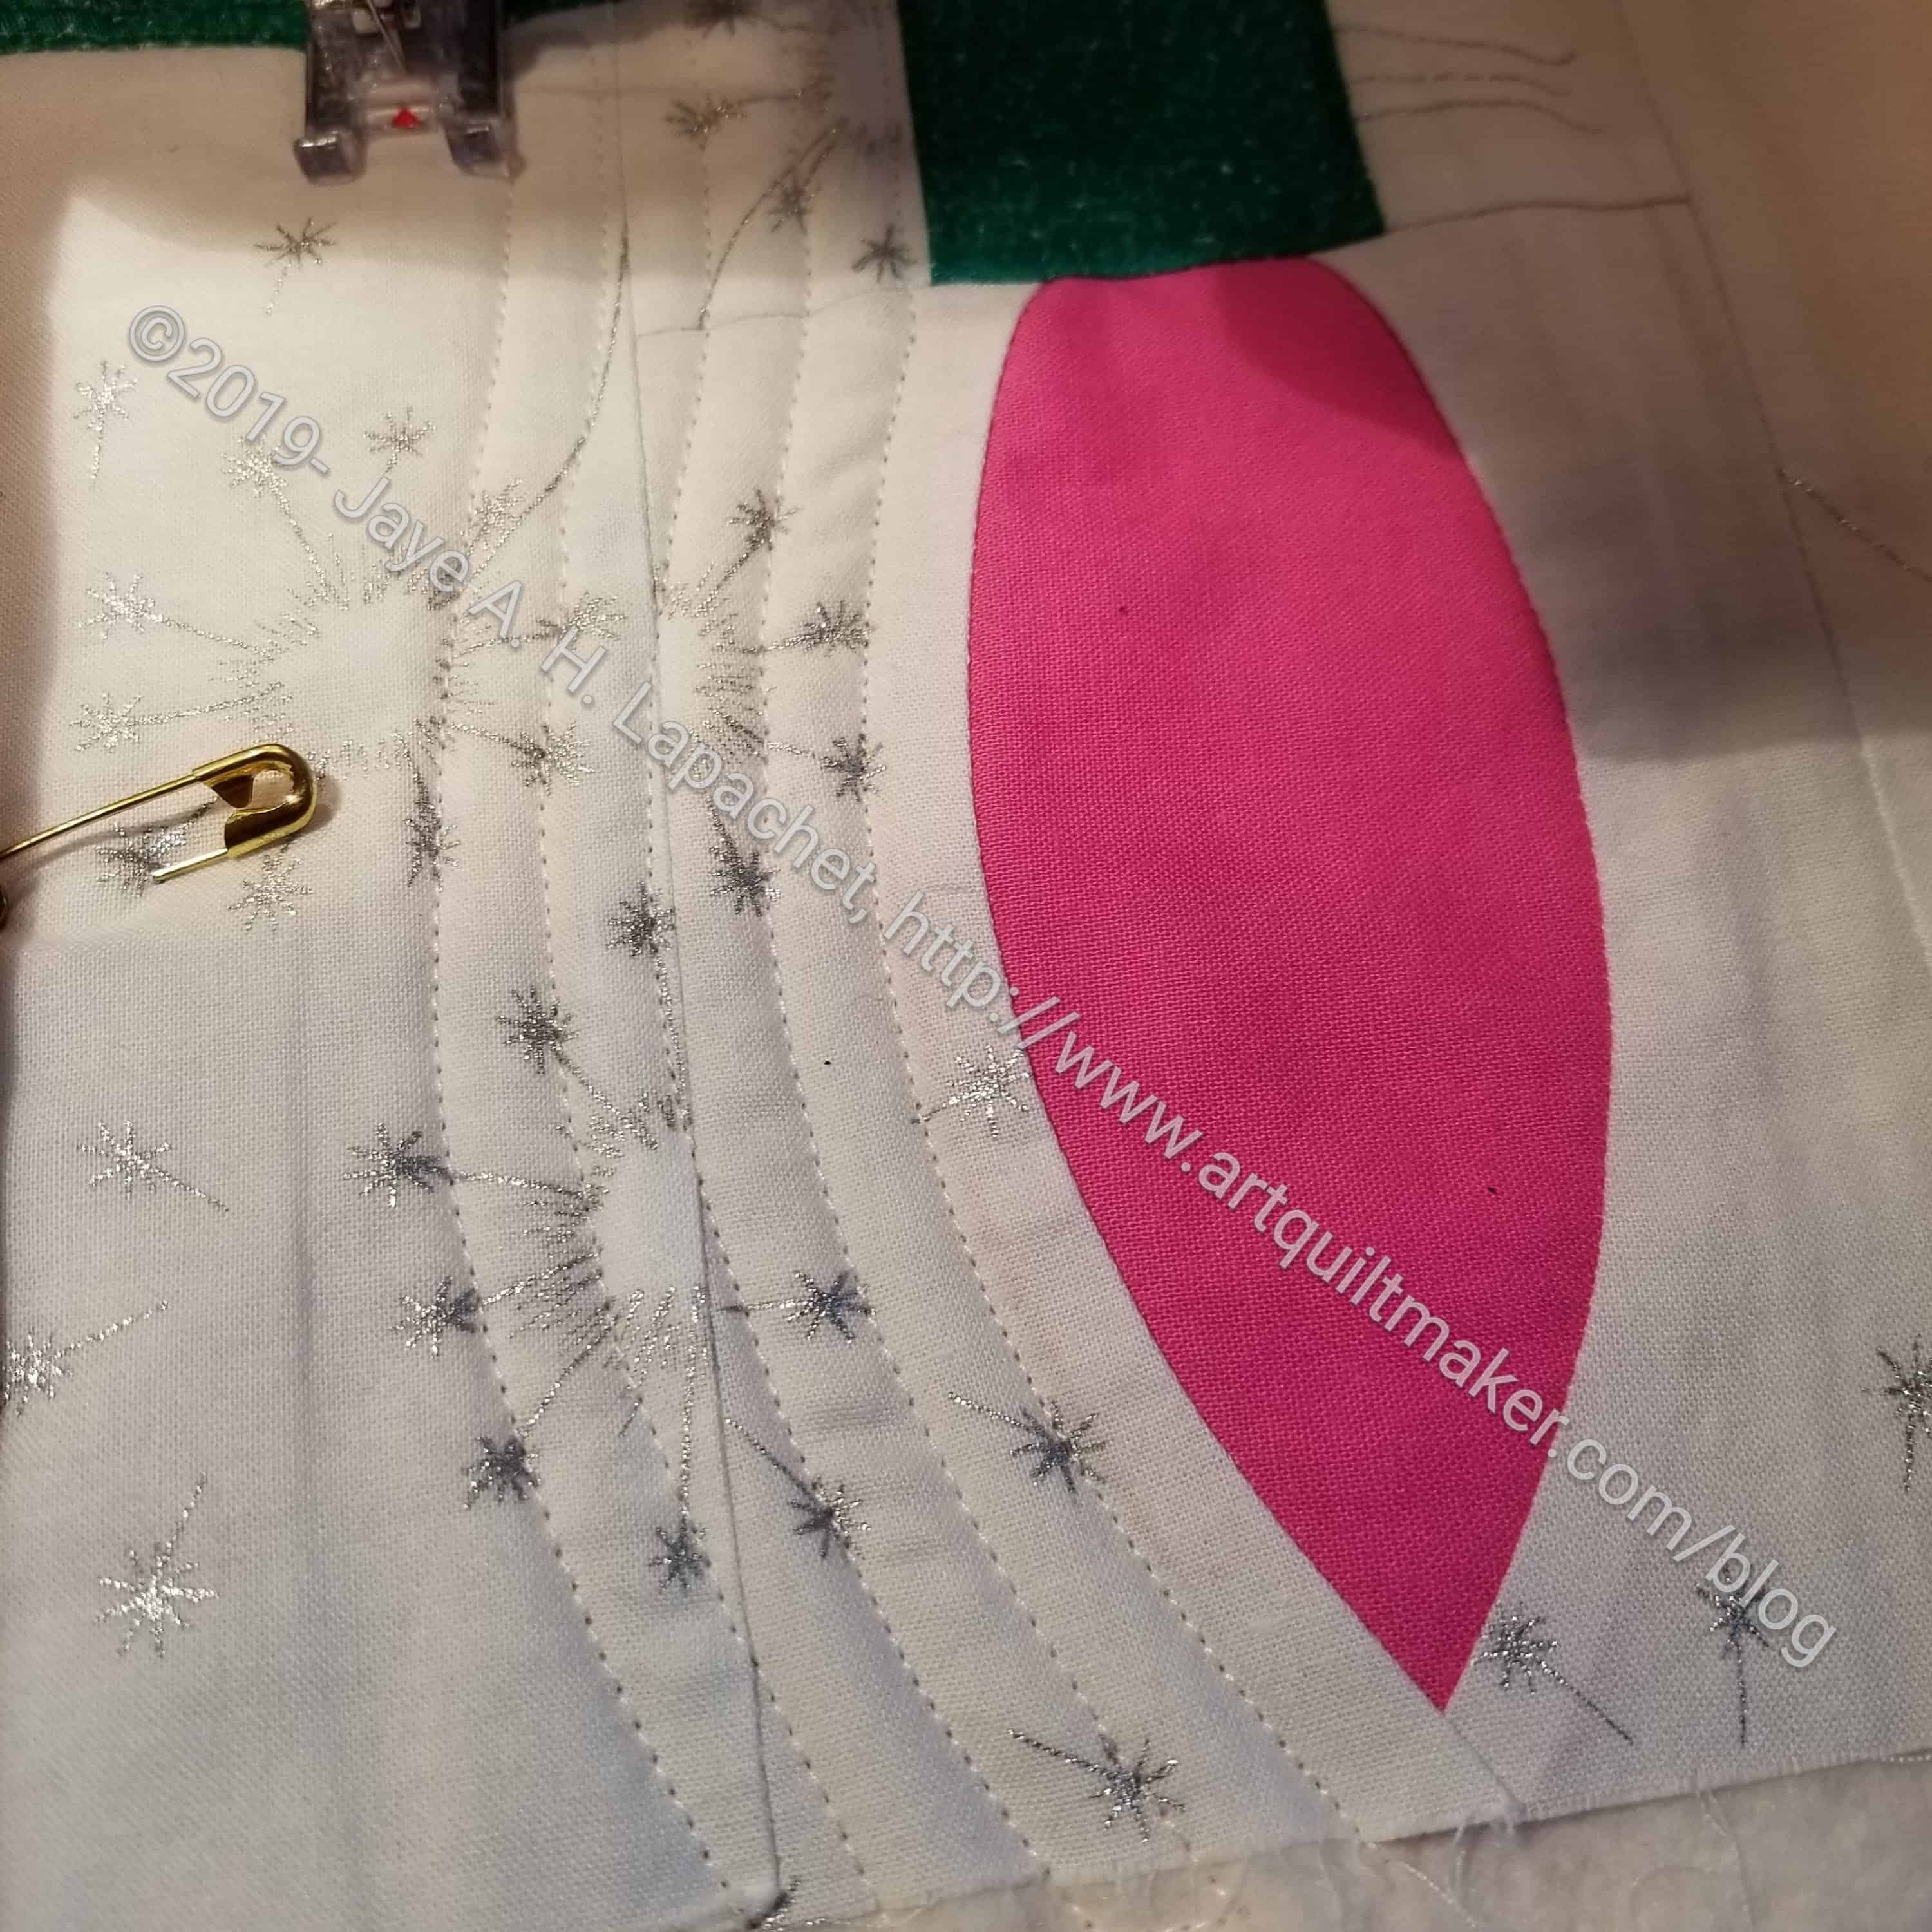
Quilting – Lights tablerunner
I spent all day Saturday quilting it. It took me all day, too, to carefully straight stitch the areas I wanted quilted.
I really didn’t want to do it, but I also don’t want another UFO hanging around, so I bit the bullet and did the quilting. I am paying for my work as my arm and neck aren’t their usual selves. I tend to attach my left shoulder to my ear as I quilt. I tried really hard to keep it down so the pain is not as bad as it could be. I have Serendipity Lady to quilt, but that piece will have to wait for another day.
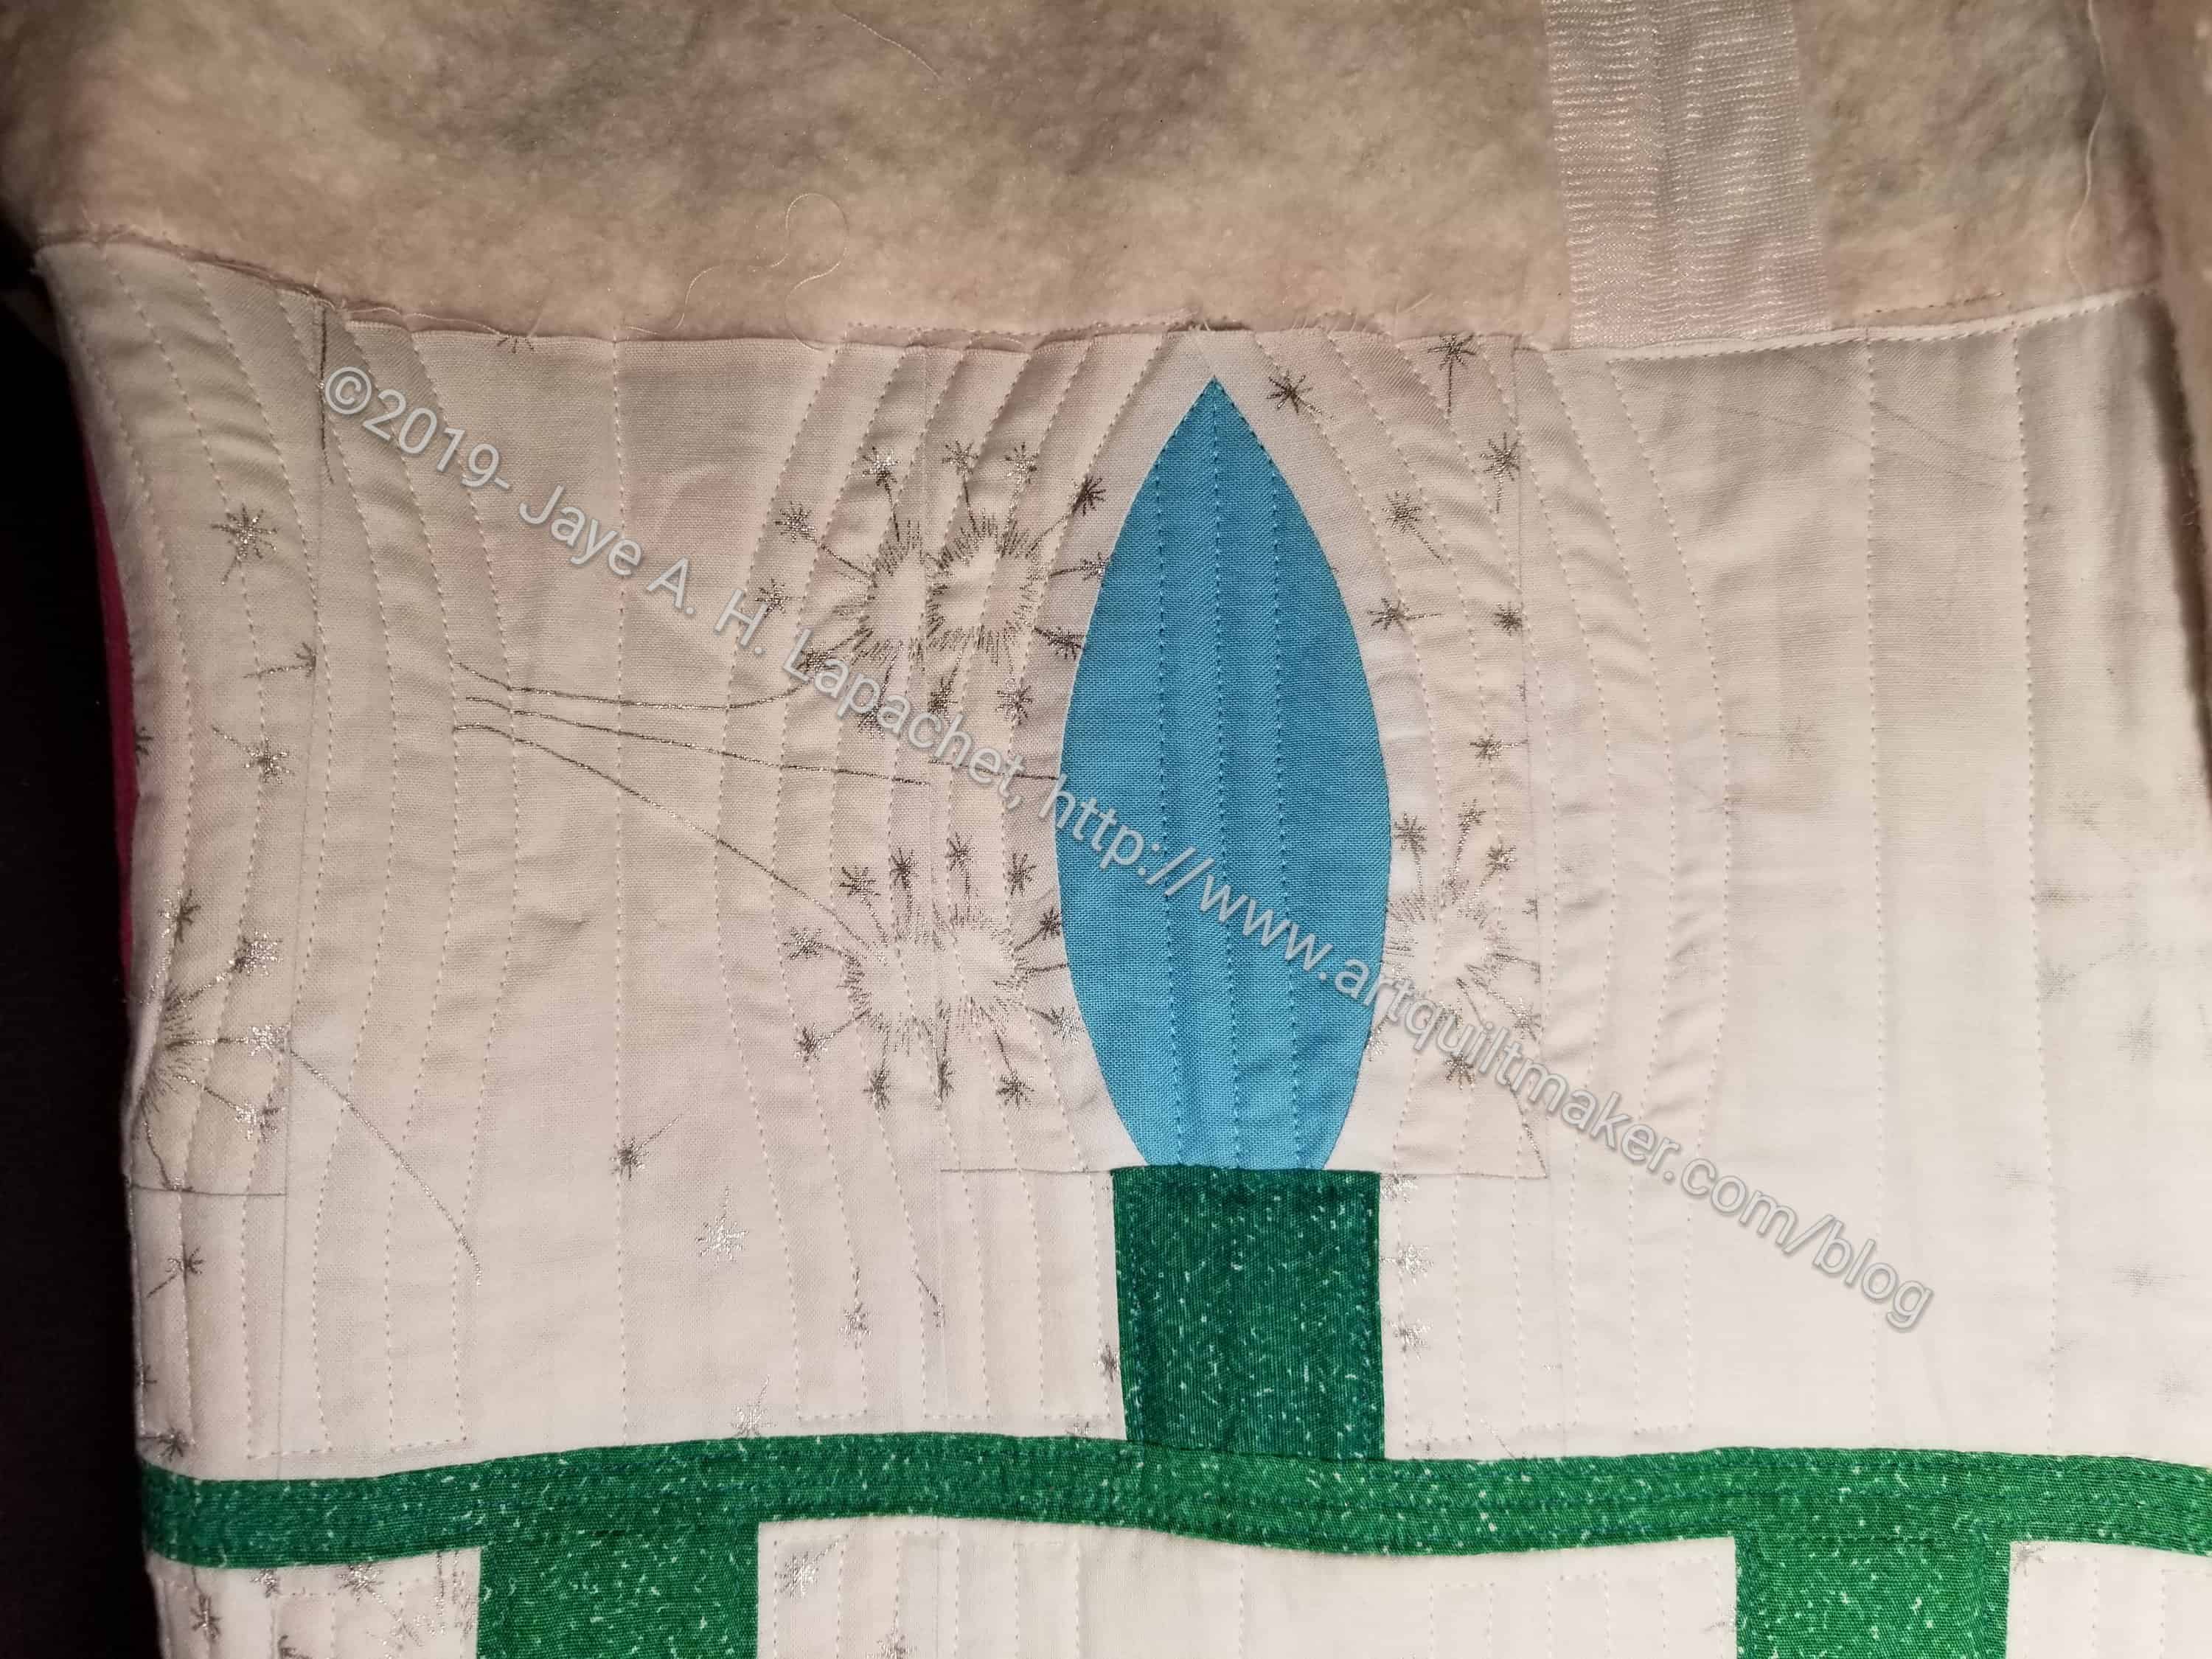
Lights tablerunner – quilting detail
The quilting isn’t perfect, but I am pretty pleased with the way it came out. There are a couple of sections I might redo, but I don’t need to worry about that now.
What really helped me was listening to the Pearl Sister as I quilted. After a couple of enjoyable, but not well written books, this was a fantastic quilting book. It is the latest in the Seven Sisters series by Lucinda Riley and was really great. I am going back to read the first in the series, because it was so good and I want to be reminded of the details of the sisters. I just found out there is another installment in the series ready for me to read as well, The Moon Sister! Yay! Perhaps it is time for another quilting project? Definitely read the series in order.
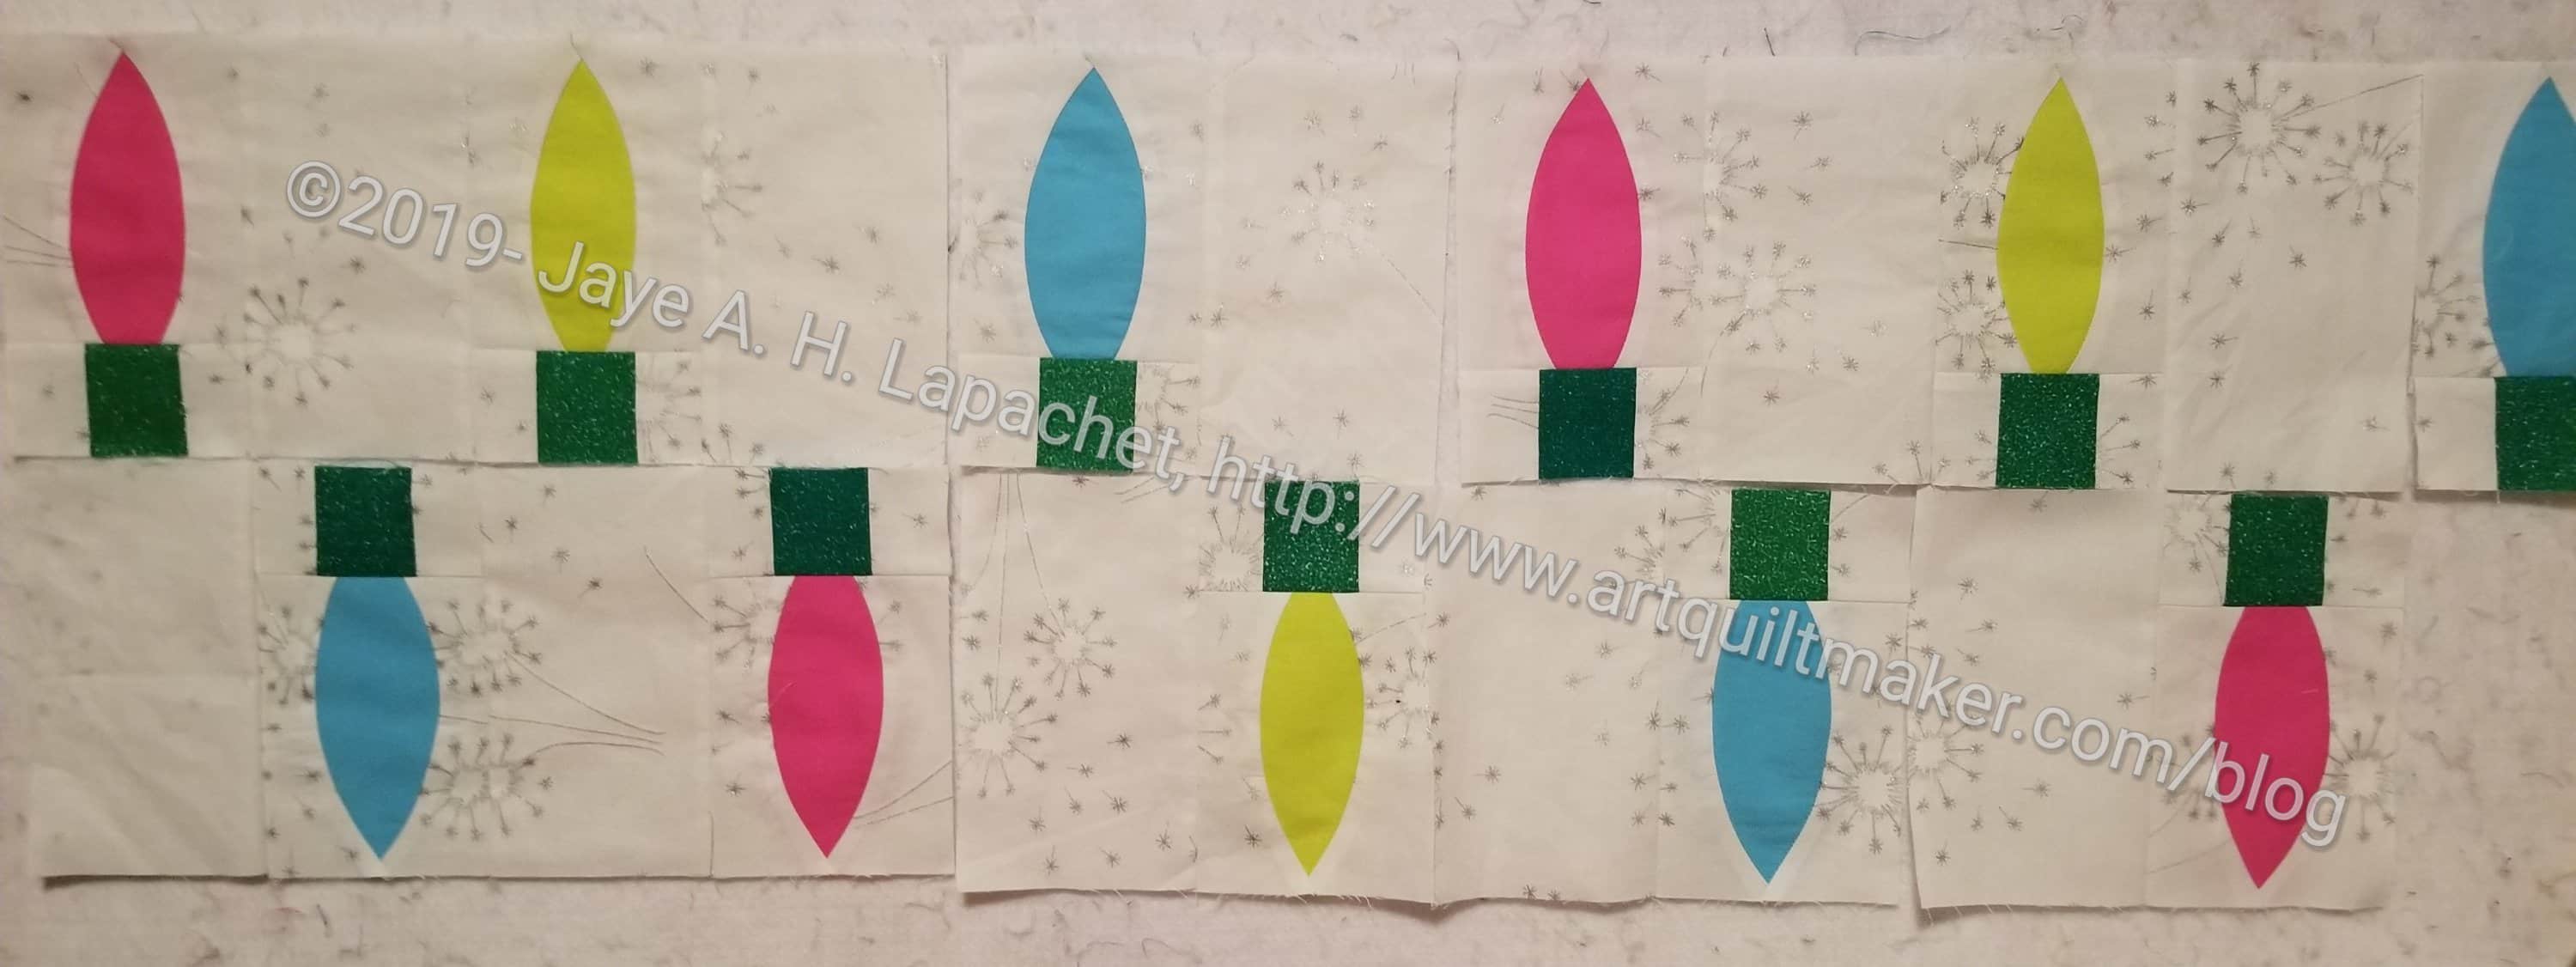
I spent most of Saturday’s Sew Day working on the Mod Lights pattern from Sew Kind of Wonderful. When I say ‘working’, you have to take that with a slight grain of salt, because I can’t help but change up the pattern.
In this case, I am not changing a lot. The fabrics are different and the size is slightly different. I want it to fit my buffet and that piece of furniture is a certain size. Otherwise, the layout and the way I put it together was the same.
Holiday Lights Buffet runner
I finished the top on Sunday, so now I have to make a back and find some batting.
I bought the pattern on a whim at Stitch in Ferndale. I stopped there, as mentioned, on my way back from Portland right before Christmas. I love that store. I would drive up there for a class, if they had one I would enjoy.
Trimming the lights
This pattern required the small/mini Quick Curve Ruler, which I also bought at Stitch. I was slightly annoyed because I thought I could use the larger version, but I ended up happy after seeing the lights develop and how great the motif is.
As mentioned when I was making MetroScape, all the curved portion of the blocks require trimming. You might sincerely dislike trimming, but I like it as it sets me up for success. Some of the curved pieces I sewed together came out super weird looking. If I had tried to sew them together as is, I would have had a disaster on my hands. As it was, I was able to help fill a pet bed and be successful.
The pattern has a couple of different projects included so you are getting some bang for your buck. All of the projects include the light. I got some ideas on other projects in which I could use the light motif, so I might get even more bang.
As I mentioned yesterday, I dropped a quilt off to be quilted. I don’t normally just go to Colleen’s to drop off a quilt. I try to take two or more at a time. As it happens, two were ready for me to pick up and Metroscape was one of them.
Metroscape quilted, reading for binding
I am pleased that it is nearly finished. Colleen machine stitched the binding on for me as usual, but I will hand stitch the rest.
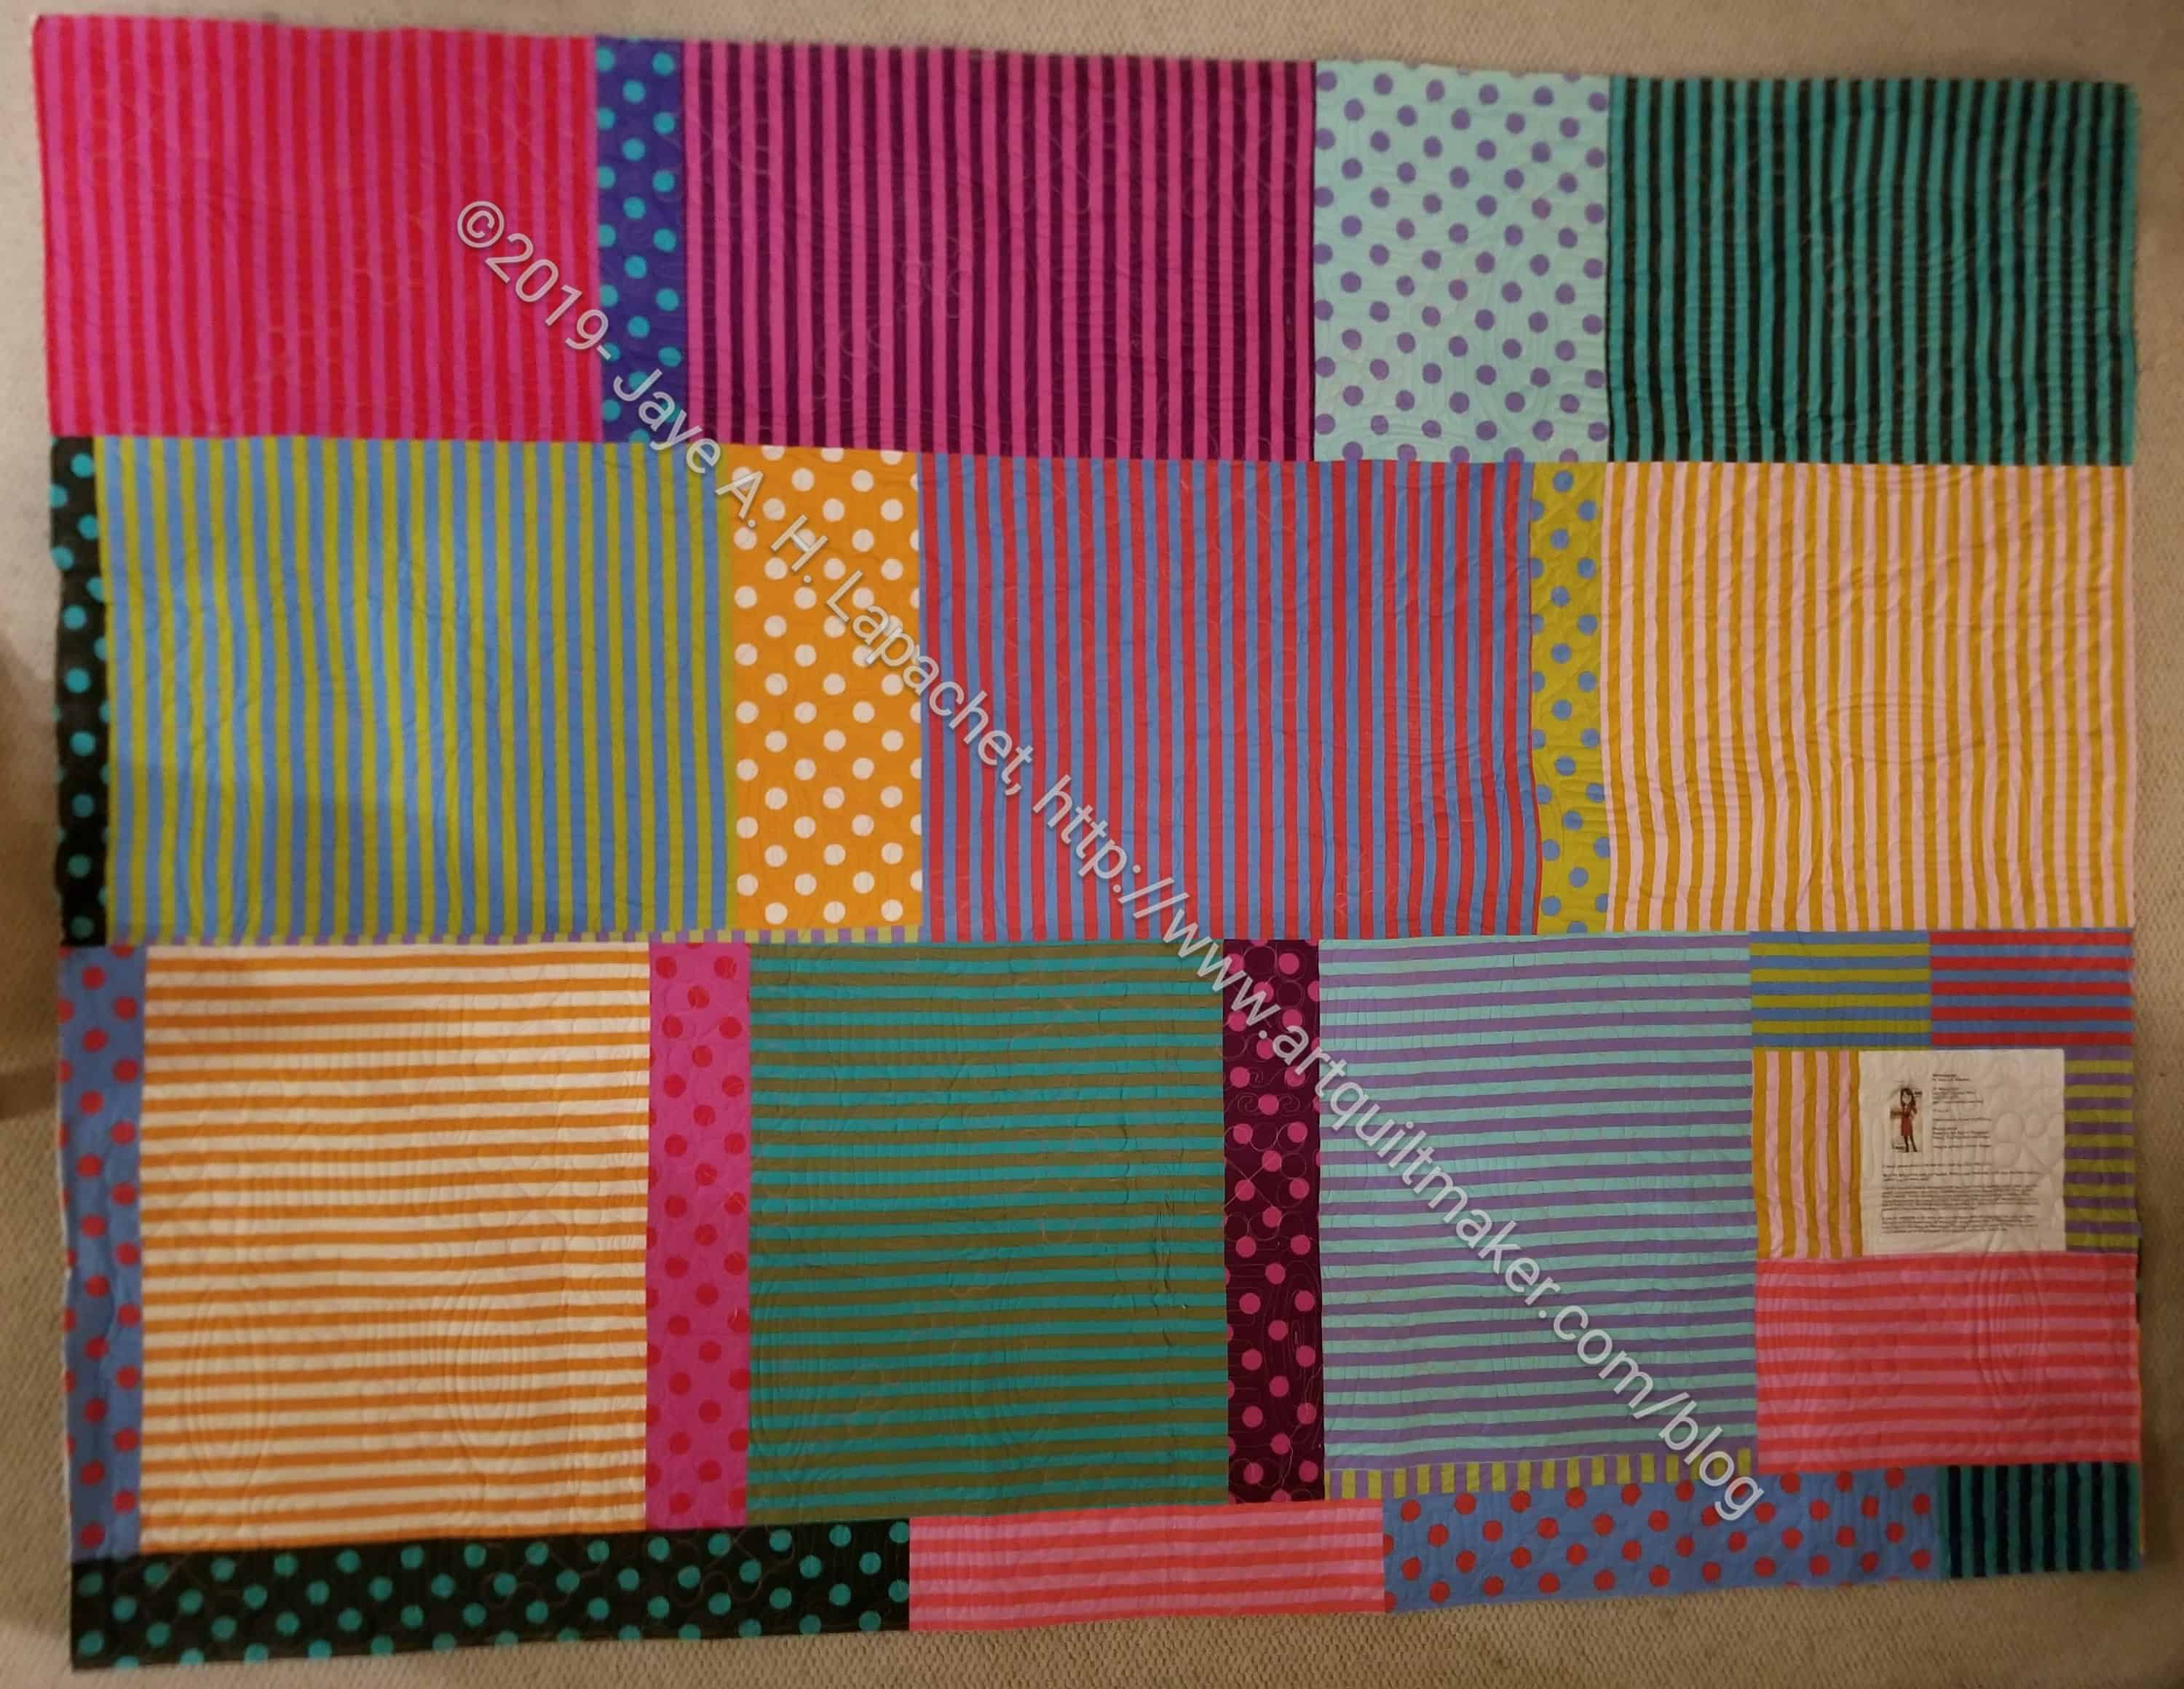
Sewing the back is my least favorite part of the quiltmaking process. Quilting doesn’t count since I usually don’t do it. This particular back took longer than expected, because I prepared all the fabric twice.
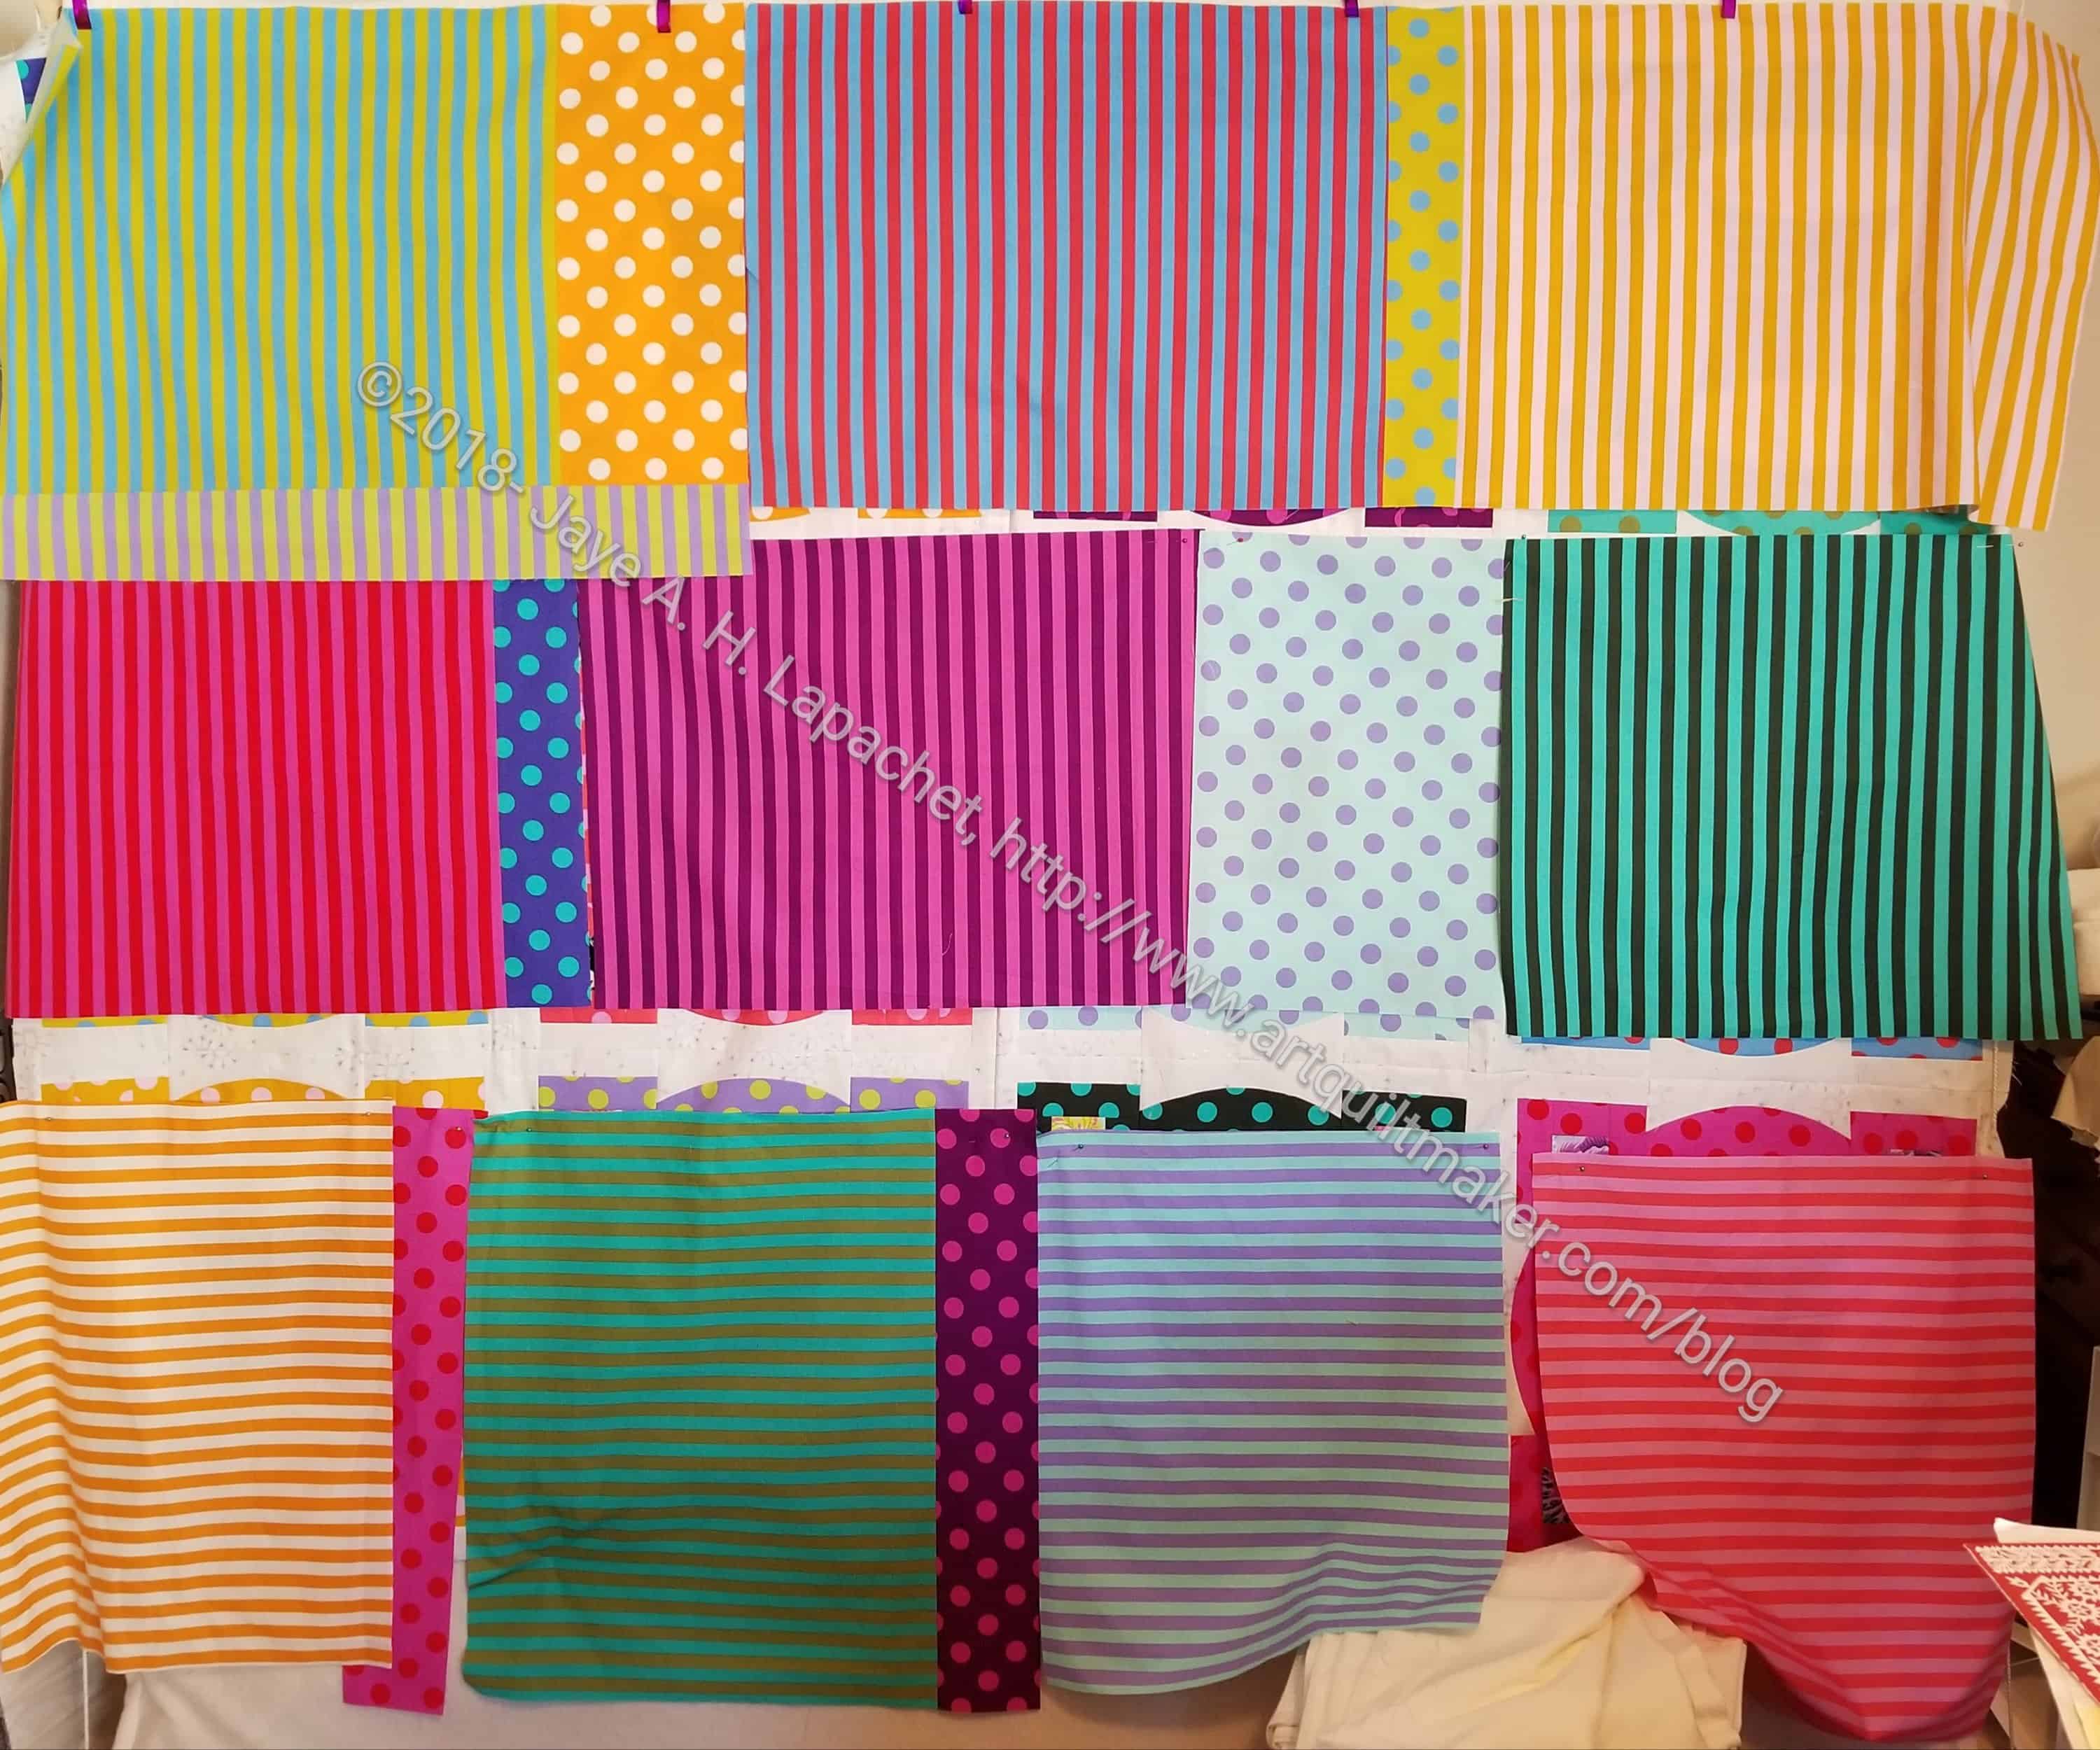
I decided to use the stripes for the back because I hadn’t used much of them on the front. I proceeded to cut up the dot fabrics for the back.
Huh?
Nope, not a typo. I did the exact opposite of what I intended. I don’t know what I was thinking.
It didn’t really matter, so I took down all the dots and started again. I had made the binding in advance so I could use all of the stripes I wanted as long as I could deal with the diagonal cut out of the yardage for the binding.
As you can see from the photo, I was able to make a back. It seems a little darker than I intended, but it could just be the contrast of the white from the front.
I stole a few minutes from a very busy weekend to sew. I need to finish the MetroScape back and binding before Thursday. I am taking quilts to Colleen to be quilted. She is finally feeling better and able to quilt a bit again, so I can pick up the Stepping Stones #2 as well.
I decided, after I cut up all the dot prints, that I hadn’t used many of the stripes on the front, so I would use them on the back. I spent a lot of Saturday evening recovering the stripes from making the binding. They all of have a big diagonal strip cut off the length.
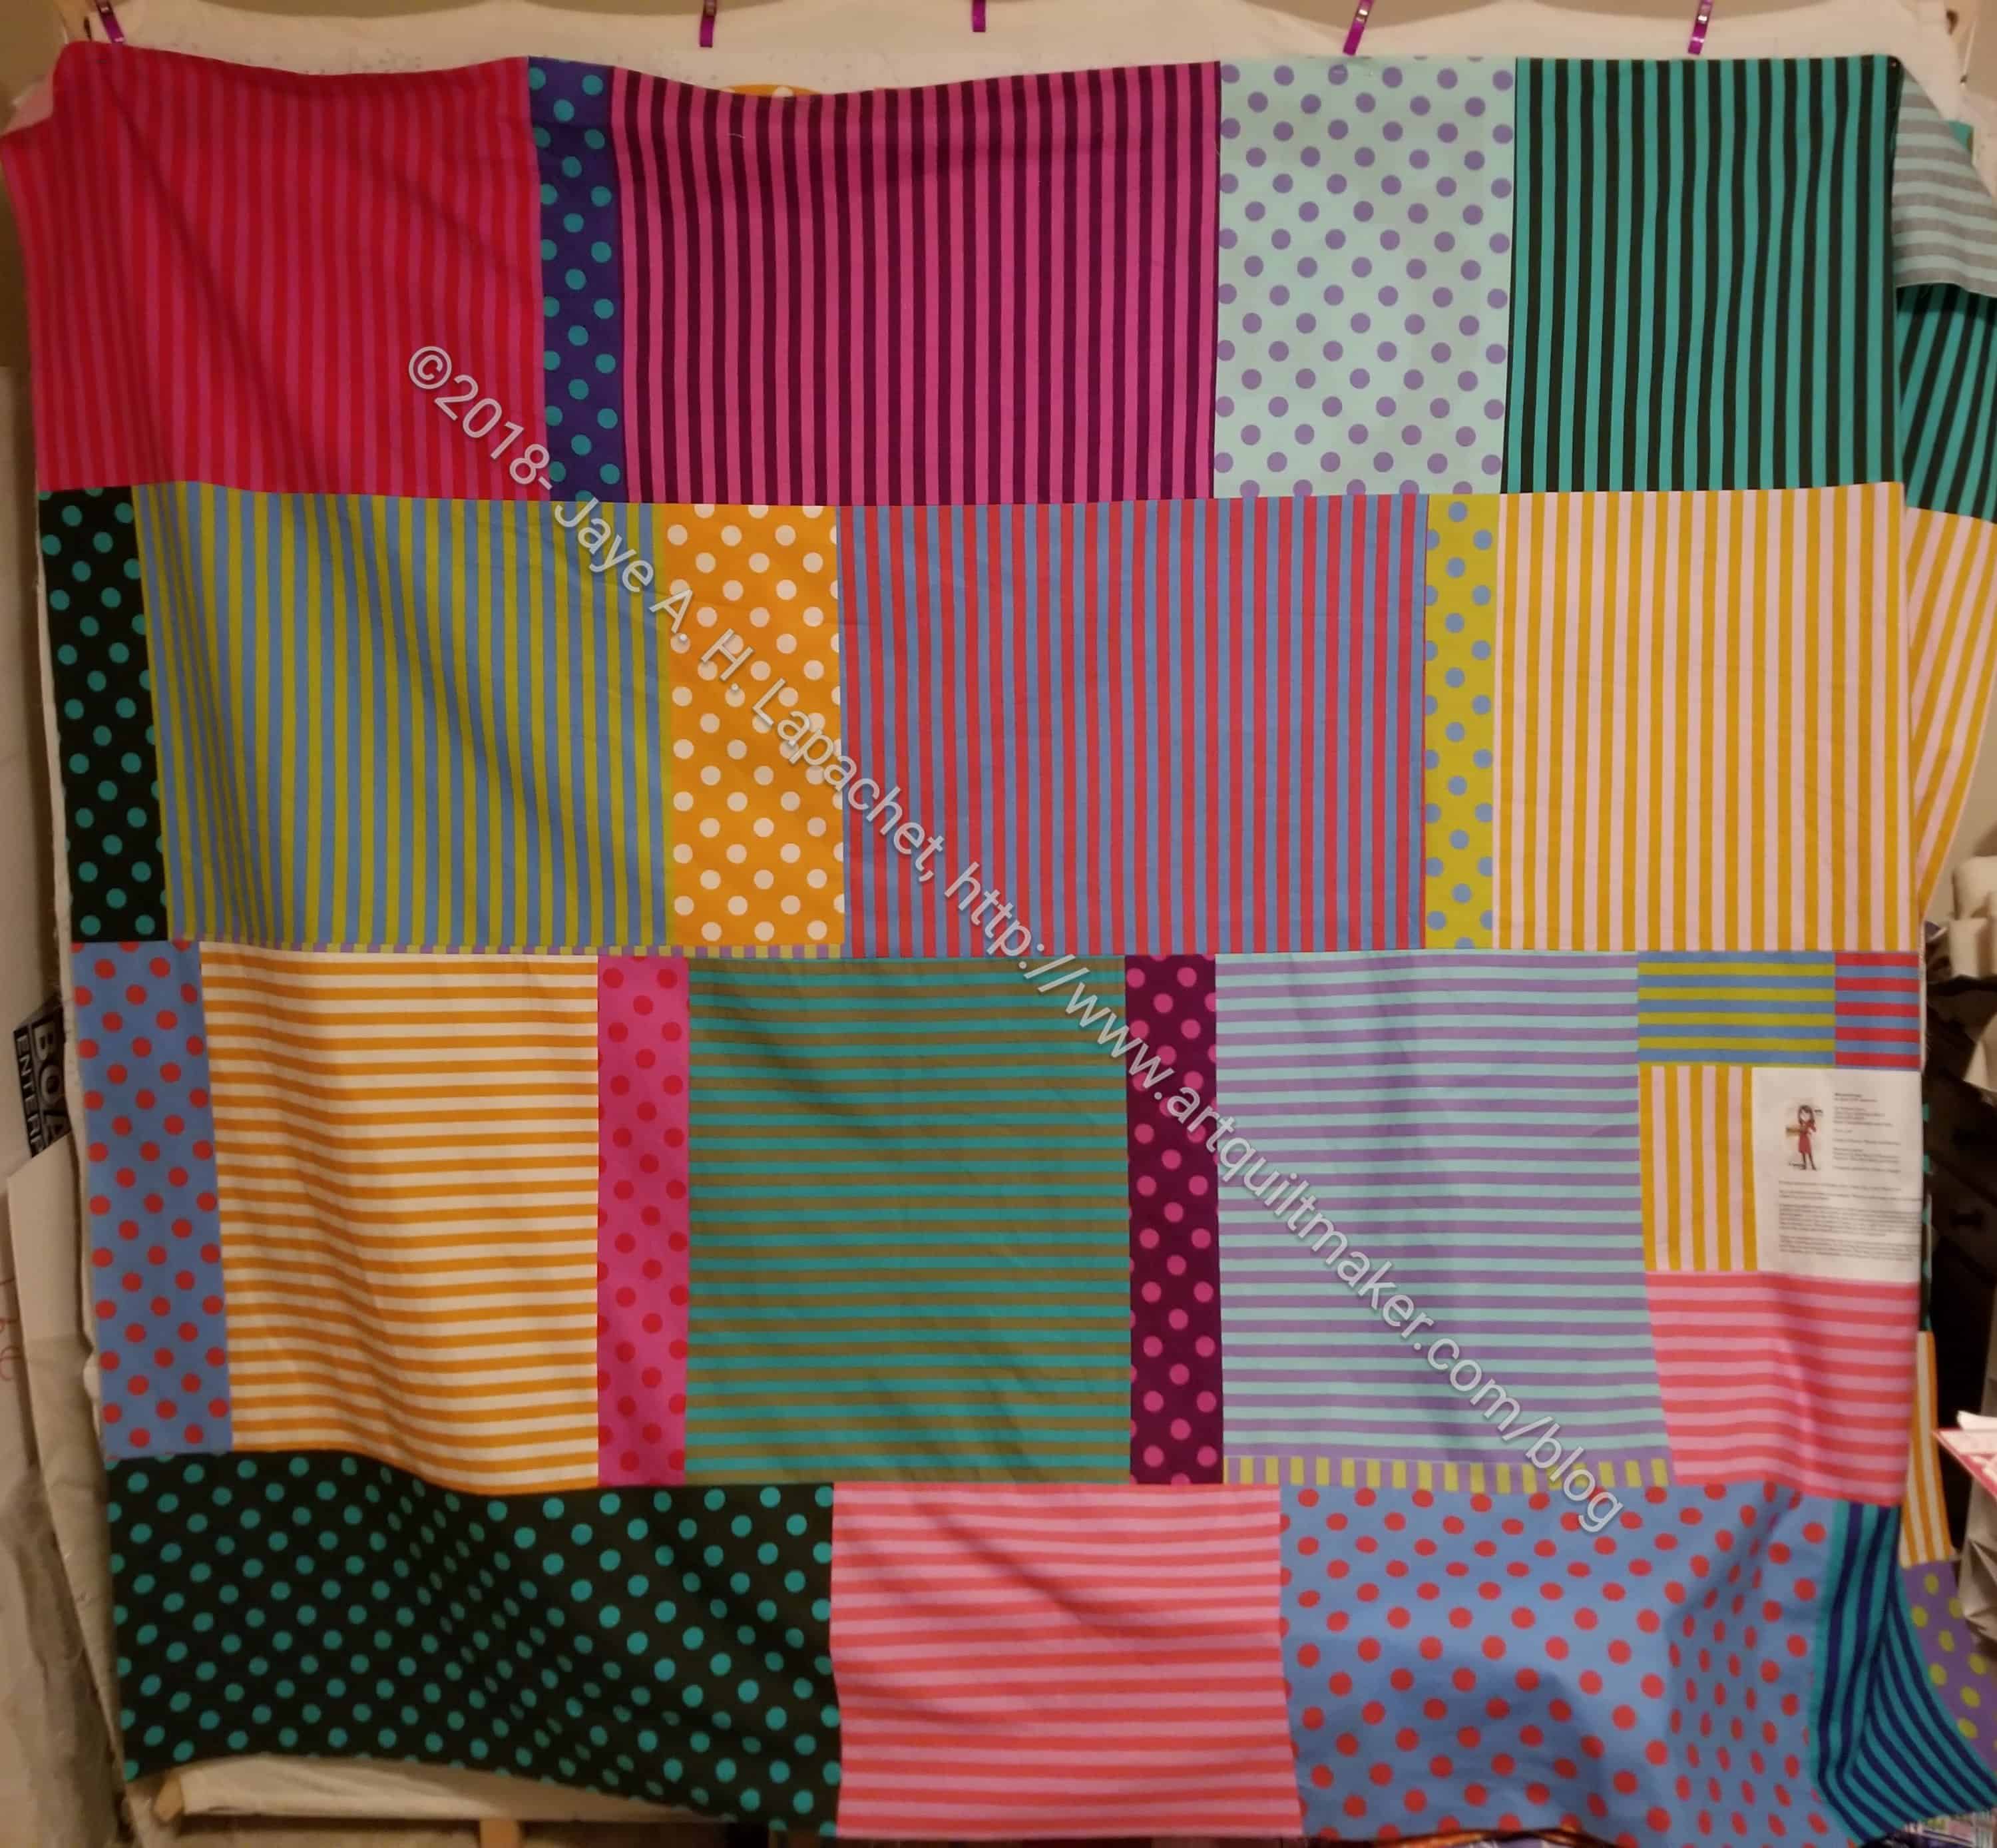
The binding is finished, which is always a relief. I have enough fabric for the back. I just have to make it work. Right now my issue is what to put in between the three horizontal lines of fabric.
I came home from my trip on Sunday evening. It was actually the second trip in a week, but I was only home for about 12 hours between trips and much of that was spent sleeping, so I hadn’t done any sewing for over 10 days except some EPP in the car.
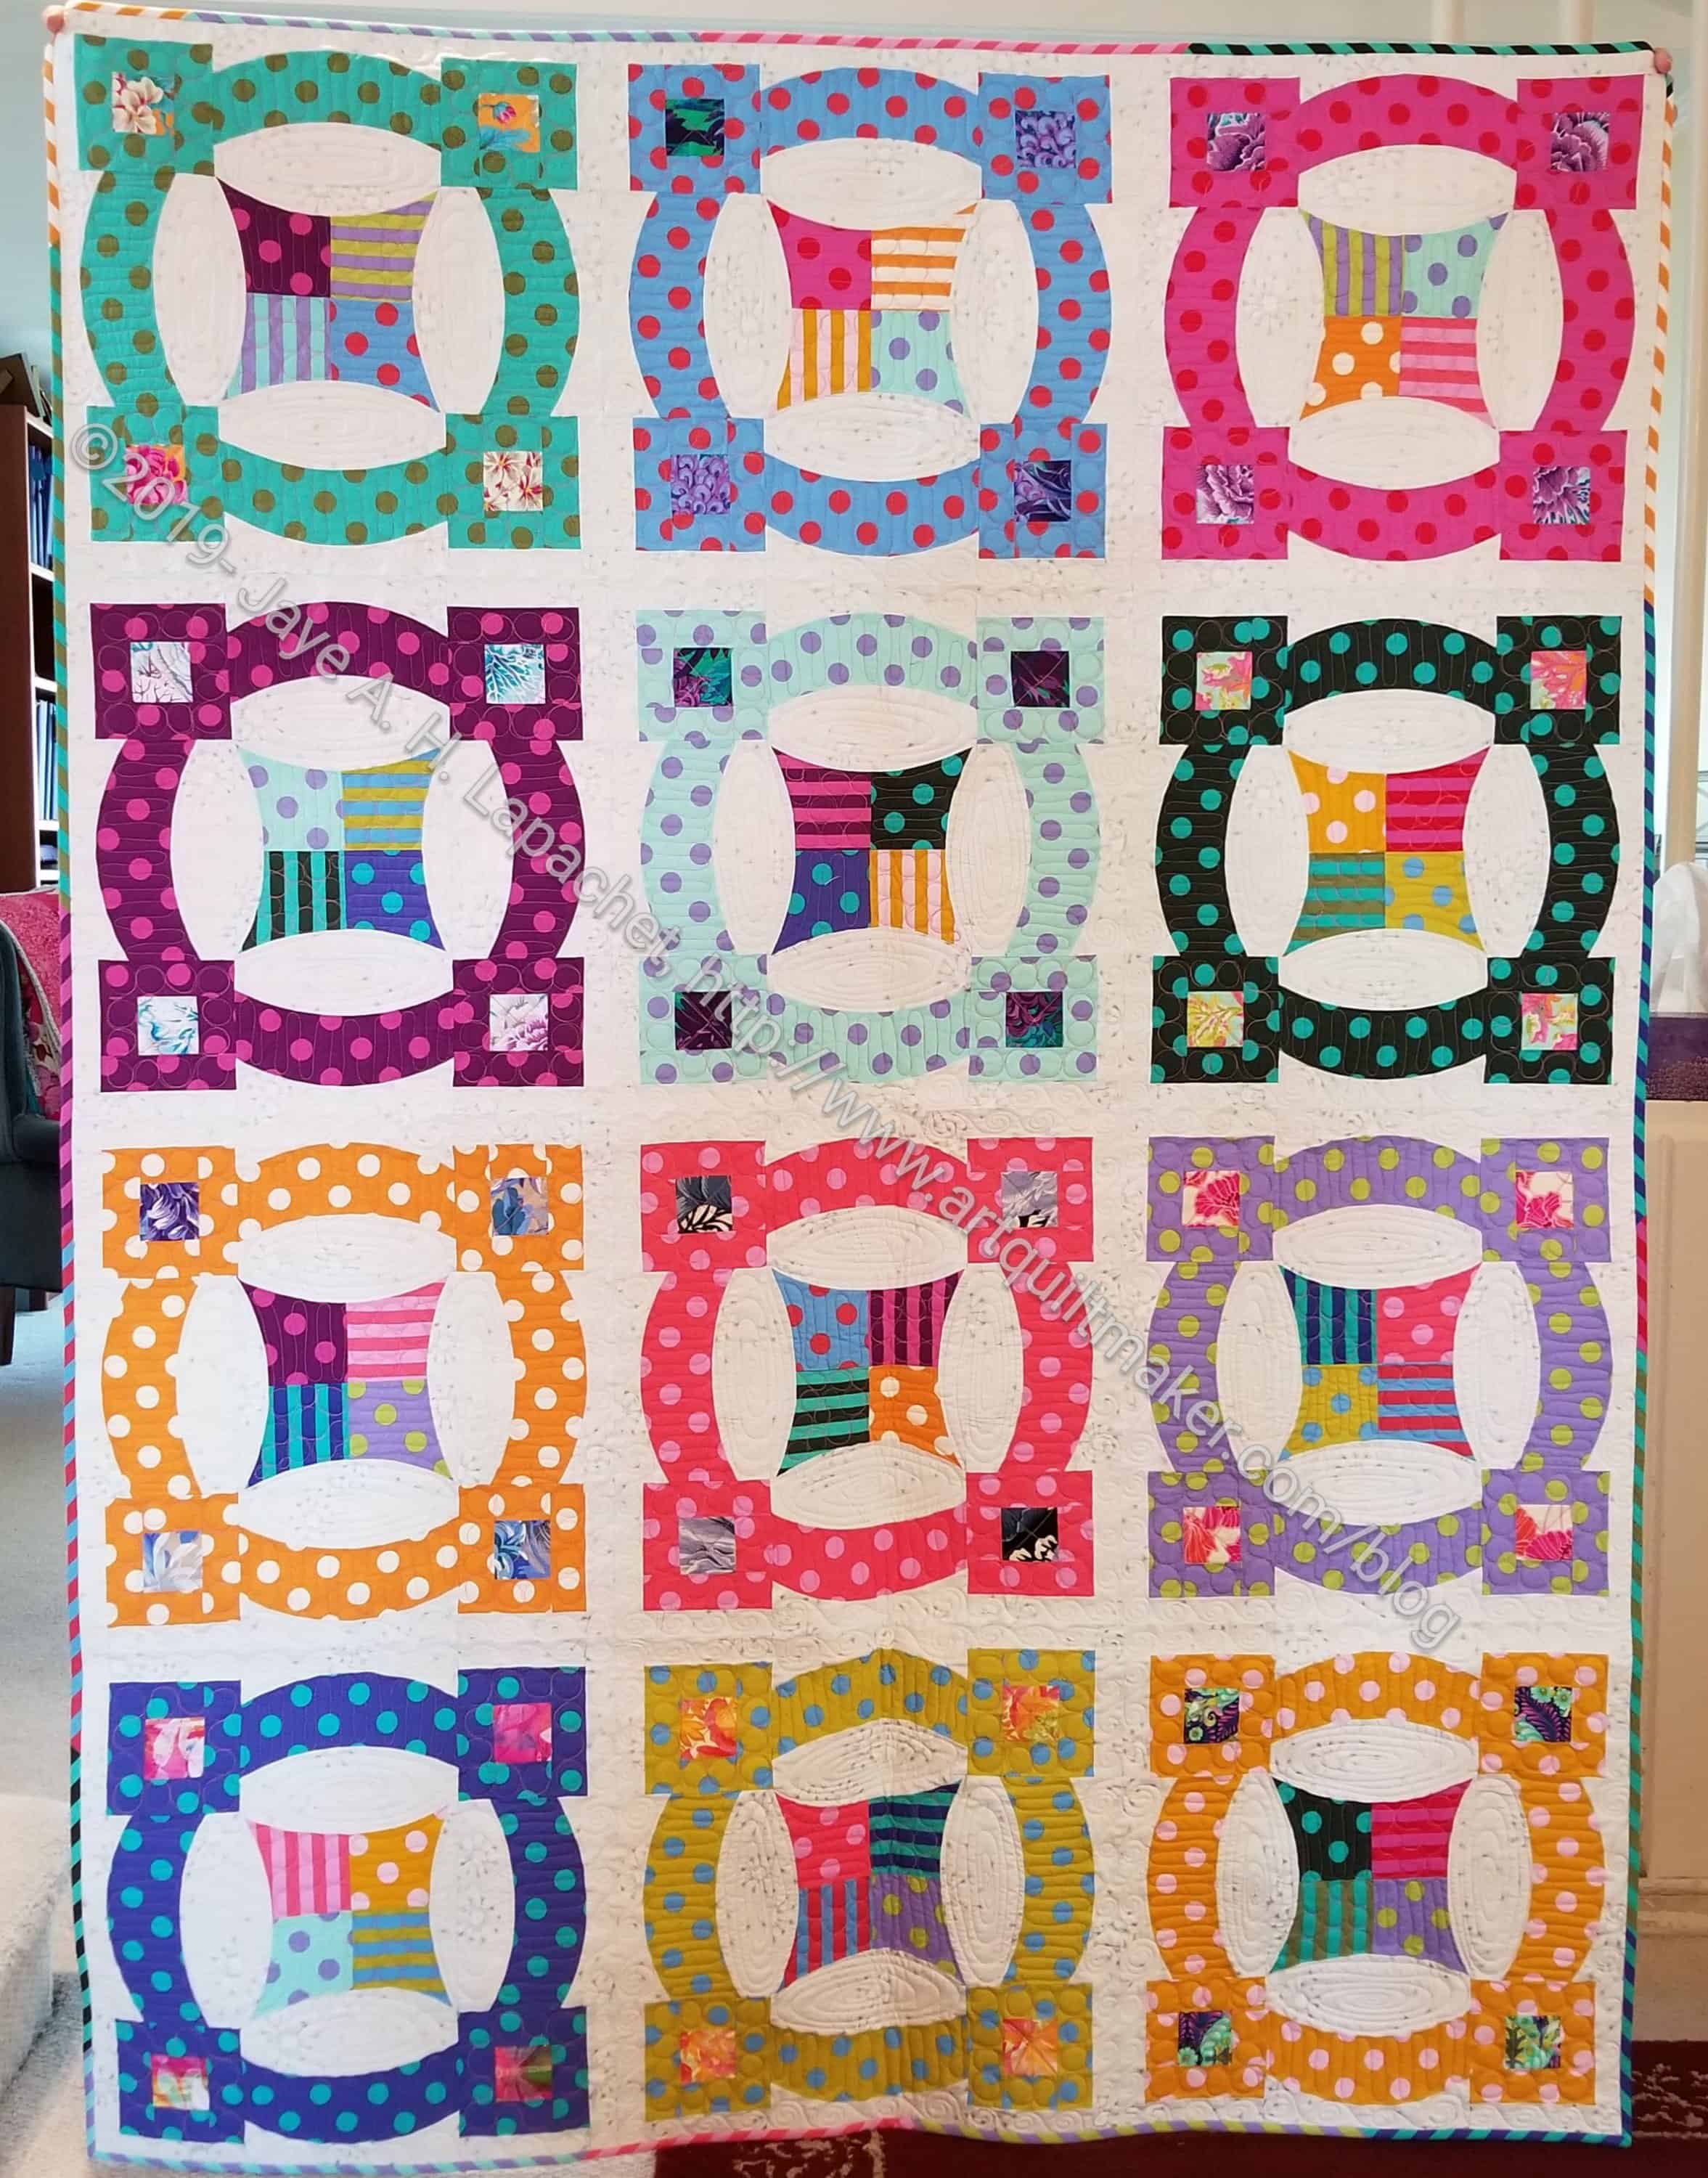
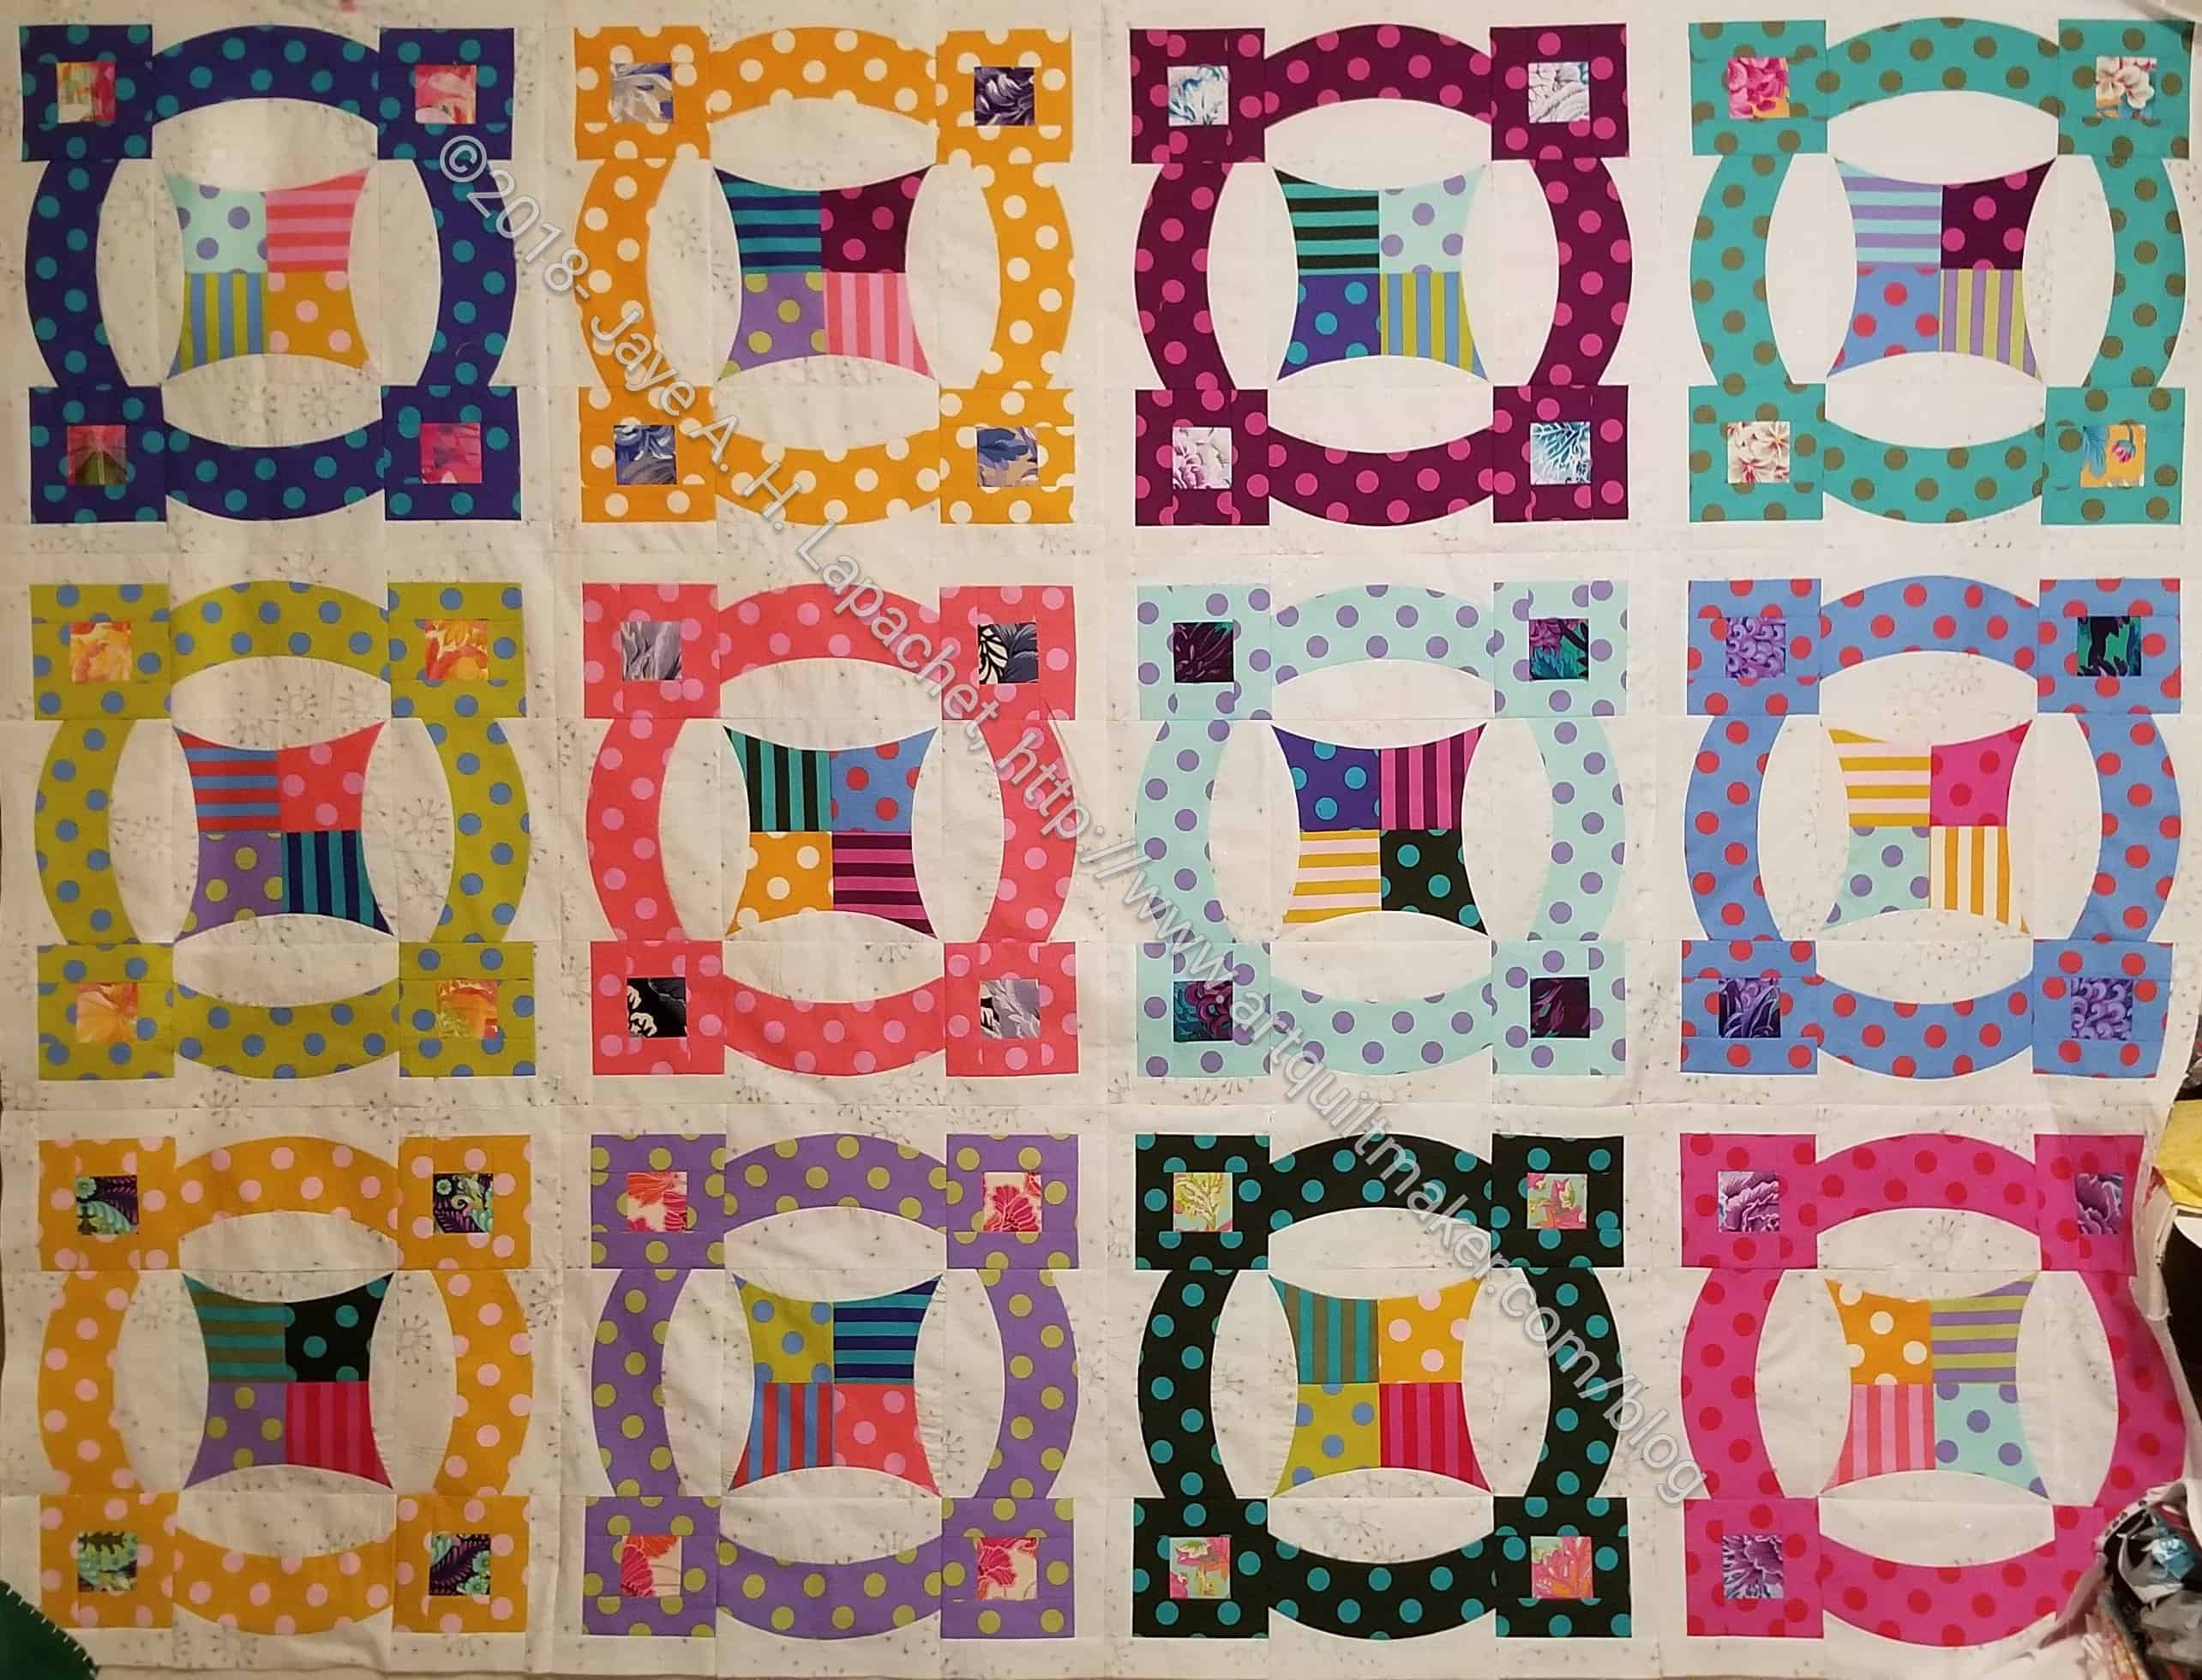
MetroScape Top – complete
Monday was a holiday and DH was home. I had to do some work, but I pretended for most of the day that it was Sunday. I chatted with my mom on the phone while I ironed a ton of fabric. I also worked on some donation blocks and put the MetroScape top together.
Yep. All those blocks are now a top! I am really pleased with the way it looks. I am just trying to decide about a border. I like I like it as is, but we will see.
I am back from 4 trips in 4 weeks. I am hoping I can can get to know my husband again, get back on schedule and get life back to normal. I have finished the last Metroscape block and am ready to start making a quilt top.
Actually, I am ready to do a whole bunch of sewing.
This block is my least favorite. The blue and red, especially the blue don’t see to go with the other blocks. I had 12 different dots and I didn’t want to repeat any, so I used it. We will see how I like it when I put all the blocks on the design wall together.