Here are my little group of 4″ stars. This group is not growing as fast as I would like it to grow, but they all look great. I am very pleased with the way they look together. Even the ones that are running towards red-violet add a spark to the group.
There are two things annoying about these stars:
There are not enough of them and they are not reproducing fast enough. Have I told you I need 89 of them? No? I need 89. I am not even a quarter of the way there.
I have a nice little violet star on my design wall half sewed. Why half sewed? I lost 2 of the Flying Geese I need to finish this one star. They HAVE to be around here somewhere. I even cleaned up my cutting table. No luck. I can make more. I probably have enough fabric, but really. To where could 2 Flying Geese have flown?
I did something a little different for this week’s blocks. I didn’t have a lot of time last weekend, so I cut the pieces for each block out in advance and had all the pieces on the design wall ready to sew. I did this, because I thought I might have a few minutes here and there to see, but really I only had various bits of time to cut. I didn’t have any sewing time until late in the day on Friday. I am not sure if cutting in advance made any difference.
I added in the Michael Miller teal dot fabric, which I also used on the sewing machine cover I made a couple of years ago. I needed some more dots and I really wanted to use this fabric in a quilt I could admire regularly.
At least I thought I cut all the pieces! Part way through I realized that I still needed to cut out the last star.
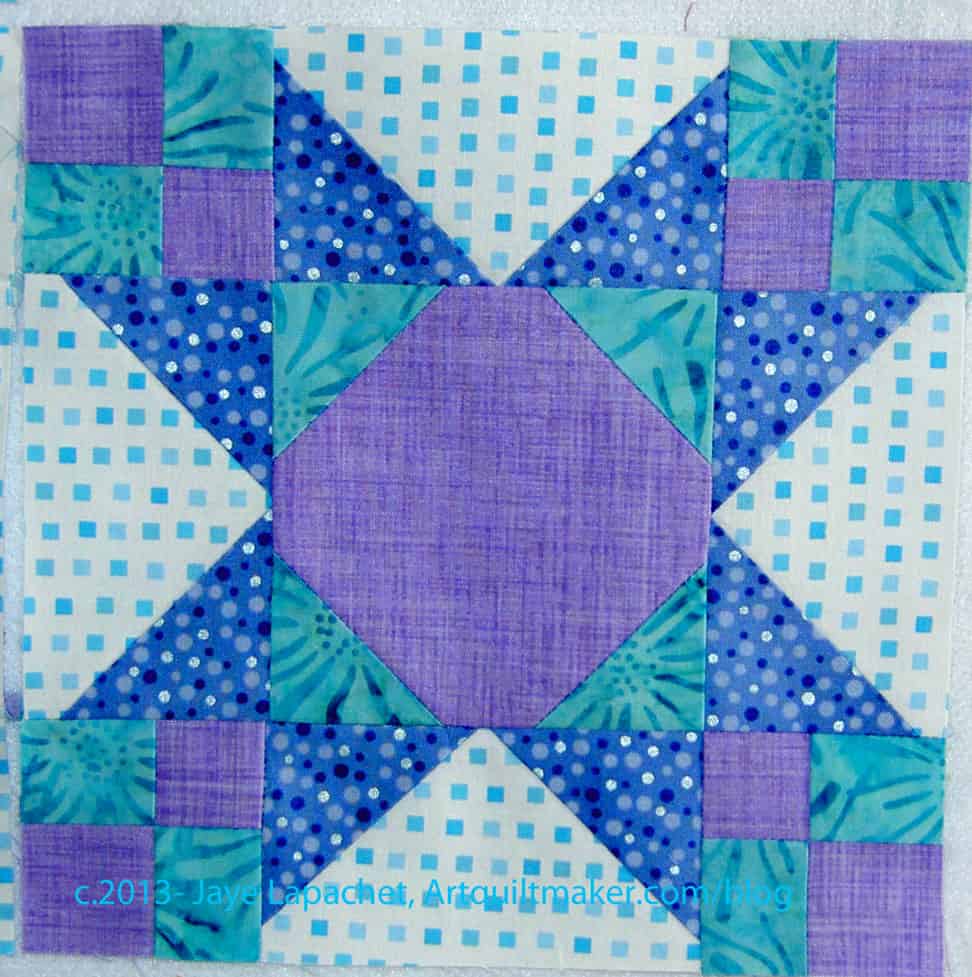
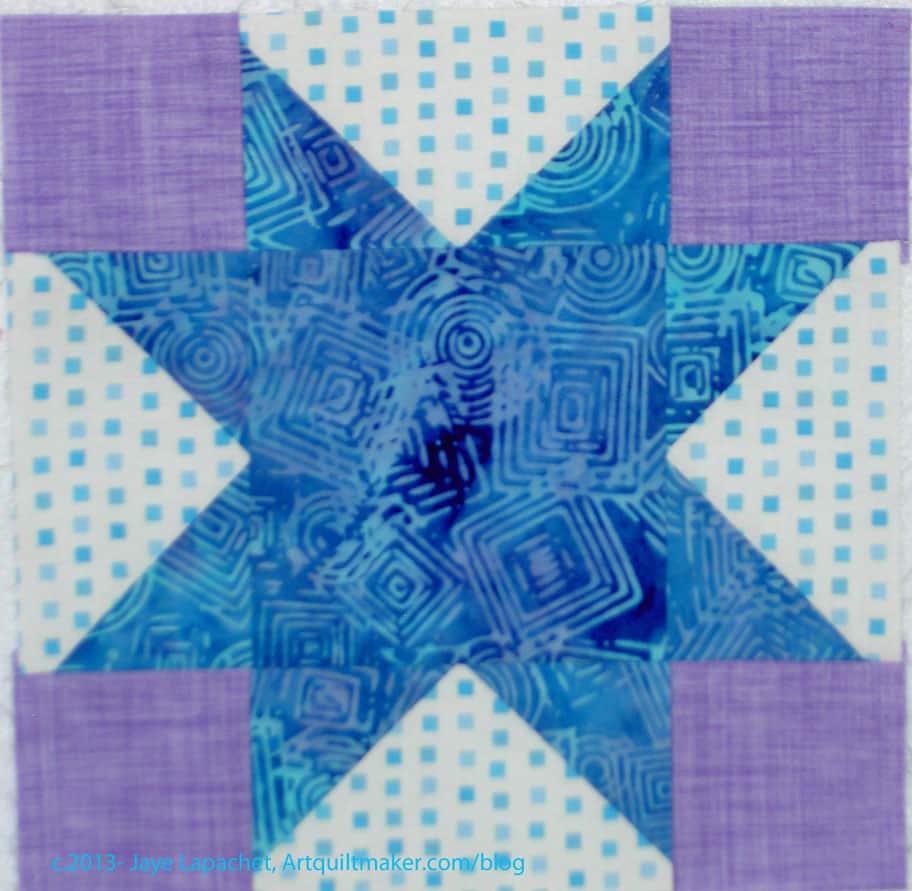
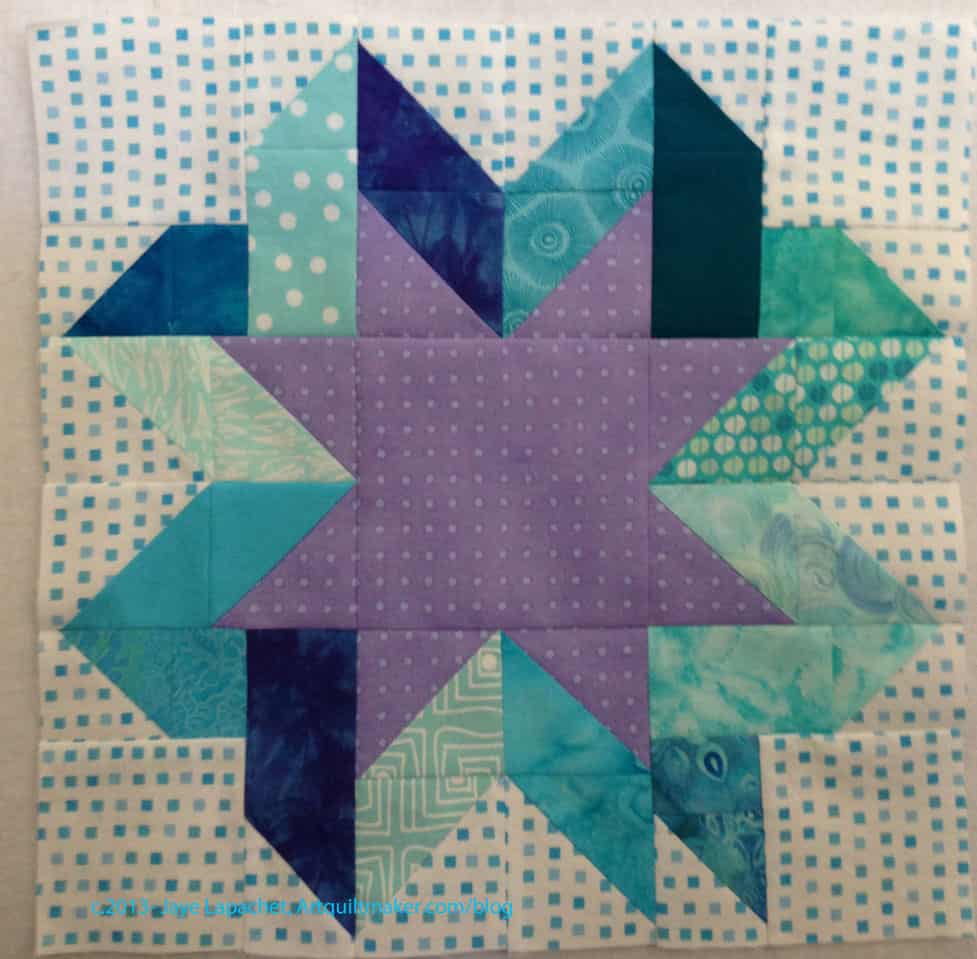
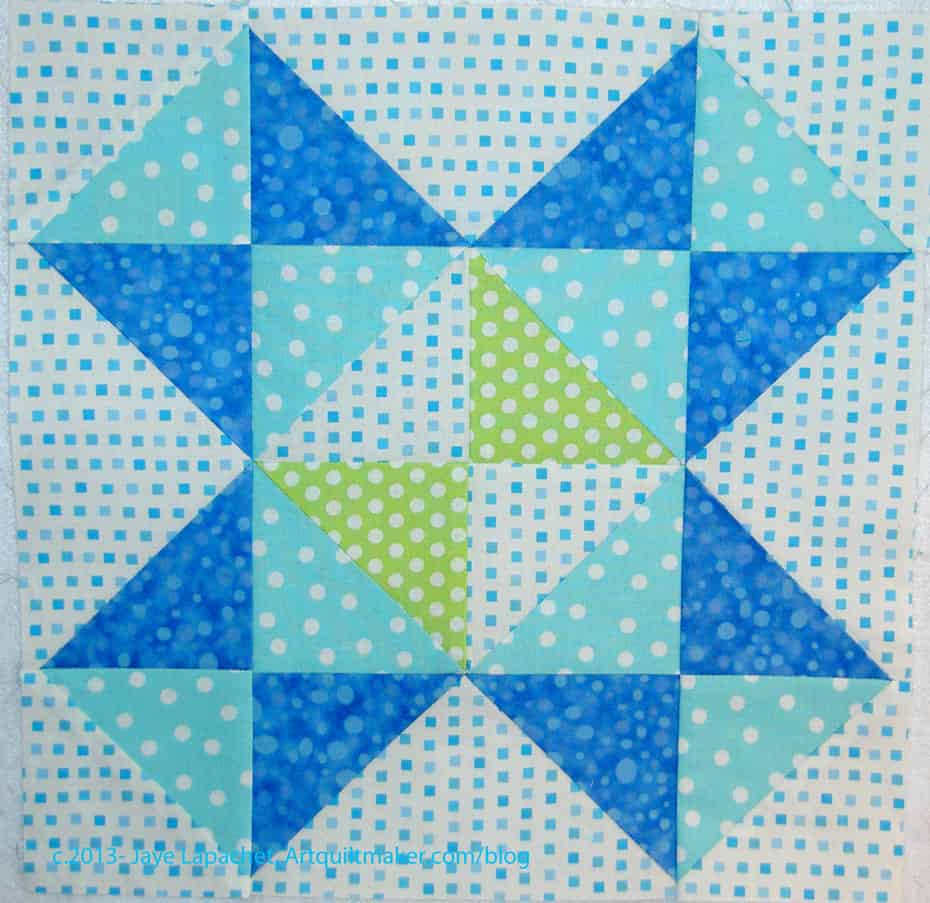
Aunt Addie’s Star
Aunt Addie’s Star looks a little backgroundy to me, but I think it will be ok. What does “Backgroundy” mean? I think it means that that big square in the center gives a look of a lot of background and not too much star. I think it is fine, but I will have to look at it in context and see if I need to make others with more background or that see through look. One of the Rising Stars has background in the center.
I do have all the stars on my design wall and think they are looking fine together.
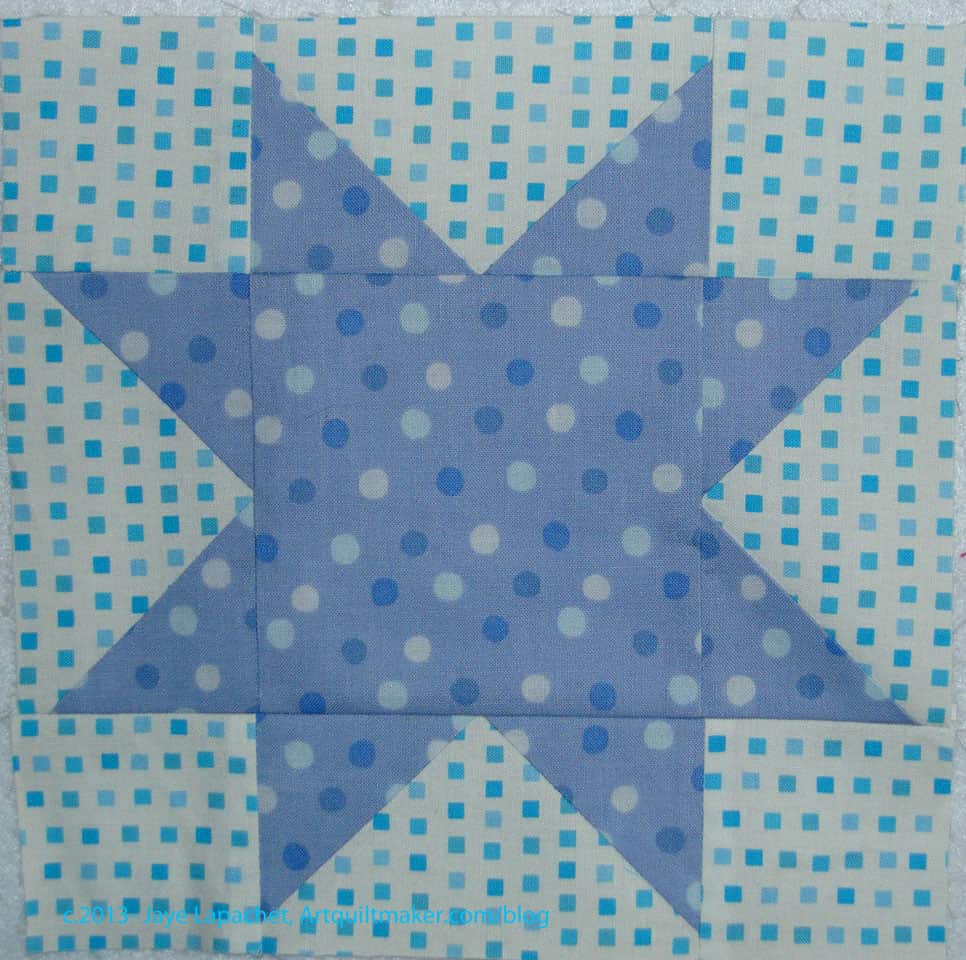
Taj Mahal Star
The Taj Mahal Star will go really well with the Austin Star from last week. It has, as you can see, the same kind of corner treatment. I need to find one more block or make another one of these two so the quilt looks on balance. I like, as I have said before, to use threes – three of the same blocks, three pieces of the same fabric, three design elements, etc to make the quilt look right. You can use 5 or some other odd number, but I use three as my starting point. I am pretty sure I talk about this concept in more depth in the Design Series. Perhaps the episode on Balance?
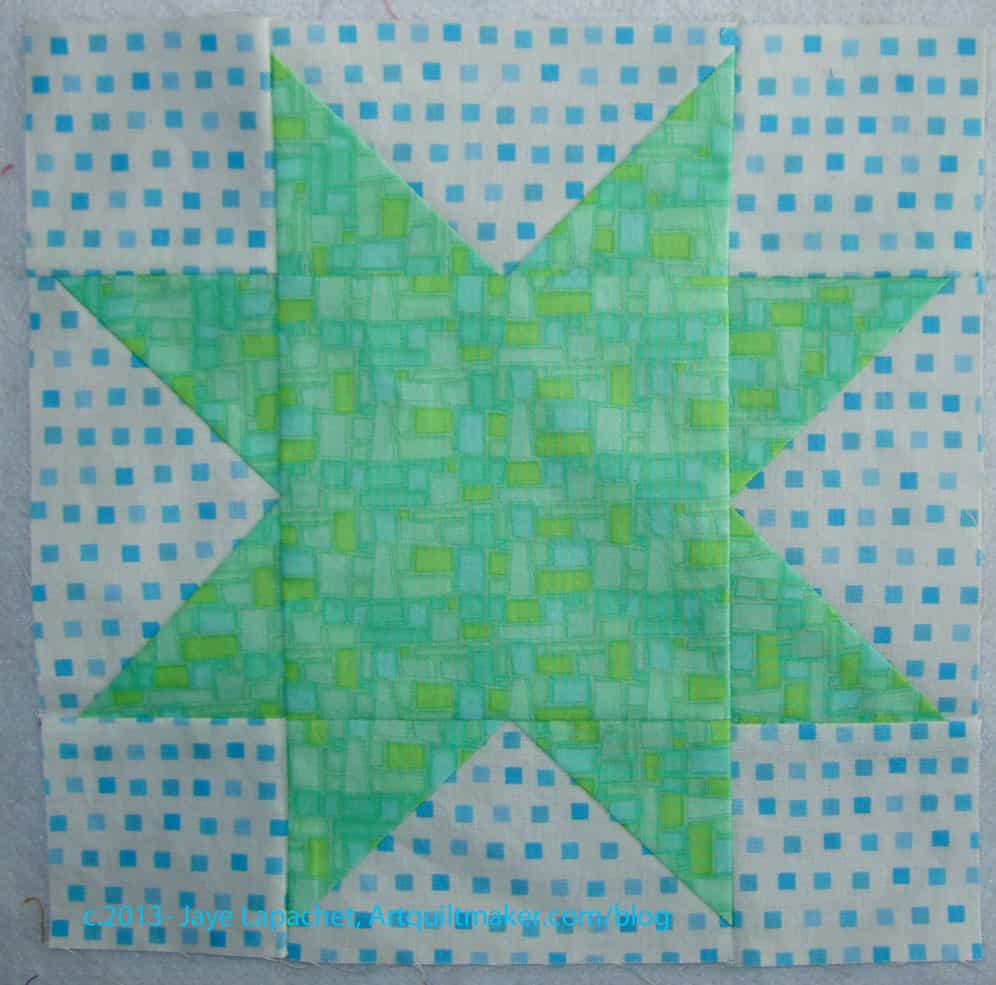
Square in a Square Star
Finally, I made the Square in a Square Star. While I was cutting for it, I was thinking of the green dot I talked about in the last post about the Star Sampler. I decided to use it in the center of this star. I wanted to make sure that there was enough of it in the quilt so one or two pieces didn’t look weird. It works GREAT, because it is enclosed and not touching the background.
I just realized it has been about two weeks since I posted about the Star Sampler. The last post was March 10. It is not an abandoned project and I have been working on the blocks. I know the week of March 11 was really busy for me. I had two meetings in the evenings that week and must have gotten off track with writing about the blocks.
Hourglass Star v.2
The first thing I did last week was redo the Hourglass Star block. The previous version didn’t work. I used that great yellow-green dot for the arms and it was too light. I had two of the centers, so I used the same center and just put a Michael Miller Dumb Dot as the arms.
I think that yellow-green has to be contained on the inside of a block. I think it is too close to the background to work effectively next to it.
If I keep screwing up blocks. I’ll have a second quilt on the back!
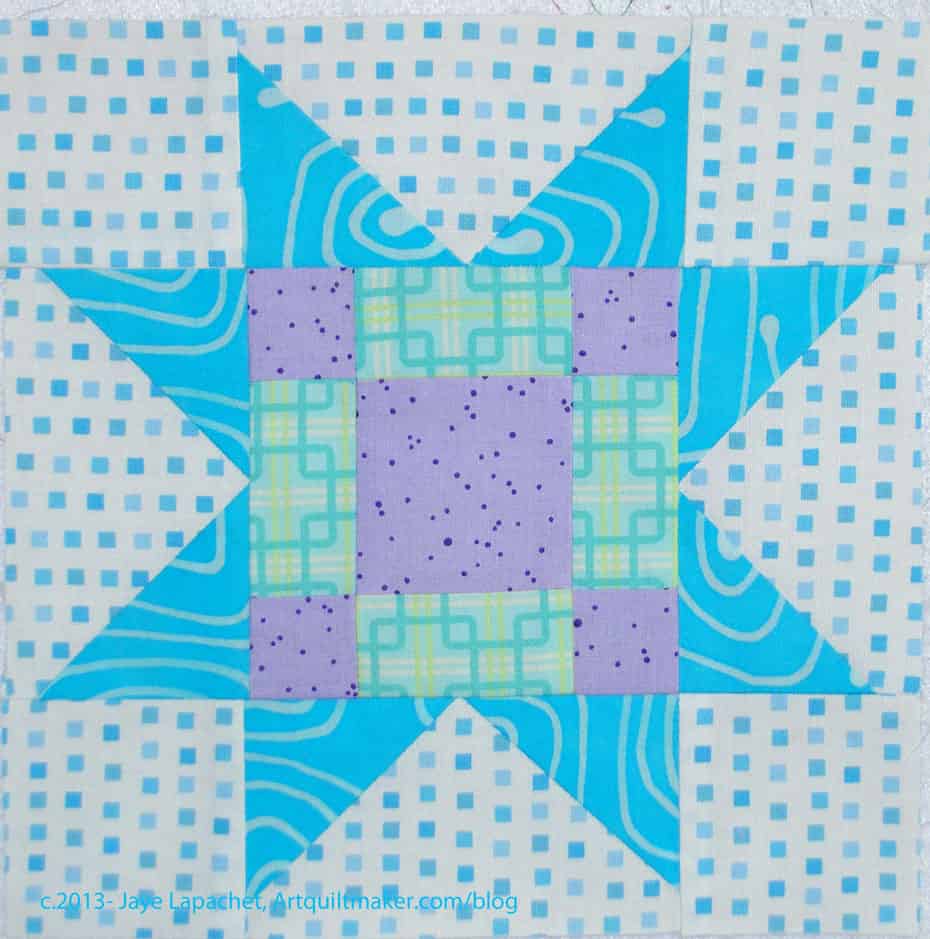
Checkerboard Star
I included some of the yellow-green in the Checkerboard Star and you can see how well it does enclosed by other fabrics. I have to keep that in mind as I move forward on the rest of the blocks.
I saw TFQ’s version of this star on Flickr and noticed that she lined up the fabrics she used for the arms so they were the same.
Plaid Star
I like the Plaid star. I like the look of the piecing. I am not 100% on board with the fabrics I chose, but I don’t dislike them enough to re do the block right at this moment. Also, I chose the colors to go with the Bard of Avon block. I didn’t want the Bard of Avon to be sitting out there with these fabrics alone.
I do love that turquoise I used for the arms, though. It is hand-dyed or some kind of special surface design by Stitch ‘n Dye fabrics. It is a very special fabric, but I thought I might as well use it. I am pleased with how it looks with the other fabrics.
Austin Star
Someone pointed out on Twitter that the Austin Star block looks really different from the others. The squares in the corner are quite prominent. They enhance the X effect of the block. I haven’t decided if this rendition of this block will make the cut for the final quilt. It is a little on the dark side. I know there is another block similar in layout that might make this work.
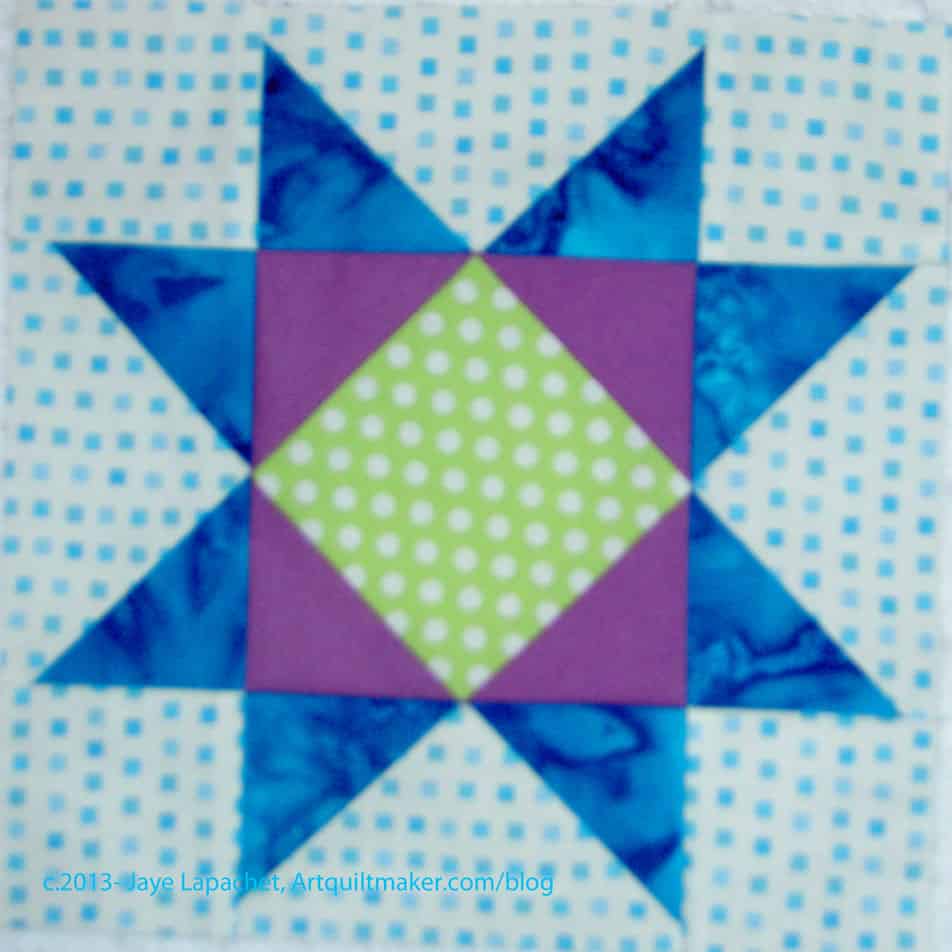
Basic Star
I am playing with lavender/purples since I ran out of that perfect lavender with white dots by Lakehouse. This one is pretty good since there are a number of different dots made up of different colors.
I am really enjoying working on this project with someone else. Seeing the placement of fabric and fabric choices some one else makes is so interesting. It also inspires me to think a little differently.
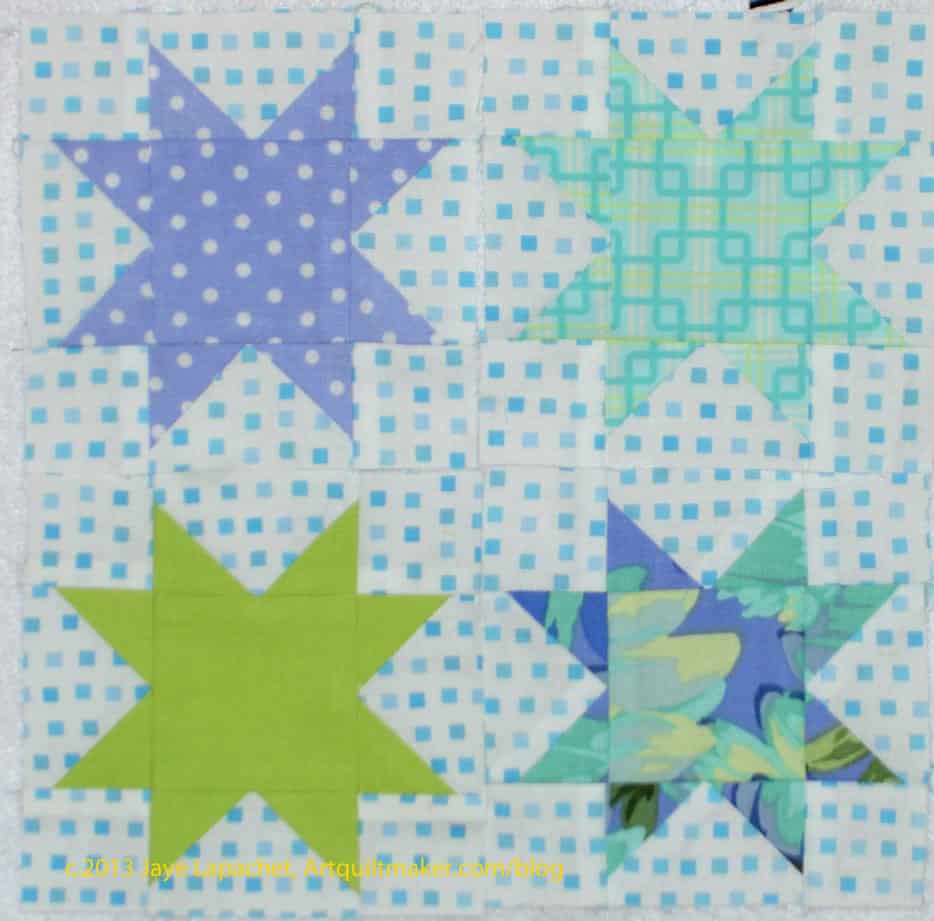
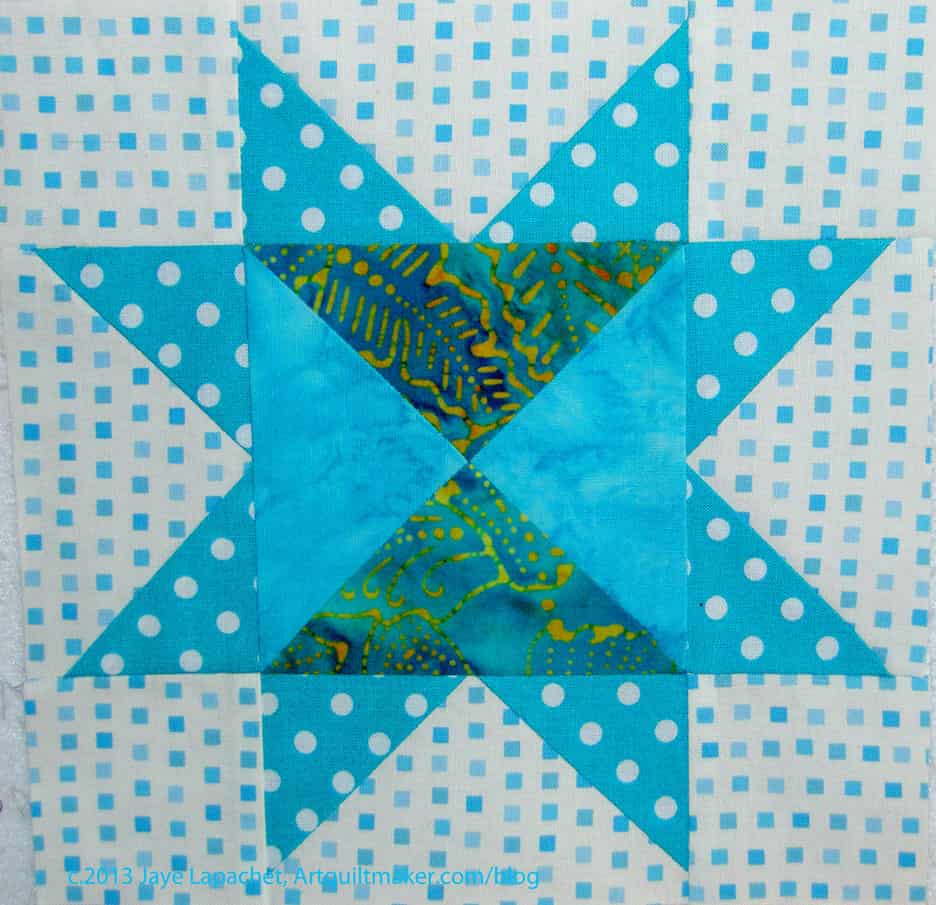
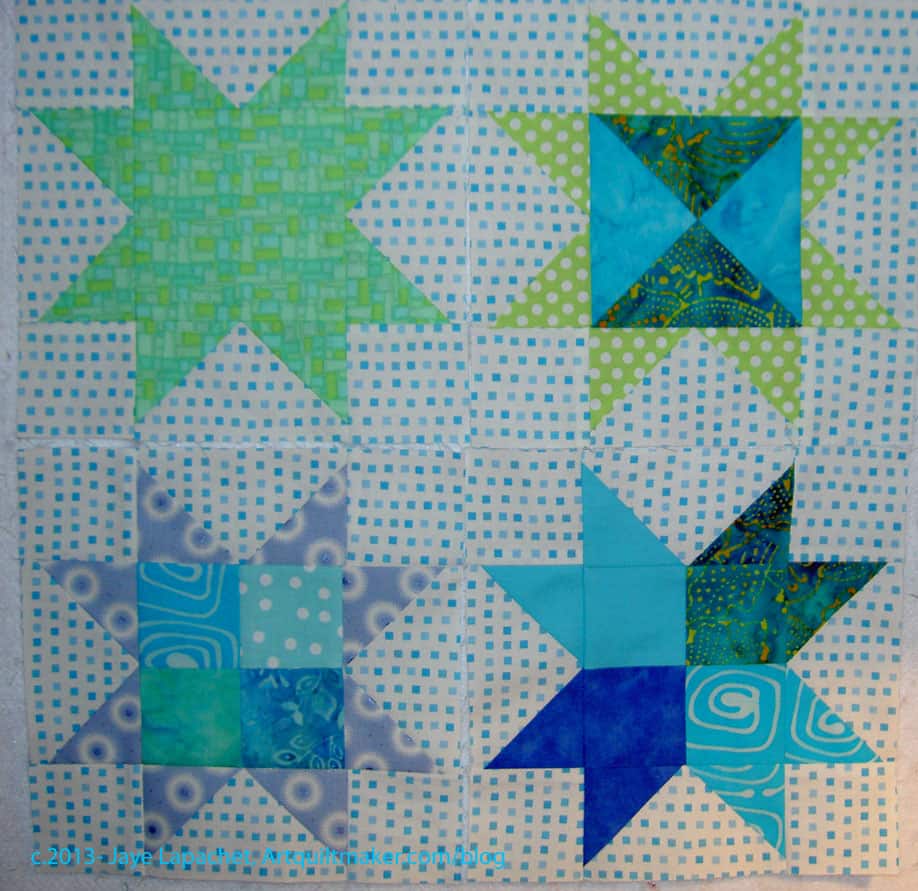
We have started the 8″ blocks this week. We are doing 4 each week and one of them will be a Basic Star. Being honest, I did the green one as a test when we started talking about the project.
Four 8″ Blocks
I was able to finish the other three blocks this weekend. I am pleased with them. I have added a couple more lavenders. I am not sure about them, but I will use at least a few more pieces so they don’t look odd.
I chose the blocks this week and they are Basic Star (top, left), Hourglass Star (top, right), Four Patch Star (bottom, right), Four Patch Variation (bottom, right).
We have 40 total of these blocks to make and I might make some of the Basic Stars in advance.
I have been doing some prep of the 4″ blocks, cutting the backgrounds and the corners in readiness for when I need some leaders and enders.
I finally got this block together. I made it differently this time; I used half square triangles instead of rectangles and squares. I don’t like the look of so many seams, but I couldn’t get the piece together in the correct size doing it any other way.
I am not giving you the pattern this time, because even in EQ, it wouldn’t come out right. I don’t want you to be frustrated either.
The other thing is that TFQ and I had a disagreement about the grid of this block. I drew it on the same grid as the other Sawtooth Stars. I found, though, that she was right once I started to make it. It is really a 9 patch. I shouldn’t have disagreed. She is usually correct about such things.
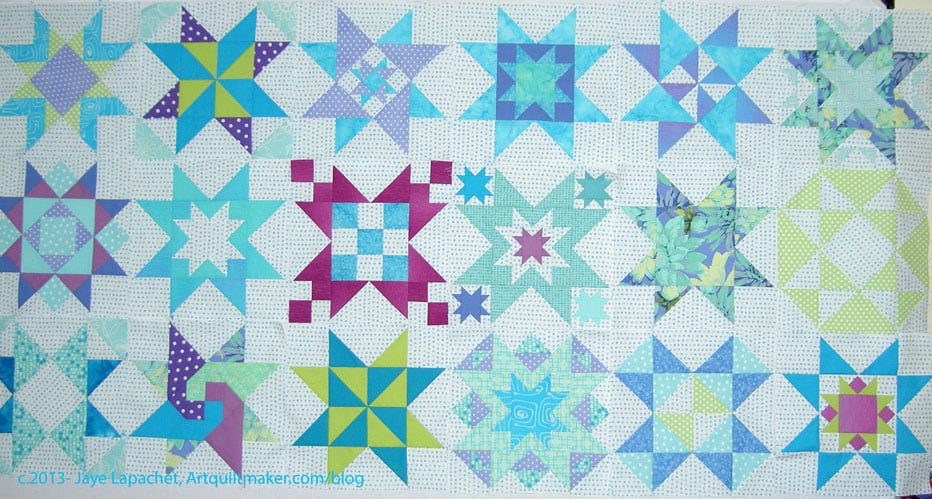
All, except one, of the 12″ stars finally made it onto my portable design wall. I finally finished the back of FOTY 2012 and was able to take the pieces and parts off the design wall.
Star Sampler blocks
While I was waiting for space to open up, I layered the blocks one on top of the other on my smaller design wall, so I could keep track of the blocks. This is unsatisfactory as I like to see what I am working on, compare fabrics I am considering for use against what I have already used and get a sense of how many times I have used a fabric. That doesn’t work well when I have to layer the blocks.
It couldn’t be helped, though, as the blocks are large and there are a lot of them.
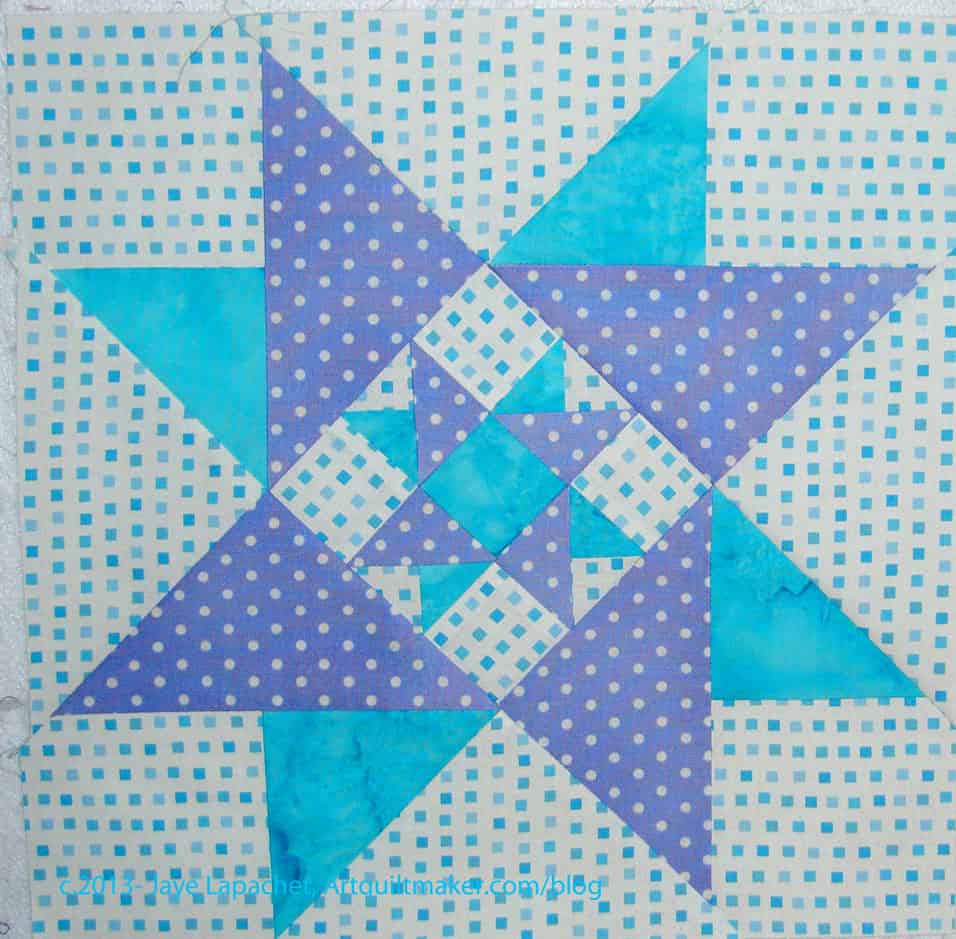
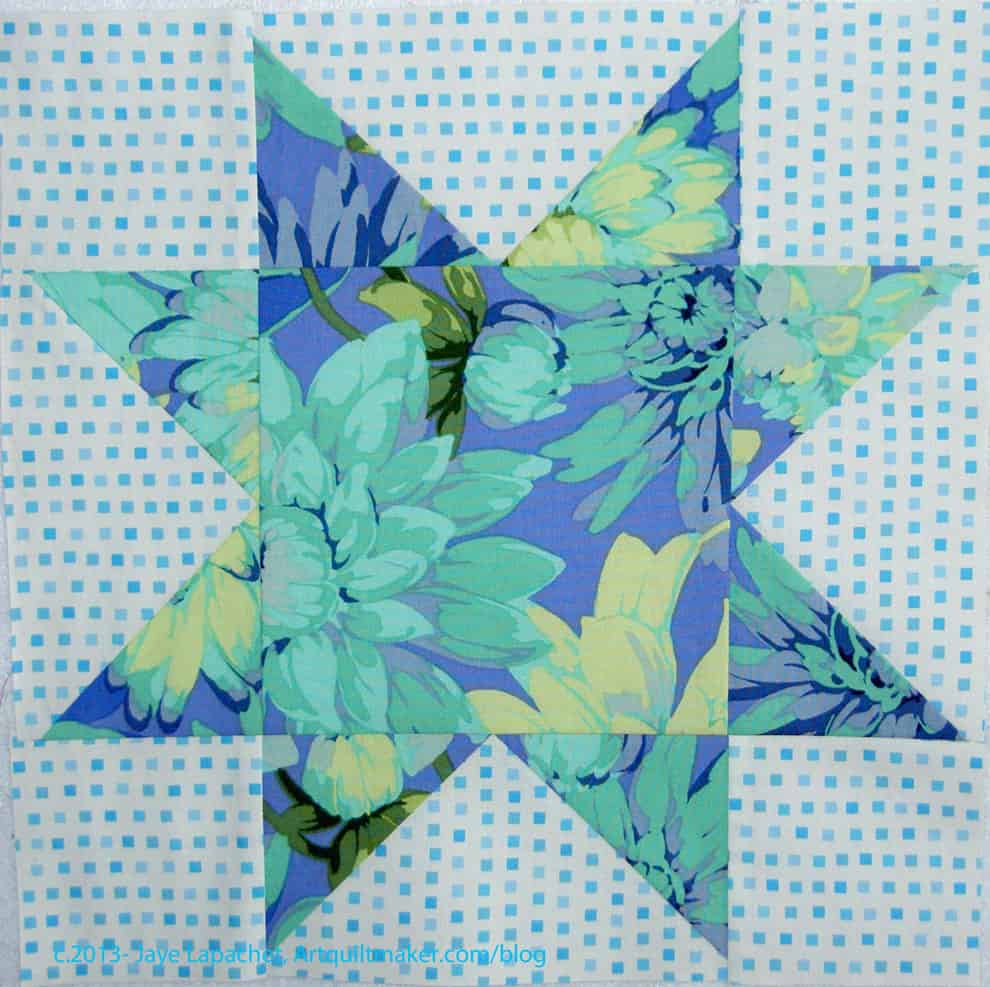
This block might be a little bit disappointing for you after the wonders of all the other complex blocks. I am posting it rather than just quietly putting it in the quilt, because I think it is a good example of how to use special fabric effectively.
Yes, I have used the Martha Negley fabric in small doses in other blocks, but I really wanted to show off as much of blooms as I could. Perhaps I could have fussy cut a little better, but I wanted to use the fabric in a reasonable way and I liked the off center nature of the fabric in the large square.
I can always make others in the 8″ size, if I want to use more of different sections of the fabric. Here’s the Basic Star pattern.
This block was kind of a pain to make, but the effect is really good. I am glad it came out well in terms of contrast, because if it had been a pain and looked bad, I would have been really disappointed.
I think it was a good choice to use the background fabric in the center of the larger star around the smaller star as it sets off the smaller star.
If you’d like to make one of these, here is the Star Sampler: Shelburne Star pattern. You can also find it in EQ7. Check out the Oh My Stars! Flickr Group to see all the other renditions of the final project. You can see all the posts on this topic by searching the tag “Star Sampler.”
Don’t you like the name of this block? I think it provides ‘scope for imagination’ and evokes mystery. That is one of the things I like about vintage blocks. They, often, have great names.
I thought that background fabric in the middle might look like the viewer was looking through the block to the background, but I don’t think I achieved that semi-goal.
I was somewhat unclear, apparently, about what I was doing with the Star Sampler, the general idea of this piece and how it came about. Apparently, I just started babbling on and posting a zillion blocks. I thought you all just mind-melded with me and knew what was in my head! 😉
So sorry! Thanks to Mrs. K for pointing this out to me.
Really, what happened is life. I went about, in a leisurely manner choosing my fabrics and cooing about them, then all of a sudden it was time to start and things heated up at work and I had several weekends in a row out of town and WHAM! I needed to get myself in gear.
The idea for doing the Star Sampler started when TFQ and I talked about doing a project together. The idea of doing a project together came up, I think, when I saw the announcement for Easy Street, the recent mystery quilt by Bonnie Hunter. Both of us were a little leery of doing a project when we didn’t know what the end result would look like. We both kind of wanted to know what direction we were headed.
Due to the distance and our crazy schedules when we are together, we decided to leverage technology and work on the same project, but in our own spaces, using our own tools and fabrics. We have worked on quilts together in the same physical space and I expect we will again, but this time, we are using the same pattern and doing the work on our own.
We looked at books, Flickr and various blogs to try and find a project we both liked. We used a joint Pinterest board (great tool, BTW) to keep track of our ideas. We eventually chose the Oh My Stars Quilt-a-long. The rest of the universe did it in 2012, but we just found it and since the directions and information are still posted, we are able to do it. We chose it because we both like Sawtooth Stars, there was enough scope for both of us to stretch our creative wings, use fabrics we liked and a wide variety of blocks.
Sheila is the owner of Thought and Found blog and the creator of the Oh My Stars QAL. She seems to post regularly to her blog. I have been hanging out there a bit more, but mostly referring to the layout or the block information. She set up a Flickr group for the QAL and I have been posting photos there even though everyone else is finished. It is a great group for inspiration, even if you are just looking for color combos.
The quilt is made up of of 12″, 8″ and 4″ Sawtooth Stars. Sheila includes patterns and tutorials for each of the Sawtooth Stars needed to complete this quilt. Scroll down on the first page of the QAL information to see the blocks. We are using many of the stars she lists, but we also went through EQ and created a group of stars that we wanted to make so some of the group’s stars will not be in our quilts.
Star Sampler Layout (Thought & Found blog)
One of the attractions for me of this project is the layout of the blocks. This is not your typical straight set. This layout makes the viewer work for their view. It is interesting and the viewer is rewarded for their work in looking at the quilt for longer than the typical 30 seconds.
I am toying with the idea of sewing the 4′ blocks to the larger blocks before I have finished all the blocks. There are a couple of reasons. First, I don’t have enough space to store the thousand (ok, it isn’t a 1,000, but sometimes it feels like a thousand!) blocks I am making and they would be easier to store in larger chunks. Second, I might like to take a chance at some random color choices near each other. Third, I am not sure I can face a bunch of single blocks needing to be sewn together. I need to think about it some more before I decide.
We are keeping ourselves to a strict schedule so this project doesn’t take forever. I have already posted bunches of blocks and I will continue to do so. You can also see my Flickr set for these blocks. TFQ has a Flickr set also. She said I could link to it, so take a look and comment.
I hope this clears up the mystery of this project and I would encourage you to join in.
I feel like this block came out really well. It is pretty, but has a delicate feel, too. The purple is from an ombre print, so I don’t have much of it left. I’ll have to use it judiciously.
If you’d like to make this block, I am posting the Star Sampler: Gypsy Dancer pattern. This project is from the Oh My Stars Quilt-a-long from the Thought and Found blog. Join in the fun and make some blocks.
One of the things I like about this block is that there are two sets of Flying Geese units in it and because of the way they are colored, they look really different and do something really different to the look of the overall block.
I realized around the time I made this block that I am going to the same fabrics over and over. I need to broaden my palette. It isn’t easy, but I have to try.
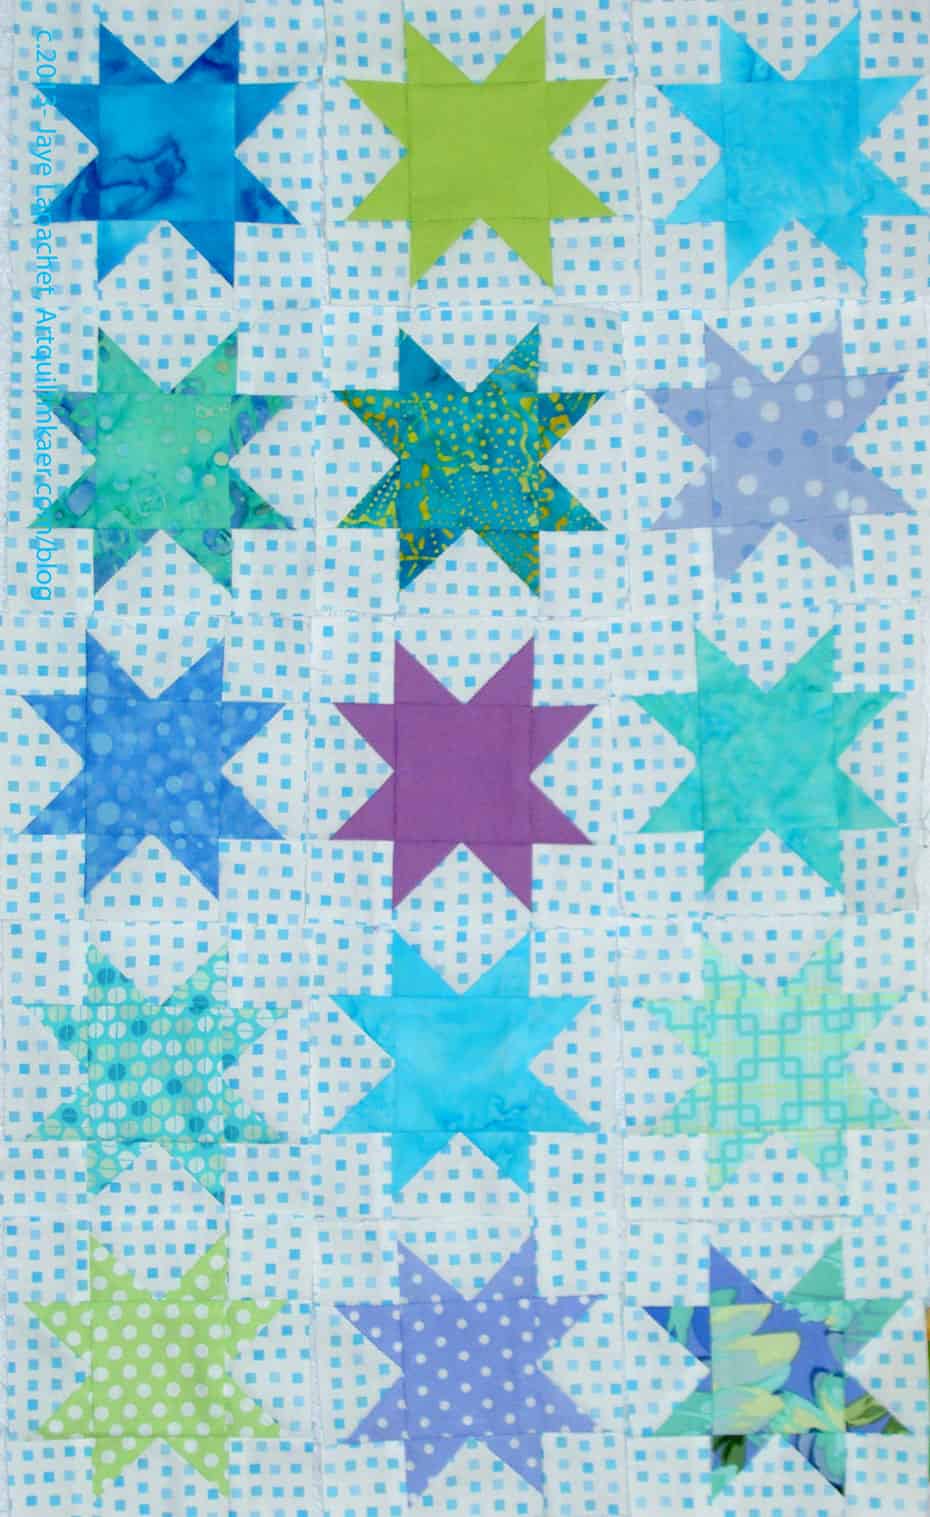
I know there are a lot of posts about this project, but we are working on it fast and furiously. This post is a milestone, I think, because I have 12 blocks made and you can see them all together.
One of the things I like about seeing them all together is I can see what fabrics I need to repeat.
I also like seeing them because it makes me feel like I have been making some progress. I *know* I am making progress, but it is great to see the progress.
I actually have an additional 4 blocks made, as of this writing, but I am experiencing a shortage of design wall space right at the moment so you will have to wait until that clears up to see them all.
I have to say that I am tempted to start sewing all the different blocks into chunks just to get them in some kind of order. The layout is pretty clear; it would just be a matter of deciding what goes where. I’ll need a lot more 8″ squares before I can make any real progress in the layout, though.
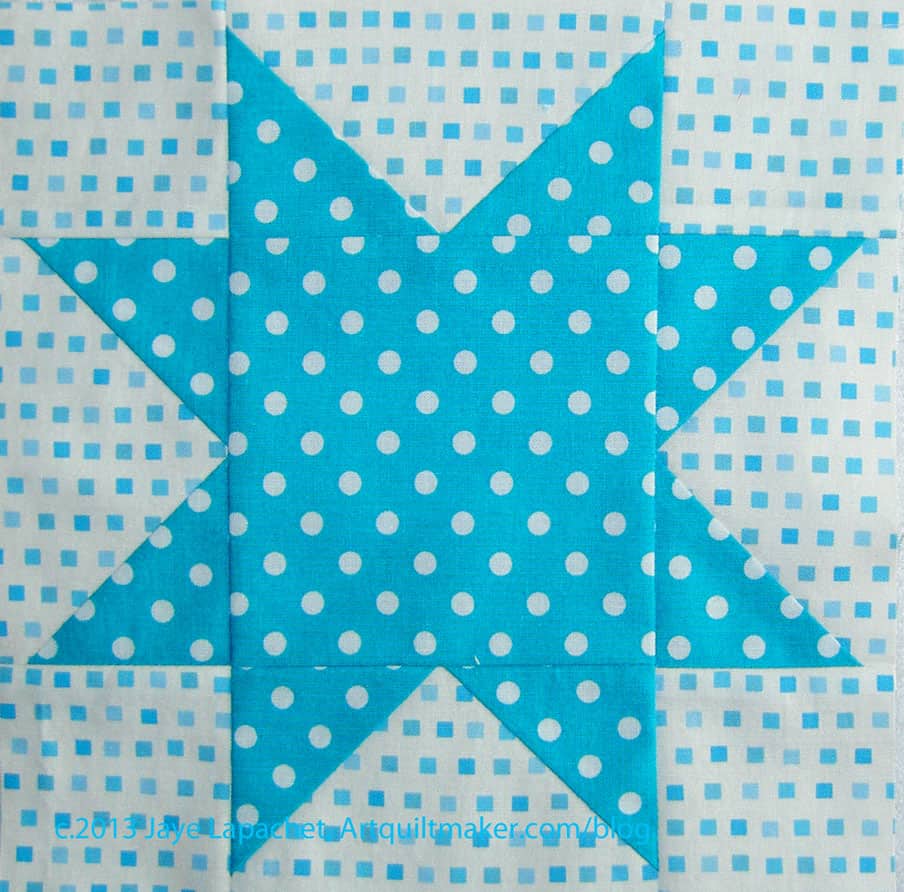
I am very surprised that this block is called Football Star. The name seems so unlike the actual block; the name doesn’t reflect the look of the block at all.
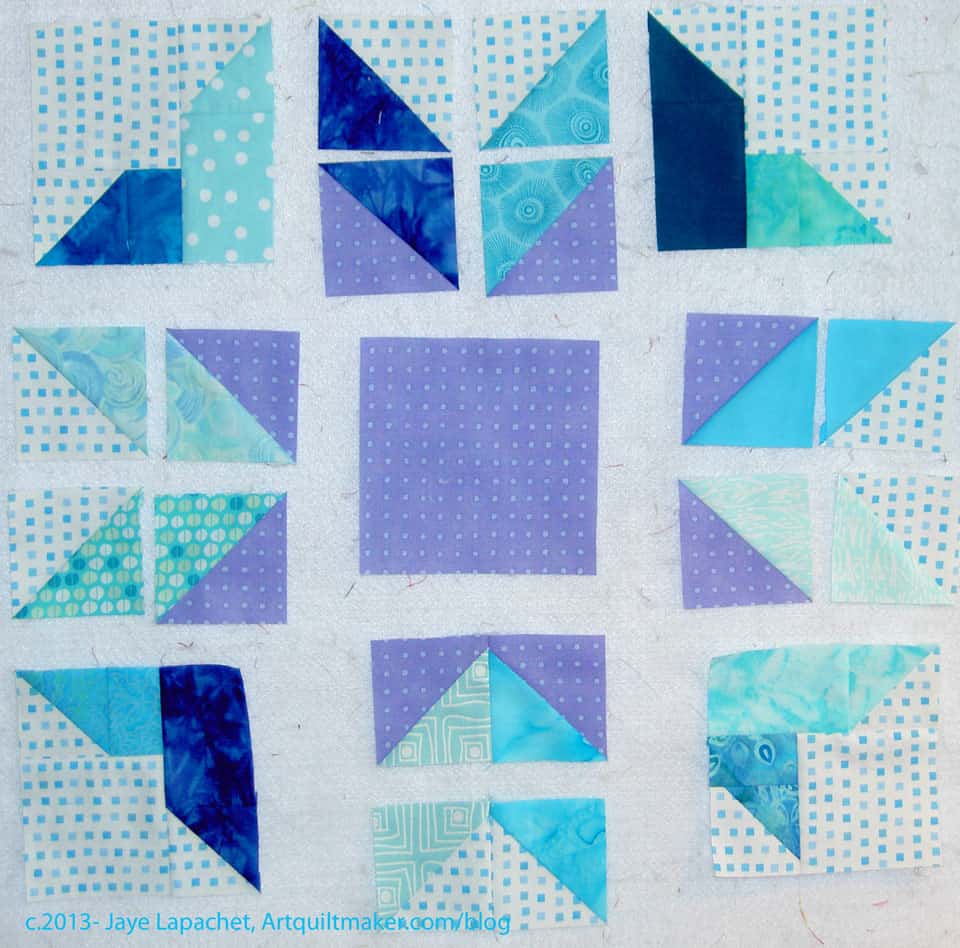
As leaders and enders, I am trying to make progress on the 89 4″ star blocks that are needed for this top. It is working pretty well and I have 7 finished and one in progress at the moment. I have also cut a bunch of pieces to make more blocks as I go along.
We only have a week or so more before we have finished the 12″ blocks and start on the 40(!!!) 8″ blocks.
If you’d like to make one of these, here is the Star Sampler: Football Star pattern. You can also find it in EQ7.
For the Star Sampler, I have to make 89 of these 4″ babies. I have been making these using leaders and enders and they are pretty painless that way. I just have to make sure I have the correct pieces cut so when I need a leader or ender they are ready.


")