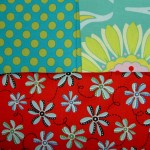
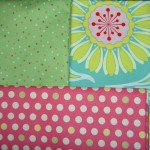
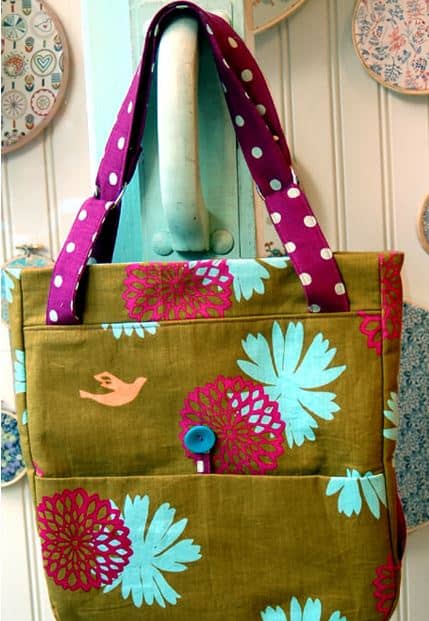
This is the finished Flea Market Bag by Grand Revival Designs. It is made with Innocent Crush by Anna Maria Horner in the grape colorway.
I have mixed feelings about this bag. The straps weren’t the same length when I went to topstitch them together at the end of the process. The bag was easy to put together and especially to turn, but the straps ended up a different length (probably my fault when I traced the pattern), so I had trouble sewing the straps together.
Also, the maker has to press all the edges of the strap under before topstitching, which was a pain, but turned out ok in the end.
The bag is a little small for a tote. It is more handbag sized, but may fit an iPad or Kindle or something. I don’t know yet if I’ll keep it or give it as a gift.
As I mentioned, I opened a Cafe Press store around Thanksgiving (http://www.cafepress.com/Artquiltmaker). I was thrilled to check on the sales and had two sales after only two days. AWESOME! if you are reading this and you bought something, thanks! I know it doesn’t sound like a lot to you big time retail executives, but I am excited. Don’t worry! I am not going to harangue you with sales pitches all the time, but won’t you go take a look and buy?
American Patchwork & Quilting Winter 2010
The Henry Glass Designer Holiday showcase of Project Goodness (or whatever it is called) just ended or is about to end. Linda Lum DeBono (Mark Lipinski’s friend) started out the first day with her blog post. She showed the picture above and I thought it was very like It’s a Merry & Bright Wrap, but much cuter. Is there another Christmas quilt in my future? I don’t know. I’ll buy the magazine, though. In general I found this blog hop confusing and gave up after a day or two. I did enjoy seeing the artists’ work.
Heather Muldur Peterson is also on the Project Hit Parade (or whatever it is called) and she has a great project in her blog post using her new fabric line called Artful Home. I like the way the stripes work in the piece. The colors are very vivid. She must have great light (or a special secret) for photographing. Her project is a dish passer, which I needed the other night. Perhaps I will make one. I assume I will have to make one for each of my baking dishes, so perhaps not.
I joined Creating the Hive when Lisa F of C&T Publishing invited me. I don’t do much there except repost my blog post and respond to comments. I was thrilled when my Red Journal post was featured last week! It makes me feel like all this writing is valuable! If you want an invitation, leave a comment and I will invite you. I think you can join without an invitation as well.
Last week I talked about the Bay Area Modern Quilt Guild meeting I attended. At that meeting, Adrianne brought a bag she had made. I really liked the bag and was thinking that I should buy the pattern. I thought I might have bought it already as the Grand Revival name rang a bell. I did a search in my blog to see if I had bought it and found that I had THOUGHT about buying that exact same bag pattern, but apparently didn’t. I wrote a blog post about it back in September. Perhaps that is a sign that I should actually buy the pattern, which I didn’t. Yes, I am still lamenting hte fact that I have so many bag patterns and haven’t made many fo them.
I did see a free bag pattern from Rebeka Lambert of Artsy Craft Babe, which might satisfy my urge for a new bag pattern. I really want to make some gifts for the holidays, but time is slipping and I am only wishing. We’ll see. Not having to wait for a pattern to arrive buys me time.
Somehow, in clicking around, I ended up at Kathy Loomis’ blog. She didn’t have a lot of pictures and sometimes I am too pressed for time to read a lot of words (I should remember that when I am going on and on, right?), but her post about taking a leap in art quilt imagery was interesting. I don’t know if I agree with her completely, but it was interesting to read some writing about going beyond the “bad, citing “clunky, obvious images” and “sappy, crappy ugly quilts or embroideries or puff-painted sweatshirts.” I think I got a glimpse of reaching beyond during the fabric exercise at the Bay Area Modern Quilt Guild meeting. I have been struggling with putting fabrics together and that exercise (which I am more and more in awe of as time goes by) really helped me. I don’t want to make representational quilts or quilts about AIDS or depression or the impending train wreck that is environmental disaster. I do want to reach beyond what I am doing now. I am not sure what that means quite yet, but since this quilt adventure is a process for me, I am sure I will reach and find it.
REACH BEYOND
I saw a feature story on the web about a grave in Massachusetts on Andi Stern’s blog with a really interesting carving of a cephalopod on it. Cthulhu was in the title of the story and I didn’t know what what it meant so I looked it up on Wikipedia and found some clarification on some other aspects of the story. Regardless, the image looks like a cheerful beast and I thought some child might like it on a quilt some day, so I saved the photo to my inspiration file.
Remember this bag? I was reading the Martha Stewart blog and saw it referenced again there. This version by Liesl of City Weekend fabric by Moda and her own company, Oliver + S. I am not a big fan of that green, but the whole look really works. I need to get the pattern out and make it! I have all hardware and have for awhile. Love those dots. I wonder if I have them? 😉
TFQ and I spent a fewer days at PIQF this year, because we wanted to sew. I think that was a good choice, though we didn’t really find a quilt we wanted to make together. I enjoy it when we work on blocks together. I always learn a lot and think we do good work together.
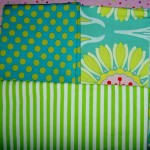
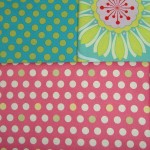
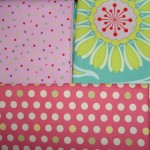
Grab Bag by Sandy's Designs
As I mentioned I bought a bag pattern called Grab Bag from Sandy’s Designs. I wasn’t able to find a website, but I found it at the Cranberry Quiltworks booth. When we returned, I worked on this bag and got advice from TFQ while she pressed fabric.
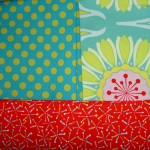
When looking at the bag from this angle, it is a great bag. I thought this pattern was a little bit fiddly. I didn’t really like making the patchwork for it. I think that is just a personal preference and not a problem with the bag pattern. Fortunately the designer gives directions on making the bag with longer strips. I want to try that. If I make these in any large scale way, I wouldn’t make a patchwork inside.
The designer gives options for different sizes and ideas for fabric placement.
The triangles used in the bag are all half square triangles. They are cut in that manner so that the bias is along the hypotenuse. The top of the bag is no exception. I think the pattern would be stronger if the designers suggested that people cut those pieces in the manner of cutting quarter square triangles so that the bias is not along the top of the bag. Granted, the makers sews the top right away.
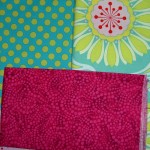
The bag looks good in the photo, because I stuffed it full of batting to make it look good. I am not sure I like the unstructured nature of the bag as a whole. I am also having a hard time imagining how I would use it. It would be a good gift bag.
I added a little batting to the handles, too, and applied them using the method described in the Chubby Charmer pattern.
Jane Market Tote
I also, finally, tried the Jane Market Tote pattern from Posy Gets Cosy. The pattern is a downloadable PDF, so you can go right now and buy it. I bought the Martha Negley fabric some weeks ago. I had been searching for the violet colorway, which I found. At the same time, the shop also had this black colorway. I couldn’t tell if it was black or a very dark purple before I bought it. When it came, I found the colorway to be a little grim. Still, it is a good fabric for tote bags, especially for boys moving out on their own. I do like the design of the vegetables scattered over the fabric.
Martha Negley Fabric
Anyway, TFQ has made a number of these bags. She uses them as the wrapping for gifts when she gives new parents receiving blankets. She encouraged me to make the bag while she was here, so I could ask her questions. I learn a lot better when someone shows me what to do as opposed to trying to figure things out from reading a pattern.
This is a great pattern. Lots of good instructions, no mistakes or weird things happening with the instructions. There are some nice little touches the designer uses to make the pattern a little more finished.
I do want to use some interfacing in the bottom just to give it a bit more structure. I’ll try it out and see how that works for me.
I think the bag is a little small. It is much smaller than a grocery bag. In a way that it is good, because it means I won’t fill it up completely and not be able to carry it.
I applied the put them on applied the handles using the method described in the Chubby Charmer pattern.
I plan to make a few more of those bags with the black Martha Negley fabric.
This is the larger size of the Anna Maria Horner Multi-tasker tote. I wanted to make a bag that worked with the Moda Half Moon fabric after the Mini Multi didn’t turn out as expected. I am pretty pleased how this one turned out.
Half Moon Tote – detail
I might be done with this pattern. I dug the Cruzer & Little Cru pattern out and may start working on that.
This is one of the totes that made over the past week or so. I think I bought the fabric when I was in Maryland a few years ago. I bought the fabric specifically for a tote bag. It has been in my tote bag fabric box for awhile. I started to wonder why I bought it and then I found a great use for it. I like the fabric, but it turns out not to be a fabric that I would carry around. I think I bought it at the beginning of my tote bag making mania when I didn’t have a lot of tote bag fabrics.
I was on a mission to start using some of the fabric I bought on my recent trips. I decided that after hauling the regular sized AMH MTT around for a couple of weeks that it was time to test out my mini version.
AMH Mini Mult-tasker Tote
Bottom line: I don’t like it. My basic problem is that it is handbag sized, not tote bag sized. What I really wanted was the AMH MTT in a slightly smaller tote bag size. I definitely did not want a handbag. I use leather handbags, because I am brutal on them. This bag looks fine, especially from this photo angle, but looks slightly out of proportion to my exacting eye.
It went together pretty well until I had to insert the lining into the exterior. I found out that the lining was much too big (did I forget to downsize?). I used tucks to make it work.
I used the pink straps instead of the straps I had originally made for this tote. I really liked the straps I made and only had a half yard of that fabric. When I decided I didn’t like this tote, I decided to save the straps for a different bag. I think the pink looks nice against the black and white. You’ll see the second version soon!
AMH Mini Mult-tasker Tote (detail)
The fabrics are fabulous and I have enough of the Moda Half Moon large dot to make another regular sized tote. I don’t have anymore of the lining fabric. It reminded me of a 1940s bathing suit fabric.
AMH Mini Multi-tasker tote (size comparison)
Above you can see the size comparison to the regular sized AMH MTT. I thought I only cut off 1″ on each size of the Mini MTT, but must have cut off more.
My mom had a good idea, which was to take the original pattern sheets to a copy place and have them reduce the size proportionally. It is a great idea and I wish I had thought of it sooner.
I have a bunch of other small projects that I have made and will post soon.
I met Faye on a list back in the dark ages of the Internet, when normal users couldn’t upload any photo they wanted and write in a blog.
She and her husband came to visit me when I was on maternity leave and took a shine to The Child. They became his unofficial New Zealand grandparents. Every year for his birthday, they send him a classic New Zealand children’s book and write him a nice note.
Faye and I have also kept in touch, sharing our recent quilt projects, bags and stories about our families. Faye had less time to sew during the past few years as she cared for ill husband. After he died, she went on a world tour to visit her family and has started to sew again.
Faye's Rose Bag
She calls these bags her Yin Yang bags. The pattern is by Jaime Kalvestran of Scrap Bags o Minnesota.
Faye's Rose Bag - backFaye's Black & White Ying Yang BagFaye's Black & White Ying Yang Bag - backFaye's Black, Brown & White Ying Yang Bag
Faye writes about these bags “I made several in the same Japanese fabrics; the blue and white ones were from unpicked antique kimonos. There are two inside pockets, suitable for a mobile phone and for keys, and the bag is deep enough for a wallet. Now I am “bagged-out” but may make more for gifts later.”
You might remember about a week ago I talked about selecting bag fabrics. I just couldn’t decide so, instead, I started on a different bag, the Anna Maria Multi-tasker Tote, where the selections were already firm in my mind.
AMH MTT in Progress
I really enjoyed working with these fabrics. I loved the colors and the feel. I finished the bag on Saturday and took it out with me on Sunday. I have to admit that even if I give bags away, I try most of them out. I intend to keep this one, but tote bags flow through my life so quickly that who knows?
These are fabrics that I bought in Ferndale and the large flower print is by Martha Negley. I do love that color, a reddish pink tending towards salmon. It is a cheerful color.
This is the first time I have made the pocket panels the same color as the exterior of the bag. They are the pieces right under the dot fabric you can see peeking out of top left and right.
It made the fabric selection process a lot easier. The pocket panels aren’t highlighted at all; they look like part of the exterior. I don’t know yet if that bothers me. I did a lot of work on the bag and wonder if I need people to see the pocket panels? I’ll have to think about it and let you know.
I like to make the inside of the bag a light color, so I can see what is hiding inside the bag. I really like that dot fabric! I got some a long time ago with a chartreuse-y / olive background. This colorway works very well for the inside of a bag.
I realize that this is another non-quilt project. Yes, I have quilt projects; I just don’t seem to be working on them. Two quilts, Chocolate Box and Passionate Purple are ready at the quilter and I haven’t gone to get them yet. I also finally called for a longarming date. I could have had March 26, but have to work that day, so FOTY 2009 will be quilted on April 23. Don’t give up! Some quilts are coming.
Every horizontal surface in my workroom is covered, mostly with fabric, but other stuff, too. I don’t have large enough horizontal surfaces, but that is no excuse. I have so many things going on. On the top of my list is sewing!
I am trying to pick out fabric for my latest Anna Maria Horner Multi-tasker Tote. I’d like a new one for spring and it just isn’t going well. I tidied up a little after I got home from CQFA, but I still don’t have enough space to work.
Option 1
Option 2
Option 3
Option 4
Option 5
Final Selection?
Option D
Option A
Option C
Option B
Cell Phone Pocket in Progress
AMH MTT in Progress
I had three fabrics ready to make the next Anna Maria Horner Multi-tasker tote and one of them disappeared or I lost it or misplaced it. To make matters worse, I don’t remember which one I had selected. Bleah!
I was looking for a red or a pink to bring out the middle of the flower, but am considering another green to encourage subtlety. I looked at pattern on the fabric as well as the color and I am not really sure any of them work. The above are some that I tried out to see if I liked them. I think I need a red with a little more pink.
Final Selection?
Perhaps you like the above?
No? I found more fabric choices in the pile behind the door. they caught my eye when I was wandering in and out. This area is like the Tollbooth in the Phantom Tollbooth and they haven’t been on my radar since my sister moved a bunch of stuff around in my workroom.
Option A
I definitely like the pink dot better. It is a lot of dots in the piece, however.
Option B
The small dot kept catching my eye as I looked at some of the other choices. It was on the top of my ironing board because I had just ironed it. I kind of like the lavender/pinkish color.
Option C
Stripes don’t work for me. Well, actually, the stripes work, but the color of the stripes doesn’t work. Too Pepto Bismally.
Option D
Too much green?
I really wanted to get going on that tote today. It has been too long since I sewed. Since I couldn’t decide on colors, I was stuck. NOT!
AMH MTT in Progress
I have plenty of fabric and had just come across the perfect green to make the straps for another AMH MTT, so I started in on that and got pretty far after I made the straps.
The reddish pink fabric is a Martha Negley for Rowan fabric from the Variegated Garden collection will be used for the exterior. This particular print is MN-40 Dahlia.
That fun dot is the inside. As you can see I have the pockets pinned and ready to sew, but haven’t sewn them yet. I was tired.
I added a cell phone pocket, which is the smaller pocket also waiting to be sewed on.
Cell Phone Pocket in Progress
Sorry, this photo is bleary. I have been up and down the stairs (4 flights) at least 8 times to fix photos and I am not doing it again. This idea is from the Sweet Harmony bag. The dimensions of this pocket are 4″x5″. I cut it 8″x5″, sew around the outside with right sides together, turn it and then sew it to the lining of the AMH MTT bag. The way I make it fit the cell phone is that I pin the bottom so that it measures only 3″, which makes a pleat.
This is a denim bag I made out of of an old pair of jeans for my stepdad, The Big Guy. I made one of these in high school that I carried around and embellished. I am not really sure what happened to that bag or whether there are any photos of it anywhere. I stitched around the edges of the pockets with embroidery floss and embroidered flowers on my version.
I wanted to do something like that on this bag, but really ran out of time. I had a lot of gifts to make, as you know.
The shoulder strap is pretty wide. I made it that wide because of the seams and because I thought it might be a little more comfortable for him to carry. The straps will be a good opportunity for him to embellish.
I really had a hard time sewing through the denim and all of the layers in various places. The 9K did NOT like the denim. As a result, I couldn’t do as much topstitching as I normally do on bags. Both of the issues I ran into allowed me to go with the flow, though, and I billed it as a joint work in progress.
The Big Guy is VERY creative. He works in various media including leather. He has made leather slippers before, so I thought the bag might be a good canvas for him to stitch on. He loved the idea! I am looking forward to seeing what he comes up with.
I am pleased [with myself] to say that 2010 started out with a sewing bang. I finished the bag for my aunt (she never reads this blog as far as I know, so I don’t feel bad about posting it even though I haven’t sent it off yet).
Jeri’s Bag
I started this bag way back in December 2009, but with one thing and another wasn’t able to finish it until Friday. I feel bad, because it was intended to be a Christmas gift. My aunt really loves purple, so I made this bag in purple for her. In terms of fabric selection I had a couple of things I wanted to accomplish and some limitations to deal with. First, I was limited in my fabric choices because of the size of the pieces of fabrics I had available. For a long time I have purchased half yards and FQs. These are fine for quilting, but I am finding that they are barely adequate for bag making. I intend to try the Mini-Multi (AMH’s pattern for the Multi-tasker tote that I resized)This limitation directed me to more plummy colored purples.
Also, I wanted to try a bag where I didn’t use fabrics with a ton of contrast. I think Marilyn’s Multi-tasker was pretty successful. That one wasn’t boring to make. Thus, I wanted to try another interesting combination of fabrics that were also not wacky looking and my aunt wouldn’t feel bad about carrying around.
I am pretty happy with the way this bag turned out. It looks nice and does not look wacky. I made the pockets and straps at the beginning of the process even though AMH says to make the straps at the end of the process, right before I am supposed to attach them. I think my process worked better for me, because once I got past the tedious, fiddly parts, I was able to put the bag together relatively quickly. I like to get all the fiddly parts done, so I can move through the process quickly as I tend to get bored if I have to keep going back to the fiddly bits periodically throughout the process.
Jeri’s Bag – detail 1
I think the combination of fabrics is a good one. The colors work well together and there is some interest in the combination. They are all older fabrics, so an added bonus is that I delved into the fabric closet and used some stuff that has been hanging around. I think Auntie would have preferred less plummy and more purply colors, but the bag is what it is.
Jeri’s Bag – detail 2
AMH does not make her pockets fully lined. Another change that I have made is that I make them fully lined [by cutting a piece of fabric, folding it in half (right sides together), sewing around, turning] before sewing them on to the bag. I think this method makes a nicer finished product and doesn’t take much longer. I want to remember next time to add a label to the pocket. It seems like a good place to include a label.
Jeri’s Bag – detail 3
I am still liking the cell phone pocket, which I learned to make from the Sweet Harmony bag, so I added one to this bag as well.
Cloth Napkins
I have bought some of the fruit and vegetable fabrics, that seem to be popular, recently. I had a joint project with my mom in mind, but decided I liked certain ones too much to give away, thus I made napkins. Perhaps I am making a series after taking a look at the raspberry napkin I made in 2009? The cake fabric and the pots and pans fabric is from my collection of fabric for backs. Those pieces are large, so I can make FQ napkins with no problem and no piecing. In general, I don’t really like making napkins. Turning the pieces and getting the seam crisp are really frustrating and I am generally not successful at it. I tried a couple of different methods this time and am progressing. I do enjoy using the new napkins! I also enjoy looking at the cake fabric. My sister wants a set, but I don’t know if I have it in me to make a SET. Perhaps I can make one a month for her, then give her a set of 12 for Christmas? We’ll see.
In a way I wanted to set a trend for 2010 of major league sewing. In 2010 I want to make major progress in the sewing-quiltmaking-bag making department. I think I did well last year. Still, I want to do better. Not necessarily in terms of numbers of projects completed, but improvement in my processes. Oh, and I would like to see major improvement in my organizational systems. I am not committing to anything on that front, but would like to see it. We’ll see about that.
I love my sister dearly, but she is hard to shop for. She buys what she wants, so I always have to think early and creatively. I found this Basic Grey fabric and just knew I had to use it for a gift for sissy. She is an invertate scrapbooker and LOVES Basic Grey paper. It started the whole thought process, actually.
Sweet Harmony - Full
On my week away, TFQ tempted me with doing a joint Sweet Harmony Bag by Amy Butler. My idea was that we would each make one at the same time. However, it turned out that we worked together on one bag.
This is probably the last time I will make an Amy Butler pattern. I purposefully did not write the review right away, because I wanted to give the shock time to wear off and give the piece a fair hearing.
While the finished product turned out really well, the directions were overly complicated and the pattern promoted extreme wastefulness.
Here are some tips and things to be aware of when making this pattern:
Trace the pattern pieces on tracing paper and keep the originals all together on the pattern sheets.
Trace the pattern pieces again, but smaller (approximately 3/4″ will work) for the fusible fleece and interfacing pieces. If you don’t do this, the pattern will tell you to cut them full size and then trim them down. Thus, this direction promoted a lot of waste in the interfacing, Peltex and fusible fleece.
Make a separate pattern piece for the inside pocket as well. This is a combined piece and it is just too confusing not to have a separate pattern piece.
Make a chart (Excel or the Google Docs Spreadsheet feature would work) of the pattern pattern pieces you will need and which fibers you need to cut them out of. I didn’t know to do this and ended up laying all the cut pieces out and reading the list over and over while counting pieces.
The designers seem to have a problem with naming pattern pieces consistently. In Step 4G, they ask you to do something to a Lining Panel. This was the first time I had ever heard of this piece.
This pattern and the directions don’t always make it clear which layer (fleece & interfacing or interfacing only) the designer wants you to work with.
Sweet Harmony Org System
Directions should have included a rotary kit (cutter, mat, ruler). The instructions do not include these tools, but they make the process much easier. I understand that the pattern isn’t necessarily targeted at quiltmakers, however I think many sewists now have rotary cutting kits as part of their tool arsenal. If you only sew garments and accessories (e.g. no quilts) and do not have a rotary cutting kit, I think you should go and buy one. What do you think?
Use tailor tacks to mark dots.
Handbag pattern includes a 20″ zipper in the list of supplies needed. Then the designer wants you to modify this zipper to make it about 8″ shorter. I don’t know about you, but I don’t know how to modify a zipper. I also did not want to modify a zipper. I barely know how to put in a zipper. TFQ who has LOTS of garment sewing experience and she didn’t know how to modify a zipper with confidence either. This is another bit of waste. I ended up omitting the zipper (it’s for a an inside pocket), but I would recommend buying a 12″ zipper and not modifying anything. The pattern also gives the pattern pieces for a tote bag, which I did not make, and I believe that the 20″ zipper would work with the tote bag. I think they were trying to save space on the pattern by not listing two supplies.
The marks for the magnetic snaps are below and to the left of where they actually should go.
Sewing piping to outside pocket
The pattern asks you to make much more piping than you actually need. You will really only need about 25″.
Finally, there are not enough pictures, despite the price of the pattern, so I would recommend giving yourself plenty of time and using nice fabric. You may never make it again, so you want to like it!
I think that making all the tote bags I have made really helped in understanding the pattern and how to follow the directions. The final product is really nice and looks very professional. I als learned how to make a pocket that has a little tuck so larger things will fit and you can actually pull it out.
I mentioned that I am trying to make as many gifts as possible for the holidays. I am having fun doing it, but I wish that I had started earlier. I wasn’t sure what to make Grama since all she really likes to do is shop and play bingo. I decided to make her a ‘Grab Bag’ from the All People Quilt pattern.
She has started bringing bags back to the grocery, so I decided to make her this bag. I knew how to make it since I made it for a gift previously and could use a couple of FQs, if necessary.
Grama's Grab Bag in process
I found the older Jinny Beyer border print and a floral for the inside and think that it turned out well. I know she doesn’t read blogs, so I am not worried about ruining the surprise by posting this before Christmas.
I was walking back from lunch the other day. I am always on the prowl for the perfect bag and saw a display of luggage I had never seen before. I looked closer and really couldn’t figure out the purpose of these suitcases. Finally, I stepped back and looked at the store’s sign and found it was a pet store and these carriers were for pets! I was amazed at the complexity.
The other day my sister sent me this picture of her dog, Cherry in the tote I made. I never thought of using the Eco-Market totes as dog carriers, but I am sure it was much cheaper than one of the pieces of luggage I saw downtown. Doesn’t Cherry look cute and sweet? She is sweet, but only intermittently. My Sis saved her from a bad home and she has to contend with 3 other dogs, the smallest of whom is 3x her size!
I hope her little claws don’t rip through. The bag has already been back and forth a time or two.


")
")