
This segment discusses sewing the block together. In order to get to this point, you should have completed parts 1 and two and three as well as part four.
Like piecing all other blocks, you want to sew smaller pieces together to make larger pieces, then sew the larger pieces together to complete the block. In part three, you should have cut any fabric for templates that did not have matching fabric patches. so, inventory your templates and make sure you have a fabric patch for each template. If you don’t, go back to part three.
In part 4 you also pinned:
Remember that the edges are not quite as smooth on the other (blue) side, but that is ok. Just remember to sew slowly and carefully.


Once those two patches are sewn, they might look a little rumpled, but once you turn them both right side up and press the section, they will look great.

Press which ever way you think will work best for your block.

Next, we will sew the corner section to the small pieced strip (Section D).
Nota bene: if you did not foundation piece the small strip, follow the directions in part 4 or part three to do so. If you haven’t done any foundation piecing you might want to start with this piece as it is smaller and less complex than the pointy triangles section.
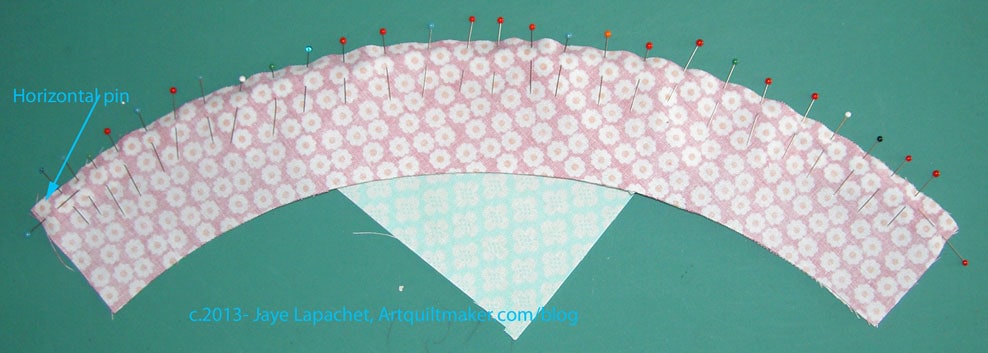
Again you will need to pin. This time you are pinning your quarter circle corner piece and your small foundation pieced strip.

Take your quarter circle corner piece and your small foundation pieced strip and pin them together. I, first, line up the straight edges on the ends and pin them together (horizontally). I make sure the horizontal pins are out of the way of other pins and the sewing machine foot. they are used just to make sure my piece is in place while I put the other pins in.
I use a lot of pins. It works for me. I know there are other tutorials that are pinless or use minimal pins, but I want precision and pins give me precision. Put these two pieces together the way it works for you. Remember: you only have two hands.

Once you are happy with your pinning, get ready to sew. I put the non-pieced corner quarter circle on the bottom and the pieced part on the top. I try to make this a habit, though it doesn’t matter with this particular foundation pieced section. In some sections, like our spiky triangle section, it matters.
You can rip off the paper before you piece or not. I was having some other problems, so I ripped it off, but normally, I would leave it on until the very last second I could, e.g. before I took the pieced top to the quilter!
Attach your quarter inch foot and sew your small foundation pieced strip to your corner quarter circle. If you don’t know how to sew curves, take a look at the curves tutorial.

Once you are finished, press carefully. I press to the side with the least number of seams, or to the side that the fabric seems to be naturally inclined to lay. Your corner will look gorgeous like the one above.
Once you have the small foundation pieced strip attached to your quarter circle, you will sew it to your spiky triangles piece. You will, again, pin a lot, using the horizontal pin trick to stabilize the piece.

Again, as shown in the photo above, I put the foundation pieced part on top. In this case, you are sewing two foundation pieced sections together, so you can choose which you want on top. I chose the spiky triangles section to go on top, but it doesn’t really matter, since there are no points to worry about cutting off.
Next sew the two remaining sections together, press, again, towards the piece with the least number of seams and you should have a piece like the one below.

After all that work, you have a beautiful foundation pieced block. Pat yourself on the back!