Vinyl is often used in bagmaking. I have talked about it in general a number of times, including last week when I talked about marking vinyl for sewing. I thought I would gather some of what I have written before into one post for your convenience.
Supplies to use for sewing with vinyl:
- SewTites – both dots and rectangle shapes are available. These act like pins without poking holes in your project
- Tissue paper
- Blue tape
- Scissors: I don’t use my good Ginghers, but I also don’t use paper scissors. I use middle of the road Fiskars
- Thread: I used my regular thread. It shows up, though, so make sure you use a color you don’t mind looking at.
- Optional: Teflon foot
- Optional: Roller foot – see post about using the roller foot
Do:
- Use fabric for making handles, if you are making a bag. You can combine fabric and vinyl with no problem and the handles will be much more comfortable make out of fabric.
- Use quilting thread, if you want, to sew vinyl bags together. It is a little thicker than regular Aurifil 50 wt. It gave me a little more of a feeling of security when I made the clear vinyl bag.
- Use a blowdryer to get folds or wrinkles out. Test on a low heat farther away from the vinyl and gradually increase the heat. Move the blowdryer closer and closer until you find the sweet spot.
- Sew in creases. Pressing them (see below) doesn’t work, so sewing an 1/8th of an inch from the edge puts in a nice, permanent crease.
Don’t:
- Press. Pressing is not an option. The vinyl will melt all over your iron, your ironing board, everything and make a huge mess. You can use a blowdryer if there are folds.
- Don’t use pins. Once you prick vinyl, the hole does not ‘heal’ like it does with cotton quilting fabric
- No ripping. Jack-the-Ripper is not your friend with this material. Again, the holes do not heal, so if you need to rip, you will need to re-cut the piece or sew in exactly the same holes.
- Add a vinyl pocket to a bag in a location that might be near a heat source, e.g. an integrated pressing mat.
The big thing is to use tissue on top and bottom of the vinyl so that the vinyl is not in contact with your sewing machine bed or presser foot. The vinyl will stick to the bed of the machine and the foot. The tissue paper buffers both from the vinyl and allows you to sew.
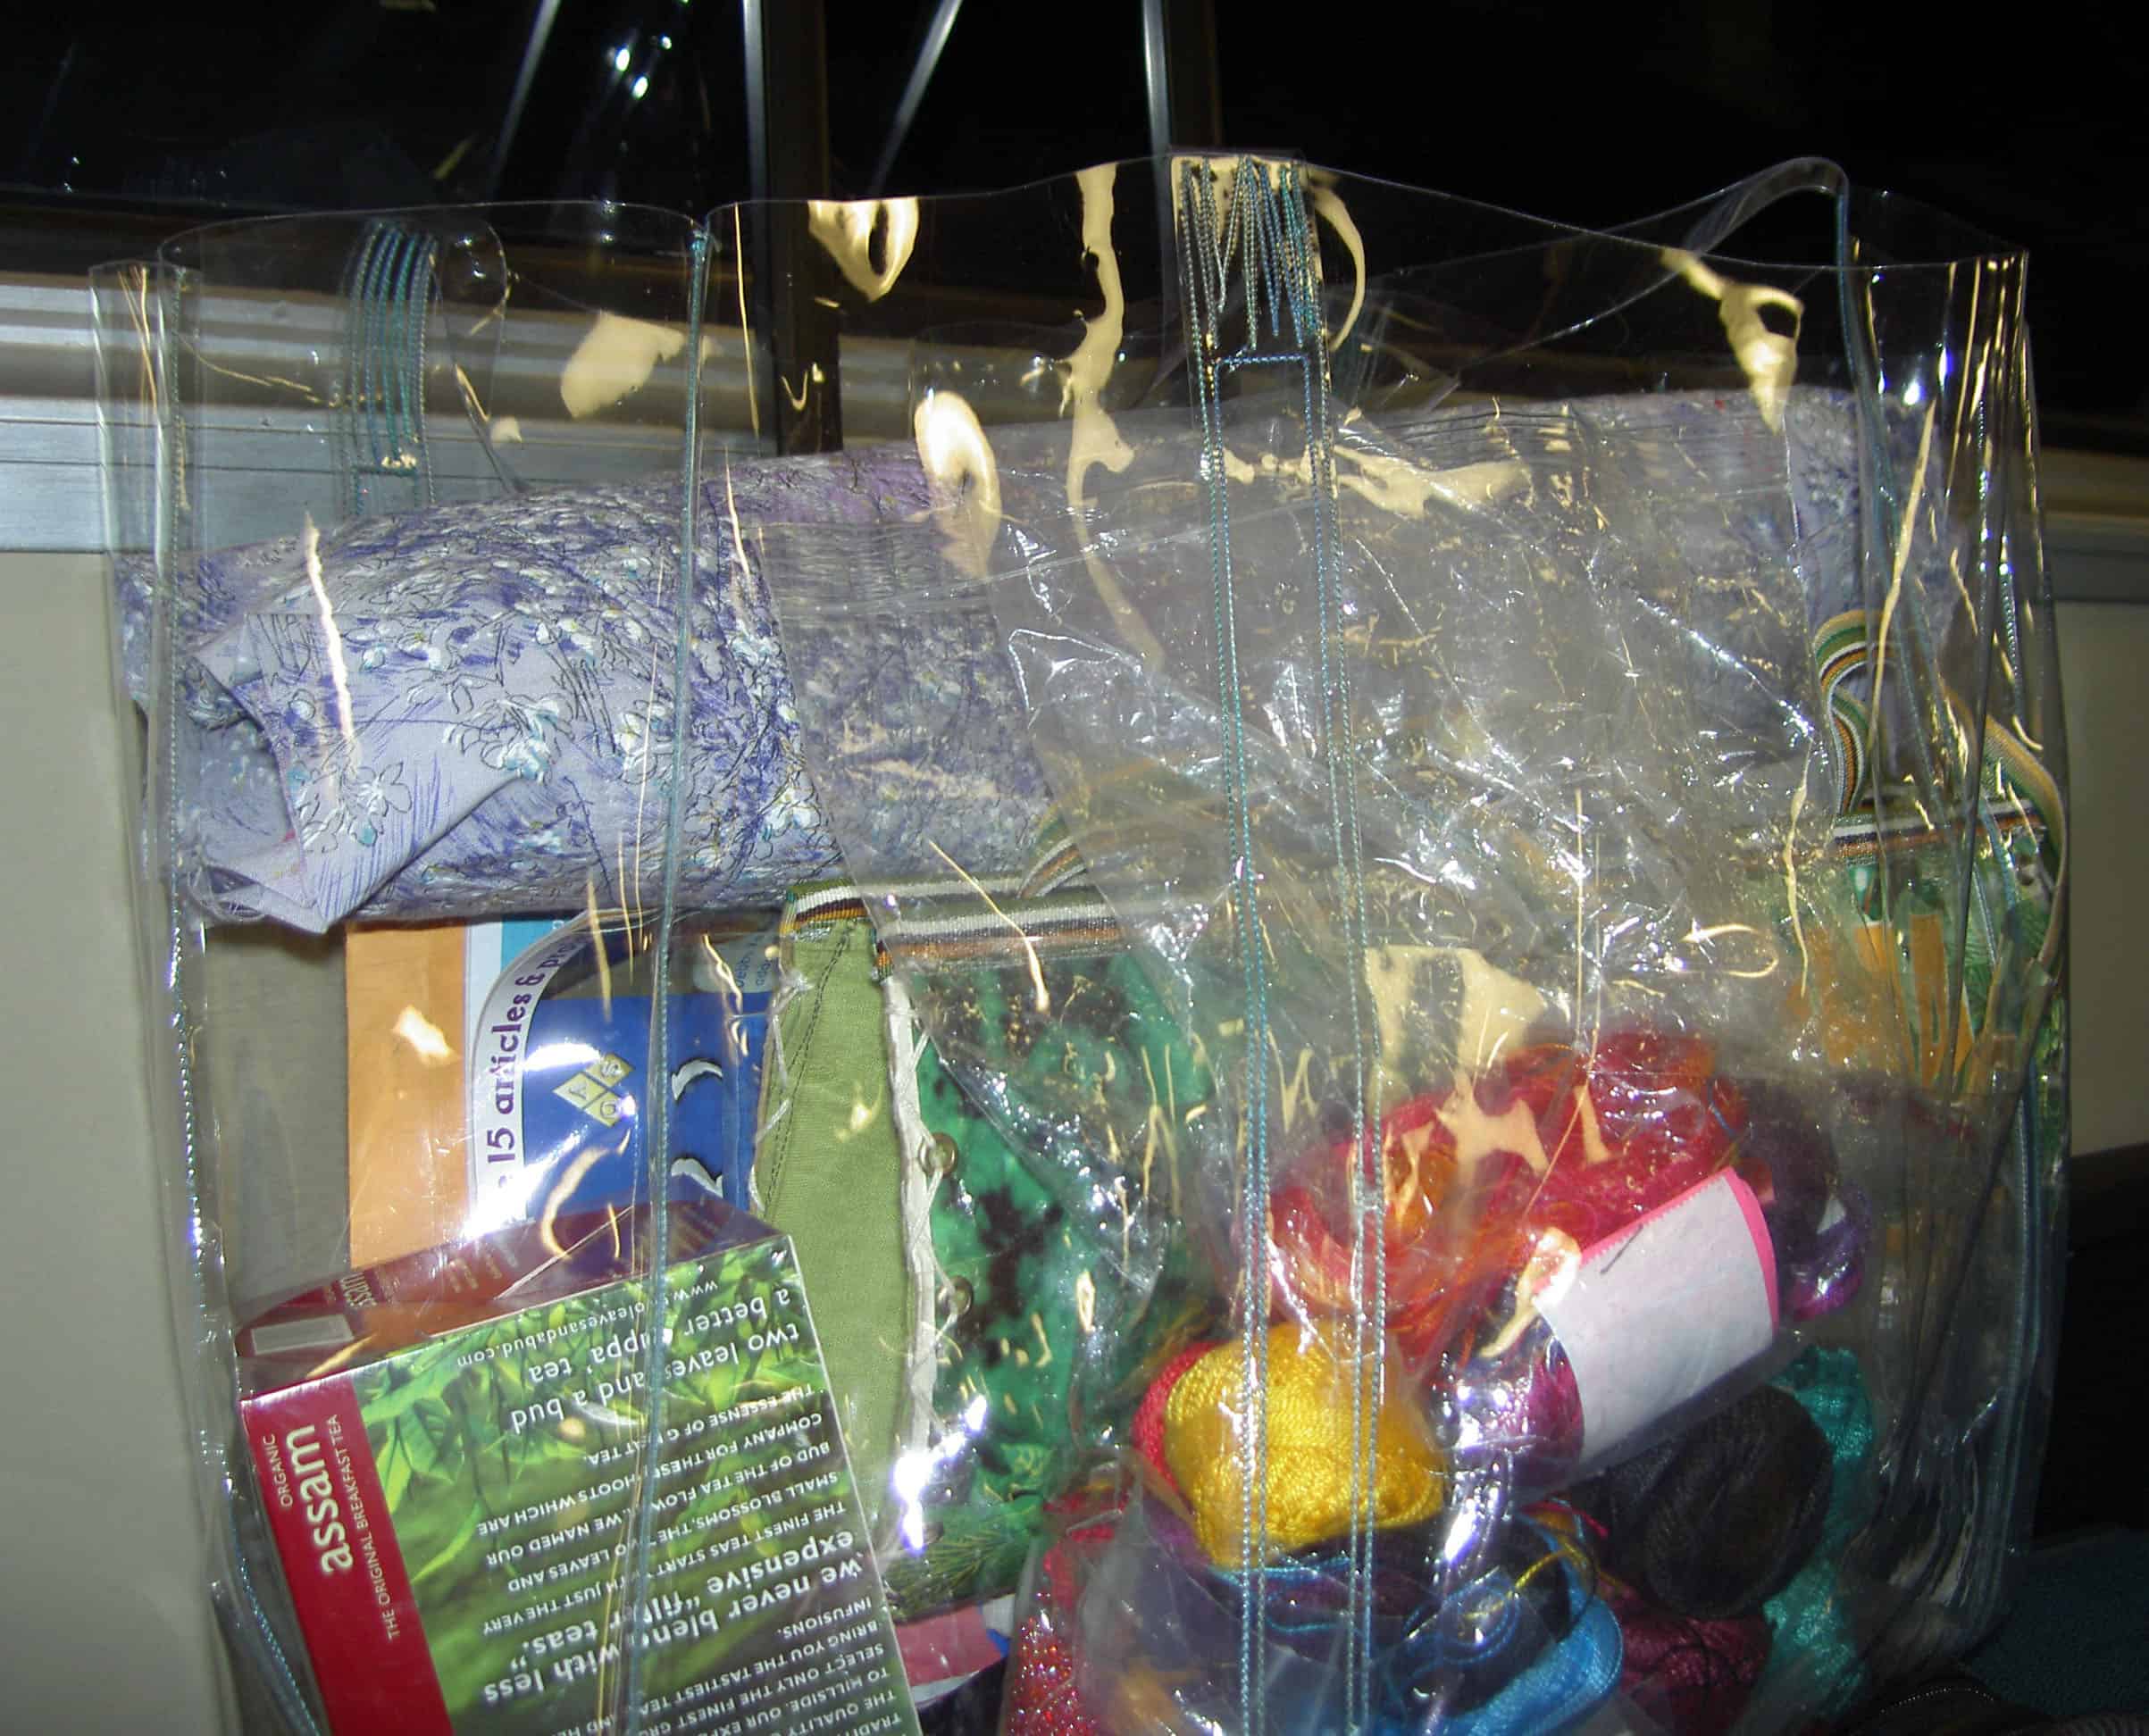
Pen leaks, water spills and other messes are easy to clean up with paper towel and some Simply Green or a cleaning wipe. Sometimes, I can’t avoid putting the vinyl bag I made down in something that someone else has spilled simply because I didn’t see the mess. The vinyl also protects my stuff quite well in the rain.
Some of the things that I like about this bag are also disadvantages. It is great for me to be able to see inside the bag, but I don’t want other people to see my phone, tablet or digital camera. I definitely cannot use this bag to hold a table at a cafe’.
Using vinyl as a bag in hot weather is iffy. The vinyl becomes very soft and pliable. I think the handles might stretch if the weather becomes hot enough.
While working on my project, I had to develop some tips/tricks of my own.
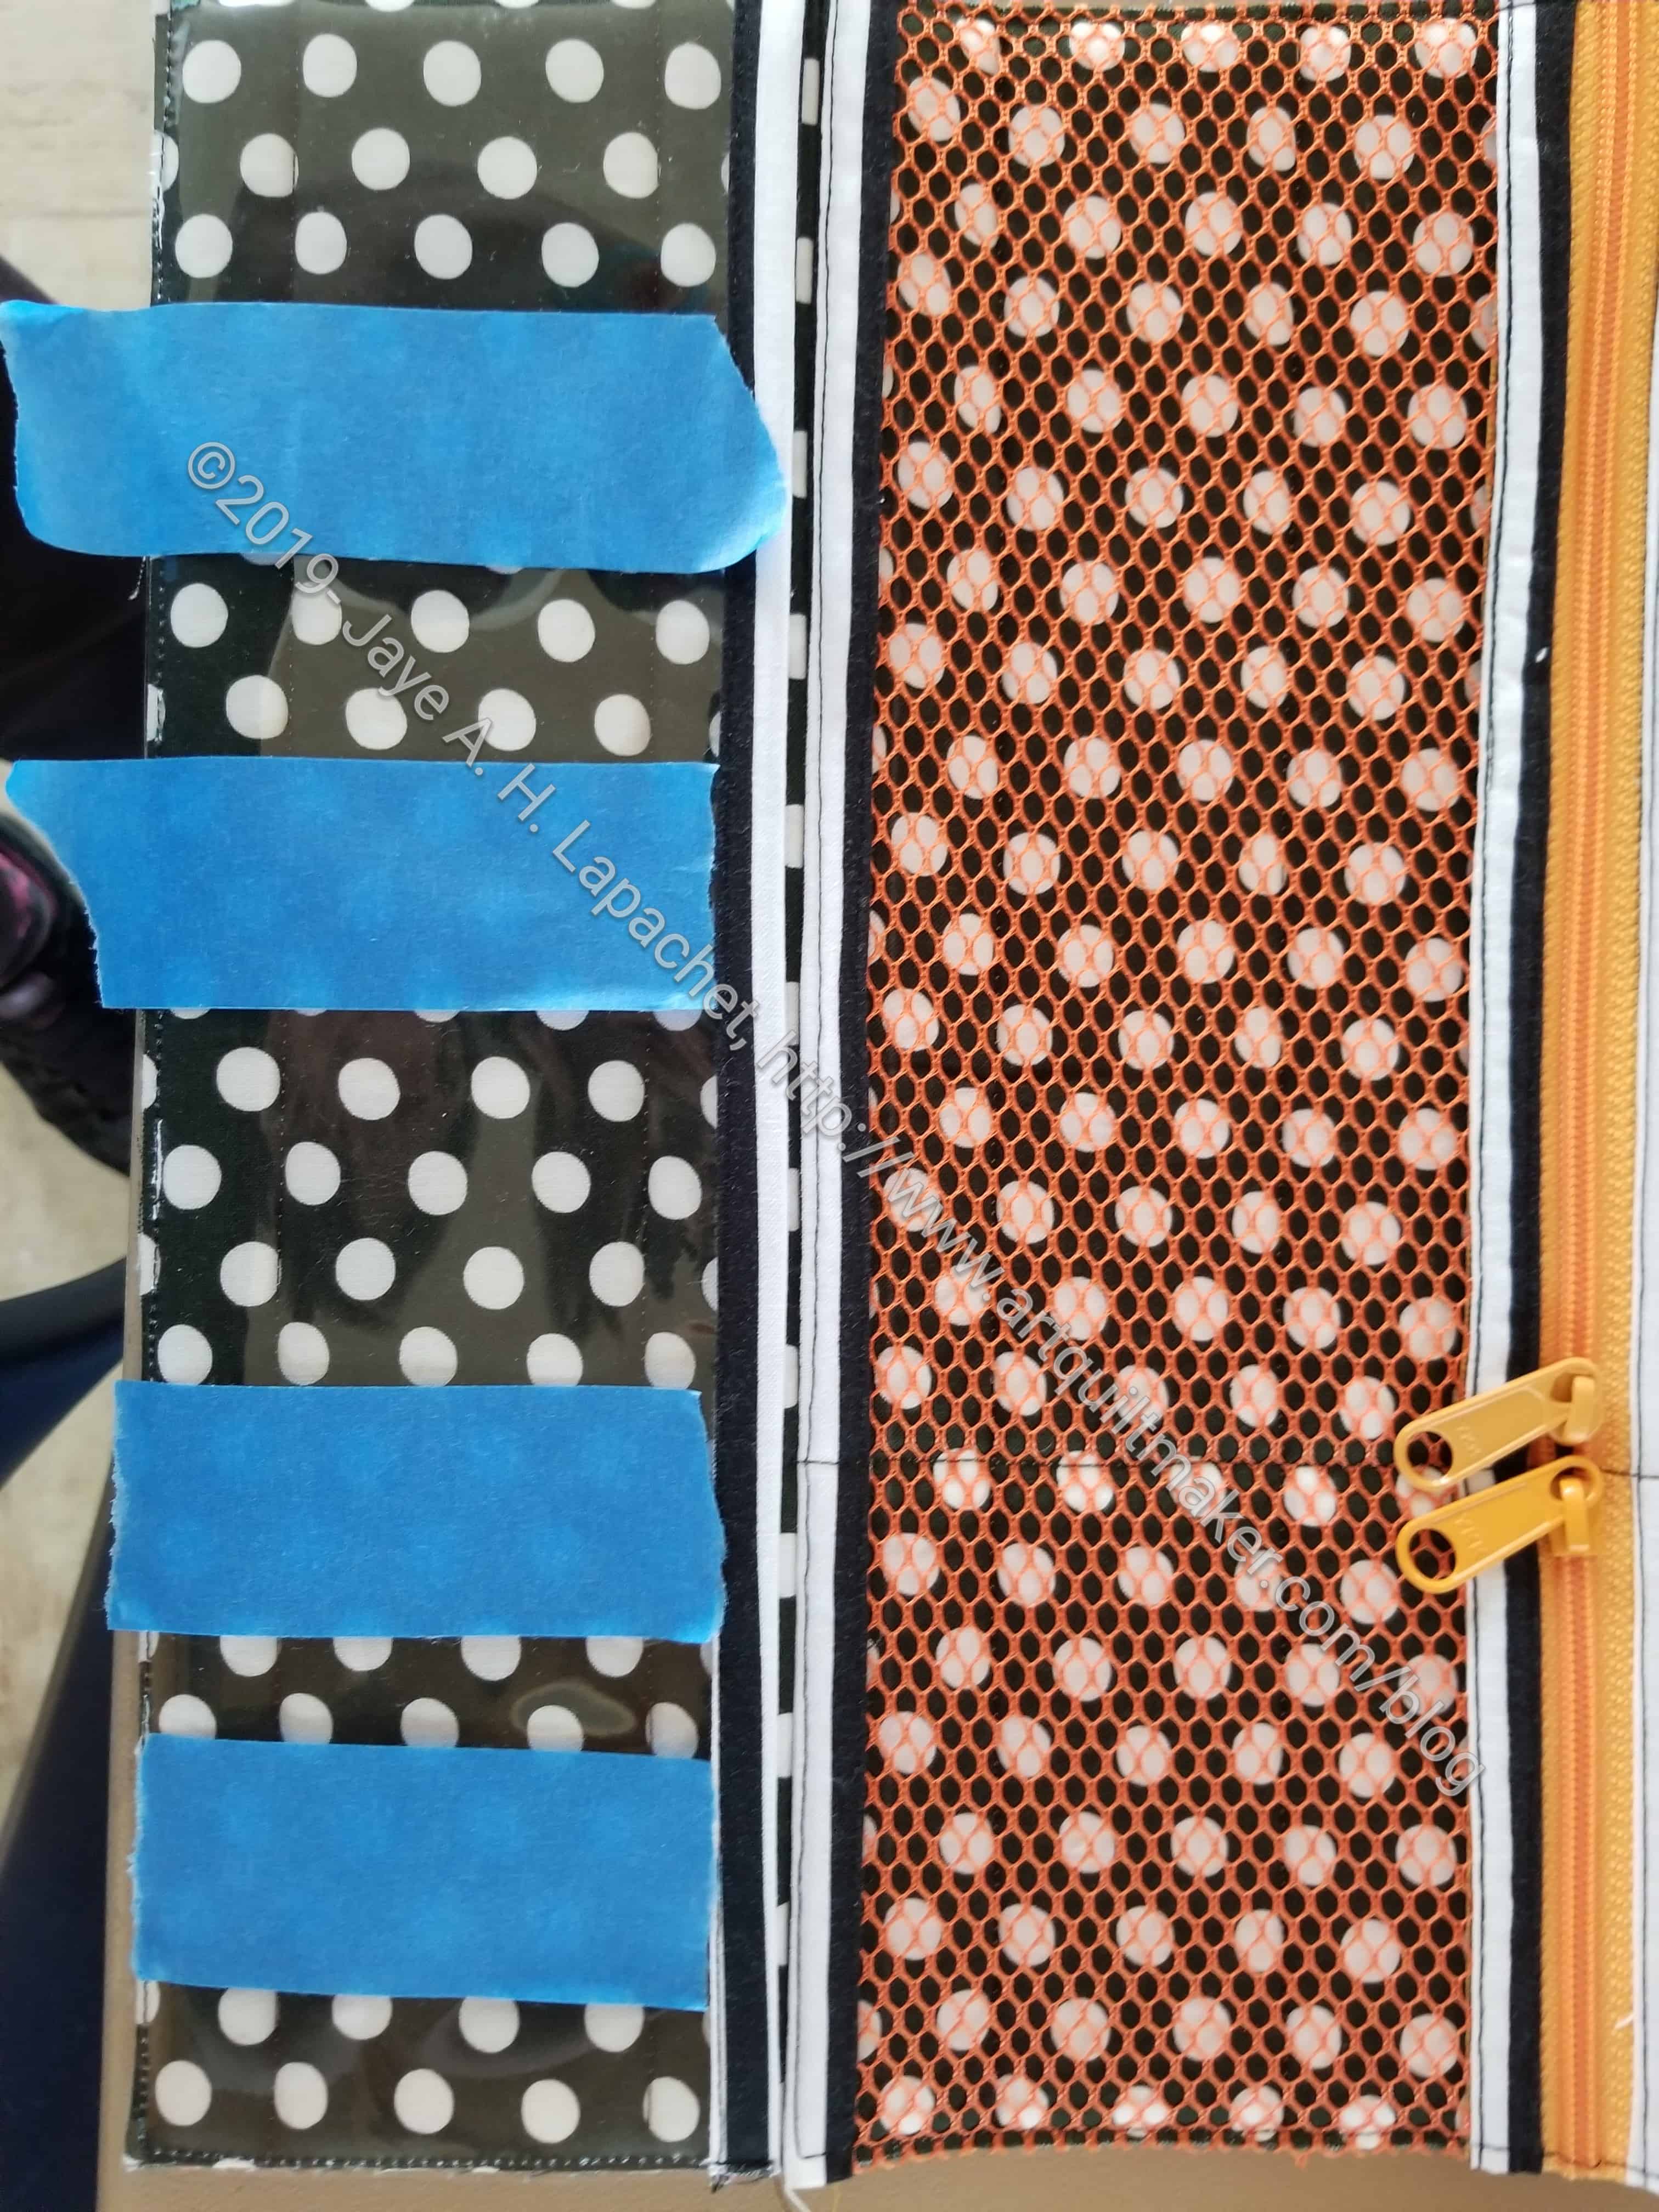
The Running with Scissors pattern, in general, is really good. It says, however, in the vinyl pocket part of the pattern, to mark the vinyl to make smaller pockets. The pattern didn’t say how to mark the vinyl. I didn’t have access to the video at the time, which may have some tips. I didn’t want to use a Micron pen, though I know that ink can be washed off of vinyl pretty easily. I also don’t have one of those wash away pens, so I decided to use blue tape. I used tape to mark the lines I needed to sew along.
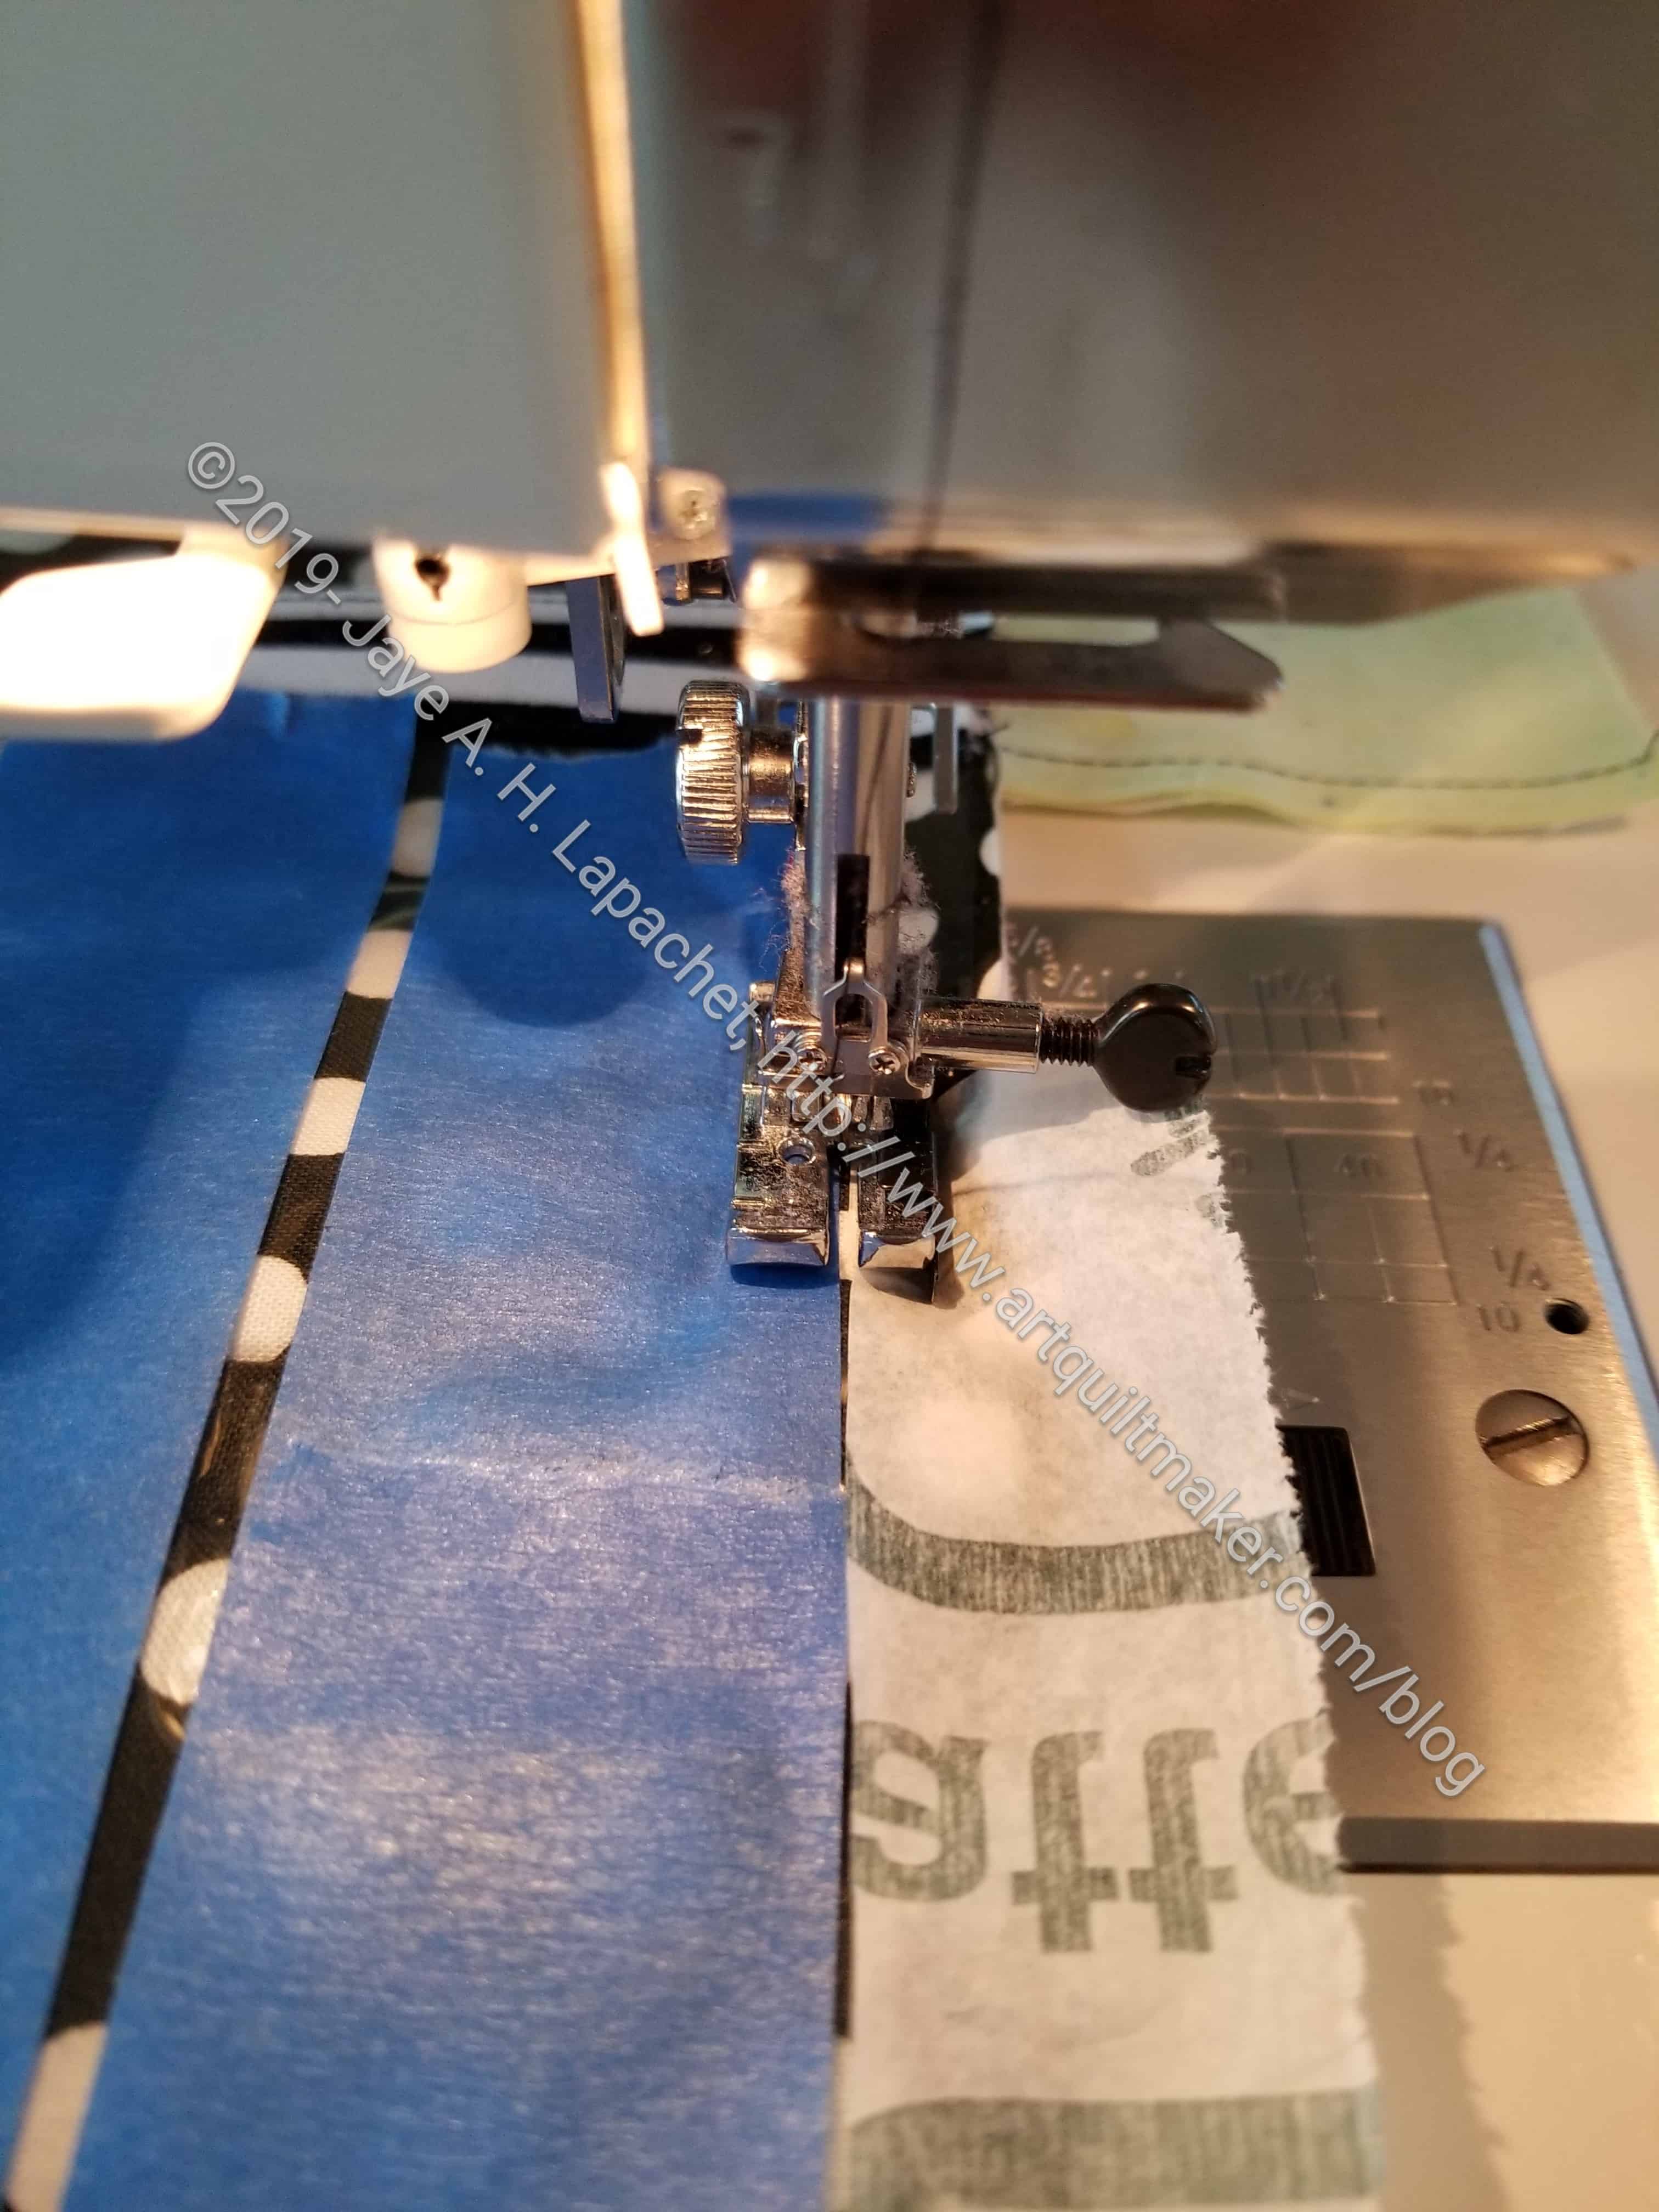
I sewed right next to the tape. I didn’t want to sew through it, because that would create a mess. I knew my needle would cake with the adhesive. This was a tricky operation, because I also needed to sew with the vinyl covered by tissue. I didn’t bring specific tissue, so I used the wrapper from the vinyl. You don’t need much, but you do need longish strips. The only issue was that there was a little residue left on the vinyl from the tape. I’ll clean it off later.
Other Useful Resources:
- Review of Clear Vinyl tote
- Using laminated cotton by ilovefabric.com
- Crafty Gemini: 6 Tips for Sewing with Clear Vinyl
- SewHungry Hippie: A Step by Step Guide to Sewing Vinyl
Updated July 2026