I cleared out a box of acrylic templates that had been in my fabric closet for awhile. I wanted to be reminded what was in there. I was surprised to find some smaller templates as well the large ones I knew were in there. I am sure I had a plan when I put the small templates in the box, but I didn’t remember the plan when I found them.
I still want to make a bag for large templates, but that is a project for another day. On that day, I decided to make 3 more I Spy pouches, one for each of the template sets.
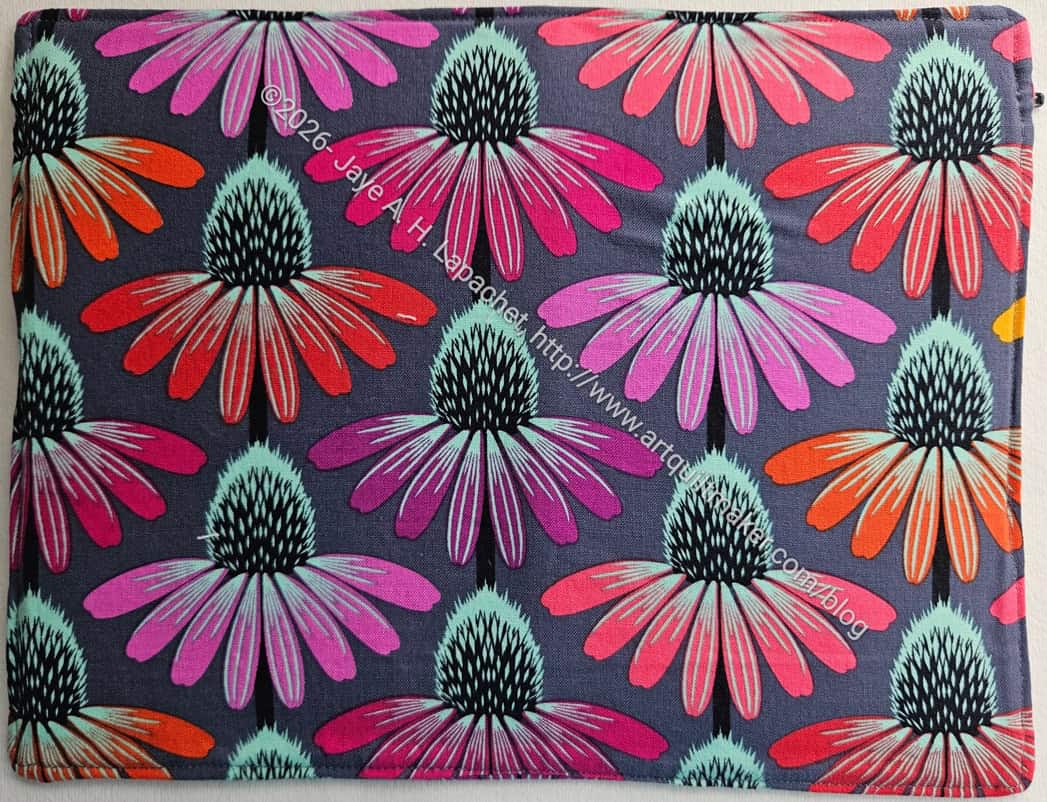
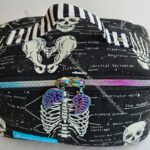
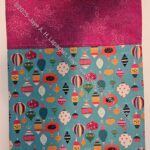
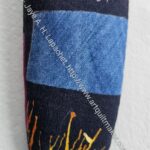
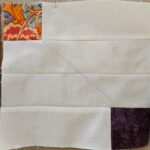
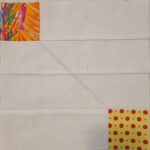
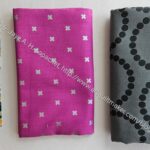
I like to highlight a special fabric on the lining. I had very little of the Anna Maria Poppy (Bright Eyes??) left, so I decided to use one of them for this pouch. The last time I used this fabric was for the Andalusian pouch.
This large I Spy will be used for the Mustang Purse Organizer templates. I made a set of these for my Mom in 2021. I have a vivid memory of making them in my machine’s old location, which was before I redid the whole room.
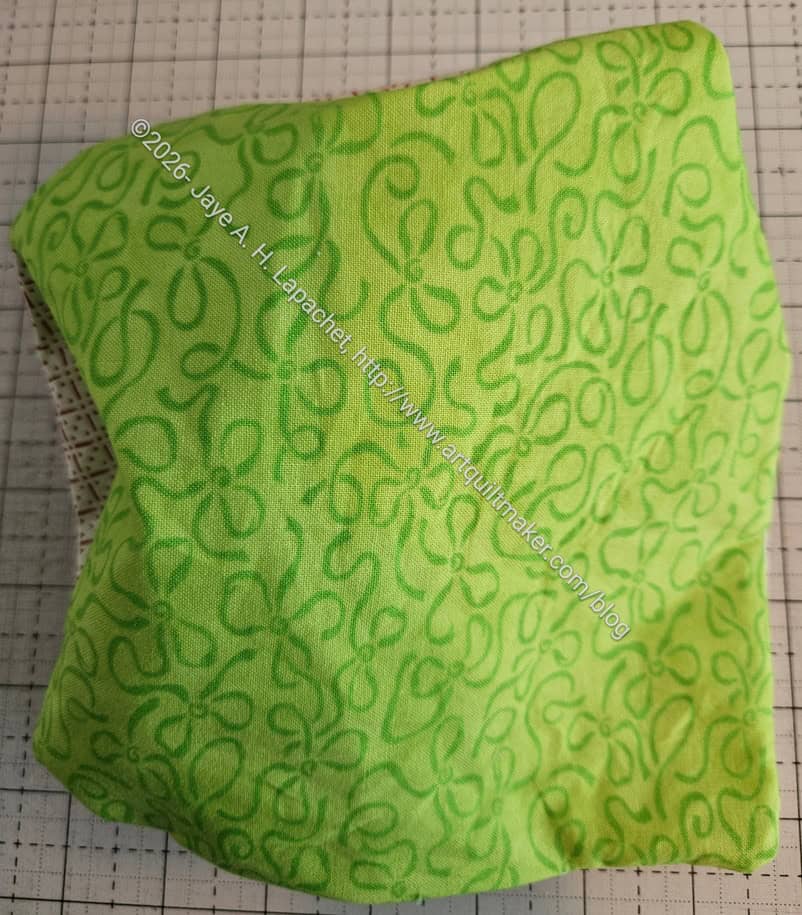
Poppy I Spy – large, back
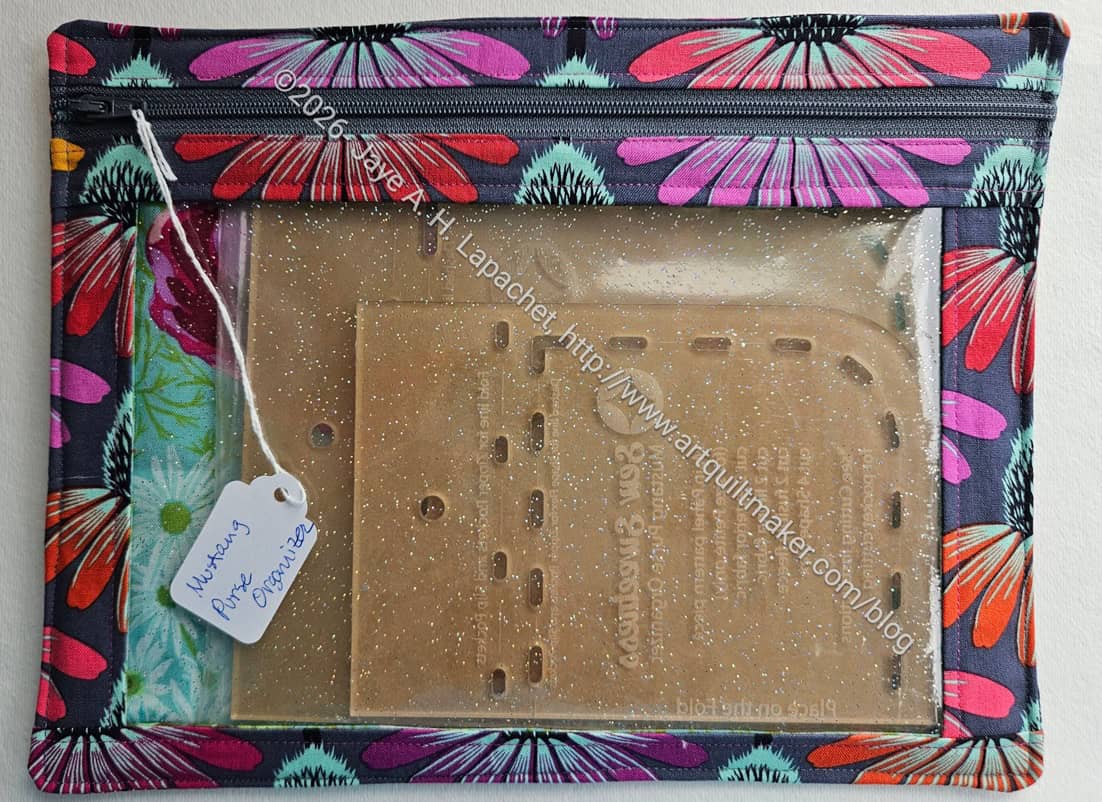
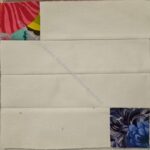
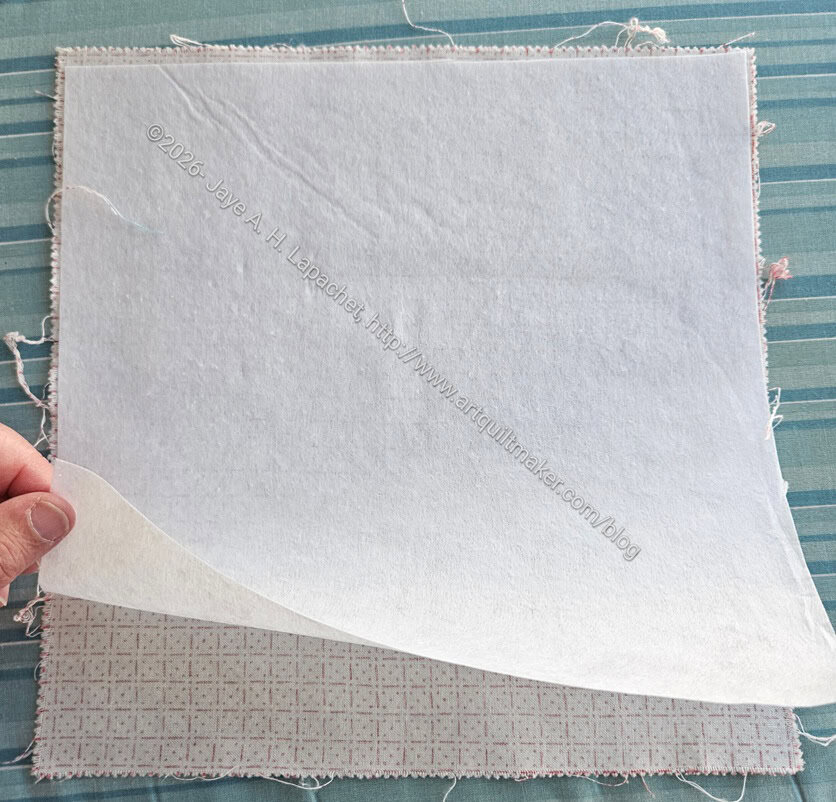
For some reason, I forgot to interface the pieces so I added a bit of the Sewfisticated 2mm stick on interfacing right before I closed the turning pocket. It was a little tricky to get the paper off the stick-on side of the interfacing, but I managed it in the end. This interfacing is much thicker than the SF101 called for in the pattern, but it worked.
The interfacing made the pouch very stiff. I top stitched around the whole edge. It made the pouch very structured and I kind of like the feel.
Poppy I Spy – large for Mustang templates
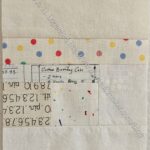
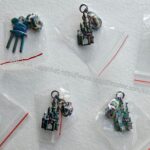
I am also using some tags I bought for another purpose to label the pouches. Thus far, I have been relying on post-it notes, which are unreliable in this context. All of the templates are engraved, but the words are hard to see sometimes.
I did make an I Spy pouch with the poppy print before. I would say ‘great minds think alike’, but I don’t think one can say that when it is yourself! LOL!
I went out again to test sewing machines, this time with my own materials. It made such a difference! I was really able to test what the machines could do.
Before I get into that, I highly recommend taking time to prepare you own samples to sew. I spent all the sewing time I had on Sunday prepping materials that I would sew as a test. These were not fake tests, they were real pieces that will be used in bags I am making.
I planned to perform the same tasks on an Elna 792 Pro Ex and a Janome Continental M8. Most everything I brought had two options. Mostly I got the same results from both machines.
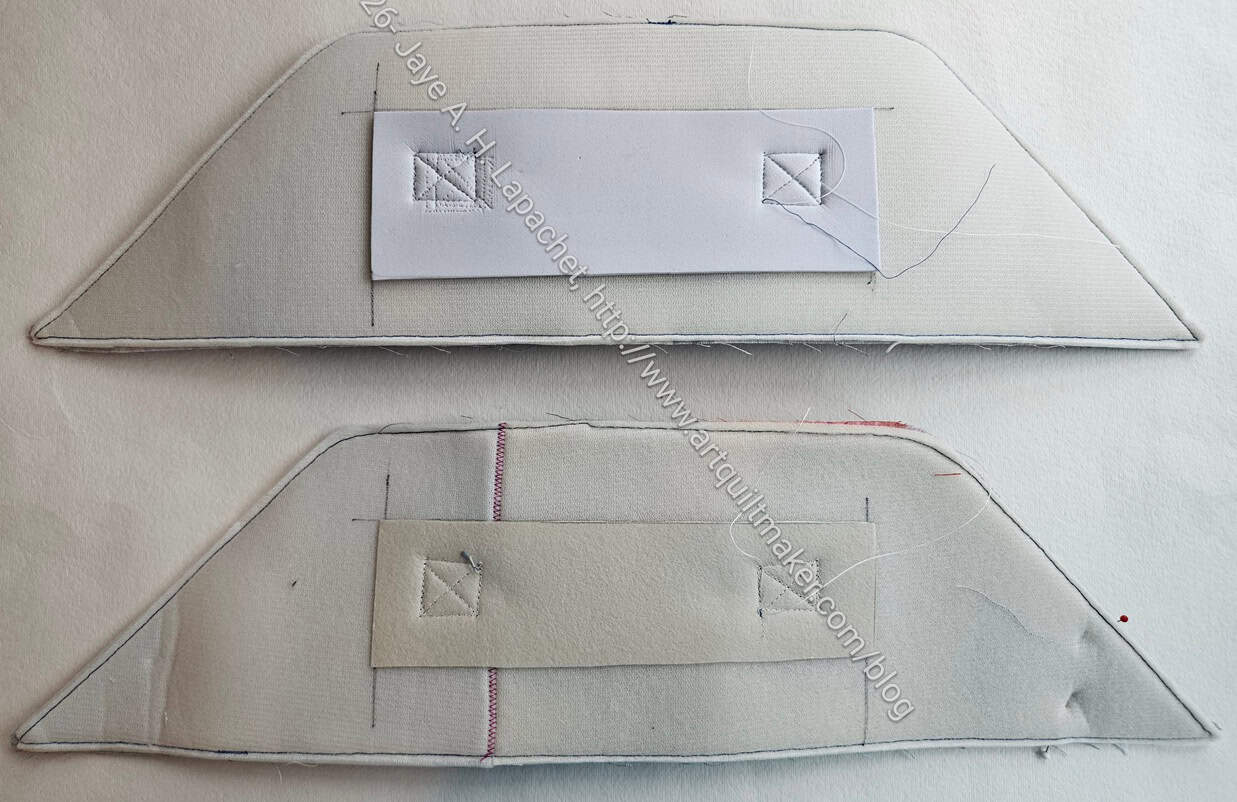
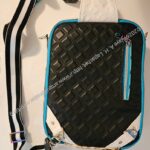
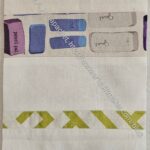
Enigma Side Panel – handle support
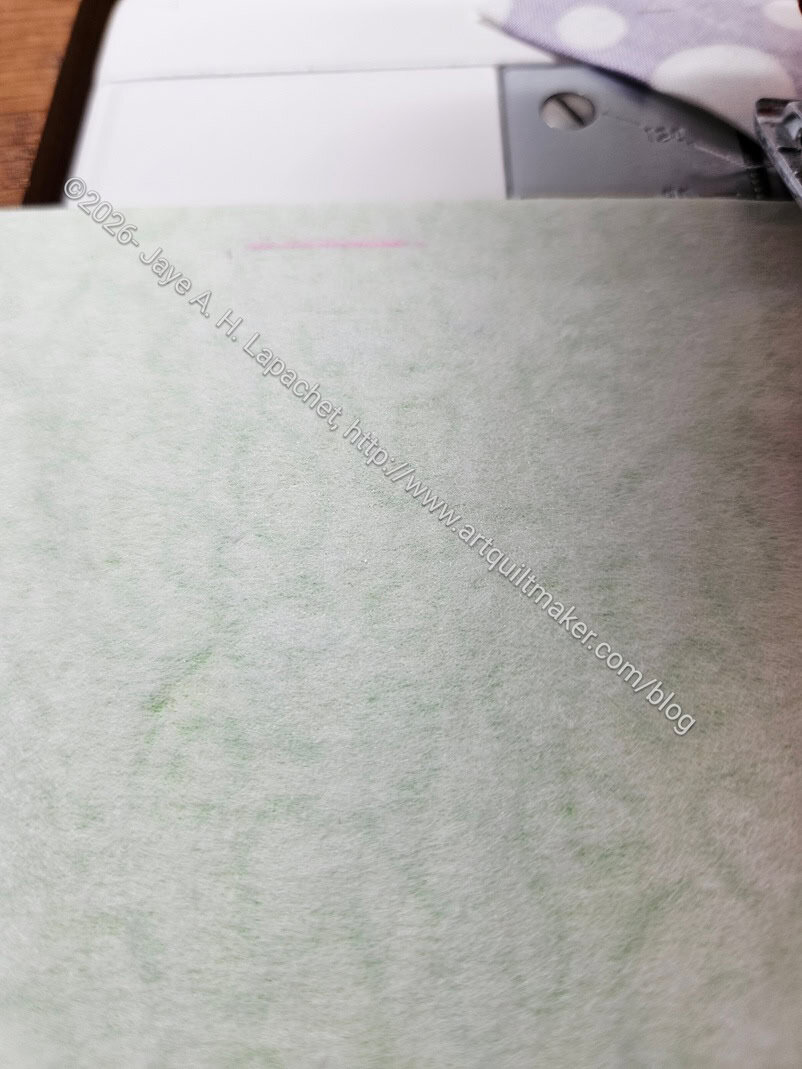
I prepped two Enigma tops, which the pattern calls the Side Panel. I wanted to test going through the handle, one of which included a layer of Decovil (bottom). The other had a layer of the Sewfisticated 2mm stick-on (top) interfacing. I wanted to see the difference in the sewing. I know the underside looks really ugly, but that is the hidden structure of the bag.
I had tried to sew the Sewfisticated 2mm stick-on interfacing on my current Enigma efforts and kept getting skipped stitches. I was annoyed, so I peeled off the Sewfisticated 2mm stick-on (top) interfacing and replaced it with Decovil. This gave me the idea to test them both out on the machines. I quickly put together the pieces for these two bags and took them with me.
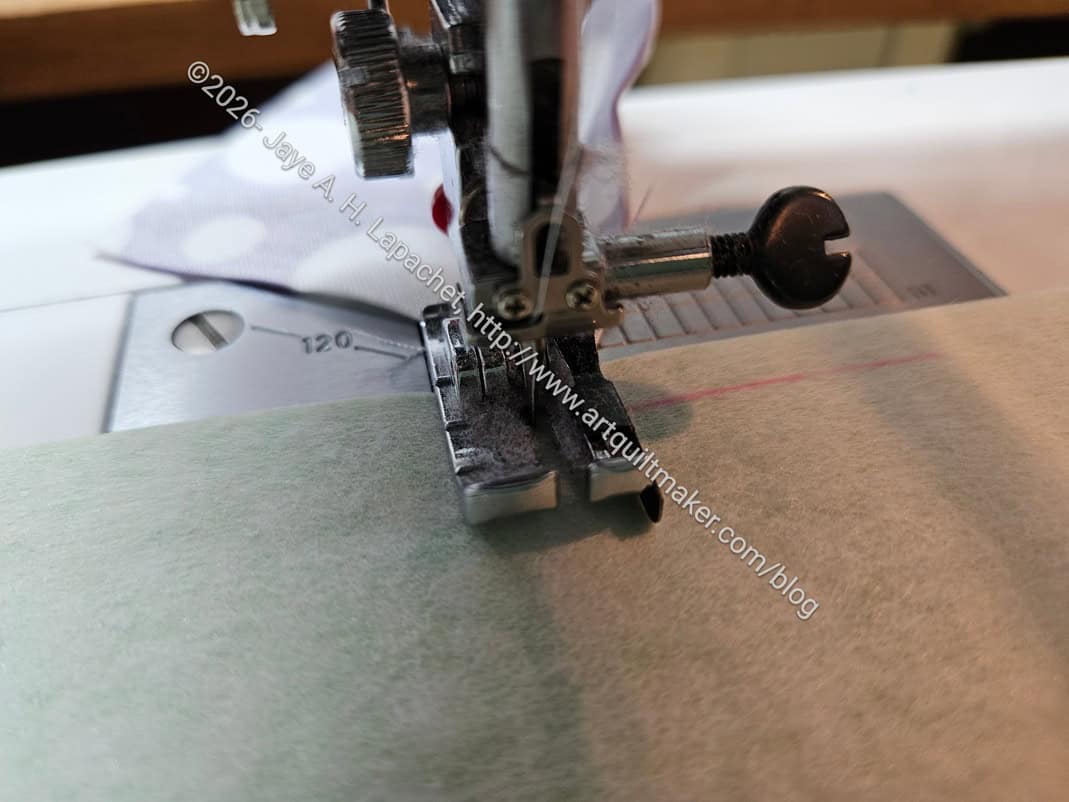
The outcome was that I learned about a new type of needle. Schmetz has a universal needle called the Super Nonstick Needles**. While I didn’t try sewing this special stabilizer with a regular needle, using one of these non-stick needles made the process very smooth. The layers were a challenge, but not the stickiness. WooHoo! I learned something new! MaryC knows everything and she hadn’t heard of these needles either.
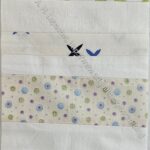
Enigma bottom panel
Enigma bottom panel lining
Enigma bottom panel lining detail
I cut a foam and fabric combination using some scraps and prepped it with the MistyFuse like I have done for the past couple of Enigmas. The test I performed was using two different thread colors. The tension definitely had to be adjusted to get it perfect, but even out of the gate, the quilting looked good. I was particularly pleased that no blue thread showed on the white side.
I tested sewing one of the last steps of the Enigma pattern – the side completed panels with zipper to the bottom panel. I had some trouble the other day with the two sections slipping out of true and not getting caught in the seam. I used the HP2 foot with Acufeed, which is described as “… holds fabrics firmly in sync with the feed dogs to achieve professional results.” I found that to be true even when sewing approximately 7 layers of fabric and foam together. Technique is not to be ignored. This time I sewed from the side where I could see the previous stitches, except over the zipper.
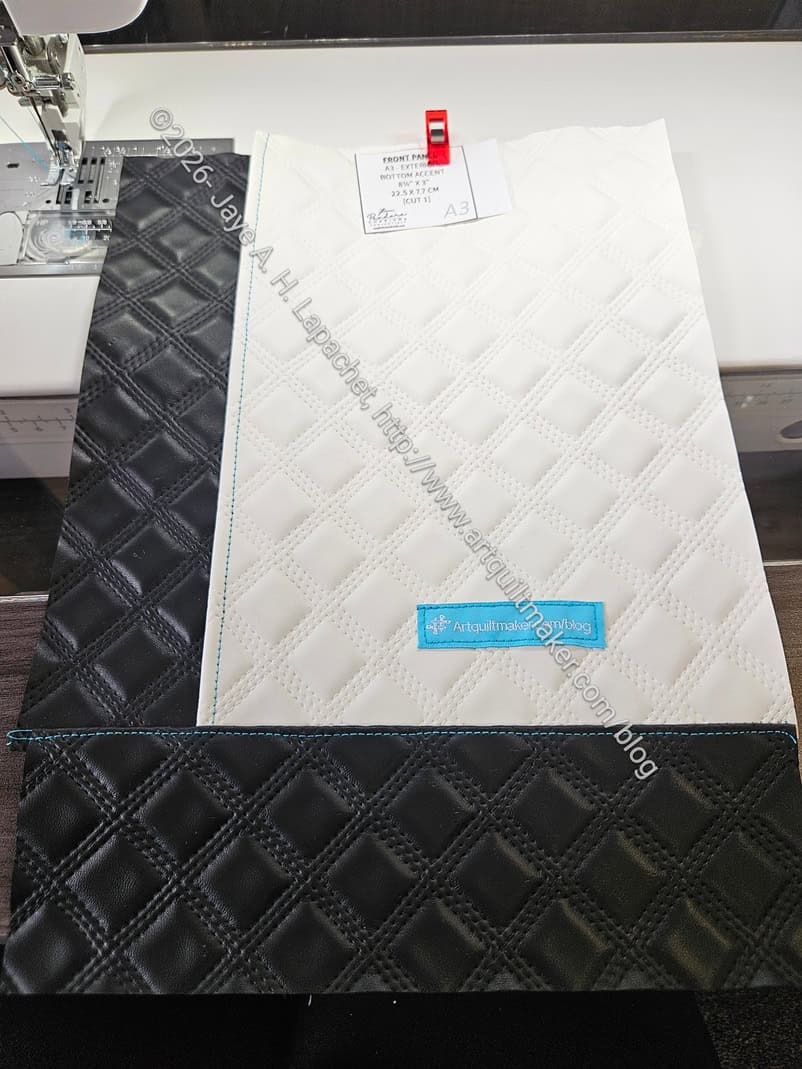
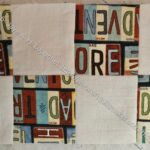
Pandora Charisma #2 front panel
I also prepped the front panel of the second Pandora Charisma. Yes, despite the swearing, I am making another. It is not at the top of the list, but I do plan to finish it. As a result, I prepped the pieces for the front panel, because I thought that if I wanted to put the machine through a hard test, this would be it. Amazingly, I sewed the entire front panel in about a half an hour (!!!) on the machine I am considering. It was amazing. The machine had no problem with multiple layers of pleather and I could really see the difference in the stitch quality. I wasn’t even using special thread.
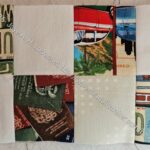
Pandora Charisma #2 front panel detail
It isn’t perfect, mostly because I am not familiar with handling the machine. Still, I was thrilled with how well I did using the pleather. I really didn’t think it was possible to have an easier time sewing through that substrate.
I know I shouldn’t compare a brand new machine to an older, well loved machine, but I was really excited by the improvement by using a machine with a more powerful motor.
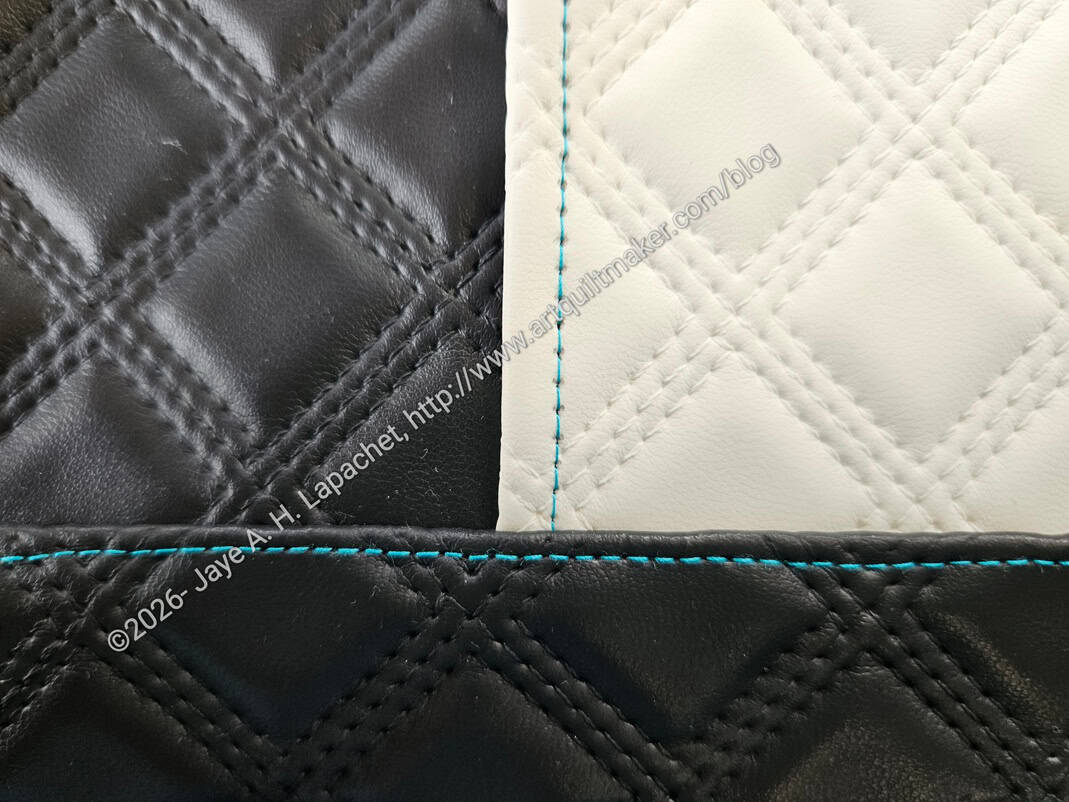
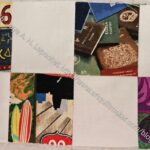
Pandora Charisma #1 & #2 front panel detail
Pandora Charisma #1 & #2 front panel detail
The above two pictures show the differences in the stitch quality. The Pandora Charisma #1 is on the left and #2 is on the right. Both show the same front panel detail. For #1, I upped the stitch length from 2.2, which is the default, to 2.5. It is still almost impossible to see the individual stitches. The pleather is almost perforated on Pandora Charisma #1.
I did not test the Janome M8 with the Pandora Charisma. I was getting tired and wasn’t up for it. I am told that both machines are the same with different housing, so I didn’t feel I needed to do it.
We’ll see what happens. I am inclined to buy one of these machines. I’ll have to wait and see.
**Obviously, you should shop at local quilt shops and small businesses. However, if you are too busy or can’t find what you need there, I use Amazon affiliate links and may be paid for your purchase of an item when you click on an item’s link in my post. There is no additional cost to you for clicking or purchasing items I recommend. I appreciate your clicks and purchases as it helps support this website.
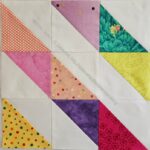
After looking at all of the Enigmas, I decided to make more this year. I have been slowly working on two new Enigmas in between working on other projects. These are gifts, one of which will be sent off soon and the other is for later this year. I am ahead of the game to a certain extent. I think I plan to make 8 total this year, of which these are number 3 and 4.
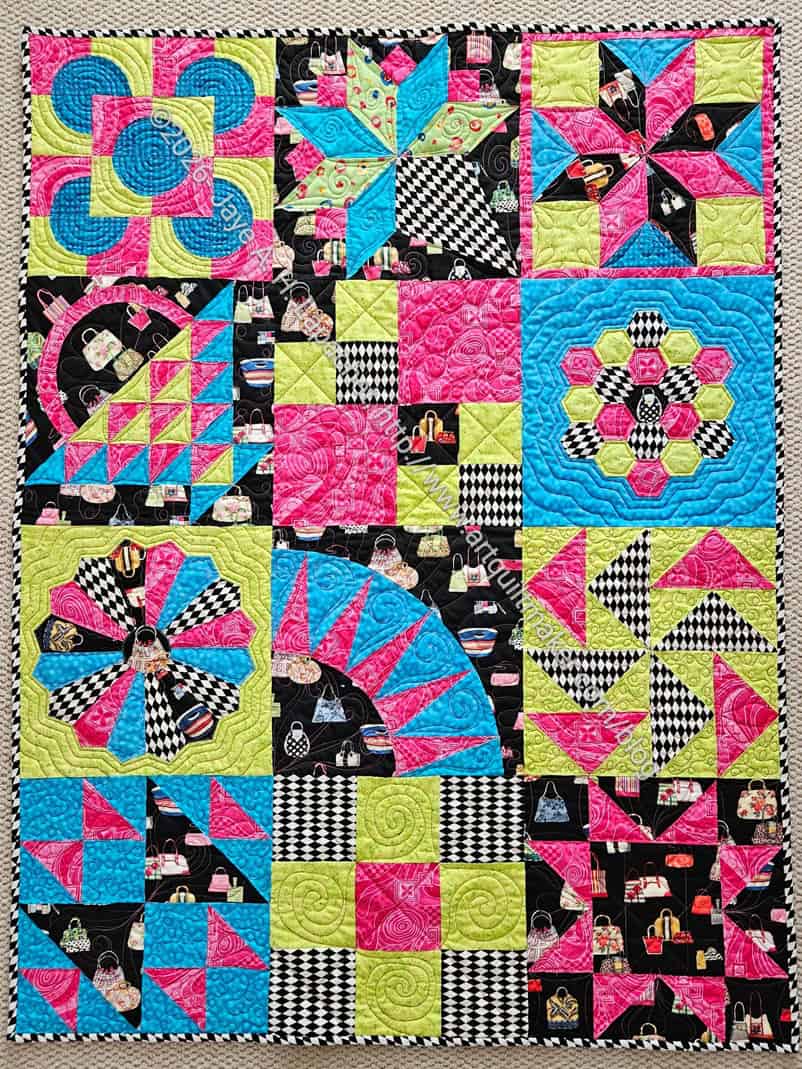
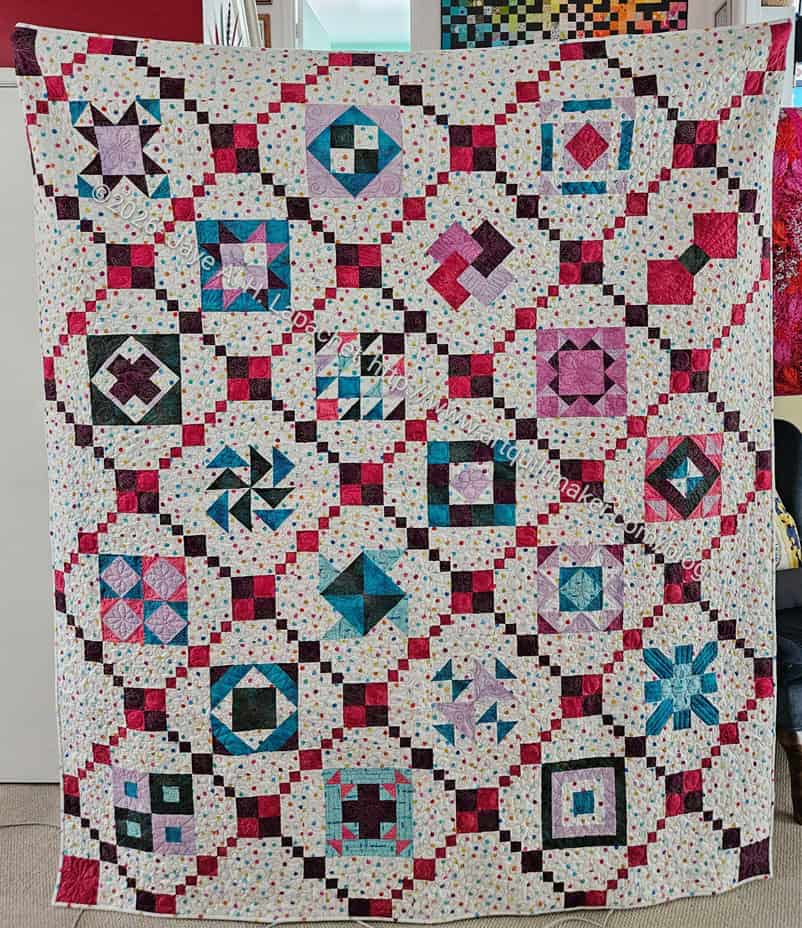
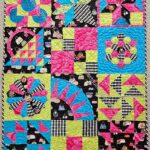
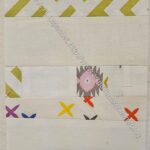
I realized that I had never posted the finished quilt. After all these months, it was time.
This poor quilt has had a time. Something about it makes the blocks get lost, the need to post about it get lost. I am not sure why as it is a good looking quilt. It is very different than the other samplers I have made. It makes me want to make another sampler with more crazy colors.
I started the Handbag Sampler when I was teaching Alice and Beth in 2006. 20 years! WOW! This is a real UFO and I am so glad to get it off my list.
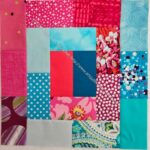
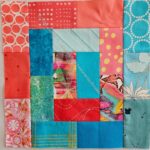
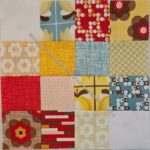
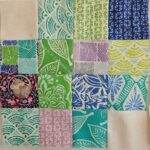
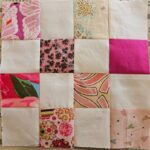
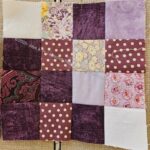
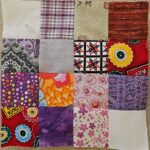
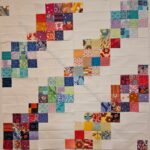
The Four Patch Fun blocks have been on the small design wall for a long time doing nothing, but annoying me. Annoying me, because I wasn’t sure what I was going to do with them.
I finally had a brainwave. I decided that I am going to divide my Four Patch Fun blocks into Warm and Cool like I did with the Warm Windmill blocks (and the cool!). Then I will give them to my friend who is raising her son’s children. One of the first quilts I made, Star Babies, when I bought my Janome 9000 was the quilt I made for her son.I was able to applique’ when I bought that machine, which was something I really wanted to do.
This seems like a good outcome for these blocks. Everyone needs a quilt.
I finished the Pacifica Quilter’s Club Lucky Blocks last week. It took me longer than I thought, but I am pleased to be contributing to another good cause.
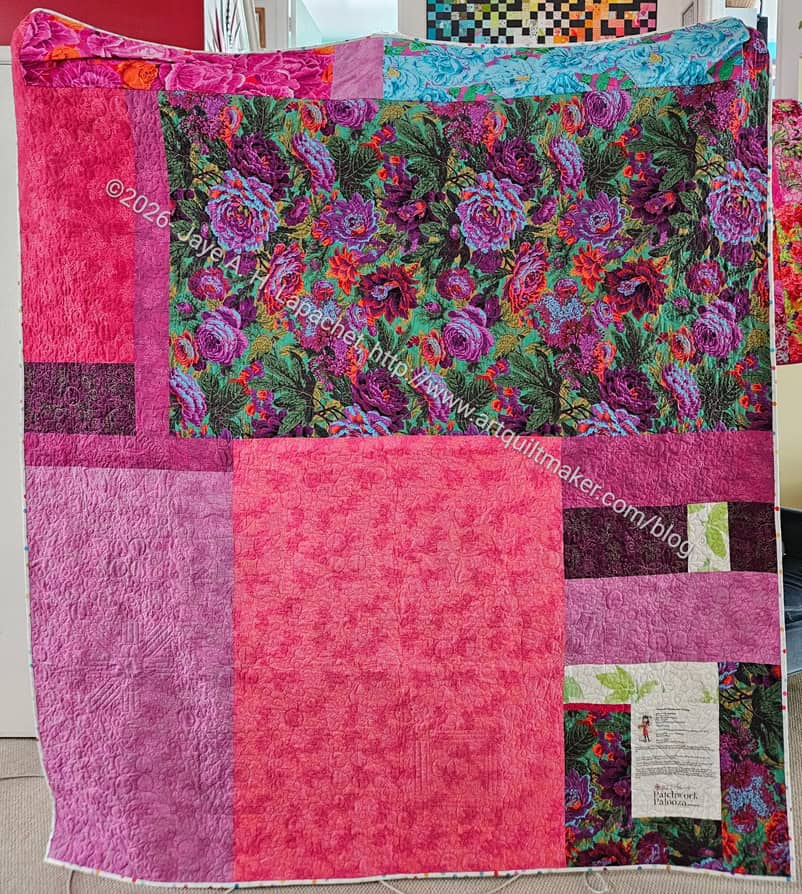
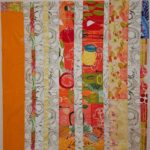
I finished the Patchwork Palooza top in January and now the whole quilt is complete: top, back, quilting, binding, sleeve. Done.
I am pleased with how I finished the edges. I think completing the diagonals looks nice.
There are blocks that I wish I had moved, but that will probably always be the case.
DH actually commented that he really liked this quilt. Maybe it will be a gift for him?
I will be entering this quilt into the Fair.
It must be some kind of record! I started this quilt on about September 6, 2025. Here it is, 6 months later finished. I am really happy and kind of stunned as well.
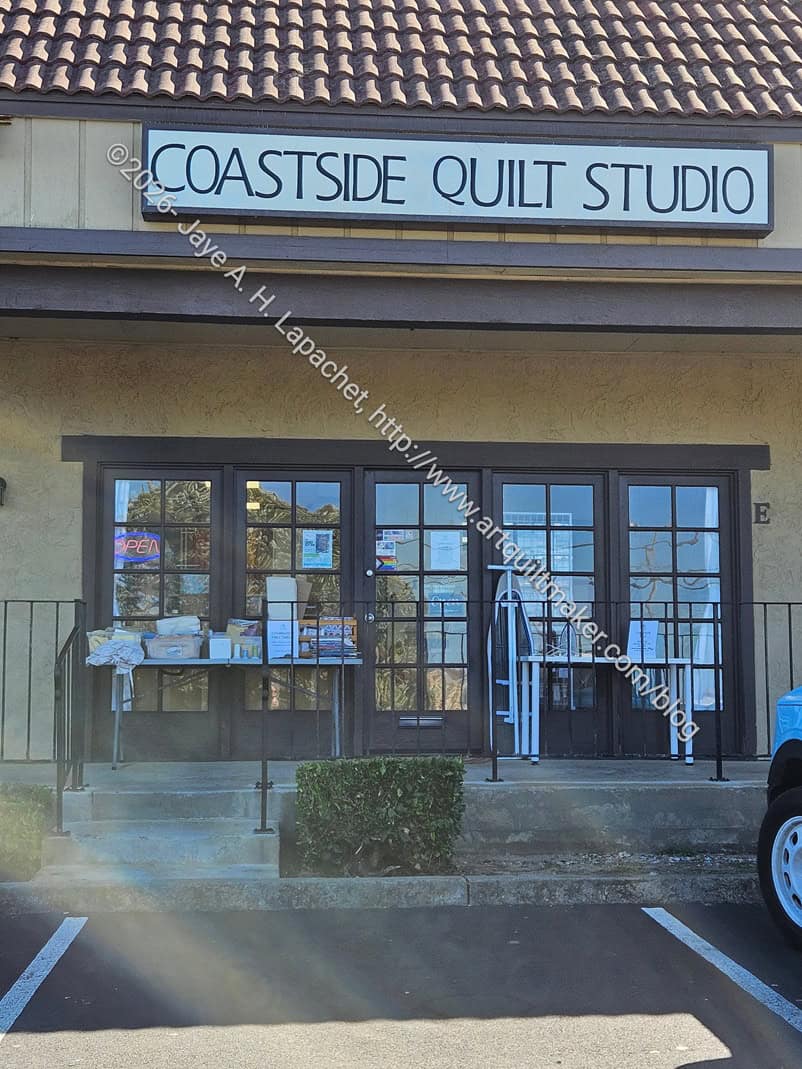
I finally made a trip to Coastside Quilt Studio. I had no excuse for not going except that I just didn’t make the time.
The shop started out as just a longarm studio where customers could meet Dana, the owner,and drop off quilts. Now that Always Quilting is closing Dana is adding a few more quilt shop type items. She has a little fabric, a few notions and she will add more slowly.
The shop has more regular hours now, so I decided to stop by on my way to lunch with a friend. OMG! The place is not hidden up in the hills as I thought, but 10 minutes from my house on the way to the grocery store. Amazing! It will become a regular stop for better or for worse. 😉
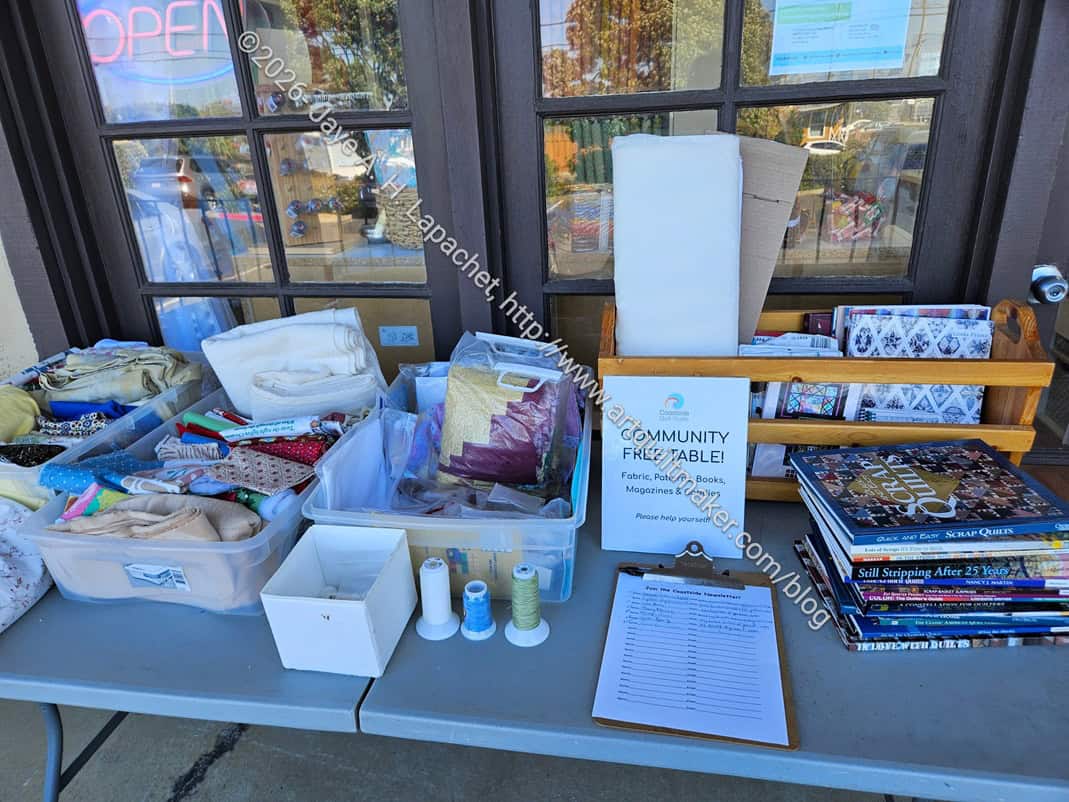
Coastside Quilts free table
Outside the shop, Dana has a free table. You can just walk up and take what you want: books, fabric, thread. Some of the items look like they came from the Pacifica Quilt Club free table. 🙂
I have never seen this type of service in a shop before and think it is a nice idea.
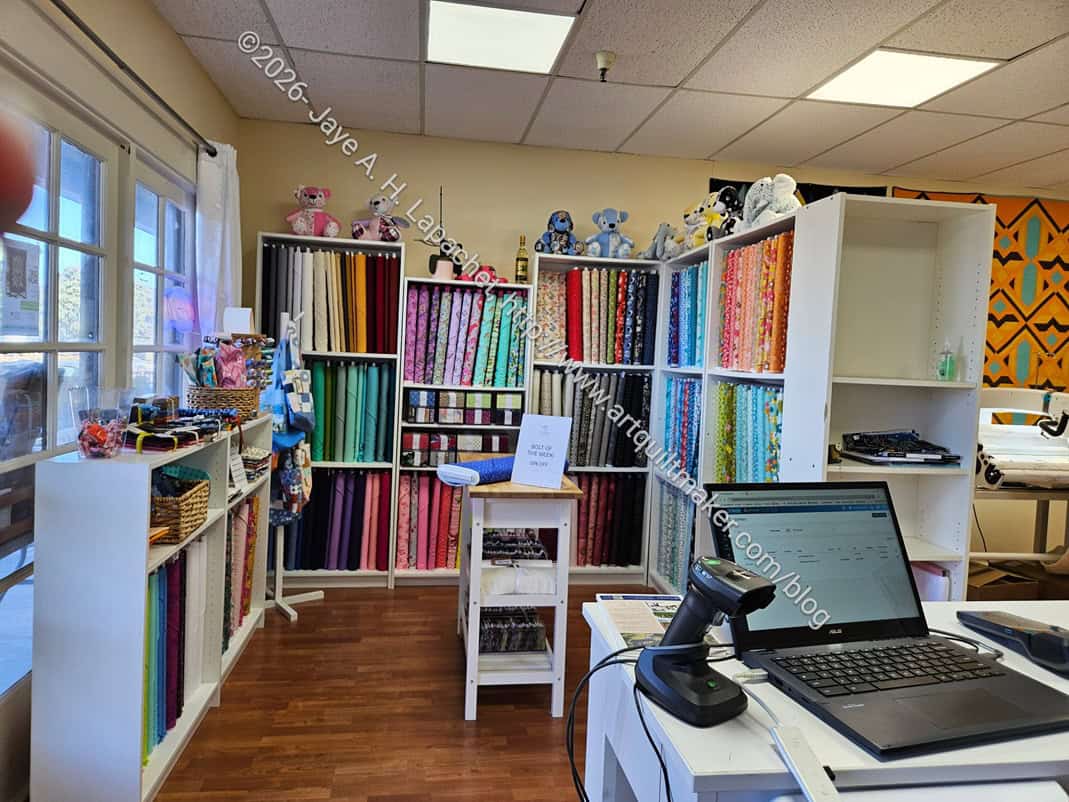
Coastside Quilts behind the counter
Inside the shop the walls are painted a nice butter yellow. The color is not a lot different than the color of my living room walls. It gives the space a nice warm feeling.
The area in the picture is “behind the counter.” I have never seen so many computers in a shop! The picture makes it look really messy, but I didn’t get that impression from my visit.
Coastside Quilts fabric area
Across from the counter is a small area of fabric. There was actually more than I thought.
She has some Tula fabrics, so I asked whether she was going to carry the Floral Reef vinyl, but she said no. It wasn’t a big surprise as Dana seems like a careful business person.
She includes a bolt of the week, which is laying on the table in the middle. It was a nice blue and I thought about buying some. Dana isn’t going to have a huge amount of fabric, she says, but since Joann closed she is having to rethink her business model. That has included adding a bit more fabric.
Coastside Quilts – Dana’s longarm
The business, as mentioned, started out as longarming only, so Dana’s machine – the one she only uses – is behind the fabric area.
It is a Handy Quilter Amara and she now has three of them.
The quilts she has around the shop are bright and cheerful.
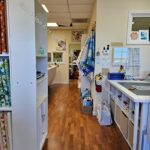
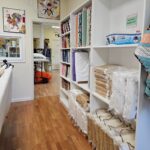
Coastside Quilts – hallway to Dana’s longarm
Coastside Quilts – hallway by Dana’s longarm
Visitors get to the back of the shop, the former classroom, by walking by Dana’s longarm down a hallway-ish space. She stores batting in this area, some Steam-A-Seam and a bit more fabric. I didn’t see any obvious 108″ wide backing fabric, but I also didn’t ask.
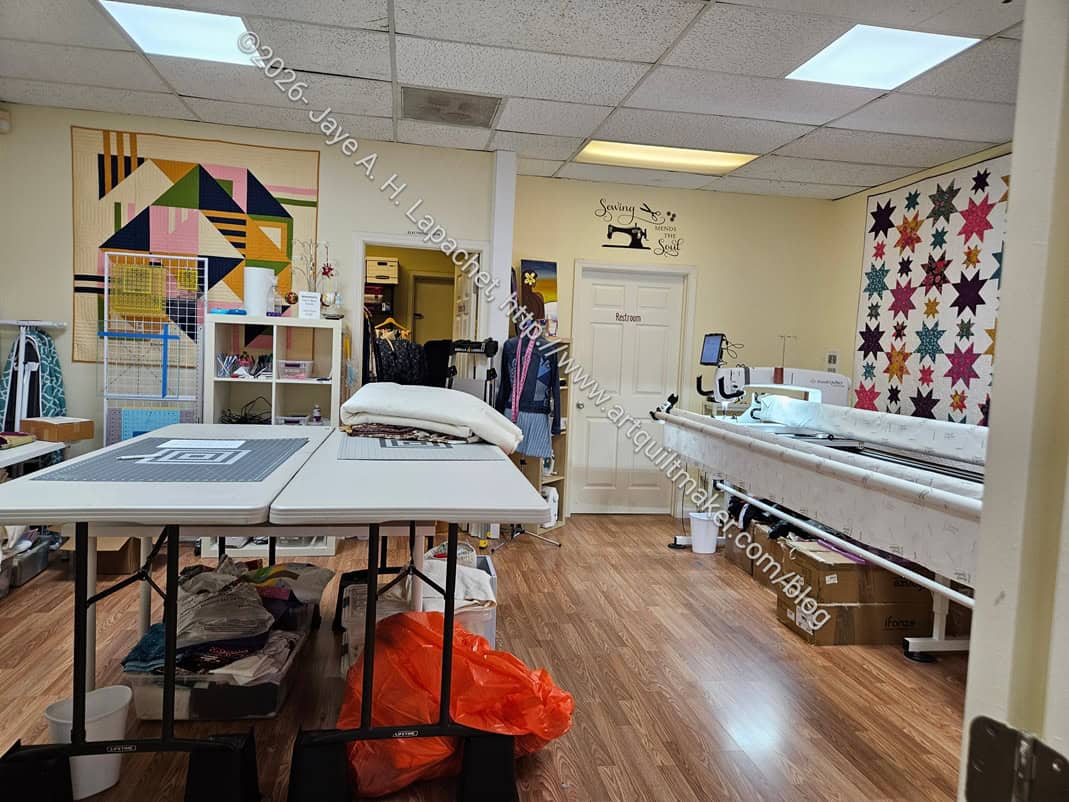
Coastside Quilts – classroom / longarm room
Dana bought one of the longarm machines from Always Quilting so now has a smaller classroom and three longarms. The one in the photo, right, is the second and the third is behind the wall on the right and to the right of the machine you can see. Dana is renting the machines out to people who are certified to use them. We talked about it and I told her about my experience longarming at Always Quilting. I learned on a Gammil, so would need to take the class again. I am shocked that I am actually considering it. DH asked if I could use Tim’s. That led me to think of another friend who might allow me to longarm certain quilts on her machine. It is shocking that I am actually considering it!
Anyway, this is a great store and I hope to become a regular visitor. Sign up for Dana’s once per week newsletter to find out longarm wait times, and other shop happenings.
Address: 1305 Palmetto Avenue, Unit E, Pacifica, CA 94044
Tel: 650-733-7200
Email: coastsidequiltstudio@gmail.com
Studio Hours:
Monday: 10am to 4pm
Tuesday: 10am to 4pm
Wednesday: 11am to 5pm
Thursday: 10am to 4pm
Friday: 12pm to 4pm
Closed Saturday & Sunday
The sad part is that it only took me about an hour to finish it. The hardest part was turning it right side out as I had used a little too much interfacing.
I reflected on the stumbling block in an effort to avoid that particular problem in the future.
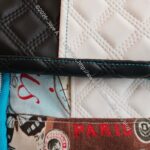
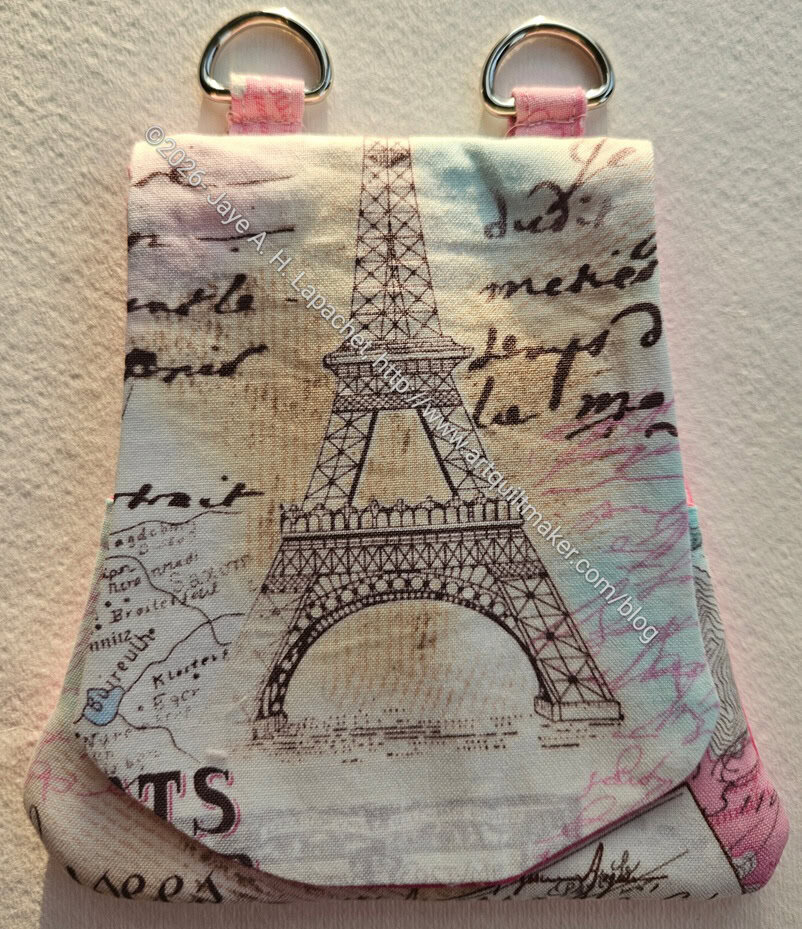
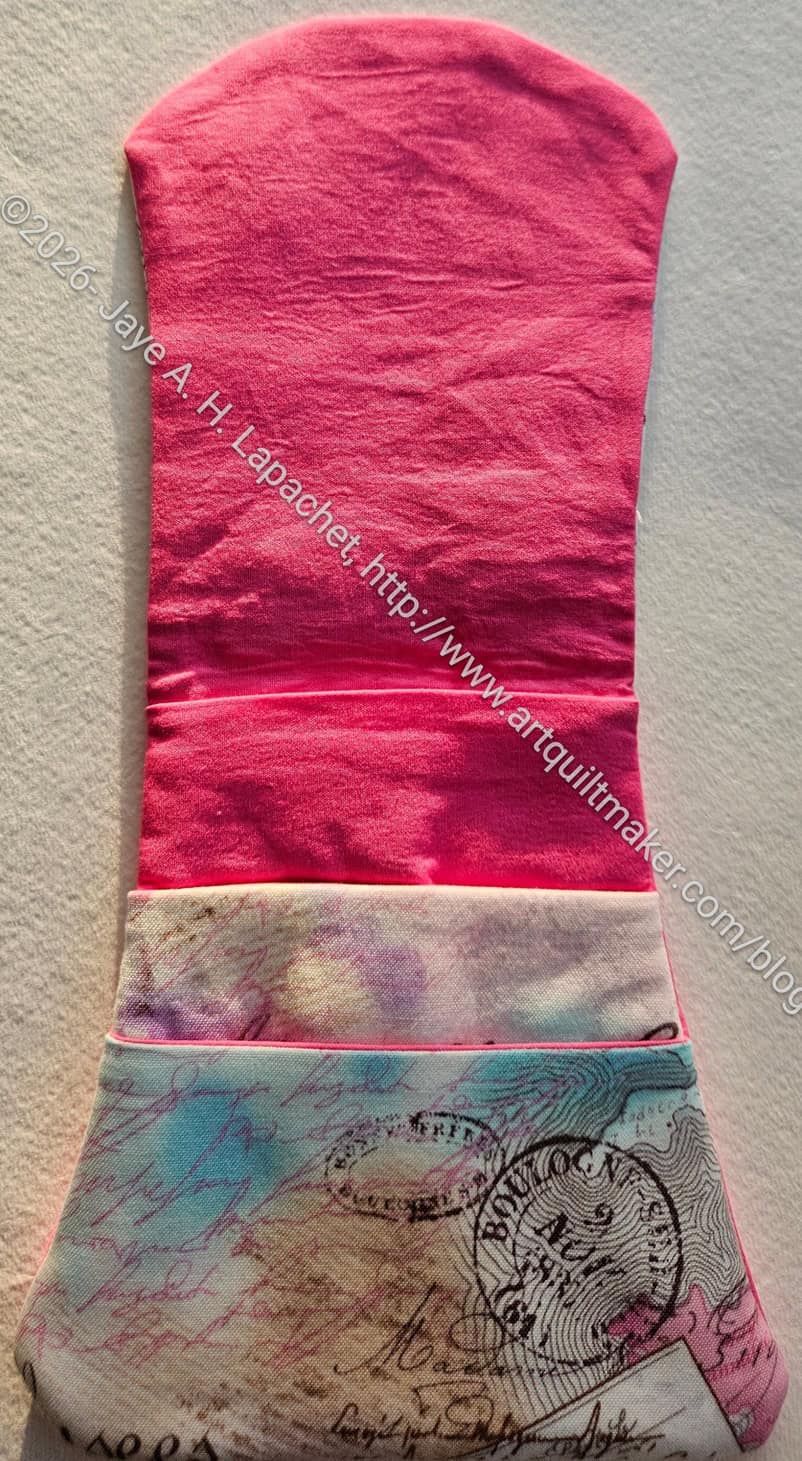
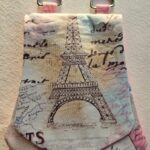
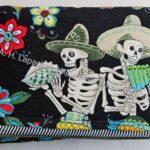
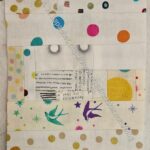
Paris Cell Phone Wallet – open
The issue was that I ran out of the Paris fabric before I could cut all the pieces. As you can see I decided to use an AGF solid, Festival Fuschia for the pieces where I didn’t have enough fabric. I think it looks fine! And DONE is better than perfect, right?
The reason I got back to it, however is the guild’s UFO challenge. I might grumble about it, but it is helping me to get some projects off my To Do list, which is a good thing.
Even though I don’t know what the next number will be I might start working on one of my other UFOs.
Projects Ready for Quilting / In the Quilting Process
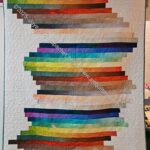
Lupine top finished
Lupine
Projects In the Finishing Process
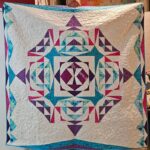
Old Town top complete
Old Town – Working on the sleeve
All the WIPs
WIPs are projects on which I am working. This means that I am past the cutting out of pieces stage, some sewing has taken place.
Country Revival – I am well into piecing. I have done some trimming and have Flower #3 sewn together. Flower #4 is the next to cut.
Four Patch Fun – putting two quilts together for a friend’s grandchildren
La Passacaglia – I decided to change the border, which means moving a couple of the rosettes. Daunting so I haven’t worked on it.
Pantone Project – it has been more than a year (where does time go?) since I worked on this. I need to get back to it.
Cut Out & Stopped
EPPic – This is all cut out and I have made tiny steps towards starting
Rose Petrillo bag – I found the pieces for this bag cut out, but not sewn.
Still UFOs
I still have UFOs. Who doesn’t, after all? A project in the ‘UFO’ category means I am stalled, it hasn’t been worked on in awhile or it is waiting its turn to be worked on. The list is a lot shorter and the projects are newer, for the most part.
I am annoyed that some of these are still UFOs. This is the year to fish or cut bait: some of these will be tossed.
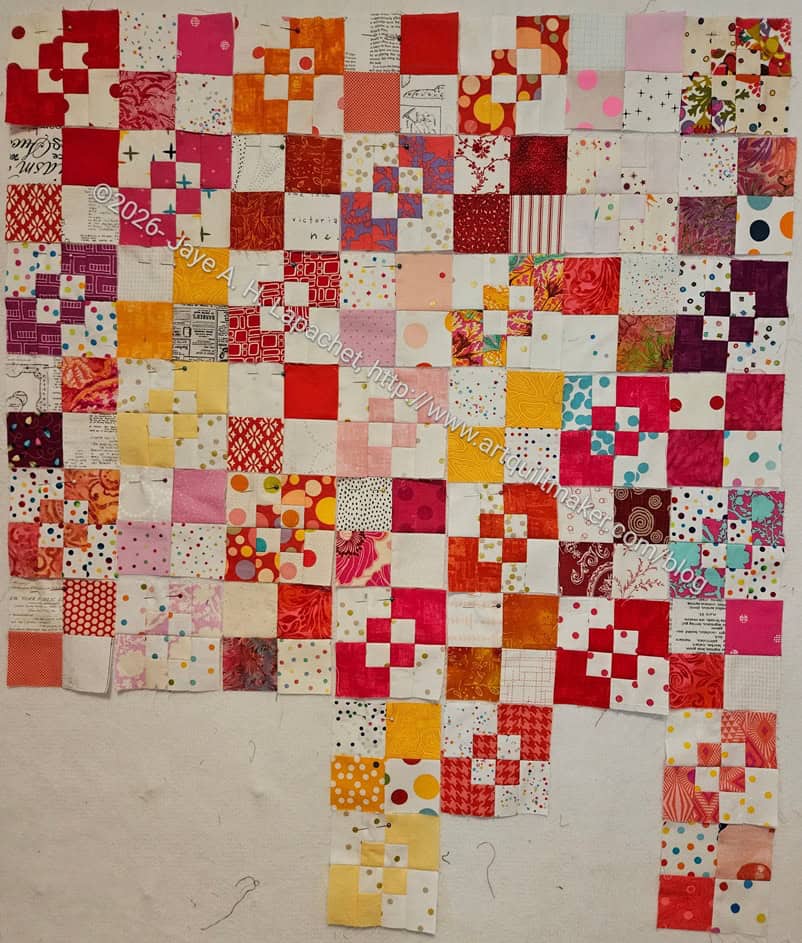
I made a few blocks for Peggy and the Community Quilts team, but decided I need to focus on the blocks I am collecting for various donation tops that I plan to make here at home.
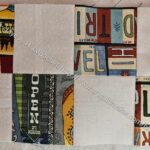
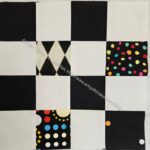
I worked on continuing to collect black and red donation blocks to make another Quarter Square donation top for the guild donation project similar to QST 16 Patch #4 Blue. I need more black and red squares, which means more scrap processing. I may do that at Sew Day on Saturday.
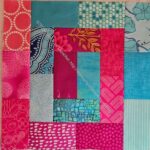
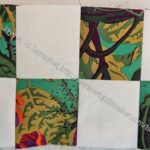
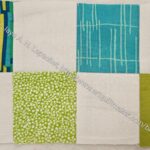
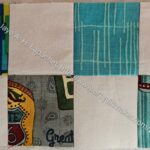
I have more green squares after a couple of sessions of scrap processing. I want to make another Sidewalk quilt, but I don’t have enough of the half blocks to make a green one yet. I only need about 9 more green half blocks to be able to make that Sidewalk quilt. Perhaps my Sew Day scrap processing session will get me the greens I need.
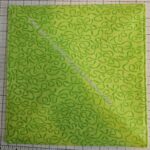
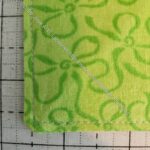
Greenish Sidewalk donation block
Greenish Sidewalk donation block
Greenish Sidewalk donation block
Greenish Sidewalk donation block
Green Sidewalk donation block
Dark green Sidewalk donation block
Green Sidewalk donation block
Green Sidewalk donation block
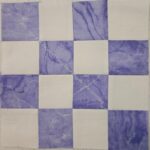
Lavender donation block
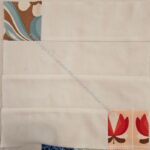
Pink Lines donation block
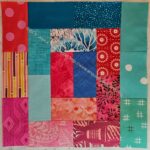
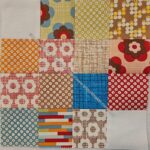
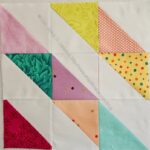
Diagonal 16 Patch block
Diagonal 16 Patch block
Diagonal 16 Patch block
Diagonal 16 Patch block
Diagonal 16 Patch block
Diagonal 16 Patch block
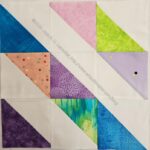
Diagonal 16 Patch block
Diagonal 16 Patch block
Diagonal 16 Patch block
Diagonal 16 Patch block
Diagonal 16 Patch block
Diagonal 16 Patch block
Diagonal 16 Patch block
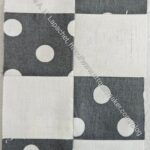
Black & some white donation block
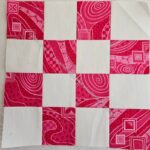
Pink donation block
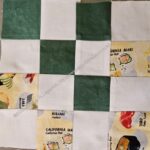
Sushi donation block
Diagonal 16 Patch block
Diagonal 16 Patch block
Diagonal 16 Patch block
Diagonal 16 Patch block
Diagonal 16 Patch block
Diagonal 16 Patch block
Diagonal 16 Patch block
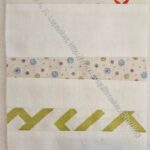
White Strip donation block #104
White Strip donation block #105
White Strip donation block #106
White Strip donation block #107
White Strip donation block #108
Lucky Block #1
Lucky Block #2
Lucky Block #3
Lucky Block #4
Grey dot half 16 Patch
White Strip donation block #10
White Strip donation block #110
White Strip donation block #111
It doesn’t always happen, but I surpassed my goal of 30 donation blocks this month.
Quilts
I have more ends/edges I can use to make another Ends quilt to hand in at Sew Day. We’ll see.
I saw a bag that looks like the UCAB, but seems to be a better design. I WILL NOT buy the pattern! If you make it, tell me what you think.
Cyndi showed me a thread catcher or clip holder that I thought was cool. I looked for a tutorial and found one! The tutorial mimics the way I thought the item was put together. I think I will try one.
Spencer Ogg has a pattern called the Curvalicious Zip Wallet. I like the curve, but also the diagonal outside pocket. I notice that if I like the fabrics, I am more inclined to think about buying a pattern.
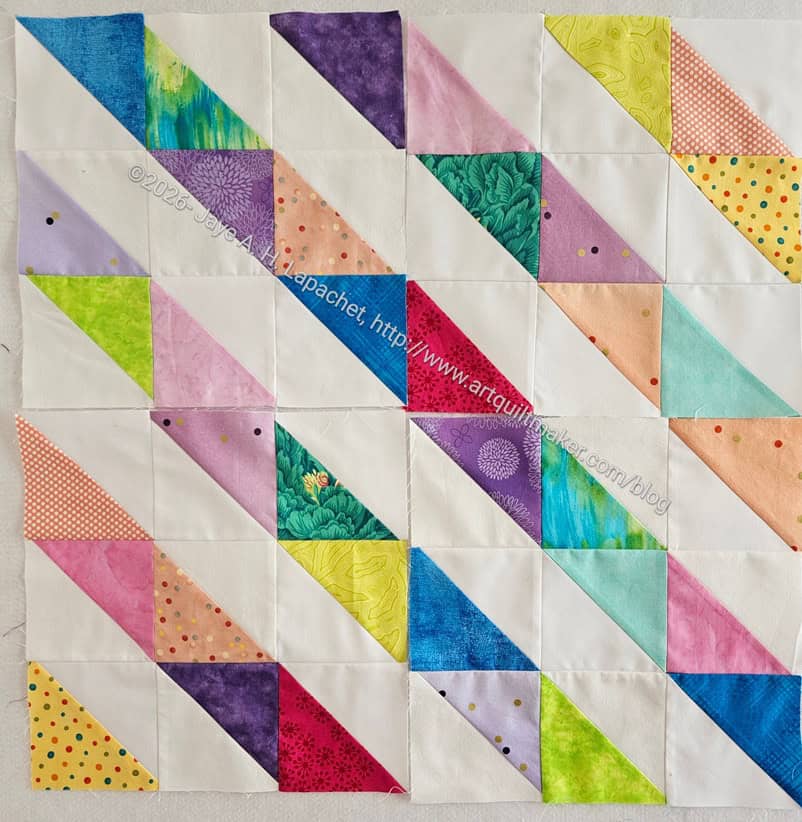
I just received the Studio 180 Designs Technique Sheet for the Split Recs Ruler. This Technique Sheet has a variety of blocks and shapes you can make with the Split Recs Ruler** in addition to HRTs. THEN I saw that Mitzie over at Jittery Wings was working with the same shapes!! Her blocks look amazing in the AGF solids. I was thinking of trying out this Technique Sheet and exploring the Split Recs Ruler a bit more, but now I HAVE to.
I wasn’t that excited about the new Kaffe Collective fabrics that were released last month. They are vibrant and colorful, but somehow just didn’t excite me.
Latifah Saafir has an exhibit called “It’s All a Dream” from March 6-July 28 at the National Quilt Museum.
Media and Articles
One of my guild mates forwarded an email from Shannon Brinkley, which resonated with me. It is called 5 things people think about teaching quilting (that aren’t true). The one that really resonated with me is that you do not have to be the most experienced quiltmaker in the room in order to teach. You do need some experience, but EVERYONE has something they can share with others.
**Obviously, you should shop at local quilt shops and small businesses. However, if you are too busy or can’t find what you need there, I use Amazon affiliate links and may be paid for your purchase of an item when you click on an item’s link in my post. There is no additional cost to you for clicking or purchasing items I recommend. I appreciate your clicks and purchases as it helps support this website.
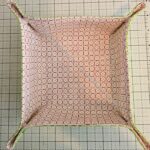
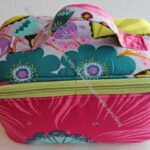
After Sew Day, I decided to make one of the trays that Lynette showed in her Heavy Metals demo. I am thinking about making them for people attending the Flash Retreat in April.
The project also inspired me to get out my KamSnaps tool.
This is not a project that I invented. I know there are probably many tutorials out there. You can do searches to find others. This tutorial shows the way I made mine.
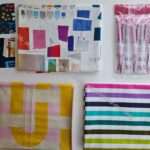
These are easy enough to make several at a time. I used a Layer Cake that I had washed and divided into pairs, but hadn’t yet used. I have no idea what I was going to do with the squares.
Any squares will work. Use a larger square for your first one. I would not use a smaller square than a 5 inch square, but try it out. I think you could also use rectangles.
Since I don’t use DecorBond much I used that for my first tray. It made the first tray really stiff, which has its advantages. I found it hard to turn. For my second one, I used ShapeFlex. The tray was a little more floopy, but still usable. ProFuse would also work. The takeaway is that many different kinds of interfacing will work. Try what you have at home and see what you think. There is always more fabric, right? 🙂
Directions
Gather supplies and materials.
You can use whatever color thread you like. Use a matching thread to make your stitches disappear when you topstitch.
Cut interfacing smaller than your square
Cut interfacing 1/2 inch smaller than your squares to lessen bulk in the seams.
Note: in the photo above, I cut my interfacing 1/2 inch smaller, but it turned out that my layer cake squares had shrunk when I washed them and were more like 9.5 inches instead of 10, thus the interfacing is not as small as I normally like. I like to keep it out of the seam allowance if I can just to lessen the bulk.
Apply interfacing of choice to the squares according to the manufacturer’s directions. Since I don’t use DecorBond much I used that for my first tray. It made the first tray really stiff. It will still be usable. For my second one, I used ShapeFlex. Since I was making 14 or so of these, I took the opportunity to try some Featherweight Fusible (Pellon 811FF) I had on hand to see how that would work and how it would feel.
Place squares RST
Place the interfaced squares right sides together.
Trim so the edges are square and all the threads are removed.
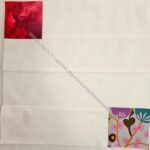
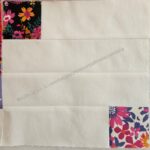
Draw a line to note 1/4 inch
Draw a line 1/4 inch away from the edge of the fabric where you plan to have your opening for turning.
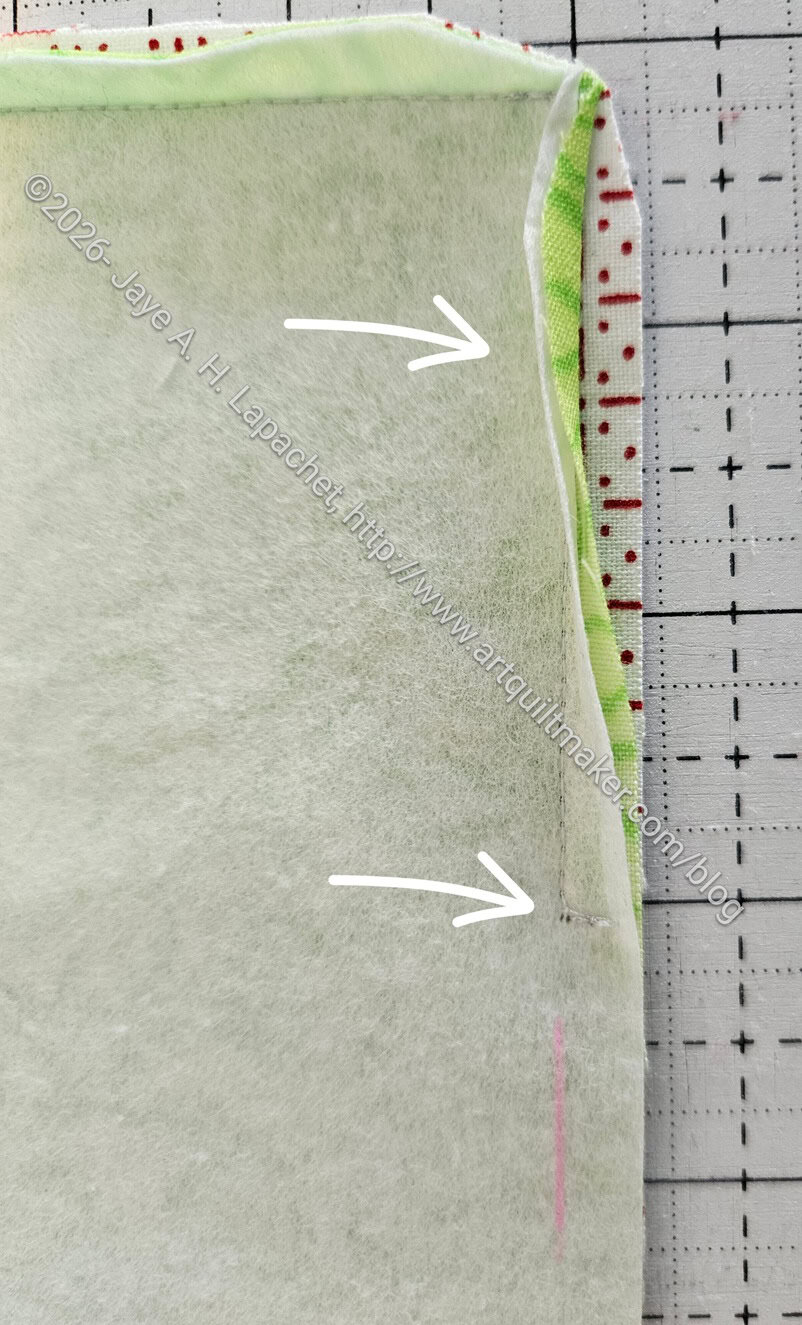
Use the line you drew or your foot to note 1/4 inch
Start sewing perpendicular to the edge of your fabric for about 3 stitches or 1/4 inch.
Stop with the needle down.
Turn the fabric so you are sewing parallel to the edge of the fabric. Remember that you are going to leave an opening.
Sew around the edge using a 1/4 inch seam allowance, leaving a 4-6 inch opening
Sew a 90 degree angle to edge
Tips for Success:
At the beginning and the edge of the opening, sew up to the 1/4 inch line from the edge of the fabric to stabilize the opening for turning
About 3 stitches before each corner, backstitch, go forward again and then turn the corner. After you turn the corner, backstitch again. this will reinforce the corner and make it less likely that you poke through the fabric or stitches when poking out the corners.
Leave a 4-6 inch or so opening for turning
Press the seams open
Press seams open
Pressing won’t be completely smooth
You won’t be able to press the seam on the side with the opening all the way flat, but do the best you can (enlarge the photo above to see more detail)
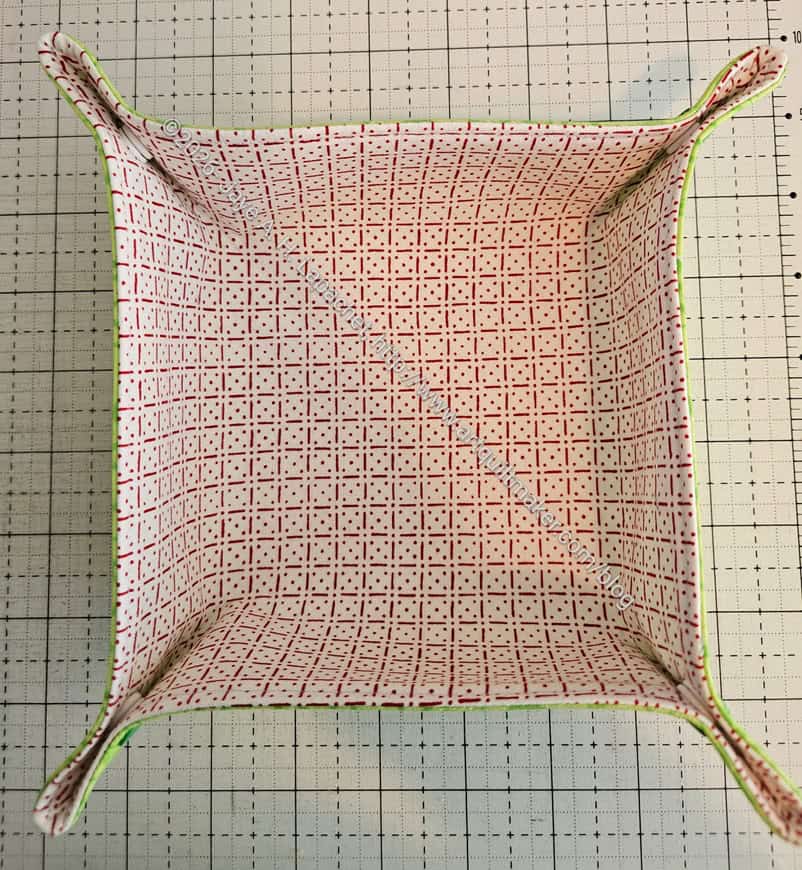
Turn the piece
Turn the piece right sides out. Poke out the corners carefully. I use my Modern American Vintage Point Turner/Hera Marker. If you backstitched at each corner, it will help keep your tool from poking through.
Topstitch
Topstitch – detail
Topstitch using 1/8 inch seam allowance
sew over the starting point and backstitch.
Fold tray in half on the diagonal in both directions.
Make holes
Make holes for Kam Snaps using your awl or leather punch.
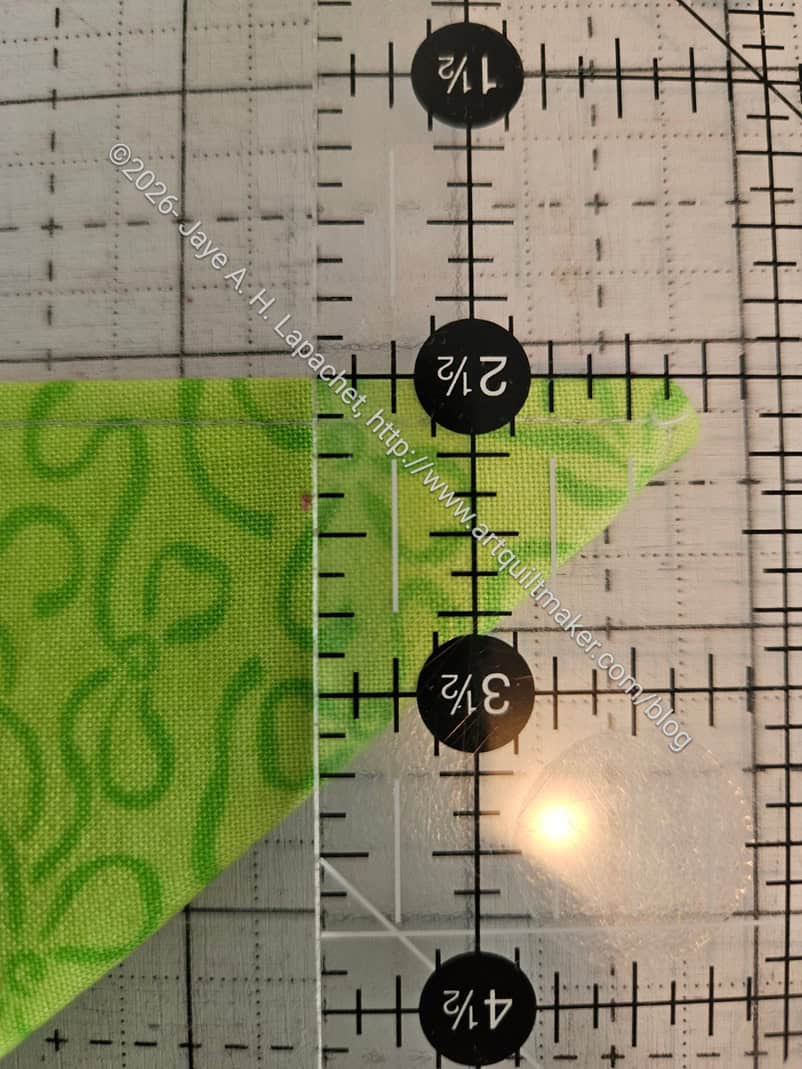
Measure and make a dot
Measure 1.25 inches from the very tip of the folded square in towards the center
My friend, Lynette, uses a 1.5 inch measurement, so try both (on different trays) and see what happens.
Keeping the ruler in place, measure 3/8 inch down from the edge of the tray
My friend, Lynette, uses a .5 inch measurement. Again, try both measurements, on different trays, and see what works for you.
Using your Sewline pencil, make a dot.
Do this on all sides near each corner.
How Snaps should look after installation
How Snaps should look after installation – detail
Follow the directions on your tool of choice (KamSnaps, SnapSetter or Rivet Press). You will need 4 caps, one Innie and one Outie for each corner.
This is a good project for your Quiltmaking Go Bag. You can store it flat and then use it at the side of your sewing machine while you are in class or on retreat for small tools and supplies, like snips and a seam ripper, or for trimmed threads. It helps with a little organization in unfamiliar spaces.
**Obviously, you should shop at local quilt shops and small businesses. However, if you are too busy or can’t find what you need there, I use Amazon affiliate links and may be paid for your purchase of an item when you click on an item’s link in my post. There is no additional cost to you for clicking or purchasing items I recommend. I appreciate your clicks and purchases as it helps support this website.
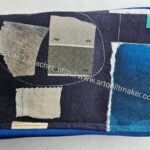
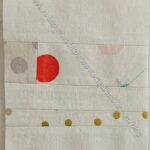
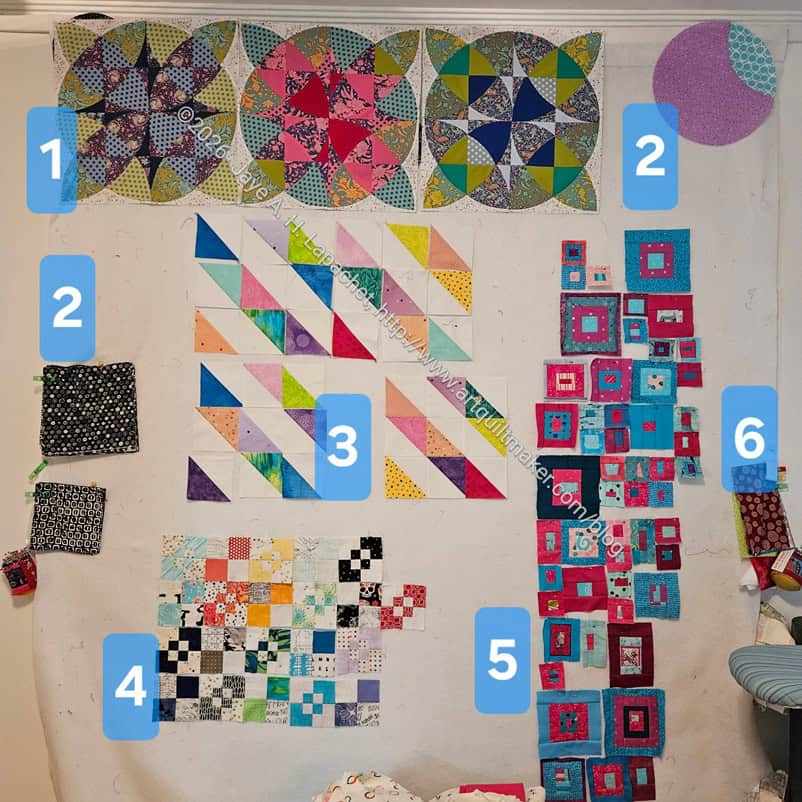
I took a look at my design wall the other day and realized that it reflected the craziness of my mind.
Yes, I have a lot of projects going on right now.
1- The Sad Quilt. I have three blocks made and need to cut out another. It takes time and a lot of brain space to do it, so I haven’t done it yet.
2- Orange Peel Circle sample. This is quite a large block and the wrong colors to use for my Orange Peel Circle quilt. The black squares will become Orange Peel Circles at some point. At the moment, I haven’t decided if I want to cut the large sample down or use it for the back. I really like the fabrics, so I want to do something good with it.
3 – Lucky Blocks. Donation blocks for the Pacifica Quilter’s Club. In process.
4 – Four Patch Fun. I finally have a plan for these blocks. I am pairing them with four patches as in the Judy Martin quilt I wrote about a few weeks ago. I am trying to highlight the contrast by using white and a color for the four patches. I hope that makes the contrast more prevalent. When I showed Cyndi the Judy Martin quilt she thought the design was hard to see and I agree. I am going to make one in cool colors and one in warm colors for the grandchildren of a friend. I think it will be a good use of the blocks.
5 – 1-2-3 Mosaic tablerunner blocks. I need more small blocks, so I will need to clear the decks a little and get back to this project. It requires some prep, which I haven’t done the way I did it in the class.
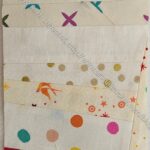
6 – I am collecting three sets of donation blocks for the Sidewalk quilts I will make at some point. At the very top are plain, one piece of fabric 4.5 x 8.5 inch blocks in scrappy colors. This top will look like Sidewalk #5, which I don’t think I ever wrote about beyond a brief mention in the All the Sidewalk quilts post. It’s very hard to see in the tiny section of the photo, but under those units are a group of pieced half 16-patch blocks in green . I need more, but have run out of green 2.5 inch patches. Way down under the ironing board are more pieced half 16-patch blocks, though in grey. Both sets need at least 20 more before I can put a quilt together. Check the tutorial to find out how to make a sidewalk quilt for yourself.