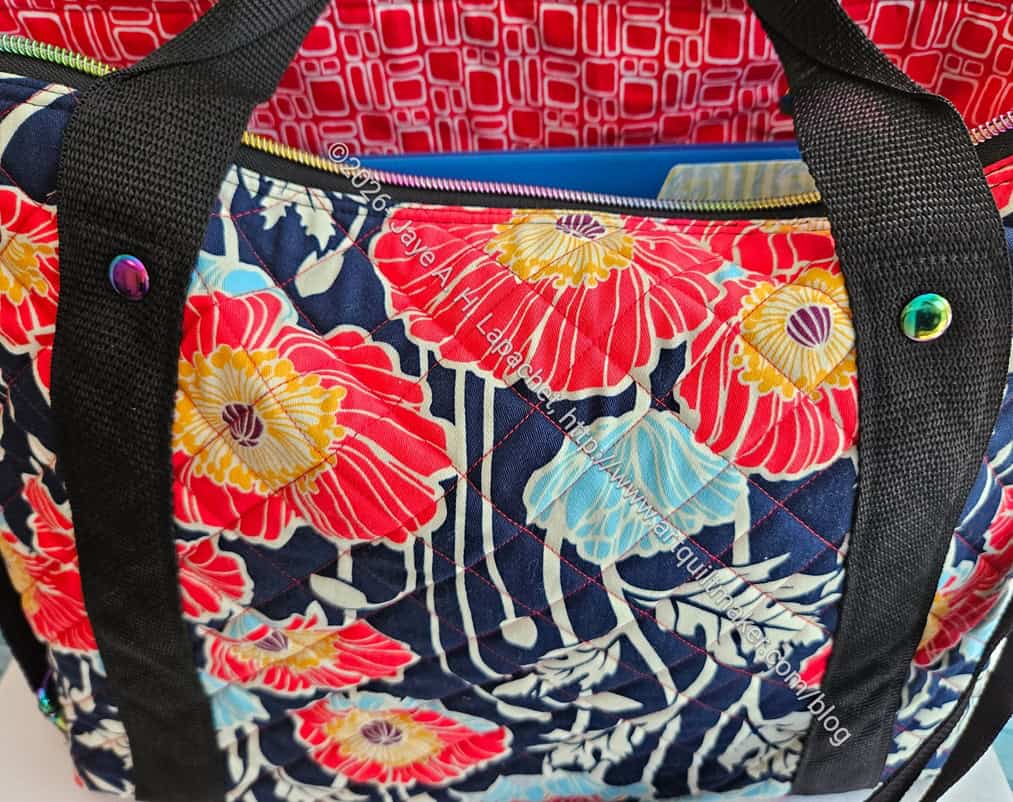
I took four bags over to Mary’s house and riveted all of them. It was super fun rivet party! I kept riveting every spot I could find on the Oxbow Tote! Mary had to stop me.
The part of the bag I wanted to rivet were the handles. I don’t think the bag is in danger of ripping apart, but I like to think a couple of rivets will help keep it in shape for a longer time.
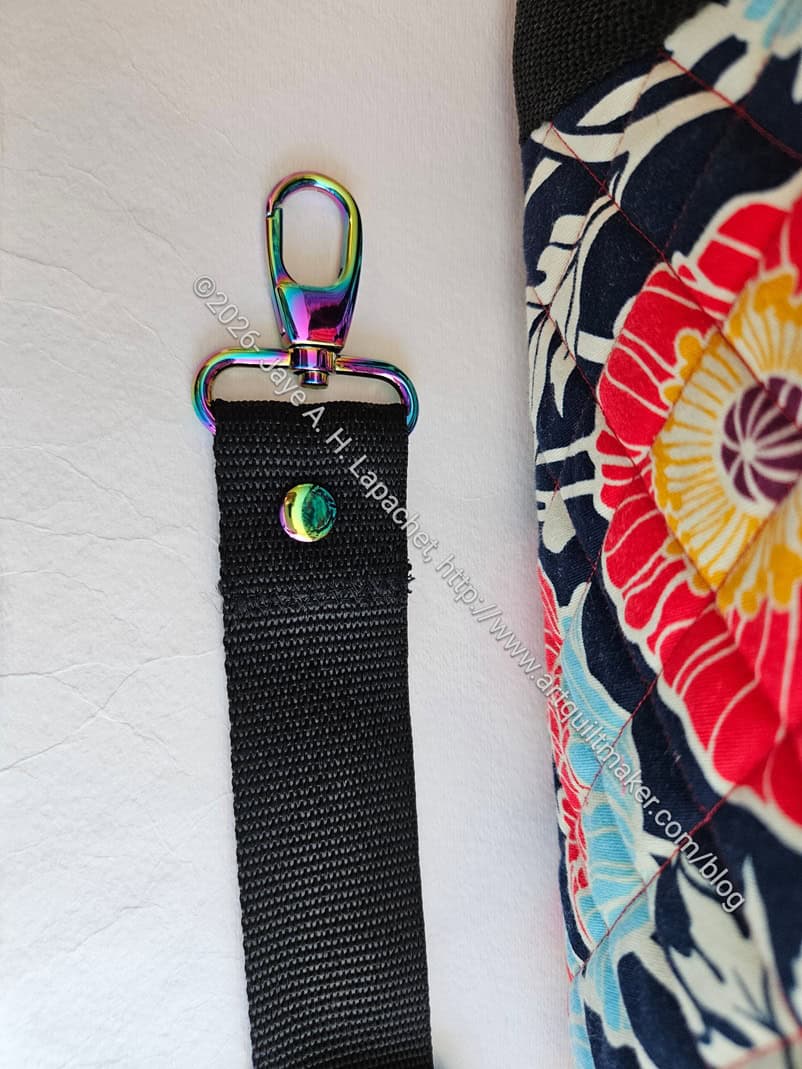
Oxbow Adjustable strap – riveted
I also took the opportunity to rivet the adjustable strap. I am never sure that the stitching I can do on my domestic machine will hold, so a rivet helps with strength.
I also think it makes the strap look more professional.
Mary just bought some rainbow hardware recently, which matched the hardware I used for the bag overall.
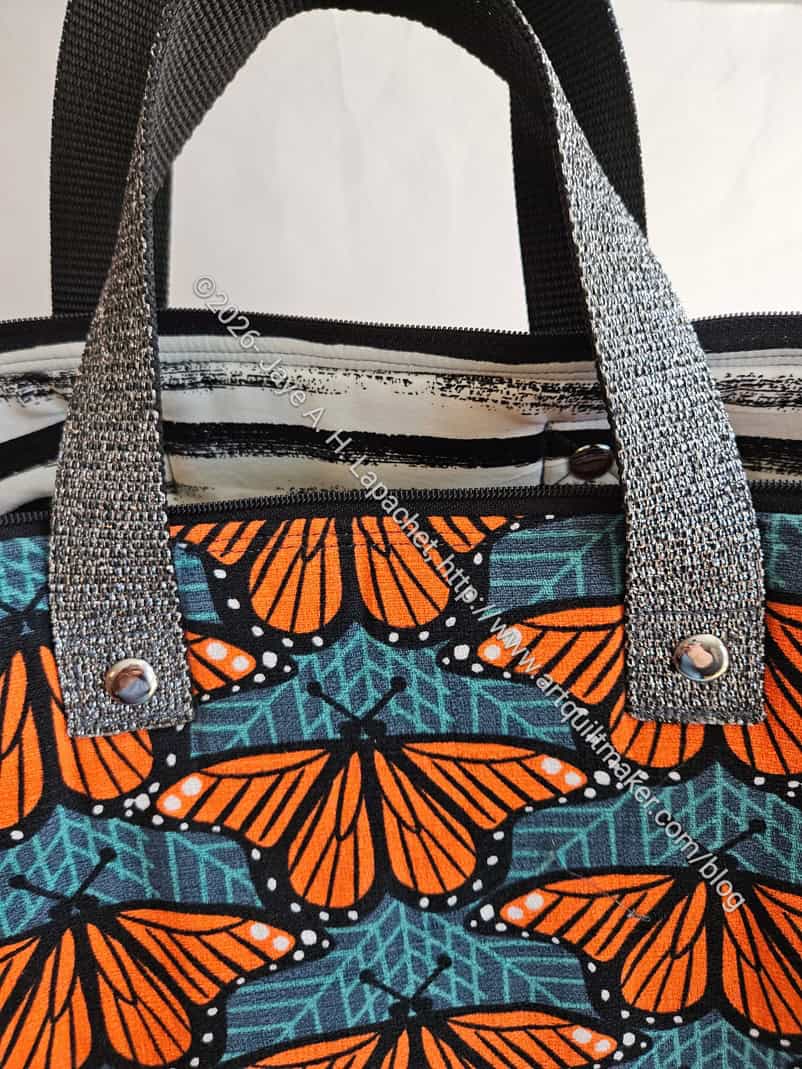
Kit Supply Tote
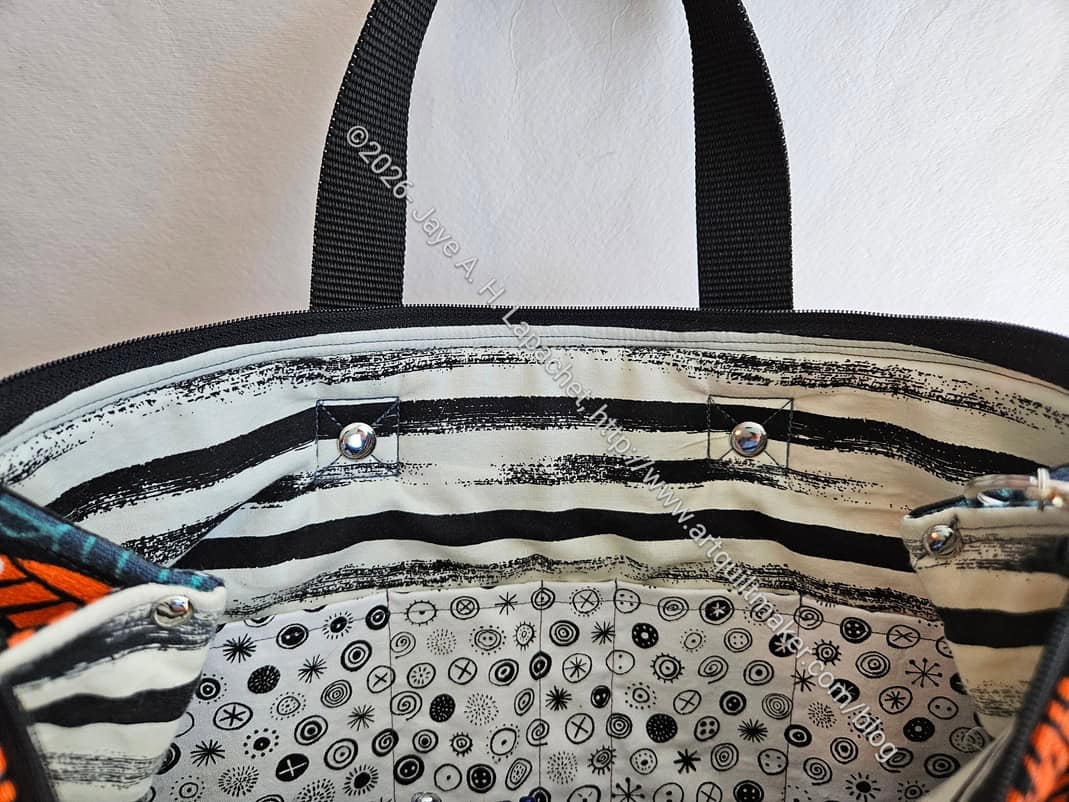
I also brought the Kit Supply Tote. That project has handles that are sewn to the outside of the bag and are not sewn into any seam. These types of handles always make me nervous. I am always afraid they will rip off. It is probably not sensible to think that, but I do.
I riveted the handles to the bag and feel much better about the handles now. I think they will stay put with the extra support.
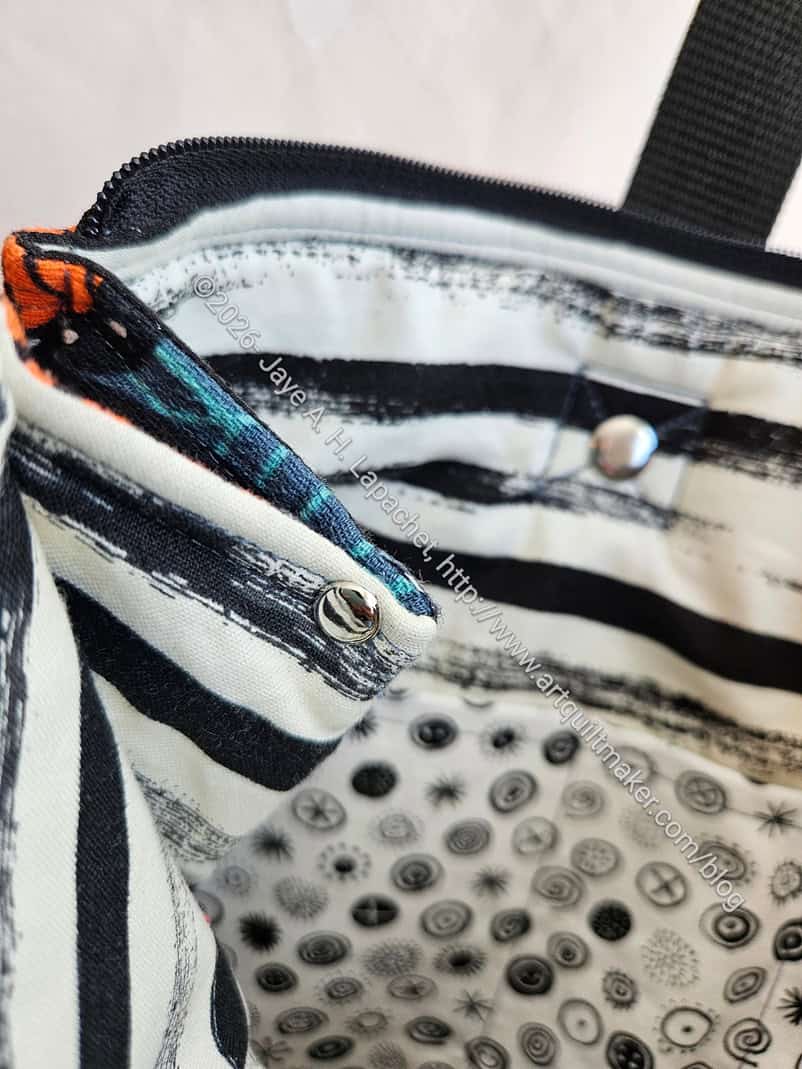
Oxbow Tote -side pleat rivet
I really like the shape and size of this bag. In addition to the handle construction issue, it has another construction issue. That is the thickness of the sides that make a pleat. I was able to sew it, but still worried about it ripping apart. The thickness meant that we used the rivets with the longer shaft.
I was amazed at how they clicked together (pressed together?) and then stayed put.
Kit Supply Tote – side pleat riveted
This bag is not made with any hardware, so I chose a chrome finish to go with the glitter handles.
I am now a fan of riveting the handles on the Enigma pouches. I brought the two most recent Enigmas to be riveted before they go off to their new homes.
Nykky’s Enigma-riveted
Tim’s Enigma
I think that riveting the handles makes these bags able to handle more weight.
I tried to find other areas to rivet, but I had to admit it would be gratuitous riveting. 😉
After I did some Pre-Sew Day work, we were able to put together a total of two quilt tops in addition to the larger top that the rest of the group put together. I am much better at working on my own. I was pleased that Sue and Lee Ann joined me without me having to say anything.
Lee Ann was kind enough to take the blocks for this one home and put the quilt together.
Sew Day donation top
The blocks I made also became a quilt top very quickly, thanks to Lee Ann. The blocks are 8 inches by 8 inches, so the quilt ended up being about 40 in. x 40 inches, which is about the size I like to hand in.
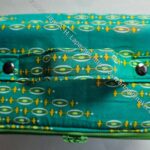
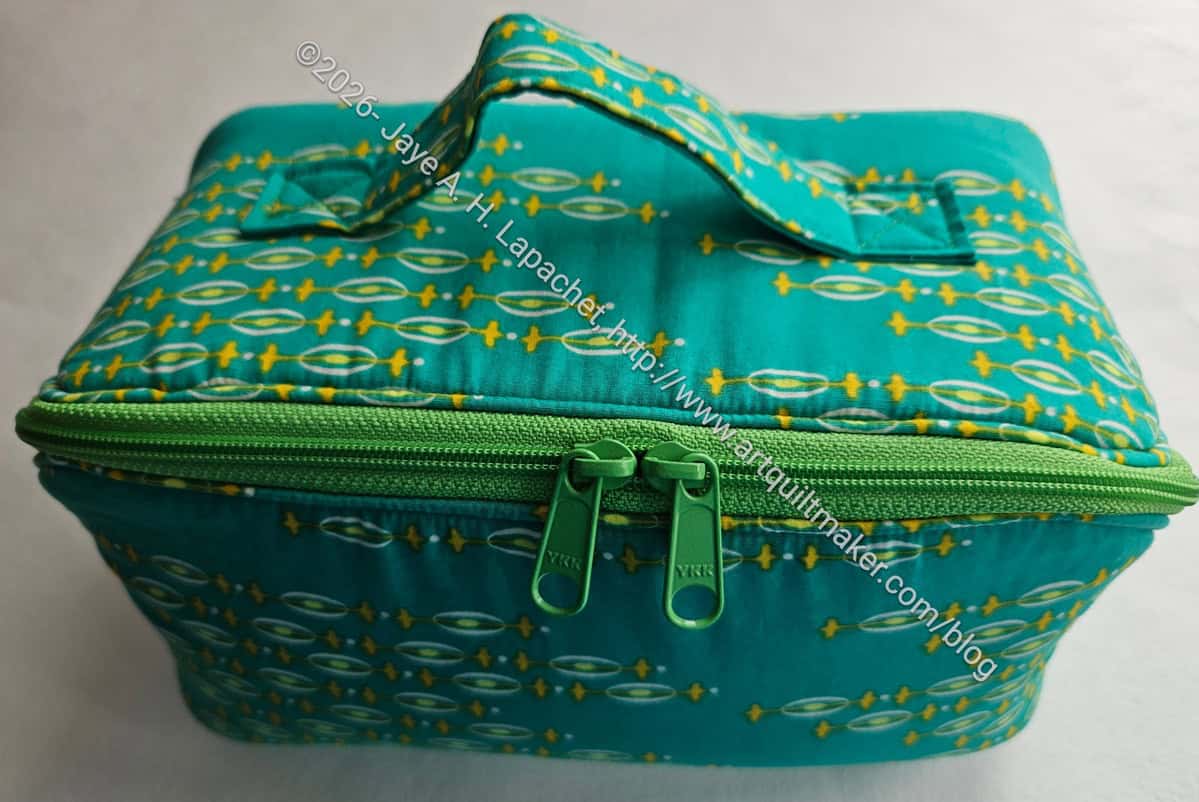
I finally finished the green Enigma. I shouldn’t say ‘finally’, though it did take longer than expected. I felt like everything that could go wrong did go wrong and I am not sure why. Still, it looks great and I am not embarrassed to give it as a gift.
I still want to rivet the handles, but that requires a little coordination with my “rivet press dealer”. LOL! And I can give it without the rivets if necessary.
Tim’s Enigma – open
I am still planning on making a few more of these this year. I want to get over the drama I felt making this one and the pink rose one that I still need to finish.
The lining fabric is one I have kind of been saving. I had it in a pink/orange colorway, but think I used it for something. I really like the blue/green colorway and was looking for a special project on which to use it. I didn’t really try to match up the squares, but they sort of ended up that way, which was nice.
Tim’s Enigma – back, closed
Sara of Sew Sweetness’ quarterly challenge has just been announced. The challenge is to use some aspect of quiltmaking in your bag or pouch. This bag requires quilting on the bottom, so it qualifies. I may enter it as my entry. I don’t expect to win, but it is fun to participate.
One of the things I learned from testing new sewing machines was about the dual feed feet. I am in love with the HP2 foot available on the Janome M8 Continental and the Elna 792 Pro Ex. I came home from my session the other day and investigate the dual feed on my current machine.
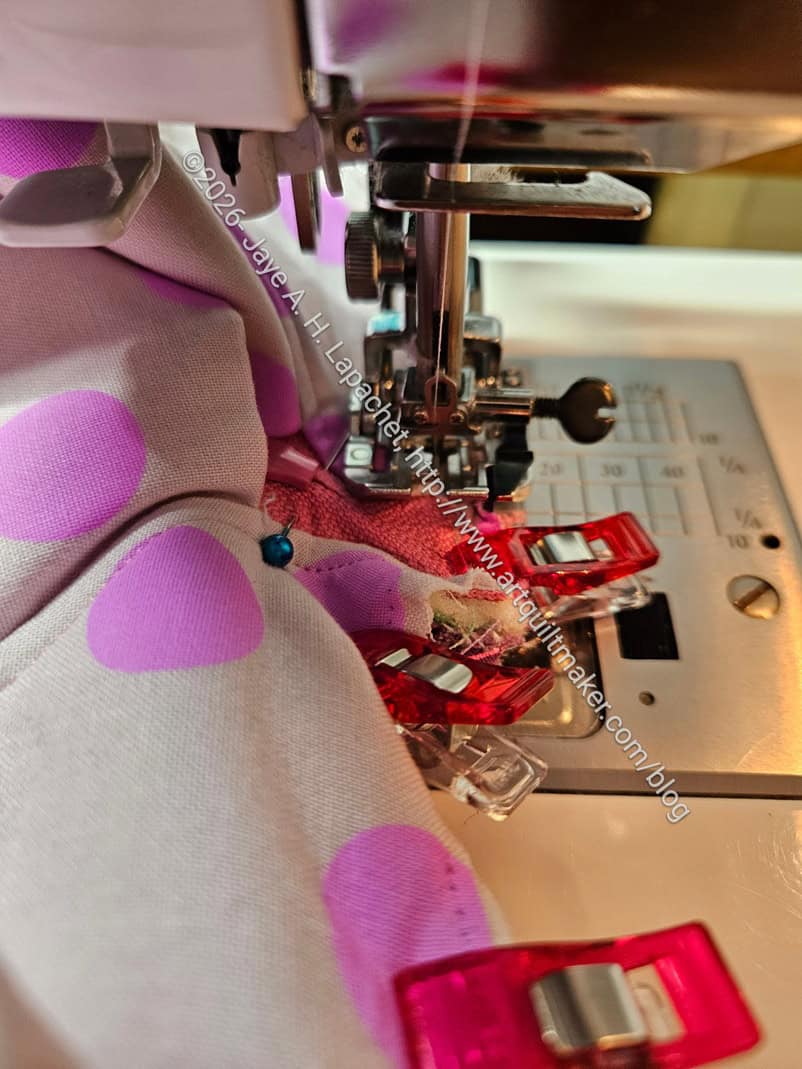
Dual feed on Nykky’s Enigma
While it probably comes as no surprise to you, I was a little surprised. Not a lot, because I do encounter the dual feed mechanism periodically.
I went through the manual and came across some notes I made about needle position, so I must have used it before. I tried it out on one of the Enigmas on which I am working. The overall theory worked well, but the width of the foot was kind of a problem.
Also, the foot you see is, presumably, the quarter inch dual feed foot. I had to adjust the needle position because it doesn’t make a quarter inch seam out of the gate. It is possible it is a 5/8ths inch foot or something else, but my recollection is that I bought a 1/4 inch Acufeed/dual feed foot at some point.
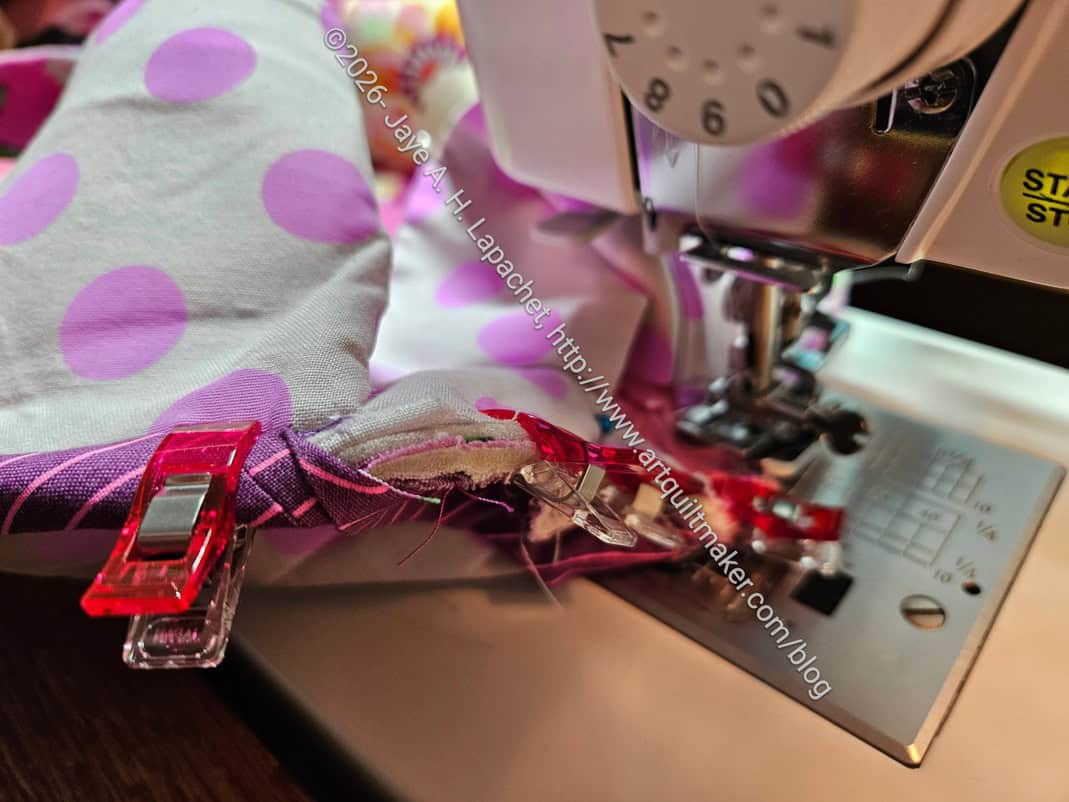
Dual feed on Nykky’s Enigma
Anyway, I tried it out to replicate what I experienced on my testing session and I could sort of do it. The HP2 foot, a feature of the Elna 792.. and the Janome M8 is narrower and that works better for me on the Enigma bags.
The thickness is really a challenge and on this particular bag, attaching the side panels to the bottom in the zipper area makes for some additional grey hairs. You can see on the photo above that I worked with the current foot to make it work. I think the issue was that I could not find a button or feature that would engage the dual feed. Perhaps the 6600 doesn’t have one?
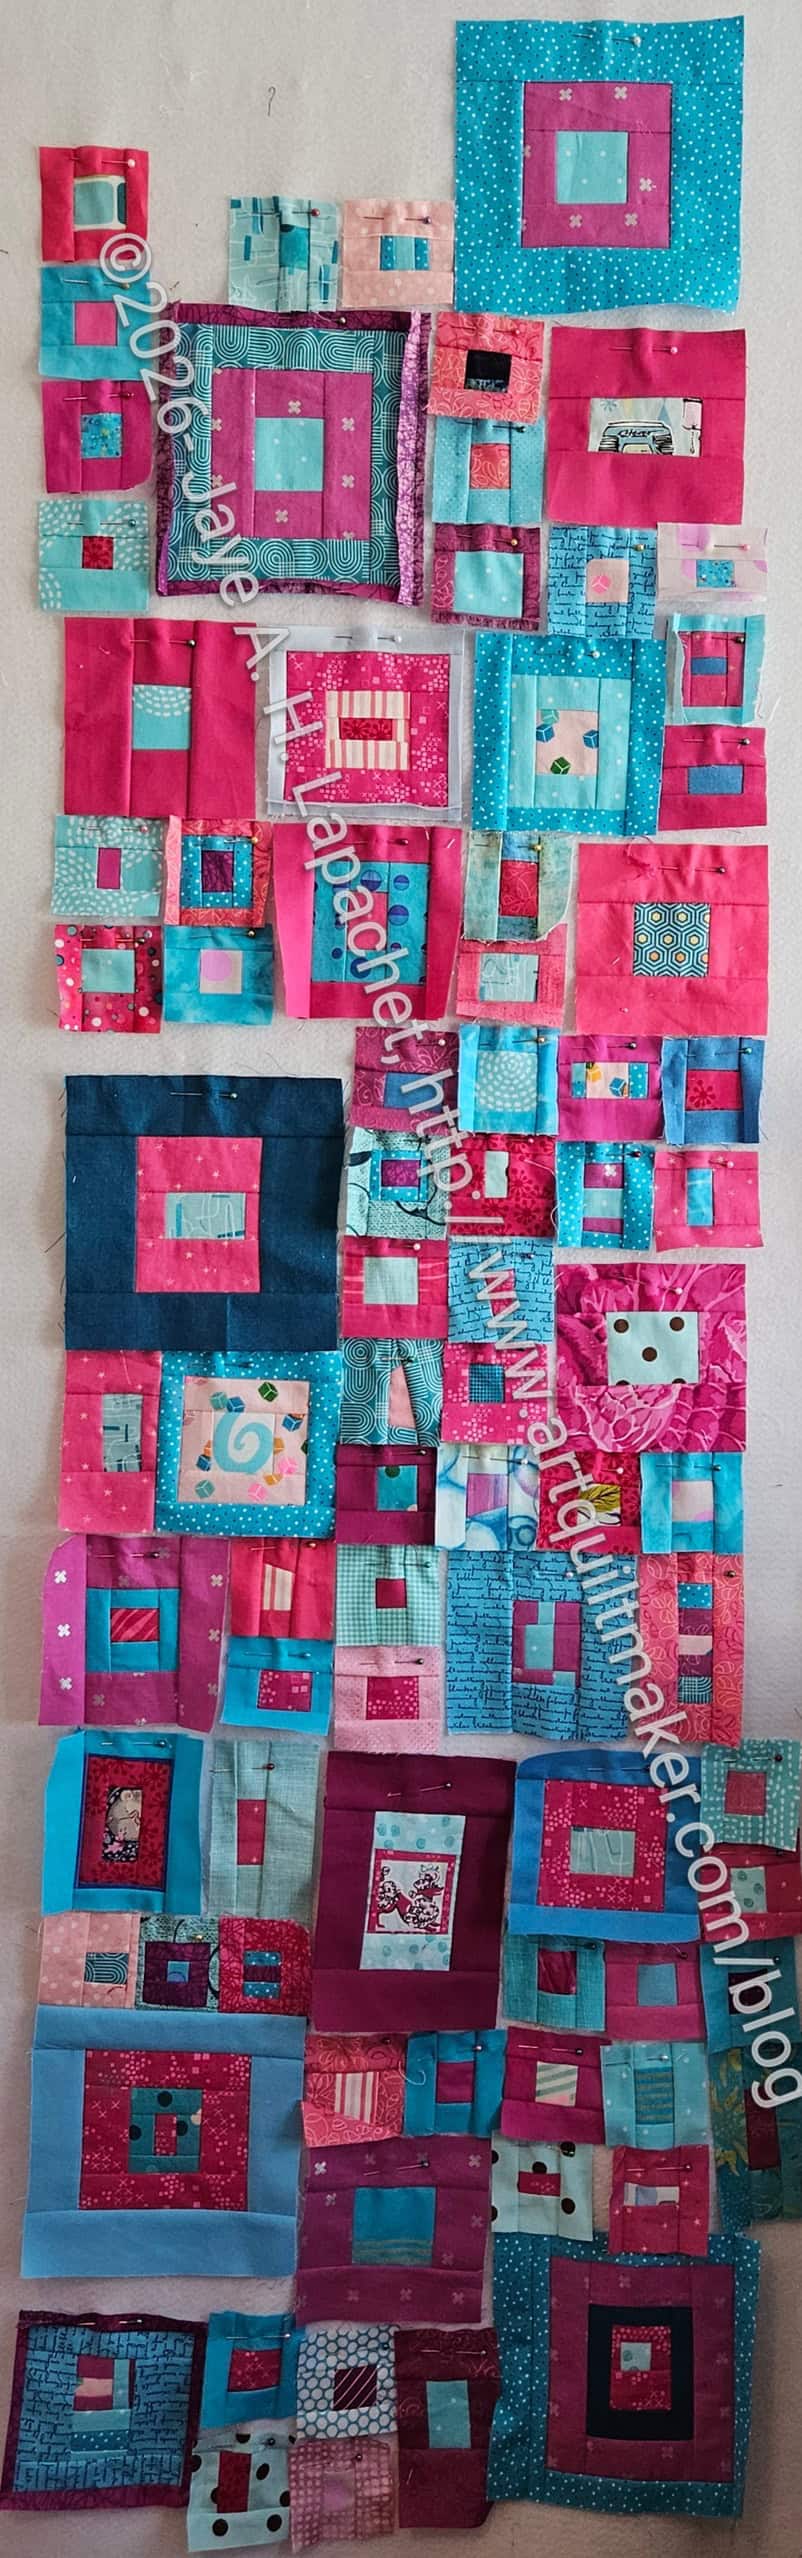
I spent the other day prepping about 20 blocks for the 1-2-3 Mosaic table runner. I want to get this off the design wall and it won’t happen magically.
I felt like I needed some additional blue blocks so I concentrated on those. Not all of the 20 came out the correct size so some went back on the board waiting for another round of fabric. I made enough of them to feel like I am nearing the finish line.
I spent some time rearranging the layout. I am happier with how it looks and will soon start putting some chunks together. The bottom looks darker than it is because the ironing board is shadowing the bottom corner of the design wall.
I have made the photo really large so you can see it more clearly.
I know there will still be some rearranging as I begin to sew, but I think I am pretty much ready to sew some chunks together. It will at least tell me what other blocks I need to make.
1-2-3 Mosaic blocks organized
As an aside, I finally made the travel board and am using it for this project. I cut up pieces, laid them out in order and then was able to sew them in an assembly line fashion. I haven’t figured out where to store this board, but while it is in use, it is very handy.
I cleared out a box of acrylic templates that had been in my fabric closet for awhile. I wanted to be reminded what was in there. I was surprised to find some smaller templates as well the large ones I knew were in there. I am sure I had a plan when I put the small templates in the box, but I didn’t remember the plan when I found them.
I still want to make a bag for large templates, but that is a project for another day. On that day, I decided to make 3 more I Spy pouches, one for each of the template sets.
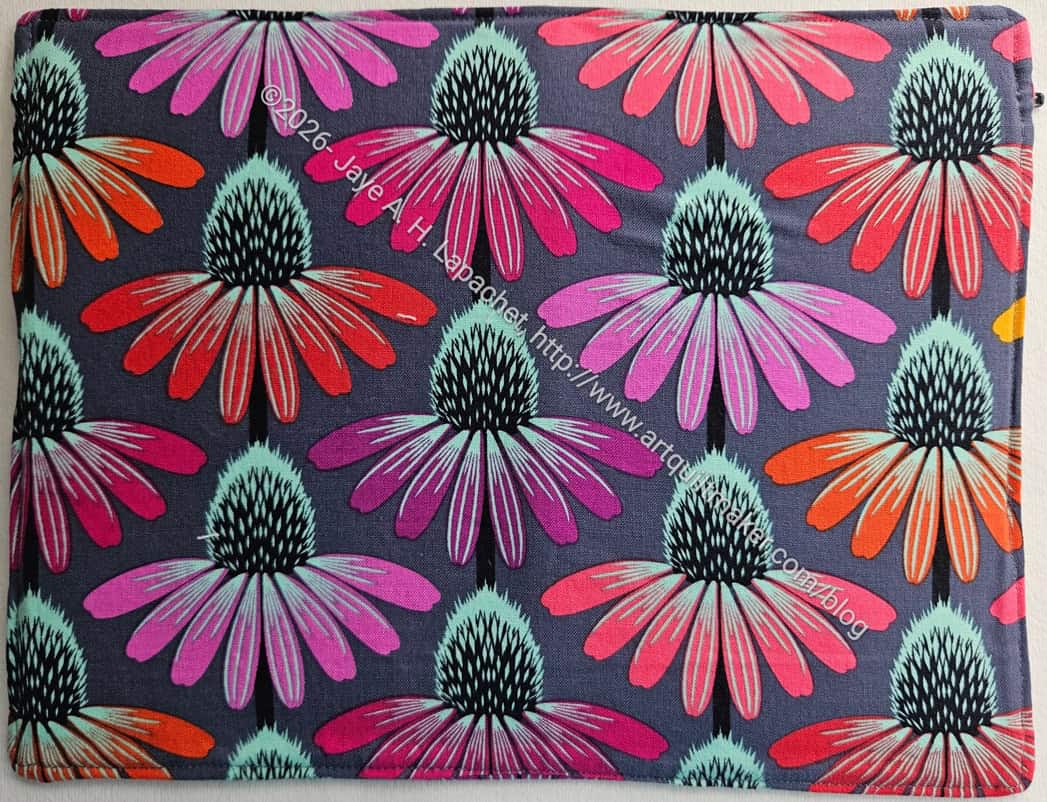
I like to highlight a special fabric on the lining. I had very little of the Anna Maria Poppy (Bright Eyes??) left, so I decided to use one of them for this pouch. The last time I used this fabric was for the Andalusian pouch.
This large I Spy will be used for the Mustang Purse Organizer templates. I made a set of these for my Mom in 2021. I have a vivid memory of making them in my machine’s old location, which was before I redid the whole room.
Poppy I Spy – large, back
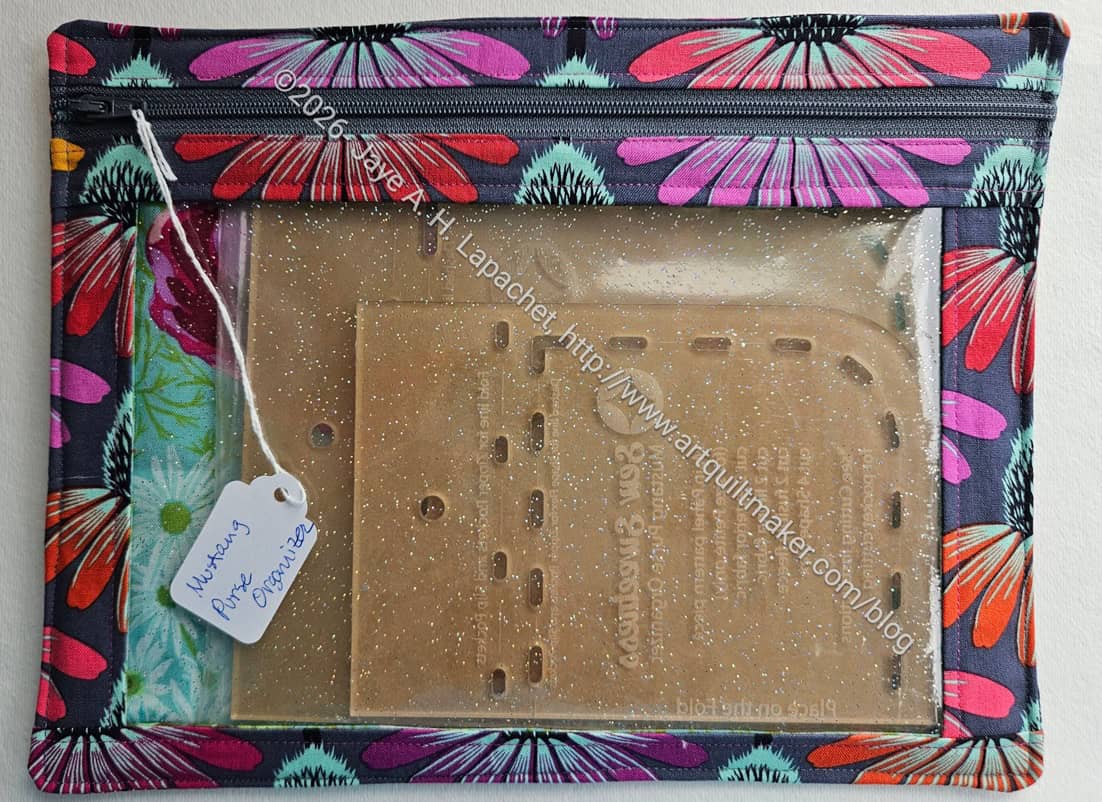
For some reason, I forgot to interface the pieces so I added a bit of the Sewfisticated 2mm stick on interfacing right before I closed the turning pocket. It was a little tricky to get the paper off the stick-on side of the interfacing, but I managed it in the end. This interfacing is much thicker than the SF101 called for in the pattern, but it worked.
The interfacing made the pouch very stiff. I top stitched around the whole edge. It made the pouch very structured and I kind of like the feel.
Poppy I Spy – large for Mustang templates
I am also using some tags I bought for another purpose to label the pouches. Thus far, I have been relying on post-it notes, which are unreliable in this context. All of the templates are engraved, but the words are hard to see sometimes.
I did make an I Spy pouch with the poppy print before. I would say ‘great minds think alike’, but I don’t think one can say that when it is yourself! LOL!
I went out again to test sewing machines, this time with my own materials. It made such a difference! I was really able to test what the machines could do.
Before I get into that, I highly recommend taking time to prepare you own samples to sew. I spent all the sewing time I had on Sunday prepping materials that I would sew as a test. These were not fake tests, they were real pieces that will be used in bags I am making.
I planned to perform the same tasks on an Elna 792 Pro Ex and a Janome Continental M8. Most everything I brought had two options. Mostly I got the same results from both machines.
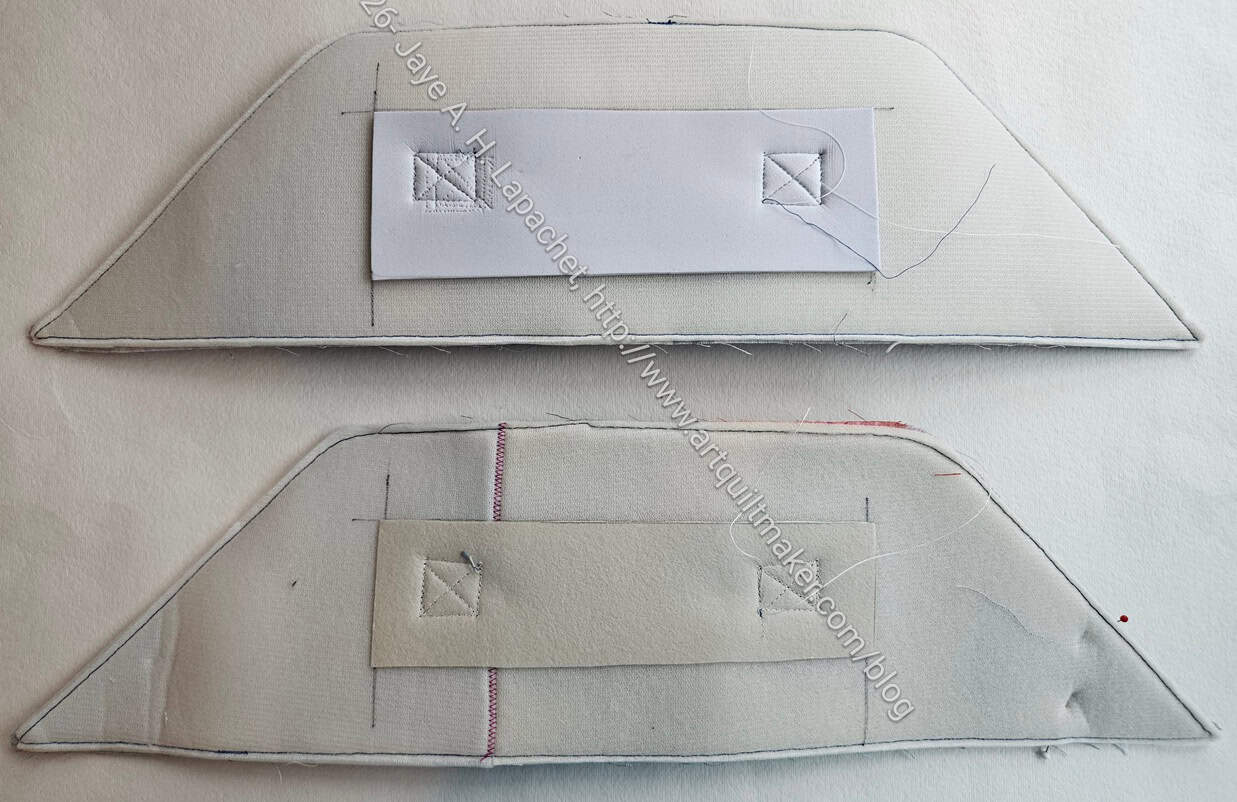
Enigma Side Panel – handle support
I prepped two Enigma tops, which the pattern calls the Side Panel. I wanted to test going through the handle, one of which included a layer of Decovil (bottom). The other had a layer of the Sewfisticated 2mm stick-on (top) interfacing. I wanted to see the difference in the sewing. I know the underside looks really ugly, but that is the hidden structure of the bag.
I had tried to sew the Sewfisticated 2mm stick-on interfacing on my current Enigma efforts and kept getting skipped stitches. I was annoyed, so I peeled off the Sewfisticated 2mm stick-on (top) interfacing and replaced it with Decovil. This gave me the idea to test them both out on the machines. I quickly put together the pieces for these two bags and took them with me.
The outcome was that I learned about a new type of needle. Schmetz has a universal needle called the Super Nonstick Needles**. While I didn’t try sewing this special stabilizer with a regular needle, using one of these non-stick needles made the process very smooth. The layers were a challenge, but not the stickiness. WooHoo! I learned something new! MaryC knows everything and she hadn’t heard of these needles either.
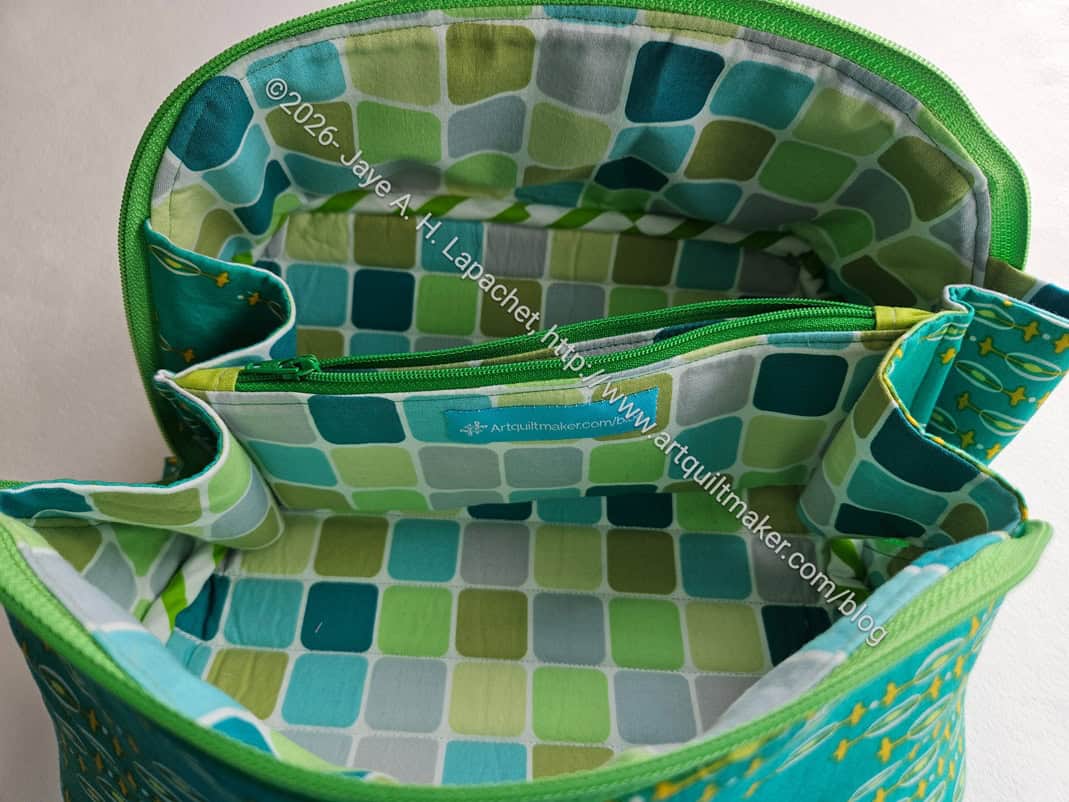
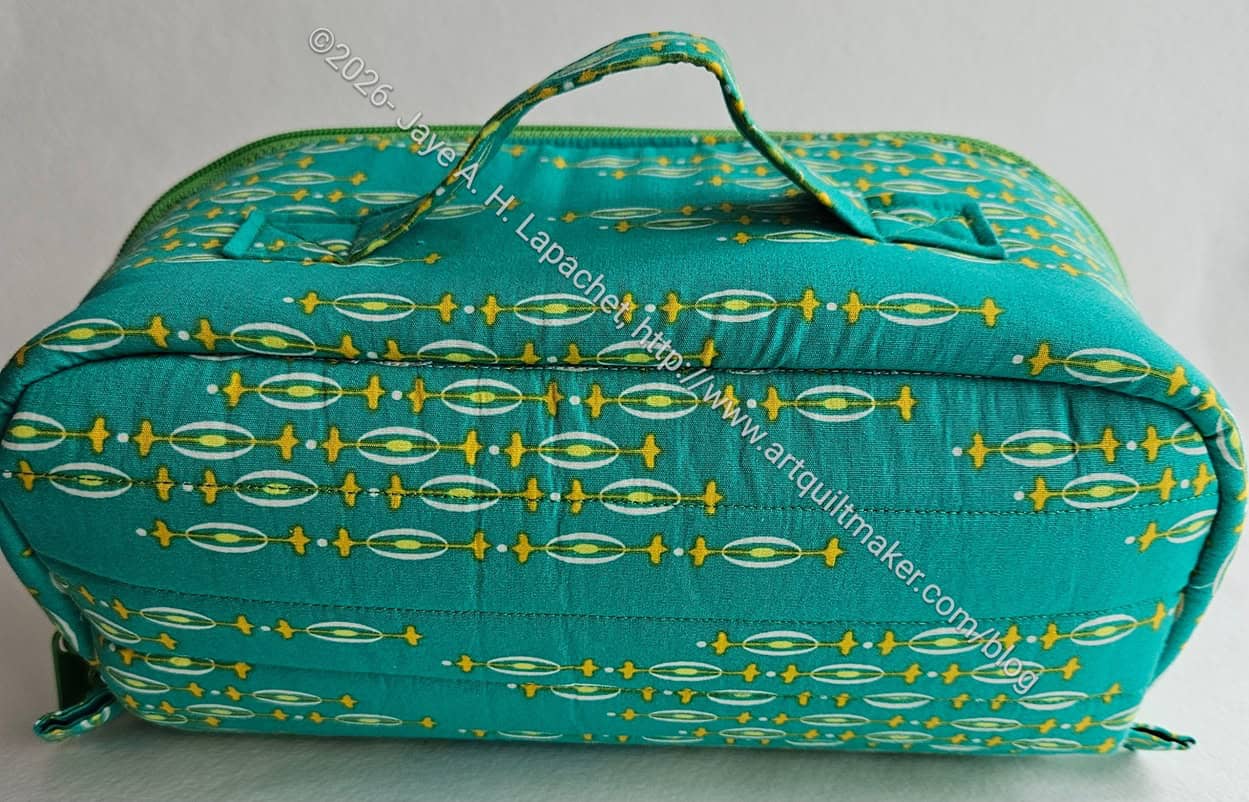
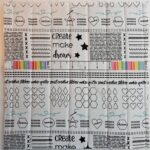
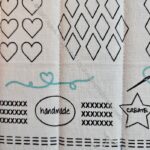
Enigma bottom panel
Enigma bottom panel lining
Enigma bottom panel lining detail
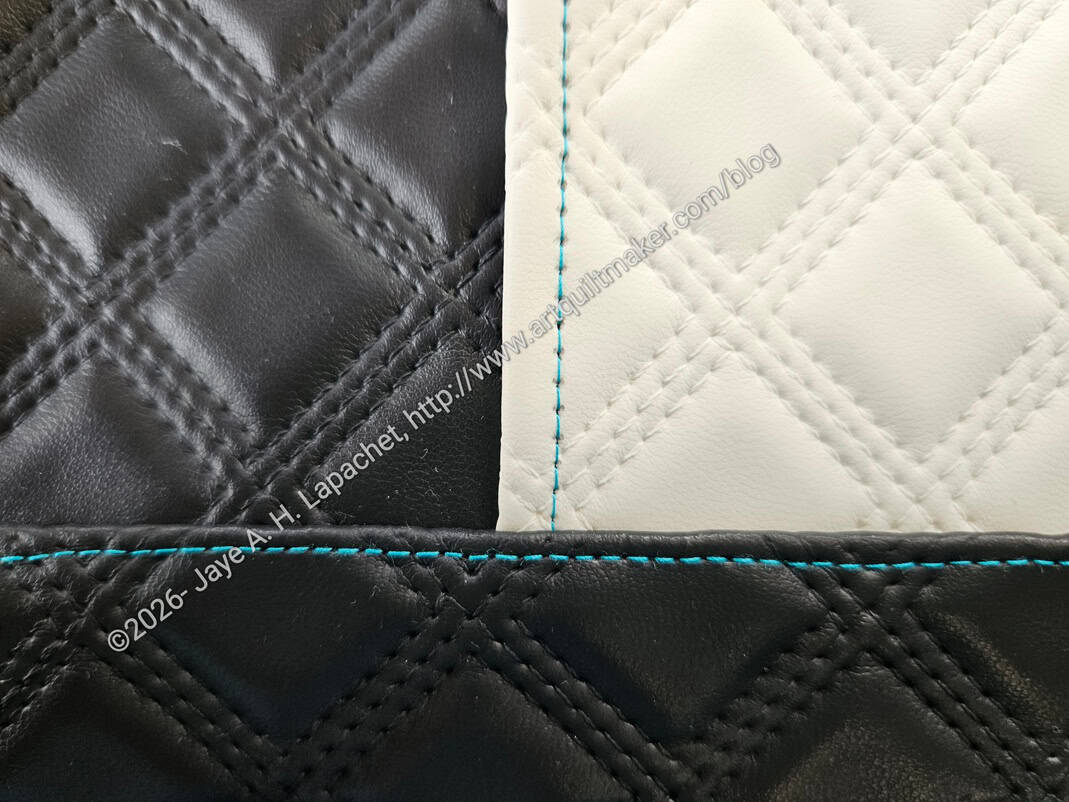
I cut a foam and fabric combination using some scraps and prepped it with the MistyFuse like I have done for the past couple of Enigmas. The test I performed was using two different thread colors. The tension definitely had to be adjusted to get it perfect, but even out of the gate, the quilting looked good. I was particularly pleased that no blue thread showed on the white side.
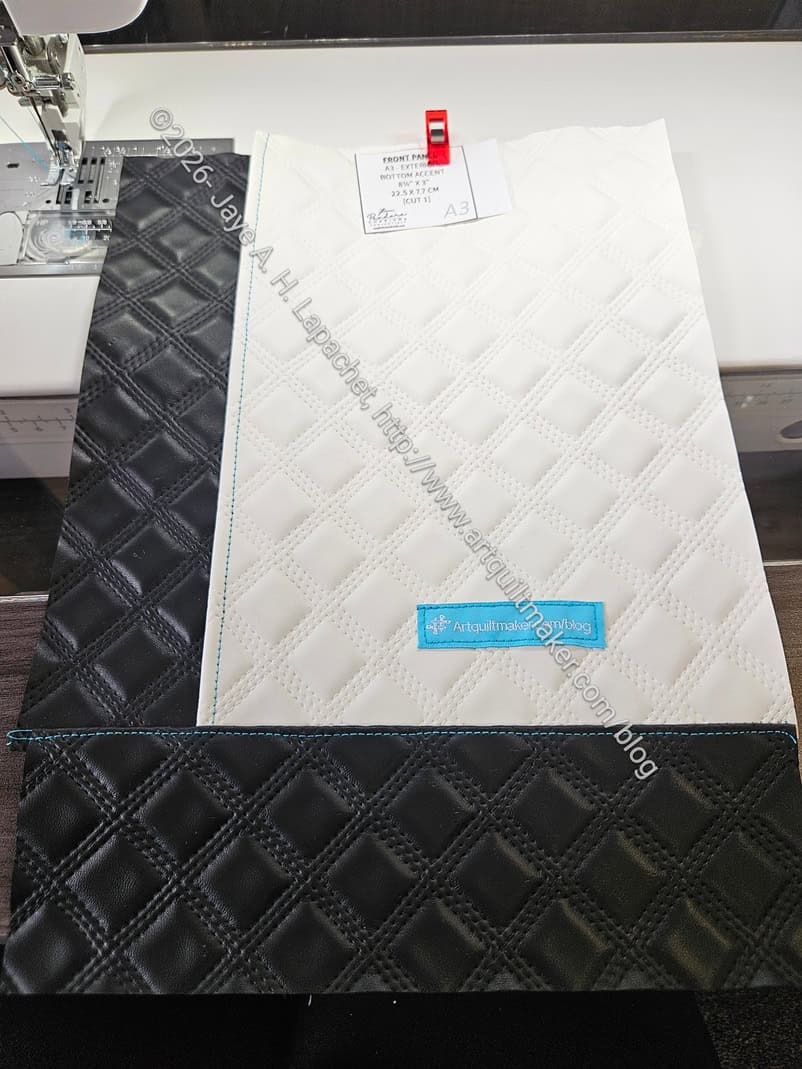
I tested sewing one of the last steps of the Enigma pattern – the side completed panels with zipper to the bottom panel. I had some trouble the other day with the two sections slipping out of true and not getting caught in the seam. I used the HP2 foot with Acufeed, which is described as “… holds fabrics firmly in sync with the feed dogs to achieve professional results.” I found that to be true even when sewing approximately 7 layers of fabric and foam together. Technique is not to be ignored. This time I sewed from the side where I could see the previous stitches, except over the zipper.
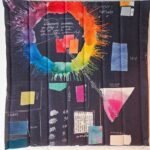
Pandora Charisma #2 front panel
I also prepped the front panel of the second Pandora Charisma. Yes, despite the swearing, I am making another. It is not at the top of the list, but I do plan to finish it. As a result, I prepped the pieces for the front panel, because I thought that if I wanted to put the machine through a hard test, this would be it. Amazingly, I sewed the entire front panel in about a half an hour (!!!) on the machine I am considering. It was amazing. The machine had no problem with multiple layers of pleather and I could really see the difference in the stitch quality. I wasn’t even using special thread.
Pandora Charisma #2 front panel detail
It isn’t perfect, mostly because I am not familiar with handling the machine. Still, I was thrilled with how well I did using the pleather. I really didn’t think it was possible to have an easier time sewing through that substrate.
I know I shouldn’t compare a brand new machine to an older, well loved machine, but I was really excited by the improvement by using a machine with a more powerful motor.
Pandora Charisma #1 & #2 front panel detail
Pandora Charisma #1 & #2 front panel detail
The above two pictures show the differences in the stitch quality. The Pandora Charisma #1 is on the left and #2 is on the right. Both show the same front panel detail. For #1, I upped the stitch length from 2.2, which is the default, to 2.5. It is still almost impossible to see the individual stitches. The pleather is almost perforated on Pandora Charisma #1.
I did not test the Janome M8 with the Pandora Charisma. I was getting tired and wasn’t up for it. I am told that both machines are the same with different housing, so I didn’t feel I needed to do it.
We’ll see what happens. I am inclined to buy one of these machines. I’ll have to wait and see.
**Obviously, you should shop at local quilt shops and small businesses. However, if you are too busy or can’t find what you need there, I use Amazon affiliate links and may be paid for your purchase of an item when you click on an item’s link in my post. There is no additional cost to you for clicking or purchasing items I recommend. I appreciate your clicks and purchases as it helps support this website.
After looking at all of the Enigmas, I decided to make more this year. I have been slowly working on two new Enigmas in between working on other projects. These are gifts, one of which will be sent off soon and the other is for later this year. I am ahead of the game to a certain extent. I think I plan to make 8 total this year, of which these are number 3 and 4.
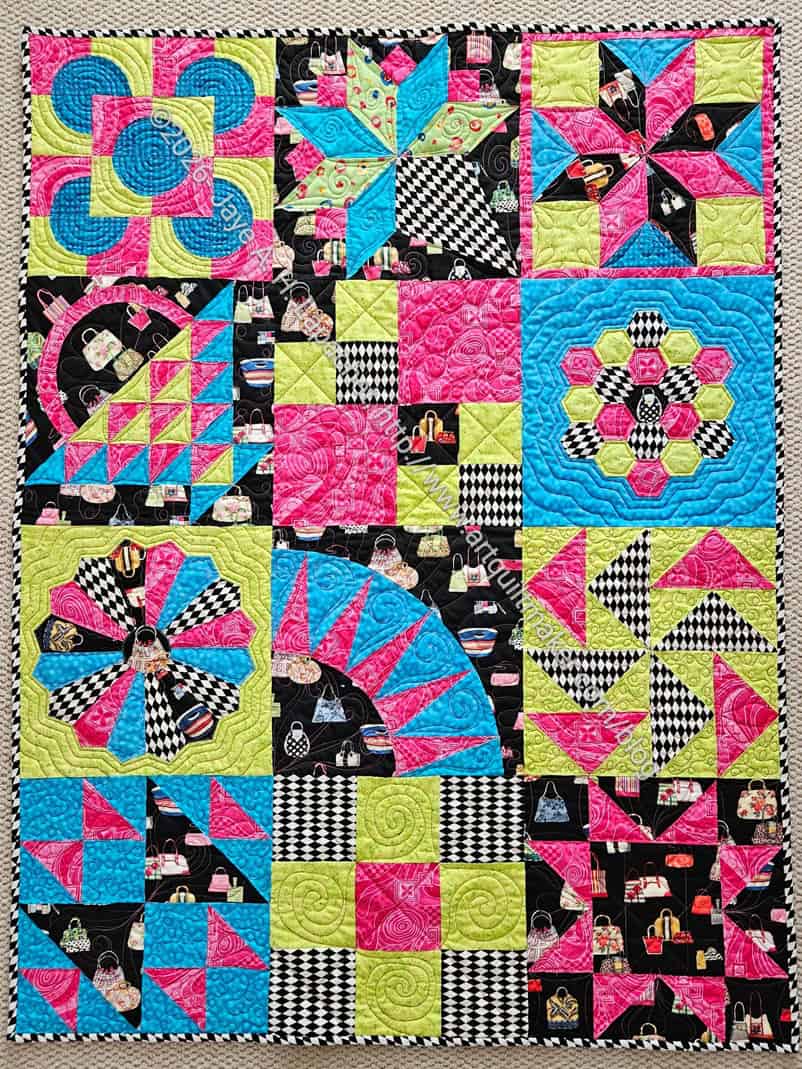
I realized that I had never posted the finished quilt. After all these months, it was time.
This poor quilt has had a time. Something about it makes the blocks get lost, the need to post about it get lost. I am not sure why as it is a good looking quilt. It is very different than the other samplers I have made. It makes me want to make another sampler with more crazy colors.
I started the Handbag Sampler when I was teaching Alice and Beth in 2006. 20 years! WOW! This is a real UFO and I am so glad to get it off my list.
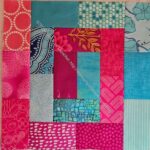
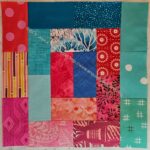
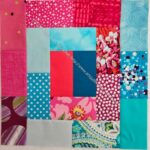
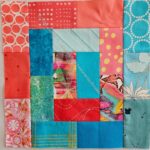
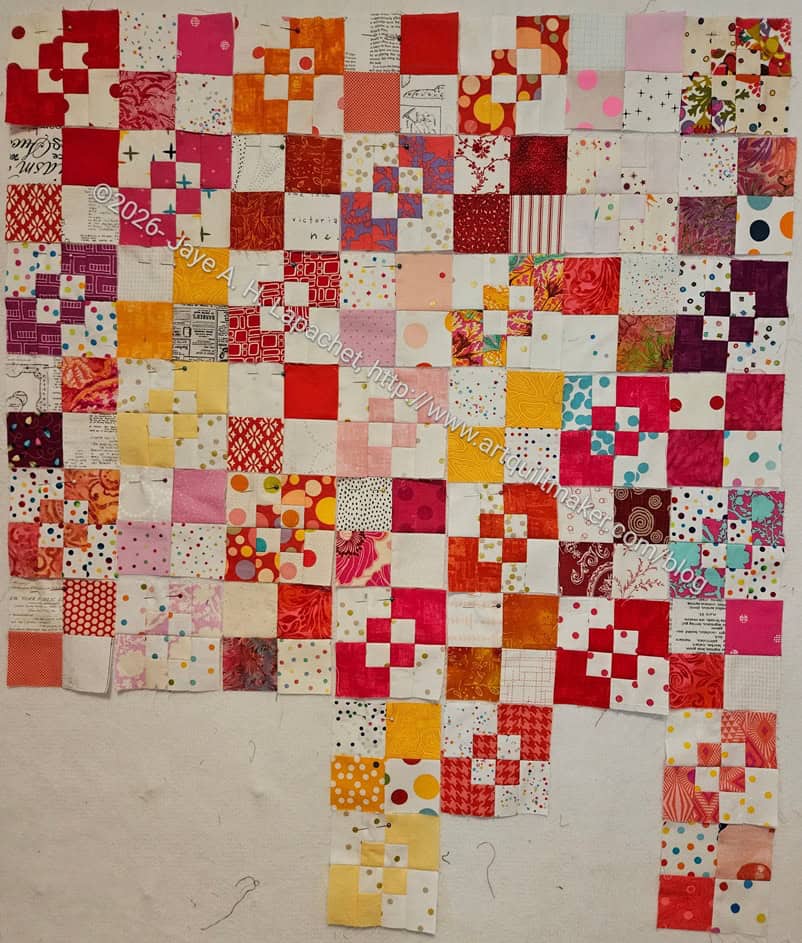
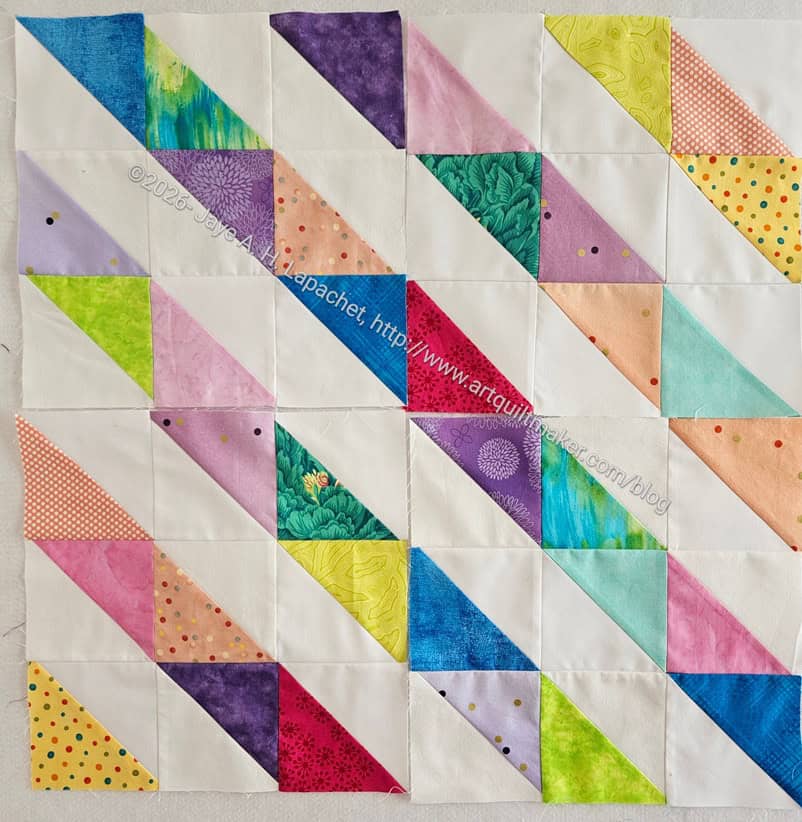
The Four Patch Fun blocks have been on the small design wall for a long time doing nothing, but annoying me. Annoying me, because I wasn’t sure what I was going to do with them.
I finally had a brainwave. I decided that I am going to divide my Four Patch Fun blocks into Warm and Cool like I did with the Warm Windmill blocks (and the cool!). Then I will give them to my friend who is raising her son’s children. One of the first quilts I made, Star Babies, when I bought my Janome 9000 was the quilt I made for her son.I was able to applique’ when I bought that machine, which was something I really wanted to do.
This seems like a good outcome for these blocks. Everyone needs a quilt.
I finished the Pacifica Quilter’s Club Lucky Blocks last week. It took me longer than I thought, but I am pleased to be contributing to another good cause.
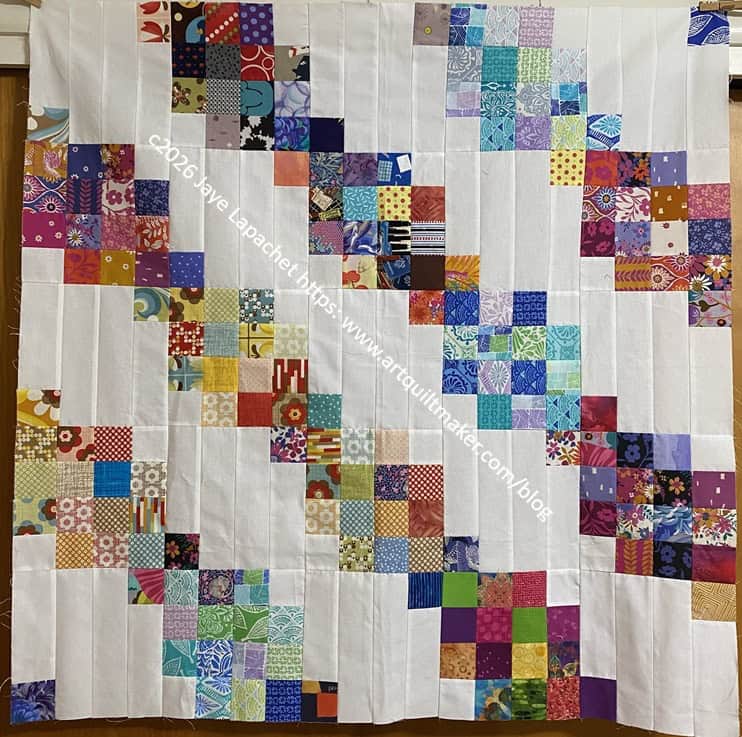
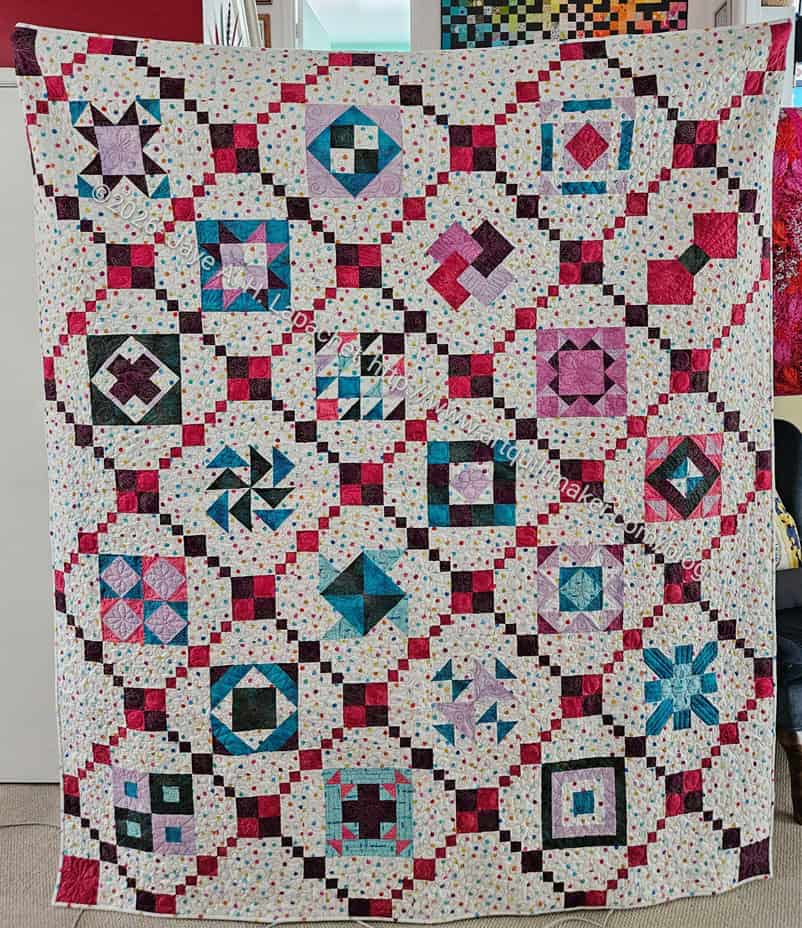
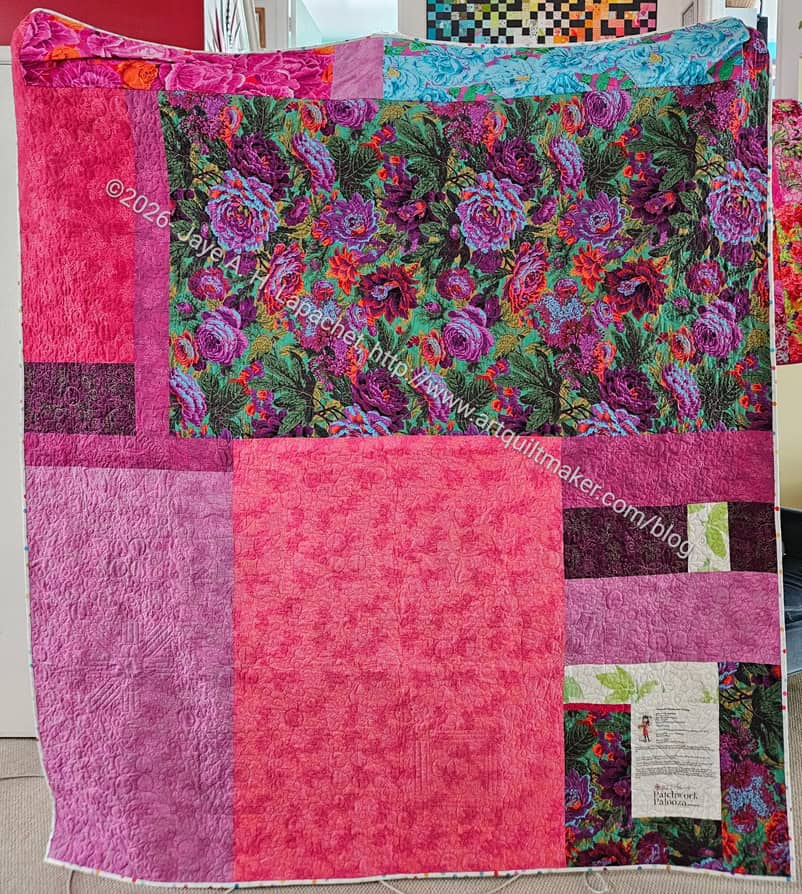
I finished the Patchwork Palooza top in January and now the whole quilt is complete: top, back, quilting, binding, sleeve. Done.
I am pleased with how I finished the edges. I think completing the diagonals looks nice.
There are blocks that I wish I had moved, but that will probably always be the case.
DH actually commented that he really liked this quilt. Maybe it will be a gift for him?
I will be entering this quilt into the Fair.
It must be some kind of record! I started this quilt on about September 6, 2025. Here it is, 6 months later finished. I am really happy and kind of stunned as well.
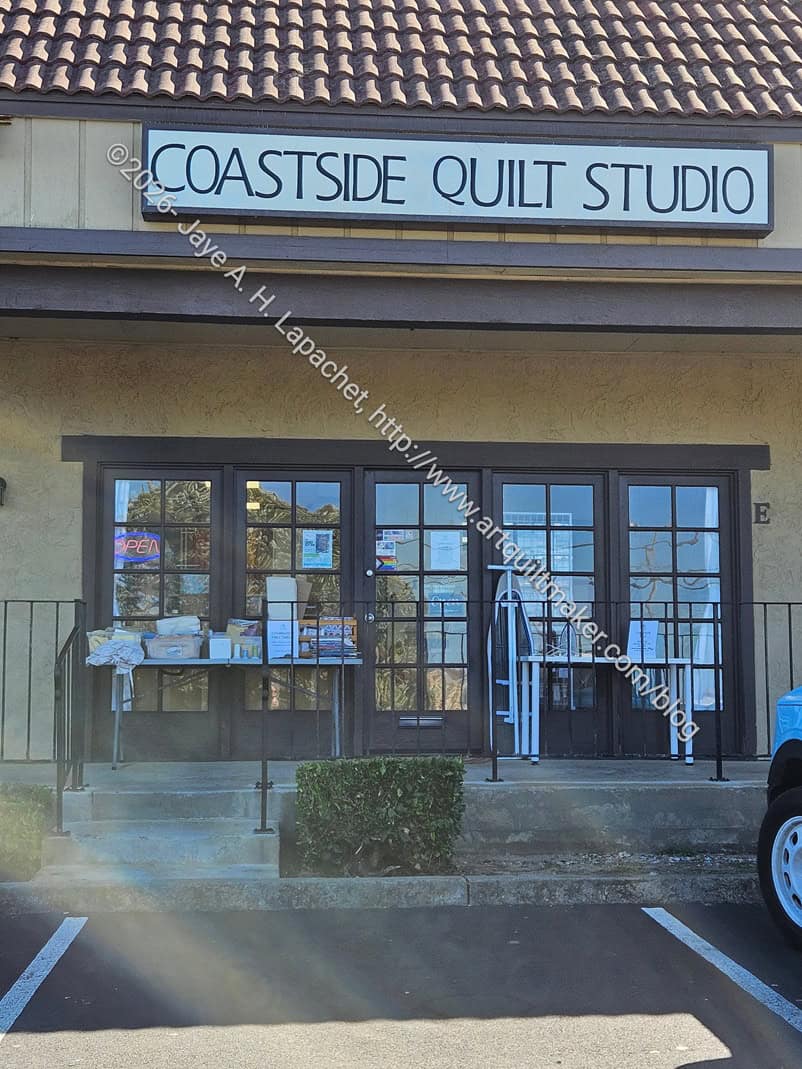
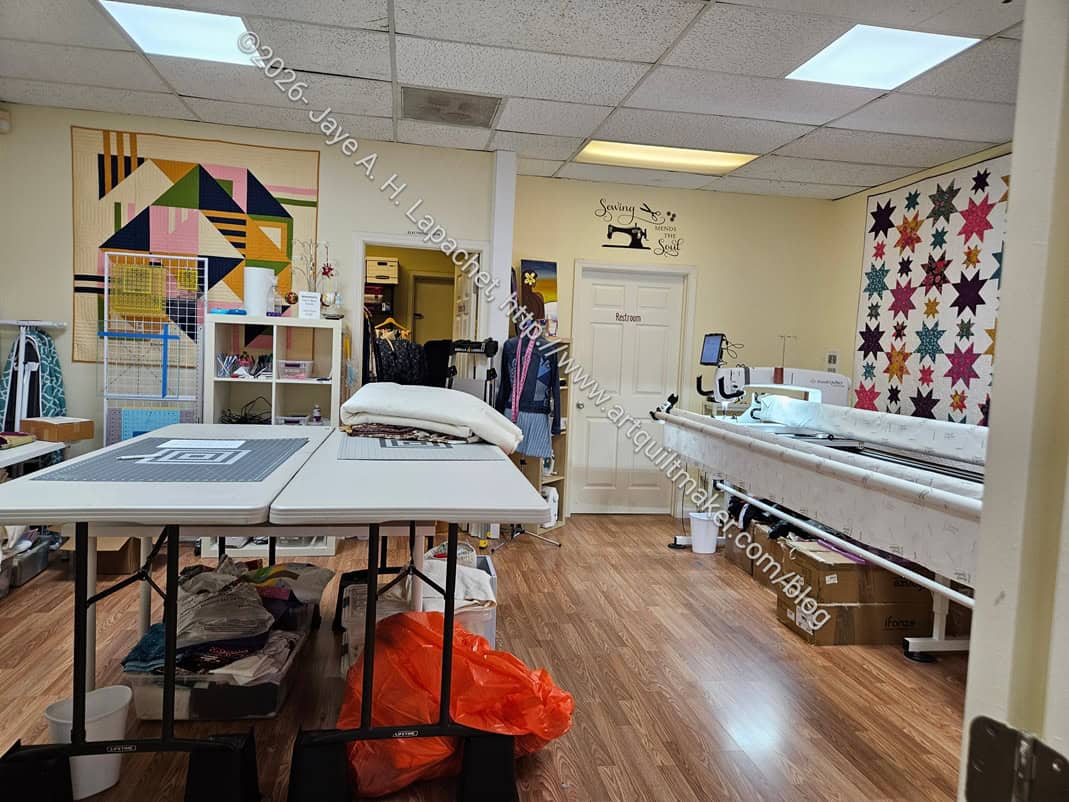
I finally made a trip to Coastside Quilt Studio. I had no excuse for not going except that I just didn’t make the time.
The shop started out as just a longarm studio where customers could meet Dana, the owner,and drop off quilts. Now that Always Quilting is closing Dana is adding a few more quilt shop type items. She has a little fabric, a few notions and she will add more slowly.
The shop has more regular hours now, so I decided to stop by on my way to lunch with a friend. OMG! The place is not hidden up in the hills as I thought, but 10 minutes from my house on the way to the grocery store. Amazing! It will become a regular stop for better or for worse. 😉
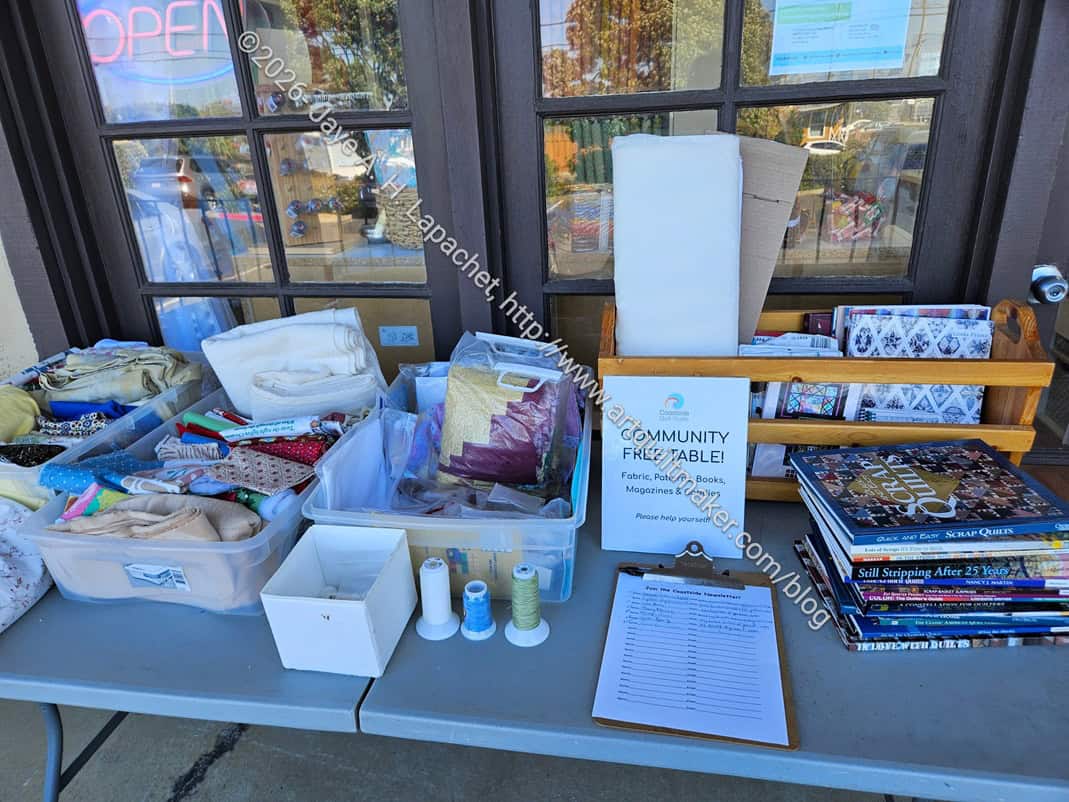
Coastside Quilts free table
Outside the shop, Dana has a free table. You can just walk up and take what you want: books, fabric, thread. Some of the items look like they came from the Pacifica Quilt Club free table. 🙂
I have never seen this type of service in a shop before and think it is a nice idea.
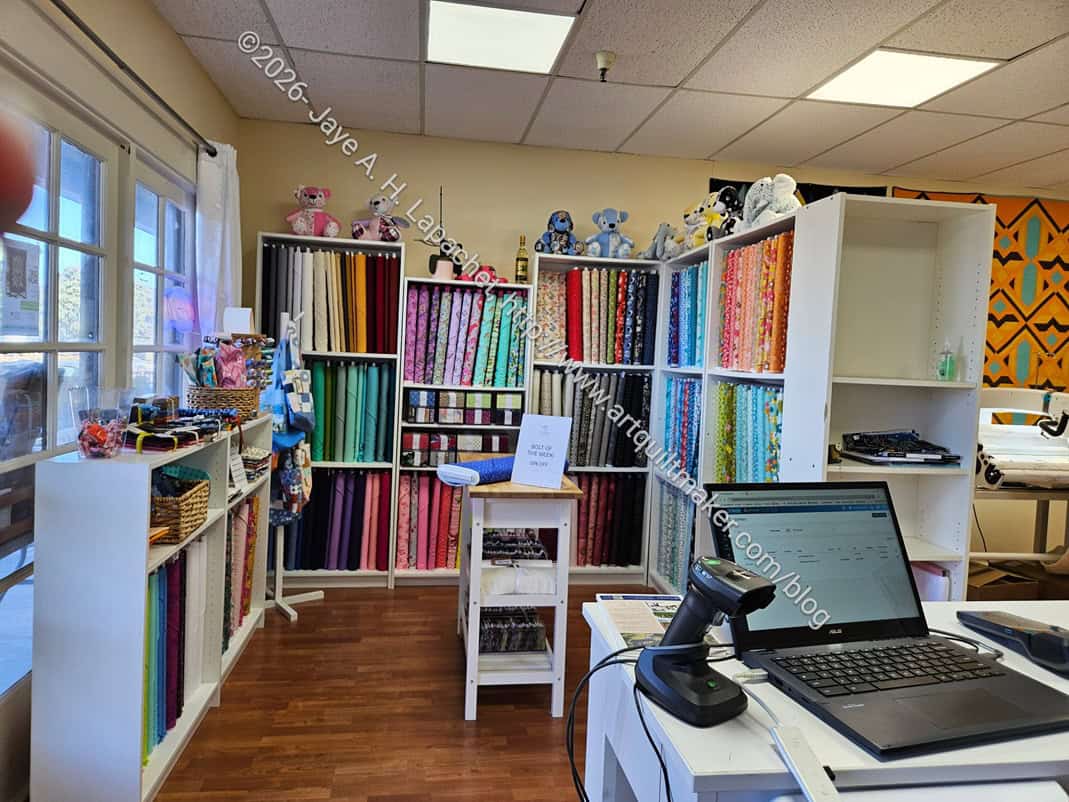
Coastside Quilts behind the counter
Inside the shop the walls are painted a nice butter yellow. The color is not a lot different than the color of my living room walls. It gives the space a nice warm feeling.
The area in the picture is “behind the counter.” I have never seen so many computers in a shop! The picture makes it look really messy, but I didn’t get that impression from my visit.
Coastside Quilts fabric area
Across from the counter is a small area of fabric. There was actually more than I thought.
She has some Tula fabrics, so I asked whether she was going to carry the Floral Reef vinyl, but she said no. It wasn’t a big surprise as Dana seems like a careful business person.
She includes a bolt of the week, which is laying on the table in the middle. It was a nice blue and I thought about buying some. Dana isn’t going to have a huge amount of fabric, she says, but since Joann closed she is having to rethink her business model. That has included adding a bit more fabric.
Coastside Quilts – Dana’s longarm
The business, as mentioned, started out as longarming only, so Dana’s machine – the one she only uses – is behind the fabric area.
It is a Handy Quilter Amara and she now has three of them.
The quilts she has around the shop are bright and cheerful.
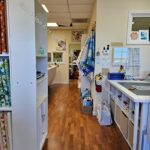
Coastside Quilts – hallway to Dana’s longarm
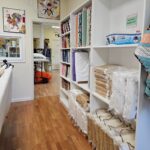
Coastside Quilts – hallway by Dana’s longarm
Visitors get to the back of the shop, the former classroom, by walking by Dana’s longarm down a hallway-ish space. She stores batting in this area, some Steam-A-Seam and a bit more fabric. I didn’t see any obvious 108″ wide backing fabric, but I also didn’t ask.
Coastside Quilts – classroom / longarm room
Dana bought one of the longarm machines from Always Quilting so now has a smaller classroom and three longarms. The one in the photo, right, is the second and the third is behind the wall on the right and to the right of the machine you can see. Dana is renting the machines out to people who are certified to use them. We talked about it and I told her about my experience longarming at Always Quilting. I learned on a Gammil, so would need to take the class again. I am shocked that I am actually considering it. DH asked if I could use Tim’s. That led me to think of another friend who might allow me to longarm certain quilts on her machine. It is shocking that I am actually considering it!
Anyway, this is a great store and I hope to become a regular visitor. Sign up for Dana’s once per week newsletter to find out longarm wait times, and other shop happenings.
Address: 1305 Palmetto Avenue, Unit E, Pacifica, CA 94044
Tel: 650-733-7200
Email: coastsidequiltstudio@gmail.com
Studio Hours:
Monday: 10am to 4pm
Tuesday: 10am to 4pm
Wednesday: 11am to 5pm
Thursday: 10am to 4pm
Friday: 12pm to 4pm
Closed Saturday & Sunday
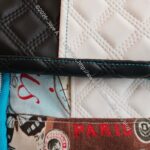
The sad part is that it only took me about an hour to finish it. The hardest part was turning it right side out as I had used a little too much interfacing.
I reflected on the stumbling block in an effort to avoid that particular problem in the future.
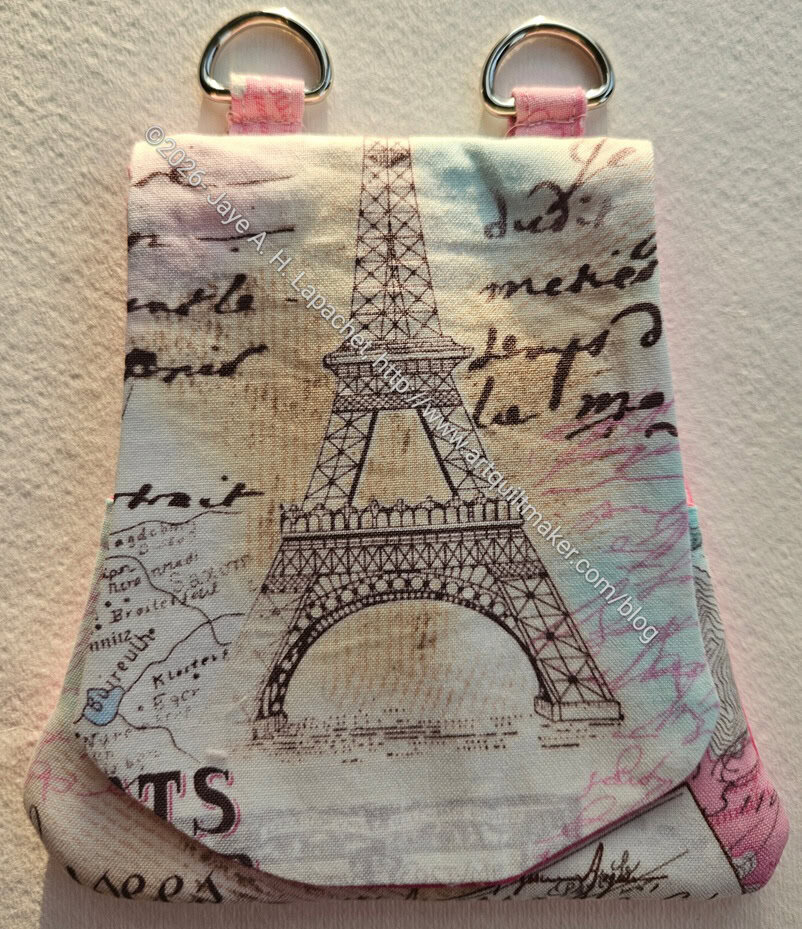
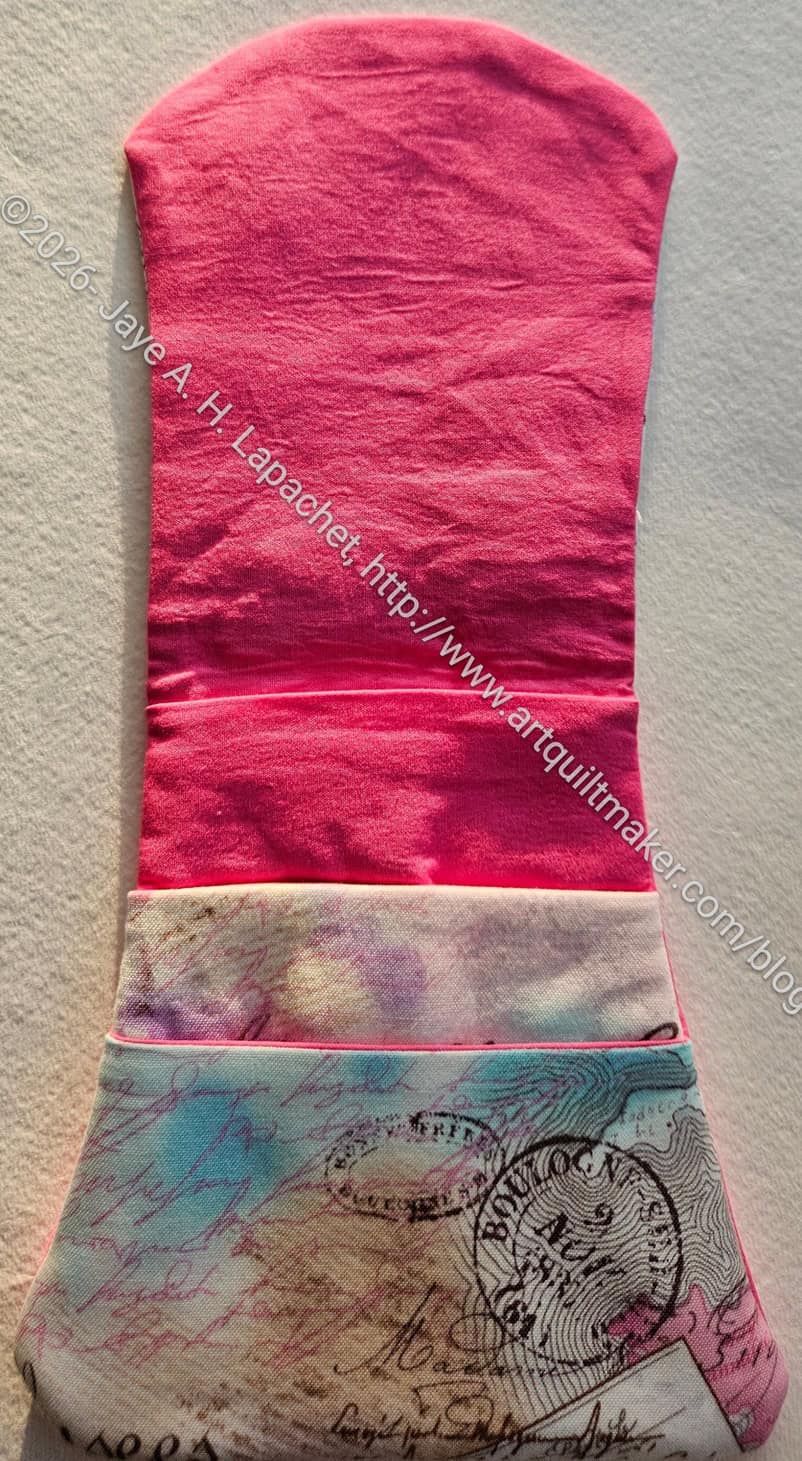
Paris Cell Phone Wallet – open
The issue was that I ran out of the Paris fabric before I could cut all the pieces. As you can see I decided to use an AGF solid, Festival Fuschia for the pieces where I didn’t have enough fabric. I think it looks fine! And DONE is better than perfect, right?
The reason I got back to it, however is the guild’s UFO challenge. I might grumble about it, but it is helping me to get some projects off my To Do list, which is a good thing.
Even though I don’t know what the next number will be I might start working on one of my other UFOs.