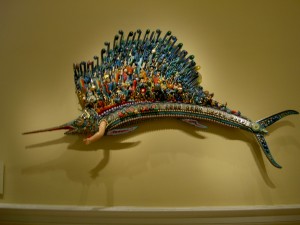
I thought this sculpture was a little creepy, but I really liked the clever encrustations.
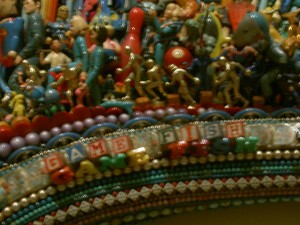
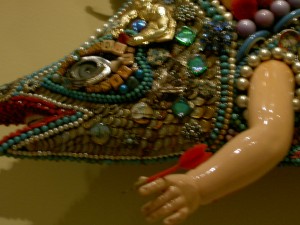
You can see some additional details at: http://www.flickr.com/photos/41738288@N00/22838189/in/photostream/
Commentary about works in progress, design & creativity
Use for posts written in 2009

I thought this sculpture was a little creepy, but I really liked the clever encrustations.


You can see some additional details at: http://www.flickr.com/photos/41738288@N00/22838189/in/photostream/
If you didn’t see the Cost Plus ad in the Sunday newspaper yesterday, go take a look. They are getting ready for spring and it is a very cheerful ad. They even have a grouping of Adirondack chairs that looks like my banner. Guess they’ve been trawling the web for ideas. 😉
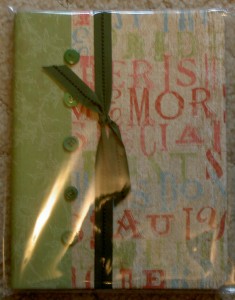
Recently, I received an email from Annie Smith, yes, podcasting Annie Smith. In better times, I left a few comments on her website and also gave a donation. She contacted me, because she felt bad for not responding to my comments. I try to respond to comments on my blog, but it isn’t always possible and I certainly don’t expect any other blog authors to respond to my prattling. Still, she contacted me and wanted to send me something, because she hadn’t responded. I told her it wasn’t necessary, but she sent me the journal above anyway. As I have mentioned, I write in a journal nearly every day. While this is not the style of journal I normally use, it might be nice to try something different. Regardless it was very thoughtful.
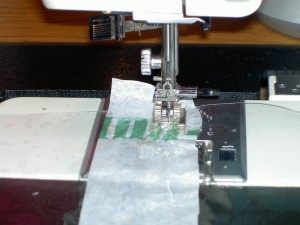
I wanted a sturdier tote bag to carry around. I decided to try to make a bag out of the clear tablecloth covering type fabric (is it really fabric??). I thought it would also be cool to have a clear plastic bag even though I would have to be careful what I put in it! I felt justified on this thought during the past week when I was carrying about my soaked flower bag. As you can see from above, I haven’t, yet, been very successful completing the clear plastic tote. The problem is that I cannot sew this tablecloth fabric on my machine 🙁 . I tried it normally, but the feed dogs wouldn’t feed. I tried backing it with some slightly heavy tissue paper, figuring I could rip it off later and he machine still wouldn’t feed. I even asked at the store where I bought the fabric and they said it should be no problem. Above is a picture of me failing at sewing the clear plastic bag. Unless any of you have any brilliant ideas, I am going to buy some colorful staples and staple it together. Not sure how sturdy it will be, though, and I am concerned that the backs of staples catching on things.
I realized that I hadn’t posted or written about the Flower tote. At least I couldn’t find any reference to it.
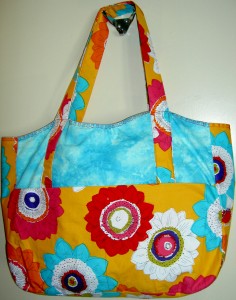
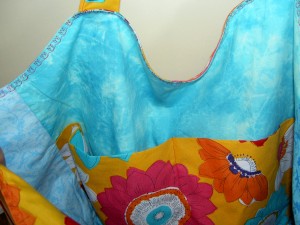
I finished this tote at the beginning of January. It is the first tote that I have made using one different fabric for the side so the pocket fabric stands out. I am pleased with that way of highlighting the ‘main’ fabric. It is a pretty easy way to do so. Basically, I cut the same numbers of fabrics out of two different fabrics as normal. Then I used one side piece in the flower print for an inside piece and one blue side piece for the outside side piece that gets the pocket attached to it.
From the City Quilter Newsletter: “If you or any friends will be in New York City the weekend of March 21/22, I thought you’d like to know of a wonderful quilt show put on by the major Manhattan guild, Empire Quilters. It is entitled Urban Inspirations, and takes place at the the Fashion Institute of Technology, a major teaching institution, which is just around the corner from us.” If you would like to subscribe to the City Quilter newsletter, email them at: info@cityquilter.com I can’t attend this year, but would love to see photos you take from the show.
When I started working on the Tarts Come to Tea again I really could not remember how to machine applique’. It was the strangest feeling. I knew the general principles (trace pattern, iron it on fabric, satin stitch around the shapes), but all the details had left my mind. I felt like I had to start over.
Being a good librarian I looked at some books, but could only find references to needle-turn and raw-edged applique’. I fumbled around for awhile and came up with the following process.
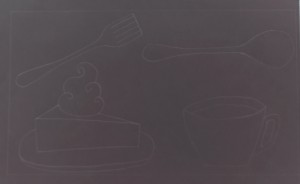
First, I draw the pattern out life size on a white sheet of sketch paper. (I know this doesn’t look like white paper, but see the Weekend Work post for an explanation). I usually draw in pencil to start.
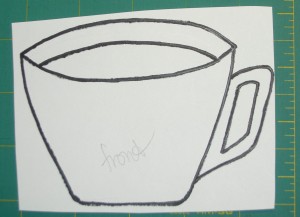
Next I draw out the patterns on individual smaller sheets of paper. If there are parts that need to be in different colors or need to be separated for some reason, then I make separate patterns for them. For example, I made a separate pattern each for the cake, plate and whipped cream, above.
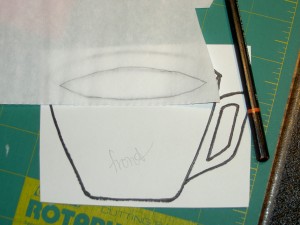
I put the Steam-a-Seam 2, or other fusible of your choice, over the pattern and trace the pattern onto Steam-a-Seam 2.
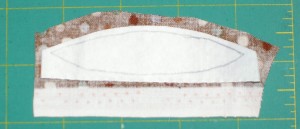
After that is done, I trim the fabric to the approximate size, then press the SAS2 (or other appropriate fusible) on to the wrong side of that piece of fabric.
Finally, I put all the pieces together, press the fusible on to the background and satin stitch around the edges.
See the Fusible Applique’ tutorial for more information. See the Machine Applique’ using Directional Motifs for more information on making sure your designs go the right way.
Last weekend, after longarming all day on Friday, I spent time on bindings. I made and machine sewed the bindings for Eye Spy and the Crazy Test. Last night I worked a bit on doing the hand sewing on the Eye Spy. Neither of these quilts will have sleeves, so once the hand sewing is done, they will be done.
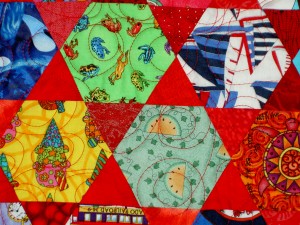
The pattern I used to quilt this quilt with is called Double Bubble. I wanted to use the same pattern as Thoughts on Dots, but I didn’t remember to look carefully at it before I left. I am pleased with this pattern and may used it again for the FOTY 2008 quilt.
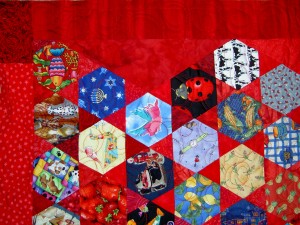
[click photo to view detail of quilting]
Practice does make perfect as well. I thought I did pretty well the first time, but my stitches improved immensely this time. I didn’t add a practice piece to this quilt and it turned out that I didn’t really need it. I worked really hard at going the same speed regardless of what I was doing. I didn’t always succeed, but I improved.
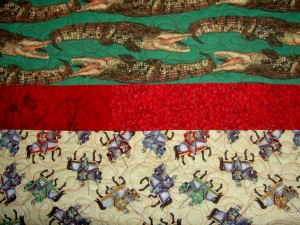
Here is the famous crocodile fabric quilted. I think using it worked out really well.
My next longarm day is in April and then I have no more quilts to quilt, so I need to get on the stick if I want to keep up my momentum. We’ll see.
|
What design do you see when you think of bubbles?
There is more information on the Creative Prompt Page.
I worked on the Tarts on Sunday. I dragged myself to the machine and was resigned to a miserable afternoon. I am pleased to report that I had a good experience with Machine Applique’ and could barely tear myself away to attend to life. So, I think I will be able to move on with this project. I am only committing to one more block ;-), but it is a start.
As I mentioned previously, I was working on the cake block below. You can see the blank block in a previous post. It sat on the wall glaring at me and taunting me while I worked on the pattern. I fiddled and moved things around quite a bit before I got an arrangement that I liked. The pattern took me a long time to get right.

You may think that this is a strange way to make a pattern or that I went to an architectural copy place and had them make one of those blue architectural drawing copies. Actually, it is just pencil on white sketch paper. It was hard to photograph and, thus, very hard to see no the screen so I inverted it so you could see it better.
I plan to do a post on my machine applique’ process sometime later.
I did find the machine applique’ process to be quite fiddly. I have been in a piecing frame of mind for so long that it took me awhile to get into the groove. Once I got the pieces cut and was satin stitching, I found it to be a pleasant process. I liked the puzzle aspect of figuring out which piece went on first and what line should be stitched over, etc. I was also able to try Steam-A-Seam Lite and Steam-A-Seam Lite 2 for the first time. I liked the results! I am pretty pleased with how the block turned out.
As I stitched, I got an idea for the block for the upper left hand corner. As soon as I had a free moment I worked on that design as well. Stay tuned!
 Bead One, Pray Too: A Guide to Making and Using Prayer Beads by Kimberly Winston
I heard about this on the CraftSanity podcast and it sounded really interesting, so I borrowed it from the library. The author said that she gave an inroduction to a variety of religions in the course of the book and crafting sounds like a great way to learn about religions of the world!
 An Illustrated Life: Drawing Inspiration From The Private Sketchbooks Of Artists, Illustrators And Designers by Danny Gregory
Danny Gregory has been recommended to me many times, especially by Amy of the Creative Mom podcast, a very creative and high quality podcast. I bought the book she uses as her bible (it sounds like), The Creative License after I had reserved An Illustrated Life at the library. Of course I received them all the same week. I think that this book will be by the Jennifer New book, Drawing From Life: The Journal as Art, but I will let you know after I have given it a thorough going over!
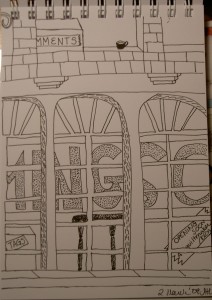
Despite the fact that this is supposed to be visual, I find myself wanting to tell a story with the pictures I am drawing. Actually, I am telling a story; I just don’t know where the story is going right now.
I am thinking of trying a thin Sharpie next time.
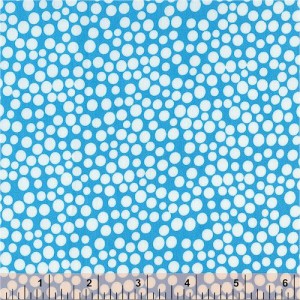 I bought a lot of this turquoise fabric (Botanical Pop from Baum Textile Mills/Windham Fabrics) – probably about 6 yards and made tote bags out of it. Now I want to make another and it so old (January 2008?) that nobody has it. I am hoping that one of you will have it and bargain with me for it. I would like at least 1.5 yards, but 2-3 would be better.
You probably remember the search for that Denyse Schmidt Flea Market Fancy fabric from May of 2007 in which Julie found the fabric at a random sore in her area. I am hoping that she or one of you will have the same good luck!
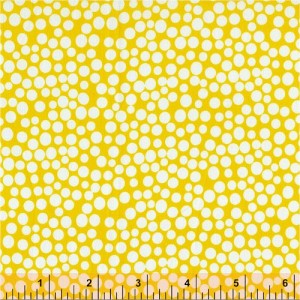 I don’t think I ever saw the yellow, but would like some of it, too. A little piece is fine. If any of you see it or have access, let me know. Thanks!
Fortunately, today was just the kind of weather I enjoy. It was cool tending towards cold, but clear with some big fluffy clouds around. The light was really gorgeous and it helped me get into a calm mood before I got to the machine.
I spent my day quilting the Eye Spy on the longarm machine. In my February 8 post, I old you that my next longarm session would be on March 2. Instead I went today. My assistant for Monday bailed and Friday works much better for me, so I changed the date. As I sit here, the Eye Spy is completely quilted. YAY!
I woke up with one of those “who stuck a knife in my temple/forehead” kind of headaches. They happen periodically especially during times of stress, but I wasn’t happy about it. I drank a whole bunch of water and caffeine and ate more protein than should be legal so I could go on about my day. Amazingly, longarming is a good antidote to a headache!
I was more familiar with most parts of the process this time and the session went a lot better. I completed a larger quilt in a slightly shorter amount of time. I didn’t have to stand as long and it was slightly less expensive.
I used an easier pattern which contributed to completing the larger quilt faster. I tried really hard to manage a consistent speed and to make the designs larger. As the day went on I did tend make smaller motifs, which I will have to work on.
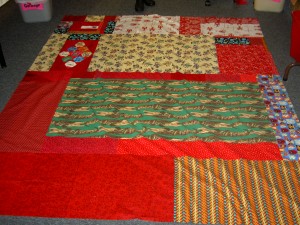 The crazy part about the whole process was the back. I spent last weekend, when I wasn’t shopping for headstones and wasting time, making sure the top, which has a lot of bias, was stable. I only started the back and figured I could do it this coming weekend. Then I changed the date of the longarm session and totally forgot I hadn’t made the back. Huh?? I don’t know what I was thinking. Fortunately, I remembered on my way home. I spent the evening, in between life stuff, making the back. They never go together as quickly as I think they should, but it all worked out.
During my last session, I felt like I had a really steep learning curve. This time, I had more of an idea of what was happening and knew, basically, what to do when prompted. By the end of the day I was starting the rows myself without assistance. I really in absorption mode – trying to absorb the process. I didn’t take as many notes. I still needed a lot of help and reminders, but I have made a lot of progress and was much more confident. I do want to go over my notes tonight and see how they jive with what I remember now that I have two sessions under my belt.
Use the word ‘excitement’ to create this week’s doodle or art work.
I updated the Creative Prompt page with some additional resources.
I don’t know where this month has gone. Frankly, I am glad February is coming to a close, but I still wonder what happened to the days.
My next longarm day is March 2 and the Eye Spy is in line to be quilted. As a result, I needed to make a back and get the Eye Spy in shape for finishing. I put the diamonds in to fill in the diamond shaped space, so that I wouldn’t have to hack through any of the hexagons (which is what most patterns recommend). I didn’t want a zig zaggy border, so I started out by cutting off the excess from the diamonds. I had intended just to leave the edges straight after cutting – no borders.
While cutting the diamonds in half, I realized that the middle of those diamonds was one big bias edge. This brand spanking new bias in addition to 3 sides of each hexagon being on the bias was asking for trouble during the quilting process. The top needed some stabilization, so I added some borders and corners to the odd shaped corners of the top.
The little star printed piece is the patch I had to insert into the corner to make the corner a 90 degree angle. You can see it really well above.
Above is a picture of half of the top. The quilt top is another monster and I gave up on moving furniture to fit the whole thing into one picture. I am going to have to think up a way to photograph whole quilts, especially these huge things I seem to be making.
I used a new (to me) method of measuring for borders. I measured width-wise (across) and lengthwise (down) in three places on the quilt and cut the borders to the average size. I did have to ease, but the top is flat and I am happy about that. I found one little tuck that I will need to fix before the longarming. All in all it worked pretty well.
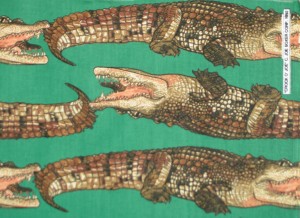
I acquired the crocodile fabric a long time ago, perhaps in the early 1990s from a woman named Joan who was getting rid of everything. It is a Joe Boxer fabric and I never saw anything like it. I also never heard of Joe Boxer selling fabric, but they totally should, because their fabrics have such a sense of humor.
At one point, I thought I would cut out the alligators (crocodiles??) and applique’ them on something, but the inspiration never struck. Also, I only have about a half yard, which limited what project I could complete using the fabric. I came across the fabric over the weekend and proposed it as a backing fabric. The Child took a liking to it, so I will use it as part of the backing. Shopping in my fabric closet can be fun!
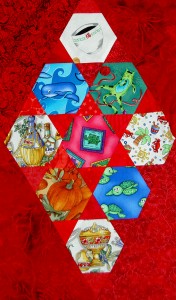
I had some leftover hexagons, so I put some straight edges on them and will also use this piece for the back. I need to find a nice way of making this bit play nicely with the crocs.