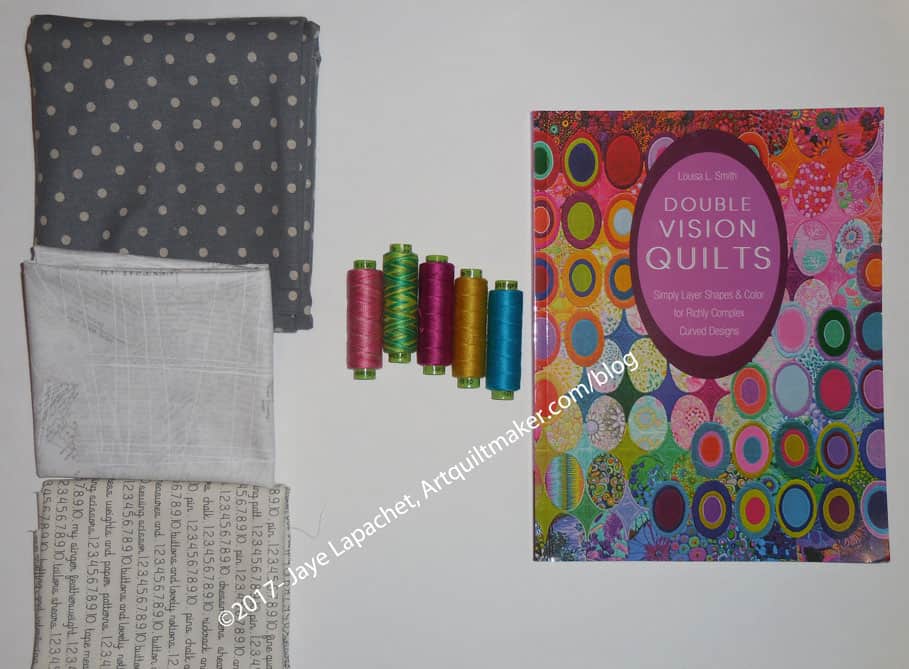
In Portland, I bought some fabric for the Poolside Tote. And the pattern. I thought I had the pattern, but I didn’t, so I bought that as well.
I really found the perfect fabrics for two totes. The text print is home dec weight and will be the inside.I hope my machine can handle it. I’d love this fabric for some chairs in my living room.
Stitch Purchases
The dots are scheduled to be used for the outside of the totes. I have some grey already that will make great straps. It might be too many dots or it might be super cheerful.
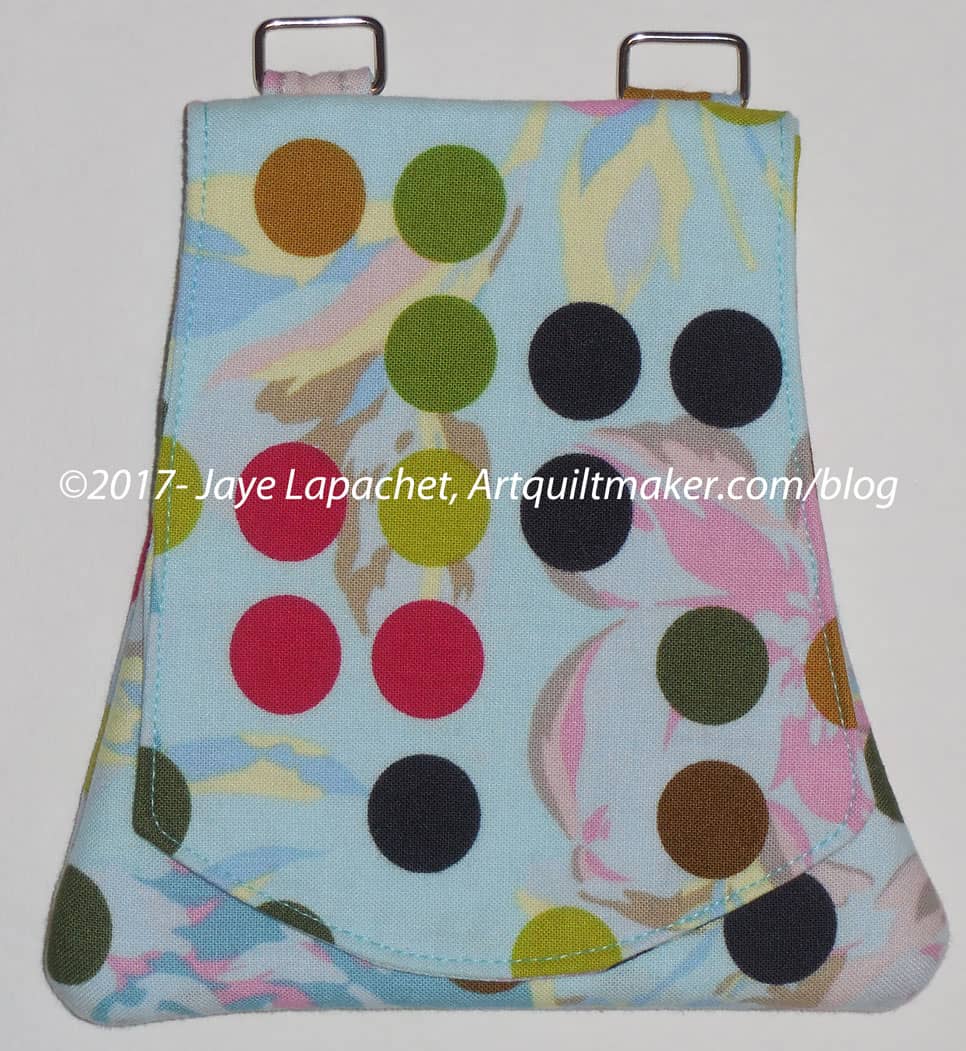
I was on a roll after yesterday’s finishing of the Red Dot Cell Phone Wallet. As a result, I decided to add to my fabric usage report by finishing the Habitat Cell Phone Wallet.
I forgot to mention that this goes with the other pattern by Valorie Wells called Little Wallet. I have made a few of these as they are really useful when giving gift cards and don’t take very along.
Habitat Cell Phone Wallet – open
This goes with the same dress pattern as the Red Dot version. No pockets in a dress or tunic is something I will avoid at all costs in the future.
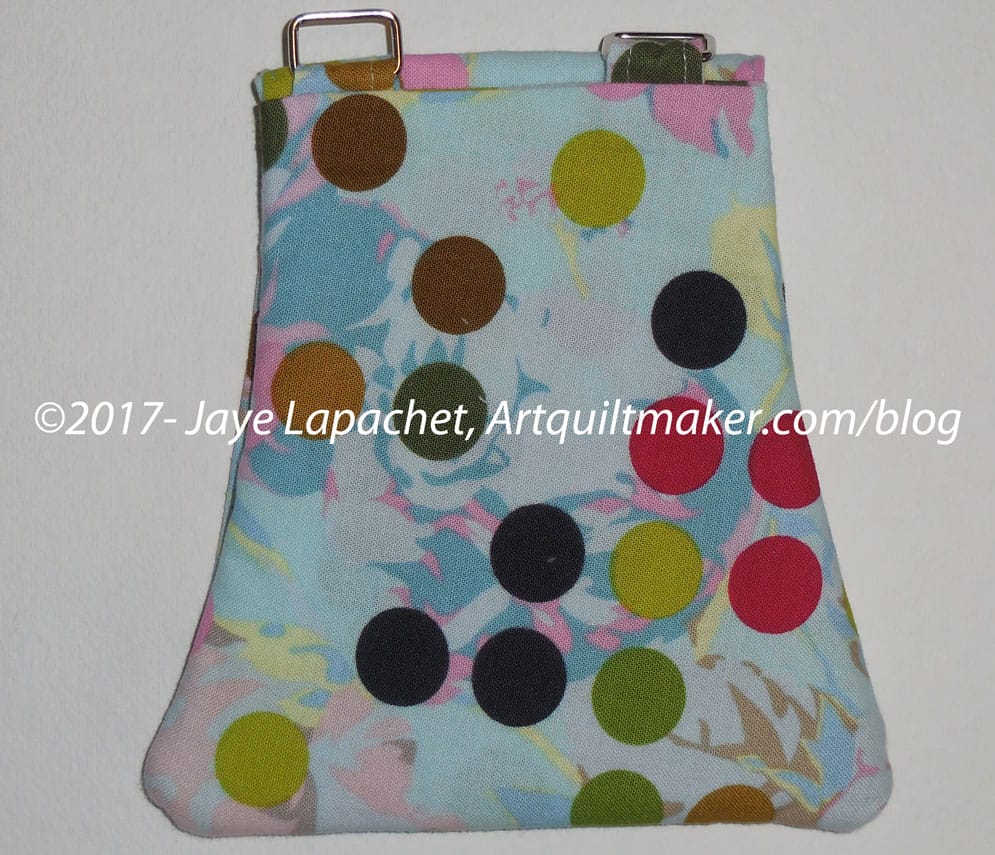
This fabric is an older one by Jay Carroll and I had enough scraps from the dress to make this. You can see the details of this version much better because of the asymmetricality of the fabric motifs. The piece has four pockets (one of which is in the back and you can see in the last photo), all with graduated sizes.
I did not put a closure on the flap, though the pattern calls for one, because I wanted easy access and wasn’t expecting to keep anything of great value in it.
Habitat Cell Phone Wallet – back
I find that I do not need to interface all but the covers. The rounded corners are quite bulky and difficult to turn. I did not topstitch the bottom part of the piece. I stuck to the flaps as my needle would not go through those corners no matter what.
I have a black one I want to make and may try the fabric strap. I also have a green one in pieces. I need to find the pieces and sew that one together.
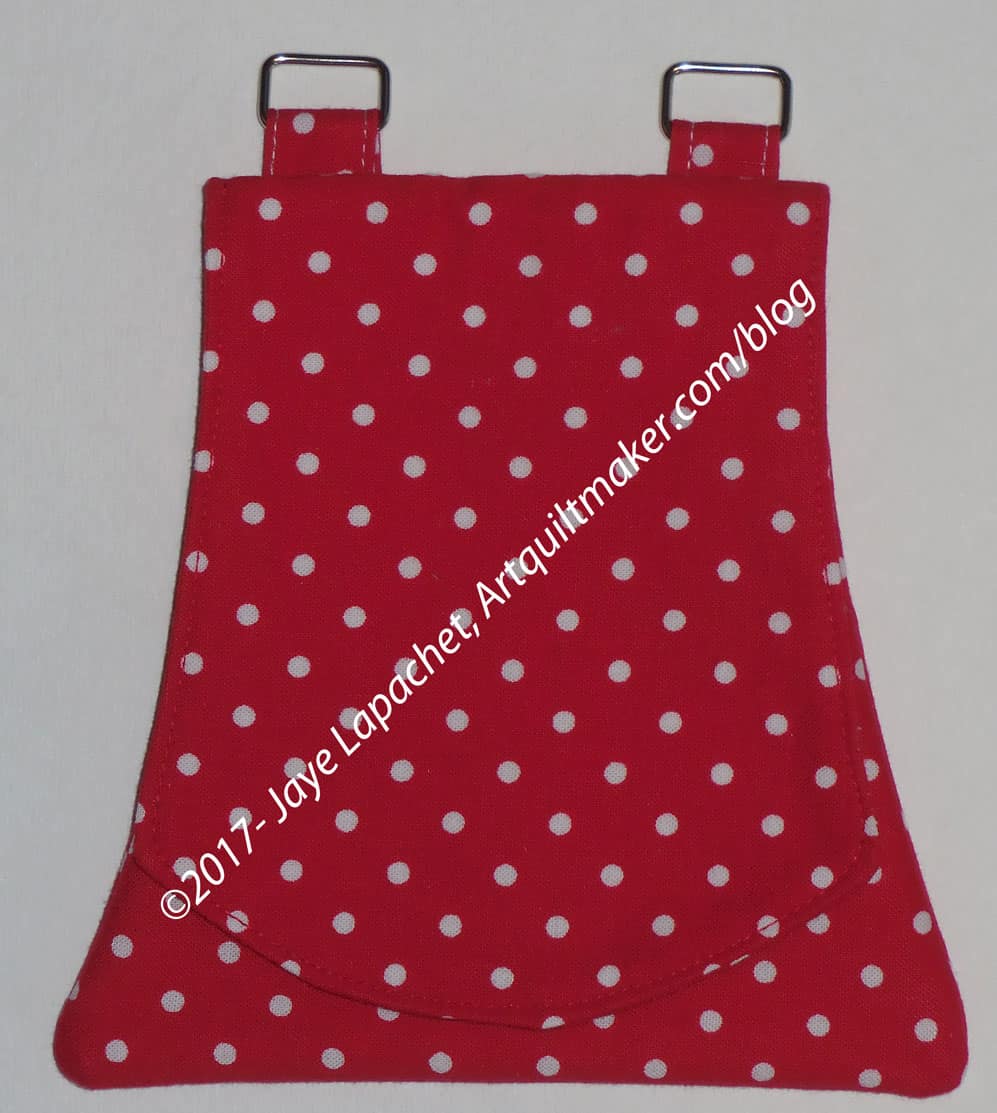
I decided to wear my red dot dress to Easter, despite the rain. That meant no pockets so I needed to finish the Red Dot Cell Phone Wallet. It had been languishing for months and only needed some topstitching. I sewed the topstitching and sank the threads really quick Easter morning before we left for the party.
My SIL noticed right away and I was pleased to have finished the bag. It was very useful for its intended purpose.
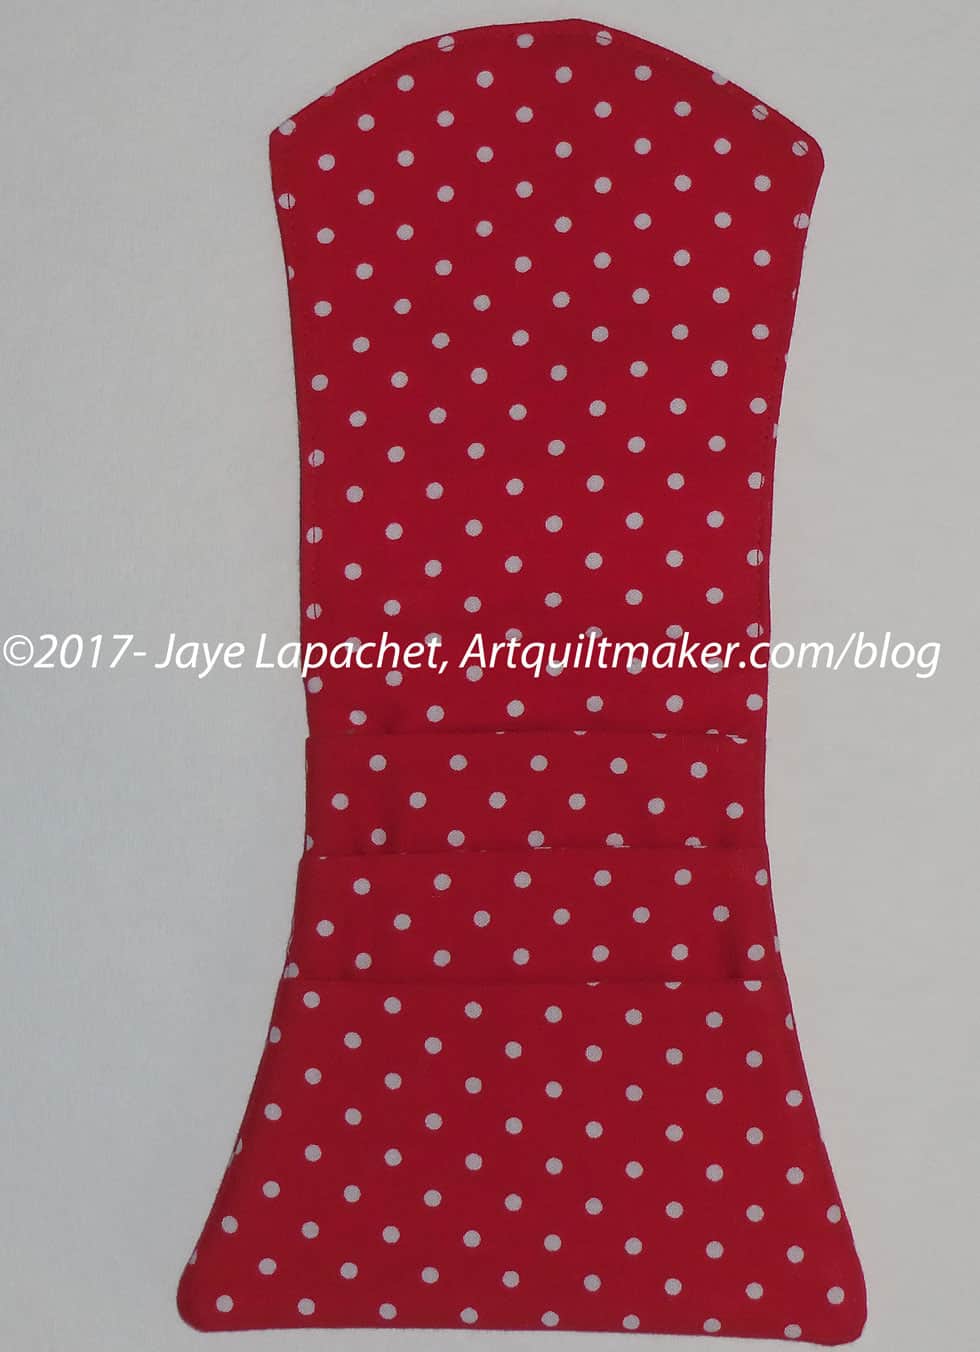
Red Dot Cell Phone Wallet – open
The pattern calls for a strap made from fabric, but SIL gave me the idea of an interchangeable strap. I bought those small rectangular ‘rings’ and a long chain, which I use for this one and two others I have. There are two things I don’t like about the chain. First, it stands out from the dress when I wear it. Second, it is of a sufficiently intricate nature as to get caught in my hair when I am not careful or needing a haircut. If I make more, I may make straps. We will see.
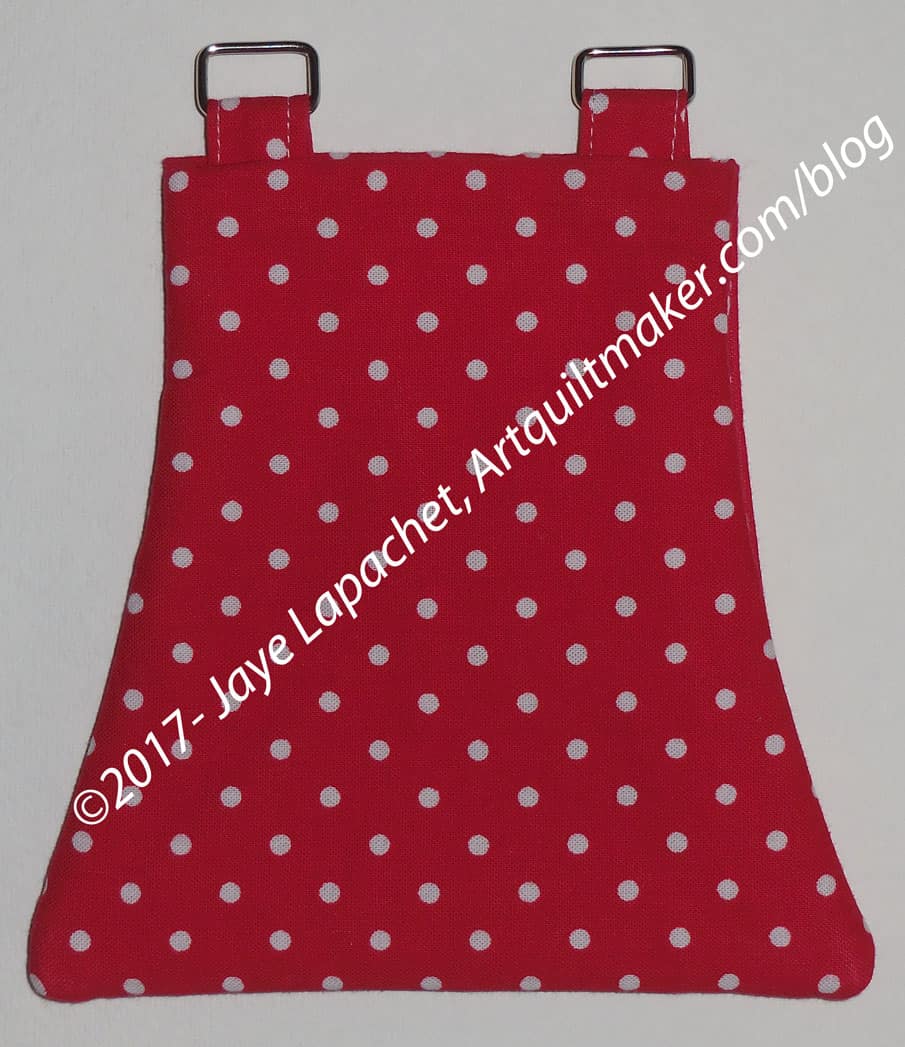
Red Dot Cell Phone Wallet – back
It is a pretty easy pattern and useful for the purpose of providing a pocket in a dress whose pattern does not lend itself to pockets. There are several pockets for cards, though I only use it for a hotel key and cell phone. I have put my keys in there, but my car keys are too bulky because of the clicker for DH’s car. I toss them in and they ruin the slim line of the bag.
After wearing the dress, I think I will bring it with me to Grand Parlor to wear at one of the less official events.
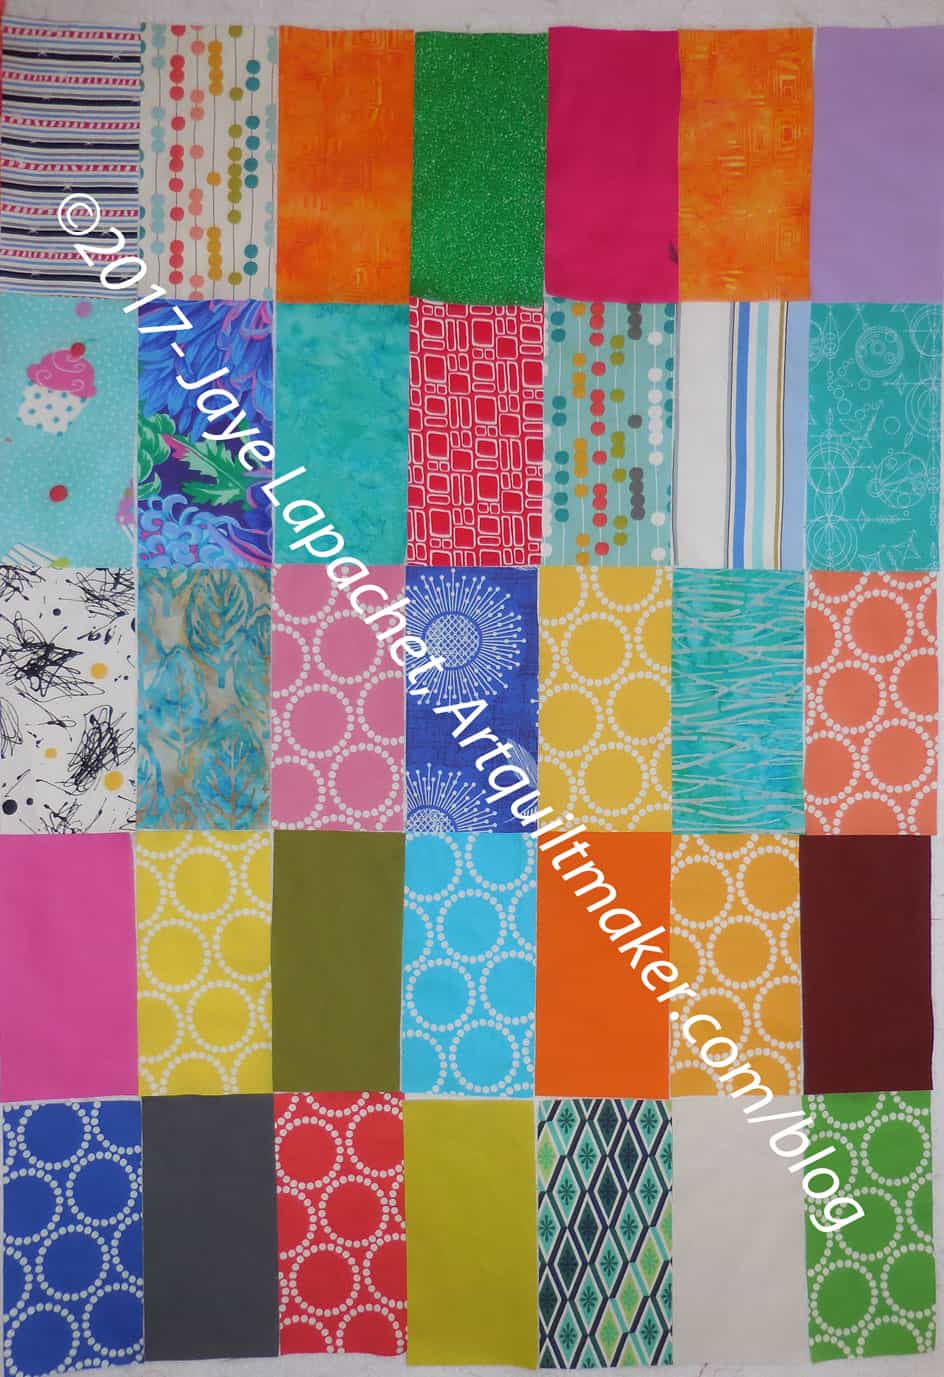
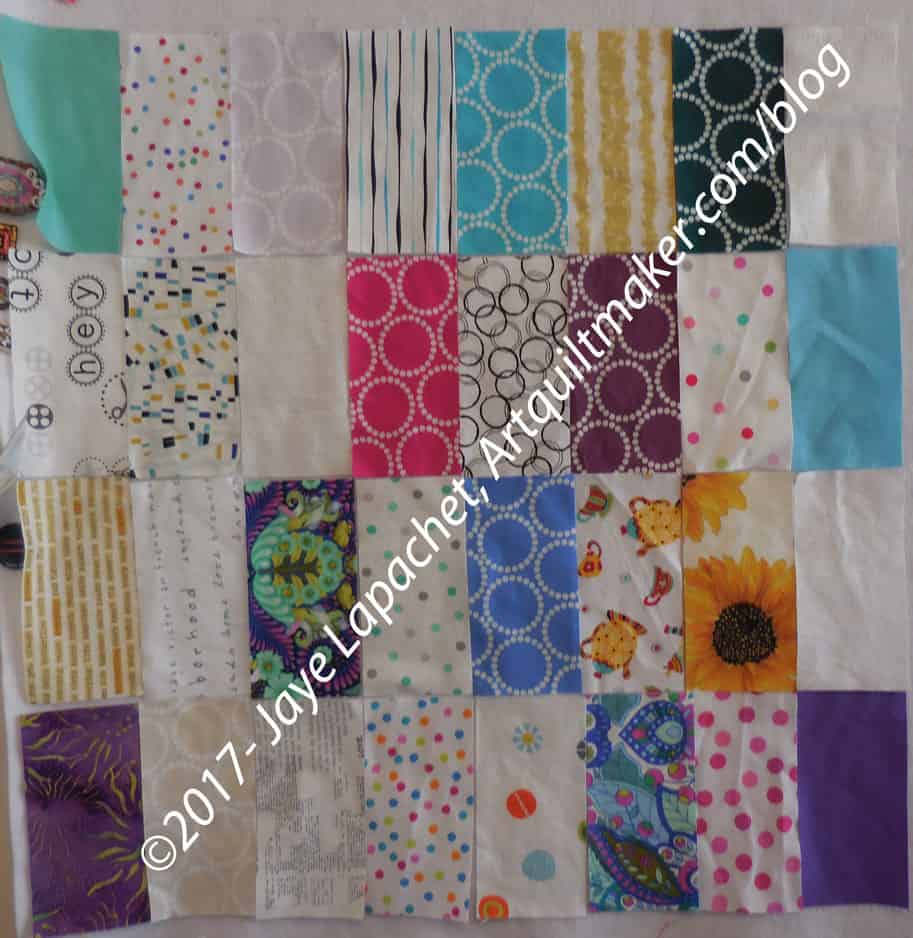
After not cutting for a long time, I am on a jag. Here is the most recent group. They are clear and cheerful. I am pleased that I finally have so many of the mini Pearl bracelets washed finally. I am thinking of making another Sew Together Bag with them.
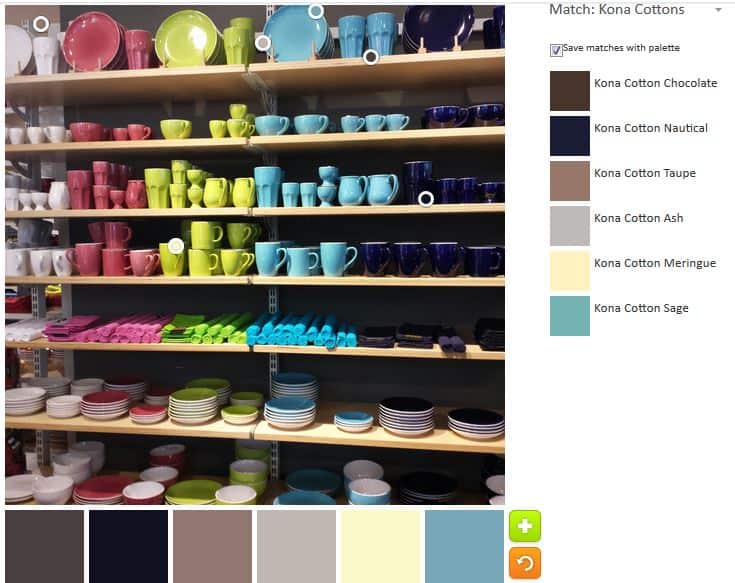
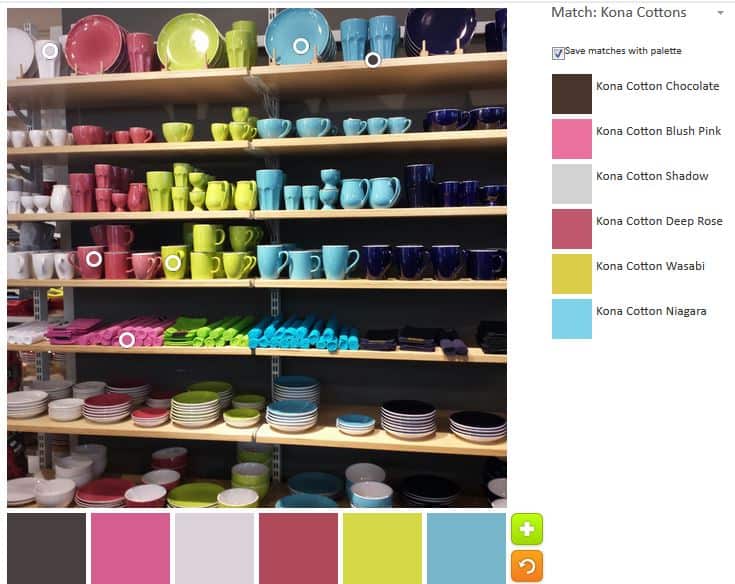
I am working on the next Creative Spark, but am not quite finished. I thought I would give you a preview with today’s ColorPlay Inspiration photo.
ColorPlay: Tableware default
Once again the default was a disappointment. More neutrals. This is a colorful photo and all I get are neutrals.
I wonder what the algorithm has against colors? Of course, it could be that the algorithm clusters together towards the top automatically. I noticed that the circles don’t go towards the bottom in the default.
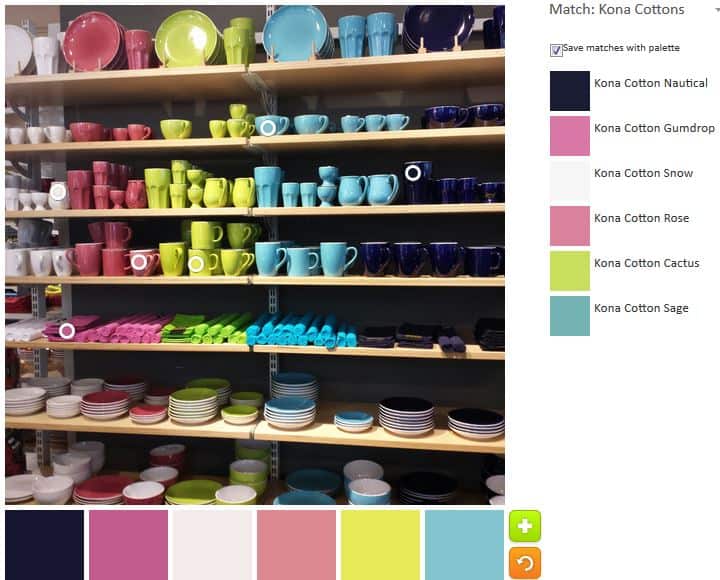
ColorPlay: Tableware 2
The second option was much better. Of course, I moved the circles around and picked the colors that I like and moved the circles around and came up with a very nice palette. I want to just stop and rest on my laurels.
Look at those pinks and the turquoise! The Kona Wasabi is an added bonus.
ColorPlay: Tableware 3
With the third palette, I tried to get different shades and tones of the same hues as in the second palette. I was moderately successful.
The Sage and Cactus are a good combination, though the Cactus looks a bit yellow in the lower part of the picture. I also like the combination of Deep Rose, shadow and Blush Pink. I like the three of them together.
ColorPlay: Tableware 4
I made some minor adjustments to the fourth palette. The colors are a little dustier than I normally like, but I think this might be my favorite palette. the Regatta blue is a very good addition.
It occurs to me that I could make a palette out of many or all of the colors from all of these palettes.
The Palette Builder is a great and fun tool. Try it out! Let me know if you make anything with any of these palettes.
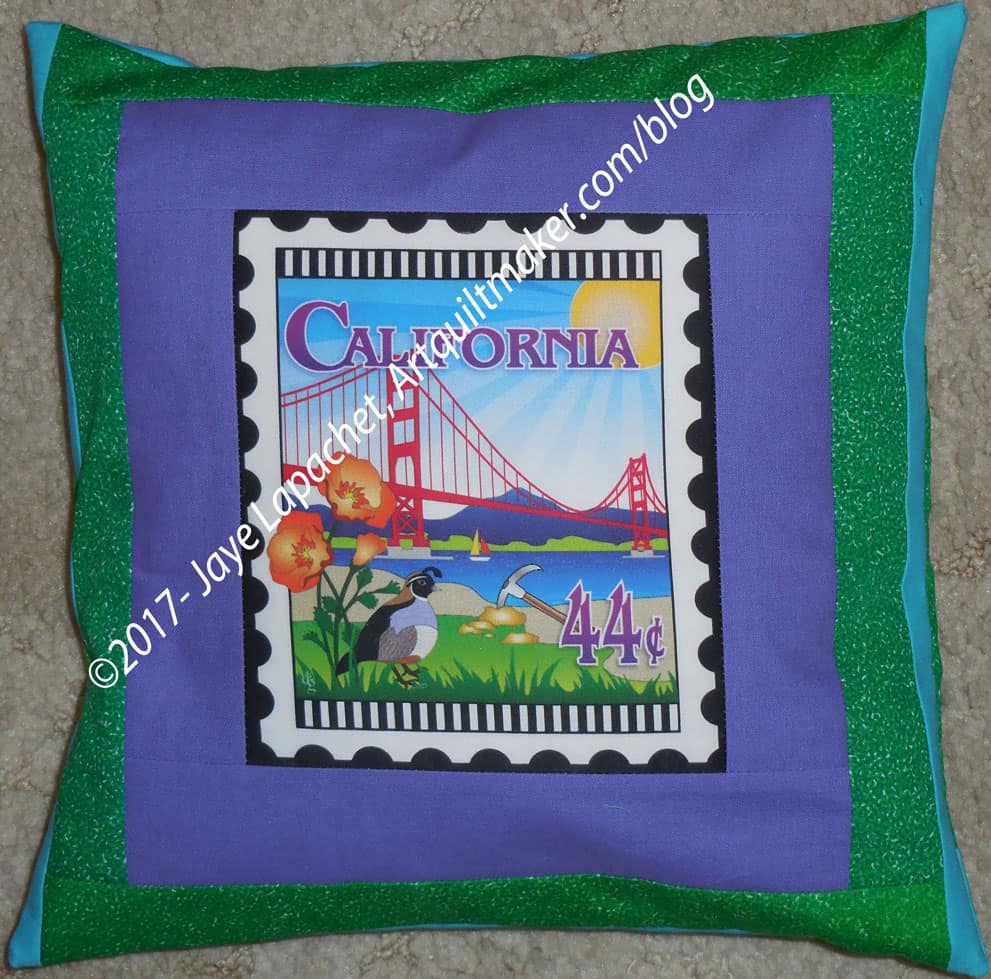
I finally made the pillow I intended to make from the panel Mrs. K sent me.
I feel like such a slacker. This panel has been hanging around since …. I don’t know…. months? I do keep sewing, so I can’t be that much of a slacker, right?
We do not have to raise money this year at Grand Parlor, so I made this pillow for one of our friends who does not get support from his Parlor to attend Grand Parlor. He is running for Grand 3rd VP and needs all the help he can get.
California Pillow back
Yes, I pulled out some Pointillist Palette fabric, after being inspired by my SIL. I can’t hoard it. I have to get the 4th Pointillist Palette quilt done and use this great fabric. Since I had it out to use for Kelly’s Color My Quilt piece, I decided this pillow would work as another effort at using it.
The back is pretty plain, but I do like that blue. I wish I had written down what it was (usually I write the brand and color on the selvedge) as I could look for more. I didn’t so, it will be a mystery.
The guild meeting was Saturday. It was a good time, but I wasn’t really in the mood for some reason. Last week was busy and I had a lot of people to deal with in stressful situations, so I might have just been overloaded with external stimulus. Still, I was glad I went.
I always feel like I am offloading a truck when I go to a BAM meeting. I hand off donation quilts, pet beds, donation blocks, free table items. At the meeting last weekend I also had a Color My Quilt piece to show and give.
Kelly’s group of Color My World chunks
It was Kelly‘s month and she she had an interesting idea. The responses were very cohesive, I thought, which was great. Some others seem to think we weren’t doing the challenge right, but I like cohesion in a quilt, so I thought this group was very successful.
My Color My Quilt Piece for Kelly
My piece is at the top and I was pretty happy with it. It was one of the largest, as you can see. As someone pointed out, I don’t make small quilts. 😉
I learned this technique when I took my second quiltmaking class at Fort Mason from Sonya Lee Barrington back in the Dark Ages. I really had fun using it this time. It was nice to make swooping curves. I didn’t want to use black and didn’t have the Pepper that Kelly suggested on her sheet, so I stayed with brights.
There was some discussion about ‘chunks’ at the meeting.I have used free form piecing on two of the pieces. I thought I used that technique on all of them, but I made a checkerboard for Cheryl’s. This has led me to think about what could be a chunk besides free form piecing. I know a strip of Flying Geese could be a chunk, but blocks seem to be out of favor in terms of chunks. If I get a month, it probably won’t be until next year, so I have a long time to think about it.
Kelly seemed pretty happy with her chunks. I talked with her about her thoughts regarding putting them together. Obviously, it is too soon to really know what she will do. In the course of the discussion, it occurred to me that I could make chunks to intersperse among those from friends and that could help to bring the different pieces together.
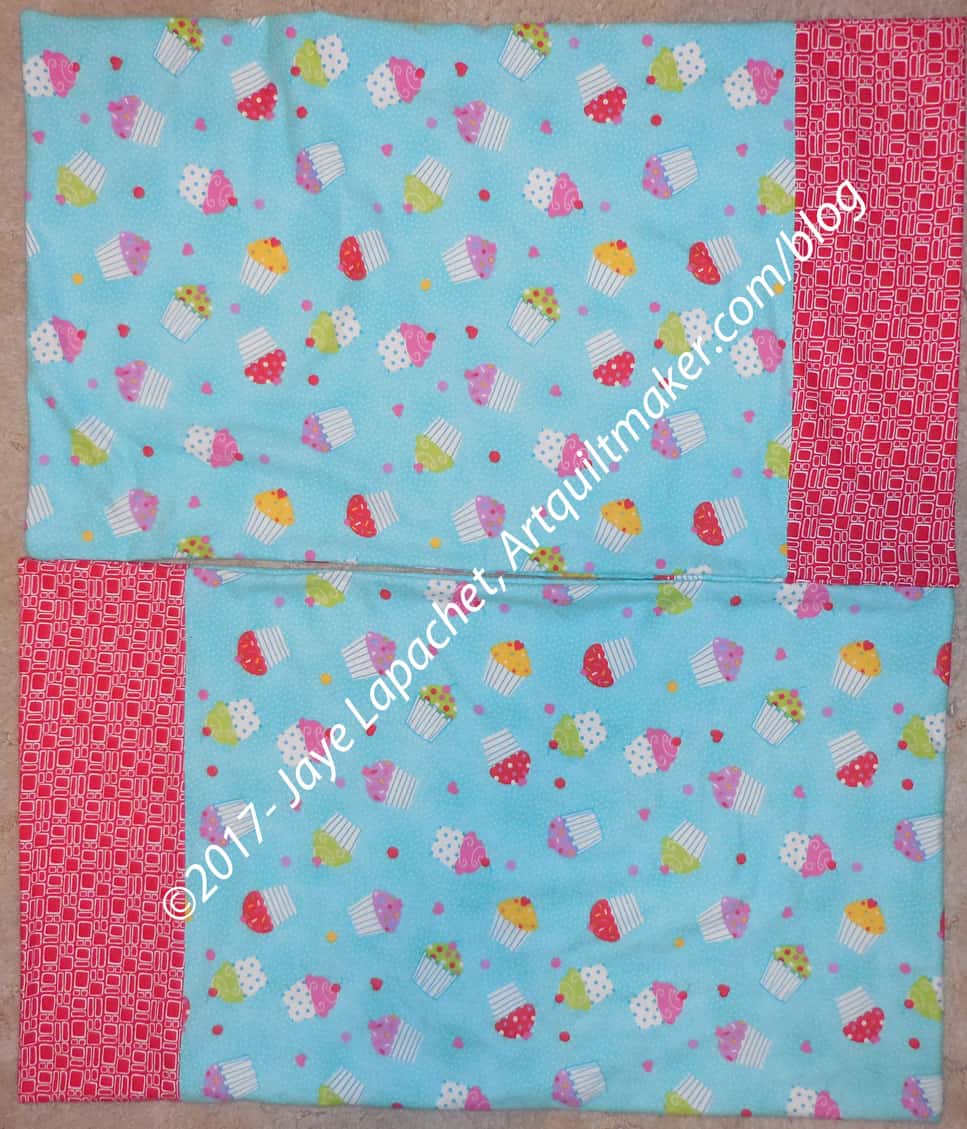
I bought some flannel cupcake fabric to make a pillowcase.
Then I saw some great flannel cupcake fabric at another shop and bought it to make a pillowcase. It turns out the two pieces were the same. If someone had bought it for me, I would have said “great minds think alike.” Since I just bought both pieces, apparently forgetting I bought it the first time, I have to wonder. I guess I really liked that fabric.
Cupcake Pillowcases
I have been on a near-frenzy lately washing fabric. The pieces of flannel got caught in the madness. Since I am trying to stay in the black in terms of fabric usage, I decided to make some pillowcases. They are a quick and easy yard of usage.
I thought I would give these to a niece who has recently become engaged. I am not sure she would like the colors, though, so I may give them to someone else.
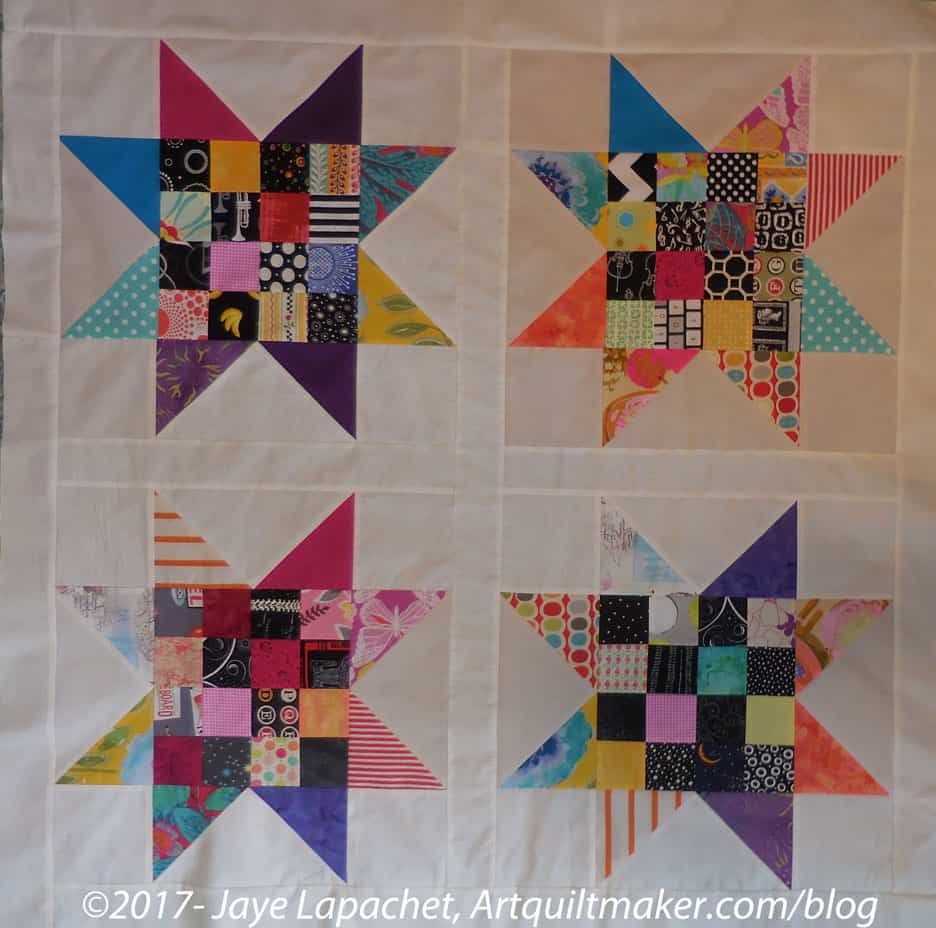
I turned in the Sawtooth Star Donation top and back on Saturday at the BAMaQG meeting.
(insert gif of me dusting off my hands and moving on)
I was sad to see it go as that was a really great quilt. I know some family with a sick baby will love it, though and makes me happy.
People at the meeting agreed that it was cheerful even with the black.
Yes, I used different background fabrics as I had a few fat quarters and thought I might as well use them up. Pretty soon I’ll have to break into yardage again.
I’ll probably make another one of these. I have some more black squares and it is a good use of them.
I saw a reference to improvisational hashtag blocks on Carol’s blog and took a look. At first I didn’t read ‘improvisational’ correctly. I read it as a weird word related to improving something. Somehow stitching words on a hashtag block as a way of improving something (society??) makes sense to me. What if we made blocks with words on them and sent them….somewhere…to Congress? 45? They probably wouldn’t know what to do with them, but aren’t allowed to throw them out, so we could blanket the Capitol with hashtag blocks. Remember how many quilts and blocks Orlando MQG got? I am sure such a project would be a success.
Fabric, Tools & Notions
Carrie Bloomston of Creative Spark fame (are you working through her book with us on Fridays?) sent me a peep at her new line of fabric. The colors are similar to her previous line, with different motifs. The similar colors mean you can blend it with scraps you might have around. The line and Windham also support the Xerces Society for Pollinator Conservation.
Do you need the Milliefiori 1 & 2 (EPP) books by Willyne Hammerstein? Scruffy Quilts (no affilliation) has them on their website. They aren’t cheap, but essential if you are making La Passacaglia.
Events & Exhibits
WWI will be the topic for this summer’s symposium, July 27-29, 2017. at the Virginia Quilt Museum, Harrisonburg, VA. Speakers such as Madelyn Shaw and well-known quilt collector Sue Reich will present programs on the pacifists, Red Cross (quilts) & Jr. Red Cross efforts, and what folks at home did to “do your bit.” Tours will include Woodrow Wilson Presidential Library and the ORIGINAL Air Force One which is being renovated nearby. Thanks to the American Quilt Study Group for the info.
After stalling out on cutting fabric early in the year, I have cut a lot this week. I have needed fabric that has languished in my ‘to wash’ pile, so I have washed quite a bit of fabric as prep for cutting. Clean fabric cannot pile up on the back of my new chair, so pressing and cutting it is.
I love the mini Pearl Bracelets Julie bought for me as a gift. Having them on the wall makes my imagination go places I wasn’t considering. I having been thinking of making another Sew Together Bag for my embroidery supplies. Except for some Philip Jacobs fabric like I used in my recentOne Hour Basket, I wasn’t sure what I wanted to use. I wonder how it would look with the Philip Jacobs on the outside and all different Pearl Bracelets on the inside?
It has been awhile since we did the last design class. There is no podcast accompaniment, but if one becomes available, I’ll come back to this post and link to it. Gradation was the last installment that I could find. You can find the entire series by clicking on the ‘Design Series’ tag in any of the relevant posts.
I want to finish the series as the unposted final classes niggle at the back of my mind like a to do list item I cannot cross off.
One element plays the dominant role in a design. (Adventures in Design, pg.106)
Medallion quilt
Focus fabric
“Dominance gives interest to one entity or area of a design over the others.” (Fiber Artist’s Guide to Color & Design, pg. 199)
“Dominance gives a painting interest, counteracting confusion and monotony. Dominance can be applied to one or more of the elements to give emphasis (John Lovett)
Notes:
The difference between focal point and dominance is subtle. An element that dominates because of size or color, etc can also be a focal point, but it is not a focal point when your attention is drawn to one spot, but then drifts away because something else is going on in the design field that could be considered as dominant or only slightly less dominant than the element that could be the focal point, if not for the other aspect of the design field. Look at page 125 of A Fiber Artist’s Guide to Color & Design by Heather Thomas for an example.
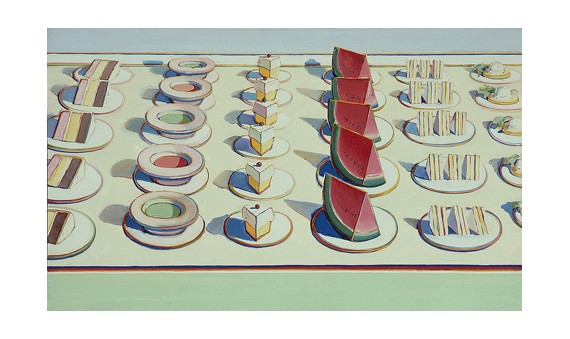
Wayne Thiebaud Lunch Table, 1964
Wayne Thiebaud’s Lunch Table is also an example. The Watermelon clearly dominates, but not is a focal point because there is so much going on in the design field. The red of the soup helps to draw the eye away.
“Both Dominance and Emphasis give interest to one entity or area over others present in a design field, however a focal point is not always formed. Giving dominance to , or emphasizing one design element or area will counteract confusion or the risk of monotony. (Fiber Artist’s Guide to Color & Design, pg. 125)
Using Dominance
Dominance “can be achieved through the use of color, value, intensity, size and scale as well as other design elements. Emphasizing one element or letting one area dominate others sends an invitation to the viewer to come in and take a closer, longer look at the work.” (Fiber Artist’s Guide to Color & Design, pg. 125)
The elements, line, shape, texture, form, are like the actors in a play. Not all the actors can be the star. You have to chose who will be the lead. When you choose who will be the lead in your quilt design, you are deciding which element will have dominance and you are enhancing visual unity. You can select another element to be your supporting actor and additional elements to play lesser roles to lend “visual support to your design.” (Adventures in Design, pg.106)
The other day I talked about making the two sections of section 2. After I did that it took me a few days to sew section 2 together and then sew that large piece to section 1.
Carpenter’s Wheel – Section 1 & 2 sewn together
I still need to make and add Section 3. I have barely any 4 patches left for the background, so I have to sew those blocks together first.
I am stupidly pleased with this section. Even more so because the feeling of having crossed a huge hurdle is even stronger now that I can see this section laid out. Of course, I may never be able to see the entire top as it is so large. I might have to move the dining room table and get a ladder to take future photos.
I thought I would write a little more about this pattern as it is a pretty good pattern and has interesting construction techniques.
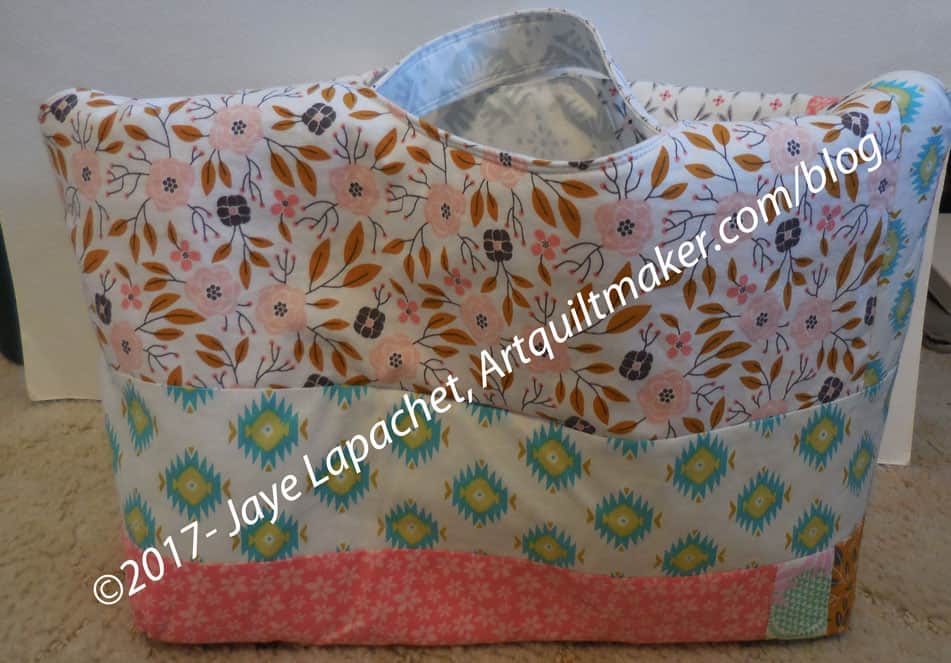
The bag pattern is included in a book called Make it Take It by Krista Hennebury. The bag is a cover girl and is what attracted me to the book.
I had a gift to make and thought this would be a perfect opportunity to try the pattern. I made the Little Patchwork the first and was a little disappointed at how little it was. I hadn’t planned to make both, but I needed a larger tote for my gift. From the photos in the book, I thought the little tote was more of the large tote size and the Big Patchwork Tote was larger – almost the size of a Chubby Charmer.
Big Patchwork Tote – 2
The pattern calls for patchwork sides and gives instructions for making a strip set. Fortunately, the pattern also gives the desired final size of the strip set, so the maker can cut the piece from one piece of fabric, if desired. This dimension also allows one to use something like mosaic piecing techniques if strips are undesired. Since I am using a fat quarter stack for this project, I didn’t have pieces large enough for the strips. I pieced strips together and used those. You can see that in the photo above if you look for vertical strips. I recommend piecing the desired fabrics together well in advance of the deadline for this bag as that takes a lot of time.
I used fusible fleece on the small bag and Soft and Stable on the larger bag. Both work, but I found the fusible fleece to be easier to deal with. Of course, if I had remembered to attach the Soft and Stable before I put the bag together, that would have made a difference. 😉 In the future, if I plan to use Soft and Stable, I will attach it (in the ditch stitching, perhaps) to the exterior before I put the bag together.
The interesting part is how the bag goes together. Instead of putting the exterior inside the interior, right sides together and sewing around the top, as the maker does in most bags, this one asks the maker to fold and press the interior and exterior in half and layer them. It is an interesting method that seems to work, though is hard to understand until you do it.
The problems with this bag are: no pockets, no closure. Considering the method of construction, I am trying to figure out if I can add a pocket or sew-in magnets as closures.
All in all this bag has an interesting shape and lot of room for creativity in making the exterior. I encourage you to buy the book and try it.
Can a person ever have too many pincushions? This is the thought running through my mind as I decided what else to make for my second group of gifts.
Mary’s Pincushion/Wonderclip caddy
You might remember the Pincushion / Wonderclip Holders I made for the guild officers. I really like this pattern and decided to make another one to go with my gift grouping.
It is a useful item and I have a lot of Beanie Baby pellets to work through. It is a quick project, which is an added incentive to include it in the gift grouping.
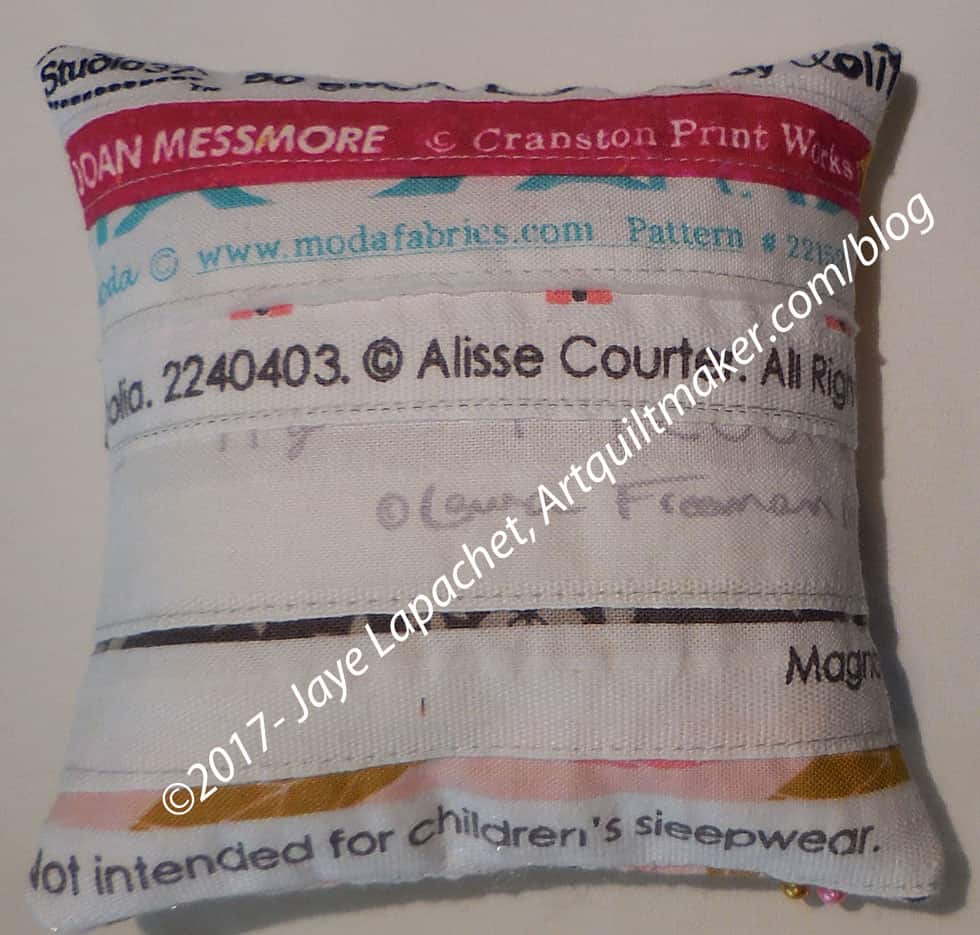
Mary’s Pincushion/Wonderclip caddy – back
I decided to continue with the selvedge back. It is interesting to look at and I have a surplus of selvedges.
The pattern can be found in Love Patchwork and Quilting, issue 39. It is available digitally in the Apple and Google Play stores.