CAYG

I have been wondering how it would be if I cut bags out as I moved through the pattern instead of cutting out all the pieces in advance. Sometimes I just want to start and having to cut feels like a drag. I know it is good to have everything ready so you don’t have to stop to cut, but cutting is such a drag. I have a good system for cutting as I go with quilts, but haven’t quite figured out such a system with bags and accessories. What I really need is a nighttime Workroom Assistant who comes in stealthily at night and cuts for me while I sleep. Of course, that wouldn’t orient me to the pattern.

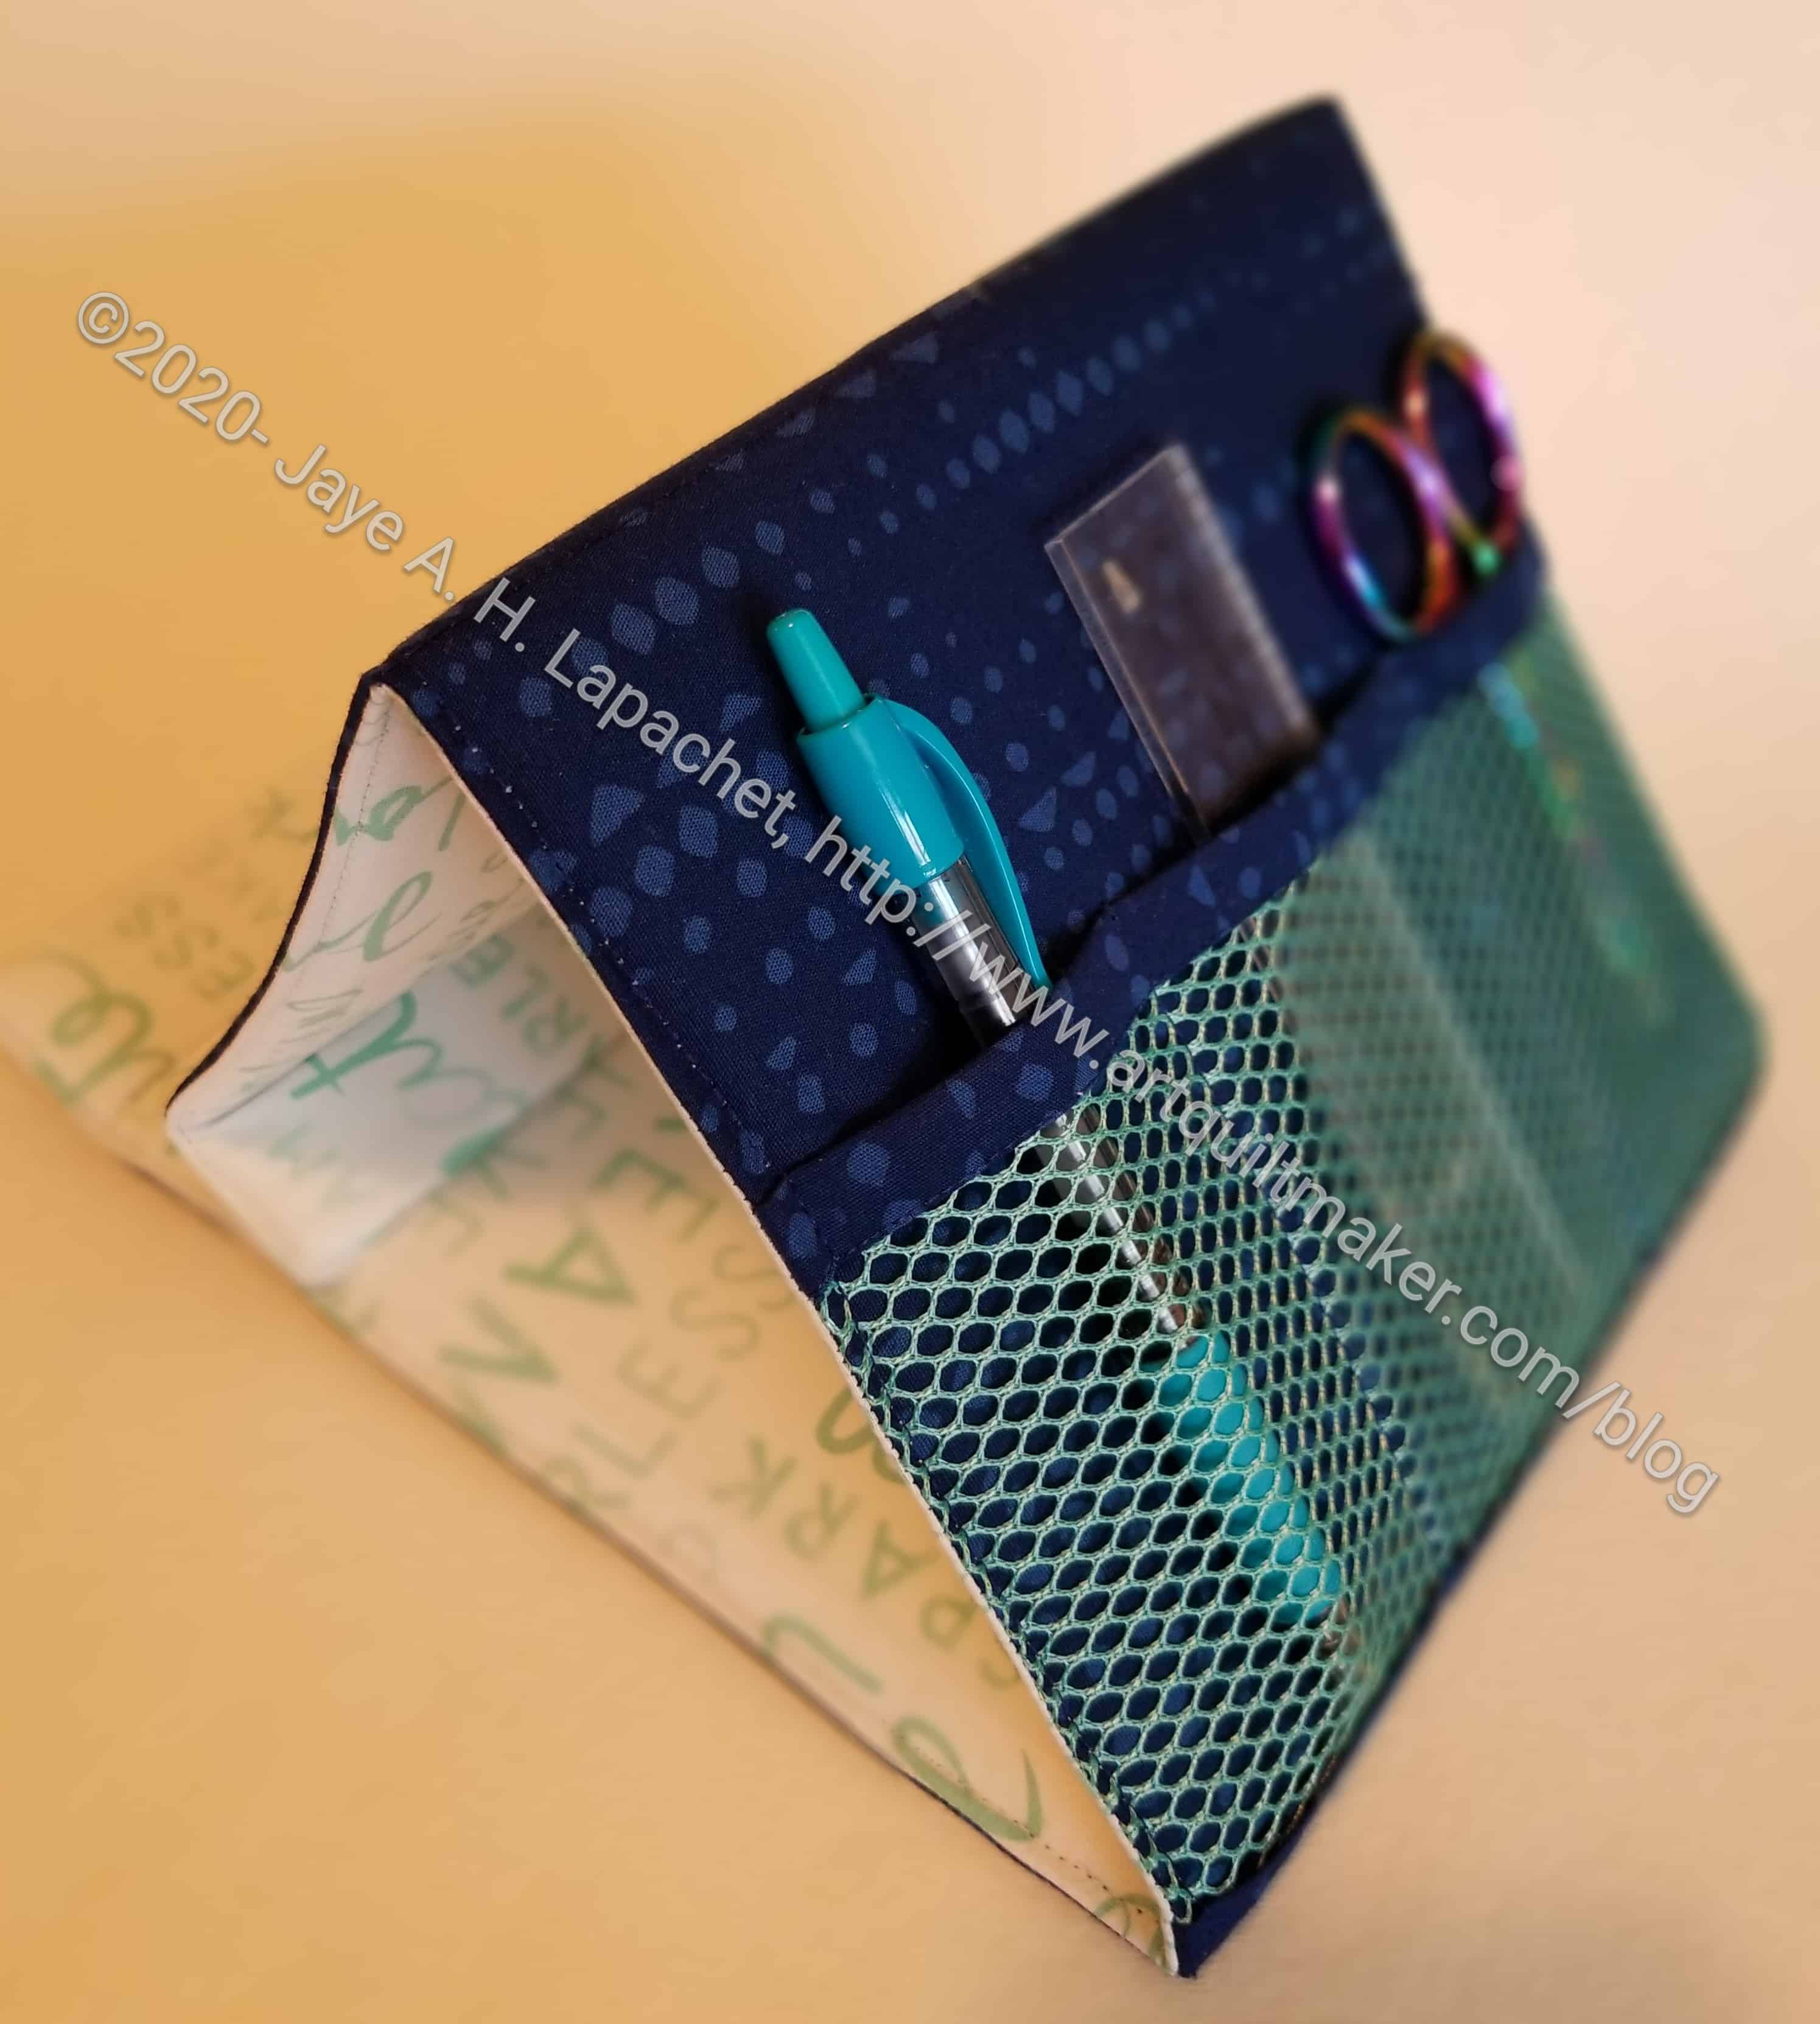
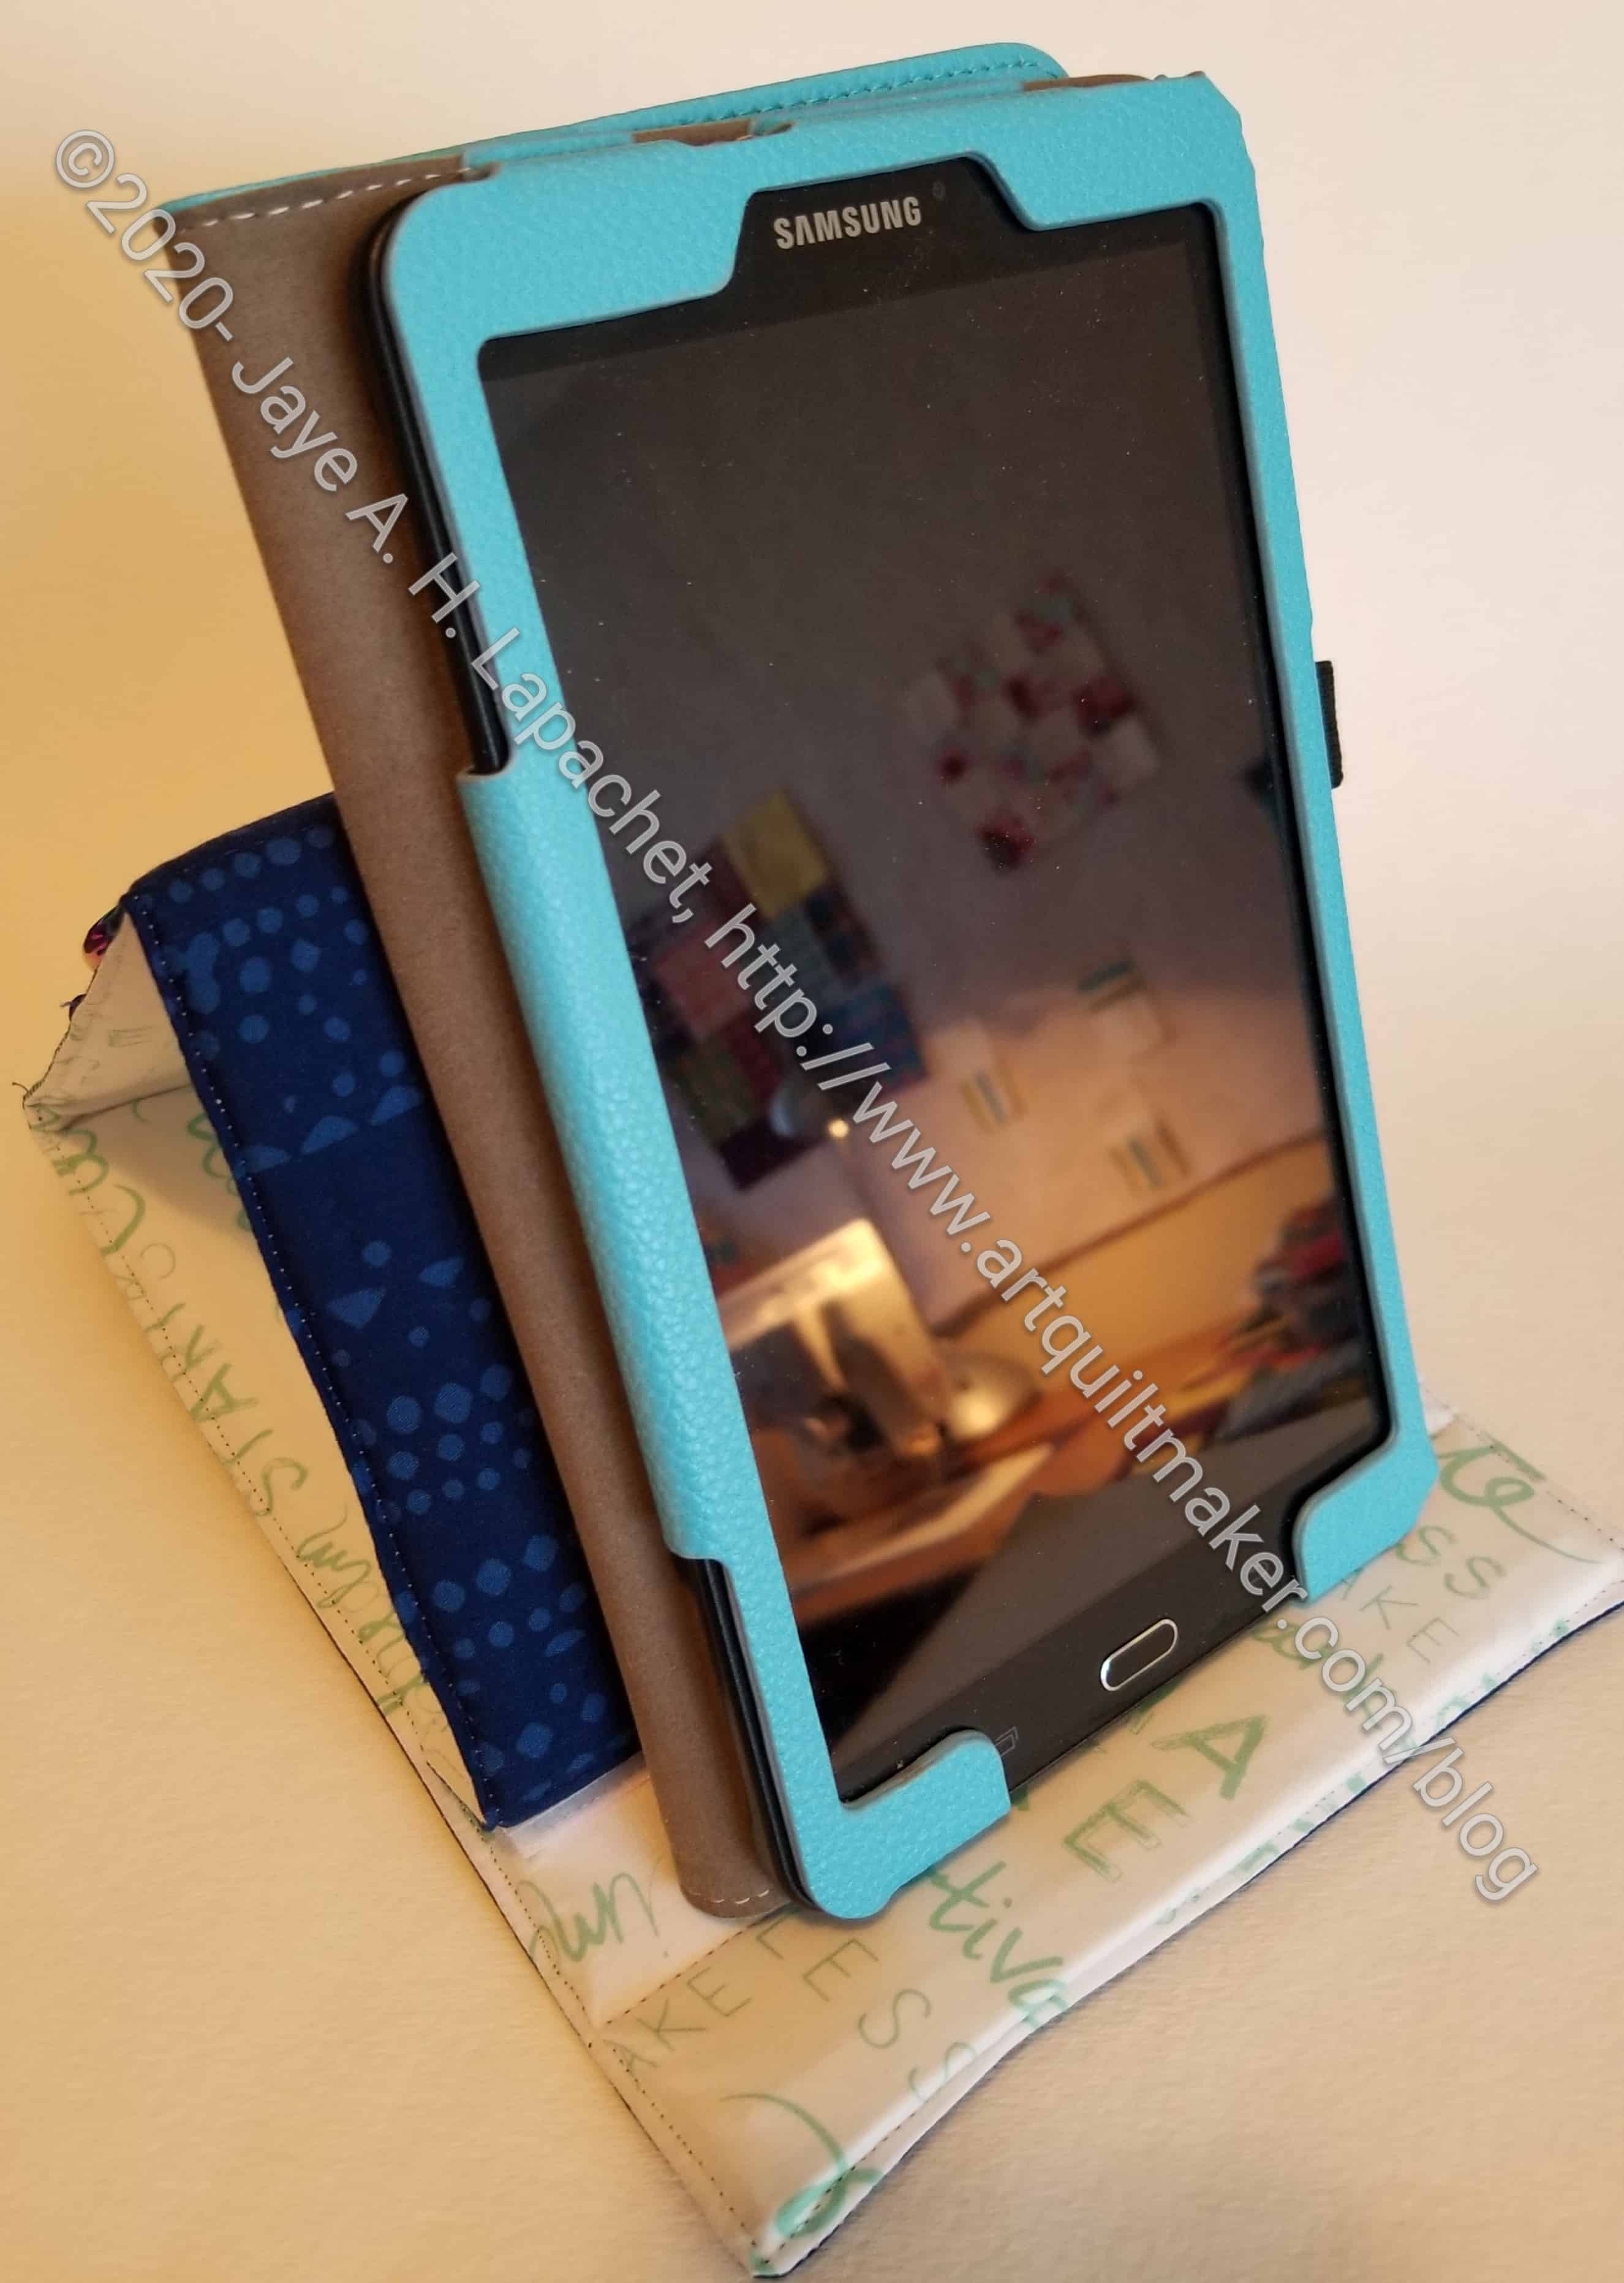
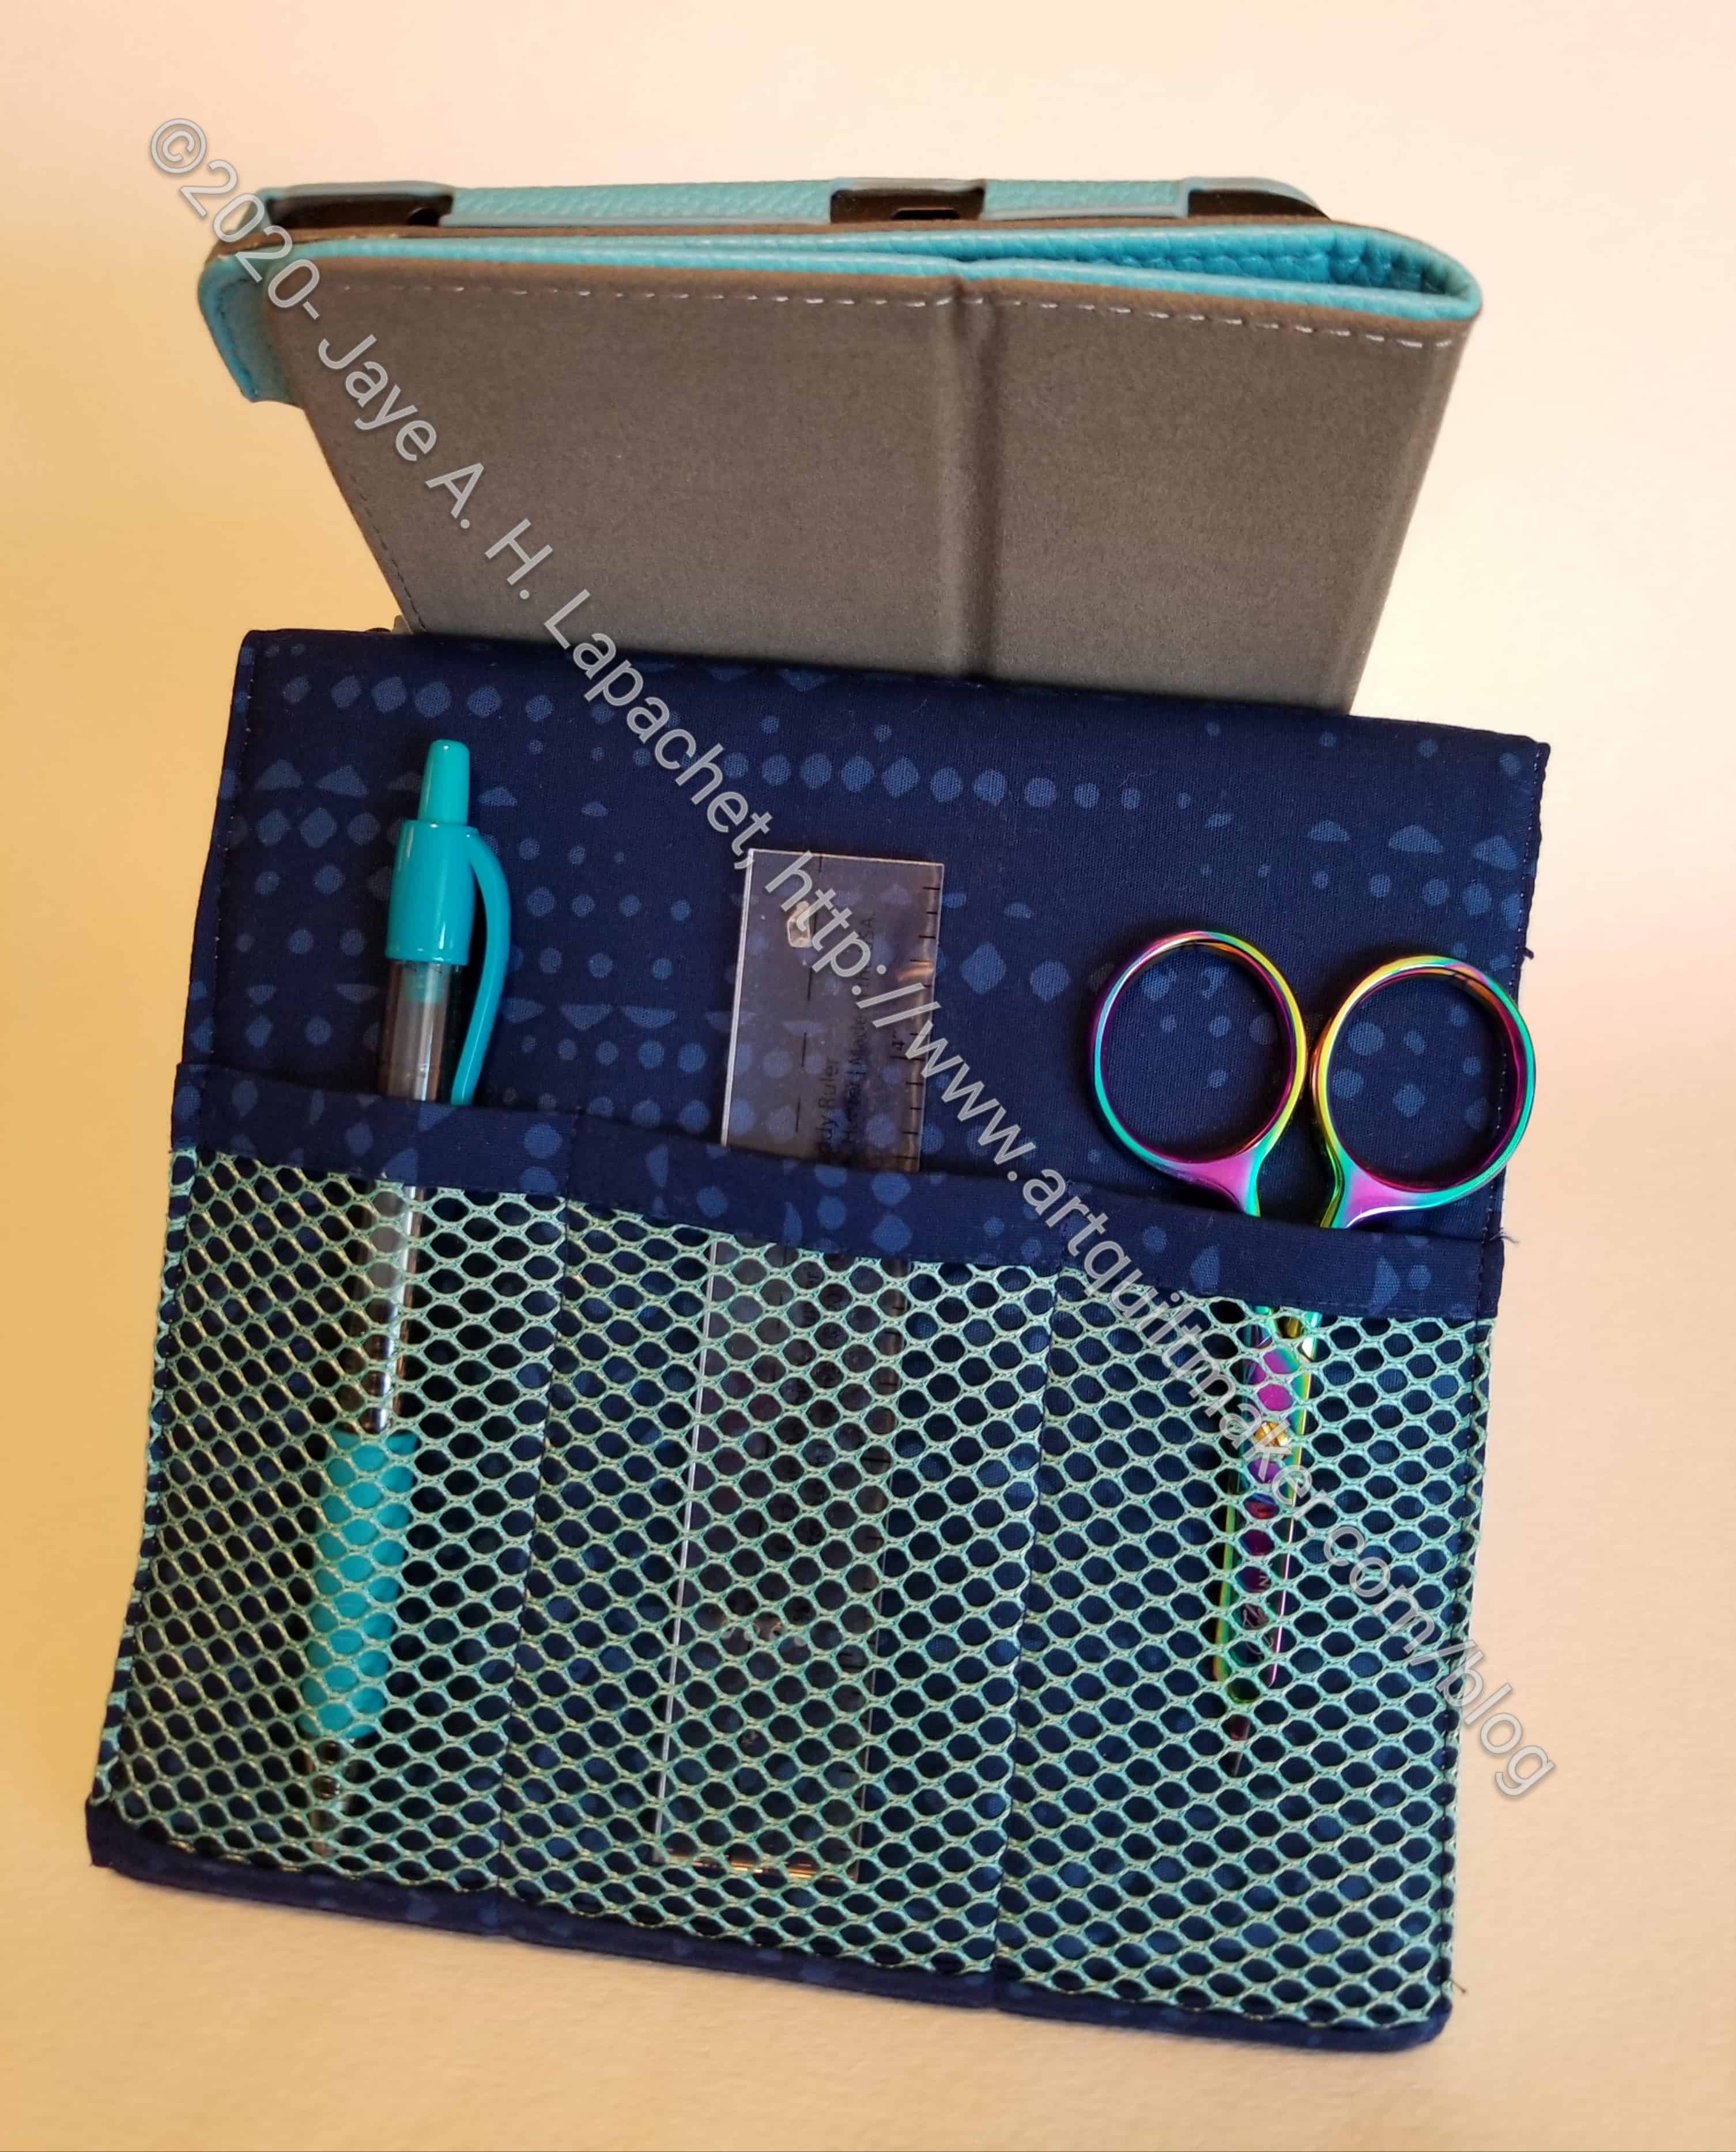
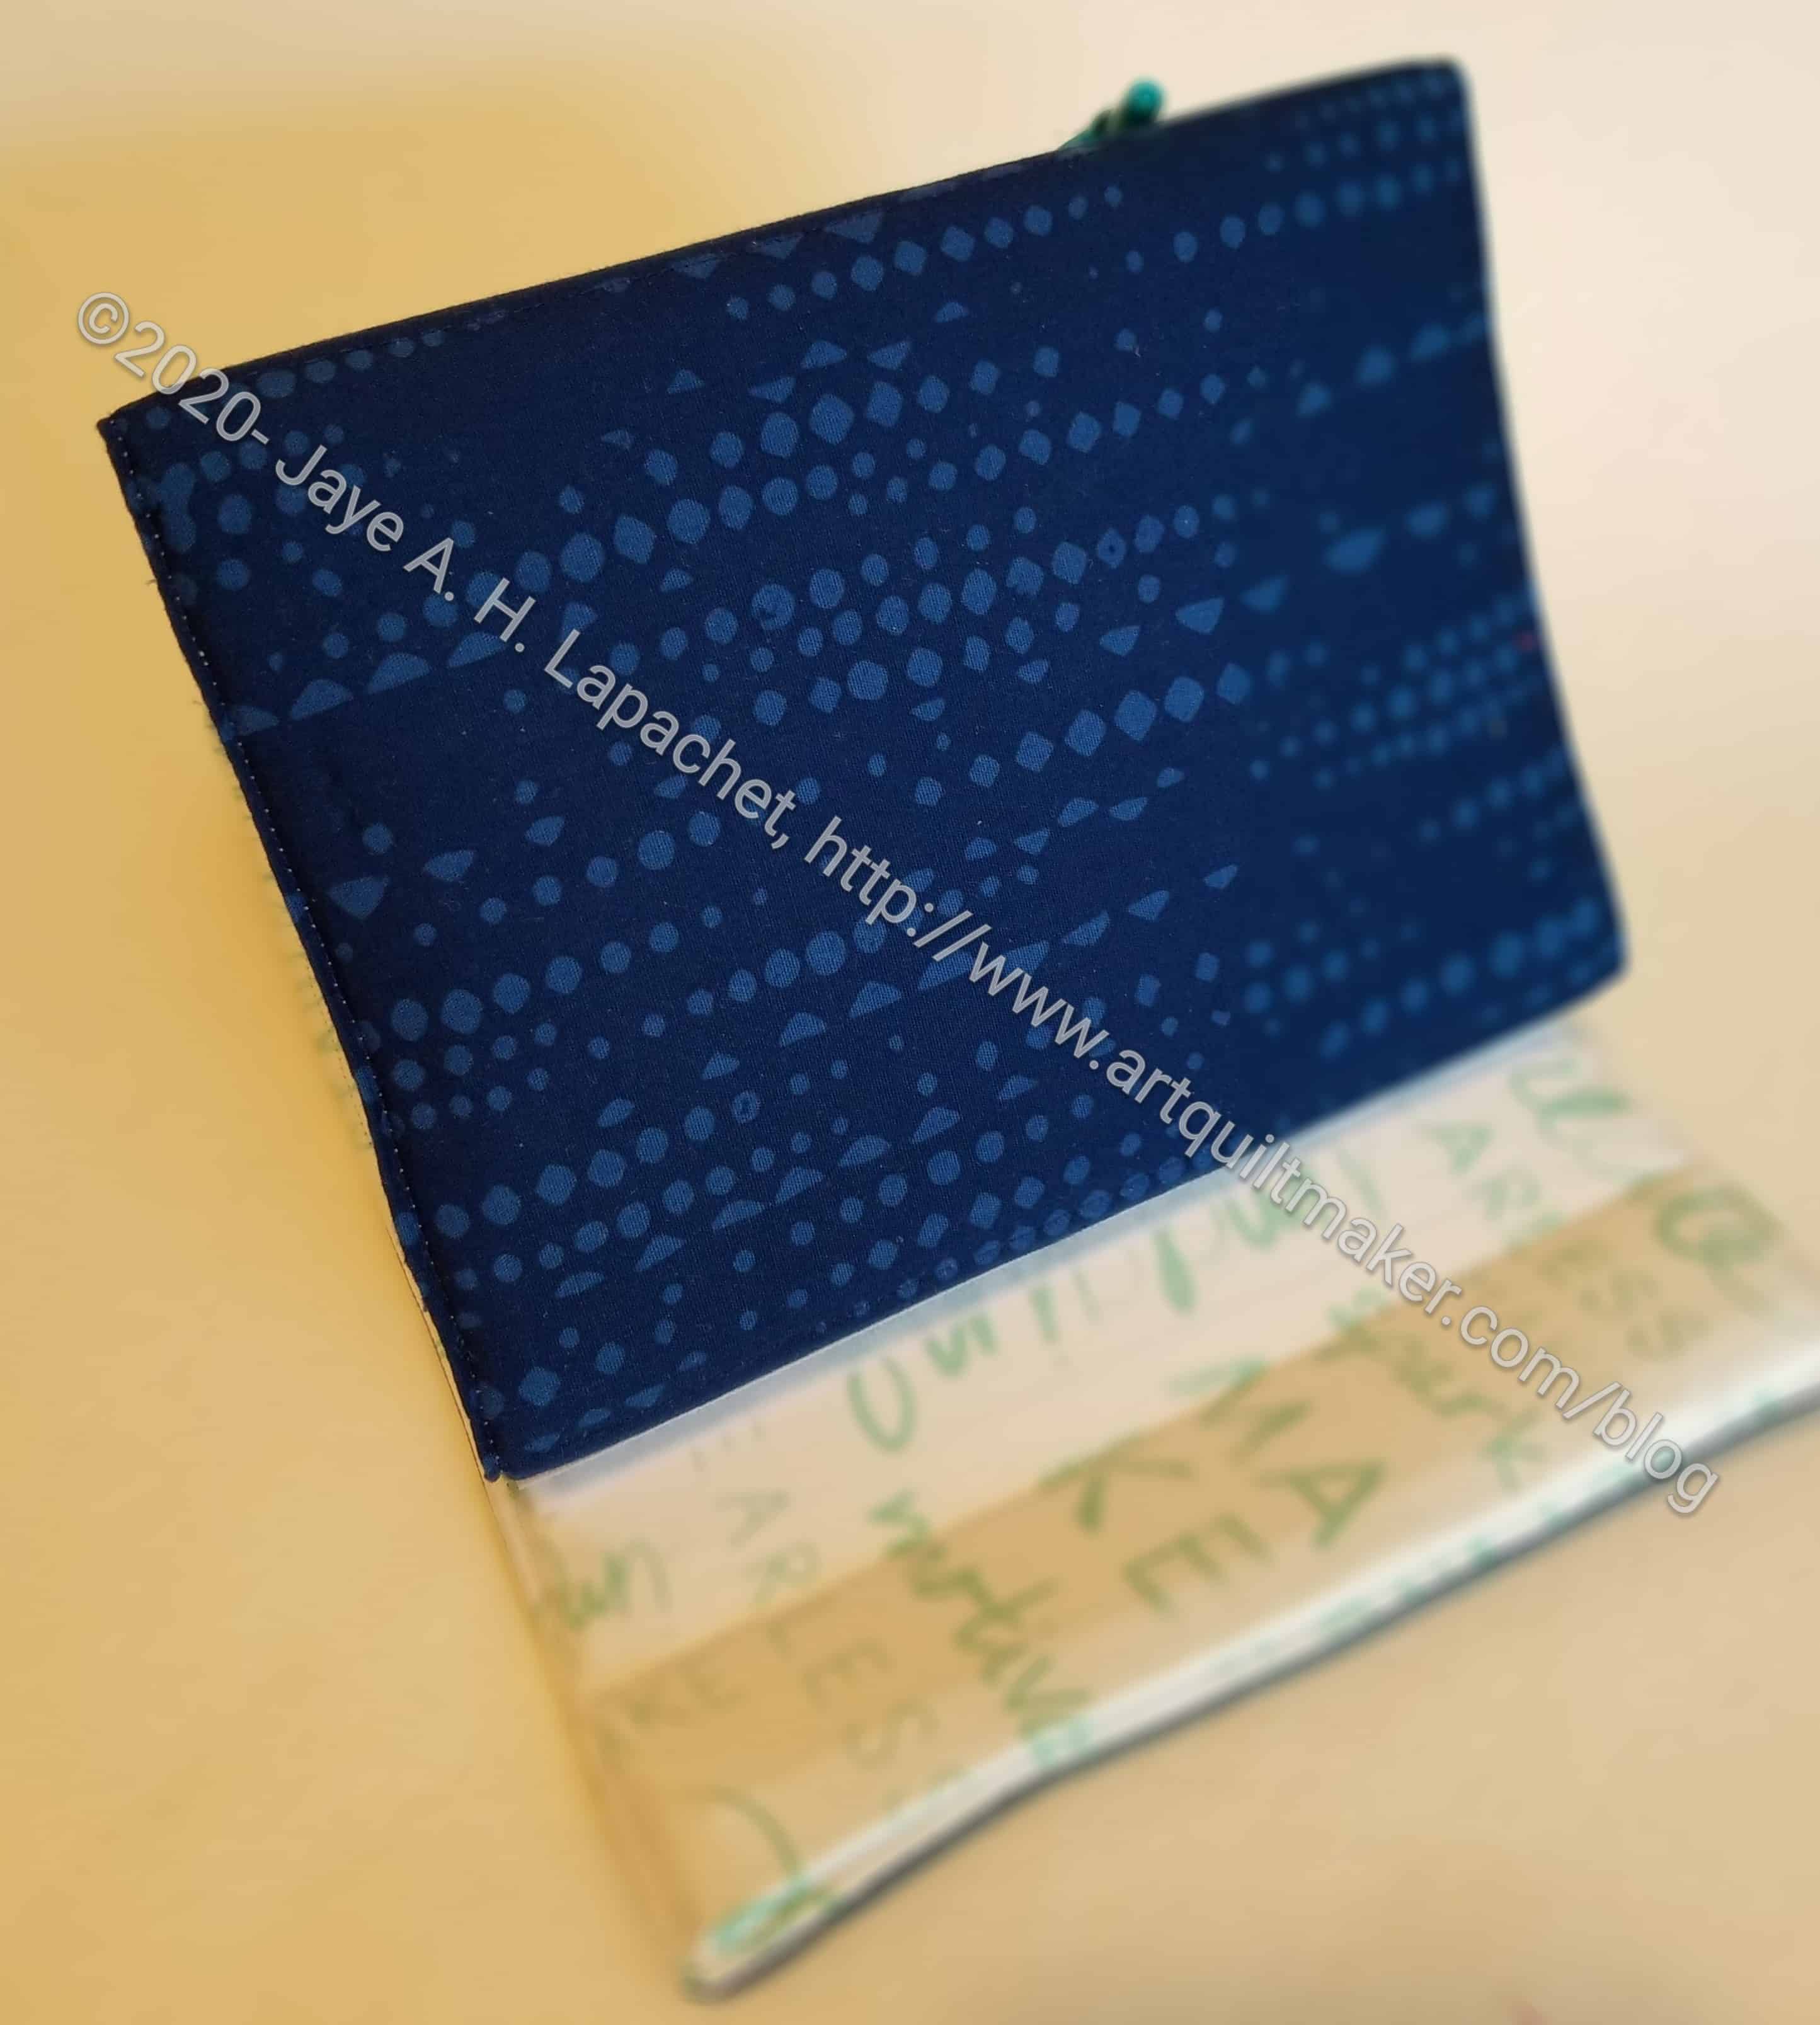
I recently sewed a Sewing Stand from the Sew Sweetness Minikins  Season 2 and decided that I would cut as I went.

First, I learned that I get oriented to the pieces when I cut them out. I read the first instruction and had no idea what pieces to use. I went to the video to see what Sara (the designer) was doing and finally got it. I think that getting oriented to the pattern by cutting out the pieces is a good thing.

I think cutting the fabric and labeling it ‘lining’ and ‘main’ is a must, but cutting and working with the interfacing could be done as I go.

Second, I found that having the pieces for the first few steps gets me going. It might be possible to be successful with CAYG if I cut a few pieces out, but cut the rest as I moved through the pattern.

Third, aside from the first few steps, I think I can cut interfacing and stiffener as I go along.

I think the problem I am experiencing comes from cutting everything out and then letting the project languish. This is happening with the UCAB. I lose my orientation to the pieces if I don’t start working on them right away.

As a result, I think that if you are not going to work on the project right away, that you should only cut out a few pieces, then cut the rest when you get back to it. If you are going to work on the project instantly, then cut all the pieces out and get busy sewing.

May Donation Blocks

As I did last month and for previous months, I made more donation blocks. After April’s work, I had a stack of 24 blocks. Now I have XX. Peggy, the community quilt organizer for BAM, I hope, will be happy.

Sewing the Windmill means that I was also churning out donation blocks. Using leaders and enders between each Windmill piece generates a lot. I have to keep the Windmill pieces in order, thus so many donation blocks. I am thinking about making another Traffic Jam quilt instead of more of the 16 patch donation blocks, but we will see. Until I decide, there will be more 16 patches.

I had to spend some time cutting scraps for new 2.5 inch squares as I was running out. You can see that some of the blocks don’t have a lot of contrast, use a ‘different’ background or look unlike my normal meticulous monochromatic blocks. I guess I am making due. I didn’t really want to cut more foreground squares until I really need them.

I am pretty fond of the red-violet block in the second row. The background is made from a shirt I made for DH a few years ago.

Sewing Room Stand

As mentioned, I had (took) Friday-Monday off for Memorial Day weekend. While I had to clean the house, I also took the time to finish a few projects that needed finishing or knocking other must-do projects off my list.

Minikins 2: Sewing Room Stand

One thing I started and finished was a Sewing Room Stand from the Minikins Season 2 patterns.

I made the item in a couple of hours. I used the video portion of the pattern (Sew Sweetness Minikin patterns comes with a video as well as the printed pattern). I didn’t find it difficult. I thought it was a lot easier than Tooly McToolston, though the Sewing Room Stand is smaller and doesn’t have as many pockets. It is the same idea.

Minikins 2: Sewing Room Stand tablet side

One of the things I like about this pattern is the possibility of standing a tablet on it and having the tablet oriented in such a way that I could see a pattern as I was working on it.

I thought the stand would come out larger based on the picture on Sara’s website. My tablet is not large (*inches?), but the one in Sara’s photo seems larger and the stand is still larger. Granted, my tablet does not hang over the ends, but still seems like it is overwhelming the Sewing Room Stand.

Minikins 2: Sewing Room Stand tool side

Thetool side is tall enough to accommodate a medium sized tool, so you could have your tools and your tablet in use at the same time.

I turned pretty quickly to the video to make this item. I was not getting what the printed pattern was saying. The video made it very clear, so I was glad to have it.

As far as I can tell, the pattern doesn’t fold up into a flat package.

Minikins 2: Sewing Room Stand empty

I chose the colors as this will be a swap gift and these are the colors the person requested!

Spiky Stars

Spiky Stars at Marin Needlearts Guild Show

This quilt was pretty innovative for me at the time. I was inspired by a Doreen Speckman class. This is the second or third quilt I made from the idea. I have ideas for more of these and I even have fabrics selected, but haven’t ever gotten around to piecing more of them. Doreen Speckman, about whom, I am sure, most of you have forgotten or never heard, was a great teacher. She was also funny and made classes a joy to take. I also took a Nosegay class from her.

Spiky Stars at Marin Needlearts Guild Show winner

I remember walking around the aisle and seeing my quilt with two ribbons, including an especially large one for Judge’s Choice and being really thrilled. I called my friend right away – from the show!- and told her.

Later, I stood and listened to a lady try and figure out how I made the quilt. I have won ribbons since, but this large and impressive ribbon still means a lot to me.

Even More Face Masks

Deirdre mask pattern

I am still flailing away at face masks. Deirdre has made tons and she sent me a pattern that I tried over the weekend. Even with curves (which don’t’ scare me), this mask came out a lot better. It still isn’t ideal as I didn’t have anything to put in it as a nose-shaper, but it was easier to sew and came out a lot better.

As usual, cutting out took the longest. I didn’t buy the rotary templates as I don’t plan on making enough to make it worthwhile. Also, D reported problems going around the template with a rotary cutter. I pinned the pattern to the fabric and used scissors, which worked fine. I might trace another pattern with tracing paper, but regular printer paper worked well for now.

DH is working on a nose shaper for us and Friend Julie will send me a few of what she is using. I want to make a few masks, especially for the YM. He takes the bus every day and works packing orders. I would be a lot happier if he had a bunch of masks to use. SIL #2 made him several, which are tiding him over.

I am really still trying to figure out a pattern that works well for us (me) and how to make it. I have high hopes for this pattern.

Vintage Tuesday: Sampler Blast from the Past

I always wonder if I should put these types of posts under the general #TBT (Throwback Thursday) posts. I suppose it would sync with other sites, but somehow I feel like my own system works, too.

Fort Mason Sampler
Fort Mason Sampler

Over the weekend, I did some chores that had been languishing, including scanning a bunch of photos I found while clearing out boxes and drawers during Lent. Some of the photos were of quilts I just hadn’t seen in awhile. Others I didn’t have digital photos of for this site. One was a sampler I did when I took a drafting class at Fort Mason just after I got married.

I made the top and gave it to my mom who quilted it. Many of the fabrics I used were from my first Sampler quilt, which, at the time, was still unquilted – well, the quilting was in progress. I knew, even then, that quilting was less appealing than piecing and my mom liked the quilt.

The point of the class was quiltmaking, but more specifically drafting blocks. I talked about this topic a little in my review of The Quilters’ Album of Patchwork Patterns. I am much more familiar with how blocks are structured, but at the time, this was a challenging part of the class. I haven’t seen the quilt in a long time and in looking at the blocks, I am much less confused by how to draft them. I am not sure I could do it the way the teacher taught me at the time, but I could do it, I think.

Fort Mason Sampler Wreath

My favorite block was the wreath type block. I really tried hard to make it look woven. I see some of the fabrics in that block are from one of the the Pointillist Palette quilts, so I must have already been working on those at the time.

More Plaid Blocks

Plaid Blocks - end of May 2020
Plaid Blocks – end of May 2020

I had 4 days off over the weekend and it was great to cross some things off my To Do list AND get some chores done. I have a number of bags and a swap gift on my to do list, but after 3 hours worth of video chats and an hour on the phone with the YM, I really only had time for the plaid blocks. I did press some new-ish fabric, though and found some pieces I’ll use for the swap gift.

I now have 25 blocks, so am definitely on the downward slope of block making for this piece. I ordered the felt for my design wall yesterday. I have little hope of it arriving today, but I am hopeful it will arrive int he coming week. I want to get these blocks up where I can see them all before I start sewing them together.

Another Drawer

Some time ago, I lined one or two of my dresser drawers with fabric. Earlier this week, I heard a cracking sound as I rearranged one of my drawers. This led to the unloading, the sorting of clothes, the repair and eventual reloading of the drawer.

Forced Reorganization

Fortunately, I am not rushing around early in the morning to get dressed and get to the office. Lately, my commute has been pretty easy, so the turmoil of my clothes being everywhere was minimal. It did look bad. I am also pretty sure the mess annoyed DH. There wasn’t anything I could do, however, until I had some time to sort everything out.

The dresser is old, but solid wood with dovetail joints, so worth repairing. DH was able to fix the drawer during one of his work breaks (we are both working from home) earlier in the week. It has been waiting for me to deal with.

Vestige by Bookhou fabric

Friday, I took a sick day off of work. I don’t have vacation, but my boss is pretty understanding about the need for rest and for the need to get paid. It is a bonus that it is a 3-day weekend. I have a lot on my to-do list including cleaning. This project was one task. The first order of business was to choose a fabric. I thought I had one selected, but I looked through some of my fabric and decided on a Anna Maria Horner print that Friend Julie gave me recently. I used this fabric, because it made me happy to look at and I couldn’t think of an immediate use for it. I still have a little of it to use in another project. I will definitely see it pretty often as I rummage around in my drawer.

Completed drawer
Completed drawer

I took the opportunity to cull some clothes I don’t wear or had forgotten about. Some will go to donation organizations and some went into the wash so I can actually wear them.

The execution didn’t succeed as well as my first effort, but since it won’t be scrutinized by judges, I don’t care. I am pretty happy with how it looks. Now I just need to get a boatload of sachets or potpourri or lavender to keep the mustiness out of the drawer and I’ll be all set.

Design Wall Testing

I have been looking for fabric for the design wall and have pretty much decided on felt, at least as a temporary solution. I found a site that, I thought, sold it for $4.75/yard. It turned out to be $4.75/ quarter yard! It’s partially wool, so I guess that makes sense, but it was disappointing as I had to go back to the drawing board.

There are a number of sites that sell different varieties of felt, including Joann, which sells 72″ wide, but only in a 10 yard bolt! I need 3 yards, but may get the 10 yard bolt if I can’t find it for less. I found one site that I thought would work, then the shipping was outrageous! I can’t win, it seems.

Felt Test
Felt Test

While I took a break from the frustrations of not being able to go to Britex and get real help, I decided to test the stickiness of different types of felt. I bought some wool felt when I visited Pioneer Quilts with Amanda, or another time I went there. I also have some small pieces of acrylic felt. I pinned them to my design wall (even the fabulous Quiet Please on my small design wall won’t hold the weight of felt) and then stuck some plaid pieces to it on Wednesday. They are still up there and not even peeling, so I think felt will work as an option.

More Plaid Blocks

I consulted with a friend who said this block is called Block Party. I did a search and found some instructions on a guild community service site. The instructions are in PDF, which is handy. I wasn’t able to find anywhere else to confirm the name.

6 more Plaid Blocks
6 more Plaid Blocks

I added another few blocks to my total during the week and am now up to 15 blocks. My first plan is for 36, which means 21 more to go.

I cut up a few more fabrics so there are some new ones included. Since I am working without a design wall, mostly, I don’t know if I am duplicating layouts. I don’t think it likely, but I also don’t think it will matter if I am.

Finished: Mermaid Doll

Mermaid Warrior
Mermaid Warrior

I saw a photo of this doll when I was looking at my previous anniversary post as I was writing my recent 15 year blogiversary post. I didn’t remember the doll until I saw the photo. I had no idea where the doll was. Then, like magic, I found her.

She was started in a doll workshop at CQFA in 2013. From the post, it sounds like I made her pretty quickly. Then, apparently, she languished and was forgotten.

When I found her, I decided that I didn’t have much to do to finish her. I decided to just get her finished. I could see any additional embellishment that was needed. I am marveling at the job I did with the sequins and the bikini top. It is really good!

Mermaid with Artist Warrior and Mother Warrior

She is part of a series of dolls.

Plaid Blocks

I made blocks like this for the charity project back in February (when we could still go out). I having been wanting to make a quilt for my cousin and decided that this was the block to use. Once the pieces are cut, the block goes together really fast. Even with all the cutting, I made 7 blocks over the weekend.

I am not sure how many I am going to make. I don’t have a design wall to fill up at the moment. I am kind of flying by the seat of my pants when I make them in terms of choosing fabrics, but I’ll make a bunch of them and see where I am. In thinking about the size, I have a 6×6 grid in my mind. The blocks are 12 inches finished, which would make a quilt 72×72 inches. That is slightly larger than the last Windmill I made and would be a fine size. I’d like to have at least three quilts to take to Colleen when S-i-P is over. More if practical or possible.

The plaids I used have been languishing for a long time. I think they have been around since before the FOTY project started. I think that is the case because some of the fabrics had no cuts out of them. Some of the pieces were just FQs, so there won’t be much of them. I think this will be lively group of blocks.

I keep thinking of men’s plaid shirts when I look at these fabrics. I am thinking of a name like The Ghost of Plaid Shirts or Thinking of Plaid Shirts. I have to think up something clever.

Amy Butler Journal Cover

Amy Butler Journal Cover

I have a number of the Miquelrius journals** without covers. I want to make covers; I just haven’t gotten around to it. This week I got around to making one.

After making Frolic!’s back, I had some large-ish pieces leftover. I decided that one was large enough to make a journal cover.

After I started, I found that I had run out of flannel. I use the flannel for the interior instead of batting, because it is thinner. Since I won’t be carrying this journal around, I don’t need to worry about the feel of it in my hand, so I just used two pieces of fabric.

I thought about using ShapeFlex, but it is out of stock everywhere and I didn’t want to use it up on a journal cover if I can’t get more at a reasonable price.

Using two pieces of fabric seems wrong somehow and makes me wonder why I think journals need covers. When I am using a Miquelrius journal every day I carry it around. I know that the cover corners can be sharp. Having a cover keeps me from getting cut. Also, having a cover keeps prying eyes away. If I am not really using these journals on a daily basis because they are full, do I need covers. Need? Clearly: no. I think I just want them all to be the same. I guess I’ll have to think about that some more.


**I use affiliate links and may be paid for your purchase of an item when you click on an item link in my post. There is no additional cost to you for clicking or purchasing items I recommend. I appreciate your clicks and purchases as it helps support this blog.

Modern Quilter’s Box

Modern Handmade is one of my favorite shops. It is relatively local, too. When this whole pandemic, shelter-in-place started, I wasn’t buying a lot, because it was so stressful to try and buy food. Also, I wanted to save money in case I get laid off.

Modern Quilter's Box
Modern Quilter’s Box

Once I got over myself, there were a few things I wanted or needed so I worked at buying things from small/local companies. I decided that it was important to me to help quilt shops stay in business. I can’t support all of them, but I can do a bit. Thus, I subscribed to the Modern Quilter’s Box from Modern Handmade.

I have been leery of these boxes. First, they may have stuff I already have. Second, they automatically add fabric to my Fabric Usage Report every month, which means I have to sew at least 2.5 yards extra every month to make up for this incoming fabric. Third, what if what I get is icky or I don’t like it? Still, I wanted to support this shop and for a limited time, this is a good way to do it. Friend Julie also subscribed, so we can talk about the boxes that come. She wrote a nice, positive post about receiving hers. Also, it is kind of a fun surprise to get something new and exciting that I might not have seen before.

Modern Quilter's Box -opened
Modern Quilter’s Box -opened

The box came late since distribution was limited during the first part of the S-i-P. This means I’ll get two in May!

Since this is my first one, I don’t know if this is how they will come or if I will get the same sorts of things. The second photo, left, is what the contents looked like when I opened it. The card on top tells about all the things inside the box and gives a brief overview of the designer of the pattern, Nancy Scott from Masterpiece Quilting.

Modern Quilter's Box -opened and arranged
Modern Quilter’s Box -opened and arranged

The card also talks about the notion, Purple Thang, and has a brief mention of the tea and snack, a Stroopwafel, which also came in the box.

They sent out a survey after I received the box and I told them to forget the snack. It looks yummy, but it isn’t gluten-free so I can’t eat it. Give me more fabric or quilt related stuff not snacks.

Modern Quilter's Box, April -everything laid out
Modern Quilter’s Box, April -everything laid out

In general I can use almost everything in the box. The pattern is sort of interesting with the added Flying Geese element. I probably won’t make it, though, so I’ll give it away. Some of the fabrics aren’t those I would buy, but I do like Art Gallery fabrics, so I am sure I can use them. I have them out so I see them as I move around my workroom. I am thinking about what to make with them. I like that pink the best so far. Are you surprised?

I think I will put the Purple Thang (sincerely dislike that name!) into my Go Bag. I tried it out when I made my most recent face mask. It worked pretty well for poking out corners and flattening the inside of seams. Apparently, while I have one, I haven’t used it before. Or I haven’t used it recently.

I bought a 6 month subscription. If you try it out, I am curious to know what you think.