You probably think I have my response all ready to go when I write the Creative Prompt posts.You would be wrong. An image may pop into my mind or it may not.
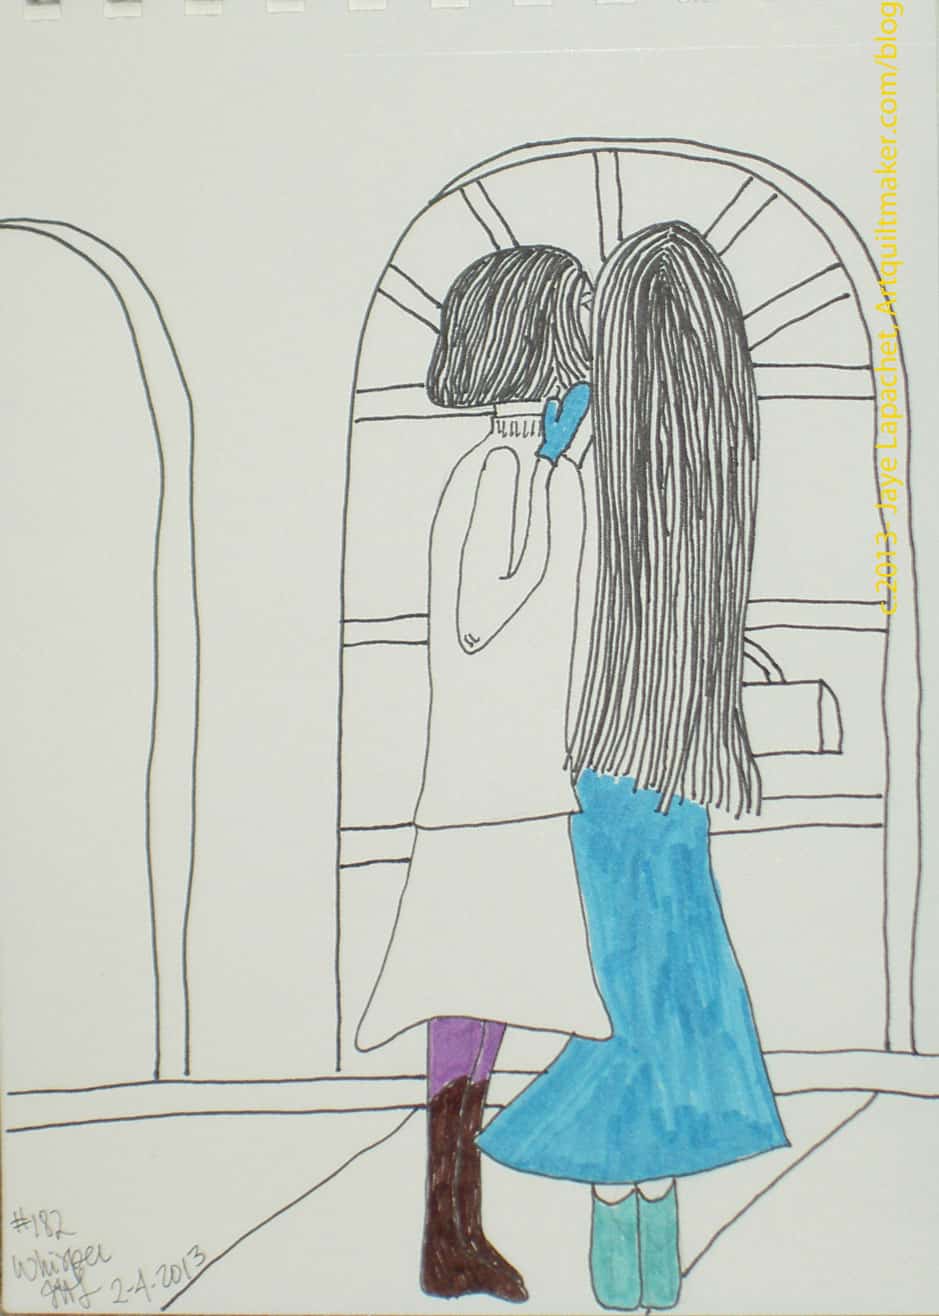
Whisper was hard and I was a bit scared to try two figures, but I am, mostly, pleased with the way it cam out.
I need to work on the proportions a bit. The arm is weird looking, but you get the idea.
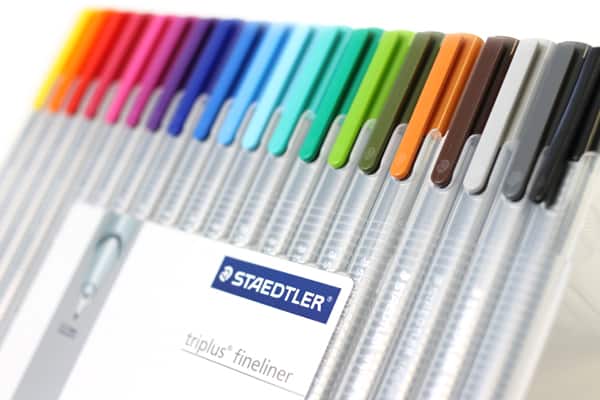
One of the things I like to do on New Year’s Day is finish a quilt, craft or fabric project so that it sets the tone for the year. I should add”write thank you notes” to that list! I received so many lovely gifts this year, including a wonderful set of Staedler markers, and I still have “write thank you notes” on my to-do list.
I bring this up because, although I have tried the pens, earlier this week was the first time I had the opportunity to sit down and use them for project.
I love them. You, who got them for me, you know who you are: I love them.
Getting a new set of markers is fabulous. It brings back all sorts of wonderful memories of being a kid. As a 10 or 11 year old, I saved up $10.00 whole dollars to buy a set of 24 Pentel medium tip markers. I remember standing in stunned silence staring at the clerk in the Art Department at May Co when she asked for $11 something because of tax. At 40 cents a week allowance, it took me a few more weeks to save up for the tax. Boy! Did I take good care of those pens!
Thanks to Jet Pens
These new Staedler pens are really great markers.
Even though they are fine point I had no trouble coloring in sections of this response. Tools are important. They have made me excited about creating responses again.
I had this one done when I posted #179, but somehow never got it posted.
I like the skirt (a lot of that like is the color), the shoes and the hair. Yes, the shoes are a bit skinny and no real woman could walk in them, but I still like them.
Take a look at the original prompt and create one of your own.
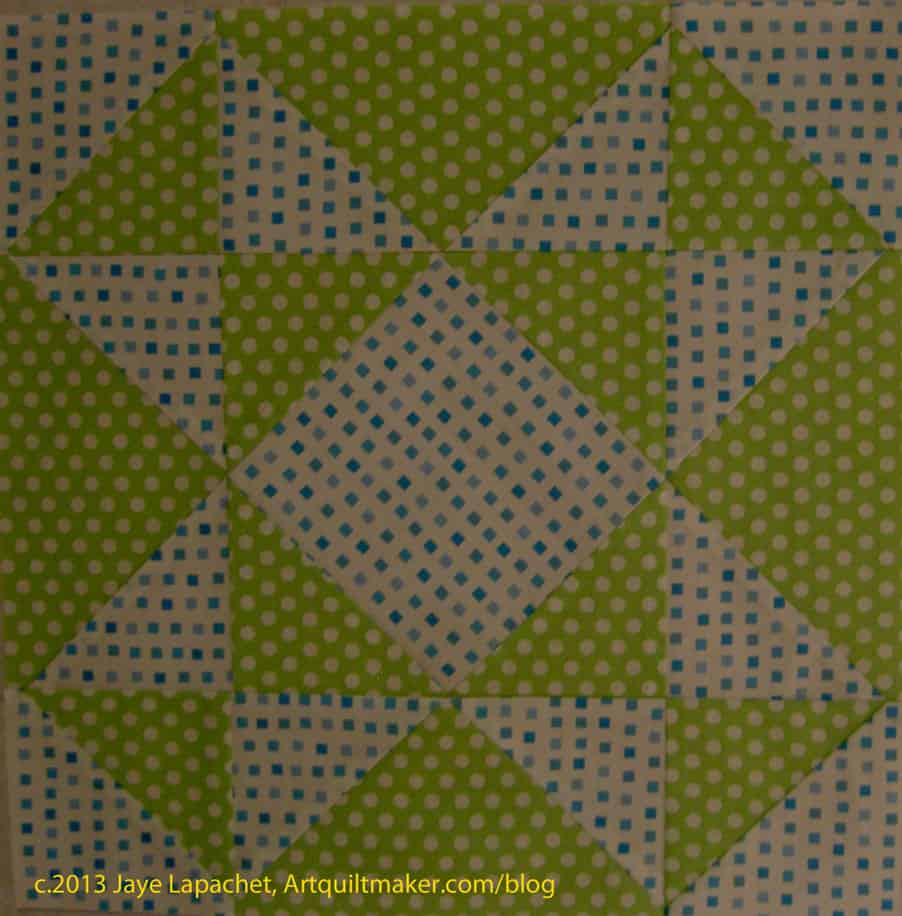
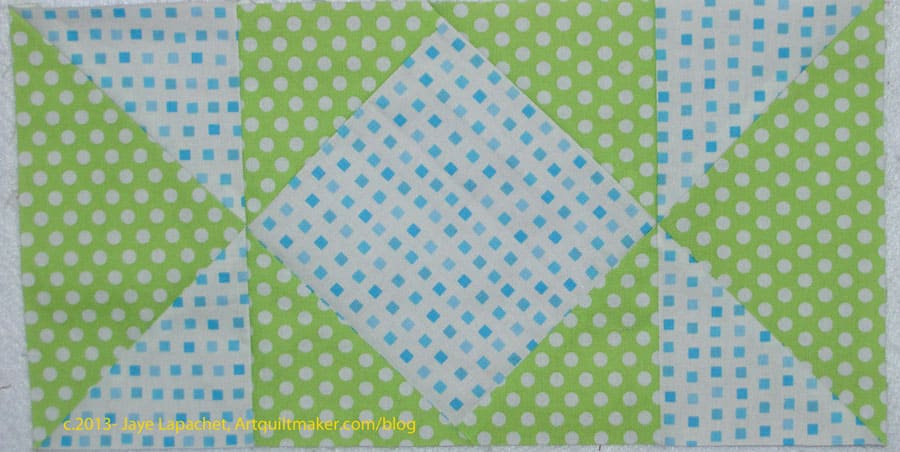
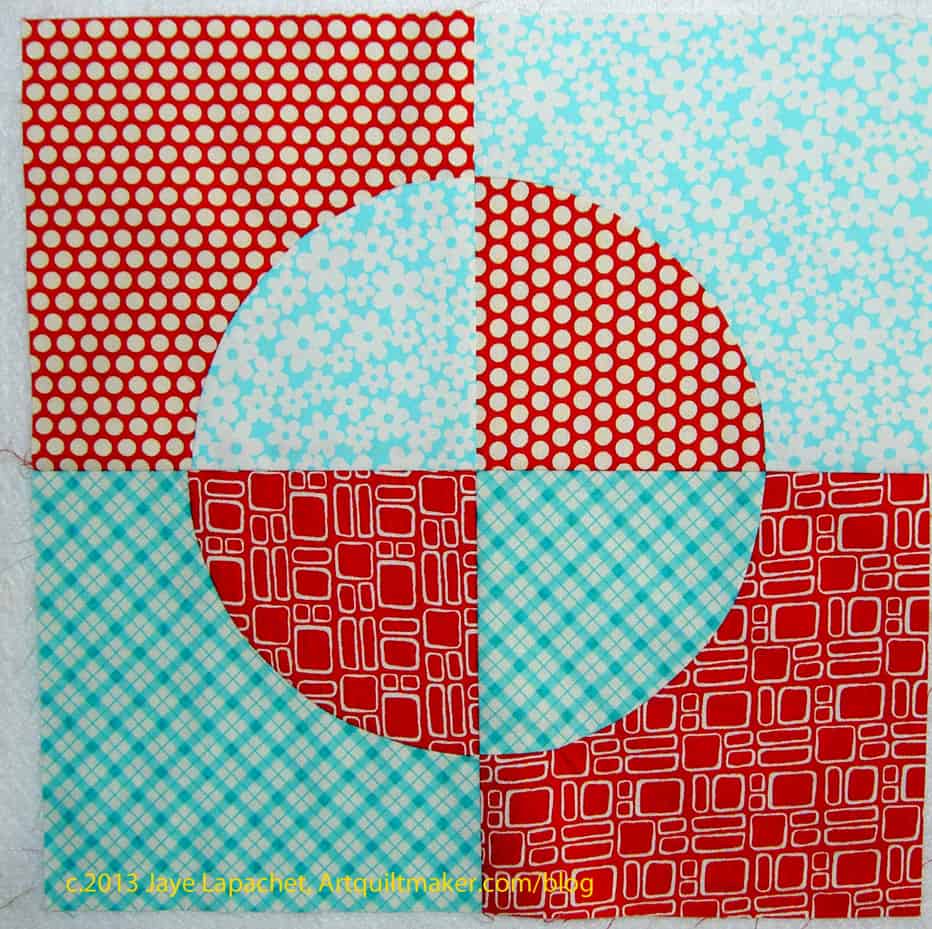
I have 3 blocks to make (due this past week) and four more to make next week. I made one! The easiest one, too.
It plays a bit with negative space. some of the pieces that should be background are colored as foreground and visa-versa. Interesting.
I said the other day that I didn’t think that fabrics with a lot of white would work, but this dot, even though it has white seems to be working fine.
Interesting Shape
Before I sewed the last two seams together, I noticed this shape.It is the middle of the block, but I thought it was really interesting. It makes me wonder what a quilt using this shape (and perhaps the size, too) would look like.
Mighty oaks from little acorns grow – an essay by D. Everett in The Columbian Orator, 1797
Grow a thicker skin
Oxfam’s GROW campaign aims to build a better food system: one that sustainably feeds a growing population (estimated to reach nine billion by 2050) and empowers poor people to earn a living, feed their families, and thrive.
Miracle-GRO
Absence makes the heart grow fonder – The Pocket Magazine of Classic and Polite Literature, 1832, in a piece by a Miss Stickland
grow “a pair”
acquire
Money doesn’t grow on trees
locally grown
“Oh, Grow up!”
accumulate
grow out of an illness, allergy or condition
Grow the economy
growing like a weed
You are growing on me
Go West, young man, go West and grow up with the country
GROW! captures the energy, passion and independence of a fresh crop of young Georgia farmers.
grow legs and walk away
Sloat Garden Center: Plant. Water. Grow.
The latest and best tweets on #grow. Read what people are saying and join the conversation.
b: to be able to grow in some place or situation <trees that grow in the tropics>
c: to assume some relation through or as if through a process of natural growth <ferns growing from the rocks>
2
a: to increase in size by assimilation of material into the living organism or by accretion of material in a nonbiological process (as crystallization)
b: to have an increasing influence <habit grows on a person>
c: to become increasingly acceptable or attractive <didn’t like it at first, but it grew on him>
transitive verb
1
a: to cause to grow <grow wheat>
b: to let grow on the body <grew a beard>
2
: to promote the development of <start a business and grow it successfully — J. L. Deckter>
Take 5 minutes to do any kind of artistic response: poem, doodle, quilt, pastel, pencil. ANYTHING counts. Don’t judge yourself or second guess yourself. There are no rules; just do it!
Post the direct URL (link) where your drawing, doodle, artwork is posted (e.g. your blog, Flickr) in the comments area of this post. I would really like to keep all the artwork together and provide a way for others to see your work and/or your blog.
The Creative Prompt Project, also, has a Flickr group, which you can join to post your responses. I created this spot so those of you without blogs and websites would have a place to post your responses.
Most quiltmakers are taught to press to the dark or in such a way as to enable nesting of seams. Generally this works pretty well for most projects.
Ruth McDowell talks a lot about the direction of the pressed seams. She uses the added bulk of the seam allowance to highlight sections of her quilts.
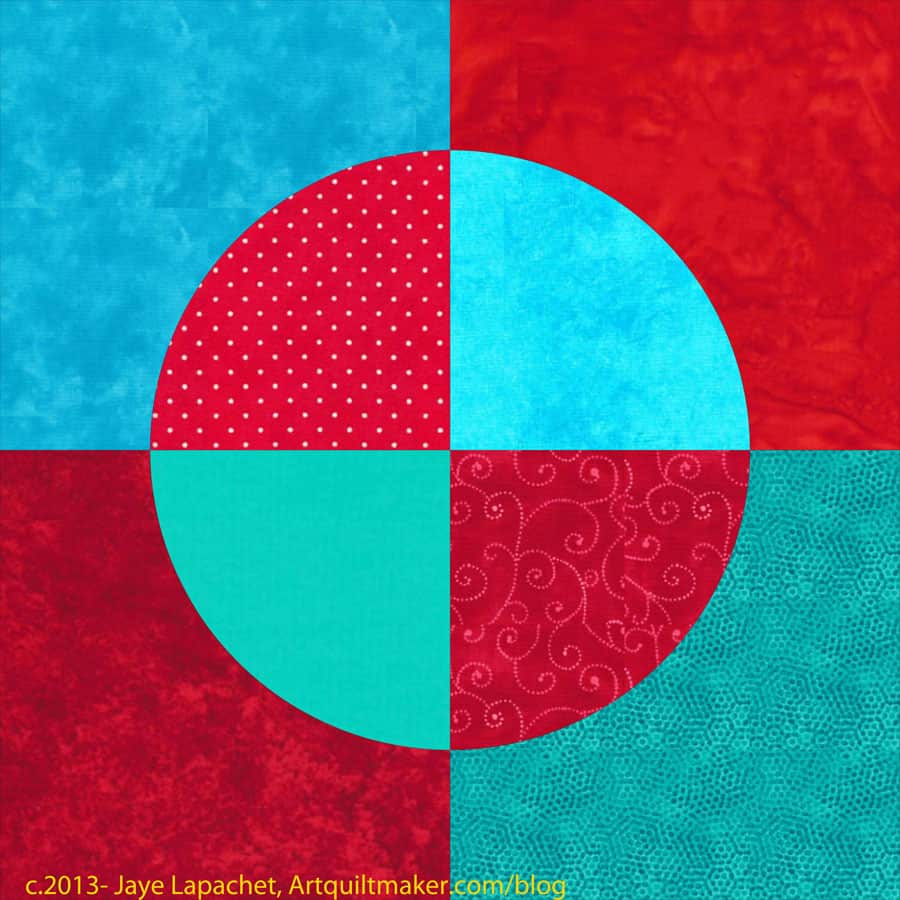
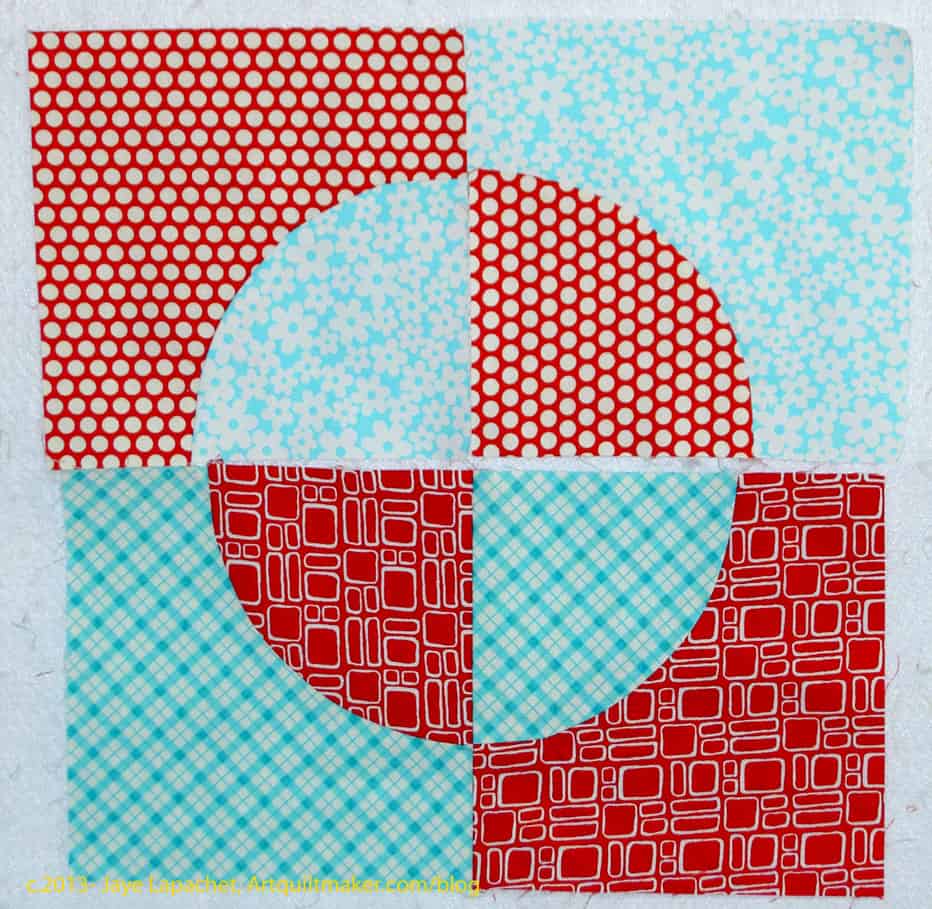
This technique came to mind when I was making a Drunkard’s Path block for the Sampler Class. I used to use the Drunkard’s Path as the block to learn curved piecing. It is a hard block, though and I want my students to be successful, so I chose the Dove this time. It went together so easily that I was glad I had chosen it.
Still, I may offer the Drunkard’s Path as an additional block in the Sampler Class, so I decided to make one in the colors of the Aqua-Red Sampler. This is where the pressing came to mind. I tried to press to the outside piece (the concave piece), so that I could next the seams, but the curved pie shape really wants to stand out, so I ended up pressing to the inside curve. We will see if it makes a difference in the way this piece stands out in the end.
Thanks to Ruth and Marlene who added notes about this book to their Goodreads update feeds. I think this might be one of my favorite books. I know I want to listen to it again.
I wasn’t sure about listening to this book. I don’t know who recommended it initially or why I added it. I know I downloaded it, because I didn’t know what else to download.
I am not am not much of a fan of the premise, but find the food aspect fascinating. I love the descriptions in this book of how traditional Chinese cooking separates flavors and textures in dishes, for example. Seeing Beijing and China through Maggie’s eyes helped me appreciate it more. I also thought the idea of meals as community (served family style) was profound.
As I worked my way through the book, I began to see links between the stated theories and principles of Chinese cooking *as it is described in the book* and quiltmaking. There is a beauty and meaning to the way the Chinese cooking is described, which I do not feel when I enter an American Chinese restaurant.
The beginning of every chapter has excerpts from a book called the Last Chinese Chef. I don’t know if this a real book, but the passages are evocative and towards the latter part of the book, especially the last chapters, I found my mind forming connections between what the narrator was saying and the Design Series I work on with Sandy. Throughout the book, the characters talk about links between the food and history, literature and poetry. I find this very beautiful.
Maggie’s situation is very sad, but seems to be about money and since she has downsized, I had a hard time feeling sorry for her with regard to the suit in China. I do feel sorry for her loss of her husband and think the grief she feels is fairly well described. I don’t think the name is a good one for her character. I am not sure why; it doesn’t seem to fit the story or her life story.
After finishing the whole book, I see the sort of crudeness of the beginning chapters in the description of the suit and China. I think that Nicole Mones smooths out the writing in such a way that the reader is soothed as the story goes on. I liked the ending very much and thought it fit. While I think there are more stories for these characters, I was satisfied with the ending.
This is a book where I might want to see the words on the page. This book also makes me want to add a section on Aesthetic to the Design series.
I have been working on getting the fabrics for the Star Sampler together.
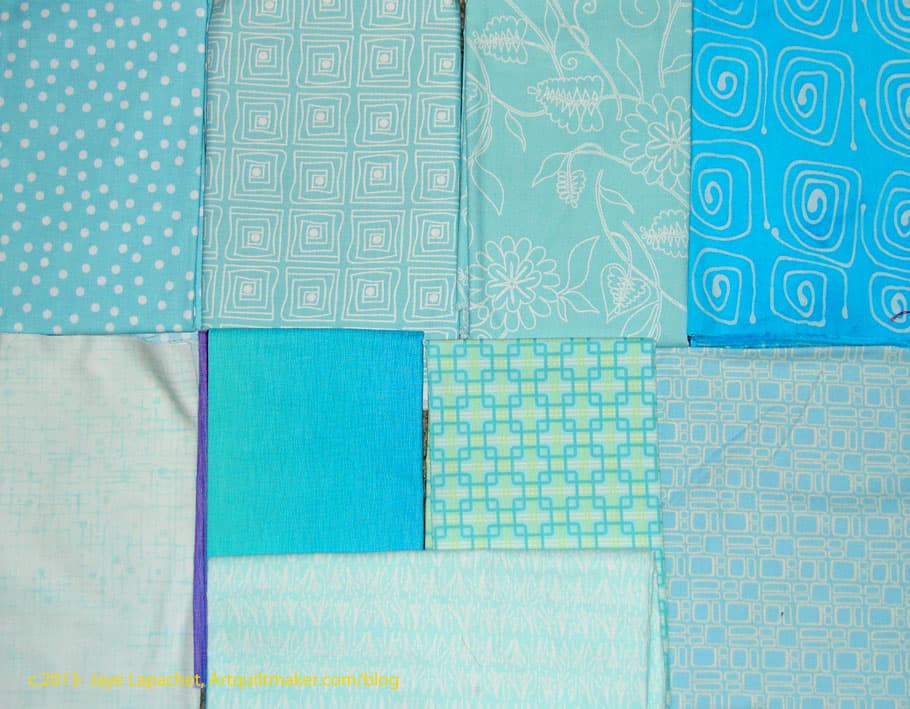
I washed a bunch of new fabrics over the weekend and have added some of them to this group. I have a few more to iron, but will probably add them as well.
It occurs to me that the ones with a lot of white won’t work with the background I have chosen. I want the stars to be crisp and I don’t want the colors of the fabric in the stars to bleed into the background. That might mean taking out that nice graphic dot in the top row.
Additional Star Sampler Fabrics – January 2013
After I started writing this post, I was doing my Qi Gong practice and looking at the FOTY 2012 top, which was in process on my design wall. I saw some other fabrics, which I thought needed to be added.
I do notice that the group is getting very blue heavy, so I need to use a lot of the non-blue fabrics OR find some more of the purples and greens.
It has taken me some time to get the right fabrics and I think I still have more to add and some to take away. This group has more fabric than the group I posted in December.
Now I need to get off my duff and make some blocks. Enough playing with fabrics!
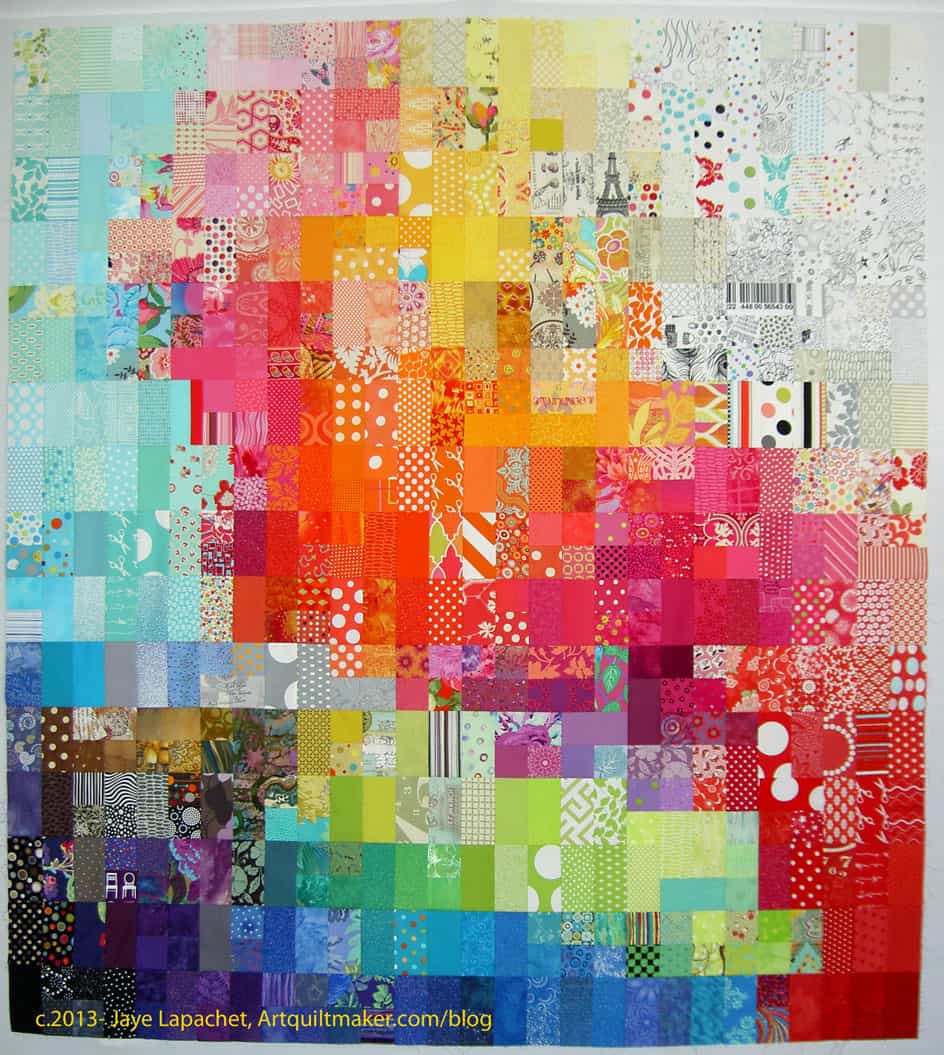
One of the things I love about this quilt is that I get to visit with my fabrics again as I sew the top together. I get to say hello and they get to tell me not to forget them and how they can be used.
I also love the anticipation of finishing this piece and hanging it on my wall and looking at it more often, walking by it every day and remembering the fabrics.
I finished the top yesterday and am very pleased with it.
I probably could have finished the back as well, but finishing this top is some kind of miracle, because of how slow I was moving. Working on it, I think it helped to keep my joints a bit more limber. It could just be a perception, though.
I have been a bit unwell and not up to a lot of contemplation about the meaning of this quilt. I thought that a slideshow of the progress might be just the thing to satisfy you. Enjoy!
I started a series of tutorials on sewing curves during my last Sampler Class, but I never finished the last two parts. The first part is about fabric and arrangement of pieces.
Curves-The Dove
Supplies:
The Dove pattern
paper scissors
template plastic
glue stick
fabric (at least 2 different)
pen ( I like the Pigma Micron & the Pilot Ultra Fine Point)
Fabric scissors
pins
Sewing machine
quarter inch foot or other marking system
thread
Iron and ironing board
We will be using a quarter inch seam allowance. You will need to adjust the pattern if you are using a different seam allowance.
The Dove pattern is a baby version of the Drunkard’s Path. If you make this piece, the next logical curved piece would be a Drunkard’s path block.
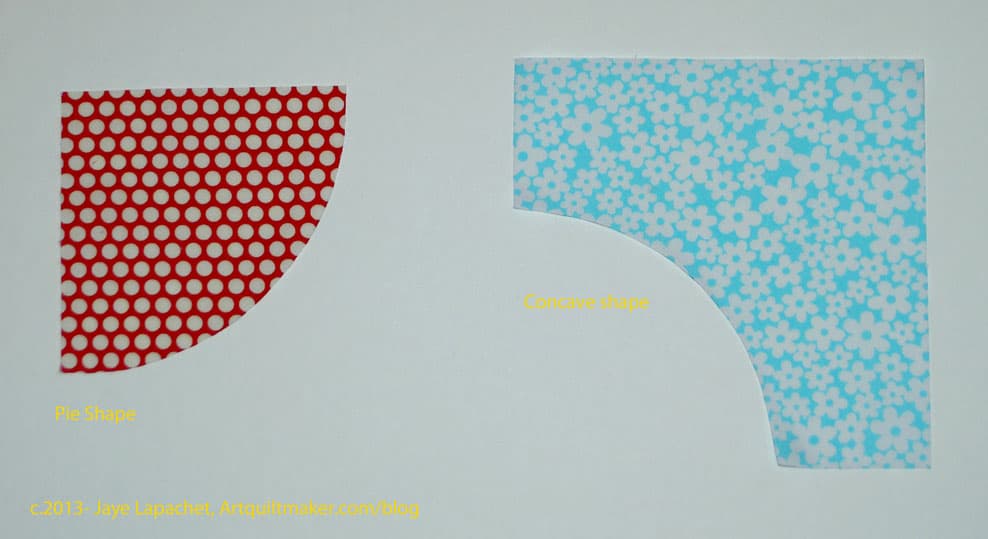
Key to Pieces
This block, as well as the Drunkard’s Path block is made from two types of pieces: a concave ‘L’ and a pie shape. The pie shape forms the circle in the center and the concave ‘L’ can be considered the background. In this block, the pieces are somewhat larger than in the 12″ Drunkard’s Path I used in my previous class. This design also has a very strong focal point.
Take the The Dove pattern and rough cut the templates.
Use the glue stick to stick the paper templates to the template plastic. You won’t need heat resistant template plastic as we won’t be ironing over the templates. It is fine to use, though, if that is the only kind you have.
Rough cut out the templates you have glued to the plastic.
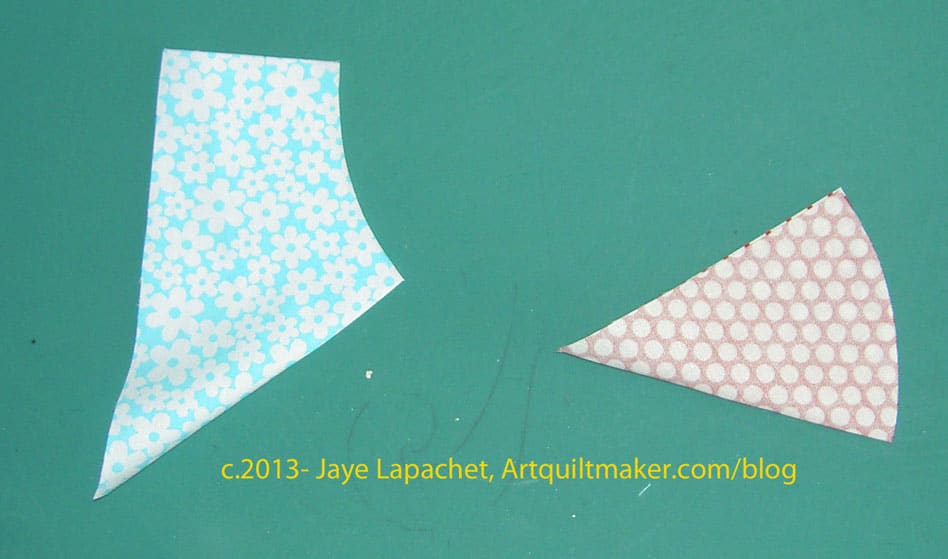
Carefully cut out the template on the seam allowance line, cutting off the rough cut paper and plastic.
Place your fabric wrong side up on a hard surface.
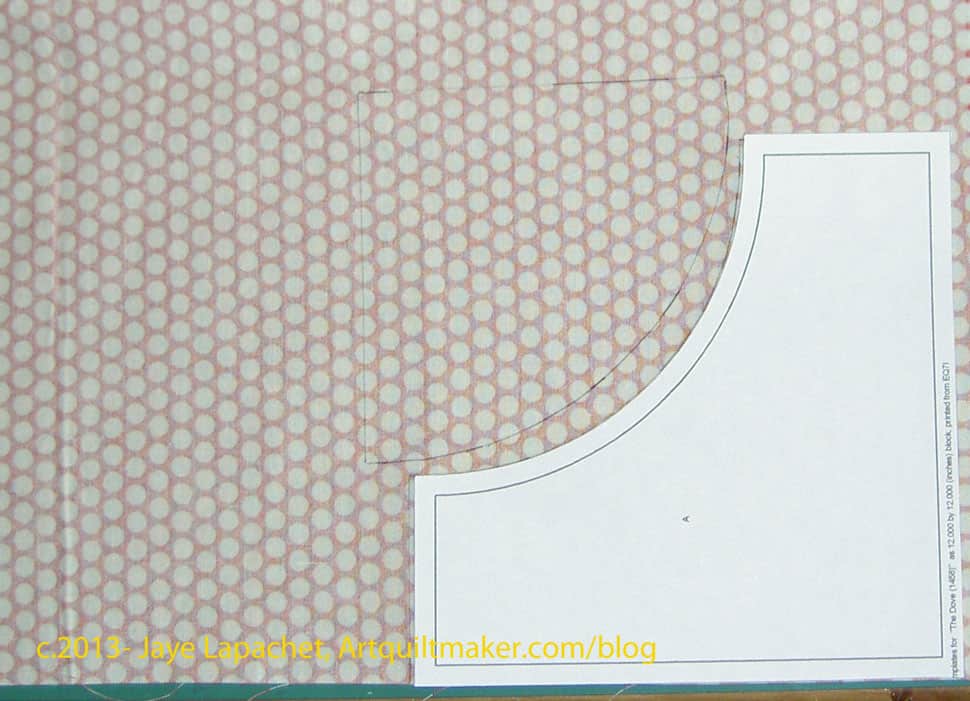
Draw Around Templates
Place the templates wrong side up on your chosen fabric. Nota bene: If you are using symmetrical templates, then it doesn’t matter whether they are right side or wrong side up, but it is good to get in the habit of doing it the right way in case you use non-symmetrical templates in a future project.
Draw around the template with your marking implement of choice. You will need to hold your template firmly so it doesn’t shift. You can also rough cut out the fabric pieces if trying to cut precisely or carefully with a long length of fabric draped over the cutting table is too difficult.
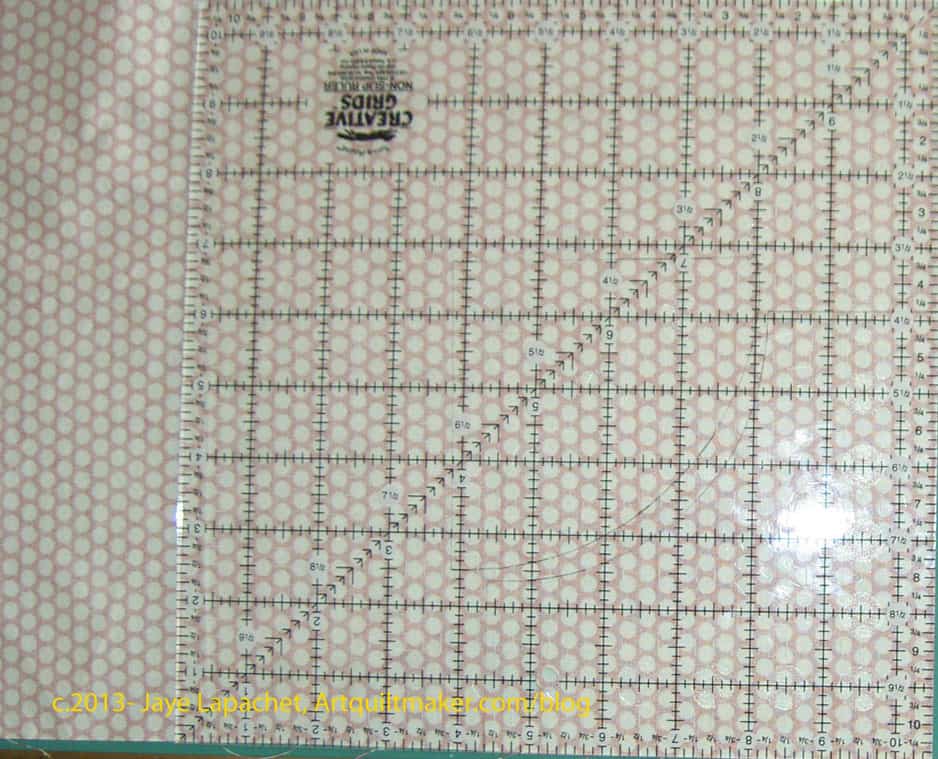
Rotary Cut 90 degree angles
Cut the fabric out carefully using your fabric scissors, especially the curves. Cut the drawn line off the fabric. I used a rotary cutter for the 90 degree angles.
Check to make sure that the fabric you just cut out is the same size and shape as your templates. You can lay the template over your fabric to check.
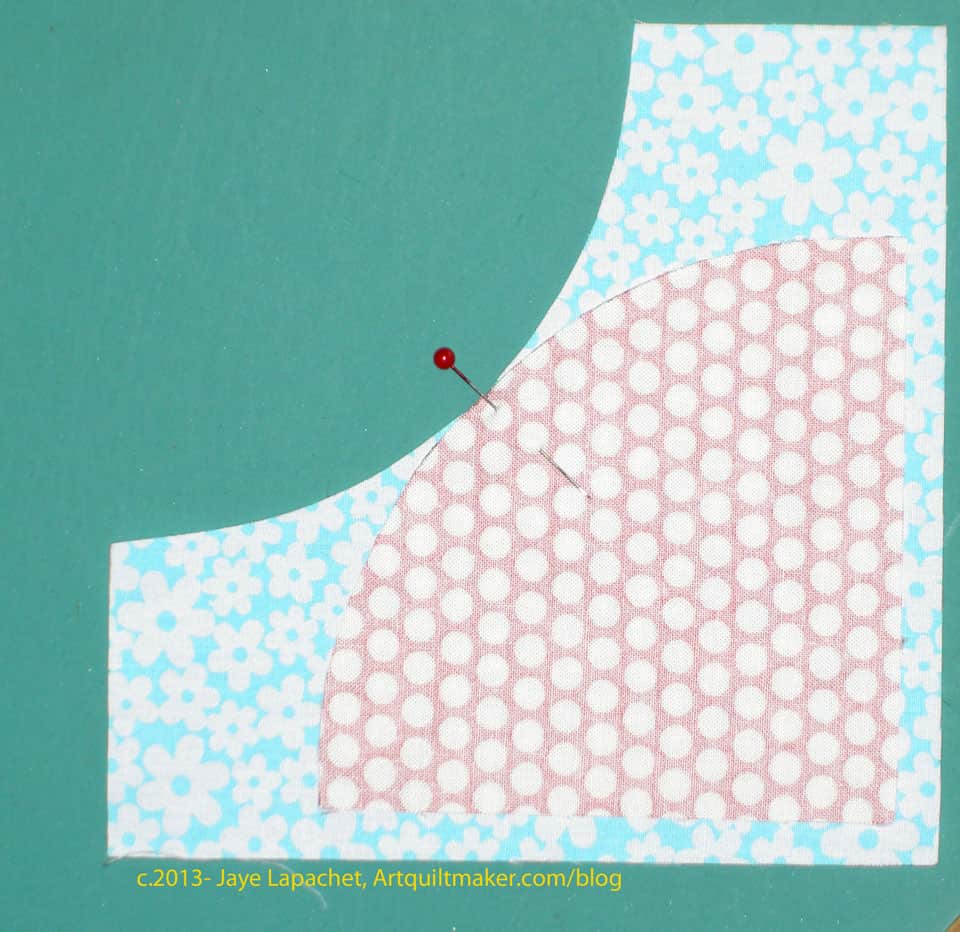
Fold Pieces in Half
Take a pie shape and a concave shape and fold them in half. Line up the edges carefully. The halfway point that you create will be used to make sure the pieces are sewn together evenly. You will want to make the marks so the patches nest. That means you fold the concave piece in half with right sides together and the pie shaped piece in half with the wrong sides together. Mark the halfway point with a pin or through finger pressing.
Nestle the pieces right sides together.
Pin in Middle
To do this, line up the middle mark where you have finger pressed to align the blocks accurately.
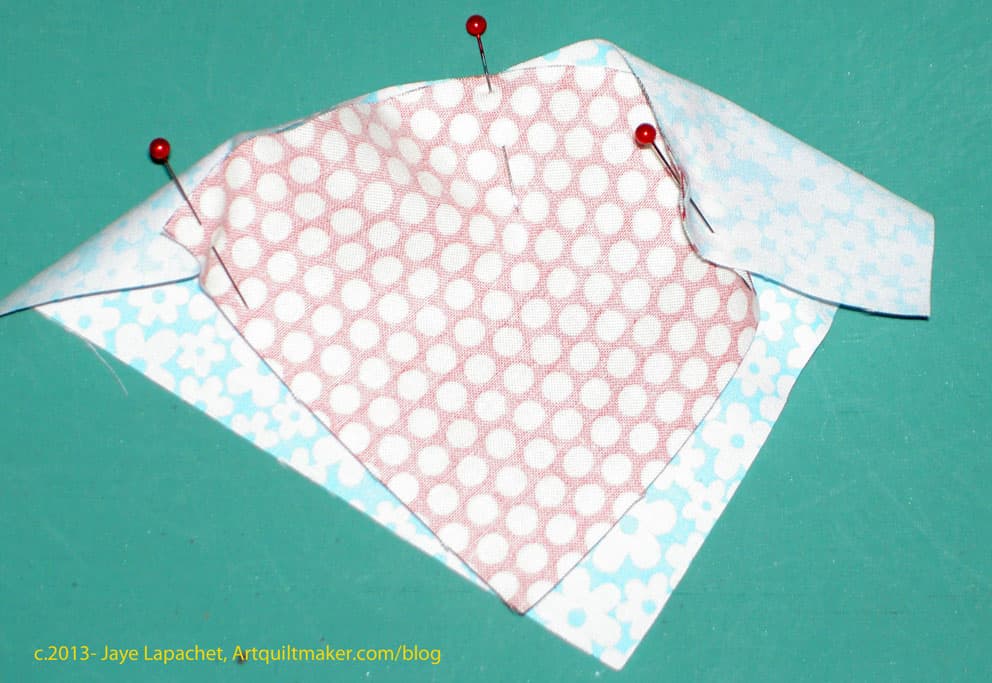
Pinned 3 times
Line up the outside edges and place a pin close to the two outside edges.
Fill in the area between the middle pin and each outside pin with pins. Ease the area between the outside and middle pins into smoothness with your fingers, lining up the edges of the fabric as you do so. Place as many pins as you need between the middle pin and the outside pin. Make sure the fabric is flat and there are no pooches. You may have to ease a bit, but do it very gently so as not to stretch the pieces. If you have to stretch and tug and pull, there is something wrong and you should check to see if your templates match your fabric pieces.
Completed Pinning
Do the same with the second section between the middle and the other outside edge until you have used a lot of pins.
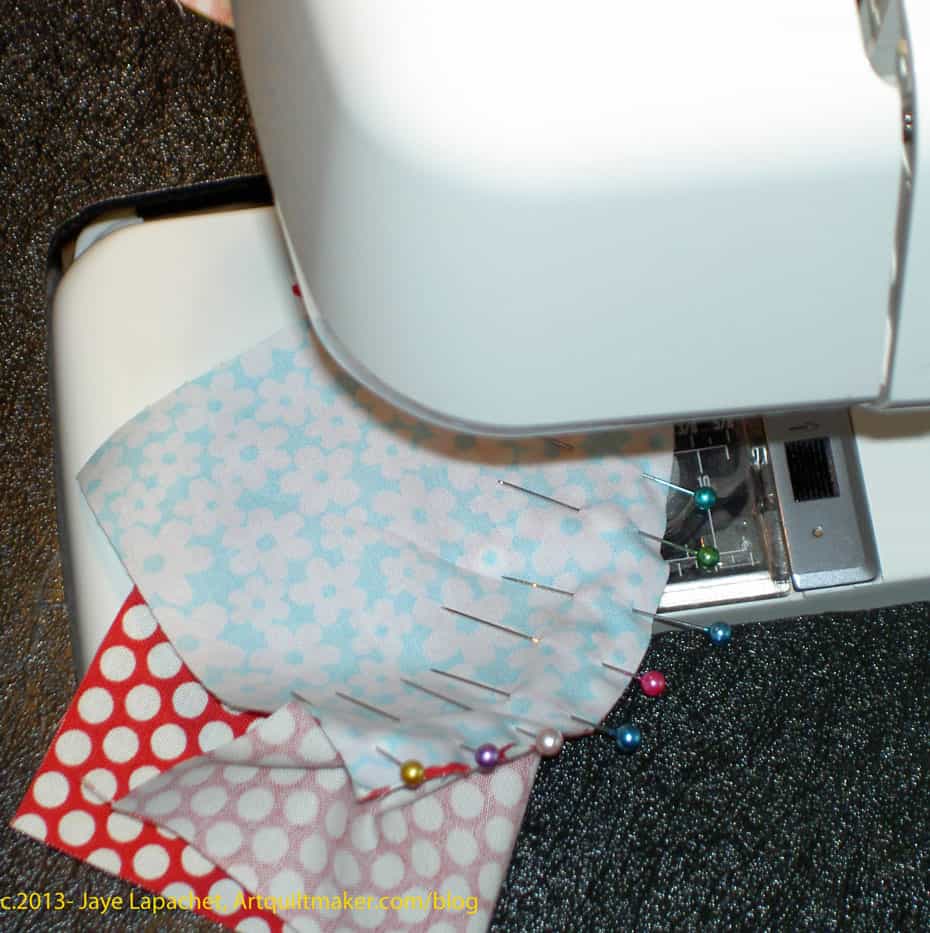
Sew Pie to Concave Piece
Sew Pie to Concave piece, removing pins before you sew over them. You may want to use the point of a pin to keep the edges of the fabric lined up until you sew over the area where the pin was. I also use a seam ripper as a stiletto to keep the two pieces in place after I remove the pins.
Dove Block in Process
Press carefully.
Repeat for all of the quarter blocks.
Dove Block in Process
Sew 2 quarter blocks together to make a half, then sew the other 2 quarter blocks together so you have two halves.
Press so that the center seams nest
Pin the two halves together, paying careful attention to the center.
Louise Ottilie Fresco (born 11 February 1952 in Meppel) is a Dutch scientist, director and writer.
al fresco
Buon fresco technique consists of painting in pigment mixed with water on a thin layer of wet, fresh (hence the name) lime mortar or plaster, for which the Italian word for plaster, intonaco, is used. (Wikipedia)
Fresco Chocolate is an artisan bean-to-bar chocolate maker producing award winning single origine chocolate.
Definition: Fresco (plural frescos or frescoes) is a technique of mural painting executed upon freshly laidlime plaster. Water is used as the vehicle for the pigment and, with the setting of the plaster, the painting becomes an integral part of the wall. The word fresco (Italian: affresco) is derived from the Italian adjective fresco meaning “fresh”. Fresco may thus be contrasted with secco mural painting techniques, on plasters of lime, earth, or gypsum, or applied to supplement painting in fresco. The fresco technique has been employed since antiquity and is closely associated with Italian Renaissance painting.[1][2]
Take 5 minutes to do any kind of artistic response: poem, doodle, quilt, pastel, pencil. ANYTHING counts. Don’t judge yourself or second guess yourself. There are no rules; just do it!
Post the direct URL (link) where your drawing, doodle, artwork is posted (e.g. your blog, Flickr) in the comments area of this post. I would really like to keep all the artwork together and provide a way for others to see your work and/or your blog.
The Creative Prompt Project, also, has a Flickr group, which you can join to post your responses. I created this spot so those of you without blogs and websites would have a place to post your responses.
Fresco Stainless Steel Coffee Percolator
Fresco Towels are produced by a family of artisans with many years of experience in the field of textile production.
A mobile kitchen serving Southern Oregon
Jacque Fresco (born March 13, 1916), is an American self-educated structural designer, architectural designer, concept artist, educator, and futurist.
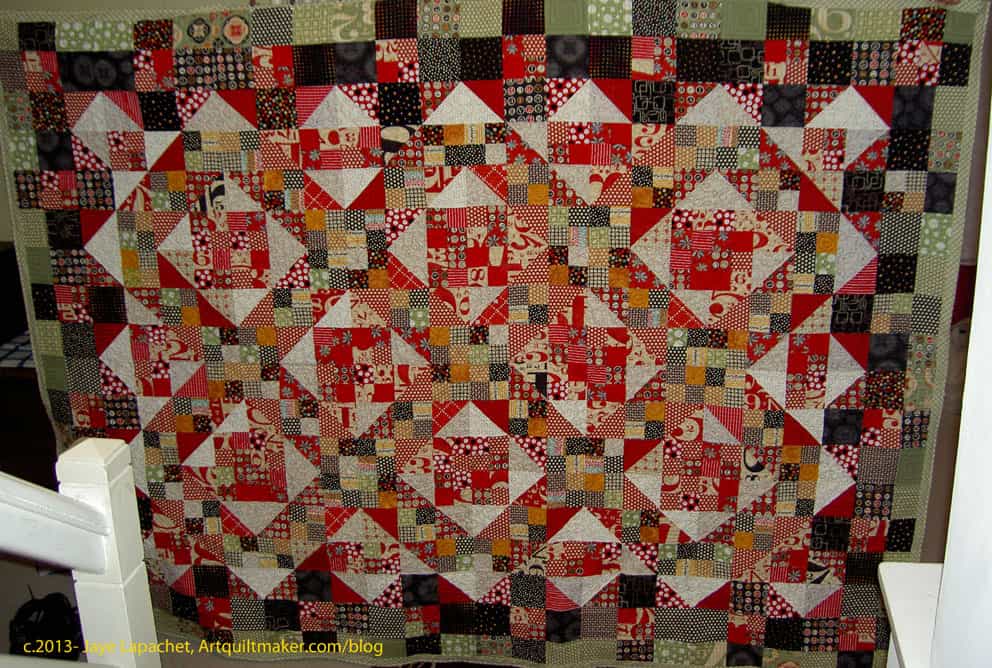
I didn’t just take a bunch of quilts to be quilted on Monday a week ago I also got the Stepping Stones quilt back from my quilter. I am sort of diligently working on the binding.
This quilt was so big. The boys insisted that I had to take the photo from the top of the stairs. I don’t know, but I didn’t want to fight with them about a photo. I’ll have to figure out another way to take the photo full on with no banister in the way.
The last weekend was spent at the CQFA Retreat. We go to a small town on the coast about half an hour away. It is perfect, because I don’t have to drive very far and it is beautiful.
Rhonda and Angela came to the CQFA Retreat for the first time. It was great, because they were able to get to know the other members better. As I mentioned CQFA and the BAMQG were on the same day so it was hard to stay and socialize. It was also great, because we got to spend much more time with Angela and Rhonda.
Rhonda brought her A-B-C Challenge and was able to work on it a little bit. It really looks great and the CQFAers loved her travel concept. I really admire people who bring multiple projects to the Retreat and then work on them. I brought two projects for the first and was able to work on both. One of my issues is I can’t organize myself well enough to make sure that I have all of the parts necessary for multiple projects.
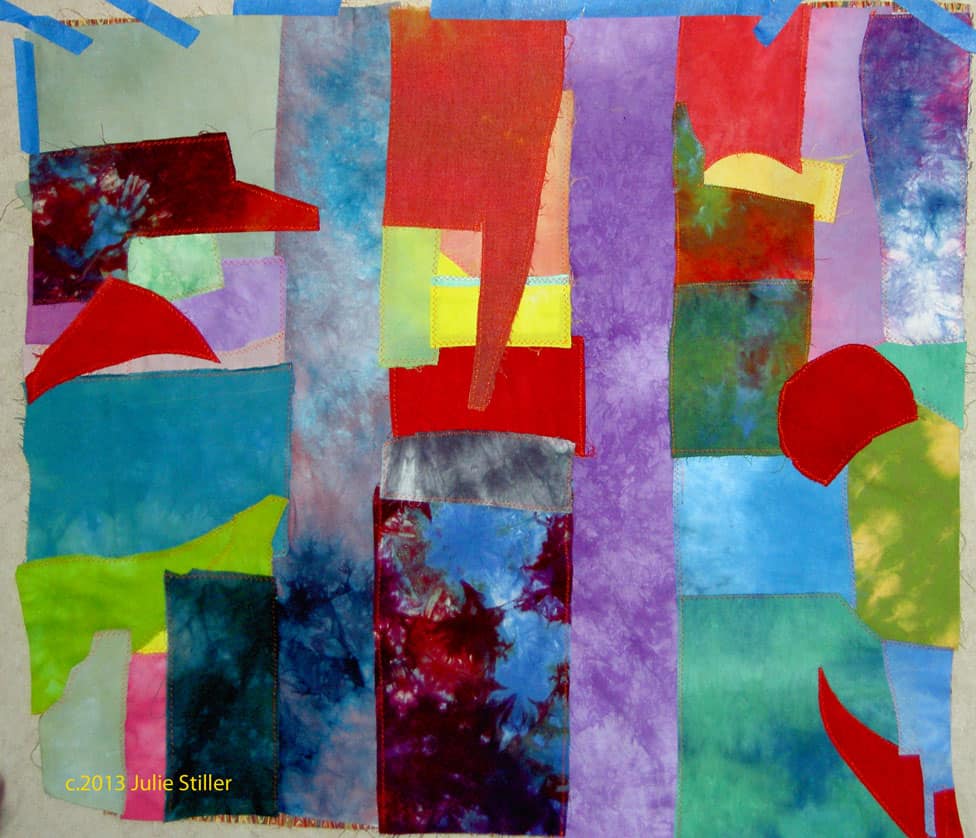
Julie, unlike me, has a wonderful spontaneity about her work. As a result, she worked on several different projects. The three parts of this piece are really a good aspect of this piece. Of course, she used her hand dyes.
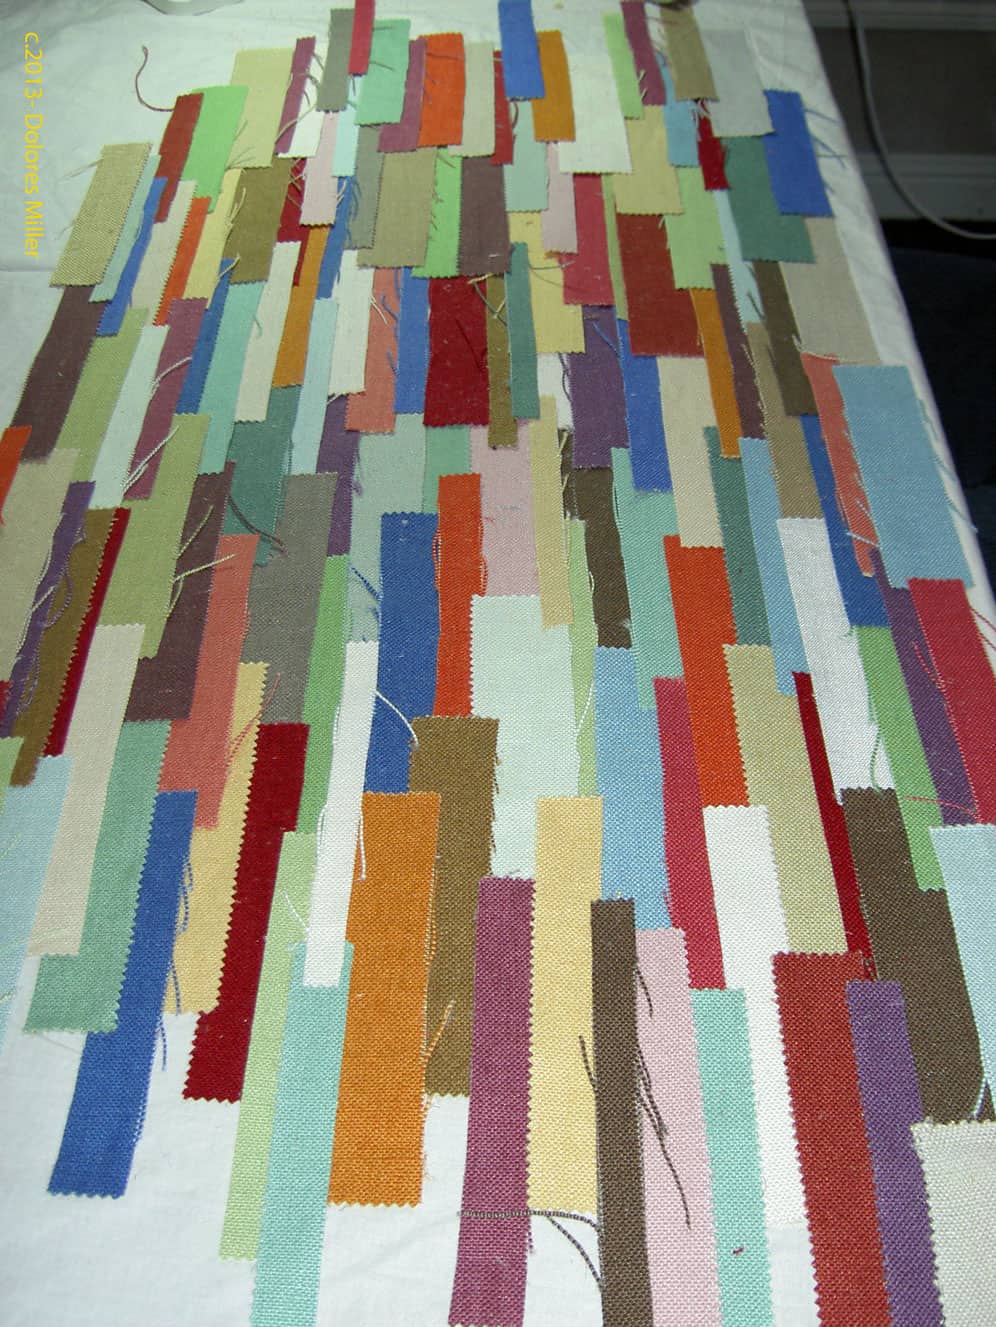
Dolores’ FabMo Piece
Dolores likes to plan her pieces and does gorgeous, thoughtful work. At this Retreat, however, Dolores was sitting next to Julie and, without Dolores realizing it, some of Julie’s spontaneity wore off (infected???) on Dolores. Dolores took a sample book of linen she got from FabMo and cut the pieces apart. She laid them out on a piece of muslin as a backing and glued them down temporarily.
Her intention was to sew them just enough to hold down the strips until she could embellish them.
The interesting thing about this piece is the texture of the fabric and the fraying of the edges. The colors are earthy with a bit of zing (see the purple?)
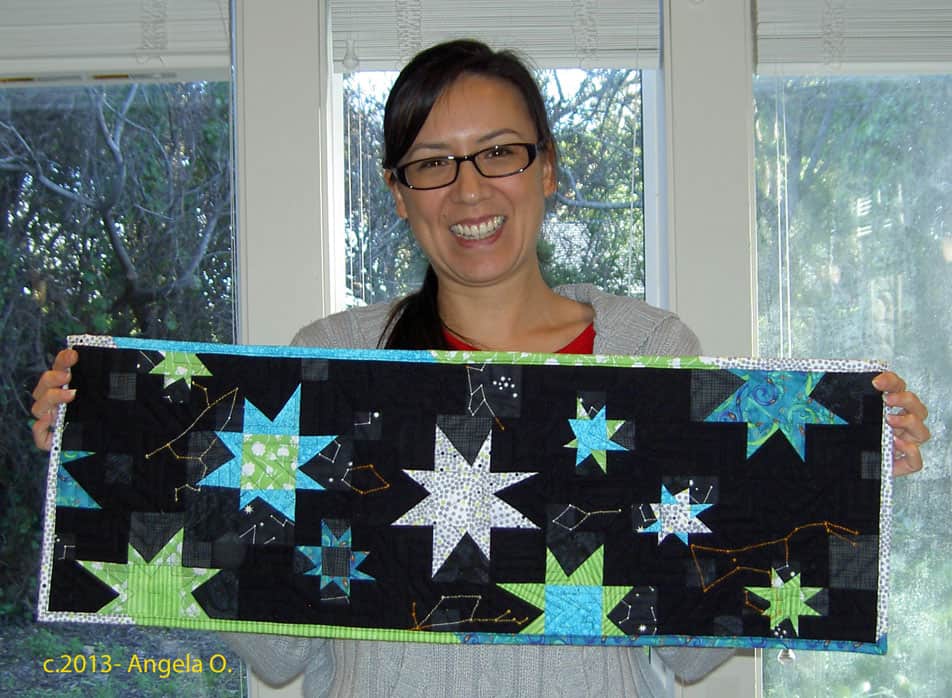
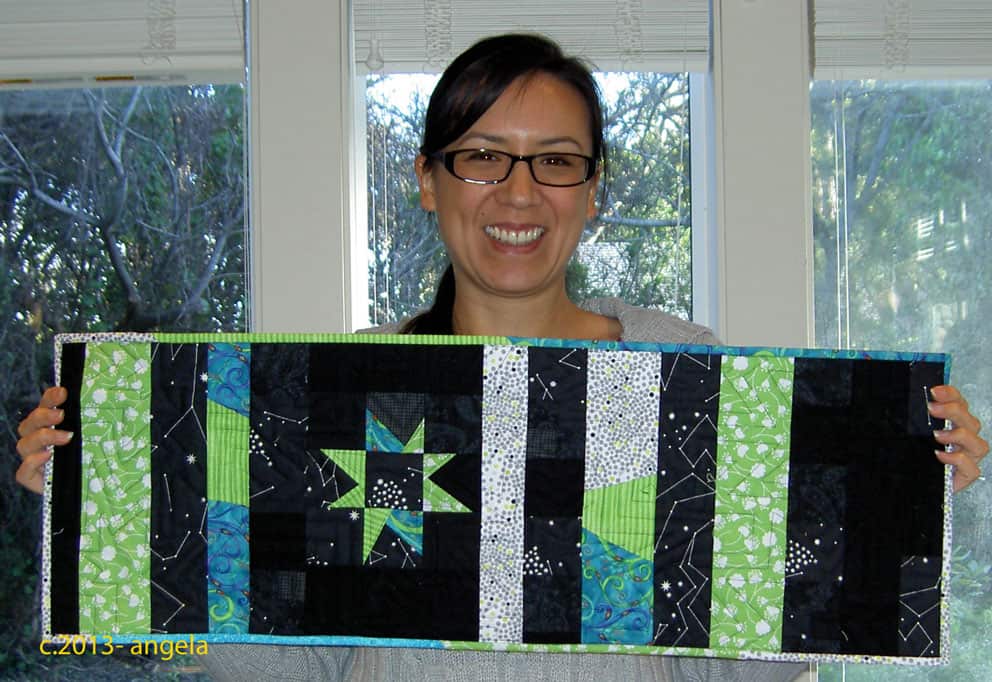
Angela’s Table Runner
Angela came with the SCVQA challenge project. They will be having a show in April and the theme is Oh My Stars!
Along with the show quilts, the organization will have a challenge exhibit and Angela brought her pieces along to work on. She brought fabric and thread and ended up with the piece on the left.
This is a miracle, because there were many, many rules to this challenge. I admire Angela for coming up with this gorgeous piece and still working within the rules of the challenge.
Angela’s Table Runner
She decided to use the Gwen Marston wonky stars technique. I love this piece. I love the colors (of course!!! Look at that turquoise). I love the embroidery of constellations she did as embellishments. I would love to see Angela make a similar piece but larger.
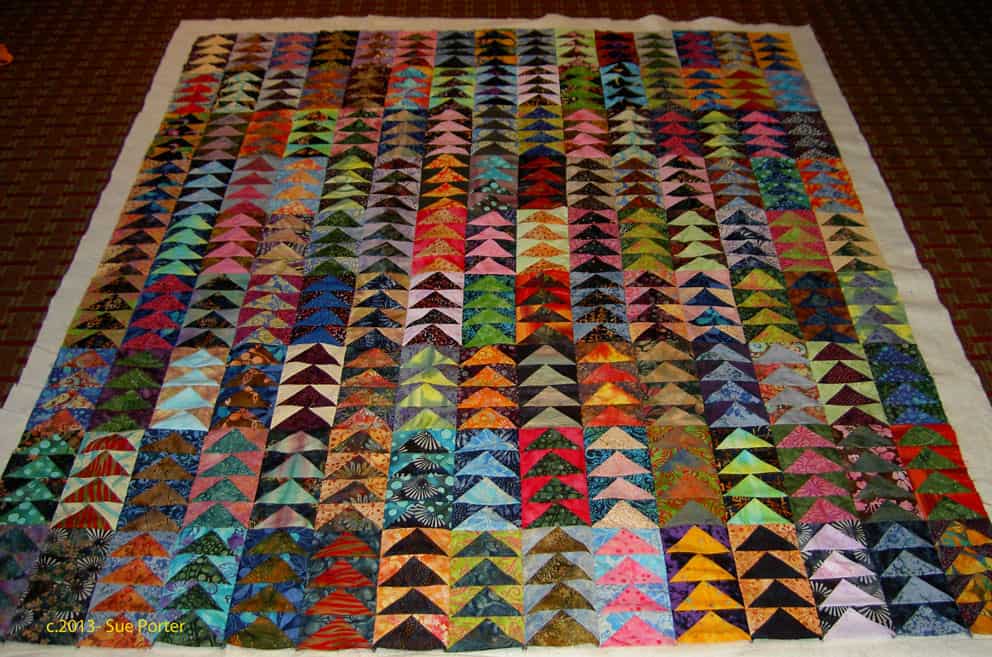
Sue’s Flying Geese
Sue worked, again, with batiks. Her piece from last year was just as gorgeous and when you look at them together, they look like a series.
I also like the juxtaposition of the classic Flying Geese with the contemporary look of the batiks. I know it is weird to say such a thing, but it looks so interesting to me and really stands out to me.
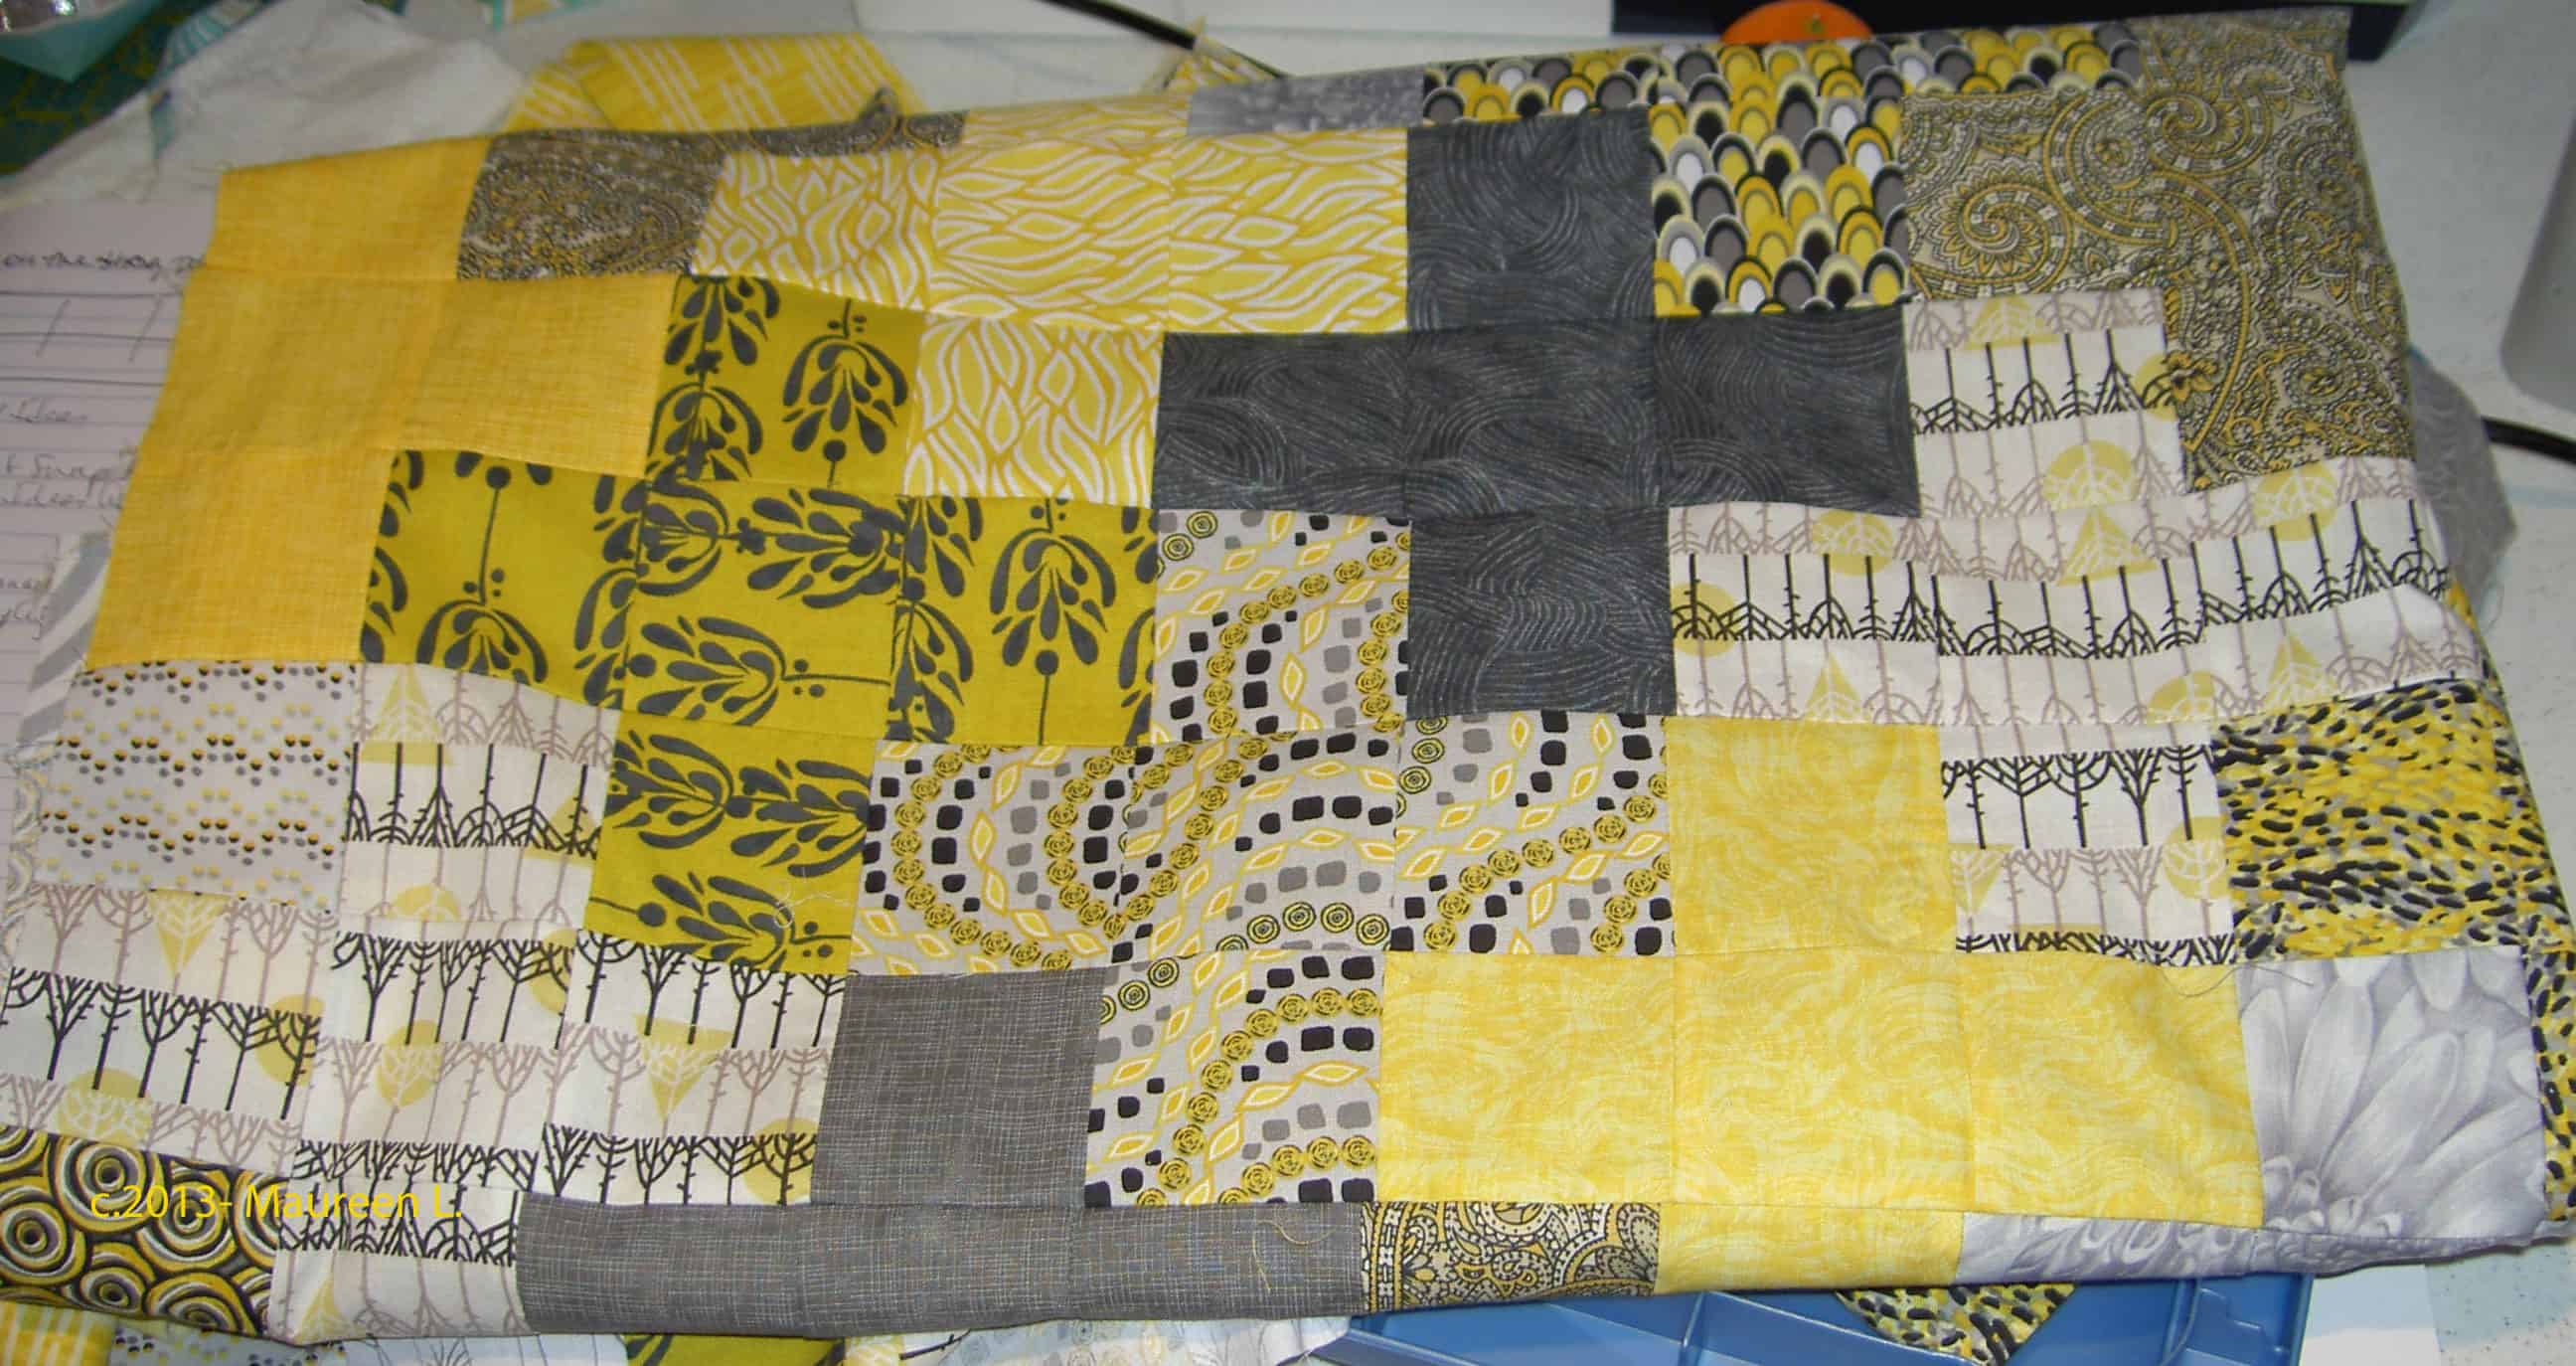
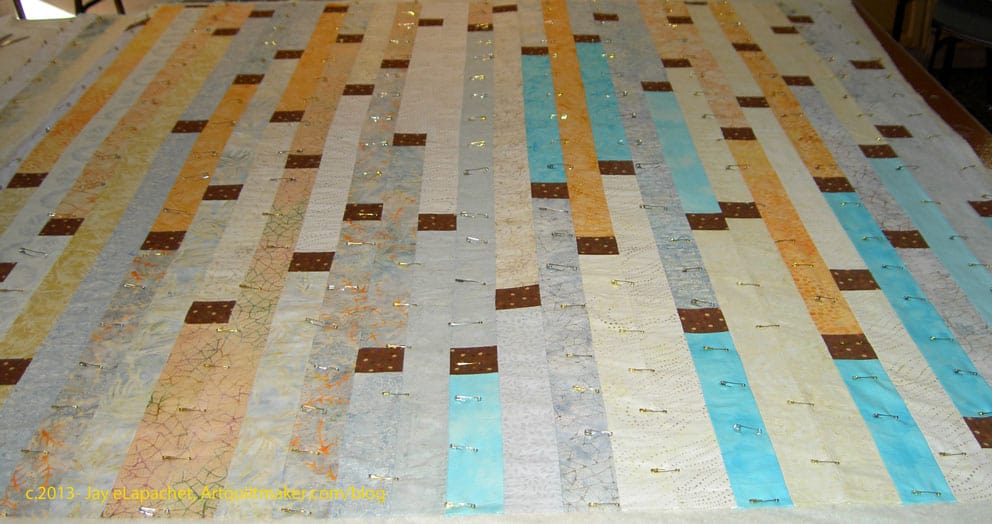
Maureen’s Plus Quilt
Maureen started out with this Plus type quilt.
I love the fabrics that she chose. Maureen had a Jelly Roll or strip set with these colors. Instead of using rectangles as some of the pieces Maureen used all squares. She told me that starting with this piece made for a very calming beginning to the quilt retreat.
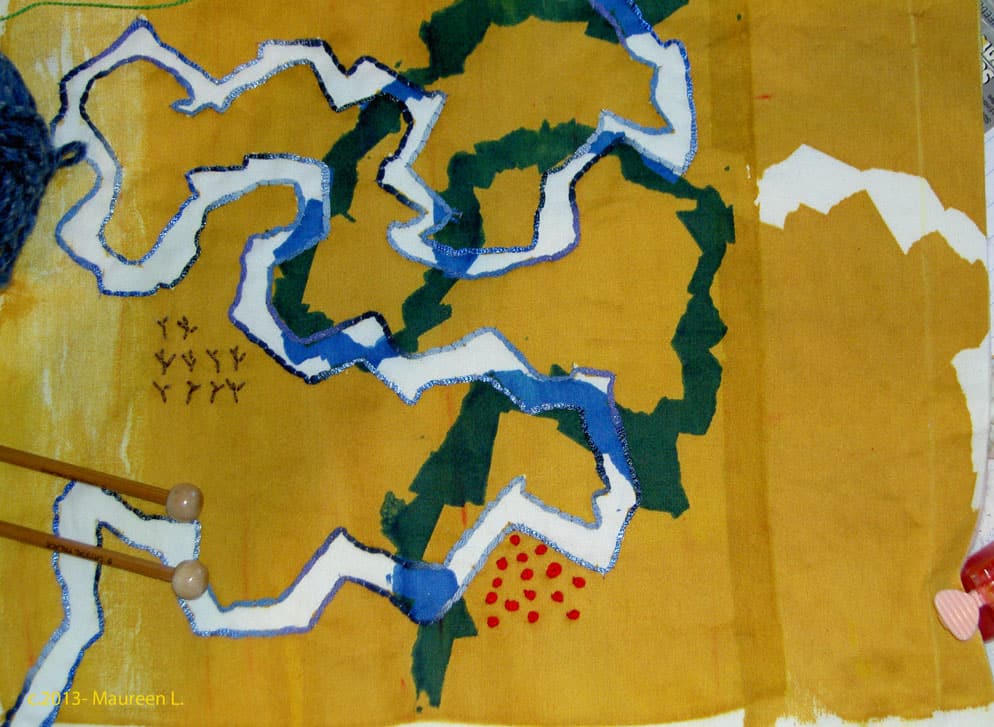
Maureen’s Fabric Map
Maureen started to have some trouble with her sewing machine so she switched to a hand project.
This piece looked like a map. Maureen did a lot of handwork on the piece and was thinking about others. She added French knots and a lot of couching around the edges of the white and blue areas..
DoloresCalm Basting
This is what Calm looks like during basting. Big Deal, right?
Rhonda’s Hand project
Rhonda took a class on different types of handwork. In the picture above we are helping Rhonda chose the colors for the next set of borders.
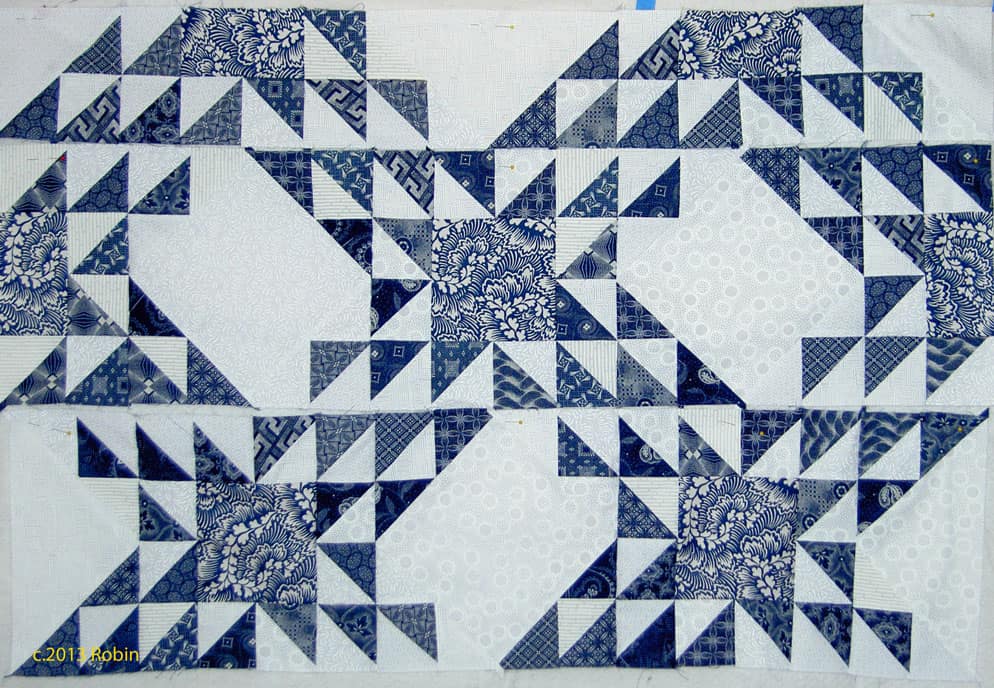
Robin’s Indigo Ocean Waves
Robin had some indigo fabrics from her mother. They were from South Africa. She found some great, and perfect, contemporary companion prints to use with the indigos.
The large squares are the contemporary prints. I also like the way these blocks are a bit off. It gives the piece movement.
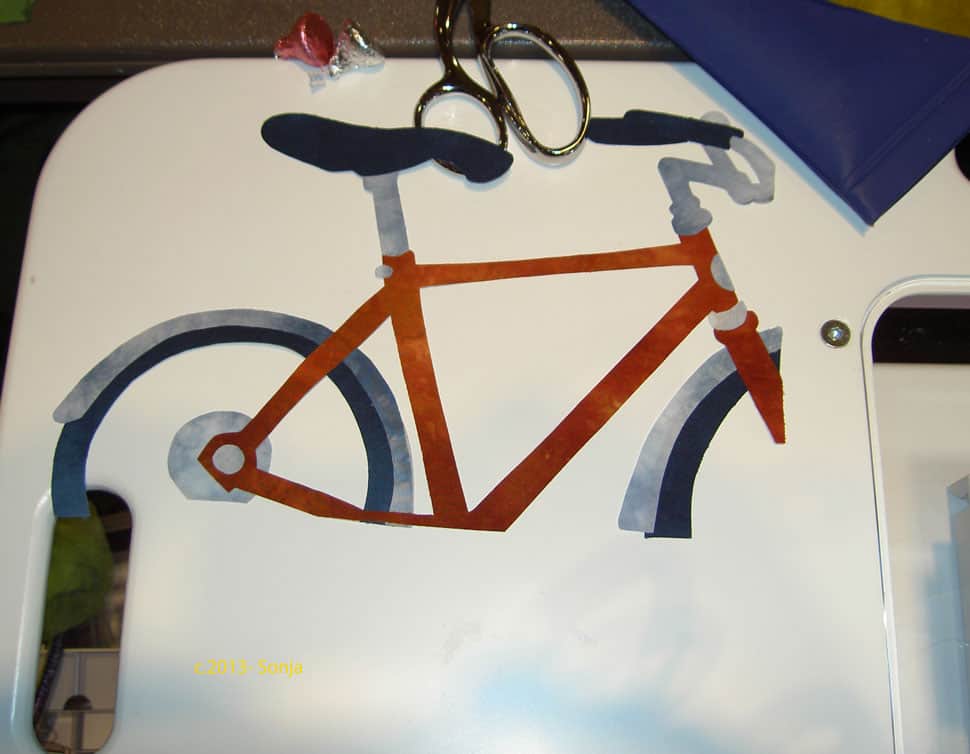
Sonja’s Bicycle
Sonja was working on several pieces as well. She was inspired by some of the activities she does with her family. In addition to the bicycle, she had a scooter as part of the series. It was such great work; I can’t wait to see it finished.