As mentioned, we are all about starting projects here at AQ!
Yes, I am doing the Latifah Saafir Mystery quilt. My time has not become more free, but I am doing it anyway. It uses the HuRTy and this is a good way to get the tool into my bag of tricks.
It is a little unclear to me whether you can still join, but here is a link and you might be able to navigate your way from there.
Latifah is at H&H in Chicago (whatever that is!), so participants have a little time. I have two selections of fabric that I am contemplating. The quilt needs 7 fabrics including a contrasting background.
Fabric Pull – Guicy Guice
First, is all fabrics that I bought recently.
Most of them are from Guicy Guice, but there are a few from Alison Glass and that white is Seasons from Figo fabrics.
This is mostly cool colors, which should come as no surprise. I am not sure if there is enough contrast, but I like all the fabrics, so I am willing to go with it.
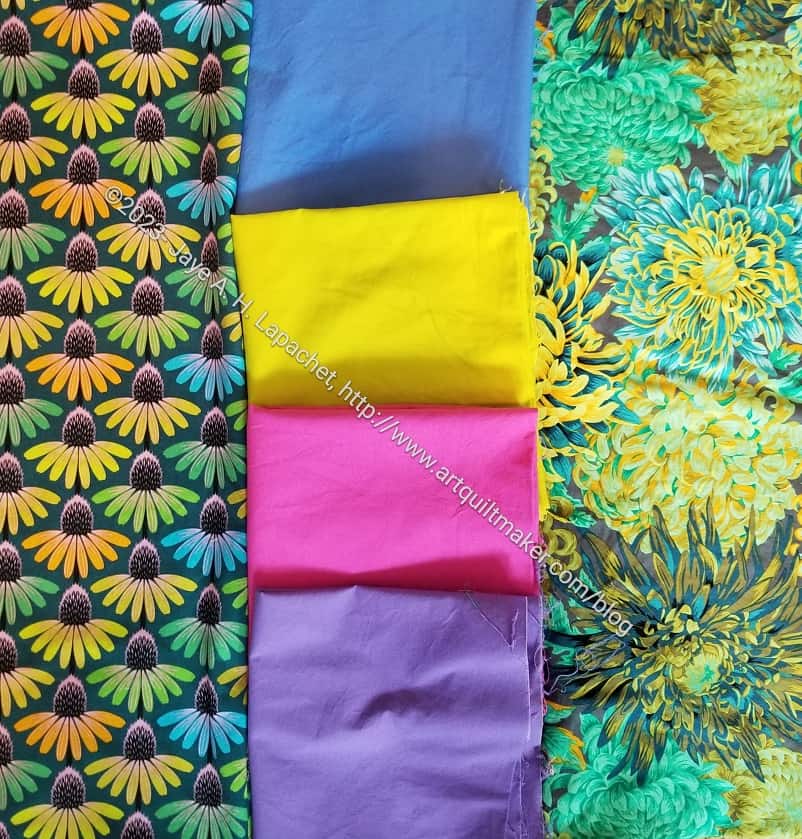
Coneflowers & Chrysanthemum Fabric Pull
The second option is an old fabric pull for which I am still seeking a project.
I still really like this group of fabrics. I am just not sure if pointy HRTs would work with the Coneflowers & Chrysanthemums.
I do feel like there is something missing and I can’t quite figure out what. Dots, maybe?
Well, the Rose Petrillo sort of returned. I found the project bag in which I put all the pieces.
There are a couple of pieces missing like the strap. I’ll have to find some good fabric for that.
The fabric pieces are all interfaced with SF101, but no foam is cut out. It could be that I didn’t have foam at the time I cut out the pieces. I really don’t remember.
I finished the Vervain belt bag the other day. This is definitely a bag I need to make again to improve my skills.
I did find that the bag went together more smoothly than I anticipated. It made me happy and it made me confident enough to try the Allium bag soon.
This bag is really making me consider buying a rivet press. I got the magnetic snaps in with no problem, but it was a bit of a struggle. What is stopping me from buying a press is space. Where would I keep such a huge piece of equipment? Not sure, so I need to clear some things out to make space.
Vervain: front pocket open
So this bag has a flat front pocket. The snaps are on the front and don’t meet when the bag is as it is shown in the first photo above. The snaps are uneven so the pocket can fit something with more dimension.
I was able to fit my phone in that pocket, but not very well. I wouldn’t store it there on a regular basis. I would use that pocket for lip balm, wet wipes and other flat items.
Vervain: back
The back has no pockets, though I could have included a vertical zipper pocket. I might if I make this again.
I also used a really nice parachute clip for this since it is for my aunt. The clip is a little heavy and that is a concern, but we will see. I hope it doesn’t prevent her from using it.
Vervain: interior
Inside is where I would put my phone, if I were using this bag.
It has a zipper that closes the bag completely and also an interior zip pocket for more security.
I decided that making a pencil roll would fit in with the upcoming Organizer swap and would be good to enter into the fair. I had nothing to enter and needed to make something. Time grew short and my free time became a precious commodity, so here we are.
I spent some of last weekend sewing the strips together after cutting them out at Sew Day. It didn’t all go as smoothly as I would have liked, but it has been about 6 years since I made one of these so some bumps in the path are to be expected. I am thinking black and white for the other pieces. Dots and stripes.
I hope to finish this sometime this week so I can hand it in at the meeting next weekend to be taken to the Fair.
Why? I don’t know. I have had a desire to make a few more recently. I bought a fat quarter of fabric specifically for this project and decided that this week was the week to make them. I was able to cut four circles out of a fat quarter and will have a few scraps left to make some donation blocks.
I also used some of the fabric I bought after Sara’s February or March live show. It’s been sitting out taunting me and this was a good way to test the waters.
I started out with the 8 inch Clammy**. I will also work on some with the 6 inch Clammy** next. I am just playing now. I don’t yet have a design or know what my background fabric will be. I have been thinking about it and will probably select a solid. Stay tuned.
**N. B. : Obviously, you should shop at local quilt shops and small businesses. However, if you are too busy or can’t find what you need there, I use Amazon affiliate links and may be paid for your purchase of an item when you click on an item’s link in my post. There is no additional cost to you for clicking or purchasing items I recommend. I appreciate your clicks and purchases as it helps support this website.
You are probably wondering why I am starting yet another quilt. I am kind of wondering that myself. I seem to be in starting mode.
Morning Flower Patch & Pencil Roll start
As mentioned a few days ago, I cut a lot of pieces for this quilt, which can be found in the book, Just Two Charm Pack Quilts* by Cheryl Brickey. I got it out of the library and used Hoopla, but if you have a lot of charm packs, you might be interested in buying it.
Cyndi turned me on to this pattern and she made a really nice version, which I know I photographed, but can’t find the photo. Stay tuned for more.
**N. B. : Obviously, you should shop at local quilt shops and small businesses. However, if you are too busy or can’t find what you need there, I use Amazon affiliate links and may be paid for your purchase of an item when you click on an item’s link in my post. There is no additional cost to you for clicking or purchasing items I recommend. I appreciate your clicks and purchases as it helps support this website.
Cyndi has been working on the donation top that she and Tim made when we had our Sew Day at her house.
She brought it to Sew Day last week so we all could see what she had done.
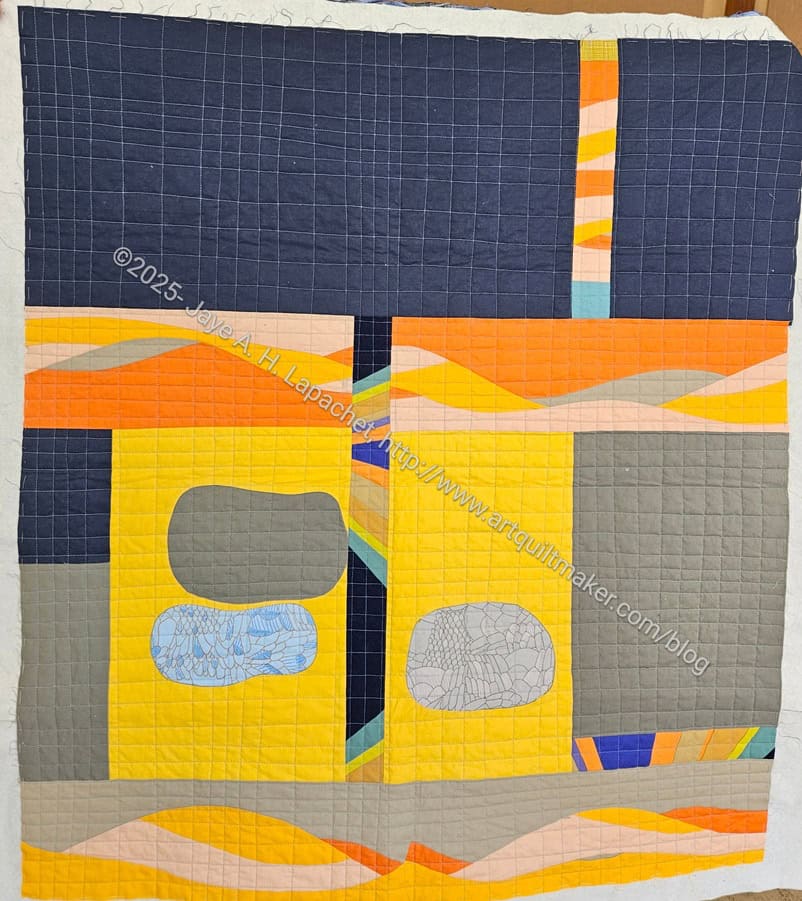
Cyndi’s donation quilt
OMG! She did a fantastic job quilting it. The improv grid is a perfect quilting design. The quilt came out so much better than any of us ever anticipated.
It really is made up of parts that Cyndi was going to toss. This is such a great outcome.
Today I have been writing on the Artquiltmaker Blog for 20 years. I started when I was three. LOL. Just kidding.
My first post was on May 9, 2005, but my first meaty post was on May 14, 2005. I even got a comment on my first post!
THEN: I was the mother of a 7 year old
YM Sewing pajama pants
NOW: I am the mother of a 28 year old
VERDICT: parenting changes, but the challenges just keep coming. I didn’t have as much time to write then so my blogging efforts got off to a slow start, but for the past 15 years I have written 300 or more posts per year. The whole time I have made various fabric related projects.
I started out on the Blogger platform with a free account and eventually moved over to WordPress, which I like. I also pay for it.
THEN: I had limits on what I could upload, thought the Blogger platform was pretty generous. I also couldn’t have my own domain name.
NOW: I use WordPress and I have a lot of flexibility. I can change the look and feel of the blog. I can upload whatever I want and write however much I want.
VERDICT: I am glad I changed to WordPress and will probably stick with it. It is a hassle to change and even now I sometimes find a link to the old blog or a photo that still lives somewhere on Blogger.
I don’t celebrate my Blogiversary every year, but I thought this year was a milestone. 20 years is a long time to do anything. I have been married for longer and my offspring is older than 20. I have friends I have known for more than 20 years, but there aren’t many other activities I have done for 20 years, except for quiltmaking. I am sure I could find other things, but still 20 years is a milestone.
I have always written in this blog to keep track of what I am doing for myself. I like to go back and read my thoughts on a project or link to an old project that influenced a new project. It is fun to see how my ideas and projects have changed over the years.
THEN: Everyone was blogging. All the famous designers and small quiltmaking business owners had blogs. It was hard to keep up with all the great information out there.
NOW: Instagram is king (queen?). People now post there and blogs are silent.
VERDICT: I still prefer blogs. I like the visual and scroll-ability of IG, but I don’t like reading long posts on my phone, so mostly I don’t read them. Also, I like writing more on my computer. It is easier to keep my thoughts coherent and organized. Also, the keyboard is bigger.
What hasn’t changed is how much I enjoy quiltmaking, and, now, bagmaking. I still enjoy writing about quiltmaking and bagmaking and getting your thoughts on my projects.
THEN: I made almost exclusively quilts. I also started new projects whenever I felt like it.
NOW: I also make bags. I started making bags about 10 years ago and never thought I would make bags as complicated as I make now. I really enjoy bagmaking, especially the speed (relative to quilts) that I can complete them. I find the shift from 2D to 3D very difficult, so I think I will continue to make bags to keep my brain supple. I also work hard at finishing the projects I start. The 26 Projects project was great for finishing up WIPs.
VERDICT: My work is evolving and that helps me to stay interested. I also prefer to finish projects I start as I found that I lose interest in old projects that have been sitting around.
House and Garden
I was full into making art quilts when I started this blog. I made quite a few. I make fewer now, but the ones I do make are mostly politically motivated and spring from my mind in the same way Athena emerged from Zeus’ head: fully formed and in full armor. Since the beginning, my work has focused on color and the relationship of shapes. I work with a lot of blocks, but hope I bring a fresh perspective to them. I am enjoying what I am making.
THEN: I worked almost exclusively in art quilts when I started this blog.
NOW: I find that technique – good technique – was very important to me. I wanted to make good quilts that would last, regardless whether they are block based quilts or art quilts.
VERDICT: A lot of my quilts have an art element, perhaps color or shape, but my technique is really good and I think that is important.
Complete Book of Quiltmaking by Michele Walker
The Sampler Quilt by Diana Leone
The two books above are the books I used as my textbooks, especially The Sampler Quilt book. I used to buy every quilt book that was published. It was possible then as not as many books were published in the late 1980s and early 1990s as are published now. Most of the books then were technique books. There was a lot of information about how to do one technique and a few projects. Now the books are all about the projects and I just don’t understand the appeal.
THEN: When I started this blog, I collected many different kinds of quilt books. I read them all and learned a lot from various artists who wrote them.
NOW: I rarely buy a current book. I get a lot of them from the library if I want to take a look. When I do buy a book, it is often a quilt history book or a book of bag projects I find interesting. I also don’t have space for many more books, so I have to be discerning.
VERDICT: I am still very book oriented and prefer to get my information from a print book than a website. I am disappointed that the market has moved towards project books. I love my collection of books and use them frequently.
Check the Year in Review tag to see all the projects I have made over the years.
While I write for myself, this blog wouldn’t be the same without you. You have contributed so much over the years. Thank you for reading.
One of the things I do when I buy new fabric and supplies is take a photo of what I bought. Then I tag the photo with the name of the shop. These photos generally stay on my phone as I don’t normally post what I bought. Occasionally I do.
Speckle from Stitch
After not being able to find that white fabric I was using for Chain Link, I went back to my Fabric & Supplies photo album and looked it up. I found the photo and that led to where I bought it. I always tag my fabric & supplies photos with the name of the shop where I bought it. That allowed me to go to their website and found the name of the fabric. I should have known! Ruby Star Society. It’s Speckled in Confetti by Rashida Coleman-Hale.
This means that I’ll have enough fabric to work on, and, with luck, finish Chain Link. Now I won’t be so anxious about working with the pieces I have for fear of running out. I know the last bit of the fabric I bought will turn up sometime.
I think I might have had a little dip in my Sew-jo and didn’t really know what was going on. I had a great sewing session over the weekend and I think I bag to my normal enthusiasm and energy.
Vervain in progress
I really made good progress on the Vervain belt bag for my aunt. You might think this doesn’t look like much, but the sewn bits are the result of about 20 steps!
I was concerned about making a belt bag (fanny pack). I am not sure why, but it seemed harder than normal bags. I think I was just feeling down.
I have a few more steps to go – maybe another 15? I am excited about this project and how it is evolving. I’ll probably be done by next week. We’ll see.
Yes, so far May seems to be all about pillowcases!
After reminding myself of the Christmas pillowcase project on which I want to work, I finally made time to check my stock of Christmas fabric. Fortunately, I have 8 yards I can use, though I may need to find some cuff fabric. I’ll mix and match a bit, but I may not have enough.
2025 Pillowcase project fabrics
The fabrics I have are more subtle than I usually use for Christmas pillowcases. I want to use fabric I have, however, so these are the choices.
The mermaid fabric is the one girly fabric I have, so I’ll have to decide which of the two girls get it.
Next steps:
Wash the fabric
Cut pillowcase bodies
Decide on cuffs
Sew
Maybe I’ll have to think about Christmas pillowcases for the Angel family?
I sent off the Butterfly set to its new home. One of my fabulous readers made a very generous donation to an organization of women helping women. I sent the check straight to them. This happened after I mentioned the organization for whom I originally made the set declined to include it in their auction. Their loss.
I don’t normally make bags to sell. The organization to whom I gave the money is very dear to my heart. They help women with scholarships for academic degrees. I received a scholarship for my undergraduate and graduate degrees from them. The organization made a huge difference in my life. I hope that this small effort on my part makes a difference in another woman’s life.
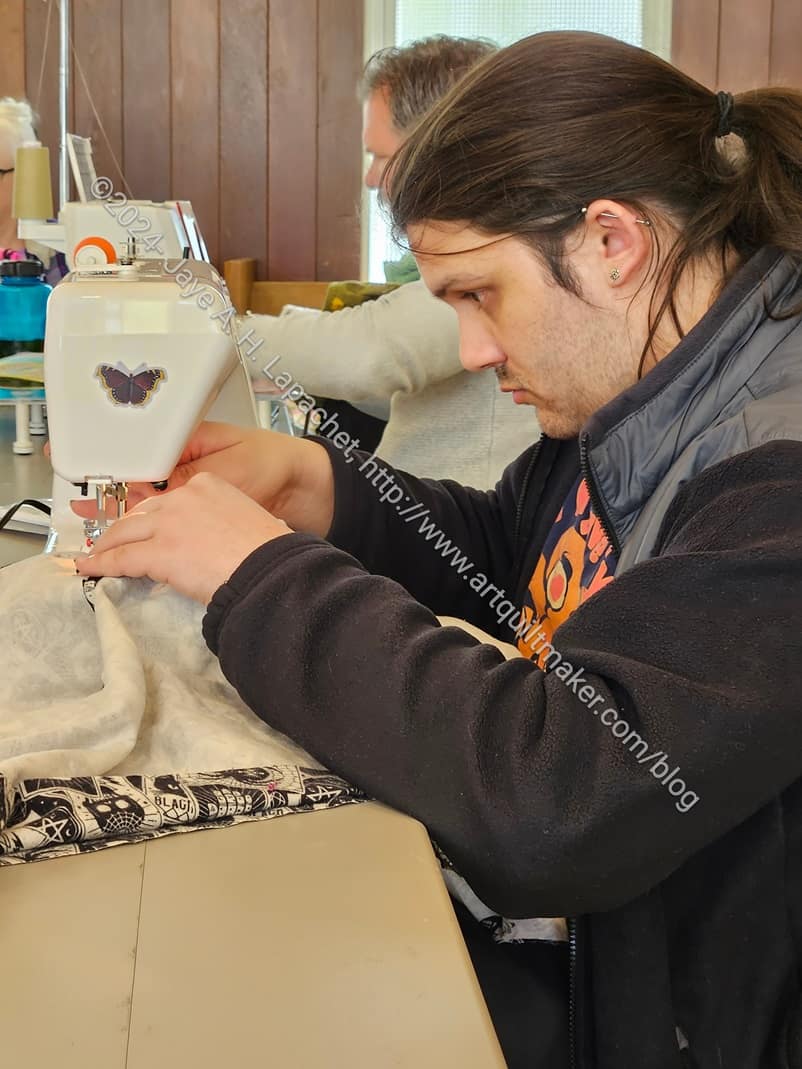
Sew Day turned out better than I expected. I threw a bunch of different projects into my large Chubby Charmers and went to Sew Day. Everything I brought would at least be a start to something.
First, I got out the Old Town instructions and worked out what I needed to do for the border. I am glad I did! I thought there was a Sawtooth border and I was in for hours of pressing and trimming HSTs. Nope. There is no Sawtooth border. It is all squares and I have pretty much made all the pieces. Yay!
After that the real work got started.
Morning Flower Patch & Pencil Roll start
I decided that for the July Organizer swap, I am going to make a pencil roll. I also decided that I would use the fabric I bought at Family Threads for the pencil roll. In addition, I will use more of that same fat quarter pack for the Morning Flower Patch quilt. Cyndi showed me her version and it caught my eye, so I decided to look up the pattern and make one. I was able to cut the 2.5 inch colored squares for that quilt along with the strips I need for the pencil roll. It took me awhile, but that accomplishment got me off to a great start.
MaryC’s medallion
Mary was working on her Tara Faughnan project and really got a lot done. I took a picture from the last Sew Day, but never posted it. The colors she used are very Southwest feeling.
This will be a quilt for her daughter’s birthday. I really like the strong diagonal motifs.
May scrap progress
After finishing the cutting of the Family Threads fat quarter pack, I started cutting scraps. I know I have done this at the January, February and March Sew Days, but I still have not finished cutting up my scraps. This time I made really GREAT progress. I took my Desktop Cube and the adjoining zipper bag of scraps and came home with only the Desktop Cube full of scraps! I feel like I accomplished something.