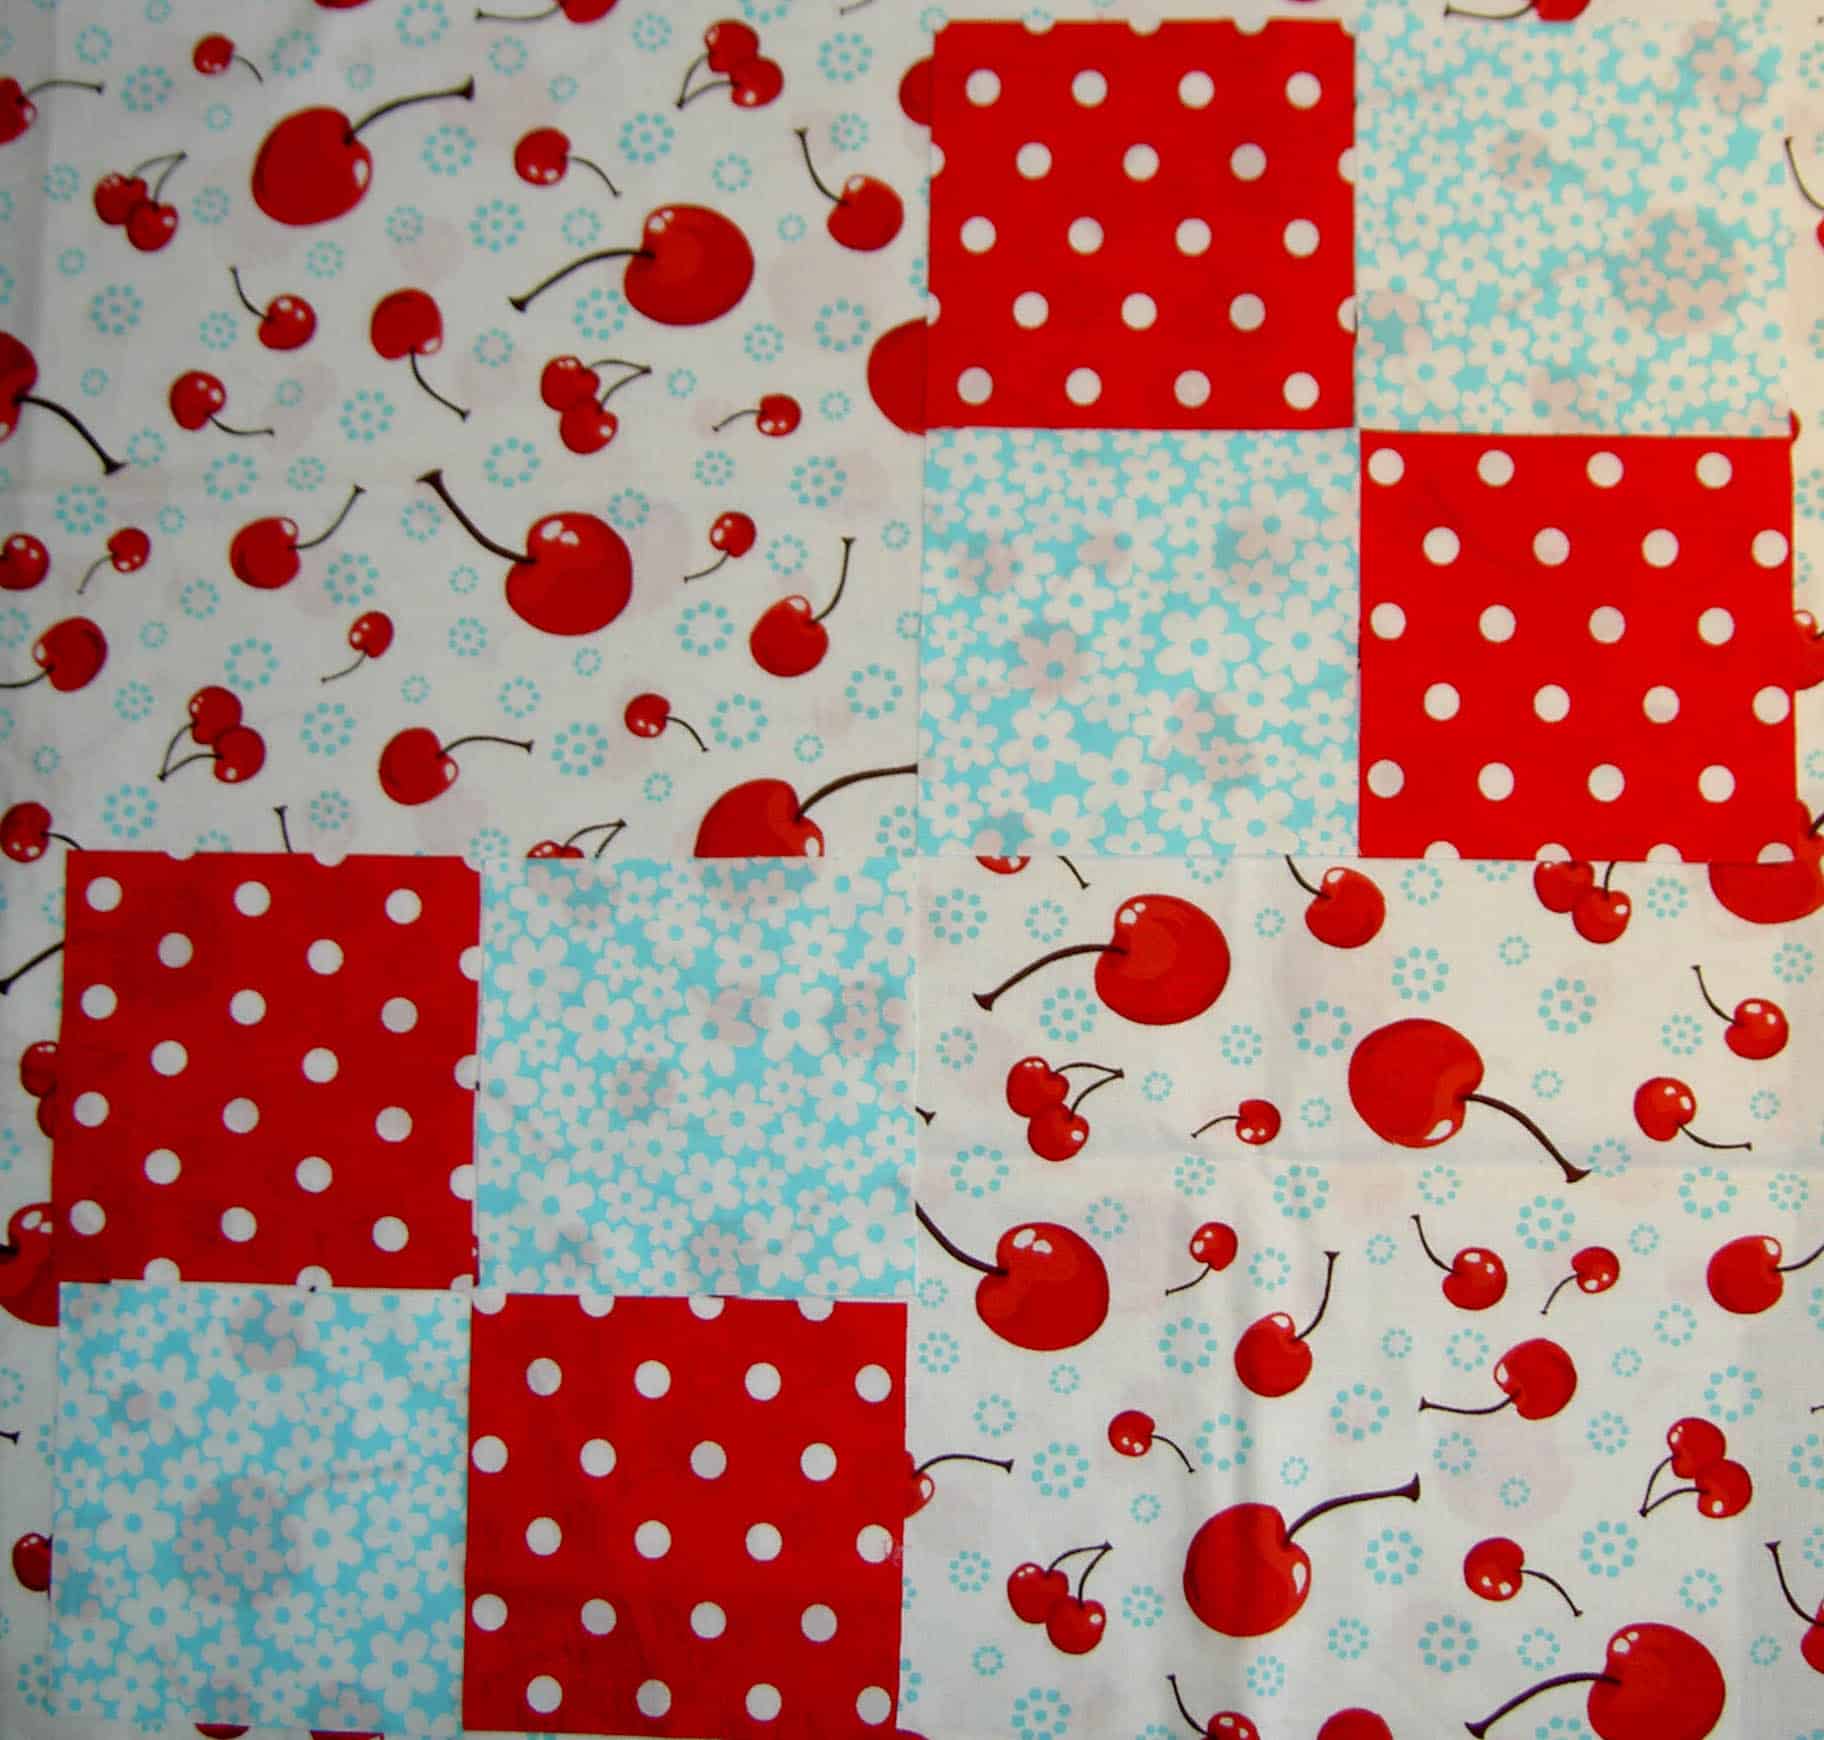
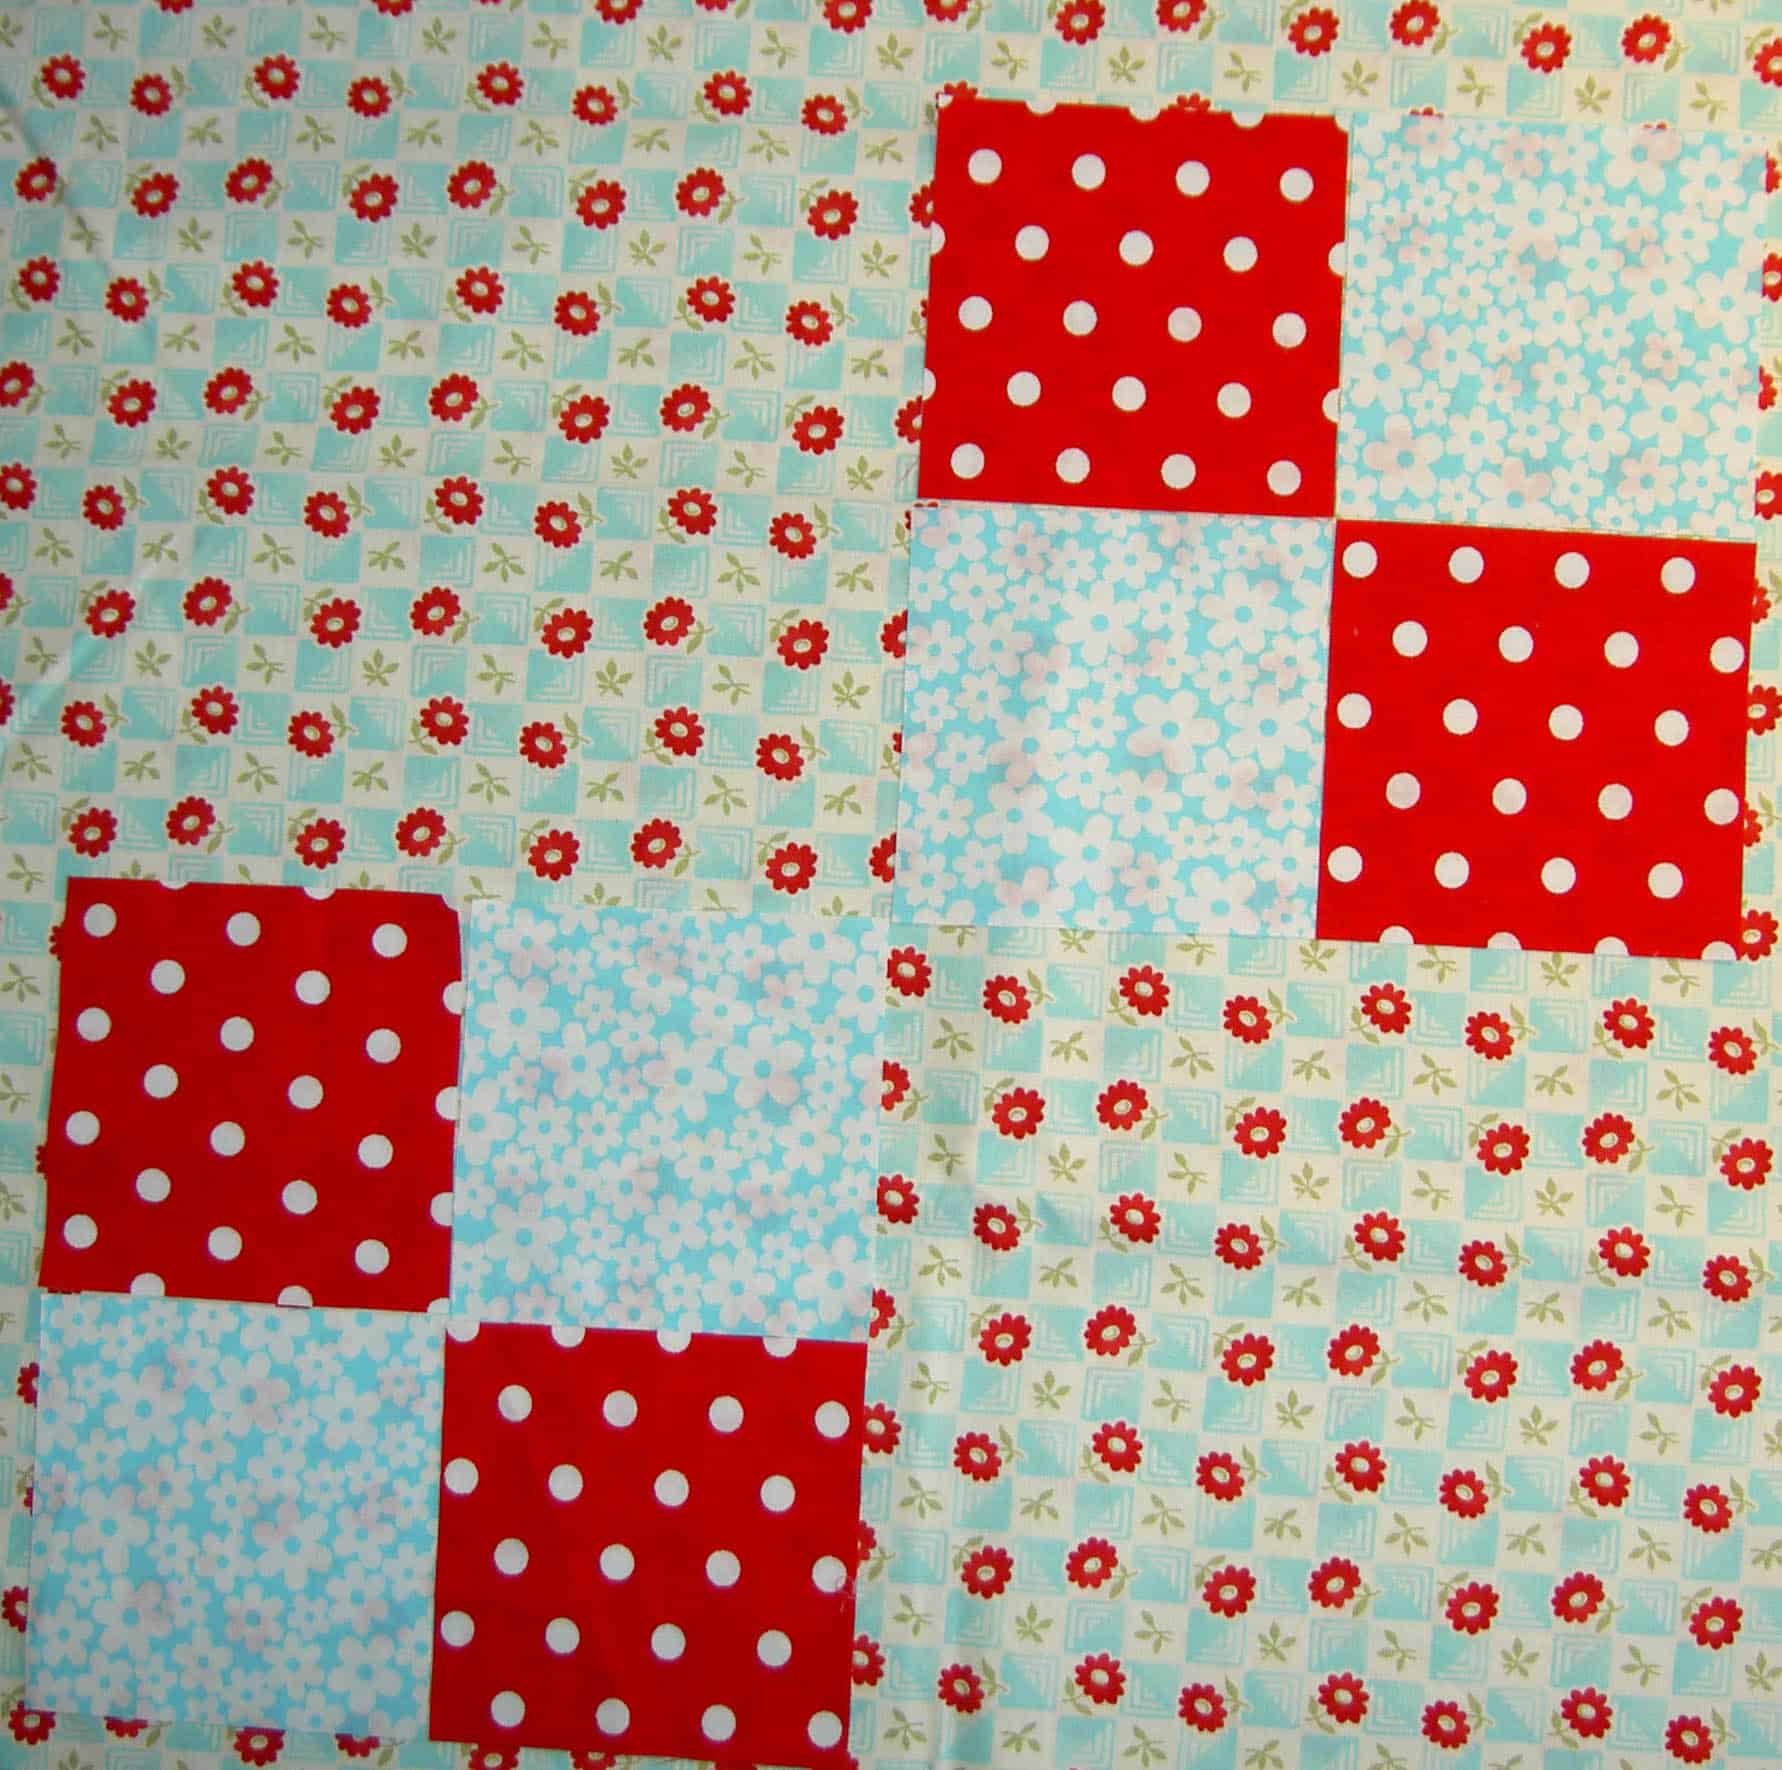
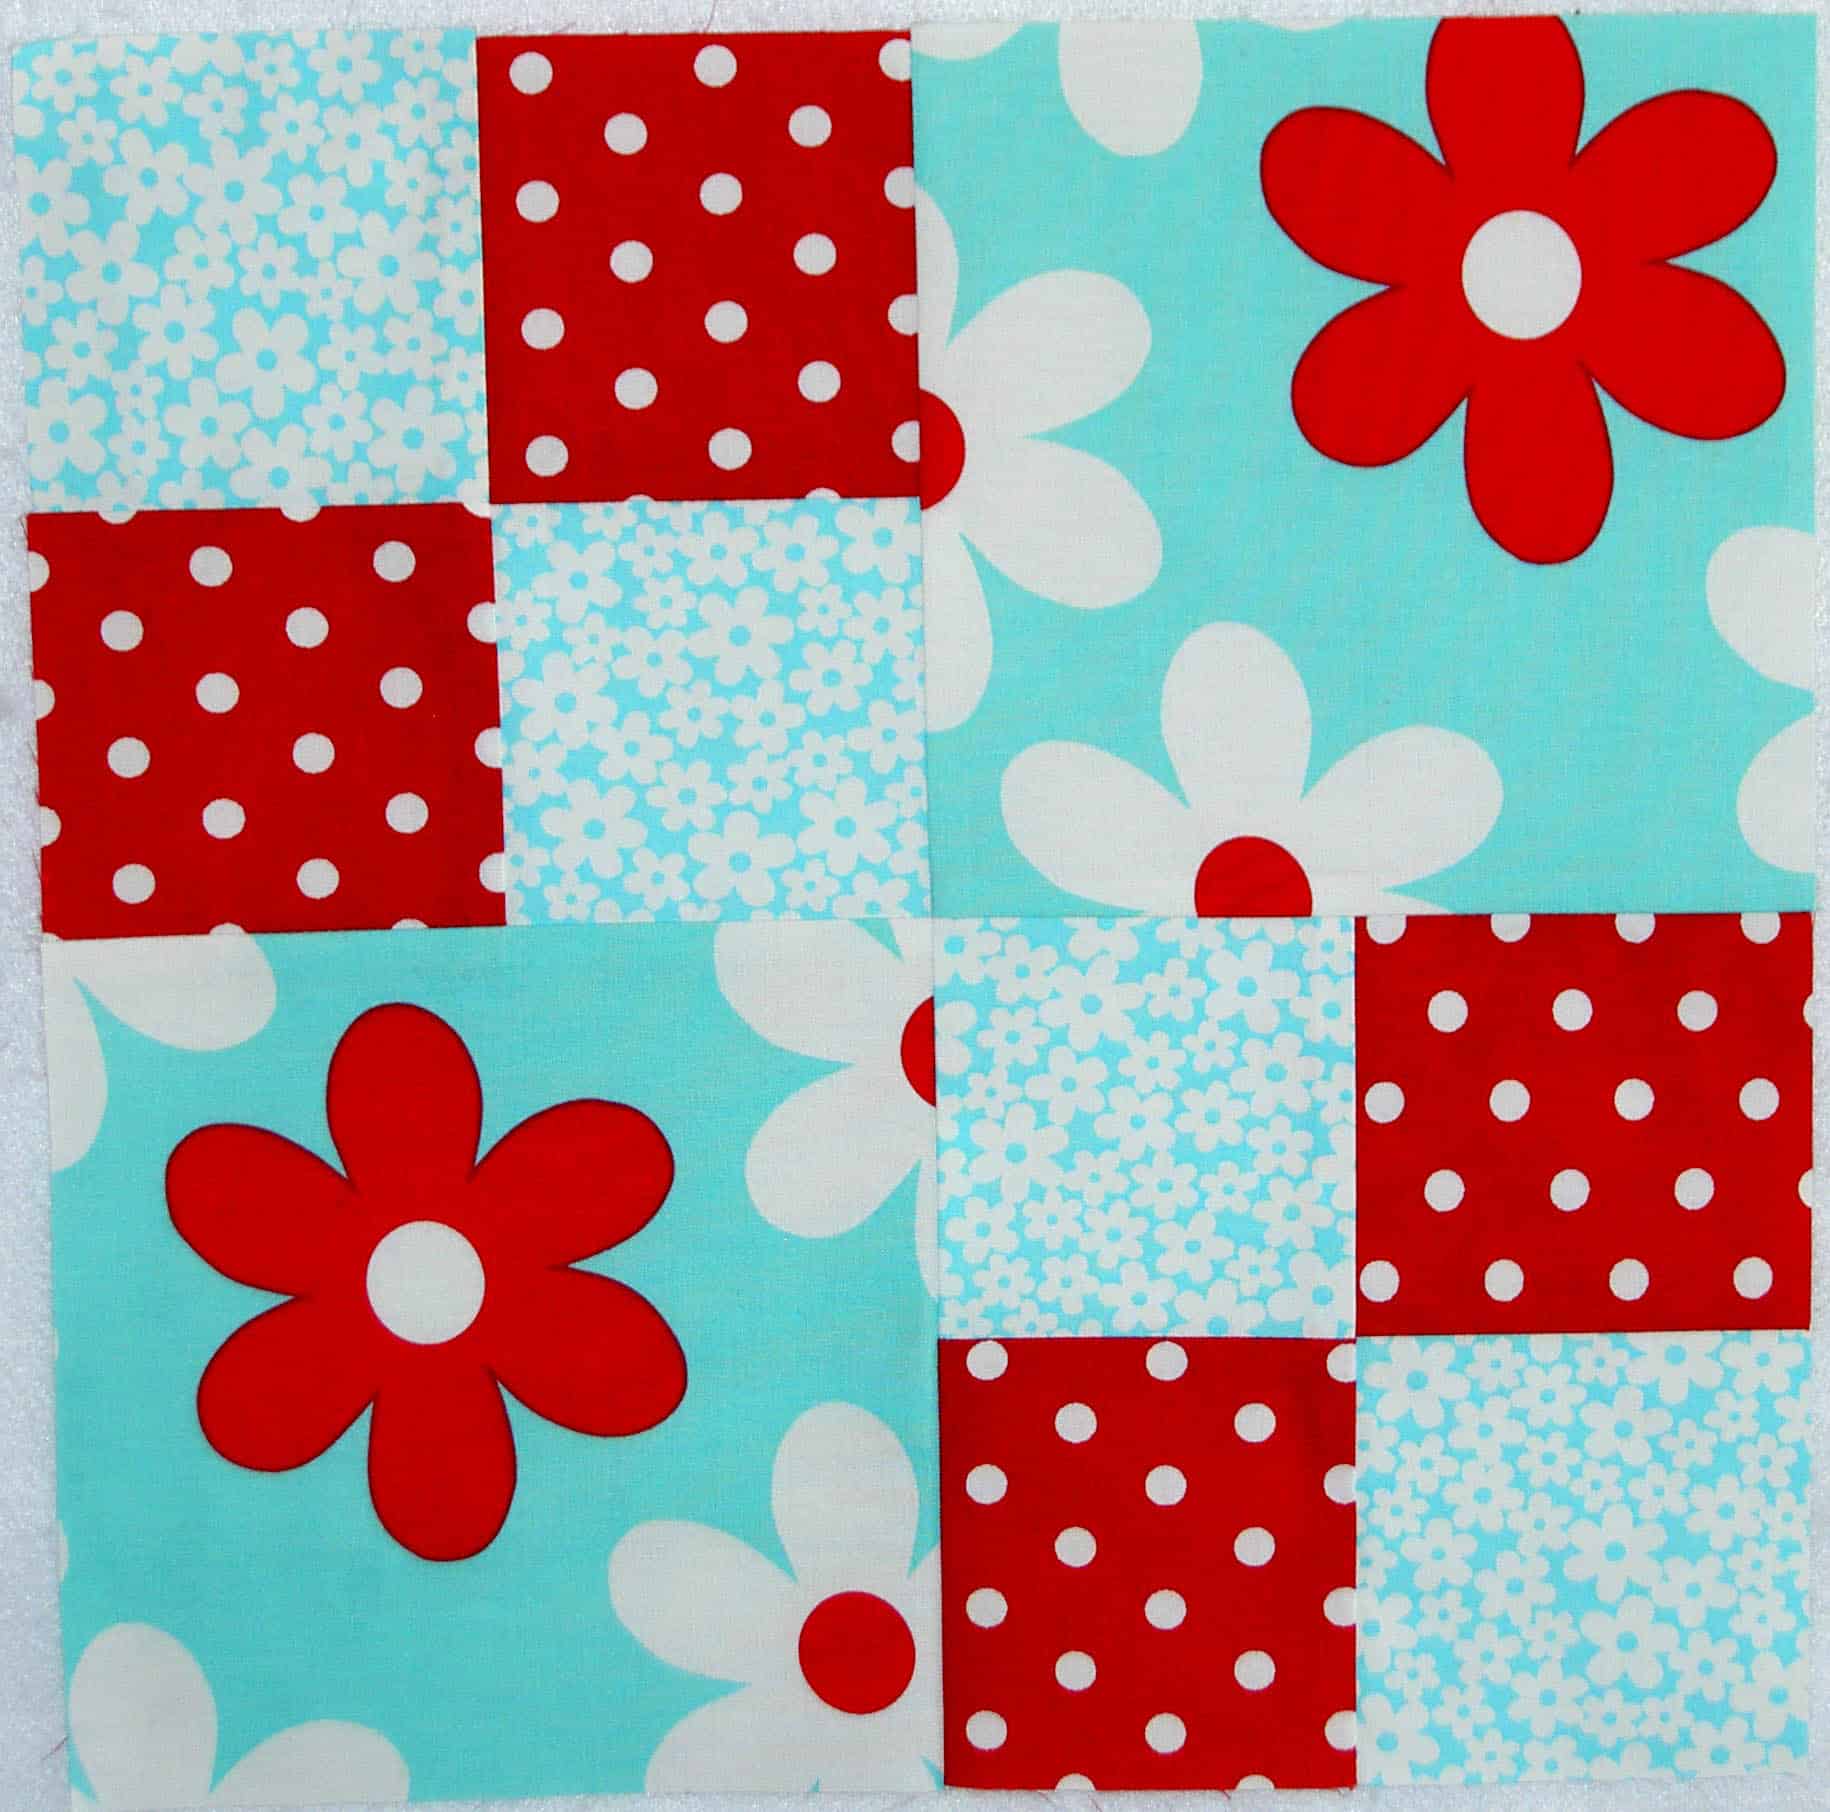
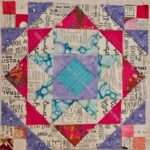
Selecting fabric is a very personal choice. I have a group of fabrics for my sampler class with Frances and I needed to choose some background-esque fabric to go with the Four Patches for my Double Four patch block. These are large blocks and I don’t normally work in this size, so I found it challenging.
I fell back on Lorraine Torrence‘s old adage: Make Visual Decisions Visually. That is the best advice I have EVER gotten in quiltmaking. Go take a class from Lorraine and buy her books. She is awesome.
Plain Jane
I liked the bold graphic-ness of this print, but thought it might be too large.
Cherries
I thought for sure this would work, but the cherries felt too scattered. They need to be hemmed in a little.
Bliss
Something in the color was off with this print. The aqua in the Bliss print is more green while the small flowered print is more on the turquoise side.
Plain Jane (smaller flowers)
This is the same print as the first one, but the flowers are smaller. I like the way you can see more of the flowers. Success!
Final
I chose the last print and above is how the finished block looks.
The Chrysanthemum print by Philip Jacobs is one that Cyndi gave me after she visited an estate sale where she found fabulous fabric on offer. This is a colorway I don’t often buy. As I said the other day, I wasn’t sure whether Lee Ann would like it, but these colors spoke to me when I thought of her. I’ll have to see about finding some more of this fabric for her next bag so she has a matching set.
Lee Ann’s Classmate tote – exterior
The outside is one continuous piece and I think the fabric is shown very well.
As you know, these colors are a little difficult for me to work with. Not as difficult as brown, but still hard. I am glad this is a Phillip Jacobs fabric as it has rich layers of color. It also makes me think of Fall, autumn colors and Thanksgiving.
Since I don’t have a lot of these autumn colors, or don’t think about combining them, I was also pleased that the yellow I chose for the folds and the binding. The color fit with the Phillip Jacobs print very well.
Lee Ann’s Classmate tote – in/exterior
For the inside, I used a poppy print I bought in Sacramento in 2017, and also some Tula as I didn’t have enough of either.
Normally, I would have used the same yellow for the folds on the inside, but, again, I didn’t have enough fabric. There is a little bit of “making it all work” going on.
Lee Ann’s Classmate tote -interior
I have plenty of zippers, but I didn’t have all the same colored zippers, so I chose a couple of different hues in the orange/sunshine yellow range.
There are 5 pockets you can see in the picture. Under two of the pockets, slip pockets provide additional flat storage. I think a 6 inch ruler might fit in the middle area.
2024 BAM Officers
Carrie did a great job wrapping, as usual. She is amazingly gifted at wrapping. I am always so impressed with what she comes up with.
I made a little more progress on the White Strip #2 donation top. I have most of the top sashings sewn. I have started to sew the blocks to the sashing, as I show in my chunking tutorial.
I started working on it a little more diligently after I put my aunt’s Superbloom together. That project isn’t finished, but I only had a few minutes and needed a break. I think I’ll be able to take the quilt to Sew Day and hand it in.
It’s officer gift time for the guild again. Since I organize the gifts, I get to decide what bag we will make. The Classmate Tote** is the bag of the year for the officers.
This is a small project bag the officers can use for a small flat project, like English Paper Piecing, or that they can use for tools and supplies. I wanted to make this pattern again after making one for Gerre and one for Lindsay. I also thought it wasn’t too big, but had a useful design.
I initially started writing this post back in December after I spent some time one day cutting for both bags. I know several officers read this blog, so I decided not write about the process as I didn’t want their surprise to be spoiled.
We gave them the bags yesterday. We delayed the thank you gifts until all of the officers were at the meeting.
Lee Ann’s Classmate tote
Mary C and I made two bags each for the officers. I’ll have to recruit more people next year as I struggled to get mine done.
I wasn’t sure what fabric to use for Lee Ann’s bag. I wasn’t originally scheduled to make it, but picked it up when another member couldn’t do it. This Philip Jacobs fabric spoke to me and I really hope she liked it.
Sue’s Classmate tote
For Sue, I used the fabric I have been using for bags for her and Carrie for the past year or two.
I am pleased with how they both came out.
Mary, as usual, did a great job on her bags.
MaryC’s Classmate for Melinda
MaryC’s Classmate for SueS
**N. B. : Obviously, you should shop at local quilt shops and small businesses. However, if you are too busy or can’t find what you need there, I use Amazon affiliate links and may be paid for your purchase of an item when you click on an item’s link in my post. There is no additional cost to you for clicking or purchasing items I recommend. I appreciate your clicks and purchases as it helps support this blog.
Today is the guild meeting and I thought I *might* have this top done and ready to turn in. No such luck.
I did stop making new blocks and focused on sewing this top together. I could do both new blocks and the top, but leaders and enders is easier for me if I focus on one project as the leaders and enders piece at a time. Also, I have enough blocks for this quilt and don’t need any more.
As I mentioned in the previous post, I am using the back of a fabric as the sashing. I haven’t turned over all the cut sashing yet, so the pieces near the top are still on the right side. I think it looks good.
As per my ‘chunking tutorial,’ I started at the bottom by sewing a block to a piece of sashing. I quickly realized I had forgotten to cut cornerstones. I am backfilling those as it becomes necessary.
I go to a hairdresser near Castro and 18th in San Francisco. Each time I go, I visit a hardware/variety shop (do you remember TG&Y?) called Cliff’s Variety. It is great place to get stocking stuffers. They have some fabric and craft supplies. I also get postcards there when I am running low on SF postcards. They have a nice toy department and wonderful housewares. It is the kind of place you can find that weird thing you need.
Their strength is creativity and creative problem solving. I have seen the most wonderful window displays and endcaps in their stores. I have brought them a number of things to help me repair. The most notable was the YM’s bassoon case (rented from his school). The handle broke off and I didn’t want to spend the money on a new case. Three awesome guys at Cliff’s worked out a way to fix the handle and didn’t even charge us for their time.
Cliff’s bags
Monday I saw the display of lunch boxes and bags above. It reminded me of selecting a lunchbox at the beginning of each school year. I was also reminded that I had seen a similar day after last month’s cut. Aren’t they fun?
I am making good progress on the Superblooms, but not enough. I really want these to be finished today, so I can take my aunt’s to the post office and mail it. I also want to show at least one of them at the meeting on Saturday. I don’t know if either will happen.
As you can see, I have made good progress. The exteriors are finished and the handles on my aunt’s are sewn on.
For my aunt’s Superbloom, I used cotton webbing for the handles that Cyndi made me take from the free table one time. It is wider than called for, but I think looks good with the exterior fabric.
SMAP Superbloom
The SMAP version is less far along. I had to rip the handles out twice. Hopefully, third time is a charm.
I’ll be working on the lining next and that is always the last step. I have a couple of interior zipper pockets for each bag to make and then lining assembly.
Who Am I? is hanging at the Twin Pines Art Center in Belmont. I am very excited.
Women’s View is an annual San Mateo County exhibition recognizing, celebrating, and honoring women artists who live or work in San Mateo County. The exhibition is co-sponsored by the San Mateo County Arts Commission, the Commission on the Status of Women, and the Twin Pines Art Center in celebration of Women’s History Month.
Women’s View 2025 poster
This is the 19th year of the exhibition and features over 60 artists who have expressed themselves in photography, painting, textiles (me!), and ceramics.
I was impressed with the variety of media this year in contrast to last year. I may be mistaken, but I thought there was a wider variety of media this year. I saw quite a few mixed media pieces, which I thought were interesting.
Who Am I? in the Manor Gallery
Who Am I?
Who Am I? in the Manor Gallery
My piece, Who Am I?, was the only quilt. It had a great location in the largest gallery. I saw a lot of people stopping to look at it and talk about it. I tried to listen in to conversations (sshh!), but I either couldn’t understand what people were saying or kept getting distracted.
Although I have entered pieces I already had finished or in progress during the last two shows, I only entered pieces that I thought fit the theme. I looking at the various pieces, I wonder if my interpretation of the theme is too narrow? My interpretation for both exhibits was about how I am affected by the world or what my role is in the world. Many of the other artists chose flowers or other parts of nature. It made me think that, perhaps, my idea of the theme was too narrow. You can review the gallery guide and decide for yourself.
Elizabeth Gomez
Elizabeth Gomez detail
I did notice that there were some details that I would consider stereotypically female, as in the Amapolos de California piece above. Elizabeth Gomez has stitched a bit of the edge of the poppy with embroidery floss or thread. One of the winners did the same on a photograph of a hummingbird.
Women’s View Winners
I did not win a prize this time. Prizes were awarded by the president of the Commission on the Status of Women. One of the winning pieces was a mosaic table, which I thought did not fit the theme at all. But, if I am generous, it could be her view of the world. It was a beautiful piece. Still, I do like to win. 😉
Mom, DH and I went to the opening on Sunday and it was a very nice event. The show ends on March 30, so I hope, if you are local, you get to see it.
I was very pleased to make this Emmaline Retreat Pouch for Carrie for her birthday.
I decided to make one when I ran out of time to make her a Classmate Bag. The other thing that helped me decide was the several Retreat Bag frames I have stashed in Quilts Illustrated Tool Tote, where I keep my bagmaking hardware.
Retreat Bag for Carrie – top
I used the Color Theory fabric by Carrie Bloomston, which is the fabric I have been using for her gifts.I have some random pieces that are cut from yardage, but still good sized that I was able to use.
Retreat Bag for Carrie – side, frame detail
The whole project went really quickly. I made the whole pouch in about 3 hours while I cooked dinner during part of the making. I did finish the pouch later in the evening. It requires a frame so I had to prepare and insert the frame, then sew up the hole.
Retreat Bag for Carrie – interior
The frame means that this is an Open Wide or Wide Mouth style pouch. It is great for seeing everything you have stashed in the bag.
Carrie’s Retreat pouch – veer zipper
Carrie’s Retreat pouch – veer zipper
I am super pleased with the technique they use to veer the zipper. It made that process SO easy and it looks great. I have to remember it and try to use is on other bags. The only other pouch I can think of offhand that veers a zipper is the Cotton Candy pouch and that is a different sort of technique.
I thought it would take me longer, but am glad I was able to get it done quickly. Her birthday was a week after I made it and I had to fill and mail it as well. Carrie is super generous and I could never match her generosity, but I can make pouches and bags.
This is a free pattern, so go and take a look. Make one and tell me what you think.
I am preparing to start a new contract and the company is really a pain. It has been taking me many hours I could be sewing to set everything up. Finally on Friday, I had a nice chunk of time, so I got to work on the two Superblooms I have been wanting to make.
I was able to get all the pieces interfaced and the side pockets made. I had some trouble with some fusible foam. It turned out to be fusible on both sides. Since it was a scrap and, I hadn’t marked it, I didn’t realize it was fusible on both sides. I don’t normally buy fusible interfacing. I especially don’t buy double sided fusible. The piece was just big enough for me to cut the foam for the bag sides. Perfect, right? Yes, until I figured out that both sides were fusible. On one hand it was good, because I could just press it on the fabric. On the other hand, I had to use a press cloth and I am not sure if my press cloth is gluey. Iron-off** is a wonderful thing for cleaning the iron.
I have a couple more pieces to cut from the new fabric I bought at Needles, but otherwise I think the rest will go quickly.
As I have mentioned the prep is the hard part.
**N. B. : Obviously, you should shop at local quilt shops and small businesses. However, if you are too busy or can’t find what you need there, I use Amazon affiliate links and may be paid for your purchase of an item when you click on an item’s link in my post. There is no additional cost to you for clicking or purchasing items I recommend. I appreciate your clicks and purchases as it helps support this blog.
I was on my way to lunch with Friend Julie when they closed the road and she couldn’t get through. I was near Los Altos, so I stopped at the gluten free bakery and then went to Needles Studio.
Superbloom for Auntie
I wanted to quickly see if they had some fabric I could use for the zipper tabs for one of the Superblooms on which I am working.
The iris fabric (right) is the lining fabric because my aunt loves LOVES Loves irises. I don’t want to use it for the zipper tabs, because most the design will not be visible and I think it will look chaotic. I could use a blue, but kept thinking of that ochre color in more of a tone-on-tone design.
Needles fabrics – March 2025
I found something that work and few other fabrics as well.
The blue fruit (lemon?) fabric will be an Atlas portfolio. I have no need to make another, but the fabric is pretty.
Needles was part of a shop hop (10 shops in 3 days – Yikes!). Though I wasn’t doing the shop hop, they gave me a free FQ, a free measuring tape and a pattern for some fabric buckets. I thought that was nice.
Today is International Women’s Day and I am celebrating by sending the bag to Gerre for her celebrations.
Sugar Skull Retreat Pouch-small – top view
This is the smaller version than I made for Gerre before. They are a matched set now, which I always like.
Sugar Skull Retreat Pouch-small – zipper end
I like the way all parts of this came out. The zipper ends came out especially well. I left a little space between the end of the zipper and the end of the fabric, which made it easier to sew.
I am still thinking about how to incorporate the technique used for veering the zipper in other patterns like the Cotton Candy pouch.
Sugar Skull Retreat pouch – interior
I chose a text print for the interior. I haven’t been using this particular print for Old Town, because the text is in pink. I love it as a fabric, though, and am really glad I can use it for this pouch.
This one came out really well and I am pleased, but this is a great project. I still want to try enlarging it and using a border print, as discussed a few months ago. I haven’t had the chance as I am caught up in making gifts.
I finished the Paint Tube Day Trip! Yay! This one went together a lot more quickly than the Hindsight Day Trip, but that’s the way it works, right?
I was thinking, as my Mom has started using the bag, that a slip pocket might be a good addition to the front. It would add to the layers, but would also be really useful.
I mentioned that I was making it so she could carry her cell phone with her and didn’t have to hold it in her hand as she moved around. That is working really well. She has also started using it as a wallet. When we go out, she takes it instead of her purse.
Paint Tube Day Trip
I was pleased, once again, that the cell phone pocket fits her new phone very well. I am also glad I reinforced the magnetic closure. I think it might have ripped already if not for the extra (Decovil Heavy**) reinforcement.
I also made the straps/tabs for the D-rings slightly longer. I did that because one pulled away from the edge stitching on the Hindsight Day Trip. I didn’t want that to happen again, but I noticed that the D-rings spin around now. The triangle hardware pieces would not have worked for this application, sadly. My mom doesn’t care, but I care. Another learning moment, I guess.
Paint Tube day Trip interior
The inside went together well and I love that I can turn this bag through the openings in the interior zipper pocket.
I used leftover zipper tape for the interior zippers. They are the handbag size, but it doesn’t matter.
I put different colored zipper pulls onto the the interior pockets to give a visual cue of the contents. The pulls are nice and large so easy to grasp.
I don’t really want to make a bunch of these, but I have the templates and some ideas, so I might make another one or two. One would definitely be a good Pink Project addition.
Check out all of the Minikins patterns I have made as well as some of the other Sew Sweetness patterns.
**N. B. : Obviously, you should shop at local quilt shops and small businesses. However, if you are too busy or can’t find what you need there, I use Amazon affiliate links and may be paid for your purchase of an item when you click on an item’s link in my post. There is no additional cost to you for clicking or purchasing items I recommend. I appreciate your clicks and purchases as it helps support this blog.
I finished a few Flying Geese over the past few days and decided to try some on the block that has been on my design wall. The Flying Geese have been missing and seeing them missing has been incentive to finish them.
I chose some light pink Flying Geese to finish this block. The block is not sewn together, so I might choose different options. I think this looks ok, though. The pink HSTs might fade a little too much into the background.
In general, I like the whole block and am pleased with how it is coming out.
I was thinking about the quilt I talked about a few days ago. I am not liking the gold. The fabric is nice as yardage, but in a white quilt it is pretty overwhelming. I really want this to read as a white quilt and the gold might interfere with that.
Checking out the back
I checked out the back of the fabric and the gold comes through, but is much more subtle.
The vertical sashing on the right is the back of the fabric while the sashing on the far left is the right side of the fabric. I think the back of the fabric might work.
I am letting it sit for a day or two to see what I think.