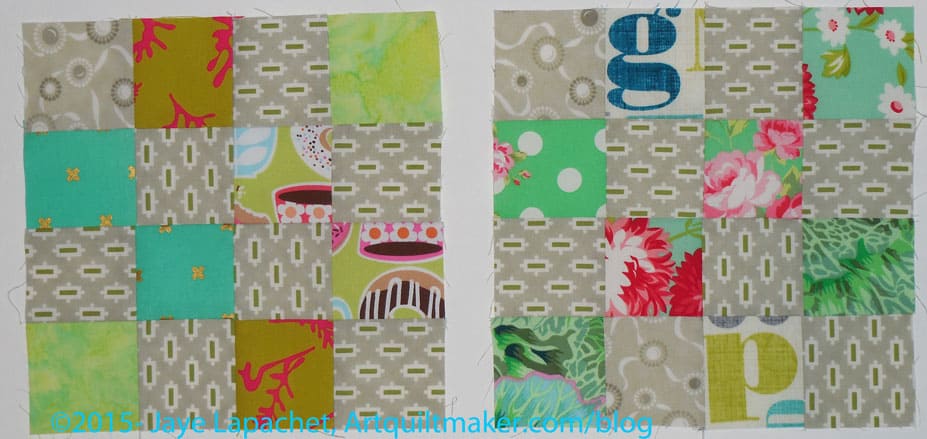
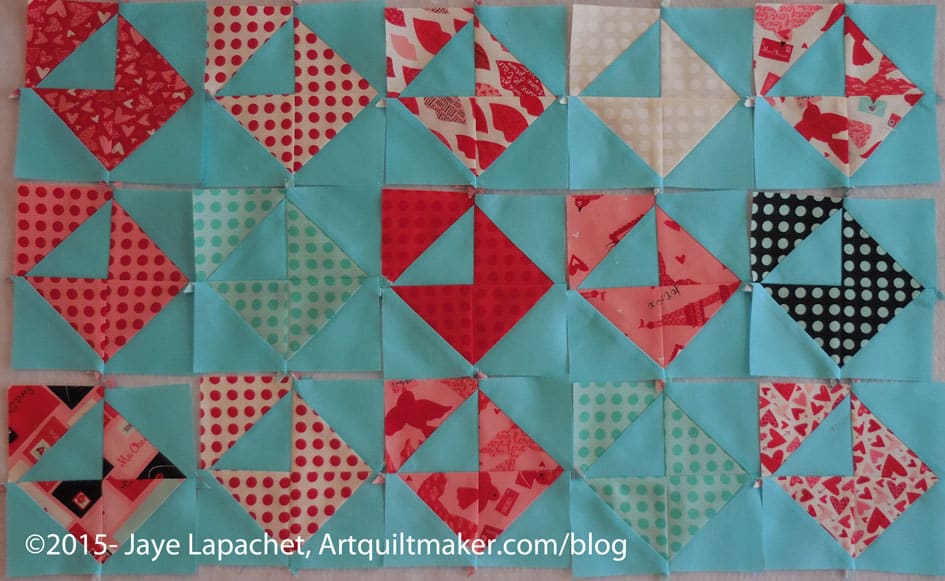
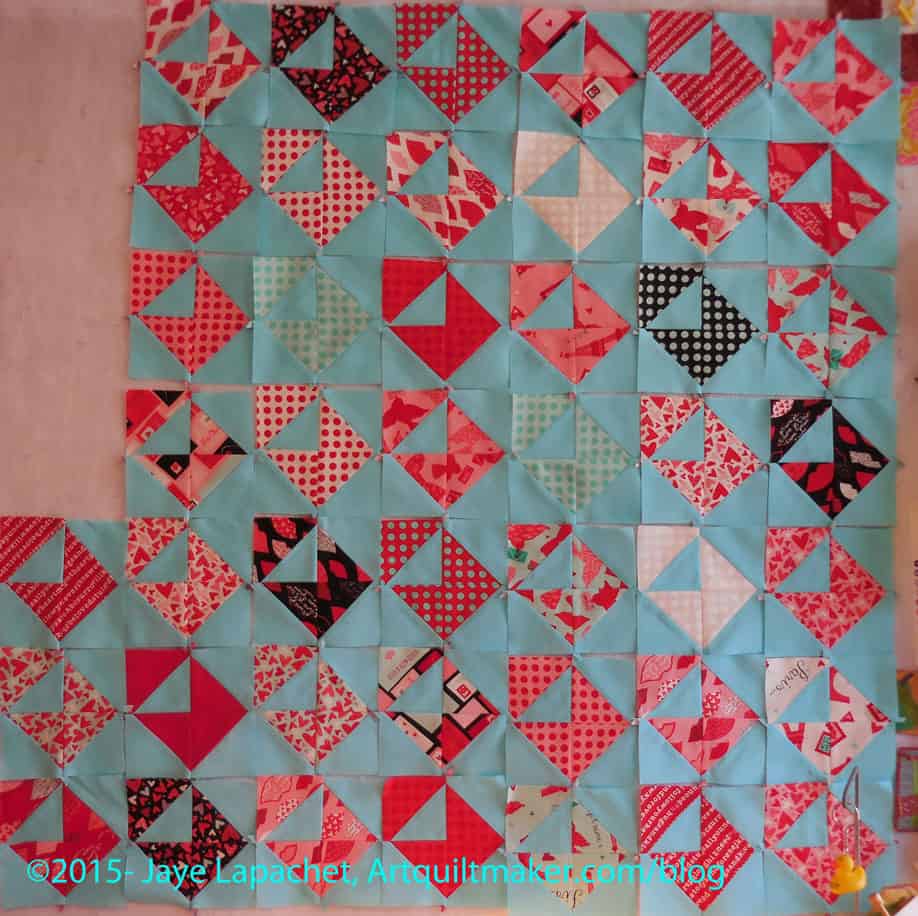
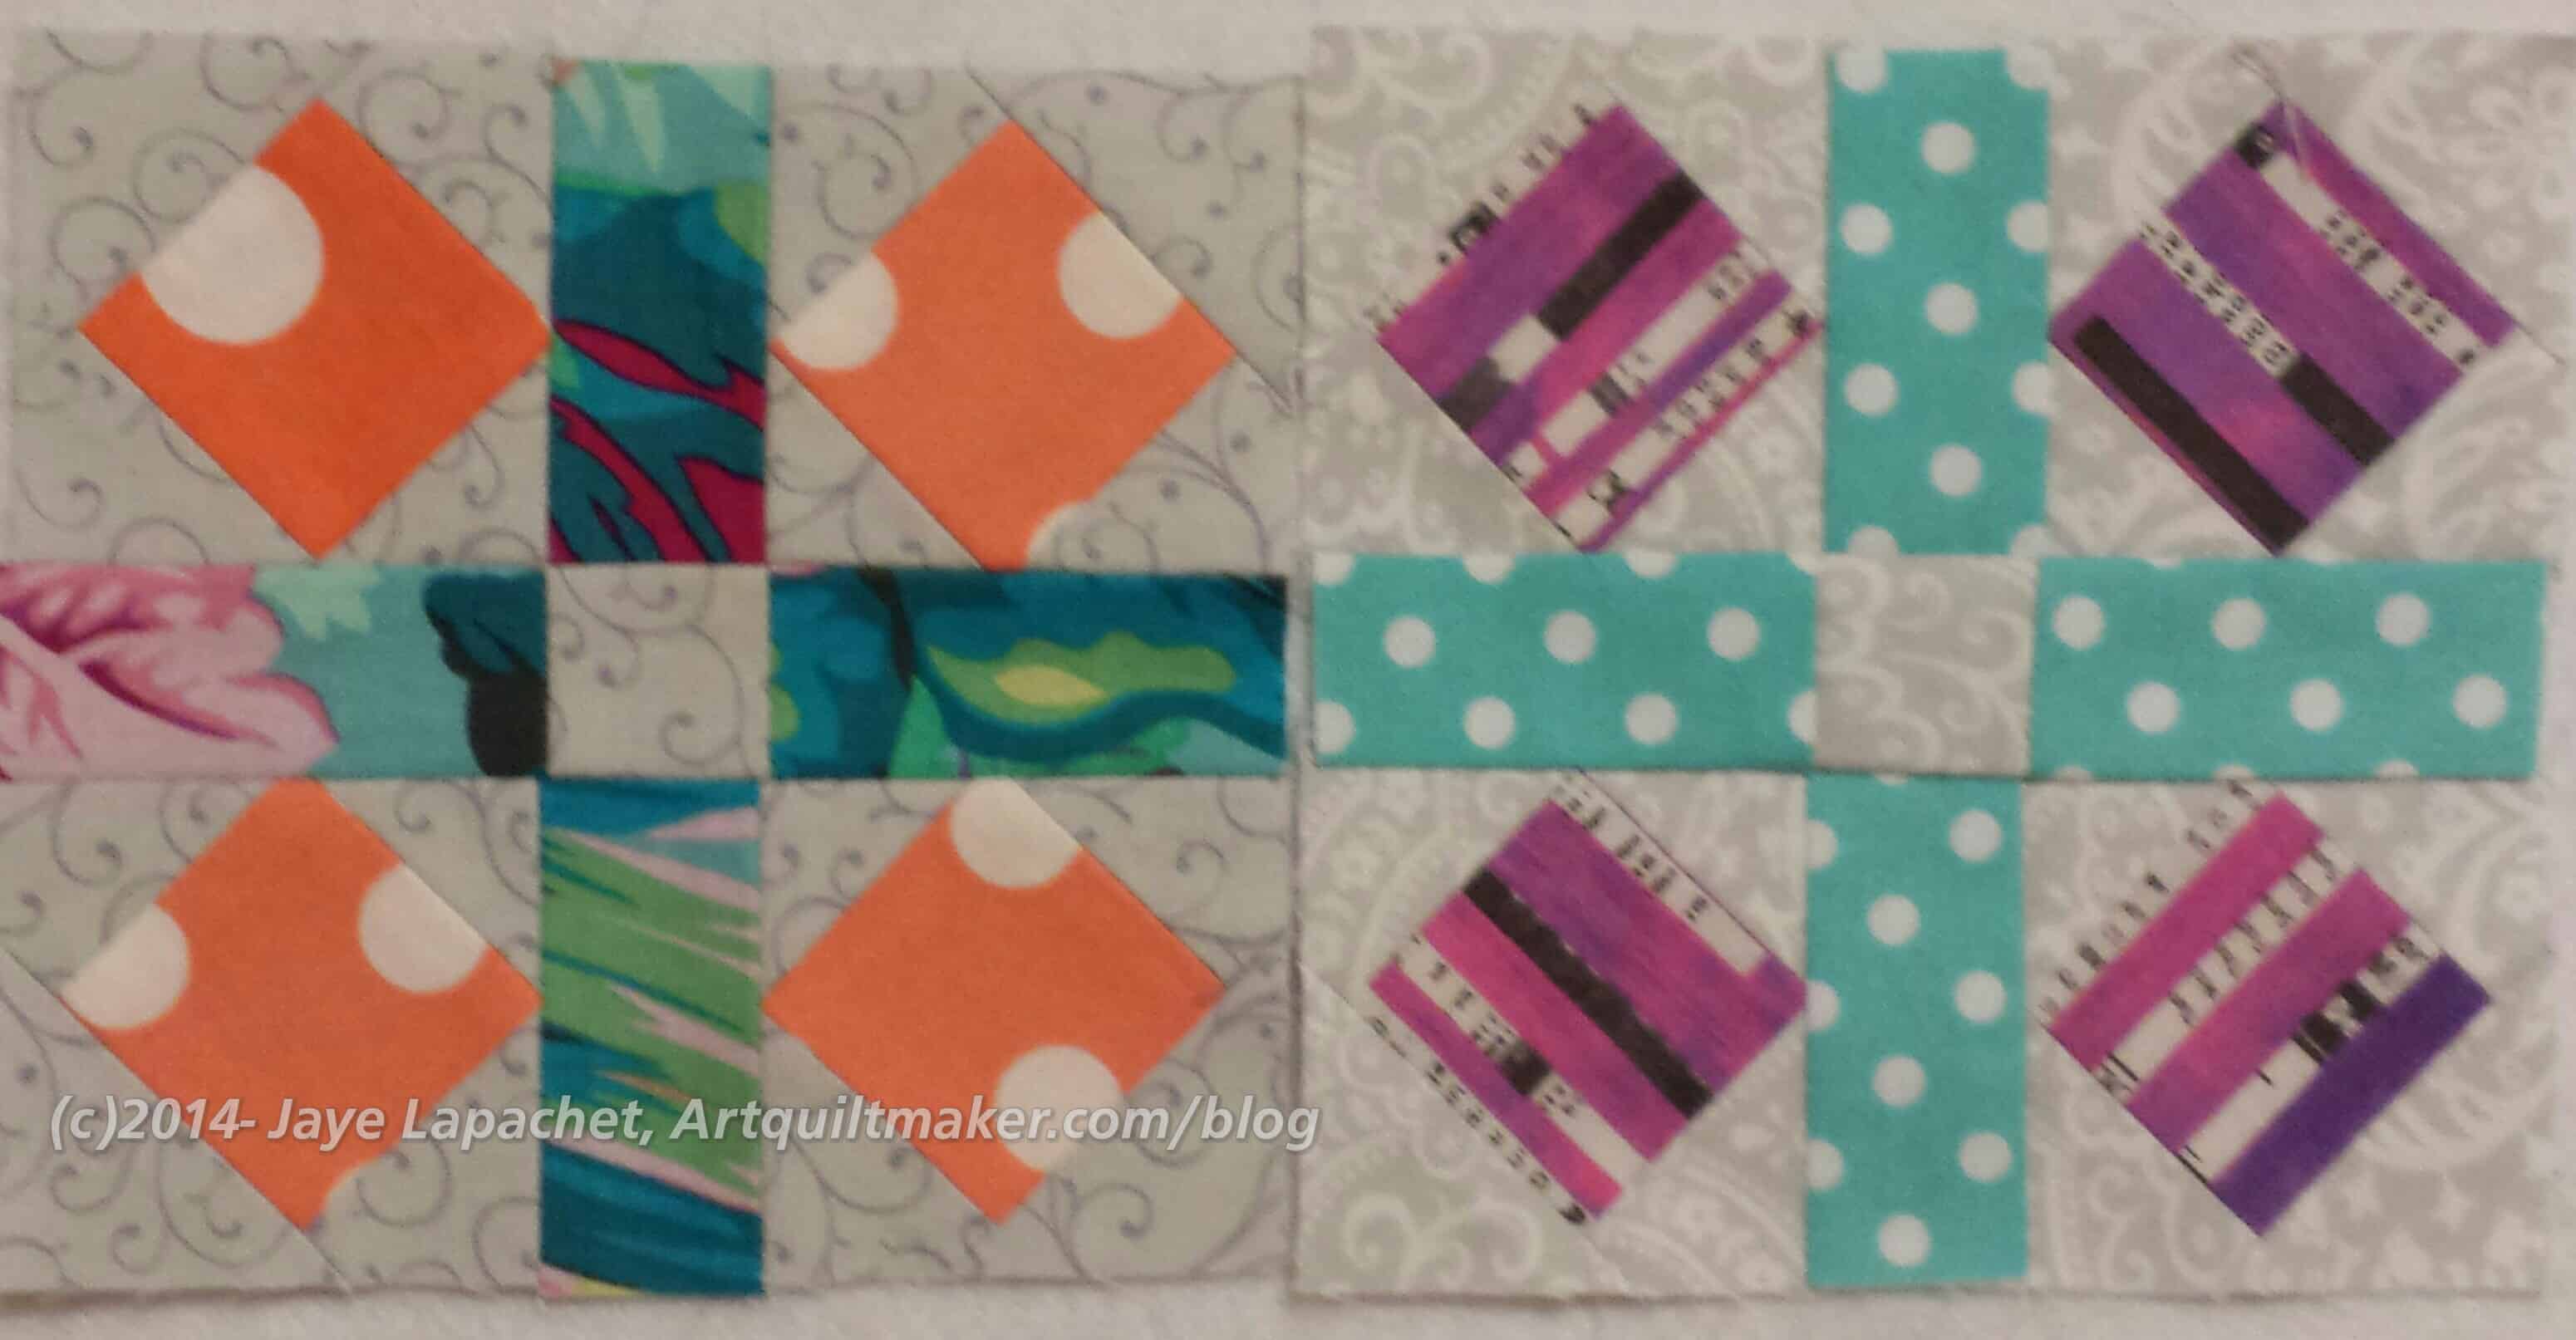
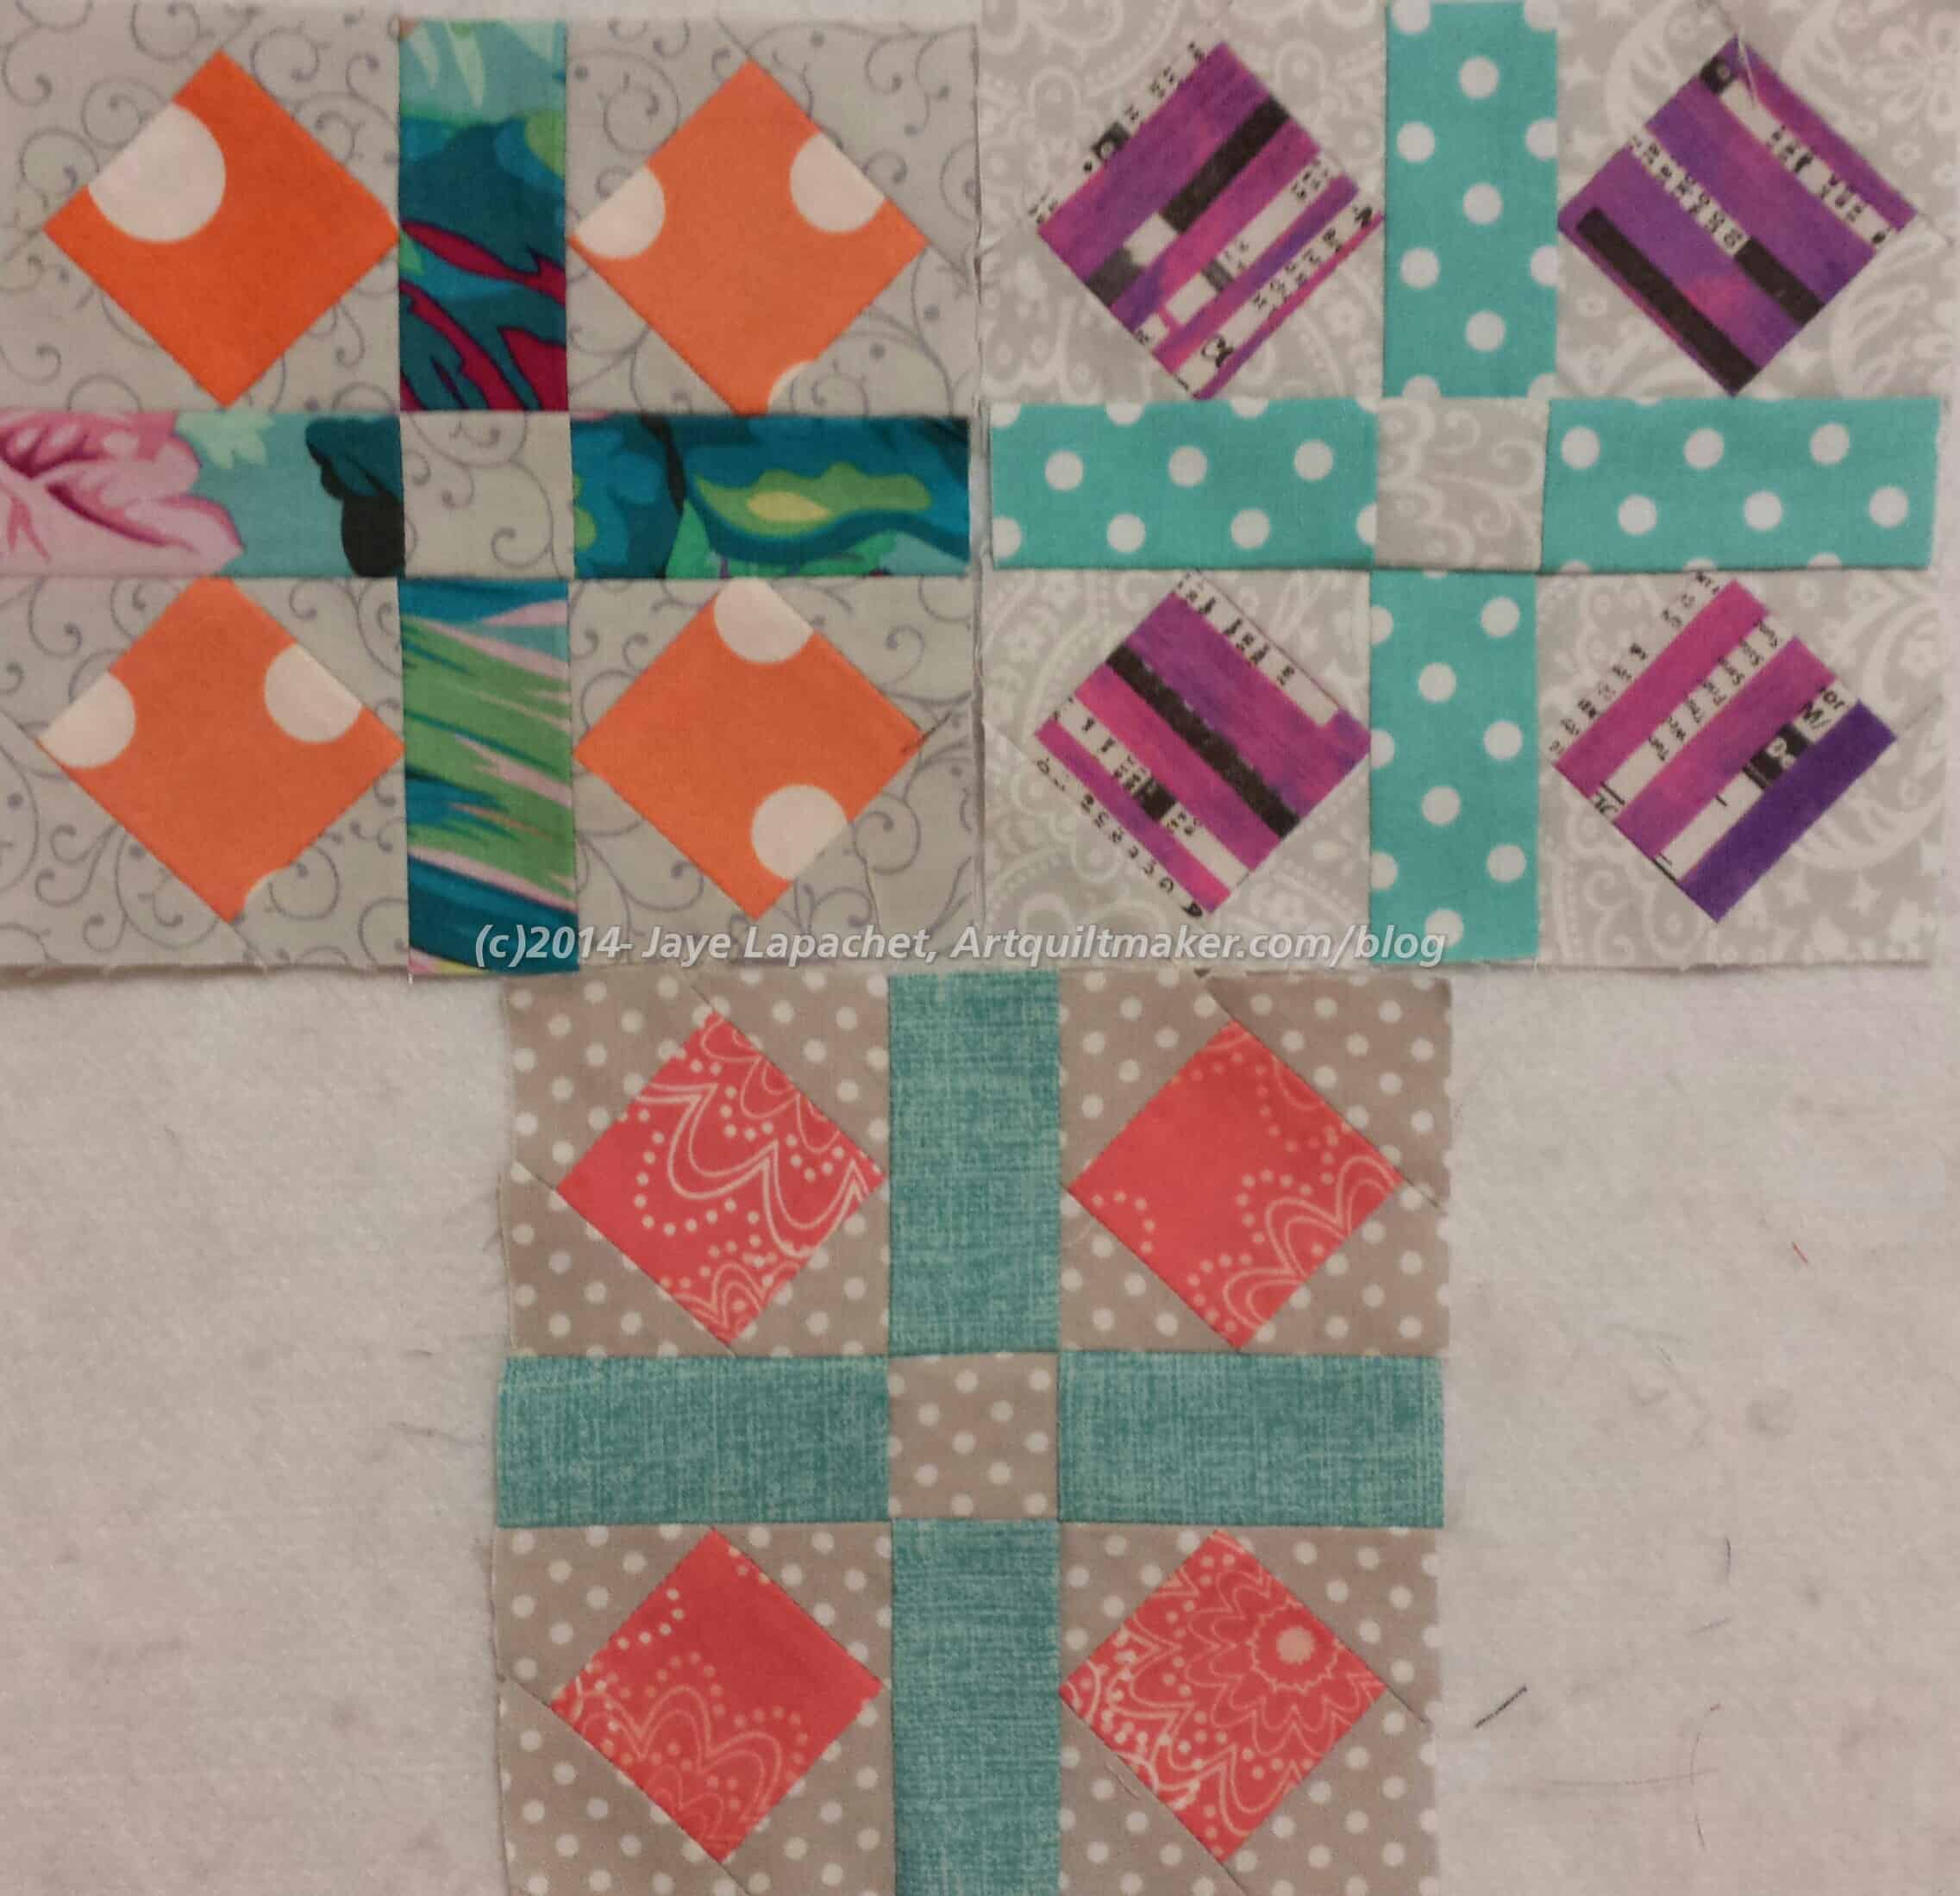
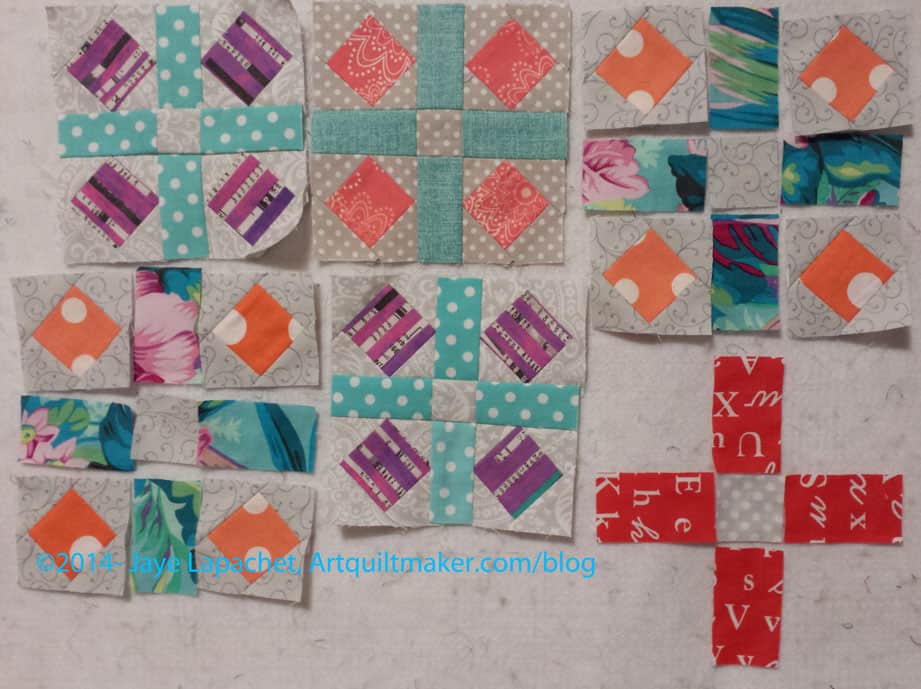
I made more donation blocks last Saturday as I worked on sewing together the FOTY 2014 patches. I thought green would be good and chose a lot of medium greens, though I had to use some darker pieces as my green scrap basket dwindled. I used, mostly, grey for the background. As you will, a little pink and some other colors crept in.
Using the leaders and enders technique, I just kept sewing the 2.5″ squares in between the FOTY 2014 patches and came up with all of these donation blocks. I joked about making enough for a whole quilt, never thinking I would be able to do it. I am close, though, especially with the blocks from the other day.
I saw a quilt on Valerie’s Twitter feed that has these blocks with Flying Geese on the outside to make them into stars. I am sorely tempted, but I have so many projects that I am going to force myself just to turn these blocks in and let someone else make a pretty quilt.
I am very pleased that this will be a quilt (or quilts) that will make someone happy.
Unlike Pam, I do not have piles of 2.5″ squares laying around, though I am starting to think I should. I cut the foreground squares from a FQ I found that I won’t use in a quilt. I decided to make the blocks, because I had some leftovers from a One Hour Basket I made. That fabric became the background. There isn’t a ton of contrast, but they are pleasant blocks. The best part is they will go to a good cause. I haven’t done as much charity work this year and it makes me feel good to add to the BAMQG charity pile.
As I started to sew the FOTY 2014 together on Friday (started last week, but got really serious on Friday), I realized that I needed leaders and enders. After I sew each FOTY pair, I need to sew something in between so that I can keep the FOTY patches in order. I have been using the Octagon 9 Patch as leaders and enders pretty regularly, but I am at a weird place with that project, so for the moment it won’t work. I gave away a bunch of my neutrals, but dug around and found some suitable greys for more donation blocks. I used leftovers of some Bonnie and Camille greys. They are a little too taupe for me, so I have been using them for projects I don’t plan to keep. Since I also have a lot of green scraps, which I don’t use much, I cut some random 2.5″ squares from those and made a couple of blocks.
Green & Grey Donation Blocks
Now I have a random thought to make 12 more and have enough for a quilt. I suppose it is possible since FOTY has a lot of pairs needing sewing, but the cutting of the 2.5″ squares – enough to make a quilt before next week is a little daunting.
I think it will be better if I get over my Octagon Nine Patch hump so I can make progress on that project, not that donation blocks are a bad thing.
I am still feeling like I am in some weird in between place with my projects. There are projects where I am at a strange point that seems to be stopping me. I have to count up all of the FOTY squares and figure out how big I need to make the quilt. I need to cut some more squares for the Octagon Nine Patch, which has been languishing for, what feels like, a long time.
Improv Top in Progress
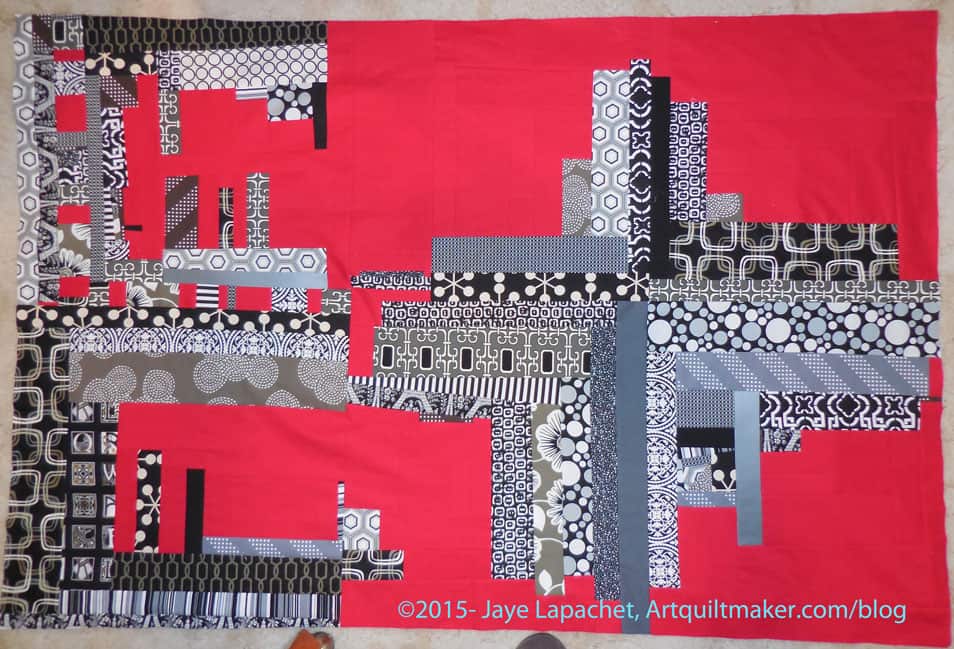
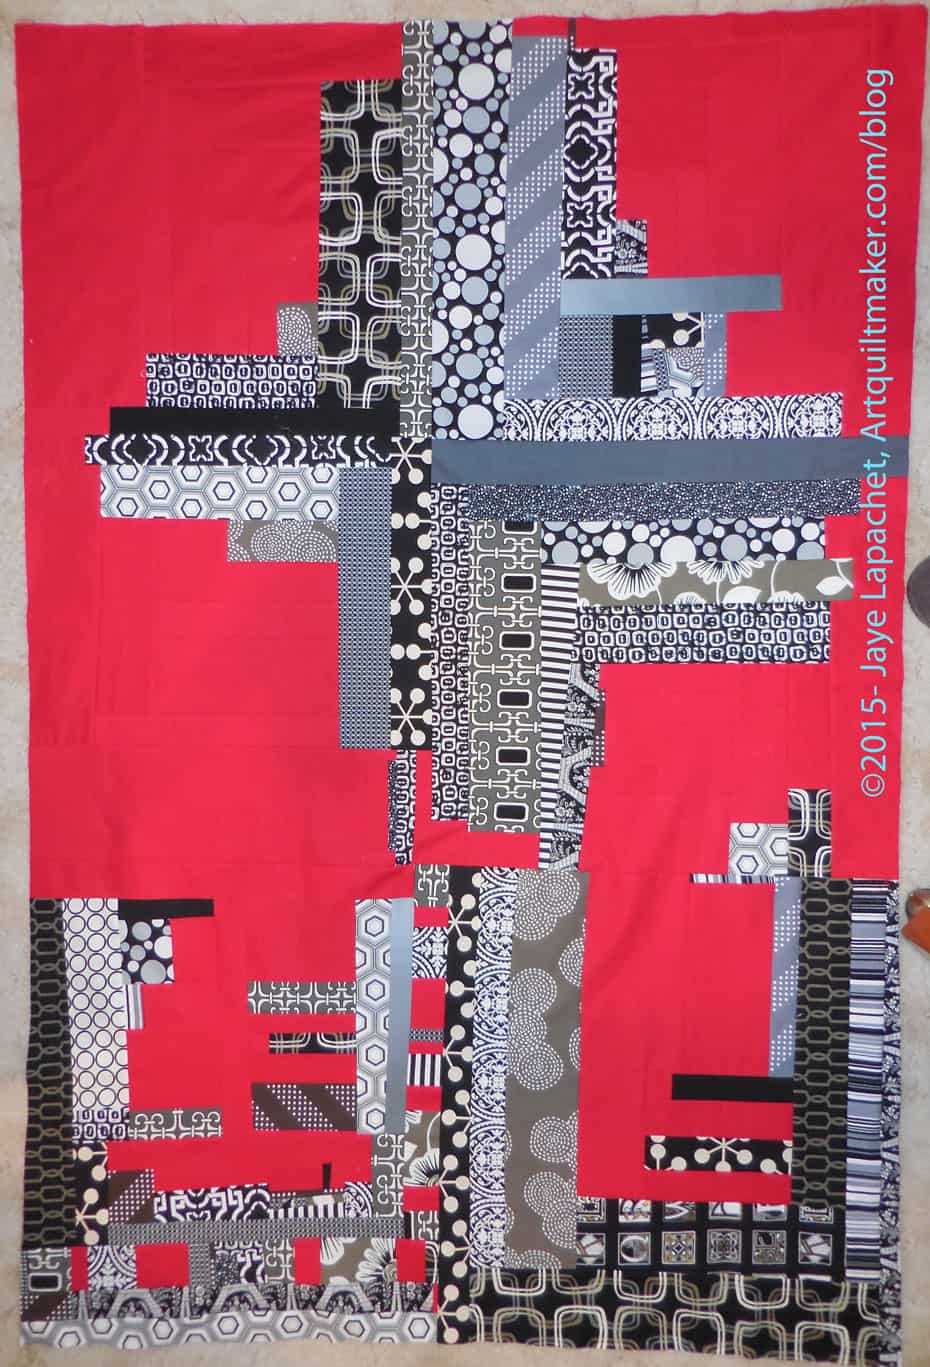
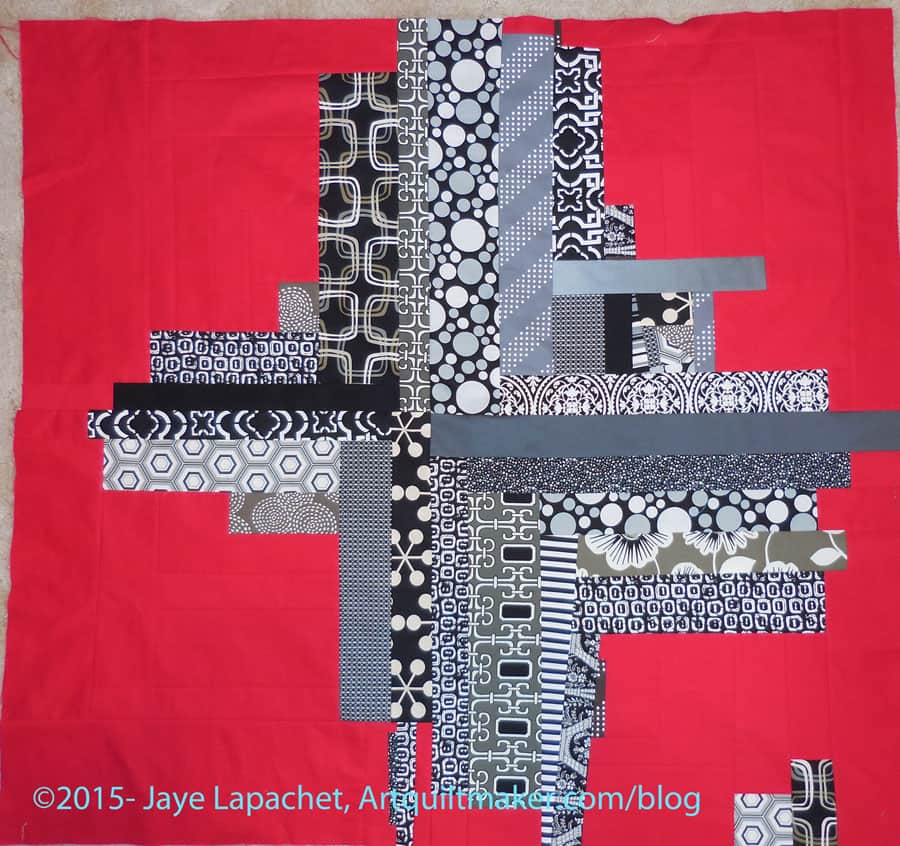
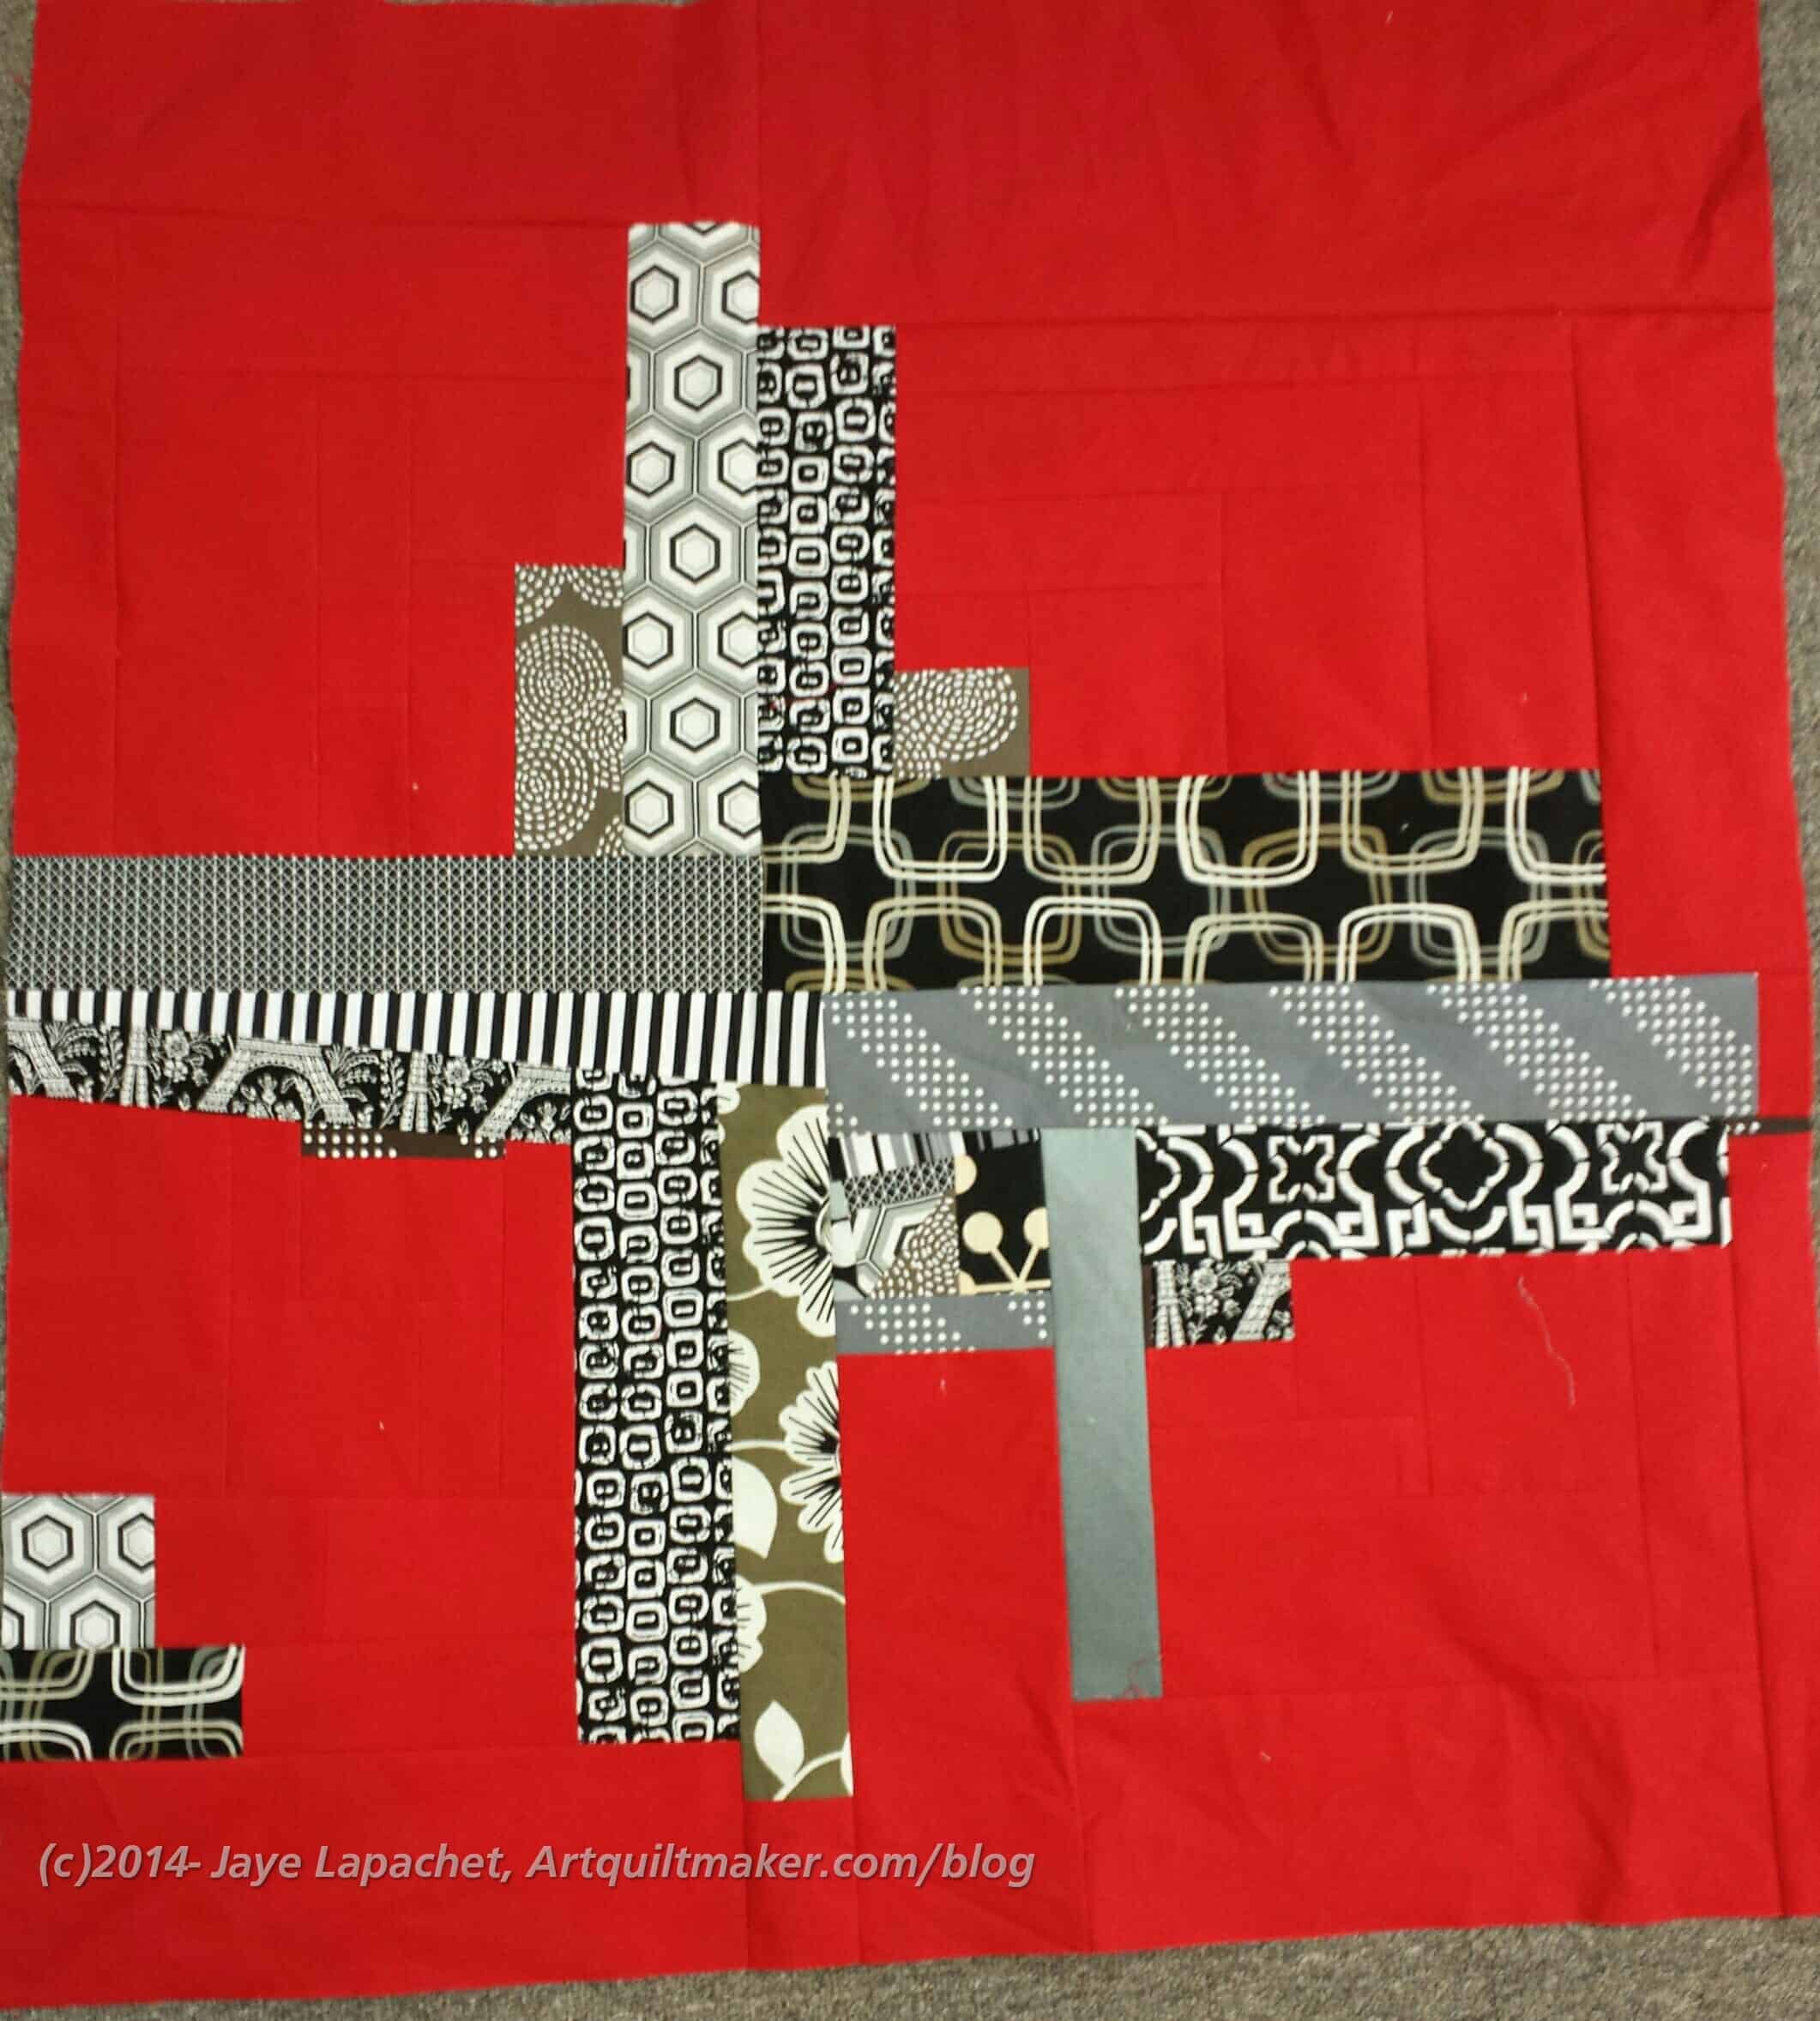
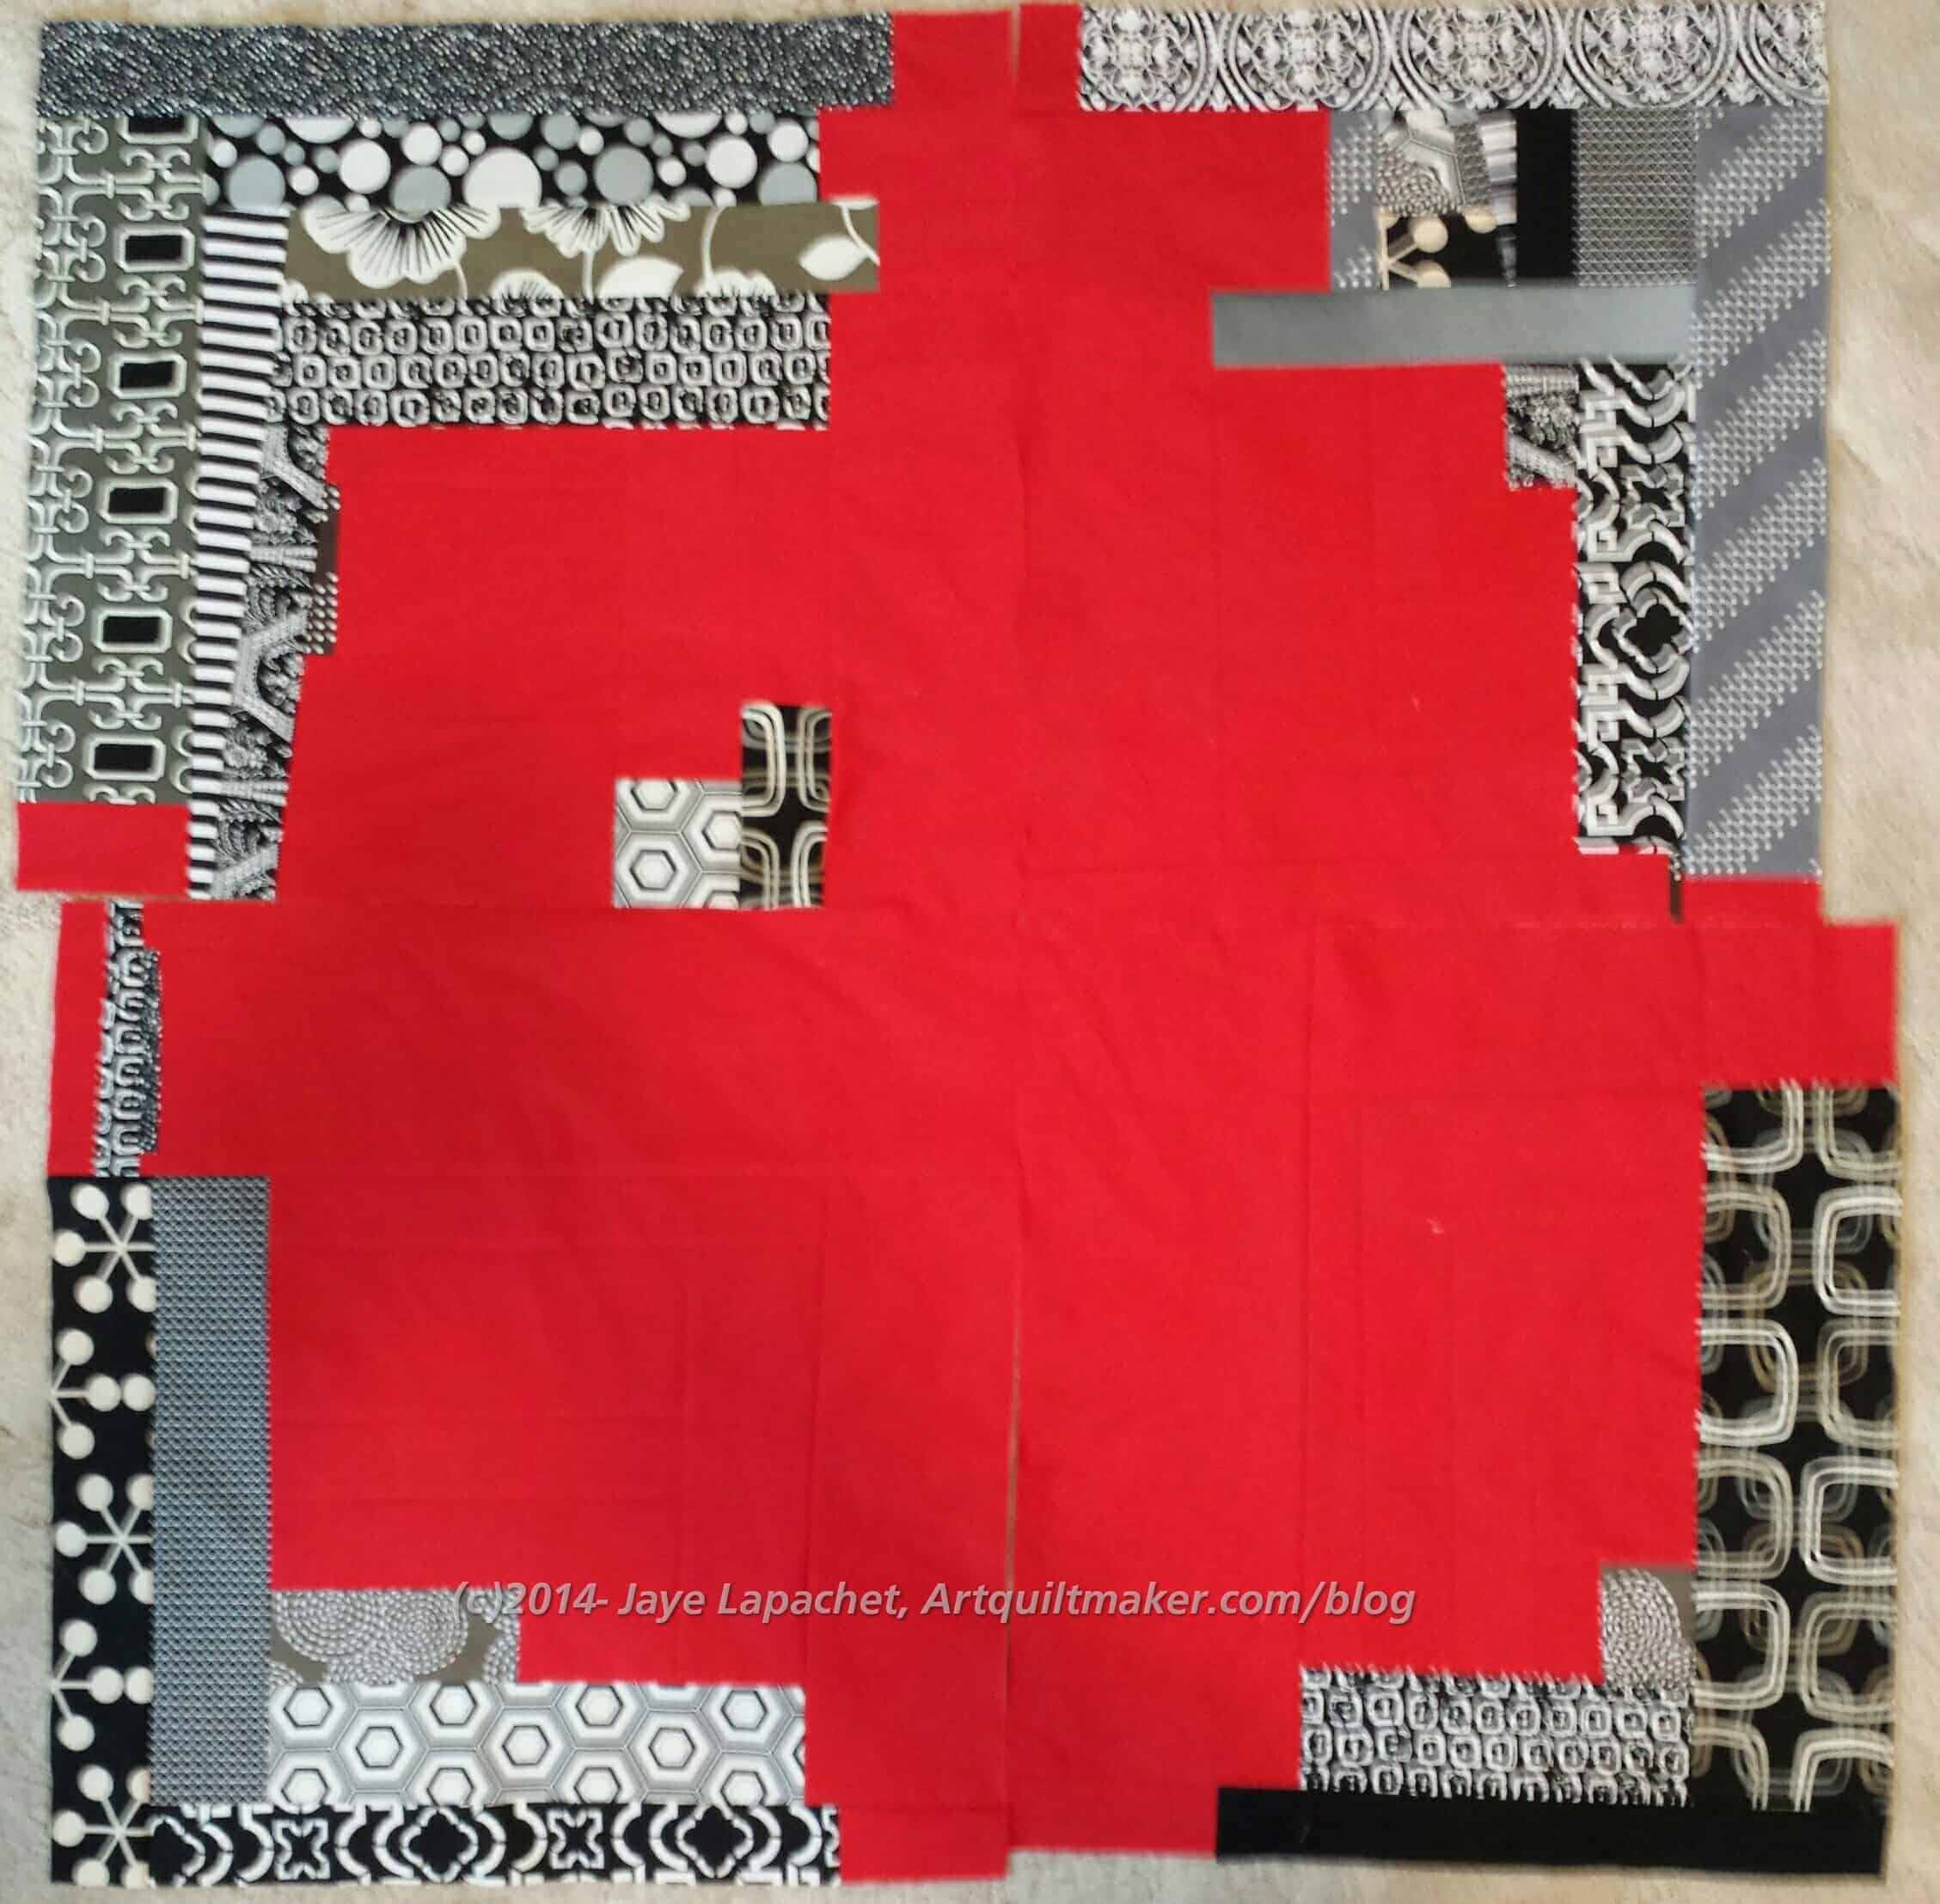
I decided to work on the Improv quilt again and get that project farther along.I finished a second ‘B’ and decided to sew it, along with the first ‘B’ block on to the quilt. I like what is happening and I can see where I go next, to a certain extent, but I think those 2 blocks look heavy. I might put them on the bottom, but I will see if I can lighten them up with more red on the three sides.
One idea I had from looking at the photo above is to make sure some red meets the red on the bottom and continues over almost to the corner. That will mean making that part of that corner side block last and making sure I remember. I think if I do that, there will have to be a bit of one of the black and white prints in the corner – or a strip of red alternated with black and white prints.
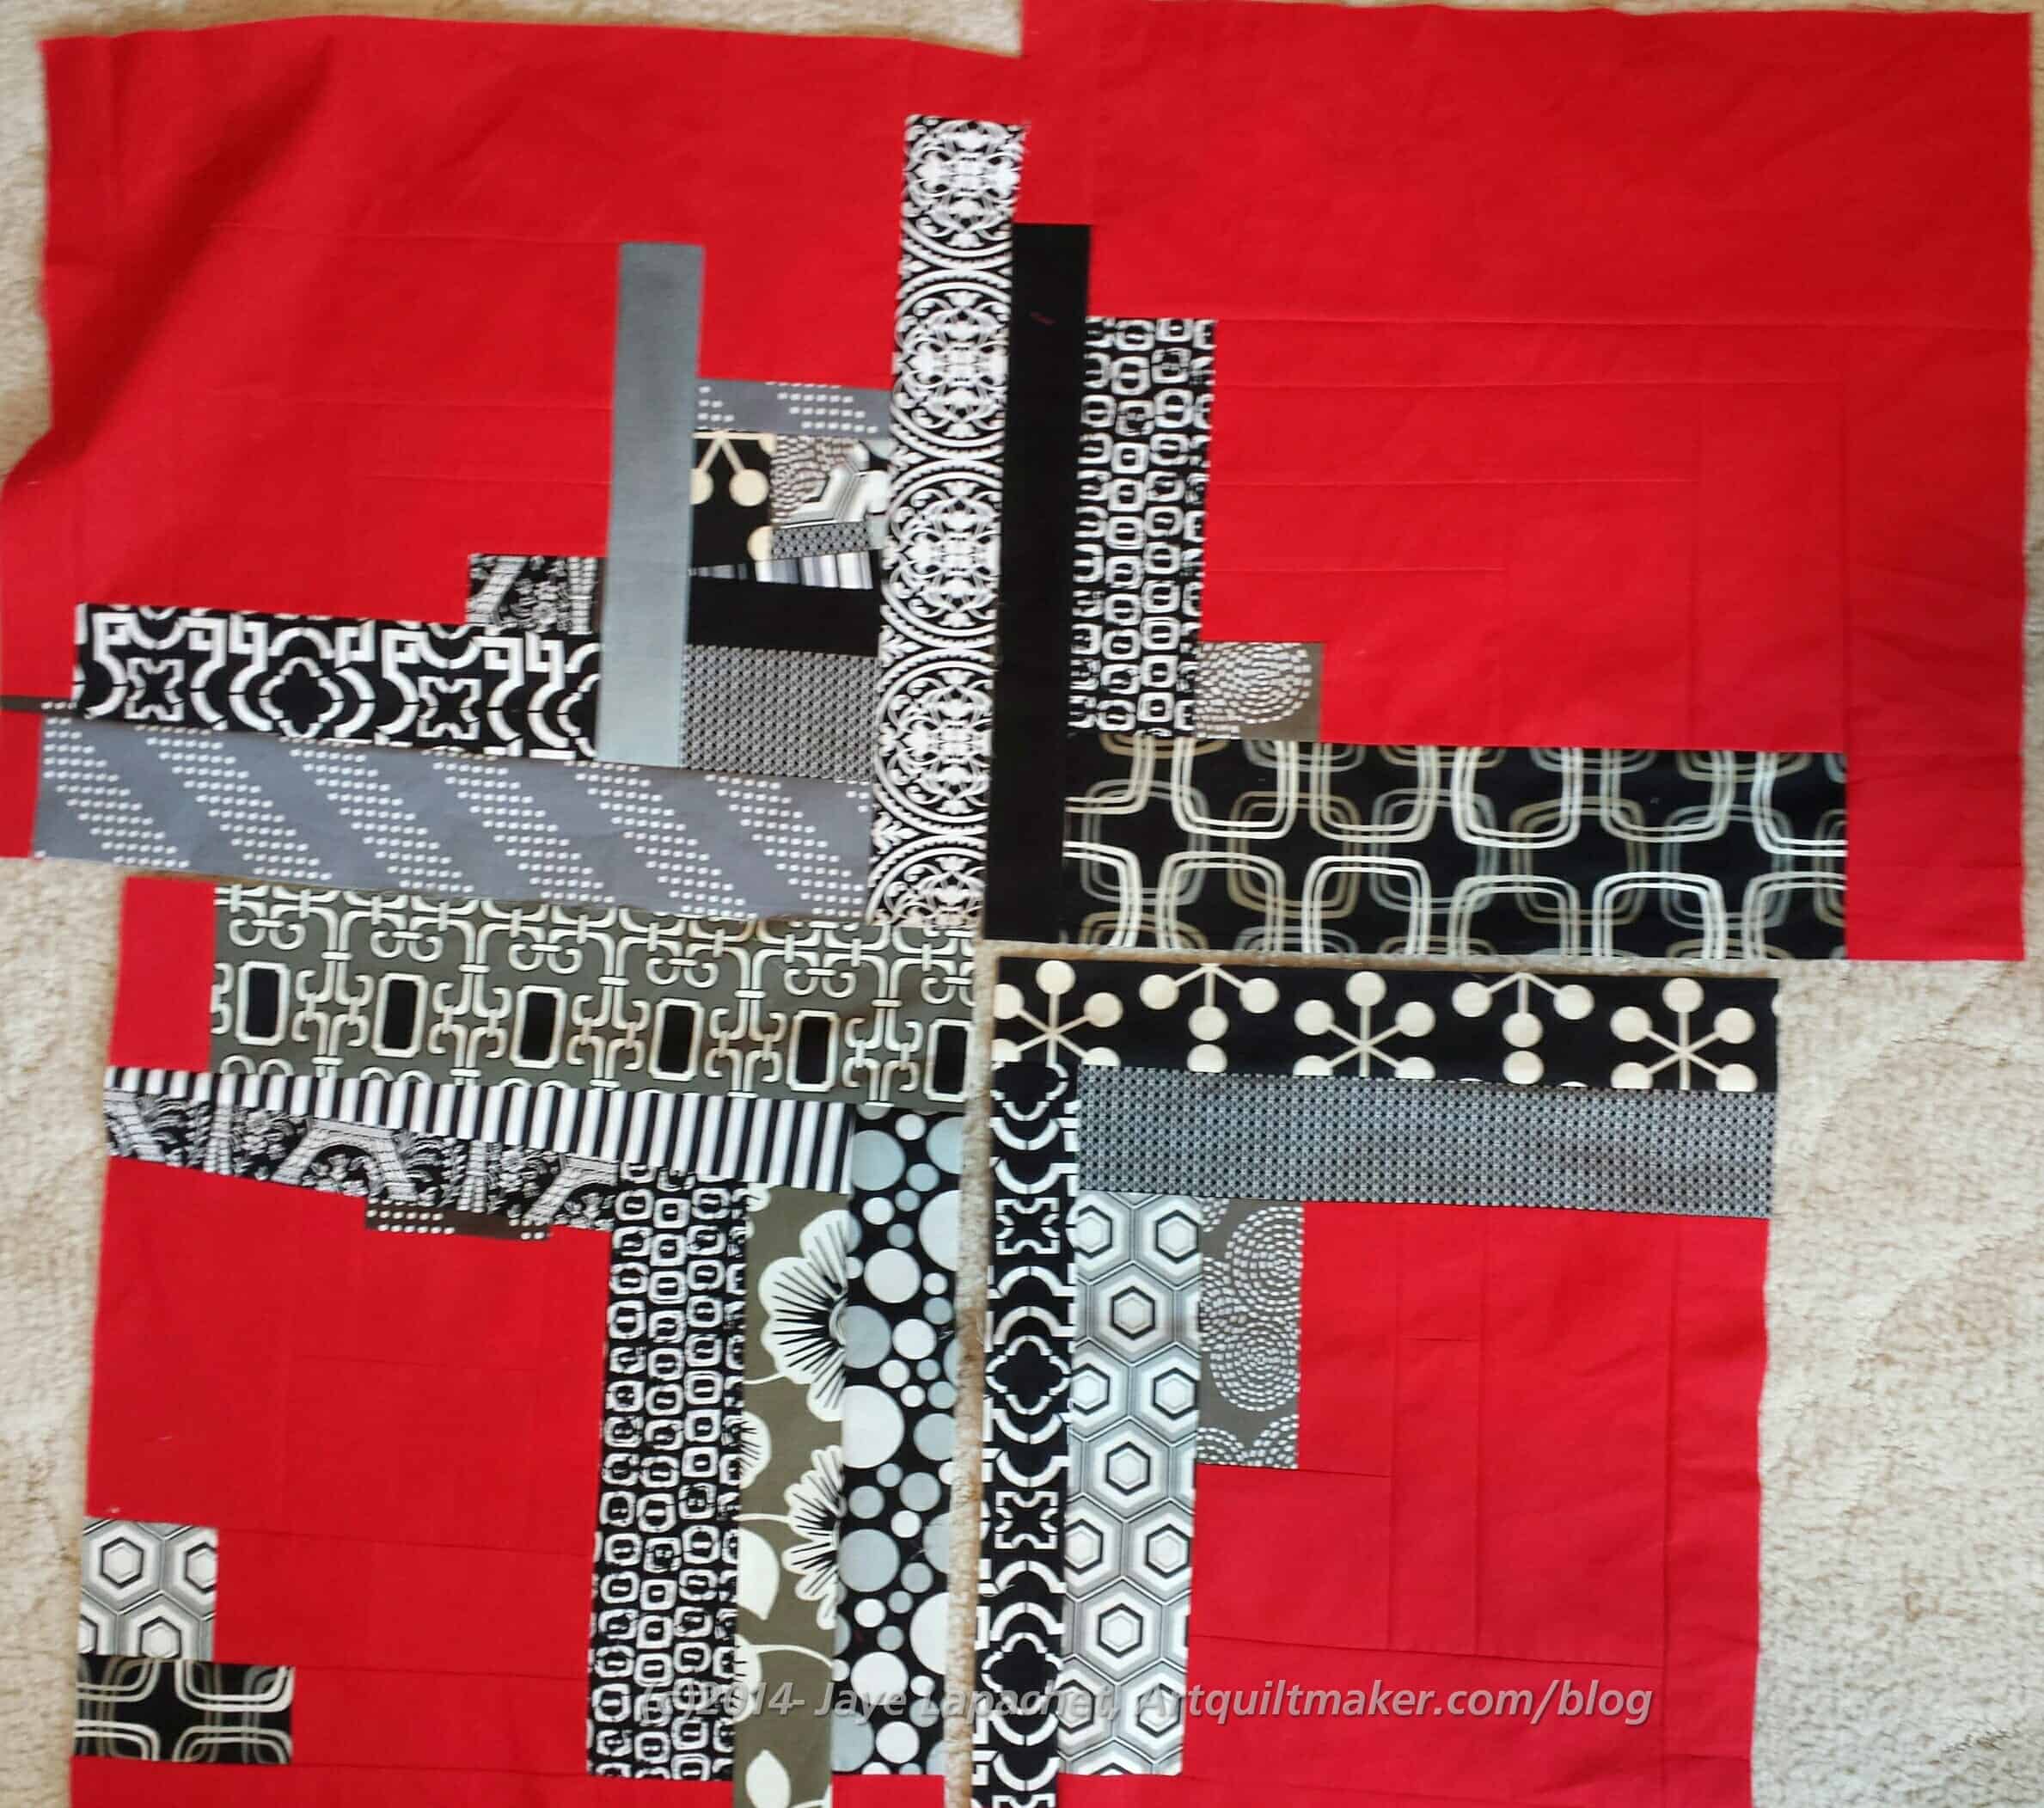
Improve top – turned
I also thought of making those blocks the bottom. Heaviness works on the bottom. The photo (left) is the same one as above, just turned so you don’t have to turn your head.
It looks ok, but I remembered that there will be other blocks on each side of those new ‘B’ blocks.
Yes, all the blocks are sewn together. I just wanted them sewn.
After using some Flying Geese as leaders and enders, I switched to using the large Improv blocks as leaders and enders while putting together the T Donation quilt. The Improv quilt is not a good project for leaders and enders as I really should have it on the design wall and be looking at it all the time as I worked. I really wanted to make progress. This project has been shuffled from corner to corner of my workroom and I am forgetting my plan. My design walls were full of other projects, so it was what it was.
I added a few more strips to make the center (A) blocks more even then sewed the four center blocks together. This breaks my ‘Chunking It” rule, but I just wanted to see the four blocks together. Somehow with them together, I was able to start on the B blocks.
Improv B Block #1
They look pretty good and I got excited about working the B blocks. I had bits and pieces that I made in class that I hoped to use, though I wasn’t sure what I was thinking when I made them, so I kept going. The first one went together relatively quickly and that helped me move forward with the others. I am working on about 4 at once right now and expect to have a big group of them done at once. We will see.
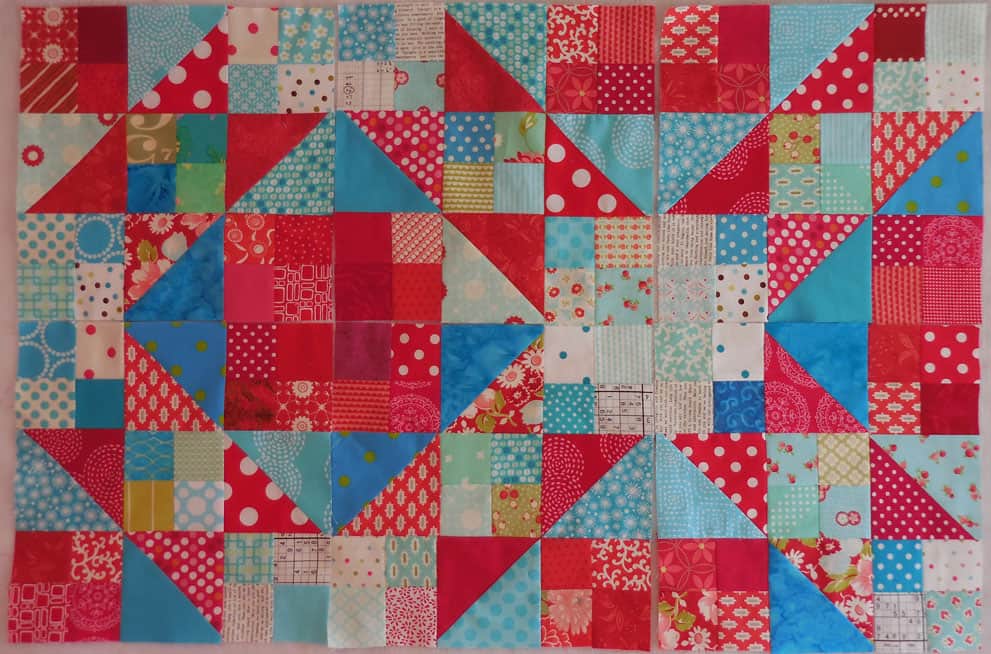
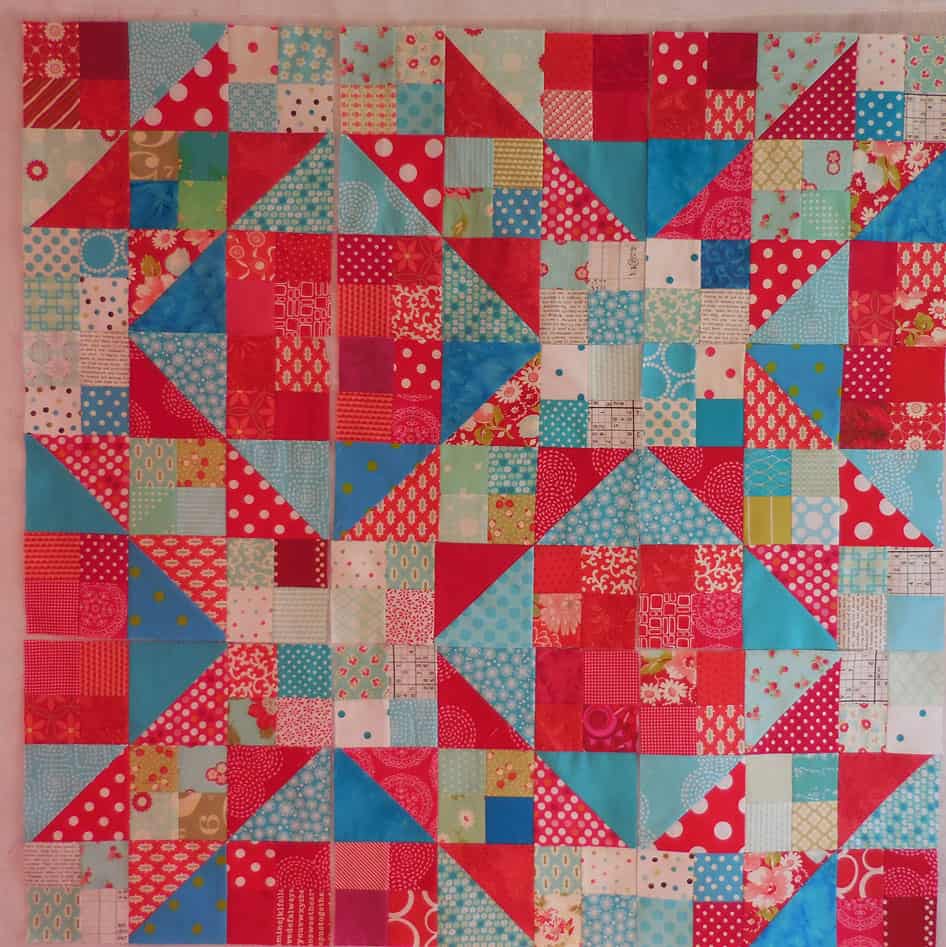
Using leaders and enders I made a few more Stepping Stones blocks. They are looking really awesome, I think. I love the way the red and blue really create distinct secondary designs. This was a little hard to see in my previous quilt. From far away the previous quilt looks great, but close up you can’t see the pattern as well as you can in this turquoise and red version.
Stepping Stones – starting to look like something
I have added a few new fabrics to the mix for this quilt. My original idea of using all Bonnie and Camille fabrics is pretty much out the window. They were a good starting place, but much too limiting. With all the fabrics I have added, I still don’t think there are enough. I get annoyed when I see two fabrics together. I am starting to see the appeal of charm quilts.
The picture to the right is the new blocks with a few of the old ones to show you the effect of the whole design.
I haven’t had a lot of time to sew recently. I was determined and pleased to carve out some time out on Sunday. I was resolved to accomplish something. Thus, I needed the most bang for my buck. I looked around and thought of the Box Full of Letters project.
Perfect.
I got to it and finished the rest of the Box Full of Letters blocks. I know I intended them to be leaders and enders, but bang for buck was foremost in my mind. As an added bonus, it was just the right project, because I didn’t have to do a lot of math or thinking.
the last 15
There were about 15 left to sew and I did them chain piecing style. Three seams per blocks makes quick work. I only had to rip one out.
I tried to arrange them to take the photo so all of the blocks made from dot fabrics were separated. Therw ere a lot of dot fabrics, so it was pretty tough. It was not a horrendous hardship, however, I have to admit. 😉
All the blocks
Now, ‘the rest’ is relative. In looking at the finished group of blocks, I am not sure that I am done.
As you can see there are an uneven number of blocks. That means that I am wondering if I need to make more blocks. I have 45 blocks total and I am not that excited about making more, but the design has to rule. I don’t want to make an ugly quilt.
The other option is that I have is to arrange them in an asymmetrical manner. I got the idea from a quilt I saw in Love Patchwork & Quilting magazine. It wasn’t this pattern, but the blocks were arranged in an alternative grid and I might just try some different layouts to see what you think.
I don’t remember exactly when it was, last Friday, I think, but I had a brief window of time before I had to go do something else for someone. The grief at the implications of my BIL’s loss were starting to creep into my brain in the quiet and threatening to overwhelm me.
4 ‘A’ Blocks
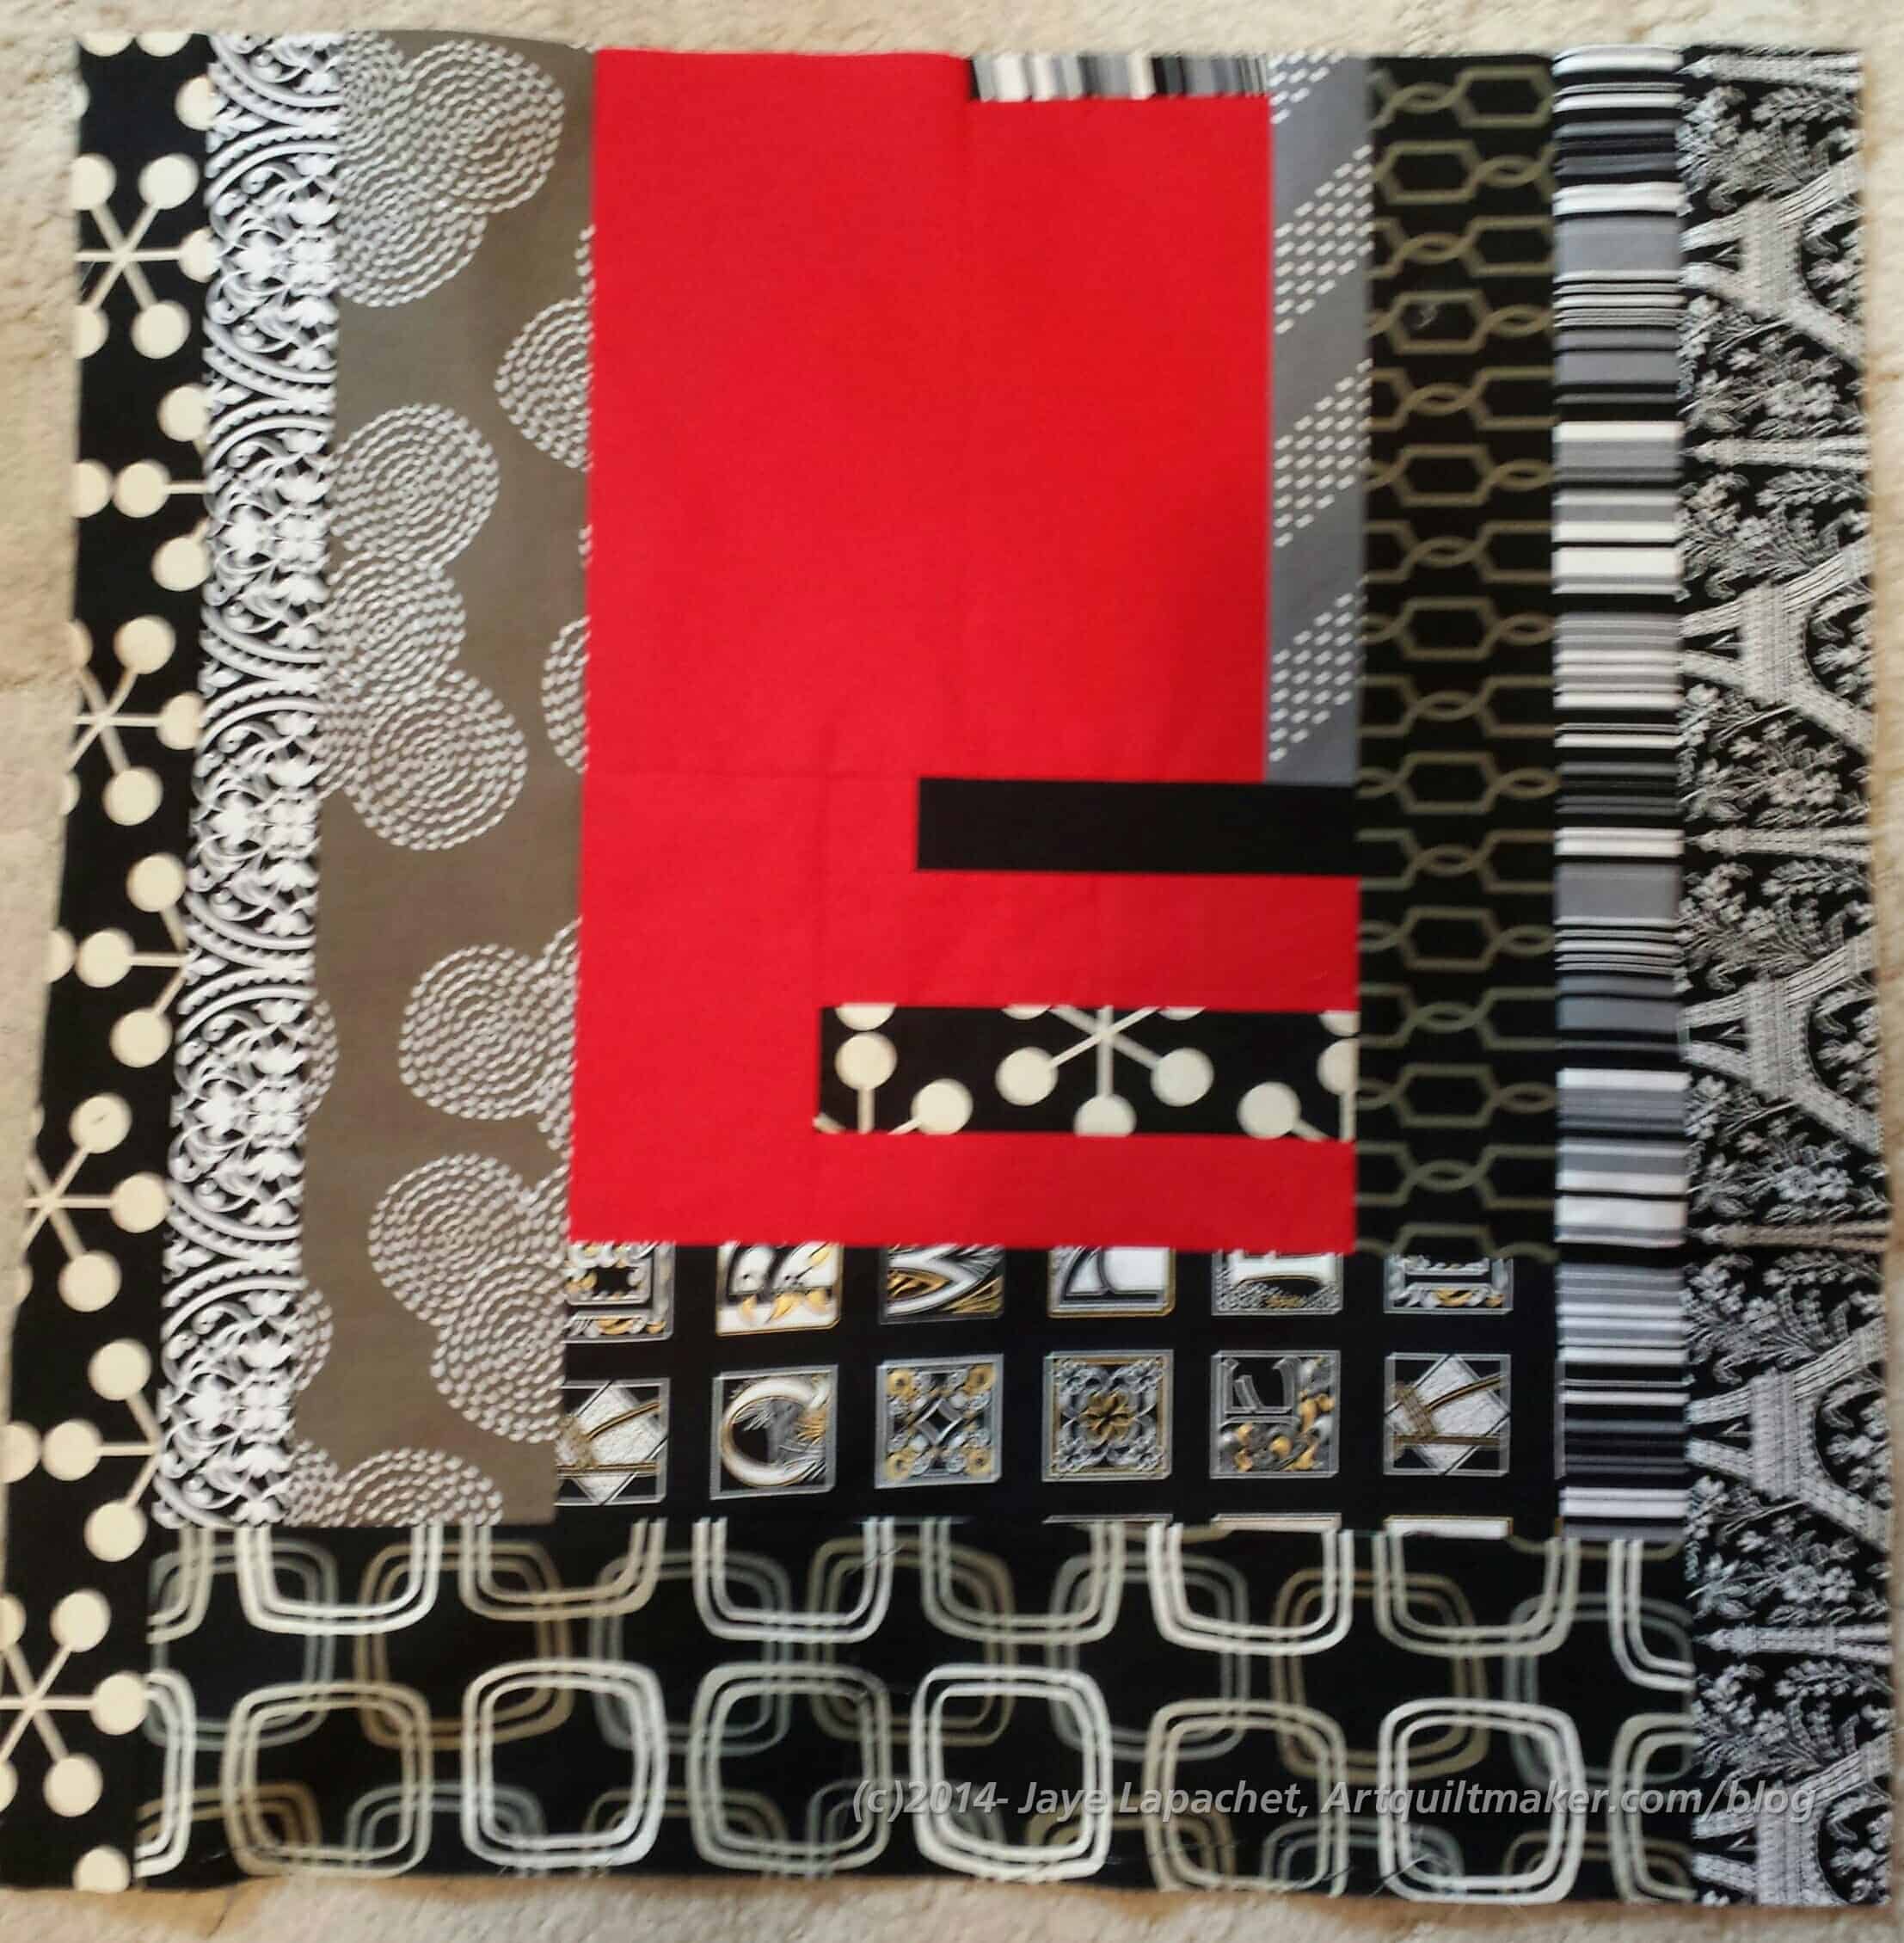
I turned to the Improv pieces I had worked on at the workshop. They were sewn together as you see (left photo), but I wasn’t happy with them, so I unstitched them and began to rework them.
Tina’s idea (from Little Blue Cottage) is that there should be a lot of negative space in the center. Because I like the interplay of the strong pattern, I wanted the blacks and whites to act as the negative space and the red to act as the foreground.
This isn’t a terrible idea, but it wasn’t working with this layout. I looked at it a lot, trying to like it – or at least be okay with the center. The reality was that I didn’t like it. I wasn’t achieving anything near what I was imagining, thus the ripping.
Big, fat Improv
The ripping really didn’t take long, but it did allow my mind time to wander, which is not what I wanted. After ripping, I began adding more neutrals to the ‘legs’. The photo (right) is what the pieces look like right now. I have not sewn the four blocks together yet. I haven’t decided if I am done with the ‘A’ blocks yet.
I think I will definitely add some more red to the outside. I also think that a few more neutrals is in order. It needs to sit a bit.
Windowframe layout
I wandered around it for awhile and then began to wonder whether I should reverse the blocks and arrange them the way Tina intended the pattern to be arranged. I think the neutral part of the blocks look too skinny again when arranged with the red in the middle. It isn’t terrible, though.
I think the ultimate path is to make some of the ‘B’ blocks and see what happens once I have more to look at.
There never seems to be a shortage in people who need a nice hug in the form of a quilt. I made three blocks for two different projects over the weekend.
I started the stars weeks ago by making Sawtooth Stars with a four patch in the middle. I made one when I did the Star Sampler and really liked it. The problem with the version for this lovey was that I tried to use the Deb Tucker ruler AND include the 4 patches in the middle. It was too difficult for my brain to process.
For a few weeks I did nothing, but when I got the call for the heart lovey block and I knew I had to get my act together and get those star blocks done. I decided just to make some basic Sawtooth Stars with super great fabric. I hope that these work out well.
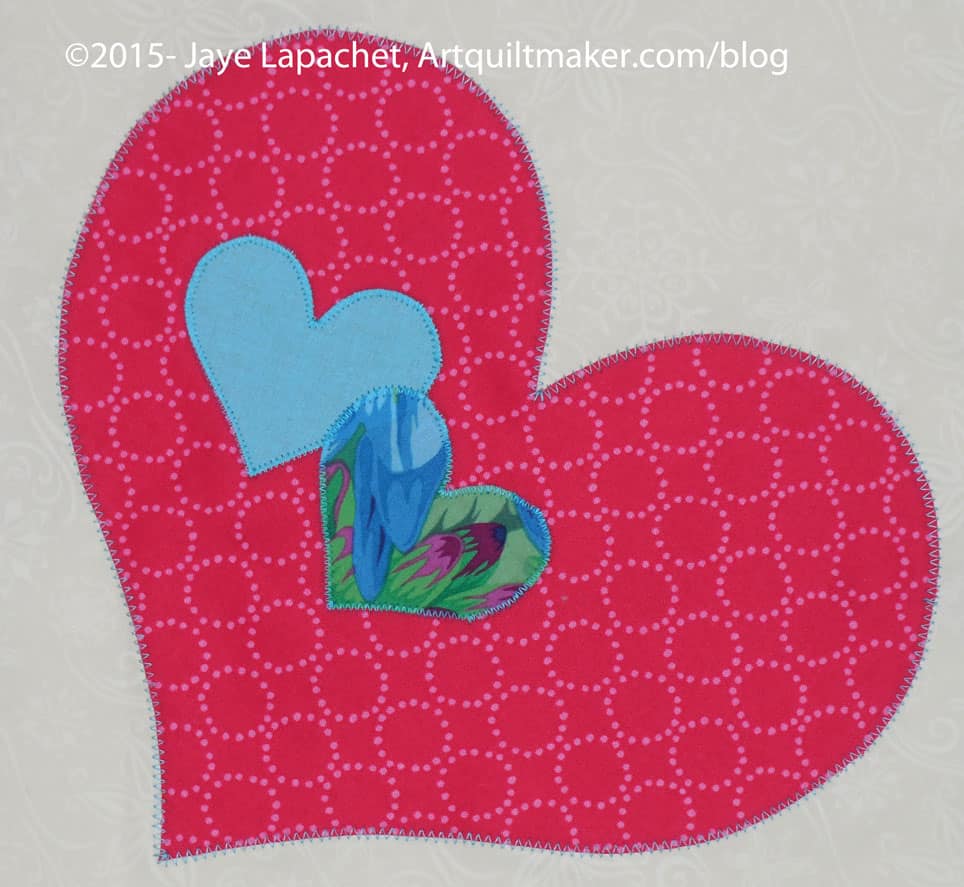
Lovey Heart Block
I got an idea for a heart block as soon as I heard the maker wanted hearts. I knew that machine applique’ was the best way to go. Fast, too.
At first, I thought I would just do the large heart, but when I finished, I thought it wasn’t enough, so I added the blue hearts. They were made from scraps, but they added something to the large heart. I think the little hearts added interest.
If you are asked to make a block for a lovey quilt, please consider making one. One block and little bit of fabric can make all the difference in the world.
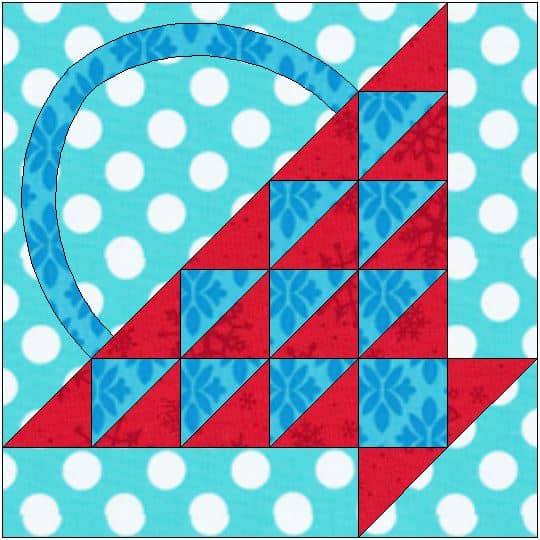
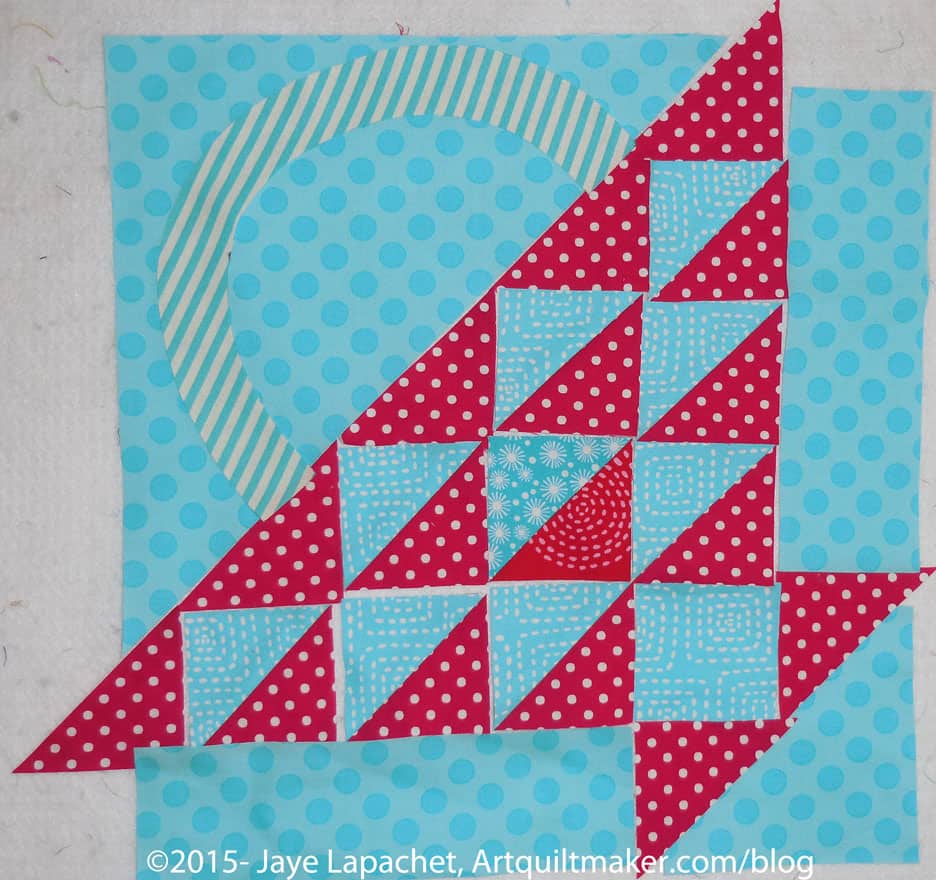
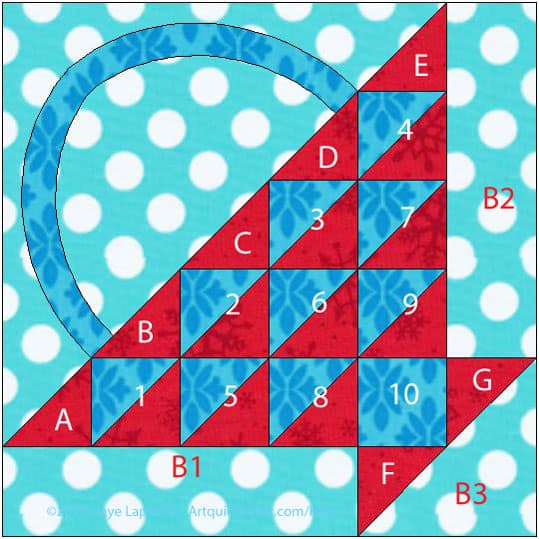
As mentioned in part 1, above is the current block in our Sampler Quilt Class. These directions are for machine sewing your Flower Basket and include a little applique’. The applique’ can be done by machine or hand.
Are you playing along? If you are just starting, below is the complete supply list. You won’t need everything for this step, but you will need to start with part 1 and that part requires more supplies. Also, note, there are a LOT of photos in this tutorial.
These directions use a quarter inch seam allowance. Check your seam allowance before you begin. If you don’t know how to do that, there are resources available, including one from Connecting Threads and Craftsy. You can search the web for others if you don’t like these tutorials.
You will be directed to use the Triangle Technique. Make sure you have the chart as well as the instructions handy.
Respect the bias.
After working through part 1, you have already chosen your fabrics, made your templates and cut your pieces. You are ready to sew.
Sewing
Carefully stitch along the hypotenuse of the large background triangle, about 1/8″ from the edge, to stabilize it. This stitching will be covered up when you stitch the handle part of the block to the basket part of the block.
Triangle Technique
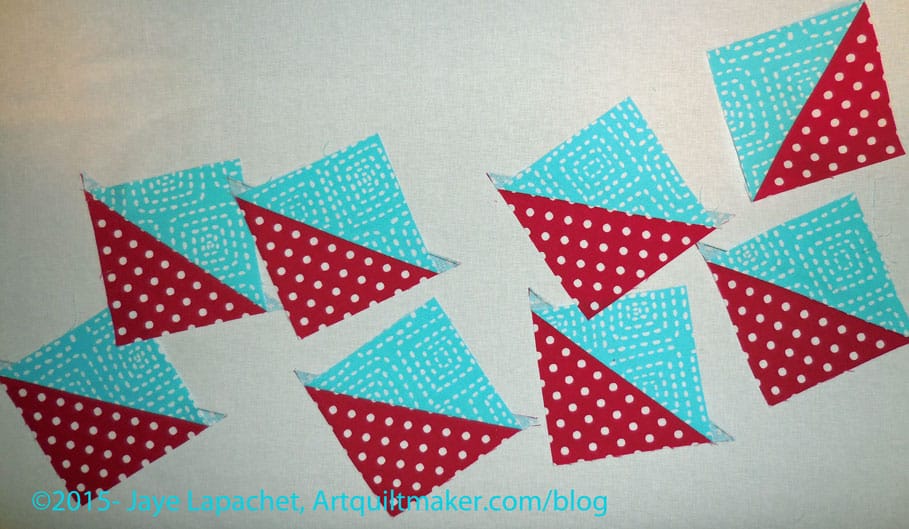
Use the Triangle Technique to make your half square triangles. Make sure you have the chart available to confirm sizes. A brief overview is:
Draw an X from corner to corner diagonally on the wrong side of each of your 6.25″ x 6.25″ squares.
Place them right sides together and sew 1/4″ on each side of the diagonal lines.
Nota bene: If I had wanted to pin I would have pinned far away from any of the diagonal lines.
Now you have a piece with four seams forming an X.
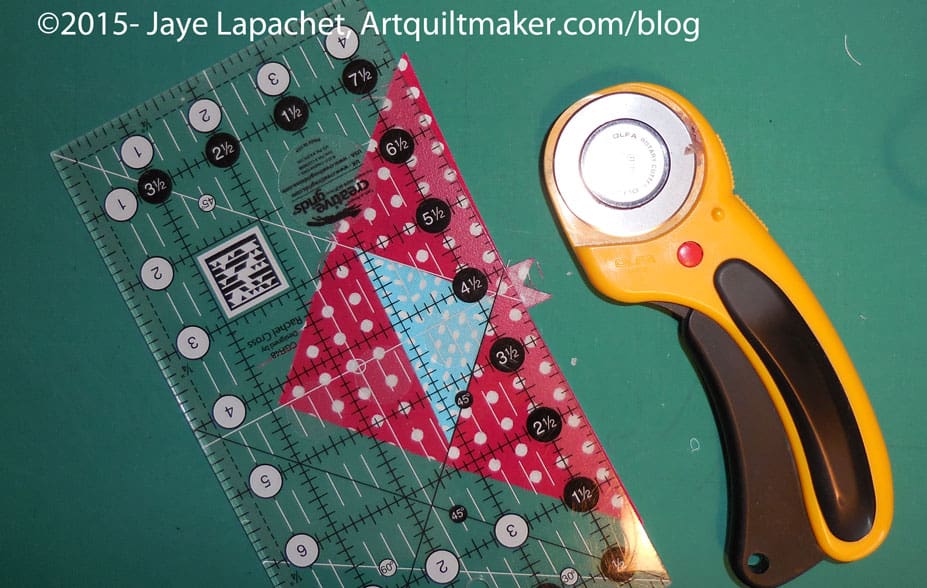
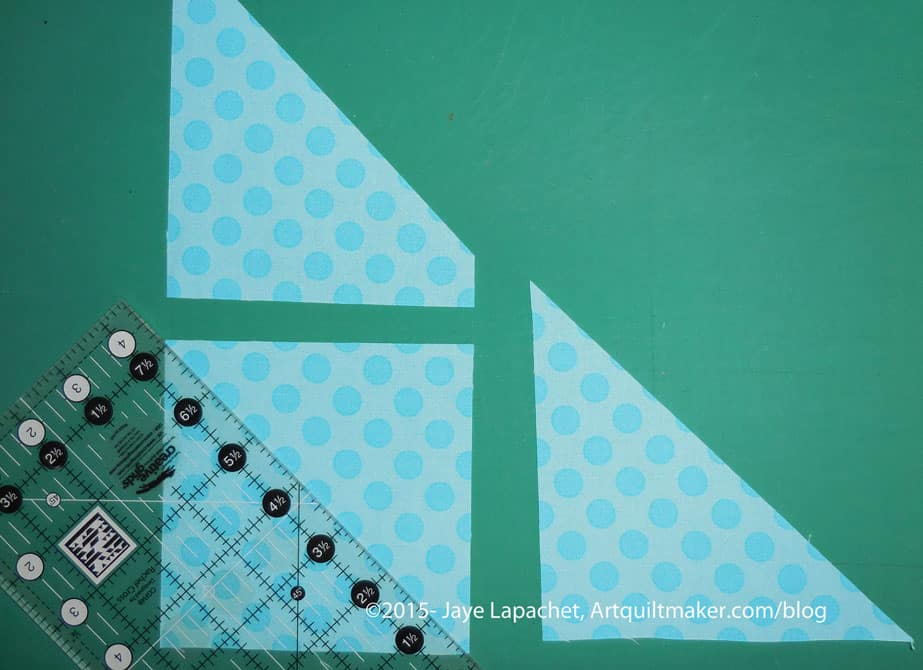
Next cut the ‘Plus’ of your sewn piece. This means that you are cutting horizontally down the middle and vertically down the middle.
Line up your ruler with the edge of the fabric and the point in the middle where the two lines forming the X come together.
Cut vertically.
Do NOT move your fabric.
Reposition your ruler and then cut the piece horizontally.
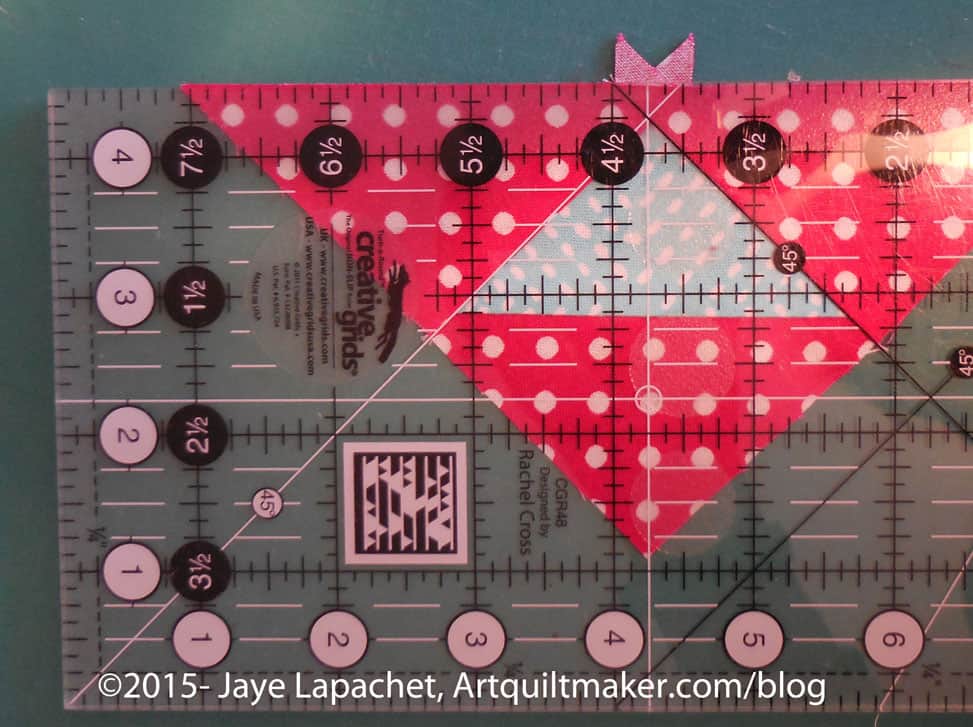
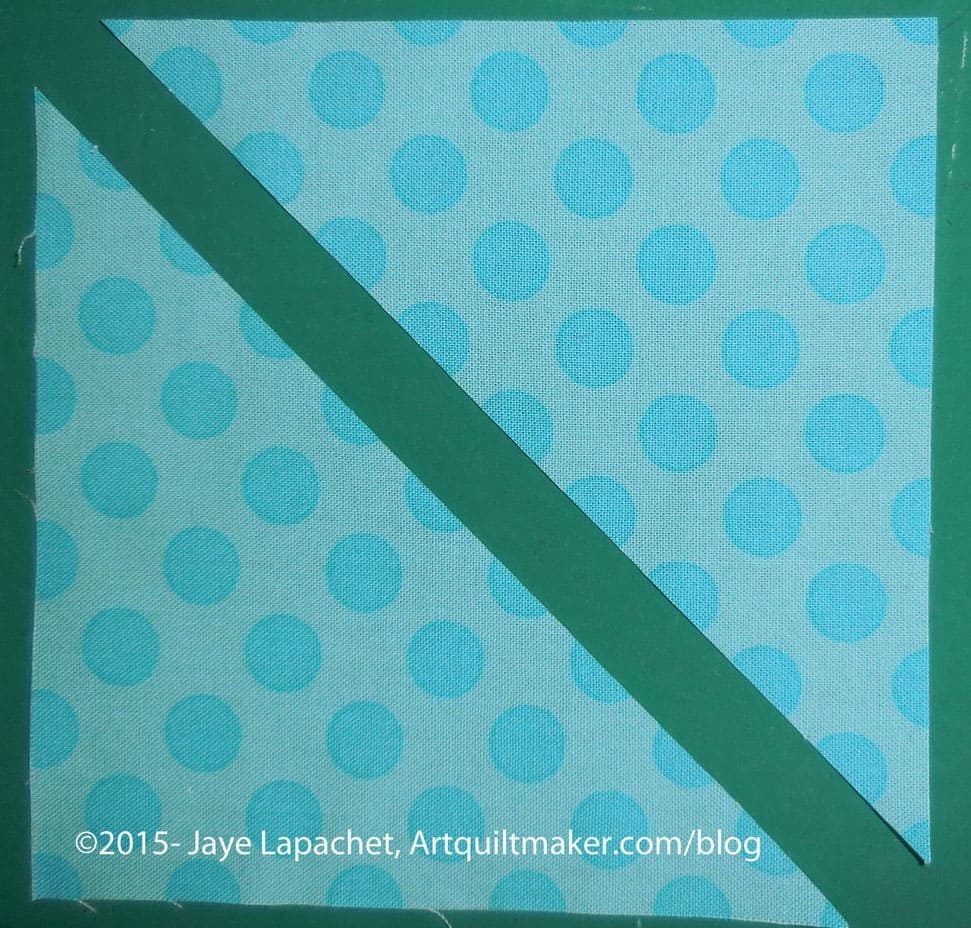
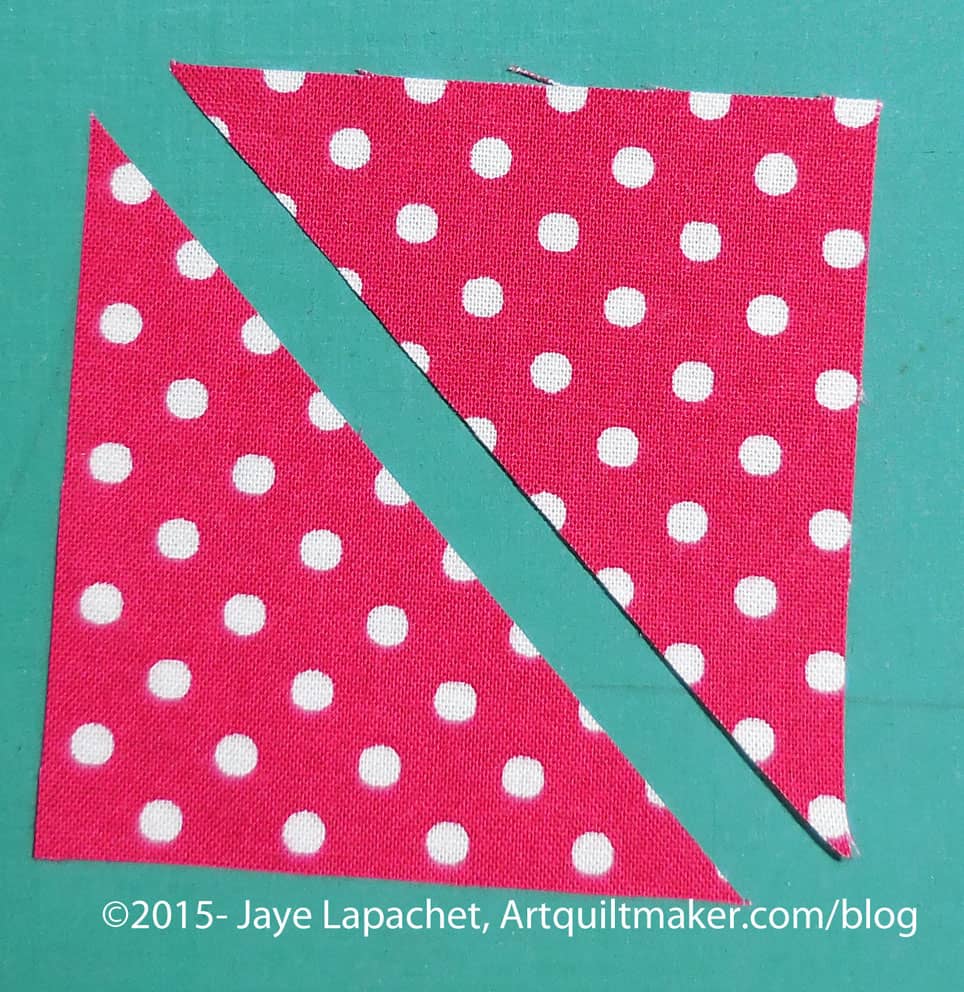
The result is 8-2.5″ half square triangles. The above are actually a thread or two larger than 2.5″, which leaves the perfect opportunity for trimming to make them an absolutely perfect 2.5″.
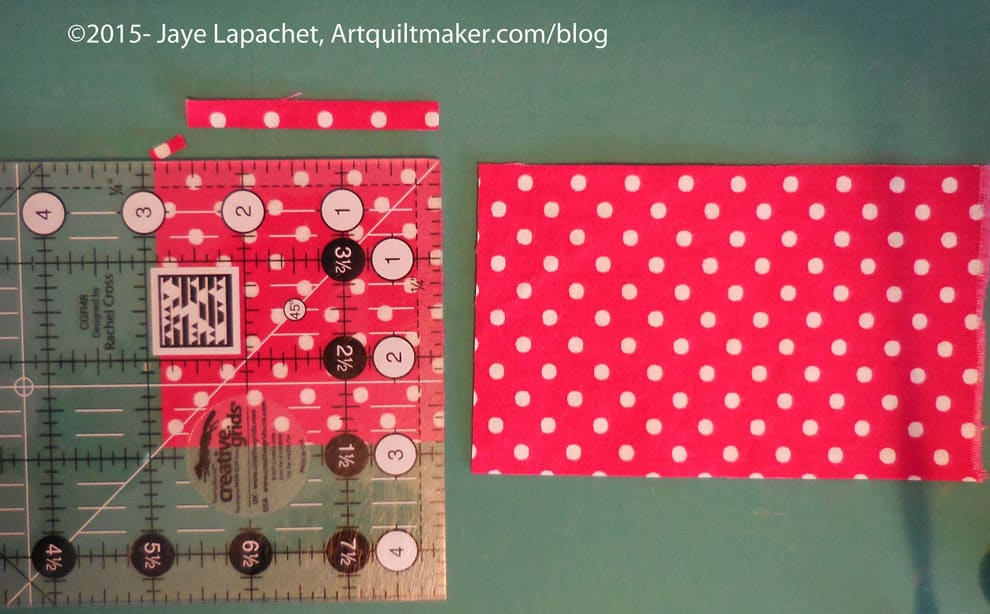
Trim your HSTs to an absolutely perfect 2.5″.
Now you have 8 beautiful HSTs.
Of course, you can use whatever technique you like to make the half square triangles.
Layout and Assembly
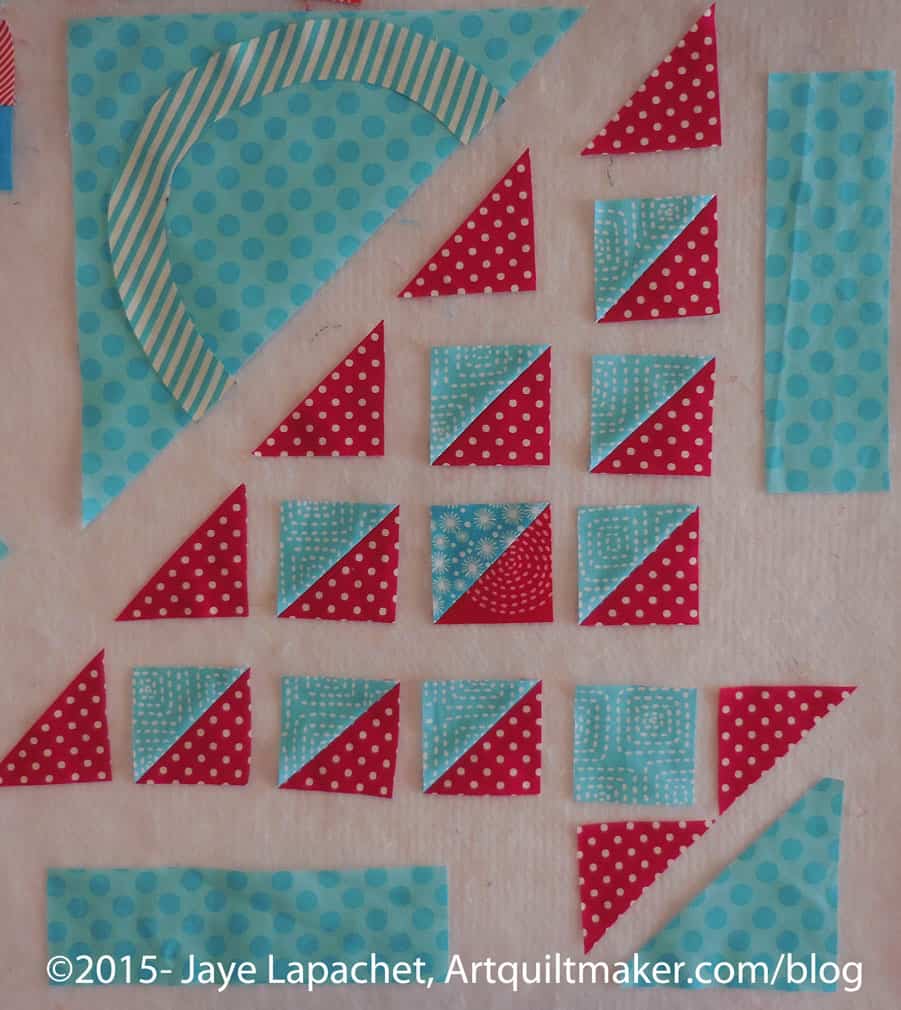
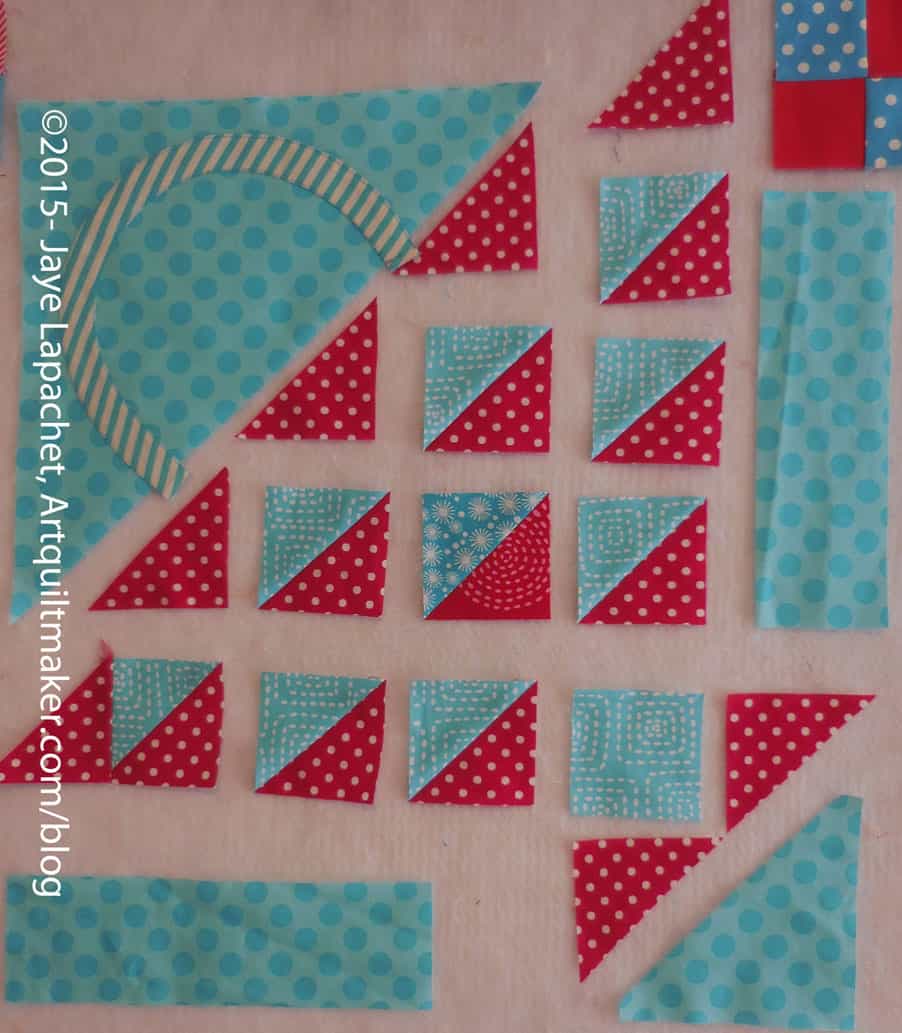
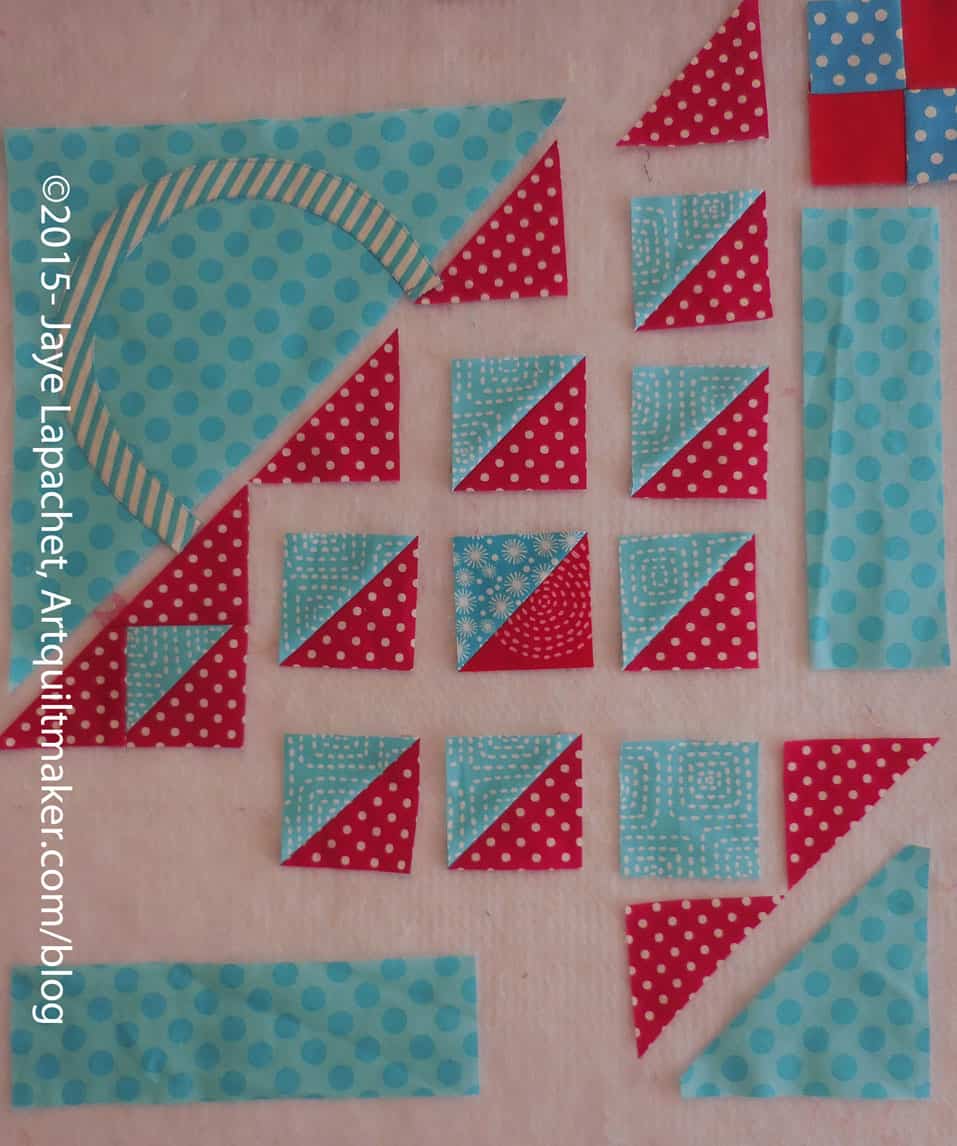
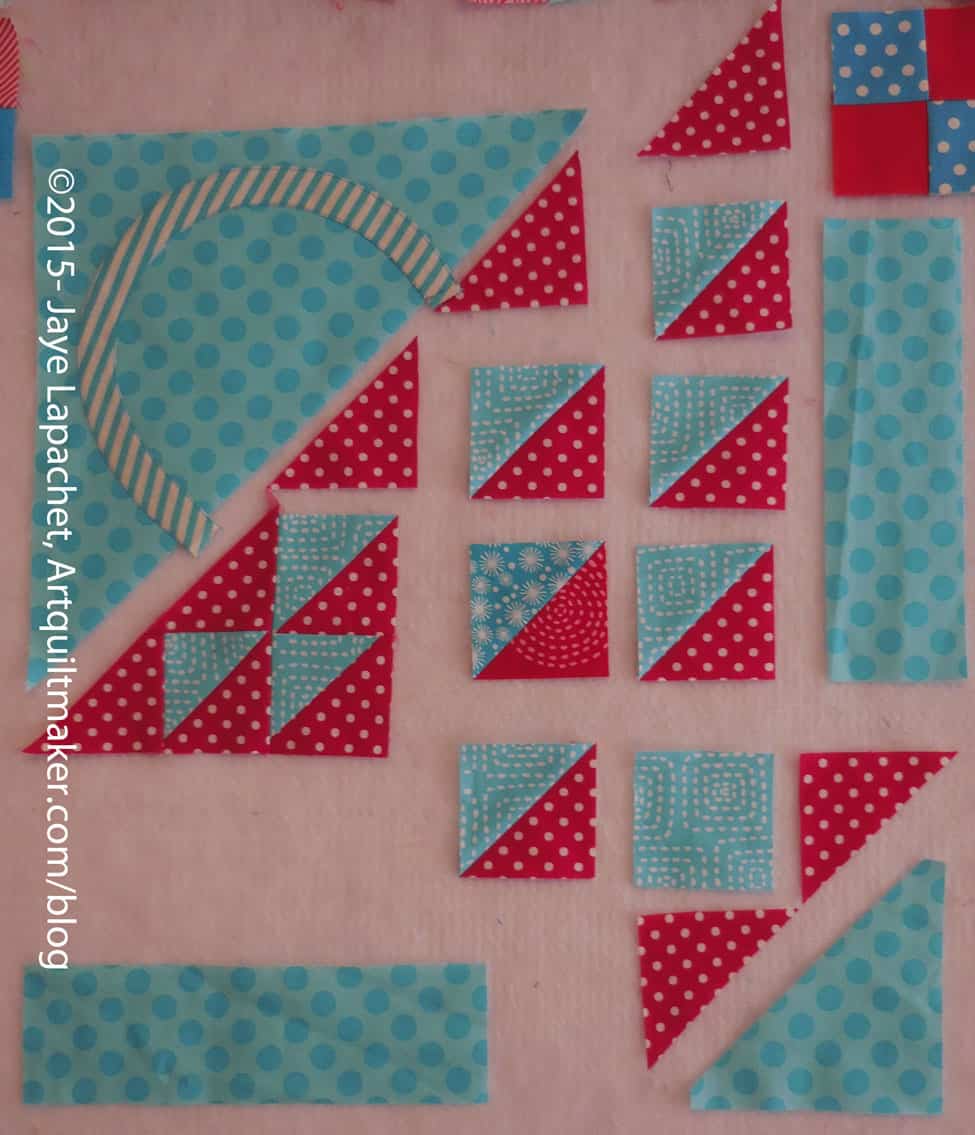
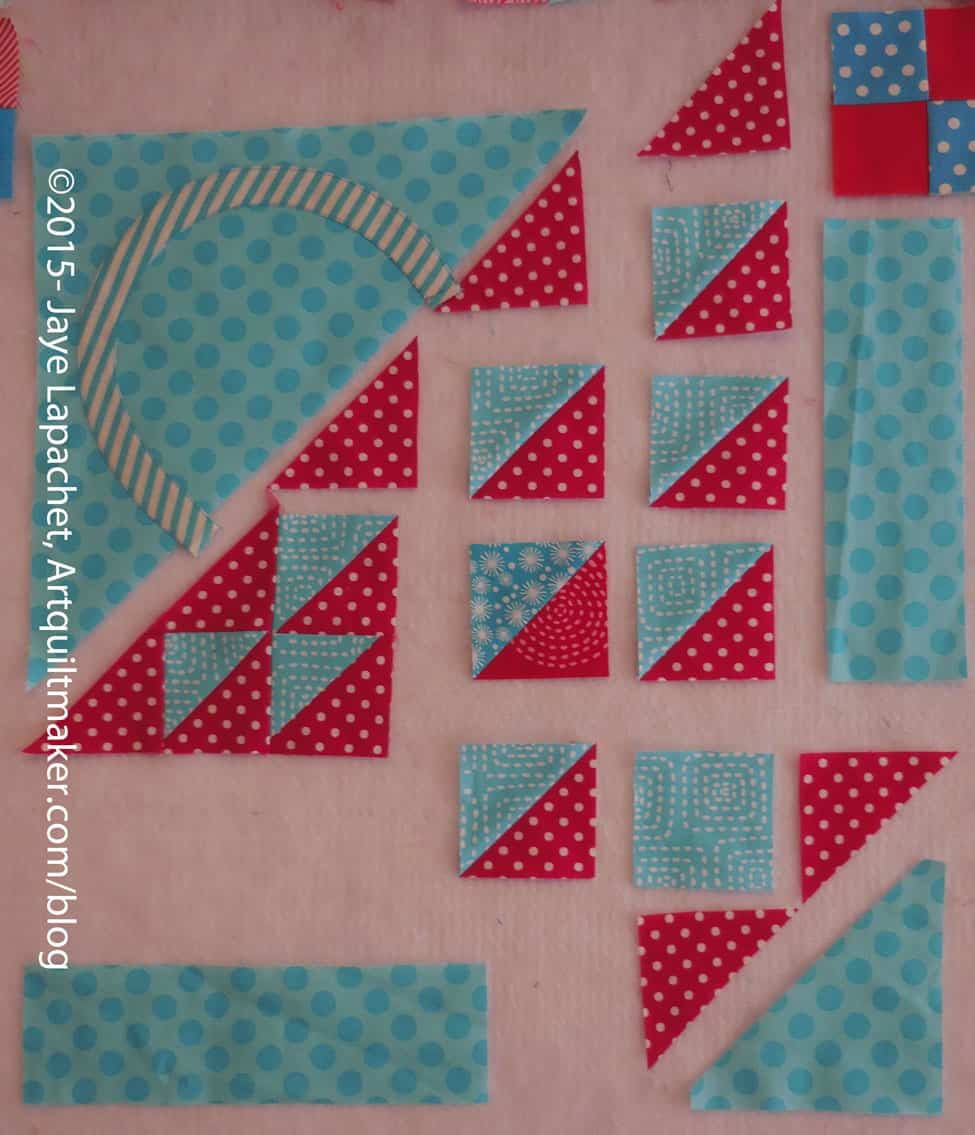
Pieces cut and ready to sew
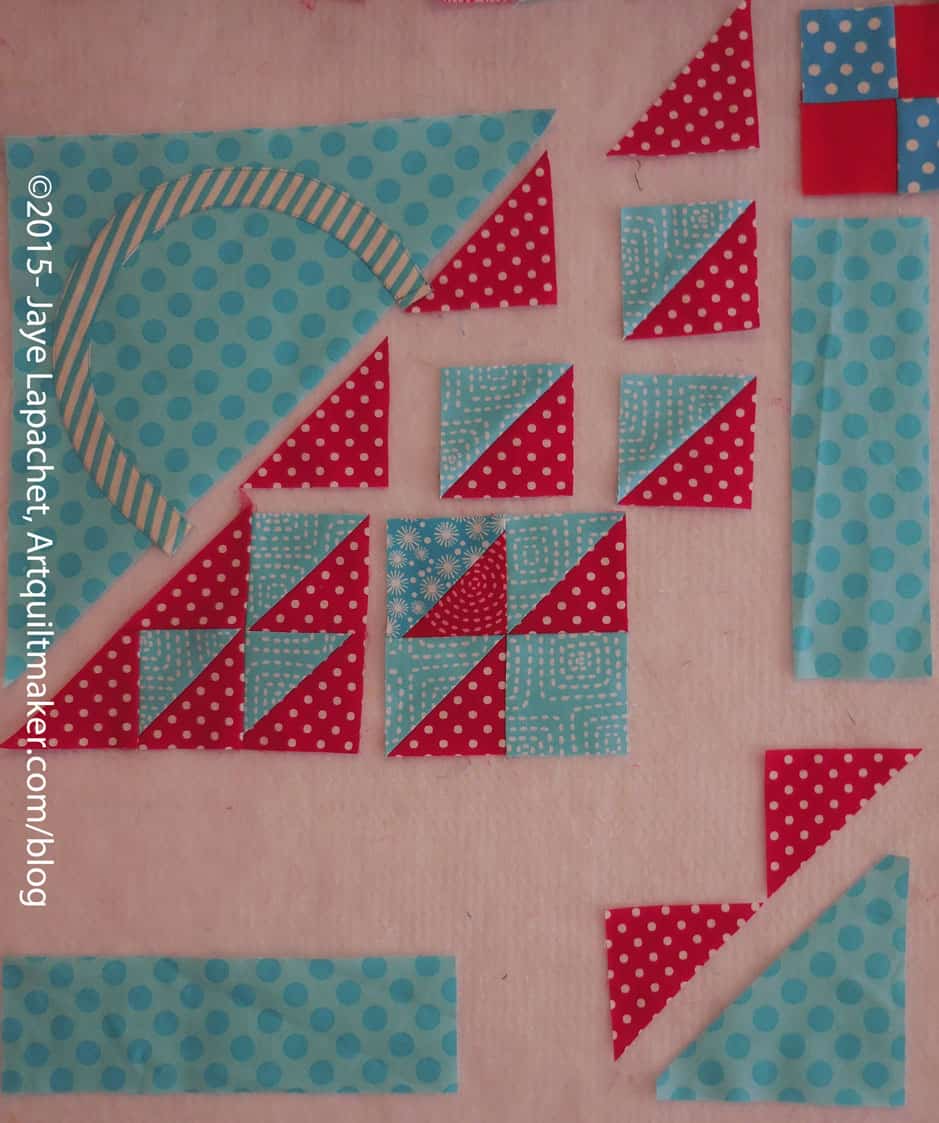
Now that you have cut all of your pieces, lay them out on your sandpaper board, or put them up on your design wall. It is great to be able to see where all the pieces belong and adjust any pieces that need adjusting before you sew.
Sew Handle to Background
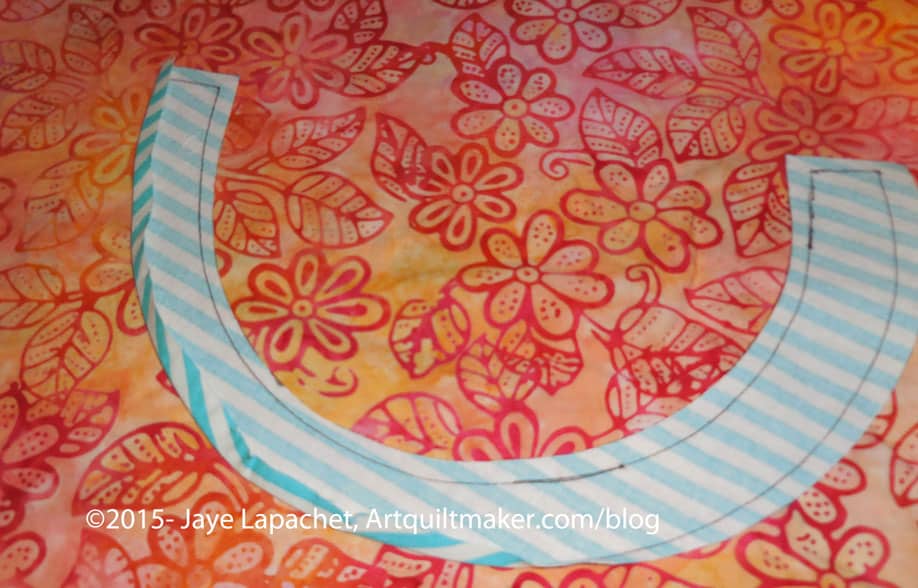
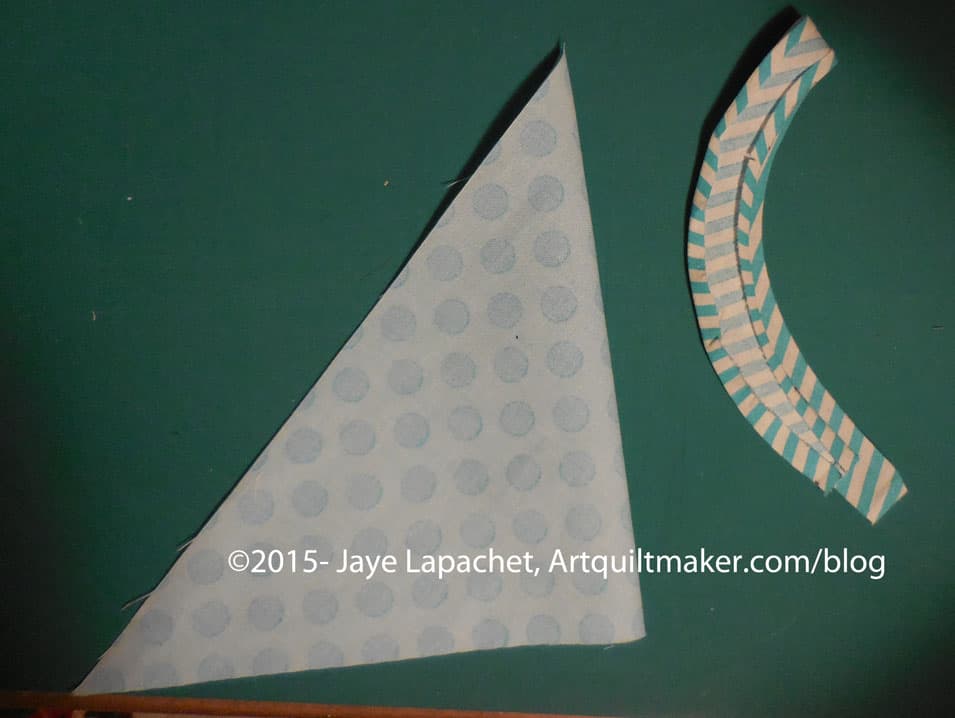
Template on Handle, ready to traceTraced & Adjusted
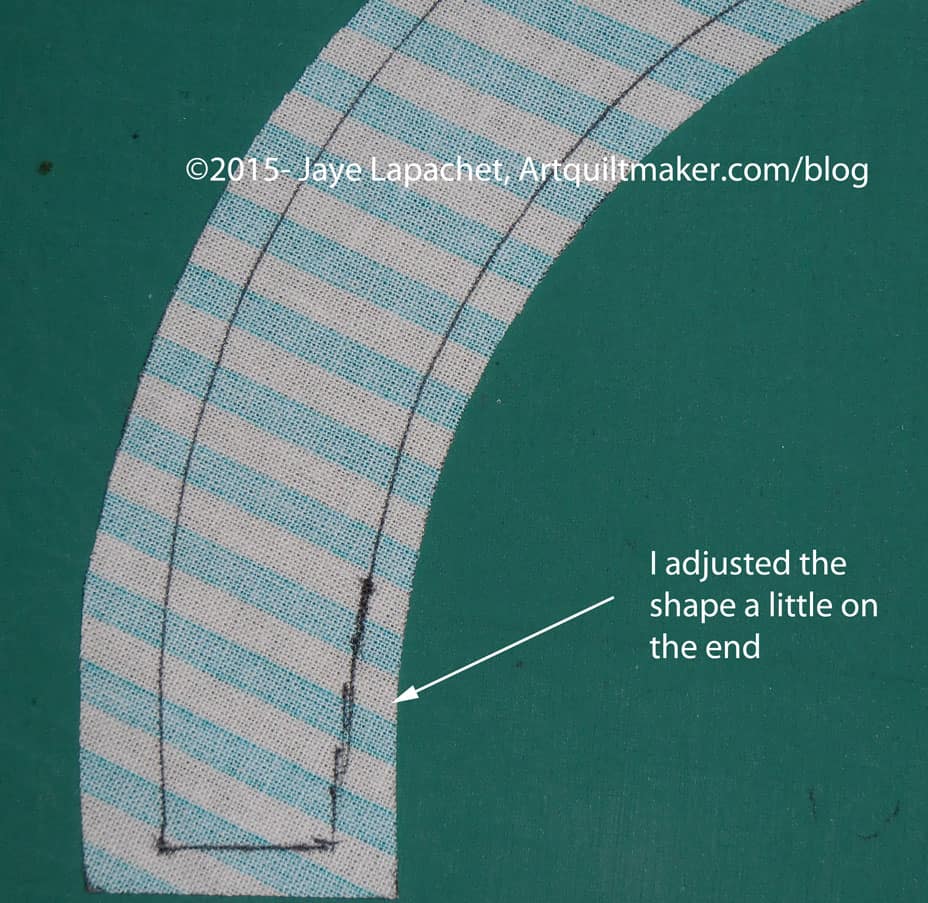
Because I decided to use the method described below, I made another handle template with NO seam allowance. I placed it on the handle I had cut from the striped fabric carefully so there was an even seam allowance on all sides. Then I traced around it with my thin black pen. I thought the template was a little wide at the end so I adjusted the line a bit to make the seam allowance larger.
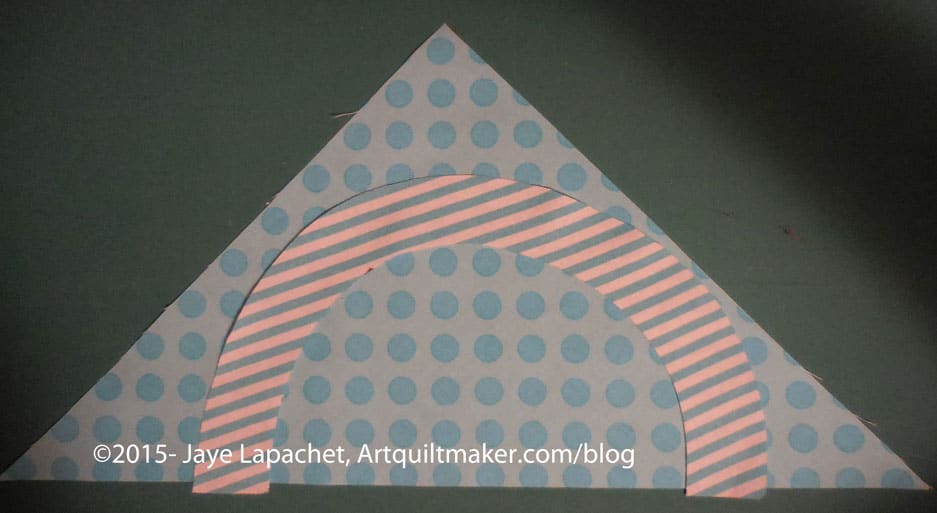
Handle & Background Triangle Cut, Laid OutPieces Laid Out
My pieces looked a little weird-not the right size, etc when I laid them out. Have no fear! They will improve.
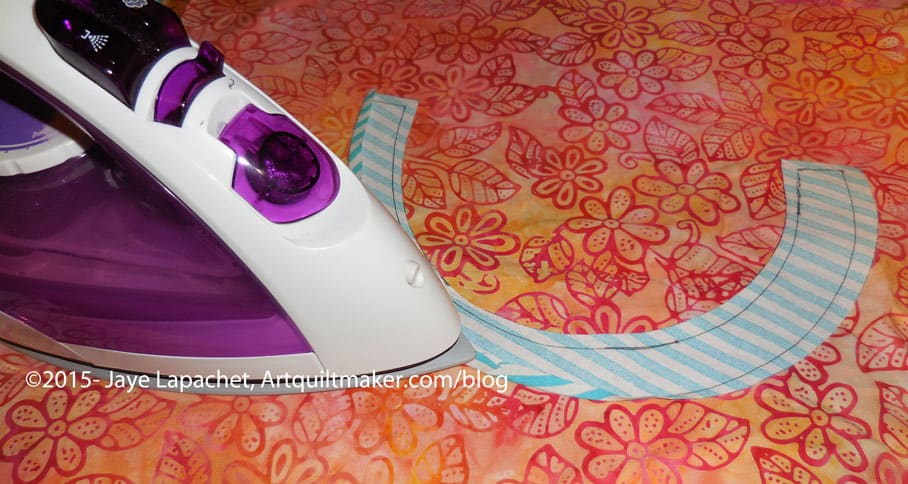
Press seam allowance underPress with hot iron
I was using my stiletto to adjust the seam allowance, but it was impossible to hold the stiletto, the camera and the iron all at once. Press carefully, so as not to distort your pieces.
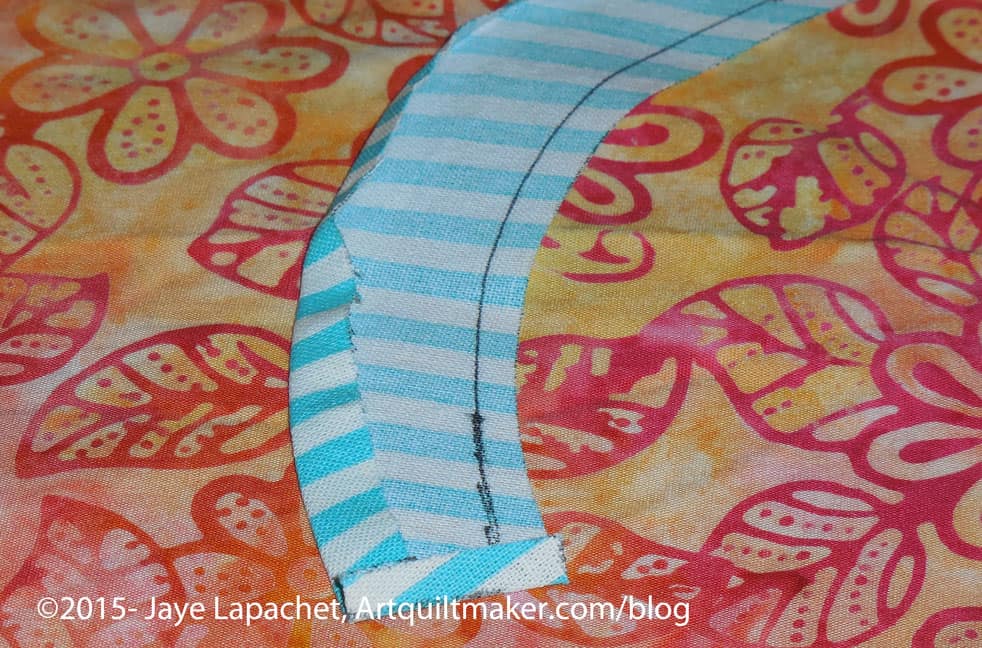
Watch out for corners
Pay attention to the corners. The layers of fabric will want to pooch in weird directions. This is where one of those mini irons might come in handy. I used my regular iron and a stiletto, so I know those tools work.
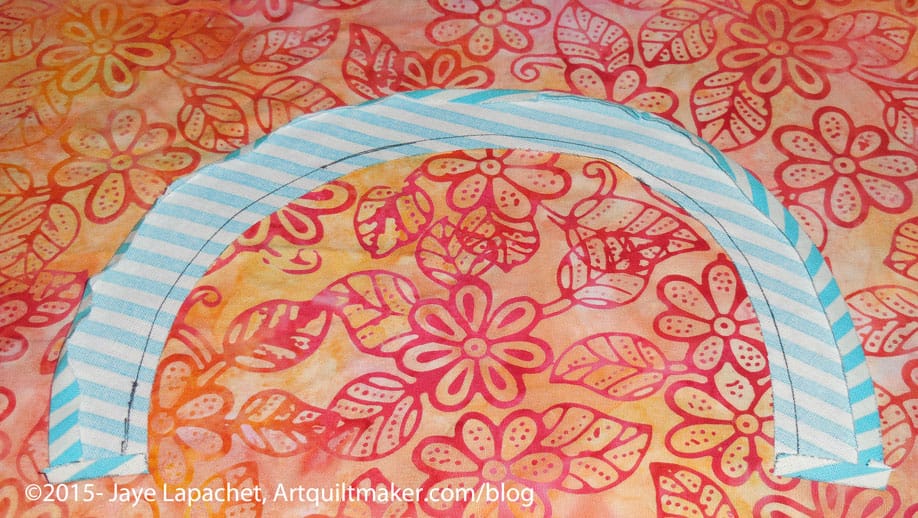
Press seam allowance on handle under
Take your handle and press the the seam allowance under on both sides of the piece. Press so that the drawn line is on the inside of the handle and is covered by the piece once the handle is sewn.
<Nota bene: the orange fabric was selected for good contrast so that the steps would show up well>
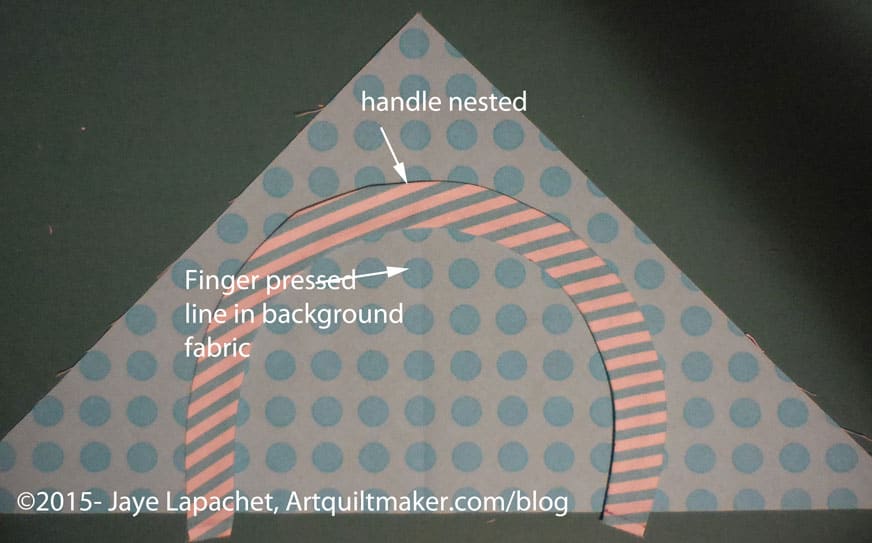
Finger press patches in half
Fold the handle in half with wrong sides together and finger press on the midpoint. Unfold.
Fold your large triangle in half with right sides together and finger press. Unfold and layout.
Nesting handle & background
Nest the handle into the triangle with the right sides up.
Line up the bottom edges of the handle with the hypotenuse of the background triangle. If the handle ends are a little over, it will be fine. You can trim them later.
Eyeball your piece to make sure everything looks good and even.
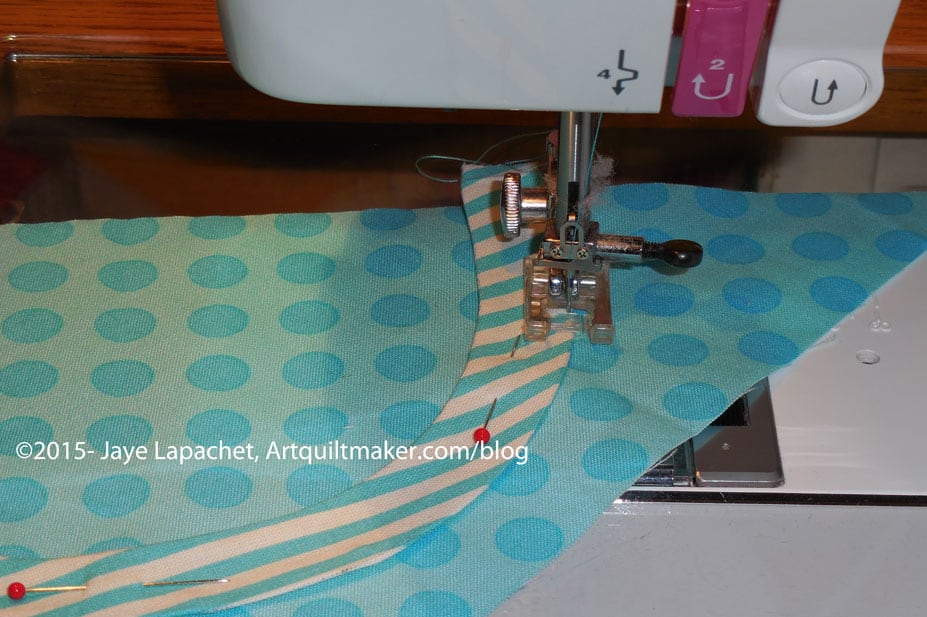
Pin the handle to the background down the center of the handle. Remove the pins as you sew. Try not to sew over them.
Using a lot of pins will help keep the handle in place as you sew
Sew carefully
Sew slowly and carefully along the drawn line around the curve. I chose a matching thread, an applique’ foot and a topstitch/sharp needle.
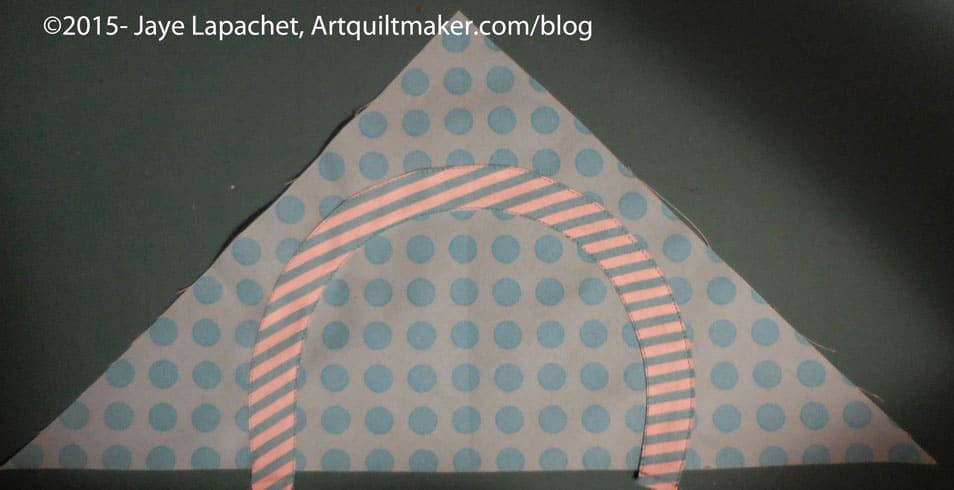
You will either need to hand applique’ the other side down or using a machine stitch that suits you.
You could sew both sides down with a straight stitch, like I did. There are many options.
Optional: You can satin stitch (see the Machine Applique’ tutorial) or blanket stitch or use some other decorative stitch to machine sew the handle to the background triangle piece. If you use one of these stitches, you may need some tearaway stabilizer
Optional 2: you can hand applique’ the handle to the background triangle.
Handle sewn to background with straight seam
Once the handle is sewn you are ready to move to the woven part of the basket.
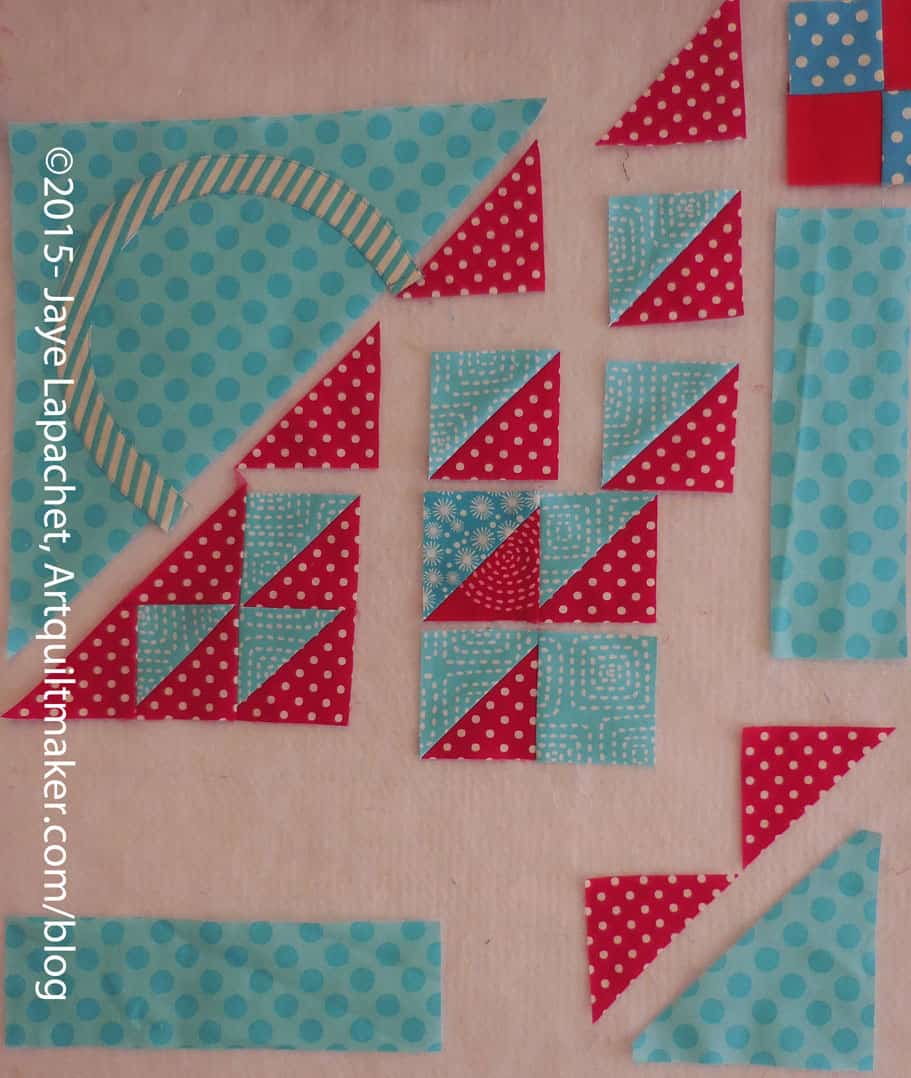
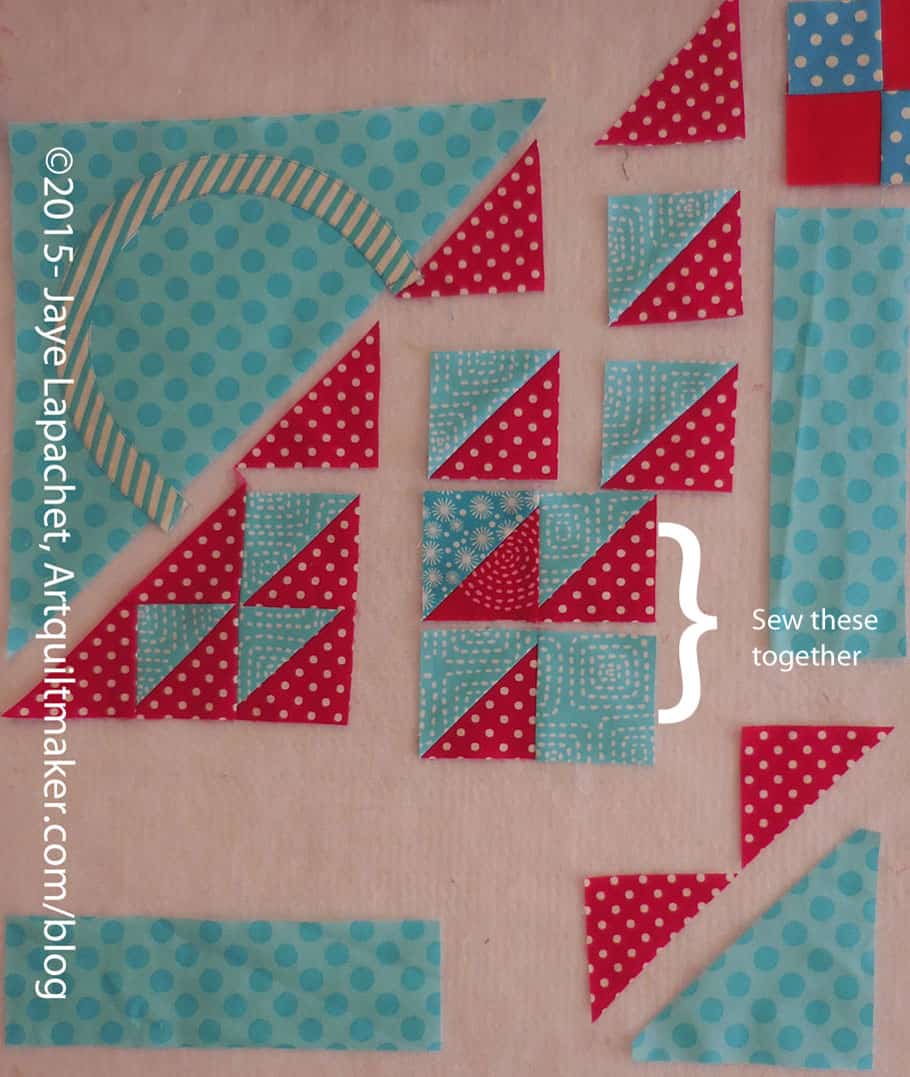
Basket Sewing Layout
Sew Basket Together
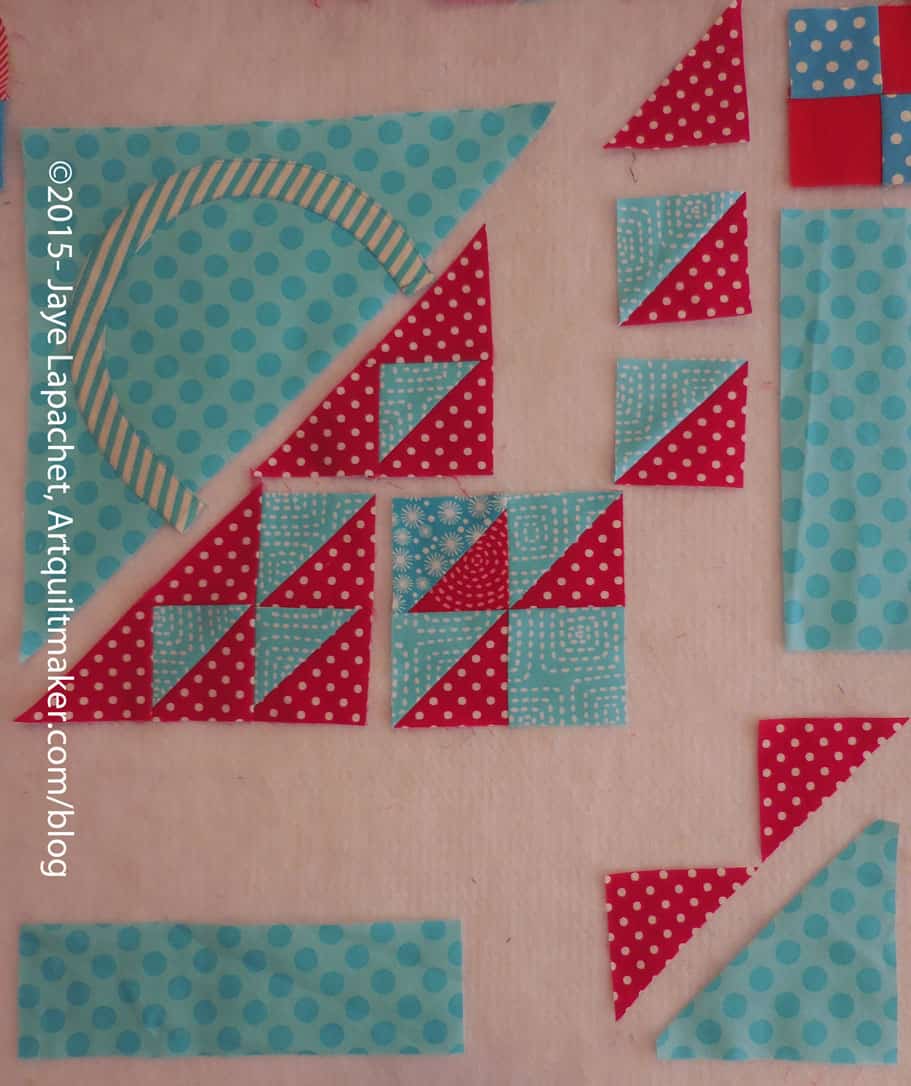
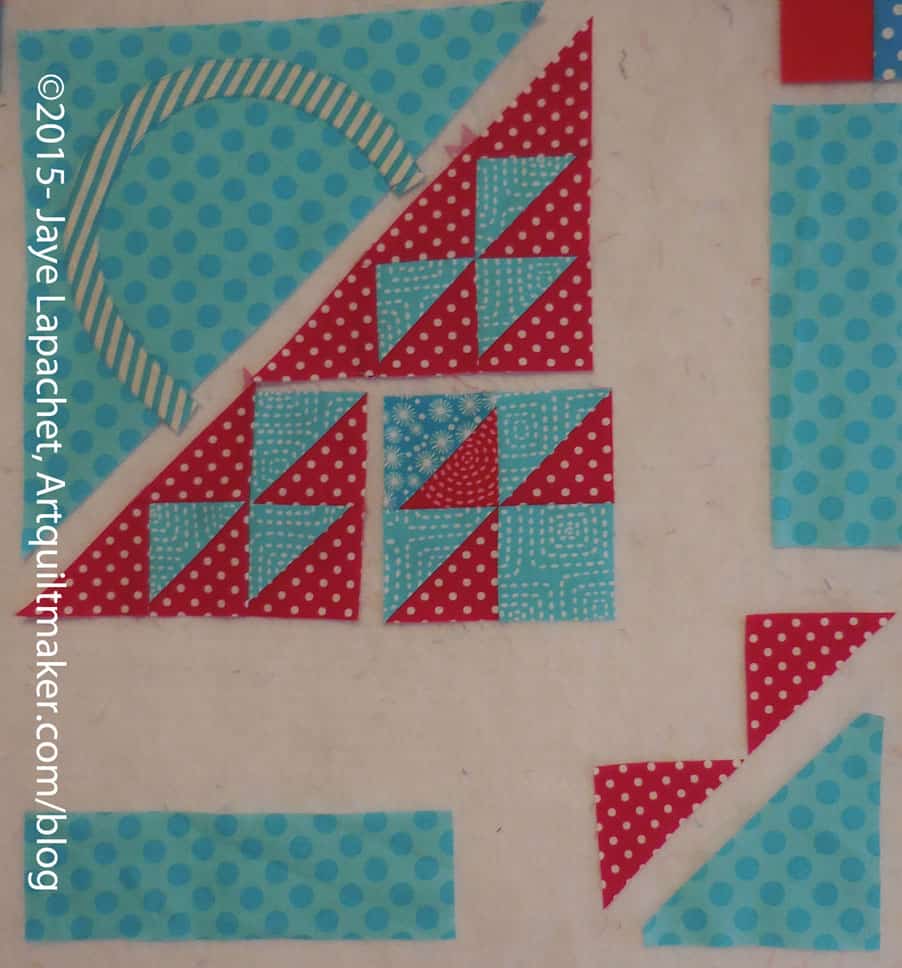
The block can be broken down into two pieces: the top half with the handle and the bottom half with the basket.
The two colored HSTs are supposed to give the illusion of a woven basket.
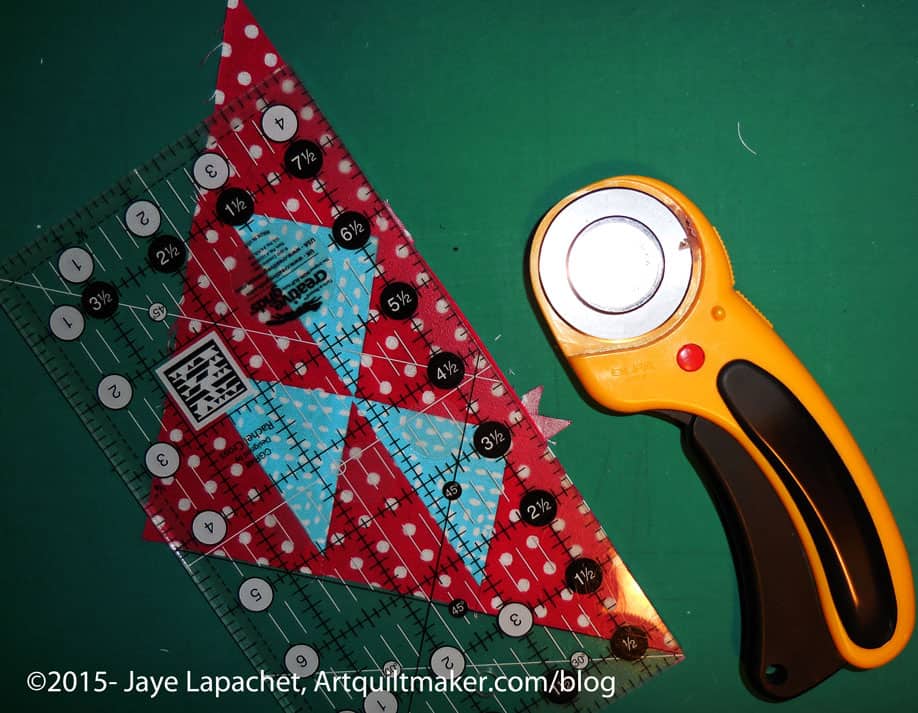
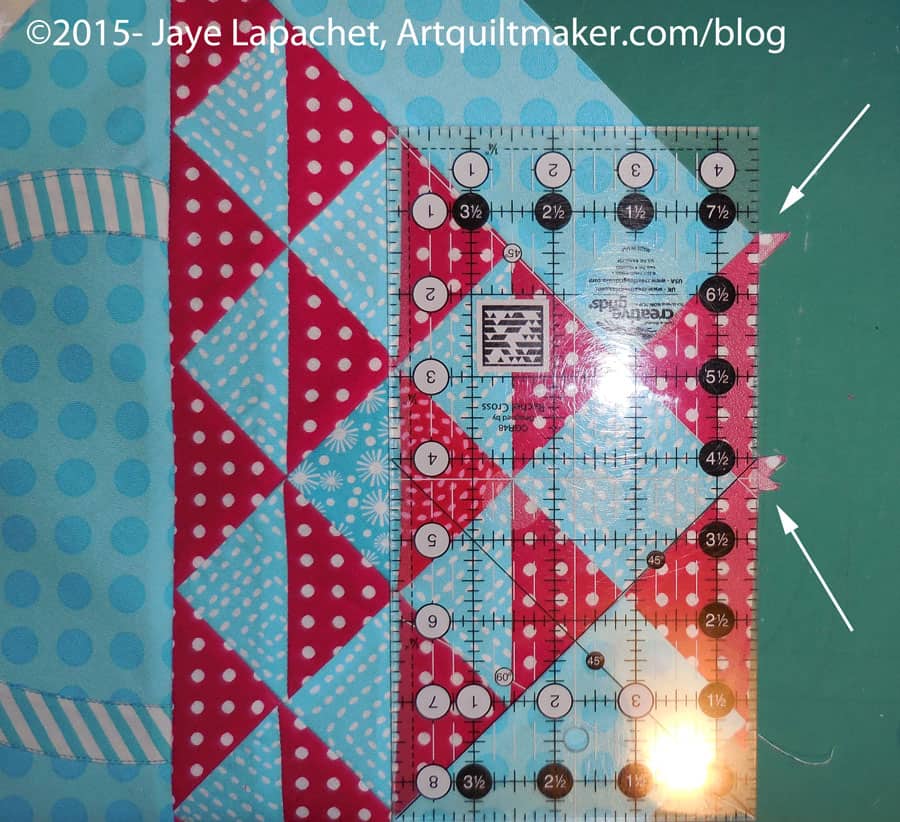
Trim off dog ears
Trim off dog ears from the A,B-HST/1 combo.
Sew Basket parts together
Sew HST/2 to HST/5. Press towards HST/5.
Using the diagram above to confirm placement, sew your A,B-HST/1 combo to your HST/2-HST/5 combo. Press towards the red.
Sew basket parts together
Sew HST/8 to Square 10. Press towards the Square 10.
Sew HST/6 to HST/9. Press towards the red part of the HST.
Sew 2 sets of woven basket parts togetherSew basket parts together
Using the diagram above to confirm placement, sew your HST/6-HST/9 combo to your HST/8-Square/10 combo. Press towards the HST/6-HST/9 combo.
Sew Triangle to HSTs
Using the diagram above to confirm placement, sew C to HST/3. Press towards the red.
Sew triangle D to C-HST/3 combo
Using the diagram above to confirm placement, sew D to your C-HST/3 combo. Press towards D.
Trim your dog ears
Trim your dog ears.
Sew HST/4 to HST/7. Press towards HST/7, making sure your seams will nest with the seams you have already pressed.
Sew parts of the basket together
Sew HST/4-HST/7 together and then sew the HST/4-HST/7 combo to E. Press towards E.
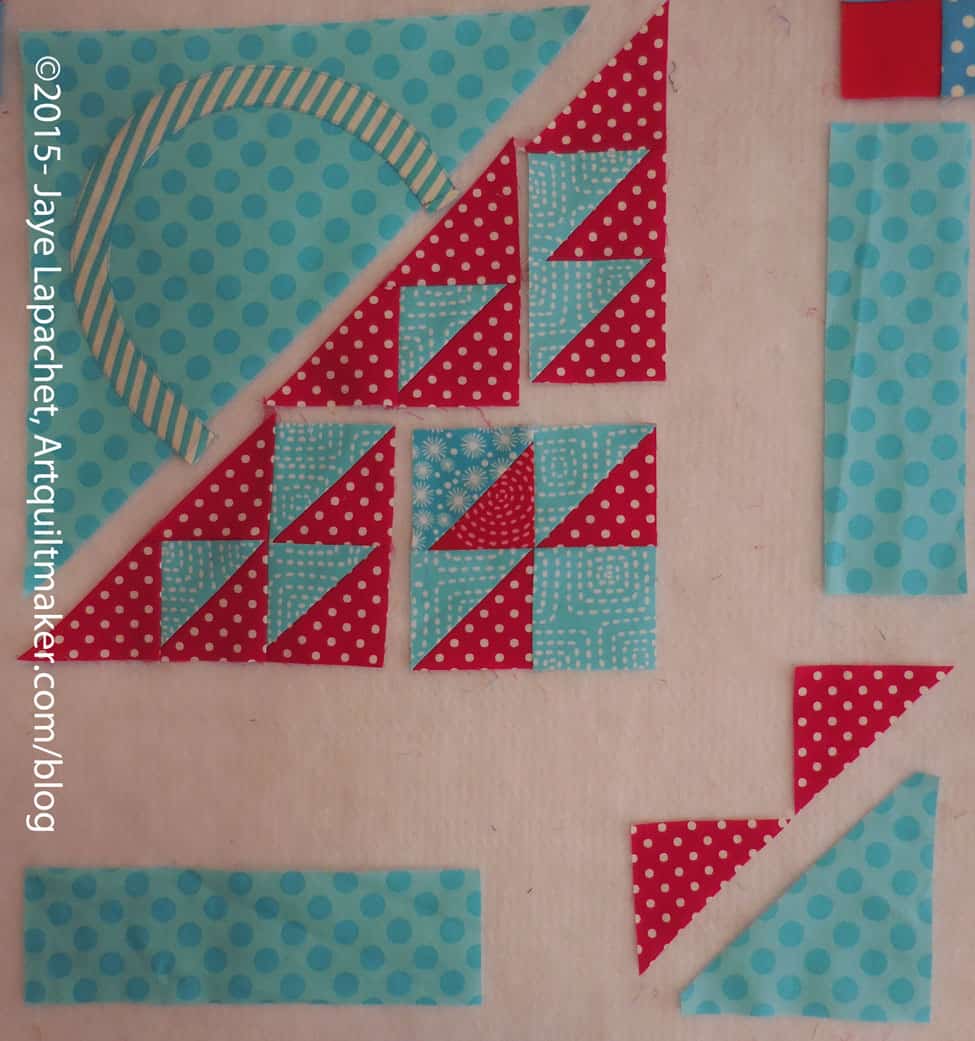
Four sections of the Basket
Using the diagram above for placement, sew your HST/4-HST/7-E combo to your C-D-HST/3 combo. Press.
Trim dog ears.
Sew 2 Sections together
Sew your A,B-HST/1-HST/2 segment to the HST/6-HST/9 segment.
Trim Your Dog Ears
Trim your dog ears!
Sew last two segments
Sew the last two segments of the basket part together. You may have to re-press some seams.
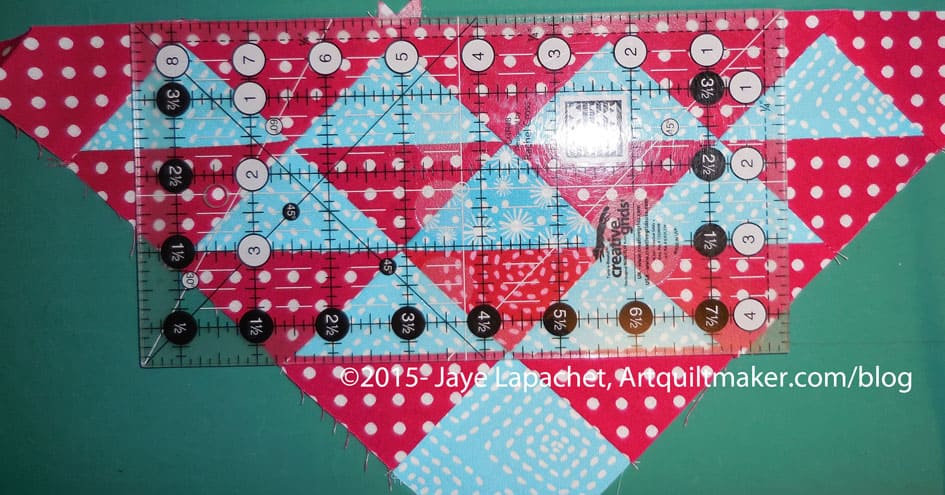
I didn’t move the borders the whole time I worked on the quilt See how much the basket part shrank? That is seam allowances for you!
Trim the dog ears
Trim the dog ears, if you haven’t already.
Sew 2 halves together
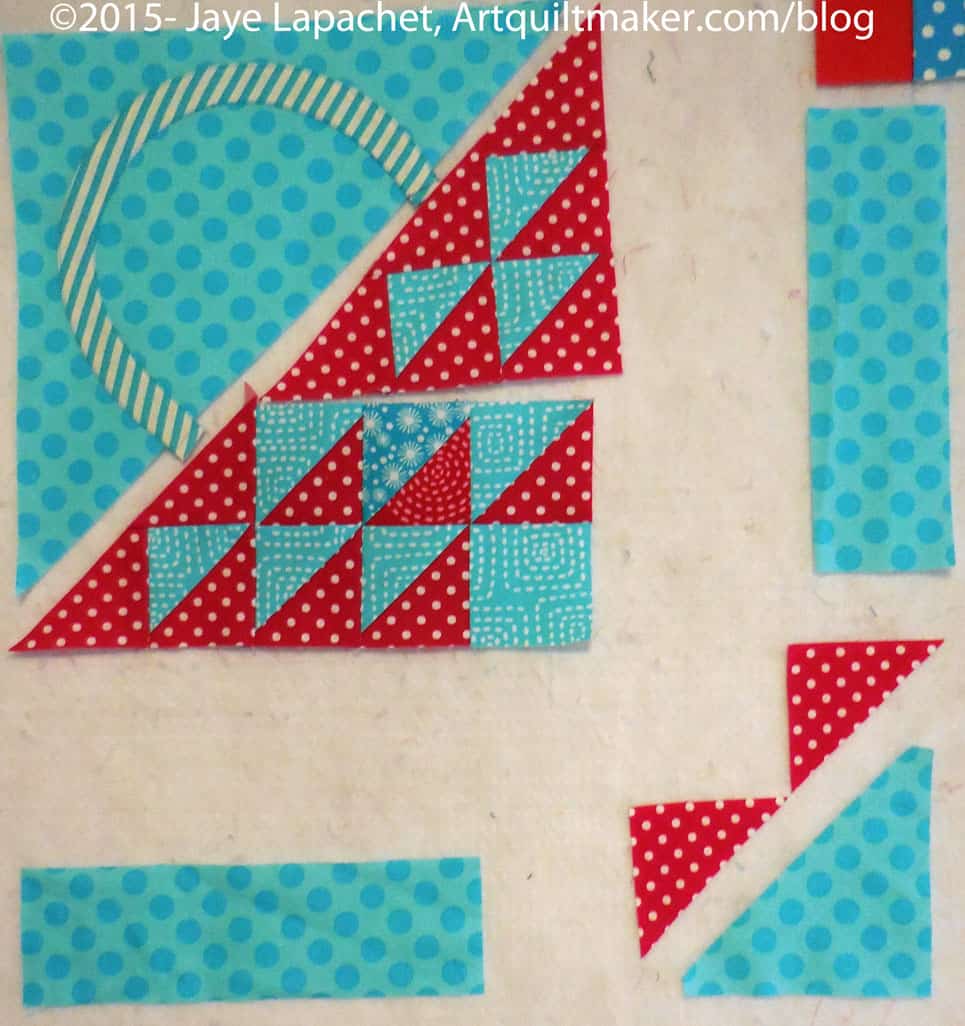
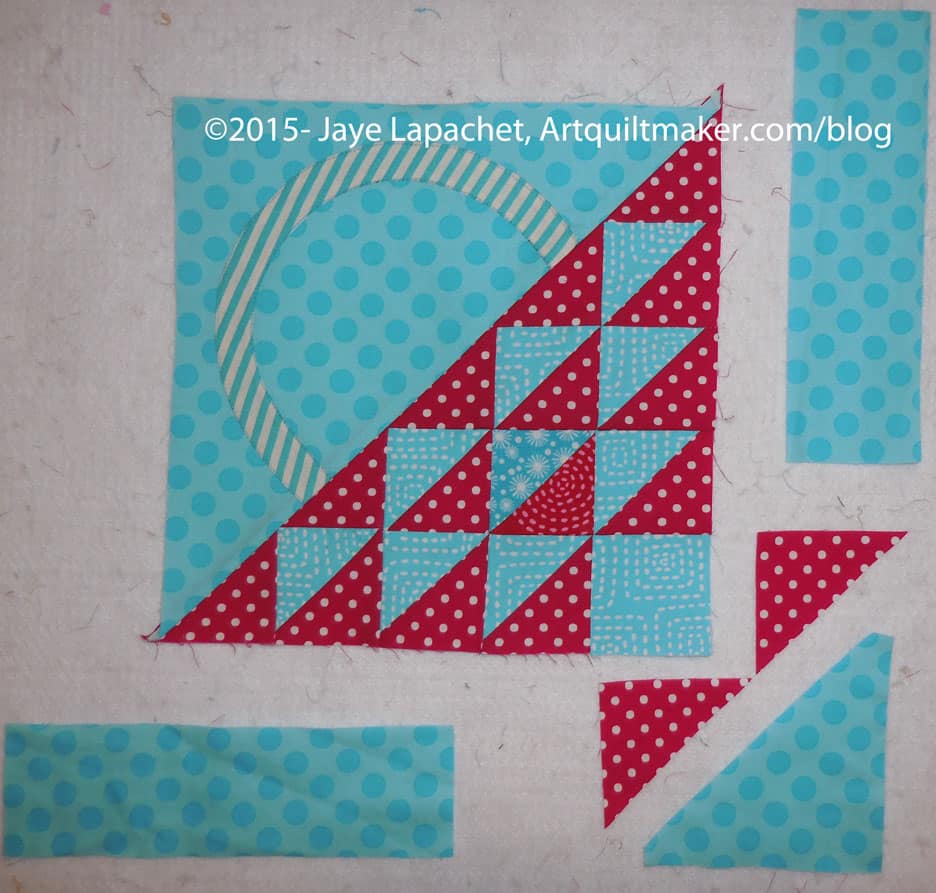
Now you have two halves of the basket. Sew the woven part to the handle part by placing the woven part on top of the handle part, lining them up and then sewing carefully. You can fold the two sections in half, bisecting the handle, to match them up if you think that you need to trim the handle portion later.
Ready to sew last borders
Now you are ready to sew on the borders.
Sew triangle to borderSew triangle to border with words
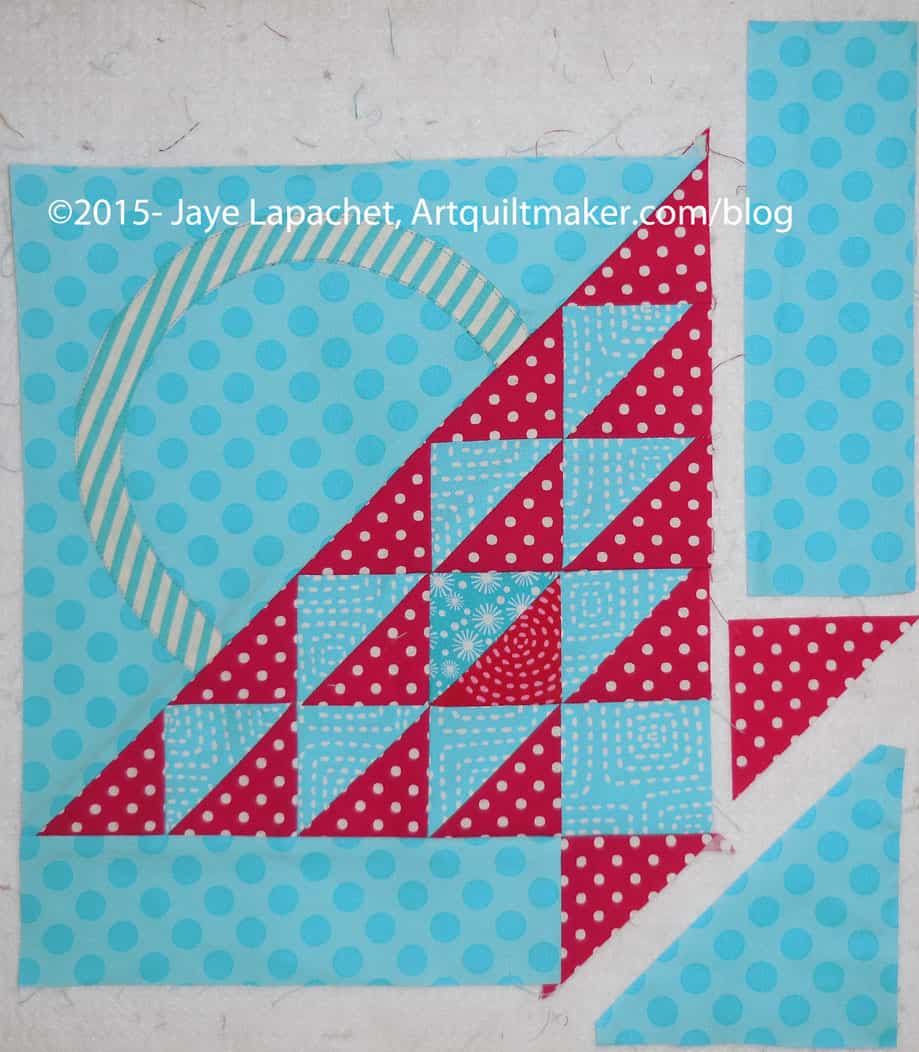
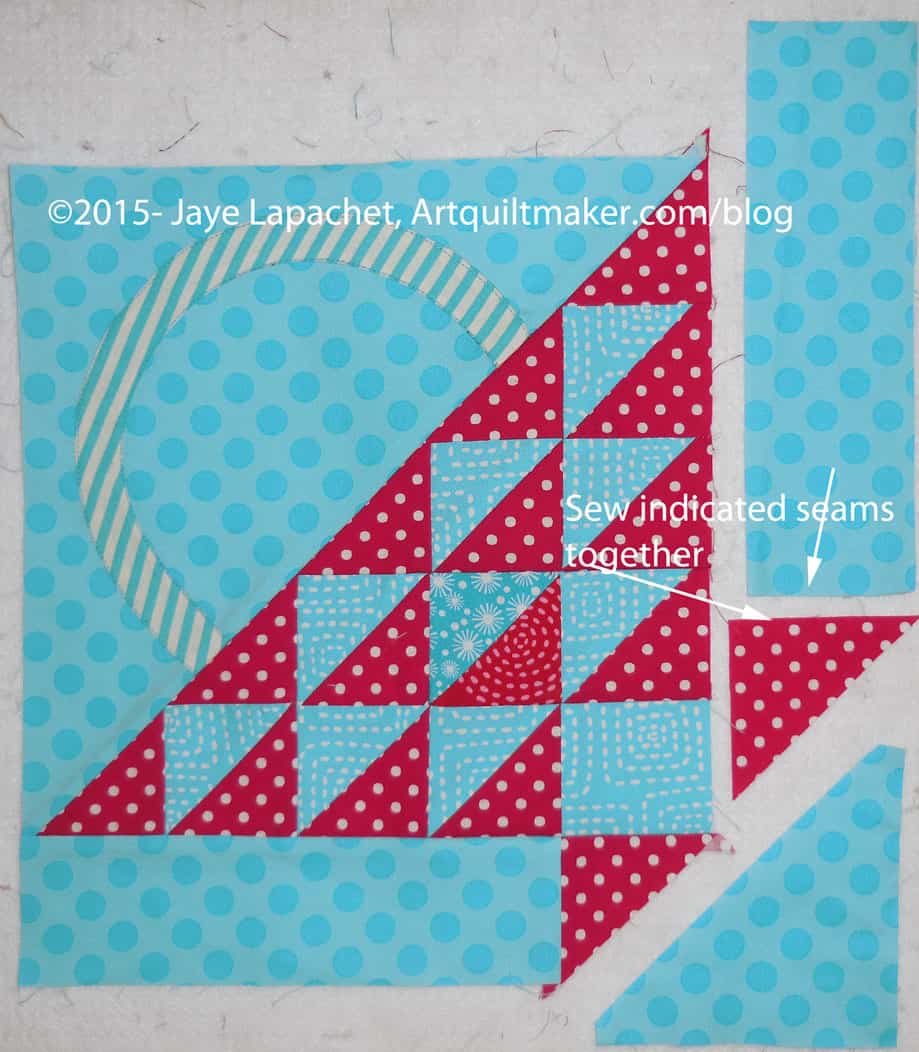
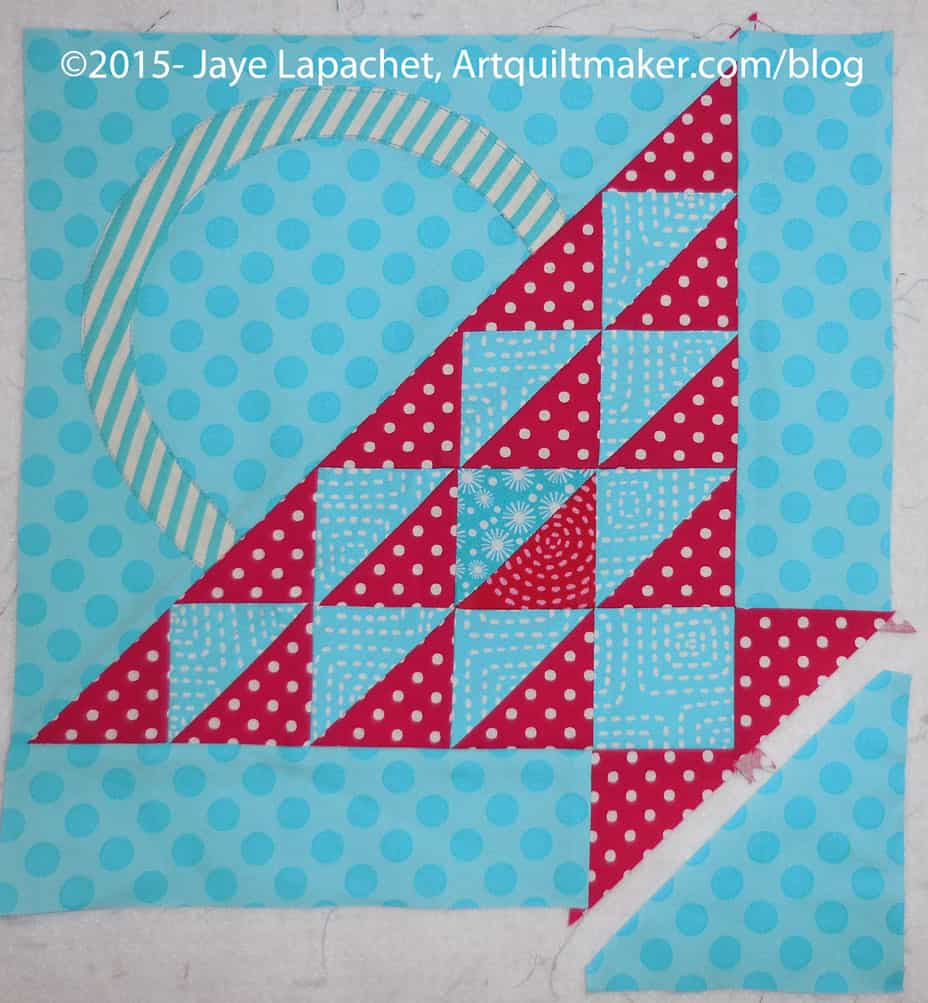
Sew the B2-G background section by placing the red triangle (G) face down on top of background piece B2 and sew the short end of the background to the triangle, as shown in the picture.
Sew on background B2/Triangle-G
Take the basket piece that you sewed together above and place the B2-G background section on top of the basket section. Line up the red triangle’s seam from the B2-G background section with the HST/8-Square 10 section. You want the seams to match, so pin. Press towards background piece B2.
Only one more border to go.
Take the basket piece that you sewed together above and place the B1-F background section on top of the basket section. Line up the red triangle’s seam from the B1-F background section with the HST/9-Square 10 section. You want the seams to match, so pin. Press towards background piece B1.
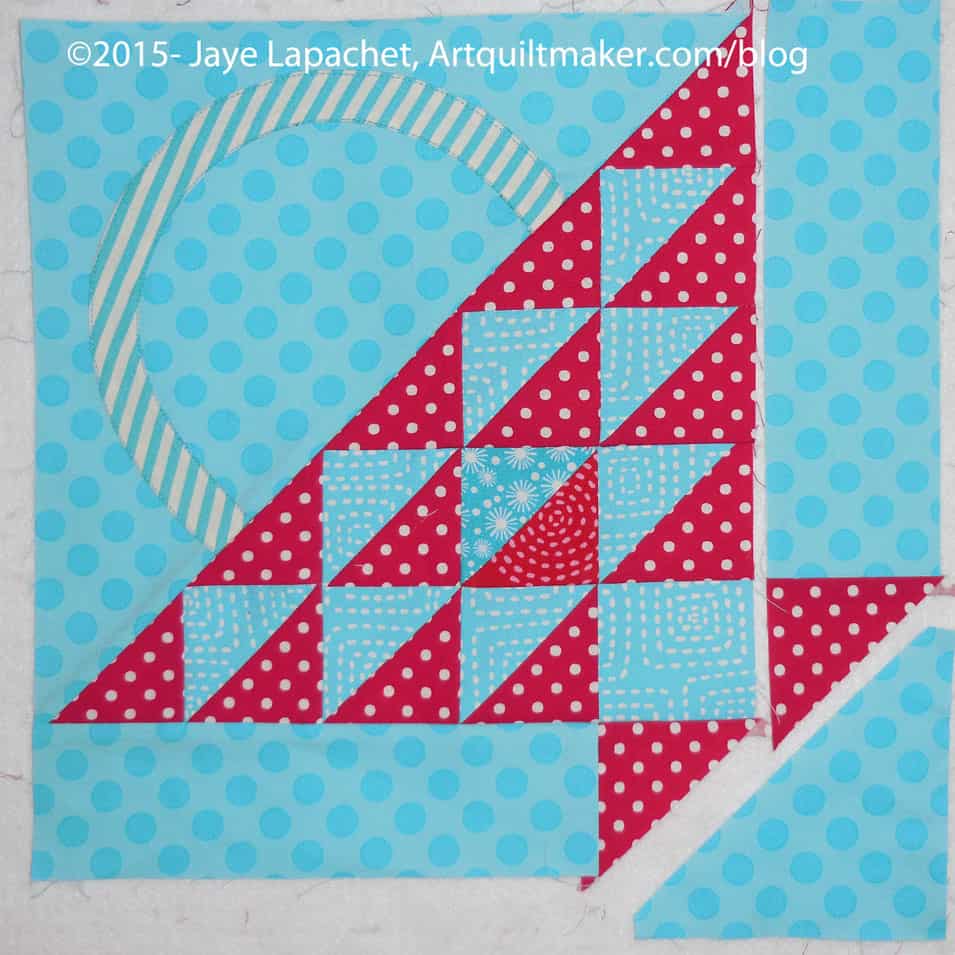
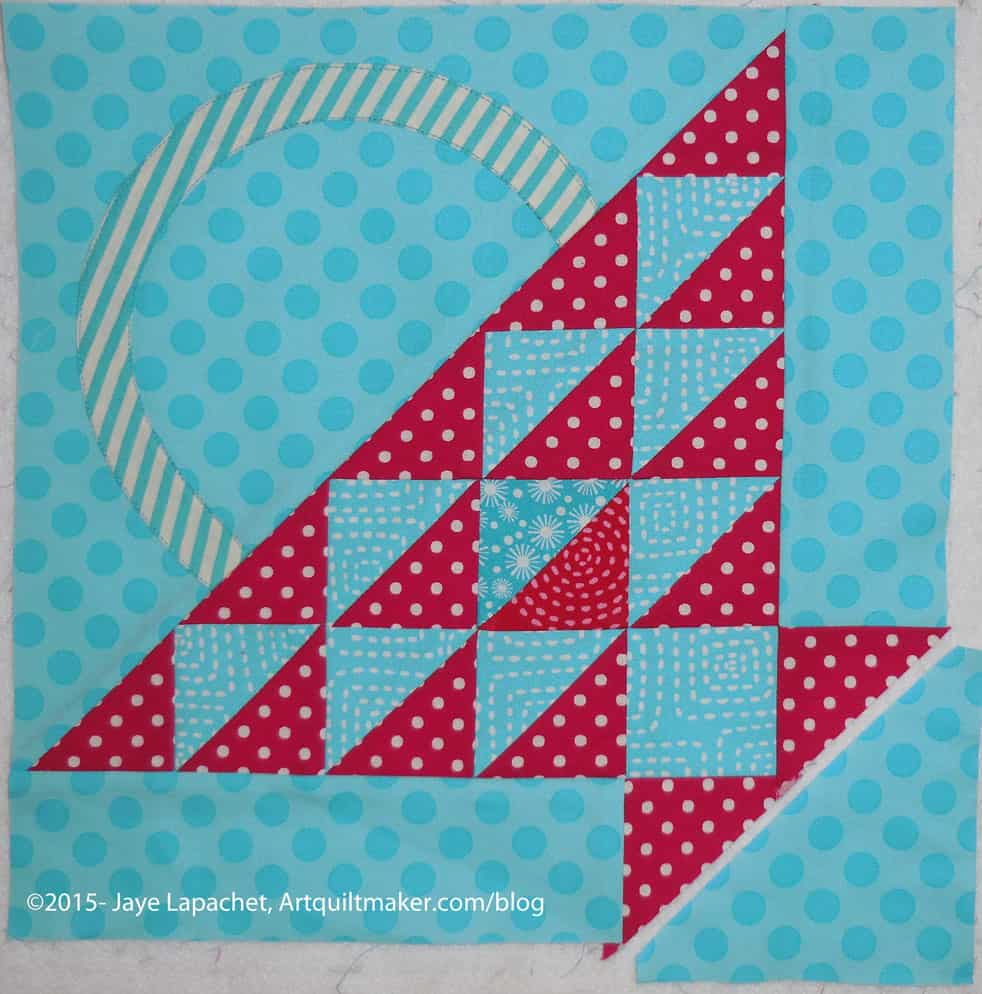
Sew on Final Triangle
Now you are ready to sew the last piece.
Trim dog ears
Trim dog ears.
Basket almost complete
Your basket is almost complete.
Line up triangle with borders
Complete your basket half by sewing background piece B3 to the basket. You have already snipped off the corners so you just have to line up the triangle piece with the borders already sewn to the block. Press towards the background piece B3.
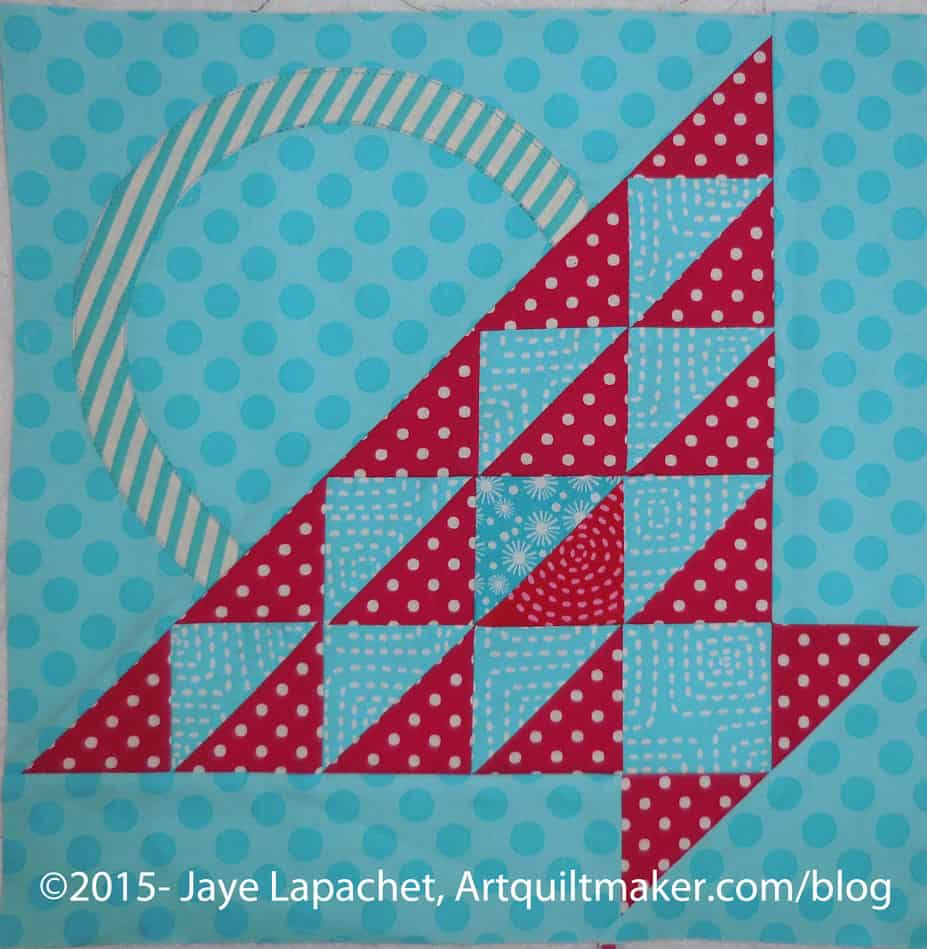
Your half is complete.
Take the top half of the basket, the piece with the handle, and carefully sew it to the basket half.
Frances finally let me know she was ready to move on with her sampler quilt. We decided to make the Flower Basket Block, so I sent her the pattern, promised the tutorial and did nothing.
These directions use a quarter inch seam allowance. Check your seam allowance before you begin. If you don’t know how to do that, there are resources available, including one from Connecting Threads and another from Craftsy. You can search the web for others if you don’t like these.
You will be directed to use the Triangle Technique. Make sure you have the chart as well as the instructions handy.
Respect the bias.
Templates
You really only a need a template for the basket handle. If you are using templates for all of your pieces, then prepare all the templates for pieces in the patterns as directed below.
Prepare pattern for your basket handle template by printing two copies of the pattern. I am telling you to do this first so when you get into the throes of sewing you won’t have to stop and fiddle around with templates.
You will eventually place one copy of the pattern in your binder, but keep it handy so you can use it as reference.
Nota bene: You probably know how to make templates. However, I am including a quick refresher. Look for a comprehensive tutorial soon. (I’ll update this post and link it from here)
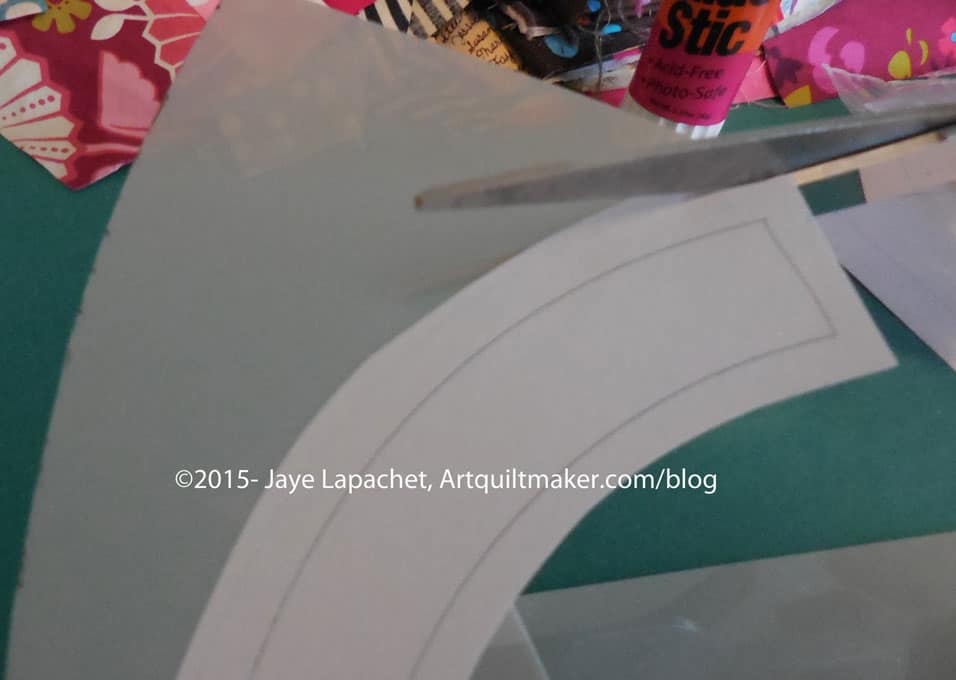
Rough cut* the handle pattern out of the second printout.
Rough Cut Pattern
Glue the paper pattern (with seam allowances) using the glue stick (or other suitable adhesive) to the template plastic.
Ok to use scraps of template plastic
It is okay to use scraps of template plastic. Put a piece of tape on seam lines to keep the joins stiff.
Fine cut templates
Fine cut** the paper pattern and template plastic you have adhered so you have an accurate template, cutting off any seam allowance that may have printed.
If you plan to machine sew the handle at all, you will want to prepare another basket handle template, in the same manner, without seam allowance.
Fabric
Gather your fabric and press it all. You can rough cut some pieces and press it with Mary Ellen’s Best Press to help deal with the bias. Consider this step for the large background triangle and the basket handle.
Cutting
Flower Basket
Basket Handle
In my example basket, above (same as at the beginning of the post), this fabric is the medium blue.
Lay out template piece
Draw around the template with your black fine tip marker. Rough cut a piece of fabric large enough for your basket handle.
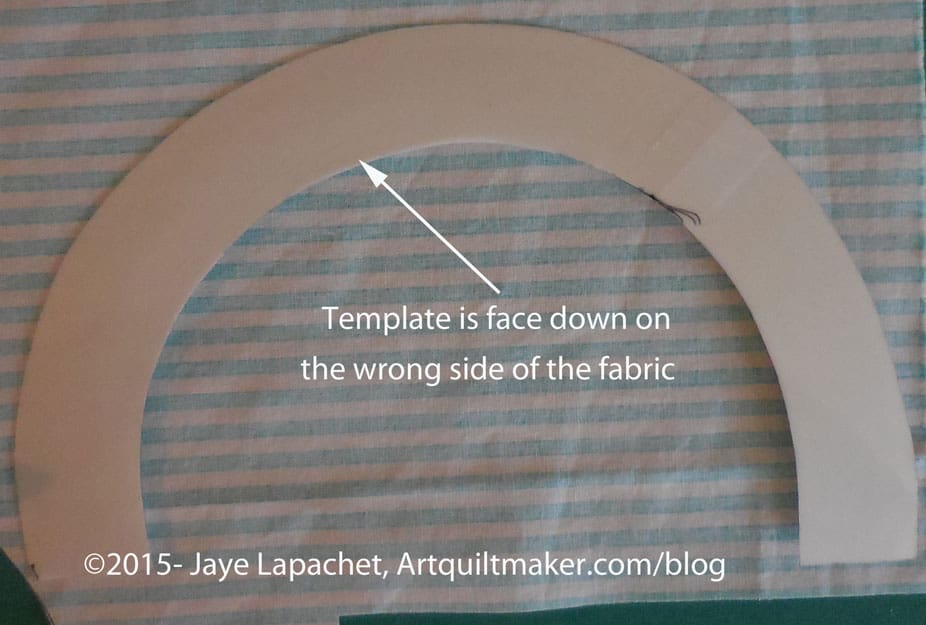
Place template face down on fabric
Place your handle template right side down on the wrong side of the fabric. Trace around the template carefully with your Pigma pen. Trace carefully without pulling or tugging at the fabric. You will be dealing with some bias on the curves. You will need to carefully move your hand along the template to keep it in place while you trace. Use the Pigma pen with a light touch.
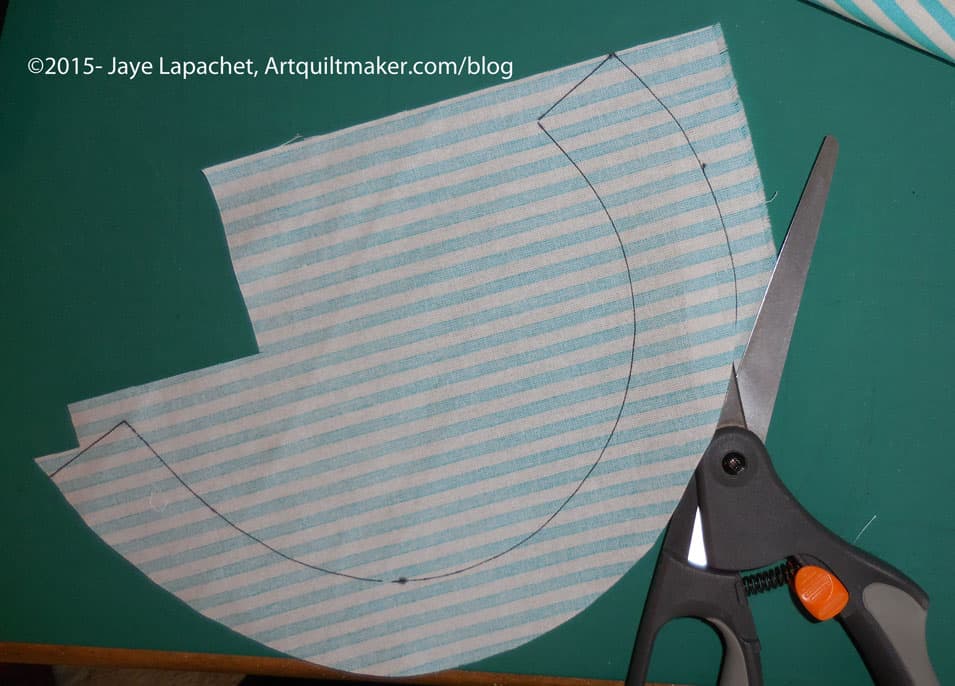
Cut out handle
Using your fabric scissors, cut around the traced image, cutting the drawn line off. If you are using a template with no seam allowance, leave approximately a quarter inch seam allowance on all sides.
Background:
In my example, above, this fabric is the blue Michael Miller Ta Dot with white dots.
Measure background
Measure the template for the large triangle of background fabric. It should be 10″ on each of the outside edges WITH seam allowance. Cut a square 10.5″ x 10.5″. You can trim it later. Better safe than sorry. Press the square with Mary Ellen’s Best Press.
Cut square on diagonal
Cut the square in half along the diagonal.
Cut the following additional pieces according to the measurements given:
Background fabric:
2 patches: 2.5″x8.5″
Nip off Bunny Ears
1 patch: square 4 7/8″x 4 7/8″. Cut in half. Nip off the bunny ears with the Judy Martin Point Trimmer
1 square: 5″ x 5″. Cut in half on the diagonal and set your second triangle aside
Remember: you have already cut the large background triangle
Cut some pieces from extra background triangle
You can cut some of the background pieces out of the leftover triangle.
Foreground fabric:
The foreground fabric is used for the basket. You will need at least two fabrics for this part. In my example I am using a scarlet red and a medium blue. See picture above for placement of foreground fabrics.
1 square: 2.5″ square
For the HSTs, you will need 2 squares, according to the Triangle Technique Chart, 6.25″ x 6.25″. Each square should be from a different foreground fabric. See the picture above.
Nota bene: The above Triangle Technique only yields 8 HSTs. You can make another set using the Triangle Technique directions and have some extras, or you can cut the triangles themselves
1 square 2.5″ x 2.5″
Cut trianglesCut squares in half
Cut 4 squares 2 7/8 in by 2 7/8 in the second background fabric (red in my project). Cut in half. These are the base and top line of your flower basket.
Cut Pieces
You should now have all of your pieces cut. Look for the next part of the tutorial on sewing the block together.
* Rough cut means that you cut around the outside line and a little away from it, leaving some extra paper. This helps to position the template properly and eventually cut it accurately.
** Fine cut means that you cut the template out very exactly and carefully getting rid of any extra paper and template material used when you rough cut. This is the shape you will use to cut your fabric so prepare this step with care.
I have not been making blocks for this project. Not for lack of desire, but I have had too much else going on. With Christmas over and the Young Man off to visit Grandma, I hope to turn my attention to the mess that I call a workroom.
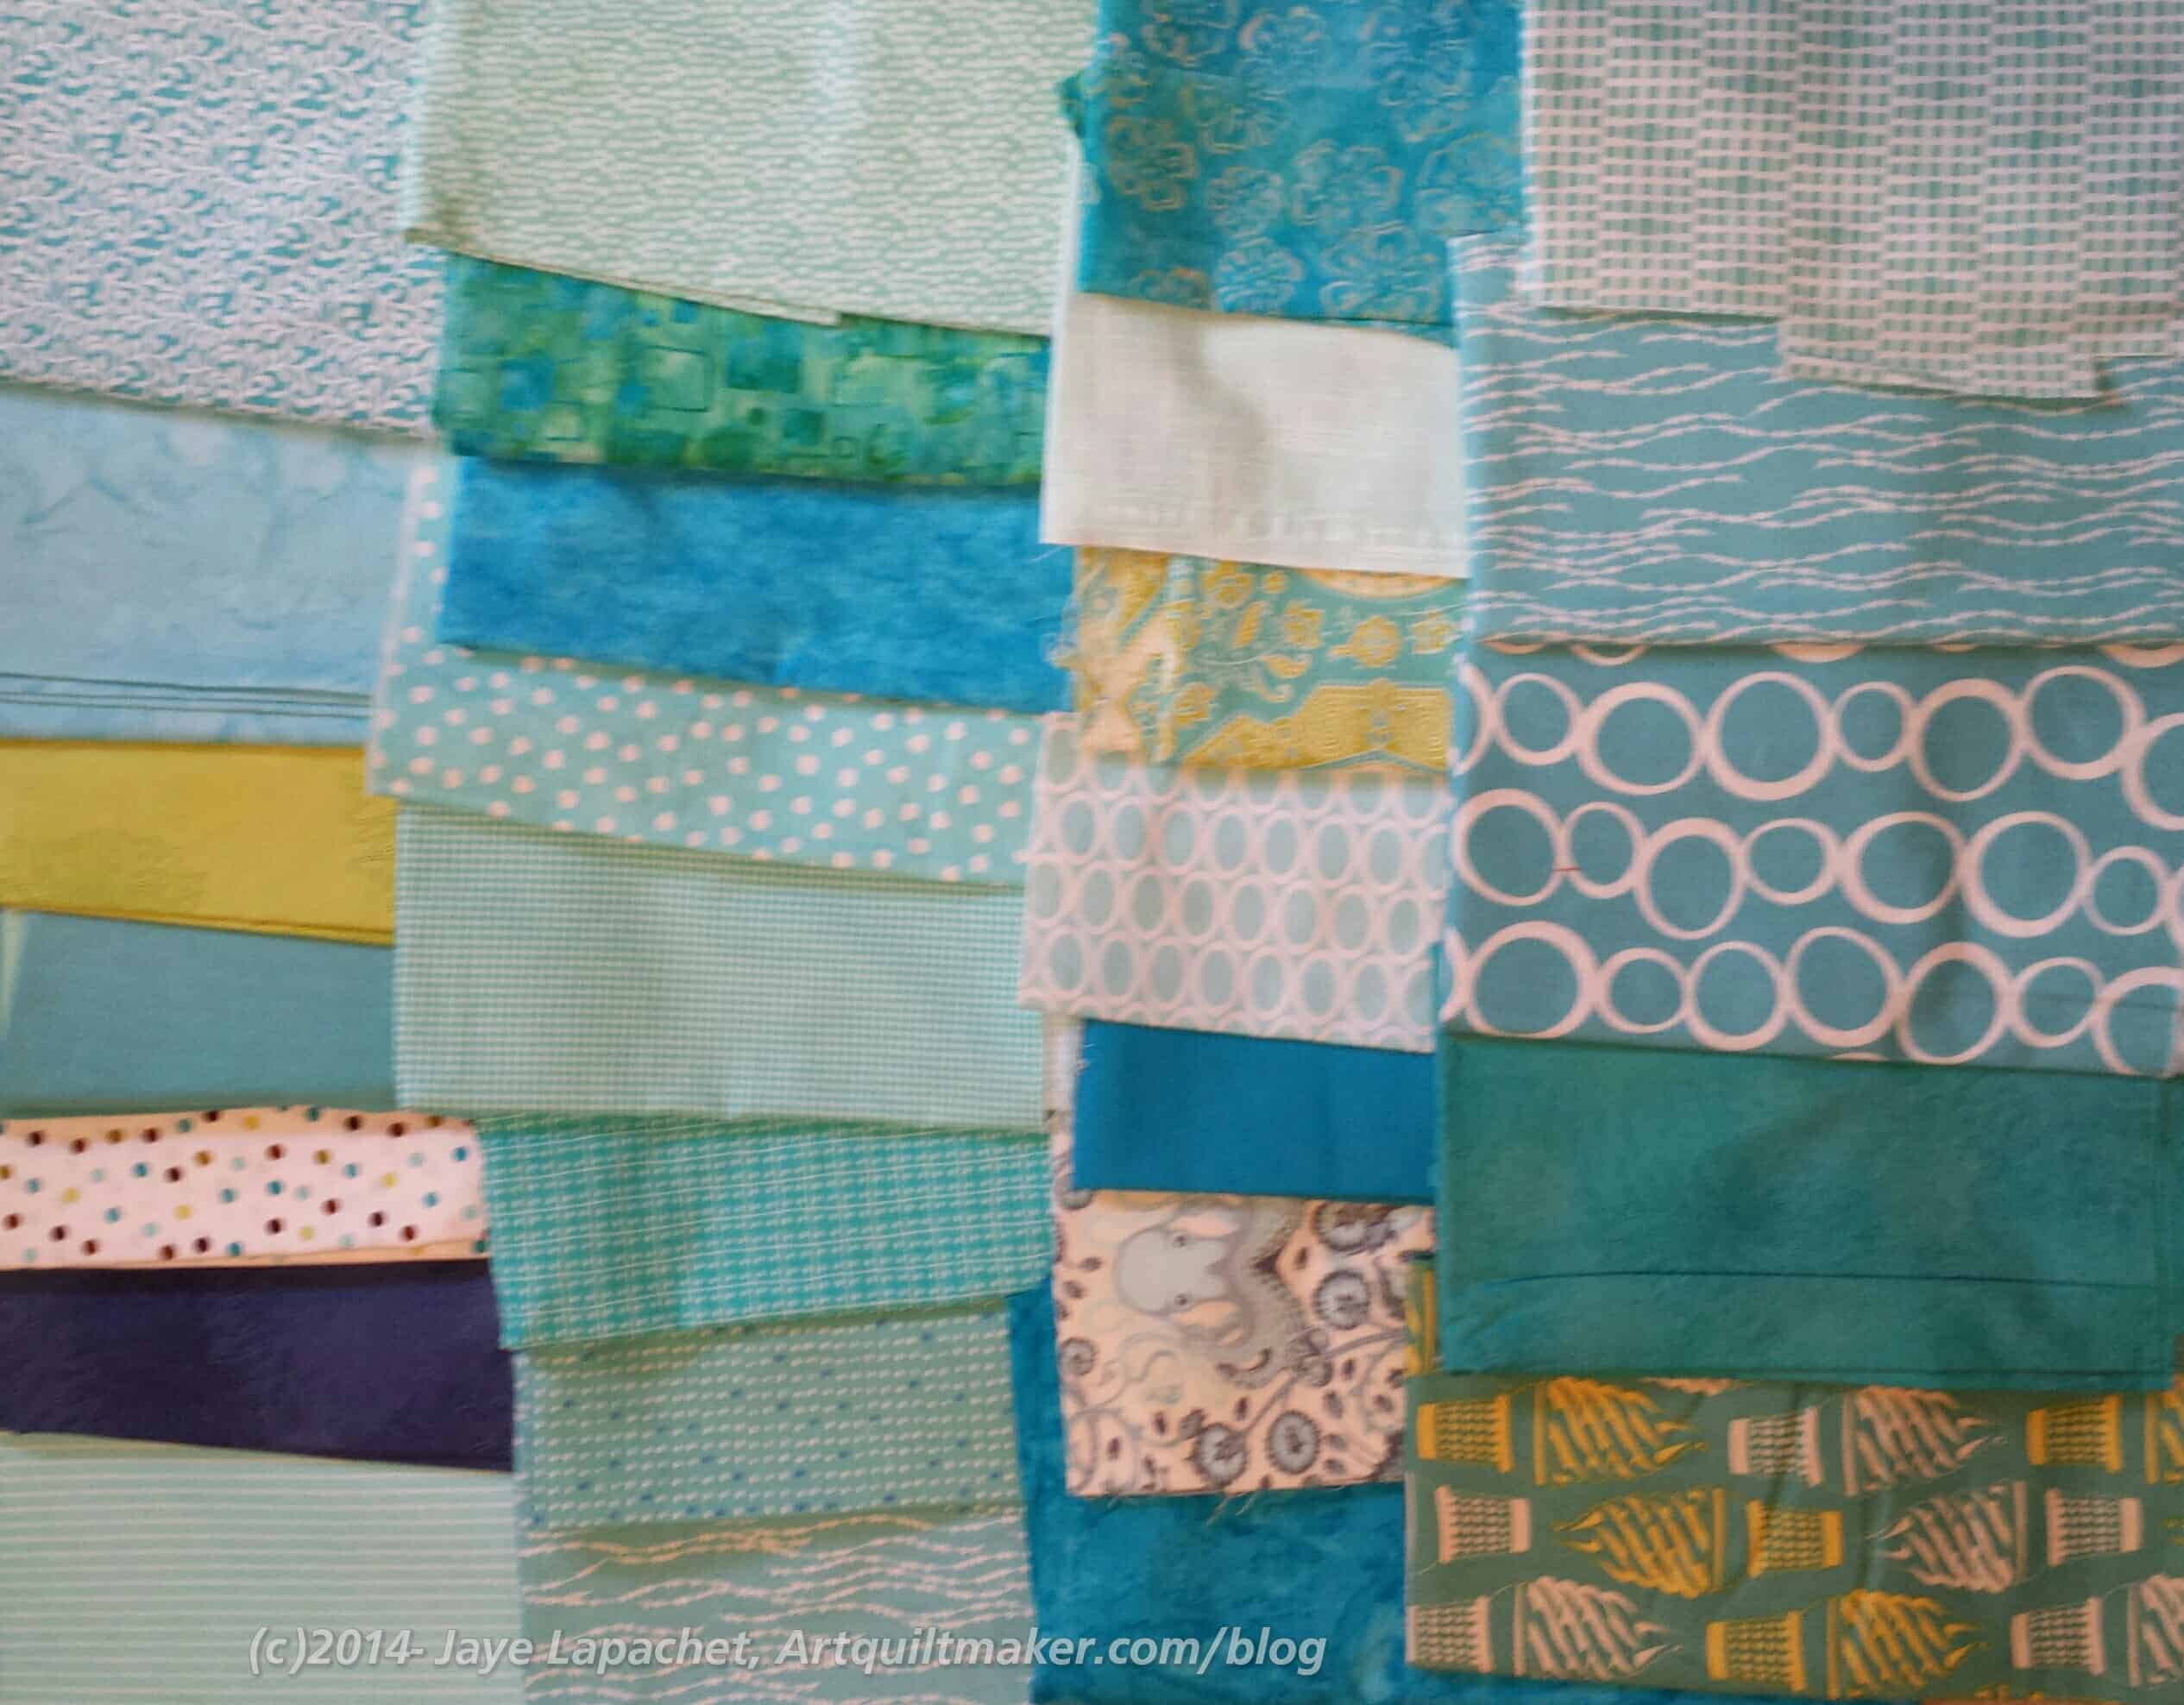
I had the Leaning Tower of Pisa of fabrics on my cutting table and it occurred to me that I had too many fabrics for the Tale of Two Cities piece. I took all the fabrics off the cutting table and laid them out then removed some, which I won’t be using for the blocks anymore.
Tale of Two Cities Fabrics – Dec 2014
My final choices, which may still evolve as I work through the blocks are shown on the left. I may have two many lights, but as I am using my phone as a camera these days, it just may be that they look lighter than they are.
I didn’t really want to keep the octopus fabric in, but it is distinctive. I have used it several times, so I didn’t feel I could leave it out without it being noticed. However, I may have used it enough so that I can spread blocks with it out over the quilt and the quilt will look fine.
I want to get back in the saddle and make a few more of these blocks in the not too distant future.
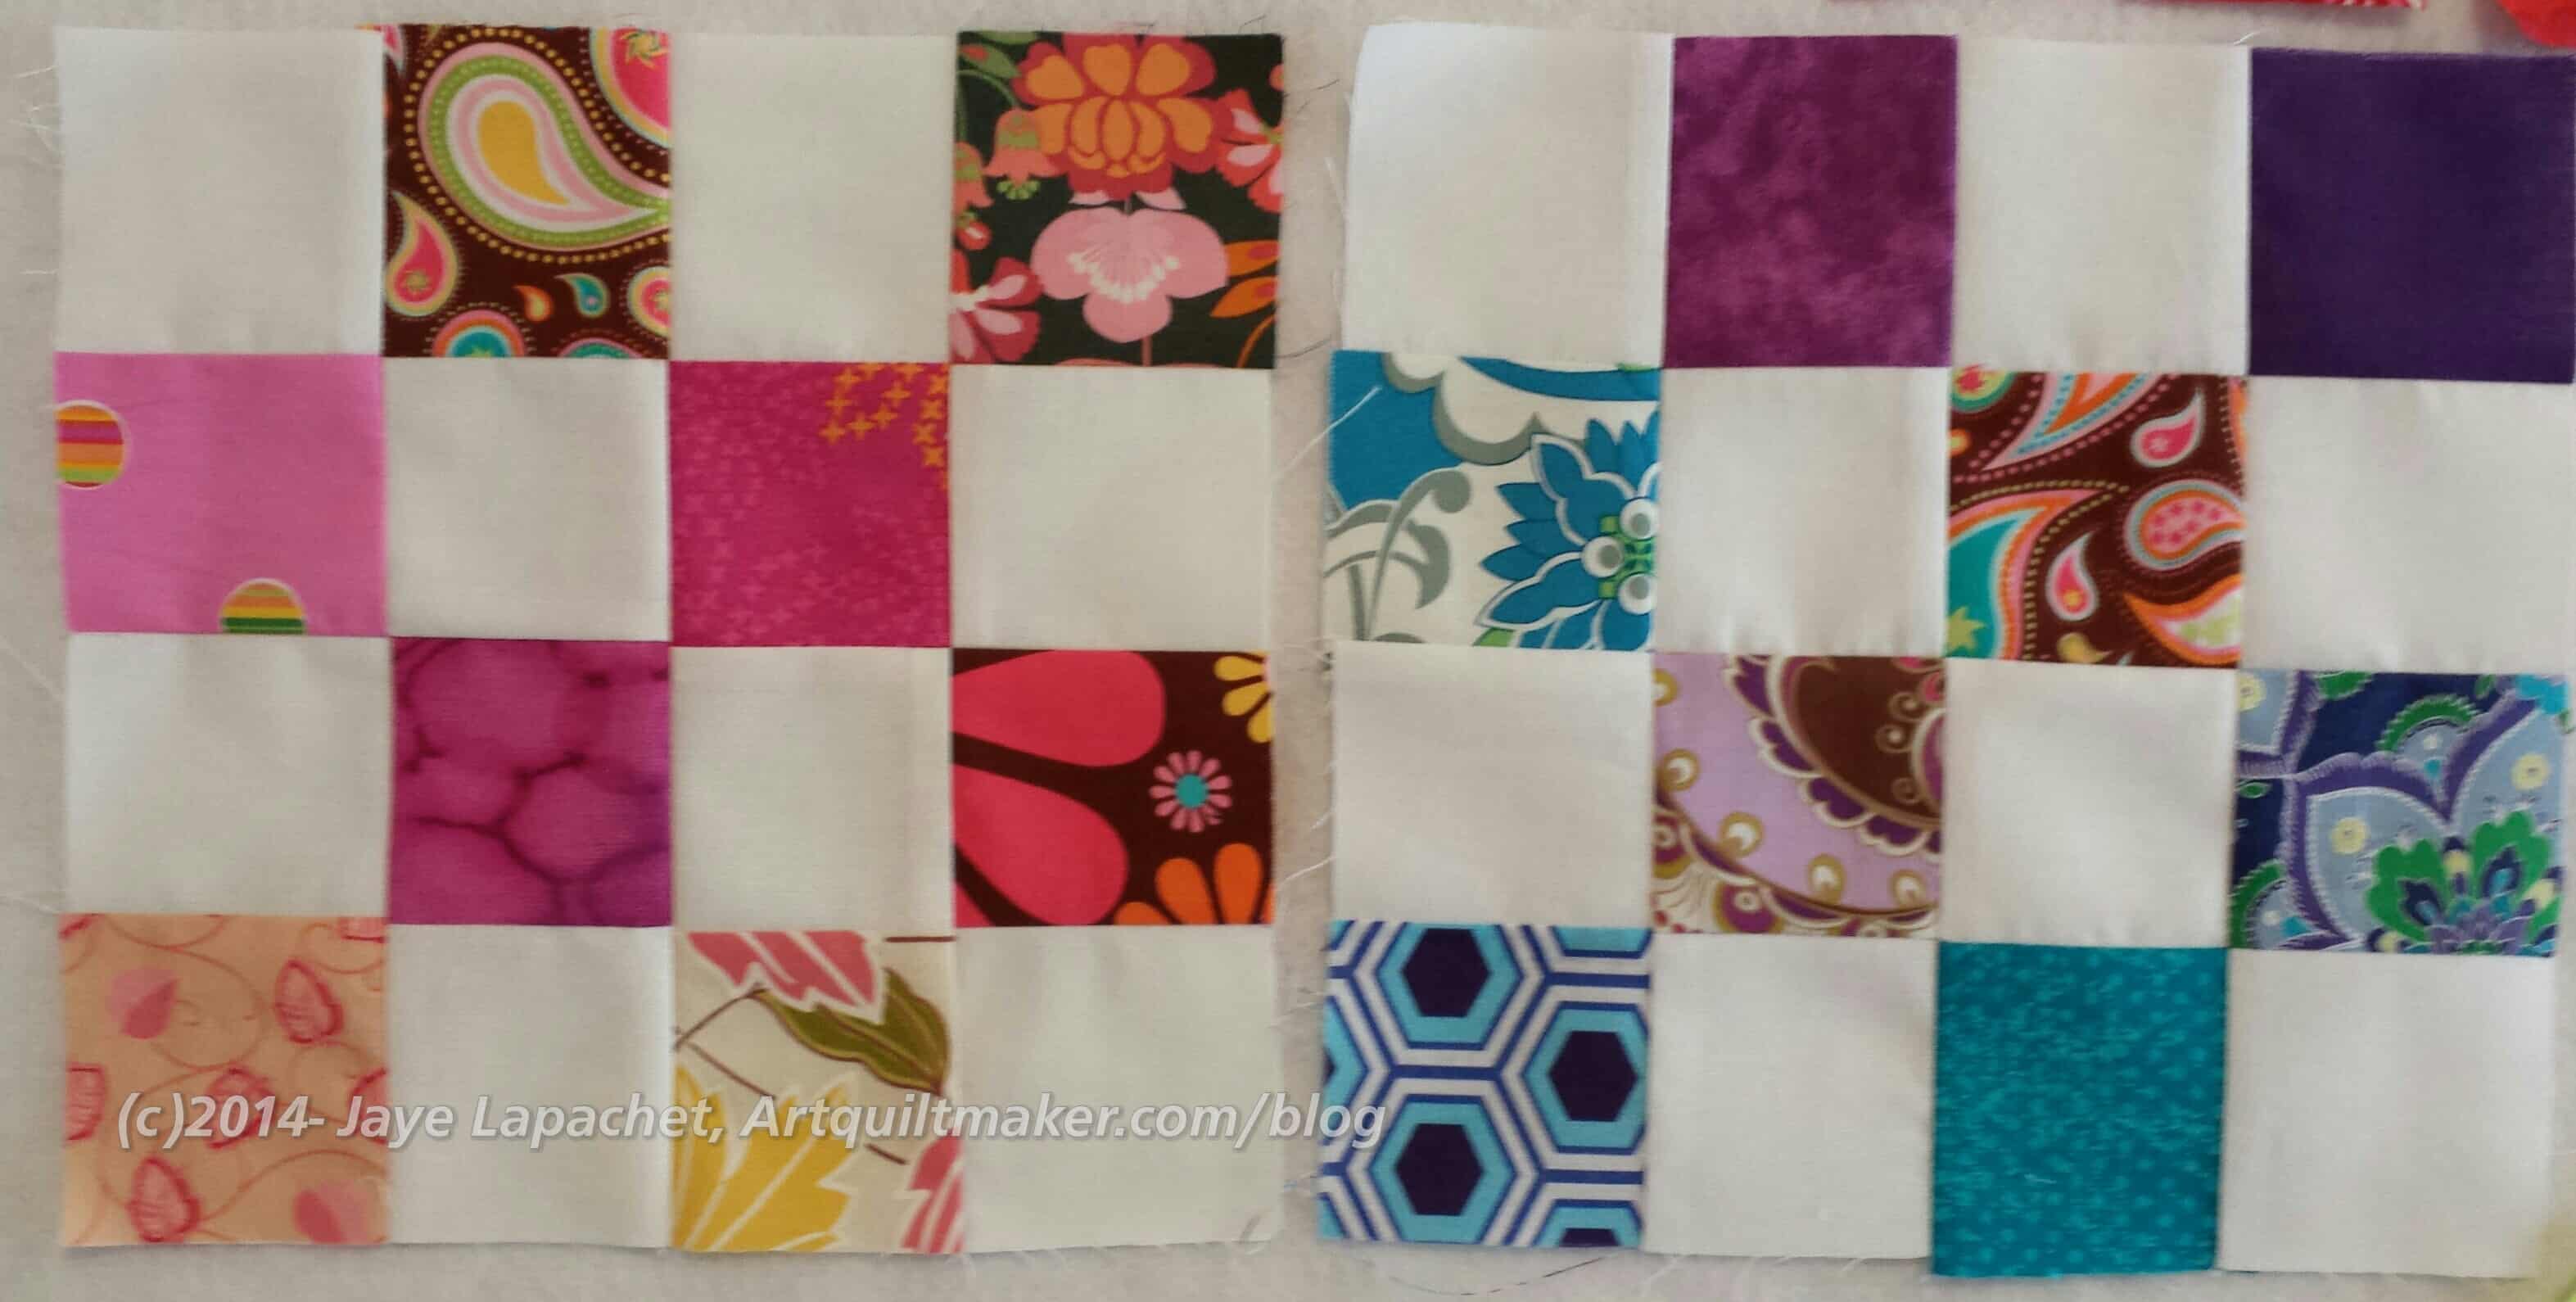
I forgot to take these quilt blocks to the meeting on Saturday, but that gives me the opportunity to show them to you.
They are the regular postage stamp block pattern the guild does. Even though I am working on the Teenage Boy Black & Grey Donation Quilt, I took the kits for these two blocks at the November meeting and just sewed them up as leaders and enders.
Peggy the Awesome puts them together and I just love these. I know a couple of the fabrics came from my scraps, but it is fun to see them again. I really like the scrappiness of the blocks.
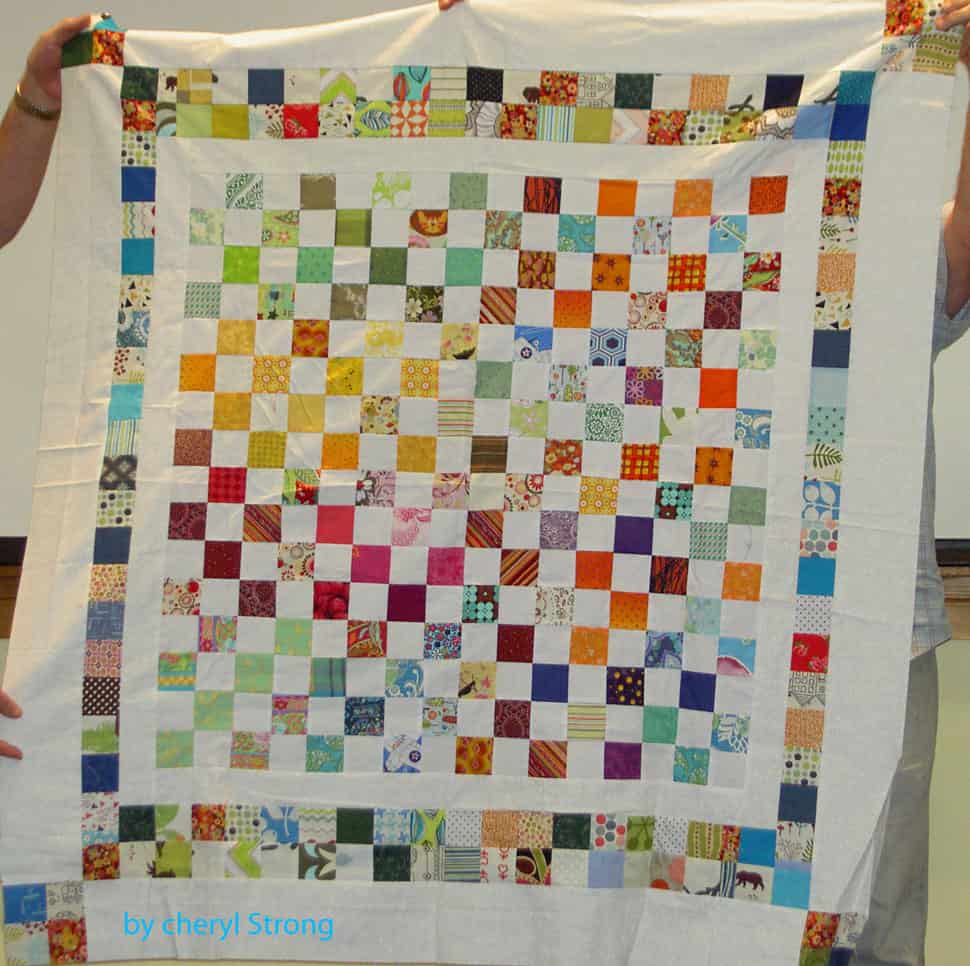
Cheryl’s Donation Quilt
Similar blocks were turned into a quilt by Cheryl. I really like her border treatment. Isn’t it a cheerful quilt? These blocks are great.
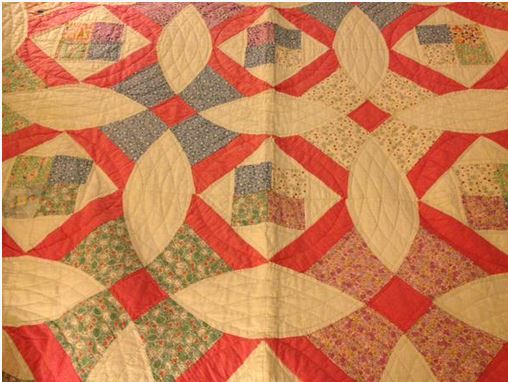
Recently Frances posted on Twitter about the name of a block. She posted the picture of a quilt. I didn’t see the thread until several people had chimed in and Nonnie had tried to draft the block. There are three tools I use to find the names of blocks:
Barbara Brackman’s book, Encyclopedia of Pieced Quilt Patterns, published by the American Quilter’s Society, 1993. I have the reprinted edition. This book is out of print, so you should buy it where ever you see a good used copy.
Blockbase, an electronic version of the Encyclopedia of Pieced Quilt Patterns.
Brackman’s book is the original scholarly block dictionary. It was not the first block dictionary, but it was the first book, that I know of, that attempted to organize blocks into families/type and note their origin.
Beyer’s book went much farther, but, clearly, built off Brackman’s book. There are more references to sources, more drafting information and more of an attempt to group blocks in the Quilter’s Album of Patchwork Patterns.
Grecian Cross Notecard
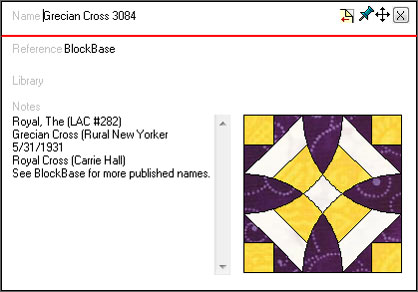
BlockBase is a wonderful tool for actually drafting blocks and printing templates or rotary cutting directions. However, not all of the information from the Brackman book is included in BlockBase. Many of the blocks have only the Brackman number rather than all of the names. I make an effort to amend the notecards in BlockBase as I come across new or additional information that would improve retrieval. For example, a very common name of the block above is Grecian Cross. This name was listed in the Brackman book, but was not in BlockBase, so I added it.
It is helpful to know something about drafting to use any of these tools. By ‘drafting,’ I mean knowing the basic structure of blocks, e.g. is the basic structure a 4 patch or a 9 patch? The reason this is important is that if you only have a picture of the block, it cuts down on the number of blocks you need to look through if you know the basic structure.
Sadly, using patterns all the time does not foster the understanding of the basic structure of blocks, because the quiltmaker only needs to follow the directions of the designer/patternmaker.
Knowing a block’s structure is also helpful in designing quilts of your own. You may not want to mix 9 patch structured blocks with 4 patch structured blocks as the seam lines won’t always line up nicely. Or you may want to look a a variety of different 16 patch blocks so that you can design a quilt with an interesting secondary pattern.
These tools are not only good for looking up block names, but are also good to learn to understand the structure of blocks, get inspiration for new quilts and see how the authors have colored the quilts. You really need these books, if you have any serious interest in quiltmaking beyond buying fabric and making quilts.
You might notice that blocks have different names. People took blocks and republished them under different names or added a line here or divided a square there and deemed it a new block. This phenomenon is still happening today and it is something of which we just need to keep track.
Can you tell that I don’t know what to call these blocks? I really have to look the pattern up in Barbara Brackman’s book or Jinny Beyer’s book and see if they have a real name.
First PIQF Crosses
I haven’t made a ton of progress since I last talked about this project. I seem to have not had much time to sew in the past week or so. I finally took a few minutes last night while I was waiting for dinner to finish to sew the blocks together. It really only took a few minutes. I finished two of the blocks I have in process, but the others need fabric cut and I wasn’t set up to do that.
I was able to use scraps for most of the pieces as they are small, which is really good since my scrap bins seem to be overflowing. Still, the blocks are small and, thus, a pain to sew. In my haste I cut off some points, which I will need to remedy if we are going to continue making these blocks. I am not sure I like them well enough to make a whole quilt out of them.
TFQ & JHL Blocks
I think they do look nice together. I like the scrappy look. We didn’t intend to use all blues for the crosses, but it seems to have worked out that way. The others I have in process do not have blue or blue green or aqua in the center.
So, my blocks will be winging their way to TFQ today. It is possible that I’ll have more time to sew tomorrow and will send some on Monday.
These are the blocks we saw in the quilt at PIQF. I had a bad start with these blocks.
PIQF Inspiration Blocks
I started making them before I went to Houston and the pain and suffering was almost beyond endurance. OK, I am exaggerating, but I couldn’t understand why the square in a square pieces took so long to make. I really have had very few issues like this with blocks.
While I was in Houston, TFQ sent me one of her blocks. I put on the wall as inspiration for my blocks. When I finally got the square in a square pieces (ONLY the square in a square pieces, mind you, there are 5 additional pieces in this block) finished and up on the design wall, I found they were wrong. Much too small.
Huh?
I went back and checked the measurements and found that I had cut wrong or read the directions and cut wrong or something. Bleah. This was a total head on desk moment.
Once I got the dimensions correct, the square in a square pieces went relatively well. I put the first block together relatively quickly. I was able to cut pieces for the other blocks from some scraps, which was great.
There are lots of pieces in this block, but being able to use scraps is a bonus. I have to make time to sew about 10 more seams and then send them off. Wish me luck.