In a way the sewing I am doing at the moment is all about getting stuff off the floor so I can move it out of my workroom before the painting starts.
The other day I organized bits of batting and the edges that came back from my quilter after she quilted a quilt. I have at least one more quilt to make from ends.
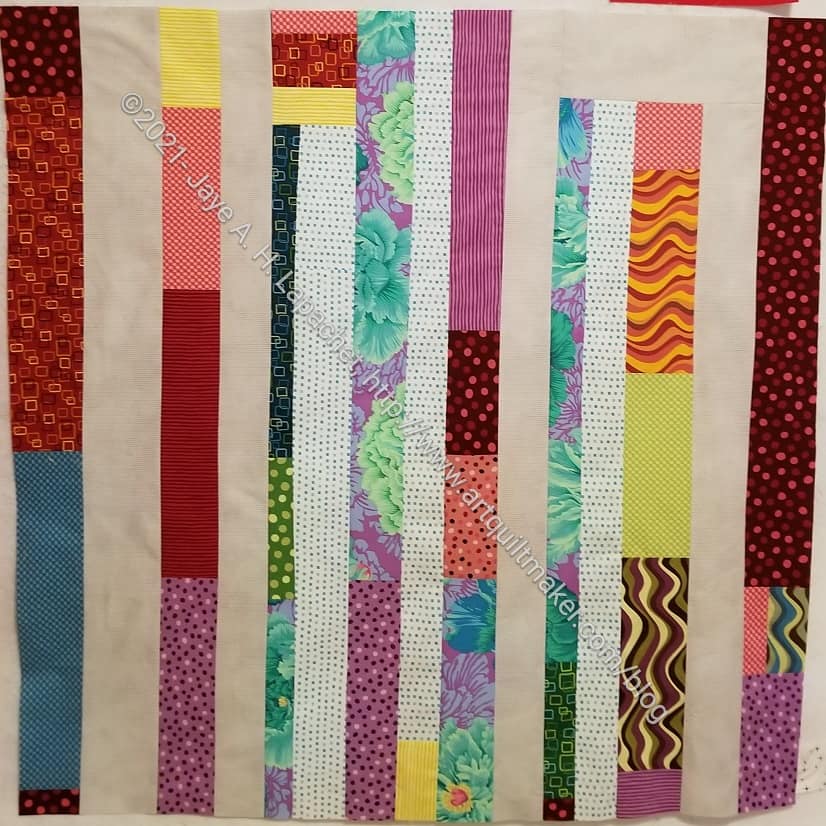
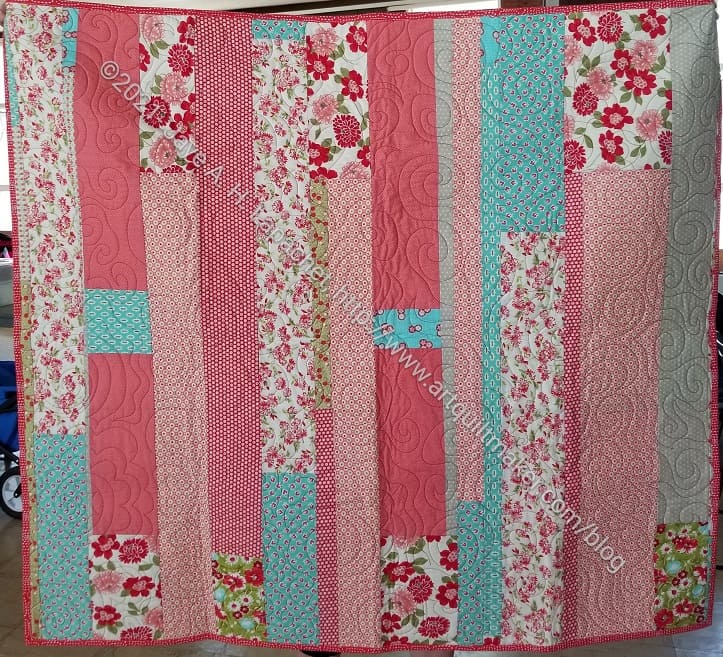
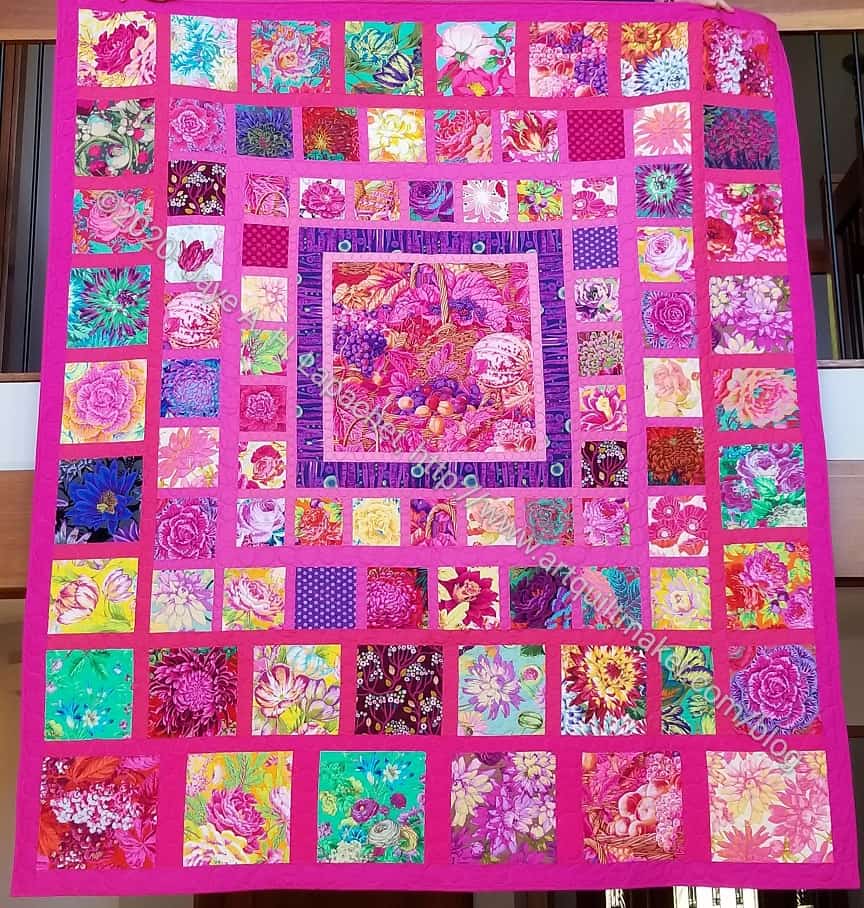
This one is the fourth quilt I have made from the Pop Parade fabric. Most of it is not Pop Parade, but you can see the Pop Parade clearly.
I also used some Dit Dot Evolution fabric for the background. I bought the fabric online and it is the wrong color. I was going to give it away, then I thought I could just use it for donation quilts, so I did. I prefer clear white, but I prefer to use fabric rather than just give it away. Someone will like this quilt. It isn’t at all ugly even if I didn’t use my preferred fabric.
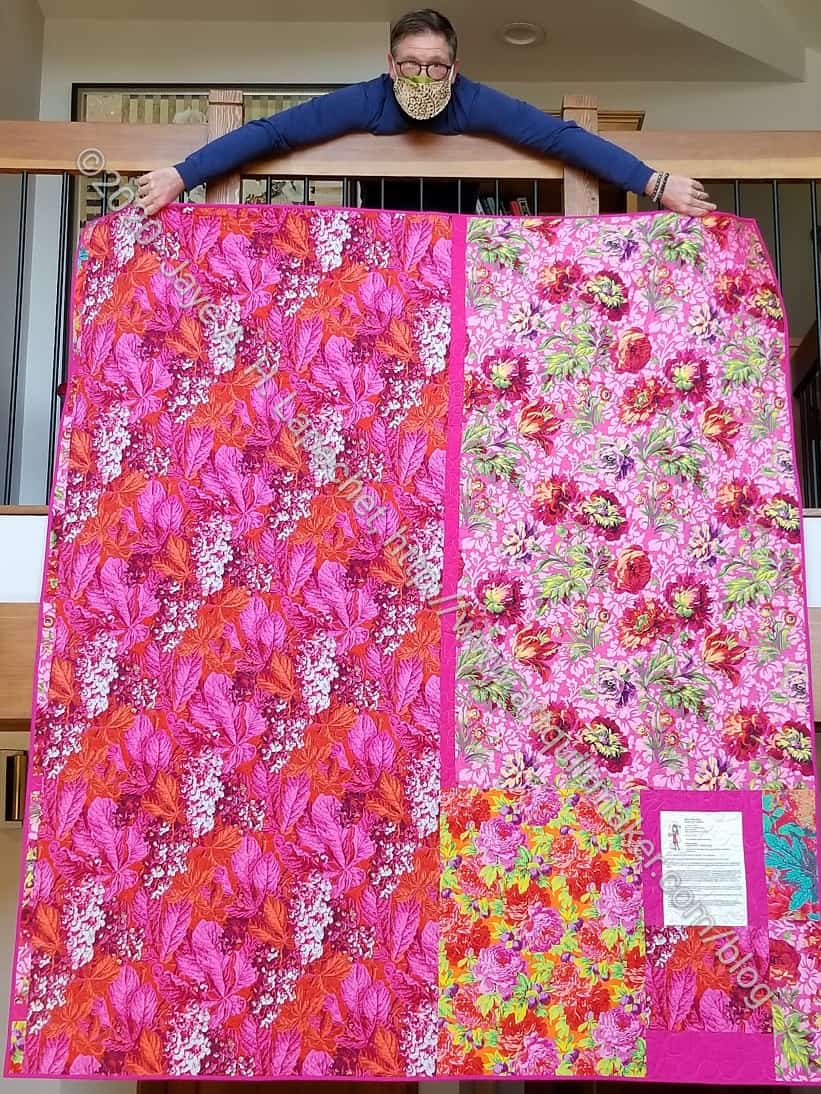
I have to make a back, which I would like to do before I go to the next Sew Day.
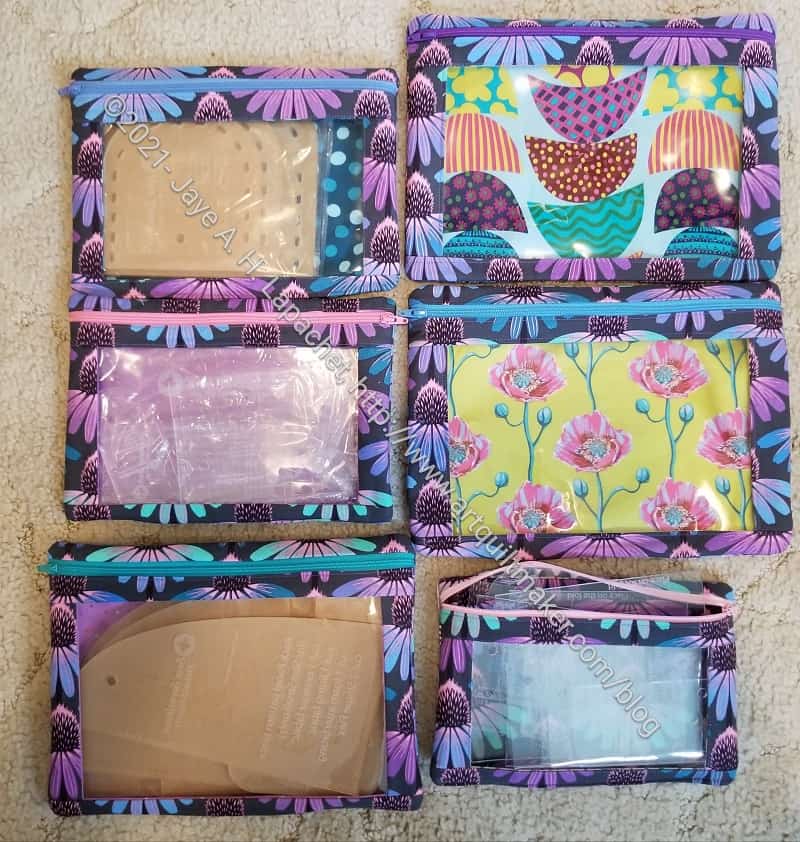
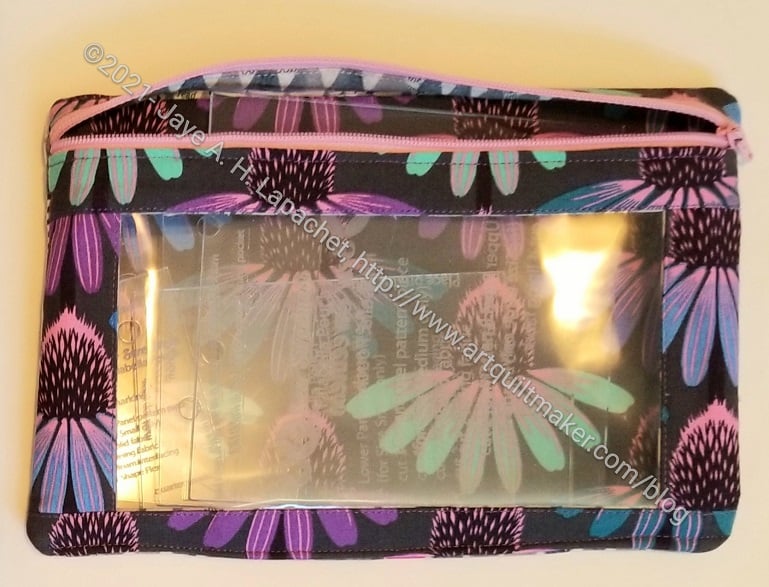
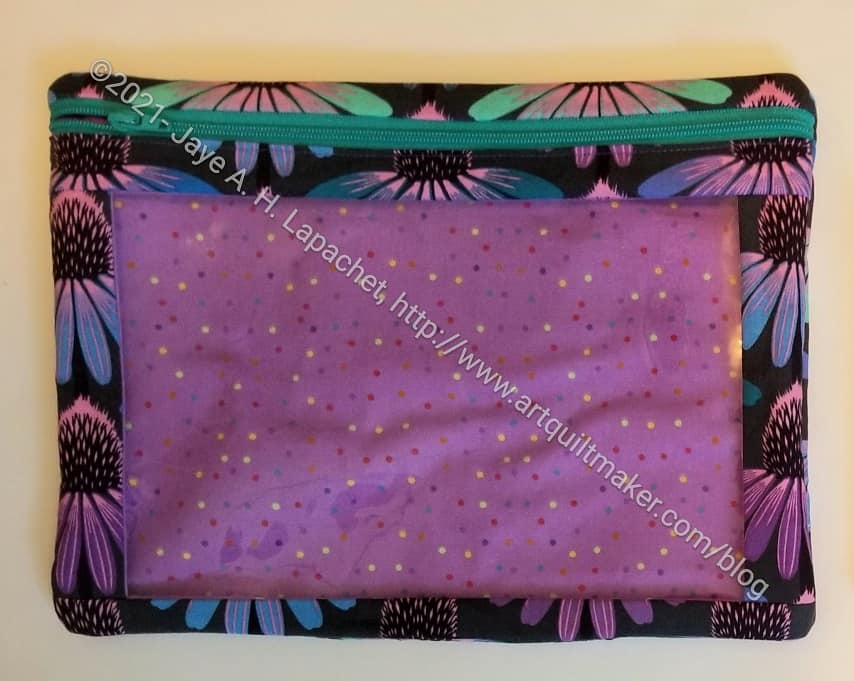
I used some of the Anna Maria Horner fabrics I received in the Quilty Box to finish some of the more recent I Spy Pouches. Once I finished the two large ones, I got all the pouches out and rearranged my templates.
I know it seems kind of ridiculous to make pouches for templates. On one hand, I like having them organized. I also like the fabric and enjoy using the coneflower print for something I am going to keep. Finally, the I Spy pouches are quick to make, so rather satisfying.
New Large I Spy Pouches
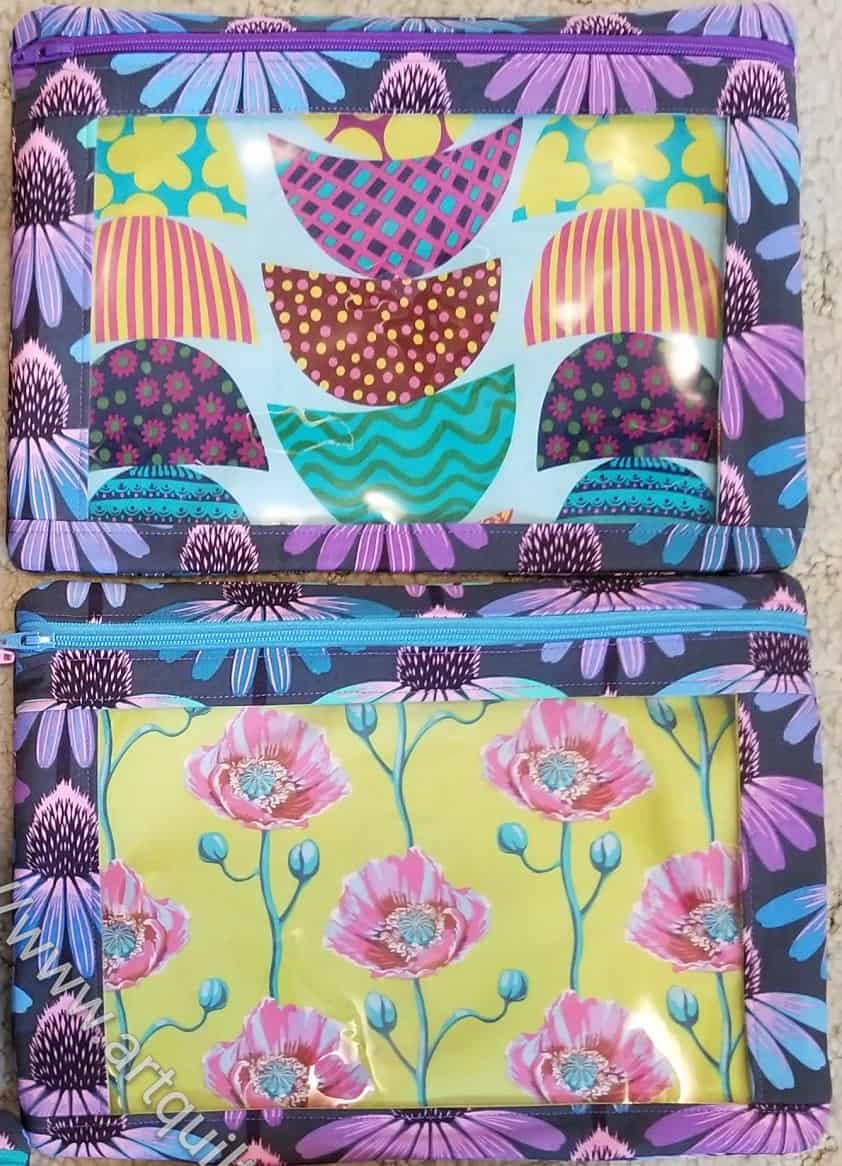
The two newest pouches are quite wild. I used a couple of the Bright Eyes prints. I didn’t really realize how exuberant the pouches would be using those fabrics. The fabrics clash a little with the coneflowers, unfortunately. Still, I like them and the coneflowers will show up when I put some templates inside.
I have a number of template sets that are too big for these pouches. I can use the same directions to make larger pouches. I just haven’t been up for that lately.
I made some I Spy pouches for my various templates. The I Spy pouches are from Sara Lawson/ Sew Sweetness’s Minikins Season 1. These are not difficult and there are a number of designers, including the Road Trip bag from Crafty Gemini, with similar patterns. I like this pattern, because mostly you don’t sew on the vinyl.
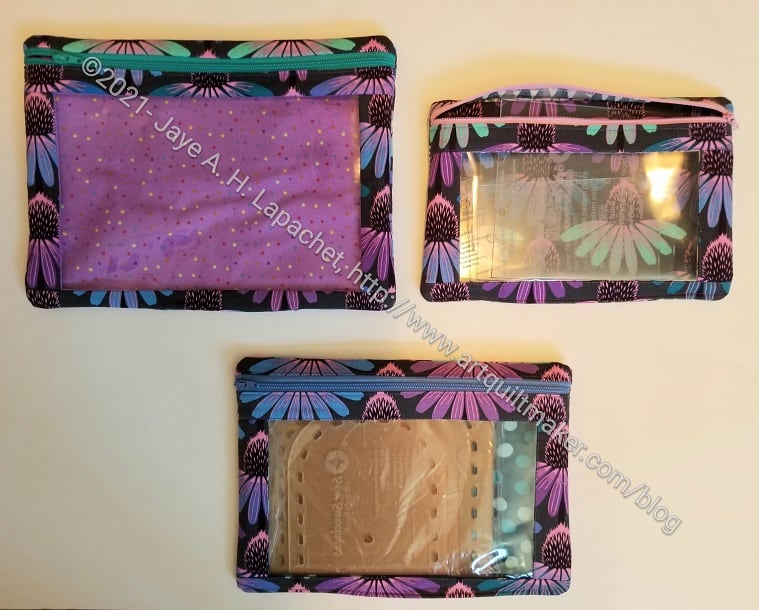
Small I Spy Pouch
My idea is to put my acrylic project templates in these pouches. Many people have told me that it is silly to make these for my templates, but for now I am making them anyway. I like the idea of seeing my fabric in use. It makes me happy. I may stop at some point, but for now I am making them.
I thought the small pouch would fit my Falabella pouch templates, from Minikins Season 3, but it is a little small. There are several pieces of the acrylic templates and they are a little too thick for the small pouch. I think the medium might fit the Falabella pouch templates better. I’ll make either the medium or the large for these templates. In the meantime, they won’t fall out.
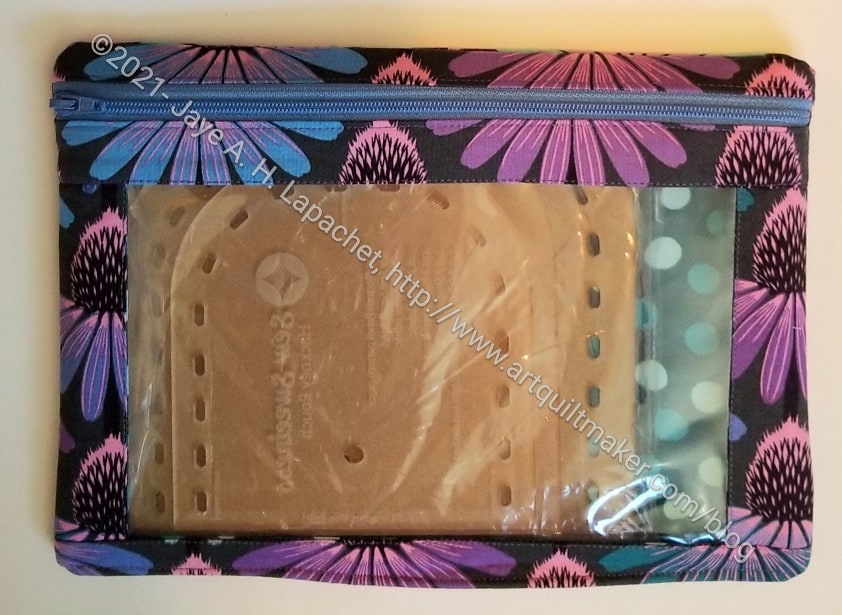
Large I Spy Pouch
I am also thinking about making some of these for my upcoming La Passacaglia project. I may need some larger ones for the EPP sections of the La Passacaglia project. I’ll have to see.
This large pouch is 10.5×8 inch and I think I might need an even larger size for EPP. I’ll have to see when the first installment of the La Pass instructions come out. It fits the Piebald Pouch acrylic templates very well.
Medium I Spy Pouch
The medium pouch fits the Hackney pouch, also from Minikins Season 3, templates pretty well.
These are a pretty quick sew and very satisfying. If I had a bag in which to clip them, I could easily add a leash with a lobster clip to keep them in the bag. That is something to think about for another day.
Another quilt that was handed in at Sew Day was made during the February 2020 Community Sew Day. I made a bunch of blocks and may have even sewn them together.
This is a really nice quilt and I hope the person who receives it enjoys it.
I keep thinking of cutting more pieces these sizes so I can make more of these donation quilts, but I haven’t done it yet. It would be better if the pieces were more standard sizes, like 5 inches and 2.5 inches.
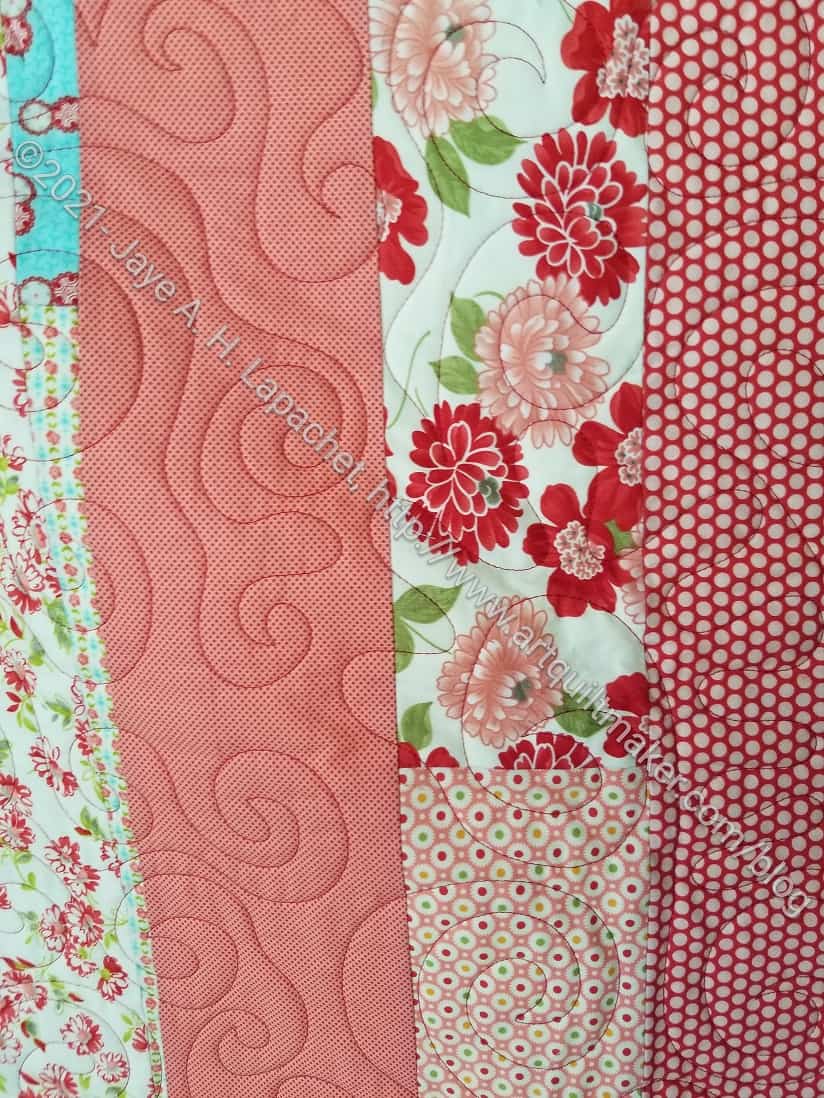
Another one of my creations that was handed in at Sew Day was Ends n.8. I only have a bad photo, so it was hard to figure out that this gorgeous quilt was actually the one I made.
Tim, again, did the quilting and Mary C added the binding. I like using up the edges of quilts and this one turned out great. As mentioned in the previous post, the ends that make up this quilt came from the Stepping Stones n.2 quilt, I think. I also added more Bonnie and Camille fabric.
Ends n.8 Finished – detail
As usual, Tim did a great job quilting it. the swirls are a little different, but organic looking and interesting.
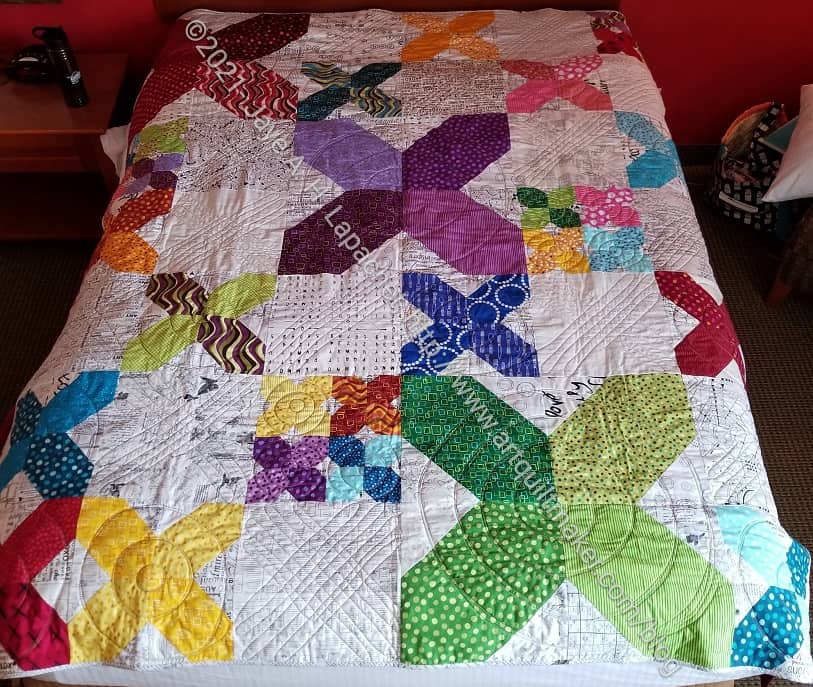
I finally finished the binding on the X Quilt!!I feel like I usually get the quilt bindings done faster. This one felt like it took forever.
Fortunately, I had a deadline and I got the quilt done before the deadline. I watched some Midsommer Murders with my Mom and was able to sew while I watched.
I took the photo in a hotel room. The best position was laying it on one of the beds. I was pleased that the quilt fit, with an overhang, on a queen sized bed.
Friday, I spent some time looking through all the patterns I have collected to see if there was a quick project that would inspire me. I moved some to other places my computer and deleted some in which I was no longer interested. It is always good to do a bit of Spring Cleaning.
Zippers from Kelly O
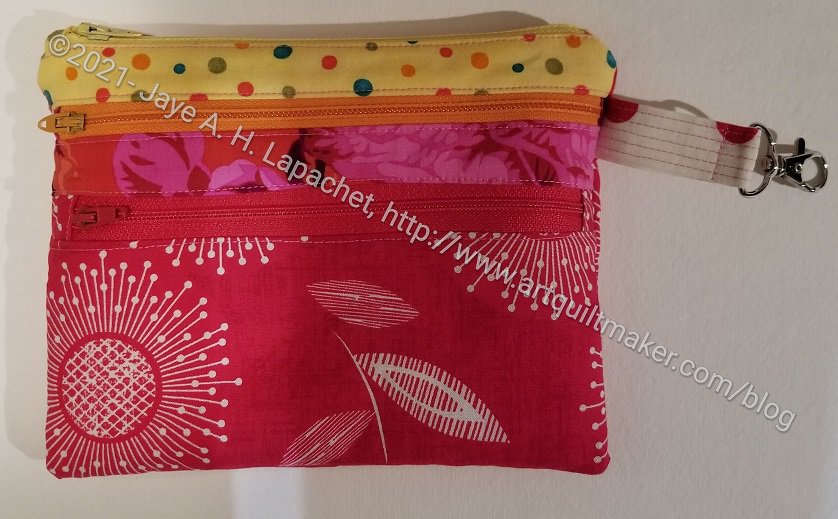
This Spring Cleaning reminded me of the Triple Zip pattern from A Quilter’s Table. I have had this Triple Zip pouch pattern waiting around for 7 years. I thought it might be a good quick go-to gift pattern I could make over and over. I haven’t found such a thing and hope springs eternal.
Kelly Orr and I talked about this pouch years ago and she gave me the zippers to use before she moved away. I have had them segregated out from my other zippers all this time.
I know I didn’t tell you that I started this project. I started cutting on Saturday and nearly finished it by Saturday evening. I had one more seam to finish sewing on Sunday, then turning it and done!
The pattern doesn’t have a lot of pieces, but they do need to be labelled. I didn’t do that and was somewhat confused. The pattern requires careful attention, especially to the renaming of the zippers part way through the project. Labeling the pieces can reduce this confusion.
If I made this again, I would omit the fusible fleece on the top of the project (where the yellow dot fabric is in my pouch). It made turning the project a little difficult and the top too thick for my taste.
I was also confused about the finishing. I think I did ok, but the top of the inside still has some raw edges. They are less than an inch and don’t show, but I am concerned that there will be unraveling. I am unclear whether I finished the inside correctly. I also wonder if there is a different way to finish the inside. I plan to send the extra pattern I printed to Lynette to see what she thinks.
I also added a leash, which I always like to do for pouches.
A Quilter’s Table had a sew-along for this pouch and the post showed over 70 pouches! She also has a tag in which you can see many other Triple Zips as well as links to others doing classes and other sew-a-longs with the pattern. It is very popular!
I finished these organizers at the end of April, but I couldn’t show you until today. They are gifts for my mom for Mother’s Day. As I mentioned yesterday, she opened her gifts early when I saw her on Friday. Good thing I got them done early!!!
Purse Organizers were a special request. As I said, I was showing her the new Minikins Season 3 patterns and she immediately saw these and loved them. I had already made her a gift, but I have put that item aside for her birthday.
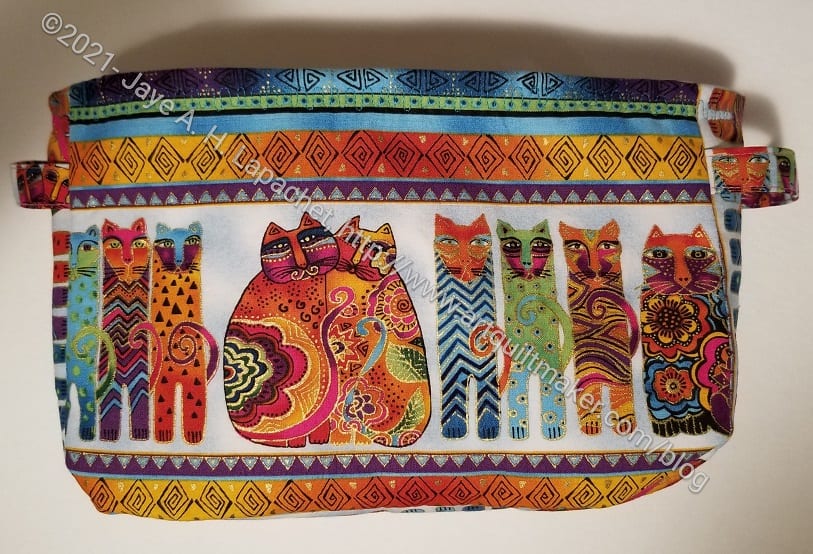
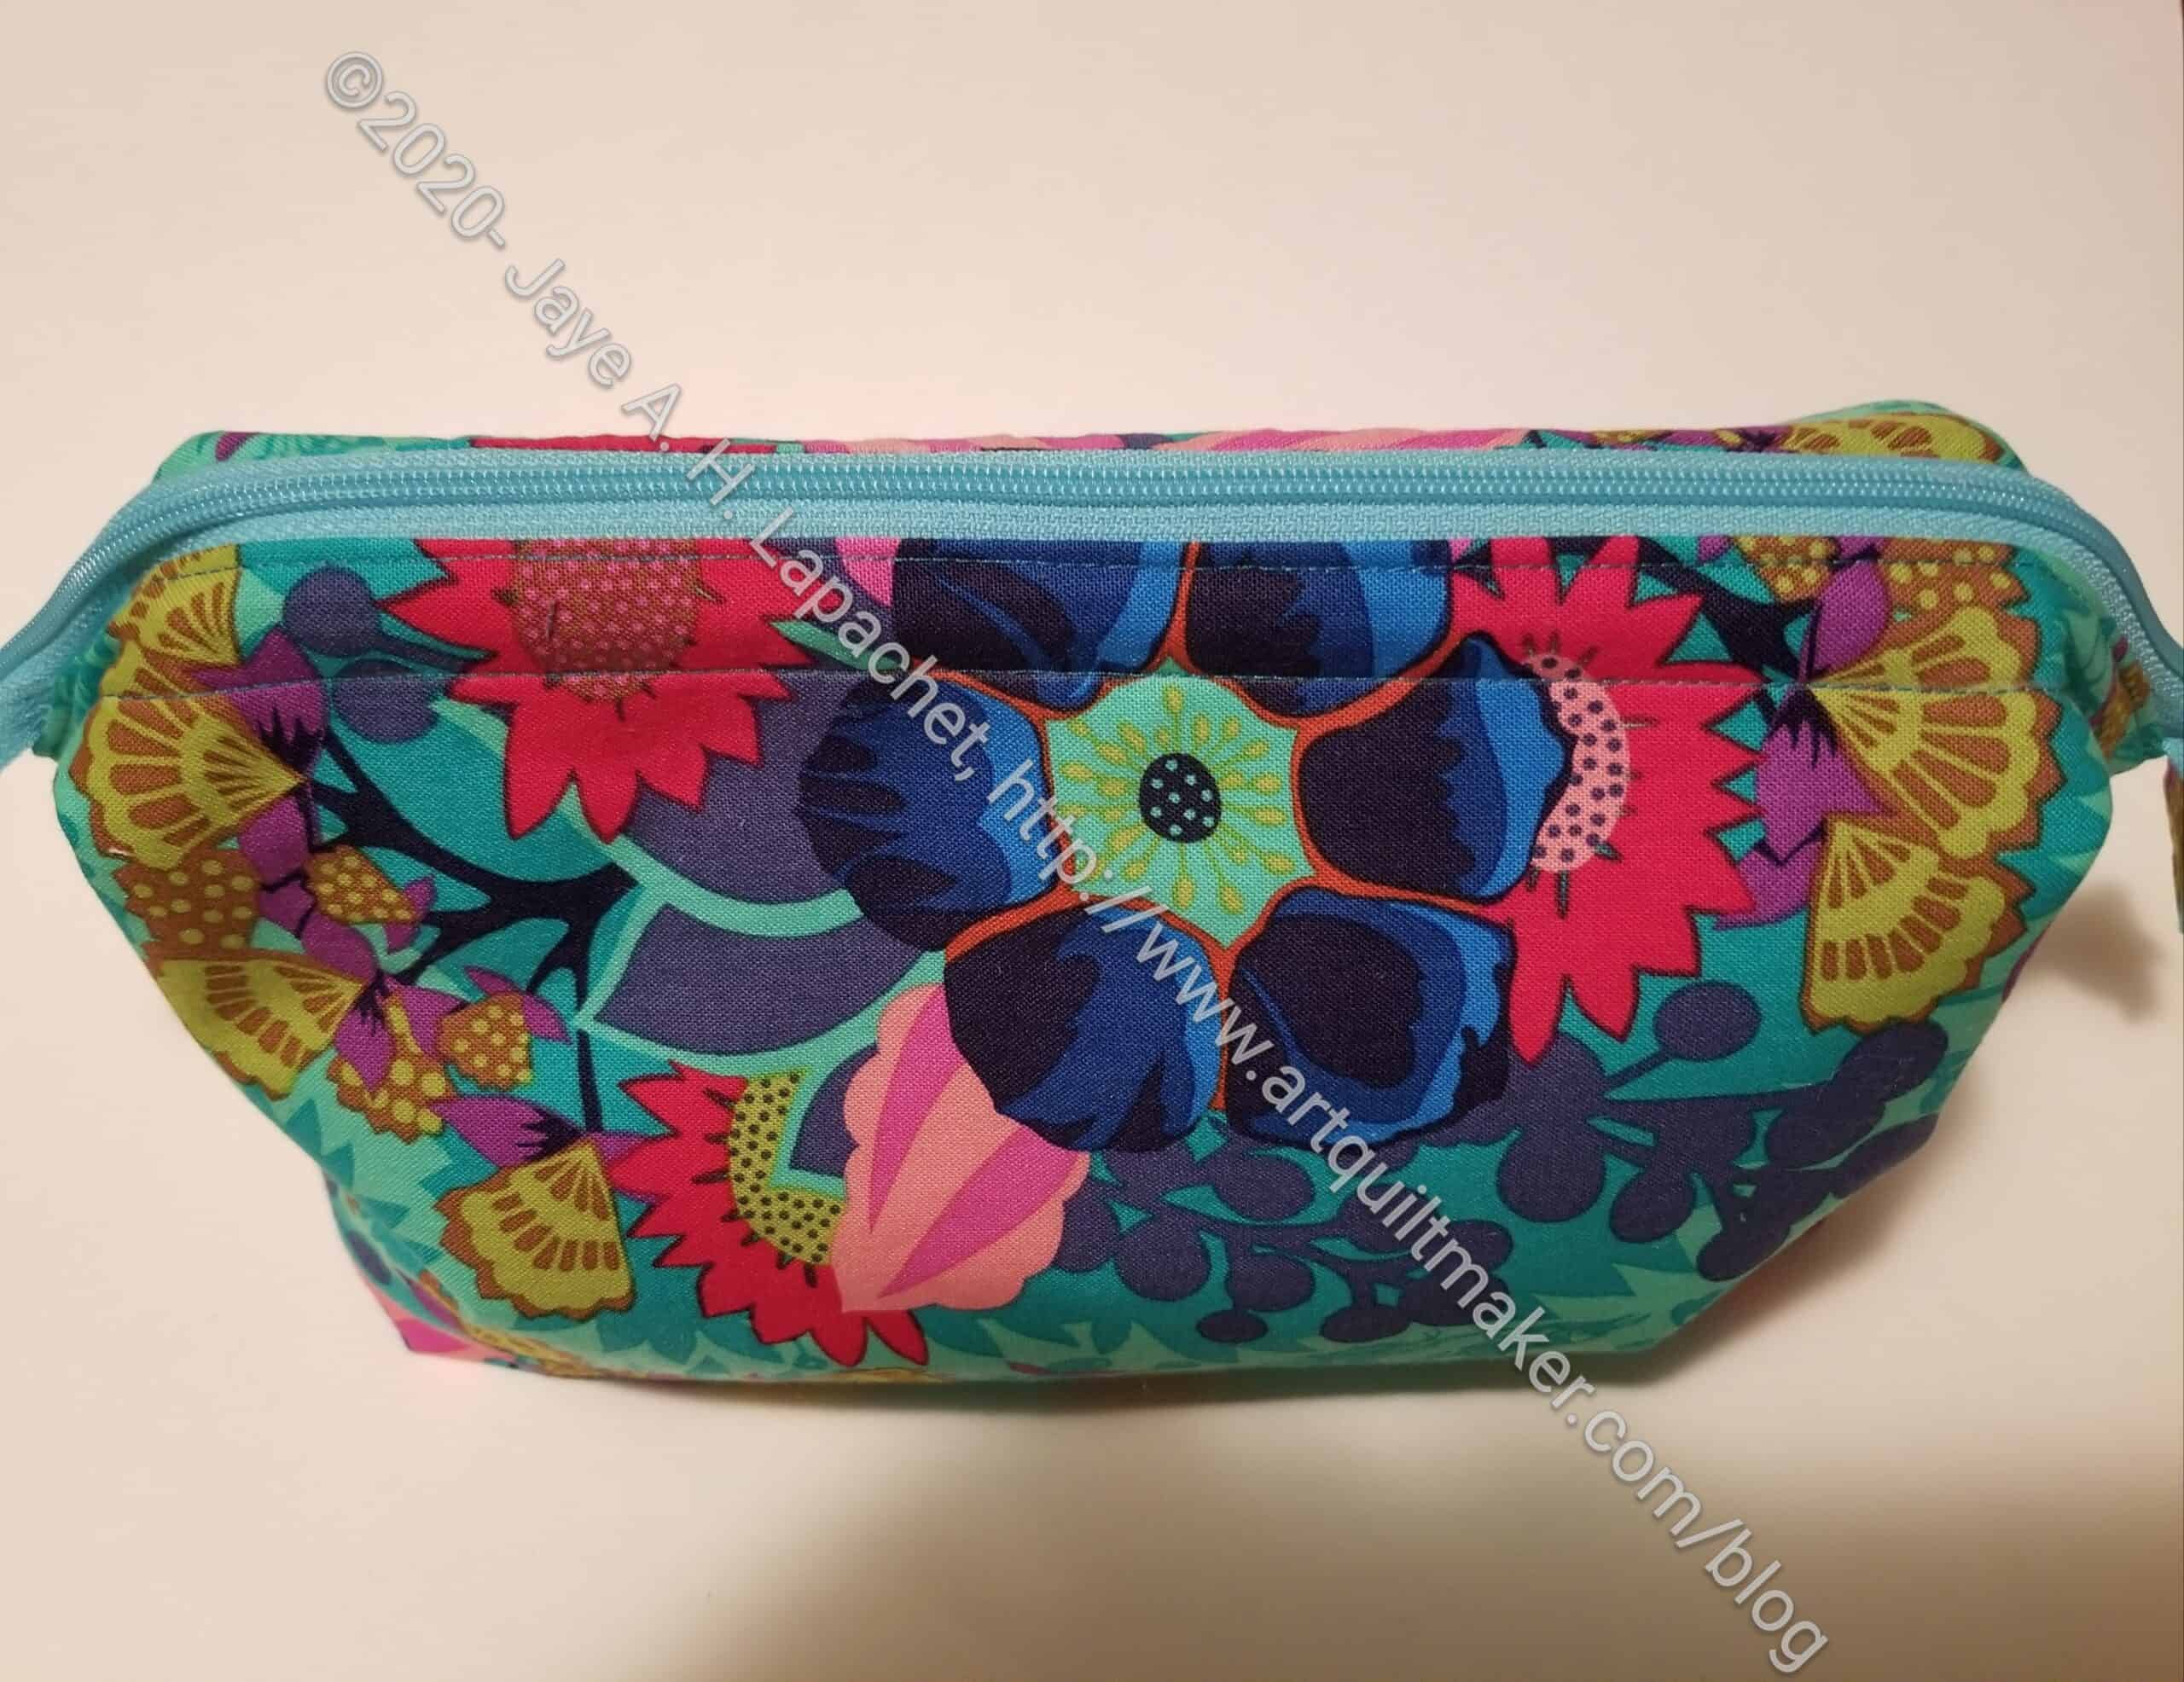
Large Mustang front and top
There are two sizes. She can choose the one that works best for her handbag or tote bag. She already has an idea of how she will use these. Someone said that using these for a tote bag would be a good idea. It never occurred to me, but I have to agree. How often do you scrabble around in your tote bag for whatever it is you need. I’ll need to think about whether one would work in the bag I take to quilt shows.
Small Mustang front
For these pouches, I used Laurel Burch fabric that I purchased to make items for Mom. I know it doesn’t go with the Artist Paint tube fabric, but these won’t be with the items I make for her to take to Sew Day. I made an effort to fussy cut well so the cats faces would show. The fabric has two sizes of cats, so I used the small cats on the small pouch and large cats on the large pouch. I am pretty happy with the fussy cutting.
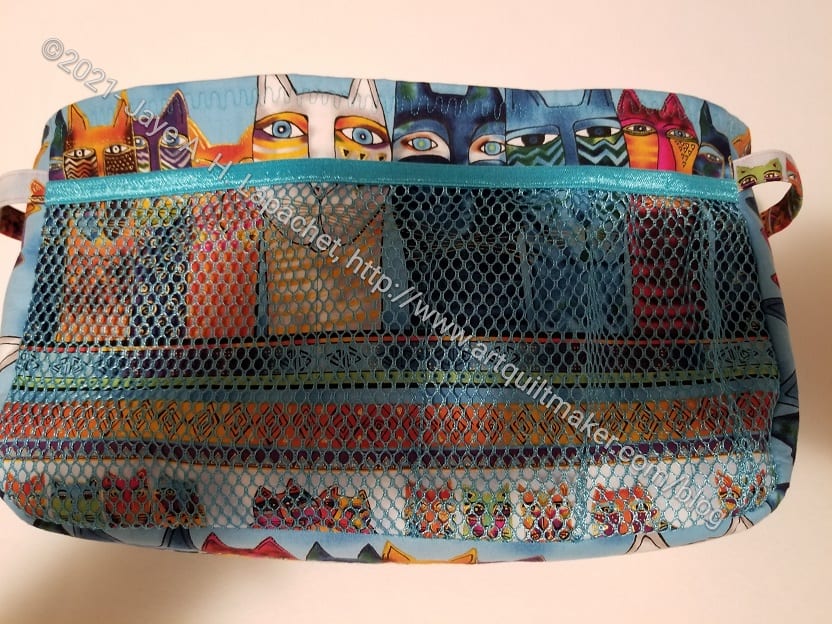
Small Mustang -mesh pocket
One thing I didn’t think about was the outside pockets. I realized that the outside pockets would cover up the cats, so I omitted them. It means fewer pockets. I made a note on my pattern and will use the main fabric for those pockets next time.
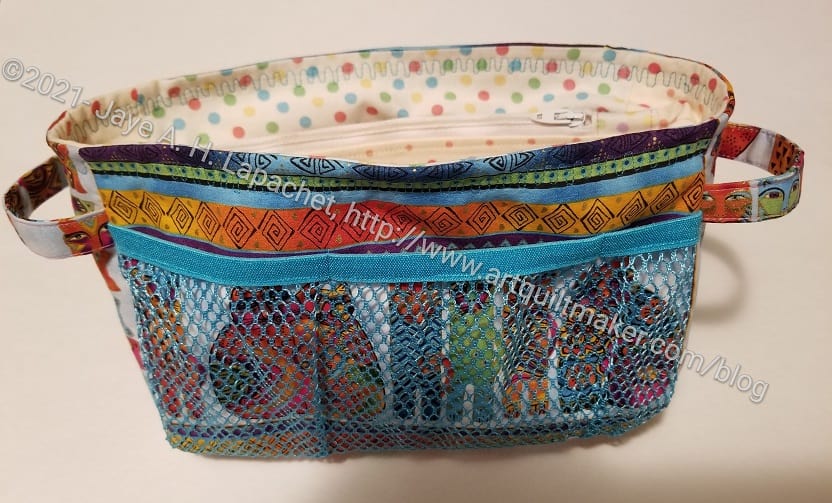
Large Mustang -mesh pocket
One side of both pouches already has mesh, which obscures the cats, but doesn’t cover them up completely. In my large version, the cats look like they are peeking over the edge of the mesh. Total luck, but cute, don’t you think?
A lot of people don’t like mesh pockets, because items get caught. I don’t mind them. One has to pick carefully what to put in them.
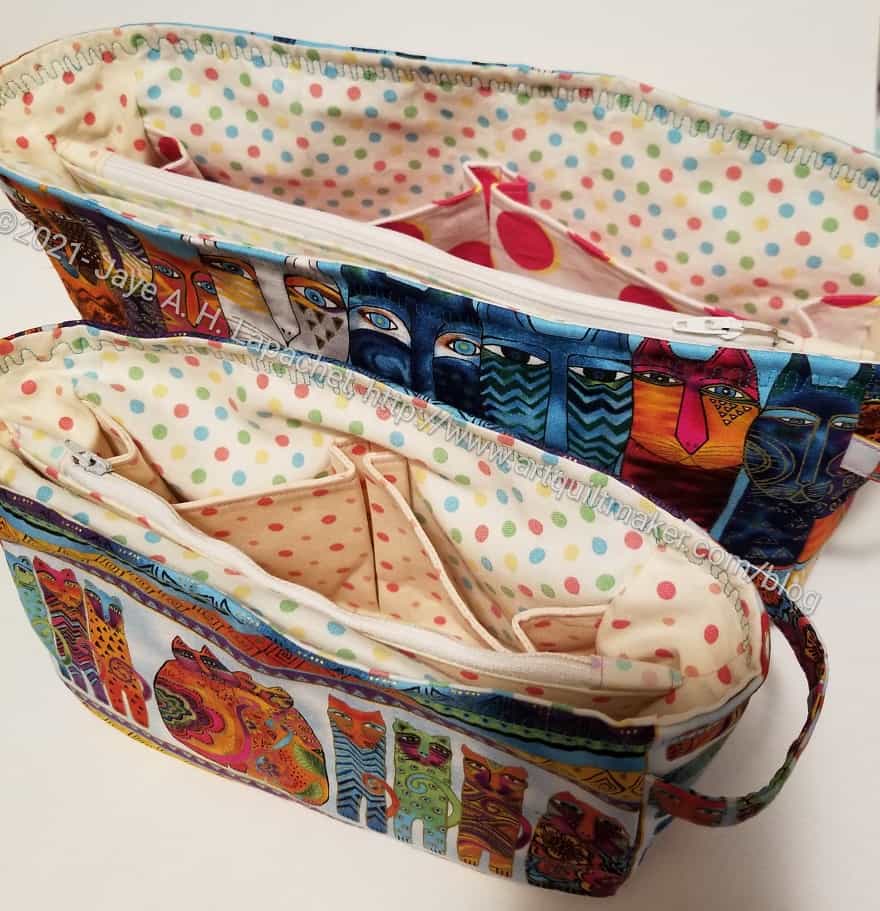
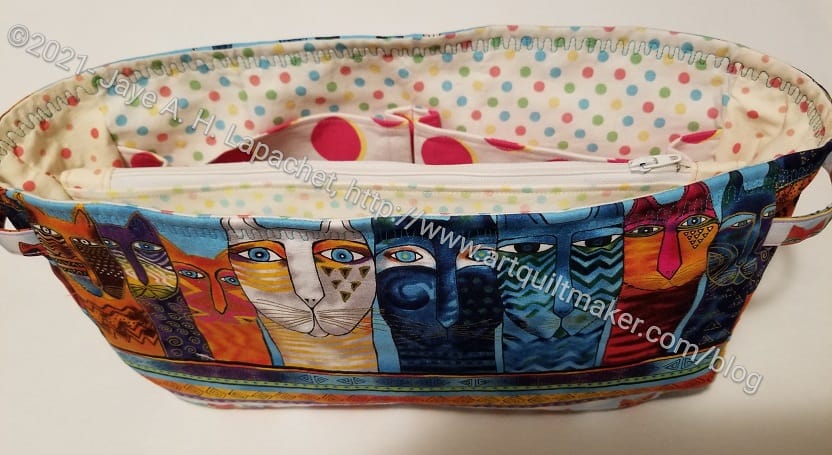
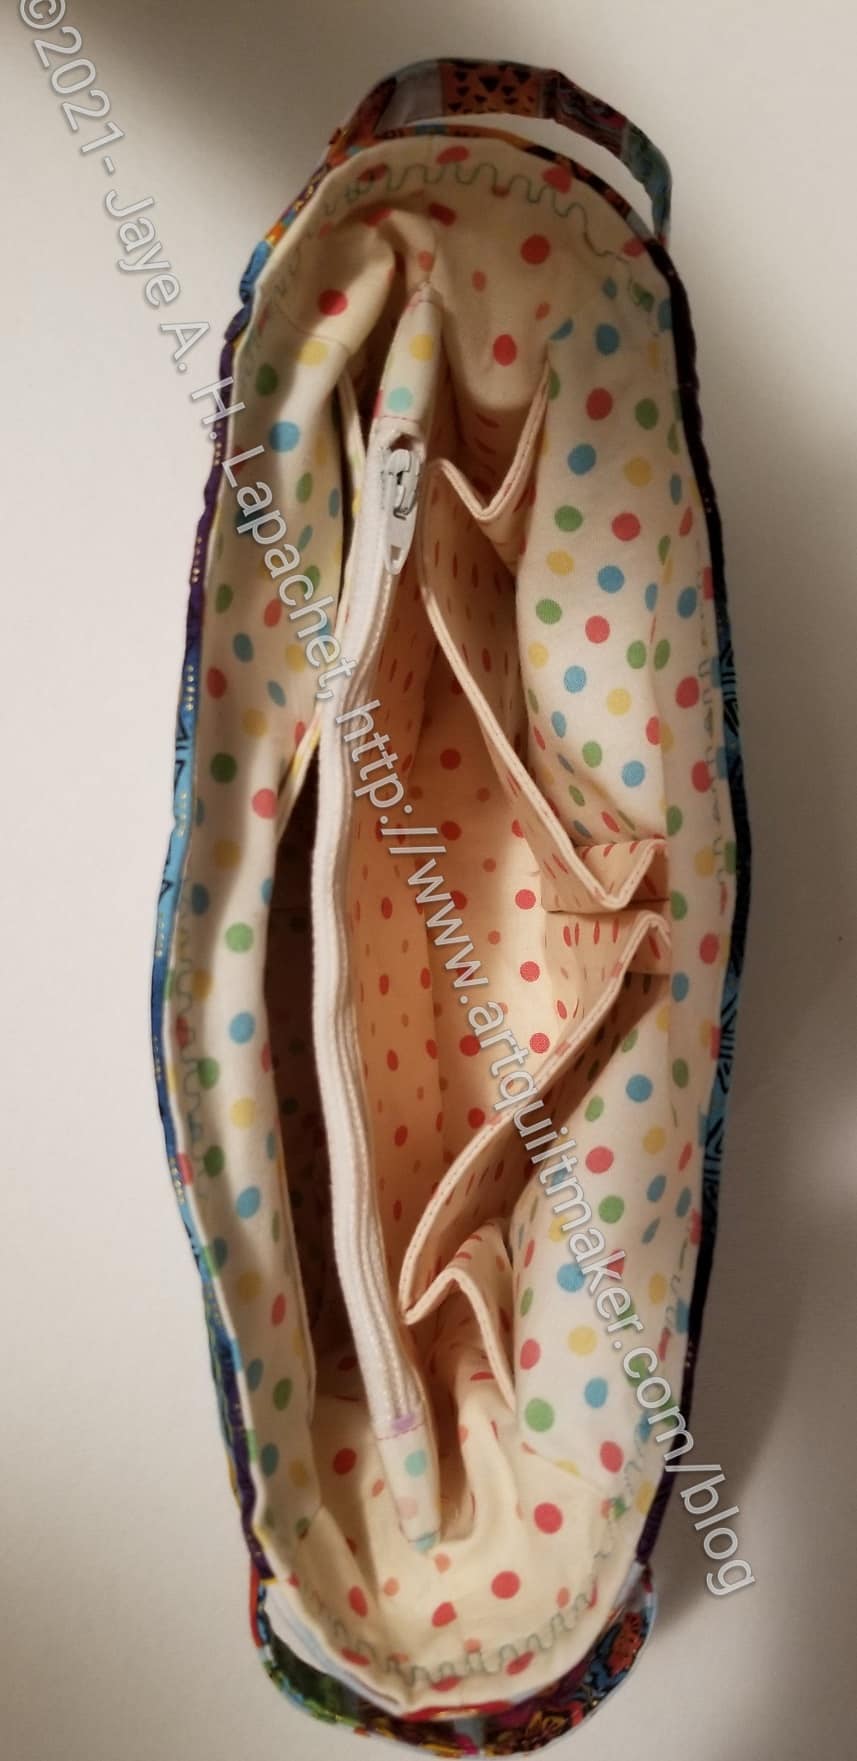
Large Mustang – interior
Even without the outer slip pocket, these bags have a lot of pockets. In addition to the mesh pockets, there are two slip pockets, a zipper pocket and two pleated pockets.
I am a little concerned about how much can be put inside as the Organizers look so slim, but I hope Mom can put enough in to make them useful.
I am also ridiculously pleased with the grab handles. Aren’t they cute?
There is no top to this pouch, so everything will fall out if it is tipped over. I hope Mom likes these pouches and they work for her.
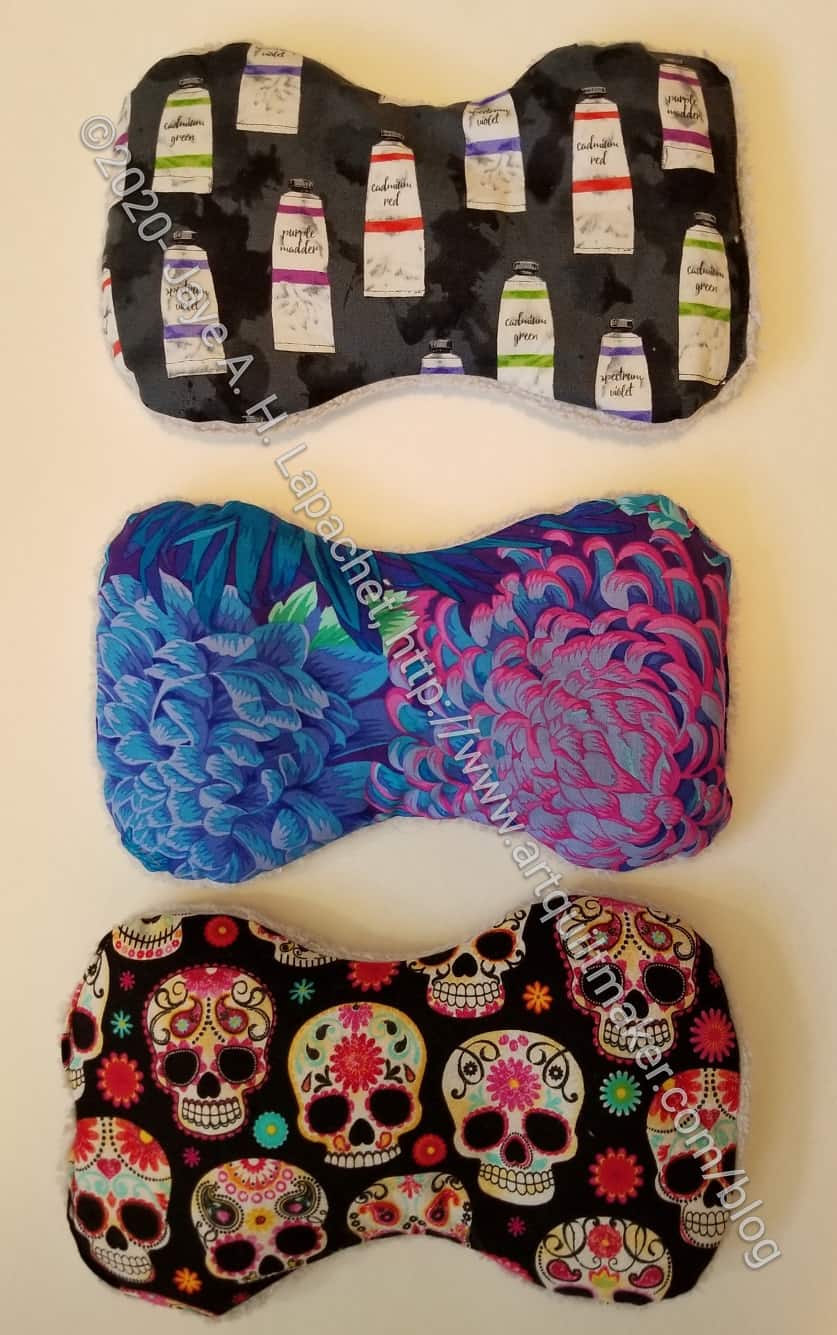
Finally, I can show all of the eye masks together. I delivered the last eye mask yesterday to my mom for Mother’s Day.I know Mother’s Day is a week away, but she came over and refused to wait to open her gifts. It was fun to see her open it.
She has a gel mask, but I had already started making her this when I found that out. She said the one I made is much softer and larger, so will work really well for her.
You might remember that I showed my mask in January, which is when I finished all of them. Then, I showed Gerre’s mask in March after International Women’s Day.
You can see that I used Mom’s fabric so this goes with her set of small items. I have used the Dia de los Muertos fabric for Gerre before and this is now the fabric I am designating for her gifts since I ran out of the purple Asbury fabric.
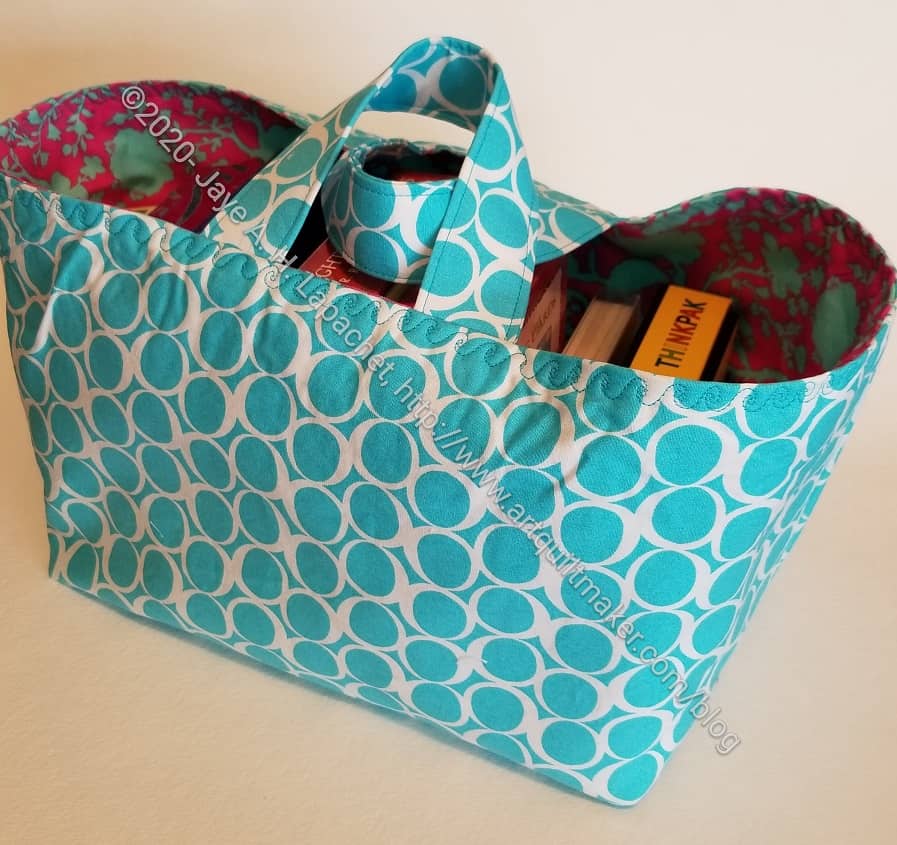
I finally made a One Hour Basket that has been on my list for a long time.
I finally made it thinking I was making it for the multitude of remotes I have in my workroom. I am not going to use it for that, because I used fusible fleece and not Soft & Stable, so it wasn’t as stiff. I wanted a One Hour Basket that I could use to organize my various card decks. This one won’t work for the remotes, but it will work for the decks.
I have undoubtedly become a Sew Sweetness groupie. I want to spend time making all of the projects I have in my library.
The Piebald Pouch is my first finished project from Minikins Season 3. I have to say that it went better than many of my other pouch and small bag projects. For whatever reason, all of the pieces and parts went together smoothly and I had very little trouble.
Except for the front panel. You can see that I didn’t line up the flowers properly, so the ones on the front panel are sideways. I still like it.
The pouch is a little bit of an odd shape. This one is for me and I am not sure how I will use it.
Piebald Pouch – open
This was a fairly easy sew. I started it last week and would have finished it sooner, but have been so swamped that I just didn’t have a moment. It was fun and a charge to finish it on Sunday.
I might be having a fit of reorganization. At least you might be thinking that after seeing yesterday’s post and reading today’s. I am sort of.
I have a number of acrylic templates for various projects. Many are for pouches and bags that I will make over and over. They come in thin plastic bags. Ideally I would like a set of map drawers in which to store them. Until I can take over the entire house, that isn’t happening. I have been looking at various bag patterns for ideas on how to store them.
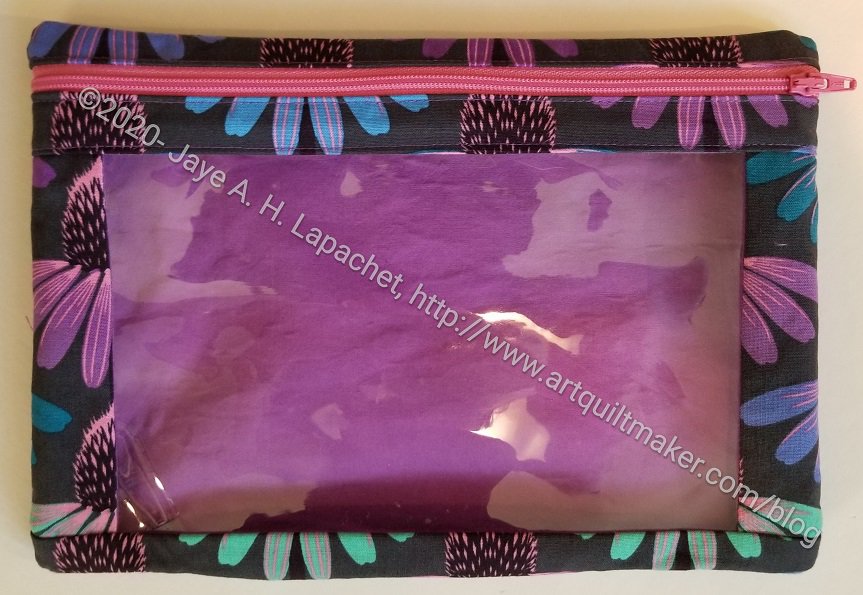
I-Spy Pouch Finished with templates
This is my first attempt. The I-Spy pouch from Sew Sweetness’ Minikins Season 1 fits my templates for a Minikins Season 2 project called the Day Trip Wallet. Not all of my templates will fit in the various sizes of the I-Spy pouch, but some will and that is a start.
The pattern comes with 3 sizes (this is the medium size). It is a very quick sew, so I can look through my other templates to see which will fit in the various sizes. I am thinking I can easily adjust the sizes to fit other templates. Finding the right-sized zipper will be the challenge if I change the size. I have a bunch of different sizes, so I should be able to manage.
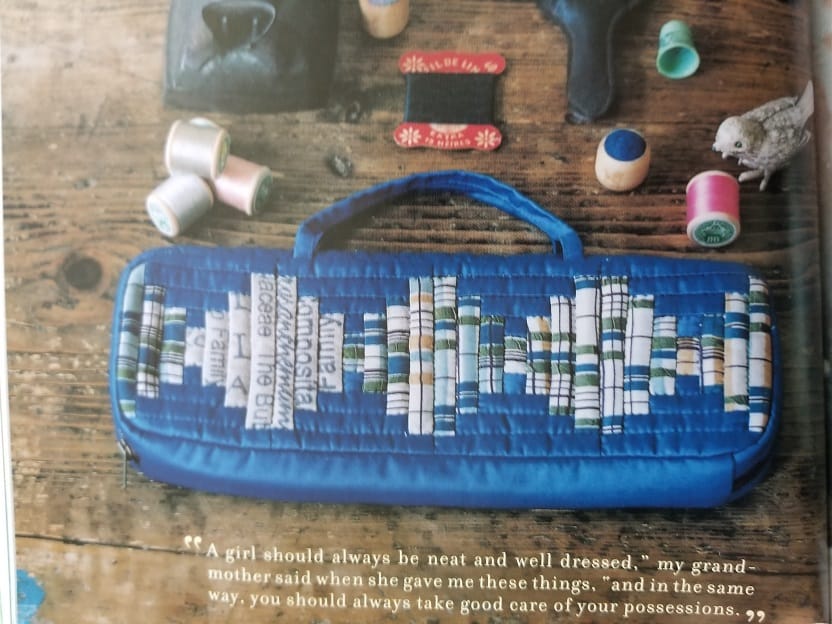
Yoko Saito’s Natural Patchwork bag
I am still looking for a bag pattern with slots in different sizes that I can just slide the templates into and not worry about resizing. I have been looking at Yoko Saito’s bags, especially this rectangular bag from Natural Patchwork. It might be too small, but I like the shape. I’d have to make different blocks for the front.
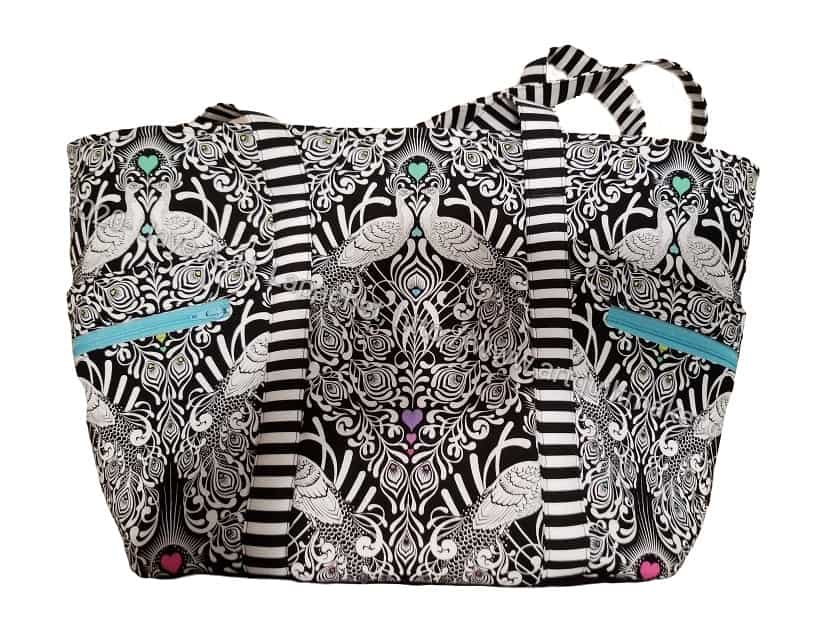
First I am excited with how well the bag came out.
Next I am excited at how well the fussy cutting looks.
Third, I am thrilled with how the Linework print and my strips fit together.
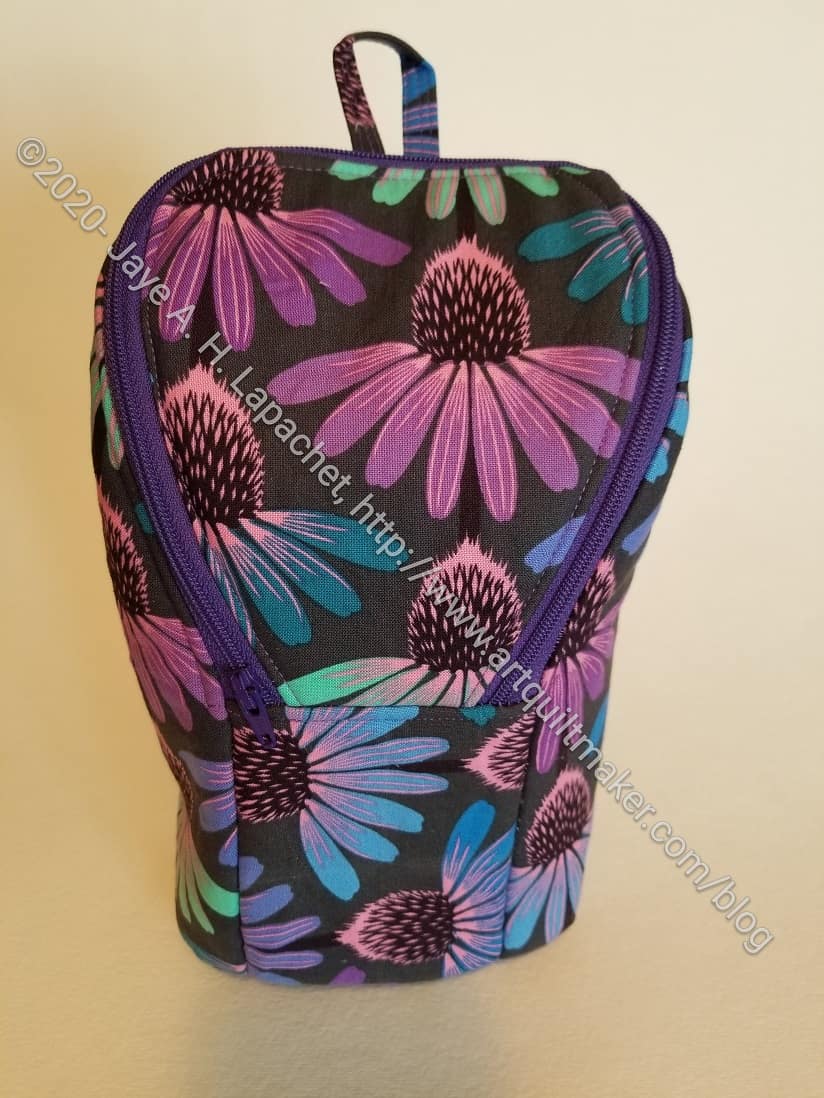
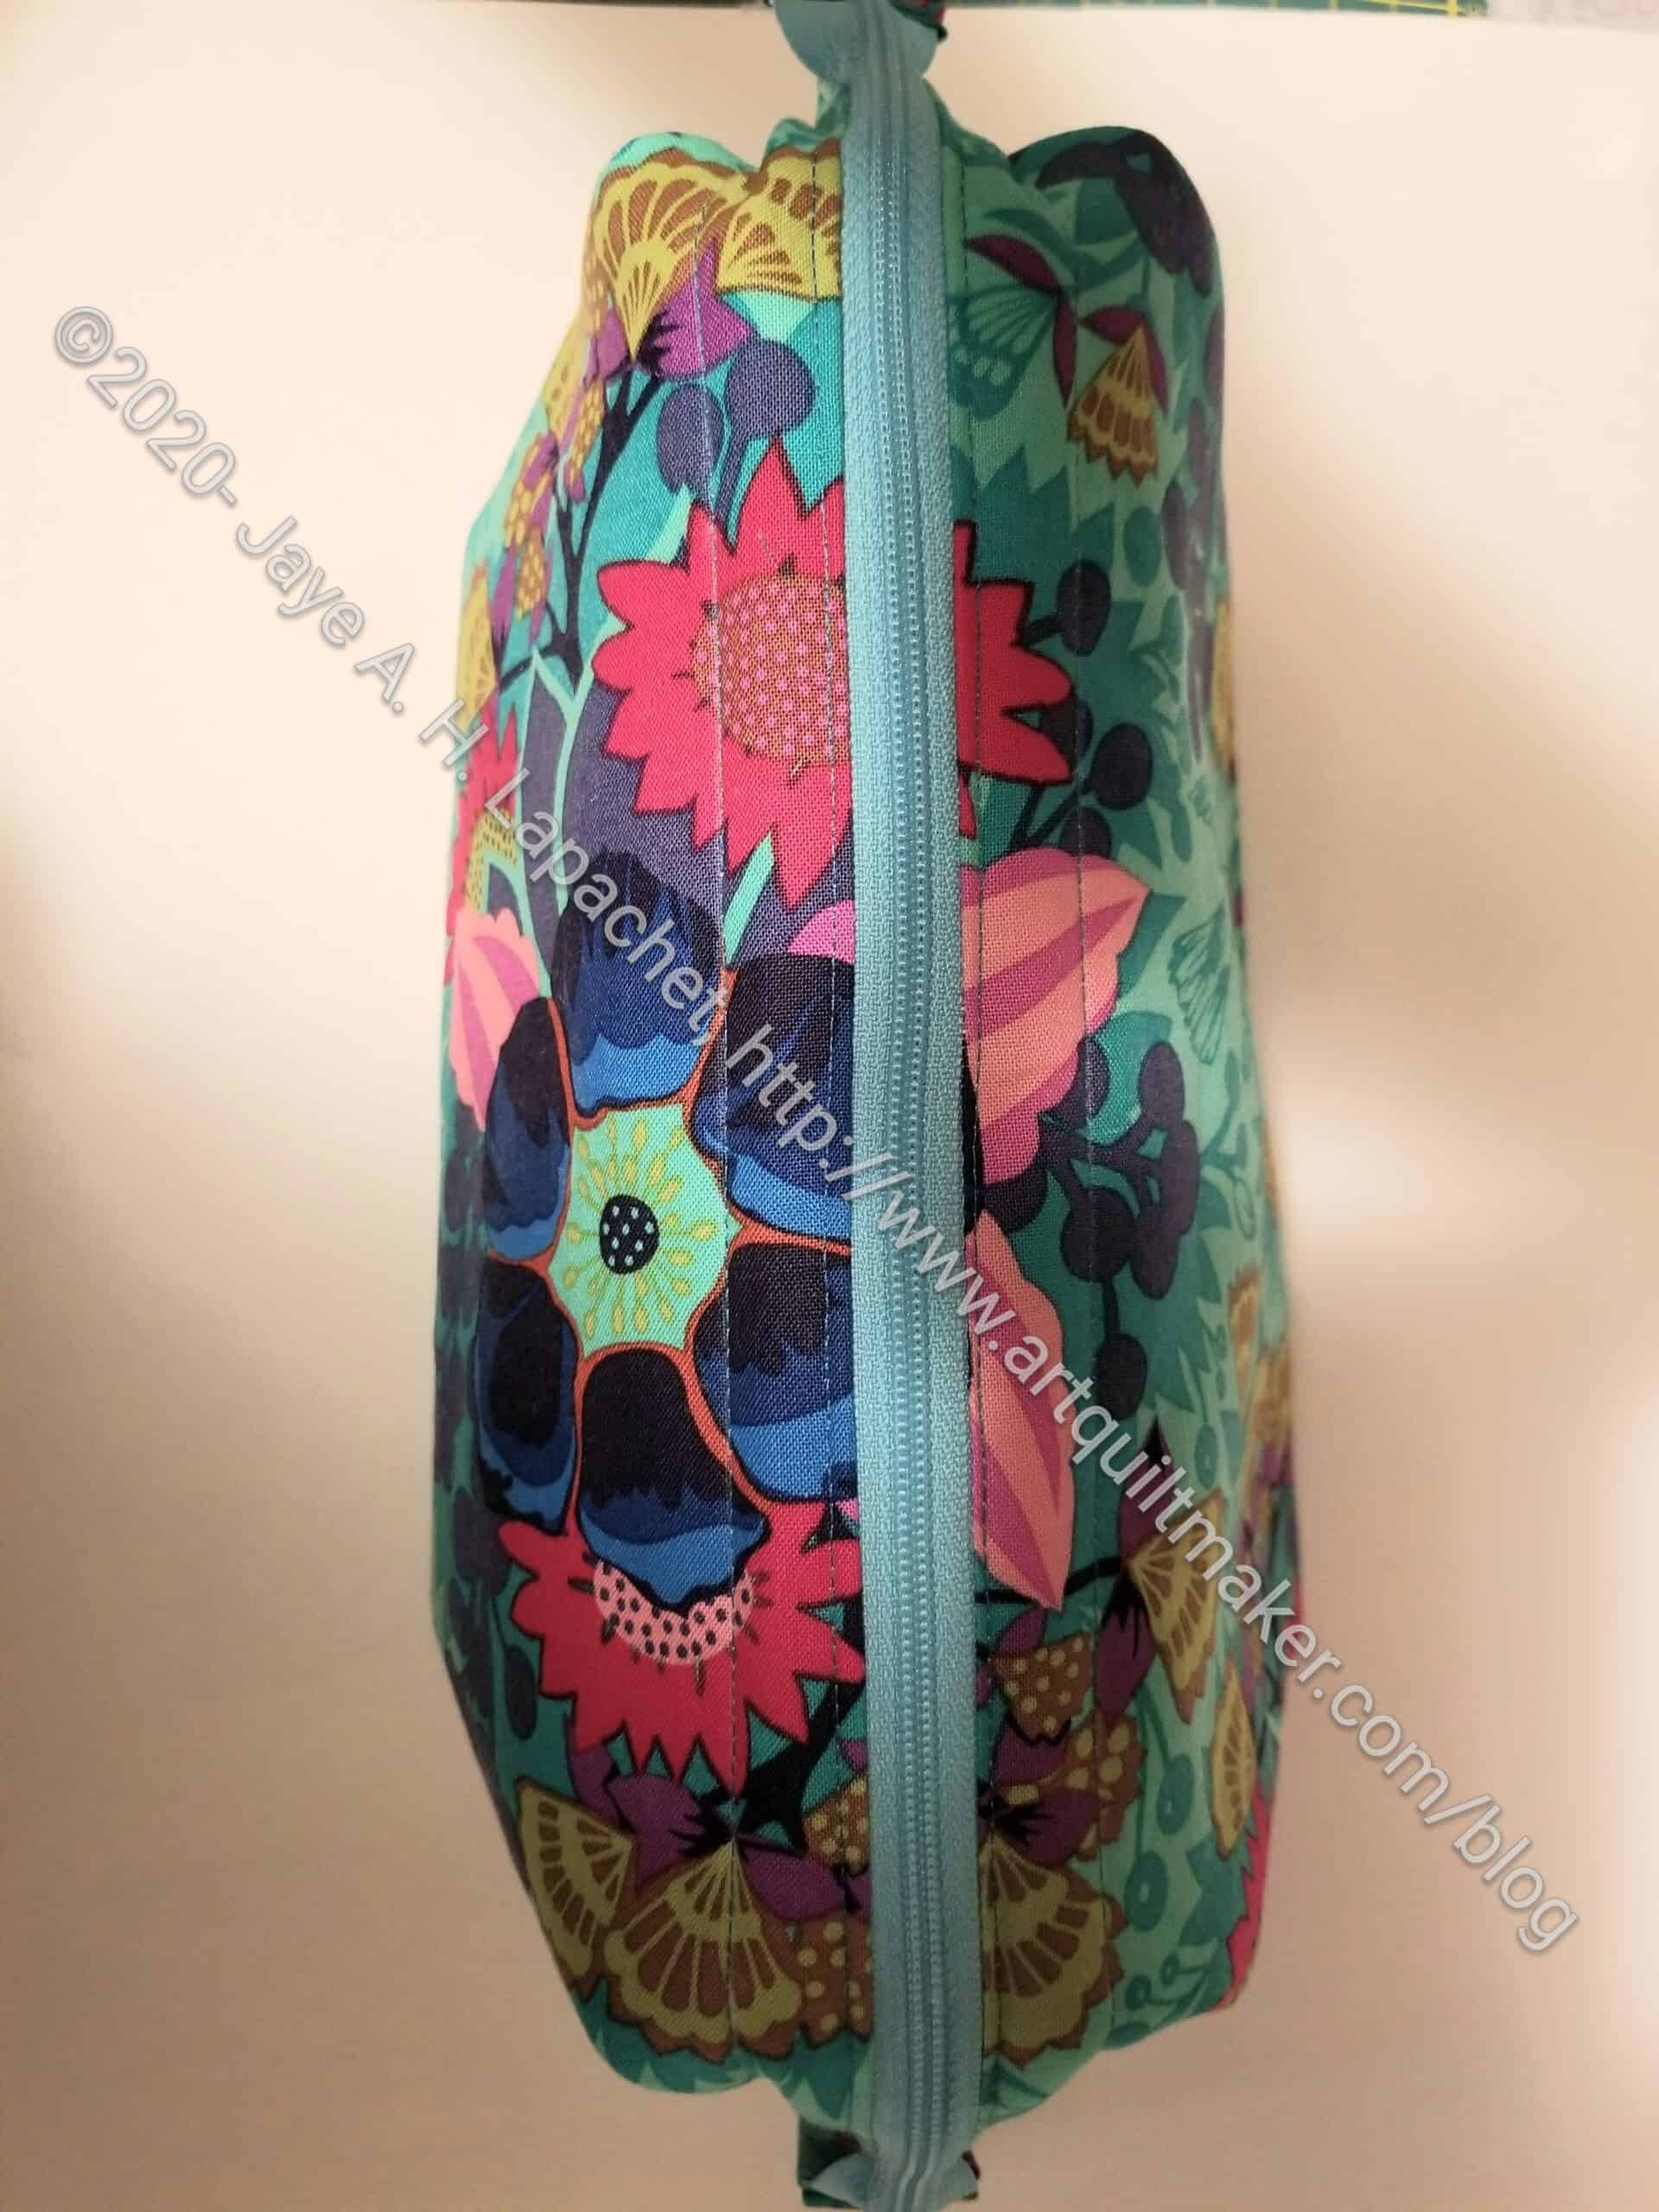
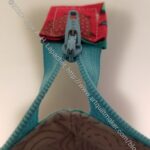
Superbloom top closed
Fourth, I am ridiculously happy about the top zipper placket. I don’t know why this bit of a bag makes me so giddy. I don’t think I have ever done one before, so that may be part of it. I’ll probably come down off my cloud tomorrow.
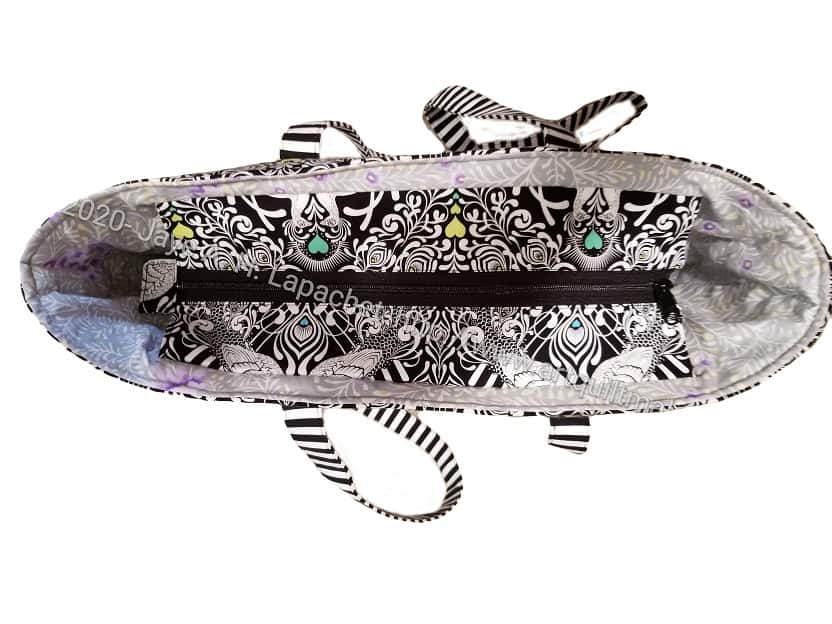
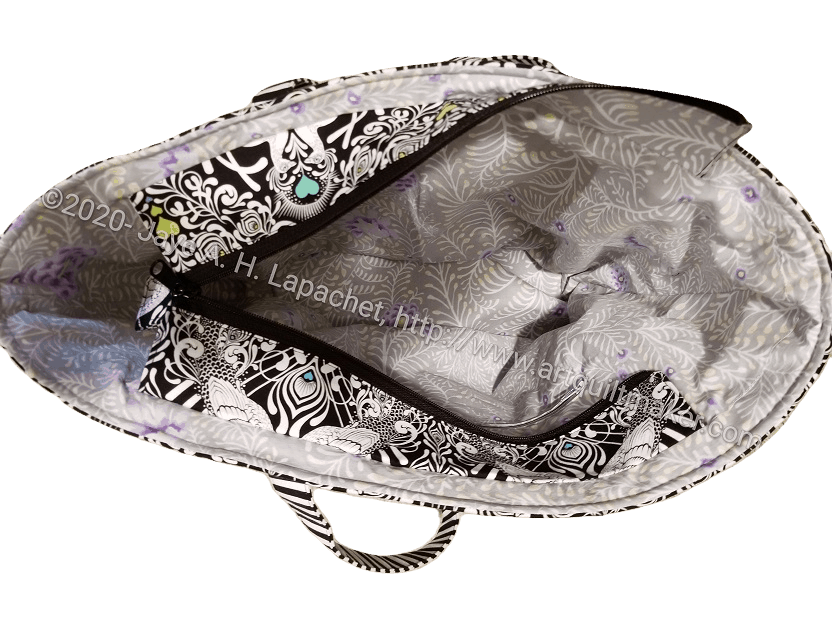
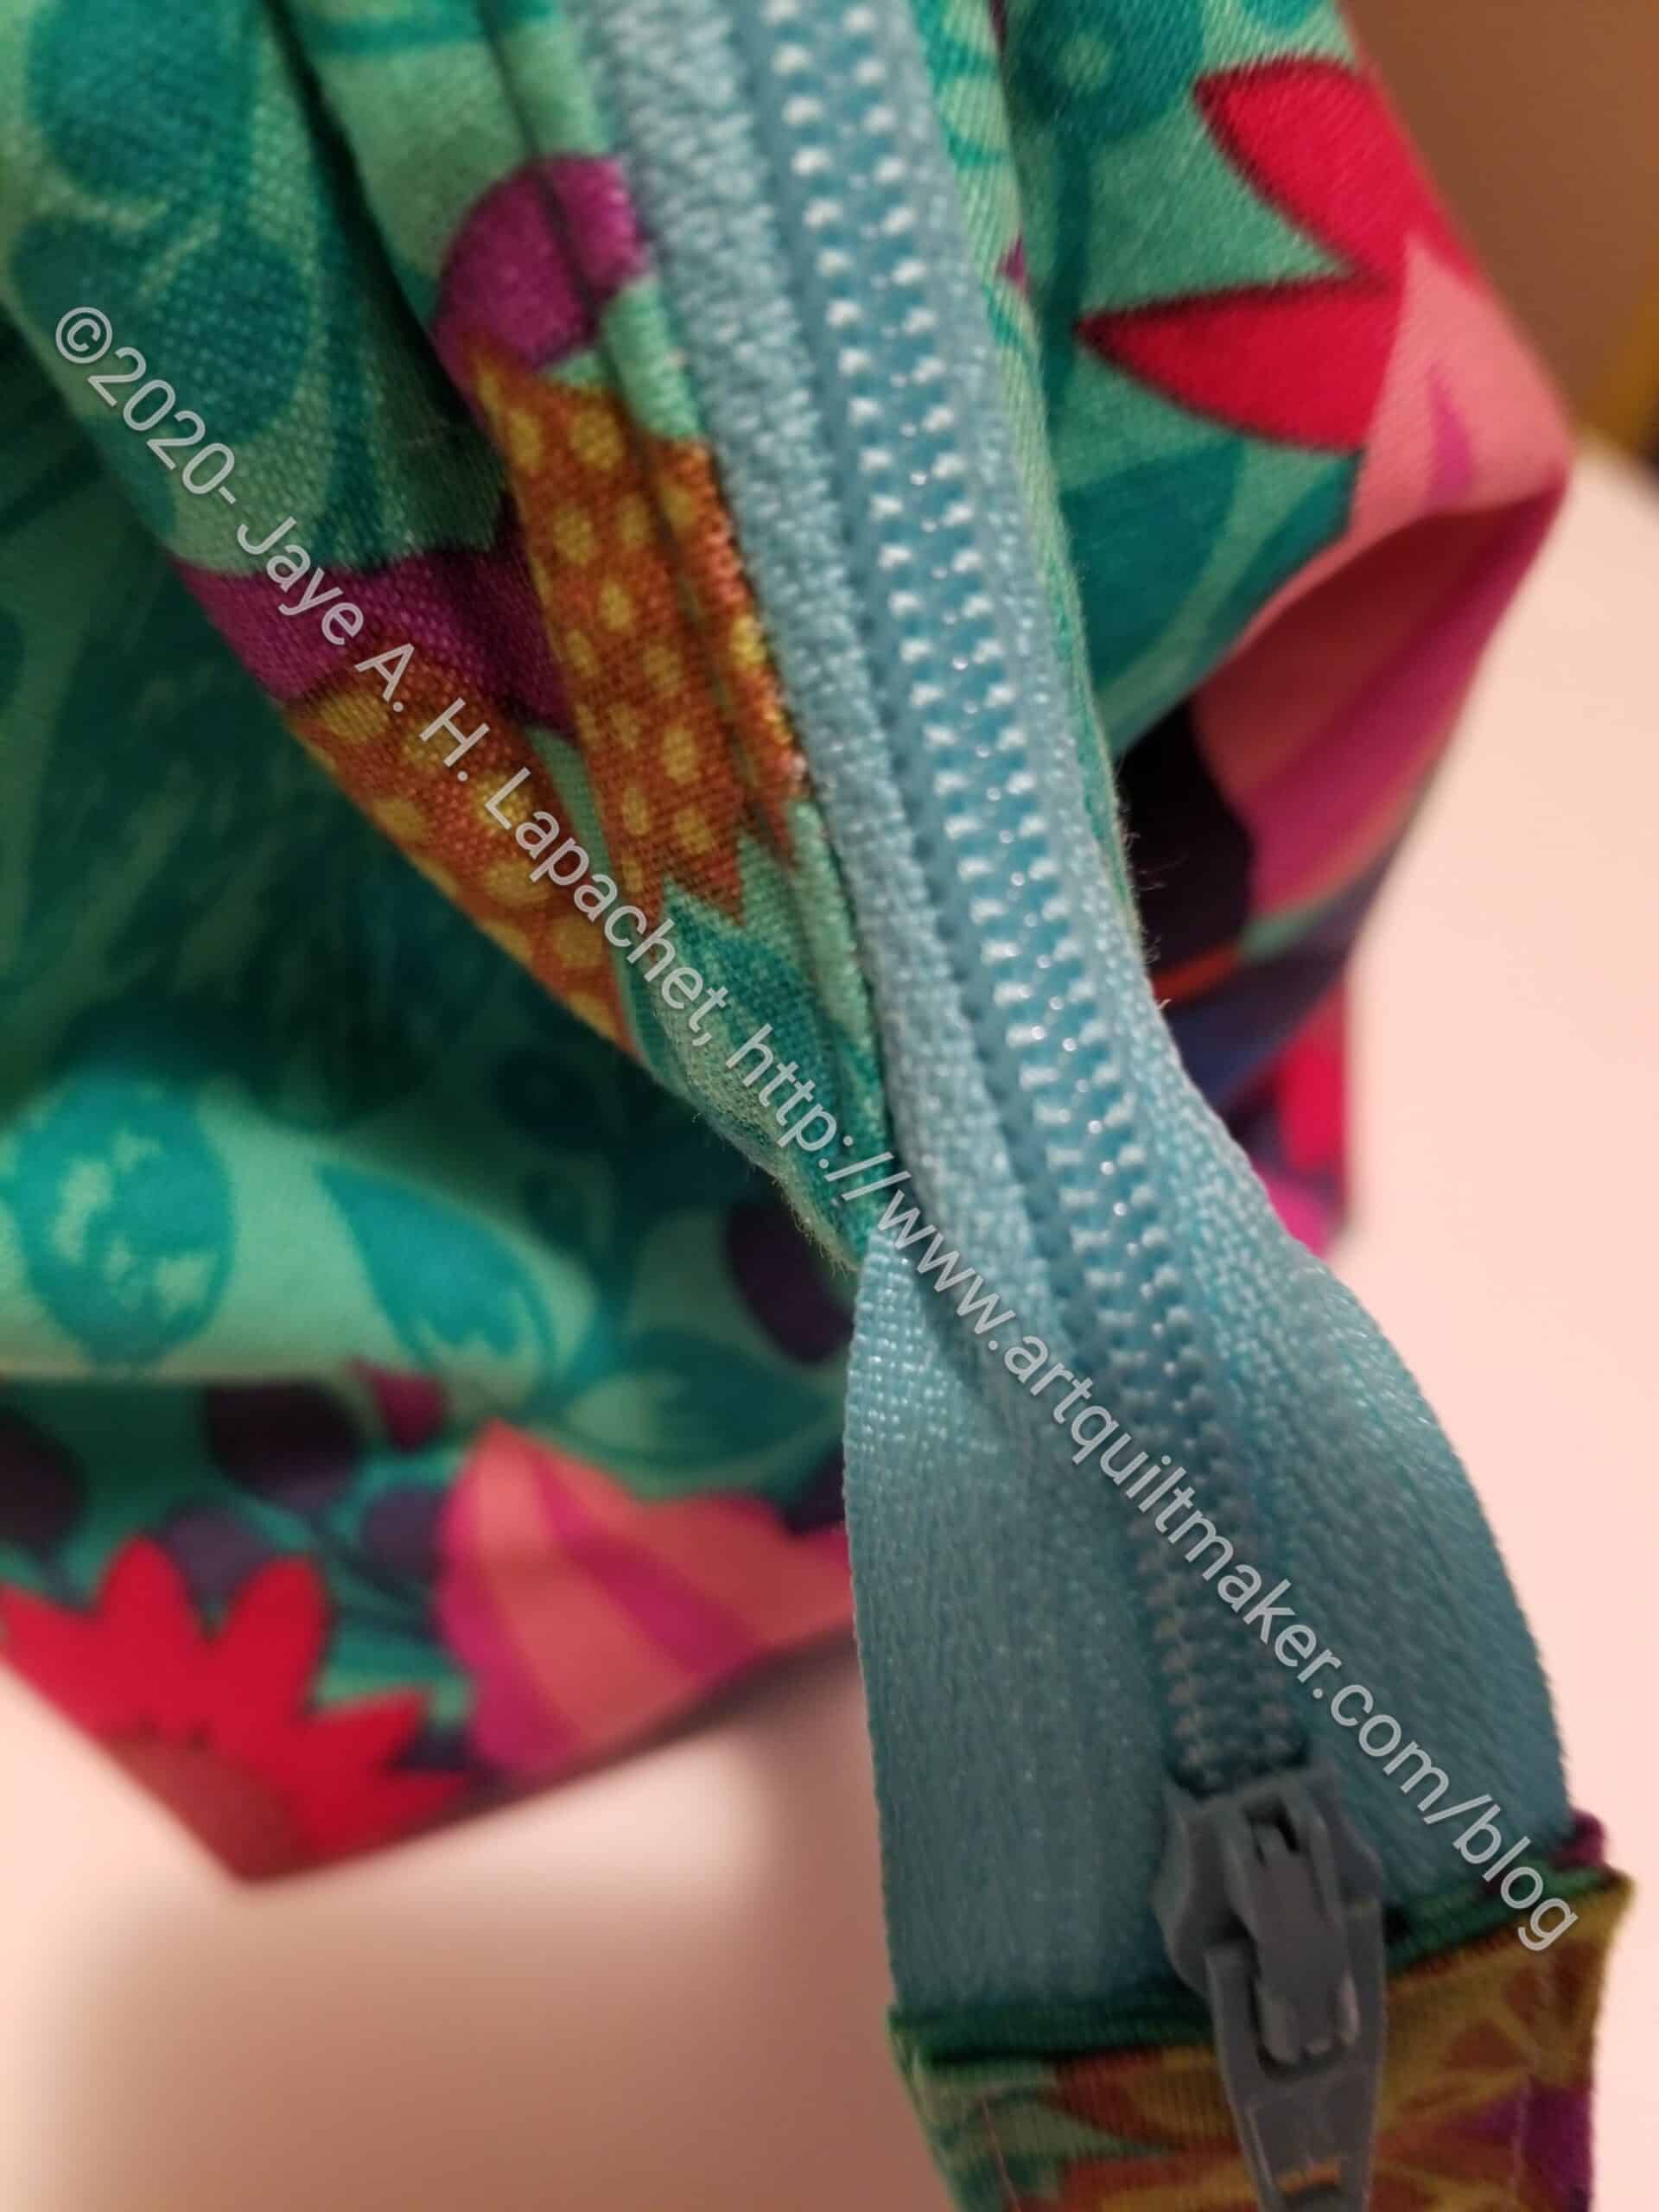
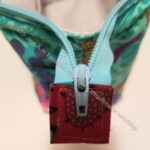
Superbloom open
Finally, I just love those turquoise zippers. Could they be any better? They add such a spark of color.
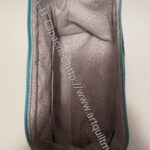
The lining is a little baggy even though I followed the directions and used different seam allowances. Not sure what that is about, but I will do better next time.
I was surprised at the size of the bag. I thought it was much larger. It isn’t a stupid size or anything. It is a reasonable size, just smaller than I thought. I really like the angled shape, though I don’t know if you can tell that from the top photo. I forgot to put a D-ring in it, though I know where I will put one next time. I plan to make another of these, especially since I bought the templates. So many bag patterns…so little time.
I made another Retreat Pouch the other day. I cut up the fabric when I went to visit Tim, then decided to sew the pouch on Saturday.
I am ridiculously pleased at how this Retreat Pouch came together. I think it looks great!
It is also a great project. Once the pieces are cut the bag goes together in a couple of hours. I think I talked about this before.
Retreat Pouch Fussy Cutting
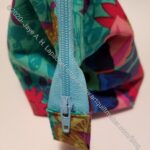
First, I love the fabric. This fabric is one of Anna Maria’s Hindsight prints. I received it in one of the Modern Handmade subscription boxes I received last year. Can you believe how lucky I got on the cutting? It looks like I intended to match the flower on either side of the zipper.
I really wanted to make the larger size, but one fat quarter is not enough to make one pouch, so I resorted to this size again. I bought two frames in each size, so I can choose some different fabrics that I have in larger quantities to make the larger version.
Retreat Pouch Beautiful Zipper
Second, the sewing went very well and the pouch looks professionally sewn. I am pleased with how the zipper ended up looking based on the instructions. I went an extra step by pinning the zipper down rather than holding it while I sewed and I think that helped. I knew where to pin it because I measured. I think this is another version of ‘veering’ the zipper that I have talked about with the Cotton Candy Pouches and the UCAB 45 degree angle technique.
Retreat Pouch Interior Pocket
Third, turning the pouch using the interior zipper pocket was a smooth process. Sara Lawson of Sew Sweetness has a tutorial. I don’t know why I don’t add these pockets for turning all the time.
This is not part of the pattern, but it is easy to add to any pouch or bag. I had to think carefully about the size because of the boxed corner. Despite my care, I still think the bottom of the pocket goes below the curve on the bottom of the pouch. I don’t think it really matters. For the moment I don’t know what I will put in that interior pocket.
I say this is an easy pocket to put in, but I always need to refer to general directions. I also have Sara Lawson’s Acrylic Zipper Pocket Template (no affiliation) and that makes the marking super speedy. I also saw one by Piera (no affiliation), which includes purse feet measurements as well.
I did watch the video before I sewed the first Retreat Pouch. I vowed to watch it again before making this one, but I didn’t. I don’t know why because it is a good resource.
I put my new Snap Setter and all of my Snap Setter Supplies in this pouch.